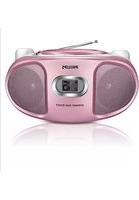
AZ102C - Cd player/recorder PHILIPS - Free user manual and instructions
Find the device manual for free AZ102C PHILIPS in PDF.


| Product Type | CD Player/Recorder with Radio |
| Brand | Philips |
| Model | AZ102C (also AZ102N, AZ102S, AZ102B, AZ102F, AZ102H) |
| Dimensions (W x H x D) | 290 x 143 x 240 mm |
| Weight | 1.62 kg |
| Power Consumption | 15 W |
| Power Supply | AC 230 V mains or 6 x 1.5 V R14/UM-2/C batteries (not included) |
| Radio Bands | FM (with telescopic antenna), MW (built-in antenna) |
| CD Playback | Audio CDs, CD-R, CD-RW; supports program (up to 20 tracks), shuffle, repeat (track/all) |
| Inputs | LINE-IN (3.5 mm) for external audio source |
| Sound Enhancement | Dynamic Bass Boost (DBB) on/off |
| Controls | Volume, Source selector (CD/FM/MW/OFF), Tuning, Play/Pause, Stop, Next/Previous, Search, Program, Shuffle, Repeat |
| Display | CD function display (track number, time, play mode icons) |
| Laser Class | Class 1 Laser Product |
| Accessories Included | AC power cord |
| Safety | Do not open, risk of electric shock; no user-serviceable parts; keep away from moisture and heat |
| Maintenance | Clean CD with soft cloth from center outward; use dry cloth for set; avoid cleaning agents with alcohol, ammonia, benzene |
| Environment | Dispose according to local regulations; packaging recyclable; product covered by WEEE directive |
Frequently Asked Questions - AZ102C PHILIPS
User questions about AZ102C PHILIPS
0 question about this device. Answer the ones you know or ask your own.
Ask a new question about this device
Download the instructions for your Cd player/recorder in PDF format for free! Find your manual AZ102C - PHILIPS and take your electronic device back in hand. On this page are published all the documents necessary for the use of your device. AZ102C by PHILIPS.
USER MANUAL AZ102C PHILIPS
Register your product and get support at www.philips.com/welcome
AZ102C AZ102N AZ102S AZ102B AZ102F AZ102H
User Manual

PHILIPS
1


3

natural_image
Simple geometric diagram with a circle and two symmetric black shapes inside (no text or symbols)7

4

8
5


natural_image
Diagram illustrating sunlight, cloud, and rain wave interaction (no text or symbols)6

natural_image
Illustration of a hand holding a small object with an 'X' mark, no text or symbols present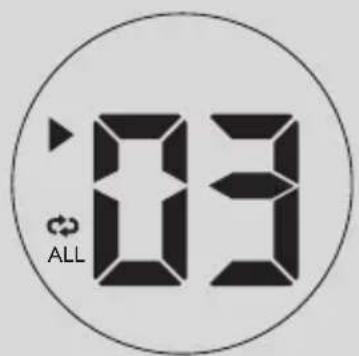
natural_image
Illustration of a hand holding a circular object with a downward arrow, no text or symbols presentCongratulations on your purchase, and welcome to Philips! To fully benefit from the support that Philips offers, register your product at www.philips.com/welcome.
Supplied Accessories
- AC power cord
Top/front panels (See 1)
① VOLUME – adjusts volume level.
② SHUFFLE – plays all tracks in random order
③ REPEAT – repeats a track/ CD program/entire CD.
④ ▶ II – starts or pause CD playback ▶▶ I ◀◀ – selects the next/previous track – searches forwards/backwards (press and hold the button) within the current track
- stops CD playback; - erases a CD program
⑤ PROG – programs tracks and reviews the program
⑥ LIFT TO OPEN - opens/closes the CD door.
⑦ TUNING – tunes to radio stations
⑧ Display – shows the CD functions
Back/bottom panel (See 1 and 2)
⑨ Source selector: CD, FM, MW, OFF
- selects CD or radio source of sound - power off switch
⑩ Telescopic antenna
- improves FM reception.
⑪ AC MAINS\~ - inlet for power cord.
⑫ DBB – turns the bass enhancement on/off.
⑬ LINE-IN – inlet for external audio source.
⑭ Battery door
- Press on the arrow and push to insert 6 × 1.5V R-14/ UM-2/ C-cells.
CAUTION
- Visible and invisible laser radiation. If the cover is open, do not look at the beam. - High voltage! Do not open. You run the risk of getting an electric shock. The machine does not contain any user-serviceable parts. - Modification of the product could result in hazardous radiation of EMC or other unsafe operation.
Notes for battery disposal
Your product contains batteries covered by the European Directive 2006/66/EC, which cannot be disposed with normal
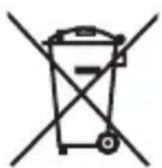
household waste. Please inform yourself about the local rules on separate collection of batteries because correct disposal helps to prevent negative consequences for the environmental and human health.
Power Supply
Whenever convenient, use the power supply cord if you want to conserve battery life.
Make sure you remove the plug from the set and wall outlet before inserting batteries.
Batteries (not included)
1 Open the battery door and insert 6 batteries, type R-14, UM-2 or C-cells, (preferably alkaline) with the correct polarity as indicated by the "+" and "-" symbols inside the compartment.
2 Replace the battery door, making sure the batteries are firmly and correctly in place. The set is now ready to operate.
Batteries contain chemical substances, so they should be disposed of properly.
- Incorrect use of batteries can cause electrolyte leakage and will corrode the compartment or cause the batteries to burst:
- Do not mix battery types: e.g. alkaline with carbon zinc. Only use batteries of the same type for the set.
- When inserting new batteries, do not try to mix old batteries with the new ones.
- Remove the batteries if the set is not to be used for a long time.
Using AC power
WARNING: Always check you have completely switched off the set, before you change or disconnect power supply.
1 Check if the power voltage, as shown on the type plate located on the bottom of the set, corresponds to your local power supply. If it does not, consult your dealer or service center.
2 Connect the power cord to the AC MAINS\~ inlet and the wall socket. The set is now connected and ready for use.
3 To switch the set off completely, withdraw the power cord from the wall socket.
4 Install the unit near the AC outlet and where the AC power plug can be easily reached.
- Disconnect the power cord from the wall socket to protect your set during heavy thunderstorms. Children could seriously injure themselves as the free end of the cable may still be live if only the connector is removed from the MAINS socket at the back of the unit.
The type plate is located on the bottom of the set.
Helpful hints:
- To avoid unnecessary energy consumption, always adjust the Source selector to OFF after using the set.
General operation
Switching on and off and selecting the function
1 To select your sound source, adjust the Source selector to: CD, FM or MW.
2 To switch off the set, adjust the Source selector to OFF position.
3 To switch to LINE IN mode, connect an external audio source to the LINE-IN inlet.
Helpful hints:
- The set switches to LINE IN mode automatically when an external audio source is connected, no matter the set is in CD, FM or MW mode.
- The LINE-IN inlet is not for earphones. Adjusting volume and sound
Adjust the sound with the VOLUME and DBB controls.
Radio reception
1 Adjust the Source selector to FM or MW.
2 Turn TUNING to tune to a station.
Helpful hints:
To improve radio reception
- For FM, extend, incline and turn the telescopic antenna for best reception. Reduce its length if the signal is too strong.
- For MW, the set uses a built-in antenna. Direct this antenna for best reception by turning the whole set.
Playing a CD
- This CD player plays Audio Discs including CD-Recordables (CD-R) and CD-Rewritables (CD-RW).
- MP3, CD-ROM, CD-I, CDV,VCD, DVD or computer CDs are not possible for playback.
IMPORTANT!
CDs encoded with copyright protection technologies by some record companies may be unplayable by this product.
1 Adjust the Source selector to CD.
2 Open the CD door, and insert a CD with the printed side facing up, then press the CD door gently to close.
→ Display shows --, and later the total number of tracks. (See 3)
3 Press ▶II to start playback.
4 To pause playback, press ▶II.
→ Display: ▶ flashes. (See 4)
5 To resume, press ▶II again.
6 To stop CD playback, press ■.
Helpful hints:
CD play will also stop when:
- you open the CD door;
— you select FM, MW or OFF sound source; - the CD has reached the end.
Selecting a different track
- Press ◄◄/ ►► once or repeatedly until the desired track number appears in the display.
- In the pause/stop position, press ▶II to start playback.
Finding a passage within a track
1 During playback, press and hold ◀◀ or ▶▶.
→ The CD is played at high speed and with reduced volume.
2 When you recognize the passage you want, release ◀◀ or ▶▶ to resume normal playback.
Helpful hints:
— When your searching reaches the end of the last track, the CD goes to stop mode.
Programming track numbers
You may store up to 20 tracks in the desired sequence. If you like, store any track more than once.
1 In the stop position, press PROG to activate programming.
→ Display: PROG and 00 flash. (See 5)
2 Press ◀◀ or ▶▶ to select your desired track number.
3 Press PROG to store the desired track number.
→ Display: PROG and 00 flash for you to program the next track..
4 Repeat steps 2 to 3 to select and store all desired tracks in this way.
→ If you attempt to store more than 20 tracks, no track can be selected and the display shows - - - -
5 To play your program, press ▶/11.
Helpful hints :
- When playback of your program comes to the stop position, your set will return to normal playback. To re-enter program mode, press PROG in the stop position.
Reviewing the program
In the stop position, press PROG repeatedly to see your stored tracks.
Erasing a program
You can erase the contents of the memory by:
- in the stop position, press PROG to enter program mode, and then press ■.
- selecting FM, MW or OFF;
- opening the CD door;
Different play modes: REPEAT. and SHUFFLE (See 6, 7)
REPEAT
You can play the current track or the whole disc repeatedly, and combine REPEAT modes with PROG (PROGRAM).
REP – plays the current track continuously.
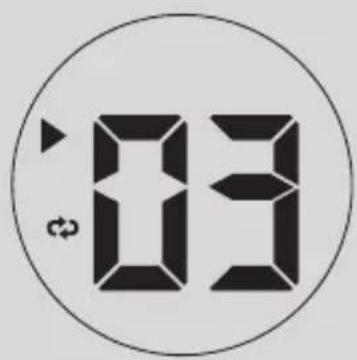
REP ALL – repeats the entire CD/program
1 To select play mode, press REPEAT once or more.
→ The display shows REP icon or REP ALL icon.
2 Press ▶II to start playback if in the stop/pause position.
3 To return to normal playback, press
REPEAT repeatedly until the modes are no longer displayed.
- You can also press ■ to cancel your play mode.
SHUFFLE
You can play all the tracks in random order.
1 In the stop position, press SHUFFLE to switch on shuffle play.
→ Display shows SHUFFLE icon.
2 To switch off shuffle play, press ■.
Helpful hints:
- During the shuffle play, when REP function is selected, it will play the current shuffled track repeatedly, or when the REP ALL function is selected, it will repeat the shuffle play of the entire CD.
CD player and CD handling
- If the CD player cannot read CDs correctly, use a cleaning CD to clean the lens before taking the set to repair.
- The lens of the CD player should never be touched!
- Sudden changes in the surrounding temperature can cause condensation on the lens of your CD player. Playing a CD is then not possible. Do not attempt to clean the lens but leave the set in a warm environment until the moisture evaporates.
- A lways close the CD door to avoid dust on the lens.
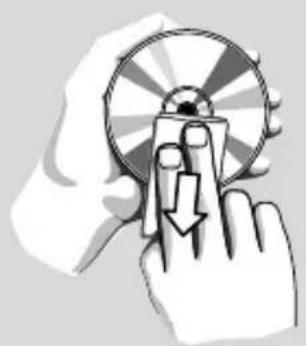
- T o clean the CD, wipe in a straight line from the center towards the edge using a soft, lint-free cloth. Do not use cleaning agents as they may damage the disc.
- Never write on a CD or attach any stickers to it.
Safety information
- Place the set on a flat, hard and stable surface so that the system does not tilt.
- Where the MAINS plug or an appliance coupler is used as the disconnect device, the disconnect device shall remain readily operable.
- Do not expose the set, batteries, CDs to humidity, rain, sand or excessive heat caused by heating equipment or direct sunlight.
- The apparatus shall not be exposed to dripping or splashing.
- Adequate ventilation with a minimum gap of 15cm (6 inches) between the ventilation holes and surrounding surfaces is necessary to prevent heat build-up.
- Do not cover the ventilation openings with items such as newspapers, table-cloths, curtains, etc.
- No objects filled with liquids, such as vases, shall be placed on the apparatus.
- No naked flame sources, such as lighted candles, should be placed on the apparatus.
- The mechanical parts of the set contain self-lubricating bearings and must not be oiled or lubricated.
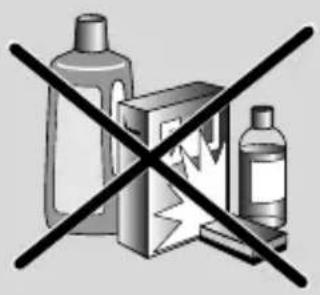
- To clean the set, use a dry cloth. Do not use any cleaning agents containing alcohol, ammonia, benzene or abrasives as these may harm the housing.
If a fault occurs, first check the points listed below before taking the set for repair.
If you are unable to remedy a problem by following these hints, consult your dealer or service centre.
WARNING:
Do not open the set as there is a risk of electric shock. Under no circumstances should you try to repair the set yourself, as this will invalidate the guarantee.
Problem
- Possible cause
- Remedy
No sound /power
- Volume not adjusted
- Adjust the VOLUME
— Power cord not securely connected - Connect the AC power cord properly
— Batteries dead/ incorrectly inserted - Insert (fresh) batteries correctly
- CD contains non-audio files
- Press ◀◀, ▶▶ once or more to skip to a CD audio track, instead of the data file.
Display does not function properly / No reaction to operation of any of the controls
- Electrostatic discharge
- Switch off and unplug the set. Reconnect after a few seconds
- No CD inserted
- Insert a CD
- CD badly scratched or dirty
- Replace/ clean CD, see Maintenance
— Laser lens steamed up - Wait until lens has cleared
- CD-R/CD-RW is blank or not finalized
- Use a finalized CD-R/CD-RW or suitable CD Audio disc only
Note:
Make sure the CD is not encoded with copyright protection technologies, as some do not conform to the Compact Disc standard.
The CD skips tracks
- CD damaged or dirty
- Replace or clean CD
- Program/shuffle is active
- Quit program/shuffle mode
Note: A CD badly scratch or dirty may result in improper operation.
Environmental information
All unnecessary packaging material has been omitted. The packaging can be easily separated into three materials: cardboard, polystyrene and plastic.
Your set consists of materials which can be recycled if disassembled by a specialized company. Please observe the local regulations regarding the disposal of packaging, dead batteries and old equipment.
Disposal of your old product
Your product is designed and manufactured with high quality materials and components, which can be recycled and reused.

When this crossed-out wheeled bin symbol is attached to a product it means the product is covered by the European Directive 2002/96/EC.
Please inform yourself about the local separate collection system for electrical and electronic products.
Please act according to your local rules and do not dispose of your old products with your normal household waste. The correct disposal of your old product will help prevent potential negative consequences for the environment and human health.
Specifications
Power Consumption......15W
Dimensions (w x h x d)..... 290 x 143 x 240 (mm)
Weight...... 1.62 kg
Important notes for users in the U.K.
Mains plug
This apparatus is fitted with an approved 13 Amp plug. To change a fuse in this type of plug proceed as follows:
- Remove fuse cover and fuse.
- Fix new fuse which should be a BS1362 3 Amp, A.S.T.A. or BSI approved type.
- Refit the fuse cover.
If the fitted plug is not suitable for your socket outlets, it should be cut off and an appropriate plug fitted in its place. If the mains plug contains a fuse, this should have a value of 3 Amp. If a plug without a fuse is used, the fuse at the distribution board should not be greater than 3 Amp.
Note: The severed plug must be disposed of to avoid a possible shock hazard should it be inserted into a 13 Amp socket elsewhere.
How to connect a plug
The wires in the mains lead are coloured with the following code: blue = neutral (N), brown = live (L). As these colours may not correspond with the colour markings identifying the terminals in your plug, proceed as follows:
- Connect the blue wire to the terminal marked N or coloured black.
- Connect the brown wire to the terminal marked L or coloured red.
- Do not connect either wire to the earth terminal in the plug, marked E (or e) or coloured green (or green and yellow).
Before replacing the plug cover, make certain that the cord grip is clamped over the sheath of the lead - not simply over the two wires.
Copyright in the U.K.
Recording and playback of material may require consent. See Copyright Act 1956 and The Performer's Protection Acts 1958 to 1972.
Meet Philips at the Internet http://www.philips.com

natural_image
Recycling symbol composed of three chasing arrows forming a triangle (no text or labels)CLASS 1 LASER PRODUCT


- Supplied Accessories
- Top/front panels (See 1)
- Back/bottom panel (See 1 and 2)
- CAUTION
- Notes for battery disposal
- Power Supply
- Batteries (not included)
- Batteries contain chemical substances, so they should be disposed of properly.
- Using AC power
- The type plate is located on the bottom of the set.
- Helpful hints:
- General operation
- Switching on and off and selecting the function
- Radio reception
- To improve radio reception
- Playing a CD
- IMPORTANT!
- Selecting a different track
- Finding a passage within a track
- Programming track numbers
- Helpful hints :
- Reviewing the program
- Erasing a program
- Different play modes: REPEAT. and SHUFFLE (See 6, 7)
- REPEAT
- SHUFFLE
- CD player and CD handling
- Safety information
- WARNING:
- Problem
- No sound /power
- Display does not function properly / No reaction to operation of any of the controls
- Note:
- The CD skips tracks
- Environmental information
- Disposal of your old product
- Specifications
- Important notes for users in the U.K.
- Mains plug
- How to connect a plug
- Copyright in the U.K.
- Meet Philips at the Internet http://www.philips.com
- CLASS 1 LASER PRODUCT
Brand : PHILIPS
Model : AZ102C
Category : Cd player/recorder