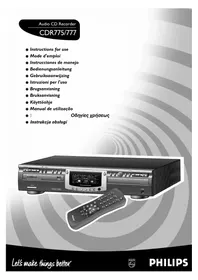
CDR777 - Cd player/recorder PHILIPS - Free user manual and instructions
Find the device manual for free CDR777 PHILIPS in PDF.


| Product Type | CD Player/Recorder |
| Brand | Philips |
| Model | CDR777 |
| Disc Compatibility | CD, CD-R, CD-RW |
| Recording Format | CD-DA (Audio CD) |
| Playback Formats | CD-DA, MP3 (if supported) |
| Dimensions (W x H x D) | 430 x 100 x 290 mm |
| Weight | 4.5 kg |
| Power Supply | 220-240 V, 50 Hz |
| Power Consumption | 20 W (typical) |
| Recording Speed | 1x, 2x, 4x (typical) |
| Audio Outputs | Analog RCA, Digital Optical (Toslink) |
| Audio Inputs for Recording | Analog RCA, Digital Optical |
| Headphone Output | 3.5 mm jack with volume control |
| Display | Multiline LCD with track/time info |
| Remote Control | Included IR remote |
| Maintenance | Clean lens with CD lens cleaner; wipe exterior with dry cloth |
| Safety | Class I, earthed; do not open casing, risk of laser radiation |
| Spare Parts / Repairability | Contact Philips service center; parts may be available |
Frequently Asked Questions - CDR777 PHILIPS
User questions about CDR777 PHILIPS
0 question about this device. Answer the ones you know or ask your own.
Ask a new question about this device
Download the instructions for your Cd player/recorder in PDF format for free! Find your manual CDR777 - PHILIPS and take your electronic device back in hand. On this page are published all the documents necessary for the use of your device. CDR777 by PHILIPS.
USER MANUAL CDR777 PHILIPS
This unit employs a laser. Only a qualified service person should remove the cover or attempt to service this device, due to possible eye injury.
USE OF CONTROLS OR ADJUSTMENTS OR PERFORMANCE OF PROCEDURES OTHER THAN THOSE SPECIFIED HEREIN MAY RESULT IN HAZARDOUS RADIATION EXPOSURE OR OTHER UNSAFE OPERATION.
NEVER MAKE OR CHANGE CONNECTIONS WITH THE POWER SWITCHED ON.

The CDR775/777 is in conformity with the EMC directive and low-voltage directive.
LASER
Type Semiconductor laser GaAlAs
Wave lenght 775\~795 nm (at 25°C)
Output Power 2,5 mW (Read)
35 mW (Write)
Beam divergence 60 degree.
NOTE: THIS WARNING IS LOCATED INSIDE THE ENCLOSURE
CAUTION INVISIBLE LASER RADIATION WHEN OPEN AVOID EXPOSURE TO BEAM
VARO! AVATTAESSA OLET ALTIINA NÄKYMÄTTÖMÄLLE LASER SÄTTEILYLLE ÄLÄ KATSO SÄTEESEN
VARNING OSYNLIG LASERSTRÅLNING NÄR DENNA DEL ÄR ÖPPNAD BETRAKTA EJ STRÅLEN
ADVERSEL USYNLIG LASERSTRÅLING VED ÅBNING. UNDGÅ UNSAETTELSE FOR STRÅLING
DANGER INVISIBLE LASER RADIATION WHEN OPEN AVOID DIRECT EXPOSURE TO BEAM
CLASS 1 LASER PRODUCT
LUOKAN I LASERLAITE
KLASS 1 LASERAPPARAT
For Customer Use:
Read carefully the information located at the back plate of your CD recorder/player and enter below the Serial N°. Retain this information for future reference.
Model N°. CDR775/777
Serial N°
CONTENTS
| English......5 | FrançaisEspañalDehtsch |
| Français......33 | |
| Español......61 | |
| Deutsch......89 | |
| Nederlands......117 | |
| Italiano......145 | ItalianoSveneldeDanskSuomiPortuguês |
| Svenska......173 | |
| Dansk......201 | |
| Suomi......229 | |
| Português......257 | |
| 'Ελληνικά......285 | Ελληνικά |
| Polski......313 | Polski |
Table of contents
GENERAL INFORMATION AND DISCS
Welcome....6
About this manual....6
Technical data 6
Discs for recording....7
Discs for playback....7
Maintenance....7
Accessories 7
CONTROLS AND CONNECTIONS
Controls on the front 8
Connections at the back 9
DISPLAY
DISPLAY indications....9
DISPLAY messages 10
MENU messages....11
INSTALLATION
Connections general 11
Analog connections CD recorder & CD player .....12
Analog connections CD player deck....12
Digital coaxial connections CD recorder 13
Digital optical connections CD recorder....13
Power supply....14
Setup recommendations....14
Inserting batteries in the remote control 14
REMOTE CONTROL
Remote control commands....15
Inserting discs....15
RECORDING
Remarks about recording....16
Recording modes....16
High speed recording from internal CD player....17
Listen mode recording from internal CD player .....18
Manual recording from external CD player....19
Autostart recording from external
CD player - CD-SYNC 20
Finalizing CDR & CDRW discs 21
Unfinalizing CDRW discs....21
Erasing CDRW discs 22
PLAYING
Play a 2-disc changer (Changer mode)....23
Playing CDs on Deck 1 and/or Deck 2 (DJ mode) .....23
Selecting a track 24
Search 24
Shuffle (random order) play 25
Repeat CD, track or program 25
PROGRAMMING
Remarks about programming....26
MENU MODE/CD TEXT INPUT
Remarks about Menu mode....27
General operation of Menu 27
A.Text input....28
B.Erasing text 28
C.Reviewing CD Text memory....29
D. Auto track increment....30
E. Balance....30
FIXING PROBLEMS
Troubleshooting....31
Welcome!
Thank you for buying this Philips Compact Disc Recorder / Player Double Deck.
In the eighties Philips invented a new audio system - the CD. The CD (compact disc) revealed to you the new dimensions of digital sounds and added to the pleasures of audio. Compact disc technology permits a high contrast in loud as well as in quiet passages, with perfect channel separation. Philips has now further developed compact disc technology and the result is the CD recorder.
With your Philips CD recorder/player, you can make your own high-quality audio CDs (subject only to legal restrictions on copying), either by recording at normal or high speed from the Player to the Recorder, or by recording from an external source. And naturally, you can also play all pre-recorded audio CDs, using one or both decks individually, or together as a 2-deck changer.
Note: In certain countries including the UK and certain Commonwealth countries, use of the product (or CD Recorder) as shown or suggested in this user manual may require the permission of copyright holders.
About this manual
This manual gives instructions for operating this CD recorder where:
- the figures (1) throughout the text indicate a sequence of actions necessary to perform a certain operation;
- the arrows ( → ) indicate the reaction from the recorder;
- the dots (●) indicate remarks, advice or special options within a sequence of actions. The dot-marked instructions are not necessary for the required operation.
Technical data
Subject to modification without notice.
General
Power consumption 20 W
Power consumption in Standby 6 W
Operating temperature 5-35°C
Weight 4.5 kg
Dimensions 435 x 310 x 88 mm
Audio
Frequency response.....2Hz-22050 Hz
Playback S/N (A-weighted) 100 dB
Playback S/N 100 dB
Playback dynamic range CDR 95 dB (90 dB)
Playback dynamic range CD....90 dB
Playback total harmonic distortion CDR......88 dB = 0.0033 %
Playback total harmonic distortion CD....85 dB = 0.0056 %
Channel separation ....100 dB
Recording S/N (A-weighted) 98 dB
Recording S/N digital without SRC ....equal to source
Recording dynamic range....92 dB
Recording total harmonic distortion + noise....85 dB (0.0056%)
Discs for recording
For recording use, special audio discs must be used (for music only). These Discs bear the logos as shown below. The text 'DIGITAL AUDIO' is present!
Your recorder uses two types of discs for recording purposes:
- CD-Audio Recordable (CDR) discs: fully recorded and finalized, these discs play on all CD players and recorders.

- CD-Audio ReWritable (CDRW) discs: can be recorded, erased and re-recorded hunderds of times. When finalized, they play on CDRW compatible CD

players and recorders. In the course of 1999 most Philips CD players and recorders will be CDRW compatible.
Important:
To ensure proper working of the set we recommend the use of Philips audio CDR and audio CDRW discs only.
Discs for playback
Your CD recorder is able to play:
- All pre-recorded audio CDs.
- All Audio CDR and Audio CDRW
Note: CDR(W) discs recorded with a computer can only be used when they are correctly treated according to the audio standard (IEC958: Consumer part). Single session only!
Maintenance
For recording it is very important to use dust and scratch free discs.
To clean a CD, wipe it in a straight line from the center toward the edge using a soft, lint-free cloth. A cleaning agent may damage the disc! Write only on the printed side of a CDR or CDRW, and only with a soft felt-tipped pen.

Clean the CD recorder with a soft, slightly dampened lint-free cloth. Do not use any cleaning agents as they may have a corrosive effect.

Do not expose the CD recorder, batteries or CDs to humidity, rain, sand or excessive heat (caused by heating equipment or direct sunlight).

Always keep the tray closed to avoid dust on the lens.
The lenses may cloud over when the CD recorder is suddenly moved from cold to warm surroundings. It is not possible to play a CD then. Leave the CD recorder in a warm environment until the moisture evaporates.
Accessories
- 2 Analog audio cables (with red and white plugs)
- 1 Digital coaxial cable (with black plugs)
- Power cord
- 2 Batteries
- Remote control
- Guarantee

Controls on the front
CD recorder
1 ON/OFF......turns the CD recorder ON or OFF (if the recorder is in Standby mode, any key press will activate the CD recorder)
2 Standby indicator
3 Disc tray
4 OPEN/CLOSE ▲......opens/closes disc tray
5 PLAY/PAUSE ▶ II .....starts play/interrupts play or recording
6 STOP ■......stops/clears a program
7 REC(ord) TYPE ......selects recording modes
8 RECORD ......starts recording, finalizing, erasing
9 FINALIZE ......selects finalize mode
10 ERASE......selects erasing mode (disc or track)
11 EXT SOURCE ......selects external input source
12 CDR ......selects CD recorder deck display/keys
CD player
14 CD ...... selects CD player deck display/keys
20 PLAY/PAUSE ▶ II .....starts play/interrupts play
21 STOP ■......stops/clears a program
22 OPEN/CLOSE ▲......opens/closes disc tray
23 Disc tray
General
13 Display......information screen
15 ← - searches backward
- cursor control in Menu/Prog.
review mode
16 ▶▶▶ ......- searches forward
- cursor control in Menu/Prog.
review mode
17 EASY JOG ▶ ......- previous/next track (Play and (rotate) Program mode)
- recording level control (recording)
- selects settings (menu on)
ENTER......- plays selected tracks
(push) - selects settings in Menu mode
- programs track numbers
18 STORE/MENU ......- stores Menu settings
- enters Menu mode
19 CANCEL/DELETE .....- deletes tracks from a program
- deletes text in Menu mode
- returns to a higher level in the menu
24 IR sensor ....receives signals from the remote control
25 PHONES....socket for headphones
26 DJ MODE ......separate play of CD recorder deck and CD player deck
27 REPEAT.....repeats play (All, program or track)
28 SCROLL......activates scrolling of text over the display (once)
29 DISPLAY......selects display information, permanent text scrolling and time
30 SHUFFLE....plays CD(RW) or program in random order
31 PROG(ram)....opens/closes program memory
Note: Unless stated otherwise, all controls are on the front of the CD recorder. When provided on the remote control, you can also use the corresponding buttons, after selecting the CD recorder deck or CD player deck by pressing CDR or CD.
Connections at the back
1 Connection to mains
2 ANALOG OUT ......connects CD player deck to the line input of an amplifier (left and right)
3 DIGITAL OUT CD .....connects CD player deck to the digital coaxial input of e.g. amplifier or recording device
4 ANALOG IN ......connects to the line output of an amplifier (left and right)
5 ANALOG OUT CDR & CD
......connects to the line input of an amplifier (left and right)
6 DIGITAL IN......connects to the digital coaxial output of an external CD player
7 DIGITAL OUT CDR & CD
connects to the digital coaxial input of e.g. amplifier or recording device
8 OPTICAL IN ......connects to the digital optical output of an external CD player
DISPLAY indications
![graph TD A["1"] --> B["REM"] C["2"] --> D["REC"] E["3"] --> F["TIME TRACK"] G["4"] --> H["REMTOTAL"] I["5"] --> J["TIME STEPTRACK"] K["6"] --> L["+"] M["7"] --> N["PROG SHUFFLE ALL REPEAT SCAN TRACK"] O["8"] --> P["+"] Q["9"] --> R["+"] S["10"] --> T["+"] U["27"] --> V["SYNC MANUAL"] W["26"] --> X["…](/content/2026/06/1309632/images/e774fd77a8937302f35ba6714bf17b1152637ca1f1e57c04b3c7b893d4bf8f6f.jpg)
1 REM/REC TIME ....remaining time/remaining recording time/recording time
2 TRACK track number
3 balance (lights during balance adjustment)
4 TOTAL REM
TRACK TIME ....total or remaining time of disc or track
5 O) remote control active
6 STEP......indicates the number of tracks in a program
7 Track bar .....indicates:
- tracks on a disc or in a program
- track in play
8 + 20 ....disc or program contains more than 20 tracks
9 PROG(ram) ......flashes during programming/lights in program mode
10 REPEAT TRACK/ALL..lights up when a track/ complete disc (or program) is repeated
11 SCAN lights up when the first 10 seconds of each track are played
12 SHUFFLE....plays tracks in random order
13 CD player deck selected
14 CD inserted (a pre-recorded CD or finalized CDR or CDRW disc)
15 ← RECORD - ......lights during recording from the internal CD
16 L/R II II.....record/play level bar. Indicates the audio signal level
17 .....DJ mode selected
18 CHANGER ......changer mode selected
19 II ......pause function active
20 ▶ lights during play
21 R(W) unfinalized CDR(W) disc inserted
22 ● lights during recording
23 ANALOG....- analog input selected for external recording - analog recording
24 OPTICAL I ......optical input I selected for external recording
25 DIGITAL I ......digital input I selected for external recording
26 SYNC automatic or synchronised start of external recording
27 MANUAL....manual start of external recording
DISPLAY messages
Messages, as listed and explained here, may appear on the display for your guidance.
General
READING......reading disc information
OPEN.....during tray opening
CLOSE ____during tray closing
NO DISC ....no disc inserted, disc unreadable or disc inserted upside down
PROS FULL ....program full
INSERT BISC ....insert disc or insert disc in correct way
WRONG DISC ......inserted disc is not an audio CD
UNFINALIZED ....unfinalized CDR(W) disc
MEMORY XXXO....indicates the amount of text memory used for unfinalized discs
Recording
WRIT ....- when STOP ■ is pressed during recording - when STOP ■ is pressed during recording the first 4 seconds of a track
UPDATE ....updating disc contents
DISC FULL ......no more recording possible
DIGITAL 1 ......digital coaxial input 1 selected
OPTICAL digital optical input selected
ANALOG analog input selected
COPY PROTECT ......no digital recording can be made of the external source
NOTFINALIZED ....when opening the tray with an unfinalized disc inserted (CD recorder)
RECORD FAST ......high speed recording selected
REC LISTEN ......listen speed recording selected
MAKE CD ......high speed recording of a complete disc and Auto Finalize function selected
REC EXT DISC ......synchronised start of recording from external source selected
REC EXT MAN....manual start of recording from external source selected -XX DB ....level is being adjusted
DOES NOT FIT ....time left on CDR(W) disc is not enough for proposed recording
ANALOG REC ......copy prohibited track found during recording. Track will be copied analog (Copy Protection Regulations)
ERASE TRACK ......when erasing one or more tracks
ERASE DISC ......when erasing a disc
FINALIZE CD ......when finalizing a disc
FINALIZED ....when trying to finalize an already finalized disc
CHECK INPUT ......when RECORD is pressed while no digital source is detected
XX XX ERASE.....time countdown when erasing a track or a disc
XX XX FINAL.....time countdown when finalizing a disc
PRESS RECORD ....to start manual recording, finalizing or erasing
START SOURCE ......to start synchronised recording from a source (e.g. CD player)
FINALIZED CD ......when trying to record on a finalized CDR or a prerecorded CD
UNFINALIZE/......when trying to record on a
PRESS ENTER finalized CDRW
PROF SOURCE ......when a professional source is connected
REC TEXT ......when reading CD text from source disc for recording
TEXT PROTECT ....when CD text of source disc is subjected to copy protection (CD text will not be recorded)
Play
CHANGER MODE ....CD changer-mode selected
DJ-MODE ....DJ-mode selected when recording keys are pressed in DJ-mode
PROGRAM......program mode selected
ALBUM TITLE ......will be followed by album title
TRACK TITLE ....will be followed by track title
ALBUM ARTIST ....will be followed by artist name
TRACK ARTIST ....will be followed by track artist name
Others
NO AUDIO TR......when the recorder enters a data track during recording
FINALIZE CD .....laser power calibration performed 96 times, finalize disc needed
INITIALIZING ....during laser power calibration for unfinalized discs
DISC RECOVER ....during disc recovering after power failure
OPC ERROR ......OPC failure during OPC procedure (OPC = Optimum Power Calibration)
RECORD ERROR ......recording error in menu mode
DISC ERROR ......when trying to record on or finalize a recovered disc
MEMORY FULL/......when text memory is full. To add a
FINALIZE CD CD to the list, first finalize or erase another disc from the list
NOT POSSIBLE ......when trying to erase a CDR
MENU messages - See Menu mode

Menu messages
| NO TRACKS ......when attempting to edit text for a disc which has no tracks | |
| TEXT EDIT ......when entering Text Edit mode | |
| ALBUM ARTIST ......when editing or erasing an artist name | |
| ALBUM TITLE ......when editing or erasing a title | |
| ARTIST TR N......when editing or erasing an artist name per track | |
| TITLE TR N ......when editing or erasing a title per track | |
| TEXT ERASE ......when entering Text Erase mode | |
| ALL TEXT ......when entering All Text mode | |
| ERASE OK ......when confirmation for erasing has to be given with ENTER key | |
| ERASE ALL OK ......when confirmation for erasing has to be given with ENTER key | |
| ERASE MEMORY ......when waiting for confirmation when erasing a disc | |
| MEMORY VIEW ......when selecting text review per unfinalized disc in memory | |
| MEMORY EMPTY ......when REVIEW is selected while no text is in memory | |
| AUTO TRACK ......when selecting auto track increment ON or OFF | |
| ON ......auto track increment on | |
| OFF ......auto track increment off | |
| SET BALANCE ......when selecting BALANCE | |
| NO TEXT ......no text stored for disc |
Connections general
For playback on the CD recorder (and/or CD player deck) the following outputs are present:
- Digital coaxial output (CD & CDR);
- Analog output (CD & CDR).
We advise you to connect these to the TAPE or CDR input on your amplifier.
For external recording the following inputs are present:
- Digital optical input;
- Digital coaxial input;
- Analog input.
For playback of CD player deck separately (DJ mode) from the CD recorder the following outputs are present:
- Digital coaxial output (CD);
- Analog output (CD).
We advise you to connect these to the CD input on your amplifier.
The connections you make will depend upon the possibilities your audio equipment offers. Please refer to the user manuals for your other audio equipment first.
Digital recordings (optical or coaxial) give the best performance in audio and usability (e.g. auto-track).
(The digital optical connection is less sensitive to external disturbances).
If your equipment does not offer digital connections, the high quality Analog-Digital-Convertor of your CD recorder will ensure very good audio performance when recordings are made from the analog input.
Playback via the digital coaxial output of the CD recorder gives the best audio performance.
If your equipment does not offer digital connections, the high quality Digital-Analog-Convertor of the CD recorder ensures a very good sound quality via the analog output.
We advise you to always establish both digital and analog connections. In this way you can always make analog recordings when digital recording is not possible.
We have described the most common ways of connecting the CD recorder. If you still have difficulties with the connections you can always contact the Philips Consumer Service desk in your country.
This connection must be made for playback on the CD recorder deck as well as the CD player deck (cable ②). Cable ① is only required if you want to make recordings from an external analog source.
![graph TD A["Input"] --> B["Tape"] B --> C["RECEIVER ②"] D["Input"] --> E["RECORDER"] E --> F["In Optical"] style A fill:#f9f,stroke:#333 style B fill:#ccf,stroke:#333 style C fill:#cfc,stroke:#333 style D fill:#fcc,stroke:#333 style E fill:#cff,stroke:#333](/content/2026/06/1309632/images/cb45e00d0a56d2eb62c283362b17a40a6cc122e59572005b328e2e16e04784b7.jpg)
Use the audio cables supplied. Connect the red plugs to the R sockets, and the white plugs to the L sockets.
1 For recording, connect cable ① between the ANALOG IN-sockets on the CD recorder and the CDR LINE- or TAPE OUT-sockets of an amplifier.
Note: For recording directly from a CD player, the analog input of the CD recorder should be connected to the analog output of the CD player.
2 For playback, connect cable ② between the ANALOG OUT-sockets on the CD recorder and the input sockets of an amplifier e.g. TAPE IN, CDR or AUX.
Note: Never use the PHONO input.
Analog connections CD player deck Analog connections CD
This connection is only required if you want to playback on the CD player deck separately from the CD recorder deck. This will be the case in DJ-mode.
![graph TD A["Analog"] --> B["CD"] B --> C["In"] C --> D["L"] D --> E["R"] E --> F["IN"] F --> G["OUT TAPE"] G --> H["RECEIVER 2"] I["CD RECORDER"] --> J["IN"] J --> K["R"] K --> L["OUT ANALOG"] L --> M["IN"] M --> N["OUT DIGITAL"] N --> O["OPTIMAL"] style A fill:#f9f,stroke:#333 style I fill:#f9f,str…](/content/2026/06/1309632/images/44cbf79c80dfb375a078614cfba1b385412b6241b3f1cabd7ca8a1660ac2686d.jpg)
1 For separate playback on the CD player deck, connect a third cable ③ (not supplied) between the ANALOG OUT sockets of the CD recorder and the input sockets of an amplifier e.g. CD, or AUX. (Connect the red plugs to the R sockets, and the white plugs to the L socket.)
Note:
- Never use the PHONO input.
- Your CD recorder/player is equipped with a digital coaxial output for the CD player deck. This output can be used for digital playback.
This connection is only required if you want to make recordings from an external CD player with a digital coaxial output.
![graph TD A["CD PLAYER"] -->|4| B["RECEIVER"] B -->|2| C["TAPE"] C --> D["REORDER"] D -->|1| E["LUX AUX"] D -->|4| F["CD"] style A fill:#f9f,stroke:#333 style B fill:#ccf,stroke:#333 style C fill:#cfc,stroke:#333 style D fill:#fcc,stroke:#333 style E fill:#ffc,stroke:#333 style F fill:#fcc,stroke:#33…](/content/2026/06/1309632/images/7bab79640e8c58741f98d56caef137adf42c213461d4b67d83cecb129a945ae1.jpg)
Use the digital coaxial cable supplied.
1 For external recording, connect the cable ④ between the DIGITAL IN-socket on the CD recorder and the DIGITAL OUT-socket of an external CD player.
Note: Your CD recorder is equipped with a digital coaxial output (common output for CD recorder & CD player deck). This output can be used for digital playback.
Digital optical connections CD recorderDigital coaxial con
This connection is only required if you want to make recordings from an external CD player with a digital optical output.

1 Remove the dust caps from the digital optical connection. (We recommend you save the cap.)
2 For external recording, connect a fibre-optic cable ⑤ between the digital optical input of the CD recorder and the digital-optical output of an external CD player.
Note: For playback, the digital coaxial outputs or analog outputs of the CD Player and CD recorder should be connected to an amplifier.
Power supply

1 Plug the power cord supplied into the MAINS connector on the CD recorder, then into a mains socket.
2 Press ON/OFF.
→The CD recorder will switch on.
Note:
- If the CD recorder is in Standby mode (red led on), press any key to activate the recorder.
- The CD recorder will automatically adjust to the local mains voltage.
- When the CD recorder is in the 'OFF' position, it is still consuming some power. If you wish to disconnect your player completely from the mains, withdraw the plug from the AC outlet.
Setup recommendations
- Place the CD recorder on a solid, vibration free surface.
- Do not place the CD recorder near a source of heat or in direct sunlight.
- Do not use the CD recorder under extremely damp conditions.
- If the CD recorder is placed in a cabinet, make sure that a 2.5 cm space remains free on all sides of the CD recorder for proper ventilation.
Important:
- Do not put the CD recorder on top of other equipment that heats up the CD recorder (e.g. receiver or amplifier).
Inserting batteries in the remote control

1 Open the battery compartment cover.
2 Insert 2 batteries ("AA", LR-6 or UM-3; as supplied) as shown.
3 Replace the cover.
Note: We recommend you use 2 batteries of the same type and condition.
Batteries contain chemical substances, so they should be disposed of properly.
Remote control commands

STANDBY ⏻ switches to Standby/On
SCAN ....plays the first 10 seconds of each track
SHUFFLE....plays CD(RW) or program in random order
REPEAT.....repeat play
Number/alphabet keys 0 - 9
- selects a track by number - selects character for text input
TRACK INCR(ement) ......increases track numbers during recording
SPACE......inserts a space character during text input
SCROLL....activates scrolling of text over the display
CDR ......selects CD recorder deck
CD ...... selects CD player deck
starts CD(RW) play
- previous track (Play and Program mode)
- cursor control in Menu/Prog. review mode
▶ I ....- next track (Play and Program mode)
- cursor control in Menu/Prog. review mode
- ......stops CD(RW) and clears a program
searches backward
searches forward
II ......interrupts CD(RW) play/recording
MENU/STORE ...... - enters Menu mode
- stores Menu settings
PROG.(ram) ......opens/closes program memory
ENTER......- selects settings in Menu mode
- programs track numbers
- starts playback of selected track
CANCEL ......- deletes tracks from a program
- deletes text in Menu mode
- returns to a higher level in the menu
Inserting discs

1 Press OPEN/CLOSE to open the disc tray.
→ OPEN lights up.
2 Insert a CD, CDR or CDRW in the appropriate recess in the tray, label side up.
3 Press OPEN/CLOSE to close the tray (see also Playing a CD).
→ CLOSE lights up, followed by READING and the display will show the type of disc you inserted.

- If you insert a blank or partly-recorded CDR or unfinalized CDRW, the CD recorder will calibrate the disc for optimum recording. During this process the display will first show INITIALIZING and then the number of audio tracks. Calibration can take up to 25 seconds.

- If a CDR(W) is finalized it will show CD on the display.
- If CD-text is available the TITLE/ARTIST will scroll by.

Note:
- Only Audio CDs will be accepted. If a non-audio disc is inserted, the display shows WRONG DISC/USE AUDIO CD.
- Reading an unfinalized disc in the CD recorder deck could take approximately 1 minute.
- For recording it is important that the blank disc is completely free from dust particles or scratches. (see maintenance).
You will soon discover how easy it is to make your own CDs. Nevertheless, it is advisable to use a CDRW disc for your first try.
We will describe:
- Recording from internal CD player deck: high speed or listen mode.
-
Recording from an external CD player deck: synchronized start with CD player or manual start. (analog or digital).
-
If the disc is a CDRW and is already finalized you must unfinalize it first.
- The recording procedure is the same for CDRs and CDRWs.
- If the disc already contains recordings, the CD recorder will automatically search for the end of the last track, so that recording can start from there.
- CD text can be added to a recording in Stop mode and during recording.
- CD text can not be recorded from an external CD player. (Text information is not available on the output of the CD player.)
- The CD recorder deck is able to record CD text from the internal CD player deck. (If not subjected to copy protection.) This may take up to 2 minutes.
- There must be at least 7 seconds of recording time left on the disc, otherwise you will not be able to enter record standby mode. DOES NOT FIT then lights up.
- If the display indicates COPY PROTECT, no digital recording can be made of the source material. Recording will not start.
- The Serial Copy Management System (SCMS) only allows digital recording under specific conditions:
- This means that it is not possible to make a digital copy from a digital copy.
- Analog recording is always possible!
- The number of recordings from the original is unlimited.
- A maximum of 99 tracks can be recorded on a disc. Minimum allowable track length is 4 seconds.
- Recordings from DAT or DCC players will not always stop automatically.
Important:
If you want to play the recorded CDR disc on any regular CD player, it must first be finalized. See finalizing discs.
Finalized CDRW discs play only on CDRW compatible CD players.
For recording from CD changers always use REC EXT DISC.
Recording modesRemarks about recording
Your recorder offers several recording modes.
For recording from internal CD-deck:
- RECORD FAST(high speed digital recording) - fast recording of a disc or programmed tracks.
- REC LISTEN (normal speed digital recording) - listening to a recording while making it.
- MAKE CD (high speed digital recording and auto-finalize) - fast recording of a disc or programmed tracks. Recording will be finalized automatically.
Warning: No more recording possible after finalizing CDR disc!

For recording from external sources:
- REC EXT DISC (automatic start of recording) - to make an automatic recording of an external source simply by starting the source.
- REC EXT MAN(manual start of recording) - to start a manual recording from an external source.
Some remarks on recording:
- During high speed recording, the original recording quality will be maintained.
- When Auto track is on (default setting), track numbers will automatically be increased during recording.
- By programming tracks first, a compilation can be recorded.
- If a finalized CD recordable disc is inserted in the CD recorder, FINALIZED CD will be displayed when REC TYPE is pressed. Recording is not possible.
- If a finalized CD rewritable disc is inserted in the CD recorder, UNFINALIZE and PRESS ENTER will be displayed when the REC TYPE is pressed. If ENTER is pressed, the disc will be unfinalized.
Note: If during recording ANALOG REC appears, the track will be recorded as analog, at normal speed. All other tracks will be copied normally (at double speed).
High speed recording from internal CD player

During high speed recording the sound is not audible.
Preparing for high speed recording
1 Make sure that the recording disc is absolutely free of scratches and dust particles.
2 Press REC TYPE to choose the type of recording:
once: to select 'RECORD FAST' if you wish to make a fast recording of a disc or programmed tracks; three times: to select 'MAKE CO' if you wish to make a fast recording of a disc or programmed tracks and to automatically finalize the recording.
→ The display first shows the selection.
The ← RECORD - label starts blinking. After 3 seconds the display shows the remaining CDR(W) recording time on the left and total time of source on the right. (every 2 seconds PRESS RECORD is displayed.) The left selection indicator is lit.


- If DOES NOT FIT appears on the display, there is not enough recording space left on the CDR(W) disc. You can press RECORD: only complete tracks that still fit on the CDR(W) will recorded.
or
You can press PROG to select one or more tracks for recording (see programming):
- rotate the EASY JOG/ENTER key to the required track number, then press the key (or ENTER on the remote control) or
- directly select the track number via the 10-keypad on the remote control then press the ENTER key to confirm your selection and go to the next step.
Start high speed recording
1 Press RECORD to start recording.
→ WAIT lights up. The display shows the total remaining time for the selected recording. High speed recording starts. ← RECORD - lights continuously.
- To check the track number and track time, press DISPLAY. This can be done during recording.
- Recording will stop automatically.
Note: Copy prohibited tracks will be copied analog. ANALOG REC is displayed.
2 To stop recording manually, press STOP.
→ UPDATE lights up, ← RECORD – goes out and recording stops. (Minimal track length must be 4 seconds otherwise silence will be added to the track.)
- If STOP was pressed within 3 seconds after RECORD, no recording will take place.
After recording, the display shows UPDATE for several seconds. The Total time indications can differ slightly. However, no music information is lost.
Note: In this Recording mode, the Pause function is not operative.
Important:
If you want to play the recorded CDR disc on any regular CD player, it must first be finalized. See finalizing discs.
Finalized CDRW discs play only on CDRW compatible CD players.
Listen mode recording from internal CD player

During Listen mode recording you listen to the recording while you are making it.
Preparing for Listen mode recording
1 Make sure that the recording disc is absolutely free of scratches and dust particles.
2 For recording, press REC TYPE twice:
→ The display first shows the selection.
The ← RECORD - label starts blinking. After 3 seconds the display shows the remaining CDR(W) recording time on the left and total time of source on the right. (every 2 seconds PRESS RECORD is displayed) The left selection indicator is lit.


- If DOES NOT FIT appears on the display, there is not enough recording space left on the CDR(W) disc.
You can press RECORD: only complete tracks that still fit on the CDR(W) will recorded.
or
You can press PROG to select one or more tracks for recording (see programming):
- rotate the EASY JOG/ENTER key to the required track number, then press the key (or ENTER on the remote control)
or
- directly select the track number via the 10-keypad on the remote control then press the ENTER key to confirm your selection and go to the next step.
3 Play the source first to set the optimal recording level on the CD recorder.
4 Rotate the EASY JOG/ENTER key until, on the Record/Play Level bar, all the blue segments are alight, but the red segments do not light continuously during the loudest passages.
→ Display shows -×× √B (Decibel, e.g. -∃B).
5 Stop the source.
Start Listen mode recording
1 To start recording,

→ WAIT lights up. ← RECORD - lights continuously and the selected track or program is copied at normal speed. The track number and the recording time left will appear.
- To check the track time, press DISPLAY. This can be done during recording.
- Recording will stop automatically.
Note: Copy prohibited tracks will be copied analog. ANALOG REC is displayed.
2 To stop recording, press STOP.
→ UPDATE lights up, ← RECORD – goes out and recording stops. (Minimal track length must be 4 seconds otherwise silence will be added to the track.)
- If STOP was pressed within 3 seconds after RECORD, no recording will take place.
After recording, the display shows UPDATE for several seconds. The Total time indications can differ slightly. However, no music information is lost.
Note: In this Recording mode, the Pause function is not operative.
Important:
If you want to play the recorded CDR disc on any regular CD player, it must first be finalized. See finalizing discs.
Finalized CDRW discs play only on CDRW compatible CD players.
Manual recording from external CD player

Important:
- Recording from CD-changers should always be started in the Auto-Start mode.
- Only make analog recordings when digital recording is not possible.
Preparing for manual recording
1 Make sure the disc is absolutely free of scratches and dust particles.
2 Press EXT(ernal) SOURCE repeatedly until (depending on the connection used):
→ DIGITAL I, OPTICAL I or ANALOG lights up and DIGITAL 1, OPTICAL or ANALOG appears on the display.

- When Auto Track is On (default setting), track numbers will automatically be increased during recording.
- To switch off the Auto Track function you have to enter Menu mode.
If you wish to increase track numbers manually, press TRACK INCR(ement) on the remote control. For further instructions see Menu mode.
ON (Auto): The track increments are automatically taken over from the digital source material or after 2.7 seconds silence during analog recording.
OFF (Manual): While recording track numbers can be incremented manually by pressing TRACK INCR(ement) on the remote control. (Minimum track length is 4 sec.) (This can also be done in Auto track ON mode.)
- Track numbers cannot be changed after recording.
Note: Auto track works only with Consumer Sources with a digital output signal according to the IEC 958 (consumer part) audio standard.
3 With the recorder stopped, press REC TYPE five times to enter the Manual Record standby mode.
→ MANUAL starts to flash and the display shows REC EXT MAN followed by WRIT. After a few seconds PRESS RECORD followed by the remaining time and track number appear on the display.

4 Play the source first to set the optimal recording level on the CD recorder.
5 Rotate the EASY JOG/ENTER key until, on the Record/Play Level bar, all the blue segments are alight, but the red segments do not light continuously during the loudest passages.
→ Display shows -xxx 13 (Decibel, e.g. -333).
6 Stop the source.
Start manual recording
1 To start recording, press RECORD on the CD recorder and immediately start the source (from Pause or Stop-mode).
→ lights continuously. The track number and recording time left appear on the display.
- If CHECK INPUT message also flashes, the digital connection is incorrect.
- To record a 3-second silence at the start of a track, press PAUSE on the CD recorder before starting the source.
- To check the total remaining recording time, press DISPLAY on the CD recorder. (This can also be done during the recording.)
2 To stop recording, press STOP on the CD recorder.
→ UPDATE lights up and → goes out.
- If STOP was pressed within 3 seconds after RECORD, no recording will take place.
- To interrupt recording, press PAUSE on the CD recorder. → starts to flash. Press PAUSE again to restart recording. ( A new track will always be made.)
After recording the display will show UPDATE for several seconds.
Note: With AUTO TRACK ON, the recorder will stop and go to REC STANDBY for 1 minute and then goes to Stop mode automatically. Recordings from DAT, DCC or recordings made analogously will stop after 20 seconds silence. With AUTO TRACK OFF, the auto stop mode is disabled.
Important:
If you want to play the recorded CDR disc on any regular CD player, it must first be finalized. See finalizing discs.
Finalized CDRW discs play only on CDRW compatible CD players.
For recording from CD changers always use REC EXT
Autostart recording from external CD player CD-SYNC

The CD-SYNC feature enables you to make fast and easy recordings of a CD. Track increments are automatically detected from the source material. Track increments cannot be added manually. In analog source material a silence of 2.7 seconds or more is automatically detected as a track increment.
Preparing for autostart recording
1 Make sure the disc is absolutely free of scratches and dust particles.
2 Press EXT(ernal) SOURCE repeatedly until (depending on the digital connection used):
→ DIGITAL I, OPTICAL I or ANALOG lights up and DIGITAL 1, OPTICAL or ANALOG appears on the display.

3 With the CD recorder stopped, press REC TYPE four times: if you wish to record a complete disc or program.
→ L and SYNC start to flash and the display shows REC EXT DISC and WAIT followed by the track number, the total remaining time and START SOURCE.

- If input label (DIGITAL I) flashes, the digital connection is incorrect.
Start autostart recording
1 To start recording, press PLAY on the selected source.
→ The CD recorder automatically starts to record and lights continuously. The track number and track time appear on the display.
- If, however, you start the source during a track, CD-SYNC recording starts at the beginning of the next track or after 2.7 seconds of silence in analog recordings.
- To check the remaining recording time on the CDR(W), press DISPLAY. (This can also be done during recording.)
- The EASY JOG/ENTER key can be used to adjust the recording level.
• The recorder stops automatically.
2 To stop recording manually, press STOP on the CD recorder.
→ UPDATE lights up and SYNC and → go out.
- If STOP ■ was pressed within 3 seconds after pressing PLAY, no recording will take place.
- To interrupt recording, press PAUSE on the CD recorder. → → starts to flash. (Autostart recording is disabled.) To resume, press RECORD on the CD recorder.
After recording the display will show UPDATE for several seconds.
Note:
- Recordings from DAT, DCC or analog sources will only stop after 20 seconds silence.
- Auto track is always active.
Important:
If you want to play the recorded CDR disc on any regular CD player, it must first be finalized. See finalizing discs.
Finalized CDRW discs play only on CDRW compatible CD players.
For recording from CD changers always use REC EXT DISC.
Finalizing CDR & CDRW discs
During finalizing the Table of Contents (TOC) is written to the disc.
Finalizing is a simple procedure, necessary to:
- be able to play recordings on a CD PLAYER,
- avoid further unwanted recordings on a disc,
- avoid erasure of tracks on a CDRW,
- write CD text on a CDR(W).
Auto finalizing
Auto finalizing is possible when using the MAKE CD recording function.
Manual finalizing
1 Make sure the disc (in the CD recorder deck) is absolutely free of scratches and dust particles.
2 With the recorder stopped press FINALIZE.
→ The display shows FINALIZE CD and PRESS RECORD.


3 Press RECORD.
→ XX XX FINAL and the approximate finalization time appears on the display.
The display counts down through the finalization. On completion, the total number of tracks and the total time recorded appears on the display.
For CDR(W), □ changes to □ on display.
Finalizing will take at least 2 - 4 minutes.
Note:
- During finalization, the CD recorder accepts no operating commands.
- When a CDR is finalized no more recordings can be added.
Unfinalizing CDRW discs
For CDRW discs only.
If you want to make more recordings (or erasures of tracks) on a finalized disc you must unfinalize it first. The Table of Contents (TOC) will be removed. (This is not possible for CDR discs.) To unfinalize:
1 With the CD recorder stopped, press REC TYPE or ERASE.
→ UNFINALIZE and PRESS ENTER will appear on the display.


2 Press JOG (ENTER).
→ The disc will now be unfinalized and can be recorded on again and the Recording or Erasure mode is entered.

3 You can now start recording or erasing. If no further recording or erasure is required press STOP ■.
Note:
- Unfinalizing will take approximately 1 minute 30 seconds.
- When unfinalizing a CDRW disc with text on it available, this text will be transferred to the CD recorder memory. It may occur that the text memory is full. The message MEMORY FULL/FINALIZE CD will be displayed. To empty the recorders text memory you have to erase text from it. This can be done in two ways:
1) Finalize one or more unfinalized discs for wich CD text is available.
2) Delete text of unfinalized discs with the 'memory view' option in the Menu mode.
Erasing CDRW discs

For unfinalized CDRW discs only.
You can erase:
- Tracks can only be erased from the end.

- With the EASY JOG you can erase more tracks.

Note: It is not possible to erase tracks within the sequence.
- It is also possible to erase the entire disc at once.
To erase one or more tracks from the end:
1 Press ERASE once.
→ The display shows the number of tracks and their total playing time. ERASE TRACK and PRESS RECORD lights up.
- If the disc is finalized, CD appears on the display after inserting a CDRW in the recorder. The recorder will ask you to confirm unfinalizing first. Confirm by pressing the EASY JOG/ENTER key or ENTER on the remote control.
2 Select the track(s) you wish to erase by turning the EASY JOG/ENTER key to the left.
→ The selected track numbers start blinking on the track bar.
→ The display shows the remaining time after erasing the selected track(s), the shown track will also be included in the erasure of tracks.


3 Press RECORD.
→ The display shows the total countdown time and ERASE.
→ After the selected track(s) have erased, the display shows the remaining tracks and their total playing time.
To erase the entire disc:
1 Press ERASE twice.
→ The display shows the number of tracks and their total playing time. ERASE DISC and PRESS RECORD light up.
- If the disc is finalized, CD appears on the display after inserting a CDRW in the recorder. The recorder will ask you to confirm unfinalizing first. Confirm by pressing the EASY JOG/ENTER key or ENTER on the remote control.


2 Press RECORD.
→ The display shows the total countdown time and ERASE. The complete disc will be erased.

Erasure of a complete disc may take up to 15 seconds.
Play a 2-disc changer (Changer mode)
Your CD recorder is able to play the two decks sequentially (CHANGER mode). This is the default setting.
1 Select Changer mode using the DJ MODE key.
→ CHANGER appears on the display and

2 On the deck you want to play, press PLAY/PAUSE ▶ II to start CD play.
→ lights up, the track number and track time of the track in play appear on the display.
→ After playing the first disc the second disc will automatically be played.
- Press DISPLAY once, twice or three times to see:
→ remaining track time, total remaining time, permanent text information (see Menu mode).
- To interrupt play temporarily, press PLAY/PAUSE ▶ II again.
→ II lights on the display.
• To continue play, press PLAY/PAUSE ▶ II again.
3 To stop play, press STOP ■.
→ The number of tracks and the total playing time appear on the display.
- If you want to see the information about the other deck, press the CDR key or the CD key in the display frame.

Playing CDs on Deck 1 and/or Deck 2 (DJ mode)
With this double deck it is possible to play the CD recorder deck and/or the CD player deck individually (at the same time). In this case the extra CD output must also be connected to an amplifier.
1 Select DJ mode using the DJ MODE key.
→ JJ MODE appears on the display and ↑ L lights up.

2 On the deck you want to play, press PLAY/PAUSE ▶ II to start CD play.
→▶ lights up and the track number and track time of the track in play appear on the display.
- You can also play the two decks at the same time. By pressing the CDR key or the CD key you can choose the deck you want to listen to.
- Press DISPLAY once, twice or three times to see:
→ remaining track time, total remaining time, permanent text information (see Menu mode).
- To interrupt play temporarily, press PLAY/PAUSE ▶ II again.
→ II lights on the display.
• To continue play, press PLAY/PAUSE ▶ II again.
3 To stop play, press STOP ■.
→ The number of tracks and the total playing time appear on the display. If you want to see this information about the other deck, press CDR or CD.
Selecting a track

Selecting a track during play
1 Turn the EASY JOG/ENTER key until the required track number appears on the display.
→ Play skips to the beginning of the selected track.
or
Select CDR or CD on the remote control and key in the required track number using the numerical keys on the remote control. For 2-digit track numbers, press the keys in rapid succession. For tracks on the other disc, first press CD or CDR as applicable.
→ Play skips to the beginning of the selected track.
or
Press ◀ or ▶ on the remote control one or more times.
→ Play skips to the beginning of the present, previous or subsequent tracks, including tracks on the disc in the other deck. (Changer mode only.)
Selecting a track when CD play is stopped
1 Turn the EASY JOG/ENTER key until the required track number appears on the display.
2 Press EASY JOG/ENTER or ENTER on the remote control to confirm or press PLAY/PAUSE ▶ II to start playing.
or
1 Select CDR or CD on the remote control and key in the required track number using the numerical keys. For 2-digit track numbers, press the keys in rapid succession. Play starts.
or
1 Briefly press ◀ or ▶ one or more times.
2 Start playback by pressing PLAY/PAUSE ▶ II, EASY JOG/ENTER or ENTER on the remote control.
Search

1 Hold down ◀◀ or ▶▶ (in play mode).
→ The player first searches backwards or forwards at 10 times normal speed with sound at low volume, then goes to 50 times normal speed with sound muted.
2 Release the button at the desired passage.
→ Play starts at the desired passage.
Note: During Shuffle, Repeat Track or Programmed play, search is restricted to within the track being played at the time.
Only in Changer mode.
1 Select Changer mode, if nessesary, using the DJ MODE key.
2 Press SHUFFLE before or during CD play to start shuffle play.
→ The tracks on the CD (or program if set) play in random order.
3 Press SHUFFLE again to disable the Shuffle mode.
→ CD recorder goes to Stop mode.
Note: Shuffle is also cleared if you open the disc tray.
Repeat CD, track or programShuffle (random order)
pla Engli
1 Press REPEAT one or more times during CD play.
→ When REPEAT TRACK lights up, the current track plays repeatedly. When REPEAT ALL lights up, the disc or program plays repeatedly.

2 To return to normal play, press REPEAT one or more times until:
→ the REPEAT label disappears from the display.
Note:
- You can use shuffle in combination with REPEAT ALL or programmed play of the 2-disc changer.
- REPEAT is also cleared if you open the disc tray.
Remarks about programming
- You can program up to 99 tracks to play in any desired sequence.
- Tracks can be programmed more than once, but each time counts as a track. (STEP)
- A program for playback can be made from both the disc in the recorder deck and the disc in the player deck. A program for recording can only be made from the disc in the player deck.
Programming for playback
1 Select Changer mode or DJ mode using the DJ MODE key.
→ CHANGER or DJ MODE appears on the display.
2 Press CDR or CD to select the required deck.
→ Selected key lights up.
3 Press PROG(ram) to enter Program mode.
→ PROG flashes and PROGRAM followed by track information appears on the display.


4 Select the required track numbers by turning the EASY JOG/ENTER key left or right and store by pressing ENTER.

or:
Key in a track number with the number keys on the remote control and press ENTER to confirm. For 2-digit numbers, press the keys in rapid succession.
→ The track will be stored in the program.
→ The track number, total program time and the number of programmed tracks (STEP) are displayed.
5 Repeat step 4 for all tracks to be programmed.
6 Press STOP or PROG(ram) to end programming. → PROG lights continuously.
7 Press PLAY/PAUSE ▶ II to start programmed play.
Programming for recording
1 Press REC TYPE to select the required recording mode (see 'Recording').
2 Compile your programme as described in "programming for playback". (steps 3 to 5)
- Only tracks from the disc in the CD player can be stored.
3 Press RECORD to start recording.
Note:
- To review the program, press PROG(ram), followed by ◀◀ or ▶▶ with the CD player or CD recorder in stop mode.
- To add more tracks to the program, repeat steps 1 to 7.
- If you try to store more than 99 tracks, PROG FULL appears on the display.
Clearing a program
1 Press STOP ■ if necessary to stop programmed play.
2 Press STOP ■ again to clear the program.
→ PROG disappears from the display.
• The program is also cleared if you open the disc tray.
Erasing a track from a program
1 In Stop mode press PROG(ram) to enter Program mode.
2 Use ◀◀ or ▶▶ to select the track that has to be deleted.
→ The track number and program step will be shown on the display.
3 Press CANCEL/DELETE to erase the track from the program
→ The remaining program steps and the remaining playing time of the program will be displayed.
4 Repeat step 2 and 3 for all tracks to be erased.
5 Press STOP ■ or PROG(ram) to end erasing.
→ PROG lights continuously.
- In Menu mode you will have access to a number of features which are not available via the regular keys (on the deck's front and the remote control).
- The TEXT submenus (A-B) allow you to give names to discs and tracks. The disc and track names will be displayed during playback.
- In the RECORDING submenus (D-E) you can set Auto Track and Balance.
- All settings (except Balance) made in Menu mode will be stored in the deck's memory and can be called up and changed at any time.
General operation of MenuRemarks about Menu mode;
English
Menu active in Recording or Stop mode.
1 When using the remote control select first CDR.
2 Press STORE/MENU on the deck or the remote control to enter Menu mode.
→ TEXT EDIT appears on the display.
3 Rotate EASY JOG/ENTER to select the required submenus.
4 Press EASY JOG/ENTER to confirm selections.
5 Rotate EASY JOG/ENTER to select options in the submenus.
6 Press EASY JOG/ENTER to confirm selections.
7 Press STORE/MENU to store settings and return to the submenu.
8 Press STOP ■ to store settings and exit Menu mode.
Note: Text can only be edited for unfinalized discs. (Finalized CDRW discs must be unfinalized first.)

A. Text input/text edit
![graph TD A["TEXT EDIT"] --> B["ALBUM ARTIST"] A --> C["ALBUM TITLE"] A --> D["ARTIST TR N"] A --> E["TITLE TR N"]](/content/2026/06/1309632/images/cd6f102097763118524cc93e2c390cba677c9e6229ec22a4f70c3e1fa5f6548a.jpg)
CD Text can be added to a recording or changed. This can be done in Stop mode or during recording.
Text will be stored in the recorder memory and can be edited until the CDR is finalized. Text on a (unfinalized) CDRW can be edited at any time.
1 Press STORE/MENU.
→ TEXT EDIT appears on the display.
2 Press EASY JOG/ENTER to confirm.
→ ALBUM ARTIST appears on the display.
3 Rotate EASY JOG/ENTER to select the required option in the submenu: ALBUM ARTIST, ALBUM TITLE, ARTIST TR 1, TITLE TR 1, etc.
4 Press EASY JOG/ENTER to confirm.
→ The first character space appears on the display.
5 Select the characters by rotating the EASY JOG/ENTER key or by pressing the corresponding numeric/alphabet key on the remote control.
6 Press EASY JOG/ENTER to store each character and move to the next cursor position.
- With the ◀◀ ▶▶ keys you can move to a required cursor position.
- With the CANCEL key you can delete a character.

7 Press STORE/MENU to store a name you have entered and return to the submenu resume at 3 or STOP ■ to exit.
Note:
- A maximum of 60 characters can be stored per item.
- By pressing the EASY JOG/ENTER key or ENTER on the remote control without selecting a character first, you can insert a space between characters.
- When an artist's name has been stored for a certain track, the name will automatically be copied for the next track. The name can be confirmed by pressing STORE/MENU or a new name can be entered as described above.
B. Erasing text/text erase

1 Press STORE/MENU.
→ TEXT EDIT appears on the display.
2 Rotate the EASY JOG/ENTER key to select the TEXT ERASE submenu.
→ TEXT ERASE appears on the display.
3 Press EASY JOG/ENTER to confirm.
→ If text is available ALL TEXT appears on the display. (When there is no text available the message NO TEXT appears on the display.)
4 Rotate EASY JOG/ENTER to select the required option in the submenu: ALL TEXT, ALBUM ARTIST, ALBUM TITLE, ARTIST TR 1, TITLE TR 1, etc.
5 Press EASY JOG/ENTER to confirm.
→ The display will ask you to reconfirm your selection. ERASE OK appears on the display.
6 Press EASY JOG/ENTER to reconfirm.
→ UPDATE appears on the display.
7 Press STORE/MENU to return to the submenu or STOP ■ to exit.
C. Reviewing CD Text in memory/memory view
![graph TD A["MEMORY VIEW"] --> B["CD 1"] A --> C["CD 2"] A --> D["CD N"]](/content/2026/06/1309632/images/06c87a1fca3f42ac67581890f1b098e6929cd322dadc9c22c74d854592bb6149.jpg)
CD Text is stored in the recorders memory. When a CDR(W) will be finalized the CD Text will be written on the disc and removed from the recorders memory. With the MEMORY VIEW function one can view/delete the CD Text in the recorders memory per unfinalized disc. The amount of memory used is displayed each time the tray opens with an unfinalized CDR(W) inserted. (e.g. MEMORY 99/0)
1 Press STORE/MENU.
→ TEXT EDIT appears on the display.
2 Rotate the EASY JOG/ENTER key to select the MEMORY VIEW submenu.
→ MEMORY VIEW appears on the display.
3 Press EASY JOG/ENTER to confirm.
→ The first album title in the recorder memory appears on the display.
4 Select the album title you wish to erase by rotating the EASY JOG/ENTER key.

5 Press EASY JOG/ENTER to confirm.
→ ERASE MEMORY appears on the display.

6 Press the EASY JOG/ENTER key to confirm the erasure of the text for that particular disc.
→ UPDATE appears on the display.
7 Press STORE/MENU to return to the submenu or STOP ■ to exit.
Note:
- If there are no discs in the memory, the message MEMORY EMPTY appears on the display.
- When the text memory of your CD recorder is full, the message MEMORY FULL will appear, followed by FINALIZE CD. If you want to add a CD to the list of discs for which text is stored, you have to erase a disc from this list or finalize another disc. ("for which text is stored")
- MEMORY FULL/FINALIZE CD may also appear when unfinalizing a CDRW disc for which text was stored (see 'Unfinalizing CDRW discs'). The same action(s) should be taken in order to obtain memory space.
D. Auto track increment/auto track

1 Press STORE/MENU.
→ TEXT EDIT appears on the display.
2 Rotate the EASY JOG/ENTER key to select the AUTO TRACK submenu.
→ AUTO TRACK appears on the display.
3 Press EASY JOG/ENTER to confirm.
→ ON appears on the display.
4 Turn the EASY JOG/ENTER key to select Auto track ON or OFF.
- When N is selected, track numbers will be automatically incremented during recording.
- When OFF is selected, you can number the recorded tracks yourself.

5 Press EASY JOG/ENTER to confirm.
→ AUTO TRACK appears on the display.
6 Press STORE/MENU to store settings and return to the submenu or STOP ■ to exit.
E. Balance (only active in Record/Standby mode)

1 Press STORE/MENU.
→ TEXT EDIT appears on the display.
2 Rotate the EASY JOG/ENTER key to select the SET BALANCE submenu.
→ SET BALANCE appears on the display.
3 Press EASY JOG/ENTER to confirm.
→ ▲▲ and L 100 R 100 appear on the display.

4 Adjust recording balance by turning the EASY JOG/ENTER key.
- Turn left: the figure left (▲) counts down, right counts up.
- Turn right: the figure right (▲) counts down, left counts up.
5 Press EASY JOG/ENTER to confirm.
6 Press STORE/MENU to store settings.
Note: The balance setting will not be stored permanently.
TROUBLESHOOTING
If your CD recorder is defective, it is wise to check this list first. You may have forgotten a simple step.
Warning!
Under no circumstances should you attempt to repair the CD recorder yourself as this will invalidate the guarantee.
SYMPTOM • possible solution:
No power • ensure that the ON/OFF button is on (red led on): the CD Recorder is in standby mode, press any key to activate it
- ensure that the mains cable is plugged in correctly
- switch the recorder OFF and then immediately back ON
Auto track does not work
- check if auto track on is selected in the menu
- check if there are 2.7 seconds silence in between the tracks (analog recording only)
- check if the source is a consumer source with the digital output according to the IEC audio standard
- source is DVD player (no track information)
No sound • check the audio connections
- if using an amplifier, try using a different source
Amplifier sound is distorted
- check that the CD recorder analog output is not connected to the amplifier Phono input
Play will not start
- ensure that the label of the CD is facing up
- clean the disc
- check that the disc is not defective by trying another disc
Remote control does not work
- point the remote control towards the CD recorder
- check the batteries and replace if necessary
- select the correct source first
Will not record
- clean the disc
- check if CDR(W) is an unfinalized disc
- check that the disc is recordable and replace if necessary
- the disc is not an AUDIO disc (WRONG BISC)
- wrong input source chosen. Input label flashing (CHECK INPUT)
- text memory full (MEMORY FULL/FINALIZE CD). When a CDRW has to be unfinalized for recording. Erase text for other disc(s) or finalize other disc(s) to obtain memory space
- total remaining time not sufficient, try programming tracks (see programming)
Recording is distorted
• make sure the recording level is correct
20 second pause between recordings
- see Autostart recording from external CD player (CD-SYNC)
Player does not react
- switch the ON/OFF button on the front of the player off and back on
DISC RECOVER on display
- a power failure has occurred during recording, the CD recorder is attempting to repair the disc
- if DISC ERROR then appears on the display, the disc cannot be recorded further, and cannot be finalized. But it can still be played on the CD recorder or another CD recorder
- on a CDRW disc, the track being recorded is lost, but further recording and finalization can still be done
The products and services described herein are not necessarily available in all contries. The specifications and design of this product are subject of change without notice.
Printed in Hungary.


- LASER
- NOTE: THIS WARNING IS LOCATED INSIDE THE ENCLOSURE
- CLASS 1 LASER PRODUCT
- LUOKAN I LASERLAITE
- KLASS 1 LASERAPPARAT
- FOR CUSTOMER USE
- CONTENTS
- TABLE OF CONTENTS
- GENERAL INFORMATION AND DISCS
- CONTROLS AND CONNECTIONS
- DISPLAY
- INSTALLATION
- REMOTE CONTROL
- RECORDING
- PLAYING
- PROGRAMMING
- MENU MODE/CD TEXT INPUT
- FIXING PROBLEMS
- WELCOME
- ABOUT THIS MANUAL
- TECHNICAL DATA
- GENERAL
- AUDIO
- DISCS FOR RECORDING
- IMPORTANT
- DISCS FOR PLAYBACK
- MAINTENANCE
- ACCESSORIES
- CONTROLS ON THE FRONT
- CD RECORDER
- CD PLAYER
- CONNECTIONS AT THE BACK
- DISPLAY INDICATIONS
- DISPLAY MESSAGES
- PLAY
- OTHERS
- MENU MESSAGES - SEE MENU MODE
- MENU MESSAGES
- CONNECTIONS GENERAL
- ANALOG CONNECTIONS CD PLAYER DECK ANALOG CONNECTIONS CD
- DIGITAL OPTICAL CONNECTIONS CD RECORDERDIGITAL COAXIAL CON
- SETUP RECOMMENDATIONS
- NOTE
- RECORDING MODESREMARKS ABOUT RECORDING
- FOR RECORDING FROM INTERNAL CD-DECK
- FOR RECORDING FROM EXTERNAL SOURCES
- SOME REMARKS ON RECORDING
- PREPARING FOR HIGH SPEED RECORDING
- START HIGH SPEED RECORDING
- LISTEN MODE RECORDING FROM INTERNAL CD PLAYER
- PREPARING FOR LISTEN MODE RECORDING
- START LISTEN MODE RECORDING
- PREPARING FOR MANUAL RECORDING
- START MANUAL RECORDING
- AUTOSTART RECORDING FROM EXTERNAL CD PLAYER CD-SYNC
- PREPARING FOR AUTOSTART RECORDING
- START AUTOSTART RECORDING
- FINALIZING CDR & CDRW DISCS
- AUTO FINALIZING
- MANUAL FINALIZING
- UNFINALIZING CDRW DISCS
- FOR CDRW DISCS ONLY
- ERASING CDRW DISCS
- TO ERASE ONE OR MORE TRACKS FROM THE END
- TO ERASE THE ENTIRE DISC
- PLAY A 2-DISC CHANGER (CHANGER MODE)
- PLAYING CDS ON DECK 1 AND/OR DECK 2 (DJ MODE)
- SELECTING A TRACK DURING PLAY
- SELECTING A TRACK WHEN CD PLAY IS STOPPED
- REPEAT CD, TRACK OR PROGRAMSHUFFLE (RANDOM ORDER)
- REMARKS ABOUT PROGRAMMING
- PROGRAMMING FOR PLAYBACK
- PROGRAMMING FOR RECORDING
- CLEARING A PROGRAM
- ERASING A TRACK FROM A PROGRAM
- GENERAL OPERATION OF MENUREMARKS ABOUT MENU MODE
- TROUBLESHOOTING
- WARNING
- AUTO TRACK DOES NOT WORK
- AMPLIFIER SOUND IS DISTORTED
- PLAY WILL NOT START
- REMOTE CONTROL DOES NOT WORK
- WILL NOT RECORD
- RECORDING IS DISTORTED
- 20 SECOND PAUSE BETWEEN RECORDINGS
- PLAYER DOES NOT REACT
- DISC RECOVER ON DISPLAY
Brand : PHILIPS
Model : CDR777
Category : Cd player/recorder