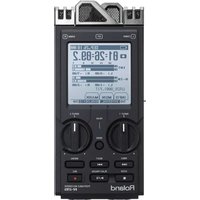
R-26 - Audio recorder ROLAND - Free user manual and instructions
Find the device manual for free R-26 ROLAND in PDF.


| Product Type | Portable Audio Recorder |
| Brand | Roland |
| Model | R-26 |
| Dimensions | Approx. 160 x 65 x 30 mm (6.3 x 2.6 x 1.2 in) |
| Weight | Approx. 250 g (8.8 oz) including batteries |
| Power Supply | 4 AA alkaline or Ni-MH batteries, or USB bus power |
| Recording Media | SD/SDHC/SDXC memory cards (up to 64 GB recommended) |
| Recording Formats | WAV (BWF) up to 192 kHz/24-bit, MP3 (320 kbps) |
| Built-in Microphones | Stereo condenser microphones (XY configuration) |
| Analog Inputs | 2 x XLR combo jacks (phantom power available: 48V) |
| Analog Output | 1/4" TRS unbalanced line out, 1/8" stereo headphone jack |
| USB Port | micro USB 2.0 for file transfer and bus power |
| Battery Life | Approx. 6 hours (alkaline) / 8 hours (Ni-MH) typical |
| Display | Backlit LCD (128 x 64 pixels) |
| Key Features | Multi-track recording with overdub, built-in effects (reverb, compression) |
| Memory Card Support | SD (compatible with SDHC up to 32 GB, exFAT for SDXC >32 GB) |
| Cleaning | Wipe with a dry, soft cloth; avoid solvents |
| Safety | Do not disassemble; avoid water and extreme temperature |
| Repairability | No user-serviceable parts; contact Roland service center |
| General Information | Designed for field recording, music rehearsal, and interviews |
Frequently Asked Questions - R-26 ROLAND
User questions about R-26 ROLAND
0 question about this device. Answer the ones you know or ask your own.
Ask a new question about this device
Download the instructions for your Audio recorder in PDF format for free! Find your manual R-26 - ROLAND and take your electronic device back in hand. On this page are published all the documents necessary for the use of your device. R-26 by ROLAND.
USER MANUAL R-26 ROLAND
Before using this unit, carefully read the sections entitled: "USING THE UNIT SAFELY" and "IMPORTANT NOTES" (p. 2; p. 6). These sections provide important information concerning the proper operation of the unit. Additionally, in order to feel assured that you have gained a good grasp of every feature provided by your new unit, Owner's manual should be read in its entirety. The manual should be saved and kept on hand as a convenient reference.
INSTRUCTIONS FOR THE PREVENTION OF FIRE, ELECTRIC SHOCK, OR INJURY TO PERSONS
About ⚠ WARNING and ⚠ CAUTION Notices
| ⚠ WARNING | Used for instructions intended to alert the user to the risk of death or severe injury should the unit be used improperly. |
| ⚠ CAUTION | Used for instructions intended to alert the user to the risk of injury or material damage should the unit be used improperly.* Material damage refers to damage or other adverse effects caused with respect to the home and all its furnishings, as well to domestic animals or pets. |
About the Symbols
| The △symbol alerts the user to important instructions or warnings. The specific meaning of the symbol is determined by the design contained within the triangle. In the case of the symbol at left, it is used for general cautions, warnings, or alerts to danger. | |
| The ⬇symbol alerts the user to items that must never be carried out (are forbidden). The specific thing that must not be done is indicated by the design contained within the circle. In the case of the symbol at left, it means that the unit must never be disassembled. | |
| The ●symbol alerts the user to things that must be carried out. The specific thing that must be done is indicated by the design contained within the circle. In the case of the symbol at left, it means that the power-cord plug must be unplugged from the outlet. |
ALWAYS OBSERVE THE FOLLOWING

WARNING
Do not open (or modify in any way) the unit or its AC adaptor.
Do not attempt to repair the unit, or replace parts within it (except when this manual provides specific instructions directing you to do so). Refer all servicing to your retailer, the nearest Roland Service Center, or an authorized Roland distributor, as listed on the "Information" page.

To completely turn off power to the unit, pull out the plug from the outlet
Even with the power switch turned off, this unit is not completely separated from its main source of power. When the power needs to be completely turned off, turn off the power switch on the unit, then pull out the plug from the outlet. For this reason, the outlet into which you choose to connect the power cord's plug should be one that is within easy reach and readily accessible.


WARNING
Never install the unit in any of the following locations.
- Subject to temperature extremes (e.g., direct sunlight in an enclosed vehicle, near a heating duct, on top of heat-generating equipment); or are
- Damp (e.g., baths, washrooms, on wet floors); or are
- Exposed to steam or smoke; or are
- Subject to salt exposure; or are
- Humid; or are
- Exposed to rain; or are
• Dusty or sandy; or are - Subject to high levels of vibration and shakiness.



WARNING
Make sure you always have the unit placed so it is level and sure to remain stable. Never place it on stands that could wobble, or on inclined surfaces.

Be sure to use only the AC adaptor supplied with the unit. Also, make sure the line voltage at the installation matches the input voltage specified on the AC adaptor's body. Other AC adaptors may use a different polarity, or be designed for a different voltage, so their use could result in damage, malfunction, or electric shock.

Use only the attached power-supply cord. Also, the supplied power cord must not be used with any other device.

Do not excessively twist or bend the power cord, nor place heavy objects on it. Doing so can damage the cord, producing severed elements and short circuits. Damaged cords are fire and shock hazards!

This unit, either alone or in combination with an amplifier and headphones or speakers, may be capable of producing sound levels that could cause permanent hearing loss. Do not operate for a long period of time at a high volume level, or at a level that is uncomfortable. If you experience any hearing loss or ringing in the ears, you should immediately stop using the unit, and consult an audiologist.

Do not place containers containing liquid on this product. Never allow foreign objects (e.g., flammable objects, coins, wires) or liquids (e.g., water or juice) to enter this product. Doing so may cause short circuits, faulty operation, or other malfunctions.



WARNING
Immediately turn the power off, remove the AC adaptor from the outlet, and request servicing by your retailer, the nearest Roland Service Center, or an authorized Roland distributor, as listed on the "Information" page when:

- The AC adaptor, the power-supply cord, or the plug has been damaged; or
• If smoke or unusual odor occurs - Objects have fallen into, or liquid has been spilled onto the unit; or
- The unit has been exposed to rain (or otherwise has become wet); or
- The unit does not appear to operate normally or exhibits a marked change in performance.
In households with small children, an adult should provide supervision until the child is capable of following all the rules essential for the safe operation of the unit.

Protect the unit from strong impact. (Do not drop it!)

Do not force the unit's power-supply cord to share an outlet with an unreasonable number of other devices. Be especially careful when using extension cords—the total power used by all devices you have connected to the extension cord's outlet must never exceed the power rating (watts/amperes) for the extension cord. Excessive loads can cause the insulation on the cord to heat up and eventually melt through.

Before using the unit in a foreign country, consult with your retailer, the nearest Roland Service Center, or an authorized Roland distributor, as listed on the "Information" page.


WARNING
Batteries must never be recharged, heated, taken apart, or thrown into fire or water.


Never expose batteries to excessive heat such as sunshine, fire or the like.

Incorrect handling of batteries, rechargeable batteries, or a battery charger can cause leakage, overheating, fire, or explosion. Before use, you must read and strictly observe all of the precautions that accompany the batteries, rechargeable batteries, or battery charger.

When using rechargeable batteries and a charger, use only the combination of rechargeable batteries and charger specified by the battery manufacturer.

CAUTION
The unit and the AC adaptor should be located so their location or position does not interfere with their proper ventilation.

Always grasp only the plug on the AC adaptor cord when plugging into, or unplugging from, an outlet or this unit.

At regular intervals, you should unplug the AC adaptor and clean it by using a dry cloth to wipe all dust and other accumulations away from its prongs. Also, disconnect the power plug from the power outlet whenever the unit is to remain unused for an extended period of time. Any accumulation of dust between the power plug and the power outlet can result in poor insulation and lead to fire.

Try to prevent cords and cables from becoming entangled. Also, all cords and cables should be placed so they are out of the reach of children.

Never climb on top of, nor place heavy objects on the unit.

Never handle the AC adaptor or its plugs with wet hands when plugging into, or unplugging from, an outlet or this unit.

Before moving the unit, disconnect the AC adaptor and all cords coming from external devices.

Before cleaning the unit, turn off the power and unplug the AC adaptor from the outlet (p. 24).

Whenever you suspect the possibility of lightning in your area, disconnect the AC adaptor from the outlet.

CAUTION
If used improperly, batteries may explode or leak and cause damage or injury. In the interest of safety, please read and observe the following precautions (p. 21).
- Carefully follow the installation instructions for batteries, and make sure you observe the correct polarity.
- Avoid using new batteries together with used ones. In addition, avoid mixing different types of batteries.
- Remove the batteries whenever the unit is to remain unused for an extended period of time.
- If a battery has leaked, use a soft piece of cloth or paper towel to wipe all remnants of the discharge from the battery compartment. Then install new batteries. To avoid inflammation of the skin, make sure that none of the battery discharge gets onto your hands or skin. Exercise the utmost caution so that none of the discharge gets near your eyes. Immediately rinse the affected area with running water if any of the discharge has entered the eyes.
- Never keep batteries together with metallic objects such as ballpoint pens, necklaces, hairpins, etc.
Used batteries must be disposed of in compliance with whatever regulations for their safe disposal that may be observed in the region in which you live.
To prevent accidental ingestion of the parts listed below, always keep them out of the reach of small children.
• Included Parts SD Card (p. 28)




CAUTION
If you remove the screw from the ground terminal, be sure to replace it; don't leave it lying around where it could accidentally be swallowed by small children. When refastening the screw, make that it is firmly fastened, so it won't come loose.

Always turn the phantom power off when connecting any device other than condenser microphones that require phantom power. You risk causing damage if you mistakenly supply phantom power to dynamic microphones, audio playback devices, or other devices that don't require such power. Be sure to check the specifications of any microphone you intend to use by referring to the manual that came with it.

(This instrument's phantom power: 48 V DC, 10 mA Max)
Batteries may reach a high temperature; please be careful to avoid burning yourself.

Power Supply
- Do not connect this unit to same electrical outlet that is being used by an electrical appliance that is controlled by an inverter (such as a refrigerator, washing machine, microwave oven, or air conditioner), or that contains a motor. Depending on the way in which the electrical appliance is used, power supply noise may cause this unit to malfunction or may produce audible noise. If it is not practical to use a separate electrical outlet, connect a power supply noise filter between this unit and the electrical outlet.
- The AC adaptor will begin to generate heat after long hours of consecutive use. This is normal, and is not a cause for concern.
- Before connecting this unit to other devices, turn off the power to all units. This will help prevent malfunctions and/or damage to speakers or other devices.
- With the factory settings, the R-26's power will automatically be switched off 30 minutes after you stop playing or operating the unit. If you don't want the power to turn off automatically, change the "Auto Off" setting to "OFF" as described on p. 94.
Power Supply: Use of Batteries
- When installing or replacing batteries, always turn off the power on this unit and disconnect any other devices you may have connected. This way, you can prevent malfunction and/or damage to speakers or other devices.
- If operating this product on batteries, please use alkaline batteries or rechargeable Ni-MH batteries.
Placement
- Using the unit near power amplifiers (or other equipment containing large power transformers) may induce hum. To alleviate the problem, change the orientation of this unit; or move it farther away from the source of interference.
-
This device may interfere with radio and television reception. Do not use this device in the vicinity of such receivers.
-
Noise may be produced if wireless communications devices, such as cell phones, are operated in the vicinity of this unit. Such noise could occur when receiving or initiating a call, or while conversing. Should you experience such problems, you should relocate such wireless devices so they are at a greater distance from this unit, or switch them off.
- Do not expose the unit to direct sunlight, place it near devices that radiate heat, leave it inside an enclosed vehicle, or otherwise subject it to temperature extremes. Excessive heat can deform or discolor the unit.
- When moved from one location to another where the temperature and/or humidity is very different, water droplets (condensation) may form inside the unit. Damage or malfunction may result if you attempt to use the unit in this condition. Therefore, before using the unit, you must allow it to stand for several hours, until the condensation has completely evaporated.
- Depending on the material and temperature of the surface on which you place the unit, its rubber feet may discolor or mar the surface. You can place a piece of felt or cloth under the rubber feet to prevent this from happening. If you do so, please make sure that the unit will not slip or move accidentally.
- Do not put anything that contains water on this unit. Also, avoid the use of insecticides, perfumes, alcohol, nail polish, spray cans, etc., near the unit. Swiftly wipe away any liquid that spills on the unit using a dry, soft cloth.
Maintenance
- For everyday cleaning wipe the unit with a soft, dry cloth or one that has been slightly dampened with water. To remove stubborn dirt, use a cloth impregnated with a mild, non-abrasive detergent. Afterwards, be sure to wipe the unit thoroughly with a soft, dry cloth.
- Never use benzine, thinners, alcohol or solvents of any kind, to avoid the possibility of discoloration and/or deformation.
Repairs and Data
- Please be aware that all data contained in the unit's memory may be lost when the unit is sent for repairs. Important data should always be written down on paper (when possible). During repairs, due care is taken to avoid the loss of data. However, in certain cases (such as when circuitry related to memory itself is out of order), we regret that it may not be possible to restore the data, and Roland assumes no liability concerning such loss of data.
Additional Precautions
- Please be aware that the contents of memory can be irretrievably lost as a result of a malfunction, or the improper operation of the unit. To protect yourself against the risk of loosing important data, we recommend that you periodically save a backup copy of important data you have stored in the unit's memory on your computer, or written down on paper (if possible).
- Unfortunately, it may be impossible to restore the contents of data that was stored SD cards or SDHC cards once it has been lost. Roland Corporation assumes no liability concerning such loss of data.
- Use a reasonable amount of care when using the unit's buttons, sliders, or other controls; and when using its jacks and connectors. Rough handling can lead to malfunctions.
- Never strike or apply strong pressure to the display.
- When connecting / disconnecting all cables, grasp the connector itself—never pull on the cable. This way you will avoid causing shorts, or damage to the cable's internal elements.
- To avoid disturbing your neighbors, try to keep the unit's volume at reasonable levels. You may prefer to use headphones, so you do not need to be concerned about those around you.
- When you need to transport the unit, package it in the box (including padding) that it came in, if possible. Otherwise, you will need to use equivalent packaging materials.
- Some connection cables contain resistors. Do not use cables that incorporate resistors for connecting to this unit. The use of such cables can cause the sound level to be extremely low, or impossible to hear. For information on cable specifications, contact the manufacturer of the cable.
Handling External Memories
- Carefully insert the SD card/SDHC card all the way in—until it is firmly in place.
Label facing upward
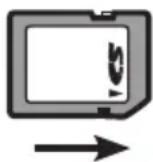

- Never touch the terminals of the SD card/SDHC card. Also, avoid getting the terminals dirty.
-
SD card/SDHC card are constructed using precision components; handle the cards carefully, paying particular note to the following.
-
To prevent damage to the cards from static electricity, be sure to discharge any static electricity from your own body before handling the cards.
- Do not touch or allow metal to come into contact with the contact portion of the cards.
- Do not bend, drop, or subject cards to strong shock or vibration.
- Do not keep cards in direct sunlight, in closed vehicles, or other such locations.
- Do not allow cards to become wet.
- Do not disassemble or modify the cards.
Handling CDs / DVDs
- Avoid touching or scratching the shiny underside (encoded surface) of the disc. Damaged or dirty DVD discs may not be read properly. Keep your discs clean using a commercially available DVD cleaner.
Copyright
- Recording, duplication, distribution, sale, lease, performance, or broadcast of copyrighted material (musical works, visual works, broadcasts, live performances, etc.) belonging to a third party in part or in whole without the permission of the copyright owner is forbidden by law.
- Do not use this product for purposes that could infringe on a copyright held by a third party. We assume no responsibility whatsoever with regard to any infringements of third-party copyrights arising through your use of this product.
- The copyright of content in this product (the sound waveform data, style data, accompaniment patterns, phrase data, audio loops and image data) is reserved by Roland Corporation and/or Atelier Vision Corporation.
- Purchasers of this product are permitted to utilize said content for the creating, performing, recording and distributing original musical works.
- Purchasers of this product are NOT permitted to extract said content in original or modified form, for the purpose of distributing recorded medium of said content or making them available on a computer network.
- Before you open the included DVD-ROM, you must read the "license agreement." Opening the DVD-ROM will be taken to mean your acceptance of the license agreement.
* Company names and product names appearing in this document are registered trademarks or trademarks of their respective owners.
* Microsoft, Windows, and Windows Vista are either registered trademarks or trademarks of Microsoft Corporation.

* Windows is known officially as: "Microsoft Windows operating system."
* Apple, Macintosh, Mac OS are either registered trademarks or trademarks of Apple Inc.
* MMP (Moore Microprocessor Portfolio) refers to a patent portfolio concerned with microprocessor architecture, which was developed by Technology Properties Limited (TPL). Roland has licensed this technology from the TPL Group.
* MPEG Layer-3 audio compression technology is licensed from Fraunhofer IIS Corporation and THOMSON Multimedia Corporation.
* The SD logo (SD) and SDHC logo are trademarks of SD-3C, LLC.
* ASIO is a trademark of Steinberg Media Technologies GmbH.
* This product contains eCROS integrated software platform of eSOL Co., Ltd. eCROS is a trademark of eSOL Co., Ltd. in Japan.
* MP3 codec is Copyright © 1995-2010, SPIRIT.
Using the Unit Safely....2
Important Notes 6
What You Can Do with the R-26 ..... 11
Overview of the R-26....13
Panel Descriptions .....13
Items in the Screen....16
Main Screen....16
Menu screen....18
Getting Ready 20
Preparing the Power Supply .....20
Installing Batteries.....20
Connecting the AC adaptor.....22
Using External Power Sources . . .23
Turning the Power On/Off .....24
Setting the Date and Time....25
Preparing an SD Card....26
Inserting an SD Card.....26
Removing an SD card....26
Formatting an SD Card .....27
Connecting Headphones or Speakers .29
Recording 30
Work Flow for Recording .....30
Recording Settings....31
Selecting the REC MODE.....31
Selecting the REC SOURCE.....31
Setting the Sampling Rate .....33
Setting the Recording Format . . .34
Pre-recording Settings.....34
Choosing the Project Naming Method....35
Using the AUTO START Function 35
Setting the File Type.....36
Input Settings......36
Internal Mic Settings .....36
ANALOG IN Settings....38
Plug-in Mic Settings .....41
Setting the Recording Level and Mic
Directionality 42
Selecting the Internal Mic Mode 42
Setting the Input Sensitivity and Input Level .....44
Automatically Setting the Sensitivity and Indicate the Optimal Input Level .....47
Recording....48
Basic Operation for Recording and Playback....48
Assigning a Marker During Recording .50
Manual Marking....50
Specifying the Interval or Level for Automatic Marking .....50
Splitting the Project During Recording 51
Splitting manually....51
Specifying the Project Size for Automatic Splitting.....51
Using the R-26 .....52
Recording an Acoustic Instrument....52
Recording a Band .....58
Recording Outdoors....59
Recording a Concert......60
Playback 62
Basic Playback Operation....62
Selecting the Playback Mode . . .62
Repeat Playback....63
Combination of PLAY MODE and REPEAT 63
Monitor Settings ....64
Assigning Markers in a Project . .65
Repeatedly Playing a Portion of a Project....66
Changing the Playback Speed . .67
Types of Files that can be Played 67
Managing Projects and Folders ..... 68
Basic Operation in the Finder .....68
Opening a Project....70
Copying a Project .....70
Moving a Project....71
Deleting a Project or a Folder .....71
Renaming a Project or a Folder .....72
Dividing, Combining, or Trimming a
Project....73
Dividing a Project .....74
Combining Projects .....75
Deleting Unwanted Portions of a Project (Trim)....75
Viewing Information about the Project 76
Adding/Deleting a Voice Memo to a
Project....77
Adding a Voice Memo .....77
Deleting a Voice Memo .....79
Creating an MP3 File 80
Repairing a Project 80
Creating a Folder....81
Creating a Folder at the Root
Level......81
Creating a Folder Within a Folder 82
Connecting to Your Computer via USB ..83
Selecting the USB Connection Mode . .83
Exchanging Files With Your
Computer (Storage) 84
Connecting the R-26 to Your
Computer......84
Project File Structure .....86
Disconnecting from Your
Computer......87
Using the R-26 as an Audio Interface . .89
Main Screen for Audio
Interface Mode......89
Audio Interface Block Diagram . .89
Installing the USB Driver.....90
Specifying the Sampling Rate . . .90
Connecting the R-26 to Your
Computer....91
Specifying the Input Device ....92
Simultaneous Recording on
the R-26 Itself .....93
Using Direct Monitor .....93
Listening to the Computer's
Playback Through the R-26 .....94
Using Loop Back .....94
Settings for the R-26 95
Restoring the R-26 to its Factory-set
State (FACTORY RESET) .....99
Error Messages ....100
Troubleshooting 101
Problems with Recording.... 101
Problems with Playback 102
Other Problems 102
Main Specifications 104
R-26 Block Diagram 106
Index....107
What You Can Do with the R-26
Record acoustic instruments
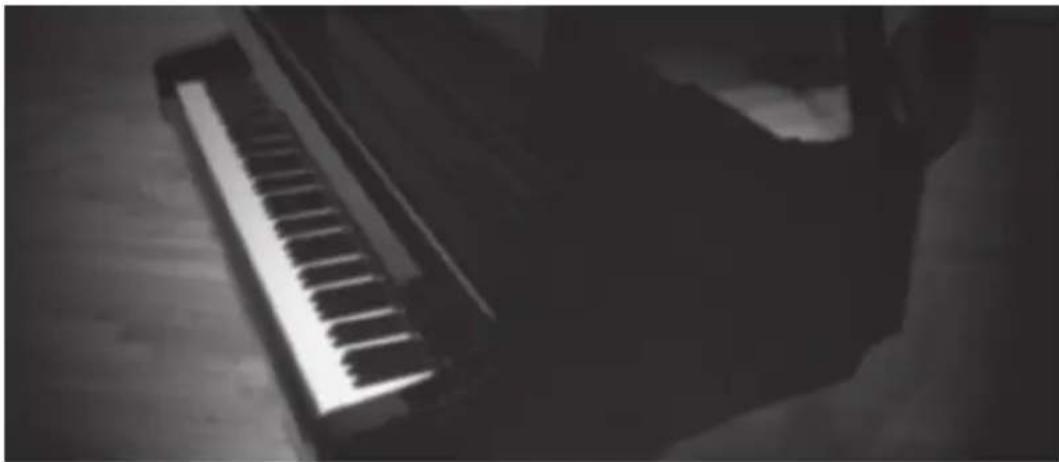
By using external mics in conjunction with the internal mics, you can record four channels simultaneously, allowing you to also record the reverberation of the room or the overall resonance of a grand piano.
Reference
"Recording an Acoustic Instrument" (p. 52)
Record a band
Even a high-volume band in a rehearsal studio can be recorded clearly. You can let the R-26 automatically detect the optimal input level while you rehearse your performance. It's even possible to record a high-quality WAV file for CD production while simultaneously recording a compact MP3 file for distribution.
Reference
"Recording a Band" (p. 58)
Record outdoors

By changing the directionality of the internal mics, you can make pinpoint recordings of distant sounds or capture a broad spread of sound. Since up to six channels can be recorded simultaneously, mics with different response can be recorded on separate channels, allowing you to choose the best recording later.
Reference
"Recording Outdoors" (p. 59)
Record concerts

By using the internal mics and external mics in combination to record four channels simultaneously, you can record the sounds of the audience and the reverberation of the location at the same time.
* Please do not use the R-26 at concerts where recording is prohibited.
Reference
"Recording a Concert" (p. 60)
Overview of the R-26
Panel Descriptions
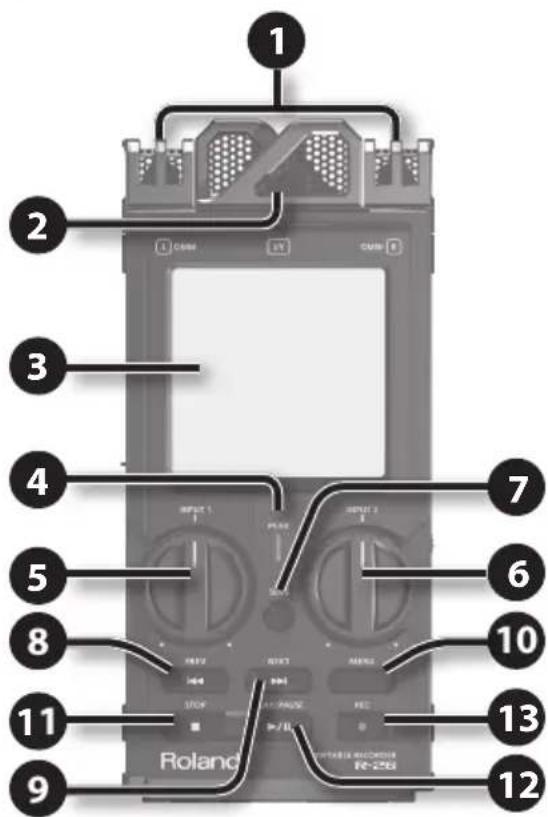
1 Omnidirectional (OMNI) mic
This is an omnidirectional stereo mic built into the R-26 (p. 42)
2 Directional (XY) mic
This is a stereo mic built into the R-26 (p. 42).
3 Touch panel display
This touch panel shows various information for the R-26, and also allows you to make settings and perform operations (p. 16).
4 PEAK indicator
This will light when the input volume is excessive.
5 [INPUT 1] knob
This adjusts the input level (p. 45).
6 [INPUT 2] knob
This adjusts the input level (p. 45).
7 [SENS] button
This sets the input sensitivity and the mode of the internal mics (p. 44).
8 [PREV] button
Press this button to move to the beginning of the project, or to select the previous project. By holding down this button, you can rewind through the project. You can do this during playback or while stopped.
9 [NEXT] button
Press this button to select the next project. By holding down this button, you can fast-forward through the project. You can do this during playback or while stopped.
10 [MENU] button
This button lets you make various settings for the R-26, such as recording/playback settings and specifying the date and time (p. 18).
11 [STOP] button
This button stops playback or recording.
12 [PLAY/PAUSE] button
Press this button to start playback, or to pause playback or recording.
13 [REC] button
This puts the R-26 in recording-standby mode, or initiates recording. The button will blink in recording-standby, and will be steadily lit during recording.

Left side
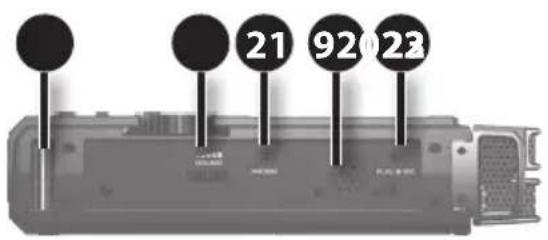
Right side
14 SD card slot
Insert the SD card into this slot (p. 26).
15 USB connector
Use the included USB cable to connect this to your computer. This allows projects recorded on the R-26 to be transferred to your computer, or WAV and MP3 files from your computer to be copied to the R-26 for playback (p. 84).
You can also use the R-26 as a USB audio interface (p. 89).
16 [POWER/HOLD] switch
Slide this switch toward POWER to turn the power on/off (p. 24). With the power turned on, you can set this switch to "HOLD" to enable the HOLD function.
When HOLD is turned on, all buttons on the panel will be disabled, and it will no longer be possible to perform operations using the touch panel. Only the [INPUT 1] and [INPUT 2] knobs will remain functional.
This way, you can prevent any unintended operation of the unit.
Even when HOLD is turned on, the [INPUT 1] and [INPUT 2] knobs will remain functional, so if you operate these knobs during recording standby or during recording, the input level will be changed. Be careful so as not to operate these knobs by mistake.
17 DC IN jack
You can connect either the included AC adaptor or a commercially available cable for an external power device.
Reference
"Connecting the AC adaptor" (p. 22)
"Using External Power Sources" (p. 23)
18 Grounding Terminal
Depending on the circumstances of a particular setup, you may experience a discomforting sensation, or perceive that the surface feels gritty to the touch when you touch this device, microphones connected to it, or the metal portions of other objects. This is due to an infinitesimal electrical charge, which is absolutely harmless. However, if you are concerned about this, connect the ground terminal (see figure) with an external ground. When the unit is grounded, a slight hum may occur, depending on the particulars of your installation. If you are unsure of the connection method, contact the nearest Roland Service Center, or an authorized Roland distributor, as listed on the "Information" page.
* Unsuitable places for connection
• Water pipes (may result in shock or electrocution)
• Gas pipes (may result in fire or explosion)
- Telephone-line ground or lightning rod (may be dangerous in the event of lightning)
19 Strap attachment
The strap included with the Cover/Windscreen Set (OP-R26CW; sold separately) can be attached here.
20 [VOLUME] dial
This adjusts the volume of the output from the preview monitor and the PHONES jack.
21 PHONES jack
You can connect headphones here (p. 29).
22 Preview Monitor
This is an internal speaker used as a monitor. No sound is output from the preview monitor when a cable is connected to the PHONES jack.
23 PLUG IN MIC jack
An external mic with a stereo mini-plug can be connected here (p. 41).
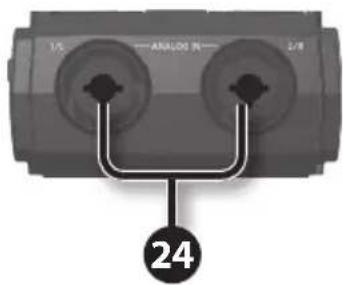
24 ANALOG IN 1/L jack, ANALOG IN 2/R jack
These analog audio input connectors are compatible with mic preamps. They support either XLR or phone plugs, which can be selected to match the connected device. They also accept either balanced or unbalanced connections. Additionally, 48 V phantom power is supported, allowing you to connect condenser mics that require phantom power. Refer to "Supplying phantom power" (p. 39).
* This instrument is equipped with balanced (XLR/TRS) type jacks. Wiring diagrams for these jacks are shown below. Make connections after first checking the wiring diagrams of other equipment you intend to connect.
XLR
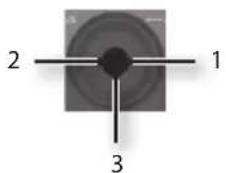
1: GND
2: HOT
3: COLD
TRS

* When connection cables with resistors are used, the volume level of equipment connected to the inputs (ANALOG IN, PLUG IN) may be low. If this happens, use connection cables that do not contain resistors.

25 Battery compartment
Install batteries here (p. 20).
26 Tripod mounting socket
This socket lets you attach the R-26 to a commercially available camera tripod.
(The socket is threaded for a 1/4" screw.)
* When using the tripod mounting socket, be sure to use a tripod that is capable of providing stable support of the R-26.
* In order to attach the R-26 to a mic stand, you'll need a mic stand adaptor (sold separately).
Items in the Screen
Main Screen
The screen that appears after you turn on the power is called the "main screen." By touching the tabs at the bottom of the screen, you can view information about the project, or make settings such as those for audio monitoring and markers.
* On the R-26, the data that you record and play back are handled in units called projects. For information on how the files in a project are organized, see "Project File Structure" (p. 86).
Playing / Stopped
![Power supply status (p. 20) (AC adaptor /batteries ) Elapsed playback time Current date and time MAY.19 15:02 Play/stop status 00:00:00.0 T 00:00:30 Project length Output level D 48 24 12 6 P B L: ---- R: ---- R26_0001 Value of [INPUT] knob INFO MON MARK A-B SPEED Ta bs Rec Source INTERNAL](/content/2026/06/1275897/images/c0e9db9875b75218dab75458cdd27206c729457bdf65465fa28429de9ffb87a9.jpg)
Recording
![Power supply status (p. 20) (AC adaptor /batteries) Record/recording- standby status Elapsed recording time Current date and time MAY.24 18:01 00:00:00.0 R 00:50:43 Remaining recordable time on the SD card Input level INT Peak L: -1dB R: -2dB QR26_0001 Value of [INPUT] knob INFO MON MARK Caps Rec So…](/content/2026/06/1275897/images/ca465c61c3d84e597733bd71403a8abe2f2413252eec4d8b619ed96a392acddc.jpg)
Tabs in the main screen
By touching a tab at the bottom of the Playing/Stopped or Recording screens, you can view information about the project, make monitor settings, assign markers within a project, and specify the playback speed.
INFO tab
This shows the project name, sampling rate, file format, and project creation date and time.

MON tab
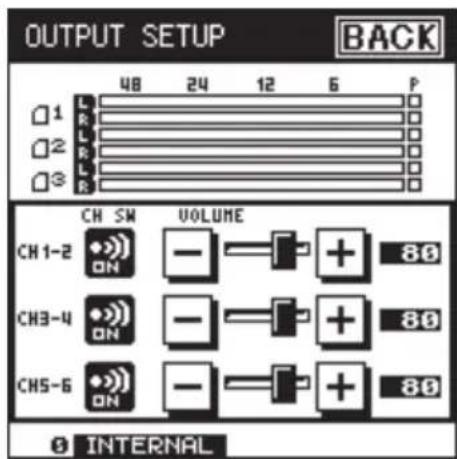
Here you can make monitor settings for playback and recording (p. 64).
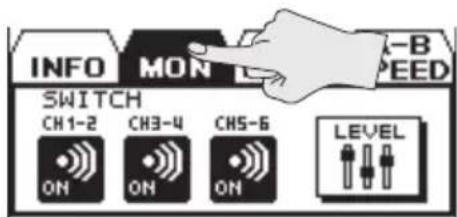
Touch the
You can assign a marker within the project (p. 65). Touch
Use JUMP to move to the preceding marker, or to move to the next marker.

- During recording
You can assign a marker within the project (p. 50). Touch
If you touch

A-B SPEED tab (only during playback)
Here you can repeatedly play a specified region within the project (p. 66), or change the playback speed (p. 67).

Menu screen
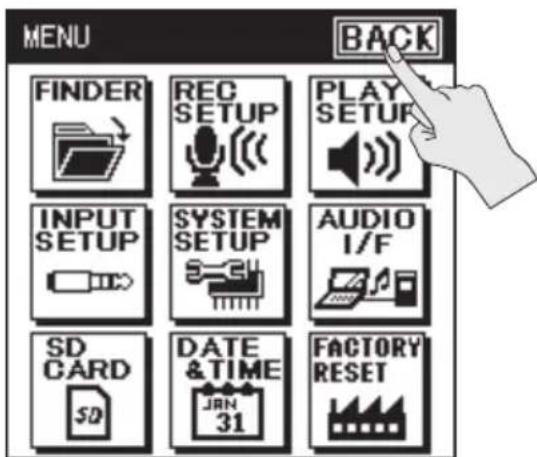
This screen will appear when you press the [MENU] button.


Touch the desired icon to enter the corresponding screen.
* In this manual, a sequence of operations such as accessing the menu screen, choosing
* The explanations in this manual include illustrations that depict what should typically be shown by the display. Note, however, that your unit may incorporate a newer, enhanced version of the system, so what you actually see in the display may not always match what appears in the manual.
FINDER

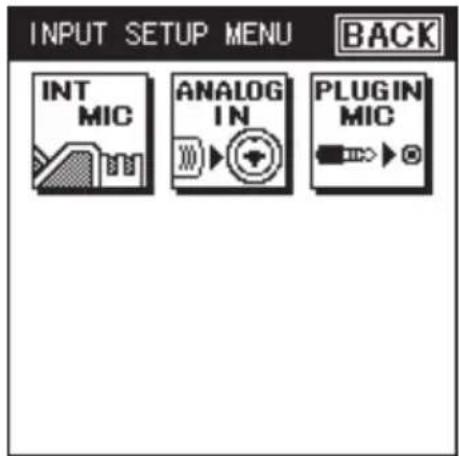
INPUT SETUP
SD CARD

REC SETUP

PLAY SETUP
SYSTEM SETUP

AUDIO I/F

DATE & TIME

FACTORY RESET

Preparing the Power Supply
The R-26 can operate using an AC adaptor, batteries, or an external power device.
Installing Batteries

After you've installed batteries, use the "SYSTEM SETUP" menu (p. 97) to specify the type of batteries you're using.
* If operating this product on batteries, please use alkaline batteries or rechargeable Ni-MH battery.
* We recommend that you keep batteries installed in the unit even though you'll be powering it with the AC adaptor. That way, you'll be able to continue a performance even if the cord of the AC adaptor gets accidentally disconnected from the unit.
* When turning the unit upside-down, take care to prevent damage to the buttons and controls.
Note when using the R-26 on batteries
If used improperly, batteries may explode or leak and cause damage or injury. In the interest of safety, please read and observe the following precautions.
- Carefully follow the installation instructions for batteries, and make sure you observe the correct polarity.
- Avoid using new batteries together with used ones. In addition, avoid mixing different types of batteries.
- Remove the batteries whenever the unit is to remain unused for an extended period of time.
- If a battery has leaked, use a soft piece of cloth or paper towel to wipe all remnants of the discharge from the battery compartment. Then install new batteries. To avoid inflammation of the skin, make sure that none of the battery discharge gets onto your hands or skin. Exercise the utmost caution so that none of the discharge gets near your eyes. Immediately rinse the affected area with running water if any of the discharge has entered the eyes.
- Never keep batteries together with metallic objects such as ballpoint pens, necklaces, hairpins, etc.
- Incorrect handling of batteries, rechargeable Ni-MH battery, or a battery charger can cause leakage, overheating, fire, or explosion. Before use, you must read and strictly observe all of the precautions that accompany the batteries, rechargeable Ni-MH battery, or battery charger.
- When using rechargeable Ni-MH batteries and a charger, use only the combination of rechargeable Ni-MH battery and charger specified by the battery manufacturer.
Types of batteries that can be used
- AA alkaline batteries (LR6) - AA nickel-metal hydride batteries (HR6)
In SYSTEM SETUP, specify the type of batteries you're using (p. 97).
* The R-26 cannot recharge nickel-metal hydride batteries. You'll need to use a battery charger designed for nickel-metal hydride batteries.
Power conservation function
- The R-26 has a power conservation function, which prevents unnecessary battery consumption. If you leave the unit for a certain period of time without performing any operation, the display will dim or the unit's power will turn off, depending on the power conservation setting.
Reference
"SYSTEM SETUP" (p. 97)
Remaining battery indication
When the remaining battery power runs low, a battery low icon appears in the lower right of the display. When this appears, install fresh batteries as soon as possible. If you continue to use the unit in this state, the display will indicate "Battery Low," and finally the R-26 will stop functioning entirely.
Expected battery life under continuous use:
Continuous recording approx. 10 hours
(When using alkaline batteries, 44.1 kHz, 2 channel, with phantom power off)
* These figures will vary depending on the specifications of the batteries and the actual conditions of use.
Connecting the AC adaptor
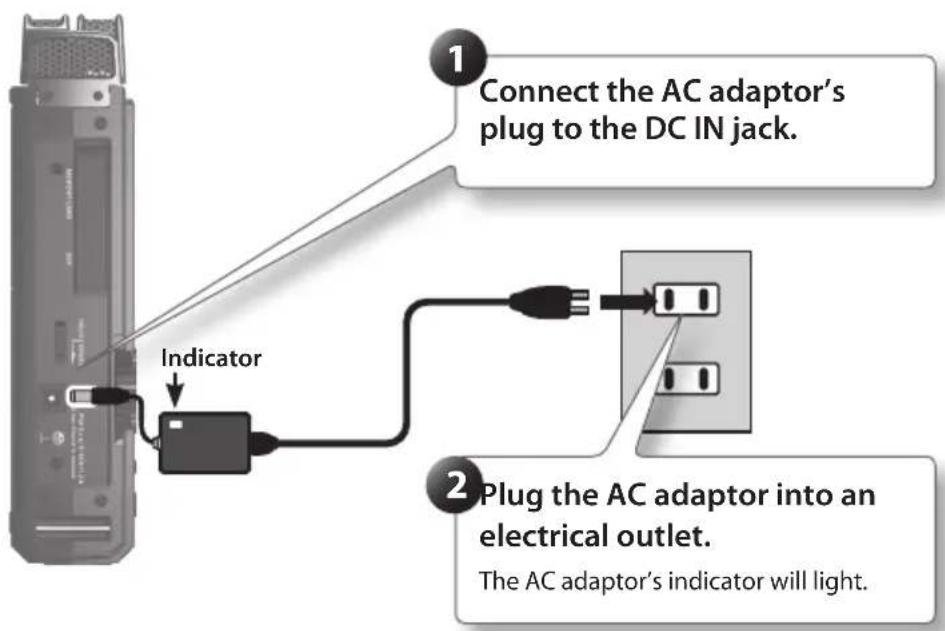
* Place the AC adaptor so the side with the indicator (see illustration) faces upwards and the side with textual information faces downwards.
The indicator will light when you plug the AC adaptor into an AC outlet.
* Be sure to use the AC adaptor supplied with this product.
* When using the AC adaptor, set the final voltage (EXT- POWER) to ADAPTOR (p. 23).
Using External Power Sources
When using an external power supply, be sure to set the final voltage.
The final voltage refers to the voltage when voltage can no longer be supplied because the capacity of the external power source is reduced and voltage decreases as electricity is consumed. If the final voltage is not properly set for the external power source, the remaining power display cannot be shown. Refer to the user's manual of the external power supply for the final voltage value.
Furthermore, when the "Battery Low" message is displayed, the recording automatically stops, and the power automatically turns off.
Change the external power source.
* When using an external power source, even when power is automatically cut off, the R-26 starts within 30 seconds after power is turned back on. During this period, the final voltage settings can be changed.
* Read the following to set the final voltage for the R-26.
MEMO
Refer to the user's manual for the external power source when using an external power source.
Setting the final voltage
- Choose [MENU] →
. - Touch
.
"EXT-POWER" is located on page 3/3. Touch to access 3/3.

- Touch the final voltage value that you want to specify.

Setting
Adaptor, 9.0 V, 9.5 V, 10.0 V, 10.5 V, 11.0 V, 11.5 V, 12.0 V
- Touch
to return to the menu screen (p. 18).
Turning the Power On/Off
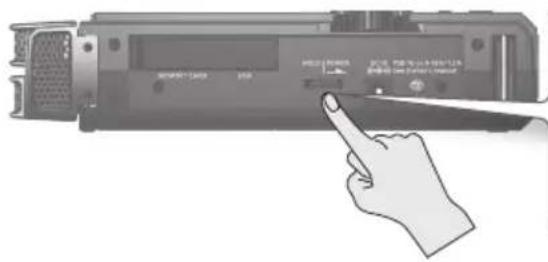
Slide the [POWER/HOLD] switch toward POWER for a few seconds to turn the power on/off.
When you turn on the power, the startup screen will appear in the display, and then the main screen will appear.
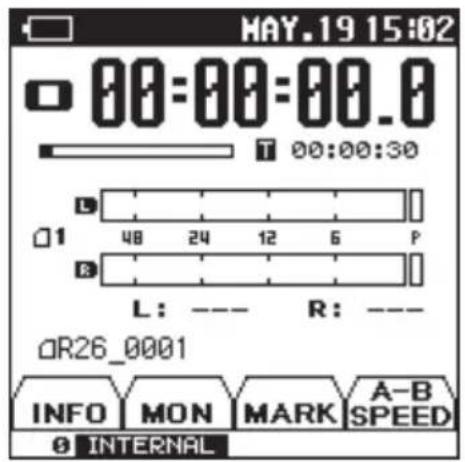
With the factory settings, the R-26's power will automatically be switched off 30 minutes after you stop playing or operating the unit. If you don't want the power to turn off automatically, change the "Auto Off" setting to "OFF" as described on p. 94.
Setting the Date and Time
1. Choose [MENU] → .
The calendar and clock setting screen will appear.

2. Specify the date and time.
Touch each item, and use ▲ to set the date and time.
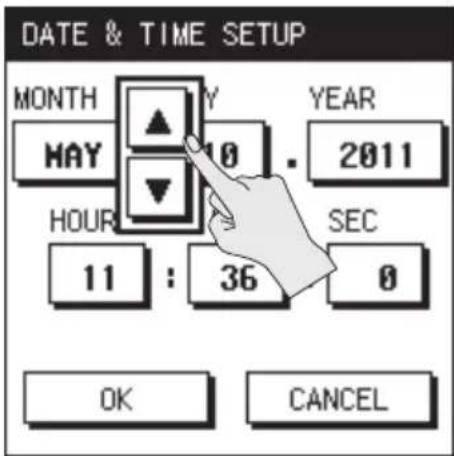
3. When you've finished setting all items, touch .
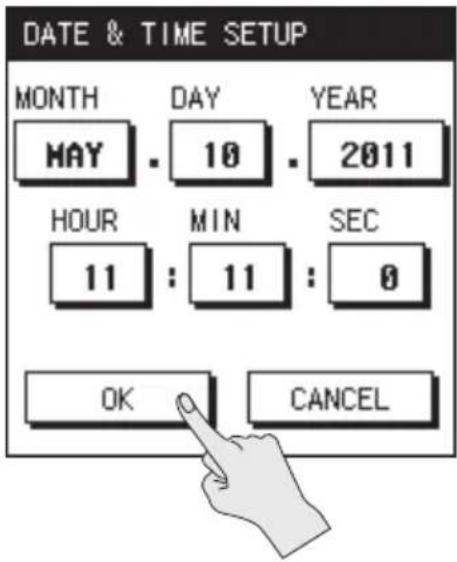
* By touching
4. Touch to return to the main screen (p. 16).
Preparing an SD Card
The R-26 stores recorded data on the SD card.
Inserting an SD Card
- Make sure that the power is off.
- Open the SD card cover located on the left side of the R-26.

* The cover may break if you use excessive force.
- Insert the SD card.
Position the SD card with its top side facing the same way as the R-26's top side, and carefully insert it.
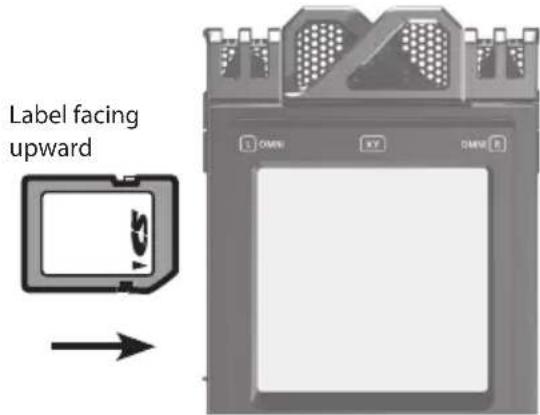
NOTE
- Forcibly inserting the SD card in the wrong orientation may damage the R-26 or the SD card. Please use caution.
-
Press the SD card firmly all the way in.
-
Close the SD cover.
- Switch on the power (p. 24).
MEMO
If an unformatted SD card is inserted in the R-26, the screen will indicate "SD Unformatted."
Removing an SD card
- Switch off the R-26's power (p. 24).
- Open the SD cover.
- Gently press the SD card inward, and then release your finger.
When the SD card pops out, remove it.
NOTE
Do not insert or remove an SD card while the power is on. The data on the SD card may be lost if you do so.
Formatting an SD Card
If you're using an SD card other than the included one, you must first format the SD card before it can be used with the R-26.
NOTE
- The included SD card contains demo songs and driver software. If you format this card, the demo songs and driver software it contains will be lost. If you decide to format this card, you should first back up this data to your computer if necessary. For details, refer to "Exchanging Files With Your Computer (Storage)" (p. 84).
- When you format an SD card, all data on the card will be erased. If the card contains important data, back it up to your computer first.
-
You must format the SD card on the R-26 itself. An SD card formatted on a device other than the R-26 might not work correctly in the R-26.
-
Make sure that the SD card you want to format is inserted in the SD card slot.
Reference
"Inserting an SD Card" (p. 26)
-
Choose [MENU] →
. -
Touch
.
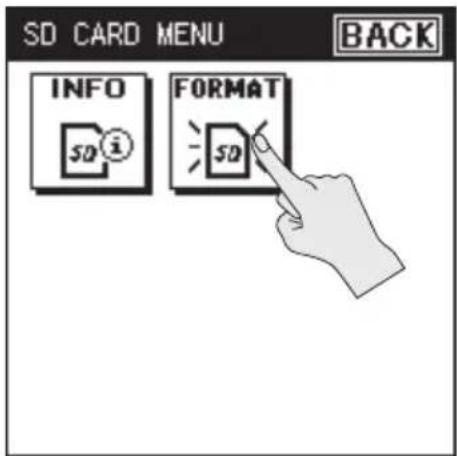
- To format the card, touch
.

The card will be formatted.

When formatting has been completed, the following screen will appear.
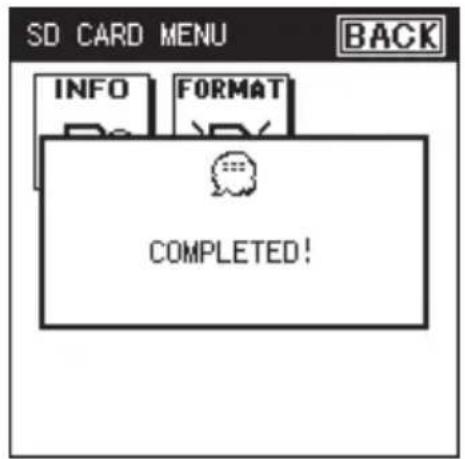
- Touch
twice to return to the main screen (p. 16).

About SD cards
- Never insert or remove an SD card/SDHC card while this unit's power is on. Doing so may corrupt the unit's data or the data on the SD card.
- Some SD card types or memory cards from some manufacturers may not record or play back properly on the R-26.
- Carefully insert the SD card/SDHC card all the way in—until it is firmly in place.
• The R-26 supports SDHC cards.
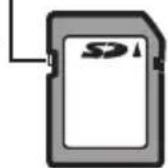
The SD card write protect feature (LOCK)
The contents of the SD card can be protected by write protecting it. To write protect a card, slide the write protect switch on the side of the memory card to the "LOCK" position. Unlock write protect to delete data on the card.
Write protect switch
About the demo songs
The included SD card contains demo songs.
- If you leave the demo songs on the SD card, the space available for recording with the card will be decreased by the size of the demo songs.
* Use of the demo songs supplied with this product for any purpose other than private, personal enjoyment without the permission of the copyright holder is prohibited by law. Additionally, this data must not be copied, nor used in a secondary copyrighted work without the permission of the copyright holder.
Connecting Headphones or Speakers
Here's how to listen to the playback through headphones or speakers you've connected.
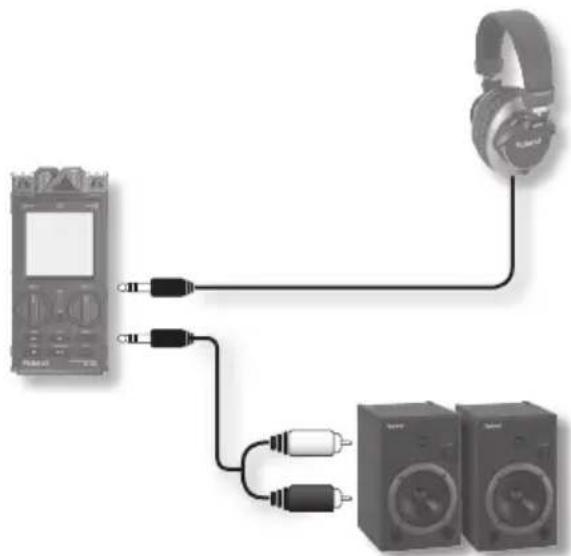
MEMO
- No sound is played from the R-26's preview monitor when headphones or speakers are connected to the PHONES jack.
- Before switching the power on/off, always be sure to turn the volume down. Even with the volume turned down, you might hear some sound when switching the power on/off. However, this is normal and does not indicate a malfunction.
When using speakers
* Once the connections have been completed, turn on power to your various devices in the order specified. By turning on devices in the wrong order, you risk causing malfunction and/or damage to speakers and other devices.
- Minimize the volume of the speakers you'll be connecting, and turn off their power.
- Connect the speakers.
You'll need to use speakers that have a built-in amplifier.
Use an audio cable to connect the R-26's PHONES jack to the line input jacks of your speaker system.
- Switch on the R-26's power(p. 24).
- Raise the R-26's [VOLUME].
- Switch on power to your speakers, and gradually increase the volume to an appropriate level.
* To prevent malfunction and/or damage to speakers or other devices, always turn down the volume, and turn off the power on all devices before making any connections.
* This unit is equipped with a protection circuit. A brief interval (a few seconds) after power up is required before the unit will operate normally.
* Howling could be produced depending on the location of microphones relative to speakers. This can be remedied by:
- Changing the orientation of the microphone(s).
- Relocating microphone(s) at a greater distance from speakers.
- Lowering volume levels.
Work Flow for Recording
This diagram describes the procedure for recording on the R-26.
Select the REC MODE

Select the number of channels you'll be recording (p. 31).
Select the REC SOURCE

Select either the internal mics, analog input, plug-in mics, or a combination of these (p.31).
Set the SAMPLE RATE

Select the sampling rate (p. 33).
Select the project's format

Select WAV, MP3, or simultaneous recording of both (p. 34).
Make settings for the input

Perform the settings for the limiter, low-cut filter, phantom power, etc.
Adjust the input sensitivity and input level

Adjust the loudness of the sound you'll be recording (p. 44). Press the [SENS] button, and use the input sensitivity setting screen to adjust the sensitivity. After you've adjusted the input sensitivity, use the [INPUT 1] knob and [INPUT 2] knob to adjust the input level.
Start recording

"Recording" (p. 48)
Stop recording

"Recording" (p. 48)
Play back the project you've recorded
Recording Settings
Specify the recording mode, the recording source, the sampling rate, and the recording format. Set these items as appropriate for the purpose of your recording; e.g., CD production, audio for video, or audio for distribution over the Internet.
Selecting the REC MODE
The R-26 can record from one channel up to a maximum of six channels simultaneously. Use REC MODE to specify the number of channels that you want to record.
- Choose [MENU] →
→ (p. 18). - Touch the number of channels that you want to record.
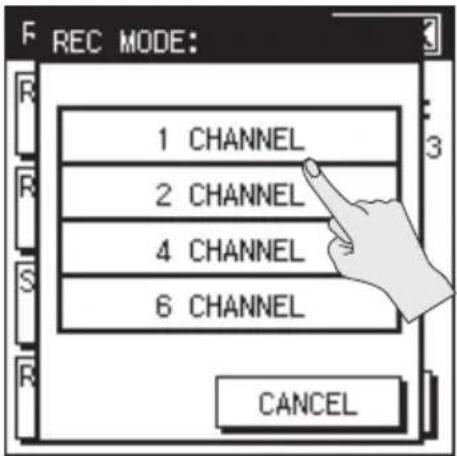
| Setting |
| 1 CHANNEL |
| 2 CHANNEL |
| 4 CHANNEL |
| 6 CHANNEL |
* In order to record in MP3 format, 2 CHANNEL needs to be selected (p. 34).
- Touch
to return to the menu screen (p. 18).
Selecting the REC SOURCE
The available combinations of recording sources will differ depending on the selected REC MODE (number of channels).
- Choose [MENU]→
→ . - Touch
.

- Touch the desired combination of recording sources.

- Touch
twice to return to the menu screen (p. 18).
REC SOURCE choices for each REC MODE
REC MODE: 1 CHANNEL
Monaural x 1
| Setting Description | |
| ANALOG (MONO) | Selects the ANALOG IN 1/L jack input. One monaural channel will be recorded. |
REC MODE: 2 CHANNEL
Stereo x 1
For ANALOG (MONO), monaural x 2
| Setting Description | |
| INTERNAL | Selects the internal mics (a mix of the directional internal mics and the omnidirectional internal mics). |
| ANALOG | Selects the input from the ANALOG IN 1/L jack and ANALOG IN 2/R jack. Record-ing will take place in stereo. |
| ANALOG (MONO) | Selects the input from the ANALOG IN 1/L jack and ANALOG IN 2/R jack. Two monaural channels will be recorded. |
| PLUG IN | Selects the input from the PLUG IN MIC jack. |
REC MODE: 4 CHANNEL
Stereo x 2
| Setting Description | |
| XY+OMNI | Selects the directional internal mics (stereo) and the omnidirectional internal mics (stereo). |
| INTERNAL +ANALOG | Selects the internal mics (a mix of the directional internal mics and the omnidirectional internal mics) and the input from the ANALOG IN 1/L jack and ANALOG IN 2/R jack. |
| ANALOG +PLUG-IN | Selects the input from the ANALOG IN 1/L jack and ANALOG IN 2/R jack, and the input from the PLUG IN MIC jack. |
| XY+PLUG-IN | Selects the input from the internal directional mics and the PLUG IN MIC jack. |
| XY+OMNI (S) | Selects the directional internal mic (stereo) and omnidirectional internal mic (stereo).The input levels can be adjusted independently for each mic. |
| ANALOG(S) +INTERNAL | Selects the input from the ANALOG IN 1/L jack, ANALOG IN 2/R jack, and internal mics (a mix of the directional internal mics and the omnidirectional internal mics).The input levels can be adjusted independently for the ANALOG IN 1/L jack and ANALOG IN 2/R jack. |
| ANALOG(S) +PLUG-IN | Selects the input from the ANALOG IN 1/L jack, ANALOG IN 2/R jack, and PLUG IN MIC jack.The input levels can be adjusted independently for the ANALOG IN 1/L jack and ANALOG IN 2/R jack. |
REC MODE: 6 CHANNEL
Stereo x 3
| Setting Description | |
| XY+OMNI+INT | Selects the internal mics (a mix of the direc-tional internal mics and the omnidirectional internal mics), only the directional mics, and only the omnidirectional mics. |
| XY+OMNI +ANALOG | Selects the input from the directional internal mics, the omnidirectional internal mics, the ANALOG IN 1/L jack, and ANALOG IN 2/R jack. |
| XY+ANALOG+P-IN | Selects the input from the internal directional mics, the ANALOG IN 1/L jack, the ANALOG IN 2/R jack, and the PLUG IN MIC jack. |
| ANALOG(S) +XY+OMNI | Selects the input from the ANALOG IN 1/L jack, ANALOG IN 2/R jack, directional internal mic, and omnidirectional internal mic.The input levels can be adjusted independently for the ANALOG IN 1/L jack and ANALOG IN 2/R jack. |
| ANALOG(S) +XY+P-IN | Selects the input from the ANALOG IN 1/L jack, ANALOG IN 2/R jack, directional internal mic, and PLUG IN MIC jack.The input levels can be adjusted independently for the ANALOG IN 1/L jack and ANALOG IN 2/R jack. |
Setting the Sampling Rate
Choose the sampling rate that's appropriate for the intended purpose of the recorded data.
-
Choose [MENU]→
→ . -
Touch the desired sampling rate.

| SAMPLE RATE |
| 44.1 kHz |
| 48.0 kHz |
| 88.2 kHz |
| 96.0 kHz |
- Touch
to return to the menu screen (p. 18).
Setting the Recording Format
Choose the file format that's appropriate for the intended purpose of the recorded data.
-
Choose [MENU]→
→ . -
Touch the desired file format.

REC FORMAT
WAV+MP3
(WAV 16-bit+MP3 128-kbps)
MP3 128-kbps
MP3 160-kbps
MP3 320-kbps
WAV 16-bit
WAV 24-bit
* MP3 can be selected only when REC MODE is 2 channel and the sampling rate is 44.1 kHz or 48.0 kHz.
- Touch
to return to the menu screen (p. 18).
Pre-recording Settings
The R-26 provides a PRE-REC function that lets you capture the two seconds of sound that preceded the moment you press the record button. Even for situations in which you're not sure when the desired sound will begin, such as when recording outdoors, this function ensures that you can record without missing the first moments of the sound.
- Choose [MENU]→
→ .
"PRE-REC" is located on page 2/3. Touch to access 2/3.
- Touch
.

- Touch
to return to the menu screen (p. 18).
Choosing the Project Naming Method
You can choose whether project names will be assigned in the form of a consecutive number or a date.
- [MENU]→
→ .
"PROJECT NAME" is located on page 2/3.
Touch ▼ to access 2/3.
- Touch the desired name format.
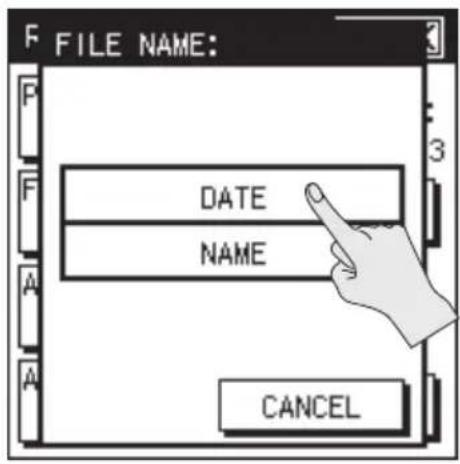
| Setting | Description |
| DATE | Each file name will be the date and time. |
| NAME | Each file name will be a consecutive number. |
- Touch
to return to the menu screen (p. 18).
Using the AUTO START Function
By using the AUTO START function, you can have recording start automatically when a specified time has elapsed, or when the recording level exceeds a specified value.
- Choose [MENU]→
→ .
"AUTO START" is located on page 2/3. Touch to access 2/3.
- Touch the time after which you want recording to start, or the input level at which you want recording to start automatically.
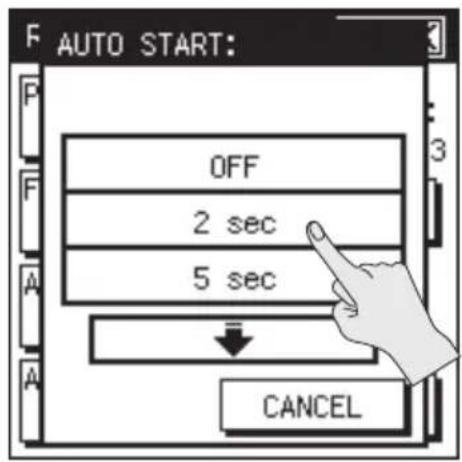
| Setting Description | |
| OFF AUTO START is not used | |
| 2 sec | Time until recording starts |
| 5 sec | |
| 10 sec | |
| Level 1 (-60 dB) | Level at which recording starts |
| Level 2 (-30 dB) | |
| Level 3 (-20 dB) | |
- Touch
to return to the menu screen (p. 18).
Setting the File Type
If the recording format is set to WAV 16-BIT or WAV 24-BIT, you can choose whether to use BWF format, which embeds information about the recording time and the recording device (Roland R-26) into the WAV file. BWF format files can be used by audio editing software that supports BWF.
* BWF setting is effective only if the recording format is set to WAV 16-BIT or WAV 24-BIT. On your computer, the file will have a file name extension of ".WAV," just like a conventional WAV file.
- Choose [MENU]→
→ .
"FILE TYPE" is located on page 3/3. Touch to access 3/3.
- Touch the desired file type.
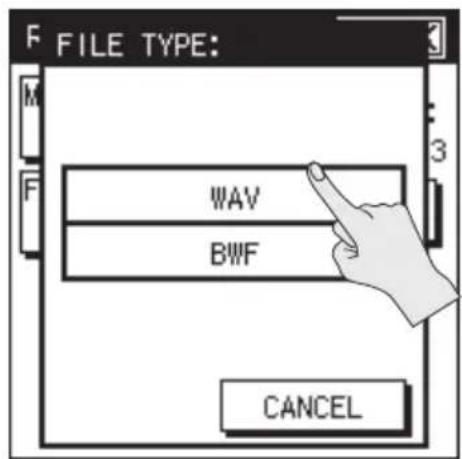
| Setting |
| WAV |
| BWF |
- Touch
to return to the menu screen (p. 18).
Input Settings
Here you can make settings for the type of each recording source, and how the power will be supplied.
Internal Mic Settings
Here you can make limiter and low-cut filter settings for the internal mic.
Using the limiter
The limiter prevents distortion by compressing the input level appropriately when the audio input is too loud.
- Choose [MENU]→→
. - Touch
.

3. Touch .

| Setting | OFF |
| ON |
4. Touch twice to return to the main screen (p. 16)
Cutting the low-frequency range
If you have problems with low-frequency noise, such as the wind noise that is often present in outdoor recordings, the rumble from automobiles or machines, or vibration, you may be able to reduce this noise by cutting the low-frequency range with low-cut filter (LCF).
If you have problems with the breath noise or muffled tone that can occur when recording a vocal, cutting the low-frequency range will give you a more crisp recording.
1. Choose [MENU]→→.
2. Touch .

3. Touch .

4. Touch .
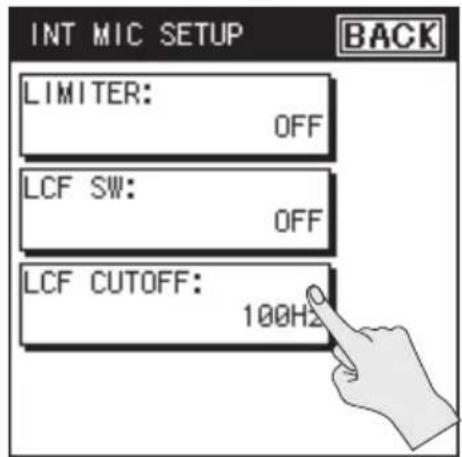
- Choose the upper boundary of the frequency range to be cut.

| Setting |
| 100 Hz |
| 200 Hz |
| 400 Hz |
- Touch
twice to return to the menu screen (p. 18).
TIPS
The limiter and low-cut filter can be turned on/off while in the recording-standby mode or during recording.
- During recording or in the recording-standby mode, choose the INFO tab and press
.
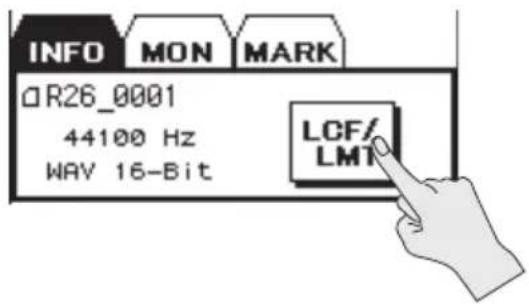
- Touch the
or icon to turn it on/off.

ANALOG IN Settings
Here you can make settings for the ANALOG IN 1/L jack and ANALOG IN 2/R jack input type, phantom power supply, and MS mic. Set the limiter and low-cut filter settings in the same way as for the internal mic (p. 36).
Setting the input type
The two inputs can be used as monaural x 2 or as stereo x 1. In addition, you can also use an MS type stereo mic.
- Choose [MENU]→→
. - Touch .
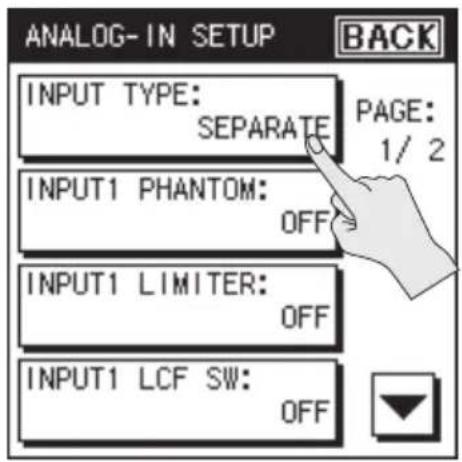
3. Select the type.
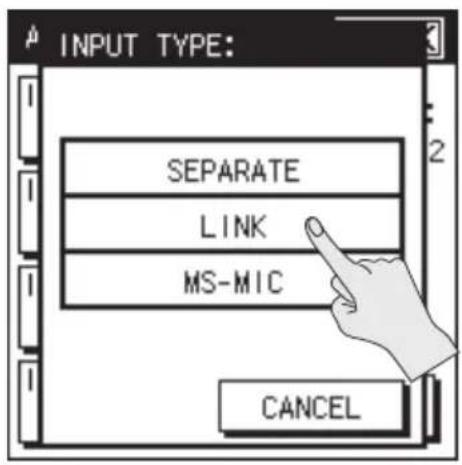
| Setting Description | |
| SEPARATE | Settings can be made separately for the ANALOG IN 1/L jack and ANALOG IN 2/R jack. |
| LINK | Settings for the ANALOG IN 1/L jack and ANALOG IN 2/R jack will be linked as a stereo pair. |
| MS-MIC | The ANALOG IN 1/L jack and ANALOG IN 2/R jack will provide for MS type stereo input. |
* If MS is selected, you must use a MS mic that directly outputs the mid signal and the side signal. Connect the mid signal to the ANALOG IN 1/L jack, and the side signal to the ANALOG IN 2/R jack.
* When SEPARATE is selected, you can make settings for phantom power, limiter, and low-cut filter separately for both the ANALOG IN 1/L jack and the ANALOG IN 2/R jack.
4. Touch twice to return to the menu screen (p. 18).
Supplying phantom power
Here's how to supply phantom power to the mics connected to the ANALOG IN 1/L jack and ANALOG IN 2/R jack.
- Choose [MENU]→→
. - Touch
or .

* If you've set LINK or MS mic as the input type, all you need to do for phantom power to be supplied is to make the setting [INPUT1 PHANTOM].
3. Touch .
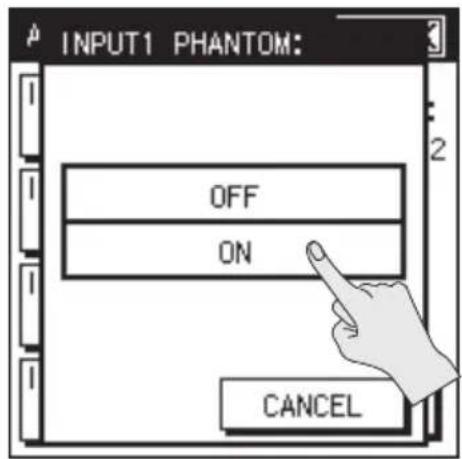
* Always turn the phantom power off when connecting any device other than condenser microphones that require phantom power to the XLR connector. You risk causing damage if you mistakenly supply phantom power to dynamic microphones, audio playback devices, or other devices that don't require such power. Be sure to check the specifications of any microphone you intend to use by referring to the manual that came with it. (This instrument's phantom power: 48 V DC, 10 mA Max)
4. Touch twice to return to the menu screen (p. 18).
MS mic settings
Here's how to adjust the MS mic's stereo width.
- Choose [MENU]→→
. - Touch
.
"MS-MIC WIDTH" is located on page 2/2. Touch ▼ to access 2/2.

* The
- Use ☐ to adjust the stereo width. When you've specified the value, touch
.

Setting 1-5-10
- Touch
twice to return to the main screen (p. 16).
Plug-in Mic Settings
Here you can specify the input type and plug-in power settings of a stereo mini-type external mic. Set the limiter and low-cut filter settings in the same way as for the internal mic (p. 36).
Setting the input type
- Choose [MENU]→→
. - Touch
.

- Select the type.

| Setting | STEREO |
| MONO |
- Touch
twice to return to the main screen (p. 16).
Supplying power to the mic
Here's how to supply power to a plug-in mic.
- Choose [MENU]→→
. - Touch
.
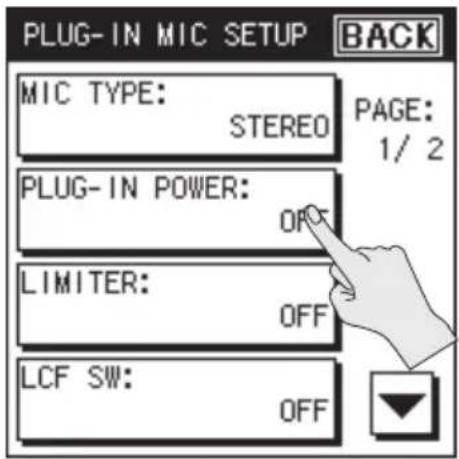
- Touch
.
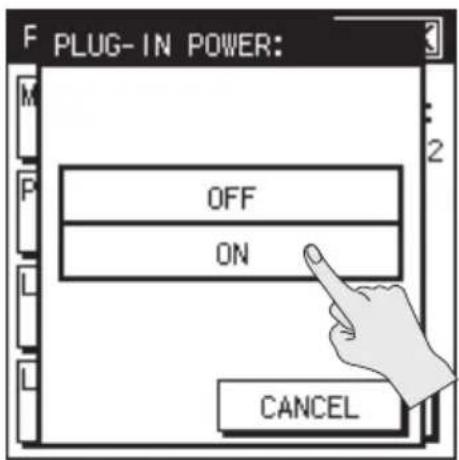
| Setting | OFF |
| ON |
- Touch
twice to return to the main screen (p. 16).
Setting the Recording Level and Mic Directionality
Here you can make settings for the input level and input device as appropriate for what you're recording. Setting the level appropriately will allow you to make a higher quality recording.
Selecting the Internal Mic Mode
If the REC SOURCE (p. 31) is set to "internal mic," "INT mic," or "INT" (internal directional mic mixed with the internal omnidirectional mic), you can change the mic response by adjusting the mix balance between the directional mic (XY) and omnidirectional mic (OMNI). The R-26 lets you choose one of three pre-adjusted modes optimized for different types of recording. In addition to these, you can choose modes that use only the directional mics, only the omnidirectional mics, or manual balance adjustment, giving you a total of six recording modes to choose from as appropriate for your needs.
- From the main screen, press the panel's [SENS] button.
The INPUT SENS SETUP screen will appear.
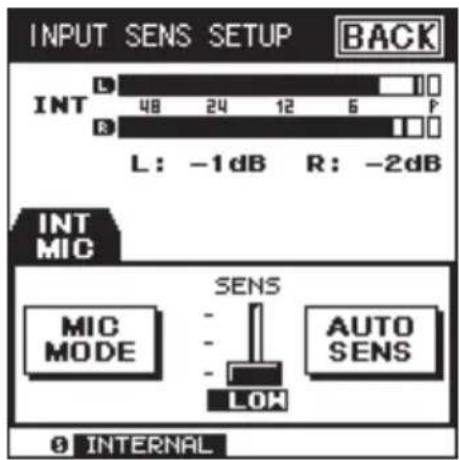
- In the display, touch
.
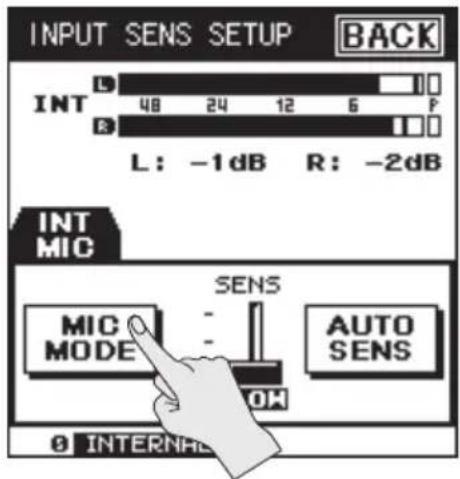
- Select the desired mode.

| Setting Description | |
| SOLO | Appropriate when recording an individual instrument or vocal. |
| CONCERT | Appropriate when recording a concert. |
| FIELD | Appropriate for outdoor field recordings. |
| OMNI MIC | Only the built-in omnidirectional mics will be used. |
| XY MIC | Only the built-in directional mics will be used. |
| MANUAL | Manually adjust the mix balance of the directional and omnidirectional mics. |
- Touch
. - Touch
to return to the main screen (p. 16).
Adjusting the mix balance in manual mode
Here's how to manually adjust the balance between the directional mics and omnidirectional mics. The balance can be adjusted over five steps.
- Select manual in step 3 (p. 42).
- Touch
.

- Use □ to adjust the balance.

-
Touch
to confirm the setting. -
Touch
to exit from the MIC MODE SETUP. - Touch
return to the main screen (p. 16).
Setting the Input Sensitivity and Input Level
Here's how to adjust the sensitivity and input level of the recording source.
Adjusting the input sensitivity
- From the main screen, press the panel's [SENS] button.
- In the display, touch the
slider.

If you're adjusting multiple recording sources when using 4 channels or 6 channels, touch the tab for the recording source that you want to adjust, and then touch the

- Touch ▲ to adjust the sensitivity.
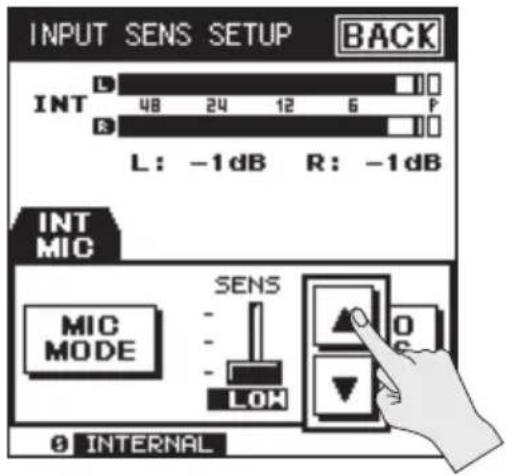
| REC SOURCE Setting | |
| INTERNAL/XY MIC/OMNI MIC/PLUG IN | HIGH |
| MID | |
| LOW | |
| ANALOG | -62 dBu |
| -56 dBu | |
| -50 dBu | |
| -44 dBu | |
| -38 dBu | |
| -32 dBu | |
| -26 dBu | |
| -20 dBu | |
| -14 dBu | |
| -8 dBu | |
| -2 dBu | |
| +4 dBu |
- Touch
twice to return to the main screen (p. 16).
Setting the input level
- From the main screen, press the panel's [SENS] button.
The INPUT SENS SETUP screen will appear.
- Produce sound on the source you're recording.
The level meter will move according to the loudness of the sound being input to the R-26.
- Turn the [INPUT 1] knob, [INPUT 2] knob, and the touch panel to adjust the input level.
Adjust the level until it is as high as you can get it without causing the PEAK indicator, or PEAK in the level meter, to light.
The recording sources adjusted by each knob and the touch panel (p. 47) will depend on the combination of REC MODE and REC SOURCE you've selected.
| REC MODE REC | SOURCE [INPUT 1] knob | [INPUT 2] knob Touch | Pael | |
| 1 CHANNEL ANALOG (MONO) ANALOG IN 1/L -- | ||||
| 2 CHANNEL | INTERNAL INTERNAL MIC -- | |||
| ANALOG | ANALOG IN 1/L, 2/R | -- | ||
| ANALOG (MONO) ANALOG IN 1/L ANALOG IN 2/R - | ||||
| PLUG-IN | PLUG IN MIC -- | |||
| 4 CHANNEL | XY + OMNI | INTERNAL MIC (shared by XY and OMNI) | - | - |
| INTERNAL + ANALOG | INTERNAL MIC | ANALOG IN 1/L, 2/R | - | |
| ANALOG + PLUG-IN | ANALOG IN 1/L, 2/R | PLUG IN MIC - | ||
| XY + PLUG-IN | INTERNAL MIC (XY) | PLUG IN MIC | - | |
| XY+OMNI (S) | INTERNAL MIC (XY) | INTERNAL MIC (OMNI) | - | |
| ANALOG(S) +INTERNAL | ANALOG IN 1/L ANALOG IN 2/R | INTERNAL MIC (shared by XY and OMNI) | ||
| ANALOG(S) +PLUG-IN | ANALOG IN 1/L ANALOG IN 2/R | PLUG IN MIC | ||
| 6 CHANNEL | XY + OMNI + INT | INTERNAL MIC (shared by XY and OMNI) | - | - |
| XY + OMNI + ANALOG | INTERNAL MIC (shared by XY and OMNI) | ANALOG IN 1/L, 2/R - | ||
| XY + ANALOG + P-IN | INTERNAL MIC (XY) ANALOG IN 1/L, 2/R - | |||
| ANALOG(S) +XY+OMNI | ANALOG IN 1/L ANALOG IN 2/R | INTERNAL MIC (shared by XY and OMNI) | ||
| ANALOG(S) +XY+P-IN | ANALOG IN 1/L ANALOG IN 2/R | INTERNAL MIC (XY) PLUG IN MIC | ||
How input sensitivity and input level are related
Input sensitivity adjusts the loudness of the input signal being received as the recording source. Input level is an additional fine adjustment applied to the signal after it's been adjusted by input sensitivity, in order to optimize it for recording.
* Adjust the input sensitivity in the following situations.
- The level meters don't move sufficiently even when the knob is in the maximum position.
- The PEAK indicator lights even when the knob is in the minimum position.
Setting an Input Level Using the Touch Panel
With the 4 CHANNEL and 6 CHANNEL recording modes, some of the input levels are adjusted using the touch panel.
- From the main screen, press the [SENS] button on the panel.
- In the touch panel, touch the tab for the input level that you want to adjust.
- In the display, touch the
slider.

- Touch ▲ to adjust the input level.
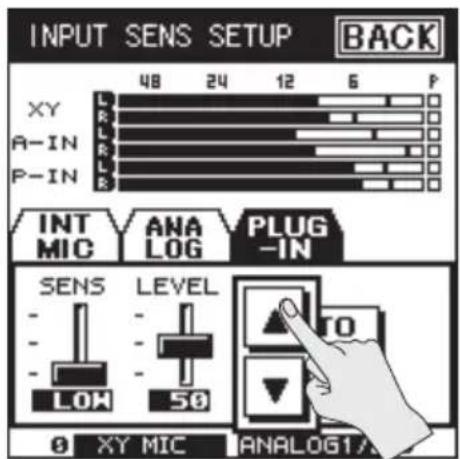
Automatically Setting the Sensitivity and Indicate the Optimal Input Level
The R-26 is capable of automatically setting the input sensitivity. The unit will automatically set the sensitivity so it is optimized for the audio currently being input, and will provide a rough indication of the input level that's most appropriate.
- From the main screen, press the [SENS] button on the panel.
- Point the mic toward the source you want to record, and touch
in the display.
Input sensitivity will be determined.

- Touch
. If you decide to cancel, touch .

- Use the [INPUT 1] knob and [INPUT 2] knob to adjust the input level so that it matches the optimal value shown in the center of the screen.
The current input level shown in the lower left of the screen will be adjusted so that it matches the value shown in the middle of the screen.

* If the REC MODE is 6-channel, the level of the plug-in mic will be adjusted automatically (p. 47).
- Touch
to return to the input sensitivity setting screen (p. 42). - Touch
return to the main screen (p. 16).
Recording
When you've finished making recording settings and input settings, you're ready to start recording.
Basic Operation for Recording and Playback

- Press the [REC] button.
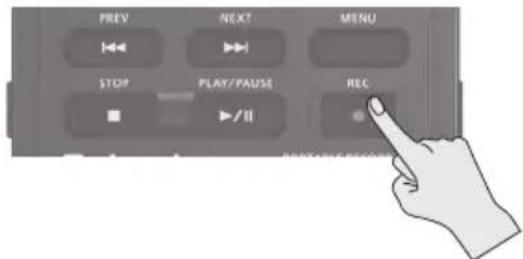
The R-26 will enter recording-standby mode; the 🔒 indication in the upper left of the screen will blink.
Blinking
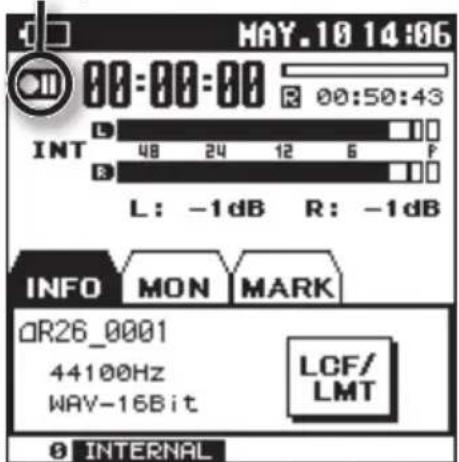
2. Press the [REC] button once again.
The blinking will change to a steadily lit indication.
MEMO
After recording has begun, you can turn on the [HOLD] switch so that recording will not stop even if a button is pressed inadvertently.
* Even with the [HOLD] switch turned on, the input level adjustment knobs will remain functional.
The input level will be changed if you operate the input level adjustment knobs while in recording-standby mode or during recording. Take care not to inadvertently operate the input level knobs.
* It's not possible to turn off the power during recording. You must first stop recording before you can turn off the power.
3. Press the [STOP] button to stop recording.
The REC indicator will go out.

The display will indicate the project that was recorded. Press the [PLAY] button to play back the recorded sound.
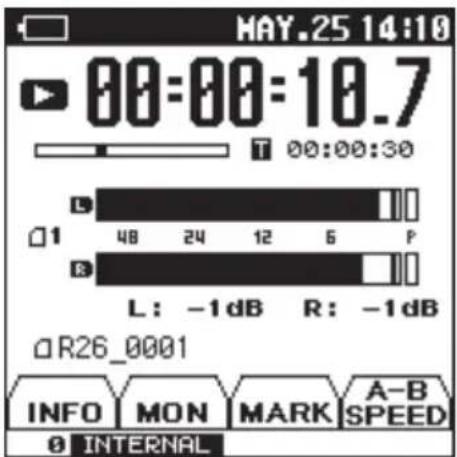
MEMO
- To delete the recorded project, please refer to "Deleting a Project or a Folder" (p. 71).
- To pause, press ▶/□. To resume recording from the paused state, press ▶/□te again.
- If you've set "number" for the project name in REC SETUP, the project will automatically be assigned a name such as R26_0001. The 0001 portion will be the number following the highest-numbered project name that exists.
- If you've set "date" for the project name in REC SETUP, the date of recording will be the project name. "Settings for the R-26" (p. 95)
Assigning a Marker During Recording
Here's how to assign a marker to the project during recording.
Once you've assigned markers, you'll be able to jump to the marked locations by touching in the MARK tab during
playback. "Assigning Markers in a Project" (p. 65)
* Markers cannot be assigned to an MP3 format project.
Manual Marking
- Start recording.
- Touch the MARK tab (p. 17).

- At the moment you want to assign a marker, touch
.

Touching
Specifying the Interval or Level for Automatic Marking
You can make the R-26 automatically assign markers to the project being recorded, either at specified intervals of time, or whenever the input level falls below a specified value.
- Choose [MENU] →
→ .
"AUTO MARK" is located on page 2/3. Touch to access 2/3.
- Touch the desired time interval or level.
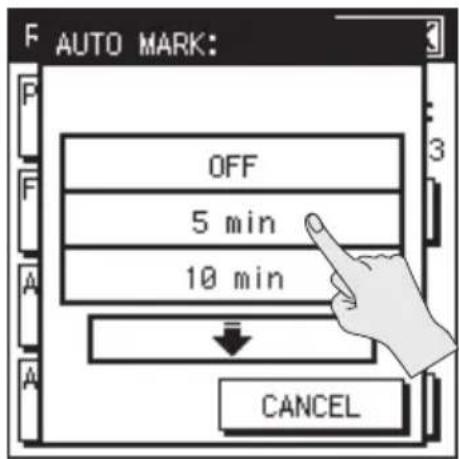
| Setting Description | |
| OFF | Time interval for automatic marking |
| 5 min | |
| 10 min | |
| 30 min | |
| LEVEL1 (-60 dB) | Input level for automatic marking |
| LEVEL2 (-30 dB) | |
| LEVEL3 (-20 dB) |
Splitting the Project During Recording
You can split the project during recording. If you've split the project, it will be easy to start playback from a division point.
When you're making a continuous recording for an extended period of time, you may find it desirable to split the project at points that will be convenient for searching.
Splitting manually
- Start recording.
- Touch the MARK tab (p. 17).

- At the moment you want to assign a marker, touch
.

Specifying the Project Size for Automatic Splitting
The R-26 will automatically split the project being recorded when it reaches a specified size. By default, the project will be automatically split when the file size reaches 2 GB.
- Choose [MENU] →
→ .
"MAX FILE SIZE" is located on page 3/3. Touch ▼ to access 3/3.
- Select the file size for automatically splitting.
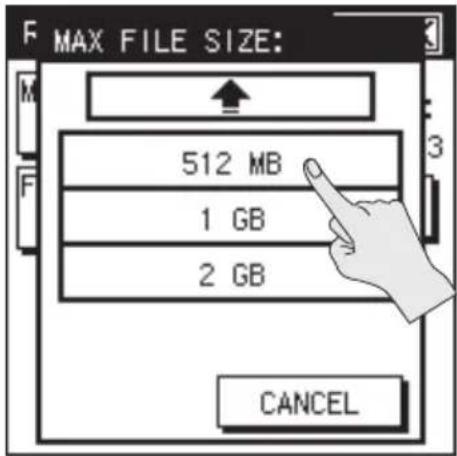
| Setting Description | |
| 64 MB | Size at which project will be automatically split |
| 128 MB | |
| 256 MB | |
| 512 MB | |
| 1 GB | |
| 2 GB | |
* The maximum size of file that the R-26 can handle is 2 GB.
Using the R-26
This section introduces how you can use the R-26 in various situations, and describes various examples of appropriate recording settings.
Recording an Acoustic Instrument
Recording vocals, acoustic guitar, or wind instruments
Using the internal mics
When using the internal mics, point the mics directly at the instrument to be recorded, taking care that the recording is not skewed toward the left or right channel. Placing the mics near the instrument (close miking) will create a clear and bright-sounding recording. Placing the mics farther away (distant miking) will create a more mellow-sounding recording. You can use the separately sold mic stand adaptor to attach the R-26 to a commercially available mic stand.

R-26
| MENU Item Setting | ||
| REC SETUP | REC MODE 2 CHANNEL | |
| REC SOURCE INTERNAL | ||
| SENS INT MIC MIC | MODE SOLO | |
Using external mics
You can connect a commercially available dynamic mic or condenser mic to the ANALOG IN 1/L jack or ANALOG IN 2/R jack. If you're recording an individual instrument, use one mic and record in monaural.
* If the REC MODE is set to one channel, only the ANALOG IN 1/L jack can be used.

| MENU Item Setting | ||
| REC SETUP REC MODE 1 CHANNEL |
| MENU INPUT SETTUP MENU Item Setting | |||
| INPUT SETTUP | ANALOG IN | INPUT TYPE | SEPARATE |
| INPUT 1 PHANTOM POWER | ON if using a condenser mic, OFF if using a dynamic mic | ||
Combining internal mics and external mics
You can use a combination of external input mics and the internal mics to simultaneously record the sound captured near the instrument (close miking) and the ambient sound of the room captured farther away (distant miking).
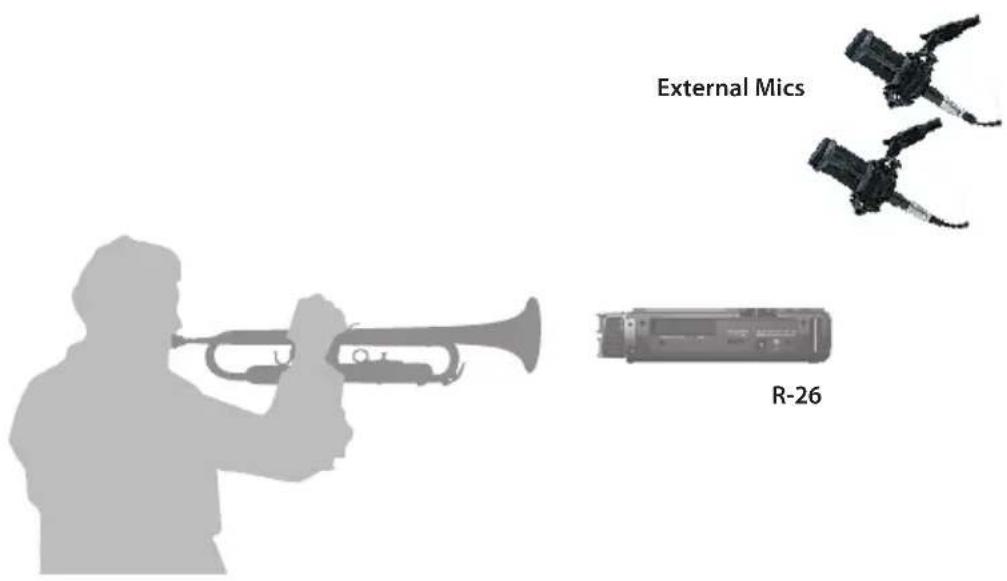
| MENU Item Setting | ||
| REC SETUP | REC MODE 4 CHANNEL | |
| REC SOURCE INTERNAL+ANALOG | ||
| SENS INT MIC MIC MODE SOLO | ||
| MENU INPUT SETTUP MENU Item Setting | |||
| INPUT SETTUP ANALOG IN | INPUT TYPE LINK | ||
| PHANTOM POWER | ON if using a condenser mic,OFF if using a dynamic mic | ||
Recording a grand piano
An acoustic piano emits sound from every part of itself, and the tone quality of the recording will differ depending on where the mics are placed. This is because different locations will have a different balance between the vibration of the strings, the resonance of the body, the reflections of the sounding board, and the sound of the hammers striking the strings. In order to record a good-sounding balance of these elements, it's important to try recording from various distances and directions in order to find the position that's best for your needs.
Using the internal mics
To capture a good balance of the overall instrument's resonance, place the R-26 at a slight distance from the S-shaped bend in the grand piano's body. By changing the angle at which the mic is pointed, you can adjust the balance between the sound of the strings and the sound from the soundboard. By changing the distance, you can adjust the balance between the attack and the resonant decay.


Adjusting the balance the strings and the sound board
| MENU Item Setting | ||
| REC SETUP | REC MODE 2 CHANNEL | |
| REC SOURCE INTERNAL | ||
| SENS INT MIC MIC | MODE SOLO | |
Using external mics
Adjust the angle and distance of the two dynamic mics or condenser mics connected to the ANALOG IN 1/L jack and the ANALOG IN 2/R jack in the same way as when using the internal mics (p. 55).
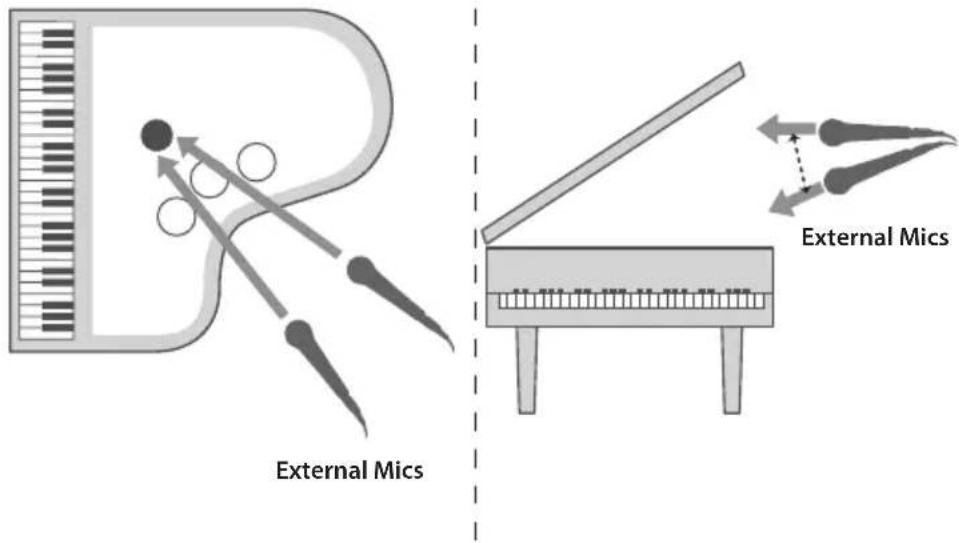
| MENU Item Setting | ||
| REC SETUP | REC MODE 2 CHANNEL | |
| REC SOURCE ANALOG | ||
| MENU INPUT SETTUP MENU Item Setting | |||
| INPUT SETTUP ANALOG IN | INPUT TYPE LINK | ||
| PHANTOM POWER | ON if using a condenser mic,OFF if using a dynamic mic | ||
Combining internal mics and external mics
If you're recording with four channels, you can record an even better balance of the sound of the entire piano. By mixing down the sound recorded from each mic position, you can obtain a piano sound that's ideal for the style of music being performed.

Use the internal mics to capture the sound of the strings, and use two condenser mics connected to the ANALOG IN 1/L jack and ANALOG IN 2/R jack to capture the sound from the soundboard.
| MENU Item Setting | ||
| REC SETUP | REC MODE 4 CHANNEL | |
| REC SOURCE INTERNAL+ANALOG | ||
| SENS INT MIC MIC MODE SOLO | ||
| MENU INPUT SETTUP MENU Item Setting | |||
| INPUT SETTUP ANALOG IN | INPUT TYPE | LINK | |
| PHANTOM POWER | ON | ||
Recording a Band
When setting the input level, have the band play the loudest section of the song while you adjust the level. If you use the AUTO SENS function (p. 47), the input sensitivity will be automatically set to the optimal point, and a recommended setting for the input level will also be displayed.
Using the internal mics
In a practice room, the instruments are typically placed around the edge of the room facing into the center. In order to record all instruments at a good balance, place the mic in the center of the room, at approximately table-top height to get the best sound. Placing the mic on the floor will produce a muffled sound with excessive low frequencies; placing the mic at a high location will fail to capture the lows, producing a thin sound.

| MENU Item Setting | ||
| REC SETUP | REC MODE 2 CHANNEL | |
| REC SOURCE INTERNAL | ||
| SENS INT MIC SE | NS LOW | |
Recording Outdoors
By adjusting the directionality of the internal mic mode, you can capture the overall soundscape or pinpoint just the desired sound. You can also take advantage of the R-26's ability to simultaneously record six channels, and record different types of internal mics and external mics on separate channels.
If you turn PRE-REC (p. 34) on, recording will start two seconds earlier than the moment you actually press [●] button. This means that you won't miss the beginning of that perfect sound.
| MENU Item Setting | ||
| REC SETUP PRE-REC ON | ||
| SENS INT MIC MIC MODE FIELD | ||
Using plug-in power stereo mics
You can use a highly directional plug-in powered mic that has a stereo mini plug. You could also enjoy binaural recording with "in-ear" binaural stereo mics.
| MENU INPUT SETTUP MENU Item | Setting | ||
| INPUTSETTUP | PLUGIN MIC | INPUT TYPE | STEREO |
| PLUG-IN POWER | ON | ||
* What is binaural recording?
Binaural recording is a method of recording that assumes the playback will be heard through headphones. By placing the recording mics very close to the human ear, this method allows the acoustic experience at the time of recording to be reproduced with a high degree of realism when heard through headphones or earphones. If you use headphones or earphones to listen to the playback of sound recorded using binaural recording, you'll enjoy a very realistic 3D auditory experience that cannot be experienced with stereo recording.
Six-channel recording
You can record different types of internal mics on separate channels, and then choose the most suitable recording later.
Settings for recording the mixed directional and omnidirectional, only the directional internal mics, and only the omnidirectional internal mics on separate channels:
| MENU Item Setting | ||
| REC SETUP | REC MODE 6 CHANNEL | |
| REC SOURCE | XY+OMNI+INT | |
| SENS INT MIC | MIC MODE MANUAL | |
Recording a Concert
During a rehearsal before the actual performance, adjust the levels suitably for the loudest passages that will occur. If you use the AUTO SENS function (p. 47), the input sensitivity will be automatically set to the optimal point, and a recommended setting for the input level will also be displayed.
As far as possible, record from exactly in front of center stage.
Using the internal mics
You can use headphones for monitoring during rehearsals, and while making numerous trial recordings, you can adjust the distance from the stage and the mode for the internal mics.

| MENU Item Setting | ||
| REC SETUP | REC MODE 2 CHANNEL | |
| REC SOURCE INTERNAL | ||
| SENS INT MIC | MIC MODE CONCERT | |
Combining internal mics and external mics
You can also use external input mics to simultaneously record the applause and other sound from the audience, in order to capture the excitement of the event.

| MENU Item Setting | ||
| REC SETUP | REC MODE 4 CHANNEL | |
| REC SOURCE INTERNAL+ANALOG | ||
| SENS INT MIC MIC MODE CONCERT | ||
| MENU INPUT SETTUP MENU Item Setting | |||
| INPUT SETTUP | ANALOG IN | INPUT TYPE | LINK |
| PHANTOM POWER | ON if using a condenser mic,OFF if using a dynamic mic | ||
* Do not use the R-26 during concerts for which recording is prohibited.
Basic Playback Operation

- Access the main screen (p. 16).
- Use [F/F] buttons to select the project that you want to play.
You can also choose a project from the finder menu. "Opening a Project" (p. 70)
- Press ▶ button to play the project.
During playback, you can hold down [◀◀] button to rewind, or [▶▶] button to fast-forward. Normal playback will resume when you release the button.
* For some types of SD card, the data reading speed may not keep up when rewinding or fast-forwarding during playback, causing the rewind or fast-forward operation to stop. If this occurs, press [■] button to stop playback. Then play back once again.
- Use [VOLUME] dial (p. 14) to adjust the volume.
- Press ☐ to stop playback.
Selecting the Playback Mode
You can specify how the projects will be played. In addition to playing projects consecutively from the first project, you can play just the selected project, or play projects in an automatically determined order (shuffle play).
- Choose [MENU]→
→ - Touch the desired PLAY MODE.
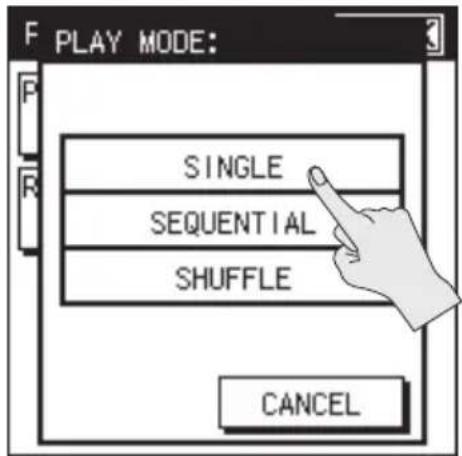
| Setting Description |
| SINGLE play one project |
| SEQUENTIAL play in order |
| SHUFFLE shuffle play |
Repeat Playback
Here's how to make the project play repeatedly for the selected play mode.
-
Choose [MENU]→
→ . -
Turn the repeat play setting on/off.
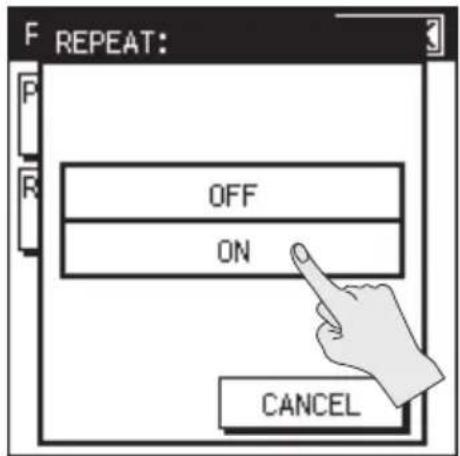
| Setting Description |
| OFF don't play repeatedly |
| ON play repeatedly |
Combination of PLAY MODE and REPEAT
The following table shows how the PLAY MODE and REPEAT settings can be combined.
| PLAY MODE REPEAT Description | ||
| SINGLE | OFF | Play only one project and then stop |
| ON | Play one project repeatedly | |
| SEQUENTIAL | OFF | Play sequentially and then stop |
| ON | Play sequentially repeatedly | |
| SHUFFLE | OFF | Shuffle play and then stop |
| ON | Shuffle play repeatedly | |
Project sorting order
The projects are displayed in alphabetical order of the following characters. This order is not the order in which the projects were recorded.
(space) ! # \$ % & ' ) + , - . 0 1 2 3 4 5 6 7 89 ; = @A B C D E F G H I J K L M N O P Q R S T U V W X Y Z ] ^ _
a b c d e f g h i j k l m n o p q r s t u v w x y z {}Double-byte characters Double-byte characters
- File names starting with "." are not shown.
- Files having a file name extension of anything other than .WAV or .MP3 are not shown.
- The file names shown in the display do not correspond to the ID3 tags of the MP3 files.
Monitor Settings
You can make various settings for playback monitoring, such as turning each channel on/off and adjusting the volume.
Turning a channel on/off
- In the main screen, touch the MON tab.

- Touch the channel that you want to turn on/off.

When you turn off a channel, its indicator will turn off.
Adjusting a channel's volume
- In the main screen, touch the MON tab.

- Touch
.

- Touch ☐ to adjust the volume of each channel.

Assigning Markers in a Project
You can assign markers to the desired locations in a project, and then jump easily to those locations.
* Markers cannot be assigned to an MP3 format project.
- In the main screen, touch the MARK tab.

- Use the [ ] button, [ ] button, [ ] button, and [ ] button to play, fast-forward, or fast-reverse to find the location at which you want to assign a marker.
- When you've found the location at which you want to assign a marker, touch
.

The number of markers will be shown. Markers are numbered sequentially starting at the beginning of the project.
A maximum of 99 markers can be assigned. Repeat steps 2 and 3 to assign markers at the desired locations.
Moving to a marker
Touch to move to the marker that precedes the current location.
Touch ▶ to move to the marker that follows the current location.
Deleting a marker
Touch the CLEAR icon to delete a marker you've assigned. Markers will be deleted starting with the marker that precedes the current location.
Repeatedly Playing a Portion of a Project
The AB Repeat function lets you repeatedly play a specified portion of a project. You can use this to repeatedly hear a section of interest.
- In the main screen, touch the A-B SPEED tab.
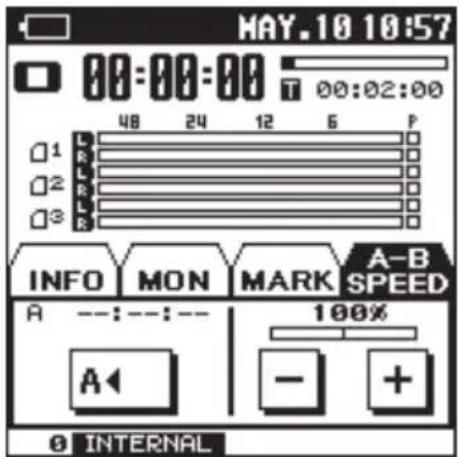
-
Press ▶ button to play the project.
-
Specify the beginning of the repeat (point A).
During playback, touch <A that point will be the beginning (point A) of the repeated portion.

- Specify the end of the repeat (point B).
During playback, touch <A.B that point will be the end (point B) of the repeated portion, and repeat playback between A-B will begin.
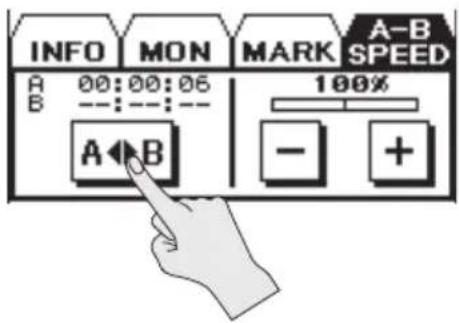
Cancelling the setting
If point A and point B are already specified, touching
To stop playback, press the ■ button. The repeat playback settings (points A and B) will be retained, but playback will stop.
MEMO
- If you've set point A and do not set point B before playback reaches the end of the project, playback will repeat between point A and the end of the project.
- The repeat settings will be cancelled if you use [◀◀]/[▶] buttons to select another project.
Changing the Playback Speed
You can make the playback faster or slower without changing the pitch.
* You can't change the playback speed when playing a project with a sampling rate of 88.2 kHz or 96 kHz.
* Changing the playback speed will affect the tonal character.
1. In the main screen, touch the A-B SPEED tab.

2. Touch ☐ to select the playback speed.
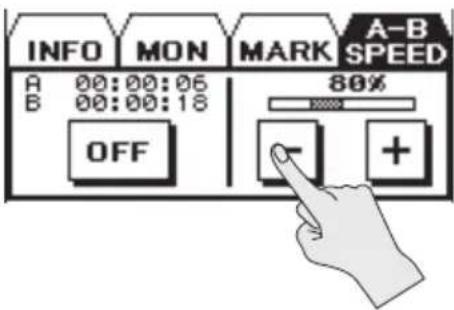
Setting (%)
50, 60, 70, 80, 90, 100 (OFF), 110, 120, 130, 140, 150
Types of Files that can be Played
The R-26 can play back the following types of files.
- WAV
| Sampling rate (kHz) | Sample size (bits) |
| 44.1, 48.0, 88.2, 96.0 | 24 |
• MP3
| Sampling rate (kHz) | Bit rate |
| 44.1, 48.0 | 32 – 320 kbps, VBR |
What is VBR?
VBR stands for Variable Bit Rate, which uses a lower bit rate when the sound is less dense and a higher bit rate when the sound is more dense.
Managing Projects and Folders
The R-26 stores recorded projects on the SD card.
The "Finder" screen provides various functions for listing, deleting, or copying these projects. You can also create folders and move projects between folders to manage your data.
"Creating a Folder" (p. 81)
Basic Operation in the Finder
Project operations
- Choose [MENU]→
. - Touch the name of the project that you want to manage.
Use ▲ to scroll.
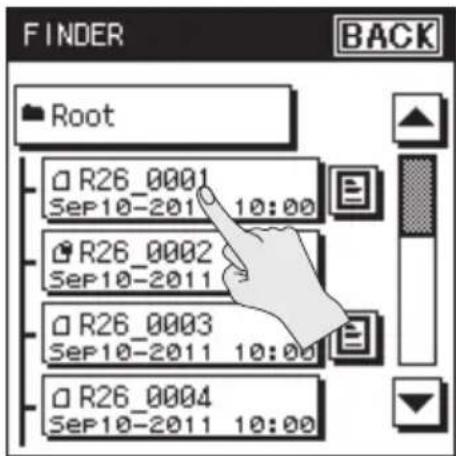
Touch play back the voice memo.

Reference
"Adding/Deleting a Voice Memo to a Project" (p. 77)
MEMO
To move into a folder, touch [图标] at the right of the folder name. To exit the folder, touch [图标].
- Touch an icon to select the desired function.

Folder operations
- Choose [MENU]→
. - Touch the folder that you want to manage.

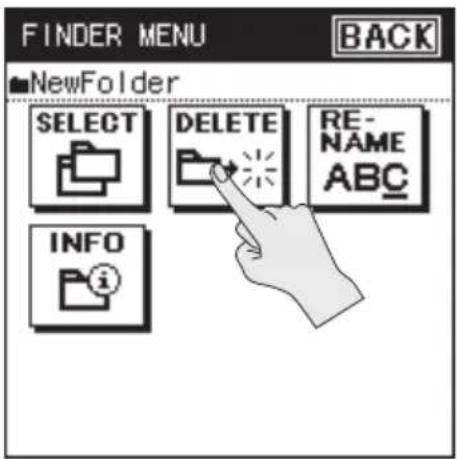
List of finder operations
Project operations
| Icon Function Procedure | ||
| SELECT Selects the project and moves to the main screen. p. 70 | ||
| COPY Copies the project. p. 70 | ||
| MOVE Moves the project. p. 71 | ||
| DELETE Deletes the project. p. 71 | ||
| RENAME Renames the project. p. 72 | ||
| EDIT | Divide or combine a project, or trim unwanted regions. | p. 73 |
| INFO | Shows information about the project. Alternatively, protects the project name. | p. 76 |
| REC MEMO | Add a voice memo to the project. | p. 77 |
| DELETE MEMO | Deletes the voice memo from the project. | p. 79 |
| CONV MP3 | Converts a WAV file into MP3. | p. 80 |
| REPAIR | Repairs the project.* This menu item is shown only if the R-26 has detected a damaged project. | p. 80 |
Folder operations
| Icon Function Procedure | ||
| SELECT Selects the folder and moves to the main screen. | p. 70 | |
| DELETE Deletes the folder. | p. 71 | |
| RENAME Renames the folder. | p. 72 | |
| INFO | Shows information about the folder. | p. 76 |
Opening a Project
Here's how to select and play a project from the list of recorded projects.
When you select a folder, the current location will change to the selected folder, and you can use the main screen to choose projects from within the selected folder. You can also record into the selected folder.
- Choose [MENU]→
. - Touch the name of the project or folder that you want to manage.
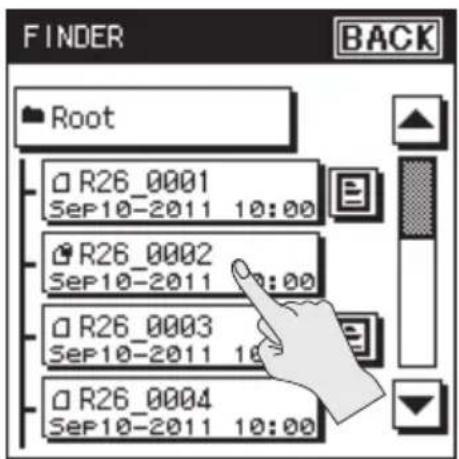
- Touch
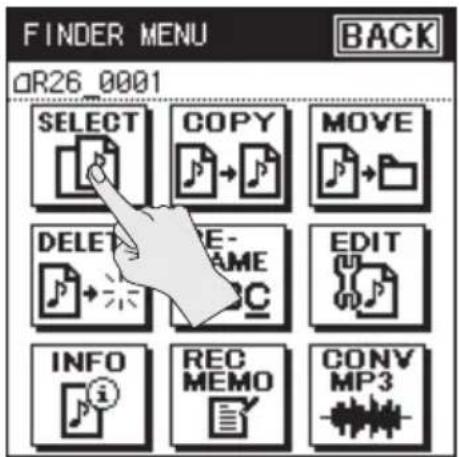
The project will be selected, and you will return to the main screen.
Copying a Project
- Choose [MENU]→
. - Touch the name of the project that you want to copy.
- Touch
. - Touch the folder to which you want to copy the project.

The project will be copied.

Moving a Project
- Choose [MENU]→
. - Touch the folder into which you want to move the project.
- Touch
. - Touch the folder to which you want to move the project.
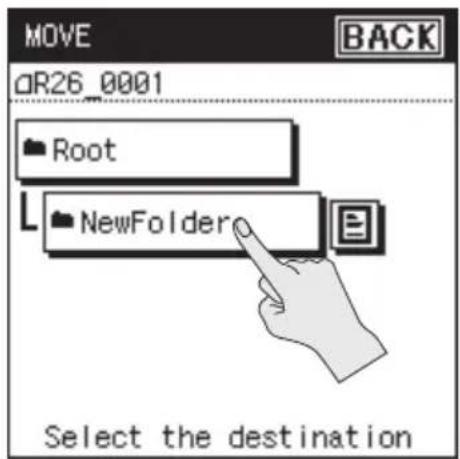
The project will be moved.

Deleting a Project or a Folder
- Choose [MENU]→
. - Touch the name of the project or folder that you want to delete.
- Touch
. - To delete, touch
. If you decide to cancel without deleting, touch .
Deleting a project
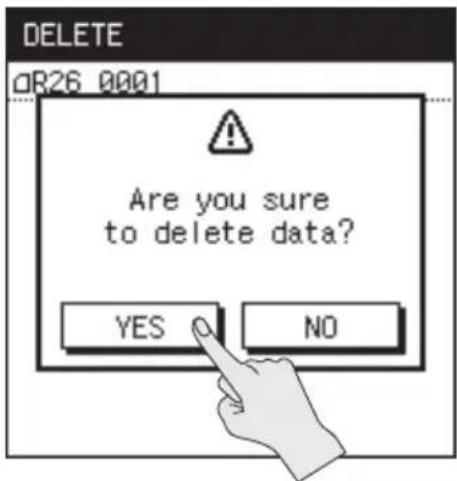
Deleting a folder
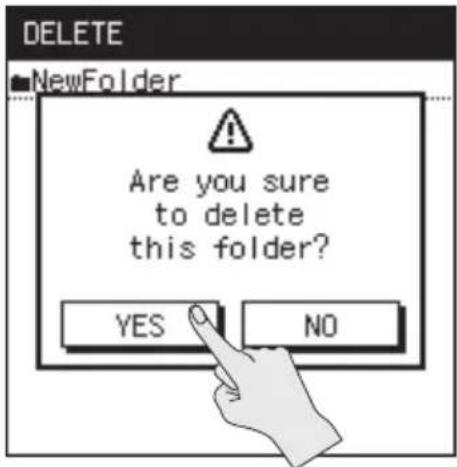
While project is being deleted
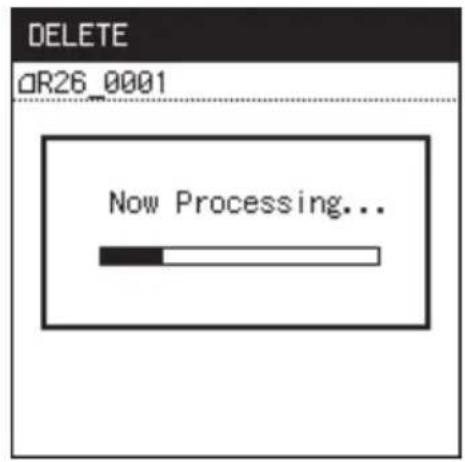
While folder is being deleted

When deleting a folder, the following message will appear if the folder is not empty; deletion of the folder will not be possible.
Try the procedure again after the folder has been emptied.
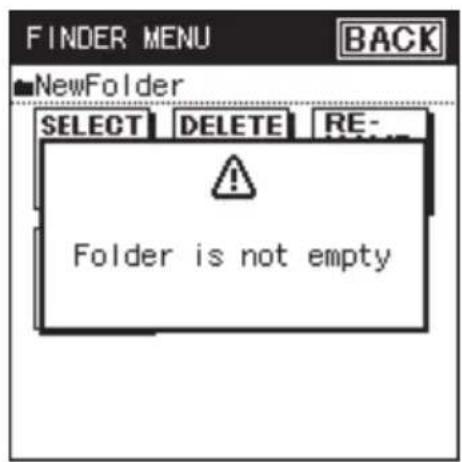
Renaming a Project or a Folder
- Choose [MENU]→
. - Touch the name of the project or folder that you want to rename.
- Touch
.

- Touch the arrow keys to move the cursor to the location at which you want to insert a character.

5. Touch the letter keys to enter characters.
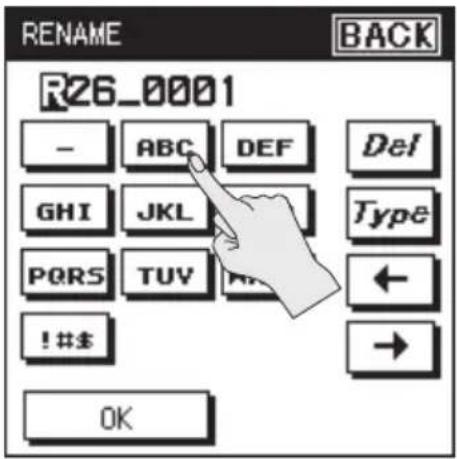
Each time you touch a letter key, the character will change in the order of A, B, and C. Touch
Touch to delete the character at the cursor location.
MEMO
- On the R-26, you can only rename file names that consist of ASCII characters (single-byte alphanumeric characters).
- You cannot rename a file name that contains double-byte characters such as Japanese.
- If an identical name already exists, the screen will indicate "Already Exists." Please specify a different name.
- You won't be able to delete all the characters. There will always be one remaining character.
Characters that can be used
(space) ! # $ % & ' ) + , - . 0 1 2 3 4 5 6 7 8
9 ; = @
ABCDEFGHIJKLMNOPQRSTUVWXYZ]^_^ _
abcdefghijklmnopqrstuvwxyz {}
Dividing, Combining, or Trimming a Project
In the finder menu's edit menu, you can divide, combine, or trim unwanted regions from a project.
- Choose [MENU]→
. - Touch the name of the project that you want to edit.
- Touch
.
The edit menu will appear.

Dividing a Project
- In the edit menu, touch the
icon. - Use [I]/[I] and [/][/] to play fast-forward, and rewind through the project to find the point at which you want to divide it.
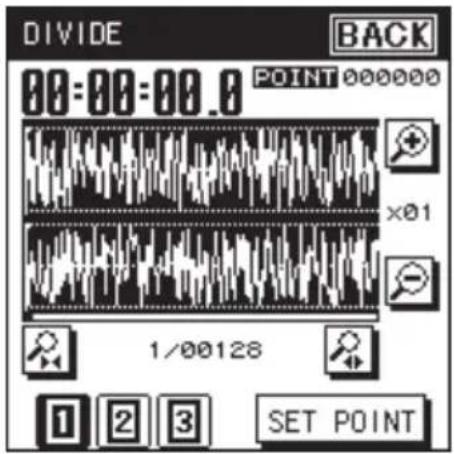
| Icon Description | |
| Zoom in on the waveform's amplitude | |
| Zoom out on the waveform's amplitude | |
| Zoom in on the time axis of the waveform | |
| Zoom out on the time axis of the waveform | |
With 4 CHANNEL and 6 CHANNEL projects, you can switch among the waveforms indicated for the <1>, <2>, and <3> buttons at the lower left of the screen.
- When you've specified the location, touch
.
The screen will indicate the location at which the project will be divided.
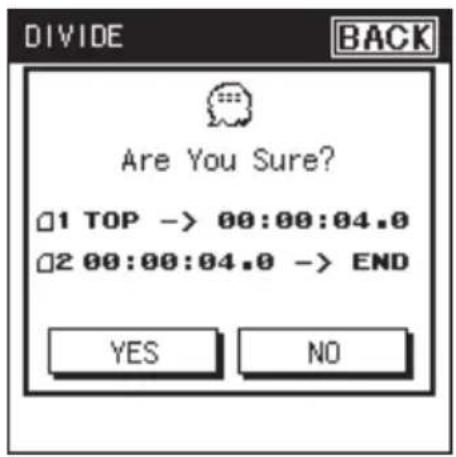
- To divide the project, touch
. The project will be divided.
Each divided project will be saved as a new project. In this case, the new projects will have "-1" and "-2" automatically appended to their name. The original project will remain unchanged. If the original project is named R26_0001.PJT, new projects named R26_0001-1.PJT and R26_0001-2.PJT will be created.
* If the SD card contains insufficient free space, the message "SD Card Full" will appear, and the Divide operation cannot be executed.
Combining Projects
- In the edit menu, touch
. - Touch the name of the project that you want to combine.
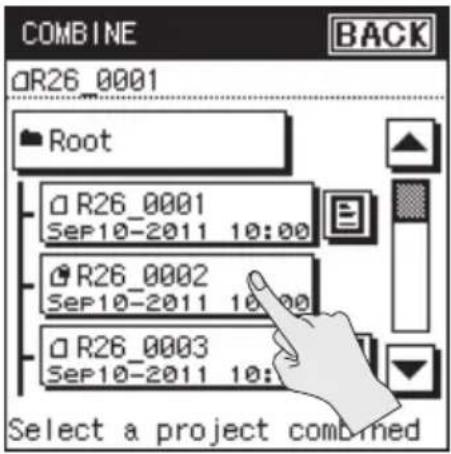
The projects will be combined.

The combined project will be saved as a new project. In this case, the new project will have "-1" automatically appended to its name. The original project will remain unchanged. If the original project is named R26_0001.PJT, the combined project will be created with the name R26_0001-1.WAV.
Deleting Unwanted Portions of a Project (Trim)
- In the edit menu, touch
.
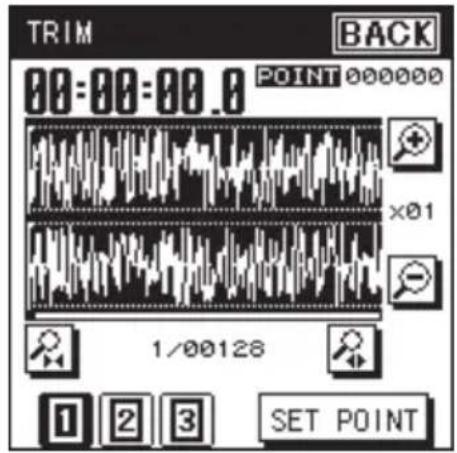
- Use [▶/[ ]an■ [ ]/[ ] to find▶ the Start Point of the region that you want to keep.
| Icon Description | |
| Zoom in on the waveform's amplitude | |
| Zoom out on the waveform's amplitude | |
| Zoom in on the time axis of the waveform | |
| Zoom out on the time axis of the waveform | |
With 4 CHANNEL and 6 CHANNEL projects, you can switch among the waveforms indicated for the <1>, <2>, and <3> buttons at the lower left of the screen.
-
Make fine adjustments to the location as described in step 2.
-
Use [#/llan[]/[] to find the End Point of the region that you want to keep.
Make fine adjustments for the location, as described in step 2.
- When you've specified the location, touch
.
The screen will indicate the region of the project to be kept.

- To execute the trim operation, touch
.
The project will be trimmed.
The trimmed project will be saved as a new project. In this case, the new project will have "-1" automatically appended to its name. The original project will remain unchanged. If the original project is named R26_0001.PJT, the trimmed project will be created with the name R26_0001-1.PJT.
Viewing Information about the Project
- Choose [MENU]→
. - Touch the name of the project whose information you want to view.
- Touch
.
Protecting a project (Protect)
You can protect a project so that it cannot be erased or renamed accidentally.
- Touch
.

MEMO
If you turn Protect on, a lock icon is displayed.

Adding/Deleting a Voice Memo to a Project
You can add a voice memo of up to 30 seconds to a recorded project. The voice memo will play when you touch beside the project name in the finder screen. This can be used as a convenient reminder of take numbers during the recording session.
Adding a Voice Memo
- Choose [MENU]→
. - Touch the name of the project for which you want to add a voice memo. Projects that don't have a voice memo have no symbol shown beside the project name.
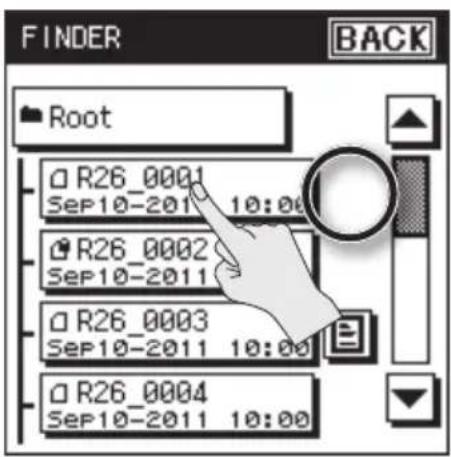
* If a project already has a voice memo, you can delete that voice memo and then create a new voice memo.
- Touch
.
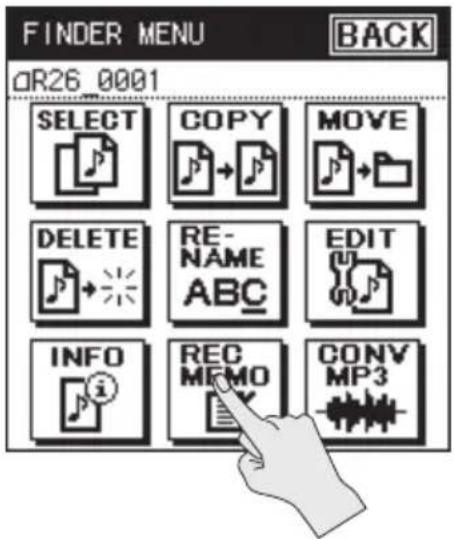
- Touch
.
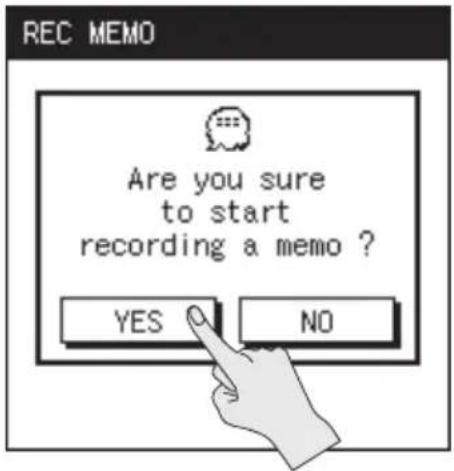
Memo recording will begin. Speak into the internal mic.
5. When you've finished recording the memo, touch .
Recording will stop automatically after 30 seconds have elapsed since the start of the memo recording, even if you don't touch

Memo recording will stop, and you will return to the finder screen.
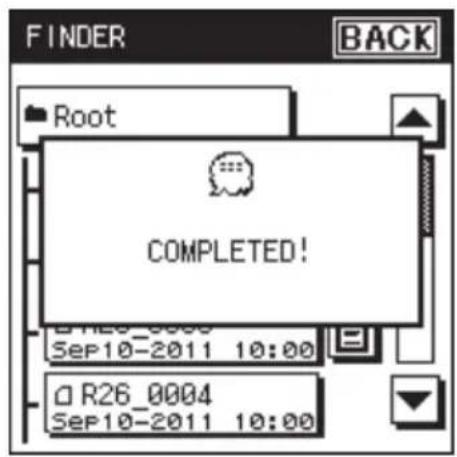
The voice memo will be attached, and the symbol will appear.
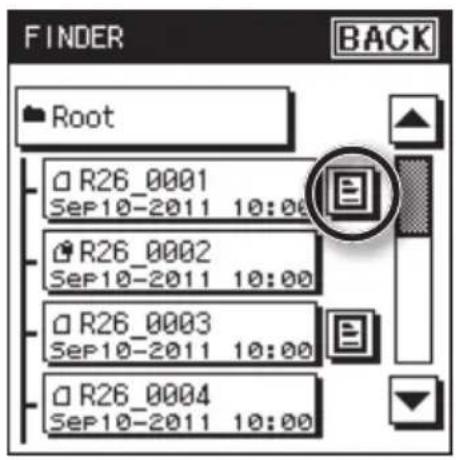
6. Touch play back the memo.
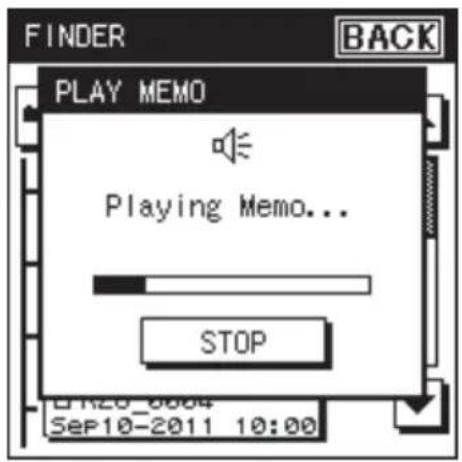
Deleting a Voice Memo
- Choose [MENU]→
. - Touch the name of the project for which you want to delete the voice memo.
A symbol is shown beside projects that contain a voice memo.

- Touch
.
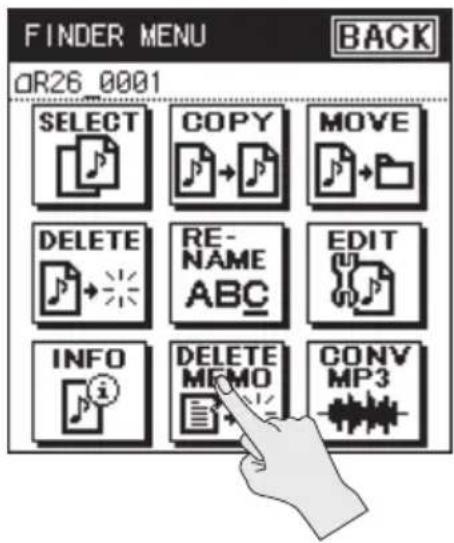
- Touch
.

Memo has been deleted, and you will return to the finder screen.

The voice memo will be deleted, and the will disappear.
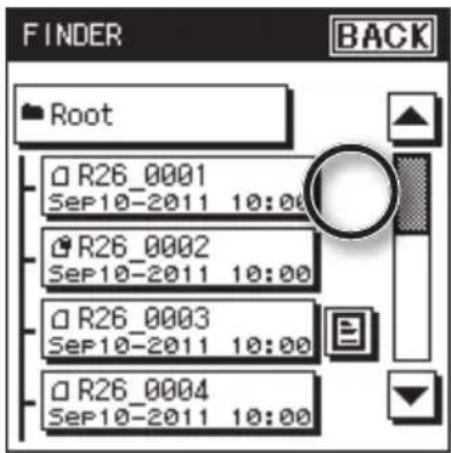
Creating an MP3 File
A project that was recorded at 44.1 kHz or 48.0 kHz as a two-channel recording can be converted to an MP3 file.
- Choose [MENU]→
. - Touch the name of the project that you want to convert to MP3.
- Touch
. - Select the bit rate.
Touch the desired bit rate.

The project will be converted to MP3.
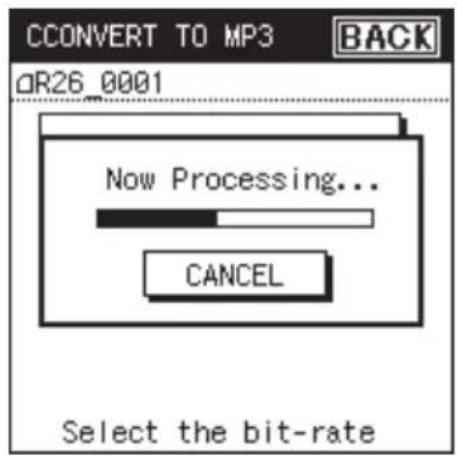
Repairing a Project
If you inadvertently disconnect the adaptor or remove the SD card during recording, the project will be damaged and unplayable. In some cases you may be able to use the Repair function to make the project playable.
- Choose [MENU]→
. - Touch the name of the project.
The
- Touch
.

4. Touch .

The project will be repaired.

* Depending on how the project has been damaged, it may not be possible to repair it.
Creating a Folder
Here's how to manage projects by creating a folder within the SD card.
Creating a Folder at the Root Level
Here's how to create a folder at the highest (Root) level of the SD card.
- Choose [MENU]→
. - Touch
.

3. Touch .
"New Folder" will be created.
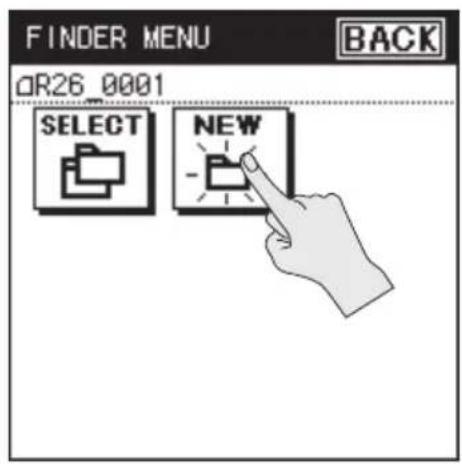
Creating a Folder Within a Folder
Here's how to create a new folder within an existing folder.
- Choose [MENU]→
. - Move into the folder in which you want to create the new folder.
Touch at the right of the move-destination folder name.

- Touch the folder name shown at the top.
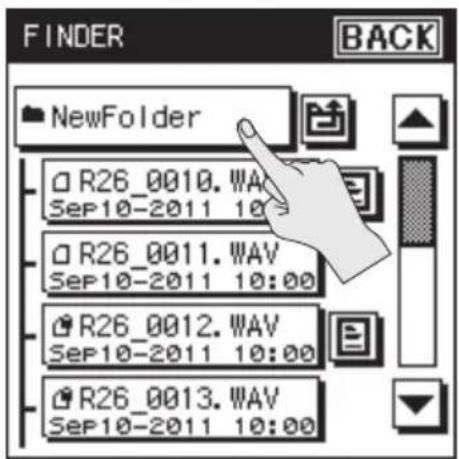
- Touch
.

"New Folder" will be created.
Connecting to Your Computer via USB
If you use an USB cable to connect the R-26's USB connector to a USB connector on your computer, you'll be able to do the following things.
Mass storage
Projects in the R-26's SD card can be backed up to your computer, and WAV files or MP3 files from your computer can be written to the R-26's SD card.
Reference
"Exchanging Files With Your Computer (Storage)" (p. 84)
Audio Interface
The audio being input to the R-26 can also be recorded via USB into software on your computer.
Sound being played back by software on your computer can also be heard through headphones or speakers connected to the R-26's PHONES jack, or recorded on the R-26. In addition, sound being played back by software on your computer can be mixed with the R-26's input and re-input to your computer.
Reference
"Using the R-26 as an Audio Interface" (p. 89)
* Sound will be output from the R-26's preview monitor only if the
Selecting the USB Connection Mode
When the R-26 is connected to your computer via a USB cable, you can specify whether it will operate as a storage device or as an audio interface. If you choose "SELECTABLE" (default setting), you'll be able to make this choice when you connect it.
1. Choose [MENU]→→.
"USB CONNECTION" is located on page 2/3. Touch ▼ to access 2/3.
2. Touch the desired mode.
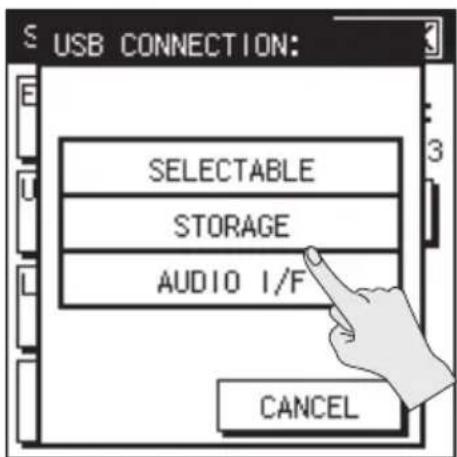
| Mode Description | |
| SELECTABLE | A selection screen will appear when you connect the R-26 to your computer via USB. |
| STORAGE | The R-26 will be in storage mode when it is connected via USB to your computer. |
| AUDIO I/F | The R-26 will operate as an audio interface when it is connected via USB to your computer. |
Exchanging Files With Your Computer (Storage)
WAV files or MP3 files can be copied from the R-26 to your computer, or from your computer to the R-26. To copy files, use your computer to drag and drop them.
Connecting the R-26 to Your Computer
- Start up your computer.
- Make sure that an SD card is inserted in the R-26's SD card slot.
"Preparing an SD Card" (p. 26) - Switch on the R-26's power (p. 24).
- Use the included USB cable to connect the R-26 to your computer.
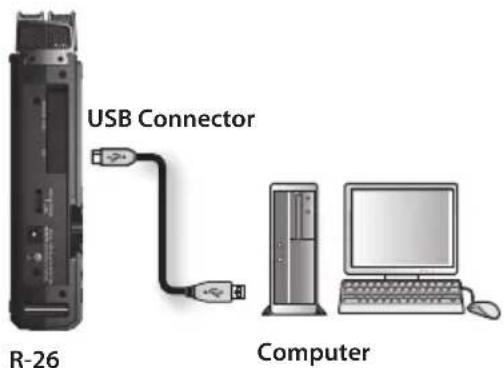
5. Select the mode (only if you've chosen "SELECTABLE").
If the USB CONNECTION (p. 83) is set to "SELECTABLE," a selection screen will appear when you connect the R-26 to your computer, allowing you to select either storage mode or audio interface mode. For this example, touch
SELECT USB MODE
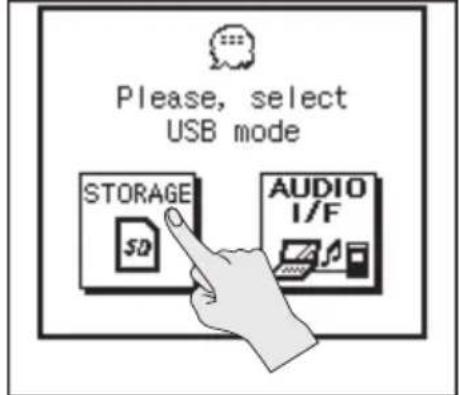
If the R-26 is connected to your computer in storage mode, the R-26's display will show the "USB Storage" screen.
* If you've chosen "STORAGE" as the USB connection mode, this screen will appear when you use a USB cable to connect the R-26 to your computer.
USB STORAGE

Your computer will recognize the R-26's SD card in the following way.
| OS Appearance on the Computer | |
| Windows | Appears in My Computer or Explorer under a name such as removable disk. |
| Mac OS | Appears on the desktop with a name such as NO NAME. |
NOTE
- When connecting the USB cable to your computer, grasp the base of the connector, and avoid touching the metallic portion of the plug.
- The R-26 will not be recognized if you connect it to your computer when playback or recording. Disconnect the USB cable that's between the R-26 and your computer, and perform the procedure again from step 3.
- The R-26's various functions are unavailable in the "USB STORAGE" screen when connected to a computer. Operations of the buttons or switches will be ignored.
- If your computer displays the message "Insert a disk with this type of file ...," click
.
Project File Structure
If you connect the R-26 to your computer, you can see how these folders and files are organized.
| REC MODE Structure | |
| 1 channel | A folder with the name of the project and an extension of .PJT will be created. Inside that folder, a monaural WAV file named “project name_1.WAV” will be created. |
| 2 channels (STEREO×1) | A folder with the name of the project and an extension of .PJT will be created. Inside that folder, a stereo WAV or MP3 file named “project name_1.WAV” or “project name_1.MP3” will be created. |
| 2 channels (MONO×2) | A folder with the name of the project and an extension of .PJT will be created. Inside that folder, monaural WAV files named “project name_1.WAV” and “project name_2.WAV” will be created. |
| 4 channels (STEREO×2) | When recording 4 channels or 6 channels, a folder with the name of the project and an extension of .PJT will be created. Inside that folder, stereo WAV files named “project name_1.WAV”, “project name_2.WAV”, and “project name_3.WAV” will be created. |
| 6 channels (STEREO×3) |
![graph TD A["/Root"] --> B["R26_0001.PJT"] A --> C["R26_0001_1.WAV"] A --> D["RecData.txt"] A --> E["R26_0002.PJT"] A --> F["R26_0002_1.WAV"] A --> G["RecData.txt"] A --> H["R26_0003.PJT"] A --> I["R26_0003_1.WAV"] A --> J["R26_0003_2.WAV"] A --> K["RecData.txt"] A --> L["R26_0004.PJT"] A --> M["R26_…](/content/2026/06/1275897/images/ede9d76ec5e8347f707dc297fc82130dcb0c56a31ef37293df02eb325cdec5b2.jpg)
* A file named "RecData.txt" containing the settings at the time of recording will be created in each project recorded by the R-26. (This file will not exist for edited projects.)
* A file named MEMO.MP3 will be created for projects that have a voice memo (p. 77).
NOTE
If you use your computer to modify, delete, or rename the files within a project, the R-26 may be unable to play back the project.
Disconnecting from Your Computer
Here's how to disconnect the R-26 from your computer. You must use the following procedure to end the connection before you disconnect the USB cable.
NOTE
Do not switch off the R-26's power, disconnect the USB cable, or remove the SD card while the R-26 is connected to your computer.
Windows 7
- In the Windows task tray, click icon, and then icon.
- Click on the message "Eject R-26" appears above the task tray.
When you see the message "Safe to Remove the Hardware", you can disconnect the USB cable that's between the R-26 and your computer.
Windows Vista/Windows XP
- Access the "Safely Remove Hardware" dialog box.
In the Windows task tray, double-click the Safely Remove Hardware ≈ icon.
- In the list of hardware devices shown, choose the item corresponding to the R-26.
| OS Indication | |
| Windows Vista USB mass storage device | |
| Windows XP, USB mass storage device | |
- In the dialog box, click
. - Click [OK].
When the stop hardware device dialog box appears, choose the item corresponding to the R-26's SD card, and click [OK].
- Disconnect the connection.
When you see the message "The device (or USB disk) can now be safely removed from the computer," you can disconnect the USB cable that's between the R-26 and your computer.
Mac OS
1. Drag "NO NAME" into the trash in the dock.
When you drag to the location of the trash at the right edge of the dock, the trash can will change to ▲, allowing you to stop the connection.
2. Stop the connection.
When the "NO NAME" or "Unnamed" icon disappears from the desktop, you can disconnect the USB cable that's between the R-26 and your computer. Alternatively, you can switch off the R-26's power.
* While under most conditions, a computer similar to the above will permit normal operation of the R-26, Roland cannot guarantee compatibility solely on these factors. This is due to numerous variables that may influence the processing environment, such as differences in motherboard design and the particular combination of other devices involved.
Using the R-26 as an Audio Interface
The audio input from the R-26 can be recorded via USB into software on your computer. At the same time, recording and playback can be carried out on the R-26.
* You won't be able to play projects that have a different sampling frequency than the sampling frequency that is set for the audio interface.
* Projects that are played back by the R-26 will be output from the PHONES jack. The output of such project playback won't be available on your computer.
Main Screen for Audio Interface Mode
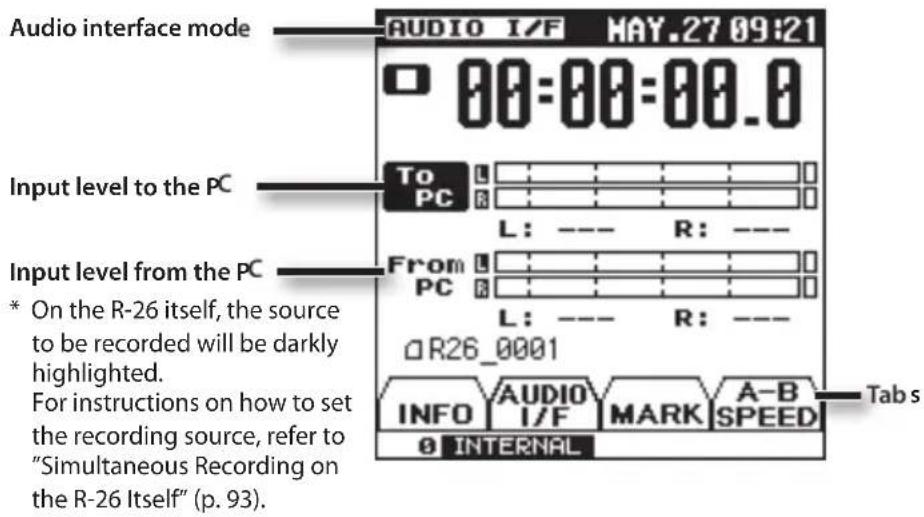
Audio Interface Block Diagram
![graph LR A["PHANTOM (XLR ONLY)"] --> B["SENSE LEVEL"] B --> C["Square Block"] C --> D["Square Block"] D --> E["Square Block"] E --> F["Square Block"] F --> G["Square Block"] G --> H["Square Block"] H --> I["Square Block"] I --> J["Square Block"] J --> K["Square Block"] K --> L["Square Block"] L -->…](/content/2026/06/1275897/images/ed25fe6bb191a93b82e74b41907c3be6290ad2f1743ef92063df0a882bdf3117.jpg)
Installing the USB Driver
In order to use the R-26's AUDIO I/F mode, you must first install the USB driver in your computer.
1. Install the USB driver in your computer.
The R-26's dedicated driver is provided on the included SD card.
It can also be downloaded from the Roland website.
Roland website
http://www.roland.com/
Refer to the Roland website for details on the operating requirements. The program and procedure for installing the driver will differ depending on your system. Carefully read the Readme.htm file included with the downloaded file.
Specifying the Sampling Rate
Select the sampling rate that's appropriate for the way you'll be using the recorded data. If you're recording into software on your computer, specify a sampling rate that your software can handle.
1. Choose [MENU]→
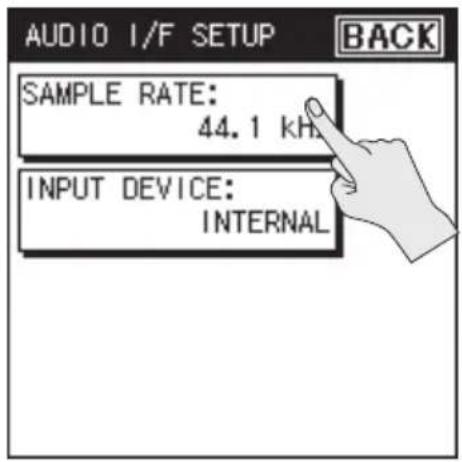
2. Touch the desired sampling rate.
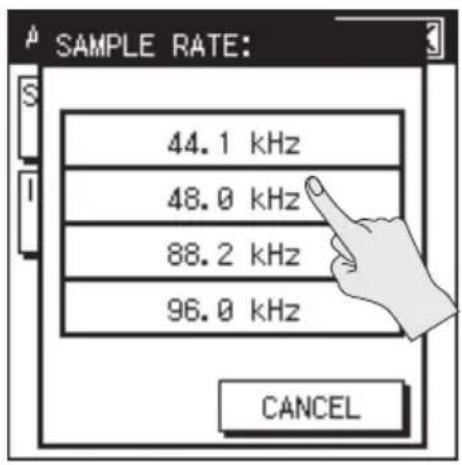
| SAMPLE RATE |
| 44.1 kHz |
| 48.0 kHz |
| 88.2 kHz |
| 96.0 kHz |
3. Touch .
* The following screen will appear if you change the sampling rate setting while the R-26 is connected in audio interface mode. Disconnect the USB cable from the R-26, and then plug it back in again.
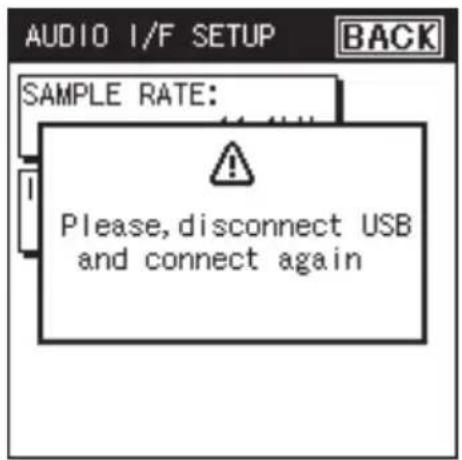
Connecting the R-26 to Your Computer
- Start up your computer.
- Switch on the R-26's power (p. 24).
- Use the included USB cable to connect the R-26 to your computer.

4. Select the mode (only if you've chosen "SELECTABLE").
If the USB CONNECTION (p. 84) is set to "SELECTABLE," a selection screen will appear when you connect the R-26 to your computer, allowing you to select either storage mode or audio interface mode. For this example, touch

Specifying the Input Device
- Choose [MENU]→
- Touch .

- Select the input.
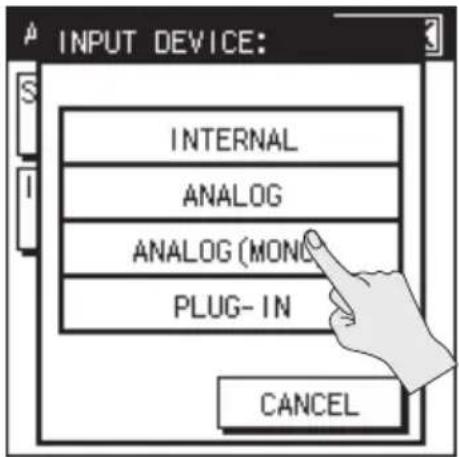
| Setting Description | |
| INTERNAL | Selects the internal mics (a mix of the directional internal mics and the omnidirectional internal mics). |
| ANALOG | Selects the input from the ANALOG IN 1/L jack and ANALOG IN 2/R jack. Record-ing will take place in stereo. |
| ANALOG (MONO) | Selects the input from the ANALOG IN 1/L jack and ANALOG IN 2/R jack. Two monaural channels will be recorded. |
| PLUG-IN | Selects the input from the PLUG IN MIC jack. |
- In the audio recording software on your computer, switch the audio input to the R-26.
For details on how to switch the audio input, refer to the manual for the software you're using.
Simultaneous Recording on the R-26 Itself
The audio being input to the R-26 can also be recorded on the R-26 itself while simultaneously recording into software on your computer.
- Chose [MENU]→
→ (p. 31). - Choose
.
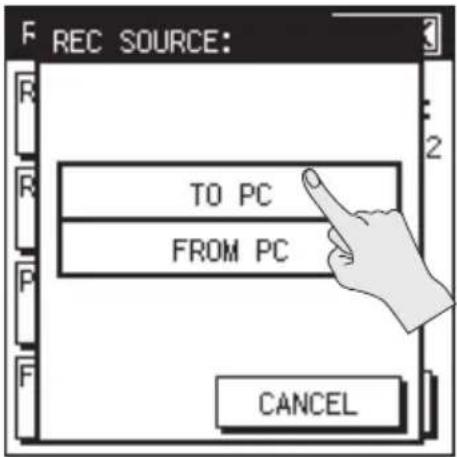
| Setting Description | |
| TO PC | Signal from the R-26 being input to the computer |
| FROM PC | Signal from the computer being input to the R-26 |
Using Direct Monitor
If the Direct Monitor function is turned on, the sound being input to the R-26 can be monitored through headphones or speakers.
- Touch the

- Touch
to turn it on/off.
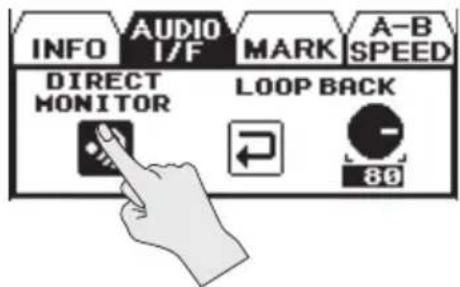
Listening to the Computer's Playback Through the R-26
Audio played back by your computer can be heard via USB through the output system connected to the R-26. This audio can also be recorded by the R-26 itself.
- In the audio playback software on your computer, switch the audio output destination to the R-26.
For details on switching the audio output destination, refer to the manual for the software you're using.
Recording the playback on the R-26 itself
-
Choose [MENU]→
→ (p. 31). -
Choose
.

| Setting Description | |
| TO PC | Signal from the R-26 being input to the computer |
| FROM PC | Signal from the computer being input to the R-26 |
Using Loop Back
The R-26's Loop Back function allows you to mix the R-26's own input with the sound being played back by your computer software, and send this back to the computer. You can use this to add a narration to music that you're playing back and re-record it anew on your computer, or to create streams for distribution.
- Touch AUDIO IF tab.
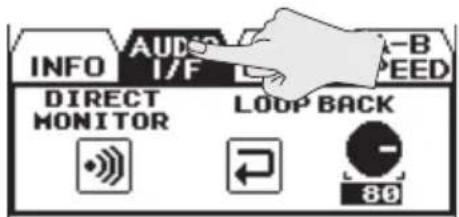
- Touch the
to turn it on/off.

- Touch the knob icon to adjust the volume of the sound being played back on your computer.
Touch ▲ to adjust the volume.

Settings for the R-26
| Category Menu | item / Effect Value (default value: bold) | ||
| REC SETUP | REC MODESpecifies the number of channels to record (p. 31).* 2 CHANNEL is the only option with Audio Interface Mode. | 1 CHANNEL ,2 CHANNEL,4 CHANNEL ,6 CHANNEL | |
| REC SOURCESelects the input device (p. 99). | 1 CHANNEL ANALOG (MONO) | ||
| 2 CHANNEL | INTERNAL, ANALOG,ANALOG (MONO),PLUG-IN | ||
| 4 CHANNEL | XY+OMNI,INTERNAL+ANALOG,ANALOG+PLUG-N,XY+PLG-IN, XY+OMNI (S)ANALOG(S)+INTERNAL,ANALOG(S)+PLUG-IN, | ||
| 6 CHANNEL | XY+OMNI+INT,XY+OMNI+ANALOG,XY+ANALOG+P-IN,ANALOG(S)+XY+OMNI,ANALOG(S)+XY+P-IN | ||
| AudioInterfaceMode | TO PC, FROM PC | ||
| SAMPLE RATESpecifies the sampling rate for recording (p. 98). | 44.1 kHz,48.0 kHz,88.2 kHz,96.0 kHz | ||
| REC FORMATSelects the file format for recording (p. 34). | WAV+MP3 ,MP3 128-kbps ,MP3 160-kbps,MP3 320-kbps,WAV 16-bit,WAV 24-bit, | ||
| PRE-RECSpecifies whether Pre-Rec will be enabled (p. 34). | OFF, ON | ||
| PROJECT NAMESpecifies how the project name is to be assigned(p. 35). | DATE, NAME | ||
| AUTO STARTSpecifies the Auto Rec Start setting (p. 35). | OFF, 2 sec, 5 sec, 10 sec,LEVEL 1, LEVEL 2, LEVEL 3 | ||
| AUTO MARKSpecifies conditions for automatic marking (p. 50). | OFF, 5 min, 10 min, 30 min,LEVEL 1, LEVEL 2, LEVEL 3 | ||
| MAX FILE SIZESpecifies the file size at which the project will be automatically divided (p. 51). | 64 MB,128 MB,256 MB,512 MB,1 GB,2 GB | ||
| FILE TYPESpecifies whether information about the recording time and recording device will be embedded in the WAV file (p. 36). | WAV,BWF | ||
| PLAY SETUP | PLAY MODESpecifies the order in which files will play (p. 62), | SINGLE, SEQUENTIAL, SHUFFLE | |
| REPEATSpecifies whether Repeat will be enabled (p. 98) | OFF, ON | ||
| INPUT SETUP | INT MIC(p. 36) | LIMITERTurns the limiter on/off. | OFF, ON |
| LCF SWTurns the low-cut filter on/off. | OFF, ON | ||
| LCF CUTOFFSpecifies the frequency of the low-cut filter. | 100 Hz, 200 Hz, 400 Hz | ||
| ANALOG IN (p. 38)*1*2 | INPUT TYPESpecifies the external input type. | SEPARATE, LINK, MS-MIC | |
| INPUT1 PHANTOMSpecifies whether phantom power will be supplied to the ANALOG IN 1/L jack. | OFF, ON | ||
| INPUT1 LIMITERTurns the limiter on/off. | OFF, ON | ||
| INPUT1 LCF SWTurns the low-cut filter on/off. | OFF, ON | ||
| INPUT2 PHANTOMSpecifies whether phantom power will be supplied to the ANALOG IN 2/R jack. | OFF, ON | ||
| INPUT2 LIMITERTurns the limiter on/off. | OFF, ON | ||
| INPUT2 LCF SWTurns the low-cut filter on/off. | OFF, ON | ||
| LCF CUTOFFSpecifies the frequency of the low-cut filter. | 100 Hz, 200 Hz, 400 Hz | ||
| MS-MIC WIDTHAdjusts the width of the sound. | 0-5-10 | ||
| MONITOR TYPESelects the type of sound when monitoring the input from the ANALOG IN 1/L jack, 2/R jack. | STEREO, MONO | ||
| INPUT SETUP | PLUGINMIC (p. 41) | MIC TYPESpecifies the type of plug-in mic. | STEREO, MONO |
| PLUG-IN POWERSpecifies whether power will be supplied to the plug-in mic. | OFF, ON | ||
| LIMITERTurns the limiter on/off. | OFF, ON | ||
| LCF SWTurns the low-cut filter on/off. | OFF, ON | ||
| LCF CUTOFFSpecifies the frequency of the low-cut filter. | 100 Hz, 200 Hz, 400 Hz | ||
*1 Settings for "INPUT2" will be displayed only when "SEPARATE" has been set for INPUT TYPE.
*2 Settings for "MS-MIC WIDTH" will be displayed only when "MS mic" has been set for INPUT TYPE.
| SYSTEM SETUP | CONTRASTAdjusts the contrast of the characters in the display. | 0-5-10 | |
| BACKLIGHTAdjusts the brightness of the display backlight. | OFF, 1, 2, 3-9 | ||
| DISPLAY TIMERSpecifies the time after which the display backlight will be darkened if no operation has been performed. (Units: seconds) | OFF, 2 sec, 5 sec, 10 sec, 20 sec | ||
| REC/PEAK LEDSpecifies whether the REC indicator and PEAK indicator will also go dark in conjunction with the Display Timer. | NORMAL, POWER SAVE | ||
| REC MONITORSpecifies whether the audio input will be monitored via headphones during recording. | OFF, ON | ||
| PREVIEW MONITORTurns the playback preview monitor (p. 15) on/off. | OFF, ON | ||
| AUTO OFFSpecifies the time after which the power will turn off if no operation has been performed. (Units: seconds) | OFF, 3 min, 5 min, 10 min, 15 min, 30 min, 45 min, 60 min | ||
| BATTERYSpecifies the type of battery that is installed. | ALKALINE, Ni-MH | ||
| EXT-POWERSelects the supplied AC adaptor or the final voltage of an external power supply (p. 23). | ADAPTOR, 9.0 V, 9.5 V, 10.0 V, 10.5 V, 11.0 V, 11.5 V, 12.0 V | ||
| USB CONNECTIONSpecifies the mode when USB-connected to a computer (p. 83). | SELECTABLE, STORAGE, AUDIO I/F | ||
| Category Menu | item / Effect Value (default value: bold) | ||
| SYSTEM SETUP | LANGUAGESelects the language shown in the display. | English,日本語 | |
| PANEL CALIBRATIONProvides for adjustment of the touch panel's sensitivity. | - | ||
| AUDIO I/F | SAMPLE RATESpecifies the sampling rate used in audio interface mode (p. 90). | 44.1 kHz, 48.0 kHz, 88.2 kHz, 96.0 kHz | |
| INPUT DEVICESelects the input device used in audio interface mode (p. 98). | INTERNAL, ANALOG, ANALOG (MONO), PLUG-IN | ||
| SD CARD | INFODisplays information about the SD card. | - | |
| FORMATFormats the SD card (p. 27). | - | ||
| FACTORY RESET | Resets the R-26 to the factory-set condition (p. 99). | - | |
| DATE & TIME Specifies the date and time. - | |||
| SENS | SENSAdjusts the input sensitivity (p. 44). | INT MIC, PLUG-IN | LOW, MID, HIGH |
| ANALOG1, ANALOG2 | +4dBu-2dBu-8dBu-14dBu-20dBu-26dBu-32dBu-38dBu-44dBu-50dBu-56dBu-62dBu | ||
| MIC MODE(Only when internal mic is selected)Adjusts the directionality of the internal mic (p. 42). | INT MIC | SOLO, CONCERT, FIELD, OMNI MIC XY MIC MANUAL | |
| AUTO SENSAutomatically adjusts the input sensitivity and indicates the optimal input level setting (p. 47). | - | ||
Restoring the R-26 to its Factory-set State (FACTORY RES
Here's how to restore the various settings of the R-26 to their factory-set state.
- Press the [MENU] button to access the MENU screen.
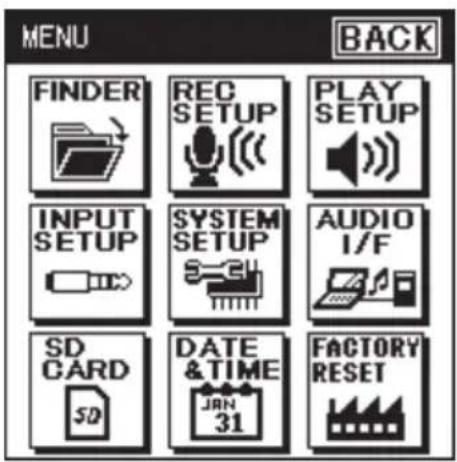
- Touch
.
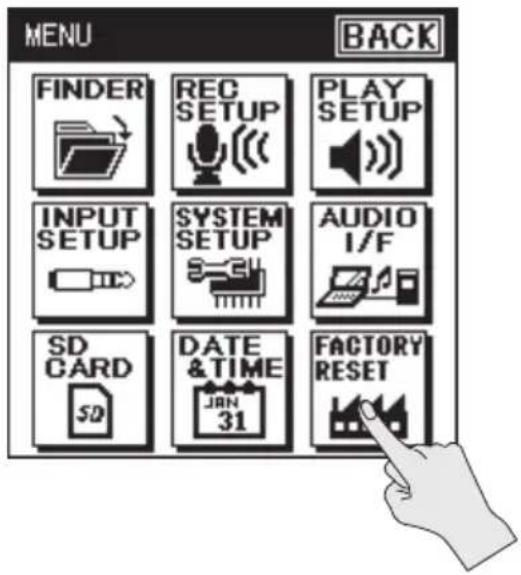
- To execute the Factory Reset operation, touch
. If you decide to cancel without executing, touch .
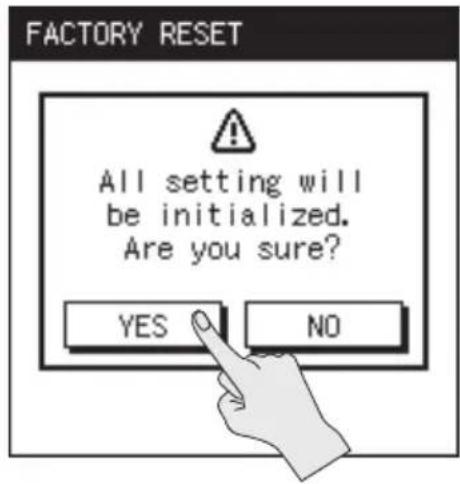
When the factory reset has been completed, a message will appear, and then you'll be returned to the MENU screen.
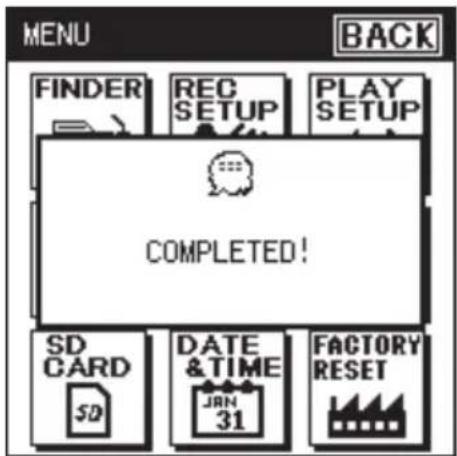
This section explains the error messages that may appear in the display.
| Message Problem | ||
 | Clock Initialized | Power for the internal clock was lost, so the internal clock has been initialized. Please specify the date and time. |
 | Battery Low | The batteries or the external power supply have run low. Please replace the batteries or use an AC adaptor. |
 | Improper Song | This file is of a format that the R-26 cannot use. |
 | Already Exists | An identically named file or folder exists. Please use a different name to create the file or folder. |
 | Song Protected | The file is protected. Turn Write Protect OFF before you execute the operation. |
 | Name Too Long | The name is too long. Shorten the name of the file. |
 | File System Error | There is a problem with the SD card. Format the SD card on the R-26. |
 | SD Card Unformatted | The SD card has not been formatted. Format the SD card on the R-26. |
 | SD Card Full | The SD card has insufficient free space. Free up space on the card by copying files to your personal computer and making backups, or by erasing files, or by formatting the card. |
 | Cannot Change Name | The file cannot be renamed because the file name contains double-byte characters. |
 | File Size Over 2 GB | The file contains too much data. |
 | SD Card Slow | Writing to the SD card could not be performed fast enough. Please use an SD card that is known to work with the R-26. In some cases, repeated writing and deleting of files may cause the files to become fragmented on the SD card, impairing the processing capability. If so, please reformat the SD card. |
 | SD Card Locked | The SD card is locked. Remove the SD card and turn off the Lock setting. |
 | SD Card Error | A problem occurred while accessing the SD card. The SD card might be damaged. |
 | Root Folder Full | The root folder is full. Erase files or move them to a different location. |
 | Folder is not empty | The folder already contains file(s). Try the procedure again after the files in the folder have been erased. |
 | No Card | No SD card is inserted. Insert an SD card into the R-26. |
 | HOLD is ON | The operation is not possible because the [HOLD] switch is on. Turn the [HOLD] switch off if you want to perform an operation. |
 | Now Recording | Currently recording. Stop recording if you want to perform an operation. |
 | Now Playing | Currently playing. Stop playback if you want to perform an operation. |
Troubleshooting
If you experience problems, refer to the information provided here.
If this information does not help you solve the problem, please contact a customer service location listed at the end of this manual.
Problems with Recording
| Problem Cause Page | ||
| Sound recorded from the mic is heard only from the L (left) channel | If you're using a monaural mic, only the L (left) channel will be recorded. If you use an external mic, check whether the mic is stereo or monaural. In order to record onto both channels using a monaural mic, use the "MIC TYPE" screen to set the external mic type to "MONO." | p. 41 |
| Can't start recording | Recording will not be possible if the SD card has less than 16 kilobytes of free space. Nor can you enter recording-standby mode. | p. 98 |
| Recording begins at a different point than when you started | If PRE-REC is on, the sound will be recorded starting two seconds before you press the [●] button. | p. 34 |
| Recording will start automatically when the unit detects input that is above a certain level, if the automatic recording start feature is on. | p. 35 | |
| Recorded sound is distorted | The sound will be distorted if the input level or the input sens is too high. Adjust the recording level appropriately. | p. 44 |
| Can't play back the recorded project | If you inadvertently disconnect the adaptor or remove the SD card during recording, the project will be damaged and cannot be played. In some cases you may be able to use the project Repair function to recover it. | p. 80 |
| Can't record | Recording is not possible if the SD card is not inserted correctly. Turn off the power, and re-insert the SD card. | p. 26 |
| If the SD card has not been formatted, it will not be recognized, and the display will indicate "SD Unformatted." Please format the SD card. | p. 27 | |
| The SD card will not work properly unless it was formatted on the R-26. If the card was formatted using a computer, it might have the wrong format. In this case, it might stop immediately after recording is started, or recording might not occur correctly. | p. 27 | |
| Recording is not possible if the SD card is write-protected (LOCK). Turn off write protection. | p. 28 | |
| Recording will not occur correctly if the recording level is too low. Set the recording level appropriately. | p. 44 | |
| Project was divided unexpectedly | The R-26 will automatically divide the project if the file currently being recorded exceeds a specified size, or if the recording level falls below a specified level. Set the Split Type setting to specify the file size or recording level at which the file is to be automatically divided. | p. 51 |
| The volume level of the instrument connected to ANALOG IN, PLUG IN is too low. | Could you be using a connection cable that contains a resistor? Use a connection cable that does not contain a resistor. | p. 15 |
| No sound received from condenser mic | In order for sound to be received from a condenser mic, phantom power must be turned on. Turn on phantom power. | p. 39 |
| No sound received from plug-in mic | In order for sound to be received from a plug-in mic, plug-in power must be turned on. Turn on plug-in power. | p. 42 |
| Cannot select MP3 as recording format | MP3 recordings are possible only when 2 CHANNEL is selected as the recording mode, and the sampling rate is set at 44.1 kHz or 48.0 kHz. | p. 34 |
Problems with Playback
| Problem Cause Page | ||
| No sound | You might not hear the sound if the output volume is too low. Try gradually increasing the output volume. | p. 62 |
| Make sure that your headphones or speakers are correctly connected. p. 29 | ||
| Can't play back | Make sure that the file name is assigned correctly. The R-26 cannot use files that have a name that begins with a “.” (period). | p. 73 |
| The R-26 can only play files with a file name extension of .MP3 or WAV. p. 67 | ||
| A damaged file cannot be played. You might be able to recover the file by using the Repair function. | p. 80 | |
| When using the unit as an audio interface, you won't be able to play projects that have a different sampling frequency than the sampling frequency that is set for the audio interface. | p. 89 | |
| Unintended files are played | The file Play Mode might be set to shuffle playback (SHUFFLE). If so, the R-26 will randomly select and play the next file. Change the setting back to conventional playback (SEQUENTIAL). | p. 62 |
| No sound heard with preview monitor | Sound won't be output while headphones are being used. p. 29 | |
| Could preview monitor be turned off in the SYSTEM SETUP?Turn preview monitor on. | p. 97 | |
| When the input device is set as the internal mics in Audio Interface Mode, sound will not be output. | p. 92 |
Other Problems
| Problem Cause Page | ||
| Power won’t turn on | Make sure that the AC adaptor is connected correctly. If you’re using batteries, make sure that they are oriented correctly, and not loose in the compartment. If the batteries have run low, install fresh batteries. | p. 20 |
| If the R-26’s power can’t be switched on even though there’s no problem with the AC adaptor or batteries, it may have malfunctioned. Please contact a customer service location listed on the warranty envelope. | - | |
| R-26 is not recognized when connected to computer | If no SD card is inserted in the R-26, it won’t be correctly recognized by the computer. If no icon appears on your computer’s desktop, make sure that the SD card is inserted correctly. | p. 26 |
| Display becomes dim | The display will be dimmed if no operation is performed during the specified Display Timer interval. | p. 97 |
| Power turns off unexpectedly | Depending on the Auto Off setting, power will turn off automatically if no operation is performed for a specified length of time. | p. 97 |
| Check to make sure that the setting for the end voltage (external) is appropriate.Check to make sure that the setting for the type of batteries (alkaline, nickel metal hydride) to be used is correct. | p. 20 | |
| If you're using batteries, power will turn off when the batteries run low.Please install fresh batteries. | p. 20 | |
| Your settings return to their original value | When you reset the R-26 to its factory settings, all settings made using the "MENU" screen or the like will return to their original values. Please make the desired settings again. | p. 95 |
| If the R-26's power is turned off without using its power switch (e.g., by a battery failure or disconnected AC adaptor), the settings you made will return to their original values. Please make the desired settings again. | - | |
| R-26 not recognized when connected to your computer via USB | The R-26 will not be recognized by your computer if you connect it when the "MENU" screen is displayed, or during playback or recording. Please disconnect the USB cable, and try again. | p. 84 |
| Project name display is slow when selecting a project | The display when selecting a file will be slower if the project is damaged, if the file is an invalid file or an unsupported type of MP3, or if the file is of a large size. This occurs because the R-26 needs to determine whether it is able to play the file. | p. 67 |
| Feedback occurs when monitoring through headphones | If you're monitoring the recording through open-air type headphones, acoustic feedback might occur if the R-26's mics pick up the sound from your headphones. The R-26's built-in mics are able to detect even faint sound, so keep your headphones away from the built-in mics. | p. 29 |
| Internal clock is reset | If the AC adaptor is connected or if batteries are installed, the internal clock will obtain its power from those sources. If several days pass with the batteries removed and the AC adaptor disconnected, the internal clock will return to its default setting. When you turn on the power in this state, the message "Clock Initialized" will appear. If this message appears, please reset the date and time. | p. 25 |
| Can't divide or combine projects | The SD card must have twice as much free space as occupied by the corresponding project(s). It is not possible to combine projects that would exceed 2 GB in size. | p. 74, p. 75 |
| Touch panel does not perform as expected | Carry out adjustment of the panel. p. 98 | |
| The message "batteries low" appears while AC adaptor is being used | Check to make sure that the setting for "EXT-POWER" is set to "ADAPTER." p. 23 | |
| Problems related to the audio interface | Please refer to the README for the driver, which can be found on the supplied SD card. | - |
Roland R-26: Portable Recorder
Recorder Part
| Tracks 6 (3 stereo) | ||||
| Signal Processing | AD/DA conversion: 24 bits96.0, 88.2, 48.0, 44.1 (kHz) | |||
| Data Type | For Recording | WAVE/BWF | Sampling Rate | 96.0, 88.2, 48.0, 44.1 (kHz) |
| Bit Depth 24, 16 (bits) | ||||
| MP3 (MPEG-1 Audio Layer 3) | Sampling Rate | 48.0, 44.1 (kHz) | ||
| Bit Rates 320, 160, 128 (kbps) | ||||
| WAVE + MP3 | Sampling Rate | 48.0, 44.1 (kHz) | ||
| Bit Depth 16 bits | ||||
| Bit Rates 128 kbps | ||||
| For Playback | WAVE/BWF | Sampling Rate | 96.0, 88.2, 48.0, 44.1 (kHz) | |
| Bit Depth 24, 16 (bits) | ||||
| MP3 (MPEG-1 Audio Layer 3) | Sampling Rate | 48.0, 44.1 (kHz) | ||
| Bit Rates | 32 - 320 kbps or VBR (Variable Bit Rate) | |||
| Memory Card SD Card (SDHC format compatible) | ||||
Recording Time (unit: hours)
| Data Format | Memory Size | |||||
| 2 GB 4 GB | 8 GB 16 GB | 32 GB | ||||
| WAVE/BWF | 16 bit, 44.1 kHz STEREO 3.0 6.1 | 12.2 24.5 48.9 | ||||
| 24 bit, 96.0 kHz STEREO 0.9 1.9 | 3.7 7.5 15.0 | |||||
| 16 bit, 44.1 kHz 4 CH 1.5 3.1 6.1 | 12.2 24.5 | |||||
| 24 bit, 96.0 kHz 4 CH 0.5 0.9 1.9 | 3.7 7.5 | |||||
| 16 bit, 44.1 kHz 6 CH 1.0 2.0 4.1 | 8.2 16.3 | |||||
| 24 bit, 96.0 kHz 6 CH 0.3 0.6 1.2 | 2.5 5.0 | |||||
| MP3 | 128 kbps 33 67 134 269 539 | |||||
| 320 kbps 13 27 53 107 215 | ||||||
| WAVE/BWF+MP3 | 16 bit+128 kbps 44.1 kHz 2.8 5.6 | 11.2 22.4 | 44.9 | |||
| 16 bit+128 kbps 48.0 kHz 2.5 5.2 | 10.4 20.7 | 41.5 | ||||
* Each recording time is approximate. The times may change depending on the card specifications.
* In case that there are plural files, the sum of recording time would be shorter than above.
Input/Output
| Audio Inputs | Internal Stereo Microphone | Omnidirectional (OMNI) mic | |
| Directional (XY) mic | |||
| Analog Input 1/L, 2/R (XLR/TRS Combo type) | XLR type (phantom powered) | ||
| 1/4-inch TRS phone type (balanced/unbalanced) | |||
| Plug-in powered mic Input Stereo miniature phone type | |||
| Audio Output Phones (Stereo miniature phone type) | |||
| Nominal Input Level (Variable)* Input Level Knob : Center* 0 dBu = 0.775 Vrms | Analog Input 1/L, 2/R | +4, -2, -8, -14, -20, -26, -32, -38, -44, -50, -56, -62 (dBu) | |
| Plug-in powered mic Input | LOW -7.5 dBu | ||
| MID -21 dBu | |||
| HIGH -26 dBu | |||
| Input Impedance | Analog Input 1/L, 2/R 5 k ohms | ||
| Plug-in powered mic Input | MID/HIGH 3 k ohms | ||
| LOW 2 k ohms | |||
| Maximum Input | Analog Input 1/L, 2/R +24 dBu (SENS = +4 dBu) | ||
| Plug-in powered mic Input +4 dBu (SENS = LOW) | |||
| Output Level | 35 mW + 35 mW (In case 16 ohms load) | ||
| Recommended Load Impedance | 16 ohms or greater | ||
| Frequency Response | 20 Hz - 40 kHz | ||
| Phantom Power | 48 V + or - 4 V10 mA or less in all channels | ||
| USB Interface | Mini-B type connectorUSB mass storage device classUSB audio (Hi-Speed USB) | ||
Others
| Display | 160 x 160 dot graphic display (touch panel) |
| Power Supply | AC adaptor (PSB-1U), Alkaline dry battery LR6 (AA) type x 4, Rechargeable Ni-MH battery (AA, HR6) X 4 |
| Current Draw | 500 mA |
| Dimensions | 82.0 (W) x 180.1 (D) x 41.1 (H) mm3-1/4 (W) x 7-1/8 (D) x 1-5/8 (H) inches |
| Weight | 0.37 kg / 14 oz (excluding batteries) |
| Accessories | Owner's manual, SD Card, AC Adaptor, Cakewalk SONAR LE DVD-ROM (for Windows), USB Cable (mini-B type),Windscreen |
| Options (sold separately) | Cover/Windscreen Set (OP-R26CW), Binaural Microphones/Earphones (CS-10EM), Stereo Microphone (CS-15S), Stereo Headphones (RH-300), Microphone Stand Adaptor (OP-MSA1), Microphone Stand (ST-100MB) |
In the interest of product improvement, the specifications and/or appearance of this unit are subject to change without prior notice.
Recording
![graph LR subgraph Input A["INPUT 1/L"] --> B["PHANTOM (XLR ONLY)"] C["INPUT 2/R"] --> D["PHANTOM (XLR ONLY)"] E["INT MIC XY-L"] --> F["INT MIC XY-R"] G["INT MIC OMNI-L"] --> H["INT MIC OMNI-R"] I["PLUG IN POWER"] --> J["PLUG IN MIC"] end subgraph SENSE B --> K["LEVEL"] D --> L["LEVEL"] F --> M["LEVE…](/content/2026/06/1275897/images/f64db6fc98e5711273ee0d853bcd787bd1de5b268f7b8d1c38565dff81249b34.jpg)
Playback
![graph LR A["1L 2L 3L1R 2R 3R"] --> B["MONITOR SW"] B --> C["DA"] C --> D["VOLUME"] D --> E["PHONES"] F["MONITOR LEVEL"] --> G["DA"] G --> H["VOLUME"] H --> I["PREVIEW MONITOR"] J["MONITOR SW"] --> K["DA"] K --> L["VOLUME"] L --> M["PREVIEW MONITOR"] N["MONITOR LEVEL"] --> O["DA"] O --> P["VOLUME"] P…](/content/2026/06/1275897/images/feb412801adc01a4ae5860e3ab214c8385e66ca8e28aa5f13502032d31da3b2a.jpg)
A
AB Repeat 66
A-B SPEED tab 17,66,67
AC adaptor 22
ANALOG IN 1/L jack.... 15,38
ANALOG IN 2/R jack.... 15,38
Audio Interface 89
AUTO MARK 50,95
Auto Off 24,97,103
AUTO START 35,95
B
BACKLIGHT 97
Batteries.... 20
Battery compartment 15,20
BWF format.... 36
C
Changing the Playback Speed.... 67
Combining Projects 75
CONTRAST.... 97
COPY 69,70
Creating a Folder.... 81
Creating an MP3 File 80
Cutting the low-frequency range 37
D
DATE & TIME 25,98
DC IN jack 14
Deleting Unwanted Portions of a Project.... 75
Directional (XY) mic.... 13
Direct Monitor 93
Dividing a Project 74
E
External Power Sources 23
F
FACTORY RESET 99
File Type.... 36
FILE TYPE 95
final voltage 23,97
Finder 68
G
Grounding Terminal.... 14
|
INFO tab.... 17
[INPUT 1] knob.... 13,45,48
[INPUT 2] knob.... 13,45,48
Input device 92,98
input level 45,47
input sensitivity.... 44, 46, 47
INPUT TYPE 38,96
Internal Mic Mode 42
L
LANGUAGE 98
limiter 36,96
Loop Back 94
low-cut filter 37,96
M
Marker.... 50,65
MARK tab.... 17
Mass storage.... 83
MAX FILE SIZE.... 51,95
[MENU] button.... 13
Menu screen.... 18
Monitor Settings 64
MON tab.... 17
MS mic 40
N
[NEXT] button 13
0
Omnidirectional (OMNI) mic.... 13
P
PEAK indicator.... 13
phantom power 39,96
PHONES jack.... 15
PLAY MODE.... 62, 63, 96
[PLAY/PAUSE] button.... 13
Plug-in Mic 41
PLUG IN MIC jack.... 15
PLUG-IN POWER 42,97
[POWER/HOLD] switch 14,24
PRE-REC 34,95
[PREV] button.... 13
Preview Monitor 97
Project File Structure 86
Project Naming Method.... 35
R
[REC] button 13
REC FORMAT.... 34,95
REC MODE.... 31,45
REC MONITOR 97
REC SOURCE 31,45,95
RENAME 69,72
Repairing a Project.... 80
REPEAT 63,96
S
Sampling Rate 33,90,95
SD Card.... 26,98
SD card slot.... 14
[SENS] button.... 13
[STOP] button.... 13
Strap attachment 14
T
Touch panel display.... 13
Tripod mounting socket.... 15
type of battery 21,97
U
USB.... 83
USB connector.... 14
USB driver 90
V
voice memo 69,77
[VOLUME] dial 14,62
Information
When you need repair service, call your nearest Roland Service Center or authorized Roland distributor in your country as shown below.
AFRICA
EGYPT
Al Fanny Trading Offi ce
9, EBN Hagar Al Askalany Street,
ARD E1 Golf, Heliopolis,
Cairo 11341, EGYPT
TEL:(022)-417-1828
REUNION
MARCEL FO-YAM Sarl
Royal Cape Park, Unit 24
Londonderry Road, Ottery 7800
Cape Town, SOUTH AFRICA
TEL:(021)7994900
ASIA
CHINA
Roland Shanghai Electronics
Co., Ltd.
5F. No.1500 Pingliang Road
Shanghai 200090, CHINA
TEL: (021) 5580-0800
Roland Shanghai Electronics
Co., Ltd. (BEIJING OFFICE)
3F, Soluxe Fortune Building
63 West Dawang Road, Chaoyang
District, Beijing, CHINA
TEL: (010) 5960-2565
HONG KONG
Tom Lee Music
11/F Silvercord Tower 1
30 Canton Rd
Tsimshatsui, Kowloon,
HONG KONG
TEL:852-2737-7688
Parsons Music Ltd.
8th Floor, Railway Plaza, 39
Chatham Road South, T.S.T,
Kowloon, HONG KONG
TEL: 852-2333-1863
INDIA
Rivera Digitec (India) Pvt. Ltd.
411, Nirman Kendra Mahalaxmi
Flats Compound Off. Dr. Edwin
Moses Road, Mumbai-400011,
INDIA
TEL (022) 2493 9051
INDONESIA
PT. Citra Intirama
Ruko Garden Shopping Arcade
Unit 8 CR, Podomoro City
Ji.Letjend. S.Parman Kav.28
Jakarta Barat 11470, INDONESIA TEL: (021) 5698-5519/5520
KAZAKHSTAN
Alatau Dybystary
141 Abylai-Khan ave, 1st floor,
050000 Almaty, KAZAKHSTAN
TEL:(727) 2725477
FAX: (727) 2720730
KOREA
Cosmos Corporation
1461-9, Seocho-Dong,
Seocho Ku, Seoul, KOREA
TEL: (02) 3486-8655
MALAYSIA
SINGAPORE
Roland Asia Pacific Sdn. Bhd.
45-1, Block C2, Jalan PJU 1/39,
Dataran Prima, 47301 Petaling
Jaya, Selangor, MALAYSIA
TEL:(03)7805-3263
PHILIPPINES
G.A. Yupangco & Co. Inc.
339 Gil J. Puyat Avenue
Makati, Metro Manila 1200,
PHILIPPINES
TEL: (02) 899 9801
OCEANIA
AUSTRALIA/
NEW ZEALAND
Roland Corporation
Australia Pty., Ltd.
38 Campbell Avenue
Dee Why West. NSW 2099,
AUSTRALIA
For Australia
TEL: (02) 9982 8266
For New Zealand
TEL: (09) 3098 71
CENTRAL/LATIN AMERICA
ARGENTINA
Instrumentos Musicales S.A.
Av.Santa Fe 2055
(1123) BUENOS ALRES, ARGENTINA TEL: (011) 4788-9788
TEL: (011) 4368-2768
BARBADOS
A&B Music Supplies LTD
12 Webster Industrial Park
Wildey, St. Michael, BARBADOS TEL: (216) 420-1100
TEL: (240) 430-1100
BRAZIL
Roland Brasil Ltda.
Rua San Jose, 211
Parque Industrial San Jose
Cotia - São Paulo - SP, BRAZIL TEL: (011) 1615 5366
TEL: (011) 4615 5666
CHILE
Comercial Fancy II S.A.
Rut.: 96.919.420-
Nataniel Cox #739, 4th Floor
Santiago - Centro, CHILE
TEL: (02) 384-2180
COLOMBIA
Centro Musical Ltda.
Cra 43 B No 25 A 41 Bododega 9
Medellin, COLOMBIA
TEL:(574)3812529
COSTA RICA
JUAN Bansbach Instrumentos
Musicales
Ave.1. Calle 11, Apartado 10237,
San Jose, COSTA RICA
TEL: 258-0211
CURACAO
Zeelandia Music Center Inc.
Orionweg 30
Curacao, Netherland Antilles
TEL:(305)5926866
DOMINICAN REPUBLIC
Instrumentos Fernando Giraldez
Calle Roberto Pastoriza #325
Sanchez Naco
Santo Domingo
DOMINICAN REPUBLIC
TEL:(809)683 0305
ECUADOR
Mas Musika
Boulevard Andrews, Albrook,
Panama City, REP. DE PANAMA
TEL: 315-0101
PARAGUAY
155, New National Road
Patras 26442, GREECE
TEL: 2610 435400
HUNGARY/ROMANIA
Roland East Europe Ltd.
E2 Calmount Park, Calmount
Avenue, Dublin 12
Republic of IRELAND
TEL: (01) 4294444
ITALY
Roland Italy S. p. A.
UK This symbol indicates that in EU countries, this product must be collected separately from household waste, as defined in each region. Products bearing this symbol must not be discarded together with household waste.
IMPORTANT: THE WIRES IN THIS MAINS LEAD ARE COLOURED IN ACCORDANCE WITH THE FOLLOWING CODE.
BLUE: NEUTRAL
BROWN: LIVE
As the colours of the wires in the mains lead of this apparatus may not correspond with the coloured markings identifying the terminals in your plug, proceed as follows:
The wire which is coloured BLUE must be connected to the terminal which is marked with the letter N or coloured BLACK. The wire which is coloured BROWN must be connected to the terminal which is marked with the letter L or coloured RED. Under no circumstances must either of the above wires be connected to the earth terminal of a three pin plug.
For the USA
DECLARATION OF CONFORMITY Compliance Information Statement
Model Name : R-26
Type of Equipment : Portable Recorder
Responsible Party : Roland Corporation U.S.
Address: 5100 S. Eastern Avenue, Los Angeles, CA 90040-2938
Telephone : (323) 890-3700
For EU Countries

This product complies with the requirements of EMC Directive 2004/108/EC.
For the USA-
FEDERAL COMMUNICATIONS COMMISSION RADIO FREQUENCY INTERFERENCE STATEMENT
This equipment has been tested and found to comply with the limits for a Class B digital device, pursuant to Part 15 of the FCC Rules. These limits are designed to provide reasonable protection against harmful interference in a residential installation. This equipment generates, uses, and can radiate radio frequency energy and, if not installed and used in accordance with the instructions, may cause harmful interference to radio communications. However, there is no guarantee that interference will not occur in a particular installation. If this equipment does cause harmful interference to radio or television reception, which can be determined by turning the equipment off and on, the user is encouraged to try to correct the interference by one or more of the following measures:
– Reorient or relocate the receiving antenna.
– Increase the separation between the equipment and receiver.
- Connect the equipment into an outlet on a circuit different from that to which the receiver is connected.
– Consult the dealer or an experienced radio/TV technician for help.
This device complies with Part 15 of the FCC Rules. Operation is subject to the following two conditions:
(1) this device may not cause harmful interference, and
(2) this device must accept any interference received, including interference that may cause undesired operation.
This equipment requires shielded interface cables in order to meet FCC class B limit.
Any unauthorized changes or modifications not expressly approved by the party responsible for compliance could void the user's authority to operate the equipment.
For Canada
NOTICE
This Class B digital apparatus meets all requirements of the Canadian Interference-Causing Equipment Regulations.
AVIS
This product contains chemicals known to cause cancer, birth defects and other reproductive harm, including lead.
Roland

- INSTRUCTIONS FOR THE PREVENTION OF FIRE, ELECTRIC SHOCK, OR INJURY TO PERSONS
- ALWAYS OBSERVE THE FOLLOWING
- WARNING
- TO COMPLETELY TURN OFF POWER TO THE UNIT, PULL OUT THE PLUG FROM THE OUTLET
- CAUTION
- POWER SUPPLY
- POWER SUPPLY: USE OF BATTERIES
- PLACEMENT
- MAINTENANCE
- REPAIRS AND DATA
- ADDITIONAL PRECAUTIONS
- HANDLING EXTERNAL MEMORIES
- HANDLING CDS / DVDS
- COPYRIGHT
- WHAT YOU CAN DO WITH THE R-26
- RECORD ACOUSTIC INSTRUMENTS
- REFERENCE
- RECORD A BAND
- RECORD OUTDOORS
- RECORD CONCERTS
- OVERVIEW OF THE R-26
- PANEL DESCRIPTIONS
- 1 OMNIDIRECTIONAL (OMNI) MIC
- 2 DIRECTIONAL (XY) MIC
- 3 TOUCH PANEL DISPLAY
- 4 PEAK INDICATOR
- 5 [INPUT 1] KNOB
- 6 [INPUT 2] KNOB
- 7 [SENS] BUTTON
- 8 [PREV] BUTTON
- 9 [NEXT] BUTTON
- 10 [MENU] BUTTON
- 11 [STOP] BUTTON
- 12 [PLAY/PAUSE] BUTTON
- 13 [REC] BUTTON
- 14 SD CARD SLOT
- 15 USB CONNECTOR
- 16 [POWER/HOLD] SWITCH
- 17 DC IN JACK
- 18 GROUNDING TERMINAL
- 19 STRAP ATTACHMENT
- 20 [VOLUME] DIAL
- 21 PHONES JACK
- 22 PREVIEW MONITOR
- 23 PLUG IN MIC JACK
- 24 ANALOG IN 1/L JACK, ANALOG IN 2/R JACK
- 25 BATTERY COMPARTMENT
- 26 TRIPOD MOUNTING SOCKET
- ITEMS IN THE SCREEN
- MAIN SCREEN
- PLAYING / STOPPED
- RECORDING
- TABS IN THE MAIN SCREEN
- INFO TAB
- MON TAB
- A-B SPEED TAB (ONLY DURING PLAYBACK)
- MENU SCREEN
- PREPARING THE POWER SUPPLY
- INSTALLING BATTERIES
- NOTE WHEN USING THE R-26 ON BATTERIES
- TYPES OF BATTERIES THAT CAN BE USED
- POWER CONSERVATION FUNCTION
- REMAINING BATTERY INDICATION
- EXPECTED BATTERY LIFE UNDER CONTINUOUS USE
- CONNECTING THE AC ADAPTOR
- USING EXTERNAL POWER SOURCES
- MEMO
- SETTING THE FINAL VOLTAGE
- SETTING
- TURNING THE POWER ON/OFF
- SETTING THE DATE AND TIME
- CHOOSE [MENU] →
- SPECIFY THE DATE AND TIME
- WHEN YOU'VE FINISHED SETTING ALL ITEMS, TOUCH
- TOUCH TO RETURN TO THE MAIN SCREEN (P. 16)
- PREPARING AN SD CARD
- INSERTING AN SD CARD
- NOTE
- REMOVING AN SD CARD
- FORMATTING AN SD CARD
- ABOUT SD CARDS
- THE SD CARD WRITE PROTECT FEATURE (LOCK)
- ABOUT THE DEMO SONGS
- CONNECTING HEADPHONES OR SPEAKERS
- WHEN USING SPEAKERS
- WORK FLOW FOR RECORDING
- SELECT THE REC MODE
- SELECT THE REC SOURCE
- SET THE SAMPLE RATE
- SELECT THE PROJECT'S FORMAT
- MAKE SETTINGS FOR THE INPUT
- ADJUST THE INPUT SENSITIVITY AND INPUT LEVEL
- START RECORDING
- STOP RECORDING
- PLAY BACK THE PROJECT YOU'VE RECORDED
- RECORDING SETTINGS
- SELECTING THE REC MODE
- SELECTING THE REC SOURCE
- REC SOURCE CHOICES FOR EACH REC MODE
- REC MODE: 1 CHANNEL
- REC MODE: 2 CHANNEL
- REC MODE: 4 CHANNEL
- REC MODE: 6 CHANNEL
- SETTING THE SAMPLING RATE
- SETTING THE RECORDING FORMAT
- REC FORMAT
- PRE-RECORDING SETTINGS
- CHOOSING THE PROJECT NAMING METHOD
- USING THE AUTO START FUNCTION
- SETTING THE FILE TYPE
- INPUT SETTINGS
- INTERNAL MIC SETTINGS
- USING THE LIMITER
- TOUCH
- TOUCH TWICE TO RETURN TO THE MAIN SCREEN (P. 16)
- CUTTING THE LOW-FREQUENCY RANGE
- CHOOSE [MENU]→→
- TIPS
- ANALOG IN SETTINGS
- SETTING THE INPUT TYPE
- SELECT THE TYPE
- TOUCH TWICE TO RETURN TO THE MENU SCREEN (P. 18)
- SUPPLYING PHANTOM POWER
- MS MIC SETTINGS
- PLUG-IN MIC SETTINGS
- SUPPLYING POWER TO THE MIC
- SETTING THE RECORDING LEVEL AND MIC DIRECTIONALITY
- SELECTING THE INTERNAL MIC MODE
- ADJUSTING THE MIX BALANCE IN MANUAL MODE
- SETTING THE INPUT SENSITIVITY AND INPUT LEVEL
- ADJUSTING THE INPUT SENSITIVITY
- SETTING THE INPUT LEVEL
- HOW INPUT SENSITIVITY AND INPUT LEVEL ARE RELATED
- SETTING AN INPUT LEVEL USING THE TOUCH PANEL
- AUTOMATICALLY SETTING THE SENSITIVITY AND INDICATE THE OPTIMAL INPUT LEVEL
- BASIC OPERATION FOR RECORDING AND PLAYBACK
- PRESS THE [REC] BUTTON ONCE AGAIN
- PRESS THE [STOP] BUTTON TO STOP RECORDING
- ASSIGNING A MARKER DURING RECORDING
- MANUAL MARKING
- SPECIFYING THE INTERVAL OR LEVEL FOR AUTOMATIC MARKING
- SPLITTING THE PROJECT DURING RECORDING
- SPLITTING MANUALLY
- SPECIFYING THE PROJECT SIZE FOR AUTOMATIC SPLITTING
- USING THE R-26
- RECORDING AN ACOUSTIC INSTRUMENT
- RECORDING VOCALS, ACOUSTIC GUITAR, OR WIND INSTRUMENTS
- USING THE INTERNAL MICS
- USING EXTERNAL MICS
- COMBINING INTERNAL MICS AND EXTERNAL MICS
- RECORDING A GRAND PIANO
- RECORDING A BAND
- RECORDING OUTDOORS
- USING PLUG-IN POWER STEREO MICS
- SIX-CHANNEL RECORDING
- RECORDING A CONCERT
- BASIC PLAYBACK OPERATION
- SELECTING THE PLAYBACK MODE
- REPEAT PLAYBACK
- COMBINATION OF PLAY MODE AND REPEAT
- PROJECT SORTING ORDER
- MONITOR SETTINGS
- TURNING A CHANNEL ON/OFF
- ADJUSTING A CHANNEL'S VOLUME
- ASSIGNING MARKERS IN A PROJECT
- MOVING TO A MARKER
- DELETING A MARKER
- REPEATEDLY PLAYING A PORTION OF A PROJECT
- CANCELLING THE SETTING
- CHANGING THE PLAYBACK SPEED
- IN THE MAIN SCREEN, TOUCH THE A-B SPEED TAB
- TOUCH ☐ TO SELECT THE PLAYBACK SPEED
- TYPES OF FILES THAT CAN BE PLAYED
- WHAT IS VBR
- MANAGING PROJECTS AND FOLDERS
- BASIC OPERATION IN THE FINDER
- PROJECT OPERATIONS
- FOLDER OPERATIONS
- LIST OF FINDER OPERATIONS
- OPENING A PROJECT
- COPYING A PROJECT
- MOVING A PROJECT
- DELETING A PROJECT OR A FOLDER
- RENAMING A PROJECT OR A FOLDER
- TOUCH THE LETTER KEYS TO ENTER CHARACTERS
- CHARACTERS THAT CAN BE USED
- DIVIDING, COMBINING, OR TRIMMING A PROJECT
- DIVIDING A PROJECT
- COMBINING PROJECTS
- DELETING UNWANTED PORTIONS OF A PROJECT (TRIM)
- VIEWING INFORMATION ABOUT THE PROJECT
- PROTECTING A PROJECT (PROTECT)
- ADDING/DELETING A VOICE MEMO TO A PROJECT
- ADDING A VOICE MEMO
- WHEN YOU'VE FINISHED RECORDING THE MEMO, TOUCH
- TOUCH PLAY BACK THE MEMO
- DELETING A VOICE MEMO
- CREATING AN MP3 FILE
- REPAIRING A PROJECT
- CREATING A FOLDER
- CREATING A FOLDER AT THE ROOT LEVEL
- CREATING A FOLDER WITHIN A FOLDER
- CONNECTING TO YOUR COMPUTER VIA USB
- MASS STORAGE
- AUDIO INTERFACE
- SELECTING THE USB CONNECTION MODE
- TOUCH THE DESIRED MODE
- EXCHANGING FILES WITH YOUR COMPUTER (STORAGE)
- CONNECTING THE R-26 TO YOUR COMPUTER
- SELECT THE MODE (ONLY IF YOU'VE CHOSEN "SELECTABLE")
- PROJECT FILE STRUCTURE
- DISCONNECTING FROM YOUR COMPUTER
- WINDOWS 7
- WINDOWS VISTA/WINDOWS XP
- MAC OS
- DRAG "NO NAME" INTO THE TRASH IN THE DOCK
- STOP THE CONNECTION
- USING THE R-26 AS AN AUDIO INTERFACE
- MAIN SCREEN FOR AUDIO INTERFACE MODE
- AUDIO INTERFACE BLOCK DIAGRAM
- INSTALLING THE USB DRIVER
- INSTALL THE USB DRIVER IN YOUR COMPUTER
- SPECIFYING THE SAMPLING RATE
- TOUCH THE DESIRED SAMPLING RATE
- SPECIFYING THE INPUT DEVICE
- SIMULTANEOUS RECORDING ON THE R-26 ITSELF
- USING DIRECT MONITOR
- LISTENING TO THE COMPUTER'S PLAYBACK THROUGH THE R-26
- RECORDING THE PLAYBACK ON THE R-26 ITSELF
- USING LOOP BACK
- SETTINGS FOR THE R-26
- RESTORING THE R-26 TO ITS FACTORY-SET STATE (FACTORY RES
- TROUBLESHOOTING
- ROLAND R-26: PORTABLE RECORDER
- A
- B
- C
- D
- E
- F
- G
- L
- M
- N
- 0
- P
- R
- S
- T
- U
- V
- INFORMATION
- AFRICA
- EGYPT
- REUNION
- ASIA
- CHINA
- HONG KONG
- INDIA
- INDONESIA
- KAZAKHSTAN
- KOREA
- MALAYSIA
- SINGAPORE
- PHILIPPINES
- OCEANIA
- AUSTRALIA
- NEW ZEALAND
- CENTRAL/LATIN AMERICA
- ARGENTINA
- BARBADOS
- BRAZIL
- CHILE
- COLOMBIA
- COSTA RICA
- CURACAO
- DOMINICAN REPUBLIC
- ECUADOR
- PARAGUAY
- HUNGARY/ROMANIA
- ITALY
- DECLARATION OF CONFORMITY COMPLIANCE INFORMATION STATEMENT
- FEDERAL COMMUNICATIONS COMMISSION RADIO FREQUENCY INTERFERENCE STATEMENT
- NOTICE
- AVIS
- ROLAND
Brand : ROLAND
Model : R-26
Category : Audio recorder