
Docpad 10c A - Tablet Baaske Medical - Free user manual and instructions
Find the device manual for free Docpad 10c A Baaske Medical in PDF.


| Product Type | Medical Tablet |
| Brand | Baaske Medical |
| Model | Docpad 10c A |
| Display Size | 10.1 inches |
| Display Resolution | 1920 x 1080 pixels |
| Processor | Quad-core 1.8 GHz |
| Operating System | Android 10 or later |
| RAM | 4 GB |
| Storage | 64 GB |
| Battery Capacity | 6000 mAh |
| Power Adapter | DC 5V/2A |
| Weight | Approx. 600 g |
| Dimensions (W x H x D) | 260 x 175 x 12 mm |
| Connectivity | Wi-Fi 802.11 a/b/g/n/ac, Bluetooth 5.0 |
| Ports | USB-C, 3.5mm audio, microSD slot |
| Camera | Rear 8 MP, Front 5 MP |
| Certifications | CE, FCC, IP65 (dust/water resistant) |
| Cleaning | Disinfect with 70% isopropyl alcohol wipes |
| Safety | Medical-grade housing, drop-proof up to 1.2 m |
| Repairability | Replaceable battery, modular design |
Frequently Asked Questions - Docpad 10c A Baaske Medical
User questions about Docpad 10c A Baaske Medical
0 question about this device. Answer the ones you know or ask your own.
Ask a new question about this device
Download the instructions for your Tablet in PDF format for free! Find your manual Docpad 10c A - Baaske Medical and take your electronic device back in hand. On this page are published all the documents necessary for the use of your device. Docpad 10c A by Baaske Medical.
USER MANUAL Docpad 10c A Baaske Medical
Baaske Medical Docpad™ 10c W
Contact
For questions related to this product contact:
© 2016 Baaske Medical GmbH & Co.KG. All rights reserved.
Information in this document has been carefully checked for accuracy; however, no guarantee is given to the correctness of the contents. Photographs and schematic diagrams used in this document are for illustration purposes only. The actual product may vary. This document contains proprietary information protected by copyright. No part of this manual may be reproduced by any mechanical, electronic, or other means, in any form, without prior written permission of Baaske Medical.
This document is subject to change without notice.
Warnings and Compliance

Note:
This symbol cautions the user that important information regarding the operation and / or maintenance of this equipment has been included. Information preceded by this symbol should be read carefully to avoid damage to the equipment.

Safety Compliance:
This product meets the requirements of EN60601-1-2.

Safety Compliance power supply:
The power supply of this product is TÜV approved with respect to and in according with the EN 60601-1 and IEC 60601-1.

Recycling:
Follow local governing ordinances and recycling plans regarding the recycling or disposal of this equipment.
Content
1. Getting to know your computer 6
Package contents 6
LayoutViews 7
Front 7
Left 8
Back and Bottom 9
Docking keyboard.... 10
Function keys 11
Docking and undocking 12
Docking into the keyboard 12
Undocking from the keyboard 12
Installing your macro lens 13
2. Using your computer 14
Powering ON/OFF 14
Powering on your computer 14
Powering on for the first time.... 14
Powering off your computer 15
Putting your computer into sleep mode 16
Waking up your computer 16
Basic touchpad operations 17
Basic touchscreen operations 18
3. Windows Interface 20
Desktop and virtual desktop experience 20
Taskbar 21
Start menu 21
Search box - Cortana 22
App shortcuts area 23
Notification area 23
Content
4. Setup and Connection 24
Settings screen 24
Windows Activation 25
Setup Your Microsoft Account 25
Replacing Desktop with Start screen 26
Pin and unpin your app 27
Pinning an App to Start menu or taskbar 27
Removing an App 27
Wireless LAN 28
Enabling wireless connection 28
Connecting to a wireless LAN 29
Micro SD Card Slot 30
To insert your micro SD card 30
To remove your memory card 31
Connecting an External Device 31
Connecting to the USB port 31
Connecting to the HDMI port 32
5. Battery 33
Charging your battery.... 33
Inspecting your battery status 34
6. Windows Help and Troubleshooting 36
Troubleshooting 36
7. Specification 39
1. Getting to know your computer
Package contents
Carefully unpack your box and take out the items listed as below. If any of the items is missing or damaged, contact your dealer immediately:
| One tablet with a stylus One docking keyboard | |
 |  |
| One power supply One power cable | |
 | 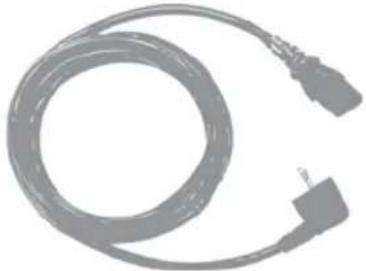 |
| One macro lens This manual | |
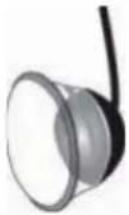 |  |
1. Getting to know your computer
LayoutViews_Front

| No Name | Function | |
| 1 | Front facing camera used | of taking self-portraits as well as for video conferencing. |
| 2 | Power button | Press it to power on/off your Tablet. |
| 3 Microphone Mainly for sound and speech recording | ||
| 4 Touchscreen The main display and also a see-touch device.You can look at it and touch it with your fingers to control the system | ||
| 5 Stylus holder Allows you to rest your stylus. | ||
| 6 Stylus Use it on the touchscreen to write on orcontrol the system. | ||
1. Getting to know your computer
LayoutViews_Left
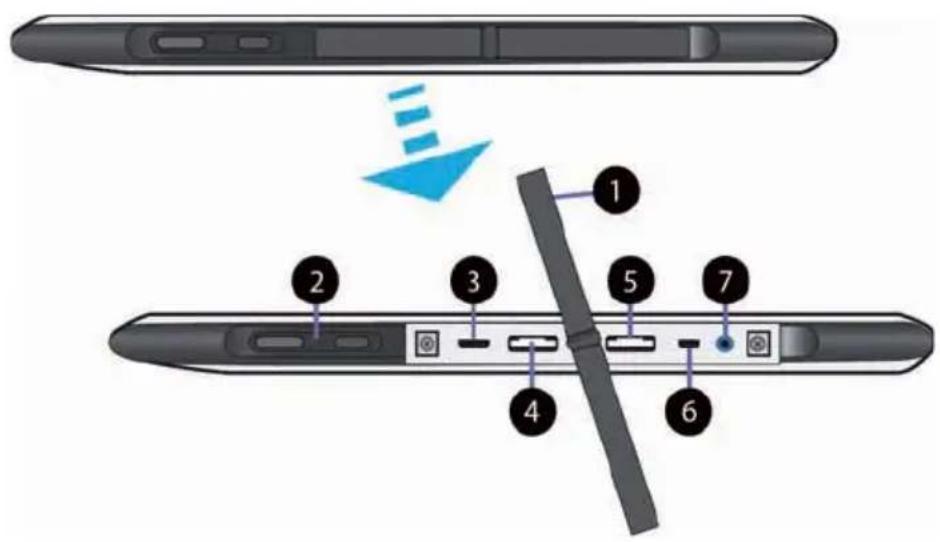
| No Name | Function | |
| 1 Rubber cover Protect the I/O interfaces and ports. | ||
| 2 | Volume up/down | Push the buttons to adjust the sound volume of your system. |
| 3 Micro USB DC IN / | Micro USB port, OTG | Allows you to plug your USB devices. And plug the provided adapter to charge the system battery. |
| 4 Micro SD card slot | Plug your micro SD card here | |
| 5 Micro SIM card slot | Plug your micro SIM card here to access data through your mobile network. | |
| 6 Micro HDMI port | Plug your HDMI-capable monitor here. | |
| 7 Headphone jack | Plug your 3.5 mm headphone here. | |
1. Getting to know your computer
LayoutViews_Back and Bottom
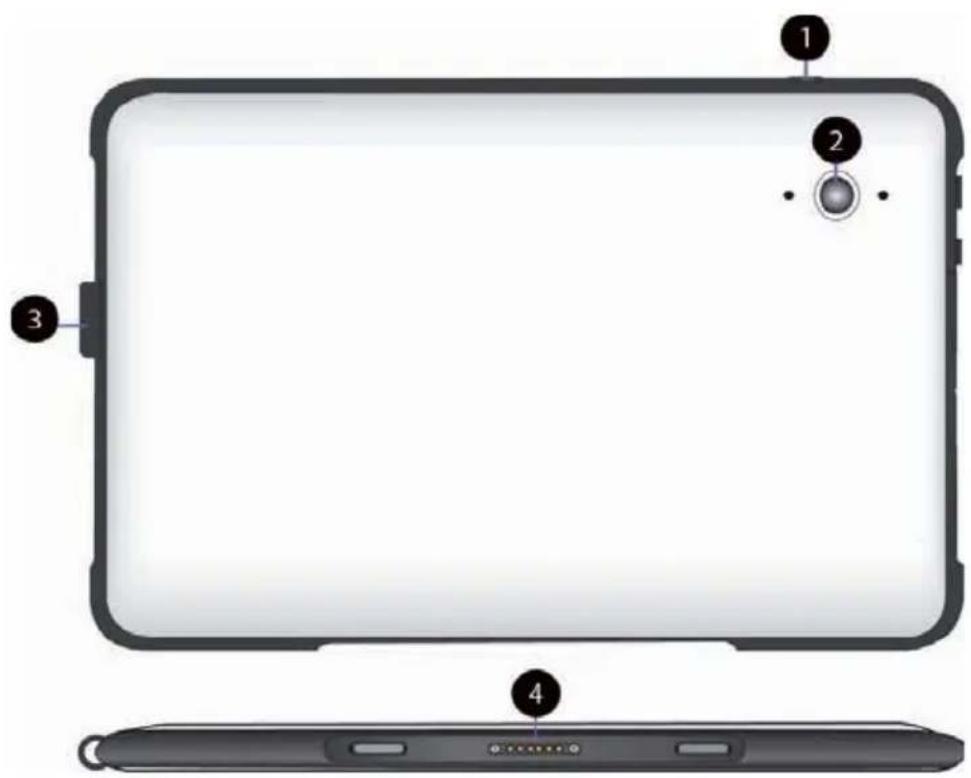
| No Name | Function | |
| 1 | Power button | Press it to power on/off your Tablet. |
| 2 Rear facing camera | a Mainly used when you | are taking photos or recording videos. |
| 3 Stylus holder Rest | the stylus here. | |
| 4 Docking connector | The connector to the keyboard dock. | |
1. Getting to know your computer
LayoutViews_Docking keyboard
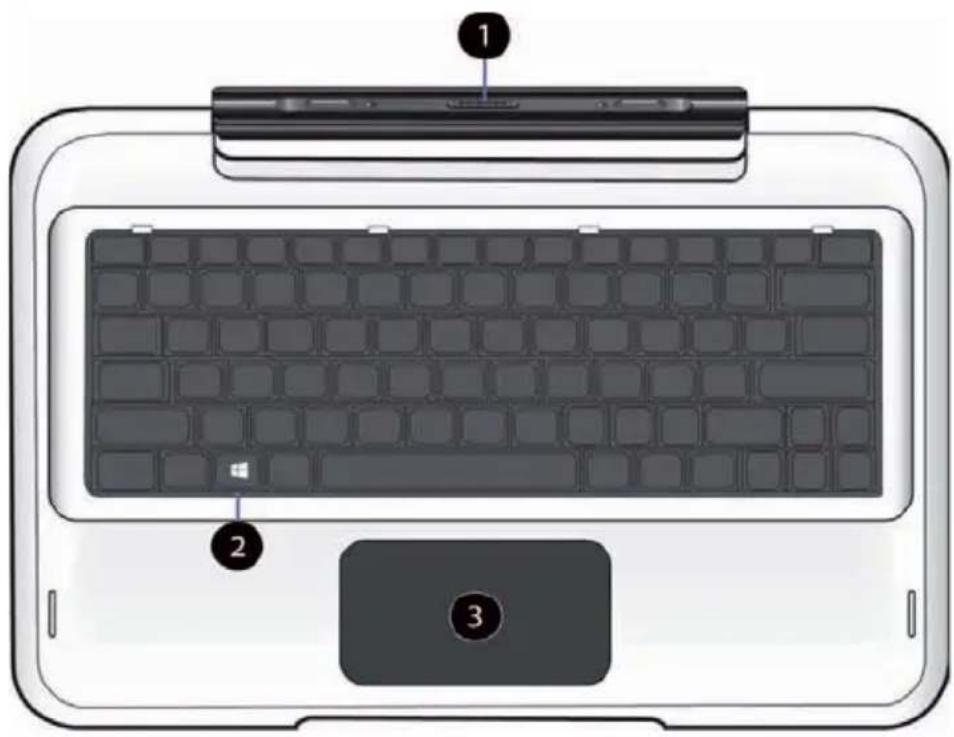
| No Name | Function | |
| 1 Docking connector | Dock your tablet here and then use it like a laptop. | |
| 2 Windows key Press | here to open the Start menu. | |
| 3 Touchpad You can | use it as you are using a traditional mouse. | |
1. Getting to know your computer
LayoutViews_Function Keys

Press one of the following key to perform your desired function. For example, if you want to mute or unmute your system, just press F1 key.
 | Mute or unmute your system. Inc |  | display brightness. |
| _GWYY] | Decreases the volume level. |  | Opens the Settings screen. |
 | Increases the volume level Play or |  | |
 | Switches display output between your display, external monitor (if connected) and both. |  | Push here to talk to Cortana, if available. |
 | Decreases the display brightness | Note: If your software uses some | |

Note: If your software uses some of the function keys to perform dedicated functions, you can perform the function by pressing "Fn" plus the desired function key.
1. Getting to know your computer
Docking and undocking
Before docking into or undocking from the keyboard
Make sure you have safely disconnected any USB device connected to the USB port on the tablet. Please refer to the device's manual on how to do so.
Before trying to undock your tablet, please turn off your tablet and then waiting at least 10 seconds.
Docking into the keyboard
- Hold your tablet with the button side facing the dock.
- Gently press and insert the tablet into the docking connector on the dock.
- When you hear a click sound, it means the tablet is successfully docked.
Undocking from the keyboard
- Tur n off your tablet.
- Set your tablet laptop on a stable surface.
- Hold the screen and detach the tablet by pulling it upward.
!
Note: The tablet connector on the dock will be locked at the position where you undock your tablet. Do not try to turn the connector, or you might break it. It can be unlocked only by docking your tablet.

1. Getting to know your computer
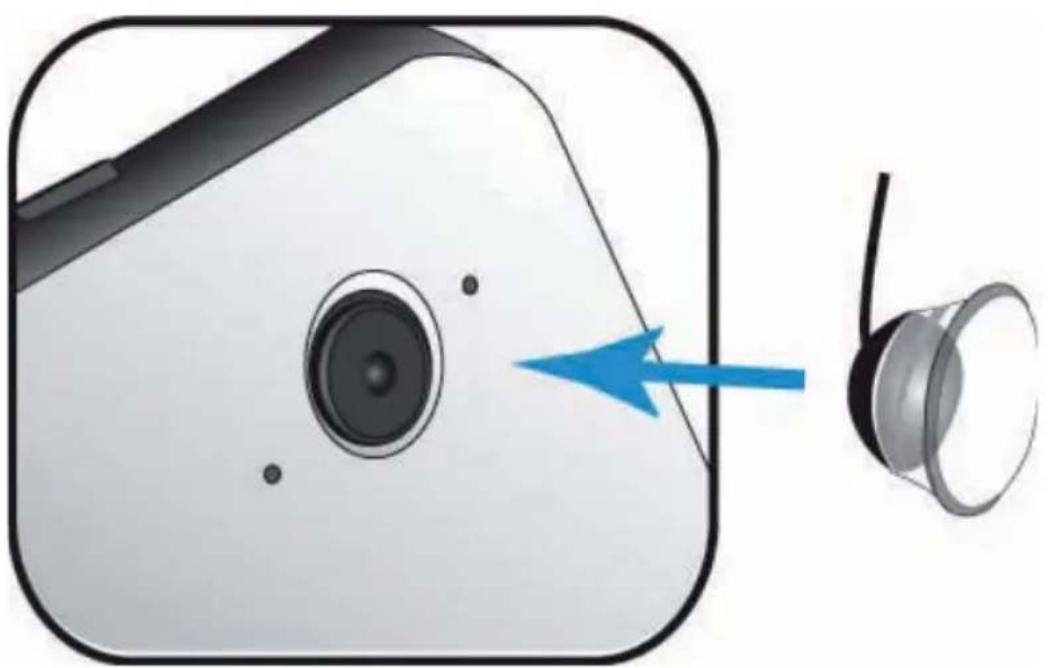
Installing your macro lens
With a few steps, you can turn your tablet into a microscope.
- Genly press the macro lens over the rear-facing camera. Make sure the bottom of the lens is fitted into the outer rim of the camera.
- Acti vate any camera app in your tablet.
- G compress the lens on the object or tissue you want to observe.
2. Using your computer
Powering ON/OFF_Powering on your computer
- If this is the first time you turn this computer on, connect the AC adapter and fully charge the battery.
- Press the power button (normally 1 to 2 seconds). You shall see the display turned on.

Powering ON/OFF_Powering on for the first time
The tablet will require you to do the initial setup, which including:
• Activate your Windows 10
• Sign in to or create your Microsoft account
- Setup a wireless connection and more
Please follow the instruction to complete the initial setup.
2. Using your computer
Powering ON/OFF_Powering off your computer
Save all your data before powering your computer off. To power off your system, following the steps below:
A. By Start menu
- Click the Windows icon in the low-left corner of the Desktop. Or, press on the Windows key in the keyboard.
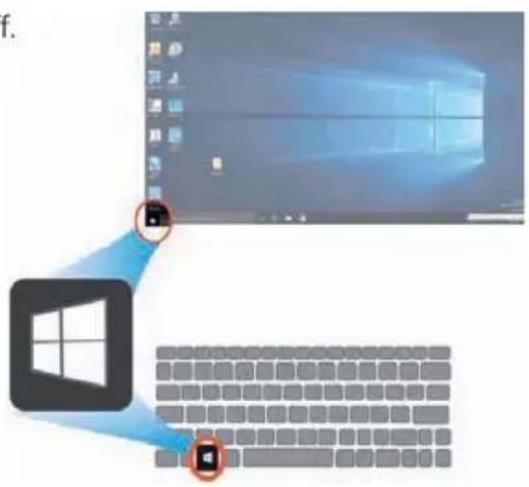
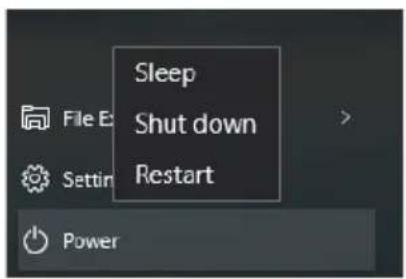
- In the Start menu,
click
option, as shown on the right.

- Select
from the power option menu, as shown on the right.
2. Using your computer
Powering ON/OFF_Putting your computer into sleep mode
When you will be away from your computer for a short time, put the computer to sleep. Do one of the following:
- Close the display panel
- Press the power button briefly one time.
- Open the Start menu and then select
→ .
Powering ON/OFF_Waking up your computer
Note: It is recommended that you put your computer to sleep before you move it. Moving your computer while the hard disk is spinning can sometimes damage the hard disk, causing loss of data.
Do one of the following:
A: Pressing the power button briefly one time.
B: Pressing any key on the keyboard, tapping the touchpad, or opening the display panel.
2. Using your computer
Basic touchpad operations
The touchpad works like a traditional mouse. With it, you can move the cursor and perform left-click, right-click, double-click actions. However, the actual available actions are application dependent.
| Action name Explanation | |
| Left-clicking (or Clicking) Tap once on the touchpad surface or pressonce on the low-left corner of the touch-pad. | |
| Right-clicking Press once on the low-right corner of thetouchpad. | |
| Dragging | Press and continue to hold down the leftcorner and then move (drag) your fingeracross the touchpad surface. |
Vertical scrolling | Drag two fingers vertically on the touchpad. |
Horizontal scrolling | Drag two fingers horizontally on thetouchpad. |
2. Using your computer2. Using your computer
Basic touchscreen operations
Your tablet is ideal for you to use your fingers or the stylus pen to perform many actions on it.
- Don't use sharp objects to touch the screen. Or, the screen may be damaged or scratched.
- Don't touch the touchscreen with a conductive material. It may cause a malfunction.
• The supporting functions are application dependent.
| Gesture name | Explanation | |
| Tap |  | Touch once on an item to start an app, open a link, or perform an optional function. This is similar to a left-click with a mouse. |
| Double-ta| |  | Slightly press twice with your finger to select an item. |
| Press and hold | 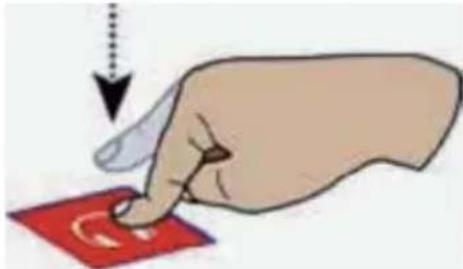 | Press and leave your finger on an item. This brings up detailed information or opens a menu with more options for the item. This is similar to a right-click with a mouse. |
2. Using your computer
| Gesture name Explanation | |
Pinch | Move two fingers together or apart while touching the screen. This is to zoom in and out on visual apps, such as pictures and maps. |
Rotate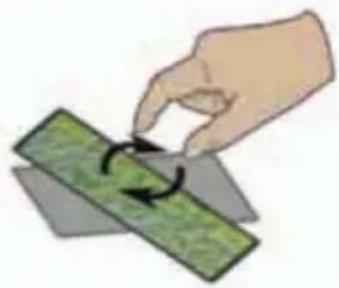 | Place two or more fingers on an item and then turn your hand. This enables you to turn an object.Note: Not all items can be rota-ted, depending upon the app. |
Slide | Drag your finger across the screen. This can scroll through lists and pages, and can also move an object or be used to draw or write, depending upon your apps. |
Note: Not all items can be rotated, depending upon the app.
3. Windows Interface
Desktop and virtual desktop experience
The Desktop screen is as shown below and natively provides virtual desktop feature.


To launch the feature you can click the app icon as shown on the left or just press Window key and TAB key of your keyboard in the same time.

3. Windows Interface
Taskbar
The black bar on the bottom of the desktop is called Taskbar. It provides several key features and they are:
- Start menu
- Search box
- App shortcuts area
- Notification area
Taskbar_Start Menu

To open the Start menu, you can either click on the windows icon (which is also known as Start button) located at the left end of the taskbar or press once on the windows key of the keyboard. And the Start menu will appear, as shown below

3. Windows Interface
Taskbar_Search box – Cortana
Next to the Start menu is the search box, as shown below.
Search the web and Windows
When you select this box, a window will pop out as shown below.

This is the Cortana icon. Cortana is a new virtual assistant built into your Windows 10. Click here to finish the setup and you can control Cortana with either keyboard or voice commands, and use it to perform intelligent searches and more.
After you setup the Cortana settings, the search box will look like

3. Windows Interface
Taskbar_App shortcuts area
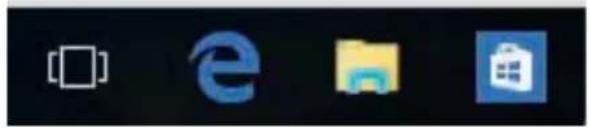
In this area, you can put the shortcuts of your frequently used apps. For how to arrange this area, please refer to p. 25.
Taskbar_Notification area
The right part of the taskbar holds several icons that show you the status of your tablet, as shown below.
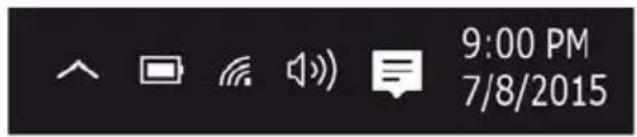
This is an area called Notification Area, where
 | Click here to show more hidden status icons. |
 | Shows you the current battery status.(For detail, please refer to page 32) |
 | Shows you the status of your wireless network connection. |
 | Click here to show the system notifications and several shortcuts. |
4. Setup and Connection
Setting screen
To access to the Settings screen:
- Clithe Windows icon in the low-left corner of the Desktop. Or, press on the Windows key in the keyboard.
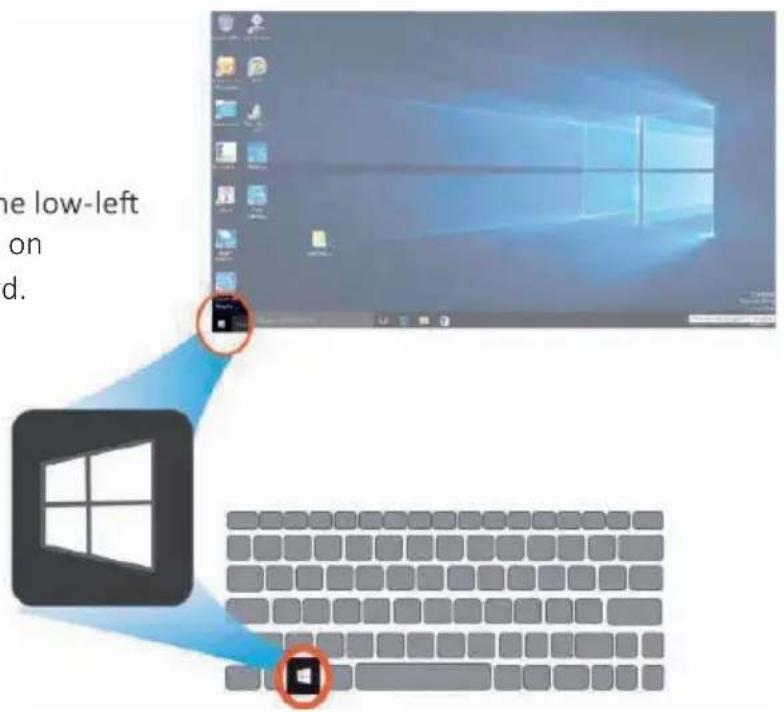
- Selt
.
This ill open the Settings screen, as shown below.
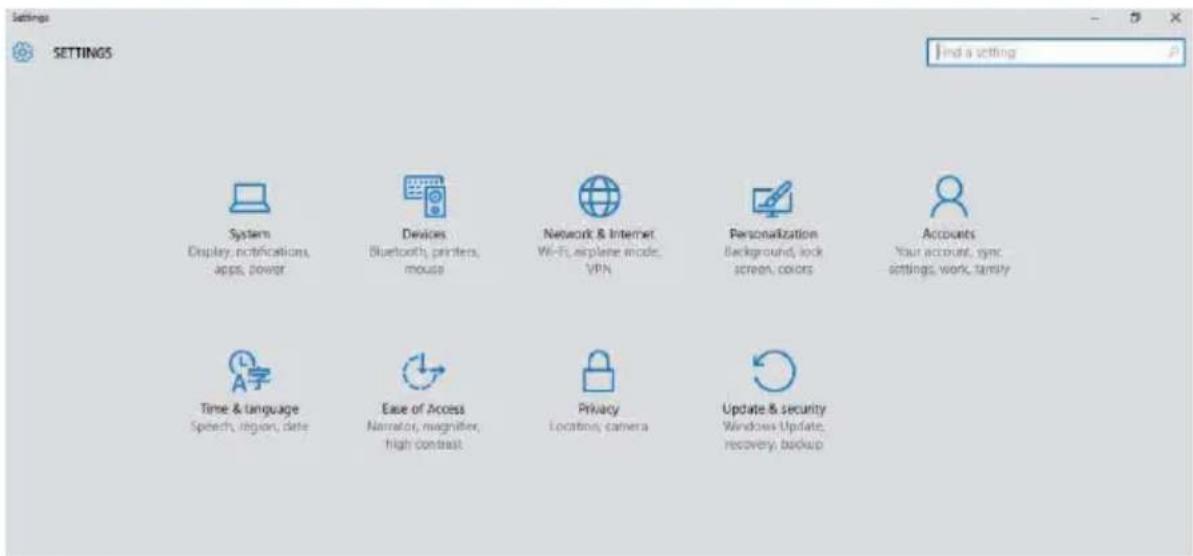
4. Setup and Connection
Windows Activation
To use all features of your Windows tablet, you may need to activate your Windows system. Follow the following steps to register and activate your Windows.
- Op the Start menu and click
. - Click
- Selt
. - How the instructions to activate your windows.

Update & security
Windows Update, recovery, backup
Setup Your Microsoft Account
To share files or settings with other devices running Windows 10, you need to setup a Microsoft Account. Furthermore, if you want to download or purchase apps from the Microsoft Store, such Microsoft Account is required.
To setup your Microsoft account
- Op the Settings screen and select
. - Select
- Selt
. - Fow the instruction to register your account information.

Accounts
Your account, sync settings, work, family
4. Setup and Connection
Replacing Desktop with Start screen
If you are more familiar with the interface similar to the Start screen introduced in Windows 8 series, you can set your tablet to show the Start screen instead of the Desktop every time when you power on your tablet. To do so, do the following steps:
- Op the Settings screen.
- Selt
. - The Personalization screen, enable the option
After these steps, you will see the Start screen every time you turn on your tablet, as shown below.

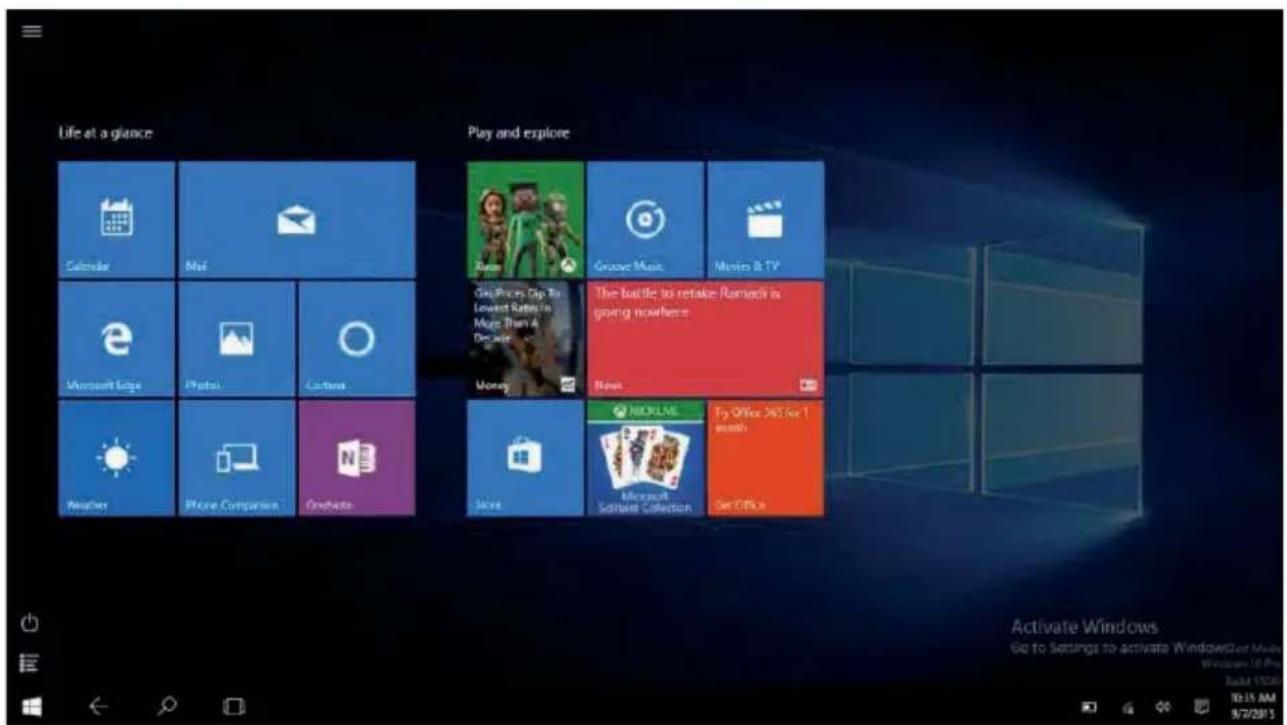
4. Setup and Connection
Pin and unpin your app_
Pinning an App to Start menu or taskbar
To add an app:
- Open the Start menu and select
.

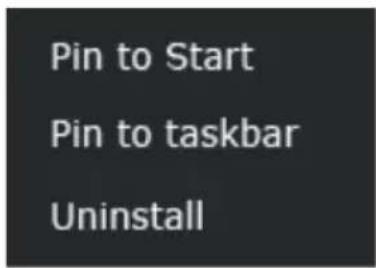
- Right-click on the app that you want to appear on your Start menu or taskbar, and n option menu appears.
- Click
or to add the app to your Start menu or taskbar.
Removing an App
To remove an app:
- Right click the app that you want to remove from your Start menu or taskbar.
- Click
or to remove it from your Start menu or taskbar.
4. Setup and Connection
Wireless LAN_Enabling wireless connection
- Open Settings menu and select
.

- Select
and set the function to ON, as shown below.

- Make sure you have switched the Airplane mode off. To confirm that Airplane mode is disabled, go to the desktop and check the notification area. If you see an airplane icon displayed on the lower right, please disable the Airplane mode first.
4. Setup and Connection
Wireless LAN_Connecting to a wireless LAN
Once the wireless has been enabled, the computer automatically scans for available wireless networks and displays them in the wireless LAN network list. To connect to your desired wireless network, click the network's name in the list, and then click Connect.
Note: Some networks require a network security key or password for connection. If necessary, ask the network administrator or the Internet service provider (ISP) for the required information.
4. Setup and Connection
Micro SD Card Slot_ To insert your micro SD card
You can utilize your micro SD cards as removable disks and conveniently exchange data with digital devices such as a digital camera, digital camcorder, MP3, etc.
- Insert the micro SD card into the card slot as shown below.

-
Fol low the message on the screen, and choose to open and view files.
-
A Win dows Explorer runs and shows all the folders and files in the micro SD cards, and you can save, move and delete data as you are handling a storage device.
4. Setup and Connection
Micro SD Card Slot_ To remove your memory card
- Press the card and release. The card will pop up.
- Pull the card out by holding the end of the card.
Connecting an External Device_Connecting to the USB port
Your computer comes with one USB 2.0 port compatible with USB devices. Once you plug a USB device into a USB port on your computer, Windows automatically loads a driver for that device. After the driver has been loaded one time, you can disconnect and reconnect the same device without performing any additional steps.

Note: If Windows requires you to install the driver before connecting, check the documentation provided by the device's manufacturer before connecting the device.

To disconnect a USB storage device, make sure you click the Safely Remove Hardware icon (as shown on the left) in the notification area of the taskbar to remove the device before disconnecting.

Note: If your USB device uses a power cord, connect the device to a power source before connecting it.
4. Setup and Connection
Connecting an External Device Connecting to the HDMI port
You can connect an external display device such as a monitor, TV, projector, etc., only if such device has a HDMI port. By doing so, you have a wider view when you give a presentation or watch a video or movie.
- Pow er off the external device.
- Locate the HDMI port on your computer.
- Connect one end of your HDMI cable to the port, and the other end to the HDMI port on the external device.
- Power on the external device.
When connecting a TV, you may need to configure your TV to external device mode.
- Open the Settings screen, select
and then . - Cli ck
to open the drop-down list.

- From the list, select your desired monitor mode.
- Click
and confirm your setting.

System
Display, notifications, apps, power
5. Battery
Charging your battery
If your tablet is just being unpacked from the box, you need to charge the tablet first. It will take around 4 to 5 hours to be fully charged.
![graph TD A["Start Cable"] --> B["Switch"] B --> C["Coiled Cable"] C --> D["Output Cable Switch"] style A fill:#f9f,stroke:#333 style B fill:#ccf,stroke:#333 style C fill:#cfc,stroke:#333 style D fill:#fcc,stroke:#333](/content/2026/06/1275330/images/887ea9472307c0135f1b9d2da7eb3f3287df49c5fb9624e2c5504a1d1f45901a.jpg)
- Plug the power cable into the power supply.
- Plug the micro-USB head of the cable – with the side marked with "B" or an icon facing down – into the micro-USB port on your tablet.
- Plug the power cable into a wall-socket.

Note: If the remaining power in your battery capacity is 90% or above, plugging the power supply will not fully charge your battery.
5. Battery
Inspecting your battery status
In Desktop, move the cursor to the battery icon in the taskbar. A pop-up dialog box appears and shows you the remaining battery percentage, as shown below.

The battery icon reveals the status of your battery, which described as below.
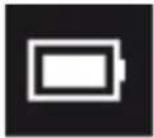 | Battery is fully charged |
 | Battery is starting to drain |
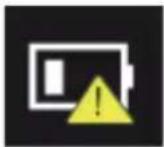 | Battery is about to completely drain, and you should stop using your-computer and charge it at once. |
 | Battery is being charged. |
5. Battery
Inspecting your battery status
A battery is an expendable supply, so when using it over a long time, the capacity/battery life is shortened. If the battery life is reduced to under half of its initial time, we recommend purchasing a new battery.
6. Windows Help and Troubleshooting
Troubleshooting
This section describes some common problems and suggested solutions, and ways to recover your computer from a crash.
Be aware that the problems and solutions described here are meant only as a guide. They are not definitive problem solving techniques. For certain problems, you might need help from your reseller or your service provider.
When you observe a problem, stop operation immediately, because taking further action might result in data loss or damage. Take a note of what the system is doing and what actions you performed before the problem occurred. Provide detailed information to your service provider for quicker problem resolution.
For about any problem, follow these steps:
- Restart your tablet.
- Check your Wi-Fi connection.
- Reset your Wi-Fi connection.
- Plug your tablet to a wall socket to charge it for at least one hour.
6. Windows Help and Troubleshooting
| Screen problems | |
| When I turn on the computer, nothing appears on the screen. | If the screen is blank, make sure that:The AC adapter is connected to the computer and the power cord is plugged into a working electrical outlet.The computer power is on. (Press the power button 6 seconds to force the power off, and power it on again.)If these items are properly set, and the screen remains blank, have the computer serviced. |
| My screen goes blank while the computer is on. | Your tablet is in its sleep mode. Do one of the following to resume from sleep mode:Press any key on the keyboard for 2 to 3 seconds.Press the power button.Press the windows key button. |
| Sleep problems | |
| The critical low-battery error message appears, and the computer turns off | The battery power is getting low:Connect the AC adapter to the computer. |
| The computer enters sleep mode immediately after Power-on. | Make sure that the battery is charged.The operating temperature may be too hot.Move to a cooler environment and try to wake the computer. |
| The computer does not return from sleep mode and the computer does not work. | If your computer is in sleep mode, connect the AC adapter to the computer, then press the key button or the power button.If your computer is powered-off, connect the AC adapter to the computer, then press the power button to resume operation. |
| Display problem | |
| The screen is blank. | Do the following:- Charging your tablet and press F6 to make the screen brighter.- Press the power button to resume from sleep mode.- If the problem persists, follow the solution in the next problem “The screen is unreadable or distorted.” |
6. Windows Help and Troubleshooting
| The screen is unreadable or distorted. | Make sure that:- The screen resolution and color quality are correctly set.- The monitor type is correct. |
| Incorrect characters appear on the screen. | Are the operating system or programs installed correctly?If they are installed and configured correctly, have the computer serviced. |
| Sound problems | |
| No sound can be heard from the speaker even when the volume is turned up. | Make sure that:- The Mute function is off.- The combo audio jack is not being used.- Speakers are selected as the playback device. |
| Other problems | |
| Your computer does not respond. | To turn off your computer, press and hold the power button for 6 seconds or more. If the computer still does not respond, remove the AC adapter.Your computer might lock when it enters sleep mode during a communication operation. Disable the sleep timer when you are working on the network. |
| The connected external device does not work. | Do not connect or disconnect any external device cables other than USB while the computer power is on. Otherwise, you might damage your computer.When using a high power consumption external device such as an external USB optical disk drive, use an external device power adapter. Otherwise, the device may not be recognized. |
- Specification
| Processor Intel® Atom | TM x5-Z8300 |
| Memory DDR3LRS- 16002GB | |
| Storage eMMC v4.5 | 32 GB |
| Dimension Tablet + Docking:275.5 (W) x 180.8 (D) x 23.53 (With Rubber Foot)< 21.6 (Without Rubber Foot)>(H)(H = 36.35 with the Macro Lens installed)Tablet only:275.5 (W) x 180.8 (D) x 12.2 (H)Docking only:278.9 (W) x 193.8 (D) x 23.15 (H) when the holder's angle is 0278.9 (W) x 199.21 (D) x 25.4 (H) when the holder's angle is 90 | |
| Weight Tablet + Docking: 1.34 kgTablet only: 790 gDocking only: 544 g | |
| Wireless Wi-Fi 802.11 b/g/n, Bluetooth 4.0 + EDR | |
| Features: 3G, GPS, GYRO, e-Compass, NFC | |
| Touchscreen | 10.1-inch TFT LVDS, Resolution: 1280 x 800, 5-point multi-touch |
| Cameras Front: 2.0M, Rear: 2.0M | |
| Battery | 7 h |
| Input/Output 1 x Micro-USB 2.0 OTG port (Type B)1 x Micro HDMI port1 x Analog Mic/head combo jack1 x Micro-SD card slot1 x Micro SIM card slot | |
| Speaker & Microphone | Build-in Speaker x 2Internal digital MIC x 1 |
| AC adapter DC Output | 5.1V / 2, 54AInput Voltage: 100-240VAC NominalInput Frequency: 50-60Hz |
| Standard EN 60601-1 | -2:2007+AC:2010; EN 55011:2009+A1:2010(limit class B); EN 61000-3-2:2006 + A1:2009+A2:2009;EN 61000-3-3:2008; CE; RoHs |



- CONTACT
- WARNINGS AND COMPLIANCE
- NOTE
- SAFETY COMPLIANCE
- SAFETY COMPLIANCE POWER SUPPLY
- RECYCLING
- CONTENT
- GETTING TO KNOW YOUR COMPUTER 6
- USING YOUR COMPUTER 14
- WINDOWS INTERFACE 20
- SETUP AND CONNECTION 24
- BATTERY 33
- WINDOWS HELP AND TROUBLESHOOTING 36
- SPECIFICATION 39
- GETTING TO KNOW YOUR COMPUTER
- PACKAGE CONTENTS
- LAYOUTVIEWS_FRONT
- LAYOUTVIEWS_LEFT
- DOCKING AND UNDOCKING
- BEFORE DOCKING INTO OR UNDOCKING FROM THE KEYBOARD
- DOCKING INTO THE KEYBOARD
- UNDOCKING FROM THE KEYBOARD
- INSTALLING YOUR MACRO LENS
- USING YOUR COMPUTER
- POWERING ON/OFF_POWERING ON YOUR COMPUTER
- POWERING ON/OFF_POWERING ON FOR THE FIRST TIME
- POWERING ON/OFF_POWERING OFF YOUR COMPUTER
- BY START MENU
- POWERING ON/OFF_PUTTING YOUR COMPUTER INTO SLEEP MODE
- POWERING ON/OFF_WAKING UP YOUR COMPUTER
- DO ONE OF THE FOLLOWING
- BASIC TOUCHPAD OPERATIONS
- USING YOUR COMPUTER2. USING YOUR COMPUTER
- BASIC TOUCHSCREEN OPERATIONS
- WINDOWS INTERFACE
- DESKTOP AND VIRTUAL DESKTOP EXPERIENCE
- TASKBAR
- TASKBAR_START MENU
- TASKBAR_SEARCH BOX – CORTANA
- SEARCH THE WEB AND WINDOWS
- TASKBAR_APP SHORTCUTS AREA
- TASKBAR_NOTIFICATION AREA
- SETUP AND CONNECTION
- SETTING SCREEN
- WINDOWS ACTIVATION
- UPDATE & SECURITY
- SETUP YOUR MICROSOFT ACCOUNT
- ACCOUNTS
- REPLACING DESKTOP WITH START SCREEN
- PIN AND UNPIN YOUR APP
- PINNING AN APP TO START MENU OR TASKBAR
- TO ADD AN APP
- REMOVING AN APP
- TO REMOVE AN APP
- WIRELESS LAN_ENABLING WIRELESS CONNECTION
- WIRELESS LAN_CONNECTING TO A WIRELESS LAN
- MICRO SD CARD SLOT_ TO INSERT YOUR MICRO SD CARD
- MICRO SD CARD SLOT_ TO REMOVE YOUR MEMORY CARD
- CONNECTING AN EXTERNAL DEVICE_CONNECTING TO THE USB PORT
- CONNECTING AN EXTERNAL DEVICE CONNECTING TO THE HDMI PORT
- BATTERY
- CHARGING YOUR BATTERY
- INSPECTING YOUR BATTERY STATUS
- WINDOWS HELP AND TROUBLESHOOTING
- TROUBLESHOOTING
Brand : Baaske Medical
Model : Docpad 10c A
Category : Tablet