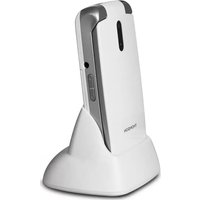
SEREA62WHT - Smartphone THOMSON - Free user manual and instructions
Find the device manual for free SEREA62WHT THOMSON in PDF.


| Product Type | Smartphone |
| Brand | Thomson |
| Model | SEREA62WHT |
| Color | White |
| Dimensions | 160 x 75 x 8 mm |
| Weight | 180 g |
| Screen | 6.2-inch IPS, 720 x 1520 pixels resolution |
| Operating System | Android 12 |
| Processor | Quad-core 1.3 GHz |
| RAM Memory | 3 GB |
| Internal Storage | 32 GB |
| Expandable Storage | Yes, via microSD card up to 128 GB |
| Rear Camera | 13 megapixels |
| Front Camera | 5 megapixels |
| Battery | Lithium-ion 4000 mAh, removable |
| Standby Time | Up to 350 hours |
| Talk Time | Up to 18 hours |
| Network | 4G LTE, Wi-Fi 802.11 b/g/n, Bluetooth 5.0 |
| SIM Cards | Dual SIM (Nano-SIM) |
| Connector | Micro-USB, 3.5 mm headphone jack |
| Sensors | Accelerometer, proximity sensor |
| Care and Cleaning | Clean with a soft, dry cloth. Avoid liquids. |
| Operating Temperature | 0 °C to 40 °C |
| Spare Parts | Battery, screen, connectors available at service center |
Frequently Asked Questions - SEREA62WHT THOMSON
User questions about SEREA62WHT THOMSON
0 question about this device. Answer the ones you know or ask your own.
Ask a new question about this device
Download the instructions for your Smartphone in PDF format for free! Find your manual SEREA62WHT - THOMSON and take your electronic device back in hand. On this page are published all the documents necessary for the use of your device. SEREA62WHT by THOMSON.
USER MANUAL SEREA62WHT THOMSON
natural_image
Simple line drawing of a trash bin with crossed lines indicating no waste or discharge (no text or symbols)C1313
natural_image
Purple icon depicting a person moving with arrows, enclosed in a circular arrow (no text or symbols)natural_image
Line drawing of a smartphone showing the left side with a red arrow pointing to the screen (no text or symbols present)natural_image
Cross-sectional diagram of a smartphone showing internal components and a red arrow indicating a specific area (no text or symbols present)natural_image
Diagram of a smartphone internal structure showing internal components and a red arrow indicating a specific area (no text or symbols present)natural_image
Diagram of a device casing with red arrows indicating internal components (no text or symbols)natural_image
Top-down schematic of a mobile phone rear panel with indicator lights and a red arrow pointing to the left side (no text or symbols)natural_image
Black handheld device with a red arrow pointing to its base (no visible text or symbols)natural_image
Simple line drawing of a trash bin with crossed lines indicating no waste or discharge (no text or symbols)CE1313
natural_image
Diagram of a smartphone showing the left side with a red arrow indicating speed, no text or symbols presentnatural_image
Cross-sectional diagram of a smartphone showing internal components and a red arrow indicating a specific area (no text or symbols present)natural_image
Diagram of a smartphone showing internal components with a red arrow indicating a specific area (no text or symbols present)natural_image
Diagram of a device casing with red arrows indicating directional movement or change, no text or symbols present.natural_image
Diagram of a mobile phone rear panel with a red arrow pointing to the left side of the screen (no text or symbols present)natural_image
Black handheld device with a red arrow pointing to its top base (no visible text or symbols)Do not become distracted by the device
while driving, and always be fully aware of all driving conditions.
- Always operate the vehicle in a safe manner.
- Follow local regulaons regarding the use of mobile phones.
- Switch o the device and remove the baery from me to me for opmum performance.
-
The cable of the charger cannot be replaced. If this cable is destroyed, the adaptor should be destroyed.
-
Do not expose the phone to rain or splashing. Do not place any objects lled with liquids, such as vases, on the device.
- Excessive sound pressure from earphones and headphone can cause hearing loss.
- The mains plug of the device should be easily accessed during use.
Baery Warning
Do not expose the device to heat or leave it in a vehicle in the sun.
Use of the Supplied Li-Ion Baery
This product uses a Li-Ion baery. Cauon: Risk of re and burns if the baery pack is handled improperly.
Warning: Danger of explosion if baery is incorrectly replaced. To reduce risk of re or burns, do not aempt to open or service baery back. Do not disassemble, crush, puncture, short external contacts or circuits, dispose of in re or water, or expose a baery pack to temperature higher than 60°C.
- Use only recommended baeries. Please recycle and dispose of used baeries according to local regulaons or the instrucons supplied with the product.
- Do not use a sharp object to remove the baery.
-
Keep the baery away from children.
-
Only use authorized charger and accessories.
- Only replace the baery with the correct replacement baery. Using other baery presents a risk of re or explosion.
Pacemakers and Other Medical Devices
Studies have shown that there may be a potenal interacon between mobile phones and normal pacemaker operaon. The pacemaker industry recommends that people with pacemakers follow these guidelines to minimize any risk of interference with pacemaker operaon:

Always maintain a distance of 15 cm (6ches) between the pacemaker and any mobile phone that is turned on.
- If you think that interference may be occurring, turn o the phone immediately.
- For other medical devices, consult with your physician or the manufacturer to determine if your mobile phone may interfere with the device, and to determine any precautions that you can take to avoid interference.
Emergency Calls
Important: This device operates using radio signals, wireless networks, landline networks, and user-programmed funcons.
Connecons in all conditions cannot be guaranteed.
You should never rely solely on any wireless device for essenal communicaons like medical emergencies.
When making an emergency call, give all the necessary informaon as accurately as possible. Your wireless device may be the only means of communicaon at the scene of an accident. Do not end the call unl given permission to do so.
Avoid Repeve Moon
You may experience occasional discomfort in your hands, arms, shoulders, neck, or other parts of your body if you perform repeve
acvies, such as typing or playing games, on the device.
Take frequent breaks. If you have discomfort while or aer using the device, stop using and see a physician.

Always prefer to use a handsfree earset when talking. You are reminded that the use of your mobile device is forbidden when driving your car.
SAR Cercaon Informaon
This mobile phone model meets the guidelines for exposure to radio waves.
Your mobile phone is a radio transmier and receiver. It is designed not to exceed the limits for exposure to radio waves
recommended by internaonal guidelines. These guidelines were developed by the independent scienc organizaon ICNIRP and include safety margins designed to assure the protecon of all persons, regardless of age and health. The exposure guidelines for mobile devices employ a unit of measurement known as the Specic Absorpon Rate or SAR. The SAR limit stated in the ICNIRP guidelines is 2.0 was/kilogram (W/kg) averaged over 10 grams of ssue.
Tests for SAR are conducted using standard operang posions with the device transming at its highest cered power level in all tested frequency bands. The
actual SAR level of an operang device can be below the maximum value because the device is designed to use only the power required to reach the network. That amount changes depending on a number of factors such as how close you are to a network base staon.
The highest SAR value under the ICNIRP guidelines for use of this device at the ear is 0.63W/Kg.
When using the earphone, reduce the volume to protect your ears.
Declaraon of Conformity
Hereby, Admea declare that this GSM Phone is in compliance with the essenal requirements and other relevant provisions of Direcve 1999/5/EC.
The declaraon of conformity is available on web site: hp://www.thomsonphones.eu

natural_image
Simple line drawing of a trash bin with crossed lines indicating no waste or plastic (no text or symbols)CE 1313
The European direcve 2012/19/EC on Waste Electrical and Electronic Equipment (WEEE) requires that old household electrical appliances must not be disposed in the normal unsorted municipal waste stream.
Old appliances must be collected separately in order to optimize the recovery and recycling of the materials they contain and reduce the impact on human health and the environment.
The crossed out “wheeled bin” symbol on the product reminds you of your obligaon, that when you dispose of the appliance it must be separately collected.
Contact your local authority or retailer for informaon concerning the correct disposal of old appliance.
Welcome
Thank you for purchasing this Thomson mobile phone. For your comfort, this phone has a large screen, an intuitive menu and large buons. Other advantages include its ease of use with the dedicated charging base and two shortcut call keys (1) Finally, the SOS buon on the back of the unit allows you to quickly contact your loved ones when needed. Here are the main features of your device:
- 2.4-inch Screen in 262,000 colors,
- Quad-Band Compatibility:
(850/900/1800/1900 MHz) for use anywhere in the world,
- SOS Funcon: by pressing the SOS buon once, you can immediately alert up to 5 family members and friends that you need help (by call and automac emergency SMS),
- Camera funcon
- Bluetooth Funcon: this handy feature allows you to make your calls using a wireless handsfree kit (Bluetooth handsfree kit not supplied),
- MP3 funcon – your phone turns into a portable audio player!
- FM Funcon: lets you listen to your favorite radio staon,
- LED Torch Funcon: gives you a lile extra light in darkness.
Package Contents
- 1 mobile phone
- 1 baery
- 1 wired handsfree kit
- 1 charging base
- 1 AC adapter
- 1 USB cable
Get Started
Please read the following instrucons in order to get to know the main funcons of your phone.
- Make sure the phone is switched o and the charger is not connected to the mains. To remove the back cover of the phone, apply slight pressure towards the boom with your thumb as shown below. The cover can be opened easily. Do not aempt to force it open or pull it to either side; otherwise the cover can be damaged or broken.

natural_image
Diagram of a smartphone showing the left side with a red arrow pointing to the screen area (no text or symbols present)- Insert the SIM card provided by your telephone operator as shown below. The metal part of the card inwards and the oblique part of the card outwards.

natural_image
Cross-sectional diagram of a smartphone showing internal components and a red arrow indicating a specific area (no text or symbols present)- If you have a Micro SD memory card, you can insert it as shown below. With a memory card, you can take pictures and listen to your music in MP3 format.

natural_image
Diagram of a smartphone showing internal components with a red arrow indicating a specific area (no text or symbols present)- Aer that, install the supplied baery as illustrated below.

natural_image
Diagram of a device casing with red arrows indicating internal components (no text or symbols)- Replace the back cover.

natural_image
Top-down schematic of a mobile phone casing with indicator lights and a red arrow pointing to the left side (no text or symbols)- Charging the baery and installing the charging base
The baery supplied is not fully charged.
Before using the telephone for the rst me, please fully charge the baery in order to maximize its service life.
- Connect one end of the supplied USB cable to the AC adapter and the other end to the charging base.

- Plug the AC adapter into a 220V outlet.
- Insert the telephone into the charging base.

natural_image
Black flip phone with a red button at the base (no visible text or symbols)- Several seconds later, the charging indicator of the phone blinks in red. When the indicator becomes constant red, the charging is complete.

Before rst use, be sure to fully charge the battery for eight hours in order to opmize its life cycle.
Presentaon of Your Phone

1. CONTACT 1 / CONTACT 2 Buons:
Assign your favorite number to each of these two buons. This allows you to directly dial a call to the saved number by simply pressing the buon once. To conjure these buons, rst long press
the 📣 or 📋 buon and then assign a number as your favorite number CONTACT 1 or CONTACT 2. In some menus, the CONTACT 1 and CONTACT 2 keys allow you to increase or reduce seng values (like screen brightness).
- Le/right selecon buons – allow you to select the opons that appear at the boom of the screen. For example, in a menu, you usually press the le
selecon buon to access the Opons menu or to conrm a selecon (by selecng OK); while you usually press the right selecon buon to choose Back (to return to the previous screen) or to cancel a selecon. From the home screen, press the le selecon buon to access the Phone menu, and press the right selecon buon to open the Phonebook.
- Up/Down Direconal Buons: These buons allow you to navigate through the menus, opons and contact list. From the home screen, press the up buon to enter the Phonebook menu
directly, or press the down buon to go directly to the Message funcon.
- Call Buon: Press this buon to answer a call. From the home screen, press this buon to check the last incoming or outgoing calls.
- Numeric Keypad
- Asterisk Key (*): Long press this buon to enter the “+” sign for internaonal calls. When wring an SMS, press this buon to display special characters.
- Camera buon
- End Call Buon: Press and hold this buon to switch the phone on or o. Press this buon shortly to end or reject
a call. In a menu, press this buon to return immediately to the home screen.
- Hash Key (#): Long press this buon to put the phone in meeng mode, and vice versa.
- 3.5mm headphone jack – To connect your handsfree kit.
- Volume +/- buon
- Charge indicator – The indicator ashes in red while the phone is charging and lights up in red when the baery is fully charged. When the phone is not in the cradle, and the indicator ashes in red while there is missed calling or new message.
-
Camera
-
SOS Buon: Long press this buon in order to dial SOS calls and send emergency messages to your loved ones.
- Flashlight Buon: Slide this buon to turn the ashlight lamp on or o.
- Flashlight
- USB connector – To charge your phone. When this device is connected to a computer via this connector, you will have access to the Micro SD card inserted in the phone (photos, music).
- Charging Base Connector
Start Guide and Main Funcons
Long press the key to switch on your phone. The home screen now appears as below.

- Signal Bar: It indicates the signal strength. Four bars indicate opmum recepon for your calls.
- Baery Status Bar: A full blue bar indicates the highest baery level. A red bar indicates low baery level; the phone needs to be recharged.
- Name of Your Telephone Operator
- Main Menu Icon: Press the le selecon buon to access this menu.
- Contacts Icon: Press the right selecon buon to view your favorite contacts.
If a round icon representing the Earth appears on the screen on the right to the signal bar, it means that you are currently roaming and significant roaming fees may be
charged by your telephone operator. In this case, check the GSM network you are using (see next paragraph). If you use a virtual operator or in some cases, the operator Free, this alert may be normal since your operator needs to connect to the network of another operator to route telecommunicaons.
More icons display on the top home screen:

: New SMS/MMS

: General mode

Meeng mode

: Silent mode

: Outside mode

: Missed call

: Earphone inserted

: Alarm is set

: Bluetooth ON
1. Choose a Telephone Operator
If the name of the operator, which should be displayed on the home screen, does not appear, if the operator shown is not the correct one, or if you wish to choose a dierent operator when you are abroad, please follow the below steps:
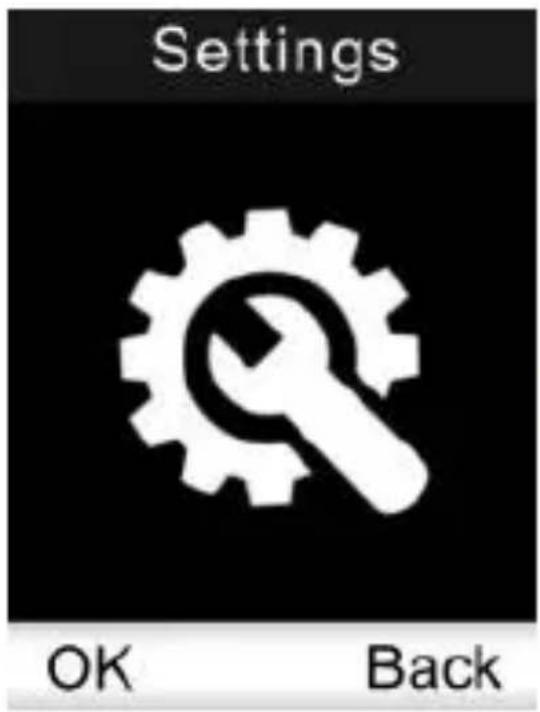
From the home screen, press the le selecon buon and the Phonebook icon appears. Press the buon to scroll to "Sengs" then press the le selecon buon (OK) again. Aer that, choose the 8 th opon "Network sengs" and then select "Manual". Aer a few moments, the list of available networks appears on the
screen.Choose a network that is compatible with the SIM card inserted.

2. Save a Phone Number
From the home screen, press the le selecon buon and the Phonebook icon appears on the screen. Press the same
buon “OK” again. The Contacts menu is displayed. Select “Add new Contact” and press the le selecon buon (Opons), then Add (Opon 1).Press le selecon buon again to save the contact to SIM card or phone. Input the name and telephone number, and press le selecon buon (Opons), and then Save to save the contact.


Seng Your Two Favorite Contacts
Assign your favorite number to each of the 📁 and 🔍ons. To congregate these buons: from the home screen, long press 📁 or 📋 then assign your favorite number.
From the home screen, simply press one of these two buons to directly dial a call to the preset number.
3. Camera and photo album
From the home screen, Press key to access to the Camera menu, and press key again to take the photo.

You must rst insert a Micro SD card in order to use the camera.
Image viewer
From the home screen, press the le selecon buon and the Phonebook icon
appears. Press the buon 4 mes to
scroll to the Image viewer. Press le
selecon again to select the opons: View
pictures, Send by MMS, Use as wall paper,
Rename the picture, Delete picture(s),
Delete all les, Display image informaon.
4. Send an SMS or MMS
From the home screen, press the key. The Message menu appears on the screen.
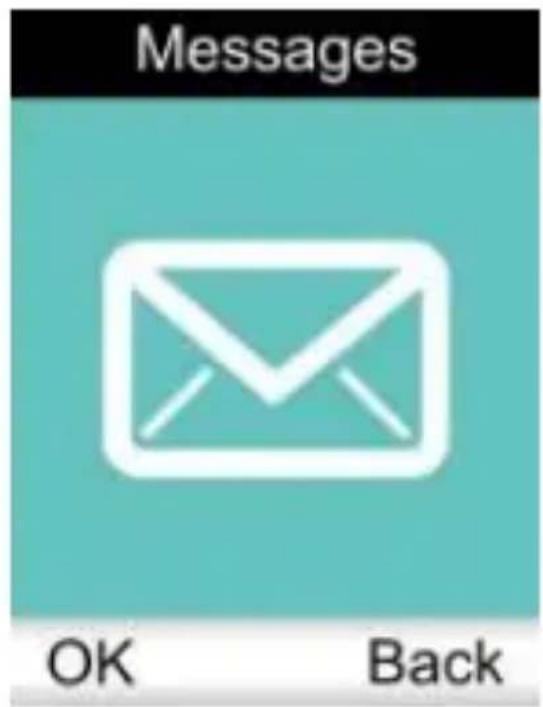

Choose opon 1 to write a new SMS or MMS, or opon 2 “Inbox” to check your received messages.

When wring a message, press the asterisk key (*) to open the list of special characters.

To send a photo along with a message, choose the MMS opon, and select the 3 rd option” Add picture”, then select the picture from your Micro SD card or take a new picture, Select the 1 st opon “Send to” to send the MMS. Before using this funcon for the rst me, you need to congregate the MMS account of your operator. Go to the Sengs menu, choose Connecvity (10 th opon) then Data Accounts (2 nd opon). Aer that, choose the name of your operator. If several
accounts appear, choose the one with the word “MMS”. If such account does not exist, you need to create one by selecng Opons, then Add PS account. In this case, ask your telephone operator to provide you with the parameters for acvang your MMS account.
5. Choose Ringtones
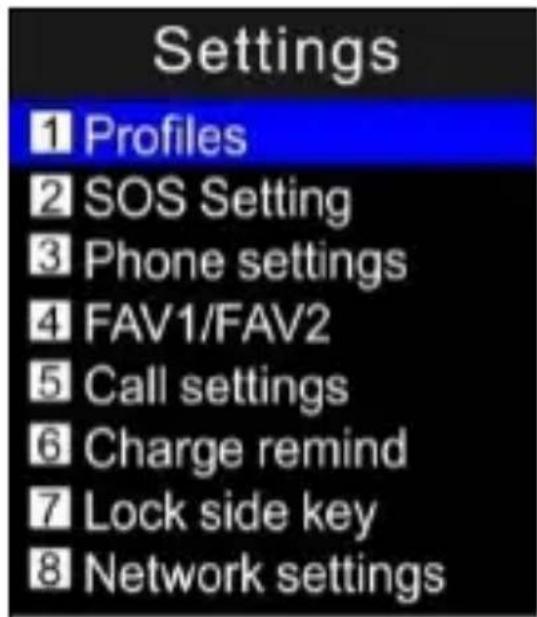
From the home screen, press the le selecon buon and the Phonebook icon appears. Press the buon to scroll to the Sengs icon. Press the le selecon buon again to select “OK”. The Sengs menu
appears on the screen. Choose the 1st opon "Proles".

OK
Back
OK
Back
Aer that, press the le selecon buon (Opons) and then select Customize (2 nd opon). Press or key to scroll to the opons, then press the le selecon buon (Opons), and select Change(1 st Opon) to change the ringtones for calls, messages as
well adjust the ringtone volume. Press the le selecon buon(OK) to conrm the seng. Finally, press the le selecon buon(Opons) again, and select Save (2 nd opon) to save the sengs.

From the home screen, you can put the phone in meeng mode at any me by making a long press on the hash key (#).
6. Acvate the SOS Funcon
By simply pressing the SOS buon on the back of the telephone once, you can immediately nofy up to ve family member/friends that you need help. The funcon works as follows:
- Press and hold the SOS buon for two to three seconds.
- The phone emits a warning tone for several seconds to alert you that the funcon has been acvated.
- The phone will then try to call the ve contacts that you have congured by dialing the corresponding numbers twice. As soon as one of them answers the call, you will be in communicaon with him/her.
- In addition, each of the ve contacts will receive a customizable SMS, informing them that you are asking for help.
To acvate and customize the SOS funcon: from the home screen, press the left selecon buon and the Phonebook icon
appears on the screen. Press the buon to scroll to the Sengs icon. Press the le selecon buon again to select "OK". The Sengs menu is displayed. Choose "SOS seng" (2 nd opon).

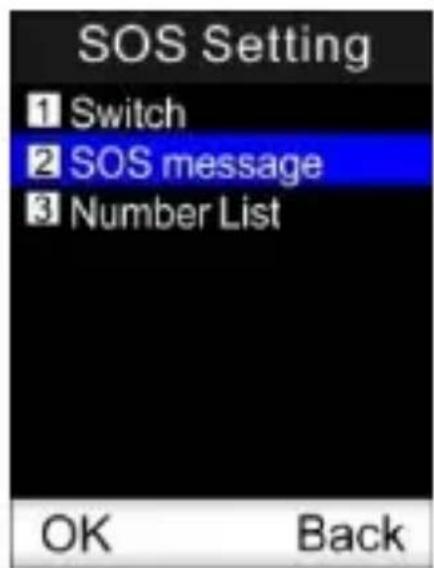
- The opon Switch allows you to enable or disable the emergency SOS call funcon.

The opon SOS SMS allows you to write the SMS message which will be sent
automacally to your loved ones. The default message is: “Please call me back urgently.”
- The opon Number List allows you to set up to ve contacts that will be alerted when you trigger the alarm.
7. Connect a Wireless Bluetooth Handsfree Kit to this Phone
From the home screen, press the le selecon buon and the Phonebook icon appears on the screen. Press the buon to scroll to the Sengs icon. Press again the le selecon buon “OK”. The Sengs
menu is displayed. Choose the 10 opon "Connecvity" and then "Bluetooth".


- Press the le selecon buon to acvate the Bluetooth funcon (1 st opon).

Now, make sure that your wireless Bluetooth kit is switched on and that the pairing mode is acvated (consult your handsfree kit's user guide if necessary).
- Select Search audio device ( 4th opon) in order to scan for the Bluetooth devices near the phone.
- Aer that, select the opon Pair by pressing the le selecon buon.
8. Secure Your Phone
You can set a PIN code or a locking code for your phone. Aenon – please write down the security codes that you have set for the phone. Go to the Sengs menu of the phone, then choose Security sengs. By default, the locking code of this phone is 0000.
9. Mulmedia Funcon
From the home screen, press the le selecon buon and the Phonebook icon appears. Press the buon repeatedly to scroll to the Audio player or FM radio icon.
The MP3 player allows you to listen to your favorite songs in MP3 format that you have previously copied from a computer onto a Micro SD card. Important - MP3 les must be stored in a directory named My music so that they can be detected and read by the player.
The FM radio will work as soon as you plug the supplied handsfree kit into the USB
headphone jack (the handsfree kit will work as the FM antenna).
- To turn on/o the radio, press buon while in the FM radio menu.
- You can adjust the volume by press VOL+/-buon
10. File manager Funcon
From the home screen, press the le selecon buon and the Phonebook icon appears. Press the buon twice to scroll to the File manager icon. Press the le selecon buon again to select the opons of Open les, Format the Micro SD card, and
Details to display Micro SD card total size and free size.
The Calendar, Alarm, Calculator, and Tasks funcons provides praccal applicaons for everyday life.
Imported by ADMEA, 12 Rue Jules Ferry, 93110 Rosny sous bois, France.
THOMSON is a trademark of Technicolor SA, used under license by ADMEA.


- C1313
- CE1313
- Do not become distracted by the device
- while driving, and always be fully aware of all driving conditions.
- Baery Warning
- Use of the Supplied Li-Ion Baery
- Pacemakers and Other Medical Devices
- Emergency Calls
- Avoid Repeve Moon
- SAR Cercaon Informaon
- Declaraon of Conformity
- CE 1313
- Welcome
- Package Contents
- Get Started
- CONTACT 1 / CONTACT 2 Buons:
- Start Guide and Main Funcons
- Choose a Telephone Operator
- Save a Phone Number
- Seng Your Two Favorite Contacts
- Camera and photo album
- Image viewer
- Send an SMS or MMS
- Choose Ringtones
- Acvate the SOS Funcon
- Connect a Wireless Bluetooth Handsfree Kit to this Phone
- Secure Your Phone
- Mulmedia Funcon
- File manager Funcon
Brand : THOMSON
Model : SEREA62WHT
Category : Smartphone