
KS 9773 - Refrigerator SEVERIN - Free user manual and instructions
Find the device manual for free KS 9773 SEVERIN in PDF.


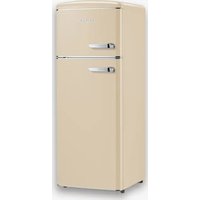
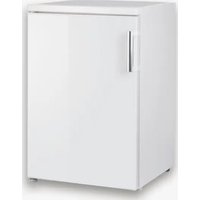
| Product type | Refrigerator |
| Brand | SEVERIN |
| Model | KS 9773 |
| Energy class | A+ |
| Net capacity | 100 liters |
| Dimensions (W x H x D) | 48 x 85 x 50 cm |
| Weight | 25 kg |
| Power supply | 220-240 V, 50 Hz |
| Annual consumption | 150 kWh |
| Noise level | 42 dB(A) |
| Refrigerant | R600a |
| Main features | Automatic defrost, adjustable thermostat, door racks, glass shelf, vegetable drawer |
| Maintenance and cleaning | Clean interior with soft cloth and soapy water, manual defrost if necessary |
| Safety | Reversible door, adjustable feet, CE compliance |
| Spare parts and repairability | Available on SEVERIN website, repairability index estimated 6.5/10 |
Frequently Asked Questions - KS 9773 SEVERIN
User questions about KS 9773 SEVERIN
0 question about this device. Answer the ones you know or ask your own.
Ask a new question about this device
Download the instructions for your Refrigerator in PDF format for free! Find your manual KS 9773 - SEVERIN and take your electronic device back in hand. On this page are published all the documents necessary for the use of your device. KS 9773 by SEVERIN.
USER MANUAL KS 9773 SEVERIN
natural_image
Warning symbol of a flame inside a triangle (no text or numbers)natural_image
Diagram showing two labeled components (1 and 2) with downward arrows indicating motion or force, no text or symbols present.natural_image
Technical line drawing of a mechanical component with an inset close-up showing a magnified detail (no text or symbols)Before using the appliance, please read the following instructions carefully and keep this manual for future reference. The appliance must only be used by persons familiar with these instructions.
Connection to the mains supply
The appliance should only be connected to an earthed socket installed in accordance with the regulations. Make sure that the supply voltage corresponds with the voltage marked on the rating label. This product complies with all binding CE labelling directives.
- Do not operate this unit by means of a transformer.
- To prevent noise vibration, ensure that the power cord does not touch any part of the rear of the unit
General information
- This appliance is a compressor refrigerator, designed for the short-term storage of food in the main cabinet and long-term storage of food in the freezer compartment.
-
Refrigeration appliances are classified into certain climate classes. Please refer to the product data sheet for information on the classification for this unit.
● This appliance is intended for domestic or similar applications, such as in -
shops, offices and other similar working environments,
-agriculturalareas, - hotels, motels etc. and similar establishments,
-
bed and breakfast type environments.
-
This appliance is not intended for commercial use, nor for use in the catering business or similar wholesale environments.
- No responsibility is accepted if damage results from improper use, or if these instructions are not complied with.
Important safety instructions
- To prevent the risk of personal injury or damage to the unit, it must only be transported while in its original packaging.
- This appliance is not intended for use by any persons (including children) with reduced physical, sensory or mental capabilities, or lacking experience and knowledge, unless they have been given supervision or instruction concerning the use of the appliance by a person responsible for their safety.
● Children should be supervised to ensure that they do not play with the appliance. - Caution: Keep any packaging materials well away from children: there is a risk of suffocation.
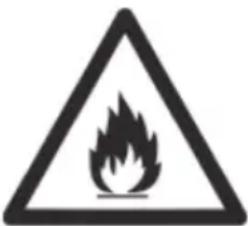
- The cooling circuit in this appliance contains the refrigerant isobutane (R600a), a natural gas with a high level of environmental compatibility, which is nevertheless flammable. Ensure, therefore, that none of the components of the refrigerant circuit become damaged during transportation and installation of the appliance. If damage to the cooling circuit does occur, do not switch on or connect the appliance to the mains
power. In the case that there is an open fire or any other sources of ignition in the vicinity of the
natural_image
Warning symbol of a flame inside a triangle (no text or numbers)refrigerant gas, make sure it is removed immediately from this area and that the room is then thoroughly ventilated.
- Warning: Do not damage the cooling circuit. Any escaping refrigerant causes damage to the eyes; there is also a danger of the gas igniting.
- Warning: Keep ventilation openings, in the appliance enclosure or in the built-in structure, clear of obstruction. Sufficient ventilation must be ensured at all times.
- Warning: Do not use any external device (e.g.; heaters or heating fans) to accelerate de-frosting; follow only the methods recommended in this manual.
● The ice removed from the unit during de-frosting is not suitable for human consumption.
- Warning: Do not operate any electrical appliances (e.g. ice makers) inside the storage compartment that are not specifically permitted in these instructions.
- Caution: do not remove the cover of the interior LED light. If there should be any malfunction, please contact the customer service for assistance.
- Before it is connected to the mains power, the unit must be thoroughly checked for transport damage, including its power cord. In the event of any such damage being found, the appliance must not be connected to the mains.
- The power cord should be regularly examined for any signs of damage. In the event of such damage being found, the appliance must no longer be used.
- To avoid the risk of fire, do not place any thermo-electric appliances on top of the unit. Do not place liquid containers on top of the unit, to prevent any leaking or escaping liquid damaging the electrical insulation.
● This unit is designed for storing food only.
● Alcoholic substances may be stored only in properly sealed containers and in upright positions.
- This appliance is not designed for the storage of explosive substances such as aerosol cans with a flammable propellant.
- To avoid the risk of food poisoning, do not consume food after its storage time has expired. Thawed foods must not be frozen a second time.
- Do not lean or put undue weight on the shelves, compartments, door etc.
- Protect the inside of the refrigerator at all times from open flames and any other sources of ignition.
- Remove the plug from the wall socket
- in case of any malfunction,
- beforede-frosting,
- duringcleaning,
- before maintenance or repair work is carried out.
- When removing the plug from the wall socket, never pull on the power cord; always grip the plug itself.
- In order to comply with safety regulations and to avoid hazards, any repairs or modifications to this unit must be carried out by our authorised service personnel, including the replacement of the power cord.
● We reserve the right to introduce technical modifications.
- If the unit is not used for an extended period of time, we recommend keeping the door open.
- If the unit is sold, handed over to a third party or disposed of at a suitable recycling facility, attention must be drawn to the presence of the insulation agent ‘cyclopenthane’ as well as to the refrigerant R600a.
Familiarisation
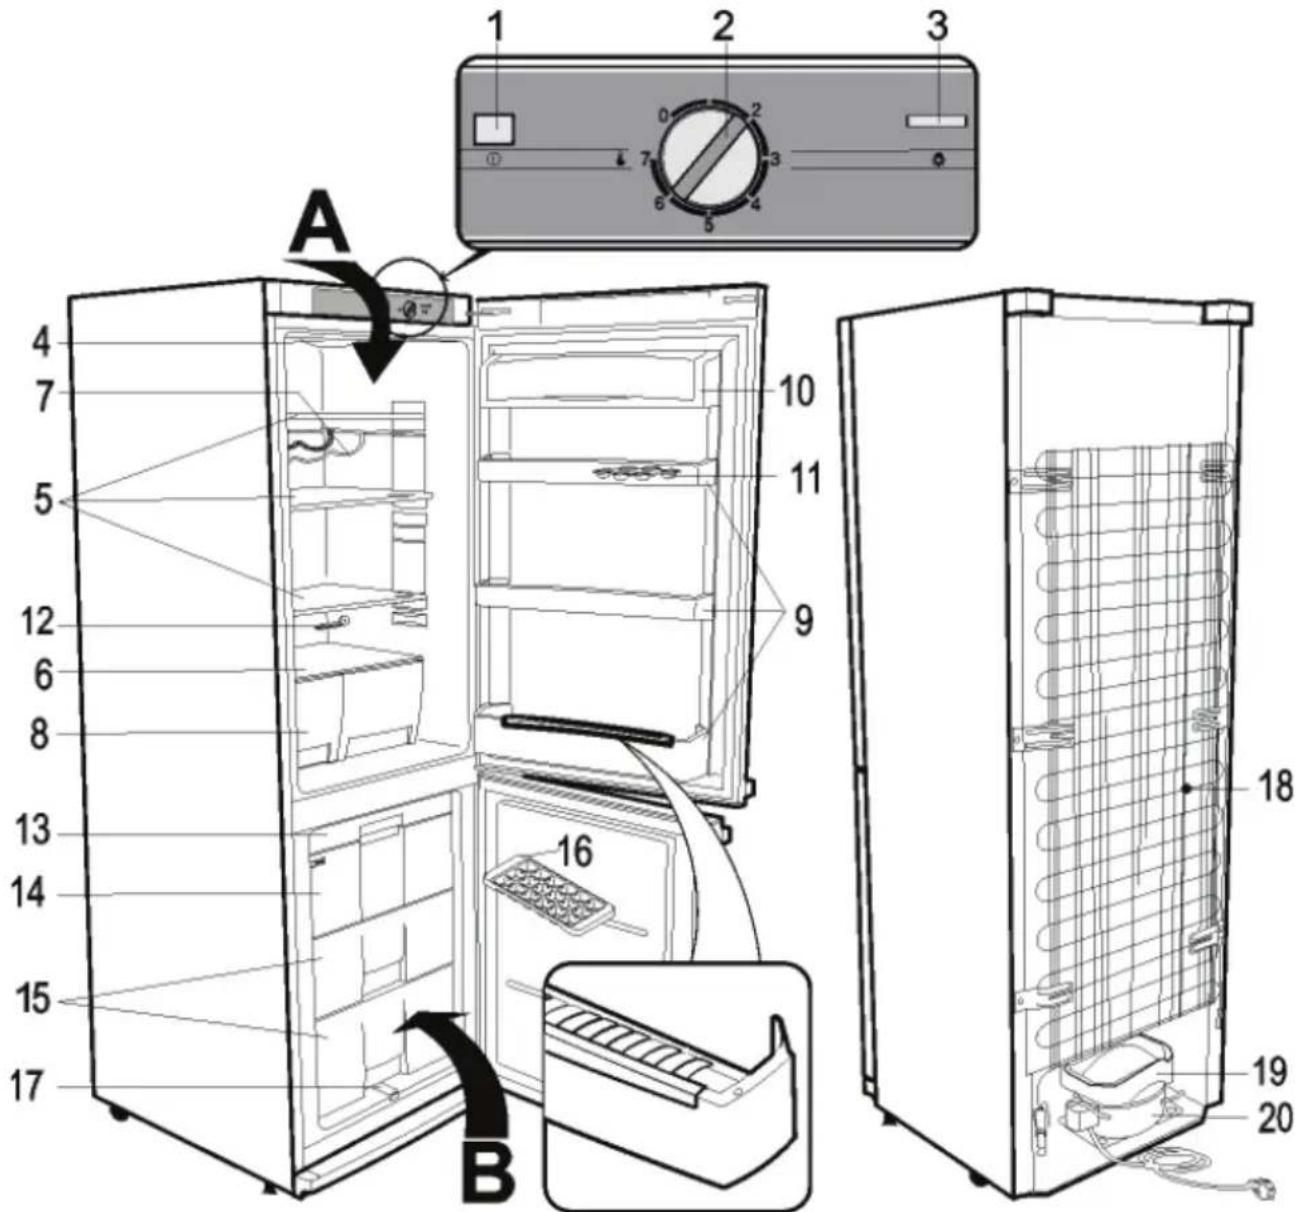
The components of your refrigerator-freezer unit may differ in quantity and design from those described here. This description refers to a unit of the group of two-compartment refrigerator-
freezer combinations.
The unit consists of two parts: refrigerator cabinet (A) and freezer cabinet (B).
The quick-freeze compartment inside the freezer cabinet carries the symbol * * * * .
-
Mains indicator light (green)
-
Temperature control
-
On/Off switch for interior light
-
Interior light
-
Storage shelves (height-adjustable)
-
Glass storage shelf
-
Bottle rack
-
Vegetable/fruit fresh storage compartment
-
Door storage
-
Butter/cheese storage compartment
-
Egg storage
-
Drain channel cleaning tool
-
Freezer tray
-
Quick-freeze compartment
-
Freezer compartments
-
Ice-cube tray
-
Freezer unit melt-water drain
-
Condenser
-
Melt-water evaporation tray
-
Compressor
Before using for the first time
- Remove any exterior and interior packaging materials completely, including the red transport securing devices.
- The packaging materials must be properly disposed of.
NOTE: When the door to the freezer unit is opened, a small red component will fall out; this is for transport only and can be disposed of.
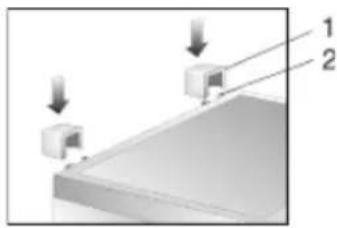
- Fit the two spacer elements (provided) into the corresponding guide slots on the rear.
- Before it is connected to the mains, the unit must be thoroughly checked for transport damage, including its power cord.
– Clean the unit as described in the section De-frosting and cleaning.
- For positioning, we recommend that you tilt the unit slightly
natural_image
Diagram showing two labeled components (1 and 2) with downward arrows indicating motion or force, no text or symbols present.backwards. In this way, the transport rollers can be used to move it to its intended place of installation.
- The unit should only be transported in its vertical position; do not tilt any more than 30^ .
- Once the unit has been positioned, wait for about 30 minutes before it is connected to the mains.
- If the unit has been tilted more than 30^ during transport, allow it to stand upright for at least 4 hours before it is connected to the mains.
- When the unit is first switched on, a slight 'new' smell may be noticed. However, this will disappear once the cooling process has begun.
Installation
● The appliance should be set up in a well-ventilated, dry room.
- It should be operated in conditions where the relative humidity is no more than 70%.
- The product data sheet contains details of the ambient temperature range suitable for this appliance.
- Do not use the appliance outdoors.
● Ensure that the plug is accessible and can be removed from the wall socket at any time.
- Do not expose the appliance to direct sunlight, and do not position it next to any heat sources (radiators, cookers etc). If this cannot be avoided, however, suitable insulation must be in installed between the heat source and the unit.
- The unit must not be installed inside a cabinet, nor directly below a hanging cupboard, shelf or similar object.
- In the case of uneven floors, the adjustable feet on the unit can be used to compensate and ensure optimum stability.
Set-up dimensions

Ventilation

The heated air around the rear of the unit must be able to circulate freely. Therefore, ensure that the air circulation behind the unit is not obstructed.
Caution: Ensure at all times that the rear ventilation openings around the top cover are not obstructed.
Reversible door
If required, the door may be reversed, i.e. from right-hinged (default installation) to left-hinged.
Warning: Always disconnect the unit from the mains before any maintenance or repair work is carried out.

Before you get started, please note the following:
- Always ensure that the correct number of washers is used on the hinge bolts.
- So that the doors can close tightly against the frame, take the utmost care that they are properly aligned during re-assembly.
-
Remove the four covers c from the housing and inside of the door.
-
Unscrew the hinge bolt on the inside of the door in the area c/6.
Caution: Support the door.
-
Take off the refrigerator door.
-
Take out the fixing screws and remove the upper bracket 6. Note the small plastic plate underneath the bracket.
-
Turn the bracket 6 including the small plastic plate through 180^ and replace it on the other side of the refrigerator, using the two screw holes adjacent to each other.
-
Remove the hinge support 5 from the underside of the door and fit the hinge support provided on the opposite side.
-
Take out the covering caps and then remove the hinge support in the middle 4.
Caution: Support the door.
-
Take off the freezer door 3.
-
Remove the lower panel 1.
-
Take out the fixing screws and remove the bracket 2 with its hinge bolt.
-
Unscrew the hinge bolt, together with the washers, from the bracket, and fit it into the corresponding opening on the opposite side of the bracket.
-
Remove the bracket 7 and replace it with the holding bracket 2 with its hinge bolt.
-
Now install the holding bracket 7 in the previous position of the bracket 2.
-
Take out the sealing plugs 8 from the partition separating the refrigeration and freezer compartments and replace them in the openings on the opposite side.
-
Take out sealing plug 9 from the freezer door and replace it in the opening on the opposite side.
-
Place the freezer door onto the hinge bolt on holding bracket 2.
Caution: Support the door.
-
Turn the holding bracket 4 with its hinge bolt through 180^ , ensuring that the washers remain in place.
-
Replace the bracket on the opposite side on the freezer door and secure it with the screws.
-
Replace the covering caps over the screw heads.
-
Place the refrigerator door onto the hinge bolt on holding bracket 4.
Caution: Support the door.
-
Re-insert the hinge bolt of the bracket 6 into the refrigerator door.
-
Fit the four covers c over the bracket and the openings.
-
Remove the screw covering caps a and the sealing plugs b.
-
Take out the screws holding the door handles. Move the handle slightly towards the side with the screw and then pull the handle off to the front.
-
Fit the handles on the opposite side, using the fixing screws to secure them. Push the sealing plugs into the now empty openings in the door and replace the covering caps on the screw heads.
-
Take out the cover 10 from the lower panel 1 and replace it on the opposite side.
-
Replace the panel 1 on the appliance.
Temperature control
The unit is re-activated by connecting it to the mains. It is only switched off completely when the plug is removed from the wall socket.
The green mains indicator light shows that the unit is connected to the mains.
The temperature in the refrigerator cabinet can be adjusted by setting the temperature control.
Turning the control clockwise will decrease the temperature, while turning it anti-clockwise will increase it.
The medium settings are usually most suitable for home use.
We recommend using a thermometer to check the actual temperature inside the cabinet and make adjustments as necessary.
Following a power interruption, or if the unit has been switched off on purpose, it may take 3 to 5 minutes before it switches on again.
In position ‘0’, the cooling function is switched off, though the appliance is still connected to the mains.
Interior lighting
Caution: do not remove the cover of the interior LED light. If there should be any malfunction, please contact the customer service for assistance.
Freezer compartment door
To ensure that frozen food will not de-frost prematurely, the door to the freezer compartment should be kept closed at all times. This will also prevent an undue build-up of ice and frost. Ensure, therefore, that the door is only opened briefly to place food in the freezer compartment or to remove it.
Freezing and storing food
- The temperatures inside the refrigerator cabinet and freezer compartment depend mainly on the ambient temperature, the temperature control setting and the amount of food stored.
Freezer compartment:
- The freezer compartment is designed for deep-freezing and long-term storage of frozen food, and for making ice cubes.
- The quick-freeze compartment inside the freezer cabinet carries the symbol
- To ensure that nutritious elements such as vitamins are not lost, fresh food should be deep-frozen right through as quickly as possible. To that effect, the prepared food should be placed into the freezer compartments, properly spaced in one or two rows.
- Avoid contact with food that has already been frozen.
- Caution: Do not exceed the maximum freezing capacity per day. The product data sheet contains details of the maximum daily freezing capacity.
- Set the temperature control to Max. After 24 hours, once the food is well frozen, the temperature control can be set back to its original position.
- To ensure sufficient distribution of cold air, keep a minimum distance of 3 cm between the vapouriser assembly and the tray containing the food to be frozen.
- The time required to freeze food may be shortened by dividing it into smaller portions.
- Suitable packaging materials for frozen food are transparent (i.e. non-coloured) plastic wrap or bags, or aluminium foil. The packaging materials should be well aired before use; check that the package is air-tight before freezing the food. We strongly recommend that you label every item stored in the freezer with all relevant information such as type of food, freezing date and use-by date.
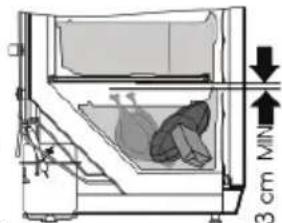
- Do not attempt to deep-freeze carbonated beverages, warm food or any kind of bottled liquids.
- Frozen food can be defrosted in the refrigerator. This way, the food is defrosted at a slower rate, retaining its taste. Furthermore, the frozen food helps to keep the temperature inside the refrigerator at its intended level.
Use-by dates for frozen food are specified (in months) in the table below.

Do not exceed these storage times.
However, always observe the manufacturer's use-by dates for the frozen food.
- If the unit remains switched off for an extended period (eg during a power failure), the door should be kept closed; this will help to maintain the lowest possible temperature in the cabinet. The product data sheet contains detailed information of the maximum safe storage time in case of malfunction. Even a slight rise in the inside temperature will shorten the storage life of the food.
Main cabinet
- Different areas of the refrigerator cabinet are affected differently by the cooling effect. The warmest area is around the door in the higher part of the cabinet, the coldest around the rear wall and in the lower part of the cabinet.
- The food should therefore be stored as follows:
- On main cabinet shelves (from top to bottom): bakery items, ready meals, dairy products, meat, fish and cold meats/sausages.
– In the vegetable compartment: vegetables, salad and fruit. - In the door (from top to bottom): butter, cheese, eggs, tubes (eg mustard), small bottles, large bottles, milk and fruit-juice tetra-packs.
- Initially, the temperature control should be set to position 4. If the cooling effect is too strong, lower it to position 1-3; if it is insufficient, raise it to 5-7.
If you notice frost on the rear wall, the most likely cause is that the door has been left open for too long, or that warm food has been placed inside the refrigerator or that the temperature control has been set too high.
- Liquid or strong-smelling food, or food which is likely to absorb strong odours (e.g. cheese, fish, butter), should be stored separately or in hermetically sealed containers.
- Warm food should be left to cool down to room temperature before being placed in the refrigerator.
- Always ensure that the door is properly closed and that the seal is not obstructed by food stored inside the cabinet or door.
Making ice cubes
A special ice-cube tray is provided for making ice cubes. Fill the tray 34 full with drinking water and place it in the freezer compartment. The ice cubes are easier to remove from the tray if the tray is left standing at room temperature for 5 minutes.
De-frosting and cleaning
- Always remove the plug from the wall socket before cleaning.
- For frequent cleaning we recommend the use of warm water with some mild detergent. To prevent any unpleasant odour within the refrigerator, it should be cleaned about once a month.
- Any accessories should be cleaned separately with soapy water. Do not put them in a dishwasher.
- Do not use abrasives or harsh cleaning solutions or any cleaning agents that contain alcohol.
- After cleaning, thoroughly clean all surfaces with fresh water before wiping them completely dry. When re-inserting the plug into the wall socket ensure that you have dry hands.
- To save energy and to ensure optimum performance, the condenser (at the rear) as well as the compressor should be cleaned at least twice a year with a broom or a vacuum cleaner.
- Take care not to remove or damage the rating plate inside the cabinet during cleaning.
When de-frosting the freezer compartment
Once the build-up of ice inside the freezer compartment has reached a thickness of 2-4 mm, it needs to be de-frosted. This should be done at least twice a year.
- Ensure that the plug has been removed from the wall socket.
- Remove all food from the compartment, wrap it in newspaper and store it in a cool place to keep the temperature down. Note that, even with a slight increase in temperature, the storage life will be shortened and the food should be used as soon as possible.
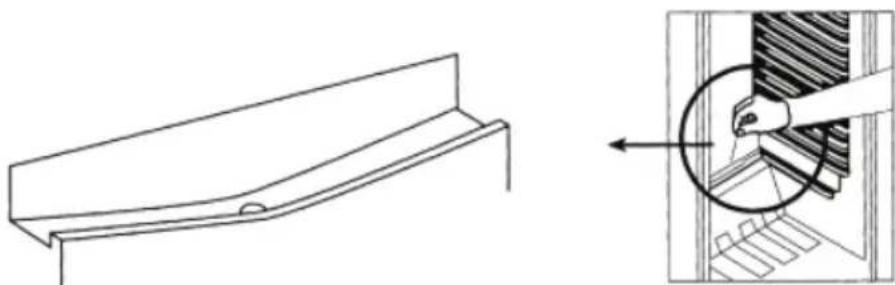
- Pull out the drain channel from the freezer cabinet, turn it 180^ and secure it (see diagram). Place a suitable container underneath the channel outlet.
- Keep the door open. To accelerate defrosting, one or several containers with hot (but not boiling) water may be placed inside the freezer compartment.

Warning: do not use any external device or other means (e.g. heaters or heating fans) to accelerate de-frosting.
- After cleaning, ensure that the freezer compartment is thoroughly dried and set the temperature control to its maximum position. After 24 hours, it may turned back to its normal setting.
Defrosting the refrigerator cabinet :
The integral vapouriser is sealed in foam in the rear wall; you may therefore notice a build-up of frost around the rear area. This layer of frost will start melting when the compressor is not working. Through a system of hoses, the melt-water drains into the collection tray below the compressor, where it will be absorbed into the surrounding air. The unit does not therefore require de-frosting, but only proper cleaning instead.
natural_image
Technical line drawing of a mechanical component with an inset showing a magnified detail (no text or symbols)- To enable the melt-water to drain freely, always ensure that the channel and discharge opening in the cabinet are free of any blockage.
Trouble-shooting
Certain typical sounds can be heard when the appliance is switched on. These sounds are:
- caused by the electrical motor within the compressor assembly; during compressor start-up the sound level will be slightly higher for a limited period of time.
- caused by the cooling agent flowing through the circuit.
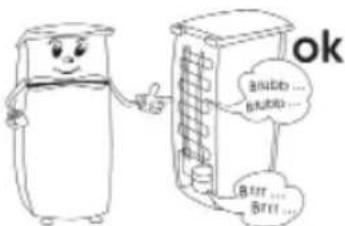
The following table lists possible malfunctions and their probable causes and solutions. In the event of operational problems, check first whether a solution can be found using this table. If the problem persists, disconnect the appliance from the mains power and contact our Customer Service Department.
| Problem Possible cause and solution | |
| The appliance is not working at all. | - There is a power failure- The main fuse has blown.- The temperature control is set to ‘0’.- The fuse in the wall socket (if applicable) has blown. This can be checked by connecting another electrical device to the socket and checking for function. |
| The temperature inside the freezer compartment is not low enough. | - Too much food has been stored in the appliance.- The doors are not properly closed.- There is too much dust on the condenser.- Insufficient ventilation: the unit is too close to a wall or other structure or object.- The temperature control is set too low. |
| The normal operating sound changes or becomes louder. | - Check for proper positioning (uneven floor?).- Are any adjacent objects affected by the running of the cooling unit (i.e. causing them to vibrate?)- Are there any objects on top of the unit which might be vibrating? |
| Water is collecting on the bottom of the unit. | The melt-water drain system is blocked. Remove the blockage and clean the system. |
Transporting the appliance
To prevent damage to the unit during transport, ensure that all accessories and components inside and around the appliance are securely fastened.
The unit must only be transported in its vertical position; do not tilt any more than 30^ .
Once the unit has been positioned, wait for about 30 minutes before it is connected to the mains.
If the unit has been tilted more than 30^ during transport, allow it to stand in an upright position for at least 4 hours before it is connected to the mains.
Disposal

This appliance has been manufactured from recyclable materials. After removing the plug from the wall socket, the unit should be rendered unusable by cutting off the power cord before disposing of it through special waste collection points in accordance with local
regulations. The refrigerant and the chemical agent in the insulation foam must be disposed of through a competent agency. Take special care not to damage the cooling circuit before the unit is handed over for such disposal.
Guarantee
This product is guaranteed against defects in materials and workmanship for a period of two years from the date of purchase. Under this guarantee the manufacturer undertakes to repair or replace any parts found to be defective, providing the product is returned to one of our authorised service centres. This guarantee is only valid if the appliance has been used in accordance with the instructions, and provided that it has not been modified, repaired or interfered with by any unauthorised person, or damaged through misuse.
This guarantee naturally does not cover wear and tear, nor breakables such as glass and ceramic items, bulbs etc. This guarantee does not affect your statutory rights, nor any legal rights you may have as a consumer under applicable national legislation governing the purchase of goods. If the
product fails to operate and needs to be returned, pack it carefully, enclosing your name and address and the reason for return. If within the guarantee period, please also provide the guarantee card and proof of purchase.
Information needed by the Customer Service Department
Should repairs to the appliance become necessary, please contact our Customer Service Department, providing a detailed fault description and quoting the model number KS ... on the rating plate of the appliance (see picture). This information will help us to handle your request efficiently.
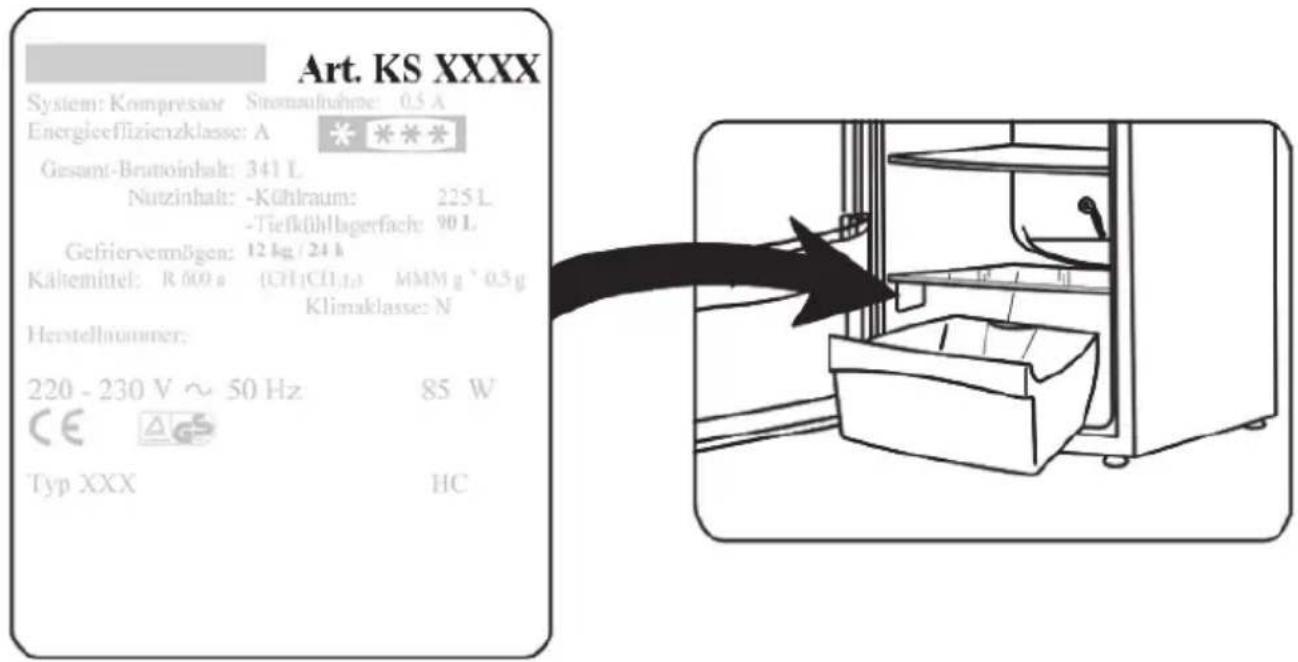
In case of any malfunction or other problem, please contact our Customer Services Department. The address can be found in the appendix to this manual.
Product data sheet
| Art. no. | KS 9770 / 9774 / 9775 / 97769897 / 9898 / 9899 | KS 9872 / 9873 / 9874 |
| Product category Refrigerator-freezer | ||
| Energy efficiency classification A++ | ||
| Energy consumption in kWh/year 179 | 204 | |
| The actual consumption depends on the pattern of use and the location of the appliance | ||
| Usable refrigerator capacity (litres) 173 | 191 | |
| Usable capacity * * * - Freezer unit (litres) | 54 88 | |
| Frost-free : freezer unit no | ||
| Frost-free : refrigeration unit yes | ||
| Safe storage time in case of malfunction, hrs | 18 20 | |
| Freezing capacity, kg/24h 6 8 | ||
| Climate classification N,ST | ||
| Ambient temperature range, °C 16-38°C | ||
| Noise emission | 40 dB(a) | |
| Dimensions (H x W x D) in mm | 1500 x 600 x 650 | 1760 x 600 x 650 |
| Weight (kg) | 55 64 | |
| Electrical specifications | See rating plate | |
Chère cliente, Cher client,
natural_image
Warning symbol of a flame inside a triangle (no text or numbers)natural_image
Diagram showing two labeled components (1 and 2) with downward arrows indicating motion or force, mounted on a flat surface (no text or symbols beyond labels)natural_image
Technical line drawing of a mechanical component with an inset showing a close-up of a component (no text or symbols present)natural_image
Warning symbol of a flame inside a triangle (no text or numbers)natural_image
Diagram showing two labeled components (1 and 2) with downward arrows indicating motion or force, no text or symbols present.Vriezer compartiment:
natural_image
Technical line drawing of a mechanical component with an inset showing a close-up of a component (no text or symbols)natural_image
Warning symbol of a flame inside a triangle (no text or numbers)natural_image
Diagram showing two labeled components (1 and 2) with arrows pointing to them, no text or symbols present.natural_image
Technical line drawing of a metal bracket with an inset showing a close-up of a component (no text or symbols)natural_image
Warning symbol of a flame inside a triangle (no text or numbers)natural_image
Diagram showing two labeled components (1 and 2) with downward arrows indicating motion or force, no text or symbols present.natural_image
Technical line drawing of a mechanical component with an inset showing a close-up of a component (no text or symbols present)natural_image
Warning symbol of a flame inside a triangle (no text or numbers)natural_image
Diagram showing two labeled components (1 and 2) with downward arrows indicating motion or force, no text or symbols present.natural_image
Technical line drawing of a metal bracket with an inset showing a close-up of the internal structure (no text or symbols)-bed-and-breakfasthus.
natural_image
Warning symbol of a flame inside a triangle (no text or numbers)natural_image
Diagram showing two labeled components (1 and 2) with arrows pointing to them, no text or symbols present.natural_image
Simple line drawing of a metal bracket or support structure (no text or symbols)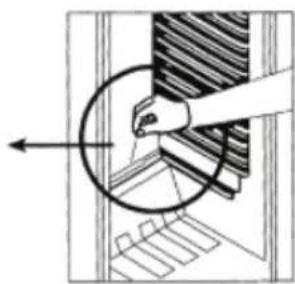
natural_image
Diagram showing a hand holding a circular object with an arrow pointing to a textured surface (no text or symbols)natural_image
Warning symbol of a flame inside a triangle (no text or numbers)natural_image
Diagram showing two labeled components (1 and 2) with arrows pointing to them, no text or symbols present.natural_image
Technical line drawing of a mechanical component with an inset showing a magnified detail (no text or symbols)natural_image
Warning symbol of a flame inside a triangle (no text or numbers)natural_image
Diagram showing two labeled components (1 and 2) with arrows pointing to a surface, no text or symbols present.Regulator temperature
natural_image
Simple line drawing of a structural beam or support component (no text or symbols)
natural_image
Diagram showing a hand holding a circular object with an arrow pointing to a textured surface (no text or symbols)natural_image
Warning symbol of a flame inside a triangle (no text or numbers)natural_image
Diagram showing two labeled components (1 and 2) with arrows pointing to them, no text or symbols present.natural_image
Technical line drawing of a mechanical component with an inset showing a hand holding a circular component (no text or symbols)natural_image
Warning symbol of a flame inside a triangle (no text or numbers)natural_image
Diagram showing two labeled components (1 and 2) with downward arrows indicating motion or force, mounted on a flat surface (no text or symbols beyond labels)natural_image
Technical line drawing of a mechanical component with an inset showing a hand holding a circular component (no text or symbols present)Kuressaare: Toomas Teder FIE, Pikk 1B,
tel: 45 55 978
Philippos Business Center
Agias Anastasias & Laertou, Pilea
Service Post of Thermi
570 01 Thessaloniki, Greece
Tel.: 0030-2310954020
Iran
IRAN-SEVERIN KISH CO. LTD.
No. 668, 7th. Floor
Bahar Tower
Ave. South Bahar
TEHRAN - IRAN
Tel.:009821-77616767
Fax:009821-77616534
Info@iranseverin.com
www.iranseverin.com
Israel
Eatay Agencies
109 Herzel St.
Haifa
Phone: 050-5358648
Email: service@severin.co.il
Italia
via Dino Col 52r-54r-56r,
I - 16149 Genova
Green Number: 800240279
Tel.: 010/6 45 11 02 - 01041 86 09
Fax: 010/6 42 50 09
e-mail: videoelettronica@panet.it
Jordan
F.A. Kettaneh
P.O. Box 485
Amman, 11118, Jordan
Tel: 00962-6-439 8642
e-mail: app@kettaneh.com.jo
Korea
Jung Shin Electronics co., Ltd.
501, Megaventuretower 77-9,
Moonrae-Dong 3ga, Yongdeungpo-Gu
Seoul, Korea
Tel: +82-22-637 3245\~7
Fax: +82-22-637 3244
Service Hotline: 080-001-0190
Latvia
SERVO Ltd.
Mr. Janis Pivovarenoks
Tel: +371 7279892
servo@apollo.lv
Lebanon
Khoury Home
7th Floor, Cité Dora 3 Building, Dora
P.O.Box 70611
Antelias, Lebanon
Telephone 01 244200, Fax 01 253535
eMail: info@khouryhome.com
Internet: www.khouryhome.com
Luxembourg
Ser-Tec
Sc. 2 Et.1, Ap. 27, Sector 1
Bucuresti
Tel: +40 21 233 41 12
+40 21 233 41 13
+40 21 688 66 13
Fax: +40 21 233 41 03
+40 21 688 66 13
E-mail: offi ce@forbrands.ro
Web site: www.forbrands.ro
Schweiz
VB Handels Sàrl GmbH
Postfach 306
1040 Echallens
Tel: 021 881 60 45
Fax: 021 881 60 46
mail: severin@helt.ch
Serbia
SMIL doo
Pasiceva 28, Novi Sad
Serbia and Montenegro
tel: +381-21-524-638
tel: +381-21-553-594
fax: +381-21-522-096
Slowak Republic
PREMT,s.r.o.
Skladová 1
917 01 Trnava
Tel: 033/544 7177
Finland
Oy Harry Marcell Ab
Rälssitie 6, PL 63
01511 Vantaa
Tel.: 00358 / 2 07 599 860
Fax: 00358 / 2 07 599 803
Svenska
Rakspecialisten HS
Möllevångsgatan 34
214 20 Malmö
Tel.: 040/12 07 70
Fax: 040/6 11 03 35
Slovenia
SEVTIS d.o.o.
Smartinska 130
1000 Ljubljana
Tel: 00386 1 542 1927
Fax: 00386 1 542 1926
Stand: 03.2010
SEVERIN


- Connection to the mains supply
- General information
- Important safety instructions
- Familiarisation
- Before using for the first time
- Installation
- Caution: Ensure at all times that the rear ventilation openings around the top cover are not obstructed.
- Reversible door
- Caution: Support the door.
- Temperature control
- Interior lighting
- Freezer compartment door
- Freezing and storing food
- Freezer compartment:
- Main cabinet
- Making ice cubes
- De-frosting and cleaning
- When de-frosting the freezer compartment
- Defrosting the refrigerator cabinet :
- Trouble-shooting
- Transporting the appliance
- Disposal
- Guarantee
- Information needed by the Customer Service Department
- Chère cliente, Cher client,
- Vriezer compartiment:
- Regulator temperature
- Iran
- Israel
- Italia
- Jordan
- Korea
- Latvia
- Lebanon
- Luxembourg
- Schweiz
- Serbia
- Slowak Republic
- Finland
- Svenska
- Slovenia
- SEVERIN
Brand : SEVERIN
Model : KS 9773
Category : Refrigerator