
Rogue Select (2015) - Car NISSAN - Free user manual and instructions
Find the device manual for free Rogue Select (2015) NISSAN in PDF.


| Manufacturer | Nissan |
| Model | Rogue Select |
| Year | 2015 |
| Category | Compact SUV |
| Body Style | 5-door SUV |
| Engine | 2.5L I4 |
| Horsepower | 170 hp @ 6000 rpm |
| Torque | 175 lb-ft @ 4400 rpm |
| Transmission | CVT (Continuously Variable) |
| Drivetrain | Front-Wheel Drive (AWD optional) |
| Fuel Type | Regular unleaded |
| Fuel Economy (city/highway) | 26/33 mpg |
| Fuel Tank Capacity | 14.5 gallons |
| Seating Capacity | 5 |
| Cargo Volume (behind 2nd row) | 32.2 cu ft |
| Length | 182.9 in |
| Width | 72.4 in |
| Height | 66.3 in |
| Wheelbase | 106.5 in |
| Curb Weight | 3,200 lbs |
| Tire Size | 225/65R17 |
| Safety Features | Airbags (front, side, curtain), ABS, Stability Control |
| Oil Capacity (with filter) | 4.8 quarts |
| Recommended Oil | SAE 0W-20 |
Frequently Asked Questions - Rogue Select (2015) NISSAN
User questions about Rogue Select (2015) NISSAN
0 question about this device. Answer the ones you know or ask your own.
Ask a new question about this device
Download the instructions for your Car in PDF format for free! Find your manual Rogue Select (2015) - NISSAN and take your electronic device back in hand. On this page are published all the documents necessary for the use of your device. Rogue Select (2015) by NISSAN.
USER MANUAL Rogue Select (2015) NISSAN
For your safety, read carefully and keep in this vehicle.
Foreword
WelcometothegrowingfamilyofnewNISSAN owners. This vehicle is delivered to you with confidence. It was produced using the latest techniques and strict quality control.
Thismanualwaspreparedtohelpyouunderstandtheoperationandmaintenanceofyour vehiclesothatyoumayenjoymanymilesof drivingpleasure.Pleasereadthroughthis manualbeforeoperatingyourvehicle.
AseparateWarrantyInformationBooklet explainsdetailsaboutthewarrantiescoveringyourvehicle.TheNISSANService andMaintenanceGuideexplainsdetails aboutmaintainingandservicingyourvehicle.Additionally,aseparateCustomer Care/LemonLawBookletwillexplainhow toresolveanyconcernsyoumayhavewith yourvehicle,aswellasclarifyyourrights underyourstate'slemonlaw.
Inadditiontofactoryinstalledoptions,your vehiclemayalsobeequippedwithadditional accessoriesinstalledbyNISSANorbyyour NISSANdealerpriortodelivery.Itisimportant thatyoufamiliarizeyourselfwithalldisclosures, warnings,cautionsandinstructionsconcerning properuseofsuchaccessoriespriortooperatingthevehicleand/oraccessory.SeeaNISSAN dealerfordetailsconcerningtheparticular accessories withwhichyourvehicleis
equipped.
YourNISSANdealerknowsyourvehiclebest. Whenyourequireanyserviceorhaveany questions,wewillbegladtoassistyouwiththe extensiveresourcesavailabletous.
READFIRST—THENDRIVESAFELY
Beforedrivingyourvehicle,readyourOwner's Manualcarefully.Thiswillensurefamiliaritywith controlsandmaintenancerequirements,assistingyouinthesafeoperationofyourvehicle.

WARNING
IMPORTANT SAFETY INFORMATION REMINDERS FOR SAFETY!
Followtheseimportantdrivingrulesto helpensureasafeandcomfortabletrip foryouandyourpassengers!
- NEVERdriveundertheinfluenceof alcoholordrugs.
- ALWAYSObservepostedspeedlimitsandneverdrivetoofastfor conditions.
-
ALWAYSgiveyourfullattentionto driving and avoid using vehicle featuresortakingotheractionsthat could distract you.
-
ALWAYSuseyourseatbeltsand appropriatechildrestraintsystems. Pre-teenchildrenshouldbeseated intherearseat.
- ALWAYSprovideinformationabout theproperuseofvehiclesafety featurestoallooccupantsofthe vehicle.
- ALWAYSreviewthisOwner'sManualforimportantsafetyinformation.
ON-PAVEMENTANDOFF-ROAD DRIVING
Thisvehiclewillhandleandmaneuver differentlyfromanordinarypassenger carbecauseithasahighercenterof gravity.Aswithothervehicleswithfeaturesofthistype,failuretooperatethis vehiclecorrectlymayresultinlossof controloranaccident.Besuretoread "On-pavementandoff-roaddrivingprecautions","Avoidingcollisionandrollover"and"Drivingsafetyprecautions"in the"5.Startinganddriving"sectionof thismanual.
MODIFICATIONOFYOURVEHICLE
This vehicles should not be modified. Modification could affect its performance, safety durability, and may even violate governmental regulations. In addition, damage or performance problems resulting from modification may not be recovered under NISSAN warranties.
WHENREADINGTHEMANUAL
This manual includes information for all features and equipment available on this model. Features and equipment in your vehicle may vary depending on model, trim level, options selected, order, date of production, region or availability. Therefore, you may find information about features or equipment that are not included or installed on your vehicle.
Allinformation, specifications and illustrations in this manual are those ineffect at the time of printing. NISSAN reserves the right to change specifications, performance, design or components suppliers without notice and without obligation. From timetotime, NISSAN may update or revisit this manual to provide owners with them most accurate information currently available. Please carefully read and retain with
thismanualallrevisionupdatessenttoyouby NISSANtoensureyouhaveaccesstoaccurate andup-to-dateinformationregardingyourve- hicle.CurrentversionsofvehicleOwner's Manualsandanyupdatescanalsobefoundin theOwnersectionoftheNISSANwebsiteat https://owners.nissanusa.com/nowners/naviga- tion/manualsGuide.Ifyouhavequestionscon- cerninganyinformationinyourOwner'sManual, contactNISSANConsumerAffairs.Seethe NISSANCUSTOMERCAREPROGRAMpage inthisOwner'sManualforcontactinformation. IMPORTANTINFORMATIONABOUT THISMANUAL
Youwillseevarioussymbolsinthismanual.They areusedinthefollowingways:

WARNING
Thisisusedtoindicatethepresenceof ahazardthatcouldcausedeathor seriouspersonalinjury.Toavoidor reducetherisk,theproceduresmust befollowedprecisely.

CAUTION
Thisisusedtoindicatethepresenceof ahazardthatcouldcauseminoror moderatepersonalinjuryordamageto yourvehicle.Toavoidorreducetherisk, theproceduresmustbefollowedcarefully.

natural_image
Abstract geometric shape resembling an 'X' with diagonal lines, no text or symbols presentIf you seethesymbol above, it means "Donot do this" or "Donot let this happen".


If you see easy symbols similar to those above in an illustration, it means the arrow point to the front of the vehicle.


Arrowsinanillustrationthataresimilartothose aboveindicatemovementoration.


Arrowsinanillustrationthataresimilartothose
abovecallattentiontoanitemintheillustration. CALIFORNIAPROPOSITION65 WARNING

WARNING
Engineexhaust, some of its constituents, and certain vehicle components containoremit chemicals known to the State of Californiatocausecancer and birth defects or other reproductive harm. In addition, certain fluids contained in vehicles and certain products of component wear containoremit chemicals known to the State of Californiatocausecancer and birth defects or other reproductive harm.
CALIFORNIAPERCHLORATEADVI- SORY
Somevehicleparts,suchaslithiumbatteries,maycontainperchloratematerial. The following advisory is provided: "PerchlorateMaterial-specialhandlingmay apply,Seewww.dtsc.ca.gov/
hazardouswaste/perchlorate."

Bluetooth
Bluetooth® isatrademarkowned by Bluetooth SIG, Inc., and licensed to Visteon Corporation. Sirius XMSatellite Radiorequires subscription, sold separately. Not available in Alaska, Hawaii or Guam. Formoreinformation, visit www.siriusxm.com.

Both NISSAN and your NISSAN dealer are dedicated to serving all your automotive needs. Your satisfaction with your vehicle and your NISSAN dealer are our primary concerns. Your NISSAN dealer is always available to assist you with all your automobile sales and service needs.
However, if there is something that your NISSAN dealer cannot assist you with or you would like to provide NISSAN directly with comments questions, please contact the NISSAN Consumer Affairs Department using our toll-free number:
1-800-NISSAN-1
(1-800-647-7261)
The Consumer Affairs Department will ask for the following information:
-Yourname,address,andtelephonenumber
- Vehicleidentificationnumber(attached to the top of the instrument panel on the driver's side)
- Dateofpurchase
●Currentodometerreading
-YourNISSANdealer'sname
-Yourcommentsorquestions OR
YoucanwritetoNISSANwiththeinformationat:
NissanNorthAmerica, Inc.
ConsumerAffairsDepartment
P.O.Box685003
Franklin,TN37068-5003
orviae-mailat:
nnaconsumeraffairs@nissan-usa.com
If you prefer, visit us at:
www.nissanusa.com
WeappreciateyourinterestinNISSANand thankyouforbuyingaqualityNISSANvehicle.
Tableof Contents
| Illustratedtableofcontents | 0 |
| Safety—Seats,seatbeltsandsupplemental restraintsystem | 1 |
| Instrumentsandcontrols | 2 |
| Pre-drivingchecksandadjustments | 3 |
| Heater,airconditioner,audio,phoneandvoice recognitionsystems | 4 |
| Startinganddriving | 5 |
| Incaseofemergency | 6 |
| Appearanceandcare | 7 |
| Maintenanceanddo-it-yourself | 8 |
| Technicalandconsumerinformation | 9 |
| Index | 10 |
0Illustratedtableofcontents
Seats,seatbeltsandSupplementalRestraint
System(SRS)....0-2
Exteriorfront....0-3
Exteriorrear....0-4
Passengercompartment....0-5
Instrumentpanel....0-6
Metersandgauges....0-7
Enginecompartment....0-8
QR25DEengine....0-8
Warningandindicatorlights....0-9
SEATS,SEATBELTSAND SUPPLEMENTALRESTRAINT SYSTEM(SRS)

-
Supplementalfront-impactairbags(Page1-41)
-
Frontseat-mountedside-impactsupplemental airbags(P.1-41)
3.Seatbelts(P.1-9)
4.Headrestraints(P.1-5)
—Front-seatActiveHeadRestraints(P.1-7)
- Roof-mounted curtainside-impact and rollover supplemental airbags (P.1-41)
6.Rearcenterseatbelt(P.1-15)
- Occupantclassificationsensor(patternsensor) —Advancedairbagsystem(P.1-47)
8.Frontseats(P.1-3)
9.Seatbeltpretensioner(P.1-52)
- Rearseats(P.1-4)
—Childrestraints(P.1-21)
11.LATCH(LowerAnchorsandTethersforCHildren)System(P.1-23)
- Childrestraintanchorpoints(fortoptetherstrap childrestraint)(P.1-37)
0-2 Illustratedtableofcontents
EXTERIORFRONT
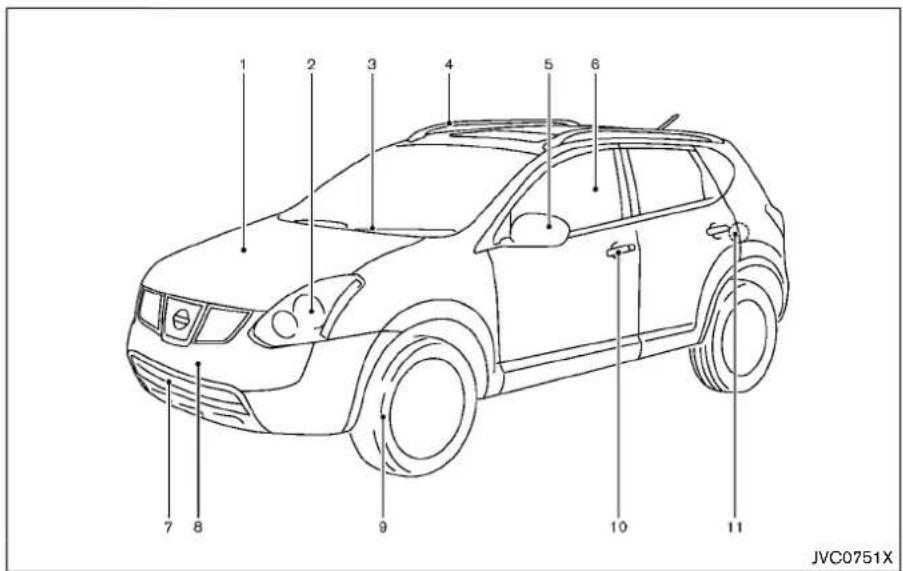
1.Hood(P.3-9)
2.Headlightandturnsignallights
—Switchoperation(P.2-29)
—Bulbreplacement(P.8-24)
3. Windshieldwiperandwasher
—Switchoperation(P.2-27)
—Bladereplacement(P.8-17)
—Windowwasherfluid(P.8-12)
4.Roofrack(rail)*(P.2-38)
5. Outsidemirrors(P.3-14)
6.Powerwindows(P.2-39)
7.Recoveryhook(P.6-14)
8. Licenseplateinstallation(P.9-11)
9.Tires
—Wheelandtires(P.8-29,P.9-7)
-Flattire(P.6-2)
—TirePressureMonitoringSystem(TPMS)
(P.2-12,P.5-3)
10.Doors
—Keys(P.3-2)
—Doorlocks(P.3-3)
—Remotekeylessentrysystem(P.3-5)
—Securitysystem(P.2-24)
11. Childsafetyreardoorlock(P.3-5)
*:ifsoequipped
EXTERIORREAR

1.Liftgate(P.3-10)
2.Rearviewcamera*(P.4-2)
3.Rearwindowwiperandwasher
—Switchoperation(P.2-28)
—Windowwasherfluid(P.8-12)
4.Rearwindowdefroster(P.2-29)
- High-mounted stoplight
—Bulbreplacement(P.8-26)
6.Antenna(P.4-38)
—Satelliteradioantenna*(P.4-12)
7.Back-uplight
—Bulbreplacement(P.8-26)
8.Rearcombinationlight
—Bulbreplacement(P.8-26)
9.Fuel-fillerdoor
—Operation(P.3-11)
—Fuelinformation(P.9-3)
*:ifsoequipped
0-4 Illustratedtableofcontents
PASSENGERCOMPARTMENT

1.Cargocover*(P.2-36)
2.Coathooks(P.2-38)
3. Ceilinglight(P.2-43)
4. Doorarmrest
Powerwindowswitch(P.2-39)
—Powerdoorlockswitch(P.3-4)
5.Sunvisors(P.3-13)
6.Frontmaplights(P.2-42)
7.Sunglassesholder(P.2-33)
8. Insidemirror(P.3-14)
9.Cargoarea
—Storages(P.2-35)
—Luggagehooks(P.2-37)
—Cargolight(P.2-44)
-Sparetire(P.6-4)
10.Rearcupholders(P.2-32)
11.Consolebox(P.2-35)
—Poweroutlet(P.2-31)
- i P 0 drUSBconnectionport*(P.4-26)
12.Frontcupholders(P.2-32)
*:ifsoequipped
INSTRUMENTPANEL
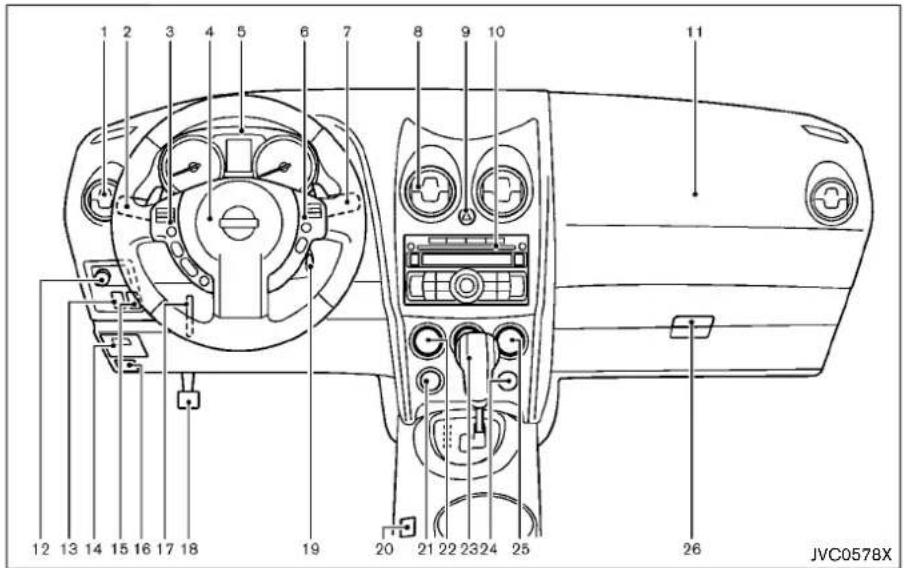
- Sideventilator(P.4-7)
- Headlightandturnsignalswitch (P.2-29)
- Steering-wheel-mounted controls(leftside)* —Audiocontrol*(P.4-37) —Bluetooth® Hands-Free Phone System control*(P.4-40)
4.Steeringwheel
—Horn(P.2-31)
—Driversupplementalairbag(P.1-41)
—Electricpowersteeringsystem(P.5-24)
5.Metersandgauges(P.2-4)
- Steering-wheel-mounted controls(rightside)
—Cruisecontrolswitches*(P.5-17)
7.Wiperandwasherswitch(P.2-27)
8. Centerventilator(P.4-7)
9.Hazardwarningflasherswitch(P.6-2)
10.Audiosystem(P.4-12)
—Clock(P.4-22,P.4-30)
—RearViewMonitor*(P.4-2)
11.Frontpassengersupplementalairbag(P.1-41)
12. Outsideremotemirrorcontrolswitch(P.3-14)
13. All-WheelDrive(AWD)LOCKswitch*(P.5-20)
14.Fuseboxcover(P.8-20)
15. VehicleDynamicControl(VDC)OFFswitch (P.2-31, P.5-27)
16.Hoodreleasehandle(P.3-9)
17.Tiltingsteeringwheellever(P.3-13)
18. Parkingbrake(P.5-16)
19. Ignitionswitch(P.5-9)
20.Sportmodeswitch(P.5-14)
21.Poweroutlet(P.2-31)
22.Heater/airconditionercontrol(P.4-8)
23Shiftlever(P.5-12)
24.Frontpassengerairbagstatuslight(P.1-48)
25.Rearwindowdefrosterswitch(P.2-29)
26.Glovebox(P.2-34)
*:ifsoequipped
0-6 Illustratedtableofcontents
METERSANDGAUGES

- Tachometer(P.2-6)
- Warning/indicatorlights(P.2-9)
- Vehicle information display(P.2-17)
- Speedometer(P.2-5)
- Enginecoolanttemperaturegauge(P.2-6)
- Switch(twintripodometercontrol and brightnesscontrol)(P.2-5,P.2-8)
- switch(settingscontrolandtripcomputer control)(P.2-17)
8.Fuelgauge(P.2-7)
ENGINECOMPARTMENT

QR25DEENGINE
- Engineoilfillercap(P.8-9)
2.Brakefluidreservoir(P.8-11)
3.Aircleaner(P.8-16) - Enginecoolantreservoir(P.8-8)
- Windowwasherfluidreservoir(P.8-12)
6.Enginedrivebeltlocation(P.8-14)
0-8Illustratedtableofcontents
- Engineoidipstick(P.8-9)
8.Radiatorfillercap(P.8-7)
—Vehicleoverheat(P.6-11)
9.Battery(P.8-13)
—Jumpstarting(P.6-9)
10.Fuse/fusiblelinkholder(P.8-19)
WARNINGANDINDICATORLIGHTS
| Warning light | Name | Page |
| All-WheelDrive(AWD)warning light(AWDmodels)(ifso equipped) | 2-10 | |
| Anti-lockBrakingSystem(ABS) warninglight | 2-10 | |
| Brakewarninglight | 2-11 | |
| Chargewarninglight | 2-11 | |
| Electricpowersteeringwarning light | 2-11 | |
| Engineoilpressurewarning light | 2-12 | |
| Lowfuelwarninglight | 2-12 | |
| Lowtirepressurewarninglight | 2-12 | |
| Masterwarninglight | 2-13 | |
| Seatbeltwarninglight | 2-13 | |
| Supplementalairbagwarning light | 2-14 | |
| VehicleDynamicControl(VDC) warninglight | 2-14 |
| Indicator light | Name | Page |
| All-WheelDrive(AWD)LOCK indicatorlight(AWDmodels)(if soequipped) | 2-14 | |
| Exteriorlightindicator | 2-14 | |
| Frontpassengerairbagstatus light | 2-15 | |
| Highbeamindicatorlight | 2-15 | |
| MalfunctionIndicatorLight (MIL) | 2-15 | |
| Overdriveoffindicatorlight | 2-16 | |
| Securityindicatorlight | 2-16 | |
| SPORTmodeindicatorlight | 2-16 | |
| Turnsignal/hazardindicator lights | 2-16 | |
| VehicleDynamicControl(VDC) offindicatorlight | 2-16 |
MEMO
0-10 Illustratedtableofcontents
1 Safety—Seats, seatbeltsandsupplemental restraintsystem
Seats....1-2
Frontseats....1-3
Rearseats....1-4
Headrestraints/Headrests....1-5
Adjustableheadrestraint/headrestcomponents.....1-6
Non-adjustablehead
restraint/headrestcomponents....1-6
Remove....1-6
Install....1-7
Adjust....1-7
Seatbelts....1-9
Precautionsonseatbeltusage....1-9
Pregnantwomen....1-11
Injuredpersons....1-11
Three-pointtypeseatbelt....1-11
Seatbeltextenders....1-18
Seatbeltmaintenance....1-18
Childsafety....1-19
Infants....1-20
Smallchildren....1-20
Largerchildren....1-20
Childrestraints....1-21
Precautionsonchildrestraints....1-21
LowerAnchorsandTethersforCHildren
System(LATCH)....1-23
Rear-facingchildrestraintinstallation
usingLATCH....1-25
Rear-facingchildrestraintinstallationusingthe
seatbelts....1-28
Forward-facingchildrestraintinstallation
usingLATCH....1-31
Forward-facingchildrestraintinstallationusingthe
seatbelts....1-33
Boosterseats....1-37
SupplementalRestraintSystem....1-41
PrecautionsonSupplementalRestraintSystem.....1-41
NISSANAdvancedAirBagSystem
(frontseats)....1-47
Frontseat-mountedside-impactsupplemental
airbagandroof-mountedcurtainside-impactand
rolloversupplementalairbagsystems....1-51
Seatbeltswithpretensioners(frontseats)....1-52
Supplementalairbagwarninglabels....1-54
Supplementalairbagwarninglight....1-54
Repairandreplacementprocedure....1-54
SEATS


WARNING
- Donotrideinamovingvehicle whentheseatbackisreclined.This canbedangerous.Theshoulderbelt willnotbeagainstyourbody.Inan accident,youcouldbethrownintoit andreceiveneckorotherserious injuries.Youcouldalsoslideunder thelapbeltandreceiveserious internalinjuries.
- Forthemosteeffectiveprotection whenthevehicleisinmotion,the seatshouldbeupright.Alwayssit
wellbackintheseatwithbothfeet onthefloorandadjusttheseat properly.See"Precautionsonseat beltusage"(P.1-9).
•Afteradjustment, gentlyrockinthe seattomakesureitissecurely locked.
- Donotleavechildrenunattended insidethevehicle.Theycouldunknowinglyactivateswitchesorcontrols.Unattendedchildrencould becomeinvolvedinseriousaccidents.
•Theseatbackshouldnotbereclined anymorethanneededforcomfort. Seatbeltsaremosteffectivewhen thepassengersitswellback and straightupintheseat.Iftheseat-backisreclined,theriskofsliding underthelapbeltandbeinginjured isincreased.

CAUTION
When adjusting theseat positions, be surenottocontactanymovingpartsto avoid possible injuries and ordamages.

natural_image
Two line drawings of car seatbelt covers with arrows indicating rotation (no text or symbols)FRONTSEATS
Frontmanualseatadjustment
Forwardandbackward:
Pullthelever ① upandholditwhileyouslide theseatforwardorbackwardtothedesired position. Releasethelevertolocktheseatin position.
Reclining:
Toreclinetheseatback,pullthelever ② upand leanback.Tobringtheseatbackforward,pull theleverupandleanyourbodyforward.Release thelevertolocktheseatbackinposition. Therecliningfeatureallowsadjustmentofthe
seatbackforoccupantsofdifferentsizesfor addedcomfortandtohelpobtainproperseat beltfit.(See"Precautionsonseatbeltusage" (P.1-9).)Also,theseatbackcanbereclinedto allowoccupantstorestwhenthevehicleis stoppedandthetransmissionintheP(Park) positionwiththeparkingbrakefullyapplied.

natural_image
Line drawing of a hand holding a car seatbelt with directional arrows indicating movement (no text or symbols)Seatlifter(ifsoequipped):
Pulluporpushdowntheadadjustingleverto adjusttheseatheightuntilthedesiredposition isachieved.

REARSEATS
Folding
Beforefoldingtherearseats:
- Securetheseatbeltsontheseatbelthooks onthesidewall.(See"Seatbelthooks" (P.1-15).)
-Releasetheconnectortongueoftherear centerseatbeltfromthebuckle,andstore theconnectorandseatbelttonguesintothe retractorbaseontheceiling.(See"Rear centerseatbelt"(P.1-15).) - If necessary, mov the front seats forward to provide enough clearances that there are seats can be folded down completely.
Tofolddowntheseatbackofeachrearseat,pull theadjustingknob Ⓐ.
Toreturntheseatbacktotheseatingposition,lift upeachseatbackandpushittotheupright positionuntilitislatched.

WARNING
- Donotusetherearseatbeltswhen thebucklesarestowedintheseat pockets.Failureretodosomayreducetheeffectivenessoftheentire restraintsystemandincreasethe chanceorseverityofinjuryinan accident.
- Donotfolddowntherearseats whenoccupantsareintherearseat areaoranyobjectsareontherear seats.
- Neverallowanyonetorideinthe cargoareaorontherearseats whentheyareinthefold-down position.Useoftheseareasby passengers without properrestraintscouldresultinseriousinjury inanaccidentorsuddenstop.
•Properlysecureallcargowithropes orstrapstohelppreventitfrom
slidingorshifting.Donotplace cargohigherthantheseatbacks.In asuddenstoporcollision,unsecuredcargocouldcausepersonal injury.
- When returning these seat back to the upright position, be certain they are completely secured in the elatched position. If they are not completely secured, passengers maybe injured in an accidentors sudden stop.
1-4 Safety—Seats, seatbeltsandsupplementalrestraintsystem
HEADRESTRAINTS/HEADRESTS

WARNING
Headrestraint/headrestsupplement theothervehiclesafetysystems.They may provide additional protection againstinjuryincertainrearendcollisions.Adjustableheadrestraints/headrestsmustbeadjustedproperly,as specifiedinthissection.Checkthe adjustmentaftersomeoneelseuses theseat.Donotattachanythingtothe headrestraint/headreststalksorremovetheheadrestraint/headrest.Do notusetheseatiftheheadrestraint/headresthasbeenremoved.Ifthehead restraint/headrestwasremoved,reinstallandproperlyadjustthehead restraint/headrestbeforeanoccupant usestheseatingposition.Failureto followtheseinstructionscanreducethe effectivenessoftheheadrestraint/headrest.Thismayincreasetheriskof seriousinjuryordeathinacollision.
natural_image
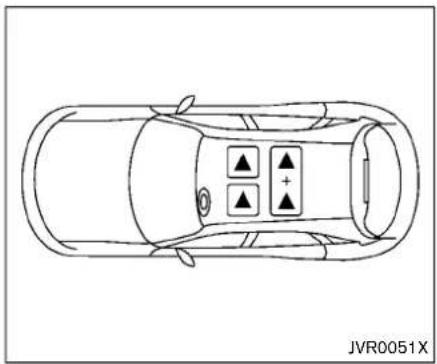
Top-down line drawing of a car with four directional indicators (up, down, left, right) on the dashboard and front wheel, labeled JVR0051X at bottom (no text or symbols on diagram itself)The illustrations show theseating positions equipped with headrestraint/headrest.
▲ Indicate theseating position is equipped with a head restraint.
■ Indicate theseating position is equipped with aheadrest.
+Indicate theseating position is not equipped with a head restraint or head rest.
- Your vehicle is equipped with a head restraint/head rest that may be integrated, adjustable or non-adjustable.
- Adjustableheadrestraints/headrestshave multiplenotchesalongthestalktolockthem inadesiredadjustmentposition.
- Thenon-adjustableheadrestraints/head-restshaveasinglelockingnotchtosecure themtotheseatframe.
●ProperAdjustment:
—Fortheadjustabletype, alignthehead restraint/headrestsothecenterofyour earisapproximatelylevelwiththecenter oftheheadrestraint/headrest.
—If you rear position is still higher than the recommended alignment, placethe head restraint/head rest at the highest position. - If the head restraint/head rest has been removed, ensure that it is reinstalled and locked in place before or ending in that designated seating position.

ADJUSTABLEHEADRESTRAINT/ HEADRESTCOMPONENTS
- Removableheadrestraint/headrest
- Multiplenotches
3.Lockknob
4.Stalks

NON-ADJUSTABLEHEADRESTRAINT/HEADRESTCOMPONENTS
- Removableheadrestraint/headrest
2.Singlenotch
3.Lockknob
4.Stalks

natural_image
Diagram of a car seat with directional arrows indicating movement (no text or symbols)REMOVE
Use the following procedure to remove the head restraint/headrest.
- Pulltheheadrestraint/headrestuptothe highestposition.
2.Pushandholdthelockknob. - Removetheheadrestraint/headrestfrom theseat.
- Storetheheadrestraint/headrestproperly in asecureplacesoitisnotlooseinthe vehicle.
- Reinstallandproperlyadjustthehead restraint/headrestbeforeanoccupantuses theseatingposition.

INSTALL
- Aligntheheadrestraint/headreststalkswith theholesintheseat.Makesurethatthe headrestraint/headrestisfacingthecorrect direction.Thestalkwiththeadjustment notch ① mustbeinstalledintheholewith thelockknob ②.
- Pushandholdthelockknobandpushthe headrestraint/headrestdown.
- Properly adjust the head restraint/head rest before an occupant use these seating position.
natural_image
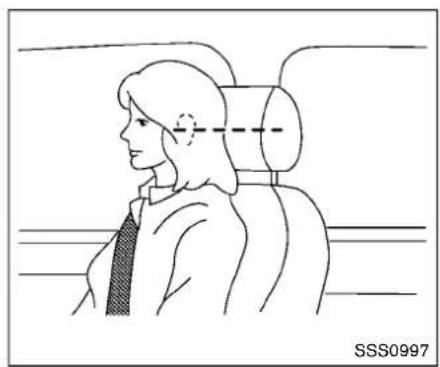
Side profile illustration of a person seated in a car seat, viewed from the side (no text or symbols)ADJUST
Foradjustableheadrestraint/headrest
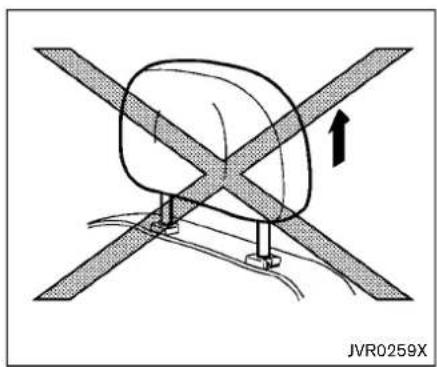
Adjusttheheadrestraint/headrestsothecenter islevelwiththecenterofyourears.Ifyourear positionisstillhigherthantherecommended alignment,placetheheadrestraint/headrestat thehighestposition.
natural_image
Diagram of a mechanical or electrical component with intersecting diagonal lines and an arrow indicating rotation (no text or symbols)Fornon-adjustableheadrestraint/head-rest
Makesuretheheadrestraint/headrestispositionedsothelockknobisengagedinthenotch beforeridinginthatdesignatedseatingposition.

natural_image
Diagram of a car seatbelt with an arrow indicating upward motion (no text or symbols)Raise
Toraisetheheadrestraint/headrest,pullitup. Makesuretheheadrestraint/headrestispositionedsothelockknobisengagedinthenotch beforeridinginthatdesignatedseatingposition.

natural_image
Diagram of a car seatbelt mechanism with directional arrows indicating movement (no text or symbols)Lower
Tolower, pushandhold the lockknob and push the head restraint/head restdown.
Makesuretheheadrestraint/headrestispositionedsothelockknobisengagedinthenotch beforeridinginthatdesignatedseatingposition.
1-8 Safety—Seats, seat belts and supplemental restraintsystem
SEATBELTS
PRECAUTIONSONSEATBELT USAGE
If you are wearing your seat belt properly adjusted, and you are sitting upright and well back in your seat with both feet on the floor, your chances of being injured or killed in an accident and/or these severity of injury may be greatly reduced. NISSAN strongly encourages you and all of your passenger to buckle up every time you drive, even if your seating position includes a supplemental airbag.
MostU.S.statesspecifythatseatbeltsbe wornatalltimeswhenvehicleisbeing driven.


natural_image
Line drawing of a person sitting in a car, showing seatbelt and dashboard (no text or symbols)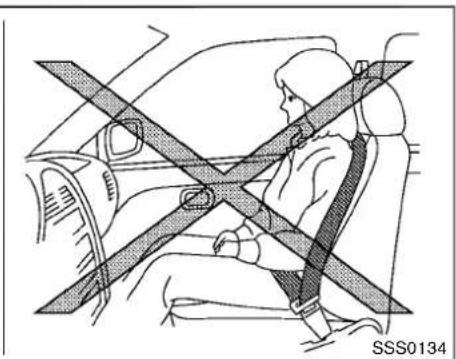
natural_image
Diagram of a car interior showing a person seated with a cross-shaped seatbelt (no text or symbols present)Safety—Seats, seatbeltsandsupplementalrestraintsystem 1-9

natural_image
Diagram of car seatbelt and passenger seatbelt crossed in a cross-section (no text or symbols)
natural_image
Line drawing of a person sitting in a car with an X-shaped seatbelt (no text or symbols)
WARNING
• Everypersonwhodrivesorridesin thisvehicleshoulduseaseatbeltat alltimes. Childrenshouldbeproperlyrestrainedintherearseatand, ifappropriate,inachildrestraint.
•Theseatbeltshouldbeproperly adjustedtoasnugfit.Failuretodo somayreducetheeffectiveness of theentirerestraintsystemandin- creasethechanceorseverity of injuryinanaccident.Seriousinjury ordeathcanoccuriftheseatbeltis notwornproperly.
•Alwaysroutetheshoulderbeltover yourshoulder and across your chest. Neverputthebeltbehind yourback, underyourarmoracross yourneck. Thebeltshouldbeaway from yourface and neck, but not falling off yourshoulder.
- Positionthelapbeltaslowand snugaspossibleAROUNDTHE HIPS,NOTTHEWAIST.Alapbelt worntoohighcouldincreasethe riskofinternalinjuriesinanaccident.
- Besuretheseatbelttongueis securelyfastenedtotheproper buckle.
- Donotweartheseatbeltinsideout ortwisted.Doingsomayreduceits effectiveness.
- Donotallowmorethanoneperson tousethesameseatbelt.
- Nevercarrymorepeopleinthe vehiclethanthereareseatbelts.
- Iftheseatbeltwarninglightglows continuouslywhiletheignitionis turnedONwithalldoorsclosedand allseatbeltsfastened,itmayindicateamalfunctioninthesystem. Havethesystemcheckedby a NISSANdealer.
-
Nochangesshouldbemadetothe seatbeltsystem. Forexample, do notmodifytheseatbelt, addmaterial, or installdevicesthat may changetheseatbeltroutingor tension. Doingsomayaffectthe operationoftheseatbeltsystem. Modifyingortamperingwiththe seatbeltsystemmayresult in seriouspersonalinjury.
-
Onceaseatbeltwithpretensioner hasactivated, it cannot be reused and must bereplaced together with theretractor. See a NISSAN dealer.
-Removalandinstallationofthe pretensionersystemcomponents shouldbedonebyaNISSANdealer. - Allseatbeltassemblies, including retractors and attaching hardware, should be inspected after an ac collision by a NISSAN dealer. NISSAN recommend that all seat belt assemblies in used during ac collision be replaced unless the collision was minor and the belt shown on damage and continueto operate properly. Seat belt assemblies not in use during ac collisions should also be inspected and replaced if either damage or improper operation is noted.
- Allchildrestraintsandattaching hardwareshouldbeinspectedafter anycollision.Alwaysfollowthe restraintmanufacturer'sinspection instructionsandreplacementrecommendations.Thechildrestraints shouldbereplacediftheyare
damaged.
PREGNANTWOMEN
NISSANrecommendsthatpregnantwomenuse seatbelts.Theseatbeltshouldbewornsnug, andalwayspositionthelapbeltaslowas possiblearoundthehips,notthewaist.Place theshoulderbeltoveryourshoulderandacross yourchest.Neverputthelap/shoulderbeltover yourabdominalarea.Contactyourdoctor for specificrecommendations.
INJUREDPERSONS
NISSANrecommendsthatinjuredpersonsuse seatbelts,dependingontheinjury.Checkwith yourdoctorforspecificrecommendations.
THREE-POINTTYPESEATBELT

WARNING
- Everypersonwhodrivesorridesin thisvehicleshoulduseaseatbeltat alltimes.
- Donotrideinamovingvehicle whentheseatbackisreclined.This canbedangerous.Theshoulderbelt willnotbeagainstyourbody.Inan accident,youcouldbethrownintoit andreceiveneckorotherserious
injuries. You could also slide under the lapbelt and receive serious internal injuries.
- Forthemosteeffectiveprotection whenthevehicleisinmotion,the seatshouldbeupright.Alwayssit wellbackintheseatwithbothfeet onthefloorandadjusttheseatbelt properly.


WARNING
Donotallowchildrentoplaywiththe seatbelts.Mostseatingpositionsare equippedwithAutomaticLockingRetractor(ALR)modeseatbelts.Ifthe seatbeltbecomeswrappedarounda child'sneckwiththeALRmodeactivated,thechildcanbeseriouslyinjured orkillediftheseatbeltretractsand becomestight.Thiscanoccurevenif thevehicleisparked.Unbuckletheseat belttoreleasethechild.Forthecenter oftherearseat,theconnectortongue
mayalsobereleased.Releasethe connectortongue ① byinsertinga suitabletool(suchasakey)intothe connectorbuckle A .Iftheseatbelt cannotbeunbuckledorisalready unbuckled,releasethechildbycutting theseatbeltwithasuitabletool(such asaknifeorscissors)toreleasethe seatbelt.
Fasteningtheseatbelts
- Adjusttheseat.(See "Seats"(P.1-2).)
natural_image
Illustration of a person sitting in a car seatbelt, showing the seatbelt being lifted by a black arrow (no text or symbols present)-
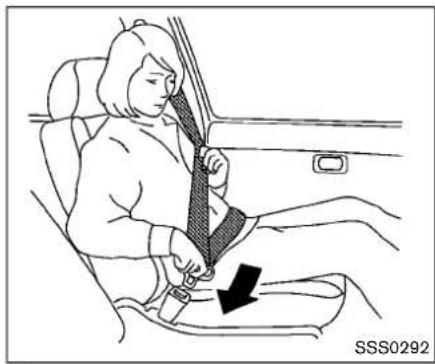
Slowlypulltheseatbeltoutoftheretractor andinsertthetongueintothebuckleuntil youhearandfeelthelatchengage.
-
Theretractorisdesignedtolock duringasuddenstoporonimpact. Aslowpullingmotionpermitsthe belttomoveandallowsyousome freedomofmovementintheseat.
- If these seat belt cannot be pulled from its fully retracted position, firmly pull the belt and release it. Then smoothly pull the belt out of the retractor.
natural_image
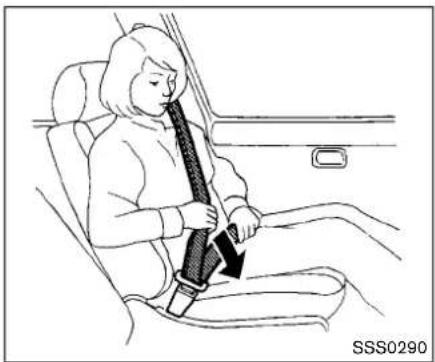
Line drawing of a person sitting in a car seatbelt, showing the seatbelt being lifted (no text or symbols present)- Positionthelapbeltportionlowandsnug onthehipsasshown.
- Pulltheshoulderbeltportiontowardthe retractortotakeupextraslack. Besurethe shoulderbeltisroutedoveryourshoulder andacrossyourchest.
Thefrontpassengerseatandtherearseating positionsthree-pointseatbeltshavetwomodes ofoperation:
●EmergencyLockingRetractor(ELR)
●AutomaticLockingRetractor(ALR)
TheEmergencyLockingRetractor(ELR)mode allowstheseatbelttoextendandretractto allowthedriverandpassengerssomefreedom
of movementintheseat.TheELRlockstheseat beltwhenthevehicleslowsdownrapidlyor duringcertainimpacts.
TheAutomaticLockingRetractor(ALR)mode (childrestraintmode)lockstheseatbeltfor childrestraintinstallation.
When ALRmodeisactivated theseatbelt cannot be extended again until theseatbelt tongue is detached from the buckland fully retracted. Theseatbelt return to the ELRmode after theseatbelt fully retracts. For additional information, see "Childrestraints" (P.1-21).
The ALR modes should be used only for child restraint installation. During normal seat belt use by an occupant, the ALR modes should not be activated. If it is activated, it may cause uncomfortable seat belt tension.

WARNING
When fastening these seat belts, be certain that seat backs are completely secured in the elatched position. If they are not completely secured, passengers maybe injured in an accidentors sudden stop.

natural_image
Illustration of a person's seatbelt being adjusted for a knot, with no text or symbols present.Unfasteningtheseatbelts
Tounfastentheseatbelt, pushthebuttononthe buckle. Theseatbeltautomaticallyretracts.
Checkingseatbeltoperation
Seatbeltretractorsaredesignedtolockseat beltmovementbytwoseparatemethods:
- Whenthebeltispulledquicklyfromthe retractor.
- Whenthevehicleslowsdownrapidly.
Checktheoperationasfollows: - Grasptheshoulderbeltandpullforward quickly. Theretractorshouldlock and restrict furtherbelt movement.
Iftheretractordoesnotlockduringthischeckor ifyouhaveanyquestionaboutseatbelt operation,seeaNISSANdealer.
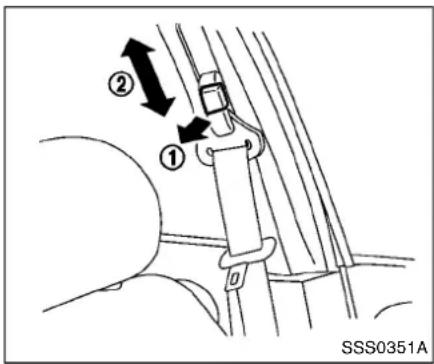
Shoulderbeltheightadjustment
Theshoulderbeltanchorheightshouldbe adjustedtothepositionbestforyou.(See "Precautionsonseatbeltusage"(P.1-9).)
Toadjust, pulltheadjustment button ① , and thenmovetheshoulderbeltanchortothe desiredposition ② , so that thebeltpasses overthecenteroftheshoulder. The belt should be away from your face and neck, but not falling off of your shoulder. Re leasetheadjustment button to lock the shoulder belt anchor into position.

WARNING
- Afteradjustment,releasethead-justmentbuttonandtrytomovethe shoulderbeltanchorupanddown tomakesureitissecurelyfixedin position.
- Theshoulderbeltanchorheight shouldbeadjustedtotheposition bestforyou.Failureuretodosomay reducetheeffectivenessofthe entirerestraintsystemandincrease thechanceorseverityofinjuryinan accident.

natural_image
Technical line drawing of a mechanical component with a black arrow indicating a specific feature (no text or symbols present)Seatbelthooks
When therearseatbeltsarenotinuse and when foldingdowntherearseats, hook therear outerseatbeltsontheseatbelthooks.
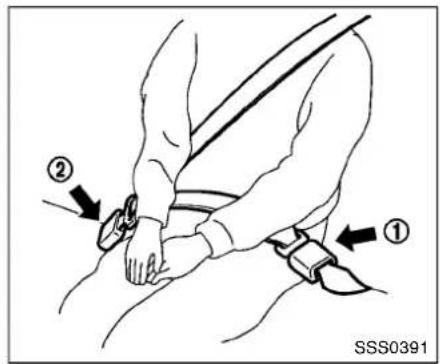
Rearcenterseatbelt
Therearcenterseatbelthasaconnectortongue ① andaseatbeltongue ②. Boththe connectortongueandtheseatbelttonguemust besecurelylatchedforproperseatbeltoperation.

natural_image
Diagram of a person seated inside a vehicle with a cross-shaped seatbelt, no text or symbols present
WARNING
●Alwaysfastentheconnectortongue andtheseatbeltintheordershown.
●Alwaysmakesureboththeconnectortongueandtheseatbelttonguearesecuredwhenusingtheseatbeltorinstallingachildrestraint.Do notusetheseatbeltorchid restraintwithonlytheseatbelt tongueattached.Thiscouldresult inseriouspersonalinjuryincaseof anaccidentorasuddenstop.

natural_image
Illustration of two hands adjusting a belt buckle with arrows indicating fastening (no text or symbols)Thecenterseatbeltbuckleandthetongueare identifiedbytheCENTERmark.Thecenterseat belttonguecanbefastenedonlyintothecenter seatbeltbuckle.

Stowingrearcenterseatbelt:
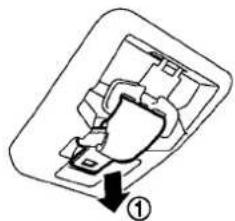
When folding down there are seat, there are center seat belt can be retracted into astowed position as follows:
1.Holdtheconnectortongue ① sothatthe seatbeltdoesnotretractsuddenlywhen the tongueisreleasedfromtheconnector buckle.Releasetheconnectortongueby insertingasuitabletoolsuchaskey A into theconnectorbuckle.
2. Insert these seat belt tongue into other retractor base first ②.
3. Thensecuretheconnectortongueintothe retractorbase ③.

WARNING
- Donotunfastentherearcenterseat beltconnectorexceptwhenfolding downtherearseat.
- When attaching there are center seat belt connector, be certain that the seatbacks are completely secured in the latched position and there are center seat belt connector is completely secured.
- Iftherearcenterseatbeltconnector andtheseatbacksarenotsecured
inthecorrectposition,seriouspersonalinjurymayresultinanaccidentorsuddenstop.
natural_image
Diagram of a mechanical component with a numbered arrow indicating a step (no text or symbols present)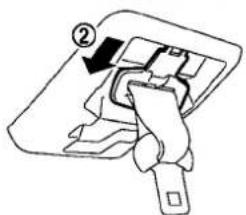

SSS0800
Attachingrearcenterseatbelt:
Alwaysbesuretherearcenterseatbelt connectortongueandconnectorbuckleare attached.Disconnectonlywhenfoldingdown therearseat.
Toconnectthebuckle:
-
Pullouttheconnectortonguefromthe retractorbase ①.
-
Pullout theseat belt tongue from the retractor base ②.
-
Pulltheseatbeltandsecuretheconnector buckleuntilclicks ③.
Thecenterseatbeltconnectortonguecanbe attachedonlyintotherearcenterseatbelt connectorbuckle.
Tofastentheseatbelt,see "Fasteningtheseat belts"(P.1-12).

WARNING
- Donotunfastentherearcenterseat beltconnectorexceptwhenfolding downtherearseat.
- Whenattachingtherearcenterseat beltconnector,becertainthatthe seatbacksarecompletelysecuredin thelatchedpositionandtherear
Safety—Seats, seatbeltsandsupplementalrestraintsystem1-17
centerseatbeltconnectoriscom- pletelysecured.
- Iftherearcenterseatbeltconnector andtheseatbacksarenotsecured inthecorrectposition,seriouspersonalinjurymayresultinanaccidentorsuddenstop.
SEATBELTEXTENDERS
If, because of bodysize or driving position, it is not possible to properly fit the lap - shoulder belt and fastenit, an extender that is compatible with the installed seat belts is available that can be purchased. The extender adds approximately 8 in (200mm) of length and maybe used for either the driver or front passenger seating position. See a NISSAN dealer for assistance with purchasing an extender if an extender is required.

WARNING
- OnlyNISSANseatbeltextenders, madebythesamecompanywhich madetheoriginalequipmentseat belts,shouldbeusedwithNISSAN seatbelts.
- Adultsandchildrenwhocanusethe standardseatbeltshouldnotusean extender.Suchunnecessaryuse couldresultinseriouspersonal injuryintheeventofanaccident.
- Neveruseseatbeltextendersto installchildrestraints.Ifthechild restraintisnotsecuredproperly,the childcouldbeseriouslyinjuredina collisionorasuddenstop.
SEATBELTMAINTENANCE
- Tocleantheseatbeltwebbing, apply a mildsoapsolutionoranysolutionrecommendedforcleaningupholsteryorcarpets. Thenwipewithaclothandallowtheseat beltstodryintheshade.Donotallowthe seatbeltstoretractuntiltheyarecompletely dry.
- If dirt builds up in the shoulder belt guide of the seat belt anchors, the seat beltsmayretractslowly.Wipetheshoulder beltguidewithaclean,drycloth.
- Periodicallychecktoseethattheseat beltandthemetalcomponents,suchas buckles,tongues,retractors,flexible wires andanchors,workproperly.Iflooseparts, deterioration,cutsorotherdamageonthe webbingisfound,theentireseatbelt
assemblyshouldbereplaced.
1-18 Safety—Seats, seatbeltsandsupplementalrestraintsystem
CHILDSAFETY
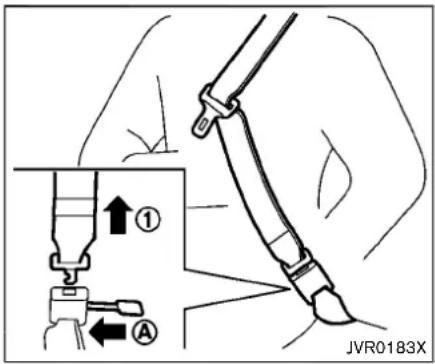

WARNING
Donotallowchildrentoplaywiththe seatbelts.Mostseatingpositionsare equippedwithAutomaticLockingRetractor(ALR)modeseatbelts.Ifthe seatbeltbecomeswrappedarounda child'sneckwiththeALRmodeactivated,thechildcanbeseriouslyinjured orkillediftheseatbeltretractsand becomestight.Thiscanoccurevenif thevehicleisparked.Unbuckletheseat belttoreleasethechild.Forthecenter oftherearseat,theconnectortongue
① mayalsobereleased.Releasethe connectortonguebyinsertingasuitabletool(such as a key) into the connectorbuckle Ⓐ. If theseatbelt cannot be unbuckled or is already unbuckled, releasethe child by cutting theseatbelt with as suitable tool(such as aknifeorscissors) toreleasethe seatbelt.
Childrenneedadultstohelpprotectthem. Theyneedtobeproperlyrestrained.
In addition to the general information in this manual, child safety information is available from many others, including doctors, teachers, government traffic safety offices, and community organizations. Every child is different, sobesure to learn the best way to transport your child.
There are three basic types of child restraint systems:
●Rear-facingchildrestraint
●Forward-facingchildrestraint
- Boosterseat
The proper restraint depends on the child's size. Generally, infants up to about 1 year and less than 20 lbs (9 kg) should be placed in rear-facing child restraints. Forward-facing child restraints are available for children who outgrow
rear-facingchildrestraintsandareatleast1 yearold.Boosterseatsareusedtohelpposition avehiclelap/shoulderbeltonachildwhocanno longeruseaforward-facingchildrestraint.

WARNING
Infantsandchildrenneedspecialpro-tection.Thevehicle'sseatbeltsmaynot fithemproperly.Theshoulderbeltmay cometooclosetothefaceorneck.The lapbeltmaynotfitovertheirsmallhip bones.Inanaccident,animproperly fittingseatbeltcouldcauseseriousor fatalinjury.Alwaysuseappropriate childrestraints.
All U.S. states require the use of approved child restraints for infants and small children. See "Childrestraints" (P.1-21).
Achildrestraintmaybesecuredinthevehicle byusingeithertheLATCH(LowerAnchorand TethersforCHildren)systemorwiththevehicle seatbelt.See"Childrestraints"(P.1-21)for moreinformation.
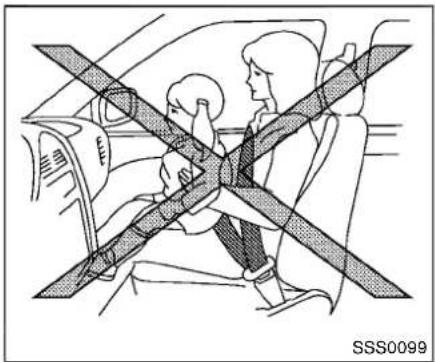
NISSANrecommendsthatallpre-teens andchildrenberestrainedintherearseat. Studiesshowthatchildrenaresaferwhen properlyrestrainedintherearseatthanin
thefrontseat.
Thisisespeciallyimportantbecauseyour vehiclehasasupplementalrestraintsystem(Airbagsystem)forthefrontpassenger.See"SupplementalRestraintSystem" (P.1-41).
INFANTS
Infantsuptoatleast1yearoldshouldbeplaced inarear-facingchildrestraint.NISSANrecommendsthatinfantsbeplacedinchildrestraints thatcomplywithFederalMotorVehicleSafety Standards.Youshouldchooseachildrestraint thatfitsyourvehicleandalwaysfollowthe manufacturer'sinstructionsforinstallationand use.
SMALLCHILDREN
Childrenthatareover1yearoldandweighat least20lbs(9kg)shouldremaininarear-facing childrestraintaslongaspossibleuptothe heightorweightlimitofthechildrestraint. Childrenwhooutgrowtheheightorweightlimit oftherear-facingchildrestraintandareatleast 1yearoldshouldbesecuredinaforward-facing childrestraintwithaharness.Refertothe manufacturer'sinstructionsforminimumand maximumweightandheightrecommendations. NISSANrecommendsthatsmallchildrenbe placedinchildrestraintsthatcomplywith FederalMotorVehicleSafetyStandards.You
shouldchooseachildrestraintthatfitsyour vehicleandalwaysfollowthemanufacturer's instructionsforinstallationanduse.
LARGERCHILDREN
Childrenshouldremaininaforward-facingchild restraintwithaharnessuntiltheyreachthe maximumheightorweightlimitallowedbythe childrestraintmanufacturer.
Onceachildoutgrowstheheightorweightlimit oftheharness-equippedforward-facingchild restraint,NISSANrecommendsthatthechildbe placedinaccommerciallyavailableboosterseat toobtainproperseatbeltfit.Foraseatbelttofit properly,theboosterseatshouldraisethechild sothattheshoulderbeltisproperlypositioned acrossthechestandthetop,middleportionof theshoulder.Theshoulderbeltshouldnotcross theneckorfaceandshouldnotfalloffthe shoulder.Thelapbeltshouldliesnuglyacross thelowerhipsorupperthighs,nottheabdomen.
Aboosterseatcanonlybeusedinseating positionsthathaveathree-pointtypeseatbelt. Theboosterseatshouldfitthevehicleseatand havealabelcertifyingthatitcomplieswith FederalMotorVehicleSafetyStandards.Once thechildhasgrownsotheshoulderbeltisno longeronornearthefaceandneck,andthelap beltcanbepositionedproperlyacrossthelower hipsorupperhighs,usetheseatbeltwithout
theboosterseat.

WARNING
Neverletachildstandorkneelonany seatandonotallowachildinthe cargoarea.Thechildcouldbeseriously injuredorkilledinasuddenstopor collision.
CHILDRESTRAINTS
natural_image
Diagram showing a car interior with two people seated, one wearing a seatbelt, crossed by a diagonal line (no text or symbols)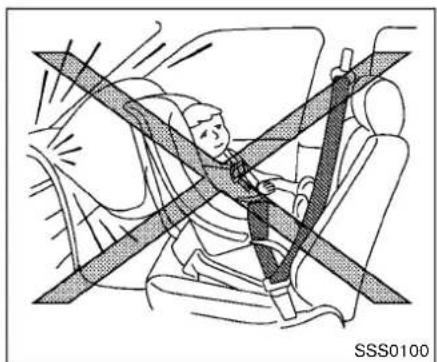
natural_image
Illustration of a person sitting in a car seatbelt with diagonal lines indicating safety or comfort (no text or symbols)PRECAUTIONSONCHILDRESTRAINTS

WARNING
- Failuretofollowthewarningsand instructionsforproperuseandin-stallationofchildrestraintscould resultinseriousinjuryordeathofachildorotherpassengersinasuddenstoporcollision:
—Thechildrestraintmustbeused andinstalledproperly.Always followallofthechildrestraint manufacturer'sinstructionsfor installationanduse.
—Infants and children should never beheldon anyone's lap. Even the strongest adult cannot resist the forces of a collision.
—Donotputaseatbeltaround bothachildandanotherpassenger.
—NISSANrecommendsthatall childrestraintsbeinstalledin therearseat.Studieshowthat childrenaresaferwhenproperly restrainedintherearseatthan
inthefrontseat.Ifyoumust installaforward-facingchild restraintinthefrontseat,see "Forward-facingchildrestraint installationusingtheseatbelts" (P.1-33).
—EvenwiththeNISSANAdvanced AirBagSystem,neverinstalla rear-facingchildrestraintinthe frontseat.Aninflatingairbag couldseriouslyinjureorkilla child.Arear-facingchildrestraintmustonlybeusedinthe rearseat.
—Besuretopurchaseachild restraintthatwillfitthechild andvehicle.Somechild restraintsmaynotfitproperly in yourvehicle.
—Childrestraintanchorpointsare designedtowithstandloads fromchildrestraintsthatare properlyfitted.
—Neverusetheanchorpointsfor adultseatbeltsorharnesses.
—Achildrestraintwithatoptether strapshouldnotbeusedinthe frontpassengerseat.
—Keepseatbacksasuprightas possibleafterfittingthechild restraint.
—Infantsandchildrenshouldalwaysbeplacedinanappropriatechildrestraintwhileinthe vehicle.
- Whenthechildrestraintisnotin use, keepitsecured with the LATCH systemorase at belt. In as sudden stop or collision, loose object scan injure occupants or damage the vehicle.

CAUTION
Achildrestraintinaclosedvehiclecan becomeveryhot.Checktheseating surfaceandbucklesbeforeplacinga childinthechildrestraint.
Thisvehicleisequippedwithauniversalalchild restraintanchorsystem,referredtoasthe LATCH(LowerAnchorsandTethersforCHildren)system.Someichldrestraintsincluderigid orwebbing-mountedattachmentsthatcanbe connectedtotheseanchors.
Fordetails,see"LowerAnchorsandTethersfor CHildrenSystem(LATCH)("P.1-23).
If you donothavea LATCH compatible child restraint, the vehicle seat belt scan be used.
Several manufacturers offer childrestraints for infants and small children of various sizes. When selecting any child restraint, keep the following points in mind:
- Chooseonlyarestraintwithalabelcertifying thatitcomplieswithFederalMotorVehicle SafetyStandard213.
- Checkthechildrestraintinyourvehicletobesureitiscompatiblewiththevehicle'sseatandseatbeltsystem.
- If the child restraint is compatible with your vehicle, place your child in the child restraint and check the various adjustment to be sure the child restraint is compatible with your child. Choose each child restraint that is designed for your child's height and weight. Always follow all recommended procedures.
- If the combined weight of the child and child restraint is less than 65 lbs (29.5 kg), you may use either the LATCH anchors or the seat belt to install the child restraint (not both the same time).
- If the combined weight of the child and child restraint is greater than 65 lbs (29.5 kg), use the vehicle's seat belt (not the lower
anchors)toinstallthechildrestraint.
- Besuretofollowthechildrestraintmanufacturer'sinstructionsforinstallation.
AllU.S. statesrequirethatinfantsand smallchildrenberestrainedinanapproved child restraint at all times while thevehicleisbeingoperated.
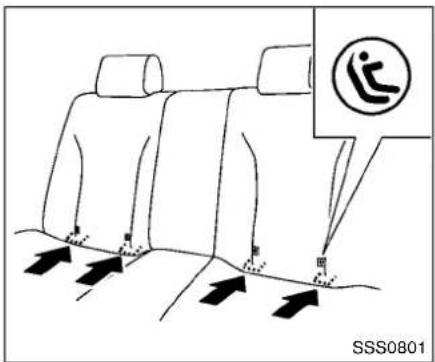
LATCHlabellocation
LowerAnchorsandTethersforCHildren System(LATCH)
Yourvehicleisequippedwithspecialanchor pointsthatareusedwiththeLATCH(Lower AnchorsandTethersforCHildren)system compatiblechildrestraints. Thissystemmay alsobereferredtoastheISOFIXorISOFIX compatiblesystem.Withthisystem,youdonot havetousevehicleseatbelttosecurethe childrestraintunlessthecombinedweightofthe childandchildrestraintexceeds65lbs(29.5 kg).Ifthecombinedweightofthechildandchild restraintisgreaterthan65lbs(29.5kg),usethe vehicle'sseatbelt(nottheloweranchors)to installthechildrestraint.Besuretofollowthe
childrestraintmanufacturer'sinstructionsfor installation.
LATCHloweranchor

WARNING
Failure to follow the warnings and instructions for proper use and installation of child restraints could result in serious injury or death of a child or other passengers in sudden stop or collision:
- AttachLATCHsystemcompatible childrestraintsonlyatthelocations shownintheillustration.
- Donotsecureachildrestraintinthe centerrearseatingpositionusing theLATCHloweranchors.Thechild restraintwillnotbesecuredproperly.
- Inspecttheloweranchorsbyinsertingyourfingersintothelower anchorarea.Feeltomakesure therearenoobstructionsoverthe anchorssuchasseatbeltwebbing orseatcushionmaterial.Thechild restraintwillnotbesecuredproperlyiftheloweranchorsareob-
structured.
Childrestraintanchoragesaredesignedtowithstandonlythoseloads imposedbycorrectlyfittedchildrestraints.Undernocircumstancesare theytobeusedtoattachadultseat belts,orotheritemsorequipment to thevehicle.Doingsocoulddamagethe childrestraintanchorages.Thechild restraintwillnotbeproperlyinstalled usingthedamagedanchorage,anda childcouldbeseriouslyinjuredorkilled inacollision.
natural_image
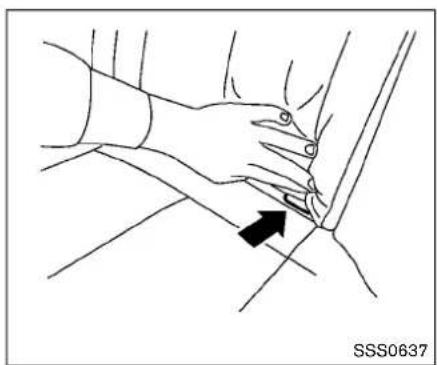
Line drawing of a hand pressing down on a car seatbelt, with a black arrow indicating the pressure point (no text or symbols present)LATCHloweranchorlocation
LATCHloweranchorlocation
TheLATCHloweranchorsarelocatedatthe rearoftheseatcushionneartheseatback.A labelisattachedtotheseatbacktohelpyou locatetheLATCHloweranchors.
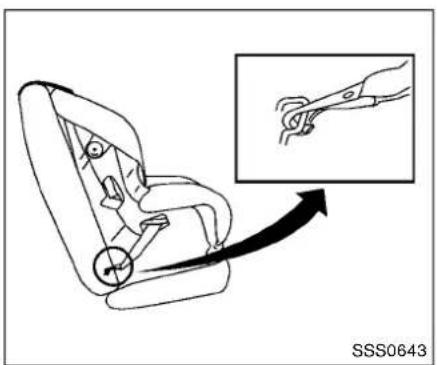
natural_image
Line drawing of a car seat with an inset showing a hand holding a tool (no text or symbols)LATCHwebbing-mountedattachment
InstallingchildrestraintLATCHlower anchorattachments
LATCHcompatiblechildrestraintsincludetwo rigidorwebbing-mountedattachmentsthatcan beconnectedtotwoanchorslocatedatcertain seatingpositionsinyourvehicle.Withthis system,youdonothavetouseavehicleseat belttosecurethechildrestraint.Checkyour childrestraintforalabelstatingthatitis compatiblewithLATCH.Thisinformationmay alsobeintheinstructionsprovidedbythechild restraintmanufacturer.

natural_image
Line drawing of a car seat assembly with an inset showing a close-up of the seat (no text or symbols)LATCHrigid-mountedattachment
Thechildrestrainttoptetherstrapmustbeused wheninstallingthechildrestraintwiththe LATCHloweranchorattachmentsorseseatbelts.
When installing a child restraint, carefully read and follow the instructions in this manual and those supplied with the child restraint.
Toptetheranchor

WARNING
- Ifthecargocover(ifsoequipped) contactsthetoptetherstrapwhenit isattachedtothetoptetheranchor, removethecargocoverfromthe
1-24 Safety—Seats, seat belts and supplemental restraintsystem
vehicleorsecureitonthecargo floorbelowitsattachmentlocation. Ifthecargocoverisnotremoved, it maydamagethetoptetherstrap duringacollision.Yourchildcould beseriouslyinjuredorkilledina collisionifthechildrestrainttop tetherstrapisdamaged.
- Donotallowcargotocontactthe toptetherstrapwhenitisattached tothetoptetheranchor.Properly securethecargosoitdoesnot contactthetoptetherstrap.Cargo thatisnotproperlysecuredorcargo thatcontactsthetoptetherstrap maydamagethetoptetherstrap duringacollision.Yourchildcould beseriouslyinjuredorkilledina collisionifthechildrestrainttop tetherstrapisdamaged.
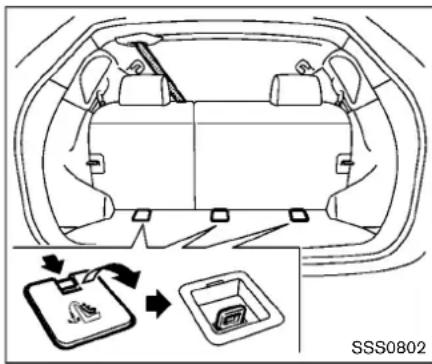
Toptetheranchorpointlocations

WARNING
Childrestraintanchoragesaredesignedtowithstandonlythoseloads imposedbycorrectlyfittedchildrestraints.Undernocircumstancesare theytobeusedtoattachadultseat belts,orotheritemsorequipmentthevehicle.Doingsocoulddamagethe childrestraintanchorages.Thechild restraintwillnotbeproperlyinstalled usingthedamagedanchorage,anda childcouldbeseriouslyinjuredorkilled
inacollision.
Anchorpointsarelocatedonthefloorbehind theoutboardandcenterseatingpositions.
Thechildrestrainttoptetherstrapmustbeused wheninstallingchildrestraintswiththeLATCH loweranchorattachmentsorseatbelts.
If you have any questions when installing a toptetherstrapchild restraint on therear seat, consulta NISSAN dealer for details.
REAR-FACINGCHILDRESTRAINTINSTALLATIONUSINGLATCH
RefertoallWarningsandCautionsinthe"Child safety"and"Childrestraints"sectionsbefore installingachildrestraint.
Donotusetheloweranchorsifthecombined weightofthechildandthechildrestraint exceeds65lbs(29.5kg).Ifthecombined weightofthechildandthechildrestraintis greaterthan65lbs(29.5kg),usethevehicle's seatbelt(nottheloweranchors)toinstallthe childrestraint.Besuretofollowthechild restraintmanufacturer'sinstructionsforinstallation.
Followthesestepstoinstallarear-facingchild restraintusingtheLATCHsystem:
- Position the child restraint on these seat. Always follow the child restraint manufacturer's instructions.

Rear-facingweb-mounted—step2
- Secure the child restraint anchor attachment stothe LATCH lower anchors. Check to make sure the LATCH attachment is properly attached to the lower anchors.

Rear-facingrigid-mounted—step2
1-26 Safety—Seats, seatbeltsandsupplementalrestraintsystem

natural_image
Illustration of a car seatbelt being adjusted for a person's seatbelt, showing two black arrows indicating movement (no text or symbols present)Rear-facing—step3
- For child restraint that are equipped with webbing-mounted attachments, remove any addition of slack from the anchor attachments. Press downward and rearward firmly in the center of the child restraint with your hand to compress the vehicle seat cushion and seat back while tightening the webbing of the anchor attachments.
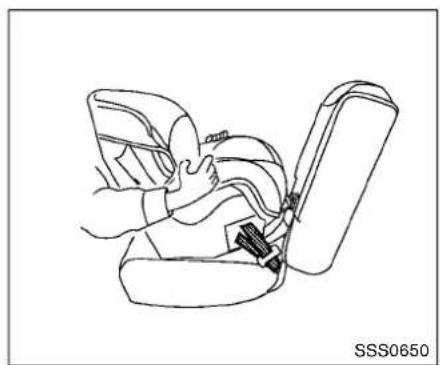
natural_image
Line drawing of a hand inserting a seatbelt into a car seatbelt (no text or symbols)Rear-facing—step4
-
After attaching the child restraint, test it before you place the childinit. Pushit from sidetosidewhileholding the child restraint near the LATCH attachment path. The child restraints should not move more than 1 inch (25mm), from sidetoside. Try to get forward and check to see if the LATCH attachment hold sthereraintin place. If the restraint is not secure, tighten the LATCH attachment necessary, or put therestraint in another seat and test it again. You may need to try different child restraint or try installing by using the vehicle seat belt (if applicable). Not all child restraints fit in all types of vehicles.
-
Checktomakesurethechildrestraintis properlysecuredpriortoeachuse.Ifthe childrestraintisloose,repeatsteps1 through4.

natural_image
Diagram of a person wearing a seatbelt and crossed over the wheel, inside a vehicle (no text or symbols)REAR-FACINGCHILDRESTRAINTINSTALLATIONUSINGTHESEATBELTS

WARNING
The three-point seat belt with Automatic Locking Retractor (ALR) must be used when installing a child restraint. Failure to set the ALR modewill result in the child restraint not being properly secured. The restraint could tip over or beloose and cause injury to achildina sudden stop or collision. Also, it can change the operation of the front passenger airbag. See "Frontpassen-
gerairbagandstatuslight"laterinthis section.

natural_image
Diagram of a person sitting in a car with a seatbelt, crossed by diagonal lines indicating safety or comfort (no text or symbols present)Rear-facing-step1
RefertoallWarningsandCautionsinthe"Child safety"(P.1-19)and"Childrestraints"(P.1-21) beforeinstallingachildrestraint.
Donotusetheloweranchorsifthecombined weightofthechildandthechildrestraint exceeds65lbs(29.5kg).Ifthecombined weightofthechildandthechildrestraintis greaterthan65lbs(29.5kg),usethevehicle's seatbelt(nottheloweranchors)toinstallthe childrestraint.Besuretofollowthechild restraintmanufacturer'sinstructionsforinstallation.
Followthesestepstoinstallarear-facingchild restraintusingthevehicleseatbeltsintherear
seats:
- Childrestraintsforinfantsmustbe usedintherear-facingdirectionand thereforemustnotbeusedinthefront seat.Positionthechildrestraintontheseat. Alwaysfollowtherestraintmanufacturer's instructions.

natural_image
Line drawing of a car seatbelt being adjusted for a hand (no text or symbols)Rear-facing—step2
- Routetheseatbelttonguethroughthechild restraintandinsertitintothebuckleuntilyou hearandfeelthelatchengage.Besureto followthechildrestraintmanufacturer's instructionsforbeltrouting.

natural_image
Diagram of a car seatbelt mechanism with a black arrow indicating the direction (no text or symbols present)Rear-facing—step3
- Pulltheshoulderbeltuntilthebeltisfully extended. Atthistime, theseatbeltretractor isintheAutomaticLockingRetractor(ALR) mode(childrestraintmode). Itrevertstothe EmergencyLockingRetractor(ELR) mode whentheseatbeltisfullyretracted.

natural_image
Diagram of a car interior showing hand positioning and movement arrows (no text or symbols)Rear-facing—step4
4. Allow these seat belt to retract. Pull upon the shoulder belt to remove anyslack in the belt.
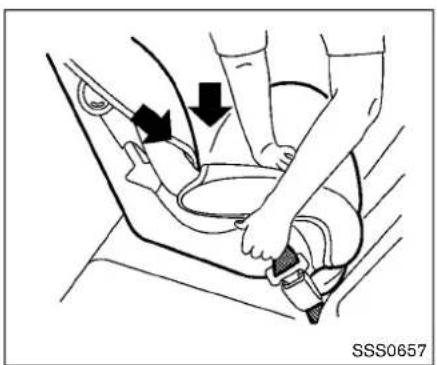
natural_image
Diagram of a car seatbelt being adjusted for a person's seatbelt, showing two black arrows indicating movement (no text or symbols present)Rear-facing—step5
5. Remove any additional slack from these seat belt; press downward and rearward firmly in the center of the child restraint to compress the vehicle seat cushion and seat back while pulling up on these seat belt.
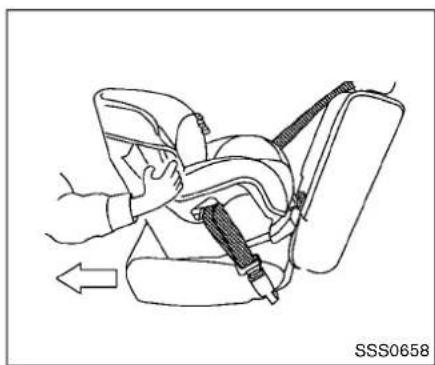
natural_image
Line drawing of a car seatbelt with hands adjusting the seatbelt (no text or symbols)Rear-facing-step6
6. After attaching the child restraint, test it before you place the childinit. Pushit from sidetosidewhileholding the child restraint near theseatbeltpath. The child restraint should not movemorethan 1 inch (25mm), fromsidetoside. Trytotugitforward and checktoseeifthebeltholdstherestraintin place. If therestraintis not secure, tighten theseatbeltas necessary, or put the restraint in another seat and test it again. You may need to try a different child restraint. Not all child restraints fit in all types of vehicles.
7. Checktomakesurethatthechildrestraintis properlysecuredpriortoeachuse.Ifthe
1-30 Safety—Seats, seatbelts and supplemental restraintsystem
seatbeltisnotlocked,repeatsteps1 through6.
Afterthechildrestraintisremovedandtheseat beltfullyretracted,theALRmode(childrestraint mode)iscanceled.
FORWARD-FACINGCHILDRESTRAINTINSTALLATIONUSING LATCH
RefertoallWarningsandCautionsinthe"Child safety" and "Childrestraints" sectionsbefore installingachildrestraint.
Donotusetheloweranchorsifthecombined weightofthechildandthechildrestraint exceeds65lbs(29.5kg).Ifthecombined weightofthechildandthechildrestraints greaterthan65lbs(29.5kg),usethevehicle's seatbelt(nottheloweranchors)toinstallthe childrestraint.Besuretofollowthechild restraintmanufacturer'sinstructionsforinstallation.
Followthesestepstoinstallaforward-facing childrestraintusingtheLATCHsystem:
- Position the child restraint on these seat. Always follow the child restraint manufacturer's instructions.

natural_image
Diagram of car seatbelt mechanism showing valve insertion and adjustment (no text or symbols)Forward-facingweb-mounted—step2
- Secure the child restraint anchor attachment to the LATCH lower anchors. Check to make sure the LATCH attachment is properly attached to the lower anchors. If the child restraint is equipped with top tether strap, routethetoptether strap and secure the tether strap to the tether anchor point. See "Installing toptether strap" in this section. Donot install child restraint that require the use of to optether strap in seating position that donothave atop tether anchor.
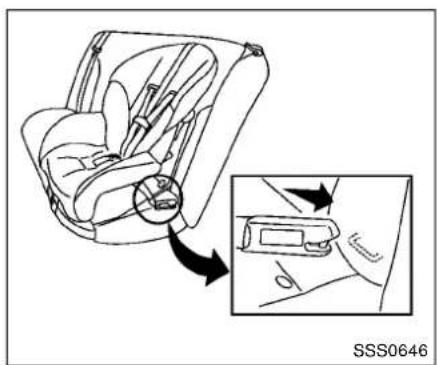
natural_image
Line drawing of a car seat assembly with an inset showing the cable being inserted (no text or symbols)Forward-facingrigid-mounted—step2
- The back of the child restraint should be secured against the vehicle seatback. If the seating position does not have an adjustable head restraint or head rest and is interfering with the proper child restraint fit, try another seating position or different child restraint.

natural_image
Car seatbelt diagram showing belt and seat movement arrows (no text or symbols)Forward-facing—step4
-
For child restraint that are equipped with webbing-mounted attachments, remove any addition of slack from the anchor attachments. Press downward and rearward firmly in the center of the child restraint with your kneetocompress the vehicle seat cushion and seat back while tightening the webbing of the anchor attachments.
-
Tightenthetherstrapaccordingtothe manufacturer'sinstructionstoremoveany slack.

natural_image
Line drawing of a car seatbelt being adjusted for a hand, no text or symbols presentForward-facing—step6
-
After attaching the child restraint, test it before you place the childinit. Pushit from sidetosidewhileholding the child restraint near the LATCH attachment path. The child restraint should not move more than 1 inch (25mm), from sidetoside. Trytotugit forward and check to see if the LATCH attachment hold stherestraerinplace. If the restraint is not secure, tightenthe LATCH attachment as necessary, or put therestraint in another seat and test it again. You may need to try different child restraint. Not all child restraints fit in all types of vehicles.
-
Checktomakesurethechildrestraintis properlysecuredpriortoeachuse.Ifthe
childrestraintisloose,repeat steps1 through6.
1-32 Safety—Seats, seatbeltsandsupplementalrestraintsystem

Installingtoptetherstrap

WARNING
Childrestraintanchoragesaredesignedtowithstandonlythoseloads imposedbycorrectlyfittedchildrestraints.Undernocircumstancesare theytobeusedtoattachadultseat belts,orotheritemsorequipmentto thevehicle.Doingsocoulddamagethe childrestraintanchorages.Thechild restraintwillnotbeproperlyinstalled usingthedamagedanchorage,anda childcouldbeseriouslyinjuredorkilled
inacollision.
Thechildrestrainttoptetherstrapmustbeused wheninstallingthechildrestraintwiththe LATCHsystem.
First, secure the child restraint with the LATCH system (rearoutboard seating positions only).
- Removetheanchorcoverfromtheanchor pointwhichislocateddirectlybehindthe childrestraint.
- Positionthetoptetherstrapoverthetopof theseatback.
- Securethetetherstraptothetetheranchor bracketthatprovidesthestraightestinstallation.
- Tightenthetetherstrapaccordingtothe manufacturer'sinstructionstoremoveany slack.
If you have any questions when installing a toptetherstrap, consult your NISSAN dealer for details.
FORWARD-FACINGCHILDRESTRAINTINSTALLATIONUSINGTHE SEATBELTS

WARNING
- Thethree-pointseatbeltwithAutomaticLockingRetractor(ALR)must beusedwheninstallingachild restraint.FailuretousetheALR modewillresultinthechildrestraintnotbeingproperlysecured. Therestraintcouldtipoverorbe looseandcauseinjurytoachildina suddenstoporcollision.Also,itcan changetheoperationofthefront passengerairbag.See"Frontpassengerairbagandstatuslight" laterinthissection.
- When installing a child restraint system in there are a center position, both the center seat belt connector tongue and bucket tongue must be secured. See "Rear center seat belt" (P.1-15).

natural_image
Line drawing of a car interior showing seat, rear seats, and side door (no text or symbols)Forward-facing(frontpassengerseat)—step1
RefertoallWarningsandCautionsinthe"Child safety" and "Childrestraints" sectionsbefore installingachildrestraint.
Donotusetheloweranchorsifthecombined weightofthechildandthechildrestraint exceeds65lbs(29.5kg).Ifthecombined weightofthechildandthechildrestraints greaterthan65lbs(29.5kg),usethevehicle's seatbelt(nottheloweranchors)toinstallthe childrestraint.Besuretofollowthechild restraintmanufacturer'sinstructionsforinstallation.
Followthesestepstoinstallaforward-facing childrestraintusingthevehicleseatbeltinthe
rearseatsorinthefrontpassengerseat:
-
If you must install child restraint in the front seat, it should be placed in forward-facing direction only. Movethe seat to there are most position. Child restraints for infants must be used in therear-facing direction and, therefore, must not be used in the front seat.
-
Position the child restraint on these seat.
Always follow the child restraint manufacturer's instructions.
The back of the child restraint should be secured against the vehicle seat back.
If necessary, adjustorremovethehead restraint/headresttoobtainthecorrectchild restraintfit. If the head restraint/headrestis removed, store itinasecureplace. Besure tore install the head restraint/headrest when the child restraint is removed.
See "Headrestraints/Headrests" (P.1-5) for headrestraint/headrestadjustment, removal and installation information.
If theseatingpositiondoesnothavean adjustableheadrestraintorheadrestandit isinterferingwiththeproperchildrestraint fit, tryanotherseatingpositionoradifferent childrestraint.

natural_image
Car seatbelt buckle diagram showing mechanical adjustment (no text or symbols)Forward-facing—step3
- Routetheseatbelttonguethroughthechild restraintandinsertitintothebuckleuntilyou hearandfeelthelatchengage.Besureto followthechildrestraintmanufacturer's instructionsforbeltrouting.
If the child restraint is equipped with top tether strap, routethetoptether strap and secure the tether strap to the ether anchor point (rearse installation only). See "Installingoptether strap" (P.1-37). Do not install child restraint that require the use of top tether strap in seating positions that do not have to opt ether anchor.
1-34 Safety—Seats, seatbelts and supplemental restraintsystem

natural_image
Medical illustration of a car seatbelt buckle with a belt buckle (no text or symbols)Forward-facing—step4
4. Pulltheshoulderbeltuntilthebeltisfully extended.Atthistime,theseatbeltretractor isintheAutomaticLockingRetractor(ALR) mode(childrestraintmode).Itrevertsto EmergencyLockingRetractor(ELR)mode whentheseatbeltisfullyretracted.
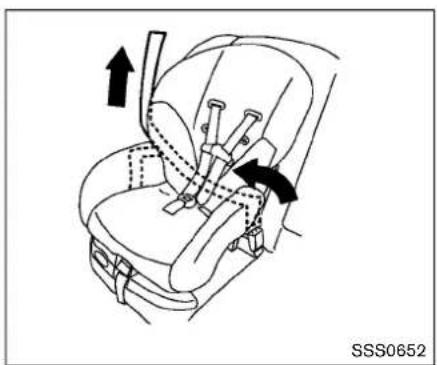
natural_image
Line drawing of a car seatbelt with arrows indicating movement or force (no text or symbols)Forward-facing—step5
5. Allow these seat belt to retract. Pull upon the shoulder belt to remove anyslack in the belt.
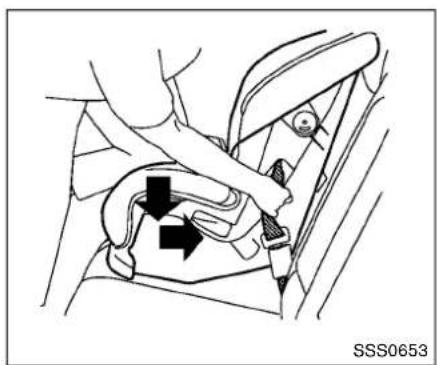
natural_image
Mechanical diagram showing a hand adjusting a seatbelt with arrows indicating direction (no text or symbols)Forward-facing—step6
6. Remove any additional slack from these seat belt; press downward and rear forward firmly in the center of the child restraint with your kneetocompress the vehicle seat cushion and seat back while pulling up on these seat belt.
7. Tightenthetherstrapaccordingtothe manufacturer'sinstructionstoremoveany slack.

natural_image
Line drawing of a person seated in a car seat with hands adjusting the seatbelt (no text or symbols)Forward-facing—step8
-
After attaching the child restraint, test it before you place the childinit. Pushit from sidetosidewhile holding the child restraint near these seat belt path. The child restraint should not move more than 1 inch (25mm), from sidetoside. Try to get forward and check to see if the belthold st her restraint in place. If there restraint is not secure, tighten these seat belt as necessary, or put the restraint in another seat and test it again. You may need to try different child restraint. Not all child restraints fit in all types of vehicles.
-
Checktomakesurethechildrestraintis properlysecuredpriortoeachuse.Ifthe
1-36 Safety—Seats, seatbeltsandsupplementalrestraintsystem
seatbeltisnotlocked,repeatsteps2 through8.

SSS0803
Forward-facing—step10
- If the child restraint is installed in the front passenger seat, placetheignitions switch in the ON position. The front passenger air bag status light shouldilluminate. If this light is not illuminated, see "Front passenger air bag and status light" in this section. Move the child restraint to another seating position. Havethesystem checked by a NISSAN dealer.
Afterthechildrestraintisremovedandtheseat beltisfullyretracted,theALRmode(child restraintmode)iscanceled.

Installingtoptetherstrap

WARNING
Childrestraintanchoragesaredesignedtowithstandonlythoseloads imposedbycorrectlyfittedchildrestraints.Undernocircumstancesare theytobeusedtoattachadultseat belts,orotheritemsorequipmentto thevehicle.Doingsocoulddamagethe childrestraintanchorages.Thechild restraintwillnotbeproperlyinstalled usingthedamagedanchorage,anda childcouldbeseriouslyinjuredorkilled
inacollision.
Thechildrestrainttoptetherstrapmustbeused wheninstallingthechildrestraintwiththeseat belts.
First, secure the child restraint with these at belt.
- Removetheanchorcoverfromtheanchor pointwhichislocateddirectlybehindthe childrestraint.
- Positionthetoptetherstrapoverthetop of theseatback.
- Securethetetherstraptothetetheranchor bracketthatprovidesthestraightestinstallation.
- Tightenthetherstrapaccordingtothe manufacturer'sinstructionstoremoveany slack.
If you have any questions when installing a toptetherstrap, consult your NISSAN dealer for details.
BOOSTERSEATS
Precautionsonboosterseats

WARNING
Ifaboosterseatandseatbeltarenot usedproperly,theriskofachildbeing injuredinasuddenstoporcollision greatlyincreases:
●Makesuretheshoulderportionof thebeltisawayfromthechild'sface andneckandthelapportionofthe beltdoesnotcrossthestomach.
- Makesuretheshoulderbeltisnot behindthechildorunderthechild's arm.
- Aboosterseatmustonlybeinstalledinaseatingpositionthathas alap/shoulderbelt.
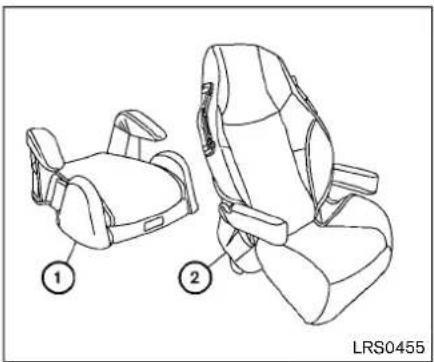
natural_image
Line drawing of two car seat compartments with labeled parts (1 and 2), no text or symbols present.Boosterseatsofvariouszisesareofferedby severalmanufacturers.Whenselectingany boosterseat,keepthefollowingpointsinmind:
- Chooseonlyaboosterseatwithalabel certifyingthatitcomplieswithFederalMotor VehicleSafetyStandard213.
- Checktheboosterseatinyourvehicletobe sureitiscompatiblewiththevehicle'sseat andseatbeltsystem.
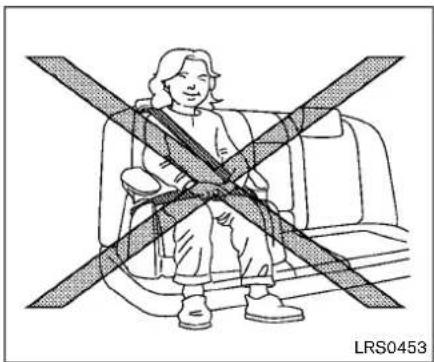
natural_image
Illustration of a person sitting in a car with a seatbelt crossed, no text or symbols present●Makesurethechild'sheadwillbeproperly supportedbytheboosterseatorvehicle seat.Theseatbackmustbeatorabovethe centerofthechild'sears.Forexample,ifa lowbackboosterseat ① ischosen,the vehicleseatbackmustbeatorabovethe centerofthechild'sears.Iftheseatbackis lowerthanthecenterofthechild'sears,a highbackboosterseat ② shouldbeused.
- If the booster seatis compatible with your vehicle, place your child in the booster seat and check the various adjustments to be sure the booster seatis compatible with your child. Always follow all recommended procedures.

natural_image
Line drawing of a person seated in a car seat, wearing a seatbelt (no text or symbols)AllU.S. statesrequirethatinfantsand smallchildrenberestrainedinanapprovedchildrestraintataltimeswhile thevehicleisbeingoperated.
The instructions in this section apply to booster seat installation in there are seats or the front passenger seat.
Boosterseatinstallation

CAUTION
Donotusethelap/shoulderbeltAutomaticLockingRetractor(ALR)mode whenusingaboosterseatwiththe
1-38 Safety—Seats, seat belts and supplemental restraintsystem
seatbelts.
RefertoallWarningsandCautionsinthe"Child safety", "Childrestraints" and "Boosterseats" sectionsearlierinthissectionbeforeinstallinga childrestraint.
Followthesestepstoinstallaboosterseatinthe rearseatorinthefrontpassengerseat:
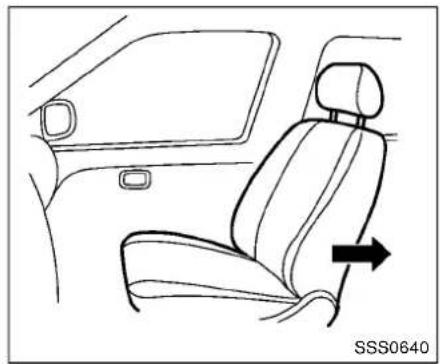
natural_image
Line drawing of a car interior showing seat, rearview, and side door (no text or symbols)- If you must install a booster seat in the front seat, movethese at to there are most position.
- Position the booster seat on these seat. Only place it in a forward-facing direction. Always follow the booster seat manufacturer's instructions.
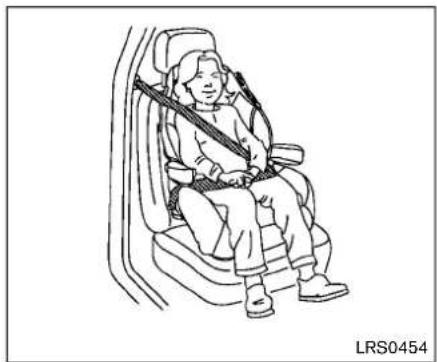
natural_image
Line drawing of a person seated in a car seat, wearing a seatbelt and holding a weight (no text or symbols)Frontpassengerposition
- The booster seat should be positioned on the vehicle seat so that it is stable.
Ifnecessary, adjustorremovethehead restraint/headresttoobtainthecorrect boosterseatfit.Iftheheadrestraint/headrestisremoved,storeitinasecureplace.
Besuretoreinstalltheheadrestraint/headrestwhentheboosterseatis
removed.See "Headrestraints/Headrests" (P.1-5)forheadrestraint/headrestadjustment,removalandinstallationinformation.
If theseatingpositiondoesnothavean adjustableheadrestraintorheadrestandit isinterferingwiththeproperboosterseatfit,
Safety—Seats, seatbeltsandsupplementalrestraintsystem 1-39
tryanotherseatingpositionoradifferent boosterseat.
- Position the lapportion of these seat belt low and snug on the child's ships. Besureto follow the booster seat manufacturer's instructions for adjusting these seat belt routing.
- Pulltheshoulderbeltporionoftheseatbelt towardtheretractortotakeupextraslack. Besuretheshoulderbeltispositioned acrossthetop,middleportionofthechild's shoulder.Besuretofollowtheboosterseat manufacturer'sinstructionsforadjustingthe seatbeltrouting.
- Followthewarnings, cautions and instructions for properly fastening a seat belt shown in "Seatbelts" (P.1-9).

SSS0803
- If the booster seat is installed in the front passenger seat, turn the ignitions switch to the ON position. The front passenger air bag status light ≥slant 2 may may not illuminate depending on the size of the child and the type of booster seat used. See "Front passenger air bag and status light" (P.1-48).
1-40 Safety—Seats, seatbelts and supplemental restraintsystem
SUPPLEMENTALRESTRAINT SYSTEM
PRECAUTIONSONSUPPLEMENTAL RESTRAINTSYSTEM
This Supplemental Restraint System (SRS) section contains important information concerning the following systems:
- Driverandpassengersupplementalfront-impactairbag(NISSANAdvancedAirBag System)
- Frontseat-mountedside-impactsupplementalairbag
●Roof-mountedcurtainside-impactandroll-oversupplementalairbag - Seatbeltwithpretensioner
Supplementalfront-impactairbagsystem: TheNISSANAdvancedAirBagSystemcan helpcushiontheimpactforcetothehead and chestofthedriverandfrontpassengerincertain frontalcollisions.
Frontseat-mountedside-impactsupplementalairbagsystem: This system can help cushion the impact for ceto the chest and pelvis areas of the driver and front passenger uncertain side impact collisions. These air bags are designed to inflate on the sides when the vehicle is impacted.
Roof-mountedcurtainside-impact and rolloversupplementalairbagsystem: This systemcanhelpcushiontheimpactforcetothe
headofoccupantsinfrontandrearoutboard seatingpositionsincertainsideimpactor rollovercollisions.Inasideimpact,thecurtain airbagsaredesignedtoinflateontheside wherethevehicleisimpacted.Inarollover,the curtainairbagsonbothsidesaredesignedto inflate.Underbothside-impactandrollover situations,thecurtainairbagswillremain inflatedforashortperiodoftime.
Thesesupplementalrestraintsystemsaredesignedtosupplementthecrashprotection providedbythedriverandpassengerseatbelts andarenotasubstituteforthem.Seatbelts shouldalwaysbecorrectlywornandthe occupantseatedasuitabledistanceawayfrom thesteeringwheel,instrumentpanelanddoor finishers.(See"Seatbelts"(P.1-9)forinstructionsandprecautionsonseatbeltusage.)
Thesupplementalairbagsoperateonly whentheignitionswitchisintheON position.
AfterturningtheignitionswitchtotheON position,thesupplementalairbagwarning lightilluminates.Thesupplementalairbag warninglightwillturnoffafterabout7 secondsifthesystemsareoperational.


WARNING
- Thefrontairbagsordinarilywillnot inflateintheeventofasideimpact, rearimpact, rollover, orlowerseverityfrontalcollision. Alwayswear yourseatbeltstohelpreducethe riskorseverityofinjuryinvarious kindsofaccidents.
- Thefrontpassengerairbagwillnot inflateifthepassengerairbag statuslightislitorifthefront passengerseatisunoccupied.See "Frontpassengerairbagandstatus light"(P.1-48).
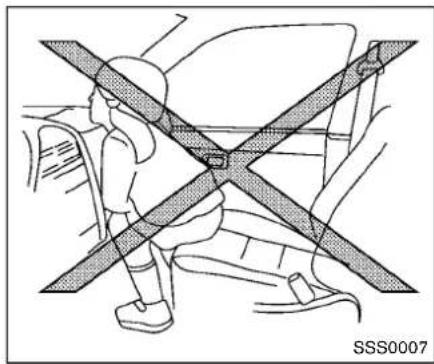
- Theseatbeltsandthefrontairbags aremosteffectivewhenyouare sittingwellbackanduprightinthe seatwithbothfeetonthefloor.The frontairbagsinflatewithgreat force.EvenwiththeNISSANAdvancedAirBagSystem,ifyouare unrestrained,leaningforward,sittingsidewaysoroutofpositionin anyway,youareatgreaterriskof injuryordeathinacrash.Youmay alsoreceiveseriousorfatalinjuries fromthefrontairbagifyouareup againstitwhenitinflates.Alwayssit
backagainsttheseatbackandas far-awayspracticalfromthesteeringwheelorinstrumentpanel.Alwaysusetheseatbelts.
- Thedriverandfrontpassengerseat belt bucklesareequipped with sensorsthatdetectiftheseatbelts arefastened.TheAdvancedAirBag Systemmonitorstheseverityofa collisionandseatbeltusagethen inflatestheairbagsasneeded. Failuretoproperlywearseatbelts canincreasetheriskorseverityof injuryinanaccident.
- The front passenger seat is equipped with an occupant classification sensor (pattern sensor) that turn the front passenger air bag OFFundersome conditions. This sensor is only used in this seat. Failure to be properly seated and wearing these seat belt can increase the risk severity of injury in an accident. See "Front passenger air bag and status light" (P.1-48).
- Keephandsontheoutsideofthe steeringwheel.Placingtheminside thesteeringwheelrimcouldincreaseetheriskthattheyareinjured
ifthefrontairbaginflates.
natural_image
Diagram of a person wearing a seatbelt and using a cross-shaped device to interact with another car (no text or symbols present)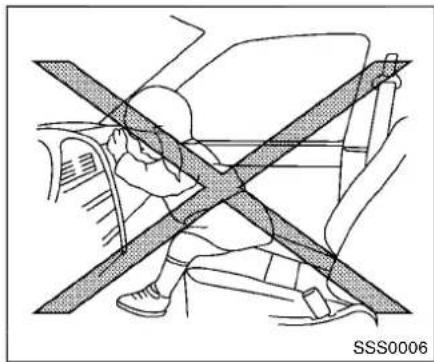
natural_image
Diagram showing a person sitting on a vehicle with a diagonal line crossing the seat, no text or symbols present.
natural_image
Diagram of a car interior showing two crossed seats and a person seated, with no visible text or symbols.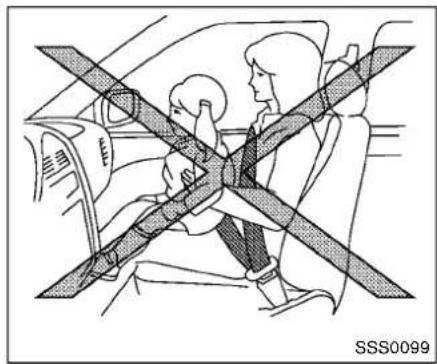
natural_image
Diagram showing car seatbelt and passenger inside a vehicle, no text or symbols present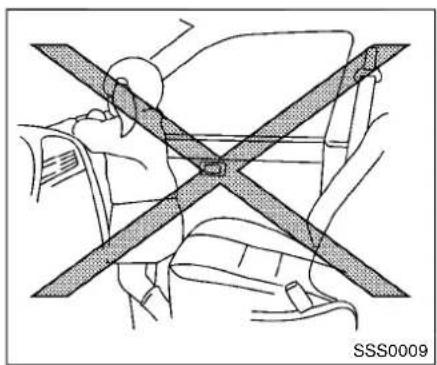
natural_image
Diagram of car seatbelt and diagonal band (no text or symbols)
natural_image
Diagram of a person sitting in a car with a seatbelt, showing no text or symbols on the diagram itself.
WARNING
- Neverletchildrenrideunrestrained orextendtheirhandsorfaceoutofthewindow.Donotattempttohold theminyourlaporarms.Some examplesofdangerousridingpositionsareshownintheillustrations.
- Childrenmaybeseverelyinjuredor killedwhenthefrontairbags,side airbagsorcurtainairbagsinflateif theyarenotproperlyrestrained. Pre-teensandchildrenshouldbe properlyrestrainedintherearseat, ifpossible.
- EvenwiththeNISSANAdvancedAir BagSystem,neverinstallarear-facingchildrestraintinthefront seat.Aninflatingfrontairbagcould seriouslyinjureorkillyourchild. See"Childrestraints"(P.1-21)for details.
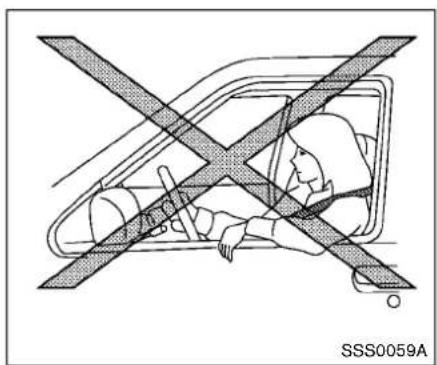
Donotleanagainstdoorsorwindows.
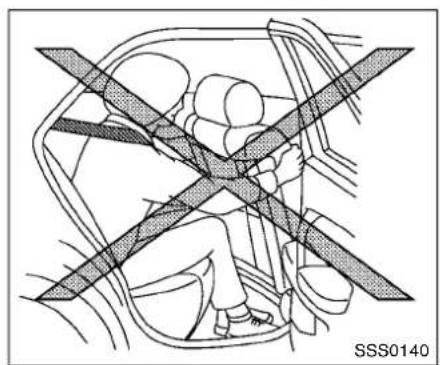
natural_image
Diagram of a car interior showing steering wheel and dashboard, with no visible text or symbols
natural_image
Diagram of a car interior with two crossed lanes and a person seated, no text or symbols present
WARNING
Frontseat-mountedside-impactsupplementalairbagsandroof-mounted curtainside-impactandrolloversupplementalairbags:
• Thesideairbagsandcurtainair bagsordinarilywillnotinflateinthe eventofafrontalimpact,rearimpactorlowerseveritysidecollision. Alwayswearyourseatbeltstohelp reducetheriskorseverityofinjury invariouskindsofaccidents.

natural_image
Diagram of a car interior with a cross-shaped barrier symbol (no text or labels)
natural_image
Line drawing of a person sitting in a car seat with a cross-shaped object overlaid, no text or symbols present.•Theseatbelts,thesideairbagsandcurtainairbagsaremosteffectivewhenyouaresittingwellbackanduprightintheseat.Thesideairbagandcurtainairbaginflatewithgreatforce.Donotallowanyonetoplacetheirhand,legorfacenearthesideairbagonthesideoftheseatbackofthefrontseatornearthesideroofrails.Donotallowanyonesittinginthefrontseatsorrearoutboardseatstoextendtheirhandoutofthewindoworleanagainstthedoor.Someexamplesofdangerousridingpositionsareshowninthepreviousillustrations.
- Whensittingintherearseat, donot holdontotheseatbackofthefront seat. If the side airbaginflates, you may be seriously injured. Beespecially careful with children, who should always be properly restrained. Some examples of dangerous riding positions are shown in the illustrations.
- Donotuseseatcoversonthefront seatbacks. They may interferewith sideairbaginflation.
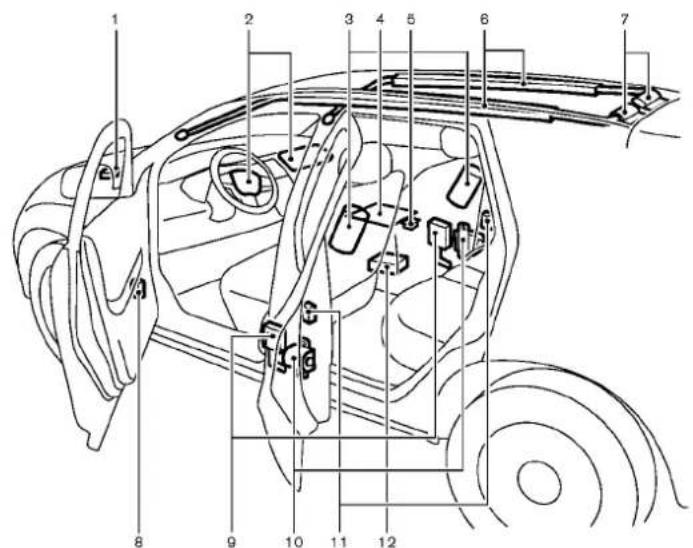
JVR0413X
- Crashzonesensor
- Supplementalfront-impactairbagmodules
- Frontseat-mountedside-impactsupplemental airbagmodules
- Occupantclassificationsensor(patternsensor)
-
Occupantclassificationsystemcontrolunit
6.Roof-mountedcurtainside-impactandrollover supplementalairbags -
Roof-mounted curtainside-impact and rollover supplemental airbag inflators
8.Doorsatellitesensors
-
Lapouterpretensioners
-
Seatbeltwithpretensioners
11.Satellitesensors
12.AirbagControlUnit(ACU)
1-46 Safety—Seats, seatbeltsandsupplementalrestraintsystem
NISSANADVANCEDAIRBAGSYS-TEM(frontseats)
This vehicle is equipped with the NISSAN Advanced Air Bag System forth driver and front passenger seats. This system is designed to meet certification requirements under U.S. regulations. Allof the information, cautions and warnings in this manual apply and must be followed.
The drivers supplemental front-impact air bag is located in the center of the steering wheel; the passengers supplemental front-impact air bag is mounted in the instrument panel above the glove box. The frontair bags are designed to inflate in higher severity frontal collisions, although they may inflate if the forces in another type of collisiona similar to those of higher severity frontal impact. They may not inflate in certain frontal collisions. Vehicled damage (or lack of it) is not always an indication of proper front air bag operation.
TheNISSANAdvancedAirBagSystemhas dualstageairbaginflators. Thesystemmonitors informationfromthecrashzonesensor, satellite sensor, AirbagControlUnit(ACU), seatbelt bucklesensorsandoccupantclassification sensor(patternsensor). Inflatoroperation is basedontheseverityofacollisionandseatbelt usageforthedriver. Forthefrontpassenger, the occupantclassificationsensorisalsomonitored. Basedoninformationfromthesensors,onlyone frontairbagmayinflateinacrash,dependingon thecrashseverityandwhetherthefront occupantsarebeltedorunbelted.Additionally, thefrontpassengerairbagmaybeautomatically turnedOFFundersomeconditions,depending ontheinformationprovidedbytheoccupant classificationsensor.Ifthefrontpassengerair bagisOFF,thepassengerairbagstatuslight willbeilluminated(iftheseatisunoccupied,the lightwillnotbeilluminated,buttheairbagwill beoff).(See"Frontpassengerairbagand statuslight"(P.1-48)forfurtherdetails.)One frontairbaginflatingdoesnotindicateimproper performanceofthesystem.
If you have any questions about your airbag system, contact NISSANora NISSAN dealer. If you are considering modification of your vehicle dueto disability, you may also contact NISSAN. Contact information is contained in the front of this Owner's Manual.
Whenafrontairbaginflates,afairlyloudnoise maybe heard,followedbyreleaseofsmoke. This smokeis notharmfulanddoes not indicate afire.Careshouldbetakennottoinhaleit,asit may cause irritation and choking.Those with a history of a breathing conditions should get fresh air promptly.
Frontairbags, alongwiththeuseofseatbelts, helptocushiontheimpactforceonthehead andchestofthefrontoccupants. Theycanhelp savelivesandreduceseriousinjuries. However, aninflatingfrontairbagmaycausefacial abrasionsorotherinjuries. Frontairbagsdo notproviderestrainttothelowerbody.
EvenwithNISSANAdvancedAirBags,seat beltsshouldbecorrectlywornandthedriver andpassengerseateduprightasfaraspractical awayfromthesteeringwheelorinstrument panel.Thefrontairbagsinflatequicklyinorder tohelpprotectthefrontoccupants.Becauseof this,theforceofthefrontairbaginflatingcan increasetheriskofinjuryiftheoccupantistoo closeto,orisagainst,theairbagmoduleduring inflation.
Thefrontairbagswilldeflatequicklyaftera collision.
Thefrontairbagsoperateonlywhenthe ignitionswitchisintheONposition. AfterturningtheignitionswitchtotheON position,thesupplementalairbagwarning lightilluminates.Thesupplementalairbag warninglightwillturnoffafterabout7 secondsifthesystemisoperational.

SSS0803
Frontpassengerairbagstatuslight
Frontpassengerairbagandstatuslight

WARNING
Thefrontpassengerairbagisdesigned toautomaticallyturnOFFundersome conditions.Readthissectioncarefully tolearnhowitoperates.Properuseof theseat,seatbeltandchildrestraintsis necessaryformosteeffectiveprotection. Failuretofollowallinstructionsinthis manualconcerningtheuseofseats, seatbeltsandchildrestraintscan increasetheriskorseverityofinjuryin
anaccident.
Statuslight:
Thefrontpassengerairbagstatuslight located on the instrument panel below the air conditioner controls. After the ignition switch is placed in the "ON" position, the front passenger airbagstatuslight illuminates for about 7 seconds and then turn so for illuminates depending on the front passenger seat occupied status. The light operates as follows:

●Unoccupiedpassengerseat:The light isOFFandthefrontpassengerairbagis OFFandwillnotinflateinacrash.
- Passenger'sseatoccupiedbyasmalladult, childorchildrestraintasoutlinedinthis section:The an lightilluminatestoindicate thatthefrontpassengerairbagisOFFand willnotinflateinacrash.
- Occupiedpassengerseatandthepassengermeetstheconditionsoutlinedinthis section:The ^2 lightisOFFtoindicate that thefrontpassengerairbagisoperational.
Frontpassengerairbag:
Thefrontpassengerairbagisdesignedto automaticallyturnOFFwhenthevehicleis operatedundersomeconditionsasdescribed belowaspermittedbyU.S.regulations.Ifthe
frontpassengerairbagisOFF, it will not inflate inacrash. The driver air bag and other air bags in your vehicle are not part of this system.
The purpose of the regulationistohelpreduce the risk of injury or death from an inflating airbag to certain front passenger seat occupants, such as children, by requiring the airbag to be automatically turned OFF.
Theoccupantclassificationsensor(pattern sensor)isinthefrontpassengerseatcushion andisdesignedtodetectanoccupantand objectsontheseat.Forexample,ifachildisin thefrontpassengerseat,theAdvancedAirBag Systemisdesignedtoturnthepassengerair bagOFFinaccordancewiththeregulations. Also,ifachildrestraintofthetypesspecifiedin theregulationsisontheseat,theoccupant classificationsensorcandetectitandcausethe airbagtoturnOFF.
Frontpassengerseatadultoccupantswhoare properlyseatedandusingtheseatbeltas outlinedinthismanualshouldnotcausethe passengerairbagtobeautomaticallyturned OFF.ForsmalladultsitmaybeturnedOFF, however,iftheoccupantdoesnotsitintheseat properly(forexample,bynotsittingupright,by sittingonanedgeoftheseat,orbyotherwise beingoutofposition),thiscouldcausethe sensortoturntheairbagOFF.Alwaysbesure
tobeseatedandwearingtheseatbeltproperly forthemosteeffectiveprotectionbytheseatbelt andsupplementalairbag.
NISSANrecommendsthatpre-teensandchildrenbeproperlyrestrainedinarearseat. NISSANalsorecommendsthatappropriate childrestraintsandboosterseatsbeproperly installedinarearseat. If this is not possible, the occupantclassificationsensorisdesigned to operate as described abovetoturnthefront passengerairbagOFF for specified child restraints. Failing to properly secure child restraintsandtousethe Automatic Locking Retractor(ALR) mode (childrestraintmode) may allow therestrainttotipormoveinan accidentorsuddenstop. This can also result in the passengerairbaginflatinginacrash instead of being OFF. (See "Childrestraints" (P.1-21) for proper use and installation.)
If the front passenger seat is not occupied, the passenger air bag is designed not to inflate a crash. However, heavy objects placed on the seat could result in air bag inflation, because of the object being detected by the occupant classification sensor. Other conditions could also result in air bag inflation, such as fachildis standing on these seat, or if two children are on the seat, contrary to the instructions in this manual. Always be sure that you and all vehicle occupants are seated and restrained properly. Using the passenger air bag status light, you can monitor when the front passenger air bag is automatically turned OFF with these at occupied. The light will not illuminate when the front passenger seat unoccupied.
Ifanadultoccupantisintheseatbutthe passengerairbagstatuslightisilluminated (indicatingthattheairbagisOFF),itcouldbe thatthepersoniasmalladult,orisnotsitting ontheseatproperly.
Ifachildrestraintmustbeusedinthefrontseat, thepassengerairbagstatuslightmayormay notbeilluminated,dependingonthesizeofthe childandthetypeofchildrestraintbeingused.If theairbagstatuslightisnotilluminated (indicatingthattheairbagmightinflateina crash),itcouldbethatthechildrestraintorseat beltisnotbeingusedproperly.Makesurethat thechildrestraintisinstalledproperly,theseat beltisusedproperlyandtheoccupantis positionedproperly.Iftheairbagstatuslightis notilluminated,repositiontheoccupantorchild restraintinarearseat.
If the passenger air bag status light will not illuminate event though you believeth the child restraint, these beat belts and the occupant are properly positioned, the system may be sensing an unoccupied seat (in which case the air bag is OFF). Your NISSAN dealer can check that the systemisOFFbyusingaspecialtool. However, until you have confirmed with your dealer that your airbag is working properly, reposition the occupant or child restraint in a rearseat.
Theairbagsystemandpassengerairbagstatus lightwilltakeafewsecondstoregisterachange inthepassengerseatstatus. However, if the seatbecomesunoccupied, theairbagstatus lightwillremainoff.
Ifamalfunctionoccursinthefrontpassengerair bagsystem,thesupplementalairbagwarning light ,locatedinthemeterandgaugesarea, willblink.Havethesystemcheckedbya NISSANdealer.
Othersupplementalfront-impactairbag precautions

WARNING
- Donotplaceanyobjectsonthe steeringwheelpadorontheinstrumentpanel. Also, donotplaceany objectsbetweenanyoccupantand thesteeringwheelorinstrument panel. Suchobjectsmaybecome dangerousprojectilesandcause injuryifthefrontairbaginflates.
- Donotplaceobjectswithsharp edgesontheseat. Also, donot placeheavyobjectsontheseat that willleavepermanentimpressions in theseat. Suchobjectscandamage theseatoroccupantclassification sensor(patternsensor). This can affect the operation of the airbag system and result in serious personal injury.
- Donotusewateroracidiccleaners (hotsteamcleaners) on theseat. This candamagetheseatoroccupantclassificationsensor. This can also affect the operation of their bagsystemandresultinserious personal injury.
- Immediatelyafterinflation,several frontairbagsystemcomponents willbehot.Donottouchthem;you mayseverelyburnyourself.
-
Nounauthorizedchangesshouldbe madetoanycomponentsorwiring ofthesupplementalairbagsystem. Thisistopreventaccidentalinflationofthesupplementalairbagordamagetothesupplementalairbag system.
-
Donotmakeunauthorizedchanges toyourvehicle'selectricalsystem, suspensionsystemorfrontend structure. This could affect proper operation of the frontairbagsystem.
- Tamperingwiththesupplemental airbagsystemmayresultinserious personalinjury.Tamperingincludes changestothesteeringwheel and theinstrumentpanelassembly by placingmaterialoverthesteering wheelpadandabovetheinstrument panelorbyinstallingadditionaltrim materialaroundtheairbagsystem.
- Modifyingortamperingwiththe frontpassengerseatmayresultin seriouspersonalinjury.Forexample,donotchangethefrontseatsby placingmaterialontheseatcushion orbyinstallingadditionaltrimmaterial,suchasseatcovers,onthe seathatisnotspecificallydesigned toassureproperairbagoperation. Additionally,donotstowanyobjectsunderthefrontpassengerseat ortheseatkushionandseatback. Suchobjectsmayinterferewiththe properoperationoftheoccupant
classificationsensor.
- Nounauthorizedchangesshouldbe madetoanycomponentsorwiring oftheseatbeltsystem. This may affect the frontair bagsystem. Tampering with theseatbeltsystem may result in serious personal injury.
- Workonandaroundthefrontair bagsystemshouldbedonebyaNISSANdealer.InstallationofelectricalequipmentshouldalsobedonebyaNISSANdealer.The SupplementalRestraintSystem (SRS)wiringharnesses*shouldnot bemodifiedordisconnected.Unauthorizedelectricaltestequipment andprobingdevicesshouldnotbe usedontheairbagsystem.
- Acrackedwindshieldshouldbe replacedimmediatelybyaqualified repairfacility.Acrackedwindshield could affectthefunctionofthe supplementalairbagsystem.
The SRSwiringharnessconnectorsare yellowandorangeforeasyidentification.
Whensellingyourvehicle, werequestthatyou informthebuyeraboutthefrontairbagsystem
andguidethebuyertotheappropriatesections inthisOwner'sManual.

natural_image
Line drawing of a car backseat with seatbelt and rear seats (no text or symbols)FRONTSEAT-MOUNTEDSIDE-IMPACTSUPPLEMENTALAIRBAGAND ROOF-MOUNTEDCURTAINSIDE-IMPACTANDROLLOVERSUPPLEMENTALAIRBAGSYSTEMS
Thesideairbagsarelocatedintheoutsideof theseatbackofthefrontseats.Thecurtainair bagsarelocatedinthesideroofrails.Allofthe information,cautionsandwarningsinthis manualapplyandmustbefollowed.The sideairbagsandcurtainairbagsaredesigned toinflateinhigherseveritysidecollisions, althoughtheymayinflateiftheforcesinanother typeofcollisionaresimilartothoseofahigher severitysideimpact.Theyaredesignedtoinflate
onthesidewherethevehicleisimpacted. They maynotinflateincertainsidecollisionsonthe sidewherethevehicleisimpacted. Curtainair bagsarealsodesignedtoinflateincertantypes ofrollovercollisionsornearrollovers.
Vehicledamage(orlackofit)isnotalwaysan indicationofpropersideairbagandcurtainair bagoperation.
Whenthesideairbagsandcurtainairbags inflate,afairlyloudnoisemaybeheard,followed byreleaseofsmoke.Thissmokeisnotharmful anddoesnotindicateafire.Careshouldbe takennottoinhaleit.asitmaycauseirritation andchoking.Thosewithahistoryofabreathing conditionshouldgetfreshhairpromptly.
Sideairbags, alongwiththeuseofseatbelts, helptocushiontheimpactforceonthechest andpelvicareaofthefrontoccupants. Curtain airbagshelptocushiontheimpactforcetothe headofoccupantsinthefrontandrearoutboard seatingpositions. Theycanhelpsavelivesand reduceseriousinjuries. However, sideairbags andcurtainairbagsmaycauseabrasionsor otherinjuries. Sideairbagsandcurtainairbags donotproviderestrainttothelowerbody.
Theseatbeltsshouldbecorrectlywornandthe driverandpassengerseateduprightasfaras practicalawayfromthesideairbags.Rearseat passengersshouldbeseatedasfarawayas
Safety—Seats, seatbeltsandsupplementalrestraintsystem 1-51
practicalfromthedoorfinishersandsideroof rails. Thesideairbagsandcurtainairbags inflatequicklyinordertohelpprotectthe occupantsintheoutboardseatingpositions. Becauseofthis, theforceofthesideairbags andcurtainairbagsinflatingcanincreasetheriskofinjuryiftheoccupantistoocloseto, oris against, theseairbagmodulesduringinflation. Inarollover, thecurtainairbagsonbothsides aredesignedtoinflate. Underbothside-impact androlloversituations, thecurtainairbagswill remaininflatedforashortperiodoftime.
Thesideairbagsandcurtainairbags operateonlywhentheignitionswitchisin theONposition.
AfterturningtheignitionswitchtotheON position,thesupplementalairbagwarning lightilluminates.Thesupplementalairbag warninglightwillturnoffafterabout7 secondsifthesystemsareoperational.

WARNING
- Donotplaceanyobjectsnearthe seatbackofthefrontseats. Also, do notplaceanyobjects(anumbrella, bag, etc.) betweenthefrontdoor finisherandthefrontseat. Such objects maybecomedangerous
projectilesandcauseinjuryifaside airbaginflates.
- Rightafterinflation,severalsideair bagandcurtainairbagsystem componentswillbehot.Donot touchthem;youmayseverelyburn yourself.
- Nounauthorizedchangesshouldbe madetoanycomponentsorwiring ofthesideairbagandcurtainair bagsystems. This is to prevent damagetooraccidentalinflation ofthesideairbagandcurtainair bagsystems.
- Donotmakeunauthorizedchanges toyourvehicle'selectricalsystem, suspensionsystemorsidepanel. Thiscouldaffectproperoperation ofthesideairbagandcurtainair bagsystems.
- Tamperingwiththesideairbag systemmayresultinseriouspersonalinjury. Forexample, donot changethefrontseatsbyplacing materialneartheseatbacksorby installingadditionaltrimmaterial, suchasseatcovers,aroundtheside airbag.
- Workaroundandonthesideairbag andcurtainairbagsystemsshould bedonebyaNISSANdealer.Installationofelectricalequipment shouldalsobedonebyNISSAN dealer.TheSupplementalRestraint System(SRS)wiringharnesses* shouldnotbemodifiedordisconnected.Unauthorizedelectricaltest equipment and probing devices shouldnotbeusedonthesideair bagandcurtainsupplementalair bagsystems.
* TheSRSwiringharnessconnectorsare yellowandorangeforeasyidentification.
Whensellingyourvehicle, werequestthatyou informthebuyeraboutthesideairbagand curtainairbagsystemsandguidethebuyerto theappropriatesectionsinthisOwner'sManual.
SEATBELTSWITHPRETENSIONERS (frontseats)

WARNING
- Thepretensionerscannotbereused afteractivation. They must be placed together with theretractor and buckleasaunit.
- If the vehicle becomes involved in a collision but a pretensioner is not activated, besureto have the pretensionersystem checked and, if necessary, replaced by a NISSAN dealer.
- Nounauthorizedchangesshouldbe madetoanycomponentsorwiring ofthepretensionersystem. This is topreventdamagetooraccidental activation of thepretensioners. Tamperingwiththepretensioner systemmayresultinseriouspersonalinjury.
•WorkaroundandonthepretensionersystemshouldbedonebyaNISSANdealer.InstallationofelectricalequipmentsshouldalsobedeonbyaNISSANdealer.Un-authorizedelectricaltestequipmentandprobingdevicesesshouldnotbeusedonthepretensionersystem.
- If you need to dispose of a pretensioner or scrap the vehicle, contact a NISSAN dealer. Correct pretensioner disposal procedures are set forth in the appropriate NISSAN Service Manual. Incorrect disposal procedures could cause personal
injury.
Thepretensionersystemmayactivatewiththe supplementalairbagsystemincertaintypesof collisions.Workingwiththeseatbeltretractor,it helpstightentheseatbeltwhenthevehicle becomesinvolvedincertaintypesofcollisions, helpingtorestrainfrontseatoccupants.
Thepretensionerisencasedwiththeseatbelt retractor.Theseseatbeltsareusedthesame wayasconventionalseatbelts.
Whenapretensioneractivates,smokeisre- leasedandaloudnoisemaybeheard.The smokeisnotharmfulanddoesnotindicatea fire.Careshouldbetakennottoinhaleit,asit maycauseirritationandchoking.Thosewitha historyofabreathingconditionshouldgetfresh airpromptly.
Afterpretensioneractivation, load limiters allow these at belt to release webbing (if necessary) to reduce forces against the chest.
Thesupplementalairbagwarninglight used to indicate malfunctions in the pretensioner system. (See "Supplementalairbagwarning light" (P.1-54) formoredetails.) If the supplemental airbag warning light indicates there is a malfunction, havethesystem checked by a NISSAN dealer.
Whensellingyourvehicle, werequestthatyou informthebuyeraboutthepretensionersystem andguidethebuyertotheappropriatesections inthisOwner'sManual.

SUPPLEMENTAL AIRBAG WARNING LABELS
Warninglabelsaboutthesupplementalfront-impactairbagsystemsareplacedinthevehicle asshownintheillustration.
①SRSairbag
Thewarninglabelsarelocatedonthesurfaceof thesunvisors.

natural_image
Silhouette of a person in motion, possibly running or assisting, with no visible text or symbols.SUPPLEMENTAL AIRBAG WARNING LIGHT
Thesupplementalairbagwarninglight,displaying intheinstrumentpanel,monitorsthe circuitsfortheairbagsystems,pretensioners andallrelatedwriting.
WhentheignitionswitchisintheONposition, thesupplementalairbagwarninglightilluminatesforabout7secondsandthenturnsoff. Thismeansthesystemisoperational.
Ifanyofthefollowingconditionsoccur,theair bagand/orpretensionersystems.
●Thesupplementalairbagwarninglight remainsonafterapproximately7 seconds.
- Thesupplementalairbagwarninglight flashes intermittently.
- Thesupplementalairbagwarninglightdoes notcomeonatall.
Undertheseconditions,theairbagand/or pretensionersystemsmaynotoperateproperly. Theymustbecheckedandrepaired.Takeyour vehicletothenearestNISSANdealer.

WARNING
If the supplemental airbag warning lightison, it could mean that the front airbag, side airbag, curtain airbag and/or pretension systems will not operate in an accident. To help avoid injury to your self for others, have your vehicle checked by a NISSAN dealer as soon as possible.
REPAIRANDREPLACEMENTPROCEDURE
Thefrontairbags,sideairbags,curtainairbags andpretensionersaredesignedtoactivateona one-time-onlybasis.Asareminder,unlessitis damaged,the supplemental air bag warning light willremainilluminatedafterinflationhasoccurred.RepairandreplacementofthesesystemsshouldbedoneonlybyaNISSANdealer.
1-54 Safety—Seats, seatbeltsandsupplementalrestraintsystem
When maintenance work is required on the vehicle, the front air bags, side air bags, curtain air bags and pretensioners and related parts should be pointed out to the person performing themaintenance. The ignitions switch should always be in the LOCK position when working under the hood or insidethe vehicle.

WARNING
- Onceafrontairbag,sideairbagor curtainairbaghasinflated,theair bagmodulewillnotfunctionagain andmustbereplaced.Additionally, theactivatedpretensionersmust alsobereplaced.Theairbagmoduleandpretensionersystemshould bereplacedbyaNISSANdealer. Theairbagmodulesandpretensionersystemcannotberepaired.
- Thefrontairbag, sideairbag and curtainairbagsystems, and pretensionersystem should be inspected by a NISSAN dealer if there is any damage to the frontor-side portion of the vehicle.
- If you need to dispose of as supplemental air bag or pretensioner, or scrap the vehicle, contact a NISSAN
dealer.Correctsupplementalair bagandpretensionersystemdisposalproceduresaresetforthinthe appropriateNISSANServiceManual.Incorrectdisposalprocedures couldcausepersonalinjury.
MEMO
1-56 Safety—Seats, seatbelts and supplemental restraintsystem
2Instrumentsandcontrols
Instrumentpanel....2-3
Metersandgauges....2-4
Speedometer....2-5
Odometer/twintripodometer....2-5
Tachometer....2-6
Enginecoolanttemperaturegauge....2-6
Fuelgauge....2-7
Instrumentbrightnesscontrol....2-8
Warning/indicatorlightsandaudiblereminders....2-9
Checkingbulbs....2-10
Warninglights....2-10
Indicatorlights....2-14
Audiblereminders....2-16
Vehicleinformationdisplay....2-17
Outsideairtemperature....2-17
Indicatorsforoperation....2-19
Indicatorsformaintenance....2-20
Tripcomputer....2-21
ContinuouslyVariableTransmission(CVT)
positionindicator....2-24
Securitysystems....2-24
VehicleSecuritySystem....2-24
NISSANVehicleImmobilizerSystem....2-26
Windshieldwiperandwasherswitch....2-27
Rearwindowwiperandwasherswitch....2-28
Rearwindowdefrosterswitch....2-29
Headlightandturnsignalswitch....2-29
Headlightswitch....2-29
Turnsignalswitch....2-30
Horn....2-31
VehicleDynamicControl(VDC)OFFswitch....2-31
Poweroutlet....2-31
Storage....2-32
Cupholders....2-32
Sunglassesholder....2-33
Glovebox....2-34
Consolebox....2-35
Luggagefloorbox(ifsoequipped)......2-35
Luggagesidebox....2-36
Cargocover(ifsoequipped)....2-36
Luggagehooks....2-37
Coathooks....2-38
Utilityhook....2-38
Roofrack(ifsoequipped)....2-38
Windows....2-39
Powerwindows....2-39

Interiorlights....2-42
Maplights....2-42
Ceilinglight....2-43
Vanitymirrorlights(ifsoequipped)....2-44
Cargolight....2-44
INSTRUMENTPANEL
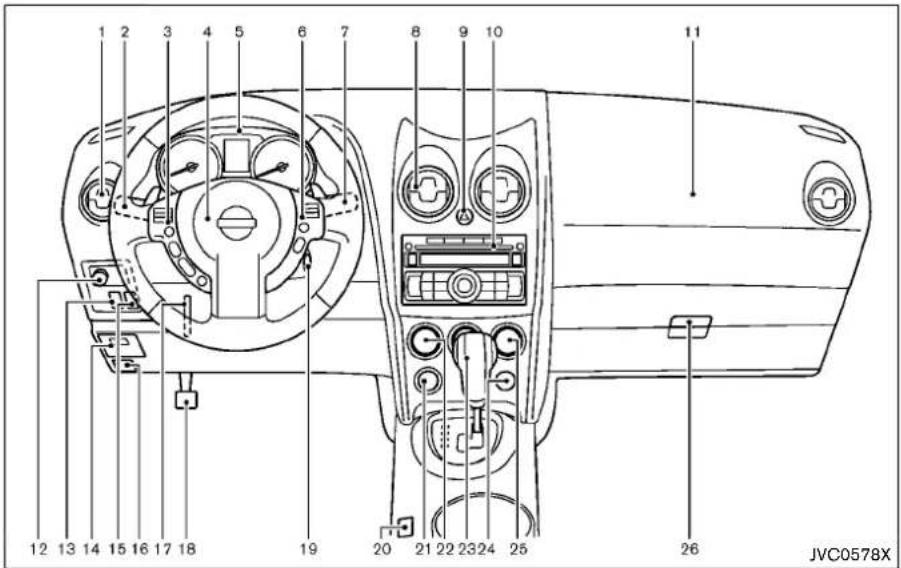
- Sideventilator
2.Headlightandturnsignalswitch - Steering-wheel-mounted controls(leftside)(if soequipped)
—Audiocontrol
—Bluetooth ^® Hands-FreePhonesystemcontrol
4.Steeringwheel
—Horn
—Driversupplementalairbag
5.Metersandgauges
6.Steering-wheel-mountedcontrols(rightside)
—Cruisecontrolswitches(ifsoequipped)
7.Wiperandwasherswitch
- Centerventilator
9.Hazardwarningflasherswitch
10.Audiosystem
—Clock
—RearViewMonitor(ifsoequipped)
11.Frontpassengersupplementalairbag
12. Outsideremotemirrorcontrolswitch
13. All-WheelDrive(AWD)LOCKswitch(ifso equipped)
14.Fuseboxcover
15. VehicleDynamicControl(VDC)OFFswitch
16.Hoodreleasehandle
17.Tiltingsteeringwheellever
18. Parkingbrake
19. Ignitionswitch
20.Sportmodeswitch
21.Poweroutlet
22.Heater/airconditionercontrol
23.Shiftlever
24.Frontpassengerairbagstatuslight
25.Rearwindowdefrosterswitch
26.Glovebox
METERSANDGAUGES
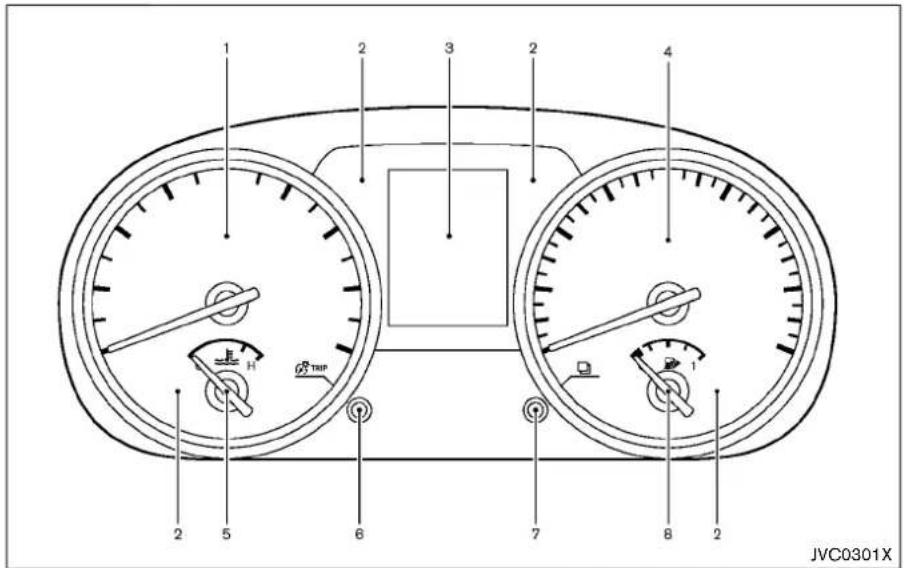
1.Tachometer
2. Warning/indicatorlights
3.Vehicleinformationdisplay
4.Speedometer
5. Enginecoolanttemperaturegauge
6. GTRIP switch(twintripodometercontrol and brightnesscontrol)
2-4 Instrumentsandcontrols


switch(settingscontrolandtripcomputer ol)
8.Fuelgauge
Theneedleindicatorsmaymoveslightly aftertheignitionswitchisturnedtothe LOCKposition.Thisisnotamalfunction.

CAUTION
- Forcleaning, use as soft cloth, dampened with water. Never use arough cloth, alcohol, benzine, thinner or any kind of solvent or papertowel with a chemical cleaning agent. They will scratch or caused discoloration to the lens.
- Donotsprayanyliquidsuchas wateronthemeterlens.Spraying liquidmaycausethesystem to malfunction.
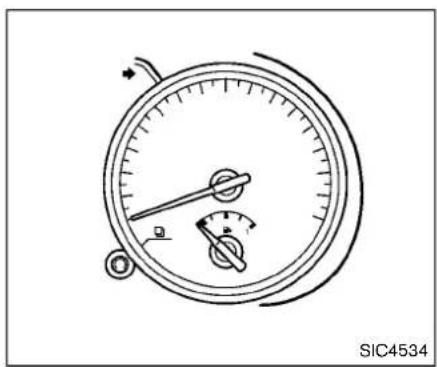
natural_image
Line drawing of a dial gauge with pointer and scale, no text or symbols presentSPEEDOMETER
Speedometer
Thespeedometerindicatesvehiclespeedin milesperhour(MPH)andkilometersperhour (km/h).

ODOMETER/TWINTRIPODOMETER
Theodometerandtwintripodometerare displayedonthevehicleinformationdisplay whentheignitionswitchisintheONposition.
Odometer
Theodometer Ⓐ recordsthetotaldistancethe vehiclehasbeendriven.
Twintripodometer
Thetwintripodometer Ⓑ recordsthedistance of2individualtrips(TRIPAandTRIPB).
Changingthedisplay:
Brieflypush the TRIP switch © tochangethe displayasfollows.
TRIPA→TRIPB→TRIPA
Resettingthetripodometer:
Pushandholdthe _TRIP^TBP switchforapproximately 1 secondtoresettheselectedtrip(TRIPAor TRIPB).

TACHOMETER
Thetachometer indicates enginespeed in revolutions per minute (RPM). Donotrev the engine into theredzone ①.

CAUTION
Whenenginespeedapproachesthered zone, shifttoahighergearorreduce enginespeed. Operatingtheenginein theredzonemaycauseseriousengine damage.
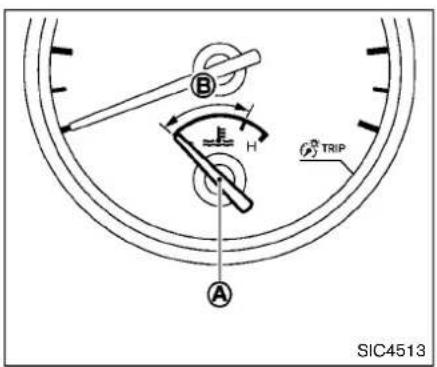
Thegauge Ⓐ indicate the engine coolant temperature.
Theenginecoolanttemperatureiswithinthe normalrangewhenthegaugeiswithinthezone (B) shownintheillustration.
The enginecoolanttemperaturevarieswiththe outsideairtemperatureanddrivingconditions.

CAUTION
Ifthegaugeindicatesenginecoolant temperaturenearthehot(H)endofthe
normalrange, reducevehiclespeed to decrease temperature. If the gauge is overthen normal range, stop the vehicle as soon as safely possible. If the engine is overheated, continued operation of the vehicle may seriously damage the engine. See "If your vehicle overheats" (P.6-11) for immediate action required.

FUELGAUGE
Thegauge Ⓐ indicate the approximate fuel level in the tank.
Thegaugemaymoveslightlyduringbraking, turning,acceleration,orgoingupordownhills.
Refillthefueltankbeforethegauge registers0.
Thelowfuelwarninglight

illuminatesand
lowfuelwarningappearsonthevehicle informationdisplaywhenthefueltankisgetting low.Refuelasoonasitisconvenient, preferablybeforethegaugereachestheempty (0)position.Thereisasmallreserveoffuelinthe tankwhenthefuergaugereachestheempty(0)
position.
The ▶ indicate that the fuel-filler door is located on the passenger's side of the vehicle.

CAUTION
- Ifthevehiclerunsoutoffuel,the malfunctionindicatorlight(MIL) maycomeon.Refuelassoonas possible.Afterafewdrivingtrips, the lightshouldturnoff.Ifthe lightremainsonafterafewdriving trips,havethevehicleinspectedby aNISSANdealer. - Foradditionalinformation,see "MalfunctionIndicatorLight(MIL)" (P.2-15).


Instrumentsandcontrols2-7
INSTRUMENTBRIGHTNESSCONTROL
Theinstrumentbrightnesscontroloperates whentheheadlightswitchisinthe spas or ID position.
Turnthecontrol A toadjustthebrightnessof themeterpanelandtheinstrumentpanellights. Thebrightnessindicator B willbeshown brieflyinthevehicleinformationdisplaywhen thecontrolisturned.
Whenthebrightnesslevelreachesthemaximum orminimum, abeepwillsound.
Whenthebrightnesslevelreachestheminimum, themeterpanelandtheinstrumentpanellights willbeturnedoff.
AftertheignitionswitchisturnedtotheOFF position,thebrightnessindicator Ⓑ isdisplayedfor30seconds.
2-8 Instrumentsandcontrols
WARNING/INDICATORLIGHTSAND AUDIBLEREMINDERS
 | All-WheelDrive(AWD)warninglight(AWD models)(ifsoequipped)Anti-lockBrakingSystem(ABS)warning lightBrakewarninglightSupplementalairbagwarningChargewarninglightVehicleDynamicControl(V ElectricpowersteeringwarninglightEngineoilpressurewarninglightExteriorlightindLowfuelwarninglightFrontpassengerairbagstaLowtirepressurewarninglightHighbeamindicat | [WTCK] | MasterwarninglightSeatbeltwarninglightninglightAll-WheelDrive(AWD)LOCKindicatorlight (AWDmodels)(ifsoequipped) |  | MalfunctionIndicatorLight(MIL)OverdriveoffindicatorlightSecurityindicatorlightSPORTmodeindicatorlightTurnsignal/hazardindicatorlightsVehicleDynamicControl(VDC)offindicator light |
CHECKINGBULBS
Withalldoorsclosed,applytheparkingbrake andturntheignitionswitchtotheONposition withoutstartingtheengine.Thefollowinglights willcomeon:



The following lights come on briefly and thengo off (if so equipped):


Ifanylightdoesnotcomeon, itmayindicatea burned-outbulboranopencircuitinthe electricalsystem.Havethesystemcheckedby aNISSANdealer.
Someindicatorsandwarningsarealsodisplayedonthevehicleinformationdisplaybetweenthespeedometerandtachometer.(See "Vehicleinformationdisplay"(P.2-17).)
WARNINGLIGHTS
AWD All-WheelDrive(AWD)warning light(AWDmodels)
Thelightilluminateswhentheignitionswitchis turnedtotheONposition.Itturnsoffafterthe engineisstarted.
If the All-Wheel Drive (AWD) system malfunc- tions, orthediameter of the front and therear wheels are different, the warning light while either remain illuminated or blink. (See "All-Wheel Drive (AWD)" (P.5-20).)

CAUTION
- Ifthewarninglightcomesonwhile drivingtheremaybeamalfunction intheAWDsystem.Reducethe vehiclespeedandhaveyourvehicle checkedbyaNISSANdealeras soonaspossible.
- IftheAWDwarninglightblinks whiledriving:
—blinksrapidly(abouttwicea second): Pullofftheroadinasafearea, andidletheengine. Thedriving modewillchangeto2WDto
prevent the AWD system from malfunctioning.Ifthewarning lightturnsoff,youcandrive again.
—blinksslowly(aboutoncevery 2seconds): Pullofftheroadinasafearea, andidletheengine.Checkthat alltiresizesarethesame,tire pressureiscorrectandtiresare notworn.
- Ifthewarninglightisstillonafter theaboveoperations,haveyour vehiclecheckedbyaNISSANdealer as soonaspossible.
ABS Anti-lockBrakingSystem(ABS) warninglight
When the ignition switch is in the ON position, the Anti-lock Braking System (ABS) warning light illuminates and then turns off. This indicates the ABS is operational.
If the ABS warning light illuminates while the engine is running, or while driving, it may indicate the ABS is not functioning properly. Havethesystem checked by a NISSAN dealer.
IfanABSmalfunctionoccurs, theanti-lock
functionisturnedoff. The brakesystem then operates normally, but without anti-lock assistance. (See "Brakesystem" (P.5-25).)

Brakewarninglight
Thislightfunctionsforboththeparkingbrake andthefootbrakesystems.
Parkingbrakeindicator:
WhentheignitionswitchisintheONposition, thelightilluminateswhentheparkingbrakeis applied.
Lowbrakefluidwarninglight:
WhentheignitionswitchisintheONposition, thelightwarnsofalowbrakefluidlevel.Ifthe lightilluminateswhiletheengineisrunningwith theparkingbrakenotapplied,stopthevehicle andperformthefollowing:
- Check the brake fluid level. Add brake fluid as necessary. (See "Brakefluid" (P.8-11).)
- If the brake fluid level is correct, have the warnings system checked by a NISSAN dealer.
Anti-lockBrakingSystem(ABS)warning indicator:
Whentheparkingbrakeisreleasedandthe brakefluidlevelissufficient,ifboththebrake warninglightandtheAnti-lockBrakingSystem
(ABS)warninglightilluminate, it may indicate the ABS is not functioning properly. Have the brakesystem checked, and if necessary repaired, by a NISSAN dealer promptly. (See "Anti-lock Braking System (ABS) warning light" (P.2-10).)

WARNING
-Yourbrakesystemmaynotbe workingproperlyifthewarninglight ison.Drivingcouldbedangerous.If youjudgeittobesafe,drivecarefullytothenarestservicestation forrepairs.Otherwise,haveyour vehicletowedbecausedrivingit couldbedangerous.
- Pressingthebrakepedalwiththe enginestoppedand/orlowbrake fluidlevelmayincreaseyourstoppingdistanceandbrakingwillrequiregreaterpedaleffortaswellas pedaltravel.
- If the brake fluid level is below the minimum or MIN mark on the brake fluid reservoir, donot drive until the brakes system has been checked at NISSAN dealer.

Chargewarninglight
If the light illuminates while the engine is running, it may indicate the charging system is not functioning properly. Turn the engine off and check the alternator belt. If the belt is loose, broken, missing or if the light remains on, see a NISSAN dealer immediately.

CAUTION
Donotcontinuedrivingifthealternator beltisloose,brokenormissing.

Electricpowersteeringwarning
When the ignitions switch in the ON position, the electric power steering warning light illuminates. After starting the engine, the electric power steering warning light turnoff. This indicates the electric power steering system is operational.
If the electric power steering warning light illuminates while the engine is running, it may indicate the electric power steering system is not functioning properly and may need servicing. Have the electric power steering system checked by a NISSAN dealer.
When the electric power steering warning light illuminates with the engineer running, the power assist to the steering will cease operation but you will still have controlof the vehicle. At this time, greater steering efforts are required to operate the steering wheel, especially in sharp turns and allows speeds.
See "Electricpowersteeringsystem" (P.5-24).

Engineoilpressurewarninglight
Thislightwarnsoflowengineoilpressure.Ifthe lightflickersorilluminatesduringnormaldriving, pullofftheroadinasafearea,stoptheengine immediatelyandcallaNISSANdealerorother authorizedrepairshop.
Theengineoilpressurewarninglightis notdesignedtoindicatealowoillevel. Usethedipsticktochecktheoillevel.(See "Engineoil"(P.8-9).)

CAUTION
Runningtheenginewiththeengineoil pressurewarninglightoncouldcause seriousdamagetotheenginealmost immediately.Suchdamageisnotcoveredbywarranty.Turnofftheengineas soonasitissafetodoso.

Lowfuelwarninglight
Thislightilluminateswhenthefuelinthetankis gettinglow. Refuelassoonasitisconvenient, preferablybeforethefuelgaugereachesthe0 position.
Therewillbeasmallreserveoffuel remaininginthetankwhenthefuelgauge reachesE.

Lowtirepressurewarninglight
YourvehicleisequippedwithaTirePressure MonitoringSystem(TPMS)thatmonitorsthetire pressureofalltiresexceptthespare.
Thelowtirepressurewarninglightwarnsoflow tirepressureorindicatesthattheTPMSisnot functioningproperly.
AftertheignitionswitchisturnedON,thislight illuminatesforabout1secondandturnsoff.
Lowtirepressurewarning:
If the vehicle is being driven with low tire pressure, the warning light will illuminate. A CHECKTIRE PRESSURE warning also appears in the vehicle information display.
Whenthelowtirepressurewarninglight illuminates,youshouldstopandadjustthetire pressuretotherecommendedCOLDtire pressureshownontheTireandLoading
Informationlabel. Thelowtirepressurewarning lightdoesnotautomaticallyturnoffwhenthetire pressureisadjusted. Afterthetireisinflatedto therecommendedpressure, the vehicle must be drivenatspeedsabove16MPH(25km/h)to activate the TPMSandturnoffthelowtire pressurewarninglight. Use atirepressure gaugetocheckthetirepressure.
The CHECKTIREPRESSURE warning appears for a period of time each time the ignition switch is placed in the ON position as long as the low tire pressure warning light remains illuminated.
For additional information, see "Vehicle information display" (P.2-17), "TirePressureMonitoring System(TPMS)" (P.5-3) and "TirePressure Monitoring System (TPMS)" (P.6-2).
TPMS malfunction:
If the TPMS is not functioning properly, the low tire pressure warning light will flash for approximately 1 minute when the ignition switch is turned ON. The light will remain on after 1 minute. Havethesystem checked by a NISSAN dealer. The CHECKTIREPRESSURE warning does not appear if the low tire pressure warning light illuminate to indicate a TPMS malfunction.
For additional information, see "Tire Pressure Monitoring System (TPMS)" (P.5-3).

WARNING
- Ifthelightdoesnotilluminatewith theignitionswitchturnedON,have thevehiclecheckedbyaNISSAN dealerassoonaspossible.
- Ifthelightilluminateswhiledriving, avoidsuddensteeringmaneuversor abruptbraking, reducevehicle speed,pullofftheroadtoasafe locationandstopthevehicleas soonaspossible.Drivingwithunder-inflatedtiresmaypermanently damagethetiresandincreasethe likelihoodoftirefailure.Serious vehicledamagecouldoccurand mayleadtoanaccidentandcould resultinseriouspersonalinjury. Checkthetirepressureforallfour tires.Adjustthetirepressuretothe recommendedCOLDtirepressure shownontheTireandLoading Informationlabeltoturnthelow tirepressurewarninglightOFF.If thelightstaysonafteradjustingthe tirepressureanddrivingover16 MPH(25km/h),havethesystem checkedbyaNISSANdealer.Ifyou haveaflattire,replaceitwitha
sparetireassoonaspossible.
- Whenasparetireismountedora wheelisreplaced, the TPMS will not function and the low tire pressure warning light will flash for approximately 1 minute. The light will remain on after 1 minute. Contact your NISSAN dealer as soon as possible for tirereplacement and or system resetting.
- ReplacingtireswiththosenotoriginallyspecifiedbyNISSANcould affecttheproperoperationofthe TPMS.

CAUTION
•TheTPMSisnotasubstituteforthe regulartirepressurecheck.Besure tocheckthetirepressureregularly.
- If the vehicle is being driven at speed of less than 16 MPH (25 km/h), the TPMS may not operate correctly.
- Besuretoinstallthespecifiedsize oftirestothefrontandrear.

Masterwarninglight
WhentheignitionswitchisintheONposition, themasterwarninglightilluminatesifanyofthe followingaredisplayedonthevehicleinformationdisplay.
●Lowfuelwarning
●Parkingbrakereleasewarning
- Dooropenwarning
●Liftgateopenwarning
- Loosefuelcapwarning
- Checktirepressurewarning
- Settingmenuoperationwarning
- Extended storage fuse warning (if so equipped)
See "Vehicleinformationdisplay" (P.2-17).

Seatbeltwarninglight
Thelightandchimeremindyoutofastenseat belts. Thelightilluminateswhenevertheignition switchisturnedtotheONposition, andwill remainilluminateduntilthedriver'sseatbeltis fastened. Atthesametime, thechimewillsound forabout6secondsunlessthedriver'sseatbelt issecurelyfastened.
Theseatbeltwarninglightforthefront passengerwillilluminateiftheseatbeltisnot fastenedwhenthefrontpassenger'sseatis
occupied.Forabout5secondsaftertheignition switchisintheONposition,thesystemdoes notactivatethewarninglightforthefront passenger.
See "Seatbelts" (P.1-9) for precaution on seat belt usage.

Supplementalairbagwarninglight
AfterturningtheignitionswitchtotheON position,thesupplementalairbagwarninglight willilluminate.Thesupplementalairbagwarning lightwillturnoffafterabout7secondsifthe supplementalfrontairbagandsupplemental sideairbag,curtainside-impactairbagsystems and/orpretensionerseatbeltareoperational. Ifanyofthefollowingconditionsoccur,thefront airbag,sideairbag,curtainairbagand pretensionersystemsneedservicingandyour vehiclemustbetakentoyournearestNISSAN dealer.
- Thesupplementalairbagwarninglight remainsonafterapproximately7seconds.
- Thesupplementalairbagwarninglight flashes intermittently.
- Thesupplementalairbagwarninglightdoes notilluminateatall.
Unless checked and repaired, the Supplemental Restraint Systems and orthepretensioners may not function properly.
2-14 Instrumentsandcontrols
Foradditionalinformation,see"Supplemental RestraintSystem"(P.1-41).

WARNING
If the supplemental airbag warning lightison, it could mean that the front airbag, side airbag, curtain airbag and/or pretension systems will not operate in an accident. To help avoid injury to your self for others, have your vehicle checked by a NISSAN dealer as soon as possible.

VehicleDynamicControl(VDC)
nglight
When the ignitions switch this in the ON position, the Vehicle Dynamic Control (VDC) warning light illuminates and then turn soff.
ThelightwillblinkwhentheVDCsystemorthe tractioncontrolsystem is operating, thus alerting the driver that the vehicle is near its distraction limits. Theroadsurface may be slippery.
If the VDC warning light illuminates while the VDC system is on, this light alerts the driveto the fact that the VDC system's fail-safemode is operating, for example the VDC system may not be functioning properly. Havethesystem
checkedbyaNISSANdealer.Ifamalfunction occursinthesystem,theVDCsystemfunction willbecanceledbutthevehicleisstilldriveable. Foradditionalinformation,see"VehicleDynamic Control(VDC)system"(P.5-27)ofthismanual.
INDICATORLIGHTS

All-WheelDrive(AWD)LOCK atorlight(AWDmodels)
Thislightilluminateswhentheignitionswitchis turnedtotheONposition,andturnsoffwithin1 second.
WhenselectingtheLOCKmodewhilethe engineisrunning,thislightwillilluminate.(See "All-WheelDrive(AWD)("P.5-20).)

Exteriorlightindicator
This indicator illuminates when the headlight switchisturned to the 30s or 10 position and the frontparking lights, instrument panellights, rear combination lights, license plate light or headlights are on. The indicator turn soff when the selights are turned off.
Frontpassengerairbagstatuslight
Thefrontpassengerairbagstatuslightwillbelit andthepassengerfrontairbagwillbeOFF dependingonhowthefrontpassengerseatis beingused.
Forfrontpassengerairbagstatuslightoperation,see"NISSANAdvancedAirBagSystem(frontseats)("P.1-47)ofthismanual.
Highbeamindicatorlight
Thislightilluminateswhentheheadlighthigh beamisonandgoesoutwhenthelowbeamis selected.
MalfunctionIndicatorLight(MIL)
Ifthemalfunctionindicatorlightilluminates steadyorblinkswhiletheengineisrunning, it may indicate apotentiallemissioncontrol and/or ContinuouslyVariableTransmission(CVT)malfunction.
Themalfunctionindicatorlightmayalsoilluminatesteadyifthefuel-fillercapislooseor missing,orifthevehiclerunssoutoffuel.Check tomakesurethefuel-filercapisinstalledand closedtightly,andthatthevehiclehasatleast3 USgallons(11.4liters)offuelinthefueltank.
Afterafewdrivingtrips, the light should turnoffifnootherpotentialemissioncontrol
systemmalfunctionexists.
If this indicator light remains on for 20 seconds and then blinks for 10 seconds when the engine is not running, it indicates that the vehicle is not ready for an emission control system inspection/maintenance test. (See "Readiness for Inspection/Maintenance (I/M) test" (P.9-26).)
Operation:
Themalfunctionindicatorlightwillilluminatein oneoftwoways:
- Malfunctionindicatorlightilluminatedsteady
—Anemissioncontrolsystemand/orCVT
malfunctionhasbeendetected.Checkthe
fuel-fillercapiftheLOOSEFUELCAP
warningappearsinthevehicleinformation
display.Ifthefuel-fillercapislooseor
missing,tightenorinstallthecapand
continuetodrivethevehicle.The
shouldturnoffafterafewdrivingtrips.Ifthe
lightdoesnotturnoffafterafewdriving trips,havethevehicleinspectedbya NISSANdealer.Youdonotneedtohave yourvehicletowedtothedealer.
- Malfunctionindicatorlightblinking—An enginemisfirehasbeendetectedwhichmay damagetheemissioncontrolsystem. Toreduceoravoidemissioncontrolsystem damage:
—Donotdriveatspeedsabove45MPH (72km/h).
—Avoidhardaccelerationordeceleration. —Avoidsteepuphillgrades.
—If possible, reduce the amount of cargo being hauledortowed.
Themalfunctionindicatorlightmaystop blinkingandremainilluminated.
HavethevehicleinspectedbyaNISSAN dealer.Youdonotneedtohaveyourvehicle towedtothedealer.

CAUTION
Continuedvehicleoperationwithout havingtheemissioncontrolsystem and/orCVTsystemcheckedandre-pairedasnecessarycouldleadtopoor driveability,reducedfueleconomy,and possibledamagetotheemissioncontrolsystem.
O/D OFF Overdriveoffindicatorlight
Theoverdriveoffindicatorlightilluminateswhen theoverdriveoffmodeisselected.
Foradditionalinformation,see"Continuously VariableTransmission(CVT)("P.5-9)ofthis manual.
Securityindicatorlight
Thelightblinkswhentheignitionswitchisinthe ACC,OFFForLOCKposition.Thisfunction indicatesthesecuritysystemequippedonthe vehicleisoperational.
If these security system is misfunctioning, this light will remain on while the ignition switch in the ON position. For additional information, see "Security systems" (P.2-24).
SPORT SPORTmodeindicatorlight
TheSPORTmodeindicatorlightilluminates whentheSPORTmodeisturned"ON".(See "ContinuouslyVariableTransmission(CVT)" (P.5-9)fortheuseoftheSPORTmodeswitch.)
Turnsignals/hazardindicatorlights
Thelightflasheswhentetheturnsignalswitch leverorhazardswitchisturnedon.
OFF VehicleDynamicControl(VDC)off indicatorlight
When the ignitions switch this on position, the Vehicle Dynamic Control (VDC) indicator light illuminates and the turn soff.
ThelightcomesonwhentheVDCoffswitchis pushedtoOFF. Thisindicate that the VDC systemandtraction control system are not operating.
AUDIBLEREMINDERS
Keyreminderchime
Thekeyreminderchimesoundsifthedriver's sidedoorisopenedwhilethekeyisleftintheignitionswitchandtheignitionswitchisintheACC,OFForLOCKposition.Removethekey andtakeitwithyouwhenleavingthevehicle.
Lightreminderchime
Thelightreminderchimewillsoundwhenthe driversidedoorisopenedwiththelightswitch inthe 3DGE orposition,andtheignition switchisintheACC,OFFForLOCKposition.
Turnthelightswitchchoffwhenyouleavethe
vehicle.
Brakepadwearwarning
Thediscbrakepadshaveaudiblewearwarnings. Whenabrakepadrequiresreplacement, it willmakeahighpitchedscrapingsoundwhen thevehicleisinmotion. Thisscrapingsoundwill firstoccuronlywhenthebrakepedalis depressed. Aftermorewearofthebrakepad, thesoundwillalwaysbeheardevenifthebrake pedalisnotdepressed. Havethebrakes checkedassoonaspossibleiftthewarning soundisheard.
Parkingbrakereminderchime
Theparkingbrakereminderchimewillsoundif thevehicleisdrivenatmorethan4MPH(7 km/h)withtheparkingbrakeapplied.Stopthe vehicleandreleasetheparkingbrake.
Seatbeltwarningchime
Theseatbeltwarningchimewillsoundfor about 6secondsunlessthedriver'sseatbeltis securelyfastened.
VEHICLEINFORMATIONDISPLAY

-
Outsidertemperature
-
Operation indicators and warnings
—Tripcomputer
—Cruisecontrol*
—Settingsmenu
3.Odometer
4.Twintripodometer
-
Continuously Variable Transmission (CVT) position indicator
-
switch(settingscontrolandtripcomputer control)
-
GTRP switch(twintripodometercontrol and brightnesscontrol)
*:ifsoequipped
The outside air temperature is displayed in °C for °C in the range of -58 to 140°C (-50 to 60°C).
The outside air temperature mode includes low temperature warning features.
- WhentheignitionswitchisplacedintheON position,
—Iftheoutsidetemperatureisbelow25°F (-4°C),theoutsidetemperaturedisplay flashesfor20seconds,thenstayson steady.
—Iftheoutsidetemperatureisbetween27 and37°F(-3and3°C),theoutside temperaturedisplayflashescontinuously.
- WiththeignitionswitchintheONposition, orwhiledriving,
- If the outsidetemperature drops below 37^(3^) , the outsidetemperature display flashes continuously. In addition, the lowoutsidetemperature warning indicator appears for 5 seconds, then turnoff.
—If the outsidetemperature drops below 25°F (-4°C), the outsidetemperature displaystayson steady. Thelow outside temperature warning indicator does not appear.
These warning features can be turned off in the Tripcomputersetting mode. (See "Tripcompu
ter"(P.2-21).)
Theoutsidetemperaturesensorislocatedin frontoftheradiator. Thesensormaybeaffected byroadorengineheat, winddirectionsand otherdrivingconditions. Thedisplaymaydiffer from the actualoutsidetemperatureorthe temperaturedisplayedonvariousssignsorbillboards.
If the battery was disconnected, when it is reconnected and the ignition switch is placed in the ON position, ^ F or ^ C will flash for one minuteto check the outside temperature sensor. When the outside temperature sensor is operational, the outside temperature will be displayed. If the outside temperature sensor is not operational, the outside temperature will not be displayed.





JVI0849X
2-18 Instrumentsandcontrols
INDICATORSFOROPERATION
Thedesignofthewarningsandalertsmaydiffer dependingonthemodel.
1. Dooropenwarning
This warning appears if any of the doors are open or not closed securely. The vehicle icon indicates which door is open on the display.
2. Liftgateopenwarning
Thiswarningappearsiftheliftgateisopenor notclosedsecurely. Whenthe switchis pushed,theliftgateopenwarningturnsoff.
3. Loosefuelcapwarning
This warning appears when the fuel-fillercapis not tightened correctly after the vehicle has been refueled. (See "Fuel-fillercap" (P.3-11).)
4. Checktirepressurewarning
This warning appears when the low tire pressure warning light in themeter illuminates and low tire pressure is detected. The warning appearseach timetheignitions switch is placed in the ON position as long asthe low tire pressure warning light remains illuminated. If this warning appears, stop the vehicle and adjust the tire pressure to there recommended COLD tire pressures shown on the Tire and Loading Information label. The check tire pressure warning turn so after a
periodoftime.(See "Lowtirepressurewarning light"(P.2-12)and "TirePressureMonitoring System(TPMS)("P.5-3).)
5. Parkingbrakereleasewarning
This warning appears when the vehicles speed is above 4 MPH (7 km/h) and the parking brake is applied.
6. Settingmenuoperationwarning
The warning appears when you try to operate the setting menu while driving. The setting menu can only be entered when the vehicle is stationary.
7. Lowoutsidetemperaturewarning
Thiswarningappearsiftheoutsidetemperature drops below 37^ F ( 3^ C) with the ignition switch intheONposition.Theoutsidetemperature displayflashesatthesametime.Thesewarning featurescanbeturnedoff.(See“Tripcomputer”(P.2-21).)
8.Lowfuelwarning
This warning appears when the fuel level in the tank is getting low. Refuel as soon as it is convenient, preferably before the fuel gauge reaches the empty (0) position.
Thereisasmallreserveoffuelremaining inthetankwhenthefuelgaugereaches theempty(0)position.
9.Driveralert
This warning appears when the previously set time for abreak is reached. You can set the time for up to 6 hours in the setting menu. (See "Trip computer" (P.2-21).)
10. Cruisecontrol indicator(ifso equipped)
Thecruisemainswitchindicator(CRUISE)is displayedwhenthecruisecontrolmainswitchis pushed.Whenthemainswitchispushedagain, theCRUISEindicatordisappears.Whenthe CRUISEindicatorisdisplayed,thecruise controlsystemisoperational.
Thecruisecontrolsetindicator(SET)is displayedwhilethevehiclespeediscontrolled by thecruisecontrolsystem.IftheSETindicator blinkswhiletheengineisrunning,itmayindicate that thecruisecontrolsystemisnotfunctioning properly.Havethesystemcheckedbya NISSANdealer.
Formoredetails,see"Cruisecontrol"(P.5-17).
11. Extended storage fuse warning (ifso equipped)
Thiswarningmayappeariftheextendedstorage fuseswitchisnotpushedin(switchedon). Whenthiswarningappears,pushin(switchon) theextendedstoragefuseswitchtoturnoffthe
warning.Formoreinformation,see"Extended storagefuseswitch"(P.8-21).


SIC4538
INDICATORSFORMAINTENANCE
1. Servicedueindicator
This indicator appears when the custom set distance comes for serviced due, for example, for engine oil and oil filter. You can set or reset the distance for serviced due. (See "Tripcomputer" (P.2-21).) Forscheduled maintenance items and intervals, see your NISSAN Service and Maintenance Guide.
2. Tirereplacementindicator
This indicator appears when the custom set distance comes for replacing tires. You can set or reset the distance for replacing tires. (See "Tripcomputer" (P.2-21).)
WARNING
Thetirereplacementindicatorisnota substituteforregulartirechecks, including tire pressure checks. See "Changingwheelsandtires"(P.8-35). Many factors including tire inflation, alignment, driving habits and road conditions affect tire wear and whentires should bereplaced. Setting the tire replacement indicator for a certain driving distance does not mean your tires will last that long. Use the tire
replacementindicatorasaguideonly andalwaysperformregulartirechecks. Failuretoperformregulartirechecks, includingtirepressurecheckscould resultintirefailure.Seriousvehicle damagecouldoccurandmayleadtoa collision,whichcouldresultinserious personalinjuryordeath.
3. "Other" indicator
This indicator appears when the customers set distance comes for checking or replacing maintenance items so other than the engine oil, oil filter and tires. Other maintenance items can include such things as air filter or tirer rotation. You can set or reset the distance for checking or replacing the items. (See "Tripcomputer" (P.2-21).) Forscheduled maintenance items and intervals, see your NISSAN Service and Maintenance Guide.

TRIPCOMPUTER
Tooperatethetripcomputer, usethe switch.

WhentheignitionswitchisintheONposition, modesofthetripcomputercanbeselectedby pushingthe □ switch Ⓐ briefly.
Eachtimethe □ switch Ⓐ ispushed,the displaywillchangeasfollows:
FuelEconomy→Averagespeed→Driving distance→Elapsedtime→Range(distanceto empty)(dte)→Settings
- When the switch is pushed and held for less than 3 seconds, these selected item can be reset except for "Range",
"Currentfuelconsumption" and "Settings". - When the switch (A) is pushed and held from more than 3 seconds, all the items on the display can be reset except for "Currentfuel consumption", "Settings", "Range" and "TRIPA".



SIC4541
*: Thedisplayunitcanbeconvertedorvaries dependingonthevehicle.
1. Fuel Economy(MPG, l/100km)
The FuelEconomymodeshowsthecurrentand averagefuelconsumption.
Currentfuelconsumption:
The current fuel consumption modes show the current fuel consumption by amoving bargraph.
Averagefuelconsumption:
The average fuel consumption modes show the average fuel consumption by the value above the bargraph, the position of the diamond icon and the value of the sincethelast reset. Resetting the average fuel consumption is done by pushing and holding the switch for less than 3 seconds.
Thedisplayisupdatedevery30seconds.At aboutthefirst0.3mile(500m)afterareset,the displayshows"----".
2. AverageSpeed(MPHorkm/h)
TheAverageSpeedmodeshowstheaverage vehiclespeedsincethelastreset. Resettingis donebypushingandholdingthe switch ⑧ forlessthan3seconds.
Thedisplayisupdatedevery30seconds. For thefirst30secondsafterareset, thedisplay shows"----".
3. Driving Distance(milesorkm)
TheDrivingDistancemodeshowsthedistance drivensincethelastreset. Thedrivingdistance canberesetbypushingandholdingthe switch Ⓐ forlessthan3seconds.

4. ElapsedTime
The Elapsed Timemodeshowsthetimesince thelastreset. Thedisplayedtimecanbereset bypassingandholdingthe switch for lessthan3seconds.
5. Range(distancetoempty)(dte—milesorkm)
Thedistancetoempty(dte)modeprovidesyou withanestimationofthedistancethatcanbe drivenbeforerefueling. Thedteisconstantly beingcalculatedbasedontheamountoffuelin thefueltankandtheactualfuelconsumption.
Thedisplayisupdatedevery30seconds.
Thedtemodeincludesalowrangewarning feature. If the fuel level is slow, the warning is displayed on the screen.
Whenthefuelleveldropsevenlower,thedte displaywillchangeto"----".
- If the amount off fuel added small, the display just before the ignition switch is turned to the "OFF" position may continue to be displayed.
- Whendrivinguphillorroundingcurves, the fuelinthetankshifts, whichmaymomentarilychangethedisplay.
Settings
Exit
Units
Maintenance
Alarms
Language
Factory
JVI1227X
6.Settings
Settingcannotbemadewhiledriving.
The □ switch Ⓐ isusedtoselectandset theitem.
Turnthe ☐ A switchtoselectoradjustand pushtoset.
Units:
Theunitscanbesetforthefollowingitemson thismenu.
- Temperature
- Dist./Fuel
Toreturntothetoppageofthesettingmode, select"Back".
Instrumentsandcontrols2-23
Maintenance:
Themaintenanceintervalsofthefollowingitems canbesetorresetforthereminders.
•Service
Selectthissubmenutosetorresetthe distanceforservicedue.
•Tire
Selectthissubmenutosetorresetthe distanceforreplacingtires.
•Other
Selectthissubmenuandsetorresetthe distanceforitemsotherthanserviceortires.
Toreturntothetoppageofthesettingmode, select"Back".
Alarms:
Alarmsmenucanbesettonotifythefollowing items.
- Driveralert
Select this submenuto set the driver alert period.
- Outsidetemp
SelectthissubmenutoturnONorOFFthe lowoutsidetemperaturewarningfeatures. ForadescriptionofthelowoutsidetemperaturewarningfeatureswhenOutside TempissettoON,see"Outsideair temperature"(P.2-17).
2-24Instrumentsandcontrols
WithOutsideTempsettoOFF,
—Theoutsidetemperaturedisplayremains onsteadyatalloutsidetemperaturesand doesnotflash.
—Thelowoutsidetemperaturewarning indicatordoesnotappear.
Toreturntothetoppageofthesettingmode, select"Back".
Language:
Select the submen to set the desired language of the display.
Factory:
Select the submenutoreset the factory settings of the display.
NOTE:
WhenresettingFactory, allprevioussettingsmadearechangedtodefault.
Toreturntothetoppageofthesettingmode, select"Back".
CONTINUOUSLYVARIABLETRANSMISSION(CVT)POSITIONINDICATOR
The Continuously Variable Transmission (CVT) position indicator indicates the shift lever position when the ignition switch is in the ON position.
SECURITYSYSTEMS

natural_image
Line drawing of a car with a circular component and directional arrows indicating flow or motion (no text or symbols)Yourvehiclehastwotypesofsecuritysystems, asfollows:
●Vehiclesecuritysystem
•NISSANVehicleImmobilizerSystem
The security condition will be shown by the securityindicatorlight.
VEHICLESECURITYSYSTEM
The vehicle security system provides visual and audio alarms signals if someone opensthedors, or lift gate when the system is armed. It is not, however, amotion detection types system that activates when vehicle is moved or when a vibration occurs.
Thesystemhelpsdetervehicletheftbutcannot
preventit, norcanit prevent the theftofinterior orexterior vehicle components in all situations. Always secure your vehicle even if parking for a brief period. Never leave your keys in the vehicle, and always lock it when unattended. Be aware of your surroundings, and parkin secure, well-lit areas whenever possible.
Manydevicesofferingadditionalprotection, suchascomponentlocks,identificationmarkers, andtrackingsystems,areavailableatauto supplystoresandspecialtyshops.Your NISSANdealermayalsooffersuchequipment. Checkwithyourinsurancecompanytoseeif youmaybeeligibleforddiscountsforvarious theftprotectionfeatures.

SIC2045
Howtoarmthevehiclesecuritysystem
- Closeallwindows.
Thesystemcanbearmedevenifthe windowsareopen.
-
TurntheignitionswitchtotheLOCK positionandremovethekey.
-
Closealldoors. Lockalldoors. Thedoors canbelockedwith:
-
thelockbuttononthkeyfob
• thepowerdoorlockswitch -
Masterkey
-
Confirm that these security indicator light illuminates. These security indicator light stays on for about 30 seconds. The vehicle
securitysystemisnowpre-armed. After about 30 secondsthevehiclesecurity systemautomaticallyshiftsintothearmed phase. Thesecuritylightbeginstoflash onceeveryapproximately3seconds.If, during this 30-secondpre-armtimeperiod, thedooris unlocked, or theignitionswitch is turned to the ACCorON position, the systemwillnotarm.
Evenwhenthedriverand/orpassengers areinthevehicle,thesystemwillactivate withalldoorslockedwiththeignition switchintheLOCKposition.Whenturning theignitionswitchtotheACCorON position,thesystemwillbereleased.
Vehiclesecuritysystemactivation
The vehicle security system will give the following alarm:
- The headlights blink and the horn sounds intermittently.
- Thealarmautomaticallyturnsoffafter approximately50seconds.However,the alarmreactivatesifthevehicleistampered withagain.
Thealarmisactivatedby:
- Unlocking the door without using the key fob,orthekey.(Evenifthedoorisopened byreleasingthedoorinsidelockknob,the
alarmwillactivate.)
Howtostopanactivatedalarm
Thealarmwillstopbyunlockingadoorby pushingtheunlockbutton 🔒 onthekeyfob,or usingthekey.Thealarmwillnotstopifthe ignitionswitchisturnedtotheACCorON position.
If the system does not operate as described above, have it checked by a NISSAN dealer.
NISSANVEHICLEIMMOBILIZERSYSTEM
TheNISSANVehicleImmobilizerSystemwillnot allowtheenginetostartwithouttheuseoftheregisteredkey.
Iftheenginefailstostartusingtheregistered key, itmaybeduetointerferencecaused by anotherregisteredkey, anautomatedtollroad deviceorautomatedpaymentdeviceonthekey ring. Restarttheengineusingthefollowing procedures:
1.LeavetheignitionswitchintheONposition for approximately5 seconds.
- TurntheignitionswitchtotheOFFForLOCK positionandwaitapproximately10seconds.
3.Repeatstep1 and2again.
- Restart the engine while holding the device (which may have caused the interference) separate from the registered key.
If this procedure allow the engine to start, NISSAN recommends placing the registered key on a separate key ring to avoid interference from other devices.
Statementrelatedtosection15ofFCC rulesforNISSANVehicleImmobilizer System(CONTASSY-BCM.ANTASSY-IMMOBILISER)
FCCNotice:
ThisdevicecomplieswithPart15ofthe FCCRules.Operationissubjecttothe followingtwoconditions:(1)Thisdevice maynotcauseharmfulinterference,and (2)thisdevicemustacceptanyinterferencereceived,includinginterferencethat maycauseundesiredoperation.
NOTE:
Changesormodificationsnotexpressly approvedbythepartyresponsiblefor compliancecouldvoidtheuser'sauthority tooperatetheequipment.

SIC2045
Securityindicatorlight
Theseurityindicatorlightislocatedonthe meterpanel.Itindicatesthestatusofthe NISSANVehicleImmobilizerSystem.
Thelightblinksaftertheignitionswitchwasin theLOCKposition. Thisfunctionindicates the securitysystemsequippedonthevehicleare operational.
If the NISSAN Vehicle Immobilizer System is malfunctioning, this light will remain on while the ignitions switch in the ON position.
Ifthelightstillremainsonand/orthe enginewillnotstart,seeaNISSANdealer forNISSANVehicleImmobilizerSystem
2-26 Instrumentsandcontrols
serviceassoonaspossible.Pleasebring allregisteredkeysthatyouhavewhen visitingaNISSANdealerforservice.

WARNING
Infreezingtemperaturesthewasher solutionmayfreezeonthewindshield and obscureyourvisionwhichmaylead toanaccident.Warmwindshieldwith thedefrosterbeforeyouwashthe windshield.

CAUTION
- Donotoperatethewashercontinuouslyformorethan30seconds.
- Donotoperatethewasherifthe reservoirtankisempty.
- Donotfillthewindowwasher reservoirtankwithwasherfluid concentratesatfullstrength.Some methylalcoholbasedwasherfluid concentratesmaypermanentlystain thegrilleifspilledwhilefillingthe windowwasherreservoirtank.
- Pre-mixwasherfluidconcentrates withwatertothemanufacturer's recommendedlevelsbeforepouring thefluidintothewindowwasher
reservoirtank.Donotusethe windowwasherreservoirtankto mixthewasherfluidconcentrate andwater.
Ifthewindshieldwiperoperationisinterruptedbysnoworice,thewipermaystop movingtoprotectitsmotor.Ifthisoccurs, turnthewiperswitchtotheOFFposition andremovethesnoworicethatisonand aroundthewiperarms.Inapproximately1 minute,turntheswitchonagaintooperate thewiper.
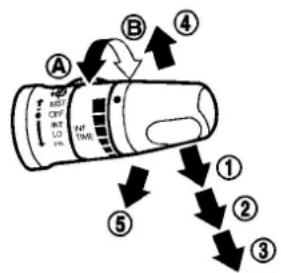
SIC2821
Thewindshieldwiperandwasheroperates whentheignitionswitchisintheONposition.
Pushtheleverdowntooperatethewiperatthe followingspeed:
① Intermittent—intermittentoperationcanbe adjustedbyturningtheknobtoward (Slower)or Ⓑ (Faster).
② Low—continuouslowspeedoperation
③ High—continuoushighspeedoperation
Pushtheleverup ④ tohaveonesweep operationofthewiper.
Pullthelevertowardyou ⑤ tooperatethe washer.Thenthewiperwillalsooperateseveral times.
REARWINDOWWIPERAND WASHERSWITCH

WARNING
Infreezingtemperaturesthewasher solutionmayfreezeontherearwindow glassandobscureyourvision.Warm therearwindowwiththedefroster beforeyouwashtherearwindow.

CAUTION
- Donotoperatethewashercontinuouslyformorethan30seconds.
- Donotoperatethewasherifthe reservoirtankisempty.
- Donotfillthewindowwasher reservoirtankwithwasherfluid concentratesatfullstrength.Some methylalcoholbasedwasherfluid concentratesmaypermanentlystain thegrilleifspilledwhilefillingthe windowwasherreservoirtank.
- Pre-mixwasherfluidconcentrates withwatertothemanufacturer's recommended levelsbeforepouring the fluidintothewindowwasher reservoirtank.Donotusethe
windowwasherreservoirtankto mixthewasherfluidconcentrate andwater.
Iftherearwindowwiperoperationis interruptedbysnoworice,thewipermay stopmovingtoprotectitsmotor.Ifthis occurs,turnthewiperswitchtotheOFF position and remove the snow or ice that is onandaroundthewiperarms.Inapproximately1minute,turntheswitchonagain tooperatethewiper.

Therearwindowwiperandwasheroperate whentheignitionswitchisintheONposition.
TurntheswitchclockwisefromtheOFFposition tooperatethewiper.
① Intermittent(INT)—intermittentoperation(not adjustable)
② Low(ON)—continuouslowspeedoperation Pushtheswitchforward ③ tooperatethe washer. Thenthewiperwillalsooperateseveral times.
REARWINDOWDEFROSTER
SWITCH
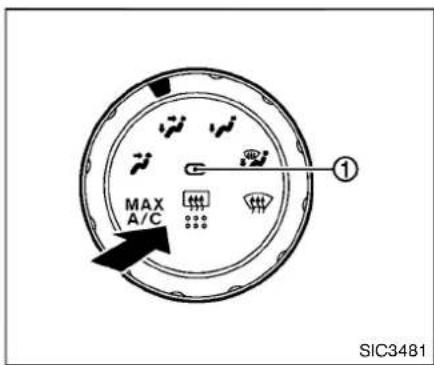
Todefog/defrosttherearwindowglass,startthe engineandpushtheswitchon.Theindicator light ① willilluminate.Pushtheswitchagainto turnthedefrosteroff.
Itwillautomaticallyturnoffinapproximately15 minutes.

CAUTION
Whencleaningtheinnersideoftherear window,becarefulnottoscratchor damagetherearwindowdefroster.
HEADLIGHTANDTURNSIGNAL
SWITCH

HEADLIGHTSWITCH
Lighting
① Turntheswitchtotheposition:
Thefrontparking,sidemarker,tail,licenseplate andinstrumentlightswillcomeon.
② Turntheswitchtotheposition: Headlightswillcomeonandalltheotherlights remainon.
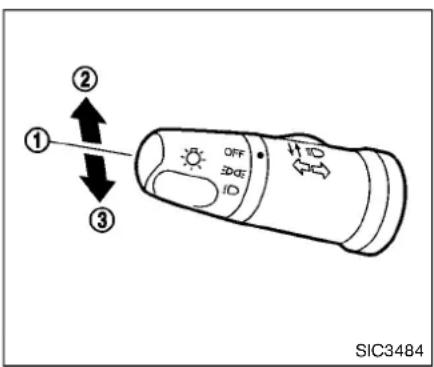
Headlightbeamselect
① Toselectthelowbeam, puttheleverinthe neutralpositionasshown.
② Toselectthehighbeam, pushtheleverforward while the switch is in the ID position. Pull it back to select the low beam.
③ Pullingthelevertowardyouwillflashthe headlighthighbeamevenwhentheheadlight switchisintheOFFposition.
Batterysaversystem
- When the headlight switch is in theorem to position while the ignition switch is in the ON position, the light switch automatically turn off within a period of time after the ignition switch has been turned to the OFF position.
- Whentheheadlightswitchremainsinthe OR positionafterthelightsautomaticallyturnoff,thelightswillturnonwhen theignitionswitchisturnedtotheON position.

CAUTION
- Whenyouturnontheheadlight switchagainafterthelightsautomaticallyturnoff,thelightswillnot turnoffautomatically.Besureto turnthelightswitchtotheOFF positionwhenyouleavethevehicle forextendedperiodsoftime,otherwisethebatterywillbedischarged. - Neverleavethelightswitchon whentheengineisnotrunningfor extendedperiodsoftimeevenifthe headlightsturnoffautomatically.

TURNSIGNALSWITCH
① Turnsignal
Movetheleverupordowntosignaltheturning direction. Whentethurniscompleted, theturn signalscancelautomatically.
② Lanechangesignal
Toindicatealanechange, movetheleverupor downtothepointwherelightsbeginflashing.
HORN

natural_image
Diagram of a car steering wheel with a black arrow indicating clockwise motion (no text or symbols)Tosoundthehorn, push the center pad area of the steering wheel.
VEHICLEDYNAMICCONTROL(VDC) OFFSWITCH
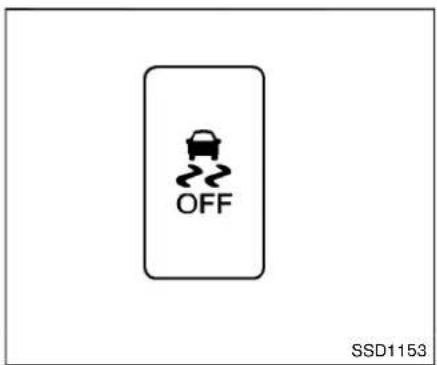
The vehicles should be driven with the Vehicle Dynamic Control (VDC) system on most driving conditions.
Ifthevehicleisstuckinmudorsnow,theVDC systemreducestheengineoutputtoreduce wheelspin.Theenginespeedwillbereduced eveniftheacceleratorisdepressedtothefloor. Ifmaximumenginepowerisneededtofreea stuckvehicle,turntheVDCsystemoff.
ToturnofftheVDCsystem,pushtheVDCOFF switch.The indicatorlightwillilluminate.
PushtheVDCOFFswitchagainorrestartthe enginetoturnonthesystem.(See"Vehicle DynamicControl(VDC)system"(P.5-27).)
POWEROUTLET
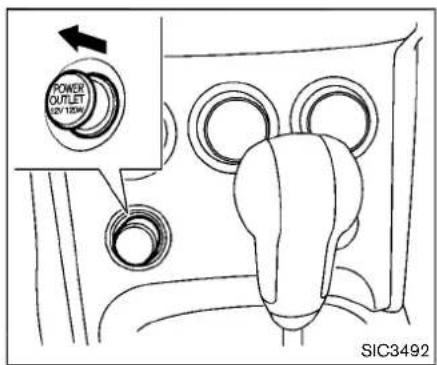
Instrumentpanel
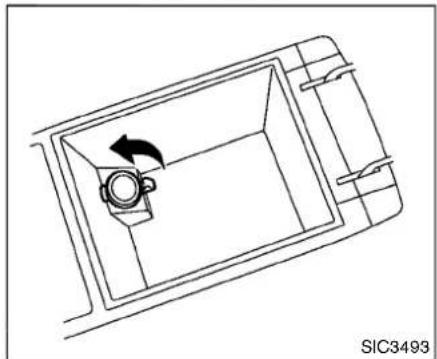
natural_image
Technical line drawing of a mechanical component with an arrow indicating rotation (no text or symbols)Centerconsole
Instrumentsandcontrols2-31
Thepoweroutletislocatedintheinstrument panelandthecenterconsole.

CAUTION
•Theoutletandplugmaybehot duringorimmediatelyafteruse.
- Donotusewithaccessories that exceeda12volt,120W(10A)power draw.Donotusedoubleadaptersor morethanoneelectricalaccessory.
- Usepoweroutletwiththeengine runningtoavoiddischargingthe vehiclebattery.
- Avoidusingpoweroutletwhenthe airconditioner,headlightsorrrear windowdefrosterison.
•Beforeinsertingordisconnectinga plug,besuretheelectricalaccessorybeingusedisturnedOFF.
- Thispoweroutletisnotdesigned forusewithacigarettelighterunit.
- Pushthepluginasfarasitwillgo. Ifgoodcontactisnotmade,theplug mayoverheatortheinternaltemperaturefusemayopen.
- Whennotinuse, besuretoclose thecap. Donotallowwaterorany liquidtocontacttheoutlet.
STORAGE
CUPHOLDERS

CAUTION
- Avoid abrupt starting and braking whenthecupholderis being used to prevent spilling the drink. If the liquid is hot, it can scald you or your passenger.
•Useonlysoftcupsinthecupholder. Hardobjectscaninjureyouinan accident.

Front
Theflap Ⓐ willbefoldeddownwheninserting alargecontainer.
Toremovetheinnertrayforcleaning,pullitupas illustrated ①.
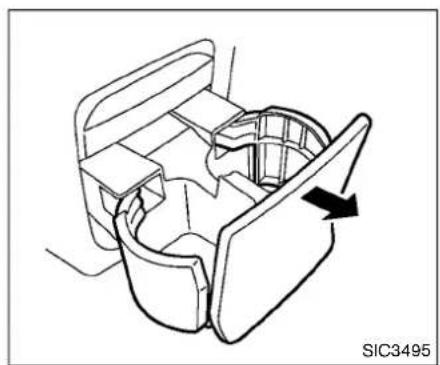
natural_image
Technical line drawing of a mechanical component with an arrow indicating direction (no text or symbols)Rear
Toopenthecupholder, pullthelid.

SUNGLASSESHOLDER

WARNING
Keepthesunglassesholderclosed whiledrivingtopreventanaccident.
Toopenthesunglassesholder, push
①.

CAUTION
- Donotuseforanythingotherthan glasses.
Instrumentsandcontrols2-33
- Donotleaveglassesinthesun-glassesholderwhileparkingin directsunlight.Theheatmaydamagetheglasses.

natural_image
Diagram of a car's front and side view showing airflow direction (no text or symbols)GLOVEBOX
WARNING
Keepgloveboxlidclosedwhiledriving tohelppreventinjuryinanaccidentora suddenstop.
Toopentheglovebox, pullthehandle.
Toclose, pushthelidin until the locklatches.
Thegloveboxlightilluminateswhenthehead-lightswitchisturnedon.
A Cardholder
B Backsidepocketoflid
© Removablepartition(ifsoequipped)
Toremovethepartition, pullitout.

2-34 Instrumentsandcontrols

CONSOLEBOX
Toopentheconsoleboxes, pushuptheknob Ⓐ andpullupthelid.
Toclose, pushtheliddownuntillatched.
Toremovetheinnerbox(ifsoequipped)for cleaningorstoringalargeobject,pullitupas illustrated Ⓑ.
The inside of the console box lid is designed to be used as a cardholder ① and pen holders ②.
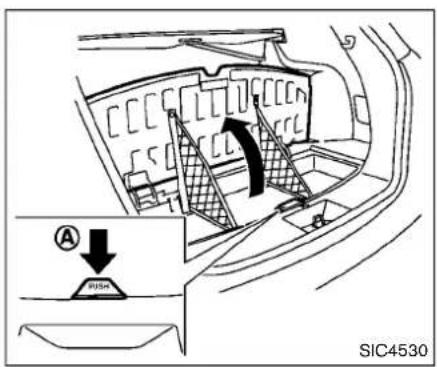
TypeA(Ifsoequipped)

TypeB(ifsoequipped)
LUGGAGEFLOORBOX(ifso equipped)
TypeA(ifsoequipped):Toopentheluggage floorbox,push Ⓐ.Toclose,pushtheliduntil thelocklatches.
Thenetpartitionscanbefoldedtomakealarger storagespace.

CAUTION
Toavoiddamage, donotloadmore than 22lbs(10kg) of cargo into the luggagefloorbox.
TypeB(ifsoequipped):Toopentheluggage floorbox, pullthehandle ⑧ onthelid. Toclose, pushthelid until the locklatches.
Theluggagefloorboxneedstoberemoved whenyouneedasparetire.(See"Flattire"(P.6-2).)
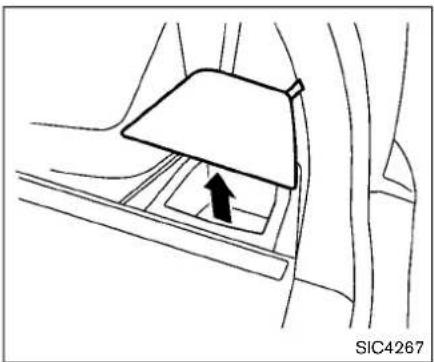
natural_image
Diagram of a mechanical component with an arrow indicating direction, no text or symbols presentLUGGAGESIDEBOX
Toopentheluggagesidebox, pullupthestrap.

CARGOCOVER(ifsoequipped)
Thecargocoverkeepsthecontentsinthecargo areahiddenfromtheoutside.
Tousethecargocover, pullitoutandhangboth sidesonthehooks ①.
Tostowthecargocover,removeitfromthe
hooksandholduntilitisretracted.
Toremovethecargocover,stowthecoverand pulltheholdertotheoppositeside ②.

WARNING
- Neverputanythingonthecargo cover,nomatterhowsmall.Any objectonitcouldcauseaninjury inanaccidentorsuddenstop.
•Closethecargocoverwhenfolding therearseat. - Donotleavethecargocoverinthe vehiclewithitdisengagedfromthe holder.
•Properlysecureallcargowithropes orstrapstohelppreventitfrom slidingorshifting.Donotplace cargohigherthantheseatbacks.In asuddenstoporcollision,unsecuredcargocouldcausepersonal injury. - If the cargocover contactsthetop tether strap when it is attached to the optether anchor, remove the cargocover from the vehicle or secure it on the cargofloor below its attachment location. If the cargo
coverisnotremoved, it may damage the toptether strap during a collision. Your child could be seriously injured or killed in a collision if the child restraint toptether strap is damaged.
- Donotallowcargotocontactthe toptetherstrapwhenitisattached tothetoptetheranchor.Properly securethecargosoitdoesnot contactthetoptetherstrap.Cargo thatisnotproperlysecuredorthat contactsthetoptetherstrapmay damagethetoptetherstrapduring acollision.Yourchildcouldbe seriouslyinjuredorkilledinacollisionifthechildrestrainttoptether strapisdamaged.

LUGGAGEHOOKS

WARNING
•Alwaysmakesurethattheluggage isproperlysecured. Usethesuitable ropesandhooks.
•Unsecured luggage can become dangerous in an accidentorsudden stop.

CAUTION
Donotapplyatotalloadofmorethan 22lb(10kg) Ⓐ toasinglehook.

COATHOOKS
Thecoathooksareequippedabovetherear window.

CAUTION
Donotapplyatotalloadofmorethan2 lb(1kg)toasinglehook.

UTILITYHOOK
Tousetheutilityhookontheseatback,pullit.

CAUTION
- Donotapplyatotalloadofmore than6lb(3kg)tothehook.
- Donotusetheutilityhooktopull theseatbacktotheuprightand lockedposition.Doingsowillcause theutilityhooktobreak.
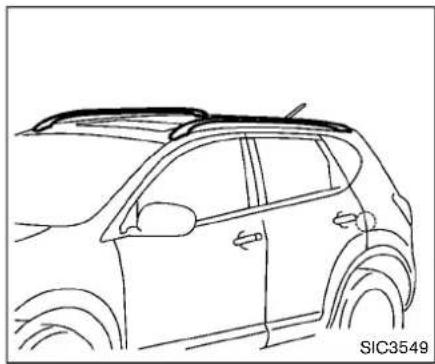
natural_image
Line drawing of a car side profile with no visible text or symbolsROOFRACK(ifsoequipped)
Securethecrossbarstotheroofrailbefore loading. Thecrossbarsareavailablefroma NISSANdealer.
Alwaysdistributetheluggageevenlyontheroof rack.Donotloadmorethan99lb(45kg).Be carefulthatyourvehicledoesnotexceedthe GrossVehicleWeightRating(GVWR)orits GrossAxleWeightRating(GAWRfrontand rear).TheGVWRandGAWRarelocatedonthe F.M.V.S.S.certificationlabel(locatedonthe driver'sdoorpillar).FormoreinformationregardingGVWR andGAWR,see"Vehicle loadinginformation"(P.9-12).

WARNING
- Driveextracarefullywhenthevehicleisloadedatornearthecargo carryingcapacity,especiallyifthe significantportionofthatloadis carriedontheroofrack.
•Heavyloadingoftheroofrackhas thepotentialtoaffectthevehicle stabilityandhandlingduringsuddenorunusualhandlingmaneuvers.
●Roofrackloadshouldbeevenly distributed. - Donotexceedmaximumroofrack loadweightcapacity.
•Properlysecureallcargowithropes orstrapstohelppreventitfrom slidingorshifting.Inasuddenstop orcollision,unsecuredcargocould causepersonalinjury.

CAUTION
Usecarewhenplacingorremoving itemsfromtheroofrack.Ifyoucannot comfortablylifttheitemsontotheroof
rackfromtheground,usealadderor stool.
WINDOWS
POWERWINDOWS

WARNING
- Makesurethatallpassengershave theirhands,etc.insidethevehicle whileitisinmotionandbefore closingthewindows.Usethewindowlockswitchtopreventunexpecteduseofthepowerwindows.
- Donotleavechildrenunattended insidethevehicle.Theycouldunknowinglyactivateswitchesorcontrolsandbecometrappedinthe window.Unattendedchildrencould becomeinvolvedinseriousaccidents.
The power windows operate when the ignition switch is in the ON position, or for about 45 seconds after the ignition switch is turned to the OFF position. If the driver's front passenger's door is opened during this period of about 45 seconds, powerto the window is canceled.

- Windowlockbutton
- Driversidewindow
- Rearleftpassengersidewindow
4.Frontpassengersidewindow - Rear right passengersidewindow
Mainpowerwindowswitch(driver's side)
Toopenorclosethewindow,pushdown ① or pullup ② theswitchandholdit.Themain switch(driversideswitches)willopenorclose allthewindows.
Lockingpassengers'windows
Whenthelockbutton © ispushedin, only the driversidewindowcanbeopenedorclosed. Pushitinagaintocancel.

natural_image
Diagram of a car interior with two cars and directional arrows indicating movement or flow (no text or symbols)Passengersidepowerwindowswitch
Thepassengersideswitchwillopenorclose onlythecorrespondingwindow.Toopenor closethewindow,pushdownorpullupthe switchandholdit.
2-40Instrumentsandcontrols

Automaticoperation(ifsoequipped)
Theautomaticoperationisavailableforthe switchthathasan A markonitssurface.
Tofullyopenorclosethewindow, pushdownor pulluptheswitchtothesecondetent and releaseit; the switchneednotbeheld. The windowwillautomatically openorcloseallthe way. Tostopthewindow, justpushorlifthe switchintheoppositedirection.
Alightpushorpullontheswitchwillcausethe windowtoopenorcloseuntiltheswitchis released.
Auto-reversefunction(ifsoequipped)

WARNING
Therearesomesmalldistancesimmediatelybeforetheclosedpositionwhich cannotbedetected.Makesurethatall passengershavetheirhands,etc.,insidethevehiclebeforeclosingthe window.
If the control unit detect something caught in the window was it closing, the window will be immediately lowered.
The autoreverse function can be activated when the window is closed by automatic operation when the ignition switch is in the ON position or for 45 seconds after the ignition switch is turned to the OFF position.
Dependingontheenvironmentordriving conditions,theautoreversefunctionmay beactivatedifanimpactorloadsimilarto somethingbeingcaughtinthewindow occurs.
If the windows donot close automatically If the power window automatic function (closing only) does not operate properly, perform the following procedure to initialize the power windowsystem.
- TurntheignitionswitchtotheONposition.
2.Closethedoor.
-
Openthewindowcompletelybyoperating thepowerwindowswitch.
-
Pullthepowerwindowswitchandholditto closethewindow, and thenholdtheswitch morethan3secondsafterthewindowis closedcompletely.
-
Releasethepowerwindows switch. Operate the window by the automatic function to confirm the initialization is complete.
If the power window automatic function does not operate properly after performing the procedure above, have your vehicle checked by a NISSAN dealer.
INTERIORLIGHTS

CAUTION
Donotuseforextendedperiodsoftime withtheenginestopped.Thiscould resultinadischargedbattery.
MAPLIGHTS
Pushthelightlenstoturnthemaplightonoroff.
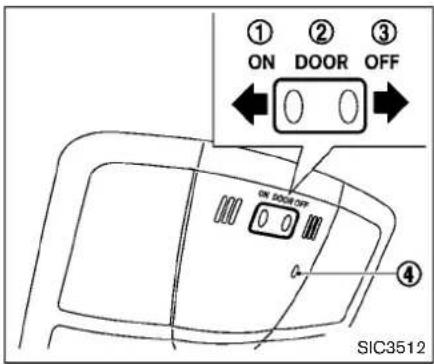
Themaplightcontrolswitchhasthreepositions: ON ①, DOOR ② andOFF ③.
Thelight ④ (ifsoequipped)willilluminate whentheheadlightswitchisturnedtothe orposition.
ONposition
WhentheswitchisintheONposition maplightswillilluminate. ①, the
DOORposition
WhentheswitchisintheDOORposition ②, themaplightswillilluminateunderthefollowing conditions:
-ignitionswitchisturnedtotheLOCK position
—remainonforabout15seconds.
- doorsareunlockedbypushingtheunlock button 🔒 (onthekeyfob),withtheignition switchintheLOCKposition
—remainonforabout15seconds.
-anydoorisopenedandthenclosedwiththe ignitionswitchintheLOCKposition
—remainonforabout15seconds.
●anydoorisopenedwiththeignitionswitch intheACCorONposition
—remainonwhilethedoorisopened.
Whenthedoorisclosed,thelightsgo off.
Thelightswillturnoffafteraperiodof timewhenthelightsremainilluminatedto preventthebatteryfrombecomingdischarged.
OFFposition
WhentheswitchisintheOFFposition ③, the maplightswillnotilluminate, regardless of the condition.

CEILINGLIGHT
Theceilinglightswitchhasthreepositions:ON, DOORandOFF.
ONposition
WhentheswitchisintheONposition ①, the ceilinglightwillilluminate.
DOORposition
WhentheswitchisintheDOORposition ②, theceilinglightwillilluminateunderthefollowing conditions:
- ignitionswitchisturnedtotheLOCK position
—remainonforabout15seconds.
- doorsare unlocked by pushing the unlock button (onthekeyfob), with the ignition switch in the LOCK position - remain on for about 15 seconds. - any door is opened and then closed with the ignition switch in the LOCK position - remain on for about 15 seconds. - any door is opened with the ignition switch in the ACC or ON position - remain on while the door is opened. Whent the door is closed, the lights go off.
Thelightwillturnoffafteraperiodoftime whenthelightsremainilluminatedto preventthebatteryfrombecomingdischarged.
OFFposition
WhentheswitchisintheOFFposition ③, the ceilinglightwillnotilluminate,regardlessofthe condition.
VANITYMIRRORLIGHTS(ifso equipped)

natural_image
Diagram of a car interior showing airflow direction with arrows and a labeled section (SIC2064), no readable text or symbols beyond the label.Thelightonthevanitymirrorwillturnonwhen thecoveronthevanitymirrorisopened. Whenthecoverisclosed,thelightwillturnoff.
Thelightswillturnoffafteraperiodof timewhenthelightsremainilluminatedto preventthebatteryfrombecomingdischarged.
CARGOLIGHT

WhentheswitchisintheONposition ①, the lightilluminateswhiletheliftgateisopened. Whenthelfitgateisclosed, the lightwillturnoff. WhentheswitchisintheOFFposition ②, the lightwillturnoff.
Thelightwillturnoffafteraperiodoftime whenthelightsremainilluminatedto preventthebatteryfrombecomingdischarged.
3Pre-drivingchecksandadjustments
Keys....3-2
NISSANVehicleImmobilizerSystemkeys....3-2
Doors....3-3
Lockingwithkey....3-3
Lockingwithinsidelockknob....3-3
Lockingwithpowerdoorlockswitch....3-4
Automaticdoorlocks....3-4
Childsafetyreardoorlock....3-5
Remotekeylessentrysystem....3-5
Howtouseremotekeylessentrysystem....3-6
Hood....3-9
Liftgate....3-10
Liftgaterelease....3-10
Fuel-fillerdoor....3-11
Openingthefuel-fillerdoor....3-11
Fuel-fillercap....3-11
Steeringwheel....3-13
Tiltoperation....3-13
Sunvisors....3-13
Mirrors....3-14
Insidemirror....3-14
Outsidemirrors....3-14
Vanitymirror....3-15
KEYS
Akeynumberplateissuppliedwithyourkeys. Recordthekeynumberandkeepitinasafe place(suchasyourwallet),notinthevehicle.If youloseyourkeys,seeaNISSANdealerfor duplicatesbyusingthekeynumber.NISSAN doesnotrecordanykeynumberssoitisvery importanttokeeptrackofyourkeynumberplate.
Akeynumberisonlynecessarywhenyouhave lostallkeysanddonothaveonetoduplicate from.Ifyoustillhaveakey,thiskeycanbe duplicatedbyaNISSANdealer.

- Masterkey(2)
2.Keynumberplate(1)
NISSANVEHICLEIMMOBILIZERSYSTEMKEYS
Yourvehiclecanonlybedrivenwiththemaster keyswhichareregisteredtotheNISSAN VehicleImmobilizerSystemcomponentsinyour vehicle.Thesekeyshaveatransponderchip in thekeyhead.
Neverleavethesekeysinthevehicle.
Additionalorreplacementkeys:
If you still have a key, the key number is not necessary when you need extra NISSAN Vehicle Immobilizer System keys. Your dealer can
duplicateyouexistingkey.Asmanyas5keys canbeusedwithonevehicle.Youshouldbring alltheregisteredkeysthatyouhavetoa NISSANdealerforregistration.Thisisbecause theregistrationprocesswillerasethememoryof allkeycodespreviouslyregisteredintothe NISSANVehicleImmobilizerSystem.Afterthe registrationprocess,thesecomponentswillonly recognizekeyscodedintotheNISSANVehicle ImmobilizerSystemduringregistration.Anykey thatisnotgiventoyourdealeratthetimeof registrationwillnolongerbeabletostartyour vehicle.

CAUTION
DonotallowtheNISSANVehicleImmobilizerSystemkey,whichcontainsanelectrical transponder,to comeincontactwithsaltwater.Thiscouldcausethesystemtomalfunction.
3-2 Pre-driving checks and adjustments
DOORS

WARNING
•Alwayshavethedoorslockedwhile driving. Alongwiththeuseofseat belts, thisprovidesgreatersafety in theeventofanaccidentbyhelping topreventpersonsfrombeing thrownfromthevehicle.Thisalso helpskeepchildrenandothersfrom unintentionallyopeningthedoors, andwillhelpkeepoutintruders.
●Beforeopeninganydoor,always lookforandavoidoncomingtraffic.
- Donotleavechildrenunattended insidethevehicle.Theycouldn-knowinglyactivateswitchesorcontrols.Unattendedchildrencould becomeinvolvedinseriousaccidents.

LOCKINGWITHKEY
Thepowerdoorlocksystemallowsyoutolock orunlockalldoorssimultaneously.
- Turningthedriver'sdoorkeycylindertothe frontofthevehicle ① willlockalldoorsand theliftgate.
- Turningthedriver'sdoorkeycylinderonce totherearofthevehicle ② willunlockthe driver'sdoor. Afterreturningthekeytothe neutralposition, turningittotherearagain within5secondswillunlockalldoorsand theliftgate.
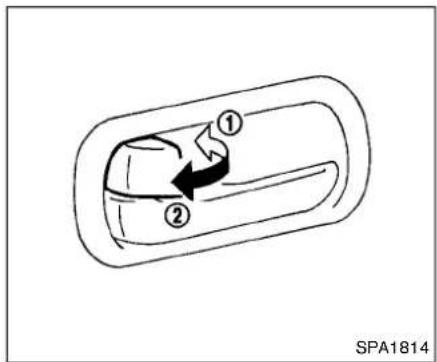
LOCKINGWITHINSIDELOCKKNOB
Tolockthedoorwithoutthekey,movetheinside lockknobtothelockposition ① thenclosethe door.
Tounlock, movetheinsidelockknobtothe unlockposition ②.
Whenlockingthedoorwithouttakey, be surenottoleavethekeyinsidethevehicle.

LOCKINGWITHPOWERDOORLOCK SWITCH
Operating the power door lock switch will lock or unlock all the doors. Thes switches are located on the driver's sand front passenger's door arm rests.
Tolockthedoors, pushthepowerdoorlock switchtothelockposition ① withthedriver's orfrontpassenger'sdooropen, thenclosethe door.
Whenlockingthedoorthisway,besure nottoleavethekeyinsidethevehicle.
Tounlockthedoors, pushthepowerdoorlock switchtotheunlockposition ②.
3-4 Pre-driving checks and adjustments
Lockoutprotection
Whenthepowerdoorlockswitch(driverorfront passenger)ismovedtothelockpositionwith thekeyintheignitionswitchandanydooropen, alldoorswilllockandunlockautomatically. Thisfunctionhelpstopreventthekeysfrom beingaccidentallylockedinsidethevehicle.
AUTOMATICDOORLOCKS
●Alldoorslockautomaticallywhenthevehicle speedreaches15MPH(24km/h).
- Alldoorsunlockautomaticallywhenthe ignitionswitchisplacedintheOFFposition orwhenthekeyisremovedfromtheignition switch.
The automatic unlock function can be deactivated or activated. Todeactivate or activate the automatic door unlock system, perform the following procedure:
- Closealldoors.
- PlacetheignitionswitchintheONposition.
- Within20secondsofperformingStep2, pushandholdthepowerdoorlockswitchto the 🔒 position(UNLOCK)formorethan5 seconds.
-
Whenactivated, thehazardindicatorwill flashtwice. Whendeactivated, thehazard indicatorwillflashonce.
-
Theignitionswitchmustbeplacedinthe OFFandONpositionagainbetweeneach settingchange.
When the automatic door unlock system is deactivated, the doors donot unlock when the ignitionswitch is placed in the OFF position. To unlock the doormanually, usethe insidelock knob or the power door lock switch (driver's or front passenger's side).
REMOTEKEYLESSENTRYSYSTEM

CHILDSAFETYREARDOORLOCK
Childsafetyreardoorlockshelppreventtherear doorsfrombeingopenedaccidentally,especiallywhensmallchildrenareinthevehicle.
When the levers are in the lock position ①, there a doors can be opened only from the outside.
Todisengage, movetheleverstotheunlock position ②.
Itispossibletolock/unlockalldoors(including the liftgate), and activate the panical arm by using the key of from outside the vehicle.
Beforelockingthedoors, makesurethe keyisnotleftinthevehicle.
Thekeyfobcanoperateatadistanceof approximately33ft(10m)fromthevehicle. (Theeffectivedistancedependsuponthe conditionsaroundthevehicle.)
Asmanyas5keyfobscanbeusedwithone vehicle. For information concerning the purchase and use of additional keyfobs, contact a NISSAN dealer.
Thekeyfobwillnotfunction:
- Whenthekeyfobisnotwithintheoperationalrange.
- Whenthedoorsareopenornotclosed securely.
- Whenthekeyisintheignitionswitch.
- Whenthebatteryisdischarged.

WARNING
Theremotekeylessentrykeyfobtransmitsradiowaveswhenthebuttonsare pushed.TheFAAadvisesthattheradio wavesmayaffectaircraftnavigation and communicationsystems.Donot
operatethekeyfobwhileonanair-plane.Makesurethebuttonsarenot operatedunintentionallywhentheunit isstoredduringaflight.

CAUTION
The following conditionsoroccurrenceswilldamagethekeyfob.
- Donotallowthekeyfobtobecome wet.
- Donotdropthekeyfob.
- Donotstrikethekeyfobsharply againstanotherobject.
- If the outside temperature is below 14^(-10^) degrees, the battery of key fob may not function properly.
- Donotplacethekeyfobforan extendedperiodinanareawhere temperaturesexceed140 °F(60 °C).
Ifakeyfobislostorstolen,NISSAN recommendserasingthelDcodeofthat keyfob.Thiswillpreventthekeyfob fromunauthorizedusetounlockthe vehicle.Forinformationregardingthe erasingprocedure,pleasecontacta
Pre-drivingchecksandadjustments
NISSANdealer.
Forinformationregardingthereplacementofa battery,see "Batteryreplacement"(P.8-22).
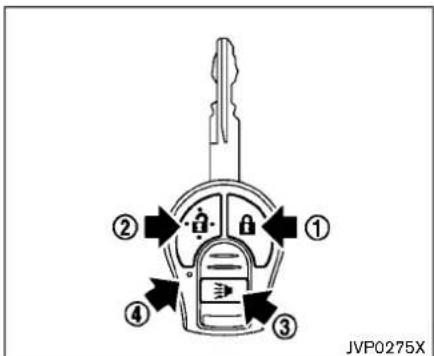
① LOCKbutton
② UNLOCKbutton
③ PANICbutton
④ Batteryindicatorlight
HOWTOUSEREMOTEKEYLESS ENTRYSYSTEM
Lockingdoors
- Removethekeyfromtheignitionswitch.
2.Closeallthedoors.
3.PushtheLOCK fob. - Allthedoorswilllock.
AllofthedoorswilllockwhentheLOCK
buttonispushedeventthoughhadoor remainsopen.
-
The hazard indicator flashest twice and the hornchirpsonce.
-
WhentheLOCK buttonispushed with alldoorslocked, thehazardindicatorflashes twice and thehornchirpsonceasa reminder that thedoorsarealreadylocked.
- Operatethedoorhandlestoconfirmthatthe doorshavebeensecurelylocked.
Unlockingdoors
- PushtheUNLOCKbutton keyfob.
② onthe
• Thedriver'sdoorunlocks.
- Thehazardindicatorflashesonceifall doorsarecompletelyclosed.
2.PushtheUNLOCK 5seconds.
buttonagainwithin
- Allthedoorsandtheliftgateunlock.
- Thehazardindicatorflashesonceifall doorsarecompletelyclosed.
Alldoorswillbelockedautomaticallyunlessone ofthefollowingoperationsisperformedwithin1 minuteofpushingtheUNLOCK button
●Anydoororliftgateisopened.
●TheignitionswitchisturnedtotheON position.
Usingpanicalarm
If you are necessary your vehicle and feel threatened, you may activate the alarm to call attention as follows:
- Push the PANIC
button ③ onthekey
fobformorethan1second.
-
The theft warning alarm and headlight will stay on for 25 seconds.
-
Thepanicalarmstopswhen:
-
Ithasrunfor25seconds,or
- Anyofthebuttonsonthekeyfobis pushed.(Note:thePANICbuttonmust bepushedformorethan1second.)
Batteryindicatorlight
Thebatteryindicatorlight ④ illuminateswhen youpushanybutton.Ifthelightdoesnot illuminate,thebatteryisweakorneedsreplacement.Forinformationregardingreplacementofabattery,see"Batteryreplacement"(P.8-22).
Settinghazardindicatorandhornmode
This vehicle is a set in hazard indicator and horn mode when you first receive the vehicle.
Inhazardindicatorandhornmode,whenthe LOCK 🔒 button ① ispushed,thehazard indicatorflashestwiceandthehornchirpsonce. WhentheUNLOCK 🔒 button ② ispushed, thehazardindicatorflashesonce.
If the horn chirpis not necessary, you can switch to hazard indicator only mode by following the switching procedure.
Inhazardindicatoronlymode,whentheLOCK buttonispushed,thehazardindicator flashestwice.WhentheUNLOCK button ispushed,neitherthehazardindicatornorthe hornoperates.
| Mode(Pushingtheorbyton) | DOORLOCK | DOORUNLOCK |
| Hazardindicatorandhornmode | HAZARD-twiceHORN-once | HAZARD-onceHORN-none |
| HazardindicatormodeHAZARD-twice | HAZARD-none | |
Switchingprocedure:
Toswitchthehazardindicatorandhornoperation,pushtheLOCK ① andUNLOCK
② buttonsonthekeyfobsimultaneously formorethan2seconds.
- Whenthehazardindicatormodeisset, the hazardindicatorflashes3times.
- Whenthehazardindicatorandhornmodeis set, thehazardindicatorflashesonce and thehornchirpsonce.

flowchart
graph TD
    A["HAZARD INDICATOR AND HORN MODE"] --> B["Push (🔒) for more than 2 sec."]
    B --> C["• HAZARD - once"]
    B --> D["• HORN - once"]
    C --> E["• HAZARD - 3 times"]
    D --> F["• HAZARD - once"]
    E --> G["Push (🔒) for more than 2 sec."]
    F --> G
    G --> H["HAZARD INDICATOR MODE"]
3-8Pre-drivingchecksandadjustments
HOOD

WARNING
- Makesurethehoodiscompletely closedandlatchedbeforedriving. Failuretodosocouldcausethe hoodtoflyopenandresultinan accident.
- Ifyouseesteamorsmokecoming fromtheenginecompartment,to avoidinjurydonotopenthehood.

Whenopeningthehood:
- Pullthehoodreleasehandle ① located belowtheinstrumentpanel; thehoodwill thenspringupslightly.
- Pullthelever ② upatthefrontofthehood withyourfingertips.
3.Raisethehood. - Removethesupportrodfromthehoodand insertitintotheslot ③.
Holdthecoatedpart Ⓐ whenremovingor resettingthesupportrod.Avoiddirect contactwiththemetalparts,astheymay behotimmediatelyaftertheenginehas beenstopped.
Whenclosingthehood:
- Whilesupportingthehood, retunethe supportrodtoitsoriginalposition.
2.Slowlylowerthehoodtoabout8to12in (20to30cm)abovethehoodlock,thenletit drop. - Makesureitissecurelylatched.
Pre-drivingchecksandadjustments3-9
LIFTGATE

WARNING
•Alwaysbesuretheliftgatehas beenclosedsecurelytopreventit fromopeningwhiledriving.
- Donotdrivewiththeliftgateopen. This could allow dangerous exhaust gas estobedrawn into the vehicle. See "Exhaustgas(carbonmonoxide)" (P.5-2) of this manual.
- Makesurethatallpassengershave theirhands,etc.insidethevehicle beforeclosingtheliftgate.
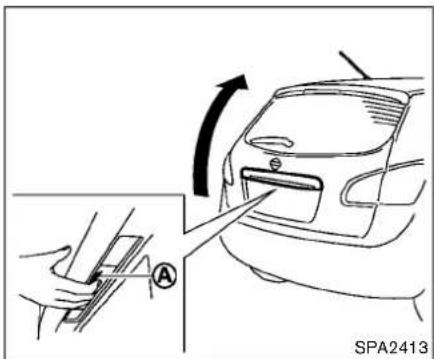
Toopenthelfitgate, unlockitandpushthe openerswitch Ⓐ .Pullupthelfitgatetoopen.
Theliftgatecanbeunlockedby:
- pushingtheunlockbutton fobtwice.

onthekey
- pushing the power door lock switch to the unlock position.
- insertingthekeyintothedriver'sdoorkey cylinderandturningittotherearofthe vehicletwice.
Toclosetheliftgate,pulldownuntilsecurely locks.

LIFTGATERELEASE
Iftheliftgatecannotbeopenedduetoa dischargedbattery,followthesesteps.
- Removethecoverinsideoftheliftgatewith asuitabletool.
2.Movethelevertowardthedirection illustratedtoopenthelfitgate.
HavethevehiclecheckedbyaNISSANdealer.

as
FUEL-FILLERDOOR

natural_image
Diagram showing a vehicle's forward motion path with arrows and a highlighted square (no text or symbols)OPENINGTHEFUEL-FILLERDOOR
Toopenthefuel-fillerdoor,pulltheleftsideof thedoor.

FUEL-FILLERCAP
Toremovethefuel-fillercap:
- Turnthefuel-fillercapcounterclockwiseto remove.
- Putthefuel-fillercaponthecapholder whilerefueling.
Toinstallthefuel-fillercap: - Insert the fuel-fillercap straight into the fuel-fillertube.
- Turnthefuel-fillercapclockwiseuntila singleclickisheard.

WARNING
•Gasolineisextremelyflammable andhighlyexplosiveundercertain conditions. You could be burnedor seriously injured if it is misused or mishandled. Always stop engine and donot smoke or allow open flames or sparks near the vehicle when refueling.
- Donotattempttotopoffthefuel tankafterthefuelpumpnozzle shutsoffautomatically.Continued refuelingmaycausefueloverflow, resultinginfuelsprayandpossibly afire.
•Useonlyanoriginalequipmenttype fuel-fillercapasareplacement.It hasabuilt-insafetyvalveneeded forproperoperationofthefuel systemandemissioncontrolsystem.Anincorrectcapcanresultina seriousmalfunctionandpossible injury.Itcouldalsocausethemalfunctionindicatorlighttocomeon.
- Neverpourfuelintothethrottle bodytoattempttostartyourvehicle.
Pre-drivingchecksandadjustments3-11
- Donotfillaportablefuelcontainer inthevehicleortrailer. Staticelectricitycancauseanexplosionof flammableliquid, vapororgasin anyvehicleortrailer. Toreducethe riskofseriousinjuryordeathwhen fillingportablefuelcontainers:
—Alwaysplacethecontaineron thegroundwhenfilling.
—Donotuseelectronicdevices whenfilling.
—Keepthepumpnozzleincontact withthecontainerwhileyouare fillingit.
—Useonlyapprovedportablefuel containersforflammableliquid.

CAUTION
- Iffuelisspilledonthevehiclebody, flushitawaywithwatertoavoid paintdamage.
- Insertthecapstraightintothefuel-fillertube, thentightenuntilthe fuel-fillercapclicks. Failuretotight-enthefuel-fillercapproperlymay
causethe malfunctionindicator light(MIL)toilluminate.Ifthe lightilluminatesbecausethefuelfillercapislooseormissing,tighten orinstallthecapandcontinueto drivethevehicle.The light shouldturnoffafterafewdriving trips.Ifthe lightdoesnotturn offafterafewdrivingtrips,havethe vehicleinspectedbyaNISSANdealer.
Foradditionalinformation,see "MalfunctionIndicatorLight(MIL)" (P.2-15).
•TheLOOSEFUELCAPwarningwill appearifthefuel-fillercapisnot properlytightened.Itmaytakeafew drivingtripsforthemessagetobe displayed.Failureletotightenthe fuel-fillercapproperlyafterthe LOOSEFUELCAPwarningappears maycausetheMalfunctionIndicator Light(MIL)toilluminate.

LOOSEFUELCAPwarning
TheLOOSEFUELCAPwarningappearsonthe vehicleinformationdisplaywhenthefuel-filler capisnottightenedcorrectlyafterthevehicle hasbeenrefueled.Itmaytakeafewdrivingtrips forthemessagetobedisplayed.Toturnoffthe warning,performthefollowingsteps:
- Remove and install the fuel-fillercapassoon as possible. (See "FUEL-FILLERCAP".)
- Tightenthefuel-fillercapuntilitclicks.
- Pushthe ☐ switch Ⓐ forabout1 secondtoturnofftheLOOSEFUELCAP warningaftertighteningthefuelcap.
STEERINGWHEELSUNVISORS

WARNING
Donotadjustthesteeringwheelwhile driving.Youcouldlosecontrolofyour vehicleandcauseanaccident.
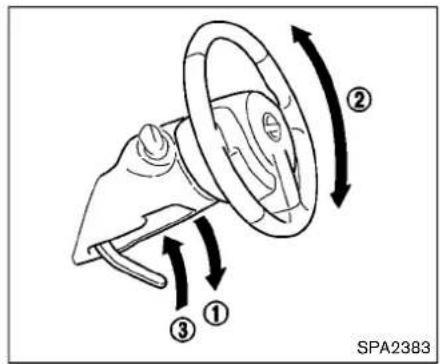
TILTOPERATION
Pullthelockleverdown steeringwheelupordown position.
① andadjustthe ② tothedesired
Pushthelockleverup ③ securelytolockthe steeringwheelinplace.Aclickingnoisemaybe heardwhentheleverismovedtothelock position.
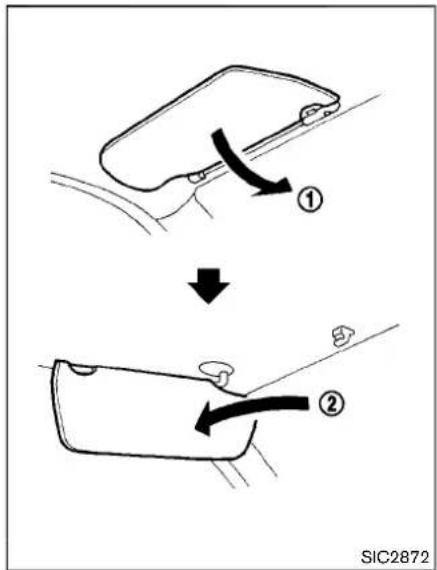
-
Toblockoutglarefromthefront, swing downthesunvisor ①.
-
Toblockglarefromtheside, removethesun visorfromthecentermountandswingitto theside ②.
Pre-drivingchecksandadjustments3-13
MIRRORS

natural_image
Diagram of a curved object with directional arrows indicating rotation or movement (no text or symbols)INSIDEMIRROR
Adjusttheheightandtheangleoftheinside mirrorothedesiredposition.
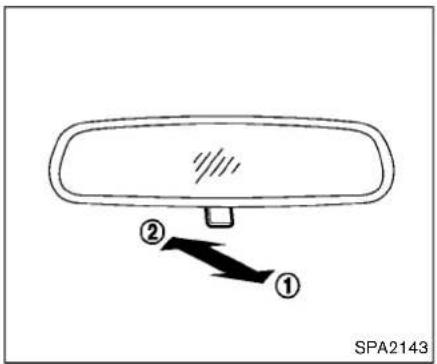
Manualanti-glaretype
Thenightposition ① willreduceglarefromthe headlightsofvehiclesbehindyouatnight.
Usethedayposition ② whendrivingindaylight hours.

WARNING
Usethenightpositiononlywhennecessary, because it reduces rearview clarity.
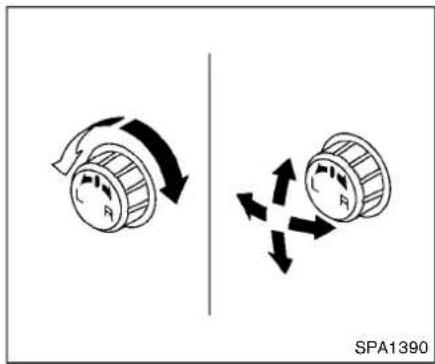
OUTSIDEMIRRORS

WARNING
Objectsviewedintheoutsidemirroron thepassengersidearecloserthanthey appear.Becarefulwhenmovingtothe right.Usingonlythismirrorcouldcause anaccident.Usetheinsidemirroror glanceoveryourshouldertoproperly judgedistancestootherobjects.
Adjustingoutsidemirrors
The outside mirror control switch is located on the left side of the instrument panel.
The outside mirror will operate only when the ignitions switch this in the ACCorON position.
Turntheswitchrightorlefttoselecttherightor leftsidemirror, thenadjustusingthecontrol switch.
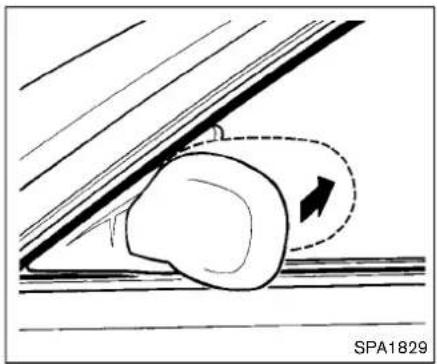
natural_image
Diagram of a car wheel mounting a roof, showing motion direction with an arrow (no text or symbols)Foldableoutsidemirrors
Foldtheoutsidemirrorbypushingittowardthe rearofthevehicle.

natural_image
Diagram of a car interior showing airflow direction with arrows, no text or symbols presentVANITYMIRROR
Tousethefrontvanitymirror,pulldownthesun visorandpullupthecover.
MEMO
3-16 Pre-driving checks and adjustments
4Heater, airconditioner, audio, phone and voice recognition systems
Safetynote....4-2
RearViewMonitor(ifsoequipped)....4-2
Howtoreadthedisplayedlines....4-3
Differencebetweenpredictiveand
actualdistances....4-3
Howtoadjustthescreen....4-6
Operatingtips....4-6
Ventilators....4-7
Heaterandairconditioner....4-8
Manualairconditioner....4-9
In-cabinmicrofilter....4-11
Servicingairconditioner....4-11
Audiosystem....4-12
Audiooperationprecautions....4-12
FM-AMradiowithCompactDisc(CD)player......4-22
FM-AM-SATradiowithCompactDisc
(CD)player....4-29
CD/DVD/USBmemorycareandcleaning....4-37
Steeringwheelswitchforaudiocontrol(if
soequipped)....4-37
Antenna....4-38
CarphoneandCBradio....4-39
Bluetooth® Hands-FreePhoneSystem(if
soequipped)....4-40
Regulatoryinformation....4-41
Usingthesystem....4-41
Controlbuttons....4-43
Gettingstarted 4-44
Listofvoicecommands....4-45
SpeakerAdaptation(SA)mode....4-49
Troubleshootingguide....4-51
SAFETYNOTE

WARNING
- Donotdisassembleormodifythis system.Ifyoudo,itmayresultin accidents,fire,orelectricshock.
- Donotusethissystemifyounotice anyabnormality,suchasafrozen screenorlackofsound.Continued useofthesystemmayresultin accident,fireorelectricshock.
•Incaseyounoticeanyforeign objectinthesystemhardware,spill liquidonit,ornoticesmokeorsmell comingfromit,stopusingthe systemimmediatelyandcontact yournearestNISSANdealer.Ignoringsuchconditionsmayleadto accidents,fire,orelectricshock.
Donotattempttooperatethesystemin extremetemperatureconditions[below -4°F (-20°C) and above 158°F (70°C)]. Operatingthissystemunderthesecondi- tionsmayresultinsystemmalfunctions.
REARVIEWMONITOR(ifso equipped)
Thesystemisdesignedasanaidtothedriverin situationssuchasslotparkingorparallel parking.
WhentheshiftleverisshiftedintotheR (Reverse)position,themonitordisplayshows theviewtotherearofthevehicle.

WARNING
Failuretofollowthewarningsand instructionsforproperuseoftheRear-ViewMonitorcouldresultinserious injuryordeath.
•TheRearViewMonitorisaconveniencebutitisnotasubstitutefor properbacking.Alwaysturnand lookoutthewindows,andcheck mirrorstobesurethatitissafeto movebeforeoperatingthevehicle. Alwaysbackupslowly.
- Thesystemisdesignedasanaidto thedriverinshowinglargestationaryobjectsdirectlybehindthevehicle,tohelpavoiddamagingthe vehicle.
- Thesystemcannotcompletelyeliminateblindspotsandmaynotshow everyobject.
• Underneaththebumperandthe cornerareasofthebumpercannot beviewedontheRearViewMonitor becauseofitsmonitoringrange limitation.Thesystemwillnotshow smallobjectsbelowthebumper, andmaynotshowobjectscloseto thebumperorontheground.
- Objectsviewed in the Rear View Monitor differr from actual distance because a wide-angle lens is used.
- ObjectsintheRearViewMonitor willappearvisuallyoppositethan whenviewedintherearviewand outsidemirrors.
●Makesurethattheliftgateis securelyclosedwhenbackingup.
- Donotputanythingontherearview camera.
- When washing the vehicle with high-pressurewater, besurenotto sprayitaround the camera. Otherwise, water may enter the camera unit causing water condensation on the lens, malfunction, fireor an electric shock.
- Donotstrikethecamera.Itisa precisioninstrument. Otherwise, it
maymalfunctionorcausedamage resultinginafireoranelectric shock.

CAUTION
Donotscratchthecameralenswhen cleaningDIRtorsnowfromthelens.
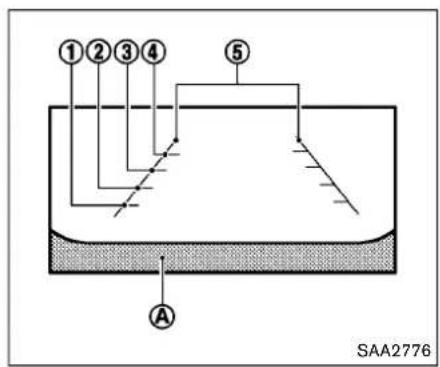
DIFFERENCE BETWEEN PREDICTIVE ANDACTUAL DISTANCES
Thedistanceguidelineandthevehiclewidth guidelinesshouldbeusedasareferenceonly whenthevehicleisonalevel,pavedsurface. Thedistanceviewedonthemonitorisfor referenceonlyandmaybedifferentthanthe actualdistancebetweenthevehicleanddisplayedobjects.
HOWTOREADTHEDISPLAYED LINES
Guidinglineswhichindicatethevehiclewidth anddistancestoobjectswithreferencetothe bumperline Ⓐ aredisplayedonthemonitor.
Distanceguidelines:
Indicated distances from the vehicle body.
•Redline
①:approx.1.5ft(0.5m)
- Yellowline
②:approx.3ft(1m)
●Greenline
③:approx.7ft(2m)
•Greenline
④:approx.10ft(3m)
Vehiclewidthguidelines ⑤:
Indicatethevehiclewidthwhenbackingup.

thehillisviewedinthemonitorfurtherthanit appears.

Backinguponasteepuphill
Whenbackingupthevehicleupahill, the distanceguidelinesandthevehiclewidthguide linesareshowncloserthantheactualdistance. Forexample, thedisplayshows3ft(1m)tothe place (A), buttheactual3ft(1m)distanceon thehillistheplace (B). Notethatanyobjecton
4-4Heater, airconditioner, audio, phone and voicerecognitionsystems
Backinguponasteepdownhill
Whenbackingupthevehicledownahill,the distanceguidelinesandthevehiclewidthguide linesareshownfurtherthantheactualdistance. Forexample,thedisplayshows3ft(1m)tothe place Ⓐ,buttheactual3ft(1m)distanceon thehillistheplace Ⓑ. Notethatanyobjecton
thehillisviewedinthemonitorcloserthanit appears.

natural_image
Technical diagram showing a car collision with impact detection and a vehicle on the ground (no text or symbols)Backingupnearaprojectingobject Thevehiclemayseemtonearlycleartheobject inthedisplay. However, thevehiclemayhitthe objectifitprojectsovertheactualbackingup course.
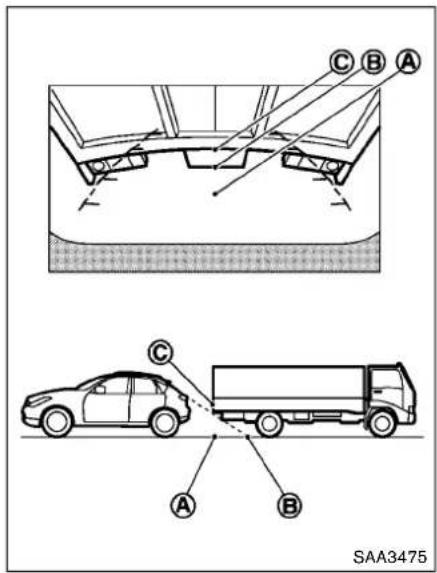
Backingupbehindaprojectingobject
Theposition C is shown further than the position B in the display. However, the position C is actually at the same distance astheposition A. The vehicle may hit the object when backing up to the position the object project so over the actual backing up
A if
Heater, airconditioner, audio, phone and voicerecognition systems 4-5

To setup the Rear View Monitor to your preferred settings, push the ENTER/SETTING button ② while the Rear View Monitorscreen is displayed. Each time the ENTER/SETTING button ② is pushed, then next setting items is selected. Turn the TUNE SCROLL control knob ① to adjust each item.
Availablesettingitems:
●Brightness
- Contrast
- Language*
Thesettingitemswilldisappearandthedisplay willreturntotheoriginalscreenifENTER/
SETTINGbuttonispushedwhenthelastsetting itemisselectedorifthescreenisleftwithout operationforsometime.
*:Onlythelanguageofthewarningmessages onthecamerascreencanbeswitched.
OPERATINGTIPS
- WhentheshiftleverisshiftedtotheR (Reverse)position,themonitorscreenautomaticallychangestotheRearViewMonitor mode.However,theradiocanbeheard.
- Whenthetemperatureisextremelyhighor low,thescreenmaynotclearlydisplay objects. Thisisnotamalfunction.
- When strong light is directly coming on the camera, objects may not be displayed clearly. This is not a malfunction.
- Verticallinesmaybeseeninobjectsonthe screen. Thisisduetostrongreflectedlight fromthebumper. Thisisnotamalfunction.
- Thescreenmayflickerunderfluorescent light. This is not a malfunction.
- ThecolorsofobjectsontheRearView Monitormaydiffersomewhatfromtheactual colorofobjects.Thisisnotamalfunction.
- Objectsonthemonitormaynotbeclearina darkenvironment. This is not a malfunction.
- lfdirt,rainorsnowaccumulatesonthe camera,theRearViewMonitormaynot
VENTILATORS
displayobjectclearly.Cleanthecamera.
- Donotusealcohol, benzineorthinnerto cleanthecamera. This will cause discoloration. Tocleanthecamera, wipewithacloth dampened with diluted mild cleaning agent and then wipewithadrycloth.
- Donotdamagethecameraasthemonitor screenmaybeadverselyaffected.
- Donotusewaxonthecamerawindow. Wipeoffanywaxwithacleancloth dampenedwithmilddetergentdilutedwith water.

Openorclose, and adjust the airflow direction of ventilators as illustrated.
HEATERANDAIRCONDITIONER

WARNING
•Theairconditionercoolingfunction operatesonlywhentheengineis running.
- Donotleavechildrenoradultswho wouldnormallyrequirethesupport ofothersaloneinyourvehicle.Pets shouldnotbeleftaloneeither.On hot,sunnydays,temperaturesina closedvehiclecouldquicklybecome highenoughtocausesevereor possiblyfatalinjuriestopeopleor animals.
- Donotusethere circulationmode forlongperiodsasitmaycausethe interiorairtobecomestaleandthe windowstofogup.
Starttheengineandoperatetheheaterandair conditionersystem.
NOTE:
- Odorsfrominsideandoutsidethe vehiclecanbuildupintheairconditionerunit.Odorcanenterthepassengercompartmentthroughthevents.
- Whenparking, settheheaterandair conditionercontrolstoturnoffair recirculationtoallowfreshairintothe passengercompartment. This should helpreduceodorsinsidethevehicle.
4-8Heater, airconditioner, audio, phone and voicerecognitionsystems
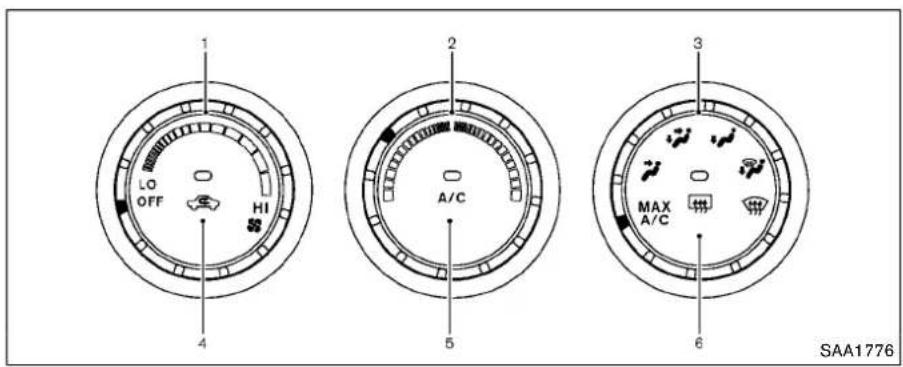
1.Fanspeedcontroldial
2.Temperaturecontroldial
3.Airflowcontroldial
4.Airrecirculationbutton
5.A/C(AirConditioner)button
6. Rearwindowdefrosterbutton(See "Rear windowdefrosterswitch" (P.2-29).)
MANUALAIRCONDITIONER
Toturnofftheheaterandairconditioner,turnthe fanspeedcontrol ✿ dialtotheOFFposition.
Controls
Outsideaircirculation:
Pushtheairrecirculationbuttontoturnoffthe indicatorlightonthebutton.Theairflowis drawnfromoutsidethevehicle.
Airrecirculation:
Pushtheairrecirculationbuttontoturnonthe indicatorlightonthebutton.Theairflowis circulatedinsidethevehicle.
Airflowcontrol:
Turntheairflowcontroldialtochangetheair flowmode.
MAX —Airflowsfromthecenterandsideventilatorswithmaximumcooling(airconditioning).(Theairrecirculation andA/Cwill beautomaticallyturnedon.)
Airflowsfromthecenterandsideventilators.
Airflowsfromthecenterandsideventilatorsandfootoutlets.
- Airflowsmainlyfromthefootoutlets.
- Airflowsfromthedefrosterandfootoutlets.
- Airflowsmainlyfromthedefrosteroutlets.
- You can also select the middle position between , and or between and
- When the , or positionis selected, the airrecirculation mode cannot be turned on to prevent the windows from being fogged up.
Fanspeedcontrol:
Turnthefanspeedcontrol ✿ dialclockwise (HI)toincreasethefanspeed.
Turn the fan speed control ✿ dial counterclockwise(LO)todecreasethefanspeed.
A/C(AirConditioner)operation:
Push the A/C button to turn on or off the air conditioner. Whentheairconditionerison, the A/Cindicatorlightonthebuttonilluminates.
Temperaturecontrol:
Turnthetemperaturecontroldialtosethesiredtemperature.Turnthedialbetweenthemiddleandtherightpositiontoselectthehottemperature.Turnthedialbetweenthemiddleandtheleftpositiontoselectthecooltemperature.
Heateroperation
Heating:
Thismodeisusedtodirectheatedairtothefoot outlets.
- Push the air recirculation button to the OFF position. (The indicator light turnoff.)
2.Turntheairflowcontroldialtothe position.
3.Turnthefanspeedcontrol desiredposition. dialtothe - Turnthetemperaturecontroldialtothe desiredpositionbetweenthemiddleandthe hot(right)position.
Ventilation:
Thismodedirectsoutsideairtothesideand centerventilators.
- Push the air recirculation button to the OFF position. (The indicator light turnoff.)
2.Turntheairflowcontroldialtothe position.
3.Turnthefanspeedcontrol desiredposition. dialtothe
4. Turnthetemperaturecontroldialtothe desiredposition.
Defrostingordefogging:
Thismodedirectstheairtothedefrosteroutlets todefrost/defogthewindows.
- Turn the airflow controldial to the position.
2.Turnthefanspeedcontrol desiredposition. dialtothe - Turnthetemperaturecontroldialtothe desiredpositionbetweenthemiddleandthe hot(right)position.
- Toremovefrostfromtheoutsidesurface of thewindshieldquickly,turnthetemperature controldialtothemaximumhotposition and thefanspeedcontrol ✿ dialtomaximum (HI)position.
- Ifitisdifficulttodefogthewindshield,turn theA/Cbuttonon.
Bi-levelheating:
Thismodedirectscoolairfromthesideand centerventsandwarmairfromthefootoutlets. Whenthetemperaturecontroldialisturnedto
themaximumhotorcoolposition, theair betweentheventilatorsandthefootoutletsis thesametemperature.
- Push the air recirculation button to the OFF position. (The indicator light turn soff.)
- Turn the airflow controldial to the position.
3.Turnthefanspeedcontrol desiredposition. dialtothe - Turnthetemperaturecontroldialtothe desiredposition.
Heatinganddefogging:
Thismodeheatstheinterioranddefogsthe windows.
- Turn the airflow controldial to the position.
- Turnthefanspeedcontrol desiredposition. ✿ dialtothe
- Turnthetemperaturecontroldialtothe desiredposition.
4-10Heater, airconditioner, audio, phone and voicerecognitionsystems
Airconditioneroperation
The air conditionersystem should be operated for approximately 10 minutes at least once a month. This helps prevent damage to the air conditionersystem duetothelack of lubrication.
Cooling:
Thismodeisusedtocoolanddehumidifytheair.
-
Push the air recirculation button to the OFF position. (The indicator light turn soff.)
-
Turn the airflow controldial to the position.
-
Turnthefanspeedcontrol desiredposition.
-
Push the A/C button on. (The A/C indicator lightwillilluminate.)
5.Turnthetemperaturecontroldialtothe desiredpositionbetweenthemiddleandthe cool(left)position.
- For quick cooling when the outside temperature is high, push the air recirculation button to the ON position. Besureto push the air recirculation button to the OFF position for normal cooling.
●Avisiblemistmaybeseencomingfromthe ventilatorsinhot,humidconditionsastheair iscooledrapidly.Thisdoesnotindicatea malfunction.
Dehumidifiedheating:
Thismodeisusedtoheatanddehumidifythe air.
-
Push the air recirculation button to the OFF position. (The indicator light turn soff.)
-
Turn the airflow controldial to the position.
-
Turnthefanspeedcontrol desiredposition.
-
Push the A/C button on. (The A/C indicator light willilluminate.)
-
Turnthetemperaturecontroldialtothe desiredpositionbetweenthemiddleandthe hot(right)position.
Dehumidifieddefogging:
Thismodeisusedtodefogthewindowsand dehumidifytheair.
-
Turn the airflow controldial to the position.
-
Turnthefanspeedcontrol desiredposition.
-
Push the A/C button on. (The A/C indicator light willilluminate.)
-
Turnthetemperaturecontroldialtothe desiredposition.
IN-CABINMICROFILTER
The air conditioningsystemisequipped with an in-cabin microfilter which collects dirt, pollen, dust, etc. Tomakesure the air conditioner heats, defogs, and ventilates efficiently, replace the filter according to the specified maintenance log shown in the NISSAN Service and Maintenance Guide. Tore placethe filter, contact a NISSAN dealer.
Thefiltershoubereplacediftheairflow decreasessignificantlyorifwindowsfogup easilywhenoperatingtheheaterorairconditioningsystem.
SERVICINGAIRCONDITIONER
The air conditionersysteminyourNISSANis chargedwitharefrigerantdesignedwiththe environmentinmind. This refrigerantwillnot harmtheearth'sozonelayer. Specialchargingequipmentandlubricantarerequiredwhen servicingyourNISSANairconditioner. Using improper refrigerantsorlubricantswillcause severedamagetoyourairconditionersystem. (See "Capacitiesandrecommendedfluids/lubricants"(P.9-2).)
ANISSAN dealer will be able to service your environmentally friendly air conditionersystem.
AUDIOSYSTEM

WARNING
Thesystemcontainsrefrigerantunder highpressure.Toavoidpersonalinjury, anyairconditionerserviceshouldbe doneonlybyanexperiencedtechnician withtheproperequipment.
AUDIOOPERATIONPRECAUTIONS
Radio
PlacetheignitionswitchtotheACCorON positionandpushtheradiobandselectbutton toturnotheradio.Ifyoulistentotheradiowith theenginenotrunning,theignitionswitch shouldbeplacedintheACCposition.
Radioreceptionisaffectedbystationsignal strength, distancefromradiotransmitter, buildings, bridges, mountainsandotherexternal influences. Intermittentchangesinreception qualitynormallyarecausedbytheseexternal influences.
Usingacellularphoneinornearthe vehiclemayinfluenceradioreception quality.
Radioreception:
YourNISSANradiosystemisequipped with state-of-the-artelectroniccircuitstoenhance radioreception. These circuits are designed to extend reception range, and to enhance the quality of that reception.
Howevertherearesomegeneralcharacteristics of both FM and AM radiosignal that can affect radioreception quality in amoving vehicle, even when the finest equipment is used. These characteristics are completely normal in given reception area, and donot indicate anymal-
functioninyourNISSANradiosystem.
Receptionconditionswillconstantlychange becauseofvehiclemovement.Buildings,terrain, signaldistanceandinterferencefromother vehiclescanworkagainstidealreception. Describedbelowaresomeofthefactorthat canaffectyourradioreception.
Somecellularphonesorotherdevicesmay causeinterferenceorabuzzingnoisetocome fromtheaudiosystemspeakers.Storingthe deviceinadifferentlocationmayreduceor eliminatethenoise.
4-12 Heater, airconditioner, audio, phone and voicerecognitionsystems

FMradioreception:
Range:FMrangeisnormallylimitedto25to30 miles(40to48km),withmonaural(single channel)FMhavingslightlymorerangethan stereoFM.Externalinfluencesmaysometimes interferewithFMstationreceptionevenifthe FMstationiswithin25miles(40km).The strengthoftheFMsignalisdirectlyrelatedtothe distancebetweenthetransmitterandreceiver. FMsignalsfollowaline-of-sightpath,exhibiting manyofthesamecharacteristicssaslight.For exampletheywillreflectoffobjects.
Fadeanddrift: As your vehicle moves away from astation transmitter, the signals will tend to fade and ordrift.
Staticandflutter: Duringsignalinterference from buildings, largehillsorduetoantennaposition, usually inconjunction within increased distance from the station transmitter, staticor flutter can be heard. This can be reduced by lowering the treble setting to reduce the trebler response.
Multipathreception: Because of the reflective characteristics of FM signals, direct and reflected signals reach there receiver at the same time. The signals may cancel each other, resulting in momentary flutter or loss of sound.
AMradioreception:
AMsignals, because of their low frequency, can bendaround objects sand skip along the ground. In addition, the signals can be bounced off the ionosphere and bent back to earth. Because of these characteristics. AMsignals are also subject to interference as they travel from transmittentoreceiver.
Fading: Occurswhilethevehicleispassing throughfreewayunderpassesorinareaswith manytallbuildings.Itcanalsooccurforseveral secondsduringionosphericurtubulenceevenin areaswherenoobstaclesexist.
Static: Caused by thunderstorms, electrical powerlines, electric signs and event traffic lights.
Satelliteradioreception(ifsoequipped):
Whenthesatelliteradioisusedforthefirsttime orthebatteryhasbeenreplaced,thesatellite radiomaynotworkproperly.Thisisnota malfunction.Waitmorethan10minuteswiththe satelliteradioONandthevehicleoutsideofany metalorlargebuildingforthesatelliteradioto receiveallofthenecessarydata.
Thesatelliteradiomoderequiresanactive SiriusXMSatelliteRadiosubscription.ThesatelliteradioisnotavailableinAlaska,Hawaiiand Guam.
Thesatelliteradioperformancemaybeaffected ifcargocarriedontheroofblocksthesatellite radiosignal.
If possible, donotputcargonearthesatellite antenna.
Abuildupoficeonthesatelliteradioantenna canaffectsatelliteradioperformance.Remove theicetorestoresatelliteradioreception.

CompactDisc(CD)player
- DonotforceacompactdiscintotheCD insertslot. This could damage the CD and/or CD player.
●Duringcoldweatherorrainydays,theplayer maymalfunctionduetothehumidity.Ifthis occurs,removetheCDanddehumidifyor
4-14Heater, airconditioner, audio, phone and voicerecognitionsystems
ventilatetheplayercompletely.
●Theplayermayskipwhiledrivingonrough roads.
●TheCDplayersometimes cannot function when the passenger compartment temperature is extremely high. Decreasethetemperature before use.
- Onlyusehighquality4.7in(12cm)round discsthathavethe"COMPACTdiscDIGITALAUDIO"logoonthediscorpackaging.
- DonotexposetheCDtodirectsunlight.
- CDsthatarefpoorquality, dirty, scratched, coveredwithfingerprints, orthathavepin holesmaynotworkproperly.
- The following CDsmaynotworkproperly:
- Copycontrolcompactdiscs(CCCD)
- Recordablecompactdiscs(CD-R)
- Rewritablecompactdiscs(CD-RW)
- DonotusethefollowingCDsastheymay causetheCDplayertomalfunction.
-3.1in(8cm)discs
—CDsthatarenotround
-CDswithapaperlabel
—CDsthatarewarped, scratched, or have abnormaledges
- This audiosystemcanonlyplayprerecorded CDs. Ithasnocapabilitiestorecordorburn CDs.
- If the CD cannot be played, one of the following messages will be displayed. CHECKDISC:
—ConfirmthattheCDisinsertedcorrectly (thelabelsideisfacingup,etc.).
—Confirm that the CD is not bentor warped and its free of scratches.
PUSHEJECT:
Thisisanerrorduetothetemperatureinside theplayeristoohigh.RemovetheCDby pushingtheCDEJECTbutton,andaftera shorttimereinserttheCD.TheCDcanbe playedwhenthetemperatureoftheplayer returnstonormal.
UNPLAYABLE:
Thefileisunplayableinthisaudiosystem (onlyMP3orWMACD).
InterfaceSystemforiPod ^ (vehicles withoutUSBport)(ifsoequipped)
-
Somecharactersusedinotherlanguages (Chinese, Japanese, etc.) are not displayed properly on the vehicle display. Were recommending English language characters with an iPod ^® .
●Largevideopodcastfilescauseslow responsesintheiPod ^® .Thevehicledisplay maymomentarilyblackout,butitwillsoon recover. -
IftheiPod ^ automaticallyselectslargevideo podcastfileswhileintheshufflemode, the vehicledisplaymaymomentarilyblackout, butitwillsoonrecover.
- ImproperlypluggingintheiPod ^ maycause acheckmarktobedisplayedonandoff (flickering).AlwaysmakesurethattheiPod ^ isconnectedproperly.
- TheiPodnano ^ (2ndGeneration) will continuetofastforwardorrewindifitis disconnectedduringaseekoperation.
- Anincorrectsongtitlemayappearwhenthe PlayModeischangedwhileusingtheiPod nano ^ (2ndGeneration).
- Audiobooksmaynotplayinthesameorder astheyappearontheiPod ^® .
- TheiPodnano ^ (1stGeneration) may remaininfastforwardorrewindmodeifit isconnectedduringaseekoperation. In this case, pleasemanuallyresettheiPod ^ .
- If you are using an iPod ^ (3rd Generation with Dockconnector), donot use every long names forth the song title, album name or artist nameto avoid the iPod ^ from resetting itself.
- Becarefulnottodothefollowing,orthe cablecouldbedamagedandalossof functionmayoccur.
—Bendthecableexcessively(1.6in(40 mm)radiusminimum).
—Twistthecableexcessively(morethan 180degrees).
—Pullordropthecable.
—Storeobjectswithsharpedgesinthe storagewherethecableisstored.
—Spillliquidsonthecableandconnectors.
- DonotconnectthecabletotheiPod ^® if the cableand/orconnectorsarewet.Itmay damagetheiPod ^® .
- If the cable and connectors are exposed to water, allow the cable and/or connector to dry completely before connecting the cable to the iPod ^ (wait 24 hours for it today).
- If the connector is exposed to fluid so other than water, evaporatoreresiduemaycause a short between the connector pins. In this case, replacothecable, otherwise damage to the iPod ^ and also so function may occur.
- If the cable is damaged (insulation cut, connectors cracked, contaminations such as liquids, dust, dirt, etc. in the connectors), do not use the cable and contact a NISSAN deal to replace the cable with anewone.
- When not in use forextended period sof time, store the cable in a clean, dust free environment at room temperature and with
outdirectsunexposure.
- Donotusethecableforanyotherpurposes otherthanitsintendeduseinthevehicle.
- iPod ^® chargingisonlypossiblefordevices that supportchargingviaaFireWire connection.
12V-chargeiPod®sarenotchargeablewiththis system.
* iPod ^ , iPhone ^ and FireWire ^ are trademark of AppleInc., registered in the U.S. and other countries.
USB(UniversalSerialBus)connection port(ifsoequipped)

WARNING
Donotconnect, disconnector operate the USB device while driving. Doing so can bead distraction. If distracted you could lose control of your vehicle and cause an accident or serious injury.

CAUTION
- DonotforcetheUSBdeviceintothe USBport.InsertingtheUSBdevice tiltedorup-side-downintotheport
maydamagetheport.Makesure thattheUSBdeviceisconnected correctlyintotheUSBport.
- DonotgrabtheUSBportcover(if soequipped)whenpullingtheUSB deviceoutoftheport.Thiscould damagetheportandthecover.
- DonotleavetheUSBcableina placewhereitcanbepulledunintentionally.Pullingthecablemay damagetheport.
The vehicle is not equipped with a USB device. USB devices should be purchased separately as necessary.
This system cannot be used to format USB devices. To form a USB device, use a personal computer.
Insomestates/area,theUSBdeviceforthe frontseatsplaysonlysoundwithoutimagesfor regulatoryreasons,evenwhenthevehicleis parked.
This system supports various USB memory devices, USB hard drives and iPod ^ players. Some USB devices may not be supported by this system.
- PartitionedUSBdevicesmaynotbeplayed correctly.
- Somecharactersusedinotherlanguages (Chinese, Japanese, etc.) are not displayed properly on display. Using English language characters with a USB device is recommended.
GeneralnotesforUSBuse:
Refertoyourdevicemanufacture'sowner informationregardingtheproperuseandcare ofthedevice.
NotesforiPod ^® use:
iPod ^® isatrademarkofAppleInc., registered in the U.S. and other countries.
- ImproperlypluggingintheiPod ^ maycause acheckmarktobedisplayedonandoff (flickering).AlwaysmakesurethattheiPod ^ isconnectedproperly.
- AniPodnano ^ (1stGeneration) may remain infastforwardorrewindmodeifitis connected during a seek operation. In this case, please manually reset the iPod ^ .
- AniPodnano ^® (2ndGeneration) will continue to fast-forward or rewind ifitis disconnected during a seek operation.
- Anincorrectsongtitlemayappearwhenthe PlayModeischangedwhileusinganiPod nano® (2ndGeneration)
- Audiobooksmaynotplayinthesameorder astheyappearonaniPod ^® .
- Largevideofilescauseslowresponsesinan iPod®.Thevehicledisplaymaymomentarily blackout,butwillsoonrecover.
-lfaniPod® automaticallyselectslargevideo fileswhileintheshufflemode,thevehicle displaymaymomentarilyblackout,butwill soonrecover.
CompressedAudioFiles(MP3/WMA)
Explanationofterms:
- MP3—MP3isshortforMovingPictures ExpertsGroupAudioLayer3.MP3isthe mostwellknowncompresseddigitalaudio fileformat.This formatallowsfornear "CD quality" sound, butatafractionofthesizeof normalaudiofiles.MP3conversionofan audiotrackcanreducethefilesizeby approximatelya10:1 ratio(Sampling:44.1 kHz, Bitrate:128kbps)withvirtuallyno perceptiblelossinquality.Thecompression reducescertainpartsofsoundthatseem inaudibletomostpeople.
●WMA—WindowsMediaAudio(WMA)isa compressedaudioformatcreatedbyMicrosoftasanalternativetoMP3.TheWMA codeoffersgreaterfilecompressionthan theMP3codec,enablingstorageofmore digitalaudiotracksinthesameamountof spacewhencomparedtoMP3satthesame levelofquality.
4-16 Heater, airconditioner, audio, phone and voicerecognitionsystems
- Bitrate—Bitratedenotesthenumberof bitspersecondusedbyadigitalmusicfile. Thesizeandqualityofacompresseddigital audiofileisdeterminedbythebitrateused whenencodingthefile.
- Samplingfrequency—Samplingfrequency istherateatwhichthesamplesofasignal areconvertedfromanalogtodigital(A/D conversion)persecond.
- Multisession—Multisessionisoneofthe methodsforwritingdatatomedia.Writing dataoncetothemediaiscalledasing session,andwritingmorethanonceis calledamultisession.
- ID3/WMATag—TheID3/WMAtagisthe partoftheencodedMP3orWMAfilethat containsinformationaboutthedigitalmusic filesuchassongtitle,artist,albumtitle, encodingbitrate,tracktimeduration,etc. ID3taginformationisdisplayedonthe Album/Artist/Tracktitlelineonthedisplay.
*Windows ^® and WindowsMedia ^® areeregisteredtrademarksortrademarksofMicrosoft CorporationintheUnitedStatesofAmerica and/orothercountries.
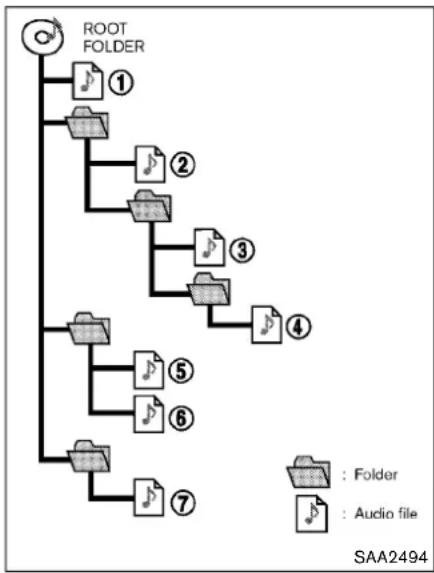
- Thefoldernamesoffoldersnotcontaining compressedaudiofilesarenotshowninthe display.
-
Ifthereisafileinthetoplevelofadisc/USB, "RootFolder" is displayed.
-
The playbackorderistheorderinwhichthe fileswerewrittenbythewritingsoftware,so thefilesmightnotplayinthedesiredorder.
●Music playback order of compressed audio filesisasillustrated.
Specificationchart(forFM-AMRadiowithCompactDisc(CD)player):
| Supportedmedia | CD,CD-R,CD-RW | ||
| Supportedfilesystems | ISO9660LEVEL1,ISO9660LEVEL2,Romeo,Joliet*ISO9660Level3(packetwriting)isnotsupported.*FilessavedusingtheLiveFileSystemcomponent(onaWindowsVista-basedcomputer)are notsupported. | ||
| Supportedversions*1 | MP3 | Version | MPEG1,MPEG2,MPEG2.5 |
| Samplingfrequency | 8kHz-48kHz | ||
| Bitrate | 8kbps-320kbps,VBR*2 | ||
| WMA*3 | Version | WMA7,WMA8,WMA9 | |
| Samplingfrequency | 32kHz-48kHz | ||
| Bitrate | 32kbps-192kbps,VBR*2 | ||
| Taginformation(SongtitleandArtistname) | ID3tagVER1.0,VER1.1,VER2.2,VER2.3(MP3only) | ||
| WMAtag(WMAonly) | |||
| Folderlevels | Folderlevels:8,Foldersandfiles:999(Max.255filesforonefolder) | ||
| Displayablecharactercodes*4 | 01:ASCII,02:ISO-8859-1,03:UNICODE(UTF-16BOMBigEndian),04:UNICODE(UTF-16 Non-BOMBigEndian),05:UNICODE(UTF-8),06:UNICODE(Non-UTF-16BOMLittle Endian) | ||
*1 Filescreatedwithacombinationof48kHzsamplingfrequencyand64kbpsbitratecannotbeplayed.
*2WhenVBRfilesareplayed, the playbacktime may not be displayed correctly.
*3ProtectedWMAfiles(DRM)cannotbeplayed.
*4Availableecodesdependonwhatkindofmedia,versionsandinformationaregoingtobedisplayed.
4-18Heater, airconditioner, audio, phone and voicerecognitionsystems
Specificationchart(forFM-AM-SATRadiowithCompactDisc(CD)Player):
| Supportedmedia | CD,CD-R,CD-RW,USB2.0 | ||
| Supportedfilesystems | CD,CD-R,CD-RW:ISO9660LEVEL1,ISO9660LEVEL2,Romeo,Joliet*ISO9660Level3(packetwriting)isnotsupported.*FilessavedusingtheLiveFileSystemcomponent(onaWindowsVista-basedcomputer)are notsupported. | ||
| USBmemory:FAT16,FAT32 | |||
| Supportedversions*1 | MP3 | Version | MPEG1AudioLayer3 |
| Samplingfrequency | 8kHz-48kHz | ||
| Bitrate | 8kbps-320kbps,VBR*2 | ||
| WMA*3 | Version | WMA7,WMA8,WMA9 | |
| Samplingfrequency | 32kHz-48kHz | ||
| Bitrate | 32kbps-192kbps,VBR*2 | ||
| Taginformation(SongtitleandArtistname) | ID3tagVER1.0,VER1.1,VER2.2,VER2.3,VER2.4(MP3only) | ||
| WMAtag(WMAonly) | |||
| Folderlevels | CD,CD-R,CD-RWFolderlevels | 8,Foldersandfiles:999(Max.255filesforonefolder) | |
| USB | Folderlevels:8,Folders255,Files:2500(Max.255filesforonefolder)Memorysize:4GB | ||
| Displayablecharactercodes*4 | 01:ASCII,02:ISO-8859-1,03:UNICODE(UTF-16BOMBigEndian),04:UNICODE(UTF-16 Non-BOMBigEndian),05:UNICODE(UTF-8),06:UNICODE(Non-UTF-16BOMLittle Endian),07:SHIFT-JIS | ||
*1 Filescreatedwithacombinationof48kHzsamplingfrequencyand64kbpsbitratecannotbeplayed.
*2WhenVBRfilesareplayed,theplaybacktimemaynotbedisplayedcorrectly.
*3ProtectedWMAfiles(DRM)cannotbeplayed.
*4Availablecodesdependonwhatkindofmedia,versionsandinformationaregoingtobedisplayed.
Troubleshootingguide(forFM-AMRadiowithCompactDisc(CD)player):
| Symptom | CauseandCountermeasure |
| Cannotplay | Checkifthediscwasinsertedcorrectly. |
| Checkifthediscisscratchedordirty. | |
| Checkifthereiscondensationinsidetheplayer.Ifthereis,waituntilthecondensationisgone(about1hour)before usingtheplayer. | |
| Ifthereisatemperatureincreaseerror,theCDplayerwillplaycorrectlyafteritreturnstothenormaltemperature. | |
| Fileswithextensionsotherthan".MP3",".WMA",".mp3"or".wma"cannotbeplayed.Inaddition,thecharactercodes andnumberofcharactersforfoldernamesandfilenamesshouldbeincompliancewiththespecifications. | |
| Check if the disc or the file is generated in an irregular format. This may occur depending on the variation or the setting of MP3/WMAwritingapplicationsorothertexteditingapplications. | |
| Checkifthefinalizationprocess,suchassessioncloseanddiscclose,isdoneforthedisc. | |
| Checkifthediscisprotectedbycopyright. | |
| Poorsoundquality | Checkifthediscisscratchedordirty. |
| Bitratemaybetoolow. | |
| Ittakesarelativelylongtimebeforethemusic startsplaying. | IfthereamanyfolderorfilelevelsontheMP3/WMAdisc,orifitisamultisessiondisc,sometimemayberequired beforethemusicstartsplaying. |
| Musiccutsofforskips | Thewritingsoftwareandhardwarecombinationmightnotmatch,orthewritingspeed,writingdepth,writingwidth,etc., mightnotmatchthespecifications.Tryusingtheslowestwritingspeed. |
| Skippingwithhighbitratefiles | Skippingmayoccurwithlargequantitiesofdata,suchasforhighbitratedata. |
| Moveimmediatelytothenextsongwhenplaying. | Whenanon-MP3/WMAfilehasbeinganextensionof".MP3",".WMA",".mp3"or".wma",orwhenplayis prohibited by copyright protection, there will be approximately 5 seconds of no sound and then the player will skip to the nextsong. |
| Thesongsdonotplaybackinthedesiredorder. | The playback order is the order in which the files were written by the writing software. Therefore, the files might not play inthedesiredorder. |
4-20Heater, airconditioner, audio, phone and voicerecognitionsystems
Troubleshootingguide(forFM-AM-SATRadiowithCompactDisc(CD)player):
| Symptom | CauseandCountermeasure |
| Cannotplay | CheckifthediscorUSBdevicewasinsertedcorrectly. |
| Checkifthediscisscratchedordirty. | |
| Check if there is condensation inside the player, and if there is, wait until the condensation is gone (about 1 hour) before usingtheplayer. | |
| Ifthereisatemperatureincreaseerror,theplayerwillplaycorrectlyafteritreturnstothenormaltemperature. | |
| IfthereisamixtureofmusicCDfiles(CD-DAdata)andcompressedaudiofilesonaCD,onlythemusicCDfiles(CD-DAdata)willbeplayed. | |
| Fileswithextensionsotherthan".MP3(.mp3)"or".WMA(.wma)"cannotbeplayed.Inaddition,thecharactercodesand numberofcharactersforfoldernamesandfilenameshouldbeincompliancewiththespecifications. | |
| Check if the disc or the file is generated in an irregular format. This may occur depending on the variation or the setting of compressedaudiowritingapplicationsorothertexteditingapplications. | |
| Checkifthefinalizationprocess,suchassessioncloseanddiscclose,isdoneforthedisc. | |
| CheckifthediscorUSBdeviceisprotectedbycopyright. | |
| Poorsoundquality | Checkifthediscisscratchedordirty. |
| Ittakesarelativelylongtimebeforethemusic startsplaying. | IftherearemanyfolderorfilelevelsonthediscorUSBdevice,sometimemayberequiredbeforethemusicstarts playing. |
| Musiccutsofforskips | Thewritingsoftwareandhardwarecombinationmightnotmatch,orthewritingspeed,writingdepth,writingwidth,etc., mightnotmatchthespecifications.Tryusingtheslowestwritingspeed. |
| Skippingwithhighbitratefiles | Skippingmayoccurwithlargequantitiesofdata,suchasforhighbitratedata. |
| Moveimmediatelytothenextsongwhenplaying. | Ifanunsupportedcompressedaudiofilehasbeingvasupportedextensionlike.MP3,orwhenplayisprohibitedby copyrightprotection,theplayerwillskiptothenextsong. |
| Thesongsdonotplaybackinthedesiredorder. | The playback order is the order in which the files were written by the writing software, so the files might not play in the desiredorder. |
| Random/ShufflemaybeactiveontheaudiosystemoronaUSBdevice. |
Heater, airconditioner, audio, phone and voicerecognitionsystems4-21

1.MUTEbutton
- DISP(display)/TEXTbutton
3.FM-AMradiobandselectbutton
4.CDbutton
- Stationpresetbuttons
6.iPod button
7.AUX(auxiliary)button
8.Audiodisplay
9.CLOCKbutton
10.CDEJECTbutton
11.iPod Ⓤ MENUbutton
12.SEEK/TRACKbutton
- ENTERbutton
14BACKbutton
4-22Heater, airconditioner, audio, phone and voicerecognitionsystems
15.PWR(power)button/VOL(volume)controlknob
16AUXINjack
17.AUDIObutton
18.TUNE/FF·REWFOLDERbutton
- SCAN/RPT(repeat)button
FM-AMRADIOWITHCOMPACTDISC (CD)PLAYER
Foralloperationprecautions,see"Audiooperationprecautions"(P.4-12).
Audiomainoperation
Headunit:
The autoloudnesscircuitenhancesthelowand highfrequencyrangesautomaticallyinboth radioreceptionandCDplayback.
ON-OFF/Volumecontrol:
PlacetheignitionswitchintheACCorON position, and then push the PWRbutton while the system is of to call up then normal mode (radio, CD, AUXandiPod ^ ) which was playing immediately before the system was turned off. While the system is on, pushing the PWRbutton turn the system off.
TurntheVOLcontrolknobtoadjustthevolume.

MUTEbutton:
Pushthe 📄 buttonomutetheaudiosound.
Pushthe ✉ buttonagainitoreleasethemute
setting.
AUDIO AUDIObutton:
PushtheAUDIObuttontochangetheselecting modeasfollows.

PushtheTUNE(,)orSEEK(,)
buttontoadjustBassandTrebletothedesired level. UsetheTUNEorSEEKbuttonalsoto adjustFadeorBalancemodes. Fadeadjuststhe soundlevelbetweenthefrontandrearspeakers and Balanceadjuststhesoundbetweenthe rightandleftspeakers.
Toturnthebeepsoundofforon, pushtheTUNE orSEEKbuttonuntilthedesiredmodeis displayed. Thisturnsonoroffthebeepsound whenaudiobuttonsarepushed.
TochangetheSpeedSensitiveVolume(Spd SenVol)modetoOFF,LOW,MIDorHIGH, pushtheTUNEorSEEKbuttonuntilthedesired modeisdisplayed.
Once you have adjusted the sound quality to the desired level, push the AUDIO button repeatedly until then normal mode display reappears. Otherwise, then normal mode display will automatically reappear after approximately seven seconds.
CLOCK CLOCKbutton:
PushtheCLOCKbuttontoturnonoroffthe CLOCKdisplay.
Adjust the clock according to the following procedure.
- PushandholdtheCLOCKbuttonuntilthe clockdisplaystartstoflash.
- Push the SEEK/TRACK button to adjust the hours.
- Push the TUNE/FF-REWFOLDER button to adjust them minutes.
- Push the CLOCK button again or the DISP/ TEXT button to exit the clock set mode.
Thedisplaywillreturntotheregularclock displayafterseveralseconds.
Radiooperation
FM·AM Radio(FM/AM)bandselect:
PushingtheFM:AMradiobandselectbuttonwill changethebandasfollows:
AM→FM1→FM2→AM
Whenthestereobroadcastsignalisweak, the radiowillautomaticallychangefromstereoto monauralreception.
Whentheradiobandselectbuttonispushed whiletheignitionswitchisintheACCorON
position,theradiowillcomeonatthestationlast played.
TUNE(Tuning):
Pushthe ▼ or ▲ buttonformanualtuning. Tomovequicklythroughthestations, pushand holdtheTUNEbutton.
SEEKtuning:
Pushthe ▼ or ▲ buttontotunefromlowto highorhightolowfrequenciesandtostopat thenextbroadcastingstation.
SCAN RPT SCANtuning:
PushtheSCAN/RPTbuttontotunefromlowto highfrequencies andstopsateachbroad-castingstationfor5seconds.Pushingthe buttonagainduringthis5secondsperiodwill stopSCANtuningandtheradiowillremain tunedtothatstation.
If the SCAN/RPT button is not pushed within 5 seconds, SCAN tuning moves to then next station.
1 to 6 Stationmemoryoperations:
12 stations can be set for the FM band (6 each for FM 1 and FM 2), and 6 can be set for the AM band foreasy access.
- Choosetheradiobandusingtheradioband selectbutton.
- TunetothedesiredstationusingtheSEEK, SCANorTUNEbutton.
- Pushandholdthedesiredradiostation presetbutton 1 tour6tilabeepsoundis heard.(Theradiomuteswhentheradio stationpresetbuttonispushed.)
- Thestationindicatorwillthencomeonand thesoundwillresume.Memorizingisnow complete.
- Otherbuttonscanbesetinthesame manner.
If the batterycable is disconnected, or if the fuse opens, theradiomemory will be erased. In that case, reset the desired stations.
RadioDataSystem(RDS):
RDSstandsforRadioDataSystem, andisa datainformationservicetransmittedbysome radiostationsontheFMband (not AMband) encodedwithinaregularradiobroadcast. Currently, most RDSstations are in large cities, but many stations are now considering broadcasting RDSdata.
RDScandisplay:
• Stationcallsign,suchas"WHFR98.3".
- Stationname,suchas"TheGroove".
- Musicorprogrammingtypesuchas"Classical", "Country" or "Rock".
- Trafficreportsaboutdelaysorconstruction. If thestationbroadcastsRDSinformation,the RDSiconisdisplayed.
DISP TEXT RADIODISPLAYchange:
WhentheDISP/TEXT buttonispushed during theFMradiomode,theradiodisplaywillchange inthefollowingorder.
FMradio:
Frequency↔ PS(ProgrammeService)/PTY (Programmetype)
IntheFMradiomode, pushingtheDISP/TEXT button will switch the frequency display to the PTYdisplay(ifavailable), and if theDISP/TEXT button is not pushed again within 5 seconds, it will automatically switch the PS display. If PTY is not available, pressing the DISP/TEXT button will only switch between the frequency display and the PS display.
CompactDisc (CD)playeroperation
Place the ignition switch in the ACC or ON position, and insert the CD into the slot with the label side facing up. The CD will be guided automatically into the slot and start playing.
Afterloadingthedisc, thenumberoftrackson thediscwillappearonthedisplay.
If the radio is already operating, it will automatically turnoff and the CD will play.
If the system has been turned off while the CD was playing, pushing the PWR button will start the CD.
Donotuse3.1 in(8cm)discs.
CD CDPLAY:
When the CD button is pushed with the system off and the CD loaded, the system will turn on and the CD will start to play.
When the CD button is pushed with the CD loaded and theradioplaying, theradiow will automatically be turned off and the CD will start to play.
DISP TEXT CDplayinformation:
WhentheDISP/TEXTbuttonispushedforless than 1.5secondswhiletheCDisbeingplayed, thediscinformationdisplaywillchangeas follows:
4-24Heater, airconditioner, audio, phone and voicerecognitionsystems
CD:

CDwithMP3orWMA:



FF(FastForward), REW(Re-
wind):
CD:
When the ▲ or button is pushed while the CD is being played, the CD will play while fast forwarding or rewinding. When the button is released, the CD will return on normal play speed.
CDwithMP3orWMA:
When the ▲ orbuttonispushedforless than1.5secondswhiletheCDisbeingplayed, thefoldersintheCDwillchange.
Whenthe ▲ orbuttonispushedformore than1.5secondswhiletheCDisbeingplayed, theCDwillplaywhileforwardingorrewinding. Whenthebuttonisreleased,theCDwillreturn tothenormalplayspeed.


APS(AutomaticProgram
Search)FF,APSREW:
Whenthe ▲ buttonispushedwhiletheCDis beingplayed,theprogramnexttothepresent onewillstarttoplayfromitsbeginning.Push severaltimestoskipthroughprograms.TheCD willadvancethenumberoftimesthebuttonis pushed.(WhenthelastprogramontheCDis skippedthrough,thefirstprogramwillbe played.)
Whenthe ▼ buttonispushed, the program being played returnstoits beginning. Push severaltimestoskipbackthroughprograms. The CDwillgobackthenumberoftimesthe buttonispushed.

SCANtuning:
When the SCAN/RPT button is pushed more than 1.5 seconds while the CD is being played, the beginning of all the track sof CD will be played for 10 seconds in sequence.
Pushingthebuttonagainduringthis10second periodwillstopSCANtuning.
If the SCAN/RPT button is not pushed within 10 seconds, SCAN tuning movesto then next disc program.

RANDOM(RDM)/REPEAT(RPT):
When the SCAN/RPT button is pushed for less than 1.5 seconds while the CD is being played, the play pattern can be changed as follows:
CD:

CDwithMP3orWMA:


CDEJECT:
When the CDEJECT button is pushed with the CD loaded, the CD will be ejected.
WhenthisbuttonispushedwhiletheCDis beingplayed,theCDwillcomeoutandthe systemwillturnoff.
If the CD comes out and is not removed, it will be pulled back into the slot to protect it.
InterfacesystemforiPod ^® operation

WARNING
Donotconnect, disconnector operate the USB device while driving. Doing so can bead distraction. If distracted you could lose control of your vehicle and cause an accident or serious injury.

CAUTION
- DonotforcetheUSBdeviceintothe USBport.InsertingtheUSBdevice tiltedorup-side-downintotheport maydamagetheport.Makesure thattheUSBdeviceisconnected correctlyintotheUSBport.
- DonotgrabtheUSBportcover(if soequipped)whenpullingtheUSB deviceoutoftheport.Thiscould damagetheportandthecover.
- DonotleavetheUSBcableina placewhereitcanbepulledunintentionally.Pullingthecablemay damagetheport.
Refertoyourdevicemanufacturer'sowner informationregardingtheproperuseandcare ofthedevice.
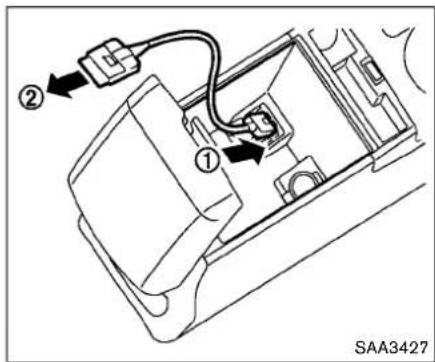
ConnectingiPod®:
TheiPod ^® outletconnectorislocatedinthe centerconsole.Connectthecable ① as illustrated, and thenconnecttheotherendof thecabletoyouriPod ^® ② .Yourvehicleis equipped with the specialized cable for connecting theiPod ^® to your vehicle audiounit. The battery of youriPod ^® is charged while its connected to the vehicle if theiPod ^® supports charging via Fire Wire ^® connection.
Whentheconnectioniscomplete,aNISSAN logowillbedisplayedontheiPod® andaniPod® icononthaeudiodisplayilluminates.While connectingtheiPod® tothevehicle,theiPod® canonlybeoperatedbythevehicleaudio
4-26Heater, airconditioner, audio, phone and voicerecognitionsystems
controls.
Todisconnectthecablefromthevehicleoutlet, fullydepresssthecenterconnectorbuttonto unlatchtheconnectorandpulltheconnector straightoutoftheoutlet.Todisconnectthe cablefromtheiPod ,fullydepresstheside connectorbuttonsandpulltheiPod ^® connector straightoutoftheiPod ^® .
* i P o ^® ofPhone ^® andFireWire ^® areatrademark ofAppleInc.,registeredintheU.S.andother countries.
Compatibility:
The following models are available:
- FourthgenerationiPod ^ (Firmwareversion 3.1.1 or later)
●FifthgenerationiPod ^® (Firmwareversion 1.1.2orlater)
- FirstgenerationiPodClassic version1.3orlater)
- SecondgenerationiPodClassic ^ (Firmware version1.3orlater)
- First, second and third generationiPod touch ^® (Firmwareversion3.1.0orlater)
- FirstandsecondgenerationiPodmini (Firmwareversion1.4.1 or later)
- iPodphoto ^ (Firmwareversion1.2orlater)
- FirstgenerationiPodnano ^ (Firmwareversion1.3.1 or later)
- SecondgenerationiPodnano version1.1.3orlater) ^® (Firmware
- ThirdgenerationiPodnano version1.2orlater) ^® (Firmware
- iPhone ^ (Firmwareversion3.1 or later)
- iPhone ^ 3G(Firmwareversion3.1 orlater)
- iPhone ^ 3GS(Firmwareversion3.1 or later)
ThefourthandfifthgenerationiPodnano ^® , i P o d touch ^® , thesecondgenerationiPodClassic andiPhone ^® 3Gmaynotworkwiththesystem insomecases.
MakesurethatyouriPod ^® firmwareisupdated.
*12V-chargeiPod ^ sarenotchargeablewith thissystem.
iPod iPod® button:
PlacetheignitionswitchintheACCorON
position.Then.pushtheiPod ^® buttonoswitch totheiPod ^® mode.
IfanotheraudiosourceisplayingandtheiPod isconnected,pushingtheiPod buttonchanges totheiPod mode.
If the system has been turned off while the iPod was playing, pushing the PWR button will start the iPod.
iPod MENU Topmenuitemselecting:
WhentheiPod ^® MENUbuttonispushedwhile theiPod ^® isconnected,theinterfaceforiPod operationisshownontheaudiodisplay.The itemsonthemenulistcanbescrolledby pushingthe ▲ or ▼ buttonwhiletheiPod isoperational.Toselectanitem,pushENTER button.Thedisplaycanbechangedasfollows:

Formoreinformationabouteachitem,seethe iPod ^® Owner'sManual.
ENTER BACK ENTER,BACKbutton:
- When the ENTER button is pushed while thetopmenuisdisplayed,programdetails areshownontheaudiodisplay.
- Toselecttheprogram, pushtosearchusing the ▲ or ▼ buttonandENTERbutton.
- WhentheBACKbuttonispushed, it returns to the previous display.
DISP TEXT iPod® playinformation:
WhentheDISP/TEXTbuttonispushedwhilea programisbeingplayed,theprograminformationdisplaywillchangeasfollows:

*ArtistNamewillnotbedisplayedforaPodcast.
FF(FastForward), REW(Re-wind) button:
Whenthe ▲ orbuttonispushedformore than1.5secondswhiletheiPod ^ isplaying,the iPod ^ willplaywhilefastforwardingorrewinding.Whenthebuttonisreleased,theiPod ^ will returntothenormalplayspeed.
Whenthe ▲ orbuttonispushedforless than 1.5secondswhiletheiPod ® isplaying,the nexttrackorthebeginningofthecurrenttrack ontheiPod ® willbeplayed.
APS(AutomaticProgram Search)FF,APSREWbutton:
Whenthe ▲ orbuttonispushedformore than1.5secondswhiletheiPod ® isplaying, numbersoftrackscanbeskippedthrough.
When the ▲ orbuttonispushedforless than1.5secondswhileiPod ® isplaying,thenext
trackorthebeginningofthecurrenttrackonthe iPod® willbeplayed.
SCAN RPT REPEAT(RPT), RANDOM(RDM):
When the SCAN/RPT button is pushed while a track is being played, the play pattern can be changed as follows:
ExceptPodcastandAudiobook:

Podcast:
ALLREPEAT↔ TRACKREPEAT
Audiobook:

AUX(Auxiliary)input
AUXINjack:
TheAUXINjackislocatedontheaudiounit. TheAUXINaudioinputjackacceptsany standardanalogaudioinputsuchasfroma portablecassettetape/CDplayer,MP3playeror laptopcomputer.
AUX AUX(Auxiliary)button:
WithanAUXdevicepluggedin, pushtheAUX buttonrepeatedlyuntilthedisplaychangesto theAUXmode.
WhentheAUXbuttonispushedwithnodevice pluggedintothejack, theaudiosystemdoesnot changetotheAUXmode.
NISSANstronglyrecommendsusingastereo miniplugcablewhenconnectingyourmusic devicetotheaudiosystem.Musicmaynotplay properlywhenamonauralcableisused.
4-28Heater, airconditioner, audio, phone and voicerecognitionsystems
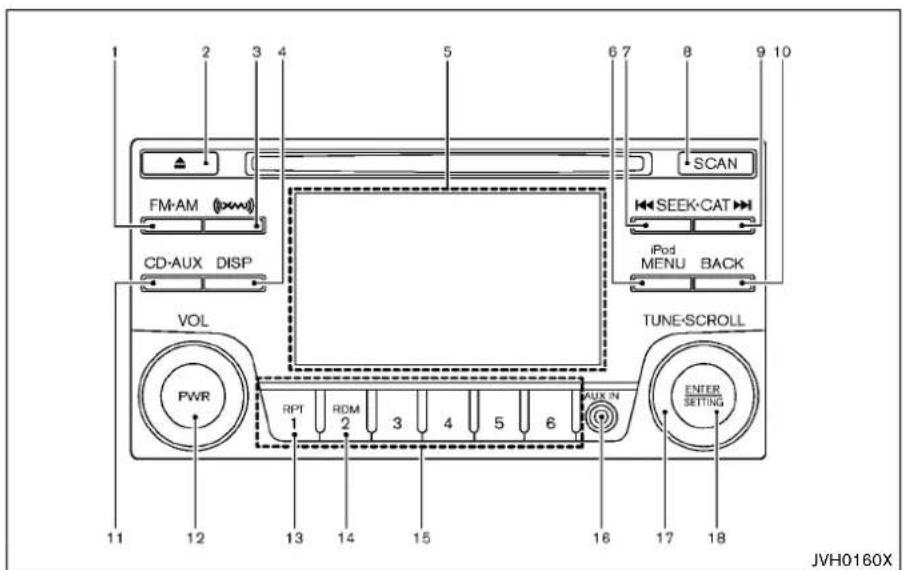
1.FM-AMbandselectbutton
2.CDEJECTbutton
3.XMbandselectbutton
-
DISP(display)button
-
Colordisplay
6.iPod Ⓜ MENUbutton
- RadioCAT(category)/REW(rewind)buttonfor SEEK/TRACK
8.RadioSCANtuningbutton
- RadioCAT(category)/FF(fastforward)button forSEEK/TRACK
10.BACKbutton
11.CD·AUXbutton
12.PWR(power)button/VOL(volume)controlknob
13.RPT(repeat)playbutton
14.RDM(random)playbutton
15.Radiostationpresetselectbuttons
16.AUXINjack
17.TUNE·SCROLLcontrolknob
18. ENTER/SETTINGbutton
FM-AM-SATRADIOWITHCOMPACT DISC(CD)PLAYER
Foralloperationprecautions, see "Audiooperationprecautions" (P.4-12).
- Nosatelliteradioreceptionisavailablewhen theSAT(satellite)bandoptionisselected unlessstheoptionalsatellitereceiver and antennaareinstalled, andthereisanactive SiriusXMSatelliteRadiosubscription.
- Thesatelliteradiomoderequiresanactive SiriusXMSatelliteRadiosubscription. The satelliteradioisnotavailableinAlaska, HawaiiandGuam.
- It may take some time to receive the activations signal afters subscribing the Sirius XM Satellite Radio. After receiving the activations signal, an available channel list will be automatically updated in the radio. Place the ignition switch from LOCK to ACC to update the channel list.
Audiomainoperation
Headunit:
The autoloudness circuitenhancesthelowand highfrequencyrangesautomaticallyinboth radioreceptionandCD playback.
PWR/Volumecontrol:
PlacetheignitionswitchintheACCorON position, and then push the PWRbutton while the system is offtoturnonthelastaudiosource, which was playing immediately before the system was turned off. While the system is on, pushing the PWRbutton turnsthesystem off.
TurntheVOLcontrolknobtoadjustthevolume.
ENTER/SETTINGbutton:
Thesettingsscreenwillappearwhenpushing theENTER/SETTINGbutton.
The following items are available in the settings screen.
●Bass, Treble, Balance and Fade
Controlsthesoundoftheaudiosystem. Balanceadjuststhesoundbetweentheleft andrightspeakers.Fadeadjuststhesound betweenthefrontandrearspeakers. Selectthe"Bass", "Treble", "Balance" or "Fade" usingtheTUNE-SCROLLcontrol knobandthenpushtheENTER/SETTING button.TurntheTUNE-SCROLLcontrol
knobtoadjusttheBass, Treble, Balance and Fadeofthescreentothepreferred level.
- SpeedSensVol.
TochangetheSpeedSensitiveVolume (SpeedSensVol.) levelfromoff(0) to 5, turntheTUNE-SCROLLcontrolknob.
●AUXVol.
Controlsthevolumelevelofincomingsound whenanauxiliarydeviceisconnectedtothe system.TochangetheAUXVol.levelfrom0 (off)to3,turntheTUNE-SCROLLcontrol knob.
●BrightnessandContrast
Adjustthebrightnessandcontrastofthe screen.
Selectthe"Brightness"or"Contrast"using theTUNE-SCROLLcontrolknobandthen pushtheENTER/SETTINGbutton.Turnthe TUNE-SCROLLcontrolknobtoadjustthe brightnessandcontrastofthescreentothe preferredlevel.
- ClockAdjust
Adjusttheclockaccordingtothefollowing procedure.

- PushtheENTER/SETTINGbutton ① until "SettingClock" and "ClockAdjust" appear on the display.
- TurntheTUNE-SCROLLcontrolknob adjustthehour. ② to
- PushtheENTER/SETTINGbutton ①.
- TurntheTUNE-SCROLLcontrolknob adjusttheminute. ② to
- PushtheENTER/SETTINGbutton ①.
- On-ScreenClock
Whenthisitemisturnedon,aclockis alwaysdisplayedintheupperrightcornerof thescreen.
Selectthe"On-ScreenClock"usingthe TUNE-SCROLLcontrolknobandthenpush theENTER/SETTINGbutton.Youcantog-
4-30Heater, airconditioner, audio, phone and voicerecognitionsystems
glebetweenONandOFFusingthe TUNE·SCROLLcontrolknob.
- RDSDisplay
WhenthishasbeensettoON,RDS(radio datasystem)informationwillbeshownon thedisplay.SelectRDSDisplayandthen pushtheENTER/SETTINGbutton.Youcan togglebetweenONandOFFusingthe TUNE:SCROLLcontrolknob.
- iPodMenulanguage
The "iPodmenulanguage" can besetto the preferred language.
Select "iPodmenulanguage" and then push the ENTER/SETTINGbutton. Use the TUNE-SCROLL control knob to select the preferred language.
DISP DISPbutton:
Displayofthescreencanbecanceledby pushingtheDISPbutton.Youcanthenlisten tomusicthatisbeingplayedback.Ifyouwantto displayhescreenagain,eitherpushtheDISP buttononcemoreorpushtheFM-AM,SiriusXM SatelliteRadioorCD-AUXbutton.
Switchingthedisplay:
PushingtheCD-AUXbuttonwillswitchthe displaysasfollows:
CD→iPod ^® /USB→AUX→CD
BACK BACKbutton:
WhentheBACKbuttonispushed,itreturnsto thepreviousdisplay.
FM-AM-SATradiooperation
FM·AM radio(FM/AM)bandselect:
PushingtheFM-AMbandselectbuttonwill changethebandasfollows:
AM→FM1→FM2→AM
XM radio(satellite)bandselect:
PushingtheXMbandselectbuttonwillchange thebandasfollows:
XM1→XM2→XM3→XM1
WhentheXMbandselectbuttonispushed whiletheignitionswitchisintheACCorON position,theradiowillcomeonatthechannel lastplayed.
Thelastchannelplayedwillalsocomeonwhen thePWRbuttonispushedtoON.
ThesatelliteradioisnotavailableinAlaska, HawaiiandGuam.
Ifanotheraudiosourceisplayingwhentheradio bandselectbuttonisturnedtoON,theaudio sourcewillautomaticallybeturnedoffandthe lastradiochannelplayedwillcomeon.
Whenthestereobroadcastsignalisweak, the radiowillautomaticallychangefromstereoto monauralreception.
TUNE(Tuning):
-ForAMandFMradio
TurntheradioTUNE·SCROLLcontrolknob formanualtuning.
-ForSiriusXMSatelliteRadio
TurntheradioTUNE·SCROLLcontrolknob toseekchannelsfromallofthecategories whenanycategoryisnotselected.
SEEKtuning/CAT(category):
●ForAMandFMradio
Pushthe or buttonotunefromlow tohighorhightolowfrequenciesandto stopatthenextbroadcastingstation.
●ForSiriusXMSatelliteRadio
Pushthe orbontotunetothe firstchannelofthenextorpreviouscategory.
SCAN SCANtuning:
PushtheradioSCANtuningbuttontototunefrom lowtohighfrequenciesandstopateach broadcastingstation/channelfor5seconds. Pushingthebuttonagainduringthis5seconds periodwillstopSCANtuningandtheradiowill remaintunedtothatstation/channel.
IftheradioSCANtuningbuttonisnotpushed within5seconds, SCANtuningmovestothe nextstation/channel.
① to ⑥ Stationmemoryoperations:
12stations/channelscanbesetfortheFMband (6eachforFM1andFM2), 12forSiriusXM SatelliteRadio(6eachforXM1andXM2)and6 stationscanbesetfortheAMband.
- Choosetheradiobandusingtheradioband selectbutton.
- Tunetothedesiredstation/channelusing theSEEK-CAT, SCANbuttonotheradio TUNE-SCROLLcontrolknob.
3.Pushandholdthedesiredstationpreset button ① to ⑥.
-
Thestationindicatorwillthencomeon. Memorizingisnowcomplete.
-
Otherbuttonscanbesetinthesame manner.
If the batterycable is disconnected, or if the fuse opens, theradiomemory will be erased. In that case, reset the desired stations/channels.
CompactDisc(CD)playeroperation
PlacetheignitionswitchintheACCorON positionandinserttheCompactDisc(CD)into theslotwiththelabelsidefacingup.TheCDwill beguidedautomaticallyintotheslotandstart playing.
AfterloadingtheCD, thenumberoftrackson theCDandtheplaytimewillappearonthe display.
Iftheradioisalreadyoperating, it will automatically turnoff and the CD will play.
If the system has been turned off while the CD was playing, pushing the PWR button will start the CD.
Donotuse3.1 in(8cm)discs.
CD • AUX PLAY:
When the CD-AUX button is pushed with the system off and the CD loaded, the system will turn on and the CD will start to play.
When the CD-AUX button is pushed with the CD loaded and theradioplaying, theradiow will automatically be turned off and the CD will start to play.
|◀◀ ▶▶▶ Next/PreviousTrackandFast Forward/Rewind:
When the orbitonispushedformore than 1.5 secondswhiletheCDisbeingplayed, the CD will play while fast forwarding or rewinding. When the button is released, the CDwillreturntonormalplayspeed.
When the ◄◀ or ▶▶ button is pushed for less than 1.5 seconds while the CD is being played, then next track the beginning of the current track on the CD will be played.
RPT REPEAT(RPT):
When the RPT play button is pushed while the CDisplayed, the play pattern can be changed as follows:
(CD)
Normal⇔ 1TrackRepeat
(CDwithcompressedaudiofiles)
Normal→1FolderRepeat→1TrackRepeat→ Normal
RDM RANDOM(RDM):
WhentheRDMplaybuttonispushedwhilea CDisbeingplayed,theplaypatterncanbe changedasfollows:
(CD)
Normal⇔ 1DiscRandom
(CDwithcompressedaudiofiles)
Normal→1DiscRandom→1FolderRandom→Normal
CDEJECT:
WhentheCDEJECTbuttonispushedwiththe CDloaded,theCDwillbeejected.
WhenthisbuttonispushedwhiletheCDis beingplayed,theCDwillbeejected.
If the CD comes out and is not removed, it will be pulled back into the slot to protect it.
BACK BACKbutton:
WhentheBACKbuttonispushed,itreturnsto thepreviousdisplay.
AUX(Auxiliary)input
AUXINjack:
TheAUXINjackislocatedontheaudiounit. TheAUXINaudioinputjackacceptsany standardanalogaudioinputsuchasfrom a portablecassettetape/CDplayer,MP3playeror laptopcomputer.
When the CD-AUX button is pushed with no device plugged into the jack, the audiosystem does not change to the AUX mode.
NISSANstrongly recommends using a stereo mini plug cable when connecting your music device the audiosystem. Music may not play properly when a musical cable is used.
USB(UniversalSerialBus)connection port
WARNING
Donotconnect, disconnector operate the USB device while driving. Doing so can bead distraction. If distracted you could lose control of your vehicle and cause an accident or serious injury.

CAUTION
- DonotforcetheUSBdeviceintothe USBport.InsertingtheUSBdevice tiltedorup-side-downintotheport maydamagetheport.Makesure thattheUSBdeviceisconnected correctlyintotheUSBport.
- DonotgrabtheUSBportcover(if soequipped)whenpullingtheUSB deviceoutoftheport.Thiscould damagetheportandthecover.
- DonotleavetheUSBcableina placewhereitcanbepulledunintentionally.Pullingthecablemay damagetheport.
Refertoyourdevicemanufacturer'sowner informationregardingtheproperuseandcare ofthedevice.

natural_image
Diagram of a car interior showing a switch and mode dial (no text or symbols)Audiomainoperation:
TheUSBconnectionportislocatedinthe centerconsole.OpentheliandconnectaUSB memoryasillustrated.Then,switchtotheUSB memorymodeautomatically. IfthesystemhasbeenturnedoffwhiletheUSB memorywasplaying,pushingthePWRbutton willstarttheUSBmemory.

PLAY:
WhentheCD-AUXbuttonispushedwiththe systemoffandtheUSBmemoryinserted,the systemwillturnon. IfanotheraudiosourceisplayingandaUSB
memoryisinserted, pushtheCD-AUXbutton repeatedly until the center display changesto the USB memory mode.

Next/PreviousFileandFast wind:
When the button is pushed more than 1.5 seconds while a USB memory is being played, the USB memory will play while forwarding or rewinding. When the button is released, the USB memory will return on normal playspeed.
When the orbiton is pushed for less than 1.5 seconds while the USB memory is being played, then next track the beginning of the current track on the USB memory will be played.
Folderselection:
TochangetoanotherfolderintheUSBmemory, turntheTUNE·SCROLLcontrolknob.

REPEAT(RPT):
When the RPT play button is pushed while the USB memory is played, the play pattern can be change as follows.
Tochangetheplaymode, pushtheRPTbutton repeatedly and themodewillchangeasfollows. Normal → 1 FolderRepeat → 1 TrackRepeat →
Normal
RDM RANDOM(RDM):
When the RDM play button is pushed while a USB memory is being played, the play pattern can be changed as follows.
Tochangetheplaymode, pushtheRDMplay button repeatedly, and themodewillchangeas follows.
Normal→AllRandom→1FolderRandom→Normal

BACKbutton:
WhentheBACKbuttonispushed,itreturnsto thepreviousdisplay.
iPod ^® playeroperation

WARNING
Donotconnect, disconnector operate the USB device while driving. Doing so can bead distraction. If distracted you could lose control of your vehicle and cause an accident or serious injury.
4-34Heater, airconditioner, audio, phone and voicerecognitionsystems

CAUTION
- DonotforcetheUSBdeviceintothe USBport.InsertingtheUSBdevice tiltedorup-side-downintotheport maydamagetheport.Makesure thattheUSBdeviceisconnected correctlyintotheUSBport.
- DonotgrabtheUSBportcover(if soequipped)whenpullingtheUSB deviceoutoftheport.Thiscould damagetheportandthecover.
- DonotleavetheUSBcableina placewhereitcanbepulledunintentionally.Pullingthecablemay damagetheport.
Refertoyourdevicemanufacturer'sowner informationregardingtheproperuseandcare ofthedevice.

ConnectingiPod®:
TheUSBconnectionportislocatedinthe centerconsole.Opentheliandconnectthe iPod® cabletotheUSBconnectionport.The batteryoftheiPod® ischargedwhilethe connectiontothevehicle.
DependingontheversionoftheiPod ^® , the displayontheiPod ^® showsaNISSANor AccessoryAttachedscreenwhentheconnectioniscompleted. WhentheiPod ^® isconnected tothevehicle, theiPod ^® musiclibrarycanonly beoperatedbythevehicleaudiocontrols.
* i P ® andiPhone ® areatrademarkofApple Inc., registeredintheU.S.andothercountries.
Compatibility:
The following models are available:
- ThirdgenerationiPhone ^ (Firmwareversion IOS4/4.0)
●FourthgenerationiPhone ^® (FirmwareversionIOS4/4.0)
●FifthgenerationiPod ^® (Firmwareversion 1.3) - FirstgenerationiPodClassic version1.1.1or1.1.2PC
- SecondgenerationiPodClassic ^ (Firmware version2.0.1)
- FirstgenerationiPodtouch ^® (Firmware version1.1.5or2.2.1)
- SecondandthirdgenerationiPodtouch (Firmwareversion2.2.1orIOS4/4.0.0)
- FirstgenerationiPodnano® (Firmwareversion1.3.1)
- SecondgenerationiPodnano version1.1.3) ^® (Firmware
- ThirdgenerationiPodnano version1.1.2PCor1.1.3PC) ^® (Firmware
- FourthgenerationiPodnano version1.0.2or1.0.4) ^® (Firmware
●FifthgenerationiPodnano ^® (Firmwareversion1.0.1 or 1.0.2)
TheiPodtouch ^® may not responsequically with thesysteminsomecases.
Heater, airconditioner, audio, phone and voicerecognitionsystems 4-35
MakesurethattheiPod ^® firmwareisupdated.
Audiomainoperation:
PlacetheignitionswitchtotheACCorON position. Then, pushtheCD-AUXbuttonrepeat- edlytoswitchtotheiPod ^ mode.
If the system has been turned off while the iPod was playing, pushing the PWR button will start the iPod.

iPod® MENUbutton:
PlacetheignitionswitchintheACCorON position.Then,pushtheiPod ^ MENUbuttonto switchtotheiPod ^ mode.
IfanotheraudiosourceisplayingandtheiPod isconnected,pushingtheiPod ^® MENUbutton changestotheiPod ^® mode.
If the system has been turned off while the iPod was playing, pushing the PWR button will start the iPod.
WhentheiPod ^® MENUbuttonispushedwhile theiPod ^® isconnected,theinterfaceforiPod operationisshownontheaudiodisplay.The itemsonthemenulistcanbescrolledby pushingthe orviletheiPod ^® is operational.Toselectanitem.pushENTER button.ItemsintheiPod ^® menuappearonthe displayinthefollowingorder.
- Nowplaying
●Playlists
●Artists
●Albums
●songs
- Podcasts
-Genres
•Composers
●Audiobooks
●Shufflesongs
Formoreinformationabouteachitem,seethe iPod ^® Owner'sManual.

Next/PreviousTrackandFast wind:
Whenthe orbuttonispushedformore than1.5secondswhiletheiPod isplaying,the iPod willplaywhilefastforwardingorrewinding.Whenthebuttonisreleased,theiPod will returntothenormalplayspeed.
Whenthe ◄◀ or ▶▶ buttonispushedforless than 1.5secondswhiletheiPod ® isplaying, the nexttrackorthebeginningofthecurrenttrack ontheiPod ® willbeplayed.
RPT REPEAT(RPT):
WhentheRPTplaybuttonispushedwhilea trackisbeingplayed,theplaypatterncanbe
changedasfollows:
RepeatOff→1TrackRepeat→AllRepeat→RepeatOff
RDM Random(RDM):
When the RDM play button is pushed while a track is being played, the play pattern can be changed as follows:
ShuffleOff→TrackShuffle→AlbumsShuffle →ShuffleOff
BACK BACKbutton:
WhentheBACKbuttonispushed,itreturnsto thepreviousdisplay.
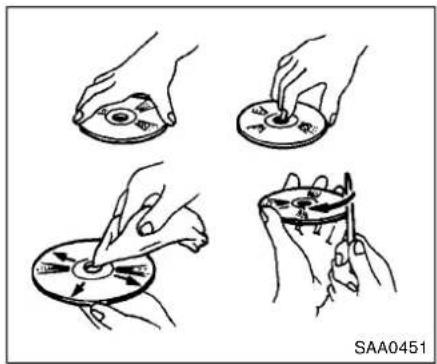
natural_image
Four hand-drawn diagrams showing a disc being cut with a tool, no text or symbols presentCD/DVD/USBMEMORYCAREAND CLEANING
CD/DVD
- HandleaCD/DVDbyitsedges.Nevertouch thesurfaceofthedisc.Donotbendthe disc.
●Alwaysplacethediscsinthestoragecase whentheyarenotbeingused. - Tocleanadisc, wipethesurface from the centertotheouteredge using a clean, soft cloth. Donotwipethediscusing a circular motion.
Donotuseaconventionalrecordcleaneror alcoholintendedforindustrialuse.
- Anewdiscmayberoughontheinnerand outeredges.Removetheroughedgesby rubbingtheinnerandouteredgeswiththe sideofapenorpencilasillustrated.
USBmemory(ifsoequipped)
- DonottouchtheterminalportionoftheUSB memory.
- DonotplaceheavyobjectsontheUSB memory.
- DonotstoretheUSBmemoryinhighly humidlocations.
- DonotexposetheUSBmemorytodirect sunlight.
- DonotspillanyliquidsontheUSBmemory. RefertotheUSBmemoryOwner'sManualfor thedetails.
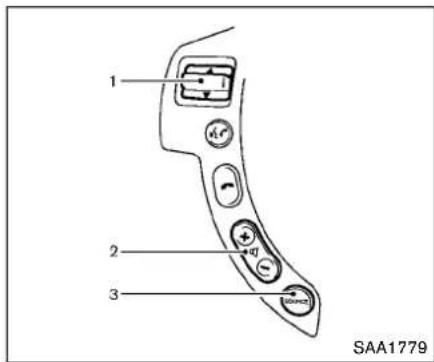
1.Tuningswitch
2.VOLUMEcontrolswitch
3.SOURCEselectswitch
STEERINGWHEELSWITCHFOR AUDIOCONTROL(ifsoequipped)
Theaudiosystemcanbeoperatedusingthe controlsonthesteeringwheel.
SOURCEselectswitch
PushtheSOURCEselectswitchtochangethe modetoavailableaudiosource.
VOLUMEcontrolswitch
PushupordowntheVOLUMEcontrolswitchto increaseordecreasethevolume.


Tuningswitch
Memorychange(radio):
Pushupordownthetuningswitchforlessthan 1.5secondstochangethenextorprevious radiopreset.
SEEKtuning(radio):
Pushupordownthetuningswitchformorethan 1.5secondstoseekthenextorpreviousradio station.
APS(AutomaticProgramSearch)FF,APS REW(CD):
Pushupordownthetuningswitchforlessthan 1.5secondstoreturntothebeginningofthe presentprogramorskiptothenextprogram. Pushseveraltimestoskipbackorskipthrough programs.
Thissystemsearchesfortheblankintervals betweenselections.Ifthereisablankinterval withinoneprogramorthereisnointerval betweenprograms,thesystemmaynotstopin thedesiredorexpectedlocation.
FOLDERchange(CDwithMP3orWMA):
Pushupordownthetuningswitchformorethan 1.5secondstochangethe folders(ifthereare any folders).
iPod®:
- Pushupordownforlessthan1.5seconds willincreaseordecreasethetracknumber.
USB:
- Pushupordownforlessthan1.5seconds willincreaseordecreasethetracknumber.
- Pushupordownformorethan1.5seconds willincrease/decreasethefoldernumber

natural_image
Line drawing of a hand holding a pen and a small object, no text or symbols presentANTENNA
Toremovetheantenna, holdthebottomofthe antennaandturnitcounterclockwise.
Toinstalltheantenna,turntheantennaclockwiseandtighten.

CAUTION
•Toavoiddamagingordeformingthe antenna,besuretoremovethe antennaunderthefollowingconditions.
—Thevehicleentersanautomatic carwash.
4-38Heater, airconditioner, audio, phone and voicerecognitionsystems
CARPHONEANDCBRADIO
—Thevehicleentersagaragewith alowceiling.
—The vehicle is covered with a car cover.
- Alwaysproperlytightentheantenna rodduringinstallation. Otherwise, theantennarodmaybreakduring vehicleoperation.
WheninstallingacarphoneoraCBradioin yourvehicle,besuretoobservethefollowing cautions,otherwisethenewequipmentmay adverselyaffecttheelectroniccontrolmodules andelectroniccontrolsystemharness.

WARNING
- Acellularphoneshouldnotbeused foranypurposewhiledrivingsofull attentionmaybegiventovehicle operation.Somejurisdictionsprohibittheuseofcellularphoneswhile driving.
- If you must make all while your vehicle is in motion, the hands-free cellular phone operational mode is highly recommended. Exercise extreme caution at all times of full attention may begin to vehicle operation.
•If you are unable to devote full attention to vehicle operation while talking on the phone, pulloff the road to as a location and stop your vehicle.

CAUTION
- Keeptheantennaasfarawayas possiblefromtheeelectroniccontrol modules.
- Keeptheantennawiremorethan8 in(20cm)awayfromtheelectronic controlsystemharness.Donot routetheantennawirenexttoany harness.
- Adjusttheantennastanding-wave ratioasrecommendedbytheman- facturer.
- Connectthegroundwirefromthe CBradiochassistothebody.
- Fordetails,consultaNISSANdealer.
Bluetooth® HANDS-FREEPHONE SYSTEM(ifsoequipped)

WARNING
- Useaphoneafterstoppingyour vehicleinasafelocation.Ifyou havetouseaphonewhiledriving, exerciseextremecautionatall timesofullattentionmaybegiven tovehicleoperation.
- If you are unable to devote full attention to vehicle operation while talking on the phone, pulloff the road to as a location and stop your vehicle.

CAUTION
To avoid draining the vehicle battery, use a phone after starting the engine.
YourNISSANisequippedwiththeBluetooth Hands-FreePhoneSystem.Ifyouhavea compatibleBluetooth ^® enabledcellularphone, youcansetupthewirelessconnectionbetween yourcellularphoneandthein-vehiclephone module.WithBluetooth ^® wirelesstechnology, youcanmakeorreceiveahands-freetelephone callinyourvehicle.
Onceyourcellularphoneisconnectedtothein-vehiclephonemodule,nootherphoneconnectingprocedureisrequired.Yourphoneis automaticallyconnectedwiththein-vehicle phonemodulewhentheignitionswitchis placedintheONpositionwiththeconnected cellularphoneturnedonandcarriedinthe vehicle.
Youcanconnectupto5differentBluetooth cellularphonesinthein-vehiclephonemodule. However,youcantalkononlyonecellularphone atatime.
BeforeusingtheBluetooth ^® Hands-FreePhone System, refertothefollowingnotes.
●WirelessLAN(Wi-Fi)andtheBluetooth functionssharethesamefrequencyband (2.4GHz).UsingtheBluetooth ^® andthe wirelessLANfunctionsatthesametimemay slowdownordisconnectthecommunicationandcauseundesirednoise.It is recommendedthatyouturnoffthewireless LAN(Wi-Fi)whenusingtheBluetooth functions.
- Setupthewirelessconnectionbetweena compatiblecellularphoneandthein-vehicle phonemodulebeforeusingtheBluetooth Hands-FreePhoneSystem.
- SomeBluetooth ^ enabledcellularphones may not be recognized by their-in-vehicle
phonemodule.Pleasevisitwww.nissanusa.com/bluetoothforarecommendedphone listandconnecting.
- You will not be a be a letouse ahands-free phone under the following conditions:
—Yourvehicleisoutsideofthetelephone servicearea.
—Yourvehicleisinanareawhereitis difficulttoreceiveradiowaves;suchasin atunnel,inanundergroundparking garage,nearatallbuildingorina mountainousarea.
—Yourcellularphoneislockedtopreventit frombeingdialed.
- Whentheradiowaveconditionisnotideal orambientsoundistooloud, it maybe difficult to hear the other person's voice during acall.
- Immediately after the ignition switch is placed in the ON position, it maybe impossible to receive a call for a short period of time.
- Donotplacethecellularphoneinanarea surroundedbymetalorfarawayfromthein-vehiclephonemoduletopreventtonequality degradationandwirelessconnectiondisruption.
- Whileacellularphoneisconnectedthrough theBluetooth ^ wirelessconnection,the
4-40Heater, airconditioner, audio, phone and voicerecognitionsystems
batterypowerofthecellularphonemay dischargequickerthanusual.TheBluetooth® Hands-FreePhoneSystemcannot chargecellularphones.
- IftheBluetooth ^ Hands-FreePhoneSystem seemstobemalfunctioning,see“Troubleshootingguide”laterinthissection.Youcan alsovisitwww.nissanusa.com/bluetoothfortroubleshootinghelp.
- Somecellularphonesorotherdevicesmay causeinterferenceorabuzzingnoiseto comefromtheaudiosystemspeakers. Storingthedeviceinadifferentlocation mayreduceoreliminatethenoise.
- RefertothecellularphoneOwner'sManual regardingbatterycharging,cellularphone antenna,etc.
- Thiswirelesshandsfreecarkitisbasedon Bluetooth® technology,
—Frequency:2402MHz-2480MHz
—OutputPower:7,94dBmE.I.R.P
—Modulation: FHSSGFSK8DPSK,π/4DQPSK
—NumberofChannel:79
—Thiswirelessequipmentcan'tbeused foranyservicesrelatedtosafetybecause thereisthepossibilityofradiointerference.
REGULATORYINFORMATION
FCCRegulatoryinformation
- CAUTION: Tomaintaincompliance with FCC's RFexposureguidelines, use only the supplied antenna. Unauthorizedantenna, modification, or attachmentscould damage the transmitter and may violate FCC regulations.
- Operationissubjecttothefollowingtwo conditions:
1) this device may not cause interference and
2) this device must accept any interference, including interference that may cause undesired operation of the device
Bluetooth ^® trademark
Bluetooth®
Bluetooth ^® isattrademarkowned byBluetoothSIG,Inc.,and licensedtoVisteonCorporation.

USINGTHESYSTEM
TheNISSANVoiceRecognitionsystemallows hands-freeoperationoftheBluetooth ^® Hands-FreePhoneSystem.
If the vehicle is in motion, some commands may not be available as full attention may begin to vehicle operation.
Initialization
WhentheignitionswitchisplacedintheON position,NISSANVoiceRecognitionisinitialized,whichtakesafewseconds.Ifthe buttonispushedbeforetheinitializationcom- pletes,thesystemwillacceptanycommand.

Operatingtips
TogetthebestperformanceoutoftheNISSAN VoiceRecognitionsystem,observethefollowing:
- Keeptheinteriorofthevehicleasquietas possible. Closethewindowstoeliminate surroundingnoises(trafficnoises,vibration sounds,etc.),whichmaypreventthesystem fromrecognizingvoicecommandscorrectly.
- Waituntilthetonesoundsbeforespeakinga command. Otherwise, the command will not bereceived properly.
-Startspeakingacommandwithin5seconds afterthetonesounds.
●Speakinanaturalvoicewithoutpausing betweenwords.
Givingvoicecommand
TooperateNISSANVoiceRecognition,push andreleasethe buttonlocatedonthe steeringwheel.Afterthetonesounds,speaka command.
The command given is picked up by the microphone, and voice feedback is given when the command is accepted.
- If you need to hear the available commands for the current menu again, say "Help" and the system will repeat them.
- Ifacommandisnotrecognized, thesystem announces, "Commandnotrecognized. Pleasesayagain." Repeat the command in aclearvoice.
- If you want to go back to the previous command, you can say "Goback" or "Correction" any timethesystem is waiting for a response.
- Youcancancelacommandwhenthe systemiswaitingforaresponsebysaying, "Cancel"or"Quit."Thesystemannounces "Cancel"and ends theVoiceRecognition (VR)session.Youcanalsopushandhold the buttonfor5secondsonthe steeringwheelatanytimetocancelthe VR session.WhenevertheVRsessionis cancelled,adoublebeepisplayedto indicateyouhaveexitedthesystem.
- If you want to adjust the volume of the voice feedback, push the volume control switch (+ or - ) on the steering wheel while being provided with feedback. You can also use the radio volume control knob.
Voicepromptinterrupt:
Inmostcasesyoucaninterruptthevoice feedbacktospeakthenextcommandby pushingthe buttononthesteeringwheel. After interrupting the system, wait for a beep beforespeakingyourcommand.
Oneshotcall:
To use the system faster, you may speak the secondlevelcommandswiththemainmenu commandonthemainmenu. Forexample, push the buttonandafterthetonesay, "Call Redial".
Howtosaynumbers
NISSAN Voice Recognition requires a certain waytospeaknumbersinvoicecommands. Refertotherulesandexamplesbelow.
- Either"zero"or"oh"canbeusedfor"0".
Example:1-800-662-6200
— “Oneeightohohsixsixtwosixtwooh oh”, or
— “Oneeightzerozerosixsixtwosixtwo ohoh”
- Words can be used for the first 4 digits places only.
Example:1-800-662-6200
— “Oneeighthundredsixsixtwosixtwooh oh”,
— NOT"Oneeighthundredsixsixtwosixty twohundred, and
— NOT"Oneeightohohsixsixtwosixty twohundred.
●Numbers can bespoken insmallgroups.
The system will prompt you to continuing enteringdigits, if desired.
4-42Heater, airconditioner, audio, phone and voicerecognitionsystems
Example:1-800-662-6200
—“Oneeightzerozero”
Thesystemrepeatsthenumbersand promptsyoutoentermore.
—“sixsixtwo”
Thesystemrepeatsthenumbersand
promptsyoutoentermore.
—“sixtwozerozero”
- Youcansay "Star" for "*" and "Pound" for "#" at any time in any position of the phone number. (Available only when using the "SpecialNumber" command.)
Example:1-555-1212*123
—“Onefivefivefiveonetwoonetwostar onetwothree”
- Say "pound" for "#". Say "star" for "*" (available when using the "SpecialNumber" command and the "Send" command during acall).
- Say"plus"for"+" (availableonlywhenusing the"SpecialNumber"command).
- Say"pause"fora2secondpause(available onlywhenstoringaphonebooknumber). See "Makingacallbyenteringaphone number"(P.4-45)and"Listofvoicecommands"(P.4-45)formoreinformation.
NOTE:
Forbestresults, sayphonenumbersas singledigits.
Thevoicecommand "Help" is available at any time. Please say the "Help" command to get information about how to set the system.
INFO
- If you are controlling the telephonesystem by voice command for the first time, don't know the appropriate voice command, speak "Help". The system announces the available commands.
- Whenyouspeaknumbers,youcanspeak both"zero"or"oh"for"0".
Manualcommandselection
Commandscanbeselectedmanually. While the commandsaredisplayedonthaudioscreen, selectacommandbyoperatingtheaudiotuning switch,and thenpushthe switch.Oncea commandismanuallyselected,thevoice commandfunctioniscancelled.Toreturnto voicecommandmode,pushthe switchto cancelthecurrentoperation,and thenperform thefirstprocedureofvoicecommand.

CONTROLBUTTONS
The control buttons for the Bluetooth ^ Hands-Free Phone System are located on the steering wheel.
PHONESEND
Pushthe 📋 buttonontoinitiateaVRsessionor answeranincomingcall.
Youcanalsousethe buttononterrupt systemfeedbackandgiveacommandatonce.
PHONEEND
While the voicerecognition system is active, push the button to go back on a step. Push and hold the button for 5 seconds to quit the voicerecognition system at any time.
GETTINGSTARTED
The following procedures will help you get started using the Bluetooth ^ Hands-Free Phone System with NISSAN Voice Recognition. For additional command options, refer to "List of voice commands" (P.4-45).
Choosingalanguage
Youcan interact with the Bluetooth ^® Hands-Free Phone System using English, Spanish or French.
Tochangethelanguage, perform the following.
- Pushandholdthe 5seconds.
buttonformorethan
-
Thesystemannounces: "PushthePHONE SEND( 📊 )buttonforthehands-free phonesystemtoenterthespeakeradaptationmodeorpushthePHONEEND( 📊 ) buttontoselectadifferentlanguage."
-
Pushthe
button.
Forinformationonspeakeradaptation,see "SpeakerAdaptation(SA)mode"(P.4-49).
- Thesystemannounce the current language and gives you the option to change the language to Spanish (in Spanish) or French (in French). Use the following chart to select the language.
NOTE:
Youmustpushthe buttonorthe buttonwithin5secondstochange thelanguage.
| Currentlanguage | Push (TALK/PHONESEND) toselect | Push (MODE/PHONEEND) toselect |
| English | Spanish | French |
| Spanish | English | French |
| French | English | Spanish |
- If you decide not to change the language, do not pus he either button. After 5 seconds, the VR session will end, and the language will not be changed.
Connectingprocedure
NOTE:
Theconnectingprocedure mustbeperformedwhenthevehicleisstationary.If thevehiclestartsmovingduringtheprocedure,theprocedurewillbecancelled.
Main menu
"Connect Phone" Ⓐ "Add Phone" Ⓑ
Initiate from handset
Name phone

-
Push the button on the steering wheel. Thesystemannounce the available commands.
-
Say: "ConnectPhone" Ⓐ. Thesystem acknowledges the command and announce the next set of available commands.
3.Say: "Add phone" Ⓑ. Thesystemacknowledgesthecommandandasksyoutoinitiate pairingfromthephonehandset Ⓞ. Theconnectingprocedureofthecellular phonevariesaccordingtoeachcellular phone.SeethecellularphoneOwner's Manualfordetails.Youcanalsovisitwww.nissanusa.com/bluetoothforinstructionson connectingNISSANrecommendedcellular phones.
When prompted fora Passkeycode, enter "1234" from the handset. The Passkeycode "1234" has been assigned by NISSAN and cannot be changed.
- Thesystemasksyoutosayanameforthe phone Ⓓ .
Ifthenameistoolongortooshort,the systemtellsyou,thenpromptsyoufora nameagain.
Also, if more than one phone is connected and then names soundstoom much like an name already used, the system tells you, then
4-44Heater, airconditioner, audio, phone and voicerecognitionsystems
promptsyouforanameagain.
Makingacallbyenteringaphone number
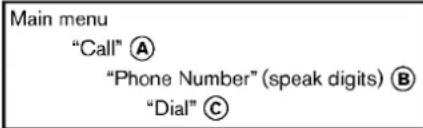
- Push the button on steering wheel. A tonewillsound.
- Say: "Call" Ⓐ . Thesystemacknowledges the command and announce the next set of available commands.
3.Say:"PhoneNumber" ⑧ .Thesystem acknowledged the command and announced then set of available commands. Say:"SpecialNumber" todial more than 10 digits or any special characters. - Saythenumberyouwishtocallstartingwith theareacodeinsingledigitformat. If the systemhastroublerecognizingthecorrect phonenumber, tryenteringthenumberin thefollowinggroups:3-digitareacode, 3-digitprefixandthelast4-digits. Forexample, 555-121-3354canbesaidas"fivefivefive" asthe1stgroup, then "onetwoone" asthe 2ndgroup, and "threethreefivefour" asthe 3rdgroup. Fordialingmorethan10digitsor
anyspecialcharacters, say "SpecialNumber". See "Howtosaynumbers" (P.4-42), formoreinformation.
- When you have finished speaking the phone number, the system repeats it back and announce the available commands.
6.Say:"Dial" © .Thesystemacknowledges thecommandandmakesthecall.
For additional command options, see "List of voicecommands"(P.4-45).
Receivingacall
When you hear the ring tone, push the buttononthesteeringwheel.
Oncethecallhasended, push the button onthesteeringwheel.
NOTE:
If you donotwishtotakethe call when you heartheringtone, push the button on the steering wheel to reject the call. LISTOFVOICE COMMANDS
Main menu
"Call"
"Phonebook"
"Recent Calls"
"Connect Phone"
When you push and release the button on the steering wheel, you can choose from the commands on the Main Menu. The following pages describe these commands and the commands each sub-menu.
Remembertowaitforthetone before speaking.
Youcansay"Help"tohearthelistofcommands currentlyavailableanytimethesystemiswaiting foraresponse.
Amenuitemcanalsobeselectedbyscrolling thedisplaywiththeSEEKswitchandentering bypushingthe button.
If you want to end an action without completing it, you can say "Cancel" or "Quit" at any time the system is waiting for a response. The system will end the VR session. Whenever the VR session is cancelled, adouble beep is played to indicate you have exited the system.
If you want to go back to the previous command, you can say "Goback" or "Correction" anytime the system is waiting for a response.
Call

(speakname) Ⓐ
If there are entries stored in the phonebook, a number associated with an name and location can be dialed.
See "Phonebook(phoneswithoutautomatic phonebookdownloadfunction)"(P.4-47) to learn how to store entries.
When prompted by the system, say the name of the phone book entry to call. The system acknowledged this name.
If there are multiple locations associated with the name, the system mask the user to choose the location.
Oncethenameandlocationareconfirmed,the systembeginsthecall.
"PhoneNumber"(speakdigits) B
When prompted by the system, say then number to call. Referto "Making acall by entering a phonenumber" (P.4-45) formoredetails.
"Redial" ©
Use the Redial command to call the last number that was dialed.
Thesystemacknowledgesthecommand, repeatsthenumberandbeginsdialing. Ifaredialnumberdoesnotexist, thesystem announces, "Thereisnonumbertoredial" and endstheVRsession.
"Callback" D
UsetheCallBackcommandtodialthenumber ofthelastincomingcallwithinthevehicle.
Thesystemacknowledgesthecommand, repeatsthenumberandbeginsdialing. Ifacallbacknumberdoesnotexist, thesystem announces, "Thereisnonumbertocallback" andendstheVRsession.
"SpecialNumber"
Todialmorethan10digitsoranyspecial characters,please say "SpecialNumber".When thesystemacknowledgesthecommand,the systemwillpromptyoutospeakthenumber.
"Duringacall"
During acallthereareseveralcommandoptions available. Pushthe buttononthesteering wheeltomutethereceivingvoiceandenter commands.
- "Help"—Thesystemannouncestheavailablecommands.
- "Goback/Correction"—Thesystemannounces"Goback,"endstheVRsession andreturnstothecall.
- "Cancel/Quit"—Thesystemannounces "Cancel," endstheVRsessionandreturns tothecall.
- "Send/Enter/Call/Dial"—Use the Send command to enternumbers, "*" or "#" during acall. Forexample, if you were directed to dial an extension by an automated system:
Say:"Sendonetwothreefour."
Thesystemacknowledgesthecommand andsendsthetonesassociatedwiththe numbers.ThesystemthenendstheVR sessionandreturnstothecall.Say"star"for "*",say"pound"for"#".
- "Transfercall"—UsetheTransferCall commandtotransferthecallfromthe Bluetooth® Hands-FreePhoneSystemto thecellularphonewhenprivacyisdesired. Thesystemannounces, "Transfercall.Call transferredtoprivacymode." Thesystem thenendstheVRsession.
Toreconnectacallfromthecellularphone totheBluetooth® Hands-FreePhonesystem,pushthe button.
4-46Heater, airconditioner, audio, phone and voicerecognitionsystems
- "Mute"—Use the Mutecommandtomute your voicesotheotherpartycannothearit. Use themutecommandagaintounmute your voice.
NOTE:
Ifacallisendedorthecellularphone networkconnectionislostwhiletheMute featureison,theMutefeaturewillbereset to"off"forthenextcallsotheotherparty canhearyourvoice.
Phonebook(phoneswithoutautomatic phonebookdownloadfunction)
Main menu
"Phonebook"
Transfer Entry Ⓐ
Delete Entry Ⓑ
List Names ©
"TransferEntry" Ⓐ
UsetheTransferEntrycommandtostoreanew nameinthesystem.
When prompted by the system, say then a name you would like to give them new entry.
Forexample, say: "Mary."
Ifthenameistoolongortooshort,thesystem tellsyou,thenpromptsyouforanameagain.
Also, ifthenamesoundstoomuchlikeaname
alreadystored, thesystemtellsyou, then promptsyouforanameagain.
Thesystemwillaskyoutotransferaphone numberstoredinthecellularphone'smemory.
Toenteraphonenumberbyvoicecommand: Forexample, say: "fivefivefiveonetwoone two." See "Howtosaynumbers" earlierinthis sectionformoreinformation.
Totransferaphonenumberstoredinthecellular phone'smemory:
Say: "Transferentry." Thesystemacknowledges the command and asks you to initiate the transfer from the phone handset. Thenew contact phonenumber will be transferred from the cellular phone via the Bluetooth ^ communication link.
The transfer procedure varies according to each cellular phone. Seethe cellular phone Owner's Manual for details. You can also visit www.nissanusa.com/bluetoothforinstructionson transferring phonenumber from NISSAN recommended cellular phones.
Thesystemrepeatsthenumberandprompts youforthenextcommand.Whenyouhave finishedenteringnumbersortransferringan entry,choose"Store."
Thesystemconfirmsthename, location and number.
"DeleteEntry" Ⓑ
UsetheDeleteEntrycommandtodeleteone entryfromthephonebook. Afterthesystem acknowledgesacommand, saythenameto deleteorsay "ListNames" to choose anentry.
"ListNames" ©
UsetheListNamescommandtohearallthe namesinthephonebook.Thesystemrecitesthe phonebookentriesbutdoesnotincludethe actualphonenumbers.Whenplaybackofthe listiscomplete,thesystemreturnstothemain menu.
Playbackofthelistcanbestoppedatanytime bypassingthe buttononthesteering wheel.ThesystemendstheVRsession.
Phonebook(phoneswithautomatic phonebookdownloadfunction)
NOTE:
Phonebookcommandsarenotavailable whenthevehicleismoving.
Main menu
"List names" Ⓐ
"Record Name" Ⓑ
"Next Name" ©
"Previous Name" D
Forphonesthatsupportautomaticdownloadof
Heater, airconditioner, audio, phone and voicerecognitionsystems 4-47
thephonebook(PBAPBluetoothprofile), the "Phonebook" commandisusedtomanage entriestothevehiclephonebook.Youcansay thenameofanentryatthismenutoinitiate dialingofthatentry.
The phonebookstoresupto1000namesfor eachphonepairedwiththesystem.Eachname canhaveupto4locations/phonenumbers associatedwithit.
Whenaphoneisconnectedtothesystem,the phonebookisautomaticallydownloaddtohe vehicle.Thisfeatureallowsyoutoaccessyour phonebookfromtheBluetooth® systemandcall contactsbyname.Youcanrecordacustom voicetagforcontactnamesthatthesystemhas difficultyrecognizing.Formoreinformationsee "RecordName"inthissection.
NOTE:
Eachphonehasitsownseparatephone-book.YoucannotaccessPhoneA'sphone-bookifyouarecurrentlyconnectedwith PhoneB.
"Listnames" A
UsetheListNamescommandtohearallthe namesandlocationsinthephonebook.
Thesystemrecitesthephonebookentriesbut doesnotincludetheactualphonenumbers. Whentheplaybackofthelistiscomplete, the
systemgoesbacktothemainmenu.
Youcanstoptheplaybackofthelistatanytime bypassingthe buttononthesteering wheel.ThesystemendstheVRsession.Seethe "RecordName" commandinthissectionfor informationaboutrecordingcustomvoicetags forlistentriesthatthesystemhasdifficulty pronouncing.

"Recordname" B
Thesystemallowsyoutorecordcustomvoice tagsforcontactnamesinthephonebookthat thevehiclehasdifficultyrecognizing. This featurecanalsobeusedtorecordvoicetags todirectlydialanentrywithmultiplenumbers. Upto40voicetagscanberecordedtothe system.
"NextName" ©
UsetheNextNamecommandtomovethenext nameoflist.
"PreviousName" D
UsethePreviousNamecommandtomovethe previousnameoflist.
RecentCalls
Main menu
"Recent Calls"
"Outgoing" Ⓐ
"Incoming" Ⓑ
"Missed" ©
"Call Back" D
UsetheRecentCallscommandtoaccess outgoing, incomingormissedcalls.
"Outgoing" A
UsetheOutgoingcommandtolisttheoutgoing callsmadefromthevehicle.
"Incoming" Ⓑ
UsethelIncomingcommandtolisttheincoming callsmadefromthevehicle.
"Missed" ©
Use the Missed command to list them missed calls made to the vehicle that were not answered.
"CallBack" D
UsetheCallBackcommandtodialthenumber ofthemostrecentlyreceivedcall.
4-48Heater, airconditioner, audio, phone and voicerecognitionsystems
ConnectPhone
NOTE:
AddPhonecommandisnotavailable whenthevehicleismoving.
Main menu
"Connect Phone"
"Add Phone" Ⓐ
"Select Phone" Ⓑ
"Delete Phone" ©
"Bluetooth Off" D
"Replace Phone" Ⓔ
UsetheConnectPhonecommandstomanage thephonesconnectingtothevehicleorto enabletheBluetooth ^® functiononthevehicle.
"AddPhone" A
UsetheAddPhonecommandtoaddaphoneto the vehicle. See "Connecting procedure" (P.4-44) form more information.
"SelectPhone" Ⓑ
Use the Select Phone command to select from a list of phones connected to the vehicle. The system will list these assigned to each phone and then promptly for the phone you wish to select. Only one phone can be active at time.
"DeletePhone" ©
Use the Delete Phone command to delete a phonethatis connected to the vehicle. The system will list these assigned to each phone and then promptly for the phone you wish to delete. Deleting a phone from the vehicle will also do let the phone book forth that phone.
"BluetoothOff" D
Use the Bluetooth Off command to prevent wireless connection to your phone.
"Replacephone" Ⓔ
This can be used to reconnect an new phonewith the vehicle you have changed your cellular phone.
SpeakerAdaptationallowsuptotwoout-of dialectuserstotrainthesystemtoimprove recognitionaccuracy. Byrepeatinganumberof commands, the userscancreateavoicemodel of their own voicethatis stored in the system. Thesystemiscapable of storing a different speaker adaptation model for each connected phone.
Trainingprocedure
-
Position the vehicle in areasonably quiet outdoor location.
-
Sitinthedriver'sseat with the engine running, the parking brakeon, and the transmission in Park.
3.Pushandholdthe 5seconds. buttonformorethan
-
Thesystemannounces: "PushthePHONE SEND( )buttonforthehands-free phonesystemtoenterthespeakeradaptationmodeorpushthePHONEEND( ) buttontoselectadifferentlanguage."
-
Push the button. For information on selecting different language, see "Choosing language" (P.4-44).
-
If the connected phone is already in use, the system will promptly to out overwrite. Follow the instructions provided by the system.
-
When preparation is complete and you are ready to begin, push the button.
-
The SAmodewillbeexplained.Followthe instructionsprovidedbythesystem.
-
Whentrainingisfinished, thesystemwilltell youanadequatenumberofphraseshave beenrecorded.
-
Thesystemwillannouncethatspeaker adaptationhasbeencompletedandthe systemisready.
TheSAmodewillstopif:
●The buttonispushedformorethan5 secondsinSAmode.
●ThevehicleisdrivenduringSAmode.
- TheignitionswitchisplacedintheOFFor LOCKposition.
Trainingphrases
DuringtheSAmode,thesysteminstructsyouto saythefollowingphrases.
(Thesystemwillpromptyouforeachphrase.)
- phonebooktransferentry
-dial30429
- deletecallbacknumber
●Incoming
- Transferentry
-8pause932pause7
- deleteallentries
•call72409
- phonebookdeleteentry
- nextentry
•dialstar2170
- yes
•no
- select
Missed
-dial85692
- Bluetooth
-Outgoing
- call31902
●97pausepause308
- cancel
- callbacknumber
- callstar2095
- deletephone
-dial83051
- RecordName
-43pause29pause0
●deleteredialnumber
- phonebooklistnames
- call80541
- correction
- setupmainmenu
-dial74018
- memopaddelete
- delete
-dial97266
- call76301
•goback
•call56280
•dial66437
4-50Heater, airconditioner, audio, phone and voicerecognitionsystems
TROUBLESHOOTINGGUIDE
The system should respond correctly to all voice commands without difficulty. If problems are encountered, try the following solutions.
Where the solutions are listed by number, try each solution in turn, starting with number 1, until the problem is resolved.
| SymptomSolution | |
| TheSystemfailstointerpretthecommandcorrectly. | 1.Ensurethatthecommandisvalid.See"Listofvoicecommands"(P.4-45). |
| 2.Ensurethatthecommandisspokenafterthetone. | |
| 3.Speakclearlywithoutpausingbetweenwordsandatalevelappropriatetotheambientnoiselevelinthevehicle. | |
| 4.Ensurethattheambientnoiselevelisnotexcessive(forexample,windowsopenordefrosteron).NOTE:Iftistoo noisytousethephone,itislikelythatthevoicecommandswillnotberecognized. | |
| 5.Ifmorethanonecommandwassaidatatime,trysayingthecommandsseparately. | |
| 6.Ifthesystemconsistentlyfailstorecognizecommands,thevoicetrainingproceduresshouldbecarriedoutto improvetherecognitionresponseforthespeaker.See"SpeakerAdaptation(SA)mode"(P.4-49). | |
| Thesystemconsistentlyselectsthewrongentryfrom thephonebook. | 1.Ensurethatthephonebookentrynamerequestedmatcheswhatwasoriginallystored.Thiscanbeconfirmedby usingthe"ListNames"command.See"Phonebook(phoneswithoutautomaticphonebookdownloadfunction)" (P.4-47). |
| 2.Replaceoneofthenamesbeingconfusedwithanewname. |
MEMO
4-52Heater, airconditioner, audio, phone and voicerecognitionsystems
5Startinganddriving
Precautionswhenstartinganddriving....5-2
Exhaustgas(carbonmonoxide)....5-2
Three-waycatalyst....5-3
TirePressureMonitoringSystem(TPMS)....5-3
Avoidingcollisionandrollover....5-5
On-pavementandoff-roaddrivingprecautions......5-6
Off-roadrecovery....5-6
Rapidairpressureloss....5-6
Drinkingalcohol/drugsanddriving....5-7
Drivingsafetyprecautions....5-7
Ignitionswitch....5-9
ContinuouslyVariableTransmission(CVT)....5-9
Keypositions....5-10
Beforestartingtheengine....5-10
Startingtheengine....5-11
Drivingthevehicle....5-12
ContinuouslyVariableTransmission(CVT)......5-12
Parkingbrake....5-16
Cruisecontrol(ifsoequipped)....5-17
Precautionsoncruisecontrol....5-17
Cruise control operations....5-18
Break-inschedule....5-19
Fuelefficientdrivingtips....5-19
Increasingfueleconomy....5-20
All-WheelDrive(AWD)(ifsoequipped)......5-20
All-WheelDrive(AWD)lockswitchoperations.....5-21
AWDwarninglight....5-22
Parking/parkingonhills....5-23
Electricpowersteeringsystem....5-24
Brakesystem....5-25
Brakingprecautions....5-25
Parkingbrakebreak-in....5-25
Anti-lockBrakingSystem(ABS)....5-25
VehicleDynamicControl(VDC)system....5-27
Coldweatherdriving....5-28
Freeingafrozendoorlock....5-28
Anti-freeze....5-28
Battery....5-28
Drainingofcoolantwater....5-28
Tireequipment....5-29
Specialwinterequipment....5-29
Drivingonsnoworice....5-29
PRECAUTIONSWHENSTARTING ANDDRIVING

WARNING
- Donotleavechildrenoradultswho wouldnormallyrequirethesupport ofothersaloneinyourvehicle.Pets shouldnotbeleftaloneeither.They couldaccidentallyinjurethemselves orothersthroughinadvertentoperationofthevehicle.Also,onhot, sunny days, temperatures in a closedvehiclecouldquicklybecome highenoughtocausesevereor possiblyfatalinjuriestopeopleor animals.
•Properlysecureallcargowithropes orstrapstohelppreventitfrom slidingorshifting.Donotplace cargohigherthantheseatbacks.In asuddenstoporcollision,unsecuredcargocouldcausepersonal injury.
EXHAUSTGAS(carbonmonoxide)

WARNING
- Donotbreatheexhaustgases;they containcolorlessandodorlesscarbonmonoxide.Carbonmonoxideis dangerous.Itcancauseunconsciousnessordeath.
- Ifyoususpectthatexhaustfumes areenteringthevehicle,drivewith allwindowsfullyopen,andhavethe vehicleinspectedimmediately.
- Donotruntheengineinclosed spacessuchasagarage.
- Donotparkthevehiclewiththe engineerunningforanyextended lengthoftime.
- Keeptheliftgateclosedwhile driving,otherwiseexhaustgases couldbedrawnintothepassenger compartment.Ifyoumustdrivewith theliftgateopen,followthese precautions:
1.Openallthewindows.
2.Setthe airrecirculationtooff andthefancontroltohighto
circulatetheair.
- If electrical wiring or other cable connections must pass to a trailer through these along the lift gate or the body, follow the manufacturer's recommendation to prevent carbon monoxide entry into the vehicle.
- Ifaspecialbody,camperorother equipmentisaddedforrecreational orotherusage,followthemanufac-turer'srecommendationtoprevent carbonmonoxideentryintothe vehicle.(Somerecreationalvehicle appliancessuchasstoves,refrigerators,heaters,etc.mayalsogen-eratecarbonmonoxide.)
•The exhaustsystem and body should be inspected by a qualified mechanic whenever:
—Thevehicleisraisedforservice.
—Yoususpectthatexhaustfumes areenteringintothepassenger compartment.
—Younoticeachangeinthe soundoftheexhaustsystem.
—Youhavehadanaccidentinvolvingdamagetotheexhaust
system, underbody, orrear of the vehicle.
THREE-WAYCATALYST
The three-way catalyst is an emission control device installed in the exhaust system. Exhaust gases in the three-way catalyst are burned at high temperature to help reduce pollutants.

WARNING
•Theexhaustgasandtheexhaust systemareveryhot.Keeppeople, animalsorflammablematerials awayfromtheexhaustsystemcomponents.
- Donotstoporparkthevehicleover flammablematerialssuchasdry grass,wastepaperorrags.They mayigniteandcauseafire.

CAUTION
- Donotuseleadedgasoline.Depositsfromleadedgasolinewillseriously reduce the three-way catalyst'sabilitytohelpreduceex-
haustpollutants.
- Keepyourenginetunedup.Malfunctionsintheignition,fuelinjection,orelectricalsystemscancause overrichfuelflowintothethree-way catalyst,causingittooverheat.Do notkeepdrivingiftheenginemisfires,orifnoticeablelossofperformanceorotherunusualoperating conditionsaredetected.Havethe vehicleinspectedpromptlybya NISSANdealer.
- Avoiddrivingwithanextremelylow fuellevel.Runningoutoffuelcould causetheenginetomisfire,dama-gingthethree-waycatalyst.
- Donotracetheenginewhilewarm- ingitup.
- Donotpushortowyourvehicleto starttheengine.
TIREPRESSUREMONITORINGSYSTEM(TPMS)
Eachtire, including the spare (if provided), should be checked monthly when cold and inflated to the inflation pressurerecommended by the vehicle manufacturer on the vehicle placardortire inflation pressure label. (If your
vehiclehastiresofadifferentsizethanthesize indicatedonthevehicleplacardortireinflation pressurelabel,youshoulddeterminetheproper tireinflationpressureforthosetires.)
Asanadded safetyfeature, yourvehiclehas beenequippedwithaTirePressureMonitoring System(TPMS)thatilluminatesalowtire pressuretelltalewhenoneormoreofyourtires issignificantlyunder-inflated.Accordingly,when thelowtirepressuretelltaleilluminates,you shouldstopandcheckyourtiresassoonas possible,andinflatethemtotheproperpressure.Drivingonasignificantlyunder-inflatedtire causesthetiretooverheatandcanleadtotire failure.Under-inflationalsoreducesfuelefficiencyandtire treadlife,andmay affectthe vehicle'shandlingandstoppingability.
Please note that the TPMS is not a substitute for propertiremaintenance, and itisthedriver's responsibility to maintain incorrect tire pressure, even ifunder-inflation has not reached the level to trigger illumination of the TPMS slow tire pressure telltale.
Your vehicle has also been equipped with a TPMS malfunction indicator to indicate when the systemis notoperatingproperly. TheTPMS malfunctionindicatoriscombinedwiththelow tirepressuretelltale. Whenthesystem detectsa malfunction, the telltale will flash for approxi-
matelyoneminuteandthenremaincontinuously illuminated. Thissequencewillcontinueupon subsequentvehiclestart-upsaslongasthe malfunctionexists. Whenthemalfunctionindicatorisilluminated, thesystemmaynotbeable todetectorsignallowtirepressureasintended. TPMSmalfunctionsmayoccurforvarietyof reasons, includingtheinstallationofreplacementoralternatetiresorwheelsonthevehicle thatpreventtheTPMSfromfunctioningproperly. AlwayschecktheTPMSmalfunctiontelltale afterreplacingoneormoretiresorwheelson yourvehicletoensurethatthereplacementor alternatetiresandwheelsallowtheTPMSto continuetofunctionproperly.
Additional information
●The TPMS does not monitor the tire pressure of the spare tire.
- TheTPMSwillactivateonlywhenthe vehicleisdrivenatspeedsabove16MPH (25km/h).Also, thissystemmaynotdetect asuddendropintirepressure(forexamplea flattirewhiledriving).
- Thelowtirepressurewarninglightdoesnot automaticallyturnoffwhenthetirepressure isadjusted. After the tire is inflated to the recommended pressure, the vehicle must be driven at speeds above 16 MPH (25 km/h) to activate the TPMS and turnoff the low tire
pressurewarninglight.Useatirepressure gaugetocheckthetirepressure.
- TheCHECKTIREPRESSUREwarning appearsinthevehicleinformationdisplay whenthelowtirepressurewarninglightis illuminatedandlowtirepressureisdetected. TheCHECKTIREPRESSUREwarning turnsoffwhenthelowtirepressurewarning lightturnsoff.
The CHECKTIREPRESSURE warning appears for a period of time each time the ignition switch is placed in the ON position as long asthe low tire pressure warning light remains illuminated.
The CHECKTIREPRESSURE warning does not appear if the low tire pressure warning light illuminate to indicate a TPMS malfunction.
- Tirepressurerisesandfallsdependingon theheatcausedbythevehicle'soperation andtheoutsidetemperature.Lowoutside temperaturecanlowerthetemperature of theairinsidethetirewhichcancausea lowertireinflationpressure.Thismaycause thelowtirepressurewarninglightto illuminate.Ifthewarninglightilluminates in lowambienttemperature,checkthetire pressureforallfourtires.
Foradditionalinformation,see"Lowtirepres-
surewarninglight"(P.2-12)and"TirePressure MonitoringSystem(TPMS)("P.6-2).

WARNING
- Ifthelowtirepressurewarninglight illuminateswhiledriving,avoidsuddensteeringmaneuversorabrupt braking,reducevehiclespeed,pull offtheroadtoasafelocationand stopthevehicleassoonaspossible.Drivingwithunder-inflatedtires maypermanentlydamagethetires andincreasethelikelihoodoftire failure.Seriousvehicledamage couldoccurandmayleadtoan accidentandcouldresultinserious personalinjury.Checkthetirepressureforallfourtires.Adjustthetire pressureotherecommendedCOLD tirepressureshownontheTireand LoadingInformationlabeltoturn thelowtirepressurewarninglight OFF.Ifyouhaveaflattire,replaceit withasparetireassoonaspossible.(See"Flattire"(P.6-2)forchangingaflattire.)
- Whenasparetireismountedora wheelisreplaced, theTPMSwillnot
5-4 Starting and driving
functionandthelowtirepressure warninglightwillflashforapproximately 1 minute. Thelightwill remainonafter 1 minute. Contact yourNISSANdealerassoonas possiblefortirereplacementand/orsystemresetting.
- ReplacingtireswiththosenotoriallyspecifiedbyNISSANcould affecttheproperoperationofthe TPMS.
- Donotinjectanytireliquidor aerosoltiresealantintothetires, asthismaycauseamalfunction of the tirepressuresensors.

CAUTION
- TheTPMSmaynotfunctionproperly whentewheelsareequippedwith tirechainsorthewheelsareburied insnow.
- Donotplacemetalizedfilmorany metalparts(antenna,etc.)onthe windows.Thismaycausepoorreceptionofthesignalsfromthetire pressuresensors,andtheTPMSwill
notfunctionproperly.
Somedevicesandtransmittersmaytemporarily interferewiththeoperationoftheTPMSand causethelowtirepressurewarninglightto illuminate.Someexamplesare:
●Facilitiesorelectricdevicesusingsimilar radiofrequenciesarenearthevehicle.
- Ifatransmittersettosimilarfrequenciesis beingusedinornearthevehicle.
- Ifacomputer(orsimilarequipment)oraDC/ACconverterisbeingusedinornearthe vehicle.
FCCNotice:
ThisdevicecomplieswithPart15ofthe FCCRules.Operationissubjecttothe followingtwoconditions:(1)Thisdevice maynotcauseharmfulinterference,and (2)thisdevicemustacceptanyinterferencereceived,includinginterferencethat maycauseundesiredoperation.
Note: Changesormodificationsnotexpresslyapprovedbythepartyresponsible forcompliancecouldvoidtheuser's authoritytooperatetheequipment.
AVOIDINGCOLLISIONANDROLL-OVER

WARNING
Failuretooperatethis vehiclein asafe andprudentmannermayresultinloss ofcontroloranaccident.
Be alert and drive defensively at all times. Obey alltrafficregulations.Avoidexcessivespeed, highspeedcornering,orsuddensteering maneuvers,becausethesedrivingpractices couldcauseyoutolose controlof yourvehicle.
As with any vehicle, a loss of control could resultinacollisionwithothervehiclesor objects,orcausethevehicletorollover, particularlyifthelossofcontrolcauses the vehicletoslidesideways.Beattentiveatall times,andavoiddrivingwhentired.Neverdrive whenundertheinfluenceofalcoholodrugs (includingprescriptionorover-the-counter drugswhichmaycausedrowsiness).Always wearyourseatbeltasoutlinedinthe"Seat belts"(P.1-9)ofthismanual,andalsoinstruct yourpassengerstodoso.
Seatbeltshelpreducetheriskofinjuryin collisions and rollovers. In a rollover crash, an unbeltedorimproperlybeltedpersonis
Starting and driving
significantly more likely to be injured or killed than a person properly wearing a seat belt.
ON-PAVEMENTANDOFF-ROAD DRIVINGPRECAUTIONS
Utilityvehicleshaveasignificantlyhigher rolloverratethanothertypesofvehicles.
Theyhavehighergroundclearancethanpassengercarstomakethemcapableofperforming inavarietyofon-pavementandoff-road applications. Thisgivesthemahighercenterof gravitythanordinarycars. Anadvantage of highergroundclearanceisabetterviewofthe road, allowingyoutoanticipateproblems. However, they are not designed for cornering at the same speeds as conventional passenger cars anymore than low slungsportscars are designed to perform satisfactorily under off-road conditions. If all possible, avoid sharp turns or abrupt maneuvers, particularly at high speeds. As with other vehicles of this type, failure to operate this vehicle correctly may result in loss of control or vehiclerollover. Seat belt should reduce risk of injury collisions and rollovers. In a rollover crash, an unbeltedor improperly belted person is significantly more likely to be injured by the person properly wearing a seat belt.
Besuretoread "Drivingsafetyprecautions"
5-6 Starting and driving
(P.5-7).
OFF-ROADRECOVERY
Iftherightsdoorleftsidewheelsleavetheroad surface, maintaincontrolofthevehicleby followingtheprocedurebelow.Plesenotethat thisprocedureisonlyageneralguide. The vehiclemustbedrivenasappropriatebasedon theconditionsofthevehicle,roadandtraffic.
-
Remaincalmanddonotoverreact.
-
Donotapplythebrakes.
-
Maintainafirmgriponthesteeringwheel withbothhandsandtrytoholdastraight course.
-
When appropriate, slowly releasethe acceleratorpedaltogradually slow the vehicle.
-
If there is nothing in the way, steer the vehicle to follow the road while the vehicle speed is reduced. Donot attempt to drive the vehicle back onto other roads surface until vehicles speed is reduced.
-
Whenitissafetodoso, gradually turn the steering wheel until both tires return to the roads surface. When all tires are on the road surface, steer the vehicle to stay in the appropriated driving lane.
- If you decide that it is not a safety return the vehicle to other roads surface based on vehicle, road traffic conditions, gradu
allyslowthevehicletoastopinasafe placeofftheroad.
RAPIDAIRPRESSURELOSS
Rapidairpressurelossora"blow-out"can occurrifthetireispuncturedorisdamageddue tohittingacurborpothole.Rapidairpressure losscanalsobecauusedbydrivingonunder-inflatedtires.
Rapidairpressurelosscanaffectthehandling andstabilityofthevehicle,especiallyathighway speeds.
Helppreventrapidairpressurelossbymaintainingthecorrectairpressureandvisually inspectthetiresforwearanddamage.See "Wheelsandtires"(P.8-29)ofthismanual.
Ifatirerapidlylosesairpressureor"blows-out" whiledrivingmaintaincontrolofthevehicleby followingtheprocedurebelow.Pleasenotethat thisprocedureisonlyageneralguide.The vehiclemustdrivenasappropriatebasedon theconditionsofthevehicle,roadandtraffic.

WARNING
The following actions can increase the chance of losing control of the vehicle if there is a sudden loss of air pressure. Losing control of the vehicle
maycauseacollisionandresultin personalinjury.
•Thevehiclegenerallymovesorpulls inthedirectionoftheflattire.
- Donotrapidlyapplythebrakes.
- Donotrapidlyreleasetheacceleratorpedal.
- Donotrapidlyturnthesteering wheel.
- Remaincalmanddonotoverreact.
- Maintain a firm grip on the steering wheel with both hands and try to hold a straight course.
- When appropriate, slowly releasethe accelerator pedal togradually slow the vehicle.
- Graduallysteerthevehicletoasafelocation offtheroadandawayfromtrafficifpossible.
- Lightly apply the brake pedalt gradually stop the vehicle.
- Turnonthehazardwarningflashersand eithercontactaroadsideemergencyservice tochangethetireorsee"Changingaflat tire"(P.6-3)ofthisOwner'sManual.
DRINKINGALCOHOL/DRUGSAND DRIVING

WARNING
Neverdriveundertheinfluence of alcoholordrugs. Alcohol in the bloodstream reduces coordination, delays reaction time and impairs judgement. Driving after drinking alcohol increases the likelihood of being involved in accident injury yourself and others. Additionally, if you are injured in an accident, alcohol can increase the severity of the injury.
NISSANiscommittedtosafedriving. However, youmustchoosenottodriveundertheinfluence ofalcohol.Everyearthousandsofpeopleare injuredorkilledinalcohol-relatedaccidents. Although the locallawsvaryonwhatis consideredtobelegallyintoxicated,thefactis thatalcoholaffectsallpeopledifferently and mostpeopleunderestimatetheeffectsof alcohol.
Remember, drinking and driving don't mix! And that istrue for drugs, too (over-the-counter, prescription, and illegal drugs). Don't drive if your ability to operate your vehicle is impaired by
alcohol, drugs, or some other physical condition. DRIVING SAFETY PRECAUTIONS
YourNISSANisdesignedforbothnormaland off-roaduse. However, avoiddrivingindeep waterormudasyourNISSANismainly designedforleisureuse, unlikeaconventional off-roadvehicle.
Remember that Two-WheelDrive(2WD) models are less capable than All-WheelDrive (AWD) models for rough road driving and extrication when stuck in deep snow, mud, or the like.
Pleaseobservethefollowingprecautions:

WARNING
- Drivecarefullywhenofftheroad andavoiddangerousareas.Every personwhodrivesorridesinthis vehicleshouldbeseatedwiththeir seatbeltfastened.Thiswillkeep youandyourpassengersinposition whendrivingoverroughterrain.
- Donotdriveacrosssteepslopes. Insteaddriveeitherstraightupor straightdowntheslopes.Off-road vehiclescantip oversidewaysmuch moreeasilythantheycanforwardor
Starting and driving
backward.
- Manyhillsaretoosteepforany vehicle.Ifyoudriveupthem,you maystall.Ifyoudrivedownthem,youmaynotbeabletocontrolyour speed.Ifyoudriveacrossthem,you mayrollover.
- Donotshiftrangeswhiledrivingon downhillgradesasthiscouldcause lossofcontrolofthevehicle.
- Stayalertwhendrivingtothetopof ahill.Atthetoptherecouldbeadrop-offorotherhazardthatcouldcauseanaccident.
-
If you'renginestallsoryoucannot make it to the top of fasteephill, never attempt to turnaround. Your vehicle could tip or rollover. Always back straight down in R (Reverse) range. Never back down in N (Neutral), using only the brake, ast his could cause loss of control.
●Heavybrakinggoingdownahill could cause your brake to overheat and fade, resulting in loss of control and an accident. Apply brakes lightly and use a low range to control your speed. -
Unsecuredcargocanbethrown aroundwhendrivingoverrough terrain.Properlysecureallcargo soitwillnotbethrownforward andcauseinjurytoyouoryour passengers.
•To avoid raising the center of gravity excessively, donot exceed therated capacity of the or refrack (if so equipped) and evenly distribut the load. Secure heavy loads in the cargo area as far forward and as low as possible. Donotequip the vehicle with tires larger than specified this manual. This could cause your vehicletorollover. -
Donotgriptheinsideorspokesof thesteeringwheelwhendrivingoff-road.Thesteeringwheelcould movesuddenlyandinjureyour hands.Insteaddrivewithyourfingersandthumbsontheoutsideof therim.
●Beforeoperatingthevehicle,ensure thatthedriverandallpassengers havetheirseatbeltsfastened.
•Alwaysdrivewiththefloormatsin placeasthefloormaybecamehot. -
Loweryourspeedwhenencounter- ingstrongcrosswinds.Withahigher center of gravity,your NISSANis moreaffectedbystrongsidewinds. Slowerspeedsensurebettervehicle control.
- Donotdrivebeyondtheperformancecapabilityofthetires,even withAWDengaged.
- ForAWDequippedvehicles, donot attempttoraisetwowheelsoffthe groundandshiftthetransmissionto anydriveorreversepositionwith theenginerunning.Doingsomay resultindrivetraindamageorun-expected vehiclemovement which couldresultinseriousvehicledamageorpersonalinjury.
- DonotattempttotestanAWD equippedvehicleona2-wheeldynamometer(suchasthedynamometers used by some states for emissionstesting),orsimilarequipmenteveniftheothertwowheels areraisedofftheground.Makesure youinformtestfacilitypersonnel thatyourvehicleisequippedwith AWD beforeitisplacedon a dynamometer.Usingthewrongtest
IGNITIONSWITCH
equipmentmayresultindrivetrain damage or unexpected vehicle movement which could result in serious vehicled damage or personal injury.
- Whenawheelisoffthegrounddue toanunlevelsurface, donotspin thewheelexcessively. (AWDmodels)
- Accelerating quickly, sharp steering maneuvers sudden braking may cause loss of control.
-
elfatallpossible, avoidsharpturning maneuvers, particularly at high speeds. Your vehicle has a higher center of gravity than a conventional passenger car. The vehicle is not designed for cornering at the same speeds as conventional passenger cars. Failure to operate this vehicle correctly could result in loss of control and/or rollover accident.
●Alwaysusetiresofthesametype, size,brand,construction(bias,bias-beltedorradial),andtreadpattern onallfourwheels.Installtraction devicesonthefrontwheelswhen drivingonslipperyroadsanddrive carefully. -
Besuretocheckthebrakesimmediatelyafterdrivinginmudorwater. See"Brakesystem"(P.5-25)forwet brakes.
- Avoidparkingyourvehicleonsteep hills.Ifyougetoutofthevehicle anditrollsforward,backwardor sideways,youcouldbeinjured.
- Whenever you drive off-road throughsand,mudorwaterasdeep asthewheelhub,morefrequent maintenancemayberequired.See themaintenanceinformationinthe "NISSANServiceandMaintenance Guide".
- Spinningthefrontwheelsonslip-perysurfacesmaycausetheAWD warninglighttoflashandtheAWD systemtoautomaticallyswitchfrom theAWDmodetothe2WDmode. Thiscouldreducetraction.Beespeciallycarefulwhentowingatrailer. (AWDmodels)

CONTINUOUSLYVARIABLETRANSMISSION(CVT)
Theignitionlockis designed sothattheignition switchcannotbeturnedtotheLOCKposition untiltheshiftleverismovedtotheP(Park) position.
- Whenturningtheignitionswitchtothe LOCKposition, makesurethattheshiftlever isintheP(Park)position.
- Whenremovingthekey fromtheignition switch,makesurethattheshift leverisinthe P(Park)position.
Whentheignitionswitchcannotbeturnedto theLOCKposition:
- MovetheshiftlevertotheP(Park)position.
- TurntheignitionswitchslightlyintheON direction.
- TurntheignitionswitchtotheLOCK position.
- Removethekey.
IftheignitionswitchisturnedtotheLOCK position, theshiftlevercannotbemovedfrom theP(Park)position. Theshiftlevercanbe movediftheignitionswitchisintheONposition withthefootbrakepedaldepressed.
TheOFFposition ① isbetweentheLOCKand ACCpositions,althoughitisnotmarkedonthe ignitionswitch.
KEYPOSITIONS
LOCK(0)
Thekeycanonlyberemovedfromtheignition switchatthisposition.
OFF(1)
Thepowersupplyisturnedoff.
ACC(2)
Theelectricalaccessorypoweractivateswithout theengineturnedon.
ON(3)
Theignitionsystemandtheelectricalaccessory poweractivatewithouttheengineturnedon.
START(4)
Theenginestarteractivatesandtheenginewill start.Theignitionswitch,whenreleased,will automaticallyturntotheONposition.

CAUTION
Assoonastheenginehasstarted, releasetheignitionswitchimmediately.
BEFORESTARTINGTHEENGINE
- Makesuretheareaaroundthevehicleis clear.
- Checkfluidlevelssuchasengineoil,coolant,brakefluid,andwindowwasherfluidas frequentlyaspossible,oratleastwhenever yourefuel.
- Checkthatallwindowsandlightsareclean.
- Visuallyinspecttiresfortheirappearance andcondition. Alsochecktiresforproper inflation.
- Lockalldoors.
- Position seat and adjust head restraints/headrests.
- Adjustinsideandoutsidemirrors.
- Fastenseatbeltsandaskallpassengersto dolikewise.
- Checktheoperationofwarninglightswhen theignitionkeyisturnedtotheONposition. (See"Warning/indicatorlightsandaudible reminders"(P.2-9).)
STARTINGTHEENGINE
- Apply the parking brake.
2.MovetheshiftlevertotheP(Park)orN (Neutral)position.(Pisrecommended.) Thestarterisdesignedsothatitdoesnot operateunlesstheshiftleverisineitherof theabovepositions.
-
Cranktheengine with your footoff the accelerator pedal by turning the ignition switch to START. Releasetheswitch when the engine starts. If the engine starts, but failstorun, repeat the above procedure.
-
Iftheengineisveryhardtostartin extremelycoldweatherorwhenrestarting,depresstheacceleratorpedalalittle (approximately1/3tothefloor)andhold itandthencranktheengine.Releasethe acceleratorpedalwhentheenginestarts.
- Iftheengineisveryhardtostartbecause itisflooded,depresstheaccelerator pedalallthewaytothefloorandholdit. Cranktheenginefor5-6seconds.After crankingtheengine,releasetheacceleratorpedal.Cranktheenginewithyour footofftheacceleratorpedalby turningtheignitionswitchtoSTART. Releasetheignitionswitchwhenthe enginestarts.Iftheenginestarts,butfails torun,repeattheaboveprocedure.

CAUTION
Donotoperatethestarterformore than15secondsatatime.Iftheengine doesnotstart,turntheignitionswitch offandwait10secondsbeforecranking again,otherwisethestartercouldbe damaged.
Donotturntheignitionswitchtothe STARTpositionunlesstheengineand starterhavestoppedmoving.Attemptingtostarttheenginewhiletheengine orstarterismovingmaycausedamage.
4.Warm-up
Allowtheenginetoidleforatleast30 secondsafterstarting.Donotracethe enginewhilewarmingitup.Driveat moderatespeedforashortdistancefirst, especiallyincoldweather.Incoldweather, keeptheenginerunningforaminimumof2-3minutesbeforeshuttingitoff.Startingand stoppingtheengineoverashortperiodof timemaymakethevehiclemoredifficultto start.
- Tostoptheengine, shift the shift left to the P(Park) position and turn the ignition switch to the OFF position.
NOTE:
Careshouldbetakentoavoidsituations thatcanleadtopotentialbatterydischarge andpotentialno-startconditionssuchas:
-
Installationorextendeduseofelectronicaccessoriesthatconsumebattery powerwhentheengineisnotrunning (Phonechargers,GPS,DVDplayers, etc.)
-
Vehicle is not driven regularly and/or only drivenshort distances.
In these cases, the battery may need to be charged to maintain battery health.
DRIVINGTHEVEHICLE
CONTINUOUSLYVARIABLETRANSMISSION(CVT)
The Continuously Variable Transmission (CVT) in your vehicle is electronically controlled to produce maximum power and smooth operation. There recommended operating procedures for this transmission are shown on the following pages. Follow these procedures for maximum vehicle performance and driving enjoyment.
EnginepowermaybeautomaticallyreducedtoprotecttheCVTiftheengine speedincreasesquicklywhendrivingon slipperyroadsorwhilebeingtestedon somedynamometers.
Startingthevehicle
- After starting the engine, fully depress the footbrakepedal before moving the shift lever out of the P(Park) position.
ThisCVTisdesignedsothatthefoot brakepedalmustbedepressedbefore shiftingfromP(Park)toanydriving positionwhiletheignitionswitchisin theONposition.
Theshiftlevercannotbemovedoutof theP(Park)positionandintoanyof theotherpositionsiftheignition switchisturnedtotheLOCK,OFFFor ACCpositionorifthekeyisremoved.
5-12 Startinganddriving
- Keep the foot brake pedal depressed, push the shift lever button and moveth shift lever to driving position.
- Releasetheparkingbrake and footbrake pedal, and thengradually start the vehicle in motion.

WARNING
- Donotdepress the accelerator pedalwhile shifting from P(Park) or N(Neutral) to R(Reverse), D(Drive), L(Low). Always depress the brake pedal until shifting is completed. Failure todos could cause out to lose control and have an accident.
- Coldengineidlespeedishigh,so usecautionwhenshiftingintoa forwardorreversegearbeforethe enginehaswarmedup.
- NevershifttoP(Park)orR(Reverse)whilevehicleismoving.Failuretodosocouldcauseyoutolose controlandhaveanaccident.

CAUTION
- Exceptinanemergency, donotshift totheN(Neutral)positionwhile driving. CoastingwiththetransmissionintheN(Neutral)positionmay causes serious damage to the transmission.
- Whenstoppingthevehicleonan uphillgrade, donotholdthevehicle bydepressingtheacceleratorpedal. Thefootbrakeshouldbeusedfor thispurpose.
- Donotdownshiftabruptlyonslip-peryroads. This may cause all loss of control.
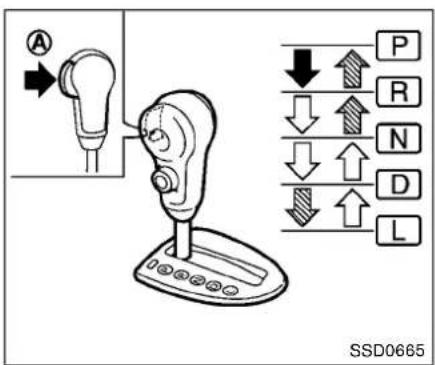
Tomovetheshiftlever,

Pushthebutton brakepedal.

Pushthebutton.

Justmovetheshiftlever.

whiledepressingthe
Shifting
Afterstartingtheengine,fullydepressthebrake pedal,pushtheshiftleverbuttonandmovethe shiftleverfromtheP(Park)positiontoanyofthe desiredshiftpositions.

WARNING
Applytheparkingbrakeiftheshiftlever isinanypositionwhiletheengineis notrunning.Failuretodosocould causethevehicletomoveunexpectedly orrollawayandresultinserious personalinjuryorpropertydamage.
If the ignitionswitchisturned to the OFF for ACC position for any reason while the shift lever is in any positions other than the P(Park), the ignitionswitch cannot be turned to the LOCK position.
If the ignitionswitch cannot be turned to the LOCK position, perform the following steps:
- Apply the parking brakewhenthe vehicle is stopped.
- TurntheignitionswitchtotheONposition whiledepressingthefootbrakepedal.
3.MovetheshiftlevertotheP(Park)position. - TurntheignitionswitchtotheLOCK position.

CAUTION
Topreventtransmissiondamage, use theP(Park)orR(Reverse)positiononly whenthevehicleiscompletelystopped.
P(Park):
Use this position when the vehicle is parked or when starting the engine. Makes sure the vehicle is completely stopped. The brake pedal must be depressed and the shift lever button pushed into movetheshift lever from N (Neutral) or any drive position to P (Park).
Applytheparkingbrake.Whenparkingonahill, applytheparkingbrakefirst,thenmovetheshift levertotheP(Park)position.
R(Reverse):
Use this position to backup. Makes sure the vehicle is completely stopped before selecting the R (Reverse) position. The brake pedal must be depressed and the shift lever button pushed into moveth shift lever from Park, N(Neutral) or any driving position to R (Reverse).
N(Neutral):
Neitherforwardnor reversegearisengaged. Theenginecanbestartedinthisposition.You
Startinganddriving
mayshifttoN(Neutral)andrestartastalled enginewhilethevehicleismoving.
D(Drive):
Use this position for all normal forward driving.
L(Low):
Use this position for maximum engine braking on steepdownhill gradients/climbing steeps slopes and whenever approaching sharp bends. Don't use the L position in any other circumstances.

SPORTmodeswitch
IntheSPORTmode,theengineandtransmissionarecontrolledtosettheenginespeed higherthanintheD(Drive)position.This enhancesthrottleresponsefora "sporty" driving feeling.
ToturnontheSPORTmode, pushtheSPORT modeswitch. The SPORTmodeindicatorlight in the instrumentpanelilluminates. Toturnoff theSPORTmode, pushtheSPORTmode switchagain. The SPORTmodeindicatorlight on the instrumentpanelturnsoff.
If the SPORTmodeindicatorlight does not illuminate when the SPORTmodeswitch is
turnedon, the switchorsystem may have a malfunction. In this case, contact your NISSAN dealer. Even if there is a malfunction in the switchorsystem, this will not affect normal driving.
●TheSPORT modeautomaticallyturnsoffifa malfunctionoccurs.
●TheSPORTmodeonlyoperatesatspeeds ofabove20MPH(30km/h).
- Iftheengineisswitchedoffwiththe SPORT modeon,theSPORTmoderesetstooff whentheengineisrestarted.

CAUTION
•IntheSPORTmode,fueleconomy maybereduced.
- If the overdriveoffmodeissetwhen theSPORTmodeison, theoverdriveoffmodewilltakepriority.
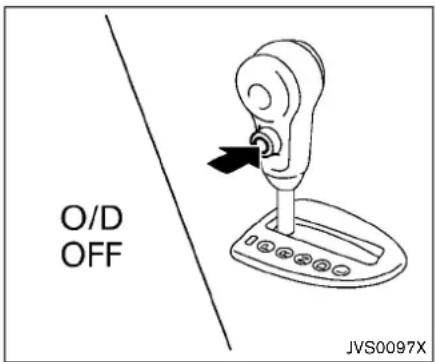
Overdrive(O/D)OFFswitch
WhentheO/DOFFswitchispushedwiththe shiftleverintheD(Drive)position,the indicatorlightintheinstrumentpanelilluminates.
Usetheoverdriveoffmodewhenyouneed improvedenginebraking.
Toturnofftheoverdriveoffmode,pushtheO/D OFFswitchagain.The O/D OFF indicatorlightwill turnoff.
Eachtimetheengineisstarted,orwhentheshift leverisshiftedtoanypositionotherthantheD (Drive)position,theoverdriveoffmodewillbe automaticallyturnedoff.
Acceleratordownshift—InDposition—Forpassingorhillclimbing,fullydepressthe acceleratorpedaltothefloor.Thisshiftsthe transmissiondownintoalowergear,depending onthevehiclespeed.
Highfluidtemperatureprotectionmode Thistransmissionhasahighfluidtemperature protectionmode.Ifthefluidtemperaturebecomestohigh(forexample,whenclimbing steepgradesinhightemperaturewithheavy loads,suchaswhentowingatrailer),engine powerand,undersomeconditions,vehicle speedwillbedecreasedautomaticallytoreduce thechanceoftransmissiondamage.Vehicle speedcanbecontrolledwiththeaccelerator pedal,buttheengineandvehiclespeedmaybe limited.
Fail-safe
Ifthevehicleisdrivenunderextreme conditions,suchasexcessivewheelspinningandsubsequenthardbraking,the fail-safesystemmaybeactivated.TheMIL mayilluminatetoindicatethefail-safe modeisactivated.(See“MalfunctionIndicatorLight(MIL)”(P.2-15).)Thiswill occurevenifallelectricalcircuitsare functioningproperly.Inthiscase,turnthe ignitionswitchtotheOFFpositionand
waitfor10seconds.Thenturntheswitch backtotheONposition.Thevehicle shouldreturntoitsnormaloperating condition.Ifitdoesnotreturntoitsnormal operatingcondition,haveaNISSANdealer checkthetransmissionandrepairifnecessary.

WARNING
Whenthehighfluidtemperatureprotectionmodeorfail-safeoperation occurs, vehiclespeedmaybegradually reduced. Thereducedspeedmaybe lowerthanothertraffic, which could increasethechanceofacollision. Be especially carefulwhendriving.Ifnecessary, pulltothesideoftheroadata safeplaceandallowthetransmission toreturntonormaloperation, orhaveit repairedifnecessary.
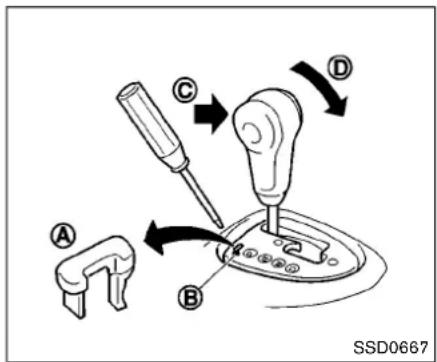
Shiftlockrelease
If the battery charge is low word discharged, the shift lever may not be removed from the P(Park) position even with the brake pedal depressed and the shift lever button pushed.
Tomovetheshiftlever, releasetheshiftlock.
TheshiftlevercanbemovedtotheN(Neutral) position. This allows the vehicle to be removed if the battery is discharged.
Toreleasetheshiftlock, perform the following procedure:
-
TurntheignitionswitchtotheLOCK position, andremovethekey.
-
Apply the parking brake.
- Removetheshiftlockreleasecover usingasuitabletool.
- Pushdowntheshiftlockrelease suitabletool.
- Pushtheshiftleverbutton
shiftlevertotheN(Neutral)position whileholdingdowntheshiftlockrelease.
TurntheignitionswitchtotheONposition.The vehiclemaybemovedtothedesiredlocation.
Replacetheremovedshiftlockreleasecover aftertheoperation.
If the shift lever cannot be removed out of the P (Park) position, have a NISSAN dealer check the CVT system as soon as possible.

WARNING
If the shift lever cannot be moved from the P(Park) position while the engine is running and the brake pedal is depressed, the top lights may not work. Malfunctioning stop lights could cause an accident in injury yourself and others.
PARKINGBRAKE

WARNING
- Besuretheparkingbrakeisfully releasedbeforedriving. Failureto dosocancausebrakefailureand leadtoanaccident.
- Do not releasetheparkingbrake fromoutsidethevehicle.
- Donotusethegearshiftinplaceof theparkingbrake. Whenparking, be suretheparkingbrakeisfully engaged.
- Donotleavechildrenunattendedin avehicle. They could releasethe parking brake and causeanaccident.
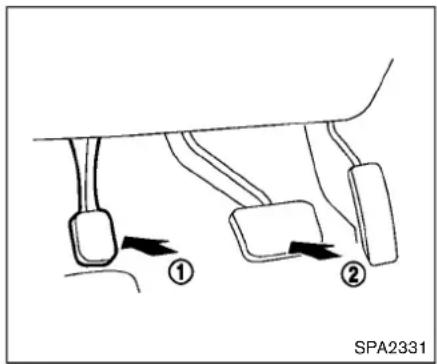
Toapply: Fully depress the parking brake pedal ①.
Torelease:
1.Firmlyapplythefootbrake ②.
2.Depresstheparkingbrakepedal theparkingbrakewillbereleased. ① and
3. Before driving, besure the brakewarning light goes out.
CRUISECONTROL(ifsoequipped)
PRECAUTIONSONCRUISECONTROL
- If the cruise control system malfunctions, it will cancel automatically. The SET indicator on the vehicle information display will then blink to warn the driver.
- If the engine coolant temperature becomes excessively high, the cruise control system will cancel automatically.
- If the SET indicator on the vehicle information display blinks, turn the cruise control mains switch off and havethesystem checked by a NISSAN dealer.
- The SET indicator on the vehicle information display may blink when the cruise control mains switch is turned ON while pushing the ACCEL/RES, COAST/SET or CANCEL switch. Top properly set the cruise control system, perform the following procedures.

WARNING
Donotusethecruise control when driving under the following conditions:
- whenitisnotpossibletokeepthe vehicleatasetspeed
•inheavytrafficorintrafficthat variesinspeed
•onwindingorhillyroads
- onslipperyroads(rain,snow,ice, etc.)
•inverywindyareas
Doingsocouldcausealossofvehicle controlandresultinanaccident.

- ACCEL/RES switch
2.COAST/SETswitch
3.CANCELswitch
4.MAIN(ON-OFF)switch
CRUISECONTROLOPERATIONS
Thecruisecontrol allows driving at a speed between 25 to 89 MPH (40 to 144 km/h) without keeping your foot on the accelerator pedal.
Toturnonthecruisecontrol, pushtheMAIN switchon. The CRUISE indicator on the vehicle information display will illuminate.
Tosetcruisingspeed, acceleratethevehicle tothedesiredspeed, pushtheCOAST/SET switchandreleaseit. (TheSETindicatorlighton
5-18 Startinganddriving
thevehicleinformationdisplaywillilluminate.) Takeyourfootofftheacceleratorpedal.Your vehiclewillmaintainthesetspeed.
- Topassanothervehicle, depress the accelerator pedal. When you are a set the pedal, the vehicle will return to the previously sets speed.
- The vehicle may not maintain the sets speed on winding or hilly roads. If this happens, drivewithout the cruise control.
Tocancelthepresetspeed, useoneofthe followingmethods:
- PushtheCANCELswitch.TheSETindicatoronthevehicleinformationdisplaywill turnoff.
- Tapthebrakepedal. The SET indicator on the vehicle information display will turn off.
- TurntheMAINswitchoff.BoththeCRUISE andSETindicatoronthevehicleinformation displaywillturnoff.
—If you depress the brake pedal while pushing the ACCEL/RES or COAST/SET switch and reset at the cruising speed, the cruise control will disengage. Turn the MAIN switch-off once and then turniton again.
—Thecruisecontrolwillautomatically cancelifthevehicleslowsmorethan8 MPH(12km/h)belowthesetspeed.
—If you movetheshiftlevertotheN (Neutral) position, the cruise control will be canceled.
Toresetatafastercruisingspeed,useone of the following methods:
- Depresstheacceleratorpedal. When the vehicleattainsthedesiredspeed, pushand releasetheCOAST/SETswitch.
- PushandholdtheACCEL/RESswitch. Whenthevehicleattainsthedesiredspeed, releasetheswitch.
- Push, then quickly releasetheACCEL/RES switch. Each time you do this, the sets speed will increase by about 1 MPH (1.6 km/h).
Toresetataslowercruisingspeed,useone of the following methods:
●Lightlytapthebrakepedal. Whenthe vehicleattainsthedesiredspeed, pushthe COAST/SETswitchandreleaseit.
- PushandholdtheCOAST/SETswitch. Releasetheswitchwhenthevehicleslows downtothedesiredspeed.
- Push, then quickly releasethe COAST/SET switch. Each time you do this, the sets speed will decrease by about 1 MPH (1.6 km/h).
Toresumethepresetspeed, pushand releasetheACCEL/RESswitch. The vehicle will resumethelastsetcruisingspeed when the vehiclespeed is over 25 MPH (40 km/h).
BREAK-INSCHEDULE
CAUTION
During the first 1,200 miles (2,000 km), follow the recommendation to obtain maximum engine performance and ensure the future reliability and economy of your new vehicle. Failure to follow the recommendations may result in shortened engine life and reduced engine performance.
- Avoiddrivingforlongperiodsatconstant speed,eitherfastorslow.Donotrunthe engineover4,000rpm.
- Donotaccelerateatfullthrottleinanygear.
- Avoidquickstarts.
●Avoidhardbrakingasmuchaspossible. - Donottowatrailerforthefirst500miles (800km). Youreengine, axleorotherparts could bedamaged.
FUELEFFICIENTDRIVINGTIPS
Followtheseeasy-to-useFuelEfficientDriving Tipstohelpyouachievethemostfueleconomy fromyourvehicle.
-
Usesmoothacceleratorandbrakepedal application.
-
Avoidrapidstartsandstops.
- Usesmooth, gentleaccelerator and brakeapplicationwheneverpossible.
-
Maintainconstantspeedwhilecommutingandcoastwheneverpossible.
-
Maintainconstantspeed.
-
Lookaheadtotryandanticipateand minimizestops.
- Synchronizingyourspeedwithtraffic lightsallowsyoutoreduceyournumber ofstops.
-
Maintainingasteadyspeedcanminimize redlightstopsandimprovefuelefficiency.
-
Use air conditioning (A/C) at higher vehicle speeds.
-
Below40MPH(64km/h), it is more efficient to open windowstocool the vehicle, but reduced engine load.
- Above40MPH(64km/h), it is more efficienttouseA/Ctocoolthevehicle duetoincreasedaerodynamicdrag.
• Recirculating the cool air in the cabin when the A/C is on reduces cooling load.
-
Driveateconomicalspeedsanddistances.
-
Observing the speed limit and not exceeding 60 MPH (97 km/h) (where legally allowed) can improve fuel efficiency due to reduced aerodynamic drag.
- Maintaining as safe following distance behind other vehicles reduces unnecessary braking.
- Safelymonitoringtrafficioanticipate changesinspeedpermitsreducedbrakingandsmoothaccelerationchanges.
-
Selectagearrangesuitabletoroad conditions.
-
Usecruisecontrol.
• Usingcruise controlduringhighway drivinghelpsmaintainasteadyspeed.
- Cruisecontrolisparticularlyeffectivein providingfuelsavingswhendrivingon flatterrains.
-
Planfortheshortestroute.
-
Utilizeamapornavigationsystemto determinethebestroutetosavetime.
-
Avoididling.
- Shuttingoffyourenginewhensafefor stopsexceeding30-60secondssaves
fuelandreducesemissions.
8.Buyanautomatedpassfortollroads.
- Automatedpassespermitdriverstouse speciallanestomaintaincruisingspeed throughthetollandavoidstoppingand starting.
- Winterwarmup.
- Limitidlingtimetominimizeimpacttofuel economy.
- Vehiclestypicallyneednomorethan30 secondsofidlingatstart-uptoeffectively circulatetheengineoilbeforedriving.
- Yourvehiclewillreachitsidealoperating temperaturemorequicklywhiledriving versusidling.
- Keeping your vehicle cool.
- Parkyourvehicleinacoveredparking areaorintheshadowwheneverpossible.
- Whenenteringahotvehicle, opening the windowswillhelptoreducetheinside temperaturefaster, resulting in reduced demand on your A/C system.
INCREASINGFUELECONOMY
- Keepyourenginetunedup.
- Followtherecommended scheduled maintenance.
- Keep the tires inflated to the correct pressure. Low tire pressure increases tire wear and lowers fueleconomy.
- Keepthewheelsincorrectalignment. Improperalignmentincreasestirewearand lowersfueleconomy.
- Usetherecommendedviscosityengineoil. (See "Engineoilandoilfilterrecommendation" (P.9-5).)
ALL-WHEELDRIVE(AWD)(ifso equipped)

WARNING
- For AWDequippedvehicles, donot attempttoraisetwowheelsoffthe groundandshiftthetransmissionto anydriveorreversepositionwith theenginerunning.Doingsomay resultindrivetraindamageorun-expectedvehicle movementwhich couldresultinseriousvehicledamageorpersonalinjury.
- DonotattempttotestanAWD equippedvehicleona2-wheeldynamometer(suchasthedynamometers used by some states for emissionstesting)orsimilarequipmenteveniftheothertwowheels areraisedofftheground.Makesure thatyouinformthetestfacility personnelthatyourvehicleis equippedwithAWDbeforeitis placedonadynamometer. Using thewrongtestequipmentmayresultindrivetraindamageorunexpectedvehiclemovementwhich couldresultinseriousvehicledamageorpersonalinjury.

ALL-WHEELDRIVE(AWD)LOCK SWITCHOPERATIONS
TheAWDLOCKswitchlocatedonthelower sideoftheinstrumentpanel.Thisswitchisused toselecttheAUTOorLOCKmodedepending onthedrivingconditions.
Eachtimeyoupushthelowerpartoftheswitch
Ⓐ ,theAWDmodewillswitch:
AUTO→LOCK→AUTO.
LOCKmode
TheAWDLOCKindicatorlightwill illuminate.

AUTOmode
TheAWDLOCKindicatorlightwillturnoff.
| AWD mode | Wheeldriven | AWD LOCK indicator light | Use conditions |
| AUTO | Distributionoftorque tothefrontandrear wheelschangesautomatically,depending onroadconditionsencountered[100:0]←[50:50]. Thisresultsinimproveddrivingstability.*1 | Turns off. | Fordrivingon pavedor slippery roads |
| LOCK | All-WheelDrive(AWD)*2,*3 | AWD LOCK AWD LOCK | Fordrivingon rough roads |
*1: Whentherotationdifferencebetweenthefront andrearwheelsislarge,theAWDmodemay changefromAUTOtoLOCKforawhile, however,thisisnotamalfunction.
*2: LOCKmodewillchangetoAUTOmode automaticallywhenthevehiclehasbeendriven at a high speed. The AWD LOCK indicator light turnsoff.
*3: LOCKmodewillautomaticallybecancelled whentheignitionswitchisturnedtotheOFF position.
- If the AWDLOCK switch is operated while accelerating or decelerating, or if the ignition switch is turned off, you may feel a jolt. This is normal.
- Theoiltemperatureofpowertrainpartswill increaseifthevehicleiscontinuously operatedunderconditionswherethedifferenceinrotationbetweenhefrontandrear wheelsislarge(wheelslip),suchaswhen drivingthevehicleonroughroadsthrough sand,mudorfreeingastuckvehicle.In thesecases,theAWDwarninglightblinks rapidlyandtheAWDmodechangesto 2WDtoprotectthepowertrainparts.Ifyou stopdrivingwiththeengineidlingandwait untilthewarninglight stops blinking,the AWDreturnstotheAUTOmode.

WARNING
- When driving straight, shift the AWD LOCKswitchtoAUTO.DonotoperatetheAWDLOCKswitchwhen makingaturnorbackingup.
- DonotoperatetheAWDLOCK switchwiththefrontwheelspin-
Startinganddriving
ning. •Engineidlingspeedishighwhile warminguptheengine.Beespeciallycarefulwhenstartingordrivingonslipperysurfaces. •WhenturningthevehicleinLOCK modeonpavedroads,youmayfeel abrakingeffect.Thisisanormal conditionoftheAWDmodel.
| Warning light | Comes on or blinks when |
 | There is a malfunction in the All-Wheel Drive (AWD) system. |
 | The powertrain oil temperature rises extremely. |
 | The difference in wheel rotation is large.SSD0336B |
AWDWARNINGLIGHT
TheAWDwarninglightislocatedinthemeter.
TheAWDwarninglightilluminateswhenthe ignitionswitchisturnedtotheONposition.It turnsoffsoonaftertheengineisstarted. IfanymalfunctionoccursintheAWDsystem
whiletheengineisrunning,thewarninglightwill comeon.
The warninglightmayblinkrapidly(abouttwice persecond)whiletryingtofreeeastuckvehicle duetohighpowertrainoiltemperature.The drivingmodemaychangeto2WD.AUTOmode maychangetoLOCKmodebeforethewarning lightblinks.Ifthewarninglightblinksrapidly duringoperation,stopthevehiclewiththe engineidlinginasafeplaceimmediately.Then ifthelightturnsoffafterawhile,youcan continuedriving.
Alargedifferencebetweenthediametersof frontandrearwheelswillmakethewarninglight blinkslowly(aboutoncepertwoseconds).Pull offtheroadinasafearea, andidletheengine. Checkthatalltiresizesarethesame, tire pressureiscorrectandtiresarenotwom.
CAUTION
- If the warning light remains after the above operation, have your vehicle checked by a NISSAN dealer as soon as possible.
- If the warning light comes on while driving theremaybeam malfunction in the AWD system. Reducethe vehiclespeed and have your vehicle
PARKING/PARKINGONHILLS
checkedbyaNISSANdealeras soonaspossible.
- Thepowertrainmaybedamaged if you continued driving with the warning light blinking rapidly.
- Neverdriveondryhardsurface roadsintheLOCKmode,asthis willoverloadthepowertrainand maycauseaseriousmalfunction.
①

natural_image
Diagram showing a cylindrical object with internal structure and an upward arrow, adjacent to a textured surface (no text or symbols)②

natural_image
Diagram showing a container with arrows indicating upward movement, alongside a textured surface (no text or symbols)③
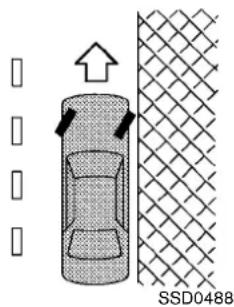

WARNING
- Donotstoporparkthevehicleover flammablematerialssuchasdry grass,wastepaperorrags.They mayigniteandcauseafire.
- Safeparkingproceduresrequire thatboththeparkingbrakebeset andthetransmissionplacedintoP (Park).Failuretodosocouldcause thevehicletomoveunexpectedlyor rollawayandresultinanaccident. Makesuretheshiftleverhasbeen pushedasfarforwardasitcango
and cannot be moved without depressing the footbrakepedal.
- Neverleavetheengine running while the vehicle is unattended.
-
Donotleavechildrenunattended insidethevehicle.Theycouldunknowinglyactivateswitchesorcontrols.Unattendedchildrencould becomeinvolvedinseriousaccidents.
-
Firmly apply the parking brake.
2.MovetheshiftlevertotheP(Park)position.
ELECTRICPOWERSTEERING SYSTEM
-
To help prevent the vehicle from rolling into traffic when parked on an incline, it is good practicetoturn the wheels as illustrated.
-
HEADEDDOWNHILLWITHCURB: ① Turnthewheelsintothecurbandmove thevehicleforwarduntilthecurbside wheelgentlytouchesthecurb.
- HEADEDUPHILLWITHCURB: ②
Turnthewheelsawayfromthecurband movethevehiclebackuntilthecurbside wheelgentlytouchesthecurb.
• HEADEDUPHILLORDDOWNHILL, NO CURB: ③
Turnthewheelstowardthesideofthe roadsothevehiclewillmoveawayfrom thecenteroftheroadifitmoves.
- TurntheignitionswitchtotheLOCK positionandremovethekey.

WARNING
- If the engine is not running, is turned off while driving, the power assist for the steering will not work. Steering will be hard to operate.
- When the electric power steering warning light illuminates with the engineer running, the power assist for the steering will cease operation. You will still have control of the vehicle but the steering will be hard to operate.
The electric power steering system is designed to provide power assist while driving to operate the steering wheel with light force.
Whenthesteeringwheelisoperatedrepeatedly orcontinuouslywhileparkingordrivingatavery lowspeed,thepowerassistforthesteering wheelwillbereduced.Thisistoprevent overheatingoftheelectricpowersteering systemandprotectitfromgettingdamaged. Whilethepowerassistisreduced,steering wheeloperationwillbecomeheavy.Whenthe temperatureoftheelectricpowersteering systemgoesdown,thepowerassistlevelwill returntonormal.Avoidrepetingsuchsteering
wheeloperationsthatcouldcausetheelectric powersteeringsystemtooverheat.
You may hear asound when the steering wheel is operated quickly. However, this is not a malfunction.
If the electric power steering warning light PS illuminates while the engine is running, it may indicate the electric power steering system is not functioning properly and may need servicing. Have the electric power steering system checked by a NISSAN dealer. (See "Electric power steering warning light" (P.2-11).)
Whenthelectricpowersteeringwarninglight illuminateswiththeengineerunning,thepower assistforthesteeringwillceaseoperation.You will still have control of the vehicle. However, greatersteering effortisneeded, especially in sharpturnsandatlowspeeds.
BRAKESYSTEM
BRAKINGPRECAUTIONS
Thebrakesystemhastwoseparatehydraulic circuits. Ifonecircuitmalfunctions, you will still have braking attwowheels.
Youmayfeelasmalclickandhearasound whenthebrakepedalisfullydepressedslowly. Thisisnotamalfunctionandindicatesthatthe brakeassistmechanismisoperatingproperly.
Vacuumassistedbrakes
Thebrakeboosteraidsbrakingbyusingengine vacuum. If the engine stops, you can stop the vehicle by depressing the brake pedal. However, greater foot pressure on the brake pedal will be required to stop the vehicle and the stopping distance will be longer.
Usingthebrakes
Avoidrestingyourfootonthebrakepedalwhile driving. This will cause overheating of the brakes, wearing out the brake and pads faster and reduce gasmileage.
To help reduce brakewear and to prevent the brakes from overheating, reduces speed and downshift to alower gear before going down a slope or long grade. Overheated brakes may reduce braking performance and could result in loss of vehicle control.

WARNING
- While driving on a slipper surface, be careful when braking, accelerating downshifting. Abrupt braking or accelerating could cause the wheelstoskid and result in an accident.
- Iftheengineisnotrunningoris turnedoffwhiledriving,thepower assistforthebrakeswillnotwork. Brakingwillbeharder.
Wetbrakes
Whenthevehicleiswashedordriventhrough water,thebrakesmaygetwet.Asaresult,your brakingdistancewillbelongerandthevehicle maypulltoonesideduringbraking.
Todrybrakes, drivethevehicleatasafespeed whilelightlytappingthebrakepedaltoheat-up thebrakes. Do this until the brakes return to normal. Avoid driving the vehicle at high speeds until the brakes function correctly.
Breakintheparkingbrakeshoeswheneverthe stoppingeffectoftheparkingbrakeisweakened orwhenevertheparkingbrakeshoesand/or drums/rotorsarereplaced,inordertoassurethe bestbrakingperformance.
This procedure is described in the vehicle servicemanual and can be performed by a NISSAN dealer.
ANTI-LOCKBRAKINGSYSTEM(ABS)

WARNING
•The Anti-lock Braking System(ABS) is asophisticated device, but it cannot prevent accidents resulting from careless dangerous driving techniques. It can help maintain vehicle controlduring braking on slipperysurfaces. Remember that stopping distances on slipperysurfaces will be longer than on normal surfaces even with ABS. Stopping distances may also belong on rough, gravel or snow covered roads, orify you are using tire chains. Always maintain as a safe distance from the vehicle in front of you. Ultimately, the driver is responsible
Startinganddriving
forsafety.
●Tiretypeandconditionmayalso affectbrakingeffectiveness.
—Whenreplacingtires,installthe specifiedsizeoftiresonallfour wheels.
—Wheninstallingasparetire, makesurethatitistheproper sizeandtypeasspecifiedonthe TireandLoadingInformation label.See“Tireandloading informationlabel”(P.9-10)of thismanual.
—Fordetailedinformation,see "Wheelsandtires"(P.8-29)of thismanual.
The Anti-lock Braking System (ABS) controls the brakessothewheels donotlock during hard braking or when braking on slipperysurfaces. The system detect stherotationspeed at each wheel and variesthe brake fluid pressure to prevent each wheelfrom locking and sliding. By preventing each wheelfrom locking, the system helps the driver maintain steering control and helpstominimizes werving and spinning on slipperysurfaces.
Usingthesystem
Depressthebrakepedalandholditdown. Depressthebrakepedalwithfirmsteady pressure, but donotpumpthebrakes. The ABSwilloperatetopreventthewheelsfrom lockingup. Steerthevehicletoavoidobstacles.

WARNING
Donotpumpthebrakepedal.Doingso mayresultinincreasedstoppingdistances.
Self-testfeature
TheABSincludeselectronicsensors,electric pumps,hydraulicsolenoidsandacomputer.The computerhasabuilt-indiagnosticfeaturethat teststhesystemeachtimeyoustarttheengine andmovethevehicleatalowspeedinforward orreverse.Whentheself-testoccurs,youmay heara"clunk"noiseand/orfeelapulsationinthe brakepedal.Thisisnormalanddoesnot indicateamalfunction.Ifthecomputersenses amalfunction,itswitchestheABSoffand illuminatestheABSwarninglightonthe instrumentpanel.Thebrakesystemthenoper- atesnormally,butwithoutanti-lockassistance.
If the ABS warning light illuminates during the
self-testorwhiledriving,havethevehicle checkedbyaNISSANdealer.
Normaloperation
TheABSoperatesatspeedsabove3to6MPH (5to10km/h). Thespeedvariesaccordingto roadconditions.
When the ABS sense sthat one or more wheels are closetolocking up, the actuator rapidly applies and releases hydraulic pressure. This action is similar to pumping the brakes very quickly. You may feel up pulsation in the brake pedaland hearanoise from under the hoodor feel vibration from the actuator when it is operating. This is normal and indicate that the ABS is operating properly. However, the pulsation may indicate that road conditions are hazardous and extracare is required while driving.
VEHICLEDYNAMICCONTROL(VDC) SYSTEM
The Vehicle Dynamic Control (VDC) system uses various sensorstomonitor driver inputs and vehicle motion. Under certain driving conditions, the VDC system help stop performance following functions.
- Controlsbrakepressuretoreducewheel slipononeslippingdrivewheelsopoweris transferredtoanonslippingdrivewheelon thesameaxle.
- Controlsbrakepressureandengineoutput toreducedrivewheelslipbasedonvehicle speed(tractioncontrolfunction).
- Controlsbrakepressureatindividualwheels andengineoutputtohelpthedrivermaintain controlofthevehicleinthefollowing conditions:
—understeer(vehicletendstonotfollow thesteeredpath despite increased steeringinput)
—oversteer(vehicletendstospindueto certainroadordrivingconditions).
The VDC system can help the driver to maintain control of the vehicle, but it cannot prevent loss of vehicle control in all drivings situations.
When the VDC system operates, the VDC warning light in the instrument panelflashes sonotethefollowing:
- Theroadmaybelipperyorthesystemmay determinesomeactionisrequiredtohelp
keepthevehicleonthesteeredpath.
- Youmayfeelapulsationinthebrakepedal andhearanoiseorvibrationfromunderthe hood. Thisisnormalandindicatesthatthe VDCsystemisworkingproperly.
- Adjustyourspeedanddrivingtotheroad conditions.
See "VehicleDynamicControl(VDC)warning light" (P.2-14).
Ifamalfunctionoccursinthesystem,theVDC warninglight illuminatesintheinstrument panel.TheVDCsystemautomaticallyturnsoff.
TheVDCOFFswitchisusedtoturnofftheVDC system.TheVDCoffindicatorlight illuminatestoindicatetheVDCsystemisoff.When theVDCswitchisusedtoturnoffthesystem, theVDCsystemstilloperatestoppreventone drivewheelfromslippingbytransferringpower toanonslippingdrivewheel.TheVDCwarning light flashesifthisoccurs.AllotherVDC functionsareoff,andtheVDCwarninglight willnotflash.TheVDCsystemisautomatically resettoonwhentheignitionswitchisplacedin theoffpositionthenbacktotheonposition.
See "VehicleDynamicControl(VDC) warning light" (P.2-14) and "VehicleDynamicControl (VDC) off indicator light" (P.2-16).
Thecomputerhasabuilt-indiagnosticfeature thatteststhesystemeachtimeyoustartthe
engineandmovethevehicleforwardorin reverseataslowspeed.Whentheself-test occurs,youmayheara"clunk"noiseand/orfeel apulsationinthebrakepedal.Thisisnormaland isnotanindicationofamalfunction.

WARNING
•TheVDCsystemisdesignedtohelp thedrivermaintainstabilitybut doesnotpreventaccidentsdueto abruptsteeringoperationathigh speedsorbycarelessordangerous drivingtechniques.Reducevehicle speedandbeespeciallycareful whendrivingandcorneringonslipperysurfacesandalwaysdrivecarefully.
- Donotmodifythevehicle'ssuspension.Ifsuspensionpartssuchas shockabsorbers,struts,springs, stabilizer bars,bushings and wheelsarenotNISSANrecommendedforyourvehicleorare extremelydeteriorated,theVDC systemmaynotoperateproperly. Thiscouldadverselyaffectvehicle handlingperformance,andtheVDC warninglight mayilluminate.
Startinganddriving
COLDWEATHERDRIVING
- Ifbrakerelatedpartssuchasbrake pads, rotorsandcalipersarenot NISSANrecommendedorareextremelydeteriorated, the VDCsystem maynotoperateproperly and the VDCwarninglight mayilluminate.
- Ifenginecontrolrelatedpartsare notNISSANrecommendedorare extremelydeteriorated,theVDC warninglight mayilluminate.
- Whendrivingonextremelyinclined surfacesuchashigherbanked corners,theVDCsystemmaynot operateproperlyandtheVDCwarninglight mayilluminate.Donot driveonthesetypesofroads.
- Whendrivingonanunstablesurfacesuchasaturntable,ferry, elevatororramp,theVDCwarning light mayilluminate.Thisisnot amalfunction.Restarttheengine afterdrivingontoastablesurface.
- If wheels sortires other than the NISSAN recommended ones are used, the VDC system may not operate properly and the VDC warning light may illuminate.
•TheVDCsystemisnotasubstitute forwintertiresortirechainsona snowcoveredroad.
FREEINGAFROZENDOORLOCK
Topreventadoorlockfromfreezing,apply deicerthroughthekeyhole.Ifthelockbecomes frozen,heatthekeybeforeinsertingitintothe keyholeorusetheremotekeylessentrykeyfob.
ANTI-FREEZE
Inthewinterwhenitisanticipatedthatthe outside temperature will drop below 32°F (0°C), checktheanti-freezetoassureproperwinter protection. For additional information, see "Enginecoolingsystem" (P.8-7).
BATTERY
If the battery is not fully charged during extremely cold weather conditions, the battery fluid may freeze and damage the battery. To maintain maximum efficiency, the battery should be checked regularly. For additional information, see "Battery" (P.8-13).
DRAININGOFCOOLANTWATER
Ifthevehicleistobeleftoutsidewithoutantifreeze,drainthecoolingsystem,includingthe engineblock.Refillbeforeoperatingthevehicle. Fordetails,see "Engine coolingsystem"(P.8-7).
TIREEQUIPMENT
SUMMERtireshaveatreaddesignedtoprovide superiorperformanceondrypavement. However, the performance of these tires will be substantially reduced in snowy and dry conditions. If you operate your vehicle on snowy or icy roads, NISSAN recommend the use of MUD & SNOW or ALL SEASON tires on all four wheels. Consulta NISSAN dealer for the tire type, size, speed rating and availability information.
Foradditionaltractiononicyroads,studded tiresmaybeused.However,someU.S.states prohibittheiruse.Checklocal,stateand provinciallawsbeforeinstallingstuddedtires.
Skidandtractioncapabilitiesofstudded snowtires,onwetordrysurfaces,maybe poorerthanthatofnon-studdedsnow tires.
Tirechainsmaybeused. Fordetails, see "Tire chains" (P.8-34) of this manual.
All-WheelDrive(AWD)model
If you install snowtires, they must also be the same size, brand, construction and tread pattern on all four wheels.
SPECIALWINTEREQUIPMENT
It is recommended that the following items be carried in the vehicle during winter:
- Ascraper and stiff-bristled brushtoremove ice and snow from the windows and wiper blades.
- Asturdy, flatboardtobeplaced under the jacktogiveitfirmsupport.
- Ashoveltodigthevehicleoutofsnow-drifts.
- Extrawindowwasherfluidtorefillthe reservoirtank.
DRIVINGONSNOWORICE

WARNING
- Wetice(32°F,0°Candfreezingrain), very cold snow or ice can beslick and very hard to drive on. The vehicle will have much less traction or "grip" under these conditions. Try to avoid driving on wet ice until the road dissalted or sanded.
-
Whateverthecondition,drivewith caution.Accelerateandslowdown withcare.Ifacceleratingordown-shiftingtoofast,thedrivewheels willloseevenmoretraction.
-
Allowmorestoppingdistanceunder theseconditions.Brakingshouldbe startedsoonerthanondrypavement.
- Allowgreaterfollowingdistances onslipperyroads.
- Watchforslipperyspots(glareice). These may appear on otherwise clear road in shaded areas. If a patch of ice is seen ahead, brake before reaching it. Try nottobrake while on the ice, and avoid any sudden steering maneuvers.
- Donotusecruisecontrol(ifso equipped) onslipperyroads.
- Snowcan trapdangerous exhaust gasesundryourvehicle. Keep snowclearoftheexhaustpipe and fromaroundyourvehicle.
MEMO
5-30Startinganddriving
6Incaseofemergency
Hazardwarningflasherswitch....6-2
Flattire....6-2
TirePressureMonitoringSystem(TPMS)......6-2
Changingaflattire....6-3
Jumpstarting....6-9
Pushstarting....6-11
If your vehicle overheats....6-11
Towingyourvehicle....6-12
TowingrecommendedbyNISSAN......6-13
Vehiclerecovery(freeingastuckvehicle)......6-14
- Ifstoppingforanemergency, be suretomovethevehiclewelloffthe road.
- Donotusethehazardwarning flasherswhilemovingonthehighwayunlessunusualcircumstances forceyoutodrivesoslowlythat yourvehiclemightbecomeahazard
toothertraffic.
-Turnsignalsdonotworkwhenthe hazardwarningflasherlightsare on.
Theflashercanbeactuatedwiththeignition switchinanyposition.
Somestatelawsmayprohibittheuseof thehazardwarningflasherswitchwhile driving.
FLATTIRE
TIREPRESSUREMONITORINGSYSTEM(TPMS)
ThisvehicleisequippedwiththeTirePressureMonitoringSystem(TPMS).Itmonitorstirepressureofalltiresexceptthespare.WhenthelowtirepressurewarninglightislitandtheCHECKTIREPRESSUREwarningappearsonthevehicleinformationdisplay,oneormoreofoyurtiresissignificantlyunder-inflated.Ifthevehicleisbeingdrivenwithlowtirepressure,theTPMSwillactivateandwarnyouofitbythelowtirepressurewarninglight.Thissystemwillactivateonlywhenthevehicleisdrivenatspeedsabove16MPH(25km/h).Formoredetails,see"Warning/indicatorlightsandaudiblereminders"(P.2-9)and"TirePressureMonitoringSystem(TPMS)("P.5-3).

WARNING
- Ifthelowtirepressurewarninglight illuminateswhiledriving,avoidsuddensteeringmaneuversorabrupt braking,reducevehiclespeed,pull offtheroadtoasafelocation and stopthevehicleassoonaspossible.Drivingwithunder-inflatedtires maypermanentlydamagethetires andincreasethelikelihoodoftire
failure.Seriousvehicledamage couldoccurandmayleadtoan accidentandcouldresultinserious personalinjury.Checkthetirepressureforallfourtires.Adjustthetire pressuretotherecommendedCOLD tirepressureshownontheTireand LoadingInformationlabeltoturn thelowtirepressurewarninglight OFF.Ifyouhaveaflattire,replaceit withasparetireassoonaspossible.
- Whenasparetireismountedora wheelisreplaced, the TPMS will not function and the low tire pressure warning light will flash for approximately 1 minute. The light will remain on after 1 minute. Contact your NISSAN dealer as soon as possible for a replacement and or system resetting.
- ReplacingtireswiththosenotoriginallyspecifiedbyNISSANcould affecttheproperoperationofthe TPMS.
- Donotinjectanytireliquidor aerosoltiresealantintothetires, asthismaycauseamalfunctionof
thetirepressuresensors.
CHANGINGAFLATTIRE
If you have a flattire, follow the instructions below.
Stoppingthevehicle
- Safelymovethevehicleofftheroadand awayfromtraffic.
- Turnonthehazardwarningflashers.
- Parkonalevel surface and apply the parking brake. Movetheshiftlevertothe P(Park) position.
- Turnofftheengine.
- Raisethehood to warn other traffic, and to signal professional road assistance personnel that you need assistance.
- Have all passengers get out of the vehicle and stand in a safe place, away from traffic and clear of the vehicle.

WARNING
- Makesuretheparkingbrakeis securelyappliedandthetransmissionisshiftedintotheP(Park) position.
●Neverchangetireswhenthevehicle is on a slope, ice or slippery areas. Thisishazardous.
- Neverchangetiresifoncoming traffic is close to your vehicle. Wait forprofessionalroadassistance.

Blockingwheels
Placesuitableblocks ① atboththefrontand backofthewheeldiagonallyoppositetheflat tiretopreventthevehiclefrommovingwhenitis jackedup.

WARNING
Besuretoblockthewheelasthe vehiclemaymoveandresultinpersonal injury.

natural_image
Line drawing of a car interior showing the rear compartment with a numbered component (no text or symbols)Gettingthesparetireandtools
- Openthelfitgate.
- Removethecargocover(ifsoequipped). (See "Cargocover"(P.2-36).)
- Liftuptheluggagefloorboard orseparatetype). ① (foldable

natural_image
Diagram showing two car interior compartments with directional arrows indicating movement, no text or symbols present- Removethelidsoftheluggagesideboxes.
6-4 Incaseofemergency
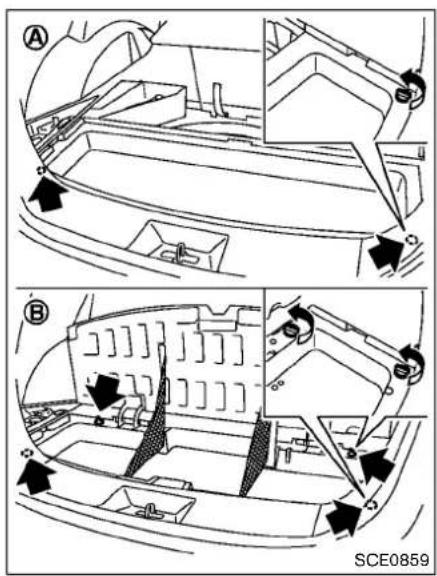
- Removetheluggagefloorbox(TypeAorB) by turning the clips counterclockwise.

natural_image
Mechanical assembly diagram showing two sequential steps of a lever mechanism (no text or labels)Jackingtools
6. Removethejackingtoolsandthesparetire.
Jackingtools: Removethejackbyturningit, thenremovetheothertools.
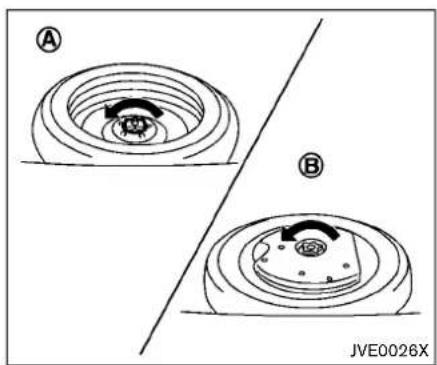
Sparetire
TypeA(ifsoequipped):
Rotatetheclampuntilcanberemovedthen removethesparetire.
TypeB(ifsoequipped):
Rotatetheclampuntilcanberemovedthen relocatethesubwoofertoasideofthecargo areaandremovethesparetire.

Removingwheelcover(ifsoequipped)

WARNING
Neveruseyourhandstoremovethe wheelcover. This may cause personal injury.
Toremovethewheelcover, usethejackrod as illustrated. ①
Applycloth ② between the wheeland jack rod to prevent damaging the wheeland wheel cover.
Jackingupthevehicleandremovingthe damagedtire

WARNING
- Nevergetunderthevehiclewhileit issupportedonlybythejack.Ifitis necessarytoworkunderthevehicle, supportitwithsafetystands.
- Useonlythejackprovidedwithyour vehicletolifthevehicle.Donotuse thejackprovidedwithyourvehicle onothervehicles.Thejackisdesignedforliftingonlyyourvehicle duringatirechange.
- Use the correct jack-uppoints. Never use any other part of the vehicle for jacksupport.
- Neverjackupthevehiclemorethan necessary.
- Neveruseblocksonorunderthe jack.
- Donotstartorruntheenginewhile vehicleisonthejack,asitmay causethevehicletomove.
- Donotallowpassengerstostayin thevehiclewhileitisonthejack.
Carefullyreadthecautionlabelattached tothejackbodyandthefollowinginstructions.
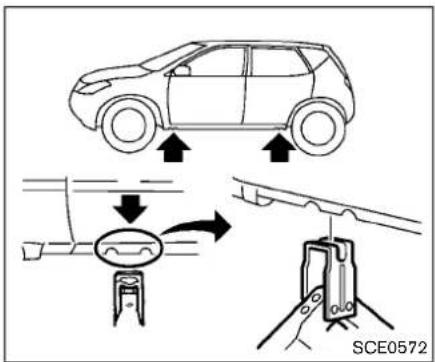
Jack-uppoint
- Placethejackdirectlyunderthejack-up pointasillustratedsothetopofthejack contactsthevehicleatthejack-uppoint. Align thejackheadbetweenthetwo notchesinthefrontortherearasshown. Alsofitthegrooveofthejackheadbetween thenotchesasshown.
Thejackshouldbeusedonlevelfirm ground.
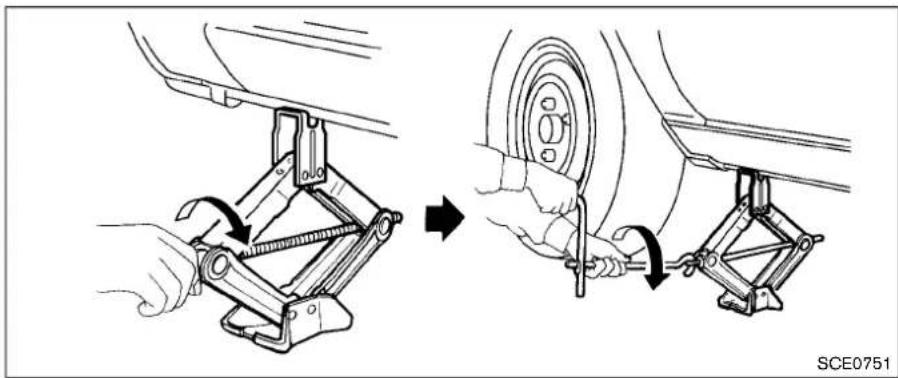
natural_image
Mechanical assembly diagram showing two steps of car suspension system with tool and wheel (no text or symbols)-
Looseneachwheelnutoneortwoturnsby turningcounterclockwisewiththewheelnut wrench. Donotremovethewheelnuts untilthetireisofftheground.
-
Toliftthevehicle, securelyholdthejacklever androdwithbothhandsasshownabove. Carefullyraisethevehicleuntilthetireclears theground.Removethewheelnuts,and thenremovethetire.

Installingthesparetire
Thesparetireisdesignedforemergency use.(Seespecificinstructionsunderthe heading"Wheelsandtires"(P.8-29).)
- Cleananymudordirtfromthesurface betweenthewheelandhub.
- Carefully put the spare tire on and tighten the wheel nuts fingertight. Check that all the wheel nuts contact the wheels surface horizontally.
- With the wheel nut wrench, tighten wheel nuts alternately and evenly in these sequence as illustrated (①, ②, ③, ④, ⑤), more than 2 times, until they are tight.
6-8 Incaseofemergency
- Lowerthevehicleslowlyuntilthetire touchestheground. Then, withthewheel nutwrench, tightenthewheelnutssecurely inthesequenceasillustrated. Lowerthe vehiclecompletely.

WARNING
- Incorrectwheelnutsorimproperly tightenedwheelnutscancausethe wheeltobecomelooseorcomeoff. Thiscouldcauseanaccident.
- Donotuseoilorgreaseonthe wheelstudsornuts. This could cause thenutstobecomeloose.
- Retightenthewheelnutswhenthe vehiclehasbeendrivenfor600 miles(1,000km)(alsoincasesofa flattire,etc.).
- As soon as possible, tighten the wheel nuts to the specified torque withatorquewrench.
Wheelnuttighteningtorque: 80ft-lb(108N·m)
Thewheelnutsmustbekeptightened to specificationatall times.Itis recommendedthatwheelnutsbetigh-
tenedtospecificationsateachlubricationinterval.
- AdjusttirepressuretotheCOLD pressure.
COLDpressure:
Afterthevehiclehasbeenparkedfor threehoursormoreordrivenlessthan 1mile(1.6km).
COLDtirepressuresareshownonthe TireandLoadingInformationlabel affixedtothedriversidecenterpillar.
Stowingthedamagedtireandthetools
- Securelystorethedamagedtire,jackand toolsinthestoragearea.
- Replacetheluggagefloorbox.
- Replacethelidsontheluggagesideboxes.
- Closetheluggagefloorboard.
- Replacethecargocover(ifsoequipped).
6.Closetheliftgate.

WARNING
•Alwaysmakesurethat the spare tire and Jackingequipmentareproperly secured afteruse. Suchitems can becomedangerousprojectilesinan
JUMPSTARTING
accidentorsuddenstop.
- TheT-typesparetireandsmallsize sparetirearedesignedforemergencyuse.Seespecificinstructions undertheheading"Wheelsand tires"(P.8-29).
Tostartyourenginewithaboosterbattery,the instructionsandprecautionsbelowmustbe followed.

WARNING
- Ifdoneincorrectly,jumpstarting canleadtoabatteryexplosion, resultinginsevereinjuryordeath. Itcouldalsodamageyourvehicle.
- Explosivehydrogengasisalways presentinthevicinityofthebattery. Keepallsparksandflamesaway fromthebattery.
- Donotallowbatteryfluidtocome intocontactwitheyes,skin,clothing orpaintedsurfaces.Batteryfluidis acorrosivesulfuricacidsolution whichcancausesevereburns.If thefluidshouldcomeintocontact withanything,immediatelyflushthe contactedareawithwater.
- Keepthebatteryoutofthereachof children.
•Theboosterbatterymustberatedat 12volts.Useofanimproperlyrated batterycandamageyourvehicle.
- Wheneverworkingonornea battery,alwayswearsuitableeye protectors(forexample,gogglesor industrialsafetyspectacles)and removerings,metalbands,orany otherjewelry.Donotleanoverthe batterywhenjumpstarting.
- Donotattempttojumpstarta frozenbattery.Itcouldexplode andcauseseriousinjury.
- Yourvehiclehasanautomaticenginecoolingfan.Itcouldcomeonat anytime.Keephandsandother objectsawayfromit.


WARNING
Alwaysfollowtheinstructionsbelow. Failuretodosocouldresultindamage tothechargingsystemandcause personalinjury.
- If the booster battery is in another vehicle
⑧ ,positionthetwovehicles( ⑨ and ⑩ ) tobringtheirbatteriesintocloseproximityto eachother.
Donotallowthetwovehiclestotouch.
- Apply the parking brake. Movetheshift lever to the P(Park) position. Switchoffall unnecessary electrical systems (lights, heater, air conditioner, etc.).
- Removeventcapsonthebattery(ifso equipped). Coverthebatterywithafirmly wrungoutmoistclothtoreduceexplosion hazard.
- Connectjumpercablesinthesequenceas illustrated(① → ② → ③ → ④).

CAUTION
- Alwaysconnectpositive(+)topositive(+)andnegative(-)tobody ground(forexample,asillustrated), nottothebattery.
-
Makesurethejumpercablesdonot touchmovingpartsintheengine compartmentandthatthecable clampsdonotcontactanyother metal.
-
Start the engine of the booster vehicle and let it run for a few minutes.
-
Keep the engines speed of the booster vehicle Ⓑ at about 2,000rpm, and start the engine of the vehicle Ⓐ being jump
started.

CAUTION
Donotkeepthestartermotorengaged formorethan10seconds.Iftheengine doesnotstartrightaway,turnthe ignitionswitchtotheOFFposition andwait10secondsbeforetrying again.
- After starting your engine, carefully disconnect then negative cable and then the positive cable (④ → ③ → ② → ①).
- Replacetheventcaps(ifsoequipped). Be suretodisposeoftheclothusedtocover theventholesasitmaybecontaminated withcorrosiveacid.
PUSH STARTING
Donotattempttostarttheenginebypushing.

CAUTION
ContinuouslyVariableTransmission (CVT)modelscannotbepush-started ortow-started.Attemptingtodosomay causetransmissiondamage.
IF YOUR VEHICLE OVERHEATS

CAUTION
- Donotcontinuetodriveify your vehicleoverheats.Doingsocould causeenginedamageorvehicle fire.
•To avoid the danger of being scalded,neverremovetheradiator capwhiletheengineisstillhot. Whentheradiatorcapisremoved, pressurizedhotwaterwillspurtout, possiblycausingseriousinjury.
- Donotopenthehoodifsteamis comingout.
If your vehicle is overheating (indicated by an extremely high temperature gaugereading), or if you feel alack of engine power, detect abnormal noise, etc., takethe following steps:
- Move the vehicle safely off the road, apply the parking brake and movetheshiftleverto the P(Park) position.
Donotstoptheengine.
- Turnoff the air conditioner. Open all the windows, mov the heater or air conditioner temperature control to maximum hot and fan control to high speed.
3.Getout ofthevehicle.Look andlistenfor steamorcoolantescapingfromtheradiator beforeopeningthehood.(Ifsteamor coolantisescaping,turnofftheengine.) Donotopenthehoodfurtheruntilnosteam orcoolantcanbeseen.
- Opentheenginehood.

WARNING
Ifsteamorwateriscomingfromthe engine,standcleartopreventgetting burned.
- Visuallycheckdrivebeltsfordamageor looseness. Also check if the cooling fan is running. Theradiatorhosesandradiator should not leak water. If coolant is leaking, the water pump belt is missing or loose, or thecoolingfandoesnotrun,stopthe engine.

WARNING
Becarefulnottoallowyourhands,hair, jewelryorclothingtocomeintocontact with,orgetcaught in,enginebeltsor theenginecoolingfan.Theengine
TOWINGYOURVEHICLE
coolingfancanstartatanytime.
- After the engine cools down, check the coolant level in the reservoir tank with the engineer running. Add coolant to the reservoir tank if necessary. Have your vehicle repaired data NISSAN dealer.
Whentowingyourvehicle, all State and local regulations for towing must be followed. Incorrect towing equipment could damage your vehicle. Towing instructions are available from a NISSAN dealer. Localservice operators are familiar with the applicable laws and procedures for towing. To assure propertowing and to prevent accidental damage you vehicle, NISSAN recommend that you have as service operator to your vehicle. It is advisable to have the service operator carefully read the following precautions.

WARNING
●Neverrideinavehiclethatisbeing towed.
- Nevergetunderyourvehicleafterit hasbeenliftedbyatowtruck.

CAUTION
- Whentowing, makesure that the transmission, axles, steeringsystem and powertrain are in working condition. If any unit is damaged, dollies must be used.
●Alwaysattachsafetychainsbefore towing.
Forinformationabouttowingyourvehiclebehind a recreational vehicle (RV), see "Flat towing" (P.9-24)ofthismanual.

SCE0439
All-WheelDrive(AWD)models
TOWINGRECOMMENDEDBYNISSAN
All-WheelDrive(AWD)models
NISSANrecommendsthattowingdolliesbe usedwhentowingyourvehicleorplacethe vehicleonaflatbedtruckasillustrated.

CAUTION
NevertowAWDmodelswithanyofthe wheelsonthegroundasthismaycause seriousandexpensivedamagetothe powertrain.
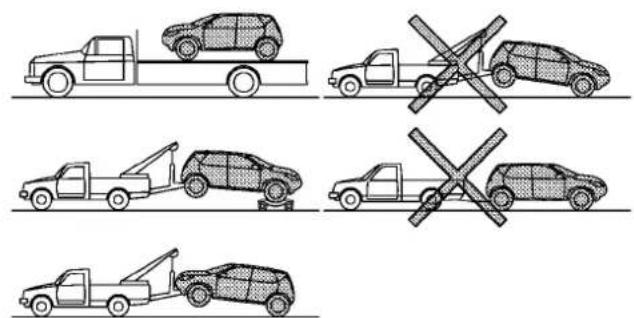
SCE0438
Two-WheelDrive(2WD)models
Two-WheelDrive(2WD)models
NISSANrecommendsthatyourvehiclebe towedwiththedriving(front)wheelsoffthe groundorplacethevehicleonaflatbedtruckas illustrated.

CAUTION
- NevertowContinuouslyVariable Transmission(CVT)modelswith thefrontwheelsonthegroundor fourwheelsontheground(forward orbackward), asthismaycause seriousandexpensivedamageto
thetransmission.Ifitisnecessaryto towthevehiclewiththerearwheels raised,alwaysusetowingdollies underthefrontwheels.
- WhentowingCVT models withthe frontwheelsontowingdollies:
—Turntheignition switch to the OFFposition, and secure the steering wheelina straight-ahead position with aropeor similar device.
—MovetheshiftlevertotheN (Neutral)position.
- WhentowingaCVTmodelwiththe rearwheelsontheground(ifyoudo notusetowingdollies):Always releasetheparkingbrake.
VEHICLERECOVERY(freeingastuck vehicle)

WARNING
•Standclearofastuckvehicle.
- Donotspinyourtiresathighspeed. This could cause them to explode andresultinserious injury. Partsof your vehicle could also overheat and bedamaged.

natural_image
Line drawing of a car's front grille and dashboard with a tool pointing to the grille (no text or symbols)Front
Pullingastuckvehicle
Donotusethetiedownhooksfortowingor vehiclerecovery.
Front:
Securelyinstalltherecoveryhook ① (storedin theluggageroom)asillustrated.
Makesurethatthehookisproperlysecuredin theoriginalplaceafteruse.

natural_image
Diagram showing a hand holding a flexible hose with a magnified inset highlighting the knot detail (no text or symbols present)Rear
Rear:
Donotusethetiedownhooktopullthevehicle.

CAUTION
- Towchainsorcablesmustbeattachedonlytothemainstructural members of the vehicle or the recovery hook. Otherwise, the vehicle body will be damaged.
- Donotusethevehicletiedown hookstofreeavehiclestuckin sand,snow,mud,etc.Nevertowa vehicleusingthevehicletiedown
hooks.
•Alwayspullthecablestraightout fromthefrontofthevehicle.Never pullonthevehicleatanangle.
- Pullingdevicesshouldberoutedso theydonottouchanypartofthe suspension,steering,brakeorcoolingsystems.
- Pullingdevicessuchasropesor canvasstrapsarenotrecommended foruseinvehicletowingorrecovery.
Rockingastuckvehicle
If your vehicle is stuckins and snow, mud, etc., use the following procedure:
- TurnofftheVehicleDynamicControl(VDC) system.
- Makesuretheareainfrontandbehindthe vehicleisclearofobstructions.
- Turnthesteeringwheelrightandlefttoclear anareaaroundthefronttires.
- Slowlyrockthevehicleforwardandbackward.
- ShiftbackandforthbetweenR(Reverse) andD(Drive).
Incaseofemergency6-15
- Applytheacceleratoraslittleaspossible tomaintaintherockingmotion.
- Releasetheacceleratorpedalbefore shiftingbetweenRandD.
-
Donotspinthetiresabove35MPH(55 km/h).
-
If the vehicle cannot be freed after a few tries, contact a professional towingservice to remove the vehicle.
6-16 Incaseofemergency
7Appearanceandcare
Cleaningexterior....7-2
Washing....7-2
Waxing....7-2
Removingspots....7-3
Underbody....7-3
Glass....7-3
Wheels....7-3
Chromeparts....7-3
Tiredressing....7-4
Cleaninginterior....7-4
Airfresheners....7-5
Floormats....7-5
Seatbelts....7-6
Corrosionprotection....7-6
Mostcommonfactorscontributingto vehiclecorrosion....7-6
Environmentalfactorsinfluencetherate of corrosion....7-6
Toprotectyourvehiclefromcorrosion....7-6
CLEANINGEXTERIOR
Inordertomaintaintheappearanceofyour vehicle,itisimportanttotakepropercareofit.
Toprotectthepaintsurfaces, washyourvehicle assoonasyoucan:
●afterarainfalltopreventpossibledamage fromacidrain
●afterdrivingoncoastalroads
- whencontaminantssuchassoot,bird droppings,treesap,metalparticlesorbugs getonthepaintsurface
- whendustormudbuildsuponthesurface Wheneverpossible,storeorparkyourvehicle insideagarageorinacoveredarea.
Whenitisnecessarytoparkoutside,parkina shadyareaorprotectthevehiclewithabody cover.
Becarefulnottoscratchthepaintsurface whenputtingonorremovingthebody cover.
WASHING
Washdirtoffthevehiclewithawetspongeand plentyofwater.Cleanthevehiclethoroughly usingamildsoap,aspecialvehiclesoapor generalpurposedishwashingliquidmixedwith clean,lukewarm(neverhot)water.

CAUTION
- Donotusecarwashesthatuseacid inthedetergent. Some car washes, especially brushless ones, usesome acid for cleaning. The acid may react with some plastic vehicle components, causing them to crack. This could affect their appearance, and also could cause them not to function properly. Always check with your car was to confirm that acid is not used.
- Donotwashthevehiclewithstrong householdsoap,strongchemical detergents,gasolineorsolvents.
- Donotwashthevehicleindirect sunlightorwhilethevehiclebodyis hot, asthesurfacemaybecome water-spotted.
- Avoidusingtight-nappedorrough cloths, such as washingmitts. Care must be taken when removing caked-ondirtorotherforeignsubstancesothepaintsurface is not scratchedordamaged.
Rinsethevehiclethoroughlywithplentyofclean water.
Insideflanges, seamsandfoldsonthedoors, hatchesandhoodareparticularlyvulnerableto theeffectsofroadsalt. Therefore, theseareas mustberegularlycleaned. Takecarethatthe drainholesintheloweredgeofthedoorare open. Spraywaterunderthebodyandinthe wheelwellstoloosenthedirtandwashaway roadsalt.
Avoidleavingwaterspotsonthepaintsurface by usingadampchamoistodrythevehicle.
WAXING
Regularwaxingprotectsthepaintsurfaceand helpsretainnewvehicleappearance.Polishing isrecommendedtoremovebuilt-upwaxresidue andtoavoidawweatheredappearancebefore reapplyingwax.
ANISSANdealercanassistyouinchoosingthe properproduct.
- Waxyourvehicleonlyafterathorough washing.Followtheinstructionssupplied withthewax.
- Donotuseawaxcontaininganyabrasives, cuttingcompoundsorcleanersthatmay damagethevehiclefinish.
Machinecompoundoraggressivepolishingona basecoat/clearcoatpaintfinishmaydullthe
finishorleaveswirlmarks.
REMOVINGSPOTS
Removetarandoilspots,industrialdust, insects,andtreesapasquicklyaspossible fromthepaintsurfacetaovoidlastingdamage orstaining.Specialcleaningproductsare availableataNISSANdealeroranyautomotive accessorystores.
UNDERBODY
Inareaswhereroadsaltisusedinwinter,the underbodymustbecleanedregularly.Thiswill preventdirtandsaltfrombuildingupand causingtheaccelerationofcorrosiononthe underbodyandsuspension.Beforethewinter periodandagaininthespring,theunderseal mustbecheckedand,ifnecessary,re-treated.
GLASS
Useglasscleanertoremovesmokeanddust filmfromtheglasssurfaces.Itisnormalforglass tobecomecoatedwithafilmafterthevehicleis parkedinthehotsun.Glasscleanerandasoft clothwilleasilyremovethisfilm.

CAUTION
Whencleaningtheinsideofthewindows,donotusesharp-edgedtools, abrasivecleanersorchlorine-based
disinfectantcleaners.Theycoulddamagetheelectricalconductors,radio antennaelementsorrearwindow defrosterelements.
WHEELS
Washthewheelswhenwashingthevehicleto maintaintheirappearance.
- Cleantheinnersideofthewheelswhenthe wheelischangedortheundersideofthe vehicleiswashed.
- Inspectwheelrimsregularlyfordentsor corrosion. Suchdamagemaycauselossof pressureorpoorsealatthetirebead.
- NISSANrecommendsthattheroadwheels bewaxedtoprotectagainstroadsaltin areaswhereitisusedduringwinter.

CAUTION
Donotuseabrasivecleanerswhen washingthewheels.
Aluminumalloywheels
Washregularlywithaspongedampenedina mildsoapsolution,especiallyduringwinter monthsinareaswhereroadsaltisused.Salt coulddiscolorthewheelsifnotremoved.

CAUTION
Followthedirectionsbelowtoavoid stainingordiscoloringthewheels:
- Donotuseacleanerthatuses strongacidoralkalicentsto cleanthewheels.
- Donotapplywheelcleanerstothe wheelswhentheyarehot. The wheeltemperatureshouldbethe sameasambienttemperature.
- Rinsethewheeltocompletelyremovethecleanerwithin15minutes afterthecleanerisapplied.
CHROMEPARTS
Cleanchrome parts regularly with an on-abrasive chromopolishtomaintain the finish.
CLEANINGINTERIOR
TIREDRESSING
NISSANdoesnotrecommendtheuseoftire dressings. Tiremanufacturerapplyacoatingto thetirestohelpreducediscolorationofthe rubber.Ifatiredressingisappliedtothetires,it mayreactwiththecoatingandformacompound. Thiscompoundmaycomeofthetire whiledrivingandstainthevehiclepaint.
If you choose to eat tired dressing, take the following precautions:
- Useawater-basedtiredressing. The coating on the tired dissolves more easily with an oil-basedtiredressing.
- Applyalightcoatoftiredressingtohelp preventitfromenteringthetiretread/grooves(whereitwouldbedifficultto remove).
- Wipeoffexcesstiredressingusingadry towel.Makesurethetiredressingis completelyremovedfromthetiretread/grooves.
- Allowthetiredressingtodryasrecommendedbytiredressingmanufacturer.
Occasionallyremoveloosedustfromtheinterior trim,plasticpartsandseatsusingavacuum cleanerorsoftbristledbrush.Wipethevinyland leathersurfaceswithaclean,softclothdam-penedinmildsoapsolution,thenwipeclean withadrysoftcloth.
Regularcareandcleaningisrequiredinorderto maintaintheappearanceoftheleather.
Before using any fabric protector, read the manufacturer's recommendations. Some fabric protectors contain chemical that may stain or bleach these at material.
Useaclothdampenedonlywithwater, toclean themeterandgaugelens.

WARNING
Donotusewateroracidiccleaners(hot steamcleaners)ontheseat.Thiscan damagetheseatoroccupantclassificationsensor.Thiscanalsoaffectthe operationoftheairbagsystemand resultinseriouspersonalinjury.

CAUTION
- Neverusebenzine, thinner, orany similar material.
- Forcleaning, use as soft cloth, dampened with water. Never use arough cloth, alcohol, benzine, thinner or any kind of solvent or papertowel with a chemical cleaning agent. They will scratch or caused discoloration to the lens.
- Donotsprayanyliquidsuchas wateronthemeterlens.Spraying liquidmaycausethesystem to malfunction.
- Smalldirtparticlescanbeabrasive anddamagingtotheleathersurfaces and should be removed promptly.Donotusesaddlesoap, carwaxes,polishes,oils,cleaning fluids,solvents,detergentsorammonia-basedcleanersastheymay damagetheleather'snaturalfinish.
- Neverusefabricprotectorsunless recommendedbythemanufacturer.
- Donotuseglassorplasticcleaner onmeterorgaugelenscovers.lt
maydamagethelenscover.
AIRFRESHENERS
Mostairfreshenersuseasolventthatcould affectthevehicleinterior.Ifyouuseanair freshener,takethefollowingprecautions:
●Hanging-typeairfreshenerscancause permanentdiscolorationwhentheycontact vehicleinteriorsurfaces. Placetheair freshenerinalocationthatallowsittohang freeandnotcontactaninteriorsurface.
- Liquid-typeairfreshenerstypicallyclipon thevents. Theseproductscancause immediatedamageanddiscolorationwhen spilledoninteriorsurfaces.
Carefullyreadandfollowthemanufacturer's instructionsbeforeusingairfresheners.
FLOORMATS

WARNING
To avoid potential pedal interference that may result in acollision or injury:
- NEVERplaceafloormatontopof anotherfloormatinthedriverfront position.
•UseonlygenuineNISSANfloor matsspecificallydesignedforuse inyourvehiclemodel.Seeyour NISSANdealerformoreinformation.
•Properlypositionthematsinthe floorwellusingthefloormatpositioningaid.See“Floormatpositioningaid(driver'ssideonly”(P.7-5).
TheuseofgenuineNISSANfloormatscan extendthelifeofyourvehiclecarpetandmakeit easiertocleantheinterior.Matsshouldbe maintainedwithregularcleaningandreplacedif theybecomeexcessivelyworn.

Floormatpositioningaid(driver'sside only)
This vehicle includes front floor matbracket to act as floor mat positioning aid. NISSAN floor mat have been specially designed for your vehicle model. The driver's side floor maths grommetholesinit. To install, position them at by placing the floor mat bracket through the floor mat grommethole while centering the mat in the floor well.
Periodically check to make certainty that them are properly positioned.
CORROSIONPROTECTION
SEATBELTS
Theseatbeltscanbecleanedbywipingthem withaspongedampenedinamildsoap solution.Allowthebeltstodrycompletely in theshadebeforeusingthem.
See"Seatbelts"(P.1-9).

WARNING
Donotallowwetseatbeltstorollupin theretractor.NEVERusebleach,dye,or chemicalsolventstocleantheseat belts,sincethesematerialsmayseverelyweakentheseatbeltwebbing.
MOSTCOMMONFACTORSCONTRIBUTINGTOVEHICLECORROSION
- The accumulation of moisture-retaining dirt and debrisin body panel sections, cavities, and other areas.
- Damagetopaintandotherprotectivecoatingscausedbygravelandstonechipsor minortrafficaccidents.
ENVIRONMENTALFACTORSINFLU-ENCETHERATEOFCORROSION
Moisture
Accumulation of sand, dirt and water on the vehicle body underside can accelerate corrosion. Wet floor coverings will not dry completely inside the vehicle, and should be removed for drying to avoid floor panel corrosion.
Relativehumidity
Corrosionwillbeacceleratedinareasofhigh relativehumidity,especiallythoseareaswhere thetemperaturesstayabovefreezingwhere atmosphericpollutionexists,orwhereroadsalt isused.
Temperature
Atemperature increase will accelerate the rate of corrosion to those parts which are not well ventilated.
Airpollution
Industrial pollution, the presence of salt in the air in coastal areas, or heavy roads salt use will accelerate the corrosion process. Roads salt will also accelerate the disintegration of paint surfaces.
TOPROTECT YOURVEHICLEFROM CORROSION
- Washandwaxyourvehicleoftentokepthe vehicleclean.
●Alwayscheckforminordamagetothepaint andrepairitassoonaspossible. - Keepdrainholesatthebottomofthedoors opentoavoidwateraccumulation.
- Checktheunderbodyforaccumulationof sand, dirtorsalt. If present, washwithwater as soonaspossible.

CAUTION
- NEVERremovedirt, sandorother debris from the passenger compartment by washing it out with a hose.
Removedirtwithavacuumcleaner. ●Neverallowwaterorotherliquidsto comeincontactwithelectronic componentsinsidethevehicleas thismaydamagethem.
Chemicalsusedforroadsurfacedeicingare extremelycorrosive. Theyacceleratecorrosion and deteriorationofunderbodycomponents suchastheexhaustsystem,fuelandbrake lines,brakecables,floorpanandfenders. Inwinter,theunderbodymustbecleaned periodically.
For additional protection against trust and corrosion, which may be required in some areas, consulta NISSAN dealer.
Appearanceandcare7-7
MEMO
7-8 Appearance and care
8Maintenanceanddo-it-yourself
Maintenancerequirement....8-2
Scheduled maintenance....8-2
Generalmaintenance....8-2
Wheretogoforservice....8-2
Generalmaintenance....8-2
Explanationofmaintenanceitems....8-2
Maintenance precautions....8-5
Enginecompartmentchecklocations....8-6
QR25DEengine....8-6
Enginecoolingsystem....8-7
Checkingenginecoolantlevel....8-8
Changingenginecoolant....8-8
Engineoil....8-9
Checkingengineoillevel....8-9
Changingengineoilandfilter....8-9
ContinuouslyVariableTransmission(CVT)fluid......8-11
Brakefluid....8-11
Windowwasherfluid....8-12
Battery....8-13
Jumpstarting....8-14
Drivebelts....8-14
Sparkplugs....8-15
Replacingsparkplugs....8-15
Aircleaner....8-16
Windshieldwiperblades....8-17
Cleaning....8-17
Replacing....8-17
Rearwindowwiperblade....8-18
Brakes....8-18
Self-adjustingbrakes....8-18
Brakepadwearindicators....8-18
Fuses....8-19
Enginecompartment....8-19
Passengercompartment....8-20
Batteryreplacement....8-22
Keyfob....8-22
Lights....8-24
Headlights....8-24
Exteriorandinteriorlights....8-26
Wheelsandtires....8-29
Tirepressure....8-29
Tirelabeling....8-31
Changingwheelsandtires....8-35

MAINTENANCEREQUIREMENTGENERALMAINTENANCE
Someday-to-dayandregularmaintenanceis essentialtomaintainyourvehicle'sfinemechanicalcondition,aswellasitsemissionandengine performance.
Itistheowner's responsibility to make sure that the scheduled maintenance, as well as general maintenance, is performed.
Asthevehicleowner, you are the only one who can ensure that your vehicle receives the proper maintenance. You are available in their maintenance chain.
Generalmaintenanceincludesthoseitems whichshouldbecheckedduringnormalday-to-dayoperation.Theyareessentialforproper vehicleoperation.Itisyourresponsibility to performtheseproceduresregularlyasprescribed.
Performinggeneralmaintenancechecksrequiresminimalmechanicalskillandonlyafew generalautomotivetools.
These checks or inspections can be done by yourself, a qualified technician, if you prefer, a NISSAN dealer.
WHERETOGOFORSERVICE
Ifmaintenanceserviceisrequiredoryourvehicle appearstomalfunction,havethesystems checkedandservicedbyaNISSANdealer.
NISSANtechniciansarewell-trainedspecialists andarekeptup-to-datewiththelatestservice informationthroughtechnicalbulletins,service tips,andin-dealershipinformationsystems. Theyarecompletelyqualifiedtoworkon NISSANvehiclesbeforeworkbegins.
YoucanbeconfidentthataNISSANdealer's servicedepartmentperformsthebestjobto meetthemaintenancerequirementsonyour vehicle.
During thenormalday-to-day operation of the vehicle, general maintenance should be performed regularly as prescribed in this section. If you detect any unusual sounds, vibrations or smell, besure to check for the cause or have a NISSAN dealer do it promptly. In addition, you should notify a NISSAN dealer to you think that repairs are required.
When performing any checks or maintenance work, see "Maintenance precautions" (P.8-5).
EXPLANATIONOFMAINTENANCE ITEMS
Additionalinformationonthefollowing itemswith“\*”isfoundlaterinthissection.
Outsidethevehicle
Themaintenanceitemslistedhereshouldbe performedfromtimetotime, unless otherwise specified.
Doorsandenginehood:Checkthatalldoors andtheenginehoodoperateproperly. Also ensurethatallatcheslocksecurely.Lubricate hinges,latches,latchpins,rollersandlinksif necessary.Makesurethatthesecondarylatch keepsthehoodfromopeningwhentheprimary latchisreleased.
Whendrivinginareasusingroadsaltorother corrosivematerials, checklubricationfrequently.
8-2 Maintenance and do-it-yourself
Lights*:Cleantheheadlightsonaregularbasis. Makesurethattheheadlights,stoplights,tail lights,turnsignallights,andotherlightsareall operatingproperlyandinstalledsecurely.Also checkheadlightaim.
Roadwheelnuts(lugnuts)*:Whenchecking thetires,makesurenowheelnutsaremissing, andcheckforanyloosewheelnuts.Tightenif necessary.
Tirerotation*:Tiressshouldberotatedevery 5,000miles(8,000km).
Tires*:Checkthepressurewithagaugeoften andalwayspriortolongdistancetrips.If necessary,adjustthepressureinalltires, includingthespare,tothepressurespecified. Checkcarefullyfordamage,cutsorexcessive wear.
TirePressureMonitoringSystem(TPMS) transmittercomponents:ReplacetheTPMS transmittergrommetseal,valvecoreandcap whenthetiresarereplacedduetowearorage.
Wheelalignmentandbalance:Ifthevehicle shouldpulltoeithersidewhiledrivingona straightandlevelroad,orifyoudetectunevenor abnormaltirewear,theremaybeaneedfor wheelalignment.
If the steering wheel or seat vibrates at normal highways speeds, wheel balancing may be needed.
For additional information regarding tires, refer to "Important Tire Safety Information" in the Warranty Information Booklet.
Windshield: Cleanthewindshieldonaregular basis. Checkthewindshieldatleasteverysix monthsforcracksorotherdamage. Havea damagedwindshieldrepairedbyaqualified repairfacility.
Windshieldwiperblades*:Checkforcracks or wear if they donot wipe properly.
Insidethevehicle
Themaintenanceitemslistedhereshouldbe checkedonaregularbasis,suchaswhen performingscheduledmaintenance,cleaning thevehicle,etc.
Acceleratorpedal: Checkthepedalfor smoothoperationandmakesurethepedal doesnotcatchorrequireuneveneffort. Keep thefloormatawayfromthepedal.
Brakepedal:Checkthepdalforsmooth operation. If the brakepedals suddenly goes down further than normal, the pedal feels spongy or the vehicle seem stotaklongerto stop, see a NISSAN dealer immediately. Keep the floormataway from the pedal.
Brakes: Check that the brakes donot pull the vehicle to ones sidewhen applied.
ContinuouslyVariableTransmission(CVT) P(Park)positionmechanism:Onafairly steephill,checkthatthevehicleisheldsecurely withtheshiftleverintheP(Park)position withoutapplyinganybrakes.
Parkingbrake:Checktheparkingbrake operationregularly. The vehicles should be securely held on a fairly steep hill with only the parking brake applied. If the parking brakeneeds adjusted, see a NISSAN dealer.
Seatbelts: Check that all part of these seat belt system (forexample, buckles, anchors, adjusters and retractors) operate properly and smoothly, and are installed securely. Check the belt webbing for cuts, fraying, wearordamage.
Seats: Checkseatpositioncontrolssuchas seatadjusters, seatbackrecliner, etc. toensure theyoperatesmoothlyandthatalllatcheslock securelyineveryposition. Checkthatthehead restraints/headrestsmoveupanddown smoothlyandthatthelocks(ifsoequipped) holdsecureyinalallatchedpositions.
Steeringwheel: Checkforchangesinthe steeringconditions, such as excessive freeplay, hardsteeringorstrangenoises.
Warninglightsandchimes: Makesurethat all warninglightsandchimesareoperating properly.
Windshielddefroster:Checkthattheair comesoutofthedefrosteroutletsproperly and insufficientquantitywhenoperatingtheheater orairconditioner.
Windshieldwiperandwasher*:Checkthat thewipersandwasheroperateproperlyandthat thewipersdonotstreak.
Underthehoodandvehicle
Themaintenanceitemslistedhereshouldbe checkedperiodically(forexample,eachtimeyou checktheengineoilorrefuel).
Battery*: Checkthefluidleveleachcell.
ItshouldbebetweentheMAXandMINlines.
Vehiclesoperatedinhightemperaturesorunder severeconditionrequirefrequentchecksofthe batteryfluidlevel.
NOTE:
Careshouldbetakentoavoidsituations thatcanleadtopotentialbatterydischarge andpotentialno-startconditionssuchas:
-
Installationorextendeduseofelectronicaccessoriesthatconsumebattery powerwhentheengineisnotrunning (Phonechargers,GPS,DVDplayers, etc.)
-
Vehicle is not driven regularly and/or only drivenshort distances.
8-4 Maintenance and do-it-yourself
Inthesecases, the battery may need to be charged to maintain battery health.
Brakefluidlevel*: Makesurethatthebrake fluidlevelisbetweentheMAXandMINlineson thereservoir.
Enginecoolantlevel*: Check the coolant level when the engine is cold.
Enginedrivebelts*: Makesurethatthedrive beltsarenotfrayed, worn, crackedorily.
Engineoillevel*:Checkthelevelafterparking thevehicleonalevelsurfaceandturningoffthe engine.Waitmorethan10minutesfortheoilto drainbackintotheoilpan.
Exhaustsystem: Makesuretherearenoloose supports,cracksorholes. If the sound of the exhaust seems unusual or there is a mellof exhaust fumes, immediately have the exhaust system inspected by a NISSAN dealer. (See "Precautions when starting and driving" (P.5-2) forexhaust gas (carbon monoxide).)
Fluidleaks: Checkunderthevehicleforfuel, oil, waterorotherfluidleaksafterthevehiclehas beenparkedforwhile. Waterdrippingfromthe airconditionerafteruseisnormal. If you should notice anyleaksorifgasolinefumesareevident, checkforthecauseandhaveitcorrected immediately.
Radiatorandhoses: Checkthefrontofthe radiatorandcleanoffanydirt, insects, leaves, etc., that may have accumulated. Makesurethe hoseshavenocracks, deformation, rotorloose connections.
Underbody: The underbody is frequently exposed to corrosives, substances such as those used on icy roads, to control dust. Its very important to remove the substances, otherwise must form the floor plan, frame, fuel lines and around the exhaust system. At the end of winter, the underbody should be thoroughly flushed with plain water, being carefully clean those areas where mud and dirt may accumulate. For additional information, see "Cleaning exterior" (P.7-2).
Windshieldwasherfluid*:Checkthatthereis adequatefluidinthereservoir.
MAINTENANCEPRECAUTIONS
When performing any inspection or maintenance work your vehicle, always take care to prevent serious accident in injury to yourself for damage to the vehicle. The following are general precautions which should be closely observed.

WARNING
- Parkthevehicleonalevelsurface, applytheparkingbrakesecurely andblockthewheelstoprevent thevehiclefrommoving.Movethe shiftlevertoP(Park).
- Besuretheignitionswitchisinthe OFForLOCKpositionwhenperforminganypartsreplacementor repairs.
- If you must work with the engine running, keep your hands, clothing, hair and tools away from moving fans, belts and any other moving parts.
-
Itisadvisabletosecureorremove anylooseclothingandremoveany jewelry,suchasrings,watches,etc. beforeworkingonyourvehicle.
●Alwaysweareyeprotectionwheneveryouworkonyourvehicle. -
Ifyoumustruntheengineinan enclosedspacesuchasagarage,be surethereisproperventilationfor exhaustgasestoescape.
- Nevergetunderthevehiclewhileit issupportedonlybyajack.Ifitis necessarytoworkunderthevehicle, supportitwithsafetystands.
- Keepsmokingmaterials,flameand sparksawayfromfueltankandthe battery.
- Thefuelfilterorfuellinessshouldbe servicedbyaNISSANdealerbecausethefuellinesareunderhigh pressureevenwhentheengineis off.

CAUTION
- Donotworkunderthehoodwhile theengineishot.Turntheengine offandwaituntilcoolsdown.
- Avoiddirectcontactwithusedengineoilandcoolant.Improperly disposedengineoil,andengine coolantand/orothervehiclefluids candamagetheenvironment.Al-
waysconformtolocalregulations fordisposalofvehiclefluid.
- NeverleavetheengineortheCVT relatedcomponentharnessesdisconnectedwhiletheignitionswitch isintheONposition.
- Neverconnectordisconnectthe batteryoranytransistorizedcomponentwhiletheignitionswitchis intheONposition.
-Yourvehicleisequippedwithan automaticenginecoolingfan.Itmay comeonatanytimewithoutwarning,eveniftheignitionkeyisinthe OFFpositionandtheengineisnot running.Toavoidinjury,always disconnectthenegative battery cablebeforeworkingnearthefan.
This"8.Maintenanceanddo-it-yourself"section givesinstructionsregardingonlythoseitems whicharerelativelyeasyforanownertoperform.
AgenuineNISSANServiceManualisalso available.(See "Owner's Manual/ServiceManualorderinformation"(P.9-28).)
You should be aware that incomplete or impowerservicing may result in operating difficulties over excessive emissions, and could
ENGINECOMPARTMENTCHECK LOCATIONS
affectwarrantycoverage.Ifindoubtabout anyservicing,werecommendthatitbe donebyaNISSANdealer.

QR25DEENGINE
- Engineoilfillercap
2.Brakefluidreservoir
3.Aircleaner - Enginecoolantreservoir
-
Windowwasherfluidreservoir
6.Drivebeltlocation -
Engineoildipstick
8.Radiatorfillercap
9.Battery
10.Fuse/fusiblelinkholder
8-6 Maintenance and do-it-yourself
ENGINECOOLINGSYSTEM
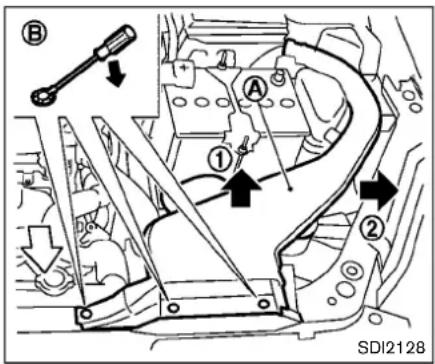
Removingtheairduct
Removetheairduct Ⓐ ifnecessary.
-
Removetheclips Ⓑ withasuitabletool.
-
Pulltheairductupward sideways ① and then
Installtheairductsecurelyafteranyinspection ormaintenanceworkisperformed.
Theenginecoolingsystemisfilledatthefactory withapre-dilutedmixtureof50%Genuine NISSANLongLifeAntifreeze/Coolant(blue)and 50%watertoprovideyear-roundanti-freeze andcoolantprotection.Theantifreezesolution containsrustandcorrosioninhibitors.Additional enginecoolingsystemadditivesarenotnecessary.

WARNING
- Neverremovetheradiatororcool- antreservoircapwhentheengineis hot.Waituntiltheengineand radiatorcooldown.Seriousburns couldbecausedbyhighpressure fluidescapingfromtheradiator. Seeprecautionsin"Ifyourvehicle overheats"(P.6-11)ofthismanual.
•Theradiatorisequippedwitha pressuretyperadiatorcap.Toppreventenginedamage,useonlya genuineNISSANradiatorcap.

CAUTION
- Neveruseanycoolingsystemadditivessuchasradiatorsealer.Ad-
ditivesmayclogthecoolingsystem andcausedamagetotheengine, transmissionand/orcoolingsystem.
- Whenaddingorreplacingcoolant, besuretouseonly Genuine NISSANLongLifeAntifreeze/Coolant(blue)orequivalent.Genuine NISSANLongLifeAntifreeze/Coolant(blue)ispre-dilutedtoprovide antifreeze protection to -34^ (-37^) .Ifadditionalfreezeprotectionisneededduetoweatherwhere youoperateyourvehicle,addGenuineNISSANLongLifeAntifreeze/ Coolant(blue)concentratefollowingthedirectionsonthecontainer. Ifanequivalentcoolantotherthan GenuineNISSANLongLifeAntifreeze/Coolant(blue)isused,followthecoolantmanufacturer's instructionstomaintain minimum antifreeze protection to -34^ (-37^) .Theuseofothertypesof coolantsolutionsotherthanGenuineNISSANLongLifeAntifreeze/ Coolant(blue)orequivalentmay damagetheenginecoolingsystem.
- Thelifeexpectancyofthefactory-fill coolantis105,000miles(168,000 km)or7years.Mixinganyother typeofcoolantotherthanGenuine NISSANLongLifeAntifreeze/Coolant(blue),including Genuine NISSANLongLifeAntifreeze/Coolant(green),ortheuseofnon-distilledwaterwillreducethelife expectancyofthefactory-fillcoolant.RefertotheNISSANService andMaintenanceGuideformore details.
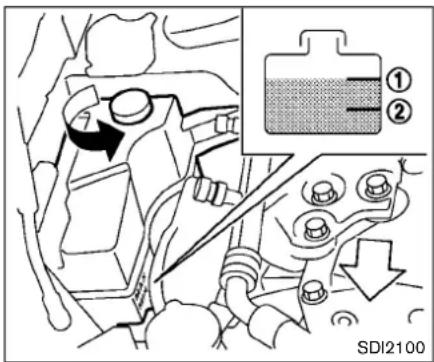
CHECKINGENGINECOOLANTLEVEL
Checkthecoolantlevelinthereservoirwhen theengineiscold. If thecoolantlevelis below theMINlevel ②, openthereservoircapand addcoolantuptotheMAXlevel ①. If the reservoirisempty, checkthecoolantlevelinthe radiatorwhentheengineiscold. If there is insufficient coolantintheradiator, filltheradiator withcoolantuptothe filleropening and also add ittothereservoiruptotheMAXlevel ①.
If the coolingsystem frequently requires coolant, have it checked by a NISSAN dealer.
CHANGINGENGINECOOLANT
MajorcoolingsystemrepairsshouldbeperformedbyaNISSANdealer.Theservice procedurescanbefoundintheappropriate NISSANServiceManual.
Improperservicingcanresultinreduced heaterperformanceandengineoverheating.

WARNING
•To avoid the danger of being scalded,neverchangethecoolant whentheengineishot.
- Neverremovetheradiatorcapwhen theengineishot.Seriousburns couldbecausedbyhighpressure fluidescapingfromtheradiator.
- Avoiddirectskincontactwithused coolant.Ifskincontactismade, washthoroughlywithsoaporhand cleanerassoonaspossible.
- Keepcoolantoutofreachofchildrenandpets.
Enginecoolantmustbedisposedofproperly. Checkyourlocalregulations.
ENGINEOIL
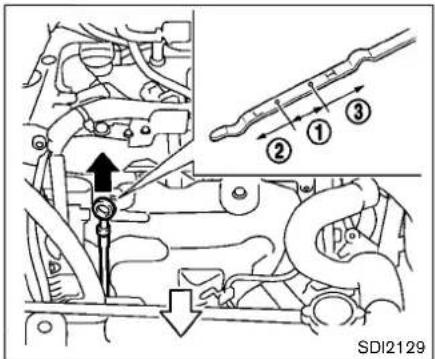
CHECKINGENGINEOILLEVEL
- Parkthevehicleonalevelsurfaceandapply theparkingbrake.
- Runtheengineuntiltreachesoperating temperature.
- Turnofftheengine. Waitmorethan10 minutesfortheoiltodrainbackinto theoilpan.
- Removethedipstickandwipeitclean. Reinsertitalltheway.
- Removethedipstickagainandchecktheoil level.Itshouldbewithintherange ① .Ifthe oillevelisbelow ② ,removetheoilfillercap andpourrecommendedoilthroughthe
opening.Donotoverfill ③.
- Recheckoillevelwiththedipstick.
Itisnormaltoaddsomeoilbetweenoil maintenanceintervalsorduringthebreak-inperiod,dependingontheseverity of operatingconditions.

CAUTION
Oillevelshouldbecheckedregularly. Operatingtheenginewithaninsufficientamountofoilandamagethe engine, and such damage is not covered by warranty.
CHANGINGENGINEOILANDFILTER
Changetheengineoilandfilteraccordingtothe maintenancelogshownintheNISSANService andMaintenanceGuide.
Vehicleset-up
- Parkthevehicleonalevelsurfaceandapply theparkingbrake.
2.Starttheengineandletitidleuntiltreaches operatingtemperature. -
Turntheengineoffandwaitmorethan10 minutes.
-
Raise and support the vehicle using a suitable floor jack and safety jack star
-
Placethesafetyjackstandsunderthe vehiclejack-uppoints.
- Asuitableadaptersshouldbeattachedto thejackstandsaddle.

CAUTION
Makesurethecorrectliftingandsupportpointsareusedtoavoidvehicle damage.

Engineoilandfilter
- Placealargedrainpanunderthedrainplug Ⓐ.
2.Removetheoilfillercap Ⓑ. - Removethedrainplugwithawrenchand completelydraintheoil.

CAUTION
Becarefulnottoburnyourself,asthe engineoilishot.
- Wasteoilmustbedisposedof properly.
- Checkyourlocalregulations.
Performsteps4to9whentheengineoil filterchangeisneeded.
- Removetheplasticcoverovertheoilfilter locationbyremovingthesmallplasticclips.
- Loosentheoilfilter © withanoilfilter wrench. Removetheoilfilterbyturningitby hand.
- Wipetheengineoilfiltermountingsurface withacleanrag.

CAUTION
Besuretoremoveanyoldgasket materialremainingonthemounting surfaceoftheengine.Failureretodoso couldleadtoenginedamage.
- Coatthegasketonthenewfilterwithclean engineoil.
- Screwintheoilfilterclockwiseuntilaslight resistanceisfelt, thentightenadditionally morethan2/3turn.
Oilfiltertighteningtorque: 11to15ft-lb (14.7to20.5N·m)
- Install the plastic cover.
- Cleanandre-installthedrainplugwitha newwasher.Securelytightenthedrainplug withawrench.
Drainplugtighteningtorque: 22to29ft-lb (29to39N·m)
Donotuseexcessiveforce.
- Refillenginewithrecommendedoilthrough theoilfilleropening, and install the oilfiller capsecurely.
See "Capacitiesandrecommendedfluids/lubricants"(P.9-2)fordrainandrefillcapacity.Thedrainandrefillcapacitydependson theoiltemperatureaddraintime.Use thesespecificationsforreferenceonly.Alwaysusethedipsticktodeterminethe properamountofoilintheengine.
- Start the engine and check for leakage around the drain plug and the oil filter. Correct as required.
- Turntheengineoffandwaitmorethan10 minutes. Checktheoillevelwiththedipstick. Addengineoilifnecessary.
Aftertheoperation
- Lowerthevehiclecarefullytotheground.
- Disposeofwasteoilandfilterproperly.

WARNING
•Prolongedandrepeatedcontact withusedengineoilmaycauseskin cancer.
- Trytoavoiddirectskincontactwith usedoil.Ifskincontactismade, washthoroughlywithsoaporhand cleanerassoonaspossible.
- Keepusedengineoiloutofreachof children.
CONTINUOUSLYVARIABLE TRANSMISSION(CVT)FLUID

CAUTION
•NISSANrecommendsusingGenuineNISSANCVTFluidNS-3ONLYin NISSANCVTs.Donotmixwithother fluids.
- DonotuseAutomatictransmission fluid(ATF)orManualtransmission fluidinaNISSANCVT,asitmay damagetheCVT.Damagecausedby theuseoffluidsotherthanas recommendedisnotcoveredunder NISSAN'sNewVehicleLimitedWarranty.
- Usingfluidsthatarenotequivalent toGenuineNISSANCVTFluidNS-3 mayalsodamagetheCVT.Damage causedbytheuseoffluidsother thanasrecommendedisnotcoveredunderNISSAN'sNewVehicle LimitedWarranty.
Whencheckingorreplacementisrequired,we recommendaNISSANdealerforservicing.
BRAKEFLUID
For additional brake fluid information, see "Capacities and recommended fluids/lubricants" (P.9-2) of this manual.

WARNING
- Useonlynewfluidfromasealed container.Old,inferiororcontaminatedfluidmaydamagethebrake system.Theuseofimproperfluids candamagethebrakesystem and affectthevehicle'sstoppingability.
•Cleanthefillercapbeforeremoving. - Brakefluidispoisonousandshould bestoredcarefullyinmarkedcontainersoutofthereachofchildren.

CAUTION
Donotspillthefluidonanypainted surfaces. This will damage the paint. If fluidisspilled, immediately wash the surface with water.
WINDOWWASHERFLUID
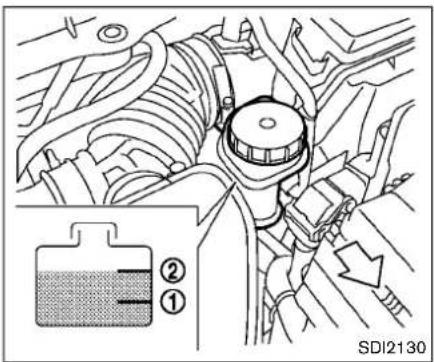
Checkthefluidlevelinthereservoir.Ifthefluidis belowtheMINline ① orthebrakewarning lightcomeson,addGenuineNISSANSuper HeavyDutyBrakeFluidorequivalentDOT3 fluiduptotheMAXline ② .Iffluidmustbe addedfrequently,thesystemshouldbechecked byaNISSANdealer.

Fillthewindowwasherfluidreservoirperiodically.
Tofillthewindowwasherfluidreservoir, lift the capandpourthewindowwasherfluidintothe reservoiropening.
Addawashersolventtothewaterforbetter cleaning.Inthewinterseason,addawindshield washerantifreeze.Followthemanufacturer's instructionsforthemixtureratio.
Refillthereservoirmorefrequentlywhendriving conditionsrequireanincreasedamountof windowwasherfluid.
Recommendedfluid:
GenuineNISSANWindshieldWasherConcen-
trateCleaner&Antifreezeorequivalent

CAUTION
- Donotsubstituteengineanti-freeze coolantforwindowwashersolution. Thismayresultindamagetothe paint.
- Donotfillthewindowwasher reservoirtankwithwasherfluid concentratesatfullstrength.Some methylalcoholbasedwasherfluid concentratesmaypermanentlystain thegrilleifspilledwhilefillingthe windowwasherreservoirtank.
- Pre-mixwasherfluidconcentrates withwatertothemanufacturer's recommended levelsbeforepouring the fluid into the windowwasher reservoir tank. Donot us the windowwasher reservoir tank to mix the washer fluid concentrate and water.
BATTERY
- Keepthebatterysurfacecleananddry. Cleanthebatterywithasolutionofbaking sodaandwater.
- Make certaintytheterminalconnections are cleanandsecurelytightened.
- If the vehicle is not to be used for 30 days or longer, disconnect then negative (-) battery terminal cable to prevent discharging it.
NOTE:
Careshouldbetakentoavoidsituations thatcanleadtopotentialbatterydischarge andpotentialno-startconditionssuchas:
- Installationorextendeduseofelectronicaccessoriesthatconsumebattery powerwhentheengineisnotrunning (Phonechargers,GPS,DVDplayers, etc.)
- Vehicle is not driven regularly and/or only drivenshort distances.
In these cases, the battery may need to be charged to maintain battery health.

WARNING
- Donotexposethebatterytoflames orelectricalsparks.Hydrogengas generatedbythebatteryisexplosive.Donotallowbatteryfluidto
contactyourskin,eyes,fabrics,or paintedsurfaces.Aftertouchinga batteryorbatterycap,donottouch orrubyoureyes.Thoroughlywash yourhands.Iftheacidcontactsyour eyes,skinorclothing,immediately flushwithwaterforatleast15 minutesandseekmedicalattention.
- Donotoperatethevehicleifthe fluidinthebatteryislow.Low batteryfluidcancauseahigherload onthebatterywhichcangenerate heat,reducebatterylife,andin somecasesleadtoanexplosion.
- Whenworkingonornearabattery, alwayswearsuitableeyeprotection andremovealljewelry.
- Batteryposts,terminalsandrelated accessoriescontainleadandlead compounds.Wash handsafter handling.
- Keepthebatteryoutofthereachof children.

DI0137MA
Checkthefluidleveleachcell.(Removethe batterycoverifitisnecessary.)Itshouldbe betweentheUPPERLEVEL ① andLOWER LEVEL ② lines.
Ifitisnecessarytoaddfluid,addonlydistilled watertobringtheleveltotheindicatorineach filleropening.Donotoverfill.

- Removethecellplugs
A
2.AdddistilledwateruptotheUPPERLEVEL
① line.
If the side of the battery is not clear, check the distilled water level by looking directly above the cell; the condition ① indicates OK and the conditions ② needs more to be added.
3.Tightencellplugs
A.
Vehiclesoperatedinhightemperaturesorunder severeconditionsrequirefrequentchecksofthe batteryfluidlevel.
8-14 Maintenance and do-it-yourself
JUMPSTARTING
Ifjumpstartingisnecessary,see "Jumpstarting" (P.6-9).Iftheenginedoesnotstartbyjump starting,thebatterymayhavetobereplaced. ContactaNISSANdealer.
DRIVEBELTS
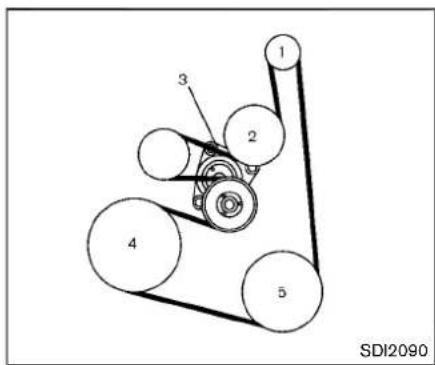
- Alternator
- Waterpump
- Drivebeltauto-tensioner
4.Crankshaftpulley - Airconditionercompressor

WARNING
BesuretheignitionswitchisintheOFF orLOCKpositionbeforeservicingdrive belts.Theenginecouldrotateunexpectedly.
- Visually inspect each belt for sign of unusual wear, cuts, fraying or looseness. If
SPARKPLUGS
thebeltisinpoorconditionorloose,haveit replacedoradjustedbyaNISSANdealer. 2.Havethebeltscheckedregularlyforcondition.

WARNING
Besuretheengineandignitionswitch areoffandthattheparkingbrakeis engagedsecurely.

CAUTION
Besuretousethecorrectsocketto removethesparkplugs.Anincorrect socketcandamagethesparkplugs.

REPLACINGSPARKPLUGS
Ifreplacementisrequired,seeaNISSANdealer forservicing.
Iridium-tippedsparkplugs
Itisnotnecessarytoreplacetheiridium-tipped sparkplugsasfrequentlyastheconventional typesparkplugssincetheywilllastmuchlonger. Followthemaintenancelogshowninthe
"NISSANServiceandMaintenanceGuide".Do notreusesparkplugsbycleaningorregapping.
Alwaysreplacesparkplugswithrecommendedorequivalentones.
AIRCLEANER

Pushthetabs ① andpulloutthefilterelement ②.
Theaircleanerfiltersshouldnotbecleanedand reused.Replaceitaccordingtothemaintenance logshowninthe"NISSANServiceandMaintenanceGuide".Whenreplacingthefilter,wipe theinsideoftheaircleanerhousingandthe coverwithadampcloth.

WARNING
- Operatingtheenginewiththeair cleanerremovedcancauseyouor otherstobeburned.Theaircleaner notonlycleanstheair,itstops
8-16 Maintenance and do-it-yourself
flameiftheenginebackfires.lfit isn'tthere,andtheenginebackfires, youcouldbeburned.Donotdrive withtheaircleanerremoved,andbe carefulwhenworkingontheengine withtheaircleanerremoved.
- Neverpourfuelintothethrottle bodyorattempttostarttheengine withtheaircleanerremoved.Doing socouldresultinseriousinjury.
WINDSHIELDWIPERBLADES
CLEANING
If your windshield is not clear after using the windshield washer or if a bladechatters when running, wax or other material maybe on the blade or windshield.
Cleantheoutsideofthewindshieldwitha washersolutionoramilddetergent.Your windshielddiscleanifbeadsdonotformwhen rinsingwithclearwater.
Cleaneachbladebywipingitwithacloth soakedinawashersolutionoramildetergent. Thenrinsethebladewithclearwater.Ifyour windshieldisstillnotclearaftercleaningthe bladesandusingthewiper,replacetheblades.

CAUTION
Wornwindshieldwiperbladescan damagethewindshieldandimpair drivervision.

REPLACING
Replacethewiperbladesiftheyareworn.
- Liftthewiperarmawayfromthewindshield.
2.Pushandholdthereleasetab Ⓐ, and movethewiperbladedownthewiperarm Ⓜ. - Insertthenewwiperbladeontothewiper armuntilaclicksounds.
- Rotatethewiperbladesothatthedimpleis inthegroove.

CAUTION
- Afterwiperbladereplacement, returnthewiperarmtoitsoriginal position;otherwiseitmaybedamagedwhenthehoodisopened.
- Makesurethewiperbladescontact theglass;otherwisethearmmaybe damagedfromwindpressure.
REARWINDOWWIPERBLADEBRAKES

Becarefulnottoclogthewashernozzle Thismaycauseimproperwindshieldwasher operation.Ifthenozzleisclogged,removeany objectswithaneedleorsmallpin ①. Be carefulnottodamagethenozzle.
ContactaNISSANdealerifcheckingor replacementisrequired.
If the brakes donot operate properly, have the brakes checked by a NISSAN dealer.
SELF-ADJUSTINGBRAKES
Yourvehicleisequippedwithself-adjusting brakes.
Thedisc-typebrakesself-adjusteverytimethe brakepedalisapplied.

WARNING
SeeaNISSANdealerforabrake systemcheckifthebrakepedalheight doesnotreturntonormal.
BRAKEPADWEARINDICATORS
Thediscbrakepadshaveaudiblewearwarnings. Whenabrakepadrequiresreplacement, it willmakeahighpitchedscrapingsoundwhen thevehicleisinmotion. Thisscrapingsoundwill firstoccuronlywhenthebrakepedalis depressed. Aftermorewearofthebrakepad, thesoundwillalwaysbeheardevenifthebrake pedalisnotdepressed. Havethebrakes checkedassoonaspossibleifthewearwarning soundisheard.
Undersomedriving or climate conditions, occasional brakesqueak, squealorothernoise maybe heard. Occasionalbrakenoiseduring
8-18 Maintenance and do-it-yourself
FUSES
lighttomoderatestopsisnormalanddoesnot affectthefunctionorperformanceofthebrake system.
Properbrakeinspectionintervalsshould befollowed.Foradditionalinformation,seethe maintenancelogsectionofyour"NISSAN ServiceandMaintenanceGuide".
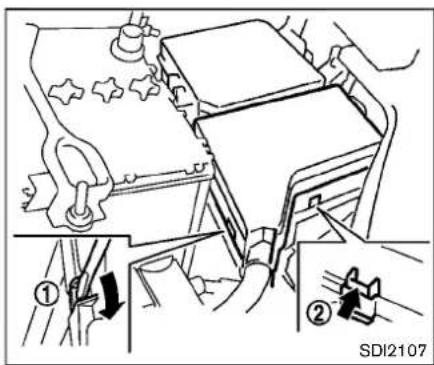
ENGINECOMPARTMENT

CAUTION
Neveruseafuseofahigherorlower amperageratingthanthatspecifiedon thefuseboxcover.Thiscoulddamage theelectricalsystemorcauseafire.
Ifanyelectricalequipmentdoesnotoperate, checkforanopenfuse.
-
Besuretheignitionswitchandtheheadlight switchareturnedoff.
-
Opentheenginehood.
-
Removetheaircleanerduct.(See "Engine compartmentchecklocations"(P.8-6).)
-
Removethefuse/fusiblelinkholdercover usingasuitabletool ① andpushingthetab ②.
-
Removethefusewiththefusepullerlocated inthepassengercompartmentfusebox.

- If the fuse is open fuse Ⓑ.
Ⓐ ,replaceitwithanew - Ifanewfusealsoopens, havetheelectrical systemcheckedandrepairedbyaNISSAN dealer.
Fusiblelinks
Ifanyelectricalequipmentdoesnotoperateand fusesareingoodcondition,checkthefusible links.Ifanyofthesefusiblelinksaremelted, replaceonlywithgenuineNISSANparts.

PASSENGERCOMPARTMENT

CAUTION
Neveruseafuseofahigherorlower amperageratingthanthatspecified on the fuseboxcover. This could damage the electrical system or cause a fire.
Ifanyelectricalequipmentdoesnotoperate, checkforanopenfuse.
-
Besuretheignitionswitchandtheheadlight switchareturnedoff.
-
Pulltoremovethefuseboxcover
-
Removethefusewiththefusepuller
①
②
8-20 Maintenance and do-it-yourself

- If the fuse is open fuse Ⓑ .
Ⓐ ,replaceitwithanew - Ifanewfusealsoopens, havetheelectrical systemcheckedandrepairedbyaNISSAN dealer.

natural_image
Hand inserting a USB into a device component (no text or symbols visible)Extendedstoragefuseswitch(ifso equipped)
Toreducebatterydrain,theextendedstorage fuseswitchcomesfromthefactoryswitchedoff. Priorodeliveryofyourvehicle,theswitchis pushedin(switchedon)andshouldalways remainon.
Iftheextendedstoragefuseswitchisnot pushedin(switchedon),the"Shippingmode on,Pushstoragefuse"warningmayappearin thevehicleinformationdisplay.See"11.Ex-tendedstoragefusewarning"(P.2-19).
Ifanyelectricalequipmentdoesnotoperate, removetheextendedstorageswitchandcheck
foranopenfuse.
NOTE:
Iftheextendedstoragefuseswitchmal-functions,orifthefuseisopen,itisnot necessarytoreplacetheswitch.Inthis case,removetheextendedstoragefuse switchandreplaceitwithanewfuseofthe samerating.
Howtoremovetheextendedstoragefuse switch:
-
Toremovetheextendedstoragefuseswitch, besuretheignitionswitchisinthe "OFF" or "LOCK" position.
-
Besuretheheadlightswitchisinthe "OFF" position.
-
Removethefuseboxcover.
-
Pinchthestoragefuseswitchandpullitin thedirectionillustrated.
BATTERYREPLACEMENT

CAUTION
Becarefulnottoallowchildrento swallowthebatteryandremovedparts.
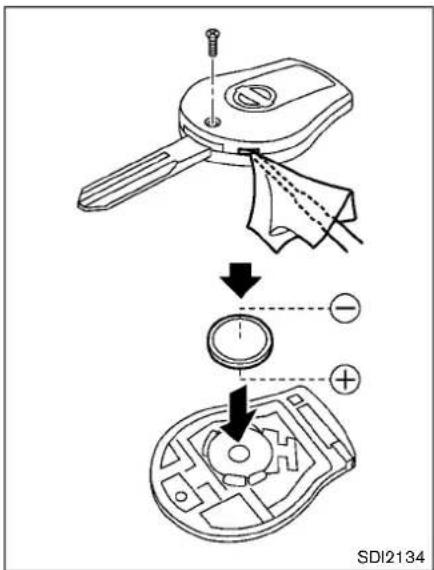
KEYFOB
Replacethebatteryinthekeyfobasfollows:
- Removethescrew.
- Insertasmallscrewdriverintotheslitofthe cornerandtwistitoseparatetheupperpart fromthelowerpart.Useaclothtoprotect
thecasing.
- Replacethebatterywithanewone.
Recommendedbattery:
CR1620orequivalent
- Donottouchtheinternalcircuitand electricterminalsasdoingsocould causeamalfunction.
- Holdthebatterybytheedges.Holding thebatteryacrossthecontactpointswill seriouslydepletethestoragecapacity.
-
Makesurethatthe ⊕ sidefacesthe bottomcase.
-
Closethelidsecurelyandinstallthescrew.
- Operatethebuttonstocheckitsoperation. SeeaNISSANdealerifyouneedanyassistance forreplacement.
FCCNotice:
ThisdevicecomplieswithPart15ofthe FCCRules.Operationissubjecttothe followingtwoconditions:(1)Thisdevice maynotcauseharmfulinterference,and (2)thisdevicemustacceptanyinterferencereceived,includinginterferencethat maycauseundesiredoperation.
Note: Changesormodificationsnotexpresslyapprovedbythepartyresponsible forcompliancecouldvoidtheuser's
authoritytooperatetheequipment.
Maintenanceanddo-it-yourself8-23
LIGHTS
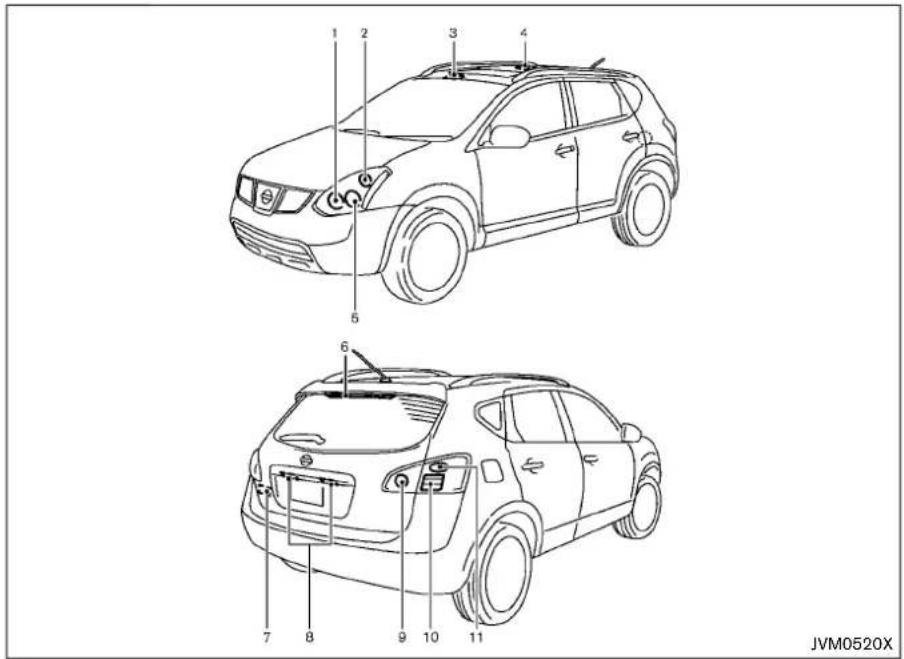
- Headlight(high-beam)
2.Frontturnsignal/parking/sidemarkerlight
3.Frontmaplight - Ceilinglight
5.Headlight(low-beam)
6.High-mountedstoplight
7.Cargolight - Licenseplatelight
9.Back-uplight - Rearcombinationlight(stop/tail/sidemarker light)
- Rearturnsignallight
HEADLIGHTS
Fogmaytemporarilyforminsidethelensofthe exteriorlightsintherainorinacarwash.A temperaturedifferencebetweentheinsideand theoutsideofthelenscausesthefog.Thisis notamalfunction.Iflargedropsofwatercollect insidethelens,contactaNISSANdealer.
Replacing
Theheadlightisasemi-sealedbeamtypewhich usesareplaceableheadlight(halogen)bulb.

CAUTION
- Donotleavethebulboutofthe headlightreflectorforalongperiod oftime.Dust,moisture,smoke,etc.
enteringtheheadlightbodymay affectbulbperformance.
•Highpressurehalogengasissealed insidethehalogenbulb.Thebulb maybreakiftheglassenvelopeis scratchedorthebulbisdropped.
- Onlytouchtheplasticbasewhen handlingthebulb.Nevertouchthe glassenvelope.
- Aimingisnotnecessaryafterreplacingthebulb.Whenaimingadjustment is necessary,contacta NISSANdealer.
Usethesamenumberandwattageasoriginally installed:
Lowbeam:
Wattage:55
Bulbno.:H11
Highbeam:
Wattage:60
Bulbno.:HB3
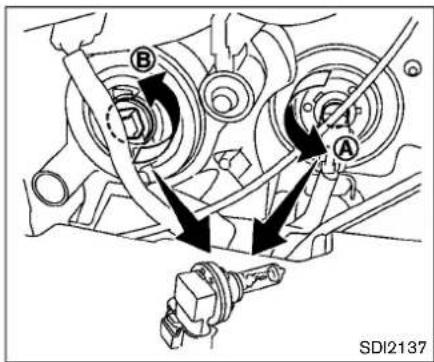
Disconnectthebatterynegativecablebefore replacingbulbs.
A High-beambulb
B Low-beambulb
EXTERIORANDINTERIORLIGHTS
| ItemWattage(W) | BulbNo. | |
| Frontturnsignal/parking/sidemarkerlight27/8 | S25 | |
| Rearcombinationlight | ||
| back-up18 | W16W | |
| turnsignal21 | W21W | |
| stop/tail/sidemarker21/5 | W21/5W | |
| Licenseplatelight5 | W5W | |
| Frontmaplight8 | — | |
| Vanitymirrorlight(ifsoequipped)2 | — | |
| High-mountedstoplight*LED | — | |
| Ceilinglight(ifsoequipped)8 | — | |
| Cargolight8 | — | |
| Gloveboxlight*3.4 | — |
*: SeeaNISSANdealerforreplacement.
NOTE: Always check with the Parts Department at a NISSAN dealer for the latest information about parts.


REMOVE
INSTALL
Replacementprocedures
All other lights are either type A, B, C, D or E. When replacing a bulb, first remove the lens and/or cover.

natural_image
Mechanical assembly diagram showing a hand operating a component with arrows indicating motion direction (no text or symbols)Frontturnsignal/parking/sidemarkerlight
Removethebulbasillustrated.

Rearcombinationlight(stop/tail/sidemarker/turn)
Openthelfitgatetoremovetherearcombinationlightassembly.
Ⓐ :Clip
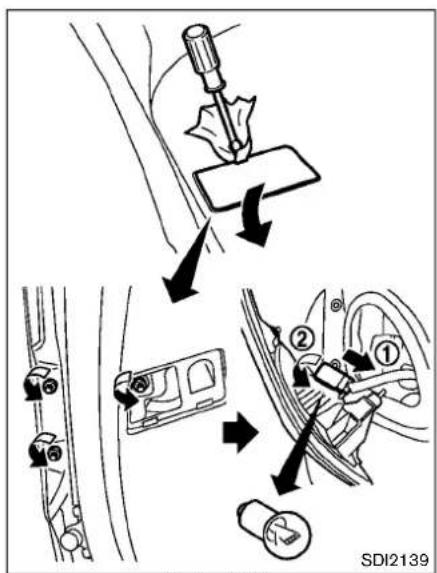
Back-uplight
Opentheliftgatetoremovetheback-uplight assembly. Onescrewislocatedbehindthe coverontheliftgate.
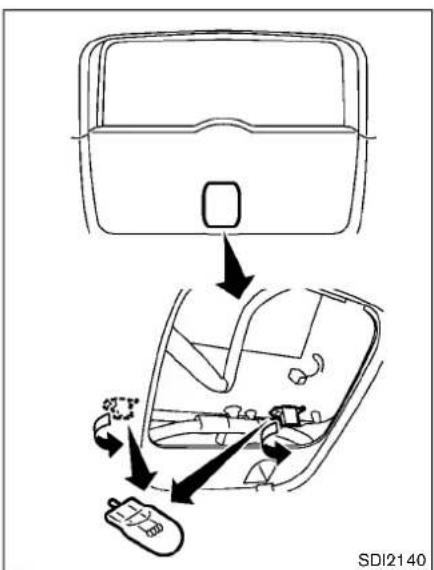
Licenseplatelight
The license plate light bulb can be accessed by removing the cover on the inside of the lift gate.

natural_image
Diagram showing a hand inserting a device into a car's side panel, with an arrow indicating rotation (no text or symbols present)Frontmaplight

Ceilinglight

Cargolight
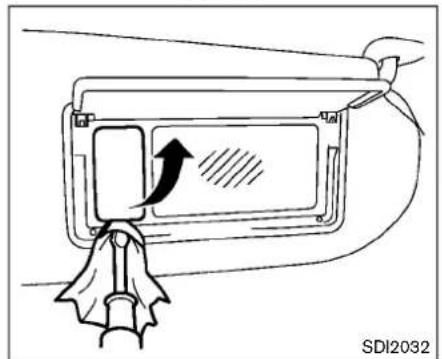
Vanitymirrorlight
8-28 Maintenance and do-it-yourself
WHEELSANDTIRES
If you have a flattire, see "Flattire" (P.6-2). TIREPRESSURE
TirePressureMonitoringSystem(TPMS)
ThisvehicleisequippedwiththeTirePressure MonitoringSystem(TPMS).Itmonitorstire pressureofalltiresexceptthespare.When thelowtirepressurewarninglightislitandthe CHECKTIREPRESSUREwarningappearson thevehicleinformationdisplay,oneormoreof yourtiresissignificantlyunder-inflated.
The TPMS will activate only when the vehicle is driven at speeds above 16 MPH (25 km/h). Also, this system may not detect as a sudden drop in tire pressure (fore example of all tire while driving).
Formoredetails, see "Lowtirepressurewarning light" (P.2-12), "TirePressureMonitoringSystem(TPMS)" (P.5-3) and "TirePressureMonitoringSystem(TPMS)" (P.6-2).
Tireinflationpressure
Check the pressure of the tires (including the spare) often and always prioritolong distancetrips. There recommended tire pressures specifications are shown on the Tire and Loading Information label under the "Cold Tire Pressure" heading. The Tire and Loading Information label is affixed to
thedriversidecenterpillar.Tirepressures shouldbecheckedregularlybecause:
- Mosttiresnaturallyloseairovertime.
- Tirescanloseairsuddenlywhendriven overpotholesorotherobjectsonifthe vehiclestrikesacurbwhileparking.
Thetirepressuresshouldbechecked whenthetiresarecold. Thetiresare consideredCOLDafterthevehiclehas beenparkedfor3ormorehours,ordriven lessthan1 mile(1.6km)atmoderate speeds.
Incorrect tire pressure, including underinflation, may adversely affect tire life and vehicle handling.

WARNING
- Improperlyinflatedtirescanfail suddenlyandcauseanaccident.
●TheGrossVehicleWeightrating (GVWR)islocatedontheF.M.V. S.S.certificationlabel.ThevehicleweightcapacityisindicatedontheTireandLoading Informationlabel. Donotload
yourvehiclebeyondthiscapacity. Overloadingyourvehicle mayresultinreducedtirelife, unsafeoperatingconditionsdue toprematuretirefailure,orunfavorablehandling characteristicsandcouldalsoleadtoa seriousaccident. Loadingbeyondthespecifiedcapacitymay alsoresultinfailureofother vehiclecomponents.
- Beforetakingalongtrip,or wheneveryouheavilyloadyour vehicle,usea tirepressure gaugetoensurethatthetire pressuresareatthespecified level.
- Foradditionalinformationregardingtires,referto"Important TireSafetyInformation"inthe WarrantyInformationBooklet.


SDI2340
TireandLoadingInformationlabel
① Seatingcapacity: Themaximumnumberofoccupantsthatcanbeseatedin thevehicle.
② Vehicleloadlimit: See "Vehicleloadinginformation" (P.9-12).
③ Originalsize: Thesizeofthetires originally installed on the vehicle at the factory.
④ Coldtirepressure:Inflatethetiresto thispressurewhenthetiresarecold. TiresareconsideredCOLDafterthe vehiclehasbeenparkedfor3ormore
hours, or driven less than 1 mile (1.6 km) at moderate speeds. There recommended cold tire inflation issue by the manufacturer to provide the best balance of tire wear, vehicle handling, driveability, tire noise, etc., upto the vehicle's GVWR.
⑤ Tiresize—see "Tirelabeling" (P.8-31).
⑥ Sparetiresizeorcompactsparetire size(ifsoequipped)
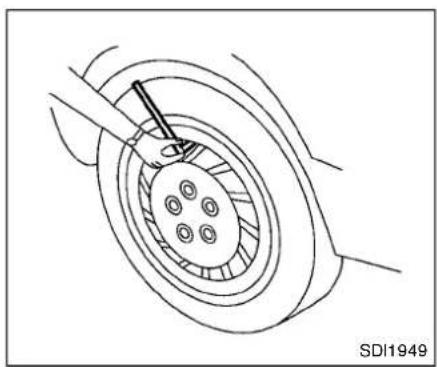
natural_image
Technical line drawing of a mechanical assembly with a central component and surrounding components (no text or symbols)Checkingthetirepressure
- Removethevalvestemcapfromthe tire.
-
Pressthepressuregaugesquarelyonto thevalvestem.Donotpresstoohardor forcethevalvestemsideways,orairwill escape.Ifthehissingsoundofair escapingfromthetireisheardwhile checkingthepressure,repositionthe gaugetoeliminatethisleakage.
-
Removethegauge.
-
Read the tire pressure on the gauge stemand compare it to the specific
tionshownontheTireandLoading Informationlabel.
5.Addairtothetireasneeded.Iftoo muchairisadded,pressthecoreofthe valvestembrieflywiththetipofthe gaugestemtoreleasepressure.Re-checkthepressureandaddorrelease airasneeded.
6. Installthevalvestemcap.
7. Check the pressure of allothertires, including the spare.
| SIZE | COLDTIRE INFLATION PRESSURE | |
| FRONT ORIGINAL TIRE | P215/70-R1699H | 230kPa, 33PSI |
| P225/60-R1798H | 230kPa, 33PSI | |
| REAR ORIGINAL TIRE | P215/70-R1699H | 230kPa, 33PSI |
| P225/60-R1798H | 230kPa, 33PSI | |
| SPARE TIRE | T155/90-D16 | 420kPa, 60PSI |

Example
TIRELABELING
Federallawrequirestiremanufacturersto placestandardizedinformationonthesidewallofalltires. Thisinformationidentifies anddescribesthefundamentalcharacteristicsofthetireandalsoprovidesthetire identificationnumber(TIN)forsafetystandardcertification.TheTINcanbeusedto identifythetireincaseofarecall.
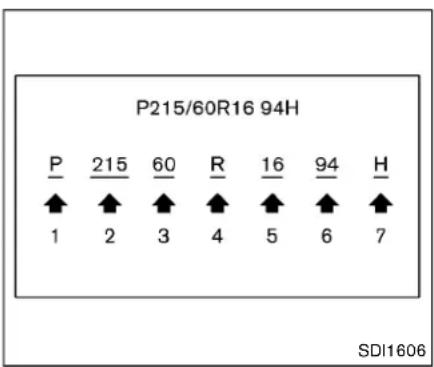
Example
① Tiresize(example:P215/60R1694H)
1.P:The"P"indicatesthetireisdesigned forpassengervehicles.(Notalltires havethisinformation.)
2. Three-digitnumber(215): This number gives the width in millimeters of the entire from sidewalled getosidewalledge.
3. Two-digitnumber(60): This number, knownastheaspectratio, gives the tire's ratio of height to width.
4.R:The“R”standsforradial.
5. Two-digit number(16): This number is the wheel or rim diameter in inches.
8-32 Maintenance and do-it-yourself
- Two-orthree-digitnumber(94): This numberisthetire'sloadindex.Itisa measurementofhowmuchweighteach tirecansupport.Youmaynotfindthis informationonalltiresbecauseitisnot requiredbylaw.
7.H:Tirespeedrating.Youshouldnot drivethevehiclefasterthanthetire speedrating.

② TIN(TireIdentificationNumber)fora newtire(example:DOTXXXXXXXX XXXX)
1. DOT: Abbreviation for the "Department of Transportation". Thesymbol can be placed above, below to the left for right of the Tire Identification Number.
2. Two-digitcode: Manufacturer's identification mark
3. Two-digitcode: Tiresize
4. Three-digitcode: Tiretypecode(Optional)
- Three-digitcode: DateofManufacture
- Fournumbers represent the week and year the tire was built. Forexample, the numbers 3103 mean the 31st week of 2003. If these numbers are missing, then look on the others' sidewal of the tire.
③ Tireplycompositionandmaterial Thenumberoflayersorpliesof rubber-coatedfabricinthetire. Tiremanufacturersalsomustindicate thematerialsinthetire,whichinclude steel,nylon,polyester,andothers.
④ Maximumpermissibleinflationpressure Thisnumberisthegreatestamountof airpressurethatshouldbeputinthe tire.Donotexceedthemaximum permissibleinflationpressure.
⑤ Maximumloadrating Thisnumberindicatethemaximum loadinkilogramsandpoundsthatcan becarriedbythetire.Whenreplacing thetiresonthevehicle,alwaysusea tirethathasthesameloadratingas thefactoryinstalledtire.
⑥ Termof"tubeless"or"tubetype" Indicateswhetherthetirerequiresan innertube("tubetype")ornot("tubeless").
⑦ Theword"radial"
Theword"radial"isshown,ifthetire hasradialstructure.
⑧ Manufacturerorbrandname
Manufacturerorbrandnameisshown.
Othertire-relatedterminology:
Inadditiontothemanytermsthatare definedthroughoutthissection,Intended OutboardSidewallis(1)thesidewallthat containsawhitewall,bearswhitelettering orbearsmanufacturer,brandand/ormodel namemoldingthatishigherordeeperthan thesamemoldingontheothersidewallof thetire,or(2)theoutwardfacingsidewall ofanasymmetricaltirethathasaparticular sidethatmustalwaysfaceoutwardwhen mountedonavehicle.
TYPESOFTIRES

WARNING
- Whenchangingorreplacingtires, besureallfourtiresareofthesame type(Example:Summer,AllSeason or Snow) and construction. A NISSANdealermaybeabletohelp youwithininformationabouttiretype, size,speedratingandavailability.
- Replacementtiresmayhavealower speed rating than the factory equippedtires, and may not match the potential maximum vehicle speed. Never exceed them maximum speed rating of the tire.
- ReplacingtireswiththosenotoriginallyspecifiedbyNISSANcould affecttheproperoperationofthe TPMS.
- Foradditionalinformationregardingtires,referto"ImportantTire SafetyInformation"intheWarranty InformationBooklet.
Allseasontires
NISSANspecifiesallseasontiresonsome modelstoprovidegoodperformanceallyear, includingsnowyandicyroadconditions.All SeasontiresareidentifiedbyALLSEASON and/orM&S(MudandSnow)onthetire sidewall.Snowtireshavebettersnowtraction thanAllSeasontiresandmaybemoreappropriateinsomeareas.
Summertires
NISSANspecifiessummertiresonsome modelstoprovidesuperiorperformanceondry roads.Summertireperformanceissubstantially reducedinsnowandice.Summertiresdonot havethetiretractionratingM&Sonthetire sidewall.
If you plant to operate your vehicle in snowy or icy conditions, NISSAN recommend the use of SNOW tires or ALL SEASON tires on all four wheels.
Snowtires
Ifsnowtiresareneeded,itisnecessarytoselect tiresequivalentinsizeandloadratingtothe originalequipmenttires.Ifyoudonot,itcan adverselyaffectthesafetyandhandlingofyour vehicle.
Generally, snowtireswillhavelowerspeed ratingsthanfactoryequippedtiresandmaynot
8-34 Maintenance and do-it-yourself
match the potential maximum vehicles speed. Never exceed them maximum speed rating of the tire.
If you install snowtires, they must be the same size, brand, construction and tread pattern on all four wheels.
Foradditionaltractiononicyroads,studded tiresmaybeused.However,someU.S.states prohibit their use.Checklocal,stateand provinciallawsbeforeinstallingstuddedtires. Skidandtractioncapabilitiesofstuddedsnow tires,onwetordrysurfaces,maybepoorerthan thatofnon-studdedsnowtires.
All-WheelDrive(AWD)models

CAUTION
●Alwaysusetiresofthesametype, size,brand,construction(bias,bias-beltedorradial),andtreadpattern onallfourwheels.Failureuretodoso mayresultinacircumference differencebetweeniresonthefrontand rearaxleswhichwillcauseexcessivetirewearandmaydamagethe transmission,transfercaseanddifferentialgears.
•ONLYusesparetiressspecifiedfor theAWDmodel.
Ifexcessivetirewearisfound,itisrecommendedthatallfourtiresbereplacedwithtires ofthesamesize,brand,constructionandtread pattern. Thetirepressureandwheelalignment shouldalsobecheckedandcorrectedas necessary.ContactaNISSANdealer.
TIRECHAINS

CAUTION
NISSAN recommends using the following tirecables made by Peerless Chain Company for this vehicleduetolimited tire clearance. Call 800-533-8056 to ordertirechains for your vehicle.
•215/70R16-Sno-trac1000partnumber0103855withchaintightener partnumber2007020
•225/60R17-Sno-trac1000partnumber0103855withchaintightener partnumber2007190
Failuretousethecorrecttraction devicewillcausedamagetothebrakes, suspensionorothervehicleparts.
The tirechainpartnumbersandPeerlessChain Companyphonenumberarecorrectatthe time of printing that is shown on the backcover of this Owner's Manual. Always confirm the correct part numbers with PeerlessChain Company before ordering.
Onlyuseothertypesoftractiondevicesifthetractiondevicemanufacturerrecommendsitforuseonyourspecificvehicleandthetireandwheelinstalledonyourvehicle.
Useoftractiondevicesmaybeprohibited accordingtolocation.Checkthelocallaws beforeinstallingtractiondevices.Wheninstallingtractiondevices,makesuretheyarethe propersizeforthetiresonyourvehicleandare installedaccordingtothetractiondevicemanufacturer'ssuggestions.Whenusingtraction devices,avoidfullyloadingyourvehicleand driveatreducedspeeds.Failureretodosomay causedamagetothebrakesandsuspension andadverselyaffecthandlingandperformance.
Tractiondevicesmustbeinstalledonlyon thefrontwheelsandnotonthear wheels.
Donotdrivewithtractiondevicesonpaved roadsthatareclearofsnow.Drivingwith tractiondevicesinsuchconditionscancause damagetothevariousmechanismsofthe vehicleduetosomeoverstress.

CAUTION
- Donotusetractiondevicesondry roads.
- NeverinstalltractiondevicesonaT-typesparetireasdoingsocould damagethebrakes,suspensionor othervehicleparts.



SDI1662
CHANGINGWHEELSANDTIRES
Tirerotation
NISSAN recommends rotating the tires every 5,000 miles (8,000 km). (See "Flat tire" (P.6-2) fortirereplacing procedures.)
Assoonaspossible,tightenthewheel nutstothespecifiedtorquewitha torquewrench.
Wheelnuttighteningtorque: 80ft-lb(108N·m)
Thewheelnutsmustbekepttigh- tenedtothespecificationatalltimes. Itisrecommendedthatwheelnutsbe
Maintenanceanddo-it-yourself
8-35
tightenedtothespecificationateach tirerotationinterval.

WARNING
- Afterrotatingthetires, check and adjust the tire pressure.
- Retightenthewheelnutswhen thevehiclehasbeendrivenfor 600miles(1,000km)(alsoin casesofaflattire,etc.).
- Donotincludethesparetireor anyothersmallsizesparetirein thetirerotation.
- Foradditionalinformationregardingtires,referto"Important TireSafetyInformation"inthe WarrantyInformationBooklet.
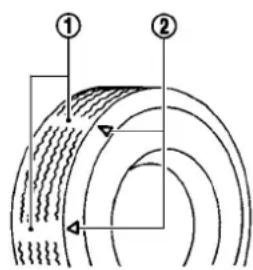
SDI1663
- Wearindicator
- Wearindicatorlocationmark
Tirewearanddamage

WARNING
- Tiresshouldbeperiodicallyin- spectedforwear,cracking,bul- gingorobjectscaughtinthe tread.Ifexcessivewear,cracks, bulgingordeepcutsarefound, thetire(s)shouldbereplaced.
- The original tires have built-in treadwear indicators. When wearindicatorsarevisible, the tire(s)shouldbereplaced.
•Tiresdegradewithageand use. Havetires,includingthespare, over6yearsoldcheckedbya qualifiedtechnician,because sometiredamagemay notbe obvious.Replacethetiresas necessarytopreventtirefailure andpossiblepersonalinjury. - Improperserviceofthespare tiremayresult inseriouspersonalinjury. Ifit isnecessary to repairthesparetire,contacta NISSANdealer.
- Foradditionalinformationregardingtires,referto"Important TireSafetyInformation"inthe WarrantyInformationBooklet.
Replacingwheelsandtires
When replacing atire, usethesamesize, tread design, speed rating and load carrying capacity as originally equipped. (See "Specifications" (P.9-7) for recommended types and sizes of tires and wheels.)

WARNING
•Theuseoftiresotherthanthose
recommendedorthemixeduseof tiresofdifferentbrands,construction(bias,bias-beltedorradial),or treadpatternscanadverselyaffect theride,braking,handling,ground clearance,body-to-tireclearance, tirechainclearance,speedometer calibration,headlightaimandbumperheight.Someoftheseeffects mayleadtoaccidentsandcould resultinseriouspersonalinjury.
- For2WDmodels, if your vehicle was originally equipped with 4tiresthat werethesamesize and you are only replacing 2 of the 4 tires, install the new tires on therear axle. Placing new tires on the frontaxle may cause lossof vehicle control in some driving conditions and cause
anaccidentandpersonalinjury.
- Ifthewheelsarechangedforany reason,alwaysreplacewithwheels whichhavethesameoff-setdimension.Wheelsofadifferentoff-set couldcauseprematuretirewear, degradevehiclehandlingcharacteristicsand/orinterferencewiththe brakediscs/drums.Suchinterferencecanleadtodecreasedbraking efficiencyand/orearlybrakepad/ shoewear.See"Wheelsandtires" (P.9-7)ofthismanualforwheeloff-setdimensions.
- Whenasparetireismountedora wheelisreplaced,theTPMSwillnot functionandthelowtirepressure warninglightwillflashforapproximately1minute. Thelightwill remainonafter1minute.Contact yourNISSANdealerassoonas possiblefortirereplacementand/orsystemresetting.
- Replacingtireswiththosenotori-ginallyspecifiedbyNISSANcould affecttheproperoperationofthe TPMS.
- Donotinstalladamagedorde- formedwheelortireevenifithas
beenrepaired.Suchwheelsortires could have structural damage and could fail without warning.
•Theuseofretreadtireisnotrecommended.
- For additional information regarding tires, referto "Important Tire Safety Information" in the Warranty Information Booklet.

CAUTION
Alwaysusetiresofthesametype,size,brand,construction(bias,bias-beltedorradial),andtreadpatternonallfourwheels.Failureretodosomayresultinacircumferencedifferencebetweenioreonthefrontandrearaxleswhichwillcauseexcessivetirewearandmaydamagethetransmission,transfercaseanddifferentialgears(AWDmodels).
Wheelbalance
Unbalanced wheels may affect vehicle handling and tire life. Even with regular use, wheels can get out of balance. Therefore, they should be balanced as required.
Wheelbalanceservicesshouldbeperformedwiththewheelsoffthevehicle. Spinbalancingthewheelsonthevehicle couldleadtomechanicaldamage.
For additional information regarding tires, refer to "Important Tire Safety Information" in the Warranty Information Booklet.
Careofwheels
See "Cleaningexterior" (P.7-2) fordetails about careofthewheels.
Sparetire
Whenasparetireismounted(TEMPORARY USEONLYorconventional), the TPMS will not function.
ObservethefollowingprecautionsiftheTEMPORARYUSEONLYsparetiremustbeused, otherwiseyourvehiclecouldbedamagedor involvedinanaccident.

WARNING
•TheTEMPORARYUSEONLYspare tireshouldbeusedforemergency use.Itshouldbereplacedwiththe standardtireatthefirstopportunity toavoidpossibletireordifferential damage.
- DrivecarefullywhiletheTEMPORARYUSEONLYsparetireisinstalled. Avoid sharp turnsand abruptbrakingwhiledriving.
- Periodicallychecksparetireinflationpressure. Always keepthe pressureoftheTEMPORARYUSE ONLYsparetireat60psi(420kPa, 4.2bar).Alwayskeepthepressure ofthefullsizesparetire(ifso equipped) atthe recommended pressureforstandardtires,asindicatedontheTireandLoading Informationlabel.
- With the TEMPORARY USE ONLY spare tire installed on not drive your vehicle speeds faster than 50 MPH (80km/h).
- Whendrivingonroadscoveredwith snoworice,theTEMPORARYUSE
ONLYsparetireshouldbeusedon therearwheelsandoriginaltire usedonthefrontwheels(drive wheels).Usetirechainsonlyon thefront(original)tires.
•TiretreadoftheTEMPORARYUSE ONLYsparetirewillwearatafaster ratethanthestandardtire.Replace thesparetireassoonasthetread wearindicatorsappear.
- Donotusethesparetireonother vehicles.
- Donotusemorethanonesparetire atthesametime.
- Do not tow a trailer while the TEMPORARYUSEONLYsparetire isinstalled.

CAUTION
- DonotusetirechainsonaTEM-PORARYUSEONLYsparetire.Tire chainswillnotfitproperlyandmay causedamagetothevehicle.
- Because the TEMPORARY USE ONLY spare tire is smaller than the original tire, ground clearance is
reduced.Toavoiddamagetothe vehicle,donotdriveoverobstacles. Also do not drive the vehicle through an automatic car wash since it may get caught.
Maintenanceanddo-it-yourself8-39
MEMO
8-40 Maintenance and do-it-yourself
9Technicalandconsumerinformation
Capacitiesandrecommendedfluids/lubricants....9-2
Fuelinformation....9-3
Engineoilandoilfilterrecommendation....9-5
Airconditioningsystemrefrigerantand lubricantrecommendations....9-6
Specifications....9-7
Engine....9-7
Wheelsandtires....9-7
Dimensionsandweights....9-8
Whentravelingorregisteringyourvehiclein
anothercountry....9-8
Vehicleidentification....9-8
VehicleIdentificationNumber(VIN)plate....9-8
Vehicleidentificationnumber(chassisnumber)......9-9
Engineserialnumber....9-9
F.M.V.S.S.certificationlabel....9-9
Emissioncontrolinformationlabel....9-10
Tireandloadinginformationlabel....9-10
Airconditionerspecificationlabel....9-10
Installingfrontlicenseplate....9-11
Vehicleloadinginformation....9-12
Terms....9-12
Vehicleloadcapacity....9-13
Securingtheload....9-14
Loadingtips....9-15
Measurementofweights....9-15
Towingatrailer....9-16
Maximumloadlimits....9-16
MaximumGrossVehicleWeight(GVW)/maximumGrossAxleWeight(GAW)....9-18
Towingload/specification....9-20
Towingsafety....9-20
Flattowing....9-24
Uniformtirequalitygrading....9-25
Treadwear....9-25
TractionAA,A,BandC....9-25
TemperatureA,BandC....9-25
Emissioncontrolsystemwarranty....9-26
Reportingsafetydefects....9-26
ReadinessforInspection/Maintenance(I/M)test......9-26
EventDataRecorders(EDR)....9-27
Owner'sManual/ServiceManualorderinformation.....9-28

CAPACITIES AND RECOMMENDED FLUIDS/LUBRICANTS
The following are approximate capacities. The actual refill capacities may be a little different. When refilling, follow the procedure instructed in the "8. Maintenance and do-it-yourself" section to determinethe proper refill capacity.
| Capacity(Approximate) | Recommendedspecifications | ||||
| USmeasureImp | pmeasure | Liter | |||
| Fuel15-7/8gal13-1/4gal60 | See“Fuelinformation”(P.9-3). | ||||
| Engineoil*Drainandrefill*Foradditionalinformation,see“Changingengineoilandfilter”(P.8-9) | Withoilfilterchange5-1/8qt4-1/4qt4.8 | GenuineNISSANengineoilorequivalentEngineoilwithAPICertificationMark*,ViscositySAE5W-30Asanalternativetohthisrecommendedoil.SAE5W-30orSAE10W-30conventionalpetroleumbasedoilsmaybeusedandmeetallspecificationsandrequirementsnecessarytomaintaintheNewVehicleLimitedWarranty.*:Foradditionalinformation,see“Engineoilandoilfilterrecommendation”(P.9-5). | |||
| Withoutoilfilterchange | 4-3/4qt | 4qt | 4.5 | ||
| Coolingsystem | Withreservoir | 7-3/4qt6-3/8qt7.3 | Pre-dilutedGenuineNISSANLongLifeAntifreeze/Coolant(blue)orequivalent | ||
| Reservoir | 3/4qt | 5/8qt | 0.75 | ||
| Continuously Variable Transmission (CVT) fluid | — | — | — | GenuineNISSANCVTFluidNS-3NISSAN recommends using Genuine NISSAN CVT Fluid NS-3 ONLY inNISSANCVTs.Donotmixwithotherfluids.UsingfluidsthataronetequivalenttoGenuineNISSANCVTFluidNS-3maydamagothcCVT.DamagecausedbytheuseoffluidsotherthanasrecommendedisnotcoveredunderNISSAN'sNewVehicleLimitedWarranty. | |
| Differentialgearoil | — | — | — | GenuineNISSANDifferentialOilHypoidSuperGL-580W-90orequivalentconventional(non-synthetic)oil | |
| Transferoil | — | — | — | ||
| Brakefluid | Refilltotheperoilevelaccordingtotheinstruc-tionsinthe“8.Maintenanceanddo-it-yourself”section. | GenuineNISSANSuperHeavyDutyBrakeFluid*orequivalentDOT3*:AvailableinmainlandU.S.A.through aNISSANdealer. | |||
| Multi-purposegrease | — | — | — | NLGINo.2(Lithiumsoapbase) | |
| Air conditioning system refrigerant | — | — | — | HFC-134a(R-134a)Foradditionalinformation,see“Vehicloidentification”(P.9-8)forairconditionerspecificationlabel. | |
| Air conditioning system lubricants | — | — | — | NISSANA/CSystemOilTypeSorexactequivalent | |
| Windowwasherfluid | 1-1/4gal | 1gal | 4.5 | Genuine NISSAN Windshield Washer Concentrate Cleaner & Antifreezeorequivalent | |
FUELINFORMATION
Useunleadedregulargasolinewithanoctane ratingofatleast87AKI(Anti-KnockIndex) number(Researchoctanenumber91).

CAUTION
- Usingafuelotherthanthatspecifiedcouldadverselyaffecttheemissioncontrolsystem,andmayalso affectwarrantycoverage.
- Undernocircumstances should leaded gasolinebeused, because this will damage the three-way catalyst.
- DonotuseE-15orE-85fuelinyour vehicle. Your vehicle is not designed torunonE-15orE-85fuel. Using E-15orE-85fuel in vehiclenot specifically designed for E-15orE-85 fuel can adversely affect the emission control devices and systems of the vehicle. Damage caused by such fuel is not covered by the NISSAN new vehicle limited warranty.
•U.S. government regulations require ethanoldispensingpumpstobe
identifiedbyasmall,square,orange andblacklabelwiththecommon abbreviationortheappropriatepercentageforthatregion.
Gasolinespecifications
NISSAN recommends using gasolinethat meets the World-Wide Fuel Charter (WWFC) specifications where it is available. Many of the automobile manufacturers developed this specification to improve emission control system and vehicle performance. Ask your service station manager if the gasolinemeets the WWFC specifications.
Reformulated gasoline
Somefuelsuppliersarenowproducingreformulatedgasolines. These gasolinesarespecially designedtoreducevehicleemissions. NISSAN supportseffortstowardscleanerairandsuggeststhatyouusereformulatedgasolinewhen available.
Gasolinecontainingoxygenates
Somefuelsuppliersellgasolinecontaining oxygenatessuchasethanol,MTBEandmethanolwithorwithoutadvertisingtheirpresence. NISSANdoesnotrecommendtheuseoffuels ofwhichtheoxygenatecontentandthefuel compatibilityforyourNISSANcannotbereadily
determined. Ifindoubt, ask your service station manager.
If you use oxygenate - blend gasoline, please take the following precautions asthe usage of such fuelsmay cause vehicle performance problems and/or fuel system damage.
- Thefuelshouldbeunleadedandhave anoctaneratingnolowerthanthat recommendedforunleadedgasoline.
- Ifanoxygenate-blend, other than methanol blend is used, it should contain non more than 10% oxygenate. (MTBEmay, however, beaded up to 15%.)
●E-15fuel contains more than 10% oxygenate. E-15fuel will adversely affect the emission control devices and system so the vehicle and should not be used. Damage caused by such fuel is not covered by the NISSAN new vehicle limited warranty. - Ifamethanolblendisused, it should containnomorethan5% methanol (methylalcohol, woodalcohol). It should also contains suitable amount of appropriate cosolvents and corrosion inhibitors. If not properly formulated with appropriate cosolvents and corrosion inhibitors, such methanol
Technical and consumer information 9-3
blendsmaycausefuelsystemdamage and/orvehicleperformanceproblems. Atthistime, sufficientdataisnot availabletoensurethatallmethanol blendsaresuitableforuseinNISSAN vehicles.
Ifanydriveabilityproblemssuchasengine stallinganddifficulthot-startingareexperienced afterusingoxygenate-blendfuels,immediately changetoanon-oxygenatefuelorafuelwitha lowblendofMTBE.
Takecarenottospillgasolineduring refueling. Gasolinecontainingoxygenates cancausepaintdamage.
E-15fuel
E-15fuelisamixtureofapproximately 15% fuel ethanoland 85% unleadedgasoline.E-15can onlybeusedinvehiclesdesignedtorunonE-15fuel.DonotuseE-15inyourvehicle.U.S. governmentregulationsrequirefuelethanol dispensingpumpstobeidentifiedwithsmall, square,orangeandblacklabelwiththecommon abbreviationortheappropriatepercentagefor thatregion.
E-85fuel
E-85fuelisamixtureofapproximately 85% fuel ethanoland 15% unleadedgasoline.E-85can onlybeusedinaFlexibleFuelVehicle(FFV).Do notuseE-85fuelinyourvehicle.U.S.governmentregulationsrequirefuelethanoldispensing pumpstobeidentifiedbyasmall,square, orangeandblacklabelwiththecommon abbreviationortheappropriatepercentagefor thatregion.
Aftermarketfueladditives
NISSANdoesnotrecommendtheuseofany aftermarketfueladditives(forexample,fuel injectorcleaner,octanebooster,intakevalve depositremovers,etc.)whicharesoldcommercially.Manyoftheseadditivesintendedforgum, varnishordepositremovalmaycontainactive solventorsimilaringredientsthatcanbeharmful tothefuelsystemandengine.
Octaneratingtips
Usingunleadedgasolinewithanoctane ratinglowerthanrecommendedcancause persistent,heavy"sparkknock".(Spark knockisametallicrappingnoise.)If severe,thiscanleadtoenginedamage.If youdetectapersistenttheavysparkknock evenwhenusinggasolineofthestated octanerating,orifyouhearsteadyspark
knockwhileholdingasteadyspeedon levelroads,haveaNISSANdealercorrect thecondition.Failuretocorrecttheconditionismisuseofthevehicle,forwhich NISSANisnotresponsible.
Incorrectignitiontimingwillresultinspark knock,after-runand/oroverheating,whichmay causeexcessivefuelconsumptionorengine damage.Ifanyoftheabovesymptomsare encountered,haveyourvehiclecheckedata NISSANdealer.
However, now and then you may notice light sparkknock for ashort timewhile accelerating or driving up hills. This is not a cause for concern, because you get the greatest fuel benefit when there is light sparkknock for ashort time under heavy engine load.
①

②
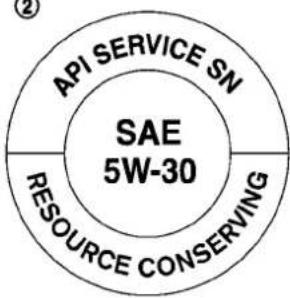
JVT0159X
- APlcertificationmark
2.APIservicesymbol
ENGINEOILANDOILFILTERRE- COMMENDATION
Selectingthecorrectoil
It is essential to choose the correct grade, quality, and viscosity engine oil to ensure satisfactory engine life and performance, see
"Capacitiesandrecommendedfluids/lubricants" (P.9-2).NISSANrecommendstheuseofan energyconservingoilinordertoimprovefuel economy.
SelectonlyengineoilsthatmeettheAmerican PetroleumInstitute(API)certificationorInterna-
tionalLubricantStandardizationandApproval Committee(ILSAC)certificationandSAEviscositystandard. TheseoilshavetheAPI certificationmarkonthefrontofthecontainer. Oilswhichdonothavethespecifiedquality labelshouldnotbeusedastheycouldcause enginedamage.
Oiladditives
NISSANdoesnotrecommendtheuseofoil additives. Theuseofanoiladditiveisnot necessarywhentheproperoiltypeisusedand maintenanceintervalsarefollowed.
Oilwhichmaycontainforeignmatterorhas beenpreviouslyusedshouldnotbeused.
Oilviscosity
Theengineoilviscosityorthicknesschanges with temperature. Because of this, it is important to select the engineoilviscosity based on the temperatures at which the vehicle will be operated before then extoil change. Choosing an oil viscosity other than that recommended could cause serious engine damage.
Selectingthecorrectoilfilter
YournewNISSANvehicleisequippedwith a high-qualitygenuineNISSANoilfilter.When replacing,useagenuineNISSANoilfilterorits equivalentforthereasondescribedin"Change intervals".
Changeintervals
Theoilandoilfilterchangeintervalsforyour enginearebasedontheuseofthespecified qualityoilsandfilters.Usinganengineoiland filterotherthanthespecifiedquality,orexceedingrecommendedoilandfilterchangeintervals could reduce engine life. Damage to the engine causedbyimpropermaintenanceoruseof incorrectoiland filterquality and/orviscosityis not covered by the NISSAN new vehicle limited warranty.
Yourenginewasfilledwithahighqualityengine oilwhenitwasbuilt.Youdonothavetochange theoilbeforethefirstrecommendedchange
Technical and consumer information
interval.Oilandfilterchangeintervalsdepend uponhowyouuseyourvehicle.
Operationunderthefollowingconditionsmay require more frequent oil and filter changes.
•repeatedshortdistancedrivingatcold outsidetemperatures
●drivingindustyconditions
●extensiveidling
- towingatraler
- stopandgocommuting Refertothe"NISSANServiceandMaintenance Guide"forthemaintenanceschedule.
AIRCONDITIONINGSYSTEMREFRIGERANTANDLUBRICANTRECOMMENDATIONS
The airconditioningsystem in your NISSAN vehicle must be charged with the refrigerant HFC-134a(R-134a) and the oil, NISSANA/Csystem oil Type Sorthe exact equivalents.

CAUTION
Theuseofanyotherrefrigerantoroil willcauseseveredamagetotheair conditioningsystemandwillrequire thereplacementofallairconditioner
systemcomponents.
TherefrigerantHFC-134a(R-134a)inyour NISSANvehiclewillnotharmtheearth'sozone layer.Althoughthisrefrigerantdoesnotaffect theearth'satmosphere,certainingovernmental regulationsrequiretherecoveryandrecyclingof anyrefrigerantduringautomotiveairconditioningsystemservice.ANISSANdealerhasthe trainedtechniciansandequipmentneededto recoverandrecycleyourairconditioningsystem refrigerant.
ContactaNISSANdealerwhenservicingyour airconditioningsystem.
9-6 Technical and consumer information
SPECIFICATIONS
ENGINE
| Model | QR25DE | |
| Type | Gasoline,4-cycle,DOHC | |
| Cylinderarrangement | 4-cylinder,in-line | |
| Bore × Strokein(mm) | 3.5 × 3.9(89.0 × 100.0) | |
| Displacementcuin(cm | ^3) | 151.82(2,488) |
| Firingorder | 1-3-4-2 | |
| Idlespeedrpm | ||
| Ignitiontiming(B.T.D.C.) | degree/rpm | Noadjustmentisnecessary. |
| SparkplugStandard | DILKAR6A-11 | |
| Sparkpluggap(Normal)in(mm) | 0.043(1.1) | |
| Camshaftoperation | Timingchain | |
WHEELSANDTIRES
Roadwheel
| TypeSize | Offsetin(mm) | |
| Steel16 × 6-1/2JJ | 1.57(40) | |
| Aluminum | 17 × 7J | |
| Spare16 × 4T | 1.18(30) | |
| Tire | ||
| TypeSize | PressurePSI (kPa)[Cold] | |
| Conventional | P215/70R1699H | 33(230) |
| P225/60R1798H | ||
| SpareT155/90D16 | 60(420) | |
DIMENSIONSANDWEIGHTS
| Overalllengthin(mm)183.3(4,655)*1 | |
| 183.9(4,670)*2 | |
| Overallwidthin(mm)70.9(1,800) | |
| Overallheightin(mm)65.3(1,658) | |
| 66.3(1,683)*3 | |
| Fronttreadin(mm)60.6(1,540) | |
| Reartreadin(mm)61.0(1,550) | |
| Wheelbasein(mm)105.9(2,690) | |
| GrossVehicle | |
| WeightRating (GVWR) | lb(kg) |
| GrossAxle WeightRating (GAWR) | SeetheF.M.V.S.S. certificationlabelonthedriver'ssidecenterpillar. |
| Frontlb(kg) | |
| Rearlb(kg) | |
*1: Withoutfrontlicenseplatebracket
*2:Withfrontlicenseplatebracket
*3:Withroofrail
WHEN TRAVELING OR REGISTERING YOURVEHICLEIN ANOTHER COUNTRY
Whenplanningtotravelinanothercountry,youshouldfirstfindoutifthefuelavailableis suitable foryour vehicle's engine.
Using fuel with an octane rating that is too low may cause engaged damage. All gasoline vehicles must be operated with unleaded gasoline. Therefore, avoid taking your vehicle to areas where appropriate fuel is not available.
When transferring the registration of your vehicle to another country, state, province ordistrict, it may be necessary to modify the vehicle to meet local laws and regulations.
The laws and regulations for motor vehicle emission control and safety standards vary according to the country, state, province or district; therefore, vehicle specifications may differ.
When any vehicle is to be taken into another country, state, province or district and registered, its modifications, transportation, and registration are the responsibility of the user. NISSAN is not responsible for any inconvenience that may result.
VEHICLEIDENTIFICATION

natural_image
Diagram of a car interior showing a curved surface with a highlighted component and an arrow indicating direction (no text or symbols)VEHICLE IDENTIFICATION NUMBER (VIN) PLATE
The vehicle identification number plate is attached as shown. This number is the identification for your vehicle and is used in the vehicle registration.

natural_image
Technical line drawing of a car hood with an inset showing internal components (no text or symbols)VEHICLEIDENTIFICATIONNUMBER (chassisnumber)
The vehicle identification number is located as shown.
Removethecovertoaccessthenumber.

natural_image
Technical line drawing of an engine component with directional arrows indicating movement (no text or symbols)ENGINESERIALNUMBER
Thenumberisstampedontheengineasshown.
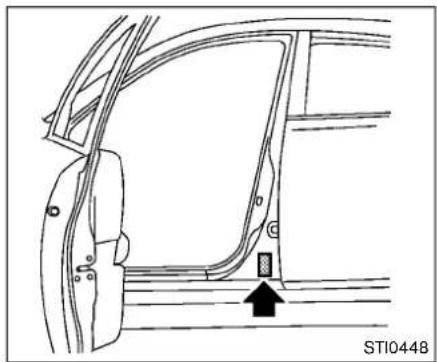
natural_image
Diagram of a car door frame with an arrow pointing to the side panel (no text or symbols present)F.M.V.S.S.CERTIFICATIONLABEL
The Federal Motor Vehicle Safety Standards (F. M.V.S.S.) certification label is affixed as shown. This label contains valuable vehicle information, such as: Gross Vehicle Weight Ratings (GVWR), Gross Axle Weight Rating (GAWR), month and year of manufacture, Vehicle Identification Number (VIN), etc. Review it carefully.
Technical and consumer information 9-9

natural_image
Diagram of a car hood with a downward arrow and a shaded square component, no text or symbols presentEMISSIONCONTROLINFORMATION LABEL
Theemissioncontrolinformationlabelisattachedtotheundersideofthehoodasshown.

natural_image
Diagram of a car interior showing the seatbelt and dashboard (no text or symbols)TIREANDLOADINGINFORMATION LABEL
ThecoldtirepressureisshownontheTireand LoadingInformationlabelaffixedtothepillaras illustrated.

natural_image
Top-down view of a car dashboard with a traffic light indicator and an arrow pointing to the dashboard area (no text or symbols on the diagram itself)AIRCONDITIONERSPECIFICATION LABEL
Theairconditionerspecificationlabelisattachedtotheundersideofthehoodasshown.
INSTALLINGFRONTLICENSEPLATE

flowchart
graph TD
    A["Car Top"] --> B["Felt-tip pen"]
    B --> C["Car Window"]
    C --> D["Mounting holes"]
    D --> E["Flat-blade screwdriver"]
    E --> F["Bumper"]
    F --> G["Grommet"]
    G --> H["Screw grommets"]
    H --> I["Screws"]
    I --> J["J-nut"]
    J --> K["Engine"]
    style A fill:#f9f,stroke:#333
    style K fill:#ccf,stroke:#333
Usethefollowingstepstomountthelicense plate:
Beforemountingthelicenseplate, confirm that the following parts are enclosed in the plastic bag.
- Licenseplatebracket
J-nut × 2 - Screw × 2
- Screwgrommet × 2
- Temporarily placethelicense plate bracket by aligning the lower part ① of it with the lines ② on the bumper.
- Markthepilotholepointswithafelt-tippen throughtheholesofthelicenseplate bracket.
- Removethelicenseplatebracket.
- Carefully drilltwopilotholesusinga0.39in (10mm)drillbitatthemarkedlocations.(Be surethatthedrillonlygoesthroughthe fascia, ordamagetothenutmay occur.)
- Insertgrommetsintotheholeonthefascia.
- Insertaflat-bladescrewdriver into the grommetholetoadd90°turnontothepart ©.
- InsertaJ-nutintothelicenseplatebracket beforeplacingthelicenseplatebracketon
Technical and consumer information 9-11
VEHICLE LOADING INFORMATION
thefascia.
- Install the license plate bracket with screws.
- Install the license plate with boltsthatareno longer than 0.55 in (14 mm).

WARNING
- Itisextremelydangeroustoride inacargoareainsidethevehicle.Inacollision,peopleriding intheseareasaremorelikely to beseriouslyinjuredorkilled.
- Donotallowpeopleoridein anyareaofyourvehiclethatis notequippedwithseatsand seatbelts.
- Besureeveryoneinyourvehicle isinaseatandusingaseatbelt properly.
TERMS
It is important to familiarize yourself with the following terms before loading your vehicle:
- CurbWeight(actualweightofyour vehicle)-vehicleweightincluding: standard and optional equipment, fluids, emergencytools, and spare tire assembly. This weight does not include passengers and cargo.
- GVW (Gross Vehicle Weight) - curb weight plus the combined weight of passengers and cargo.
- GVWR(GrossVehicle Weight Rating) -maximumtotalcombinedweightofthe unloadedvehicle,passengers,luggage, hitch, trailer tongue load and any other optionalequipment.This informationis locatedontheF.M.V.S.S.label.
●GAWR(GrossAxleWeightRating) - maximumweight (load) limitspecified forthefrontorrearaxle. This informationislocatedontheF.M.V.S.S.label. - GCWR(GrossCombinedWeightRating)-The maximum total weightrating ofthevehicle,passengers,cargo,and trailer.
●VehicleCapacityWeight,Loadlimit, Totalloadcapacity-maximumtotal weightlimitspecifiedoftheload (passengersandcargo)forthevehicle. Thisisthemaximumcombinedweight of occupants and cargo that can be loadedintothevehicle. Ifthevehicleis used to tow a trailer, the trailer tongue weightmustbe includedaspart ofthe
cargoload.Thisinformationislocated ontheTireandLoadingInformation label.
- Cargocapacity-permissibleweightof cargo, the subtracted weight of occupants from the load limit.
VEHICLELOADCAPACITY
Donotexceedtheloadlimitofyourvehicle shownas"Thecombinedweightofoccupantsandcargo"ontheTireandLoading Informationlabel.Donotexceed the numberofoccupantsshownas"Seating Capacity"ontheTireandLoadingInformationlabel.
Toget "the combined weight of occupants and cargo", add the weight of allooccupants, then add the total luggage weight. Examples are shown in the following illustration.
Example
$$ \boxed {\text {Load limit}} - \left( \begin{array}{c c} \text {Occupants} & \text {Luggage} \ 1 5 0 \mathrm{lb} \times 2 = 3 0 0 \mathrm{lb} & 3 0 \mathrm{lb} \times 2 = 6 0 \mathrm{lb} \ (7 0 \mathrm{kg}) & (1 3 5 \mathrm{kg}) \end{array} + \begin{array}{c} \text {Trailer Tongue} \ \text {Weight} \ (1 4 \mathrm{kg}) & (2 7 \mathrm{kg}) \end{array} + \begin{array}{c} \text {Remaining available} \ \text {cargo and luggage} \ (1 3 5 \mathrm{kg}) \end{array} \right) = \begin{array}{c} \text {Load capacity} = \ 7 4 0 \mathrm{lb} \ (3 3 6 \mathrm{kg}) \end{array} $$
$$ \boxed {\text { Load limit }} - \left( \begin{array}{c c} \text { Occupants } & \text { Luggage } \ 1 5 0 \mathrm{lb} \times 2 = 3 0 0 \mathrm{lb} & 3 0 \mathrm{lb} \times 2 = 6 0 \mathrm{lb} \ (7 0 \mathrm{kg}) & (1 3 5 \mathrm{kg}) \ (1 4 \mathrm{kg}) & (2 7 \mathrm{kg}) \end{array} \right) = \begin{array}{l} \text { Remaining available } \ \text { cargo and luggage } \ \text { load capacity } = \ 1, 0 4 0 \mathrm{lb} \ (4 7 2 \mathrm{kg}) \end{array} $$
$$ \boxed { \begin{array}{l} \text {Load limit} \ 1, 4 0 0 \mathrm{lb} \ (6 4 0 \mathrm{kg}) \end{array} } - \left( \begin{array}{c c c c} \text {Occupants} & & \text {Luggage} \ \bigcirc & \bigcirc & \bigcirc & \bigcirc \ 1 5 0 \mathrm{lb} \times 5 = 7 5 0 \mathrm{lb} & & + & \ (7 0 \mathrm{kg}) & (3 4 0 \mathrm{kg}) & & 3 0 \mathrm{lb} \times 5 = 1 5 0 \mathrm{lb} \ & & (1 4 \mathrm{kg}) & (7 0 \mathrm{kg}) \end{array} \right) = \begin{array}{l} \text {Remaining available} \ \text {cargo and luggage} \ \text {load capacity} = \ 5 0 0 \mathrm{lb} \ (2 2 7 \mathrm{kg}) \end{array} $$
STI0445
Stepsfordeterminingcorrectloadlimit
- Locatethestatement "Thecombined weightofoccupantsandcargoshould neverexceedXXXkgorXXXlbs" on yourvehicle'splacard.
- Determinethecombinedweightofthe driverandpassengersthatwillberiding inyourvehicle.
- Subtract the combined weight of the driver and passengers from XXXkgor XXXlbs.
- Theresultingfigureequalstheavailable amountofcargoandluggageload capacity. Forexample, iftheXXX amountequals1400lbs.andtherewill befive150lb.passengersinyour vehicle, theamountofavailablecargo andluggageloadcapacityis650lbs. (1400- 750(5x150)=650lbs)or (640- 340(5x70)=300kg.)
-
Determinethecombinedweightof luggageandcargobeingloadedon thevehicle.Thatweightmaynotsafely exceedtheavailablecargoandluggage loadcapacitycalculatedinStep4.
-
If your vehicle will betowing a trailer, load from your trailer will be transferred to your vehicle. Consult this manual to determine how this reduces the available cargo and luggage load capacity of your vehicle.
Beforedrivingloadedvehicle, confirm that you donot exceed the Gross Vehicle Weight Rating (GVWR) or the Gross Axle Weight Rating (GAWR) for your vehicle. (See "Measurement of weights" (P.9-15).)
Alsochecktiresforproperinflationpressures.SeetheTireandLoadingInformation label.
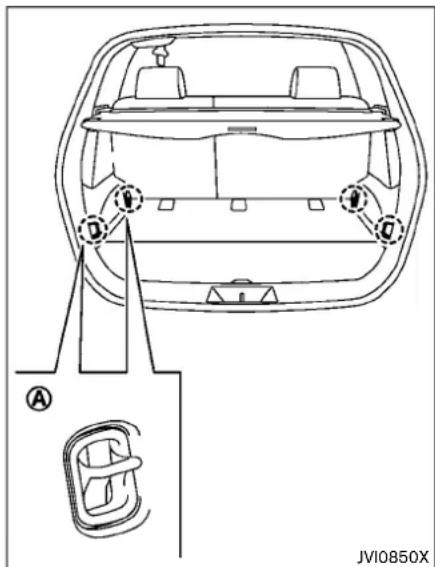
SECURINGTHELOAD
There are tied down hooks located in the cargo area as shown. The tied down hook scan be used to secure cargowithropesorothertypes of straps.
Donotapplyatotalloadofmorethan22 lb.(98N)to asinglehook A when
securingcargo.

WARNING
•Properlysecureallcargowithropes orstrapstohelppreventitfrom slidingorshifting.Donotplace cargohigherthantheseatbacks.In asuddenstoporcollision,unsecuredcargocouldcausepersonal injury.
- The child restraint to optether strap may be damaged by contact with items in the cargo area. Secure any items in the cargo area. Your child could be seriously injured or killed in a collision if the optether strap is damaged.
- Donotloadyourvehicleanyheavier thantheGVWRorthemaximum frontandrearGAWRs.Ifyoudo, partsofyourvehiclecanbreak,tire damagecouldoccur,oritcan changethewayyourvehiclehandles.Thiscouldresultinlossof controlandcausepersonalinjury.
LOADINGTIPS
●TheGVWmustnotexceedGVWRor GAWRassspecifiedontheF.M.V.S.S. certificationlabel.
- Donotloadthefrontandrearaxleto the GAWR.Doingsowillexceedthe GVWR.

WARNING
•Properlysecureallcargowith ropesorstrapstohelppreventit fromslidingorshifting.Donot place cargo higher than the seatbacks.Inasuddenstopor collision,unsecuredcargocould causepersonalinjury.
- Donot loadyourvehicle any heavierthantheGVWRorthe maximum front and rear GAWRs.Ifyoudo,partsofyour vehiclecanbreak,tiredamage couldoccur,oritcanchangethe wayyourvehiclehandles.This couldresultinlossofcontrol andcausepersonalinjury.
Overloadingnotonlycanshort- enthelifeofyourvehicleand thetire,butcancauseunsafe vehicle handling and longer braking distances. This may causeaprematuretirefailure, whichcouldresultinaserious accident and personal injury. Failurescausedbyoverloading arenotcoveredbythevehicle's warranty.
MEASUREMENTOFWEIGHTS
Securelooseitemstopreventweightshifts that could affect the balance of your vehicle. Whenthevehicleisloaded, drive toascaleandweighthefrontandtherear wheelsseparatelytodetermineaxleloads. Individualaxleloadsshouldnotexceed eitheroftheGrossAxleWeightRatings (GAWR). Thetotaloftheaxleloadsshould not exceed the Gross Vehicle Weight Rating(GVWR). Theseratingsaregiven onthevehiclecertificationlabel.lfweight ratings areexceeded, moveor remove itemstobringallweightsbelowtheratings.
Technicalandconsumerinformation
TOWINGATRAILER

WARNING
Overloadingorimproperloadingofa traileranditscargocanadverselyaffect vehiclehandling,brakingandperformanceandmayleadtoaccidents.

CAUTION
- Donottowatrailerorhaulaeavy loadforthefirst500miles(800km). Youreengine,axleorotherparts couldbedamaged.
- Forthefirst500miles(800km)that youtowatrailer,donotdriveover 50MPH(80km/h)anddonotmake startsatfullthrottle.Thishelpsthe engineandotherpartsofyour vehiclewearattheheavierloads.
Yournewvehiclewasdesignedtobeused primarilytocarrypassengersandcargo. Remember that towing a trailer places additional loadsonyourvehicle'sengine,drivetrain,steering,brakingandothersystems.
ANISSANTowingGuide(U.S.only)isavailable onthewebsiteatwww.nissanusa.com.This
9-16 Technical and consumer information
guideincludesinformationontrailertowing capabilityand thespecialequipmentrequired forpropertowing.
MAXIMUMLOADLIMITS
Maximum trailer loads
Neverallowthetotaltrailerloadtoexceedthe valuespecified in the "TowingLoad/Specification" chart. The total trailer load equals trailer weightplusitscargoweight.
- Whentowingatrailerloadof1,000lbs (454kg)ormore,trailerswithabrake systemMUSTbeused.
ThemaximumGCWR(Gross Combined Weight Rating) should not exceed the values specified in the following "TowingLoad/Specification" chart.

STI0541
TheGCWRequalsthecombinedweightofthe towing vehicle(includingpassengersandcargo) plusthetotaltrailerload.Towingloadsgreater thantheseorusingimpropertowingequipment couldadverselyaffectvehiclehandling,braking andperformance.
Theabilityofyourvehicletotowatrailerisnot only related to the maximum trailer loads, but also the places you plan to tow. Tow weights appropriateforlevelhighwaydrivingmay haveto bereducedonverysteepgradesorforlow tractionsituations(forexample,onslipperyboat ramps).
Temperatureconditionscanalsoaffecttowing. Forexample,towingaheavytrailerinhigh
outsidetemperaturesongradedroadscan affectengineperformanceandcauseoverheating. Thetransmissionhighfluidtemperature protectionmode, which helps reduce the chanceoftransmissiondamage,couldactivate and automaticallydecreaseenginepower. Vehiclespeedmaydecreaseunderhighload. Planyourtripcarefullytoaccountfortrailerand vehicleload,weatherandroadconditions.

WARNING
Overheatingcanresultinreducedenginepowerandvehiclespeed.The reducedspeedmaybelowerthanother traffic,whichcouldincreasethechance ofacollision.Beespeciallycareful whendriving.Ifthevehiclecannot maintainasafedrivingspeed,pullto thesideoftheroadinasafearea. Allowtheenginetocoolandreturnto normaloperation.See"Ifyourvehicle overheats"(P.6-11)ofthismanual.

CAUTION
Vehicledamageresultingfromimpropertowingproceduresarenotcovered
byNISSANwarranties.
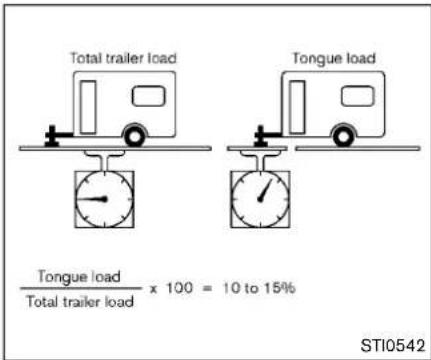
Tongueload
When using a weight carrying or a weight distributing hitch, keep the tongue load between 10 to 15% of the total trailer load within the maximum tongue load limit shown in the following "Towing Load / Specification" chart. If the tongue load becomes excessive, rearrange cargoto allow for proper tongue load.
Technical and consumer information 9-17

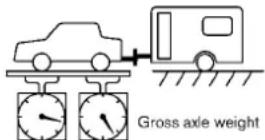
TI1012M
MAXIMUMGROSSVEHICLEWEIGHT (GVW)/MAXIMUMGROSSAXLE WEIGHT(GAW)
TheGVWofthetowingvehiclemustnotexceed theGrossVehicleWeightRating(GVWR) shownontheF.M.V.S.S.certificationlabel.The GVWequalsthecombinedweightofthe unloadedvehicle,passengers,luggage,hitch,trailertongueloadandanyotheroptional equipment.Inaddition,frontorrearGAWmust notexceedtheGrossAxleWeightRating (GAWR)shownontheF.M.V.S.S.certification label.
Towing capacities are calculated assuming a base vehicle with driver and any options
9-18 Technical and consumer information
requiredtoachievetherating. Additionalpassengers, cargoand/oroptionalequipment, such asthetrailerhitch, willaddweighttothevehicle andreduceyourvehicle'smaximumtowing capacityandtrailertongueload.
The vehicle and trailer need to beweighed to confirm the vehicle is within the GVWR, Front GAWR, Rear GAWR, Gross Combined Weight Rating (GCWR) and Towing capacity.
All vehicle and trailer weight scan be measured using platform typescales commonly found at truck stops, highway weigh stations, building supply centers or salvage yards.
Todeterminetheavailablepayloadcapacityfor tongueload, usethefollowingprocedure.
-
LocatetheGVWRontheF.M.V.S.S.certificationlabel.
-
Weighyourvehicleonthescalewithallof thepassengersandcargothatarenormally inthevehiclewhentowingatrailer.
-
Subtract the actual vehicle weight from the GVWR. Theremaining amount is the available maximum tongue load.
Todeterminetheavailabletowingcapacity,use thefollowingprocedure.
-
FindtheGCWRforyourvehicleonthe "TowingLoad/Specification" chartfound laterinthissection.
-
Subtract the actual vehicle weight from the GCWR. Theremaining amount is available to maximum towing capacity.
TodeterminetheGrossTrailerWeight,weigh yourtraileronascalewithallequipmentand cargo,thatarenormallyinthetrailerwhenitis towed.MakesuretheGrosstrailerweightisnot morethantheGrossTrailerWeightRating shownonthetrailerandisnotmorethanthe calculatedavailablemaximumtowingcapacity.
Alsoweighthefrontandrearaxlesonthescale tomakesuretheFrontGrossAxleWeightandRearGrossAxleWeightarenotmorethanFrontGrossAxleWeightandRearGrossAxleWeightontheF.M.V.S.S.certificationlabel.Thecargoin thetrailerandvehiclemayneedtobemovedor removedtomeetthespecifiedratings.
Example:
●GrossVehicleWeight(GVW)asweighed onascale-includingpassengers,cargo andhitch-4,133lb.(1,874kg).
●GrossVehicleWeightRating(GVWR)from F.M.V.S.S.certificationlabel-4,233 lb. (1,920kg).
●GrossCombinedWeightRating(GCWR) from "Towing Load/Specification" chart - 5,136lb.(2,329kg).
●Maximum Trailertowing capacity from "Towing Load/Specification" chart-1,000lb. (453kg).
| 4,233lb.(1,920kg) | GVWR |
| - 4,133lb.(1,874kg) | GVW |
| =100lb.(45kg) | Availablefortongue weight |
| 5,136lb.(2,329kg) | GCWR |
| - 4,133lb.(1,874kg) | GVW |
| =1,003lb.(455kg) | Capacityavailablefor towing |
| 100lb.(45kg)/1,003lb.(455kg) | AvailabletongueweightAvailablecapacity=10%tongueweight |
Alwaysverifythatavailablecapacitiesarewithin therequiredratings.
Theavailabletowingcapacitymaybelessthan themaximumtowingcapacityduetothe passengerandcargoloadinthevehicle. Remembertokeeptrailertongueweightbetween10to15%ofthetrailerweight.Ifthe tongueloadbecomesexcessive,rearrangethe cargotoobtainthepropertongueload.Donot exceedthe10to15%tongueweightspecifica-tionevenifthecalculatedavailabletongue weightisgreaterthan15%.Ifthecalculated tongueweightislessthan10%,reducethetotal trailerweighttomatchtheavailabletongue weight.
TOWINGLOAD/SPECIFICATION
| TOWINGLOAD/SPECIFICATIONCHART | |
| Unit:lb(kg) | |
| MAXIMUMTRAILERWEIGHT*1 | 1,000(453) |
| MAXIMUMTONGUELOAD | 150(68) |
| GROSSCOMBINEDWEIGHTRATING (GCWR) | 5,136(2,329) |
| RECOMMENDEDEQUIPMENT*2 | SwayControlDevice(SCD) |
1: Alltowing above 1,000 lb (454 kg) require the use of trailer brakes.
2: Swaycontroldevicesarenotoffered by NISSAN. Seeaprofessional trailer/hitchoutlet for a properly designed swaycontrol device for your trailer.
TOWINGSAFETY
Trailerhitch
Chooseproperhitchforyourvehicleand trailer.AgenuineNISSANtrailerhitchis availablefromaNISSANdealer.Makesurethe trailerhitchissecurelyattachedtothevehiclet helpavoidpersonalinjuryorpropertydamage duetoswaycausedbycrosswinds,roughroad surfacesorpassingtrucks.
Hitchball
Chooseahitchballofthepropersizeand weightratingforyourtrailer:
- Therequiredhitchballsizeisstampedon mosttrailercouplers.Mosthitchballsalso havethesizeprintedontopoftheball.
- Choosetheproperclasshitchballbasedon the trailerweight.
- Thediameterofthethreadedshankofthe hitchballmustbematchedtotheballmount holediameter.Thehitchballshankshould benomorethan1/16"smallerthanthehole intheballmount.
- Thethreadedshankofthehitchballmustbelongenoughtobeproperlysecuredtothe ballmount. Thereshouldbeatleast2 threadsshowingbeyondthelockwasher andnut.
Swaycontroldevice
Suddenmaneuvers, windgustsandbuffeting caused by other vehicles can affect trailer handling. Sway control devices maybe used to help control these affects. If you choose to use one, contact are up a trailer hitch supplier to make sure the way control device will work with the vehicle, hitch, trailer and the trailer's brake system. Follow the instructions provided by the manufacturer for installing and using the way control device.
Classlhitch
Classltrailerhitchequipment(receiver, ball mountandhitchball) can be used to to trailers of a maximum weight of 2,000 lb (909 kg).

CAUTION
- Thehitchshouldnotbeattachedto oraffecttheoperationoftheimpact-absorbingbumper.
- Donotuseaxle-mountedhitches.
- Donotmodifythevehicleexhaust system,brakesystem,etc.toinstall atrailerhitch.
•Toreducethepossibilityofadditionaldamageifyourvehicleis
struckfromtherear,wherepractical,removethehitchand/orreceiverwhennotinuse.Afterthehitch isremoved,sealtheboltholesto preventexhaustfumes,wateror dustfromenteringthepassenger compartment.
- Regularlycheckthatalltrailerhitch mounting bolts are securely mounted.
Tirepressures
- Whentowingatrailer,inflatethevehicle tirestotherecommendedcoldtirepressure indicatedontheTireandLoadingInformationlabel.
- Trailertirecondition,size,loadratingand properinflationpressureshouldbein accordancewiththetrailerandtiremanufacturers'specifications.
Safetychains
Alwaysuseasuitablechainbetweenyour vehicleandthetrailer.Thesafetychainsshould becrossedandshouldbeattachedtothehitch, nottothevehiclebumperoraxle.Thesafety chainscanbeattachedtothebumperifthe hitchballismountedtothebumper.Besureto leaveenoughslackinthechainstopermit
turningcorners.
Trailerlights

CAUTION
Whensplicingintothevehicleelectrical system, a commercially available power-typemodule/convertermustbe usedtoprovidepowerforalltrailer lighting. This unit uses the vehicle battery as direct powersource for all trailer lights while using the vehicletail light, stoplightandturnsignalcircuits as signals source. The module / converter must drawnomore than 15 milliamps from the stop and taillamp circuits. Using amodule / converter that exceeds these power requirements may damage the vehicle's electrical system. See are putable trailer deal to obtain the properequipment and to have it installed.
Trailerlightsshouldcomplywithfederaland/or localregulations.Forassistanceinhookingup trailerlights,contactaNISSANdealeror reputabletrailerdealer.
Technical and consumer information 9-21
Trailerbrakes
If your trailerise equipped with abrakingsystem, makesureitconformstofederaland/or local regulations and that it is properly installed.

WARNING
Neverconnectatralerbrakesystem directlytothevehiclebrakesystem.
Pre-towingtips
- Becertainyourvehiclemaintainsalevel positionwhenloadedorunloadedtraileris hitched.Donotdrivethevehicleifithasan abnormalnose-upornose-downcondition; checkforimpropertongueload,overload, worn suspensionorotherpossiblecauses ofeithercondition.
●Alwayssecureitemsinthetrailertoprevent loadshiftwhiledriving. - Keepthecargoloadaslowaspossiblein thetrailertokeepthetralercenterofgravity low.
-
Loadthetrailersoapproximately60%ofthe trailerloadisinthefronthalfand40%isin thebackhalf. Alsomakesuretheloadis balancedsidetoside.
-
Checkyourhitch,trailertirepressure, vehicletirepressure,trailerlightoperation, andtrailerwheellignutseverytimeyou attachatrailertothevehicle.
- Becertainyourrearviewmirrorsconformto allfederal,stateorlocalregulations.Ifnot, installanymirrorsrequiredfortowingbefore drivingthevehicle.
- Determinetheoverallheightofthevehicle andtrailersotherequiredclearanceis known.
Trailertowingtips
Inordertogainskillandunderstandingofthe vehicle'sbehavior,youshouldpracticeturning, stoppingandbackingupinanareawhichisfree fromtraffic.Steeringstability,andbraking performancewillbesomewhatdifferentthan undernormaldrivingconditions.
●Alwayssecureitemsinthetrailertoprevent loadshiftwhiledriving.
- Lockthetrailerhitchcouplerwithapinor locktopreventthecouplerfrominadvertentlybecomingunlatched.
- Avoidabruptstarts, accelerationorstops.
●Avoidsharpturnsorlanechanges.
●Alwaysdriveyourvehicleatamoderate speed. Somestatesorprovinceshave specificspeedlimitsforvehiclesthatare
towingtrailers. Obeythelocalspeedlimits.
- Whenbackingup, hold the bottom of the steering wheel with one hand. Move your hand in the direction in which you want the trailertogo. Makes small corrections and backups slowly. If possible, has someone guide you when you are back ing up.
Alwaysblockthewheelsonbothvehicleand trailerwhenparking.Parkingonaslopeisnot recommended;however,ifyoumustdoso:

CAUTION
If you movetheshiftlevertotheP (Park) position before blocking the wheels and applying the parking brake, transmission damage could occur.
- Applyandholdthebrakepedal.
- Havesomeoneplaceblocksonthedownhill sideofthevehicleandtrailerwheels.
- Afterthewheelblocksareinplace,slowly releasethebrakepedaluntiltheblocks absorbthevehicleload.
- Applytheparkingbrake.
-
ShiftthetransmissionintoP(Park).
-
Turnofftheengine.
Todriveaway:
- Apply and hold the brake pedal.
2.Starttheengine.
3.Shiftthetransmissionintogear.
-
Releasetheparkingbrake.
-
Driveslowlyuntilthevehicleandtrailerare clearfromtheblocks.
-
Apply and hold the brake pedal.
-
Havesomeoneretrieveandstoretheblocks.
- Whengoingdownahill, shift into a lower gear and set the engine braking effect. Whengoing up along grade, down shift the transmission to a lower gear and reduce speed to reduce each changes of engine overloading and/or overheating.
- If the engine coolantan tris esto an extremely high temperature when the air conditioning system is on, turn off the air conditioner. Cool an the at can be additionally vented by opening the windows, switching the fan control to high hand setting the temperature control to the HOT position.
●Trailertowingrequiresmorefuelthannormal circumstances.
●Avoidtowingatralerforthefirst500miles (800km).
- Have your vehicles serviced more oftenthan at intervals specified in there recommended maintenances schedule in the NISSAN Service and Maintenance Guide.
- Whenmakingaturn,yourtrailerwheelswill beclosertotheinsideoftheturnthanyour vehiclewheels.Tocompensateforthis, makealargerthannormalturningradius duringtheturn.
- Crosswindsandroughroadswilladversely affectvehicle/trailerhandling,possiblycausingvehiclesway.Whenbeingpassedby largervehicles,bepreparedforpossible changesincrosswindsthatcouldaffect vehiclehandling.Ifswayingdoesoccur, firmlygripthesteeringwheel,steerstraight ahead,andimmediately(butgradually) reducevehiclespeed.Thiscombinationwill helpstabilizethevehicle.Neverincrease speed.
Dothefollowingifthetrailerbeginstosway:
- Takeyourfootofftheacceleratorpedalto allowthevehicletocoastandsteeras straightaheadastheroadconditionsallow. Thiscombinationwillhelpstabilizethe vehicle.
- Donotcorrecttrailerswaybysteeringor applyingthebrakes.
-
Whenthetrailerswaystops, gently apply the brakes and pull to the side of the roadin as a fe area.
-
Trytorearrangethetrailerloadsoitis balancedasdescribedearlierinthissection.
- Becarefulwhenpassingothervehicles. Passingwhiletowingatrailerrequires considerablymoredistancethannormal passing.Rememberthelengthofthetrailer mustalsopasstheothervehiclebeforeyou cansafelychangelanes.
- Downshift the transmission to lower gear forengine braking when driving downsteep or long hills. This will help slow the vehicle without applying the brakes.
- Avoidholdingthebrakepedaldowntoo longortoofrequently. Thiscouldcausethe brakestooverheat,resultinginreduced brakingefficiency.
- Increase your following distance to allow for greater stopping distances while towing a trailer. Anticipate stops and brake gradually.
- Donotusecruisecontrol(ifsoequipped) whiletowingatraler.
- Somestatesorprovinceshavespecific regulationsandspeedlimitsforvehicles thataretowingtrailers. Obeythelocal speedlimits.
Technicalandconsumerinformation9-23
- Checkyourhitch, trailerwiringharness connections, and trailerwheellignuts after 50 miles (80 km) of travel and at every break.
- When stopped intraffic for long periods of time in hot weather, put the vehicle in the Park position.
- When launching a boat, don't allow the water level to go over the exhaust tail pipe or rear bumper.
- Makesureyoudisconnectthetrailerlights beforebackingthetrailerintothewateror thetrailerlightsmayburnout.
Whentowingatrailer, the transmission fluid should be changed more frequently. For additional information, seethe "8. Maintenance and do-it-yourself" section earlier in this manual.
Towingyourvehiclewithallfourwheelsonthe groundissometimescalledflattowing.This methodissometimesusedwhentowinga vehiclebehindarecreationalvehicle,suchasa motorhome.
FLATTOWING

CAUTION
- Failuretofollowtheseguidelines canresultinseveretransmission damage.
- Whenever flattowing your vehicle, alwaystowforward, never backward.
•DONOTtowanycontinuouslyvariabletransmissionvehiclewithall fourwheelsontheground(flat towing).DoingsoWILLDAMAGE internaltransmissionpartsdueto lackoftransmissionlubrication.
•DONOTtowanAll-WheelDrive (AWD) vehicle with any of the wheelsontheground.Doingso maycauseseriousandexpensive damagetothepowertrain. - Foremergencytowingprocedures referto"Towingrecommendedby NISSAN"(P.6-13)ofthismanual.
ContinuouslyVariableTransmission (CVT)
All-WheelDrive(AWD)models:
DonottowanAWDvehiclewithanyofthe wheelsontheground.
Two-WheelDrive(2WD)models:
TotowavehicleequippedwithaContinuously VariableTransmission(CVT),anappropriate vehicledollyMUSTbeplacedunderthetowed vehicle'sdrivingwheels.Alwaysfollowthedolly manufacturer'srecommendationswhenusing theirproduct.
UNIFORMTIREQUALITYGRADING
DOT(DepartmentOfTransportation)Quality Grades:Allpassengercartiresmustconformto federalsafetyrequirementsinadditiontothese grades.
Qualitygradescanbefoundwhereapplicable onthetiresidewallbetweentreadshoulderand maximumsectionwidth. Forexample:
Treadwear200TractionAATemperatureA TREADWEAR
Thetreadweargradeisacomparativerating basedonthewearrateofthetirewhentested undercontrolledconditionsonaspecified governmenttestcourse. Forexample, atire graded150wouldwearoneandone-half (11/2)timesaswellonthegovernmentcourse asatiregraded100. Therelative performance of tiresdependsuponactualconditionsoftheir use, however, and may departsignificantly from thenormduetovariationsindrivinghabits, servicepracticesanddifferencesinroadcharacteristicsandclimate.
TRACTIONAA,A,BANDC
Thetractiongrades, from highest to lowest, are AA, A, Band C. Those grades represent the tire's sability to stop on wet pavement as measured under controlled conditions specified government tests surfaces of asphalt and concrete. Atiremarked C may have poor
tractionperformance.

WARNING
Thetractiongradeassignedtothistire isbasedonstraight-aheadbraking tractiontests, and does not include acceleration, cornering, hydroplaning, or peaktraction characteristics.
TEMPERATUREA, BANDC
ThetemperaturegradesA(thehighest),B,and C,representingthetire'sresistancetothe generationofheatanditsabilitytodissipate heatwhentestedundercontrolledconditionson aspecifiedindoorlaboratorytestwheel.Sustainedhightemperaturecancausethematerial ofthetiretodegenerateandreducetirelife,and excessivetemperaturecanleadtosuddentire failure.ThegradeCcorrespondstoalevelof performancewhichallpassengercartiresmust meetundertheFederalMotorVehicleSafety StandardNo.109.GradesBandArepresent higherlevelsofperformanceonthelaboratory testwheelthanthemminumrequiredbylaw.

WARNING
Thetemperaturegradeforthistireis establishedforatirethatisproperly inflatedandnotoverloaded.Excessive speed,under-inflation,orexcessive loading,eitherseparatelyorincombination,cancauseheatbuild-upand possibletirefailure.
EMISSIONCONTROLSYSTEM WARRANTY
YourNISSANiscoveredbythefollowing emissionwarranties.
●EmissionDefectsWarranty
●EmissionsPerformanceWarranty
Detailsofthesewarrantiesmaybefoundwith othervehiclewarrantiesinyourWarrantyIn- formationBookletwhichcomeswithyour NISSAN.IfyoudidnotreceiveaWarranty InformationBooklet,orithasbecomelost,you mayobtainareplacementbywritingto:
●NissanNorthAmerica,Inc.
ConsumerAffairsDepartment
P.O.Box685003
Franklin,TN37068-5003
REPORTINGSAFETYDEFECTS
If you believethat your vehicle has a defect which could cause acrashor could cause injury or death, you should immediately inform the National Highway Traffic Safety Administration (NHTSA) in addition to notifying NISSAN.
If NHTSAReceivessimilarcomplaints, it may open an investigation, and if it finds that as safety defect exists in a group of vehicles, it may order are call and remedy campaign. However, NHTSA cannot become involved in individual problems between you, your dealer, or NISSAN.
TocontactNHTSA,youmaycallthe VehicleSafetyHotlinetoll-freeat1-888-327-4236(TTY:1-800-424-9153);goto http://www.safercar.gov;orwriteto:Administrator,NHTSA,400SeventhStreet, SW.,Washington,D.C.20590.Youcan alsoobtainotherinformationaboutmotor vehiclesafetyfrom
http://www.safercar.gov.
YoumaynotifyNISSANbycontactingour ConsumerAffairsDepartment,toll-free,at 1-800-NISSAN-1.
READINESSFORINSPECTION/MAINTENANCE(I/M)TEST

WARNING
A vehicle equipped with All-Wheel Drive (AWD) should never be tested using a twowheeldynamometer (such as the dynamometers used by some states for emission testing), or similar equipment. Make sure you inform test facility personnel that your vehicle is equipped with AWD before it is placed on dynamometer. Using the wrong test equipment may result in transmission damage or unexpected vehicle movement which could result in serious vehicle damage or personal injury.
Duetolegalrequirementsinsomestates, your vehiclemayberequiredtobeinwhatiscalled the "readycondition" for an inspection/Maintenance (I/M) test of the emission control system.
The vehicle is set to the "ready condition" when it is driven through certain driving patterns. Usually, the "ready condition" can be obtained by ordinary usage of the vehicle.
Ifapowertrainsystemcomponentisrepairedor thebatteryisdisconnected,thevehiclemaybe resettoa"notreadycondition".Beforetaking
EVENTDATARECORDERS(EDR)
thel/Mtest, checkthevehicle'sinspection/maintenance testreadiness condition. Placethe ignitions switch in the ON position without starting the engine. If the Malfunction Indicator Light (MIL) comes on steady for 20 seconds and then blinks for 10 seconds, the Mtest condition is "not ready". If the MIL does not blink after 20 seconds, the Mtest condition is "ready".
ContactaNISSANdealertoset"readycondition"ortopreparethevehiclefortesting.
ThisvehicleisequippedwithanEventData Recorder(EDR).ThemainpurposeofanEDRis torecord,incertaincrashornearcrash-like situations,suchasanairbagdeploymentor hittingaroadobstacle,datathatwillassistin understandinghowavehicle'ssystemsperformed.TheEDRisdesignedtorecorddata relatedtovehicledynamicsandsafetysystems forashortperiodoftime,typically30seconds orless.TheEDRinthisvehicleisdesignedto recordsuchdataas:
- Howvarious systems in your vehicle were operating;
- Whetherornotthedriverandpassenger safetybeltswerebuckled/fastened;
- Howfar(ifatall)thedriverwasdepressing theacceleratorand/orbrakepedal;and,
●Howfastthevehiclewastraveling.
●Soundsarenotrecorded.
Thesedatacanhelpprovideabetterunderstandingofthecircumstancesinwhichcrashes andinjuriesoccur.
NOTE:EDRdataarerecordedbyyourvehicle onlyifanontrivialcrashsituationoccurs;nodata arerecordedbytheEDRundernormaldriving conditionsandnopersonaldata(e.g.name, gender,ageandcrashlocation)arerecorded. However,otherparties,suchaslawenforcement,couldcombinetheEDRdatawiththetype
of personally identifying dataroutinely acquired during acrashinvestigation.
ToreaddatarecordedbyanEDR, special equipmentisrequiredandaccesstothehvehicle ortheEDRisneeded.Inadditiontothevehicle manufacturerandNISSANdealer,otherparties, suchaslawenforcement,thathavethespecial equipment,canreadtheinformationiftheyhave accesstothevehicleortheEDR.EDRdatawill onlybeaccessedwiththeconsentofthevehicle ownerorlesseeorasotherwiserequiredor permittedbylaw.
OWNER'SMANUAL/SERVICE MANUALORDERINFORMATION
GenuineNISSANServiceManualsforth this modelyearandpriorcanbepurchased.A genuineNISSANServiceManualisthebest sourceofserviceandrepairinformationforyour vehicle.Thismanualisthesameoneusedbythe factorytrainedtechniciansworkingatNISSAN dealerships.GenuineNISSANOwner's Manualscanalsobepurchased.
Forcurrentpricingandavailabilityofgenuine NISSANServiceManuals,contact:
1-800-450-9491
www.nissan-techinfo.com
Forcurrentpricingandavailabilityofgenuine NISSANOwner'sManuals,contact:
1-800-247-5321
MEMO
Technical and consumer information 9-29
MEMO
9-30 Technical and consumer information
10Index
A
ABS(Anti-lockBrakingSystem)....5-25
Advancedairbagsystem....1-47
Airbagsystem
Advancedairbagsystem....1-47
Frontpassengerairbagandstatuslight.....1-48
Front-seatmountedside-impact
supplementalairbagsystem....1-51
Roof-mountedcurtainside-impactand
rolloversupplementalairbagsystem....1-51
Airbagwarninglabels....1-54
Airbagwarninglight....1-54,2-14
Aircleanerhousingfilter....8-16
Airconditioner
Airconditioneroperation....4-8
Airconditionerservice....4-11
Airconditionerspecificationlabel....9-10
Airconditioningsystemrefrigerantand
lubricantrecommendations....4-11,9-6
Alarm, Howtostopalarm(seevehicle
securitysystem)....2-26
Alcohol,drugsanddriving....5-7
All-wheeldrive(AWD)....5-20
All-wheeldrive(AWD)warninglight....2-10
Antenna....4-38
Anti-lockBrakingSystem(ABS)....5-25
Anti-lockbrakingsystem(ABS)warninglight....2-10
Appearancecare
Exteriorappearancecare....7-2
Interiorappearancecare....7-4
Audiblereminders....2-16
Audiooperationprecautions....4-12
Audiosystem....4-12
Steeringwheelaudiocontrols....4-37
Automatic
Doorlocks....3-4
Averagespeed(MPHorkm/h)....2-22
Avoidingcollisionandrollover....5-5
B
Backdoor(Seeliftgate)....3-10
Battery....8-13
Batteryreplacement,Keyfob....8-22
Batterysaversystem....2-30
Keyfobbatteryreplacement....8-22
Beforestartingtheengine....5-10
Belts(Seedrivebelts)......8-14
Bluetooth® Hands-FreePhoneSystem....4-40
Boosterseats....1-37
Brake
Anti-lockBrakingSystem(ABS)....5-25
Brakefluid....8-11
Brakesystem....5-25
Parkingbrakeoperation....5-16
Warninglight....2-11
Break-inschedule....5-19
Brightnesscontrol
Instrumentpanel....2-8
Bulbcheck/instrumentpanel....2-10
Bulbreplacement....8-24
C
Capacitiesandrecommendedfluids/lubricants...9-2
CarphoneorCBradio....4-39
Cargocover....2-36
Cargolight....2-44
Catalyticconverter, Threewaycatalyst....5-3
CD/CF/USBmemorycareandcleaning....4-37
Ceilinglight....2-43
Childrestraints....1-21
Boosterseats....1-37
LATCHsystem....1-23
Precautionsonchildrestraints....1-21
Childsafety....1-19
Childsafetyreardoorlock....3-5
Chimes,Audiblereminders....2-16
Circuitbreaker,Fusiblelink....8-20
Cleaningexteriorandinterior....7-2,7-4
Clock....4-23,4-30
Coathooks....2-38
Coldweatherdriving....5-28
CompactDisc(CD)player(See
audiosystem)....4-24,4-32
Consolebox 2-35
ContinuouslyVariableTransmission
(CVT)fluid....8-11
Controls,Steeringwheelaudiocontrols....4-37
Coolant
Capacitiesand
recommendedfluids/lubricants....9-2
Changingenginecoolant....8-8
Checkingenginecoolantlevel....8-8
Corrosionprotection....7-6
Cover,Cargocover....2-36
Cruisecontrol....5-17
Cupholders....2-32
CVT, DrivingwithCVT(Continuously
VariableTransmission)....5-9,5-12
D
Defrosterswitch, Rearwindow
defrosterswitch....2-29
Dimensionsandweights....9-8
Drivebelts....8-14
Driving
All-wheeldrive(AWD)....5-20
Coldweatherdriving....5-28
Distance(milesorkm)......2-23
DrivingwithCVI(Continuously
VariableTransmission)....5-9,5-12
On-pavementandoff-roaddriving....5-6
Precautionswhenstartinganddriving....5-2
Safetyprecautions....5-7
E
Economy, Fuel....5-20
Elapsedtime....2-23
Electricpowersteeringsystem....5-24
Electricpowersteeringwarninglight....2-11
Emissioncontrolinformationlabel....9-10
Emissioncontrolsystemwarranty....9-26
Engine
Beforestartingtheengine....5-10
Break-inschedule....5-19
Capacitiesand
recommendedfluids/lubricants....9-2
Changingenginecoolant....8-8
Changingengineoilandfilter....8-9
Checkingenginecoolantlevel....8-8
Checkingengineoillevel....8-9
Coolanttemperaturegauge....2-6
Enginecompartmentchecklocations......8-6
Enginecoolingsystem....8-7
Engineoil....8-9
Engineoilandoilfilterrecommendation......9-5
Engineoilviscosity....9-5
Engineserialnumber....9-9
Enginespecifications....9-7
If your vehicle overheats....6-11
Startingtheengine....5-11
EventDataRecorders(EDR)....9-27
Exhaustgas(carbonmonoxide)....5-2
Extendedstoragefusewarning....2-19
Exteriorlightindicator....2-14
F
F.M.V.S.S.certificationlabel....9-9
Filter
Aircleanerhousingfilter....8-16
Changingengineoilandfilter....8-9
Flashers(Seehazardwarningflasherswitch).....6-2
Flattire....6-2
Flattowing....9-24
Floormatcleaning....7-5
Fluid
Brakefluid....8-11
Capacitiesand
recommendedfluids/lubricants....9-2
ContinuouslyVariableTransmission
(CVT)fluid....8-11
Enginecoolant....8-7
Engineoil....8-9
Windowwasherfluid....8-12
FM-AMradiowithCompactDisc(CD)player....4-22
FM-AM-SATradiowithCompactDisc
(CD)player....4-29
Frontmanualseatadjustment....1-3
Frontpassengerairbagandstatuslight....1-48
Frontseat, Frontseatadjustment....1-3
Fuel
Capacitiesand
recommendedfluids/lubricants....9-2
Fueleconomy....5-20
Fuelinformation....9-3
Fueloctanerating....9-3
Fuel-fillercap....3-11
Fuel-filleroor....3-11
Gauge....2-7
Loosefuelcapwarning....2-19,3-12
Fuelefficientdrivingtips....5-19
Fuses....8-19
Fusiblelinks....8-20
G
Gascap....3-11
Gauge....2-4
Enginecoolanttemperaturegauge....2-6
Fuelgauge....2-7
Tachometer....2-6
Tripcomputer....2-21
Generalmaintenance....8-2
Glovebox....2-34
H
Hands-FreePhoneSystem,Bluetooth ^® 4-40
Hazardwarningflasherswitch....6-2
Headrestraints/headrests....1-5
Headlights
Bulbreplacement....8-24
Headlightswitch....2-29
Heater
Heaterandairconditioneroperation....4-8
Hoodrelease....3-9
Hook
Coathooks....2-38
Luggagehook....2-37
Utilityhook 2-38
Horn....2-31
|
Ignitionswitch....5-9 Keypositions....5-10
Immobilizersystem....2-26 Indiasterights....8-14
Indicator lights....2-14 Insidemirror....3-14
Inspection/maintenance(I/M)test....9-26
Instrumentbrightnesscontrol....2-8
Instrumentpanel....2-3
Interiorlightreplacement....8-26 Interiorlights....2-42
iPod® connecting....4-26
iPod® playeroperation....4-34
ISOFIXchildrestraint....1-23
J
Jumpstarting....6-9
K
Keylessentry (Seeremotekeylessentrysystem)....3-5 Keys....3-2
L
Labels Airbagwarninglabels....1-54 Airconditionerspecificationlabel....9-10 Emissioncontrolinformationlabel....9-10 Engineserialnumber....9-9 F.M.V.S.S.certificationlabel....9-9 TireandLoadinginformationlabel....8-30,9-10 Vehicleidentificationnumber(VIN)....9-8 LATCHsystem....1-23
Licenseplate,Installingfrontlicenseplate....9-11 Liftgate....3-10
Light Airbagwarninglight....1-54 Bulbreplacement....8-24 Cargolight....2-44 Ceilinglight....2-43 Headlightswitch....2-29 Headlightsbulbreplacement....8-24 Indicatorlights....2-14 Interiorlights....2-42 Maplights....2-42 Replacement....8-24 Vanitymirrorlights....2-44 Warning/indicatorlightsand audiblereminders....2-10
Lights, Exterior and interior light replacement....8-26 Loading information (See vehicle loading information)....9-12 Lock
Automaticdoorlocks....3-4 Doorlocks....3-3
Liftgatelock....3-10
Powerdoorlock....3-3 Loosefuelcapwarning....2-19,3-12 Lowfuelwarninglight....2-12 Lowtirepressurewarninglight....2-12 Lowtirepressurewarningsystem (Seetirepressuremonitoringsystem(TPMS))....5-3 Luggagefloorbox....2-35 Luggagehooks....2-37 Luggagesidebox....2-36
M
Maintenance Battery....8-13
Generalmaintenance....8-2 Indicatorsformaintenance....2-20
Insidethevehicle....8-3
Maintenance precautions 8-5
Maintenancerequirements....8-2
Outsidethevehicle....8-2
Seatbeltmaintenance....1-18 Malfunctionindicatorlight(MIL)....2-15
Manualairconditioner....4-9 Manualfrontseatadjustment....1-3
Maplights....2-42
Masterwarninglight....2-13
Meter, Tripcomputer....2-21
Metersandgauges....2-4
Instrumentbrightnesscontrol....2-8
Mirror Insidemirror....3-14 Outsidemirrors....3-14
Mirror, Vanitymirror....3-15 Monitor, RearviewMonitor....4-2
N
Newvehiclebreak-in....5-19 NISSANVehicleImmobilizerSystem....2-26
0
Off-roadrecovery....5-6
Oil Capacitiesand recommendedfluids/lubricants....9-2 Changingengineoilandfilter....8-9 Checkingengineoilevel....8-9 Engineoil....8-9 Engineoilviscosity....9-5 OneShortCall....4-42
Operation, Indicators for operation....2-19
Outsideairtemperature....2-17
Outsidemirrors....3-14
OverdriveOFFswitch....5-15
Overheat,Ifyourvehicleoverheats......6-11
Owner'sManual/ServiceManual
orderinformation....9-28
P
Panicalarm....3-7
Parking
Brakebreak-in....5-25
Parkingbrakeoperation....5-16
Parkingonhills....5-23
Phone
Bluetooth® Hands-FreePhoneSystem......4-40
CarphoneorCBradio....4-39
Power
Electricpowersteeringsystem....5-24
Powerwindows....2-39
Precautions
Audiooperation....4-12
Brakingprecautions....5-25
Childrestraints....1-21
Cruisecontrol....5-17
Drivingsafety....5-7
Maintenance....8-9
On-pavementandoff-roaddriving....5-6
Seatbeltusage....1-9
Supplementalrestraintsystem....1-41
Whenstartinganddriving....5-2
Pushstarting....6-11
R
Radio 4-12
CarphoneorCBradio....4-39
FM-AMradiowithCompactDisc
(CD)player 4-22
Steeringwheelaudiocontrols....4-37
Range(distancetoempty)....2-23
Rapidairpressureloss....5-6
Readinessforinspection/maintenance
(I/M)test....9-26
Rearcenterseatbelt....1-15
Reardoorlock,Childsafetyreardoorlock......3-5
Rearseats....1-4
Rearwindowdefrosterswitch....2-29
Rearwindowwiperandwasherswitch....2-28
RearViewMonitor....4-2
Recorders, Eventdata....9-27
Registeringyourvehicleinanothercountry......9-8
Remotekeylessentrysystem....3-5
Reportingsafetydefects....9-26
Rollover....5-5
Roof
Roofrack....2-38
S
Safety
Childseatbelts....1-19
Towingsafety....9-20
Satelliteradiooperation....4-31
Seatadjustment
Frontmanualseatadjustment....1-3
Frontseats....1-3
Seatbelt(s)
Childsafety....1-19
Infants....1-20
Injuredpersons....1-11
Largerchildren....1-20
Precautionsonseatbeltusage....1-9
Pregnantwomen....1-11
Rearcenterseatbelt....1-15
Seatbeltcleaning....7-6
Seatbeltextenders....1-18
Seatbelthooks....1-15
Seatbeltmaintenance....1-18
Seatbeltwarninglight....2-13
Seatbelts....1-9
Seatbeltswithpretensioners....1-52
Shoulderbeltheightadjustment....1-14
Smallchildren....1-20
Three-pointtype....1-11
Seat(s)
Seats....1-2
Securitysystem(NISSANVehicleImmobilizer
System),Enginestart....2-26
Securitysystem,Vehiclesecuritysystem......2-24
Servicingairconditioner....4-11
Settings....2-23
Shiftlever, Shiftlockrelease....5-16
Shiftlockrelease
Transmission....5-16
Shifting
CVT(Continuously
VariableTransmission)....5-9,5-12
Shoulderbeltheightadjustment....1-14
Sparetire....8-38,9-7
Sparkplugs....8-15
Sportmodeswitch....5-14
Starting
Beforestartingtheengine....5-10
Jumpstarting....6-9
Precautionswhenstartinganddriving....5-2
Pushstarting....6-11
Startingtheengine....5-11
Statuslight,Frontpassengerairbag....1-48
Steering
Electricpowersteeringsystem....5-24
Steeringwheelswitchforaudiocontrols.....4-37
Tiltingsteeringwheel....3-13
Storage....2-32
Sunvisors....3-13
Sunglassesholder....2-33
Supplementalairbagwarninglabels....1-54
Supplementalairbagwarninglight.....1-54,2-14
Supplementalrestraintsystem....1-41
Precautionsonsupplemental
restraintsystem....1-41
Switch
All-WheelDrive(AWD)lockswitch....5-21
Audiocontrolsteeringwheelswitch....4-37
Hazardwarningflasherswitch....6-2
Headlightswitch....2-29
Ignitionswitch....5-9
OverdriveOFFswitch....5-15
Turnsignalswitch....2-30
Vehicledynamiccontrol(VDC)offswitch....2-31
T
Tachometer....2-6
Temperaturegauge,Enginecoolant
temperaturegauge....2-6
Theft(NISSANVehicleImmobilizerSystem),
Enginestart....2-26
Three-waycatalyst....5-3
Tiltingsteeringwheel....3-13
Tirepressure, Lowtirepressurewarninglight....2-12
Tires
Flattire....6-2
Lowtirepressurewarningsystem....5-3
TireandLoadinginformationlabel.....8-30,9-10
Tirechains....8-34
Tiredressing....7-4
Tirepressure....8-29
Tirepressuremonitoring
system(TPMS)....5-3,6-2
Tirerotation....8-35
Uniformtirequalitygrading....9-25
Wheel/tiresize....9-7
Wheelsandtires....8-29
Tonneaucover(seecargocover)......2-36
Towing
Flattowing....9-24
Towtrucktowing....6-12
Towingsafety....9-20
Trailertowing....9-16
TPMS,Tirepressuremonitoringsystem....5-3
TPMS,Tirepressurewarningsystem....6-2
Trailertowing....9-16
Transmission
ContinuouslyVariableTransmission
(CVT)fluid....8-11
DrivingwithCVT(Continuously
VariableTransmission)....5-9,5-12
Transmissionshiftleverlockrelease......5-16
Transmitter(Seeremotekeylessentrysystem)....3-5
Travelingorregisteringyourvehiclein
anothercountry....9-8
Tripcomputer....2-21
Turnsignalswitch....2-30
U
Underbodycleaning....7-3
Uniformtirequalitygrading....9-25
USB(UniversalSerialBus)connectionport.....4-33
Utilityhook 2-38
V
Vanitymirror....3-15
Vanitymirrorlights....2-44
Vehicle
Dimensionsandweights....9-8
Identificationnumber(VIN)....9-8
Informationdisplay....2-17
Loadinginformation....9-12
Recovery(freeingastuckvehicle)......6-14
Securitysystem....2-24
Vehicledynamiccontrol(VDC)offswitch....2-31
Vehicledynamiccontrol(VDC)system......5-27
Vehicledynamiccontrol(VDC)warninglight.....2-14
Ventilators....4-7
Voicecommand(Bluetooth ^® Hands-Free
PhoneSystem)....4-45
VoicePromptInterrupt....4-42
W
Warning
Hazardwarningflasherswitch....6-2
Lights....2-10
Tirepressuremonitoring
system(TPMS)....5-3,6-2
Warning/indicatorlightsand
audiblereminders....2-9
Warninglabels, Airbagwarninglabels....1-54
Warninglight
Airbagwarninglight....1-54,2-14
All-wheeldrive(AWD)warninglight.....2-10
Anti-lockbrakingsystem(ABS)
warninglight....2-10
AWDwarninglight....5-22
Brakewarninglight....2-11
Electricpowersteeringwarninglight......2-11
Lowfuelwarninglight....2-12
Lowtirepressurewarninglight....2-12
Seatbeltwarninglight....2-13
Warranty,Emissioncontrolsystemwarranty......9-26
Washerswitch
Rearwindowwiperandwasherswitch.....2-28
Windshieldwiperandwasherswitch.....2-27
Washing....7-2
Waxing....7-2
Weights(Seedimensionsandweights)......9-8
Wheel/tiresize....9-7
Wheelsandtires....8-29
Careofwheels....7-3
Cleaningaluminumalloywheels....7-3
Windowwasherfluid....8-12
Window(s)
Cleaning....7-3
Powerwindows....2-39
Windshieldwiperandwasherswitch....2-27
Wiper
Rearwindowwiperandwasherswitch.....2-28
Rearwindowwiperblade......8-18
Windshieldwiperandwasherswitch....2-27
Wiperblades....8-17
MEMO
MEMO
MEMO
GASSTATIONINFORMATION
FUELINFORMATION:
Useunleadedregulargasolinewithanoctane ratingofatleast87AKI(Anti-KnockIndex) number(Researchoctanenumber91).

CAUTION
- Using fuel other than that specified could adversely affect the emission control systems, and may also affect warranty coverage.
- Undernocircumstanceshoulda leadedgasolinebeused, because thiswilldamagethethreeway catalyst.
- DonotuseE-15orE-85fuelinyour vehicle. Your vehicle is not designed torunonE-15orE-85fuel. Using E-15orE-85fuel in a vehiclenot specifically designed for E-15orE-85 fuel can adversely affect the emission control devices and systems of the vehicle. Damage caused by such fuel is not covered by the NISSAN new vehicle limited warranty.
•U.S. government regulations require ethanold dispensing pumpstobe identified by a small, square, orange and black label with the common abbreviation or the appropriate percentage forth at region.
For additional information, see "Capacities and recommended fluids/lubricants" (P.9-2).
ENGINEOILRECOMMENDATION:
●GenuineNISSANengineoilorequivalent
●EngineoilwithAPICertificationMark, ViscositySAE5W-30
See "Capacitiesandrecommendedfluids/lubricants" (P.9-2) forengineoilandoilfilter recommendation.
COLDTIREPRESSURES:
The labelistypicallylocatedonthedriverside centerpillaroronthedriver'sdoor. For additional information, see "Wheelsandtires" (P.8-29).
NEWVEHICLEBREAK-INPROCEDURE DURESRECOMMENDATION:
During the first 1,200 miles (2,000 km) of vehicle use, follow there recommendations outlined in the "Break-inschedule" (P.5-19) of this Owner's Manual. Follow these recommendations for the future reliability and economy of your new vehicle.

Printing : October 2014 (43)
Publication No.: OM15E0 0S35U0
Printed in U.S.A.
TOOUM-JM06D
S35-D
- Foreword
- READFIRST—THENDRIVESAFELY
- WARNING
- IMPORTANT SAFETY INFORMATION REMINDERS FOR SAFETY!
- ON-PAVEMENTANDOFF-ROAD DRIVING
- MODIFICATIONOFYOURVEHICLE
- WHENREADINGTHEMANUAL
- CAUTION
- Bluetooth
- 0Illustratedtableofcontents
- SEATS,SEATBELTSAND SUPPLEMENTALRESTRAINT SYSTEM(SRS)
- EXTERIORFRONT
- EXTERIORREAR
- PASSENGERCOMPARTMENT
- INSTRUMENTPANEL
- 0-6 Illustratedtableofcontents
- METERSANDGAUGES
- ENGINECOMPARTMENT
- QR25DEENGINE
- Safety—Seats, seatbeltsandsupplemental restraintsystem
- SEATS
- FRONTSEATS
- Forwardandbackward:
- Reclining:
- Seatlifter(ifsoequipped):
- REARSEATS
- Beforefoldingtherearseats:
- HEADRESTRAINTS/HEADRESTS
- REMOVE
- INSTALL
- ADJUST
- Foradjustableheadrestraint/headrest
- Fornon-adjustableheadrestraint/head-rest
- Raise
- Lower
- SEATBELTS
- PRECAUTIONSONSEATBELT USAGE
- damaged.
- PREGNANTWOMEN
- INJUREDPERSONS
- THREE-POINTTYPESEATBELT
- Shoulderbeltheightadjustment
- Stowingrearcenterseatbelt:
- Attachingrearcenterseatbelt:
- SEATBELTEXTENDERS
- SEATBELTMAINTENANCE
- CHILDSAFETY
- Childrenneedadultstohelpprotectthem. Theyneedtobeproperlyrestrained.
- thefrontseat.
- Thisisespeciallyimportantbecauseyour vehiclehasasupplementalrestraintsystem(Airbagsystem)forthefrontpassenger.See"SupplementalRestraintSystem" (P.1-41).
- INFANTS
- SMALLCHILDREN
- LARGERCHILDREN
- CHILDRESTRAINTS
- PRECAUTIONSONCHILDRESTRAINTS
- structured.
- LATCHloweranchorlocation
- inacollision.
- FORWARD-FACINGCHILDRESTRAINTINSTALLATIONUSING LATCH
- BOOSTERSEATS
- seatbelts.
- Besuretoreinstalltheheadrestraint/headrestwhentheboosterseatis
- SUPPLEMENTALRESTRAINT SYSTEM
- PRECAUTIONSONSUPPLEMENTAL RESTRAINTSYSTEM
- NISSANADVANCEDAIRBAGSYS-TEM(frontseats)
- anaccident.
- Statuslight:
- Frontpassengerairbag:
- Thesideairbagsandcurtainairbags operateonlywhentheignitionswitchisin theONposition.
- injury.
- ①SRSairbag
- REPAIRANDREPLACEMENTPROCEDURE
- 2Instrumentsandcontrols
- 2-4 Instrumentsandcontrols
- SPEEDOMETER
- ODOMETER/TWINTRIPODOMETER
- Odometer
- Twintripodometer
- Changingthedisplay:
- Resettingthetripodometer:
- TACHOMETER
- FUELGAUGE
- Refillthefueltankbeforethegauge registers0.
- INSTRUMENTBRIGHTNESSCONTROL
- WARNING/INDICATORLIGHTSAND AUDIBLEREMINDERS
- CHECKINGBULBS
- WARNINGLIGHTS
- Parkingbrakeindicator:
- Lowbrakefluidwarninglight:
- Anti-lockBrakingSystem(ABS)warning indicator:
- Lowtirepressurewarning:
- TPMS malfunction:
- Masterwarninglight
- Seatbeltwarninglight
- INDICATORLIGHTS
- Frontpassengerairbagstatuslight
- Highbeamindicatorlight
- MalfunctionIndicatorLight(MIL)
- Operation:
- O/D OFF Overdriveoffindicatorlight
- Securityindicatorlight
- SPORT SPORTmodeindicatorlight
- Turnsignals/hazardindicatorlights
- OFF VehicleDynamicControl(VDC)off indicatorlight
- AUDIBLEREMINDERS
- Keyreminderchime
- Lightreminderchime
- Brakepadwearwarning
- Parkingbrakereminderchime
- Seatbeltwarningchime
- VEHICLEINFORMATIONDISPLAY
- ter"(P.2-21).)
- INDICATORSFOROPERATION
- Dooropenwarning
- Liftgateopenwarning
- Loosefuelcapwarning
- Checktirepressurewarning
- Parkingbrakereleasewarning
- Settingmenuoperationwarning
- Lowoutsidetemperaturewarning
- 8.Lowfuelwarning
- 9.Driveralert
- Cruisecontrol indicator(ifso equipped)
- Extended storage fuse warning (ifso equipped)
- INDICATORSFORMAINTENANCE
- Servicedueindicator
- Tirereplacementindicator
- "Other" indicator
- TRIPCOMPUTER
- Fuel Economy(MPG, l/100km)
- Currentfuelconsumption:
- Averagefuelconsumption:
- AverageSpeed(MPHorkm/h)
- Driving Distance(milesorkm)
- ElapsedTime
- Range(distancetoempty)(dte—milesorkm)
- Thedisplayisupdatedevery30seconds.
- Settings
- 6.Settings
- Settingcannotbemadewhiledriving.
- Units:
- Maintenance:
- Alarms:
- 2-24Instrumentsandcontrols
- Language:
- Factory:
- NOTE:
- WhenresettingFactory, allprevioussettingsmadearechangedtodefault.
- CONTINUOUSLYVARIABLETRANSMISSION(CVT)POSITIONINDICATOR
- VEHICLESECURITYSYSTEM
- Thesystemcanbearmedevenifthe windowsareopen.
- Evenwhenthedriverand/orpassengers areinthevehicle,thesystemwillactivate withalldoorslockedwiththeignition switchintheLOCKposition.Whenturning theignitionswitchtotheACCorON position,thesystemwillbereleased.
- REARWINDOWWIPERAND WASHERSWITCH
- HEADLIGHTSWITCH
- Lighting
- Headlightbeamselect
- Batterysaversystem
- TURNSIGNALSWITCH
- ① Turnsignal
- ② Lanechangesignal
- HORN
- STORAGE
- CUPHOLDERS
- CONSOLEBOX
- LUGGAGEFLOORBOX(ifso equipped)
- Toavoiddamage, donotloadmore than 22lbs(10kg) of cargo into the luggagefloorbox.
- WINDOWS
- POWERWINDOWS
- Automaticoperation(ifsoequipped)
- INTERIORLIGHTS
- MAPLIGHTS
- ONposition
- DOORposition
- OFFposition
- CEILINGLIGHT
- Thelightwillturnoffafteraperiodoftime whenthelightsremainilluminatedto preventthebatteryfrombecomingdischarged.
- 3Pre-drivingchecksandadjustments
- KEYS
- NISSANVEHICLEIMMOBILIZERSYSTEMKEYS
- Neverleavethesekeysinthevehicle.
- DOORS
- LOCKINGWITHKEY
- LOCKINGWITHINSIDELOCKKNOB
- LOCKINGWITHPOWERDOORLOCK SWITCH
- Whenlockingthedoorthisway,besure nottoleavethekeyinsidethevehicle.
- 3-4 Pre-driving checks and adjustments
- Lockoutprotection
- AUTOMATICDOORLOCKS
- REMOTEKEYLESSENTRYSYSTEM
- CHILDSAFETYREARDOORLOCK
- When the levers are in the lock position ①, there a doors can be opened only from the outside.
- Beforelockingthedoors, makesurethe keyisnotleftinthevehicle.
- NISSANdealer.
- HOWTOUSEREMOTEKEYLESS ENTRYSYSTEM
- Lockingdoors
- Unlockingdoors
- Usingpanicalarm
- Batteryindicatorlight
- Settinghazardindicatorandhornmode
- Switchingprocedure:
- HOOD
- LIFTGATE
- LIFTGATERELEASE
- FUEL-FILLERDOOR
- FUEL-FILLERCAP
- LOOSEFUELCAPwarning
- STEERINGWHEELSUNVISORS
- TILTOPERATION
- MIRRORS
- INSIDEMIRROR
- OUTSIDEMIRRORS
- 4Heater, airconditioner, audio, phone and voice recognition systems
- SAFETYNOTE
- REARVIEWMONITOR(ifso equipped)
- DIFFERENCE BETWEEN PREDICTIVE ANDACTUAL DISTANCES
- HOWTOREADTHEDISPLAYED LINES
- Distanceguidelines:
- Backinguponasteepuphill
- Backinguponasteepdownhill
- Availablesettingitems:
- OPERATINGTIPS
- VENTILATORS
- HEATERANDAIRCONDITIONER
- MANUALAIRCONDITIONER
- Controls
- Outsideaircirculation:
- Airrecirculation:
- Airflowcontrol:
- Fanspeedcontrol:
- A/C(AirConditioner)operation:
- Temperaturecontrol:
- Heating:
- Ventilation:
- Defrostingordefogging:
- Bi-levelheating:
- Heatinganddefogging:
- Airconditioneroperation
- Cooling:
- Dehumidifiedheating:
- Dehumidifieddefogging:
- IN-CABINMICROFILTER
- SERVICINGAIRCONDITIONER
- AUDIOSYSTEM
- AUDIOOPERATIONPRECAUTIONS
- Radio
- Usingacellularphoneinornearthe vehiclemayinfluenceradioreception quality.
- Radioreception:
- FMradioreception:
- AMradioreception:
- Satelliteradioreception(ifsoequipped):
- CompactDisc(CD)player
- PUSHEJECT:
- UNPLAYABLE:
- GeneralnotesforUSBuse:
- NotesforiPod ® use:
- CompressedAudioFiles(MP3/WMA)
- Explanationofterms:
- FM-AMRADIOWITHCOMPACTDISC (CD)PLAYER
- Headunit:
- ON-OFF/Volumecontrol:
- MUTEbutton:
- AUDIO AUDIObutton:
- PushtheTUNE(,)orSEEK(,)
- CLOCK CLOCKbutton:
- FM·AM Radio(FM/AM)bandselect:
- TUNE(Tuning):
- SEEKtuning:
- SCAN RPT SCANtuning:
- to 6 Stationmemoryoperations:
- RadioDataSystem(RDS):
- DISP TEXT RADIODISPLAYchange:
- CompactDisc (CD)playeroperation
- CD CDPLAY:
- DISP TEXT CDplayinformation:
- Search)FF,APSREW:
- SCANtuning:
- CDEJECT:
- ConnectingiPod®:
- Compatibility:
- iPod iPod® button:
- iPod MENU Topmenuitemselecting:
- ENTER BACK ENTER,BACKbutton:
- DISP TEXT iPod® playinformation:
- FF(FastForward), REW(Re-wind) button:
- APS(AutomaticProgram Search)FF,APSREWbutton:
- SCAN RPT REPEAT(RPT), RANDOM(RDM):
- AUX(Auxiliary)input
- AUXINjack:
- AUX AUX(Auxiliary)button:
- FM-AM-SATRADIOWITHCOMPACT DISC(CD)PLAYER
- PWR/Volumecontrol:
- ENTER/SETTINGbutton:
- DISP DISPbutton:
- Switchingthedisplay:
- BACK BACKbutton:
- XM radio(satellite)bandselect:
- SEEKtuning/CAT(category):
- SCAN SCANtuning:
- ① to ⑥ Stationmemoryoperations:
- CompactDisc(CD)playeroperation
- CD • AUX PLAY:
- |◀◀ ▶▶▶ Next/PreviousTrackandFast Forward/Rewind:
- RPT REPEAT(RPT):
- RDM RANDOM(RDM):
- Audiomainoperation:
- PLAY:
- Next/PreviousFileandFast wind:
- Folderselection:
- REPEAT(RPT):
- BACKbutton:
- iPod® MENUbutton:
- Next/PreviousTrackandFast wind:
- CD/DVD/USBMEMORYCAREAND CLEANING
- CD/DVD
- USBmemory(ifsoequipped)
- STEERINGWHEELSWITCHFOR AUDIOCONTROL(ifsoequipped)
- SOURCEselectswitch
- Memorychange(radio):
- SEEKtuning(radio):
- APS(AutomaticProgramSearch)FF,APS REW(CD):
- FOLDERchange(CDwithMP3orWMA):
- USB:
- ANTENNA
- CARPHONEANDCBRADIO
- Bluetooth® HANDS-FREEPHONE SYSTEM(ifsoequipped)
- To avoid draining the vehicle battery, use a phone after starting the engine.
- REGULATORYINFORMATION
- FCCRegulatoryinformation
- Bluetooth ® trademark
- Bluetooth®
- USINGTHESYSTEM
- Initialization
- Givingvoicecommand
- Voicepromptinterrupt:
- Oneshotcall:
- Howtosaynumbers
- 4-42Heater, airconditioner, audio, phone and voicerecognitionsystems
- Forbestresults, sayphonenumbersas singledigits.
- Manualcommandselection
- CONTROLBUTTONS
- PHONESEND
- PHONEEND
- GETTINGSTARTED
- Choosingalanguage
- Connectingprocedure
- Receivingacall
- Remembertowaitforthetone before speaking.
- Call
- (speakname) Ⓐ
- "PhoneNumber"(speakdigits) B
- "Redial" ©
- "Callback" D
- "SpecialNumber"
- "Duringacall"
- "TransferEntry" Ⓐ
- "DeleteEntry" Ⓑ
- "ListNames" ©
- Eachphonehasitsownseparatephone-book.YoucannotaccessPhoneA'sphone-bookifyouarecurrentlyconnectedwith PhoneB.
- "Recordname" B
- "NextName" ©
- "PreviousName" D
- RecentCalls
- "Outgoing" A
- "Incoming" Ⓑ
- "Missed" ©
- TROUBLESHOOTINGGUIDE
- 5Startinganddriving
- PRECAUTIONSWHENSTARTING ANDDRIVING
- THREE-WAYCATALYST
- TIREPRESSUREMONITORINGSYSTEM(TPMS)
- Additional information
- 5-4 Starting and driving
- notfunctionproperly.
- FCCNotice:
- AVOIDINGCOLLISIONANDROLL-OVER
- significantly more likely to be injured or killed than a person properly wearing a seat belt.
- ON-PAVEMENTANDOFF-ROAD DRIVINGPRECAUTIONS
- Utilityvehicleshaveasignificantlyhigher rolloverratethanothertypesofvehicles.
- (P.5-7).
- OFF-ROADRECOVERY
- RAPIDAIRPRESSURELOSS
- DRINKINGALCOHOL/DRUGSAND DRIVING
- alcohol, drugs, or some other physical condition. DRIVING SAFETY PRECAUTIONS
- backward.
- IGNITIONSWITCH
- CONTINUOUSLYVARIABLETRANSMISSION(CVT)
- KEYPOSITIONS
- LOCK(0)
- OFF(1)
- ACC(2)
- ON(3)
- START(4)
- BEFORESTARTINGTHEENGINE
- STARTINGTHEENGINE
- 4.Warm-up
- DRIVINGTHEVEHICLE
- Startingthevehicle
- Shifting
- P(Park):
- R(Reverse):
- N(Neutral):
- D(Drive):
- L(Low):
- SPORTmodeswitch
- Overdrive(O/D)OFFswitch
- Fail-safe
- Shiftlockrelease
- PARKINGBRAKE
- Torelease:
- CRUISECONTROL(ifsoequipped)
- PRECAUTIONSONCRUISECONTROL
- CRUISECONTROLOPERATIONS
- BREAK-INSCHEDULE
- FUELEFFICIENTDRIVINGTIPS
- INCREASINGFUELECONOMY
- ALL-WHEELDRIVE(AWD)(ifso equipped)
- ALL-WHEELDRIVE(AWD)LOCK SWITCHOPERATIONS
- LOCKmode
- AUTOmode
- AWDWARNINGLIGHT
- PARKING/PARKINGONHILLS
- ELECTRICPOWERSTEERING SYSTEM
- BRAKESYSTEM
- BRAKINGPRECAUTIONS
- Vacuumassistedbrakes
- Usingthebrakes
- Wetbrakes
- ANTI-LOCKBRAKINGSYSTEM(ABS)
- forsafety.
- Donotpumpthebrakepedal.Doingso mayresultinincreasedstoppingdistances.
- Self-testfeature
- Normaloperation
- VEHICLEDYNAMICCONTROL(VDC) SYSTEM
- COLDWEATHERDRIVING
- FREEINGAFROZENDOORLOCK
- ANTI-FREEZE
- BATTERY
- DRAININGOFCOOLANTWATER
- TIREEQUIPMENT
- Skidandtractioncapabilitiesofstudded snowtires,onwetordrysurfaces,maybe poorerthanthatofnon-studdedsnow tires.
- All-WheelDrive(AWD)model
- SPECIALWINTEREQUIPMENT
- DRIVINGONSNOWORICE
- 6Incaseofemergency
- FLATTIRE
- thetirepressuresensors.
- CHANGINGAFLATTIRE
- Stoppingthevehicle
- TypeA(ifsoequipped):
- TypeB(ifsoequipped):
- Thesparetireisdesignedforemergency use.(Seespecificinstructionsunderthe heading"Wheelsandtires"(P.8-29).)
- JUMPSTARTING
- PUSH STARTING
- IF YOUR VEHICLE OVERHEATS
- Donotstoptheengine.
- TOWINGYOURVEHICLE
- coolingfancanstartatanytime.
- ●Alwaysattachsafetychainsbefore towing.
- TOWINGRECOMMENDEDBYNISSAN
- Front:
- Rear:
- hooks.
- Rockingastuckvehicle
- 7Appearanceandcare
- CLEANINGEXTERIOR
- Becarefulnottoscratchthepaintsurface whenputtingonorremovingthebody cover.
- WASHING
- WAXING
- REMOVINGSPOTS
- UNDERBODY
- GLASS
- WHEELS
- CHROMEPARTS
- CLEANINGINTERIOR
- TIREDRESSING
- maydamagethelenscover.
- AIRFRESHENERS
- FLOORMATS
- CORROSIONPROTECTION
- MOSTCOMMONFACTORSCONTRIBUTINGTOVEHICLECORROSION
- ENVIRONMENTALFACTORSINFLU-ENCETHERATEOFCORROSION
- Moisture
- Relativehumidity
- Temperature
- Airpollution
- TOPROTECT YOURVEHICLEFROM CORROSION
- 8Maintenanceanddo-it-yourself
- MAINTENANCEREQUIREMENTGENERALMAINTENANCE
- WHERETOGOFORSERVICE
- EXPLANATIONOFMAINTENANCE ITEMS
- Additionalinformationonthefollowing itemswith“\*”isfoundlaterinthissection.
- Outsidethevehicle
- MAINTENANCEPRECAUTIONS
- ENGINECOOLINGSYSTEM
- CHECKINGENGINECOOLANTLEVEL
- CHANGINGENGINECOOLANT
- ENGINEOIL
- CHECKINGENGINEOILLEVEL
- CHANGINGENGINEOILANDFILTER
- Vehicleset-up
- Engineoilandfilter
- Aftertheoperation
- CONTINUOUSLYVARIABLE TRANSMISSION(CVT)FLUID
- BRAKEFLUID
- WINDOWWASHERFLUID
- DRIVEBELTS
- SPARKPLUGS
- REPLACINGSPARKPLUGS
- AIRCLEANER
- WINDSHIELDWIPERBLADES
- CLEANING
- REPLACING
- REARWINDOWWIPERBLADEBRAKES
- SELF-ADJUSTINGBRAKES
- BRAKEPADWEARINDICATORS
- FUSES
- Fusiblelinks
- BATTERYREPLACEMENT
- KEYFOB
- LIGHTS
- HEADLIGHTS
- WHEELSANDTIRES
- If you have a flattire, see "Flattire" (P.6-2). TIREPRESSURE
- TireandLoadingInformationlabel
- Checkingthetirepressure
- TIRELABELING
- Othertire-relatedterminology:
- TYPESOFTIRES
- Allseasontires
- Summertires
- Snowtires
- •ONLYusesparetiressspecifiedfor theAWDmodel.
- Tractiondevicesmustbeinstalledonlyon thefrontwheelsandnotonthear wheels.
- CHANGINGWHEELSANDTIRES
- Assoonaspossible,tightenthewheel nutstothespecifiedtorquewitha torquewrench.
- Replacingwheelsandtires
- •Theuseoftiresotherthanthose
- anaccidentandpersonalinjury.
- Wheelbalance
- Careofwheels
- Sparetire
- 9Technicalandconsumerinformation
- CAPACITIES AND RECOMMENDED FLUIDS/LUBRICANTS
- FUELINFORMATION
- Gasolinespecifications
- Reformulated gasoline
- Gasolinecontainingoxygenates
- E-15fuel
- E-85fuel
- Aftermarketfueladditives
- Octaneratingtips
- ENGINEOILANDOILFILTERRE- COMMENDATION
- Selectingthecorrectoil
- Oiladditives
- Oilviscosity
- Selectingthecorrectoilfilter
- Changeintervals
- systemcomponents.
- SPECIFICATIONS
- WHEN TRAVELING OR REGISTERING YOURVEHICLEIN ANOTHER COUNTRY
- VEHICLE IDENTIFICATION NUMBER (VIN) PLATE
- INSTALLINGFRONTLICENSEPLATE
- VEHICLE LOADING INFORMATION
- TERMS
- VEHICLELOADCAPACITY
- SECURINGTHELOAD
- securingcargo.
- LOADINGTIPS
- MEASUREMENTOFWEIGHTS
- TOWINGATRAILER
- MAXIMUMLOADLIMITS
- byNISSANwarranties.
- Tongueload
- MAXIMUMGROSSVEHICLEWEIGHT (GVW)/MAXIMUMGROSSAXLE WEIGHT(GAW)
- Example:
- TOWINGSAFETY
- Trailerhitch
- Hitchball
- Swaycontroldevice
- Classlhitch
- Tirepressures
- Safetychains
- Trailerbrakes
- Neverconnectatralerbrakesystem directlytothevehiclebrakesystem.
- Pre-towingtips
- Trailertowingtips
- If you movetheshiftlevertotheP (Park) position before blocking the wheels and applying the parking brake, transmission damage could occur.
- FLATTOWING
- All-WheelDrive(AWD)models:
- Two-WheelDrive(2WD)models:
- UNIFORMTIREQUALITYGRADING
- Treadwear200TractionAATemperatureA TREADWEAR
- TRACTIONAA,A,BANDC
- TEMPERATUREA, BANDC
- EMISSIONCONTROLSYSTEM WARRANTY
- REPORTINGSAFETYDEFECTS
- READINESSFORINSPECTION/MAINTENANCE(I/M)TEST
- EVENTDATARECORDERS(EDR)
- OWNER'SMANUAL/SERVICE MANUALORDERINFORMATION
- 10Index
- A
- B
- C
- D
- E
- F
- G
- H
- |
- J
- K
- L
- M
- N
- 0
- P
- R
- S
- T
- U
- V
- W
- Warninglight
- GASSTATIONINFORMATION
- FUELINFORMATION:
- ENGINEOILRECOMMENDATION:
- COLDTIREPRESSURES:
- NEWVEHICLEBREAK-INPROCEDURE DURESRECOMMENDATION:
Brand : NISSAN
Model : Rogue Select (2015)
Category : Car