
70570 Big Mouth - Food Processor HAMILTON BEACH - Free user manual and instructions
Find the device manual for free 70570 Big Mouth HAMILTON BEACH in PDF.


| Product Type | Food Processor |
| Brand | Hamilton Beach |
| Model | 70570 Big Mouth |
| Dimensions (L x W x H) | Approximately 25 x 20 x 40 cm |
| Weight | Approximately 4.5 kg |
| Power Supply | Mains 220-240 V, 50/60 Hz |
| Power | 600 W |
| Bowl Capacity | 2.4 L (10 cups) |
| Feed Chute | Large (Big Mouth), for bulky ingredients |
| Main Functions | Chopping, slicing, grating, mixing, kneading, emulsifying |
| Included Accessories | S-blade, slicing/grating disc, dough hook, whisk |
| Speeds | 2 speeds + pulse |
| Noise Level | Approximately 80 dB |
| Bowl Material | BPA-free plastic |
| Maintenance and Cleaning | Bowl and lid dishwasher safe, blades and discs hand wash |
| Safety | Lid lock, automatic shut-off in case of overload |
| Spare Parts and Repairability | Parts available (bowl, lid, blades), easy repair |
| Color | White and gray |
Frequently Asked Questions - 70570 Big Mouth HAMILTON BEACH
User questions about 70570 Big Mouth HAMILTON BEACH
0 question about this device. Answer the ones you know or ask your own.
Ask a new question about this device
Download the instructions for your Food Processor in PDF format for free! Find your manual 70570 Big Mouth - HAMILTON BEACH and take your electronic device back in hand. On this page are published all the documents necessary for the use of your device. 70570 Big Mouth by HAMILTON BEACH.
USER MANUAL 70570 Big Mouth HAMILTON BEACH
Visit www.hamiltonbeach.com for our complete line of products and Use and Care Gridles as well as
cans bulbus - as well as delicious recipes, tins, and
to register your product online!
Please call us – our friendly
associates are ready to help.
USA: 1.800.851.8900
Questions?
natural_image
Line drawing of a mechanical device with no visible text or symbolsHamilton Beach®
Big Mouth™
Food Processor
Robot culinaire
When using electrical appliances, basic safety precautions should always be followed, including the following:
- Read and save all instructions.
- To protect against risk of electrical shock, do not immerse base, motor, cord, or plug in water or other liquid.
- Close supervision is necessary when any appliance is used by or near children.
- This appliance should not be used by children.
- Unplug cord from outlet when not in use, before putting on or taking off parts, and before cleaning.
- Avoid contacting moving parts.
- Do not operate any appliance with a damaged cord or plug or after the appliance malfunctions or is dropped or damaged in any manner. Call our toll-free customer service number for information on examination, repair, or electrical or mechanical adjustment.
- The use of attachments not recommended or sold by the appliance manufacturer may cause fire, electric shock, or injury.
- Do not use your food processor if any part is broken.
- Do not use appliance outdoors.
- Do not let cord hang over edge of table or counter, or touch hot surfaces.
- Keep hands and utensils away from moving blade and disc while processing food to reduce the risk of severe personal injury and/or damage to the food processor. A rubber scraper may be used but ONLY when the food processor is not running.
-
The blade and disc are sharp. Handle carefully. Store out of reach of children.
-
To reduce the risk of injury, never place cutting blade or disc on base without first putting bowl properly in place.
- Be certain lid is securely locked in place before operating appliance.
- Never feed food into food chute by hand. Always use the food pushers.
- Do not attempt to defeat the lid interlock mechanism.
- Make sure the blade or disc has come to a full stop before removing lid.
- To reduce the risk of injury, be sure to insert or remove blade and disc using hubs provided for this purpose. Use caution when removing blade and disc from the bowl, when emptying the bowl, and when cleaning.
- Be sure to turn switch to OFF (O) position after each use. Always use the pushers to clear the food chute. When this method is not possible, turn the motor off and disassemble unit to remove the remaining food.
- The appliance is not intended for commercial, professional, or industrial use. It is designed and built exclusively for household use only.
- Never use appliance for a longer period or with a larger amount of ingredients other than that recommended by appliance manufacturer. See section titled "Processing Charts."
- Do not place on or near a hot gas or electric burner or in a heated oven.
- Do not use appliance for other than intended use.
SAVE THESE INSTRUCTIONS!
OTHER CONSUMER SAFETY INFORMATION
This product is intended for household use only.
WARNING! Shock Hazard: This appliance has a polarized plug (one wide blade) that reduces the risk of electric shock. The plug fits only one way into a polarized outlet. Do not defeat the safety purpose of the plug by modifying the plug in any way or by using an adapter. If the plug does not fit, reverse the plug. If it still does not fit, have an electrician replace the outlet.
To avoid an electrical circuit overload, do not use another high-wattage appliance on the same circuit with your food processor.
The length of the cord used on this appliance was selected to reduce the hazards of becoming tangled in or tripping over a longer cord. If a longer cord is necessary, an approved extension cord may be used. The electrical rating of the extension cord must be equal to or greater than the rating of the appliance. Care must be taken to arrange the extension cord so that it will not drape over the counter-top or tabletop where it can be pulled on by children or accidentally tripped over.
Parts and Features
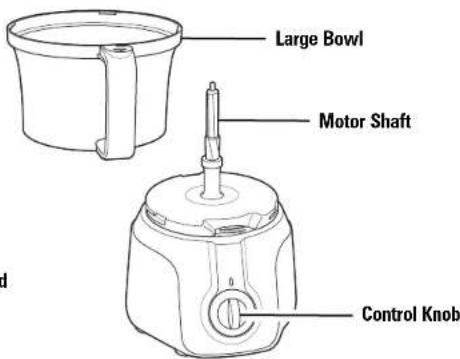
BEFORE FIRST USE: Unpack processor. Handle Blade and Disc(s) carefully; they are very sharp. Wash all parts except base in hot, soapy water. Rinse; then dry.
ON SELECT MODELS OR OPTIONAL ACCESSORY

S-Blade Adapter Shaft
(for use with small bowl only)

Small Bowl
(on select models)

Chopping/Mixing Blade (Pulse or Speeds 1–3)
Use to coarsely chop, mince, mix, or puree food.
Small Food Pusher


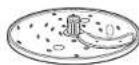
Reversible Slicing/Shredding Disc (Speeds 1 or 2)
(for use with large bowl only)
Use to shred cheese or to slice or shred a variety of foods (such as potatoes, pepperoni, carrots, celery).
Food Chute
Lid Latch
Food Chute
Lid

natural_image
Line drawing of a mechanical device with a handle and central knob (no text or symbols)
French Fry Blade (Speeds 1 or 2)
(on select models or optional accessory)
To order:
1.800.851.8900 (US)
1.800.267.2826 (Canada)

How to Use Chopping/Mixing Blade (with Large Bowl) (Pulse or Speeds 1–3)
WARNING
Laceration Hazard. Handle blade carefully; it is very sharp.
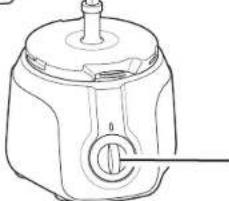
Make sure control knob is turned to OFF (O) and unit is unplugged. NOTE: Operate using only one blade or disc at a time.
natural_image
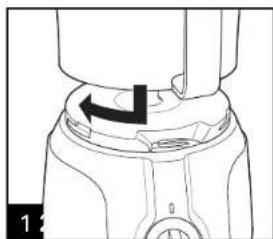
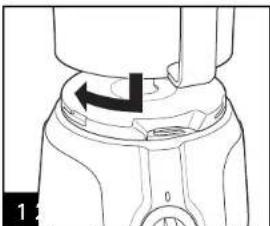
Technical line drawing of a mechanical component with a curved arrow indicating motion (no text or symbols)Align large bowl and base. Turn large bowl clockwise to lock into place. NOTE: Unit will not work unless large bowl is locked.

natural_image
Diagram of a mechanical component with a downward arrow indicating force or direction (no text or symbols)Carefully place blade onto motor shaft.

natural_image
Line drawing of a hand pouring liquid into a container with food items (no text or symbols)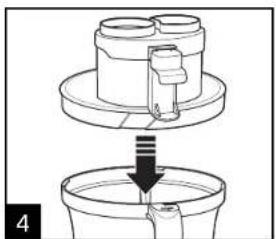
natural_image
Diagram showing a mechanical assembly with a lid and bucket, no text or symbols presentAlign lid and large bowl.

Turn lid clockwise to lock into place. NOTE: Unit will not work unless lid is locked.
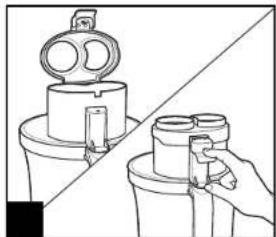
natural_image
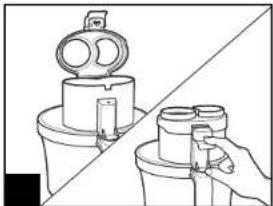
Diagram showing two views of a mechanical device with a handle and base, separated by a diagonal line (no text or symbols)Push lid latch firmly to lock. NOTE: Unit will not work unless latch is locked.
natural_image
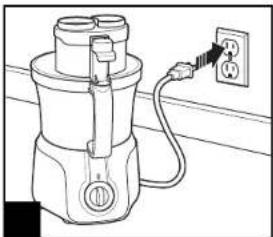
Line drawing of a blender with a power outlet connected to its side panel (no text or symbols)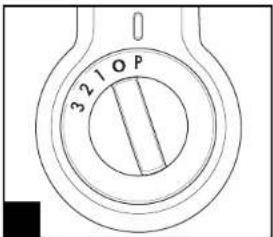
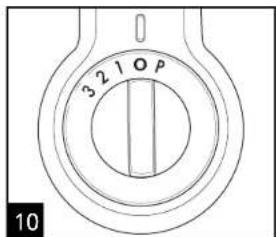
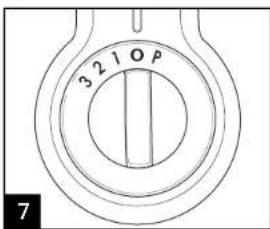
Pulse=Highest, 3=High, 2=Medium, 1=Low

How to Use Chopping/Mixing Blade
(with Large Bowl) (Pulse or Speeds 1–3) (cont.)

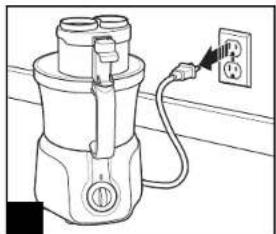
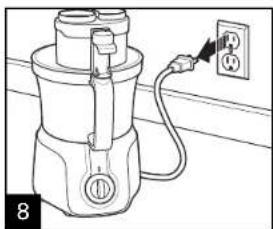
When finished, turn to OFF (O).
natural_image
Line drawing of a blender with a power outlet connected to a wall-mounted socket (no text or symbols)WARNING! Laceration Hazard: Always wait until blade has stopped moving before removing lid.

natural_image
Diagram showing a mechanical assembly with an upward arrow indicating motion or force, no text or symbols present.Always remove lid before removing bowl to avoid possible damage to the appliance.

natural_image
Diagram of a mechanical component with an upward arrow indicating motion or force, no text or symbols presentCarefully remove blade from motor shaft.

natural_image
Diagram of a device component with an arrow indicating upward motion (no text or symbols present)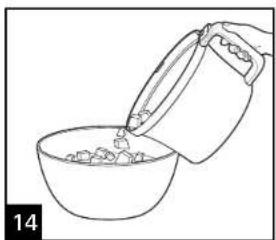
natural_image
Line drawing of a hand pouring liquid into a bowl (no text or symbols)
How to Use Chopping/Mixing Blade
(with Small Bowl on select models) (Pulse or Speeds 1–3)
WARNING
Laceration Hazard. Handle blade carefully; it is very sharp.
Make sure control knob is turned to OFF (O) and unit is unplugged. NOTE: Operate using only one blade or disc at a time.

natural_image
Technical line drawing of a mechanical component with a curved arrow indicating rotation (no text or symbols)Align large bowl and base. Turn large bowl clockwise to lock into place. NOTE: Unit will not work unless large bowl is locked.

natural_image
Diagram showing a container being inserted into a bucket with liquid, labeled with number 2 (no text or symbols on the diagram itself)Place small bowl over motor shaft and set in place (small bowl will not lock).
natural_image
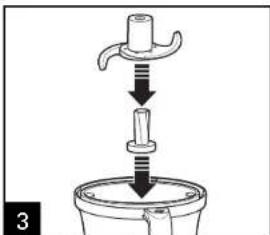
Diagram of a mechanical assembly with a lever and base, showing downward force arrows (no text or symbols)Place adapter shaft and then mixing blade on motor shaft.

natural_image
Simple line drawing of a container with a cross mark on top, no text or symbols presentDO NOT use small bowl with chopping blade in bottom position.

natural_image
Line drawing of a hand placing food into a steamer (no text or symbols)
natural_image
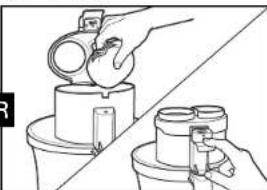
Diagram showing a mechanical assembly with a cylindrical component being inserted into a container, then dropping into a socket (no text or symbols present)Align lid and large bowl.

Turn lid clockwise to lock into place. NOTE: Unit will not work unless lid is locked.

natural_image
Illustration of two mechanical devices with a hand holding a device, showing front and side views (no text or symbols)Push lid latch firmly to lock. NOTE: Unit will not work unless latch is locked.
How to Use Chopping/Mixing Blade
(with Small Bowl on select models) (Pulse or Speeds 1–3) (cont.)
Pulse=Highest, 3=High, 2=Medium, 1=Low
When finished, turn to OFF (O).
WARNING! Laceration Hazard: Always wait until blade has stopped moving before removing lid.
Always remove lid before removing small bowl to avoid possible damage to the appliance.
Carefully remove mixing blade and adapter shaft from motor shaft before dispensing food.
Use tabs on small bowl to remove from large bowl.

How to Use Slicer/Shredder Disc (with Large Bowl only) (Speeds 1 or 2)
WARNING
Laceration Hazard. Handle blade carefully; it is very sharp.
Make sure control knob is turned to OFF (O) and unit is unplugged. NOTE: Operate using only one blade or disc at a time.
natural_image
Technical line drawing of a mechanical component with an arrow indicating rotation (no text or symbols)Align large bowl and base. Turn large bowl clockwise to lock into place. NOTE: Unit will not work unless large bowl is locked.

Carefully place disc onto motor shaft with desired side facing UP.

natural_image
Pure mechanical diagram showing a lever and base assembly without any text, numbers, or symbolsAlign lid and large bowl. Turn lid clockwise to lock into place. NOTE: Unit will not work unless lid is locked.

Close lid and push lid latch firmly to lock. NOTE: Unit will not work unless latch is locked.

natural_image
Line drawing of a hand inserting a plug into a cylindrical container (no text or symbols)SMALLER, THINNER FOODS
Put large food pusher into place. Place food into open tube of large food pusher.

natural_image
Line drawing of a hand pressing down on a cylindrical mechanical component (no text or symbols)SMALLER, THINNER FOODS
Push small, thin food with small food pusher. Never push food through chute with fingers.
OR
natural_image
Illustration of a hand pouring liquid into a container with another hand holding a small object (no text or symbols present)4B LARGER FOODS
Close lid and push lid latch firmly to lock. NOTE: Unit will not work unless latch is locked.

natural_image
Line drawing of a hand pressing down on a multi-tiered cylindrical device (no text or symbols)LARGER FOODS
Push large foods using large and small food pushers together. Never push food through chute with fingers.
How to Use Slicer/Shredder Disc
(with Large Bowl only) (Speeds 1 or 2) (cont.)

natural_image
Line drawing of a blender with an electrical outlet connected to a power strip (no text or symbols)
2=Medium, 1=Low

When finished, turn OFF (O).

natural_image
Line drawing of a blender with electrical outlet connected to a wall socket (no text or symbols)WARNING! Laceration Hazard: Always wait until blade has stopped moving before removing lid.

natural_image
Diagram showing a mechanical assembly with an upward arrow inside a container (no text or symbols)Always remove lid before removing large bowl to avoid possible damage to the appliance. 10
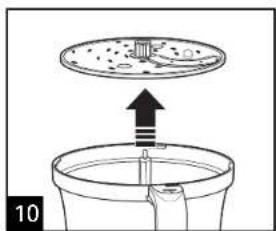
Carefully remove blade from motor shaft.

natural_image
Diagram of a mechanical component with an arrow indicating upward motion (no text or symbols)natural_image
Line drawing of a hand pouring granular substance from a container into a bowl (no text or symbols)Tips and Techniques
- For a more uniform consistency, start with pieces of food that are similar in size. Cut food into 1-inch (2.5 cm) pieces before processing with Chopping/Mixing Blade.
- This food processor is excellent to chop, mix, slice, or shred most foods. However, to maintain peak performance, do not use your food processor for the following: grinding grain, coffee beans, or spices; slicing frozen meats; kneading dough; or crushing ice.
- When chopping foods, pulsing on and off will produce the best results.
- Operating time will depend on quantity of food being processed. Most foods can be sliced, chopped, or shredded in seconds. If unit is operated for 2 minutes continuously, let the processor rest about 4 minutes before continuing.
- Do not puree or mash starchy vegetables like potatoes as they are easily over-processed and will become gummy.
• To slice or shred cheese, select firm cheese like Cheddar, Monterey Jack, or Swiss. For best results, process cheese that is well chilled.
- The Reversible Slicing/ Shredding Disc has a slicing blade on one side and shredding teeth on the other and can only be used with the large bowl. The name engraved on the blade, facing up, is the function selected. Place on motor shaft with desired cutting edge facing up.
• To julienne vegetables, slice, remove from bowl, and restack the vegetables. Pack into food chute with slices vertical. Slice again to make matchstick-cut vegetables.
Processing Charts
Disc attachments are reversible and labeled. This label should face up for the desired function. When using disc attachments, do not process past the MAX LEVEL on the Bowl.
ATTACHMENT FOODS SPEED
| Chopping/Mixing Blade Vegetables, Fruit, Meat,(chop, mince, mix, puree) Nuts, Hard Cheeses such as Parmesan (chilled) | Pulse or Speeds1-3 |
| Slicing Disc Vegetables, Fruit 1-2(slicing side facing UP) | Firm Cheeses (chilled) 1 only |
| Shredding Disc Vegetables 1–2(shredding side facing UP) | Cheese (chilled) 1 only |
For best results do not exceed the following amounts when chopping, mincing, or pureeing with the Chopping/Mixing Blade.
| FOOD | MAXIMUM AMOUNT LARGE BOWL | MAXIMUM AMOUNT SMALL BOWL |
| Fruits and Vegetables | 3 to 4 cups (.75 L to 1 L)(cut in 1" [2.5 cm] cubes) | 1.5 to 2 cups (.38 L to .5 L)(cut in 1" [2.5 cm] cubes) |
| Meats | 2 lbs. (900 g) (cut in 1"[2.5 cm] cubes) | 1 lbs. (450 g) (cut in 1"[2.5 cm] cubes) |
| Parmesan or Romano | 15 ounces (425 g) (cut in 1" [2.5 cm] cubes) | 8 ounces (225 g) (cut in 1"[2.5 cm] cubes) |
| Crackers | 14 cups (3.5 L) (can fill bowl and lid up into chute) | 7 cups (1.75 L) (can fill bowl and lid up into chute) |
| Nuts | 4 cups (1 L) | 2 cups (.5 L) |

Cleaning and Care
WARNING
Electrical Shock Hazard.
Disconnect power before cleaning. Do not immerse cord, plug, or base in any liquid.

natural_image
Line drawing of a blender with a power outlet connected to a wall-mounted electrical outlet (no text or symbols)
natural_image
Line drawing of a mechanical device with a lever and base (no text or symbols)
natural_image
Diagram showing a mechanical component with an arrow indicating direction, no text or symbols present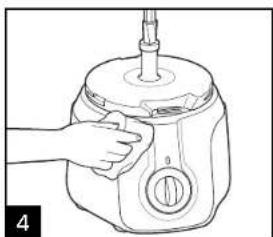
natural_image
Line drawing of a hand holding a kitchen appliance with a handle (no text or symbols)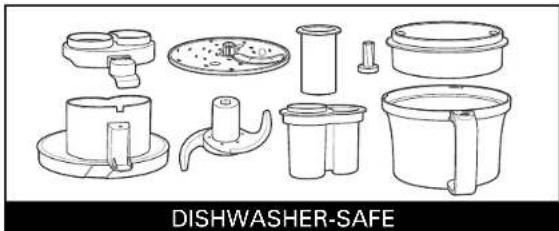
Wipe base, control knob, and cord with a damp cloth or sponge. If necessary, use a mild nonabrasive cleanser.
TO STORE: Place large bowl on base. (For a unit that includes the small bowl, place the large bowl on the base and set the small bowl inside. Lay the adapter shaft loose in the small bowl.) Place Chopping/Mixing Blade and Slicer/Shredder Disc onto the motor shaft. Place lid on bowl(s). To prevent damage to the bowl, DO NOT LOCK.
Visit www.hamiltonbeach.com for our complete line of products and Use and Care Guides – as well as delicious recipes, tips, and to register your product online!
Troubleshooting
| PROBLEM | PROBABLE CAUSE |
| Unit does not operate on any speed or Pulse. | Is the unit plugged in? Does the outlet work?Are the bowl, bowl lid, and food chute lid all locked in place? See “How to Use” sections.If using small bowl, adapter shaft may be missing and must be placed on motor shaft for S-blade to operate. |
| Food is not chopped, sliced or shredded uniformly. | Packing too much food in the food chute or pushing too hard on the food pusher may cause the processed food to be irregularly sliced or shredded.Recommended speed for slicing and shredding disc should be 1 for cheeses and 1 or 2 for vegetables or fruit.Refer to the food processing charts for recommended sizes, speeds, and quantities. |
| Unit stops and will not come back on. | Are the bowl, bowl lid, and food chute lid all locked in place? They may have moved slightly during processing. See “How to Use” sections.Is the outlet still working? Check it by plugging in a working lamp or other appliance. You may have overloaded the circuit and blown a fuse or tripped the circuit breaker.Turn unit OFF, allow to stand for 3 to 4 minutes, and then turn back ON. If none of these suggestions correct the problem, DO NOT attempt to repair the unit. Call the Customer Service number to get the name of your nearest Authorized Service Center. |
| Unit has a burning smell. | There may be a residue left on the motor from the manufacturing process, causing a slight odor during initial use. This will go away. If a strong odor or any visible smoke appears, unplug unit IMMEDIATELY and call the Customer Service number. |
| Motor seems weak. | Are you using the recommended food size and quantity to be processed? Refer to the Food Processing Charts for recommended food sizes and speeds. |
Limited Warranty
This warranty applies to products purchased in the U.S. and Canada. This is the only express warranty for this product and is in lieu of any other warranty or condition.
This product is warranted to be free from defects in material and workmanship for a period of one (1) year from the date of original purchase. During this period, your exclusive remedy is repair or replacement of this product or any component found to be defective, at our option; however, you are responsible for all costs associated with returning the product to us and our returning a product or component under this warranty to you. If the product or component is no longer available, we will replace with a similar one of equal or greater value.
This warranty does not cover glass, filters, wear from normal use, use not in conformity with the printed directions, or damage to the product resulting from accident, alteration, abuse, or misuse. This warranty extends only to the original consumer purchaser or gift recipient. Keep the original sales receipt, as proof of purchase is required to make a warranty claim. This warranty is void if the product is used for other than single-family household use.
We exclude all claims for special, incidental, and consequential damages caused by breach of express or implied warranty. All liability is limited to the amount of the purchase price. Every implied warranty, including any statutory warranty or condition of merchantability or fitness for a particular purpose, is disclaimed except to the extent prohibited by law, in which case such warranty or condition is limited to the duration of this written warranty. This warranty gives you specific legal rights. You may have other legal rights that vary depending on where you live. Some states or provinces do not allow limitations on implied warranties or special, incidental, or consequential damages, so the foregoing limitations may not apply to you.
To make a warranty claim, do not return this appliance to the store. Please call 1.800.851.8900 in the U.S. or 1.800.267.2826 in Canada or visit hamiltonbeach.com in the U.S. or hamiltonbeach.ca in Canada. For faster service, locate the model, type, and series numbers on your appliance.
IMPORTANTS CONSEILS DE SÉCURITÉ
natural_image
Technical line drawing of a mechanical component with an arrow indicating rotation (no text or symbols)natural_image
Line drawing of a hand pouring liquid into a container with a bottle and food items (no text or symbols)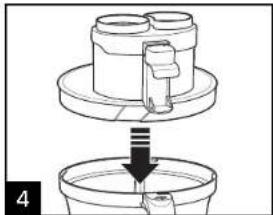
natural_image
Diagram showing a mechanical assembly with a downward arrow indicating a process (no text or symbols present)
natural_image
Diagram showing two mechanical components with a hand holding a tool, no text or symbols presentnatural_image
Line drawing of a blender with an electrical outlet connected to a plug (no text or symbols)
Impulsion (P) = Maximale, 3 = Elevée, 2 = Moyenne, 1 = Minimale
natural_image
Line drawing of a blender with a power outlet connected to a wall socket (no text or symbols)natural_image
Diagram showing a mechanical assembly with a component inserted into a container, and an upward arrow indicating motion (no text or symbols present)natural_image
Diagram of a kitchen utensil with a handle and lever, showing a step to press down or install (no text or symbols present)natural_image
Technical line drawing of a mechanical component with an arrow indicating upward motion (no text or symbols)
natural_image
Line drawing of a hand pouring liquid into a bowl (no text or symbols)
natural_image
Technical line drawing of a mechanical component with an arrow indicating rotation (no text or symbols)natural_image
Diagram of a mechanical press or lifting device with a lever and base component (no text or symbols)natural_image
Simple line drawing of a container with a cross mark on top (no text or symbols)natural_image
Line drawing of a hand placing food into a steamer with visible contents (no text or symbols)20

natural_image
Diagram showing a mechanical assembly with a cylindrical component being inserted into a base plate (no text or symbols present)natural_image
Diagram showing two views of binoculars with a hand holding the eyepiece (no text or symbols present)natural_image
Line drawing of a blender with a power outlet connected to a wall socket (no text or symbols)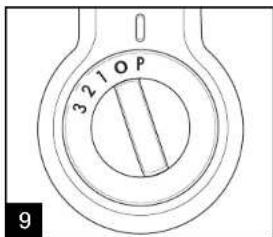

natural_image
Line drawing of a blender with power outlet and cable (no text or symbols)Impulsion (P) = Maximale,
3 = Elevée, 2 = Moyenne,
1 = Minimale
natural_image
Technical diagram showing a mechanical assembly with an upward arrow indicating a component (no text or symbols present)

natural_image
Diagram showing a kitchen appliance with arrows indicating motion or movement, no text or symbols present
natural_image
Line drawing of a hand pouring food into a bowl with another bowl containing food (no text or symbols)natural_image
Technical line drawing of a mechanical component with an arrow indicating direction (no text or symbols)natural_image
Line drawing of a blender with a power outlet connected to a wall socket (no text or symbols)
2 = Moyenne, 1 = Minimale

natural_image
Line drawing of a blender with a power outlet connected to a wall socket (no text or symbols)natural_image
Diagram showing a mechanical assembly with a piston and housing, no text or symbols present
natural_image
Line drawing of a blender with an arrow indicating upward motion (no text or symbols)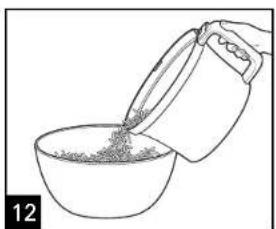
natural_image
Line drawing of a hand pouring granular material into a bowl (no text or symbols)natural_image
Line drawing of a washing machine with electrical outlet and power plug (no text or symbols)
natural_image
Line drawing of a mechanical device with a lever and base (no text or symbols)
natural_image
Diagram of a mechanical device with an arrow indicating rotation or movement (no text or symbols present)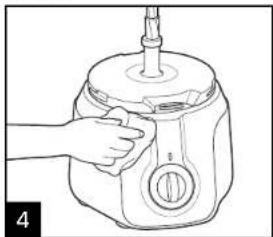
natural_image
Line drawing of a hand holding a small appliance with a handle, no text or symbols present
natural_image
Technical line drawing of a mechanical component with no visible text or symbolsnatural_image
Diagram of a kitchen utensil with a downward arrow indicating a process (no text or symbols present)natural_image
Line drawing of a hand pouring liquid into a container with food items inside (no text or symbols)
natural_image
Diagram showing a mechanical assembly with a cylindrical component being inserted into a bucket, no text or symbols present.natural_image
Diagram showing two mechanical components with a hand holding a tool, no text or symbols presentnatural_image
Line drawing of a blender with a power outlet connected to a wall socket (no text or symbols)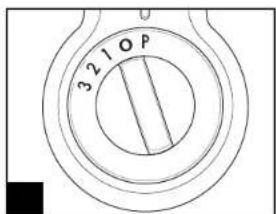
natural_image
Line drawing of a portable air purifier connected to an electrical outlet (no text or symbols)natural_image
Diagram showing a mechanical assembly with an upward arrow inside a container (no text or symbols)natural_image
Diagram of a kitchen utensil with a handle and lever, showing a step to press down or install (no text or symbols present)natural_image
Diagram of a mechanical component with an arrow indicating upward motion (no text or symbols)32
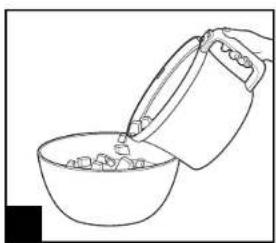
natural_image
Line drawing of a hand pouring liquid into a bowl (no text or symbols)
natural_image
Technical line drawing of a mechanical component with no visible text or symbolsnatural_image
Diagram showing a container being inserted into a container with liquid, labeled with number 2 (no text or symbols on the diagram itself)natural_image
Diagram of a mechanical assembly showing a cylindrical component being inserted into a base, with no visible text or symbols.natural_image
Simple line drawing of a cylindrical container with a cross mark on its side (no text or symbols)natural_image
Line drawing of a hand pouring liquid into a container with food items inside (no text or symbols)
natural_image
Line drawing of a hand pouring liquid into a container with food items inside (no text or symbols)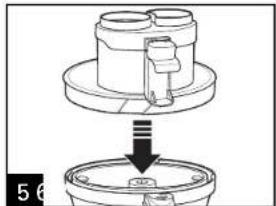
natural_image
Mechanical assembly diagram showing a component being inserted into a housing (no text or symbols visible)
natural_image
Mechanical assembly diagram showing a cylindrical component being inserted into a housing (no text or symbols visible)
natural_image
Diagram showing two containers with different sizes and a hand holding binoculars (no text or symbols)
natural_image
Diagram showing two containers with different sizes and a hand holding binoculars (no text or symbols)natural_image
Line drawing of a blender with a power outlet connected to a wall socket (no text or symbols)
natural_image
Line drawing of a blender with power outlet and plug (no text or symbols)natural_image
Diagram showing a mechanical assembly with an upward arrow indicating a component (no text or symbols present)
natural_image
Diagram showing a mechanical assembly with arrows indicating forces or motion, no text or symbols presentnatural_image
Line drawing of a hand pouring food into a bowl with a spoon, and a lid of food (no text or symbols)
natural_image
Technical line drawing of a mechanical component with an arrow indicating rotation (no text or symbols)natural_image
Line drawing of a hand inserting a plug into a cylindrical container (no text or symbols)natural_image
Line drawing of a hand pouring liquid into a cylindrical container (no text or symbols)ALIMENTOS MÁS PEQUENOS Y DELGADOS
natural_image
Line drawing of a blender with power outlet and plug, no text or symbols present
natural_image
Line drawing of a blender with power outlet and plug, no text or symbols presentnatural_image
Diagram showing a mechanical assembly with an upward arrow and a container (no text or symbols)natural_image
Diagram showing a container with a lid and an upward arrow indicating flow or movement (no text or symbols)natural_image
Diagram of a mechanical component with an arrow indicating upward motion (no text or symbols present)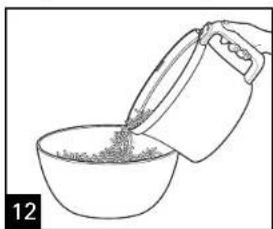
natural_image
Line drawing of a hand pouring granular material into a bowl (no text or symbols)Consejos y Técnicas
natural_image
Line drawing of a washing machine with electrical outlet connected to a power outlet (no text or symbols)
natural_image
Line drawing of a mechanical device with a lever and base (no text or symbols)
natural_image
Diagram showing a mechanical component with an arrow indicating direction, no text or symbols present
natural_image
Line drawing of a hand holding a small electronic device with a cylindrical port (no text or symbols)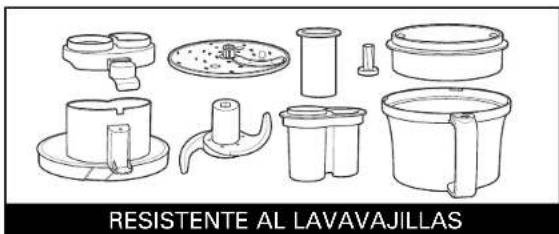
Col. Palmitas Polanco
Mixcoac MEXICO 03910 D.F
Tel: 01 55 5563 8723 • Fax: 01 55 5615 1856
Nuevo Leon
natural_image
Empty rectangular frame with corner markers and dimension label '43' (no text or symbols beyond basic markings)
Modelos:
Tipo:
Características Eléctricas:
70570
FP17
120V\~ 60Hz 500W
70570C
FP17
120V\~ 60Hz 500W
70573
FP17
120V\~ 60Hz 500W
70575
FP17
120V\~ 60Hz 525W
70579
FP17
120V\~ 60Hz 525W


- Questions?
- Hamilton Beach®
- Food Processor
- SAVE THESE INSTRUCTIONS!
- OTHER CONSUMER SAFETY INFORMATION
- This product is intended for household use only.
- Parts and Features
- How to Use Chopping/Mixing Blade (with Large Bowl) (Pulse or Speeds 1–3)
- WARNING
- How to Use Chopping/Mixing Blade
- How to Use Slicer/Shredder Disc (with Large Bowl only) (Speeds 1 or 2)
- OR
- How to Use Slicer/Shredder Disc
- Tips and Techniques
- Processing Charts
- Cleaning and Care
- Electrical Shock Hazard.
- Limited Warranty
- IMPORTANTS CONSEILS DE SÉCURITÉ
- Consejos y Técnicas
- Nuevo Leon
Brand : HAMILTON BEACH
Model : 70570 Big Mouth
Category : Food Processor