
DFL-160 - Firewall D-LINK - Free user manual and instructions
Find the device manual for free DFL-160 D-LINK in PDF.


| Product Type | Firewall Appliance |
| Brand | D-Link |
| Model | DFL-160 |
| Dimensions (W x D x H) | 440 x 260 x 44 mm (1U rack-mountable) |
| Weight | 4.5 kg |
| Power Supply | 100-240V AC, 50-60 Hz, 30W max |
| Interfaces | 4x LAN 10/100/1000, 1x WAN 10/100/1000, 1x Console RS-232 |
| Supported Protocols | TCP/IP, UDP, ICMP, HTTP, HTTPS, FTP, DNS, DHCP |
| Security Features | Stateful packet inspection, VPN (IPsec/PPTP/L2TP), IDS/IPS, content filtering |
| VPN Tunnels | Up to 50 |
| Throughput | Up to 100 Mbps |
| Maximum Users | Up to 50 |
| Key Functions | Firewall, VPN, load balancing, QoS, logging |
| Maintenance | Clean with dry cloth; avoid moisture |
| Safety | Place behind another firewall; change default passwords |
| Spare Parts / Repairability | Not user-serviceable; contact technical support |
| Operating Temperature | 0°C to 40°C |
| Operating Humidity | 10% to 90% non-condensing |
| Certifications | CE, FCC, RoHS |
| Warranty | 1 year (varies by region) |
Frequently Asked Questions - DFL-160 D-LINK
User questions about DFL-160 D-LINK
0 question about this device. Answer the ones you know or ask your own.
Ask a new question about this device
Download the instructions for your Firewall in PDF format for free! Find your manual DFL-160 - D-LINK and take your electronic device back in hand. On this page are published all the documents necessary for the use of your device. DFL-160 by D-LINK.
USER MANUAL DFL-160 D-LINK
NETWORK SECURITY SOLUTION http://www.dlink.com.tw
User Manual
D-Link DFL-160 Firewall
NetDefendOS Version 2.27.00
D-Link Corporation
No. 289, Sinhu 3rd Rd, Neihu District, Taipei City 114, Taiwan R.O.C.
http://www.DLink.com
Published 2010-05-24
Copyright © 2009
User Manual
D-Link DFL-160 Firewall
NetDefendOS Version 2.27.00
Published 2010-05-24
Copyright © 2009
Copyright Notice
This publication, including all photographs, illustrations and software, is protected under international copyright laws, with all rights reserved. Neither this manual, nor any of the material contained herein, may be reproduced without written consent of the author.
Disclaimer
The information in this document is subject to change without notice. The manufacturer makes no representations or warranties with respect to the contents hereof and specifically disclaim any implied warranties of merchantability or fitness for any particular purpose. The manufacturer reserves the right to revise this publication and to make changes from time to time in the content hereof without obligation of the manufacturer to notify any person of such revision or changes.
Limitations of Liability
UNDER NO CIRCUMSTANCES SHALL D-LINK OR ITS SUPPLIERS BE LIABLE FOR DAMAGES OF ANY CHARACTER (E.G. DAMAGES FOR LOSS OF PROFIT, SOFTWARE RESTORATION, WORK STOPPAGE, LOSS OF SAVED DATA OR ANY OTHER COMMERCIAL DAMAGES OR LOSSES) RESULTING FROM THE APPLICATION OR IMPROPER USE OF THE D-LINK PRODUCT OR FAILURE OF THE PRODUCT, EVEN IF D-LINK IS INFORMED OF THE POSSIBILITY OF SUCH DAMAGES. FURTHERMORE, D-LINK WILL NOT BE LIABLE FOR THIRD-PARTY CLAIMS AGAINST CUSTOMER FOR LOSSES OR DAMAGES. D-LINK WILL IN NO EVENT BE LIABLE FOR ANY DAMAGES IN EXCESS OF THE AMOUNT D-LINK RECEIVED FROM THE END-USER FOR THE PRODUCT.
Table of Contents
1. Product Overview 6
1.1. The DFL-160 Solution 6
1.2. Ethernet Interfaces 8
1.3. The LED Indicators 10
2. Initial Setup 12
2.1. Unpacking 12
2.2. Web Browser Connection .....14
2.3. Browser Connection Troubleshooting 19
2.4. Console Port Connection 20
3. The System Menu 23
3.1.Administration 23
3.2. Internet Connection 26
3.3. LAN Settings 28
3.4. DMZ Settings 31
3.5. Logging 34
3.6. Date and Time 36
3.7. Dynamic DNS Settings 38
4. The Firewall Menu 40
4.1. Outbound LAN Traffic Options 41
4.2. Outbound DMZ Traffic Options 43
4.3. Inbound Traffic Options 45
4.4. VPN Options 47
4.4.1.IPsec 48
4.4.2. L2TP/PPTP Client 52
4.4.3. L2TP/PPTP Server 53
4.5. VPN Users 55
4.6. Web Content Filtering ....56
4.6.1. Options 56
4.6.2. The Content Categories ....58
4.7. Anti-Virus 65
4.8. IDP Options 68
4.9. Traffic Shaping 71
4.10.Schedules 74
5. The Tools Menu 77
5.1. Ping 77
6. The Status Menu 79
6.1. System Status 80
6.2. Logging Status 82
6.3. Anti-Virus Status 83
6.4. Web Content Filtering Status 84
6.5. IDP Status 85
6.6.Connections Status 86
6.7. Interfaces Status 87
6.8. IPsec Status 89
6.9.User Authentication Status 90
6.10. Routes 91
6.11. DHCP Server Status 92
7. The Maintenance Menu 94
7.1. The Update Center 94
7.2. Licenses 96
7.3.Backups 98
7.4. Reset to Factory Defaults 99
7.5. Upgrades 100
7.6. Technical Support 101
8. The Console Boot Menu 103
9. Troubleshooting 105
A. CLI Reference 107
B. Windows XP IP Setup 121
C. Windows Vista IP Setup 123
D. Windows 7 IP Setup 125
E. Apple Mac IP Setup 127
Alphabetical Index 129
Chapter 1. Product Overview
• The DFL-160 Solution, page 6
• Ethernet Interfaces, page 8
• The LED Indicators, page 10
1.1. The DFL-160 Solution
The NetDefend SOHO UTM product is a D-Link hardware/software solution designed for situations where a conventional IP router connected to the public Internet in a small organization or home environment does not have sufficient capabilities to provide the network security required to combat today's universe of potential external threats.
The DFL-160 and the NetDefendOS Software
The term DFL-160 refers to the physical hardware that is provided with the NetDefend SOHO UTM product. The operating system software that drives the hardware is a purpose built networking operating system called D-Link NetDefendOS. This operating system is also found in D-Link DFL firewall products designed for larger enterprises.
The NetDefendOS Management Interface
The principle management interface for the DFL-160 is through a web browser running on a separate computer. This computer acts as a management workstation and the DFL-160 acts as a web server, allowing the product to be managed through an intuitive set of web pages that are viewed through the web browser.
The DFL-160 Interfaces
The DFL-160 provides 10/100/1000 Mbps capable LAN (Local Area Network) and DMZ (Demilitarized Zone) Ethernet interfaces for the internal, protected networks plus a 10/100 Mbps capable WAN (Wide Area Network) interface for connection to the public Internet. Further information about all these can be found in Section 1.2, “Ethernet Interfaces”.
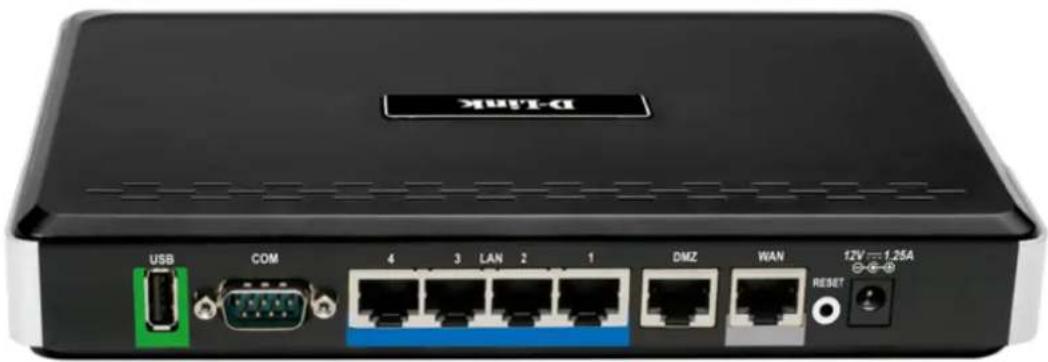
Additionally, a serial interface (the COM port) is provided for access to a Command Line Interface (CLI).
Below is an image of the back of the DFL-160 unit showing all the connection ports.
"Inside" and "Outside" Networks
The NetDefendOS provides the administrator with the ability to control and manage the traffic that flows between the trusted "inside" networks and the much more threatening public Internet that lies "outside".
The "outside" Internet network is connected to the DFL-160's WAN interface and the trusted "inside" network is connected to the LAN interface. As explained later, there are, in fact, four LAN interfaces connected together through an internal switch.
The network connected to the DMZ interface can be considered to also be "inside" but it is designed for a network where servers are situated which are accessed by external hosts and users on the public Internet. The DMZ therefore represents a place where threats such as server viruses can be isolated and kept separate from the more sensitive LAN network. For this reason, connections initiated from hosts and users on the DMZ network to the LAN network are never allowed.
Firewalling and UTM
NetDefendOS provides the NetDefend SOHO UTM product with the following important features to protect against external threats coming from the Internet:
- Extensive Firewalling Capabilities
NetDefendOS can block traffic which does not comply with security policies defined by the user. These policies can target traffic according to which protocol (such as HTTP or FTP) is arriving and leaving, and by which interface, as well as optionally determining when such traffic is allowed according to a time schedule.
There are three sets of basic traffic flow policies that can be defined:
- Traffic initiated by internal networks ("outbound traffic")
- Traffic initiated by external networks to hosts and users on the LAN network ("inbound LAN traffic").
- Traffic initiated by external networks to hosts and users on the DMZ network ("inbound DMZ traffic").

Note: No inbound traffic is initially allowed
When a DFL-160 is started for the first time, no inbound traffic is allowed so the administrator should decide what inbound traffic will be allowed as one of the first setup steps.
• Unified Threat Management (UTM)
UTM is performed by NetDefendOS through the following features:
- An Anti-Virus option to scan file downloads for viruses.
- Intrusion Detection and Prevention to scan all traffic connecting to internal servers.
- Web Content Filtering to implement policies on the types of web sites that can be accessed.
1.2. Ethernet Interfaces
Physical Interface Arrangement
The DFL-160 has a number of physical Ethernet interfaces which can be used to plug into other Ethernet networks. The image below shows these interfaces at the back of the hardware unit.

Interface Network Connections
The illustration below shows the typical usage of network connections to the DFL-160 interfaces.
![graph TD A["SMTP Server"] --> B["DMZ"] C["Web Server"] --> B B --> D["DFL-160"] D --> E["Internet"] D --> F["LAN"] F --> G["Users"] F --> H["Internet"]](/content/2026/06/1264362/images/5b4d26486befd546a55ee6e41e1cd6c556de8a8ae469b2eab5265d3a954bb27f.jpg)
Intended Interface Usage
The interfaces are intended to be used in the following ways:
• The LAN interfaces.
There are four physical LAN interfaces which are labelled: LAN1, LAN2, LAN3 and LAN4.
These are intended for connection to local, internal networks which will be protected from the outside internet by the highest security available from the DFL-160.
Interfaces LAN1 to LAN4 are connected together via a switch fabric in the DFL-160 which means that traffic travelling between them will not be subject to the control of NetDefendOS. All four are considered to be part of the single logical LAN interface.
This manual will refer to the LAN interface and by this will mean a connection to any of these 4 physical interfaces.
The management options for the LAN interface are described in Section 3.3, "LAN Settings".
• The DMZ interface.
This is for connection to a local network which will be the Demilitarized Zone (DMZ). A DMZ is usually set aside to contain computers that regularly receive data from and send data to the public internet. An example might be a mail server. The intent with the DMZ interface is to provide a stage of security between the well protected, internal LAN networks and the public Internet which is connected to the WAN interface.
If desired, the DMZ can be used like another LAN interface but does not share the common LAN switch fabric mentioned above.
The management options for the DMZ interface are described in Section 3.4, "DMZ Settings".
• The WAN interface.
This is intended for connection to an external network. In most cases this interface will be connected to the public Internet via your Internet Service Provider (ISP).
The basic management options for the WAN interface are described in Section 3.2, "Internet Connection".
Interface Link Speed Capabilities
The physical speed capabilities are as follows:
| Ethernet Interface Capability (Megabits/second) | |
| LAN (1 to 4) | 10/100/1000 Mbps |
| DMZ 10/100/1000 Mbps | |
| WAN 10/100 Mbps | |
1.3. The LED Indicators
On the front portion of the DFL-160 casing are a set of indicator lights which show system status and Ethernet port activity.

Power and Status
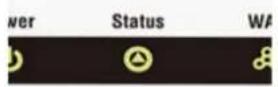
The power light is illuminated when power is applied and the status light is illuminated after NetDefendOS has completed start up or if the boot menu has been entered prior to complete startup (the latter is described in Chapter 8, The Console Boot Menu).
Ethernet Ports
On the right hand side of the front of the DFL-160 there is a line of LED lights that show the status of the different Ethernet interfaces by showing a flashing or solid light in orange or green. The image below shows these LED status indicators.

The following table shows the meaning of the Ethernet port LED colors.
| LED Status Indicated Link Status | |
| Solid Amber | 1000 Mbps link established |
| Blinking Amber | Data transmission over 1000 Mbps link |
| Solid Green | 10/100 Mbps link established |
| Blinking Green | Data transmission over 10/100 Mbps link |
| Light off | No data link exists |
Chapter 2. Initial Setup
- Unpacking, page 12
• Web Browser Connection, page 14 - Browser Connection Troubleshooting, page 19
- Console Port Connection, page 20
2.1. Unpacking
Package Contents
Carefully open the product packaging and inside you will find the following:
• The DFL-160 hardware unit.
• The DFL-160 Quick Installation Guide.
• A plug-in 12 Volt/1.2 Amp power supply with connecting cable.
• One Category 5e Ethernet cable.
• One RS232 cable for connecting a console to the DFL-160 serial COM port.
• A CD ROM containing essential product documents and useful software utilities.
Location of the Hardware
The DFL-160 unit is designed for table mounting only. The product can be mounted on any appropriate stable, flat, level surface that can safely support the weight of the unit and its attached cables.

Environmental and Operating Parameters
The following table lists the key environmental and operating parameters for the DFL-160 hardware.
| Parameter DFL-160 Value | |
| AC Input | 100-240 VAC, 50/60 Hz, External supply |
| Operating Temperature Range | 0°C to +50°C |
| Storage Temperature Range | -40°C to +70°C |
| Operational Humidity Range | 10% to 90% RH |
| Storage Humidity Range | 5% to 90% RH |
| Power Consumption Under 20 Watts |
Heat Flow Considerations
The DFL-160 is a low power device that generates a modest amount of heat output during operation. The following precautions should be taken to allow this heat to dissipate:
- Do not install the DFL-160 in an environment where the operating ambient temperature might come close to or go beyond the recommended operating temperature range (as stated in the table above, the operating range is from 0°C to +50°C ).
• Make sure that airflow around the DFL-160 unit is not restricted. - Do not place anything on top of the unit, including any other electronic devices.
Power Supply Precautions
The following is recommended in regard to the power supply:
- Make sure that any power source circuits are properly grounded, and use the power cord supplied with the DFL-160 to connect it to the power source.
- Ensure that the DFL-160 does not overload the power circuits, wiring and over-current protection. To determine the possibility of overloading the supply circuits, add together the ampere ratings of all devices installed on the same circuit as the DFL-160 and compare the total with the rating limit for the circuit. The maximum ampere ratings are usually printed on the devices near AC power connectors.
- If your installation requires any power cords other than the one supplied with the product, be sure to use a power cord displaying the logo of the safety agency that defines the regulations for power cords in your country. The logo is your assurance that the power cord can be used safely with the DFL-160.
- The purchase and use of a separate surge protection unit from a third party should be considered to protect against damage by electrical power surges. This is particularly recommended in geographic regions where lightning strikes might occur.
Software Installation
A copy of the NetDefendOS network operating system is already pre-installed on the DFL-160 unit. When the unit is powered up, NetDefendOS will automatically start for the first time with the factory default settings. Initial startup is described in Section 2.2, "Web Browser Connection".
2.2. Web Browser Connection
This section describes the steps for accessing a DFL-160 for the first time through a web browser. The user interface accessed in this way is known as the NetDefendOS Web Interface (or WebUI).
1. Connect the Cables
The DFL-160 and a management workstation (typically a Windows PC) running a web browser should be physically connected together so they are on the same Ethernet network. A connection can be made directly using a crossover Ethernet cable, or by connecting the management workstation and the firewall to the same switch.
One of the four LAN interfaces should be attached to the same Ethernet network as the management workstation (or a network accessible from the workstation via one or more routers). Typically the connection is made via a switch or hub in the network but can, instead, be done directly using a regular straight-through Ethernet cable.
For Internet connection, the WAN interface should be connected to your ISP.
2. Setting the Workstation Interface IP Address
Traffic will be able to flow between the designated workstation interface and the DFL-160 LAN interface because they are on the same IP network. If DHCP is enabled on the workstation (and this is usually the default) or DHCP is enabled on the device, such as a router, via which the connection is made then the workstation should not need further configuration. IP addresses are assigned automatically with DHCP and the reader can skip to step 3.
If, for some reason, DHCP is not available then manual configuration of the workstation interface IP address will be needed. There are a series of appendices at the back of this manual that describe how to do this, depending on the computer and operating system used:
• Appendix B, Windows XP IP Setup
• Appendix C, Windows Vista IP Setup
• Appendix D, Windows 7 IP Setup
• Appendix E, Apple Mac IP Setup
3. Connect the Power
NetDefendOS starts up as soon as the DFL-160 unit is connected to the power supply (there is no On/Off switch). Power is connected by plugging the cable from the power supply into the unit's power plug socket and then plugging the supply into a normal wall socket.

Once power is connected, NetDefendOS will take a couple of seconds to boot up. When this process is complete, the Status front panel light is lit and the DFL-160 is ready to be managed through a web browser.
4. Connect to the DFL-160 by Surfing to the IP address 192.168.10.1
Using a web browser (Internet Explorer or Firefox is recommended), surf to the IP address 192.168.10.1. This can be done using either HTTP or the more secure HTTPS protocol in the URL. These two alternatives are discussed next.
A. Using HTTP
Enter the address http://192.168.10.1 into the browser navigation window as shown below. This will send an initial browser request to the DFL-160.

If the browser does not respond, check that the web browser does not have a proxy server configured. For possible problems with the network connection, consult Section 2.3, "Browser Connection Troubleshooting".
B. Using HTTPS
To connect with the added security of HTTPS instead, enter https://192.168.10.1 in the browser.

When responding to an https://request, NetDefendOS sends a self-signed certificate which will not be initially recognized so it will be necessary to tell the browser to accept the certificate for this and future sessions. Different browsers handle this in slightly different ways. For example, in Microsoft Internet Explorer the following error message will be displayed in the browser window.

There is a problem with this website's security certificate.
To continue, tell the Windows IE browser to accept the certificate by clicking the following link which appears near the bottom of the browser window.

Continue to this website (not recommended).
In FireFox, this procedure is called "Add a security exception" and is a similar process of telling the browser to accept the unsigned certificate.
5. Logging on to the DFL-160
NetDefendOS will next respond like a web server with the initial login dialog page as shown below.
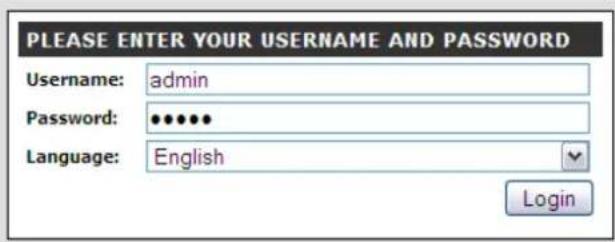
The available management web interface language options are selectable at the bottom of this dialog. This defaults to the language set for the browser if NetDefendOS supports that language.
Now login with the username admin and the password admin. The full web interface will now appear as shown below and you are ready to begin setting up the initial DFL-160 configuration.
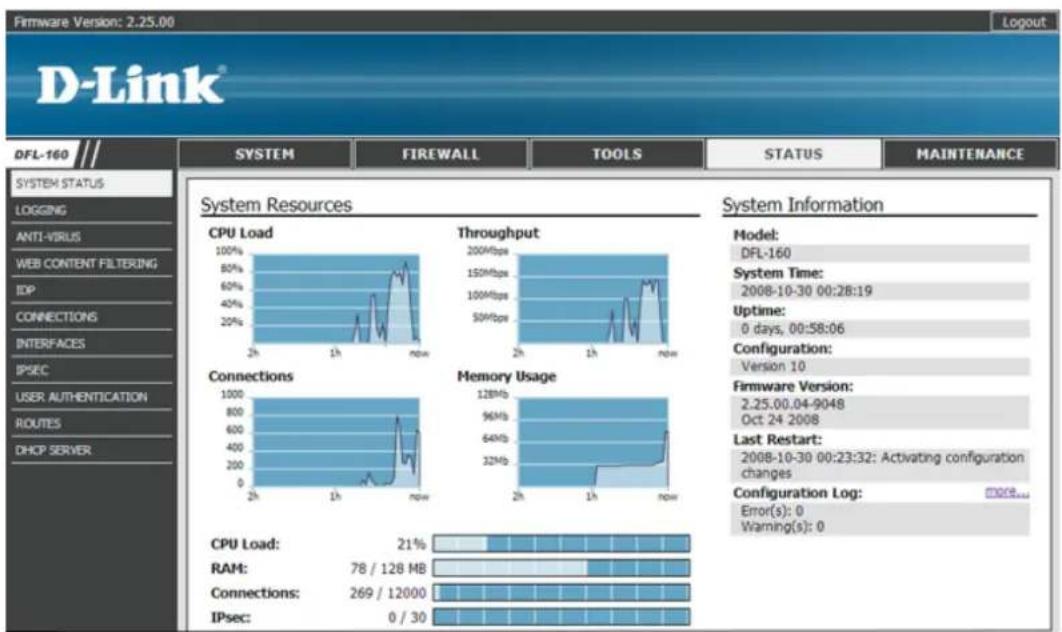
This initial web interface page after login always displays the System option in the Status menu, as shown above. As a first step, it is recommended to click on the different menus shown in the top menu bar to a get a feel where different options are located. This menu structure is duplicated in the layout of later chapters that describe the options.
During initial setup, the System menu is the only set of options that should need to be changed.
| DFL-160 /// | SYSTEM | FIREWALL | TOOLS |
Logging Out
When you have finished working with the management web interface, it is recommended to always logout to prevent other with access to the workstation getting unauthorized access to the DFL-160. Logout by clicking on the Logout link at the top right of the management web interface.

Automatic Logout
Logout will occur automatically after a period of 15 minutes management inactivity and this length
of time is fixed. After automatic logout occurs, the next interaction with the management web interface will take the browser to the login page.
Connecting to the Internet
In the typical DFL-160 installation the next step is to connect to the public Internet. To do this the WAN interface should be connected to your Internet Service Provider (ISP). This is usually done through other equipment such as a broadband modem.
The WAN interface is, by default, configured to use DHCP to automatically fetch the required external IP addresses from the ISP. If required, detailed WAN interface configuration is done by going to the System > Internet Connection menu (these options are described in Section 3.2, "Internet Connection").
Once a connection to the Internet is established, web surfing from clients on networks attached to the LAN interfaces is then possible. This is not possible with the DMZ interface since connections on that interface are blocked until they are explicitly allowed.
Setting Firewall Security Policies
A key feature of the DFL-160 product is the ability to act as a firewall and impose security policies on what kinds of traffic can flow between interfaces and in what direction.
| SYSTEM | FIREWALL | TOOLS | STAT |
As a next step, it is recommended to go to the Firewall > Outbound LAN Traffic menu and decide what kinds of traffic can be initiated by internal hosts and users (these options are described in Section 4.1, "Outbound LAN Traffic Options").
By default, everything is allowed for outbound connections on the LAN interface but it is recommended to restrict this to the minimum necessary. For instance, allowing the HTTP and HTTPS services may be sufficient for web surfing.
A corresponding set of firewall options exists for the DMZ interface (see Section 4.2, “Outbound DMZ Traffic Options”) but on initial setup, no outbound traffic is allowed on this interface so services must be explicitly allowed.
The Meaning of "Outbound"
Keep in mind that the term outbound refers to traffic that is initiated from "inside", behind the DFL-160 (in other words, from hosts and clients connected to the LAN or DMZ interface). All web surfing traffic, no matter if it is a server request from a client or the reply to that request, is considered to be outbound (this point will be repeated later in the manual). Conversely, inbound traffic is exchanges that are initiated from the "outside", on the public Internet.
Using the DMZ for Management
By default, the DMZ interface is allocated the IP address 192.168.11.1 on the 192.168.11.0/24 network. However, the DMZ interface can't be used for initial connection with a browser because it is not enabled as a management interface.
Management access through the DMZ interface can be enabled after initial management connection through the LAN interface.
Going Further
At this point the DFL-160 product should be operational and acting as a secure barrier between internal networks and the public Internet. The next step for the administrator is to further explore the
features of the product and bring into use those which meet the needs of a particular installation.
It is recommended that administrators familiarize themselves with the web interface by clicking on the main menu options and exploring the individual options available with each. The later part of this manual has a structure which reflects the naming and order of these menu options.
In most instances the web interface provides a helpful text description on the right hand side for how features are used as well as more detailed descriptions for individual fields and options.
2.3. Browser Connection Troubleshooting
If the management interface does not respond after the DFL-160 has powered up and NetDefendOS has started, there are a number of simple steps to trouble shoot basic connection problems:
1. Check that the LAN interface is being used
The most obvious problem is that the wrong DFL-160 interface has been used for the initial connection. Only the LAN interface is enabled for management access for the initial connection from a browser after NetDefendOS starts for the first time.
2. Is the LAN interface properly connected?
Check the link indicator lights on the management interface. If they are dark then there may be a cable problem.
3. Check the cable type connected to the management interface.
If the management interface is connected directly to the management workstation or another router or host? In this case, an Ethernet "cross-over" cable may be needed for the connection, depending on the capabilities of the interface.
4. Using the ifstat CLI command
To investigate a connection problem further, connect a console to the RS232 port on the DFL-160 after NetDefendOS starts. The details of making this connection are described below in Section 2.4, "Console Port Connection".
When you press the enter key, NetDefendOS should respond with the standard CLI prompt:
DFL-160:/>
Now enter the following command a number of times:
DFL-160:/> ifstat lan
This will display a number of counters for the LAN interface.
If the Input counters in the hardware section of the output are not increasing then the error is likely to be in the cabling. However, it may simply be that the packets are not getting to the DFL-160 in the first place. This can be confirmed with a packet sniffer if it is available.
If the Input counters are increasing, the LAN interface may not be attached to the correct physical network. There may also be a problem with the routing information in any connected hosts or routers.
5. Using the arpsnoop CLI command
A final diagnostic test is to try using the console command:
DFL-160:/>arpsnoop-all
This will show the ARP packets being received on the different interfaces and confirm that the correct cables are connected to the correct interfaces.
2.4. Console Port Connection
Initial setup of the DFL-160 can be done using only the web interface but DFL-160 also provides a Command Line Interface (CLI) which can be used for certain administrative tasks. This is accessed through a console connected directly to the unit's RS232 COM port, which is shown below. All CLI commands are listed in Appendix A, CLI Reference.
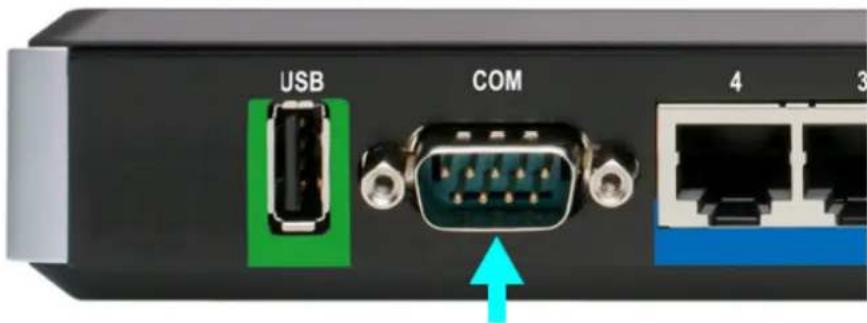
The console also provides the ability to interact directly with the firmware that controls the operation of the DFL-160 (see Chapter 8, The Console Boot Menu).
Console Setup
When setting up a console connected directly to the DFL-160's RS232 port, the console can be a traditional "dumb" console device but is more typically a PC or other computer running console emulation software (such as the HyperTerminal software included with some Windows versions).
An included RS232 null modem cable is used to connect the console to the console port. This port is marked COM, as shown in the image above.
The connected console must have the following communication settings:
• 9600 bps.
- No parity.
- 8 bits.
- 1 stop bit.
- No flow control.
Entering the Boot Menu
The Boot Menu is another feature that can only be accessed through the console. It is a direct management interface to the DFL-160's firmware loader software which underlies the NetDefendOS software. It allows the administrator to reset the DFL-160 unit as well as set a console password.
The boot menu is entered by pressing any console key between power up and NetDefendOS starting. The console will display the message Press any key to abort and load boot menu during this interval. This feature is described further in Chapter 8, The Console Boot Menu.
Console Output Truncation
The only limitation with issuing CLI commands through the serial console is that there is a finite
buffer allocated for output. This buffer limit means that a single large volume of console output may be truncated. This happens rarely and only with certain commands.
The DFL-160 USB Port
Next to the RS232 port is a USB port. This port is not used with the current version of
NetDefendOS. The port is intended for use with features planned for future NetDefendOS versions and is provided so that no hardware upgrade will be required in order to make use of those features after a software upgrade.
Chapter 3. The System Menu
• Administration, page 23
- Internet Connection, page 26
• LAN Settings, page 28
• DMZ Settings, page 31
- Logging, page 34
• Date and Time, page 36
• Dynamic DNS Settings, page 38

The System menu options allow the administrator to control and manage essential operating settings of the DFL-160.

The sections that follow describe the options in this menu in the order they appear.
3.1. Administration
The options on this page deal with administrator access to the DFL-160 through one of the Ethernet interfaces. The page is divided into 3 sections:
A. Management Settings
B. Administrator Settings
C. Management Ports
A. Management Settings
The principal purpose of these settings are to determine with which protocol and on what interfaces the administrator can manager the DFL-160 through a web browser using the web interface.
| WAN | LAN | DMZ | |
| HTTP: | □ | □ | □ Allow HTTP access to the web user interface. HTTP is unencrypted and passwords are sent in clear text. |
| HTTPS: | □ | ☑ | □ Allow HTTPS access to the web user interface. HTTPS is an encrypted and secure protocol. |
| Ping: | □ | ☑ | ☑ Allow the firewall to respond to ICMP ECHO requests on the specified interface(s). |
The recommendation is to restrict the interfaces which allow management access and to always use the HTTPS protocol to ensure that management communication is encrypted.
The only advantage in using HTTP for management access is to avoid the issue with certificates. NetDefendOS sends an unsigned certificate to the browser when using HTTPS and this means there is an extra, small step involved to tell the browser to accept the certificate (the interaction to do this is slightly different depending on the browser).
Enabling Ping Requests
Another option in the management settings is to determine which interfaces will receive and respond to an ICMP ping request. Ping requests are a simple means to establish if a host is "alive" and consist of a simple sequence of an "are you there" ping request to an IP address followed by a "yes I am" response by the host.
It is often best to disallow responses to ping requests received from the public internet on the WAN interface which is why ping responses on WAN are disabled by default. Potential intruders often use pings to scan the internet for potential target IP addresses and it is therefore not recommended to expose the DFL-160s public IP address to this probing.
For troubleshooting purposes, however, it may be desirable to temporarily enable ping responses on the WAN interface.
B. Administrator Settings
By default, the administrator username admin with a password admin exists when a brand new DFL-160 is started for the first time. It is recommended, at a minimum, to change the password of this user as one of the first steps during initial setup.
| Admin Login Name: | admin |
| Password: | ********** |
| Confirm Password: | ********** |
If desired, the username admin can also be changed and this will also boost security for administrator access.
A second user with username audit is also defined but must be explicitly enabled by ticking the checkbox on the web interface page. The audit user has read-only access to the NetDefendOS. They can see the entire NetDefendOS web interface but cannot make any configuration changes. The default password for the audit user is audit and this also, as a minimum, should be changed as soon as possible if the audit user is enabled. If desired, the audit username can also be changed from audit to something else.
C. Management Ports
The default port numbers for HTTP and HTTPS management access can be changed. This must be done if normal inbound traffic is enabled for the same protocol that is used for management access.
HTTP Port:
| 80 |
| 443 |
HTTPS Port:
For instance, if HTTPS is used for management access and HTTPS inbound traffic is enabled (this is done in Section 4.3, "Inbound Traffic Options") then both will use the port number 443 and there will be a problem. The port number for management traffic and normal HTTPS traffic must be unique.
The solution is to change the HTTPS port that is used for administrator access. This could, for example, be changed to port 400. Then the administrator would surf to https://192.168.10.1:400/ in order to access the web management interface through a browser.

Important: Changing the port number may be necessary
Changing the port number must be done if there is a clash of port numbers after enabling inbound traffic.
Management Through the Serial Console
Some administration tasks can be carried out through a console device attached directly to the serial port of the DFL-160 which is described in Section 2.4, "Console Port Connection".
There are two administration options when using the console port:
• Using the boot menu
The boot menu can be accessed between power up and completion of NetDefendOS startup. It is used for performing a limited set of low level administration tasks and is described fully in Chapter 8, The Console Boot Menu.
• Using CLI Commands
Once NetDefendOS has booted up and started, a set of CLI commands can be entered through the console. These commands are listed and described in Appendix A, CLI Reference.
3.2. Internet Connection
The options on this page allow the administrator to specify the communications protocol with which the WAN interface is connected to the public Internet via an Internet Service Provider (ISP).
Your ISP will provide details of their connection. The first task is to make a physical Ethernet connection between the DFL-160's WAN interface and the ISP. This might be typically done through some form of broadband modem and the relevant third party modem documentation should be consulted in order to have this link operational.
The possible connection protocol options are:
A. DHCP Setup
B. Static Connection
C. PPPoE Connection
D. PPTP Connection
A. DHCP Setup
The DHCP protocol is a means for a network device, such as the DFL-160, to retrieve all required IP addresses automatically from a DHCP server. In this case, the ISP provides the IP addresses from its DHCP server, provided that the Ethernet connection to the ISP is functioning.
All required IP addresses will automatically be retrieved and no further configuration is normally required for this option. The only option is the MTU value that will be used for this connection but this normally doesn't need to be changed.
MTU:
1500
Should normally not be changed
The MTU value appears as an option in all the different types of Internet connections described below. The MTU value affects the level of packet fragmentation in connections to the ISP. A lower MTU value increases fragmentation with a resulting increase in processing overhead to re-assemble the packets. The default MTU value is 1500.
B. Static Connection
With this option the IP addresses required for the internet connection are entered manually.
Your ISP should provide all the information needed for this option. All fields need to be entered except for the Secondary DNS server field.
C. PPPoE Connection
With this option, the username and password supplied by your ISP for PPPoE connection should be entered. The Service field should be left blank unless the ISP supplies a value for it.
If the Dial-on-Demand option is enabled, the PPPoE connection will not be set up until traffic is actually sent.
○ Always Connected
Dial-on-demand
Idle Timeout: 30 seconds
The Idle Timeout is the length of time with inactivity that passes before PPPoE disconnection occurs if the Dial-on-Demand is selected.
DNS servers are set automatically after connection with PPPoE.
D. PPTP Connection
With this option, the username and password supplied by your ISP for PPTP connection should be entered. If DHCP is to be used with the PPTP connection to the ISP then this should be selected, otherwise Static should be selected and the static IP addresses supplied by the ISP should be entered.
If the Dial-on-Demand option is enabled, the PPTP connection will not be set up until traffic is actually sent. This works in the same way as described above with a PPPoE connection.
The Idle Timeout is the length of time with inactivity that passes before PPTP disconnection occurs if the Dial-on-Demand is selected.
DNS servers are set automatically after connection with PPTP.
3.3. LAN Settings
The settings in this part of the management web interface determine how the DFL-160's LAN interface operates. These settings are very similar to the corresponding page for the DMZ interface (see Section 3.4, "DMZ Settings").
The Logical LAN Interface
There are four physical interfaces in the DFL-160 hardware which are labelled: LAN1...LAN4. As explained in Section 1.2, "Ethernet Interfaces", these are connected together by a switch fabric in the DFL-160 so they act as a single logical interface called LAN. This manual, therefore, refers only to the LAN logical interface and the rules applied to LAN apply to all four physical interfaces but not the traffic flowing between them.
LAN Interface Options
There are three sections on the web interface page relating to the LAN:
A. LAN Interface Settings
B. Mode
C. DHCP Server Settings
A. LAN Interface Settings
The IP address of the LAN interface is allocated here for NAT and Routing mode. Transparent mode does not require an IP address to be allocated, instead, the LAN interface automatically gets the same IP address as the WAN interface.
The presentation of the LAN interface options in the web interface is shown below:

The setting Enable DNS Relay relays DNS queries sent to the LAN interface IP. This should be enabled if, for example, web browsers running on LAN clients are going to be resolved using external DNS servers on the internet. Any other situation where URL resolution is required will also need to find a DNS server. These DNS servers should be manually configured, if this hasn't already been done automatically through DHCP when connecting to an ISP.
If the Enable DNS Relay option is not enabled then clients will communicate directly with the DNS servers that are configured for public Internet access and the DNS server will send responses directly back to the client through the firewall. Relaying will not take place.
B. Mode
There are three modes that are available with the LAN interface. The presentation of the mode options in the web interface is shown below.
| Use NAT Mode (default) | Network Address Translation should be enabled, unless the LAN uses public IP addresses. |
| Use Router Mode | In Router Mode, NAT is disabled and clients on the internal networks need to be routable from the WAN interface. Local clients use this device as default gateway. |
| Use Transparent Mode | In Transparent Mode, the firewall can easily be deployed in an already established environment without any need for changing the configuration of the present network devices. |
• NAT Mode
This mode enables Dynamic Network Address Translation (NAT) use between the LAN and WAN interfaces. This means that the individual IP addresses of hosts on the LAN interface will be hidden from the public internet. All traffic coming from the public Internet to LAN hosts will be directed to the public IP address of the WAN interface and NetDefendOS will perform the necessary IP address translation.
Enabling NAT is a recommended way to shield the users and hosts on the LAN network from outside attack. It also means that a DFL-160 requires just a single public IP address to be allocated by the ISP.
- Router Mode
This is the mode used if NAT is not used. It means that each the individual hosts and users on the LAN network need their own public IP addresses if they are to communicate with the public Internet.
Although not recommended when WAN is connected to the public internet, there may be situations where NAT cannot be applied and the individual LAN network addresses need to be exposed through the WAN interface.
In some scenarios, the WAN interface may be connected to another internal network and in this case NAT usage may also not be appropriate because there is no need to shield LAN addresses and there are lots of internal IP addresses that can be used.
- Transparent Mode
This mode is used if the DFL-160 is to be placed between the LAN and WAN interface in a transparent way. This means that no IP addresses need to be changed in either network, but the traffic flowing between the interfaces is still subject to the rules and controls imposed by NetDefendOS.
In transparent mode, NetDefendOS works out from the traffic itself which networks can be found on the interfaces and creates the necessary entries in its routing table.

Note: The LAN and WAN IP addresses are the same
In transparent mode, the LAN interface takes on the same IP address as the WAN interface.
If both the LAN and DMZ interfaces have transparent mode enabled, traffic will flow transparently between all 3 of the DFL-160 interfaces.
In transparent mode, the additional option is provided that allows the relaying of DHCP requests.
√ Allow DHCP Requests to be relayed to a DHCP server on the WAN interface.
C. DHCP Server Settings
With this option enabled, a range of IP addresses can be allocated which can then be allocated out to hosts on the network that need them. The presentation of the DHCP server options in the web interface is shown below.

In most scenarios, the LAN network will be an "internal" network that does not require public IP addresses. However, if a range of public IP addresses are allocated by the ISP these could also be allocated using this feature.
NetDefendOS also allows a DHCP Reservations list to be created. These bind a certain IP address with a particular MAC address. When a request for a DHCP lease is received on the interface, NetDefendOS checks the MAC address of the requesting DHCP client against the list. If a match is found, the IP address that has been associated with the MAC address is the one that is handed out.
The screenshot below shows how this option appears in the web interface. Combinations of IP address and MAC address can be added to the list. The red icon on the right of each entry can be clicked to delete the entry.

This feature allows the same IP address to be always allocated to a particular DHCP client.
Transparent Mode and the Interface IP Address
There are some considerations that should be noted with the LAN IP address when transparent mode is enabled:
- In transparent mode, the LAN interface will take on the same IP address as the WAN interface.
- If DHCP is enabled on the WAN interface and the IP address on WAN cannot be refreshed within its DHCP lease time then it will receive the IP address 0.0.0.0 and the LAN interface will also receive this IP address.
This will mean that it will not be possible for the administrator to connect through the LAN interface with a browser to perform management tasks while the LAN interface has the 0.0.0.0 IP address.
These IP address considerations are also true if transparent mode is enabled on the DMZ interface.
3.4. DMZ Settings
The settings in this part of the management web interface determine how the DFL-160's DMZ interface operates. These settings are very similar to the corresponding page for the LAN interface (see Section 3.3, "LAN Settings").
DMZ Interface Options
There are three sections on this page of the web interface:
A. DMZ Interface Settings
B. Mode
C. DHCP Server Settings
A. DMZ Interface Settings
The IP address of the DMZ interface is allocated here for NAT and Routing mode. Transparent mode does not require an IP address to be allocated. Instead, the LAN interface automatically gets the same IP address as the WAN interface.

The setting Enable DNS Relay relays DNS queries sent to the DMZinterface IP. This should be enabled if, for example, web browsers running on DMZ clients are going to be resolved using external DNS servers on the internet. Any other situation where URL resolution is required will also need to find a DNS server. These DNS servers should be manually configured, if this hasn't already been done automatically through DHCP when connecting to an ISP.
If the Enable DNS Relay option is not enabled then clients will communicate directly with the DNS servers that are configured for public Internet access and the DNS server will send responses directly back to the client through the firewall. Relaying will not take place.
B. Mode
There are three modes that are available with the LAN interface. The presentation of the mode options in the web interface is shown below.
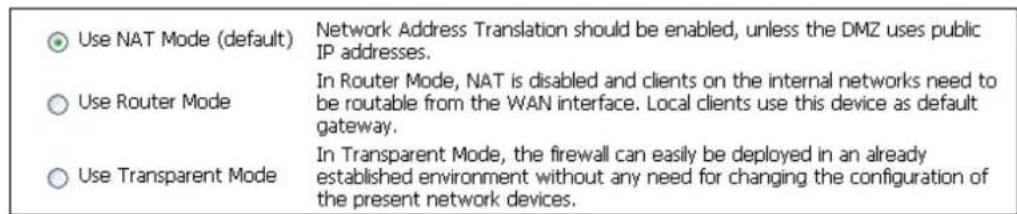
• NAT Mode
This mode enables Dynamic Network Address Translation (NAT) use between the DMZ and WAN interfaces. This means that the individual IP addresses of hosts on the DMZ interface will be hidden from the public internet. All traffic coming from the public Internet to DMZ hosts will be directed to the public IP address of the WAN interface and NetDefendOS will perform the necessary IP address translation.
Enabling NAT is a recommended way to shield the users and hosts on the DMZ network from outside users. It also means that a DFL-160 requires just a single public IP address to be allocated by the ISP.
- Router Mode
This is the mode used if NAT is not used. It means that each the individual hosts and users on the DMZ network need their own public IP addresses if they are to communicate with the public Internet.
Although not recommended when WAN is connected to the public internet, there may be situations where NAT cannot be applied and the individual DMZ network addresses need to be exposed through the WAN interface.
In some scenarios, the WAN interface may be connected to another internal network and in this case NAT usage may also not be appropriate because there is no need to shield DMZ addresses and there are lots of internal IP addresses that can be used.
- Transparent Mode
This mode is used if the DFL-160 is to be placed between the DMZ and WAN interface in a transparent way. This means that no IP addresses need to be changed in either network, but the traffic flowing between the interfaces is still subject to the rules and controls imposed by NetDefendOS.
In transparent mode, NetDefendOS works out from the traffic itself which networks can be found on the interfaces and creates the necessary entries in its routing table.
If both the LAN and DMZ interfaces have transparent mode enabled, traffic will flow transparently between all 3 of the DFL-160 interfaces.
In transparent mode, the additional option is provided that allows the relaying of DHCP requests.
√ Allow DHCP Requests to be relayed to a DHCP server on the WAN interface.
C. DHCP Server Settings
With this option enabled, a range of IP addresses can be allocated which can then be allocated out to hosts on the network as they are needed. The presentation of the server options in the web interface is shown below.

In most scenarios, the DMZ network will be an "internal" network that does not require public IP addresses. However, if a range of public IP addresses are allocated by the ISP these could also be allocated using this feature.
NetDefendOS also allows a DHCP Reservations list to be created. These bind a certain IP address with a particular MAC address. When a request for a DHCP lease is received on the interface, NetDefendOS checks the MAC address of the requesting DHCP client against the list. If a match is found, the IP address that has been associated with the MAC address is the one that is handed out.
The screenshot below shows how this option appears in the web interface. Combinations of IP address and MAC address can be added to the list. The red icon on the right of each entry can be
clicked to delete the entry.

This feature allows the same IP address to be always allocated to a particular DHCP client.
Transparent Mode and the Interface IP Address
There are some considerations that should be noted with the DMZ IP address when transparent mode is enabled:
- In transparent mode, the DMZ interface will take on the same IP address as the WAN interface.
- If DHCP is enabled on the WAN interface and the IP address on WAN cannot be refreshed within its DHCP lease time then it will receive the IP address 0.0.0.0 and the DMZ interface will also receive this IP address.
As a result, the administrator cannot connect through the DMZ interface to perform management tasks with a browser while the DMZ has the 0.0.0.0 IP address.
These IP address considerations are also true if transparent mode is enabled on the LAN interface.
3.5. Logging
NetDefendOS Log Messages
During NetDefendOS operation, log messages are routinely generated to indicate when certain events occur. These messages form an important audit trail that show what has occurred during system operation and can dealt with in various ways.
There are dozens of events for which event messages can be generated. The events range from high-level user events down to low-level system events. The conn_open event, for instance, is a typical high-level event that generates an event message whenever a new connection, such as a TCP/IP link is established. An example of a low-level event would be the startup_normal event, which generates a mandatory event message as soon as the system starts up.
All event messages have a common format, with attributes that include category, severity and recommended actions. These attributes enable easy filtering and analysis of messages, either within NetDefendOS or on an external SysLog server.
A list of all event messages can be found in the DFL-160 Log Reference Guide. That guide also describes the design of event messages, the meaning of severity levels and the various attributes available. The severity of each event is predefined and it can be, in order of severity, one of:
1 - Emergency (the most severe)
2 - Alert
3 - Critical
4 - Error
5 - Warning
6 - Notice
7 - Info
8 - Debug
By default all messages of severity Info and above are sent. The Debug category of messages is designed for troubleshooting only and is only used when troubleshooting a problem.
Logging Options
The Logging page of the web interface is divided into three option sections:
A. Syslog Settings
B. Audit Logging
C. Email Alerts
A. Syslog Settings
Syslog is a log message standard that is widely used for sending messages to a separate Syslog Server. NetDefendOS supports this standard and up to two syslog servers can be configured to receive messages from NetDefendOS by specifying their IP addresses.
The Syslog Facility is a way of marking syslog messages with a specific source identifier. For instance, one DFL-160 might be given the syslog facility local0 while a second might be local1. When messages are sent to the same syslog server, the messages from one unit can be distinguished from the messages of the other unit.
B. Audit Logging
When data connections are opened and closed, these events are not normally part of the log
messages generated by NetDefendOS. By enabling this option, these log messages will be included.
C. Email Alerts
NetDefendOS can be configured to send emails to up to three email addresses when log messages are generated that are equal to or exceed a defined threshold. This threshold is referred to as the sensitivity.
The sensitivity settings translate into the following values:
- Very High
Min Repeat Delay: 600 seconds
Hold Time: 120
Log Threshold: 0
• High
Min Repeat Delay: 600 seconds
Hold Time: 120
Log Threshold: 2
- Medium
Min Repeat Delay: 600 seconds
Hold Time: 120
Log Threshold: 3
- Low
Min Repeat Delay: 1800 seconds
Hold Time: 120
Log Threshold: 5
- Very Low
Min Repeat Delay: 3600 seconds
Hold Time: 120
Log Threshold: 10
The Log Threshold indicates the threshold severity for the log message generated. Every log message has a severity value that ranges from zero (the most severe) to 10 (the least severe).
An SMTP server should be specified that will be used to send the email messages. The SMTP server MUST be specified using an IP address and cannot be specified using a domain name such as dns:smtp.domain.com.
3.6. Date and Time
A variety of NetDefendOS functions depend on the system date and time being set correctly for the DFL-160. It is therefore recommended to set the correct time and date as soon as possible. There are three time and date options:
A. General
B. Time zone and daylight saving time settings
C. Automatic time synchronization
A. General
The Set Date and Time button allows the current management workstation's computer's date and time to be used as the DFL-160's date and time.
B. Time zone and daylight saving time settings
The applicable time zone and applicable daylight saving time settings can be set in this part of the web page.

C. Automatic time synchronization
A number of publicly available time servers exist on the Internet which any host can query to get the current time and date. These can be used to automatically check and adjust the DFL-160 system clock. NetDefendOS can make use of one of two types of time server:
• D-Link own time servers.
- Public time servers.
The details of D-Link's own time servers are built into NetDefendOS and this option only has to be enabled for the servers to be used. If public time servers are used, the details for server access have to be entered manually and it recommended that more than one is defined for redundancy.
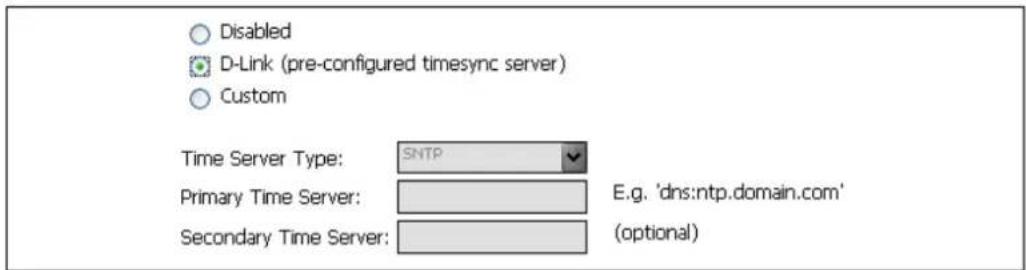
When usage of time servers is enabled, NetDefendOS will poll them on a regular basis and then adjust the DFL-160 system clock with the exact time.
If the time server and the current time differ by more than one hour (60 minutes) then the time server is ignored.
3.7. Dynamic DNS Settings
A DNS feature offered by NetDefendOS is the ability to explicitly inform DNS servers when the external IP address of the DFL-160 has changed. This is sometimes referred to as Dynamic DNS (DDNS) and is useful where the DFL-160 has an external IP address that can change.
By enabling this option, NetDefendOS acts as a dynamic DNS client and every time it restarts, it will send a message so the dynamic DNS server is informed of the current IP address on the WAN interface. This messaging is also repeated at set intervals during normal operation.
The httpposter CLI Command
The CLI console command httpposter can be used to troubleshoot problems by showing what NetDefendOS is sending and what a server is returning during dynamic DNS lookup.
All CLI commands are documented in Appendix A, CLI Reference.
Usage in VPN Scenarios
Dynamic DNS can also be useful in VPN scenarios where both ends of the tunnel have dynamic IP addresses. If only one side of the tunnel has a dynamic address then the NetDefendOS VPN keep-alive feature solves this problem.

Note: Queries should not be too frequent
Dynamic DNS services are often sensitive to repeated logon attempt over short periods of time and may blacklist IP addresses that are sending excessive requests. It is therefore not advisable to query these services too often otherwise they may cease to respond.
The D-Link DDNS Server
D-Link offers its own DDNS server which is a free service for D-Link customers. Registration is required and can be done by going to https://www.dlinkddns.com/login. This service is recommended but one of the other pre-defined services could be used instead.
Chapter 4. The Firewall Menu
- Outbound LAN Traffic Options, page 41
• Outbound DMZ Traffic Options, page 43
• Inbound Traffic Options, page 45
• VPN Options, page 47
• VPN Users. page 55
• Web Content Filtering, page 56
• Anti-Virus, page 65
• IDP Options, page 68
• Traffic Shaping, page 71
• Schedules, page 74

The options in the Firewall menu allow the administrator to control and manage the features of the DFL-160 that are specific to a firewall. A firewall, as the name suggests, is a capability that provides a protective barrier against a range of potential threats that can be transported by the public Internet towards sensitive internal networks.

Using the DFL-160 as a Firewall
The firewalling capabilities of NetDefendOS allow the administrator to impose various security restrictions on the traffic flowing through the interfaces of the DFL-160. In summary, the firewalling options are:
- The types of traffic that are allowed to flow between interfaces can be specified and also in what direction they are allowed to flow.
- Secure VPN connections can be specified for traffic flowing through interfaces.
- Policies can be set for the URLs to which web surfing is allowed.
• Anti-Virus scanning can be enabled for file downloads.
- Intrusion Detection and Prevention (IDP) can be enabled to search streams of traffic for threats against internal resources.
- Time schedules can be set up which can be then used to specify the times when security policies are applied.
- Lists of users that are allowed to access protected resources can be specified.
The sections that follow describe the options in this menu in the order they appear.
4.1. Outbound LAN Traffic Options
The Meaning of Outbound
These options determine what types of traffic can pass between the LAN network on the protected "inside" of the DFL-160 and the WAN interface when the connection is initiated by a client or host on the LAN network.
For instance, the retrieval of data from a web server on the public Internet is still considered part of outbound traffic if the retrieval request is initiated by a web surfer sitting on the LAN network.
Allowing Services
A Service refers to a higher level protocol such as the HTTP protocol used for web surfing and is a convenient way of identifying different types of data traffic. The presentation of the first few choices in the web interface is shown below.
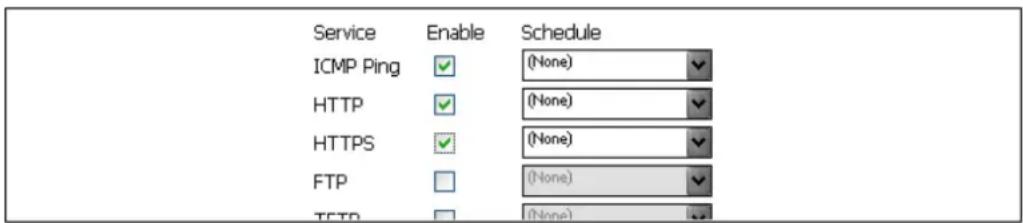
By default, all services are allowed, that is to say, no connections initiated from the LAN network are blocked.
It is recommended, however, to try and impose restrictions that match the expected needs of the clients and hosts on the LAN network. For instance, selecting only the HTTP and HTTPS protocols allows only web surfing to take place from the LAN network and other protocols such as FTP will not be allowed.
Connections from the LAN to the DMZ
Connections initiated from the LAN network to hosts on the DMZ network are always allowed. However, the opposite is never true: connections initiated by hosts on the DMZ network are never allowed to the LAN network.
This arrangement prevents a host that becomes infected on the DMZ spreading the problem to the LAN network.
Specifying Custom Traffic
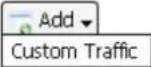
By clicking the Custom Traffic tab and then selecting Add > Custom Traffic it is possible to allow through a protocol not specified in the pre-defined list.

For a custom protocol it is necessary to specify if the protocol uses TCP or UDP connections or both and to specify the port number the protocol will try and connect to at the other end of the connection.

Specifying a Schedule
A named Schedule can be defined through the Firewall > Schedules menu option and this can then be used with any individual protocol allowed for outgoing traffic from the LAN interface.
Schedules specify a period of time when a particular selection is valid. For example, the administrator might decide to not allow web surfing during working hours. The HTTP and HTTPS protocols could then have the appropriate schedule associated with them to achieve this.
More details can be found in Section 4.10, "Schedules".
4.2. Outbound DMZ Traffic Options
The Meaning of Outbound
These options determine what types of traffic can pass between the DMZ network and the WAN interface when the connection is initiated by a client or host on the DMZ network.
For instance, the retrieval of data from a web server on the public Internet is still considered part of outbound traffic if the retrieval request is initiated by a web surfer sitting on the DMZ network.
The options on the page of the web interface follow the same pattern described for the LAN interface described in Section 4.1, “Outbound LAN Traffic Options” although there are some differences.
Allowing Services
A Service refers to a higher level protocol such as the HTTP protocol used for web surfing and is a convenient way of identifying different types of data traffic. The presentation of the first few choices in the web interface is shown below.

By default, all services are allowed, that is to say, no connections initiated from the DMZ network are blocked.
It is recommended, however, to try and impose restrictions that match the expected needs of the clients and hosts on the DMZ network.
Connections from the DMZ to the LAN
Connections initiated from the DMZ network to hosts on the LAN network are never allowed. However, the opposite is always true: connections initiated by hosts on the LAN network are always allowed to the DMZ network.
This arrangement prevents a host that becomes infected on the DMZ spreading the problem to the LAN network. This implements one of the prime purposes of the DMZ which is to be a network where hosts which receive connections from the public Internet can be placed.
Specifying Custom Traffic
By clicking the Custom Traffic tab and then selecting Add > Custom Traffic, it is possible to allow through a protocol not specified in the pre-defined list.

For a custom protocol it is necessary to specify if the protocol uses TCP or UDP connections or both and to specify the port number that the protocol will try and connect to at the other end of the connection. The presentation of the new custom rule options in the web interface is shown below.

Specifying a Schedule
A named Schedule can be defined through the Firewall > Schedules menu option and this can then be used with any individual protocol allowed for outgoing traffic from the LAN interface.
Schedules specify a period of time when a particular selection is valid. For example, the administrator might decide to not allow web surfing during working hours. The HTTP and HTTPS protocols could then have the appropriate schedule associated with them to achieve this.
More details can be found in Section 4.10, "Schedules".
4.3. Inbound Traffic Options
This set of NetDefendOS options deals using firewalling to protect against inbound traffic. The term inbound refers to connections that are initiated from the public Internet on the WAN interface.
These connections are typically made to access some resource that sits behind the DFL-160, such as an HTTP server that is sitting on the DMZ network. By default, NO SUCH CONNECTIONS ARE ALLOWED and the administrator must explicitly allow individual protocols by ticking one or more of the checkboxes on this page of the web interface.
This page of the web interface is divided into 3 parts:
A. Inbound Traffic
B. Inbound Multicast
C. Custom Traffic
A. Inbound Traffic
A pre-defined list is displayed on this page of all the most common protocols. Ticking the checkbox against a protocol name means that inbound traffic of just that protocol type will be allowed through. The presentation of the first few checkboxes in the web interface is shown below.

The IP address for each service must be entered. Default IP addresses are already entered but these probably need to be changed. The IP address entered would be a private IP address of the internal host if NAT is being used or a public IP address if it is not.
If there are two IP addresses for a particular service (for instance 2 web servers) then the inbound traffic to one could be allowed by ticking the box here and the inbound traffic to the other could be allowed by creating a Custom Traffic rule as described below. If NAT is being used then the port numbers for each server must be different (otherwise NAT cannot function).

Important: Changing the management access port number
Note that if HTTP or HTTPS is allowed then management access that uses the same protocol must have the default port number changed. This is explained more fully in Section 3.1, “Administration”.
A named Schedule can be defined and then associated with any protocol for inbound traffic. Schedules specify times when a particular protocol is allowed. Schedules can also be defined for outbound traffic protocols. More details can be found in Section 4.10, "Schedules".
B. Inbound Multicast
Multicast is an IP networking technique that allows a single host to broadcast messages to multiple receiving clients. If such inbound traffic is allowed then the allowed IP address range can also be specified.
Multimedia applications sometimes make use of multicast and the administrator should check with the needs of internal users to determine if this option should be enabled. For example, "IP-TV" is an
application that typically makes use of multicast data transfers.
Multicast traffic can be forwarded to local clients on LAN and DMZ if the clients have requested the traffic using the IGMP protocol.

Allow requested multicast traffic
Multicast Groups: 224.0.2.0-239.255.255.255
Multicast groups to allow
C. Custom Traffic
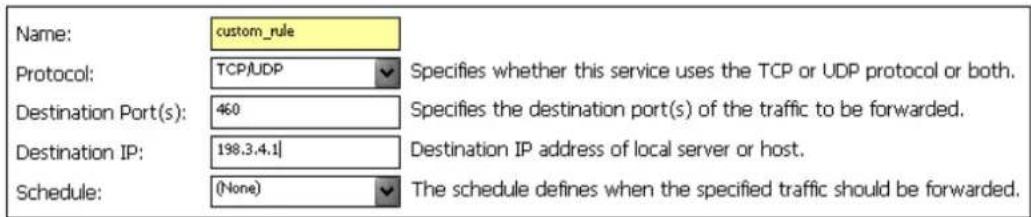
If a particular protocol does not appear in the standard list of protocols then a Custom Traffic "rule" can be created which allows incoming TCP or UDP traffic through on a specified port.
As explained above, the custom rule must have a destination IP address specified which either an internal IP address if NAT is being used of a public IP if NAT is not being used. The port number must be different from any other rule for the same protocol if NAT is being used. The presentation of the new custom inbound rule options in the web interface are shown below.
4.4. VPN Options
VPN Usage
The Internet is increasingly used as a means to connect together computers since it offers efficient and inexpensive communication. The requirement therefore exists for data to traverse the Internet to its intended recipient without another party being able to read or alter it.
VPN allows the setting up of a tunnel between two devices known as tunnel endpoints. All data flowing through the tunnel is then secure. The mechanism that provides tunnel security is encryption.
There are two common scenarios where VPNs are used:
- LAN to LAN connection - Where two internal networks need to be connected together over the internet. In this case, each network is protected by an individual DFL-160 and the VPN tunnel is set up between them.
![graph TD A["Client 1"] --> B["Firewall"] C["Client 2"] --> D["Firewall"] B --> E["Internet"] D --> E style A fill:#f9f,stroke:#333 style C fill:#f9f,stroke:#333 style B fill:#ccf,stroke:#333 style D fill:#ccf,stroke:#333 style E fill:#cfc,stroke:#333](/content/2026/06/1264362/images/c05845a3f9d31402d8367bef866f562951ff30847738d4d0bb302a7a072f2d1d.jpg)
- Client to LAN connection - Where many remote clients need to connect to an internal network over the internet. In this case, the internal network is protected by the DFL-160 to which the client connects and the VPN tunnel is set up between them.
![graph TD A["Computer 1"] -->|Red Key| B["Firewall"] C["Computer 2"] -->|Red Key| B D["Internet"] -->|Red Key| B B --> E["Computer 3"]](/content/2026/06/1264362/images/6c0e4c39d883a3da69d5233b5cc63a670251347ce04d50e7b47a28cc2b09f075.jpg)
In summary, a VPN allows the public Internet to be used for setting up secure communications or tunnels between DFL-160s or between a DFL-160 and other security gateway devices or clients.
VPN with the DFL-160
NetDefendOS supports setting up tunnels using the following types of tunnel protocols for secure communication:
- IPsec tunnels.
• L2TP tunnels.
Using L2TP tunnels the DFL-160 can either be:
- An L2TP client - which connects to an L2TP server.
- Or an L2TP server - to which L2TP clients connect.
- PPTP tunnels.
Using PPTP tunnels the DFL-160 can either be:
- A PPTP client - which connects to a PPTP server.
- Or a PPTP server - to which PPTP clients connect.
Pressing the Add button on the initial VPN page of the web interface allows the administrator to define a tunnel based on one of these protocols. The following sections explore these options in greater depth.
In the web interface, the L2TP and PPTP setup options are grouped together into the same pages. This is because of their similarity. L2TP is a protocol that has superseded PPTP but PPTP is still used in some scenarios.
4.4.1. IPsec
This section explains the IPsec options available when setting up an IPsec based VPN tunnel.
An IPsec Overview
Internet Protocol Security (IPsec) is a standardized set of protocols that provide highly secure data transportation. IPsec is made up of two parts:
• The Internet Key Exchange protocol (IKE)
• IPsec protocols (AH and ESP)
The first part, IKE, is the initial negotiation phase, where two VPN tunnel endpoints agree on which methods will be used to provide transportation and security for the data traffic. IKE manages connections by creating a set of Security Associations (SAs) for each tunnel. An SA is unidirectional so there are usually at least two for each IPsec connection.
The second part is the actual data transfer and this is done using the encryption and authentication methods agreed upon in the IKE negotiation.
The flow of events for IPsec can be summarized as follows:
• IKE negotiates how IKE should be protected.
- IKE negotiates how IPsec should be protected.
• An IPsec tunnel is established which is used to securely transport data.
The following sections are used in the web interface for IPsec setup:
A. General
B. Authentication
C. Tunnel Type
D. Advanced
A. General
Here, a textual Name for the tunnel is specified. This is used only for identifying the tunnel for management purposes in the web interface.

The Local Network is the network attached to the LAN or DMZ interface which will communicate through the IPsec tunnel.
B. Authentication
This is the Pre-shared Key (PSK) that provides the initial means to set up the tunnel. The key should be the same for both end points of the tunnel for communication to succeed.
A PSK can be any alphanumeric character string.
Security using digital certificates is not possible with the DFL-160 but is possible with higher-end D-Link NetDefend products.
C. Tunnel Type
An IPsec tunnel can be one of two types:
- Roaming Users.
If clients will be connecting through the tunnel via the WAN port then this option should be enabled. If XAuth is required then this means a user must give a username and password listed in the user database (see Section 4.5, "VPN Users").
○ Roaming Users
☐ Require user authentication via IKE XAuth to open tunnel.
- Lan-to-Lan.
If the tunnel is being used to connect a remote network on the WAN interface to a local network on the LAN or DMZ
The tunnel's remote endpoint may require XAuth authentication in which case a valid username
and password must be specified.
LAN-to-LAN
Remote Network:
10.3.3.0/24
Remote Gateway:
dns:vpn.example.com

Note: Fully qualified domain names
If fully qualified DNS names (FQDN) are used, for example vpn.example.com, then the prefix dns: must be used when these are entered. For this example: dns:vpn.example.com (a DNS server must also be configured either manually or automatically for resolution to an IP address to succeed).
LAN-to-LAN tunnel establishment can also optionally require a username and password pair for authentication using XAuth. This can be optionally specified.
☐ Pass username and password to peer via IKE XAuth, if the remote gateway requires it.
XAuth User Name:
XAuth Password:
Confirm Password:
Advanced
The advanced options provide a way to customize some of the parameters used by IPsec. This may be necessary in certain scenarios where the DFL-160 must communicate with an IPsec peer that expects certain conventions to be used.
The advanced options are as follows:
A. Lifetimes
B. IKE Settings
C. Perfect Forward Secrecy
D. Dead Peer Detection
E. Keep-Alive
A. Lifetimes
Both the IKE and the IPsec connections have limited lifetimes and are described both in terms of time (seconds). These lifetimes prevent a connection from being used too long, which is desirable from a crypto-analysis perspective.
IKE lifetime:
IPsec lifetime:
26800
3600
seconds
seconds
The IPsec lifetime must be shorter than the IKE lifetime. The difference between the two must be a minimum of 5 minutes. This allows for the IPsec connection to be re-keyed simply by performing
another phase-2 negotiation. There is no need to do another phase-1 negotiation until the IKE lifetime has expired.
It is recommended that the lifetimes not be shorter than the following:
• IKE lifetime - 600 seconds (10 minutes)
• IPsec lifetime - 300 seconds (5 minutes)
B. IKE Settings
Internet Key Exchange is the IPsec protocol used to set up an IPsec tunnel between two computers.
IKE Mode:
DH Group:

- IKE Mode
The options for the mode are Main or Aggressive. Aggressive Mode provides faster tunnel setup because fewer negotiation messages are exchanged but with the tradeoff that tunnel security is reduced. Main Mode is the default and is the recommended option.
• DH Group
Diffie Hellman (DH) is a method used to establish a mutually agreed secret key between two computers without a third party who monitors the exchange being able to work out the key. The DH group value selects the strength of the DH algorithm being used. The options are 1, 2 and 5.
C. Perfect Forward Secrecy
Perfect Forward Secrecy (PFS) ensures that the session key derived from public and private keys is not compromised if one of the private keys is compromised.
PFS:
PFS DH Group:

If PFS is selected then the PFS DH Group drop-down box becomes enabled and the Diffie Hellman group can be selected for PFS. The DH group options for PFS are also 1, 2 and 5.
D. Dead Peer Detection
DPD monitors the aliveness of the tunnel by looking for traffic coming from the peer at the other end of the tunnel. If no message is seen within a set length of time then NetDefendOS sends DPD-R-U-THERE messages to the peer to determine if it is still reachable and alive.

Enable Dead Peer Detection.
If the peer does not respond to DPD-R-U-THERE messages during a set period of time then the peer is considered dead and the tunnel is taken down. NetDefendOS will then automatically try to
re-establish the tunnel after a set period of time.
E. Keep-Alive
The IPsec Keep-alive option ensures that the tunnel remains established at all possible times even if no traffic flows. It does this by continuously sending ICMP Ping messages through the tunnel. If replies to the ping messages are not received then the tunnel link is assumed to be broken and an attempt is automatically made to re-establish the tunnel. This feature is only useful for LAN to LAN tunnels.
Disabled
Auto
○ Manual
Keep-alive destination IP:
With the Manual option, a specific source IP address and/or a destination IP address for the pings can optionally be specified. It is recommended to specify a destination IP of a host which is known to being able to reliably respond to ICMP messages.
If the Auto option is chosen and a destination IP is therefore not specified, NetDefendOS will use the first IP address on the remote network for sending messages.
Listing IPsec Tunnels
Currently established IPsec tunnels can be listed and their usage examined through the IPsec option in the Status menu (see Section 6.8, "IPsec Status").
4.4.2. L2TP/PPTP Client
This option allows a tunnel to be set up where the DFL-160 acts as a L2TP or PPTP client. In this mode, a tunnel is set up where the DFL-160 connects to an L2TP or PPTP server.
In this mode, users and hosts on the DFL-160 LAN and DMZ interfaces can connect securely to resources at the other end of the tunnel. Unlike pure IPsec VPN where separate VPN tunnels are set up for each user or host, only one L2TP tunnel is set up and all traffic flows through it.
The following sections appear in the web interface for setup:
A. General
B. Authentication
C. IPsec Encryption
D. Security Authentication
E. MPPE
F. Dial-on-Demand
A. General
In this section, the tunnel is named and the protocol (L2TP or PPTP is chosen).
The Remote endpoint is the IP address of the other end of the tunnel (the server's IP address). It can be specified as a URI such as gw.domain.com but if it is then the prefix dns: must be added so the full entry would be dns:gw.domain.com.
The Remote Network is the network behind the server to which the client will communicate.
B. Authentication
The client will need a username and password for authentication.
C. IPsec Encryption
L2TP usually uses IPsec as its encryption method.
D. Security Authentication
This section specifies how authentication is done when connecting to the server.
E. MPPE
Microsoft Point to Point Encryption (MPPE) is an optional encryption method usually used only by PPTP. The method chosen must be compatible with the method chosen on the server.
F. Dial-on-Demand
If this option is enabled, the tunnel will not be set up until traffic is actually sent.
The Idle Timeout is the length of time with inactivity that passes before tunnel disconnection occurs.
4.4.3. L2TP/PPTP Server
This option allows VPN tunnels to be set up based on the L2TP protocol, where the DFL-160 acts as a L2TP or PPTP server, receiving connection requests from external clients. Such clients are sometimes called roaming clients since they might not have a fixed IP address and might connect through temporary connection to a remote network.
Secure VPN connections by external clients could also be achieved, as described previously, using IPsec tunnels. However, IPsec requires special IPsec client software be installed on the client computer which can increase the overall complexity and expense of VPN. On many computers, such as all Microsoft Windows PCs, L2TP and PPTP client software exists as a standard component which means VPN is much simpler to implement.
The following sections appear in the web interface for setup:
A. General
B. IP Pool Settings
C. Authentication
D. MPPE
D. Idle Timeout
A. General
In this section of the page, the type of tunnel is selected (L2TP or PPTP) and if the tunnel uses IPsec encryption (this is usually only the case for L2TP tunnels).
B. IP Pool Settings
The IP Pool is a range of IP numbers that can be handed out to clients as they connect to the DFL-160 using this tunnel.
Relaying of DNS queries means that URL resolution requests are relayed to a DNS server. This will require that the DFL-160 to have at least one DNS server defined.
C. Authentication
This section specifies how authentication is done with connecting clients.
D. MPPE
Microsoft Point to Point Encryption (MPPE) is an optional encryption method usually used only by PPTP. The method chosen must be compatible with that used by connecting clients.
E. Idle Timeout
The Idle Timeout is the length of time with inactivity that passes before tunnel disconnection occurs.
4.5. VPN Users
The User Database
This page in the web interface allows the administrator to enter the details of new users into the NetDefendOS user database and to also administer these users by making deletions or changes. There is no limit on the database size.
The NetDefendOS user authentication database is used only with VPN. When external clients connect through a VPN link to resources protected by the DFL-160, they can be required to provide a unique combination of a userid and a password (access without any authentication is also possible).
For a description of how to set up VPN connections with the DFL-160, see Section 4.4, "VPN Options".
VPN Types That Use VPN Authentication
The exact types of VPN actions that rely on this user database are:
- Access by an external client through an IPsec tunnel through the WAN interface (see Section 4.4.1, "IPsec").
- Access by an external client through an L2TP tunnel through the WAN interface, where the DFL-160 is acting as an L2TP server (see Section 4.4.3, “L2TP/PPTP Server”).

Note: User databases
The users in the user database have no connection with the usernames and associated passwords used for the system administration and system audit functions. Those are described in Section 3.1, "Administration".
4.6. Web Content Filtering
4.6.1. Options
The Web Content Filtering (WCF) options allow control over the types of web surfing allowed by clients on the LAN or DMZ. When web browsers try to access a URL on the public Internet through the WAN interface, NetDefendOS checks the URL against a D-Link URL database to find out what category it is. For instance, a URL for web site like CNN might belong to the News category.
The administrator can set up policies to determine what categories are permitted or denied for web surfing. A company's internal surfing policy might be, for example, to only allow access to news and e-banking sites but not to any other type of site.
![graph TD A["Internet"] -->|2b| B["Firewall"] B -->|3| C["Server"] C -->|1| D["Computer"] B -->|2a| E["Server"] style A fill:#f9f,stroke:#333 style B fill:#ccf,stroke:#333 style C fill:#cfc,stroke:#333 style D fill:#fcc,stroke:#333 note1["Multiple replicated databases are deployed worldwide to maximi…](/content/2026/06/1264362/images/361dc09cd82b98c1c1ebc19e2b7f076eca89069dbb09d3837e82e58d2502d866.jpg)
The sections of the WCF page in the web interface are:
A. Subscription
B. Web Content Filter
C. Categories
D. Options
E. URL Filters
A. Subscription
WCF is a subscription based service and a one year subscription can be purchased as a license add-on from your D-Link agent. The buy license link here will open a D-Link window in your browser so that you can find your local agent. Alternatively you can click the link here: http://security.dlink.com.tw/wheretobuy.asp.
B. Web Content Filter
The option here is to enable or disable web content filtering. Note that HTTP and HTTPS traffic (or all traffic) should be allowed in the outgoing traffic options for the LAN or DMZ interfaces for clients on those networks to able to reach the public Internet.
C. Categories
The administrator adds the categories that are to be blocked from the choices in the left table to the selected list in the right. In most cases the category description should be self-explanatory.
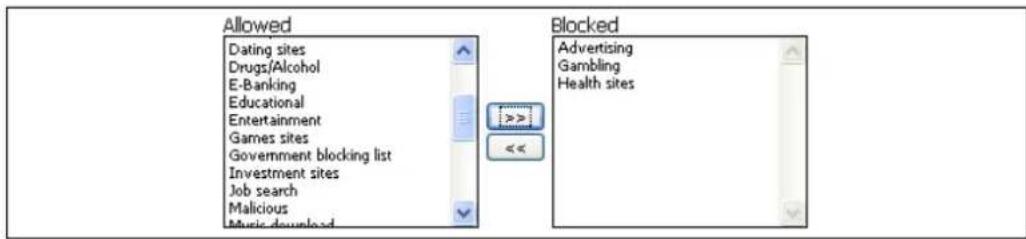
D. Options
There are three further options which can be selected when WCF is enabled as shown below.

• Non-Managed Action
If a URL is not found in the WCF database (and is therefore not "classified") then the default action is allow access anyway. The administrator can decide, however, to block any unclassified URLs.
- Allow Override
With this option, a web page is displayed to the user to indicate that they are trying to access a URL which has been "flagged" by the WCF database. There is a link on the page, however, which allows them to continue on to the URL.
This option is useful to draw users attention to the fact that their web surfing is being monitored but not is still intrusive enough to totally block their surfing.
Blocking all flagged URLs in all undesirable categories at once can sometimes result in strong protests from an internal web surfing community and it is therefore often advisable to introduce blocking gradually.
- Allow Reclassification
This option displays a web page that shows a URL has been "flagged" by the WCF database and gives the user a link to request "reclassification" of the URL. This option provides users a way to give feedback when they believe the WCF subsystem is incorrectly classifying URLs.
E. Static URL Filters
It is possible to explicitly allow or explicitly block certain URLs by adding one or more Static URL Filters. This is also referred to as whitelisting and blacklisting and the URLs specified in such filters are not looked up by the WCF subsystem.
When defining a URL filter it is important to note that wildcarding can be used when specifying the URL. The wildcard character "*" can represent any sequence of characters in the URL.
For example, the URL filter blacklist *.blocked_site.com will block all pages with URLs that end with blocked_site.com.
If we want to now explicitly allow one particular page in this domain then this can be done using a whitelist URL filter of the form ok_page.blocked_site.com. The blacklisting URL filter above will not prevent this page from being reachable since the whitelist has precedence.
Monitoring WCF
The log messages generated by WCF can be viewed through the Status menu and this is described in Section 6.4, "Web Content Filtering Status". A graphical summary of WCF activity, shown below, can be found in the initial display screen which is described in Section 6.1, "System Status".
UTM Statistics
Top 5 Web Content Filtering Categories

Total classification count: 1444
News
703 hits, 49%
Entertainment 337 hits, 23%
Computing/IT
209 hits, 14%
Advertising 62 hits, 4%
Business oriented 50 hits, 3%
Other 83 hits, 6%
UTM Information
AV Signatures:
4000 Signatures Last updated 2008-10-29 06:26:13
IDP Signatures:
16243 Signatures Last updated 2008-10-28 08:35:40
4.6.2. The Content Categories
Below is a list of all the categories used with WCF and with a description of the purpose of each category.
Category 1: Adult Content
A web site may be classified under the Adult Content category if its content includes the description or depiction of erotic or sexual acts or sexually oriented material such as pornography. Exceptions to this are web sites that contain information relating to sexuality and sexual health, which may be classified under the Health Sites Category (21). Examples might be:
• www.naughtychix.com
- www.fullonxxx.com
Category 2: News
A web site may be classified under the News category if its content includes information articles on recent events pertaining to topics surrounding a locality (for example, town, city or nation) or culture, including weather forecasting information. Typically this would include most real-time
online news publications and technology or trade journals. This does not include financial quotes, refer to the Investment Sites category (11), or sports, refer to the Sports category (16). Examples might be:
• www.newsunlimited.com
• www.dailyscoop.com
Category 3: Job Search
A web site may be classified under the Job Search category if its content includes facilities to search for or submit online employment applications. This also includes resume writing and posting and interviews, as well as staff recruitment and training services. Examples might be:
- www.allthejobs.com
• www.yourcareer.com
Category 4: Gambling
A web site may be classified under the Gambling category if its content includes advertisement or encouragement of, or facilities allowing for the partaking of any form of gambling; For money or otherwise. This includes online gaming, bookmaker odds and lottery web sites. This does not include traditional or computer based games; refer to the Games Sites category (10). Examples might be:
• www.blackjackspot.com
- www.pickapony.net
Category 5: Travel / Tourism
A web site may be classified under the Travel / Tourism category if its content includes information relating to travel activities including travelling for recreation and travel reservation facilities. Examples might be:
- www.flythere.nu
• www.reallycheaptix.com.au
Category 6: Shopping
A web site may be classified under the Shopping category if its content includes any form of advertisement of goods or services to be exchanged for money, and may also include the facilities to perform that transaction online. Included in this category are market promotions, catalogue selling and merchandising services. Examples might be:
- www.megamall.com
- www.buy-alcohol.se
Category 7: Entertainment
A web site may be classified under the Entertainment category if its content includes any general
form of entertainment that is not specifically covered by another category. Some examples of this are music sites, movies, hobbies, special interest, and fan clubs. This category also includes personal web pages such as those provided by ISPs. The following categories more specifically cover various entertainment content types, Pornography / Sex (1), Gambling (4), Chatrooms (8), Game Sites (10), Sports (16), Clubs and Societies (22) and Music Downloads (23). Examples might be:
• www.celebnews.com
• www.hollywoodlatest.com
Category 8: Chatrooms
A web site may be classified under the Chatrooms category if its content focuses on or includes real-time on-line interactive discussion groups. This also includes bulletin boards, message boards, online forums, discussion groups as well as URLs for downloading chat software. Examples might be:
- www.thetalkroom.org
- chat.yazoo.com
Category 9: Dating Sites
A web site may be classified under the Dating Sites category if its content includes facilities to submit and review personal advertisements, arrange romantic meetings with other people, mail order bride / foreign spouse introductions and escort services. Examples might be:
- adultmatefinder.com
• www.marriagenow.com
Category 10: Game Sites
A web site may be classified under the Game Sites category if its content focuses on or includes the review of games, traditional or computer based, or incorporates the facilities for downloading computer game related software, or playing or participating in online games. Examples might be:
• www.gamesunlimited.com
- www.gameplace.com
Category 11: Investment Sites
A web site may be classified under the Investment Sites category if its content includes information, services or facilities pertaining to personal investment. URLs in this category include contents such as brokerage services, online portfolio setup, money management forums or stock quotes. This category does not include electronic banking facilities; refer to the E-Banking category (12).
Examples might be:
• www.loadsofmoney.com.au
• www.putsandcalls.com
Category 12: E-Banking
A web site may be classified under the E-Banking category if its content includes electronic banking information or services. This category does not include Investment related content; refer to the Investment Sites category (11). Examples might be:
- www.nateast.co.uk
• www.borganfanley.com
Category 13: Crime / Terrorism
A web site may be classified under the Crime / Terrorism category if its content includes the description, promotion or instruction in, criminal or terrorist activities, cultures or opinions. Examples might be:
- www.beatthecrook.com
Category 14: Personal Beliefs / Cults
A web site may be classified under the Personal Beliefs / Cults category if its content includes the description or depiction of, or instruction in, systems of religious beliefs and practice. Examples might be:
• www.paganfed.demon.co.uk
• www.cultdeadcrow.com
Category 15: Politics
A web site may be classified under the Politics category if its content includes information or opinions of a political nature, electoral information and including political discussion groups. Examples might be:
• www.democrats.org.au
- www.political.com
Category 16: Sports
A web site may be classified under the Sports category if its content includes information or instructions relating to recreational or professional sports, or reviews on sporting events and sports scores. Examples might be:
• www.sportstoday.com
- www.soccerball.com
Category 17: www-Email Sites
A web site may be classified under the www-Email Sites category if its content includes online, web-based email facilities. Examples might be:
- www.coldmail.com
- mail.yazoo.com
Category 18: Violence / Undesirable
A web site may be classified under the Violence / Undesirable category if its contents are extremely violent or horrific in nature. This includes the promotion, description or depiction of violent acts, as well as web sites that have undesirable content and may not be classified elsewhere. Examples might be:
- www.itstinks.com
- www.ratemywaste.com
Category 19: Malicious
A web site may be classified under the Malicious category if its content is capable of causing damage to a computer or computer environment, including malicious consumption of network bandwidth. This category also includes "Phishing" URLs which designed to capture secret user authentication details by pretending to be a legitimate organization. Examples might be:
- hastalavista.baby.nu
Category 20: Search Sites
A web site may be classified under the Search Sites category if its main focus is providing online Internet search facilities. Refer to the section on unique categories at the start of this document. Examples might be:
- www.zoogle.com
- www.yazoo.com
Category 21: Health Sites
A web site may be classified under the Health Sites category if its content includes health related information or services, including sexuality and sexual health, as well as support groups, hospital and surgical information and medical journals. Examples might be:
• www.thehealthzone.com
- www.safedrugs.com
Category 22: Clubs and Societies
A web site may be classified under the Clubs and Societies category if its content includes information or services of relating to a club or society. This includes team or conference web sites. Examples might be:
- www.sierra.org
- www.walkingclub.org
Category 23: Music Downloads
A web site may be classified under the Music Downloads category if it provides online music downloading, uploading and sharing facilities as well as high bandwidth audio streaming. Examples might be:
- www.onlymp3s.com
- www.mp3space.com
Category 24: Business Oriented
A web site may be classified under the Business Oriented category if its content is relevant to general day-to-day business or proper functioning of the Internet, for example Web browser updates. Access to web sites in this category would in most cases not be considered unproductive or inappropriate.
Category 25: Government Blocking List
This category is populated by URLs specified by a government agency, and contains URLs that are deemed unsuitable for viewing by the general public by way of their very extreme nature. Examples might be:
• www.verynastystuff.com
• www.unpleasantvids.com
Category 26: Educational
A web site classified under the Educational category may belong to other categories but has content that relates to educational services or has been deemed of educational value, or to be an educational resource, by educational organizations. This category is populated by request or submission from various educational organizations. Examples might be:
- highschoollessays.org
• www.learn-at-home.com
Category 27: Advertising
A web site may be classified under the Advertising category if its main focus includes providing advertising related information or services. Examples might be:
- www.admessages.com
• www.tripleclick.com
Category 28: Drugs/Alcohol
A web site may be classified under the Drugs/Alcohol category if its content includes drug and alcohol related information or services. Some URLs categorized under this category may also be categorized under the Health category. Examples might be:
• www.the-cocktail-guide.com
• www.stiffdrinks.com
Category 29: Computing/IT
A web site may be classified under the Computing/IT category if its content includes computing related information or services. Examples might be:
- www.purplehat.com
- www.gnu.org
Category 30: Swimsuit/Lingerie/Models
A web site may be categorized under the Swimsuit/Lingerie/Models category if its content includes information pertaining to, or images of swimsuit, lingerie or general fashion models. Examples might be:
• www.vickys-secret.com
- sportspictured.cnn.com/features/2002/swimsuit
Category 31: Spam
A web site may be classified under the Spam category if it is found to be contained in bulk or spam emails. Examples might be:
- kaqsovdij.gjibhgk.info
• www.pleaseupdateyourdetails.com
Category 32: Non-Managed
Unclassified sites and sites that do not fit one of the other categories will be placed in this category. It is unusual to block this category since this could result in most harmless URLs being blocked.
4.7. Anti-Virus
Overview
The NetDefendOS Anti-Virus module protects against malicious code carried in file downloads. Files may be downloaded as part of a web-page in an HTTP transfer or in an FTP download or perhaps as an attachment to an email delivered through SMTP. Malicious code in such downloads can have different intents ranging from programs that merely cause annoyance to more sinister aims such as sending back passwords, credit card numbers and other sensitive information. The term "Virus" can be used as a generic description for all forms of malicious code carried in files.
Combining with Client Virus Scanning
Unlike IDP, which is primarily directed at attacks against servers, Anti-Virus scanning is focused on downloads by clients. NetDefendOS Anti-Virus is designed to be a complement to the standard antivirus scanning normally carried out locally by specialized software installed on client computers. IDP is not intended as a complete substitute for local scanning but rather as an extra shield to boost client protection. Most importantly, it can act as a backup for when local client antivirus scanning is not available.
The Scanning Mechanism
As a file transfer is streamed through the DFL-160, NetDefendOS will scan the data stream for the presence of viruses if the Anti-Virus module is enabled. Since files are being streamed and not being read completely into memory, a minimum amount of memory is required and there is minimal effect on overall throughput.
The inspection process is based on pattern matching against a database of known virus patterns and can determine, with a high degree of certainty, if a virus is in the process of being downloaded to a user behind the DFL-160. Once a virus is recognized in the contents of a file, the download can be terminated before it completes.
Types of File Downloads Scanned
Anti-Virus scanning can scan file downloads associated with the HTTP, FTP, SMTP and POP3 protocols. More specifically:
- Any uncompressed file type transferred for these protocols can be scanned.
- If the file has been compressed, ZIP and GZIP file downloads will be scanned although the maximum allowed compression ratio is 1:20 (if the ratio exceeds this, the file will be dropped and logged).
The reason for the compression ratio limit is that when scanning compressed files, NetDefendOS must apply decompression to examine the file's contents. Some types of data can result in very high compression ratios where the compressed file is a small fraction of the original uncompressed file size. This can mean that a comparatively small compressed file attachment might need to be uncompressed into a much larger file which can place an excessive load on NetDefendOS resources and noticeably slowdown throughput.
The Virus Signature Database
NetDefendOS Anti-Virus scanning is implemented by pattern matching against a virus signature database maintained locally in the DFL-160's memory. This database is the "SafeStream" virus signature database which is created and maintained by Kaspersky, a company which is a world
leader in the field of virus detection. The database provides protection against virtually all known virus threats including trojans, worms, backdoor exploits and others. The database is also thoroughly tested to provide near zero false positives.
NetDefendOS Anti-Virus scanning is a subscription based service and yearly subscriptions can be purchased from your local D-Link agent. After purchase, you will receive a code which is then used for activating IDP.
A subscription means that the SafeStream database is updated on a daily basis from D-Link servers with any new virus signatures that become available. Older signatures are seldom retired but instead are replaced with more generic signatures covering several viruses.
Anti-Virus Settings
The NetDefendOS Anti-Virus feature provides the option to scan any file downloads for viruses. The downloads that are scanned are those that pass through the WAN interface.
The page in the web interface for Anti-Virus scanning is divided into 3 sections:
A. Anti-Virus Database
B. Anti-Virus Scanning
C. Scan Exclusion Control
A. Anti-Virus Database
This section of the user interface shows the current status of the virus database which is discussed previously in this section.
B. Anti-Virus Scanning
This part of the interface is where virus scanning is enabled. Any combination of the HTTP, FTP, SMTP or POP3 protocols can be selected. If none is selected, no virus scanning will take place.
C. Scan Exclusion Control
It is possible to explicitly exclude some file types from virus scanning. Virus scanning takes up processing resources so expanding this list can help increase throughput. Some filetypes are excluded by default.
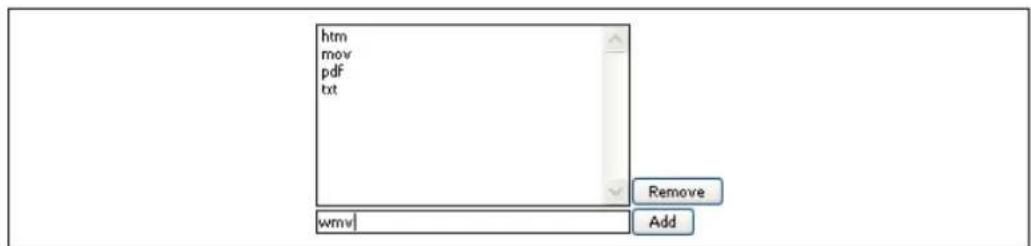
When using the Add button, the filetype should not have a leading period. In other words, if adding PDF files, specify pdf and not .pdf.
File Type Checking
Some viruses can try to hide inside files by using a misleading name. For example, a file might pretend to be a .pdf file by using the name myfile.pdf but actually contain a virus. If .pdf files are on
the exclusion list such a file might not be scanned. To avoid this situation, NetDefendOS always performs MIME checking where it looks inside the file to determine what the true filetype of the data is. Only if the filetype determined by MIME checking is on the exclude list is virus scanning skipped.
4.8. IDP Options
The Intrusion Threat
Computer servers can sometimes have vulnerabilities which leave them exposed to attacks carried by network traffic. Worms, trojans and backdoor exploits are examples of such attacks which, if successful, can potentially compromise or take control of a server. A generic term that can be used to describe these server orientated threats are Intrusions.
Intrusion Detection
Intrusions differ from viruses in that a virus is normally contained in a single file download and this is normally downloaded to a client system. An intrusion manifests itself as a malicious pattern of Internet data aimed at bypassing server security mechanisms. Intrusions are not uncommon and they can constantly evolve since their creation can be automated by the attacker.
With the DFL-160, servers that are accessed from the public Internet are typically situated on the network connected to the DMZ interface. This provides one form of defense against intrusions by isolating any server infection away from the most sensitive "inside" network which is usually connected to the LAN interface. However, it is much better to take steps to prevent these infections ever occurring.
The IDP Solution
Intrusion Detection and Prevention (IDP) is a NetDefendOS feature that is designed to detect and neutralize such intrusion attempts. When IDP is enabled, it functions by monitoring network traffic as it passes through the DFL-160's WAN interface from the public Internet, searching for patterns that indicate an intrusion is being attempted. When such a pattern is detected, NetDefendOS IDP can then neutralize the attempt by dropping the traffic containing the threat.
The IDP Database and Subscribing
NetDefendOS IDP uses a locally held database of threat patterns which is routinely updated by downloads from external D-Link servers with the latest threat information as they become available.
NetDefendOS IDP is a subscription based service and yearly subscriptions can be purchased from your local D-Link agent. After purchase, you will receive a code which is then used for activating IDP.
![graph TD A["Internet"] -->|1| B["Firewall"] B -->|2| C["Computer"] B -->|3| D["D-Link Firewall"] B -->|4| E["WWW Server"] style A fill:#f9f,stroke:#333 style B fill:#ccf,stroke:#333 style C fill:#cfc,stroke:#333 style D fill:#fcc,stroke:#333 style E fill:#ffc,stroke:#333](/content/2026/06/1264362/images/59520378e43442b49d1cf0db32462e82749aa1b7f8cb2f7c8a5aeabee734ce0e.jpg)
Enabling IDP for a Protocol
The IDP page of the NetDefendOS web interface lists a set of protocols which can be scanned by the IDP subsystem. Selecting any of the protocols switches on IDP scanning.
Dropping Connections or Only Logging
When IDP is enabled, the administrator has two options for how detected intrusions are dealt with:
- Log only.
- Log and drop connection.
The Log only option can be useful to first examine what traffic IDP would block if it was fully enabled.
Select the Minimum Number of Protocols
It is recommended to scan the minimum number of protocols required. For example, if there is only an SMTP server in the DMZ network, then enabling the SMTP checkbox only is recommended. IDP scanning can consume the processing resources of the DFL-160 and it is therefore best to keep the scanning requested to a minimum.
The Scanners Category
The Scanners IDP category is not protocol specific and is an additional precaution against attempted connections coming from the public Internet which randomly search for hosts that will respond. Often, these try and make connections on different port numbers that might allow access to a host.
The Worms and Malware Category
This category is similar to Scanners in that it is not protocol specific but provides an additional "catch all" protection against intrusion attempts that are not specific to a particular protocol.
With both Worms and Malware and Scanners, it is important to use them with caution since they will use more processing resources by increasing the scanning load. Both can be particularly useful when used for periods of time in log only mode to determine if IDP is indicating that a DFL-160 installation is being targeted by external intrusions.
4.9. Traffic Shaping
Traffic Shaping allows the administrator to control the level of flows for different types of traffic between the public Internet connected to the WAN interface and hosts on the LAN and DMZ networks.
For example, we may want to specify how much of the available bandwidth is used for FTP downloads from the internet. Traffic shaping allows us to do this by setting up a rule that triggers on FTP traffic and that has the desired maximum specified.
Instead of, or as well as, specifying a maximum we can also use traffic shaping to specify a guarantee for how much of the total bandwidth will be available for a particular traffic type. For example, we could guarantee that FTP download traffic will always get at least a tenth of the total bandwidth if it is needed. As explained later, Priorities help to resolve competing guarantees.
Setting Up traffic Shaping
After selecting the Traffic Shaping menu option in the Firewall menu, we must first click the box that enables the option.
Enable Traffic Shaping
Specifying WAN Capacity
Next, it is necessary to specify the total available maximum downstream and upstream capacity of the Internet link connected to the WAN interface.


Important: The total capacity should be correctly specified
It is important to specify the total capacity on the WAN interface as accurately as possible. Failure to do so may result in unexpected behaviour.
Adding Rules
After specifying the total capacity, we next must add Traffic Shaping Rules each of which identify a particular type of traffic to shape and what amount of bandwidth that traffic is allowed and/or what amount is to be guaranteed.
Click the Rules tab to begin adding individual traffic shaping rules.

When the Add button is pushed, the dialog for entering a traffic shaping rule is displayed.
Specifying Rules
Each rule is given a name for display purposes and then the Service associated with the rule can be specified. The Service corresponds to a protocol such as FTP. The predefined services are shown below.
| DNS | port 54 |
| FTP | port 21 |
| HTTP | port 80 |
| HTTPS | port 443 |
| POP3 | port 110 |
| RDP | Remote Desktop Protocol (port 21) |
| SMTP | Simple Mail Transfer Protocol (port 25) |
| SSH | port 22 |
| TFTP | UDP port 69 |
| VNC | port 5900 |
| VPN | L2TP, PPTP or IPsec |
| VoIP | SIP (port 5060-5061) |
Either one of the predefined services can be used or a new service can be specified in terms of the lower level protocol (for example, TCP) and the port number associated with it.


Tip: Specifying all services
It is not possible to explicitly specify all services. However, it is possible to specify a custom service with a port range that is zero to a very large number. A port range could therefore be specified as 1-65535 for all ports.
Specifying Rule Bandwidth
In the Bandwidth part of the rule definition we can specify the desired traffic limits and/or guarantees for the type of traffic that triggers this rule.
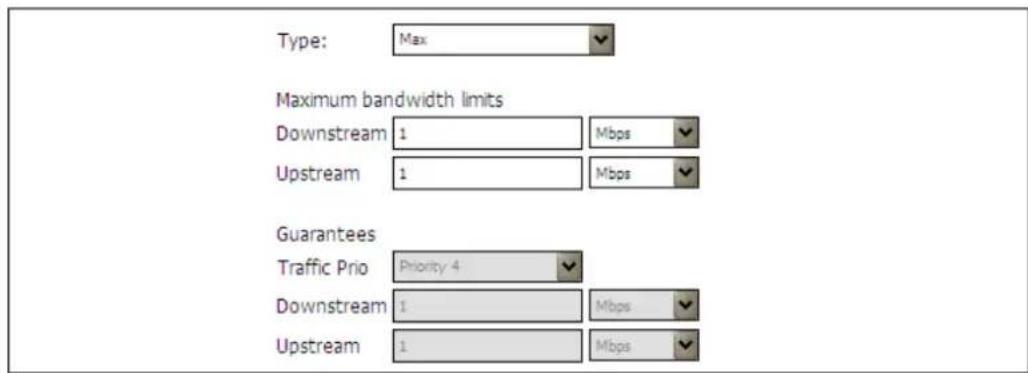
The possible types combinations that can be specified for the rule are:
• Max - Specify the maximum bandwidth only.
• Guarantee - Specify the guaranteed bandwidth only.
• Max and Guarantee - Specify both the maximum and guaranteed bandwidth.
The entry fields for the bandwidth are enabled in the interface according to the option chosen. The term Upstream means traffic leaving the WAN interface going towards the public Internet. The term Downstream is the opposite, which is traffic arriving from the public Internet.
Guarantee Priorities
If guarantees are specified then a Priority is also specified and this can take a value from 1 up to 4 (1=low, 2=normal, 3=high, 4=critical). These priorities apply when the guarantee cannot be met because of competing guarantees. The guarantee with the highest priority is met first and remaining bandwidth is used to meet guarantees with lower priorities.
Specifying Networks
If required, the traffic shaping rule can apply to a specific local network (on LAN or DMZ) and/or a specific remote network on the Internet.

If specified, the source and/or destination networks provide an alternate condition for the traffic shaping rule to trigger. The IP addresses specified can either be in one of the following forms:
• A network. For example, 192.168.10.0/24.
• An individual IP address. For example, 192.168.10.10.
• A network range. For example, 192.168.10.10-192.168.10.20.
Rules Summary
After adding a number of rules, a summary can be displayed of the defined rules and is shown as a table under the Rules tab.
| # | Name | Service | Maximum Up/Down | Guaranteed Up/Down |
| 1 | HTTP_limit | HTTP | 500kbps / 1Mbps | |
| 2 | FTP_limit | FTP | 800kbps / 800kbps | |
| 3 | RDP_guarantee | RDP | 4Mbps / 4Mbps |

Tip: Sharing the Total Bandwidth
Keep in mind when specifying a rule maximum that it should be less than the total capacity we have specified for WAN otherwise there is no reason to specify a maximum.
Similarly, a guarantee should be just a portion of the entire WAN bandwidth since the aim is to guarantee a minimum level of service for a particular type of traffic.
4.10. Schedules
Schedules are used to determine when certain features in NetDefendOS are enabled.
For instance, it may be decided to allow web surfing from clients on the LAN interface only at certain times of the day. In this case, we would create a schedule that contained the times when surfing is allowed and then associate the schedule with the enabled HTTP option of Outbound LAN Traffic in the Firewall menu options.
Schedule Usage
When creating a schedule, the administrator gives the schedule a name and it is then possible to associate the schedule with a feature using the name. The principle usage for schedules is to control when certain inbound and outbound traffic services are allowed and this is described further in:
• Section 4.1, "Outbound LAN Traffic Options".
• Section 4.2, "Outbound DMZ Traffic Options".
• Section 4.3, "Inbound Traffic Options".
Predefined Schedules
By default, a number of predefined schedules are provided that provide commonly used time arrangements.

Custom Schedules
When creating a new schedule, a grid of checkboxes is displayed which correspond to each hour in each days of the week (24 times 7 checkboxes). The left-hand checkbox is the first hour of the day (midnight to one o'clock) and so on. Clicking the checkbox indicates that the hour is to a have the associated feature enabled. An example is shown below with the first three hours of Monday checked.

A range of dates can also be specified. If no range is specified then the schedule will apply continuously once it is associated with a feature.

Adding Comments
The comments field allows some text explanation to be added to the schedule. It serves only as a reminder to the administrator what the schedule was intended for.
Chapter 5. The Tools Menu
- Ping, page 77

The Tools menu provides access to features which can be helpful in overall system operation.

The sections that follow describe the options in this menu in the order they appear.
5.1. Ping
The ICMP ping protocol provides a simple query/response tool to determine if a particular network component is alive. A ping request asks the question "are you there" on a given IP address and the response is either "yes I am" or there is no response and the request times out.
The ping page in the NetDefendOS web interface provides a simple way to issue a ping command to any IP address and also to repeat the ping request a certain number of times with a certain size of packet. The image below shows the ping dialog while waiting for a response.
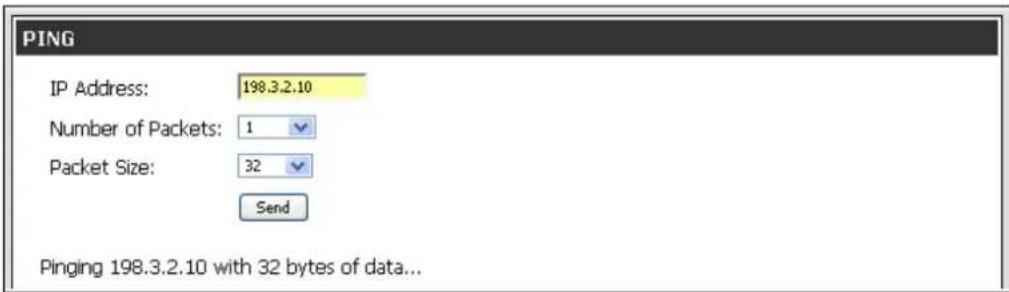
The response from a ping is expressed as the percentage of packet loss. Packet loss is 100% if no response is received as shown below.

In the case of NetDefendOS, a response to a ping request on a particular interface depends on if the administrator has enabled ping responses or not. This is discussed further in Section 3.1, "Administration".
Initiating Ping Requests from the CLI
An alternative method of issuing ping requests is to use the CLI ping command. This command is described in Appendix A, CLI Reference.
Chapter 6. The Status Menu
• System Status, page 80
- Logging Status, page 82
• Anti-Virus Status, page 83
• Web Content Filtering Status, page 84
• IDP Status, page 85
- Connections Status, page 86
• Interfaces Status, page 87
• IPsec Status, page 89
- User Authentication Status, page 90
- Routes, page 91
• DHCP Server Status, page 92

The Status menu of the DFL-160 web interface provides various views of the current status, performance and loading of the various subsystems that make up NetDefendOS.

Filtering Output
Where the status output could consist of a large number of lines of output, the web interface provides the ability to impose a filter on the output so only those lines that are of interest are displayed.
Where a large number of lines could be displayed, the convention in the web interface is to break these into 100 entry blocks and to have available up to 500 entries in total.
Status Screens are a Snapshot
It should also be kept in mind that the status screens are providing a snapshot of the system status and history at a given point in time. In many screens, a Refresh button is provided to force the status display to be updated.
The sections that follow describe the options in this menu in the order they appear.
6.1. System Status
The System Status page is the default page that is shown when the web interface opens after logging in to NetDefendOS as administrator.
The status display is divided into three parts:
A. System Resources
B. UTM Statistics
C. Log History
A. System Resources
Various graphical displays and numerical values show the current status of the DFL-160 system and how its resources are being used.
System Resources


System Information
Model:
DFL-160
System Time:
2008-10-30 00:28:19
Uptime:
0 days, 00:58:06
Configuration:
Version 10
Firmware Version:
2.25.00.04-9048
Oct 24 2008
Last Restart:
2008-10-30 00:23:32:
changes
Configuration Log:
Error(s): 0
Warning(s): 0
B. UTM Statistics
Unified Threat Management (UTM) consists of the 3 components: Anti-Virus, IDP and Web Content Filtering. If any of these features are enabled, this section gives an overview of the throughput statistics for the features.
The configuration options for setting up the different aspects of UTM can be found in Chapter 4, The Firewall Menu.
C. Log History
This table shows the last few log events generated by NetDefendOS (an example of this is shown below).
| Date | Severity | Category/ID | Event/Action |
| 2008-10-2714:01:49 | Warning | ARP300049 | invalid_arp_sender_ip_addressdrop |
| 2008-10-2714:01:49 | Warning | ARP300049 | invalid_arp_sender_ip_addressdrop |
| 2008-10-2714:01:48 | Notice | SYSTEM3203000 | admin_login |
| 2008-10-2714:01:48 | Notice | SESMGR4900001 | sesmgr_session_creatednone |
| 2008-10-2714:01:48 | Warning | ARP300049 | invalid_arp_sender_ip_addressdrop |
Clicking the More... link in the display will take you to the Logging option in the System menu for a more complete list of recent events and the filters to analyze them.
The details of NetDefendOS logging can be found in Section 3.5, "Logging".
6.2. Logging Status
Various events that occur in NetDefendOS cause log messages to created. All possible log messages generated are documented in the accompanying DFL-160 Log Reference Guide. An external SysLog server can be configured to receive these events, as described in Section 3.5, "Logging". That section also describes setting up email alerts for certain events.
As events occur, the last 500 log general messages are kept in local memory and this store is known as the NetDefendOS MemLog. Along with these 500, the last 500 from each of the Anti-Virus, Web Content Filtering and IDP subsystems are also kept in memory and these can be viewed separately.
The MemLog Display
The most recent 500 log messages from all sources (including AV, WCF and IDP) can be viewed through the Logging page of the Status menu.
Log messages are visible in 100 message blocks on the page and tools are also provided for filtering out messages of interest based on various criteria. The dialog for entering the search criteria are shown below.
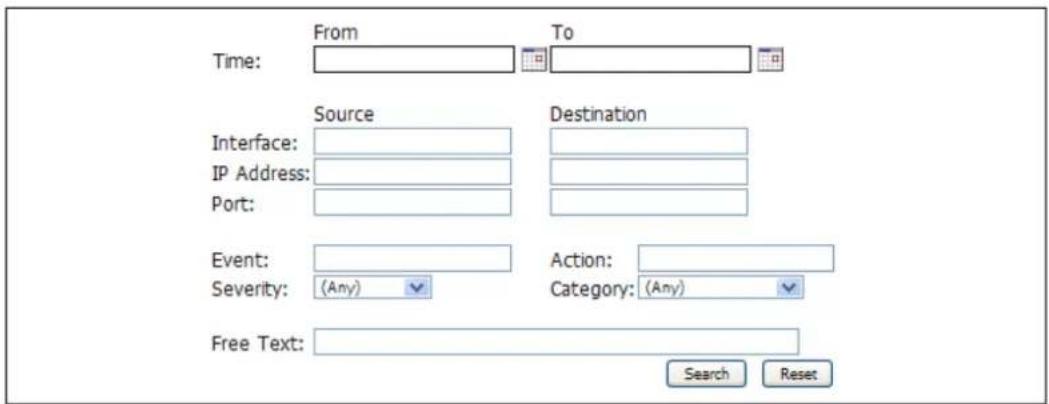
Some typical log output for the Anti-Virus subsystem is shown below.
| Date | Severity | Category/ID | Rule | Proto | Src/DstIf | Src/DstIP | Src/DstPort | Event/Action |
| 2008-10-3000:50:36 | Warning | ANTIVIRUS5800001 | TCP | lancore | 10.10.10.1081.216.65.11 | 322925 | virus_foundblock_data | |
| filename="eicar.com" virusname="EICAR-Test-File" virussig="EICAR-Test-File" advisoryid="AV1" layer7_srcinfo=algmod=smtp algsesid=1333 origsent=1323 termsent=813 Advisory link | layer7_dstinfo= | |||||||
| 2008-10-3000:49:33 | Notice | ANTIVIRUS5800003 | TCP | lancore | 10.10.10.1081.216.65.11 | 321225 | excluded_fileallow_data_without_scan | |
| filename="techsupport-20081030.txt" filetype="bt" layer7_srcinfo=termsent=813 | layer7_dstinfo= | algmod=smtp algsesid=1328 origsent=3425 | ||||||
| 2008-10-3000:34:01 | Notice | ANTIVIRUS5800003 | TCP | lancore | 10.10.10.10160.68.205.231 | 226380 | excluded_fileallow_data_without_scan | |
| filename="weekend.html" filetype="html" algmod=http algsesid=1280 origsent=1071 termsent=84 | ||||||||
6.3. Anti-Virus Status
This page of the web interface provides the ability to view and filter out the last 500 log messages generated by just the Anti-Virus subsystem.
These same messages can also appear mixed in with other messages in the Logging page in the Status menu (described in Section 6.2, "Logging Status").
Log messages are visible in 100 message blocks on the page and tools are also provided for filtering out messages of interest based on various criteria.
These messages can provide valuable feedback from the Anti-Virus system on any files being dropped because of viruses being detected.
A full description of the NetDefendOS Anti-Virus feature can be found in Section 4.7, "Anti-Virus".
6.4. Web Content Filtering Status
This page of the web interface provides the ability to view and filter out the last 500 log messages generated by just the Web Content Filtering (WCF) subsystem.
These same messages can also appear mixed in with other messages in the Logging page in the Status menu (described in Section 6.2, "Logging Status").
Log messages are visible in 100 message blocks on the page and tools are also provided for filtering out messages of interest based on various criteria.
These messages can provide valuable feedback from the WCF subsystem on the surfing habits of internal users and which URL accesses are being denied..
A full description of the NetDefendOS Web Content Filtering feature can be found in Section 4.6, "Web Content Filtering".
6.5. IDP Status
This page of the web interface provides the ability to view and filter out the last 500 log messages generated by just the IDP subsystem.
These same messages can also appear mixed in with other messages in the Logging page in the Status menu (described in Section 6.2, "Logging Status").
Log messages are visible in 100 message blocks on the page and tools are also provided for filtering out messages of interest based on various criteria.
These messages can provide valuable feedback from the IDP system on what kinds of threats are being detected.
A full description of the NetDefendOS IDP feature can be found in Section 4.8, "IDP Options".
6.6. Connections Status
A connection in NetDefendOS refers to either a normal TCP/IP connection set up to perform a transfer of data or a UDP packet based "connection", where a stream of packets is being sent from a sender to a receiver (such as in a streaming video transfer).
This page of the web interface shows the currently established connections. The list shows the protocol (TCP or UDP), the source IP address and the destination IP address of the connection. A example of the information displayed is shown below.
| State table contents (max 100 entries) | ||||
| State | Proto | Source | Destination | Timeout |
| RAWIP | ESP | wan:10.6.200,3:0 | core:10.6.28.160:0 | 129 |
| PING | ICMP | lan:192.168.1.11:1280 | core:192.168.1.1:1280 | 7 |
| UDP | UDP | lan:192.168.1.100:123 | wan:207.46.197,32:123 | 106 |
| UDP | UDP | core:0.0.0.0:0 | core:10.6.28.160:1701 | 108 |
| UDP | UDP | core:10.6.28.160:1701 | IPsec_RemoteUsers_WinXP:10.6.200.3:1701 | 129 |
| UDP | UDP | RemoteUsers_WinXP:192.168.1.150:137 | wan:255.255.255.255:137 | 127 |
| FIN_RCVD | TCP | core:10.6.28.160:29947 | wan:10.6.0.17:80 | 62 |
| FIN_RCVD | TCP | lan:192.168.1.100:1141 | core:10.6.0.17:80 | 75 |
| UDP | UDP | lan:192.168.1.100:1025 | wan:192.168.1.1:53 | 106 |
| FIN_RCVD | TCP | lan:192.168.1.100:1139 | core:10.6.0.17:80 | 71 |
| FIN_RCVD | TCP | lan:192.168.1.100:1142 | core:10.6.0.17:80 | 78 |
| FIN_RCVD | TCP | lan:192.168.1.100:1140 | core:10.6.0.17:80 | 78 |
| TCP_OPEN | TCP | core:10.6.28.160:2009 | wan:10.6.0.17:80 | 262142 |
| TCP_OPEN | TCP | lan:192.168.1.100:1143 | core:10.6.0.17:80 | 262142 |
| TCP_OPEN | TCP | core:10.6.28.160:13116 | wan:10.6.0.17:80 | 262142 |
| TCP_OPEN | TCP | lan:192.168.1.100:1144 | core:10.6.0.17:80 | 262142 |
| TCP_OPEN | TCP | lan:192.168.1.11:2458 | core:192.168.1.1:443 | 262144 |
Where the source of destination address is marked as core this means that it is NetDefendOS itself that is dealing with the connection.
The ability to filter the connections is possible based on specific combinations of source/destination IP address/interface.
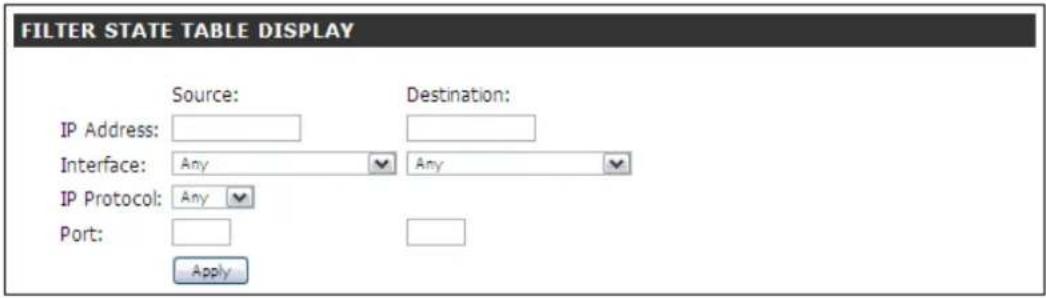
6.7. Interfaces Status
This option can show the current status for each of the DFL-160 interfaces. When one of the interfaces is selected from a drop-down box in this page, information about the interface's status is displayed, both in numerical and graphical form. The sections displayed for the chosen interface are:
A. Interface Status
B. Driver Information/Hardware Statistics
C. Throughput Statistics
A. Interface Status
The general information for the chosen interface is displayed. The example below is for the DMZ interface.
| Interface: | dmz |
| IP Address: | 192.168.2.1 |
| Link Status: | 100 Mbps Full Duplex |
| MAC Address: | 00-e0-4c-69-21-5 |
| Send Rate: | 712 kbps |
| Receive Rate: | 33720 kbps |
B. Driver Information/Hardware Statistics
This section of the display shows summary performance values for the chosen interface. An example of the typical output is shown below.
| IN : packets=712675811 | bytes=2187616505 | errors= | 0 | dropped= | 0 |
| OUT: packets=356556501 | bytes=4213800359 | errors= | 0 | dropped= | 8 |
| Multicast packets : | 0 | ||||
| Collisions : | 0 | ||||
| In : Length Errors : | 0 | ||||
| In : Overruns : | 0 | ||||
| In : CRC Errors : | 0 | ||||
| In : Frame Errors : | 0 | ||||
| In : FIFO Overruns : | 0 | ||||
| In : Packets Missed : | 0 | ||||
| Out: Sends Aborted : | 0 | ||||
| Out: Carrier Errors : | 0 | ||||
| Out: FIFO Underruns : | 0 | ||||
| Out: Late Collisions : | 0 |
C. Throughput Statistics
The throughput statistics over the last 24 hours are shown in graphical form as shown below. First, are the statistics for sent (outgoing) traffic. An example of this is shown below (the image is truncated on the right side).
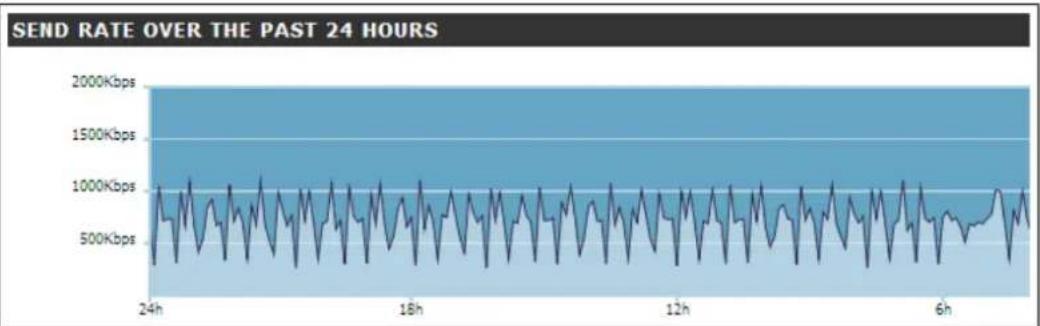
Secondly, the statistics for received (incoming) traffic are shown over the last 24 hours. An example is shown below (the image is also truncated on the right side).

6.8. IPsec Status
List VPN Interfaces
This option (the default) shows all the currently established VPN tunnels (also known as VPN interfaces). An example of this display is shown below.
| IPSEC STATUS | |
| IPsec Interface: | IPsec_RemoteUsers_WinXP |
| Name: | IPsec_RemoteUsers_WinXP |
| Local IP: | 10.6.28.160 |
| Broadcast: | 0.0.0.0 |
| Local Network: | 10.6.28.160 |
| Remote Network: | 0.0.0.0/0 |
| Remote Gateway: | 0.0.0.0/0 |
| IKE Mode: | Main |
| D-H modp group: | 2 |
| NAT Traversal: | Enabled if needed and supported by the remote peer |
| SA per: | Net |
| PFS: | Disabled |
| Config Mode: | Disabled |
| DHCP over IPsec: | Disabled |
| Add Route: | Enabled |
| XAUTH Client: | Disabled |
| XAUTH: | Disabled |
| Keep-alive: | Disabled |
| Authentication: | PSK: L2TPServ_RemoteUsers_WinXP |
| MTU: | 1420 |
| Send Rate: | 0 kbps |
| Receive Rate: | 0 kbps |
List all active IKE SAs
An IKE Security Association (SA) is an entity that defines the encryption methods and other parameters that will be used for data flowing from one end of an IPsec tunnel to the other. SAs are set up after the two ends of a VPN tunnel use the Internet Exchange Protocol (IKE) to agree how they will communicate. A single SA applies to data flowing in only one direction and for that reason an IPsec tunnel usually has two SAs set up.
An example of the SA status display is shown below.
| Remote Gateway | Local Net | Remote net | Protocol |
| 10.6.200.4 | 10.6.28.160 | 10.6.200.4 | 3des-cbc |
| 10.6.200.3 | 10.6.28.160 | 10.6.200.3 | 3des-cbc |
6.9. User Authentication Status
This page of the web interface displays the users who have been authenticated and are using a VPN tunnel. An example of the user authentication display is shown below.
| Username | IP Address | Interface | Timeout | Idle Timeout | Logged in as | Forcibly Log Out |
| Mark | 192.168.1.151 | RemoteUsers_WinXP | 28m | |||
| Anna | 192.168.1.150 | RemoteUsers_WinXP | 27m |
The Forcibly Logout Option
For each user, the administrator has the option to force a logout of a user with this option. This can be useful if suspicious activity is seen coming from a particular logged in user.
6.10. Routes
A Brief Overview of Routing
A list of all routes are maintained by NetDefendOS in its internal routing table. The routing table indicates which networks can be found on which interface. When traffic arrives at the DFL-160 on one interface, the routing table is consulted by NetDefendOS to determine on which interface the traffic should be forwarded so it gets to its intended destination. When the routing table is consulted, the route chosen is the one that has the narrowest match to the destination IP address being looked up (this is explained further below).
The traffic forwarding function performed with the help of the routing table is the primary task of any device which is called a router. It is also one of the primary tasks of the DFL-160 and in most cases the routes in the NetDefendOS routing table are created automatically without intervention from the administrator.
The image below shows a typical example of the status display for the NetDefendOS routing table.
| Routing table contents (max 100 entries) | |||||
| Flags | Network | Interface | Gateway | Local IP | Metric |
| DA | 192.168.1.150 | RemoteUsers_WinXP | 0 | ||
| D | 10.6.200.3 | IPsec_RemoteUsers_WinXP | 0 | ||
| 192.168.1.0/24 | lan | 100 | |||
| 192.168.2.0/24 | dmz | 100 | |||
| 10.6.0.0/16 | wan | 100 | |||
| 0.0.0.0/0 | wan | 10.6.0.1 | 100 | ||
The 0.0.0.0/0 Route
When NetDefendOS looks up the routing table, it searches for a route which is the closest match possible for the IP address it is trying to find a route to. The routing table always contains a "catch all" route which points to the IP address 0.0.0.0/0 which is a special IP address that means "all networks". This route is, by default, assigned to the WAN interface since if NetDefendOS cannot find an IP address on the LAN or DMZ interface, then it must be on the public Internet.
The Route Metric
Routing metrics are one of the criteria routing algorithms use to compute the "best" route to a destination. A routing protocol relies on one or several metrics to evaluate links across a network and to determine the optimal path.
6.11. DHCP Server Status
As explained in Section 3.3, "LAN Settings" and Section 3.4, "DMZ Settings", the LAN and DMZ interfaces can be configured to act as DHCP servers, allocating IP addresses from a predefined IP range to any users or hosts that require them.
This option in the Status menu allows the administrator to see which DHCP servers are configured and the status of these servers. Each line is the display shows the current usage of a DHCP server and provides the ability to drill down to show the current Leases and Mappings for that server.
| Name | Interface | IP Span | |||
| DHCPSRvlan | lan | 10.6.58.20/30 | 0% | Leases | Mappings |
| DHCPSRvdmz | dmz | 192.168.2.100-.149 | 0% | Leases | Mappings |
Chapter 7. The Maintenance Menu
• The Update Center, page 94
- Licenses, page 96
- Backups, page 98
- Reset to Factory Defaults, page 99
- Upgrades, page 100
• Technical Support, page 101

The Maintenance menu options deal with routine administrative tasks such as backups and software upgrades.

The sections that follow describe the options in this menu in the order they appear.
7.1. The Update Center
The Update Center refers to the external network of D-Link servers that supply updates for the Anti-Virus and IDP databases. This portion of the web interface is divided into 3 tabs:
A. General
B. Update Interval
C. History
A. General
This section of the user interface allows the administrator to enable or disable the automatic updating of the IDP and Anti-Virus databases.
The Register at D-Link's Portal button opens a web browser window at the page for registering for the IDP or Anti-Virus service after purchase from a D-Link agent.
B. Update Interval
These options allow the frequency of the update interval to be determined. The recommendation is to select a time during a day when there is little user activity through the DFL-160. Typically, this might be in the early hours of the morning.
The default interval is Daily and this is recommended to keep the databases updated with the latest releases. It is not often that the databases are updated more than once in a day.
C. History
This tab shows the history of recent database updates and can also indicate if there were problems with server access or downloading.
7.2. Licenses
The license page shows information about the current license installed in the DFL-160. When the DFL-160 is initially delivered it comes with a standard license preinstalled which determines the capabilities of the system.
Add On Services
It is possible to expand the capabilities of the DFL-160 by purchasing a license for any of the following features:
- Anti-Virus
This option enables NetDefendOS to scan for viruses in any files downloaded to the unit, such as those that might be contained in HTTP or FTP downloads.
• Intrusion Detection and Prevention (IDP)
This option enables NetDefendOS to scan traffic for patterns that indicate attempted network intrusions. These are most often directed against internal servers.
- Web Content Filtering
The option enables NetDefendOS to check the URLs requested during web surfing to see if the content type at the URL is allowed by administrator defined policies.
Activating a Service
After buying a subscription to a new service from your D-Link distributor or sales office, an activation code is received which can then be entered into the license page to activate the service.
License Properties
Each DFL-160 comes pre-installed with a standard NetDefendOS license. This page of the web interface shows the contents of the current license. The license determines the maximum capabilities of the system and the parameters in a license are as follows:
- Connections
This is the number of connections that can exist between interfaces in the NetDefendOS. A connection refers to a logical concept in the state engine of the NetDefendOS software. A single TCP based transfer can be regarded as a single connections but a UDP based data stream, such as used with VOIP data transfers, can also be viewed as consisting of a connection.
The connection restriction can result in limitations on the total number of client users that can be accessing Internet based facilities at the same time.
- Rules
This is the maximum number of IP rules that can be created by NetDefendOS. An IP rule determines what protocols can flow between what interfaces in the DFL-160. The default value is normally sufficient.
- IPsec Tunnels
The maximum number of IPsec tunnels which terminate at the WAN interface that can be created.
- PPP Tunnels
The maximum number of PPP tunnels which terminate at the WAN interface that can be created.
To expand the capabilities of the standard product license, consult with your local D-Link representative.
7.3. Backups
The administrator has the ability to take a snapshot of a NetDefendOS system at a given point in time and restore it when necessary. The snapshot can be of two types:
- A configuration backup which does not include the installed NetDefendOS version. This is a recommended precaution to allow the configuration at a given point in time to be restored provided the NetDefendOS version does not change.
- A system backup which is a complete backup of both the configuration and the installed NetDefendOS software. This is a recommended precaution if both the configuration is to be changed and the NetDefendOS version is upgraded.
To restore a backup file, the administrator should upload a backup file to the DFL-160. The name of the file does not really matter since NetDefendOS will read a header in the file to determine what it is.
Backups Do Not Contain Everything
Backups include only static information from the NetDefendOS configuration. Dynamic information such as the DHCP server lease database or Anti-Virus/IDP databases will not be backed up.
Operation Interruption
Backups can be created at any time without disturbing NetDefendOS operation. After restoring a backup it is necessary to perform an Activate to make the restored configuration/system active.
Restoring and activating a configuration-only backup should not, in most cases, disturb system operation. Complete system restore, however, is more involved and will require that NetDefendOS reinitializes, with the loss of all existing connections. Initialization may require some seconds to complete depending on the hardware type and normal operation will not be possible during this time.
7.4. Reset to Factory Defaults
Reset Through Software
A restore to factory defaults can be applied so that it is possible to return to the original hardware state that existed when the DFL-160 was shipped by D-Link. When a restore is applied in this way, all configuration data is lost and the IDP and Ant-Virus databases are lost which means they must be reloaded.
Performing a Reset Manually
An alternative way to reset the DFL-160 is to push in the reset button at the rear of the unit for 10 to 15 seconds while powering it on. After that, release the reset button and the unit will continue to load and start up in default mode as though it were brand new and had never been configured. A simple tool such as the tip of a pencil or pen could be used to hold the reset button in.


Warning: Do not abort a reset to factory defaults
DO NOT STOP THE RESET TO FACTORY DEFAULTS PROCESS PREMATURELY. If the factory default reset process is interrupted, the DFL-160 can cease to function properly since its memory may be left in an inconsistent internal state.
End of Life Procedures
The restore to factory defaults option should also be used as part of the end of life procedure when a DFL-160 is taken out of operation and will no longer be used. As part of the decommissioning procedure, a restore to factory defaults should always be run in order to remove all sensitive information such as VPN settings.
As a further precaution at the end of the product's life, it is also recommended that the memory media in a DFL-160 is destroyed and certified as destroyed by a suitable provider of computer disposal services.
7.5. Upgrades
New releases of NetDefendOS are routinely made available by NetDefendOS. These releases are available as a single file which can be uploaded to the DFL-160 through this page in the web interface.
NetDefendOS upgrades can be downloaded for free from your local D-Link site or from the D-Link NetDefend Center at http://security.dlink.com.tw.
7.6. Technical Support
This section of the web interface allows the user to easily download a file of useful troubleshooting information that can be emailed to technical support personnel.
After clicking on the button Download support file, a file is automatically generated by the NetDefendOS and downloaded to the web interface and can be saved to the local disk.
The techsupport CLI Command
This file contains the same information that can also be generated on a console with the CLI command:
DFL-160:/> techsupport
Chapter 8. The Console Boot Menu
The NetDefendOS loader is the base software on top of which NetDefendOS runs and the administrator's direct interface to this is called the console boot menu (also known simply as the boot menu). This section discusses the boot menu options.
Accessing the Console Boot Menu
The boot menu is only accessible through a console device attached directly to the serial console located on the DFL-160 (see Section 2.4, "Console Port Connection").
The boot menu can be accessed through the console port after the DFL-160 is powered up and before NetDefendOS is ready. After powering up, there is a 3 second interval before NetDefendOS fully starts up and in that time the message Press any key to abort and load boot menu is displayed, as shown below.

If any console key is pressed during these 3 seconds then NetDefendOS startup pauses and the console boot menu is displayed.
Initial Boot Menu Options without a Password Set
When NetDefendOS is started for the first time with no console password set for console access then the full set of boot menu options are displayed as shown below.

The options available in the boot menu are:
1. Start firewall
This initiates the complete startup of the NetDefendOS software on the DFL-160.
2. Reset unit to factory defaults
This option will restore the hardware to its initial factory state. The operations performed if this option is selected are the following:
- Remove console security so there is no console password.
- Restore default NetDefendOS executables along with the default configuration.
3. Revert to default configuration
This will only reset the configuration to be the original, default NetDefendOS configuration file. Other options, such as console security, will not be affected.
4. Set console password
A password should be set for console access. If a password is not set, anyone can use the console. After it is set, the console will prompt for the password before access is allowed to either the boot menu or the command line interface (CLI) (more on the CLI can be found in Appendix A, CLI Reference).
Initial Options with a Console Password Set
If a console password is set then the initial options that appear when NetDefendOS loading is interrupted with a key press are shown below.

The Start firewall option re-continues the interrupted NetDefendOS startup process. If the Login option is chosen, the console password must be entered and the full boot menu described above is entered.
Removing the Console Password
Once the console password is set it can be removed by selecting the Set console password option in the boot menu and entering nothing as the password and just pressing the Enter key to the prompt.
The Console Password is only for the Console
The password set for the console is not connected to the management passwords used for administrator access through a web browser. It is valid only for console access.
Chapter 9. Troubleshooting
When the DFL-160 does not behave as expected, the following CLI tools are available to troubleshoot problems.
The stat CLI Command
If a serious NetDefendOS problem is suspected then the first step should be to use the console command:
> stat
The stat command will indicate the date and time of the last system shutdown and can indicate if there has been a serious error in NetDefendOS operation. It should be remembered however that the buffer which stat uses is cleared by certain operations such a reconfigure and the output will not therefore show what occurred prior to buffer clearance.
The dconsole CLI Command
The next step if to use the console command:
> dconsole
This can be abbreviated to:
> dcon
The dconsole command provides a list of important events in NetDefendOS operation and can help to establish the date, time and nature of events leading up to a serious problem occurring. The output might look similar like the following:
Showing diagnose entries since 2008-05-22:
2008-06-21 11:54:58 Start (2.27.00-0:131)
2008-06-21 11:56:16 Stop (RECONFIGURE)
2008-06-21 11:56:21 Start (2.27.00-0:131)
2008-06-21 11:57:29 Stop (RECONFIGURE)
2008-06-21 11:59:31 Start (2.27.00-0:131)
2008-06-21 11:59:49 Stop (NORMAL)
dconsole output above may include a dump of the system memory in the case of serious runtime errors. This will look similar like the following:
Reason: Exception 'DataAbort' occurred at address 0x7aaea34
Generation date/time: 2008-07-04 14:23:56 List of loaded PE-modules:
fwloader(1.07.04): BA:0x00100000, EP:0x00101028, SS:0x0, IS:0xe7000
fwcore(82.27.00-2336): BA:0x07761038, EP:0x0007c630 Register dump:
r0 : 0xe1a0003c, r1 : 0x07c685dc, r2 : 0x00000004, r3 : 0x50013700,
r4 : 0x06cb2d04, r5 : 0x0753a740, r6 : 0x050ce1f8, r7 : 0x00000000,
r8 : 0x0753a79c, r9 : 0x050ce1f8, r10 : 0x00000000, r11 : 0x0775ff34,
r12 : 0x00000004, sp : 0x0775fce, lr : 0x079de7e4 Stack dump:
5da89306 c33613f4 c330cfc5 04411507 45515a49 86619f8b c0db0a81
4e395861 cb25b796 e3108934 932766c5 4dcff9e9 711c3463 b9cd5d1e
52149961 9324dea3 d340dc25 15458610 63582ded 689a0c54 dfb43131
02c7d971 a0ebb72c bfaae832 db216923 08ba693b 95e4de97 98d121a2
:
Although dconsole output may be difficult to interpret by the administrator, it can be emailed to D-Link support representatives for further investigation. The dconsole command supersedes the crashdump command found in earlier versions of NetDefendOS.
Restarting
If a system is in a non-functional "frozen" state then system restart can offer a simple way to clear all error conditions. This can take a few minutes and while restart occurs no traffic can flow through the unit. All connections will be lost, including any VPN tunnels, and these will have to be re-established after restart.
Restarting can be regarded as a last resort when dealing with system problems but is perhaps the only solution when all other methods of troubleshooting are exhausted.
Appendix A. CLI Reference
This section summarizes in alphabetical order the command set that can be entered through a console connected to the RS232 console port on the DFL-160.
Details of how to connect up a console device to the console COM port on the DFL-160 can be found in Section 2.4, "Console Port Connection". Once the connection is made and NetDefendOS has started up, pressing the Enter key on the console should get a CLI prompt response on the console:
DFL-160:/>
It is advisable to use the Boot Menu to place a password on access through the console port to prevent unauthorized access. How to do this is described in Chapter 8, The Console Boot Menu.
About
Display information about the version of NetDefendOS currently running on the DFL-160.
Syntax: about
ARP
Displays ARP entries for the specified interface(s). Published, static as well as dynamic items are shown.
Syntax: arp [options]
Options:
-ip <pattern> - Display only IP addresses matching <pattern>.
-hw <pattern> - Display only hardware addresses matching <pattern>.
-num <n> - Display only the first <n> entries per iface (default: 20).
-hashinfo - Display information on hash table health.
-flush - Flush ARP cache of ALL interfaces.
-flushif - Flush ARP cache of an iface.
Example:
DFL-160:/> arp wan
ARP cache of iface wan
Dynamic 194.2.1.1 = 0020:d216:5eec Expire=141
ARPSnoop
Toggles the on-screen display of ARP queries. This command can be of great help in configuring the hardware, since it shows which IP addresses are heard on each interface.
Syntax: arpsnoop
Toggle snooping on given interfaces.
Syntax: arpsnoop all
Snoop all interfaces.
Syntax: arpsnoop none
Disable all snooping.
Example:
DFL-160:/>arpsnoop all
ARP snooping active on interfaces: lan wan dmz
ARP on wan: gw-world requesting wan_ip
ARP on lan: 192.168.123.5 requesting lan_ip
Buffers
This command can be useful for troubleshooting. For example, if an unexpectedly large number of packets begin queuing or when traffic does not seem to be flowing for an unknown reason. By analyzing the contents of the buffers, it is possible to determine whether such traffic is making it to the DFL-160 at all.
Syntax: buffers
Brings up a list of most recently freed buffers.
Example:
DFL-160:/> buff
Displaying the 20 most recently freed buffers
RecvIf Num Size Protocol Sender Destination
wan 1224 121 UDP 192.168.3.183 192.168.123.137
lan 837 131 UDP 192.168.123.137 192.168.3.183
wan 474 112 UDP 192.168.3.183 192.168.123.137
wan 395 91 UDP 192.168.3.183 192.168.123.137
lan 419 142 UDP 192.168.123.137 192.168.3.183
wan 543 322 UDP 194.2.1.50 192.168.123.182
lan 962 60 UDP 192.168.123.182 194.2.1.50
lan 687 60 ARP 0080:ad87:e592 ffff:ffff:ffff
wan 268 88 UDP 192.168.3.183 192.168.123.137
lan 249 101 UDP 192.168.123.137 192.168.3.183
wan 219 60 TCP 193.12.33.105 192.168.123.12
lan 647 60 ARP 0010:a707:dd31 ffff:ffff:ffff
wan 1185 98 UDP 192.168.3.183 192.168.123.137
lan 912 98 UDP 192.168.123.137 192.168.3.183
wan 682 112 UDP 192.168.3.183 192.168.123.137
lan 544 60 TCP 192.168.123.12 194.2.1.50
lan 633 60 TCP 192.168.123.26 194.2.1.50
lan 447 60 TCP 192.168.123.25 194.2.1.50
lan 645 60 TCP 192.168.123.23 194.2.1.50
lan 643 123 UDP 192.168.123.137 192.168.3.183
Syntax: buffer
Shows the contents of the specified buffer.
Example:
DFL-160:/> buff 1059
Decode of buffer number 1059
lan: Enet 0050:dadf:7bbf > 0003:325c:cc00 type 0x0800 len 1058
IP 192.168.123.10 -> 193.13.79.1 IHL:20
DataLen:1024 TTL:254 Proto:ICMP
ICMP Echo reply ID:6666 Seq:0
Syntax: buffer
Shows the contents of the most recently used buffer.
Example:
DFL-160:/> buff .
Decode of buffer number 1059
lan: Enet 0050:dadf:7bbf > 0003:325c:cc00 type 0x0800 len 1058
IP 192.168.123.10 -> 193.13.79.1 IHL:20
DataLen:1024 TTL:254 Proto:ICMP
ICMP Echo reply ID:6666 Seq:0
CfgLog
Shows the results of the most recent reconfiguration or start up of the firewall. This text is the same as is shown on-screen during reconfiguration or start up.
Syntax: cfglog
Example:
DFL-160:/> cfglog
Configuration log:
Configuring from FWCore_N.cfg
Configuration done
Configuration "FWCore_N.cfg" (v153)
verified for bi-directional communication
Connections
Shows the last 20 connections opened through the DFL-160. Connections are created when traffic is permitted to pass via Allow or NAT rules. Traffic permitted to pass under FwdFast is not included in this list. Each connection has two timeout values, one in each direction. These are updated when the firewall receives packets from each end of the connection. The value shown in the Timeout column is the lower of the two values.
Possible values in the State column include:
SYN_RECV TCP packet with SYN flag received.
SYNACK_S TCP packet with SYN + ACK flags sent.
ACK_RECV TCP packet with ACK flag received.
TCP_OPEN TCP packet with ACK flag sent.
FIN_RECV TCP packet with FIN / RST flag received.
PING The connection is an ICMP ECHO connection.
UDP The connection is a UDP connection.
RAWIP The connection uses an IP protocol other than TCP, UDP or ICMP.
Syntax: connections
Example:
DFL-160:/> conn
State Prot Source Destination Time
TCP_OPEN TCP wan:60.20.37.6:5432 dmz:wwwsrv:80 3600
SYN_RECV TCP wan:60.20.37.6:5433 dmz:wwwsrv:80 30
UDP_OPEN UDP lan:10.5.3.2:5433 dmz:dnssrv:53 50
Crashdump
Displays the contents of the file crashdump.dmp stored by NetDefendOS. The file contains critical diagnostic information which can help determine the reason for a critical system event.
Syntax: crashdump
Dconsole
Displays a list of event information that is useful in pinpointing the occurrence of critical system errors.
Syntax: dconsole
DHCP
Syntax: dhcp [options]
Options:
-renew - Force interface to renew its lease.
-release - Force interface to release its lease.
Example:
DFL-160:/> dhcp -renew wan
DHCPServer
Show the contents of the DHCP server configuration section and active DHCP leases.
Syntax: dhcpserver [options]
Options:
-rules - Shows dhcp server rules.
-leases - Shows dhcp server leases.
-mappings - Shows dhcp server IP=>MAC mappings.
-release - Releases an active or blacklisted IP.
Example:
DFL-160:/> dhcpserver
Contents of the DHCP-Server rule set; default action is IGNORE
<h1 id="source-pool-gateway-dns1-ltime">Source Pool Gateway DNS1 LTime</h1>
1 lan 192.168.32.1-.39.1, ... 192.168.39.254 192.168.39.253 10800
Active DHCP sessions:
Rule Iface Client MAC Client IP Expire
1 lan 000f:3d0f:797a 192.168.32.212 10746
1 lan 0050:8df5:24a3 192.168.37.88 10700
1 lan 000f:3d3f:c409 192.168.34.96 10678
1 lan 000d:8802:61cd 192.168.34.175 10574
1 lan 000f:3dlf:a3cc 192.168.34.154 10549
1 lan 0030:f12e:587f 192.168.38.220 10529
DNS
Show what external DNS servers are configured for domain name lookups. Up to 3 servers can be configured.
Syntax: dns
Options:
-list - List pending DNS queries.
-query=
Example:
DFL-160:/> dns
DNS client is initialized.
Using servers:
DNS Server 0 : 10.5.0.19
DNS Server 1 : Not set
DNS Server 2 : Not set
Frags
Shows the 20 most recent fragment reassembly attempts. This includes both ongoing and completed attempts.
Syntax: frags
Example:
DFL-160:/> frags
RecvIf Num State Source Destination Proto Next Timeout
lan 2 Done 10.5.3.2 26.23.5.4 ICMP 2000 58
wan 8 Accept 23.3.8.4 10.5.3.2 ICMP 1480 60
HTTPPoster
Show the configured httpposter URLs and status.
Syntax: httpposter [options]
Options:
-repost - Re-post all URLs now.
Example:
DFL-160:/> httpposter
HTTPPoster_URL1:
Host : ""
Port : 0
Path : ""
Post : ""
User : ""
Pass : ""
Status: (not configured)

HTTPPoster_URL2:
Host : ""
Port : 0
Path : ""
Post : ""
User : ""
Pass : ""
Status: (not configured)
HTTPPoster_URL3:
Host : ""
Port : 0
Path : ""
Post : ""
User : ""
Pass : ""
Status: (not configured)
IfStat
Syntax: ifstat
Shows a list of the interfaces installed.
Example:
DFL-160:/> ifstat
Configured interfaces:
Iface IP Address PBR membership Interface type
core 127.0.0.1 <all> Null (sink)
mgmt 10.9.0.36 <all> Builtin e100 - Intel(R) 8255..
wan 172.16.87.252 <all> Builtin e100 - Intel(R) 8255..
lan 192.168.121.1 <all> Builtin e100 - Intel(R) 8255..
pptp 10.10.240.131 <all> PPTP tunnel to 192.168.23.1
Syntax: ifstat
Shows hardware and software statistics for the specified NIC.
Example:
DFL-160:/> ifstat lan

Iface lan
Builtin e1000 - Intel(R) PRO/1000 T Server Adapter Slot 2/1 IRQ 5
Media : "1000BaseTx"
Speed : 1000 Mbps Full Duplex
MTU : 1500
Link Partner :
10BASE-T, 10BASE-T FD, 100BASE-TX, 100BASE-TX FD, 1000BASE-TX F
Bus Type : PCI 64-bit/33MHz
IP Address : 192.168.123.1
Hw Address : 00-03-47-ab-ea-25

Software Statistics:
Soft received : 193075 Soft sent : 212480 Send failures : 0
Dropped : 0 IP Input Errs : 0

Hardware statistics:
IN : packets= 193074 bytes=36524718 errors= 10 dropped= 10
OUT: packets= 212646 bytes=208065794 errors= 0 dropped= 0
Collisions : 0
In : Length Errors : 0
In : Overruns : 0
In : CRC Errors : 0
In : Frame Errors : 0
In : FIFO Overruns : 0
In : Packets Missed : 0
Out: Sends Aborted : 0
Out: Carrier Errors : 0
Out: FIFO Underruns : 0
Out: SQE Errors : 0
Out: Late Collisions : 0
The Dropped counter in the software section states the number of packets discarded as the result of structural integrity tests or rule set drops. The IP Input Errs counter in the software section specifies the number of packets discarded due to checksum errors or IP headers broken beyond recognition. The latter is most likely the result of local network problems rather than remote attacks.
Ikesnoop
Ikesnoop is used to diagnose problems with IPsec tunnels.
Syntax: ikesnoop
Display current ikesnoop status.
Syntax: ikesnoop -off
Turn IKE snooping off.
Syntax: ikesnoop -on [ipaddr]
Turn IKE snooping on, if an IP is specified then only IKE traffic from that IP will be shown.
Syntax: ikesnoop -verbose [ipaddr]
Enable verbose output, if an IP is specified then only IKE traffic from that IP will be shown.
IPsecstats
Display connected IPsec VPN gateways and remote clients.
Syntax: ipsecstats
Options:
-u - Append SA usage.
-num
Example:
DFL-160:/> ipsecstats
--- IPsec SAs:
Displaying one line per SA-bundle
VPN Tunnel Local net Remote net Remote GW
vpn-home 192.168.123.0/24 192.168.1.2/32 192.168.1.2/32
IPsectunnels
Display configured IPsec VPN connections.
Syntax: ipsectunnels
Example:
DFL-160:/> ipsectunnel
No Name Local Net Remote Net Remote GW
1 vpn-home 192.168.123.0/24 0.0.0.0 0.0.0.0/0
Killsa
Kills all IPsec and IKE SAs for the specified IP-address.
Syntax: killsa
Example:
DFL-160:/> killsa 192.168.0.2
Destroying all IPsec & IKE SAs for remote peer 192.168.0.2
License
Shows the content of the license-file.
Syntax: license
Lockdown
Sets local lockdown on or off. During local lockdown, only traffic from admin nets to NetDefendOS itself is allowed. Everything else is dropped. Note: If local lockdown has been set by NetDefendOS itself due to licensing or configuration problems, this command will NOT remove the lock.
Syntax: lockdown [ on | off ]
Logout
Only works on the serial or local console, it is used to logout the current user and enable the password.
Syntax: logout
Memory
Displays core memory consumption. Also displays detailed memory use of some components and lists.
Syntax: memory
Ping
Sends a specified number of ICMP Echo Request packets to a given destination. All packets are sent in immediate succession rather than one per second and this behavior is best suited for diagnosing connectivity problems. Pinging can optionally be done on specific ports using UDP or TCP.
Syntax: ping
Options:
-r
-s
-p


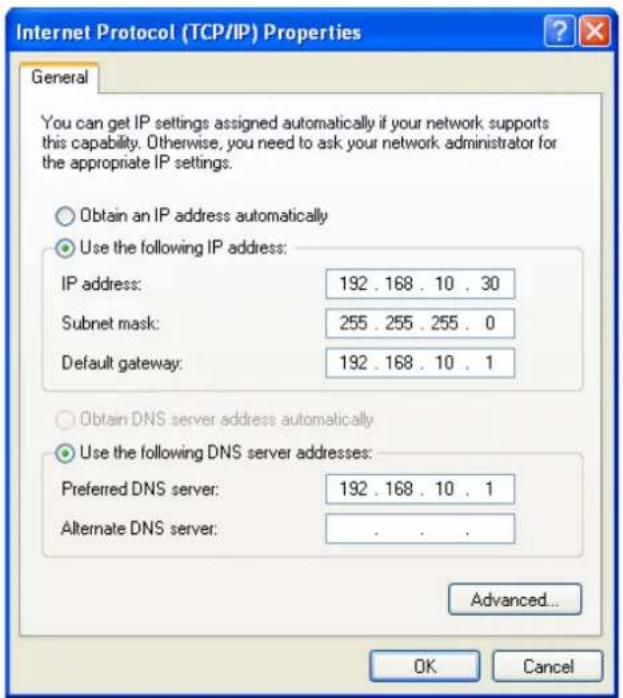



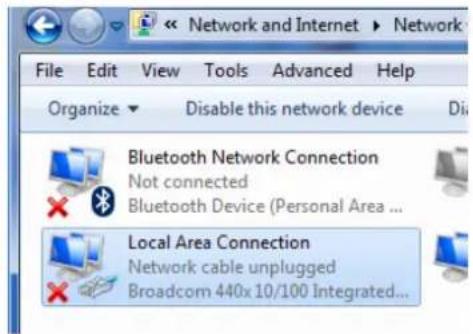

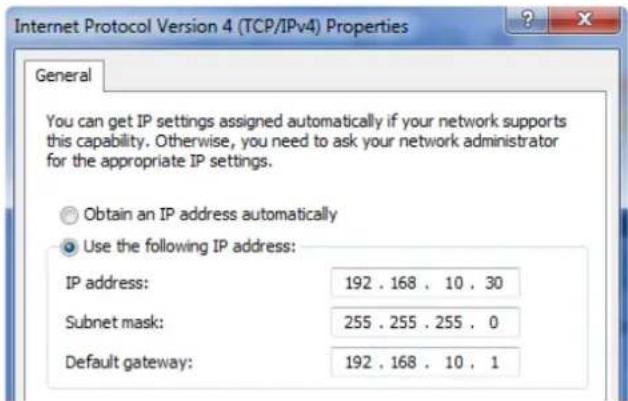

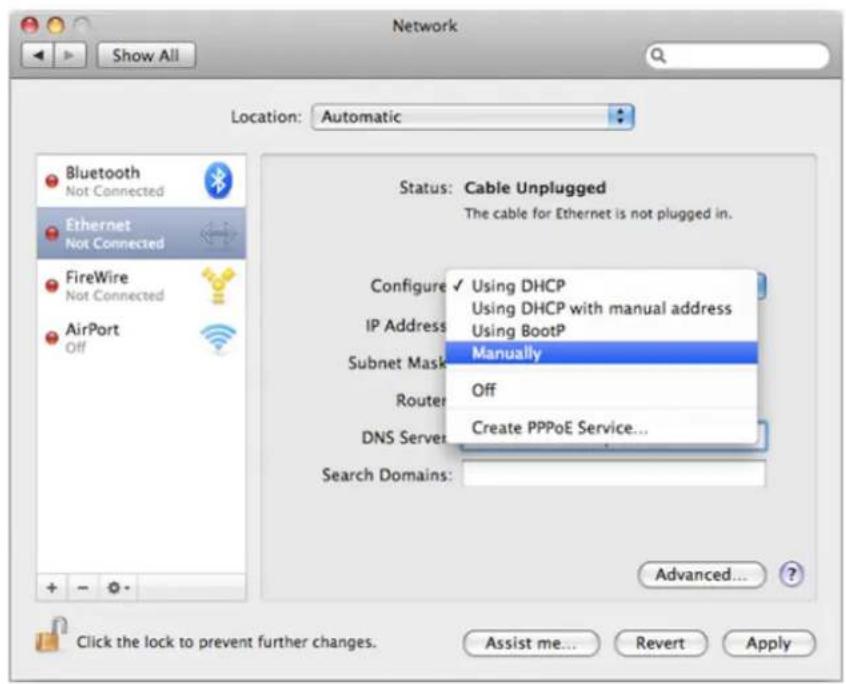


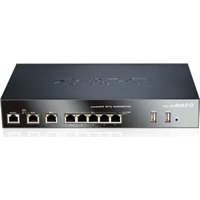


- USER MANUAL
- D-LINK DFL-160 FIREWALL
- NETDEFENDOS VERSION 2.27.00
- COPYRIGHT NOTICE
- DISCLAIMER
- LIMITATIONS OF LIABILITY
- TABLE OF CONTENTS
- PRODUCT OVERVIEW 6
- INITIAL SETUP 12
- THE SYSTEM MENU 23
- THE FIREWALL MENU 40
- THE TOOLS MENU 77
- THE STATUS MENU 79
- THE MAINTENANCE MENU 94
- THE CONSOLE BOOT MENU 103
- TROUBLESHOOTING 105
- CLI REFERENCE 107
- CHAPTER 1. PRODUCT OVERVIEW
- THE DFL-160 SOLUTION
- THE DFL-160 AND THE NETDEFENDOS SOFTWARE
- THE NETDEFENDOS MANAGEMENT INTERFACE
- THE DFL-160 INTERFACES
- INSIDE" AND "OUTSIDE" NETWORKS
- FIREWALLING AND UTM
- EXTENSIVE FIREWALLING CAPABILITIES
- NOTE: NO INBOUND TRAFFIC IS INITIALLY ALLOWED
- UNIFIED THREAT MANAGEMENT (UTM)
- ETHERNET INTERFACES
- PHYSICAL INTERFACE ARRANGEMENT
- INTERFACE NETWORK CONNECTIONS
- INTENDED INTERFACE USAGE
- INTERFACE LINK SPEED CAPABILITIES
- THE LED INDICATORS
- POWER AND STATUS
- ETHERNET PORTS
- CHAPTER 2. INITIAL SETUP
- UNPACKING
- PACKAGE CONTENTS
- LOCATION OF THE HARDWARE
- ENVIRONMENTAL AND OPERATING PARAMETERS
- HEAT FLOW CONSIDERATIONS
- POWER SUPPLY PRECAUTIONS
- SOFTWARE INSTALLATION
- WEB BROWSER CONNECTION
- CONNECT THE CABLES
- SETTING THE WORKSTATION INTERFACE IP ADDRESS
- CONNECT THE POWER
- CONNECT TO THE DFL-160 BY SURFING TO THE IP ADDRESS 192.168.10.1
- USING HTTP
- USING HTTPS
- THERE IS A PROBLEM WITH THIS WEBSITE'S SECURITY CERTIFICATE
- CONTINUE TO THIS WEBSITE (NOT RECOMMENDED)
- LOGGING ON TO THE DFL-160
- LOGGING OUT
- AUTOMATIC LOGOUT
- CONNECTING TO THE INTERNET
- SETTING FIREWALL SECURITY POLICIES
- THE MEANING OF "OUTBOUND
- USING THE DMZ FOR MANAGEMENT
- GOING FURTHER
- BROWSER CONNECTION TROUBLESHOOTING
- CHECK THAT THE LAN INTERFACE IS BEING USED
- IS THE LAN INTERFACE PROPERLY CONNECTED
- CHECK THE CABLE TYPE CONNECTED TO THE MANAGEMENT INTERFACE
- USING THE IFSTAT CLI COMMAND
- USING THE ARPSNOOP CLI COMMAND
- CONSOLE PORT CONNECTION
- CONSOLE SETUP
- ENTERING THE BOOT MENU
- CONSOLE OUTPUT TRUNCATION
- THE DFL-160 USB PORT
- CHAPTER 3. THE SYSTEM MENU
- ADMINISTRATION
- MANAGEMENT SETTINGS
- ENABLING PING REQUESTS
- ADMINISTRATOR SETTINGS
- MANAGEMENT PORTS
- IMPORTANT: CHANGING THE PORT NUMBER MAY BE NECESSARY
- MANAGEMENT THROUGH THE SERIAL CONSOLE
- INTERNET CONNECTION
- DHCP SETUP
- STATIC CONNECTION
- PPPOE CONNECTION
- PPTP CONNECTION
- LAN SETTINGS
- THE LOGICAL LAN INTERFACE
- LAN INTERFACE OPTIONS
- LAN INTERFACE SETTINGS
- MODE
- NAT MODE
- ROUTER MODE
- TRANSPARENT MODE
- NOTE: THE LAN AND WAN IP ADDRESSES ARE THE SAME
- DHCP SERVER SETTINGS
- TRANSPARENT MODE AND THE INTERFACE IP ADDRESS
- DMZ SETTINGS
- DMZ INTERFACE OPTIONS
- DMZ INTERFACE SETTINGS
- LOGGING
- NETDEFENDOS LOG MESSAGES
- LOGGING OPTIONS
- SYSLOG SETTINGS
- AUDIT LOGGING
- EMAIL ALERTS
- VERY HIGH
- HIGH
- MEDIUM
- LOW
- VERY LOW
- DATE AND TIME
- GENERAL
- TIME ZONE AND DAYLIGHT SAVING TIME SETTINGS
- AUTOMATIC TIME SYNCHRONIZATION
- DYNAMIC DNS SETTINGS
- THE HTTPPOSTER CLI COMMAND
- USAGE IN VPN SCENARIOS
- NOTE: QUERIES SHOULD NOT BE TOO FREQUENT
- THE D-LINK DDNS SERVER
- CHAPTER 4. THE FIREWALL MENU
- OUTBOUND LAN TRAFFIC OPTIONS
- THE MEANING OF OUTBOUND
- ALLOWING SERVICES
- CONNECTIONS FROM THE LAN TO THE DMZ
- SPECIFYING CUSTOM TRAFFIC
- SPECIFYING A SCHEDULE
- OUTBOUND DMZ TRAFFIC OPTIONS
- CONNECTIONS FROM THE DMZ TO THE LAN
- INBOUND TRAFFIC OPTIONS
- INBOUND TRAFFIC
- IMPORTANT: CHANGING THE MANAGEMENT ACCESS PORT NUMBER
- INBOUND MULTICAST
- CUSTOM TRAFFIC
- VPN OPTIONS
- VPN USAGE
- VPN WITH THE DFL-160
- IPSEC
- AN IPSEC OVERVIEW
- AUTHENTICATION
- TUNNEL TYPE
- NOTE: FULLY QUALIFIED DOMAIN NAMES
- ADVANCED
- LIFETIMES
- IKE SETTINGS
- IKE MODE
- DH GROUP
- PERFECT FORWARD SECRECY
- DEAD PEER DETECTION
- KEEP-ALIVE
- LISTING IPSEC TUNNELS
- L2TP/PPTP CLIENT
- IPSEC ENCRYPTION
- SECURITY AUTHENTICATION
- MPPE
- DIAL-ON-DEMAND
- L2TP/PPTP SERVER
- IP POOL SETTINGS
- IDLE TIMEOUT
- VPN USERS
- THE USER DATABASE
- VPN TYPES THAT USE VPN AUTHENTICATION
- NOTE: USER DATABASES
- WEB CONTENT FILTERING
- OPTIONS
- SUBSCRIPTION
- WEB CONTENT FILTER
- CATEGORIES
- NON-MANAGED ACTION
- ALLOW OVERRIDE
- ALLOW RECLASSIFICATION
- STATIC URL FILTERS
- MONITORING WCF
- UTM INFORMATION
- THE CONTENT CATEGORIES
- CATEGORY 1: ADULT CONTENT
- CATEGORY 2: NEWS
- CATEGORY 3: JOB SEARCH
- CATEGORY 4: GAMBLING
- CATEGORY 5: TRAVEL / TOURISM
- CATEGORY 6: SHOPPING
- CATEGORY 7: ENTERTAINMENT
- CATEGORY 8: CHATROOMS
- CATEGORY 9: DATING SITES
- CATEGORY 10: GAME SITES
- CATEGORY 11: INVESTMENT SITES
- CATEGORY 12: E-BANKING
- CATEGORY 13: CRIME / TERRORISM
- CATEGORY 14: PERSONAL BELIEFS / CULTS
- CATEGORY 15: POLITICS
- CATEGORY 16: SPORTS
- CATEGORY 17: WWW-EMAIL SITES
- CATEGORY 18: VIOLENCE / UNDESIRABLE
- CATEGORY 19: MALICIOUS
- CATEGORY 20: SEARCH SITES
- CATEGORY 21: HEALTH SITES
- CATEGORY 22: CLUBS AND SOCIETIES
- CATEGORY 23: MUSIC DOWNLOADS
- CATEGORY 24: BUSINESS ORIENTED
- CATEGORY 25: GOVERNMENT BLOCKING LIST
- CATEGORY 26: EDUCATIONAL
- CATEGORY 27: ADVERTISING
- CATEGORY 28: DRUGS/ALCOHOL
- CATEGORY 29: COMPUTING/IT
- CATEGORY 30: SWIMSUIT/LINGERIE/MODELS
- CATEGORY 31: SPAM
- CATEGORY 32: NON-MANAGED
- ANTI-VIRUS
- OVERVIEW
- COMBINING WITH CLIENT VIRUS SCANNING
- THE SCANNING MECHANISM
- TYPES OF FILE DOWNLOADS SCANNED
- THE VIRUS SIGNATURE DATABASE
- ANTI-VIRUS SETTINGS
- ANTI-VIRUS DATABASE
- ANTI-VIRUS SCANNING
- SCAN EXCLUSION CONTROL
- FILE TYPE CHECKING
- IDP OPTIONS
- THE INTRUSION THREAT
- INTRUSION DETECTION
- THE IDP SOLUTION
- THE IDP DATABASE AND SUBSCRIBING
- ENABLING IDP FOR A PROTOCOL
- DROPPING CONNECTIONS OR ONLY LOGGING
- SELECT THE MINIMUM NUMBER OF PROTOCOLS
- THE SCANNERS CATEGORY
- THE WORMS AND MALWARE CATEGORY
- TRAFFIC SHAPING
- SETTING UP TRAFFIC SHAPING
- SPECIFYING WAN CAPACITY
- IMPORTANT: THE TOTAL CAPACITY SHOULD BE CORRECTLY SPECIFIED
- ADDING RULES
- NAME SERVICE MAXIMUM UP/DOWN GUARANTEED UP/DOWN
- SPECIFYING RULES
- TIP: SPECIFYING ALL SERVICES
- SPECIFYING RULE BANDWIDTH
- GUARANTEE PRIORITIES
- SPECIFYING NETWORKS
- RULES SUMMARY
- TIP: SHARING THE TOTAL BANDWIDTH
- SCHEDULES
- SCHEDULE USAGE
- PREDEFINED SCHEDULES
- CUSTOM SCHEDULES
- ADDING COMMENTS
- CHAPTER 5. THE TOOLS MENU
- PING
- INITIATING PING REQUESTS FROM THE CLI
- CHAPTER 6. THE STATUS MENU
- FILTERING OUTPUT
- STATUS SCREENS ARE A SNAPSHOT
- SYSTEM STATUS
- SYSTEM RESOURCES
- SYSTEM INFORMATION
- MODEL
- SYSTEM TIME
- UPTIME
- CONFIGURATION
- FIRMWARE VERSION
- LAST RESTART
- CONFIGURATION LOG
- UTM STATISTICS
- LOG HISTORY
- LOGGING STATUS
- THE MEMLOG DISPLAY
- ANTI-VIRUS STATUS
- WEB CONTENT FILTERING STATUS
- IDP STATUS
- CONNECTIONS STATUS
- INTERFACES STATUS
- INTERFACE STATUS
- DRIVER INFORMATION/HARDWARE STATISTICS
- THROUGHPUT STATISTICS
- IPSEC STATUS
- LIST VPN INTERFACES
- LIST ALL ACTIVE IKE SAS
- USER AUTHENTICATION STATUS
- THE FORCIBLY LOGOUT OPTION
- ROUTES
- A BRIEF OVERVIEW OF ROUTING
- THE 0.0.0.0/0 ROUTE
- THE ROUTE METRIC
- DHCP SERVER STATUS
- CHAPTER 7. THE MAINTENANCE MENU
- THE UPDATE CENTER
- UPDATE INTERVAL
- HISTORY
- LICENSES
- ADD ON SERVICES
- INTRUSION DETECTION AND PREVENTION (IDP)
- ACTIVATING A SERVICE
- LICENSE PROPERTIES
- CONNECTIONS
- RULES
- IPSEC TUNNELS
- PPP TUNNELS
- BACKUPS
- BACKUPS DO NOT CONTAIN EVERYTHING
- OPERATION INTERRUPTION
- RESET TO FACTORY DEFAULTS
- RESET THROUGH SOFTWARE
- PERFORMING A RESET MANUALLY
- WARNING: DO NOT ABORT A RESET TO FACTORY DEFAULTS
- END OF LIFE PROCEDURES
- UPGRADES
- TECHNICAL SUPPORT
- THE TECHSUPPORT CLI COMMAND
- CHAPTER 8. THE CONSOLE BOOT MENU
- ACCESSING THE CONSOLE BOOT MENU
- INITIAL BOOT MENU OPTIONS WITHOUT A PASSWORD SET
- START FIREWALL
- RESET UNIT TO FACTORY DEFAULTS
- REVERT TO DEFAULT CONFIGURATION
- SET CONSOLE PASSWORD
- INITIAL OPTIONS WITH A CONSOLE PASSWORD SET
- REMOVING THE CONSOLE PASSWORD
- THE CONSOLE PASSWORD IS ONLY FOR THE CONSOLE
- CHAPTER 9. TROUBLESHOOTING
- THE STAT CLI COMMAND
- THE DCONSOLE CLI COMMAND
- RESTARTING
- APPENDIX A. CLI REFERENCE
- ABOUT
- ARP
- EXAMPLE
- ARPSNOOP
- BUFFERS
- SYNTAX: BUFFER
- CFGLOG
- CRASHDUMP
- DCONSOLE
- DHCP
- DHCPSERVER
- DNS
- SYNTAX: DNS
- FRAGS
- HTTPPOSTER
- IFSTAT
- IKESNOOP
- IPSECSTATS
- IPSECTUNNELS
- KILLSA
- LICENSE
- LOCKDOWN
- LOGOUT
- MEMORY
- RECONFIGURE
- SETTINGS
- SHUTDOWN
- STATS
- SYNTAX: STATS
- SYSMSGS
- TECHSUPPORT
- TIME
- UARULES
- UPDATECENTER
- URLCACHE
- USERAUTH
- USERDB
- APPENDIX B. WINDOWS XP IP SETUP
- APPENDIX C. WINDOWS VISTA IP SETUP
- APPENDIX D. WINDOWS 7 IP SETUP
- APPENDIX E. APPLE MAC IP SETUP
- NOTE: DIFFERENT MACOS VERSIONS
- ALPHABETICAL INDEX
- A
- B
- C
- D
- E
- F
- H
- K
- L
- M
- 0
- P
- R
- S
- T
- U
- W
- V
Brand : D-LINK
Model : DFL-160
Category : Firewall