
5360 - Telephone AASTRA - Free user manual and instructions
Find the device manual for free 5360 AASTRA in PDF.


| Product Type | SIP Phone |
| Brand | Aastra |
| Model | 5360 |
| Dimensions (W x H x D) | 205 x 175 x 110 mm |
| Weight | 0.9 kg |
| Power Supply | Power over Ethernet (PoE) IEEE 802.3af or AC adapter (12V DC) |
| Display | 3-line backlit LCD with soft keys |
| Keypad | 12 programmable keys, 4 soft keys, navigator key |
| Audio | Full-duplex speakerphone, handset, headset jack |
| Network Interface | 2 x 10/100 Base-T Ethernet ports (RJ-45) |
| Protocols | SIP v2, TFTP, HTTP, HTTPS, SNMP |
| Key Functions | Call hold, transfer, conference, call park, do not disturb, call forwarding, speed dial, voicemail, redial, mute |
| Directory | Local phonebook up to 200 entries |
| Call Log | Missed, received, dialed calls |
| Headset Compatibility | RJ-9 headset jack, supports wired headsets |
| Wall Mount | Yes, optional wall mount bracket |
| Maintenance | Clean with a soft, dry cloth. Do not use liquids or abrasive cleaners. |
| Safety | Use only supplied AC adapter. Keep away from moisture and heat sources. |
| Spare Parts | Handset, handset cord, base stand, footstand |
| Operating Temperature | 0°C to 40°C (32°F to 104°F) |
Frequently Asked Questions - 5360 AASTRA
User questions about 5360 AASTRA
0 question about this device. Answer the ones you know or ask your own.
Ask a new question about this device
Download the instructions for your Telephone in PDF format for free! Find your manual 5360 - AASTRA and take your electronic device back in hand. On this page are published all the documents necessary for the use of your device. 5360 by AASTRA.
USER MANUAL 5360 AASTRA
natural_image
Close-up of black electronic buttons with green and red icons, no readable text or symbolsAastra Communications Systems
A150
A300
2025
2045
2065
natural_image
Black office telephone with keypad and earbuds, no visible text or symbols on device body
■ Operating elements
1 D i s p l a y
Status display with symbols, current displays on telephone traffic, displays the available Foxkey functions.
2 I n d i c a t o r L E D
• Left LED flashes: Call.
• Right LED flashes: Voice Mail, message, or callback.
3 K e y b l o c k
Enters digits or letters.
4 N a v i g a t i o n k e
• Up w ard: Resetting activated features.
• T o t h e r i g h t: Opens the menu.
• D o w n w ard: Opens settings.
• General: Scrolls forwards/backwards in the menu, navigates lists.
5 F o x k e y
Executes displayed function using the key.
6 C o r r e c t i o n k e
Deletes the last character or goes back one step in the menu.
7 F o x m e n u
Opens the menu or calls up other Foxkey functions.





8 A b s e n c e k e y w
Preconfigured as call forwarding. The Absence key can be configured as a function key or digit key.

9 Phone book key
Opens phone books.

10 Redialkey
Selects the phone numbers last dialled.

11 Microphone key
Switches handset microphone off/on.

12 Loudspeaker key
Open listening mode on/off.

13 Volume/cursor keys
Adjustsvolume.

14 Call key
Set up / answer a call.

15 End key
- Ends a call.
- Exits input without saving and goes back to the idle state.

16 Configurable Keys
Freely configurable as a number or function key:
• Number key with 2 storage locations: (1. Phone number: 1 press once, 2nd phone number: 2 Press twice).
- Function key: Activate / Deactivate function.
Configure key: press and hold down.

17 Write-on labels
Write-on labels for the configurable keys can be found on the internet at www.aastra.com/docfinder as an electronic document. You can fill out the fields directly on your PC and then print out the labels.
Operating and Display Elements
■ Display symbols
More text information available
Foxmenu: Access to the menu or the available Foxkey functions
Other menu entries available Loudspeaker activated
Text mode activated Function activated
Entries on the call list Search mode
Microphone deactivated Activate discreet ringing
Forwarding activated New text messages
New Voice Mail


Safety Information
Failure to observe this information can be hazardous and infringe existing laws.

Connections
Always plug the phone cable connectors into the appropriate sockets. Do not modify the connections in any way.

Mains connection
Use the original power supply only. Connect the power supply only to power sources that conform to the indications on the device.

Maintenance
Make sure all installation and repair work is carried out by a specially qualified technician.
Always use a soft, moistened, or antistatic cloth to clean your device. Do not use chemicals or other chemical products.

Cost control
You should protect your telephone with a PIN so that no-one can make phone calls at your expense. A code will also protect your personal settings.

Ambient conditions
Do not operate the device outside the temperature range of +5 °C to approx. +40 °C. Avoid direct sunlight and other sources of heat.
Protect your device against the wet, excessive dust, corrosive liquids and steam.
Do not expose your device to electromagnetic fields (electric motors, household appliances). The speech quality could be affected. To prevent interference, avoid placing your handset in the immediate vicinity of computers, radios, TV sets, VCRs, and other telephone sets.

Disposal
Be sure to dispose of your device and its packaging in an environmentally compatible way; alternatively send it back to your supplier or servicing agent.


Accessories
Use original accessories or specifically approved accessories only. The use of other accessories may decrease performance or pose a risk to your health or safety.
User information
Your terminal has been supplied with a Quick User's Guide, safety information and, where applicable, with other terminal-specific information. You will find this and other documents for your device at
http://www.aastra.com/docfinder.
More information on your terminal can be found in the documentation or your dealer's homepage. It is your responsibility to inform yourself about the scope of functions, operation and proper use of your equipment.
- Check whether you have all the user information available on your terminal, whether it conforms to your terminal's version and whether it is up to date.
- Read through the user information carefully before putting your terminal into operation.
- Store the user information within easy reach and refer to it whenever uncertainties arise in connection with the use of the terminal.
- When handing over your terminal to others, make sure you enclose the relevant user information.
New
- Changing Terminal Names Please note that with implementing the 17.7 system, the Office 60IP / Office 60IP is renamed in Astra 5360ip / Astra 5360ip.
- Your system administrator can set up several terminals for you that hold all the same phone number. If you are busy on one of these terminals, you are busy for all further incoming calls. But you are able to make further outgoing calls on the other terminals.
Intended Purpose
This phone is part of the Ascotel® IntelliGate® communication system and is intended to be operated on that system.
Ascotel® IntelliGate® is an open, modular and comprehensive communication system that comprises the IP-PBX (referred to in the end-user information as “the system”), a vast number of expansion cards and modules, and a complete series of system terminals including IP system terminals. The system and all its component parts were designed to cover in full all the telecommunication requirements of companies and organisations with a single user-friendly solution. The individual components of the overall system are fully compatible and must not be used for other purposes or replaced by third-party components (except when connecting other authorized networks, applications and terminals to the interfaces provided specifically for that purpose).
■ System and software-related functions
Some systems or system versions do not support all the features. The corresponding text sections are identified by a letter inside square brackets. The Chapter "System and Software-Related Functions", page 61 indicates which system versions support the relevant features.
Disclaimer
This product was manufactured in accordance with ISO 9001 quality guidelines.
This product and the user information belonging to it have been produced with the utmost care. The product's functions have been tested and approved after comprehensive conformity tests. Nonetheless errors cannot be entirely excluded. The warranty is limited to the replacement of defective hardware.
The manufacturers shall not be liable for any direct or indirect damage that may be caused by incorrect handling, improper use, or any other faulty behaviour on the part of a product. Potential hazards are mentioned in the relevant places in the user information. Liability for loss of profit shall be excluded in any case.
Document information
- Document number: eud-0840
- Document version: 2.1
- Valid upwards: 17.7
• © 10.2008
Dialling and Phoning 9
Answering Calls 10
Making calls.... 11
Using the Display and Operating Elements 13
Display 14
Keys 15
Input 16
Menu-Guided Navigation.... 18
Signals....19
Supplementary features 20
Making and answering calls 21
Using functions while in a call 29
Organising absences from the desk 32
Functions for special situations 38
Setting functions by remote control 46
Personalizing Your Phone 47
Display 48
Setting the Ringing Properties (Audio) 48
General settings....50
Protection 53
Phone Book Management 54
Configuring Voice Mail 55
Configuring Keys....56
Formulating Functions 58
Further information 59
Troubleshooting 60
Declaration Open Source Software (Aastra 5360ip)....61
System and Software-Related Functions 61
Installation and First-Time Operation 62
Equipment provided 63
Options....63
Setting up and mounting the phone....64
Connecting Astra 5360....66
Connecting Astra 5360ip 67
Dialling and Phoning
The following sections explain how to make phone calls simply and the functions your phone offers you whenever you receive a call.
Answering Calls 10
Making calls....11
Answering Calls
This section explains the procedure for answering a call.
Answering a Call
Your phone is ringing and the indicator LED is flashing. To answer the call, proceed as follows.

Pick up the handset.
Note:
If the caller's phone number is received, it is shown on the display. If the phone number is stored in the private phone book or in the system, the display also shows the corresponding name.
Ending a Call
You want to end the call.
After the call the call duration is indicated. Call charges are also displayed after any external call which you initiated, provided your provider supports this function.

Put the handset on-hook.
Making calls
This section explains the different ways you can make a call with your phone.
■ Dialling with the Phone Number
You want to call someone and key in that person's phone number.
With call preparation you can enter a phone number without it being dialled automatically, so you have time to check the number and, if necessary, correct it. The number is not dialled until you go off-hook, for example by picking up the handset.

Enter a phone number in call preparation.
You can use the Correction key to delete any incorrect character.
Pick up the handset.
Or:
Press the Call key or the Foxmenu>Foxkey Call.
→ The enquiry call party is called.
■ Dialling with Redial
You want to call a person you have already called.
In the last-number redial list your phone automatically stores the phone numbers of the persons you have already called, complete with their names, where available. You can now call the person in question using this last-number redial list.
The last-number redial list has a maximum of 4 entries.

Press the Redial key.
→ Redial list is displayed.
Press the Redial key several times or press the down navigation key to scroll through all the phone numbers you last dialled.
Pick up the handset.
→ The phone number displayed is dialled.
■ Using Your Phone in Open Listening Mode
You want other people in the room to be able to listen in to the call.
The open listening function lets you activate the loudspeaker in addition to the handset.

During a call:
Press the Loudspeaker key.
→ Open listening is now activated, is displayed.
Note:
You can continue with the call as usual using the handset.

Deactivating open listening:
Press the Loudspeaker key a second time.
→ Open listening is now deactivated.
Note:
To end a call in open listening mode, you need to press the Loudspeakerkey and hang up the phone.
■ Muting the Microphone
In the middle of a call you want to talk briefly with other persons in the room without your call partner hearing your conversation.
You can switch the microphone on and off during a call.

Switching the microphone off:
Press Microphone key.
→ The microphone is now deactivated, is displayed.

Switching the microphone back on:
Press the Microphone key once again.
Using the Display and Operating Elements
The following sections explain how to operate your phone quickly and simply.
Display....14
Keys....15
Input....16
Menu-Guided Navigation....18
Signals....19
Using the Display and Operating Elements
Display
■ Display symbols and display text
New events such as a call in your absence, a new message or activated functions (e.g. Forwarding) are signalled on the display in the idle state by a symbol or a display text. You can then use the relevant Foxkey to call up the information.

You have access to the menu or the Foxkey functions available in each case.

To see the rest of the text:
Press the horizontal navigation key.
End

Deleting the display text:
Foxmenu > Press the End Foxkey.
→ The display returns to the idle state; the function remains activated.

Function activated:
The activated function or selected setting is indicated by a check mark.
Keys
Pressing a Key
A key may have various functions depending on the situation and the operating mode. The function activated depends on the number of times the key is pressed or whether it is pressed quickly or held down for a moment. Here are some examples:

Press the Foxkey.
Keep the Foxkey held down for a moment (about 2 seconds).
Press the key twice in quick succession.
■ Using the Foxmenu key
The Foxmenu key gives you access to the menu or the Foxkey functions available in each case. Press the key directly on the Fox symbol.

Pressing the Foxmenu:
In the idle state: Opens the menu.
In the menu/during a call: Retrieves available Foxkey functions.

is displayed.
Using the Foxkey
The Foxkey has variable functions. These functions are displayed above the key.
Several contacts are stored under the broad Foxkey, which means you need to press the Foxkey precisely under the function you want.

Press the Foxkey under the position where the display shows the function you want.
Using the Display and Operating Elements
Input
Enters digits
The digit keys are used to enter the digits 0 to 9.
Enter the letters
You can also use the digit keys to enter letters and special characters. A number of letters and special characters are assigned to each key.
To enter letters using the digit keys, you need to be in text mode. The text mode is activated automatically if the phone is expecting a text input. You can switch back and forth between number mode and letter mode during your input.
abc-->123

Switching between number mode and letter mode during your input:
Press Foxmenu> Foxkey abc-->123 or 123-->abc.
→ Abc is displayed.
Digit keys
The characters are assigned to the digit keys as follows. Press the relevant digit key repeatedly until the character you want is displayed.
Note:
Only capital letters for Astra 5360.

- .? 1 ! , : ; ' " i

DEF3É def3éêê

JKL5 jkl5

PQRS7 pqrs7β

WXYZ9 wxyz9

@ * / () <= > % £ \$ ∈ ¥ a & §

A B C 2 Ä A E Å Ç a b c 2 ä æ å à ç

GHI4 ghi4ì

MNO6ÑÖ∅ mno6ñöøò

TUV8Ü tuv8üù

+0

■ Switching between Upper and Lower Case
You want to switch between upper and lower case while making an input in text mode.
Upper-case input is automatically activated when the first letter is entered. The text mode then automatically switches to lower-case input. You can use the Foxkey to switch manually between upper-case and lower-case input.

Switching between upper case and lower case in text mode:
Press Foxmenu > Fox key a > A and A > a respectively.
Note:
Only capital letters for Astra 5360.
■ Correcting your Input
You notice you have entered a wrong digit or character. You can either delete the input one character at a time or cancel the entire input.

To delete the last character:
Press the correction key.
Note:
With the navigation key you can go straight to the character you want to delete.

End input without saving:
Press the End key.
■ Moving the Cursor
You want to go to a certain character for an input or correction.
With the navigation key you can move the cursor to the left or right.

Move the cursor with the horizontal navigation key.
Menu-Guided Navigation
■ Accessing the menu
The phone is in standby mode:

Menu

Press the Foxmenu.
→ The menu is displayed.
Press the Menu Foxkey.
→ The first menu entry is displayed.

Select

Use the vertical navigation key to scroll through the menu entries.
Press the Select Foxkey.
→ Accessing the displayed menu.
■ Navigating with the navigation key
You can retrieve a particular menu entry even more simply and efficiently using the navigation key. You can scroll vertically and horizontally through the different menu entries.

Horizontal navigation key:
Left: scrolls back through the menu.
Right: opens displayed menu, scrolls forward through the menu, retrieves detailed information.

Vertical navigation key:
Bottom: opens Settings, scrolls downwards in the list.
Top: opens Activated features, scrolls upwards in the list.
■ Undoing Actions
To cancel operating steps, proceed as follows:

End input without saving:
Press the End key.

Back to the idle state in the menu:
Press the End key.
■ Other navigation possibilities

Scrolling back through the menu:
Press the correction key.
■ Resetting activated features
You can deactivate again all the activated functions (e.g. Forwarding, Barring).
Menu

Activated features

Reset/Delete

Press Foxmenu, then the Foxkey.
Scroll to Activated features and press the Select Foxkey.
→ All the activated functions are now displayed.
Reset or Delete the function in question.
→ The function is now deactivated.
Signals
Indicator LED Signals
Depending on the situation the indicator LEDs either flash or remain steadily lit.

Left LED flashes:
→ Phone is ringing.

Right LED flashes:
→ New Voice Mail, message, or callback received.
Supplementary features
The following sections explain the supplementary features provided by your phone for more efficient use.
Making and answering calls....21
Using functions while in a call 29
Organising absences from the desk....32
Functions for special situations 38
Setting functions by remote control....46
Making and answering calls
This section explains some convenient features provided by your phone for making a call.
■ Dialling by Name - Quickdial
You want to make a call by entering a name.
Requirement: The name and the corresponding call number are stored in one of the system's phone book or in an external phone directory connected to the system.
With Quickdial you only need to press the digit keys for each letter once, even though each key is assigned several letters. An efficient algorithm provides quick search results.
The surname and first name have to be separated by a space (# key), for example "no s" (6 6 # 7) for Noble Stephen. Ask your system administrator whether you should start with the surname or the first name.
Notes:
- To be able to search in an external phone book using Quickdial, you need to press the * key or 0-key before entering the first letter.
- The response time may vary greatly depending on the size and the number of phone books connected.

Press each of the corresponding digit keys once for the first few letters of the name you are looking for.
For each letter, the display shows the corresponding digit, for example a "6" for the letter "n".

Press the phone book key.
→ The phone searches for matching users.

You may have to enter another letter before the name you want or a list of users is displayed.

Scroll through the list until the user you want is displayed. Select the phone number you want.

Pick up the handset.
→ The phone number displayed is dialled.
■ Dialling from the phone book
You want to search directly in one of the connected phone books.
The surname and first name have to be separated by a space, for example "no s" for Noble Stephen. Ask your system administrator whether you should start with the surname or the first name.
To find out to create a new contact in your private phone book, refer to the Chapter "Creating a New Phone Book Entry", page 54.

Search entry

Press the phone book key.
Scroll to Search entry and press the Select Foxkey.
If required, enter the first few letters of the name you are looking for (first name and surname separated by a space) until the user or a list is displayed.
Notes:
- Text mode is activated automatically.
- Use the #key to enter spaces.


Scroll through the list until the user you want is displayed. Select the phone number you want.
Pick up the handset.
→ The phone number displayed is dialled.
Notes:
- The search function is not affected by upper/lower case and special characters.
- If the phone is unable to find a matching user, List empty will appear on the display.
■ Dialling from external phone books
If you select Advanced search, you can search directly in the connected external phone books. This function is not available if no external phone book is connected.
The surname, first name and town each have to be separated by a space, for example "no s so" for Noble Stephen in Solothurn. Ask your system administrator whether you should start with the surname or the first name.

Advanced search

Press the phone book key.
Scroll to Advanced search and press the Select Foxkey.
Enter the first few letters of the name you want (first and last name separated by a space).
Notes:
- Text mode is activated automatically.
- Use the #key to enter spaces.
If required, enter the first few letters of the town's name (name and town name separated by a space) until the user or a list is displayed.


Scroll through the list until the user you want is displayed.
Pick up the handset.
→ The phone number displayed is dialled.
Notes:
- The search function is not affected by upper/lower case and special characters.
- When searching in external phone books you must always enter portions of the first and last name and possibly of the town name.
■ Dialling from the Call List of Unanswered Calls
You want to call someone who has previously tried to reach you.
Your phone automatically stores the phone number of this user in a calllist and the display reads Missed calls. You can now call the person back using this call list.
The call list of unanswered calls contains a maximum of 4 entries.
Show

Calling a user back:
Press Foxmenu > Foxkey Show.
The display shows a list of the last unanswered calls.

Scroll through the list until the user you want is displayed.

Pick up the handset.
The phone number displayed is dialled. Once the call has been successfully connected, the entry is deleted from the call list.
End

Clearing the "Missed calls" display:
Press Foxmenu > Foxkey End.
→ Deletes the display. The entry remains stored in the list of the last unanswered calls, is displayed.
Note:
The call list of the unanswered calls can also be accessed via the menu (Menu > Call lists > Unanswered).
■ Dialling from the Call List of Answered Calls
You want to call back someone whose call you answered.
Your phone automatically stored the person's phone number on the list of answered calls. You can now call the person back using this call list.
The list of answered calls contains a maximum of 4 entries.
Menu

Press Foxmenu > Foxkey Menu.
Call lists

Scroll to Call lists and press the Select Foxkey.
Answered calls

Scroll to the Answered calls call list and press the Ok Foxkey.
→ The display shows the list of the last calls.

Scroll through the list until the user you want is displayed.

Pick up the handset.
⇒ The phone number displayed is dialled.
■ Dialling with Redial
You want to call a person you have already called.
In the last-number redial list your phone automatically stores the phone numbers of the persons you have already called, complete with their names, where available. You can now call the person in question using this last-number redial list.
The last-number redial list has a maximum of 4 entries.

natural_image
Abstract black-and-white graphic with upward arrows, a circle, and a stylized symbol (no text or symbols)Press the Redial key.
→ Redial list is displayed.
Press the Redial key several times or press the down navigation key to scroll through all the phone numbers you last dialled.
Pick up the handset.
→ The phone number displayed is dialled.
■ Dialling with a Configurable Key
You want to call someone whose phone number is stored under a configurable key.
You can dial the person by pressing the corresponding key.
To find out how to configure a configurable key, refer to the Chapter "Configuring Keys", page 56.

Activate the key's first allocated function:
Press the key once.
→ The key's first allocated function is displayed.

Activate the key's second allocated function:
Press the key twice in quick succession.
The key's second allocated function is displayed.

Pick up the handset.
→ The phone number is dialled.
■ Requesting a Callback
You want to talk to a certain person. The person is busy or does not answer. You can make call-back requests to both internal and external users. Not all providers support this function.
If the called party is busy, you can activate an automatic callback. In this case, your phone will start ringing as soon as the party you are trying to reach goes on-hook. When you pick up the handset, the person you want to call is dialled directly.
If the called party does not answer, you can also request a callback. The user then obtains a message indicating your callback request on his display.
You called someone and hear the busy tone or the ring-back tone.
Callback


End

Deactivate

To activate a callback request:
Press Foxmenu > Foxkey Callback.
Put the handset on-hook.
→ The display shows Call expected.
Back to the idle state:
Press Foxmenu > Foxkey End.
→ Callback remains activated.
Note:
The call back is stored in Menu > Activated features as long as it was not answered or cancelled by the system.
Reset callback:
Press Foxmenu > Foxkey Deactivate.
→ Callback is deactivated.
Note:
You can only have 1 call back activated at a time and only 1 call back can be expected from you. Your callback request will automatically be cancelled by the system after about half an hour.
■ To answer the callback request
Someone has asked you to call back. You can tell this from the lit attention LED in the idle state. The display reads Call back requested.
Call

Delete

To answer the callback request:
Press Foxmenu > Foxkey Call.
→ The phone number is dialled.
Clear callback:
Press Foxmenu > Foxkey Delete.
→ Callback is deleted.
Note:
The call back can be changed via Menu > Activated features > FoxkeyDelete or Answer as long as it was not answered or cancelled by the system.
■ Call Waiting on an internal user
You want to talk to an internal user. However, the person is busy.
As a result of your call waiting, the person hears a call waiting tone and your phone number or name appears on his display. The person can either answer or reject your call.
Requirement: It is essential that the internal user has not barred the Call waiting function on his phone (for configuration see the Chapter "Do not disturb/Call waiting/Intrusion/Announcement/Forward", page 53).
Ask your system administrator whether the Call waiting function is enabled on the system.
Call waiting

User is busy:
Press Foxmenu > Foxkey Call waiting.
→ You hear the dialling tone.
Note:
If the person rejects your call request or if call waiting is not possible, the call is, depending on the system's configuration, disconnected (busy tone) - or forwarded to a preconfigured destination.
■ Answering Call Waiting
You are in a call and hear the call waiting tone. Someone is urgently trying to reach you.
You can either answer, deflect or reject the call.
Answer

Answering the call:
Press Foxmenu > Foxkey Answer.
- Your original call partner is put on hold. You are now connected with the party who initiated the call waiting.
Note:
For more detailed information on how to broker between callers or set up a conference, please refer to the Chapters "Brokering between an Enquiry Call Party and Your Call Partner", page 29 and "Making a Conference Call", page 30 respectively.
Deflect


Deflect call:
Press Foxmenu > Foxkey Deflect.
Enter the user's phone number and confirm with the Ok Foxkey.
→ Call-waiting party is put through.
Note:
You can also search in the phone book, last-number redial list or call list for the phone number of the person you are looking for.
Reject

Rejecting the call:
Press Foxmenu > Foxkey Reject or End key.
→ You remain connected with your first call partner. Depending on the system configuration the call-waiting party hears the busy tone- or he is forwarded to a preconfigured destination.
End call

Ending a current call:
Press Foxmenu > Foxkey End call.
- The first call is terminated. You are now connected with the party who initiated the call waiting.
■ Starting an Announcement
You want to address internal users directly via their loudspeaker – where available –, without waiting for a reply (similar principle to that of an intercom system).
Requirement: It is essential that the internal user has not barred his phone against announcement (for configuration see the Chapter "Do not disturb/Call waiting/Intrusion/Announcement/Forward", page 53).

Announcement

Pick up the handset.

Press Foxmenu > Foxkey Announcement.
Select destination (User or Group) and confirm Ok with the Foxkey.

Enter the phone number and confirm with the Ok Foxkey.
→ User is made aware of the announcement by an acoustic signal. The display reads Announcement: You can now talk.
Note:
You can also search in the phone book, last-number redial list or call list for the phone number of the person you are looking for.
Or:
Press Foxmenu > Menu > Call features > Announcement > User/Group to start the announcement.
■ Receiving an Announcement
After an attention tone you will be addressed via your loudspeaker.
You can listen to the announcement or stop it.

To continue the announcement as a phone call:
Pick up the handset.
→ You are now connected to the person who initiated the announcement.
Note:
If the announcement was started to a group, all the other recipients of the announcement are excluded.

To stop the announcement:
Press the End key.
Private call with PIN
You want to make a private call on your phone or on a third-party phone.
With the aid of your PIN you can use any phone to make an external call with your own personal settings, even if that phone is locked for external calls. The called party's display shows your personal phone number and not the number of the phone from which you are making your call. Any call charges incurred will be charged to you.
The call number dialled is not stored in the last-number redial list.

-
Enter #46 followed by your internal call number.
-
Enter your PIN.
-
Enter the external call number directly, without the exchange access digit.
→ The phone is now enabled. The external user is called.

Pick up the handset.
Note:
The factory setting "0000" is not accepted. First change the PIN as described in chapter "Changing the PIN", page 51 or use */# procedure *47 (see "User's Guide */# Procedures"). If you have forgotten your PIN, your system administrator can reset it to the factory setting.
Using functions while in a call
This section explains the different options provided by your phone while you are in a call.
■ Enquiry Call During a Call
You want to call someone else briefly without losing your current call partner. Then you want to resume your conversation with your original call partner.
With the Enquiry call function you can call someone else in the middle of a call and put your original call partner on hold. You can make enquiry calls to both internal and external users.
Enquiry call


End call

You are making/taking a call:
Press Foxmenu > Foxkey Enquiry.
Enter the phone number of the enquiry call party.
Enquiry call party is called; 1st call partner is on hold.
Note:
You can also search in the phone book, last-number redial list or call list for the phone number of the person you are looking for.
To end the enquiry call:
Press End key or Foxmenu > Foxkey End call.
→ You are now back through to your first call partner.
Notes:
- If your enquiry call party hangs up and you also go on-hook by mistake, you will hear a continuous ringing signal for 10 seconds to draw your attention to the person still on hold. If you press the Call key during the continuous ringing, you will be reconnected with your first call partner.
- If the other user does not answer, you can cancel the enquiry with Foxmenu > Foxkey End call and take back the first call.
■ Brokering between an Enquiry Call Party and Your Call Partner
You are talking with an enquiry call party and have your original call partner on hold. You want to be able to switch back and forth between the two.
In an enquiry call you can use the brokering function to switch back and forth between an enquiry call party and the party on hold. Brokering is possible with both internal and external users. You can also broker between conference parties as a group and an enquiry call party.
Brokering

End call

Brokering:
Press Foxmenu > Foxkey Brokering.
→ Your call partner changes. The other call party is put on hold.
To terminate the current connection:
Press Foxmenu > Foxkey End call.
→ Call party disconnected. Connected with the call party on hold.
■ Making a Conference Call
You are in a call and have a call party on hold at the same time. You want to include the party on hold in the conversation and hold a conference call.
With the conference function you can include a call party on hold in the current conversation. From the conference call you can initiate an enquiry call to someone else. You can broker between the parties of the conference and the enquiry call party.
Depending on the system, a conference call can consist of up to 6 conference participants. You can hold a conference call with internal and external users.
Conference

To connect the call party on hold:
Press Foxmenu > Foxkey Conference.
→ The call party on hold is now included in the call.
Note:
Depending on the system's configuration you may hear an attention tone.

Leaving a conference call:
Put the handset on-hook.
→ The other conference parties remain in the call.
■ Transferring a Call Partner
You want to put your call partner through to someone else.
With the Enquiry call function you can connect your call partner with someone else. You can connect internal and external users with one another.
Enquiry call

Press Foxmenu > Foxkey Enquiry call.
- Your original call partner is put on hold.

Enter the other party's phone number.
→ The other party is called.
Note:
You can also search in the phone book, last-number redial list or call list for the phone number of the person you are looking for.
Connect

Connecting with notification:
Wait until the person has answered the call. Announce the call party.
Put the handset on-hook or press Foxkey Connect.
⇒ 1. Your call partner and the other person are now connected with each other.
Note:
If the other user does not answer, you can cancel the enquiry with Foxmenu > Foxkey End call and take back the first call.

Connecting without notification:
Wait for the first ringing tone, then hang up.
→ The other party is then called directly by your first call partner.
Note:
Recall: If the other party does not answer, the call comes back to your phone.
Parking a Call Partner
You want to put your call partner on hold without using a phone channel as a result.
You can park your call partner locally. A locally parked call partner can only be retrieved by the phone from which the function was initially carried out (applies only to communication systems prior 17.7). For communication systems beginning with 17.7 the call partner can be taken at each phone assigned to you.
You can also allocate the Park function to a freely configurable key (see Chapter "Configuring Keys", page 56).
![Park [P]](/content/2026/06/1260202/images/133dc8b8ccdaf02be887e135982c7deadcf0557f673c8b972c7dafeafd8e5d51.jpg)
Foxmenu > Press the Park Foxkey.
→ Your call partner is now parked locally.
Put the handset on-hook.
To retrieve a parked call party:
Press Foxmenu > Foxkey [P].
To phone with the handset:
Pick up the handset.
Notes:
- With Foxmenu > Foxkey End the display returns to the idle state. As long as your call partner does not hang up, he remains parked. You can retrieve your parked call party using Menu > Activated features > Foxkey [P].
- The */# procedure for central parking can be found in the "User's Guide */# Procedures".
Organising absences from the desk
This section explains the different options provided by your phone when you want to leave your desk.
Note:
A forwarding applies to all connected terminals.
Organising absences using the Absence Key
You want to leave your desk and set up your phone for your absence.
Your phone has an Absence key. It is factory set as a call forwarding unconditional key. By simply pressing the Absence key you can activate a call forwarding unconditional.

Configure the Absence key:
Enter the phone number of the user to which the call is to be forwarded.

Press the Absence key.
→ Call Forwarding is activated; LED is lit.

To activate the last forwarded destination:
Press the Absence key.
→ Call Forwarding is activated; LED is lit.
Note:
You can configure the Absence key like any other configurable key (see Chapter "Configuring Keys", page 56).

When you are back at your desk:
Press the Absence key.
The call forwarding unconditional is deactivated. The phone reverts to the idle state.
■ Forwarding Calls (Call forwarding)
You want to leave your desk. Calls for you are to be forwarded to a different destination (e.g. phone, Voice Mail, pager).
With Call Forwarding you can forward incoming calls directly to a different destination.
Menu

Forwarding

Call Forwarding

User

Press Foxmenu > Foxkey Menu.
Scroll to Forwarding and press the Select Foxkey.
Scroll to Call Forwarding and confirm Ok with the Foxkey.
Scroll to User and confirm Ok with the Foxkey.
Enter the user's phone number and confirm with the Ok Foxkey.
→ Forwarding is activated.
Notes:
- You can also search in the phone book, last-number redial list or call list for the phone number of the person you are looking for.
- If a call is to be forwarded only when you are already in a call, select Call forwarding busy.
- You can also forward to your Voice Mail (see Chapter "Forward to Voice Mail", page 34), to a Message (see Chapter "Forwarding to a message", page 35) or to a Pager.
- You can deactivate forwarding using Menu > Activated features > Deactivate Foxkey.
- You can also activate forwarding by remote control, see Chapter "Setting functions by remote control", page 46.
■ Forwarding a Call on No Reply (CFNR)
You want calls that you receive on your phone to be forwarded to another destination.
Both your own phone and the other destination will then start ringing. The system configuration determines whether or not there is a ringing delay at the other destination. Whoever goes off-hook first, answers the call. Depending on the system configuration, Call Forwarding on No Reply can also be activated when your phone is busy.
Menu

Forwarding


Call Forwarding on No Reply


User


Press Foxmenu > Foxkey Menu.
Scroll to Forwarding and press the Select Foxkey.
Scroll to Call Forwarding on No Reply and confirm Ok with the Foxkey.
Scroll to User and confirm Ok with the Foxkey.
Enter the phone number of the destination to which your calls are to be forwarded and confirm Ok with the Foxkey.
→ Forwarding is activated.
Notes:
- You can also search in the phone book, last-number redial list or call list for the phone number of the person you are looking for.
- You can also forward calls to your Voice Mail (see Chapter "Forward to Voice Mail", page 34) or to a Pager.
- You can deactivate forwarding using Menu > Activated features > Deactivate Foxkey.
- You can also activate forwarding by remote control, see Chapter "Setting functions by remote control", page 46.
Forward to Voice Mail
You cannot momentarily be reached on your phone. If you forward to your Voice Mail, a user can leave you a voice message.
You can use the global greeting or your own greeting (see Chapter "Configuring Voice Mail", page 55).
For more information on Voice Mail refer to the "Operating Instructions for the Voice Mail Systems Ascotel® IntelliGate®".
Menu

Forwarding

Press Foxmenu > Foxkey Menu.
Scroll to Forwarding and press the Select Foxkey.
Call Forwarding


Voice Mail


Scroll to Call Forwarding and confirm Ok with the Foxkey.
Scroll to Voice Mail and confirm Ok with the Foxkey.
→ Forwarding is activated.
Notes:
- You can specify whether your Voice Mail should answer directly (Call Forwarding) or with a delay (Call Forwarding on No Reply), or only if you are already on the phone (Call Forwarding Busy).
- You can deactivate forwarding using Menu > Activated features > Deactivate Foxkey.
- A new Voice Mail message is signalled with a text message on the display and a lit indicator LED in the idle state.
Forwarding to a message
You cannot be reached on your phone. You want any internal user who calls you to get a text message. The subscriber hears the busy tone and obtains a text message on his display.
Requirement: The internal user must have a phone capable of receiving text messages. Users whose phone cannot receive text messages are put through to your phone or rerouted to a destination predefined within the system.
You can use one of the text messages stored in the system directly, modify it or create a new message.
Menu


Forwarding


Call Forwarding


Message


Press Foxmenu > Foxkey Menu.
Scroll to Forwarding and press the Select Foxkey.
Scroll to Call Forwarding and confirm Ok with the Foxkey.
Scroll to Message and confirm Ok with the Foxkey.
Select one of the text messages stored in the system and press Select Foxkey.
Adapt or expand the text and confirm Ok with the Foxkey.
→ Forwarding is activated.
Note:
If you activate another forwarding, the message you have left on your phone will be deactivated.
■ Locking Your Phone
You need to leave your desk and want to ensure that no-one can alter your phone's settings, look at your private data, or make outside calls from your phone.
You can lock your phone with a PIN consisting of two to ten digits. You can modify this via menu (see chapter "Changing the PIN", page 51) or with */# procedure *47 (see "User's Guide */# Procedures").
Menu

Settings

General

Barring



Press Foxmenu > Foxkey Menu.
Scroll to Settings and press the Select Foxkey.
Scroll to General and press the Select Foxkey.
Scroll to Barring and press the Modify Foxkey.
→ You are prompted to enter your PIN.
Enter the PIN and confirm with the Ok Foxkey.
Select the required type of barring and confirm Ok with the Foxkey.
→ The phone is now locked; 🔔 is displayed.
To lock all your terminals, execute the function code *33*
Note:
You can lock either just the configuration (Configuration locked) or the entire phone (Phone locked). With Phone locked your private data cannot be viewed and external calls can only be made from your phone in accordance with the system settings.
■ Unlocking Your Phone
You want to unlock your phone.
You can use the PIN to unlock your phone. If you have forgotten your PIN, your system administrator can reset it to the factory setting.
Menu

Activated features



Free

Press Foxmenu > Foxkey Menu.
Scroll to Activated features and press the Select Foxkey.
Select the barring you want and press Foxmenu >Foxkey Deactivate.
→ You are prompted to enter your PIN.
Enter the PIN and confirm with the Ok Foxkey.
Scroll to Free and confirm Ok with the Foxkey.
→ The phone is unlocked.
To unlock all your terminals, execute the function code #33*
Functions for special situations
This section explains the different options provided by your phone to deal with special situations.
■ Deflect a call during the ringing phase
You do not want to answer a call yourself but deflect it to another user.
With the function Deflect you can deflect calls to an internal or external user or to the Voice Mail during the ringing phase.
Your phone is ringing and the indicator LED is flashing. To deflect the call, proceed as follows.

Press Foxmenu > Foxkey Deflect.
Enter the phone number and confirm with the Ok Foxkey. ⇒ The call is deflected to the desired user.
Notes:
- You can also search in the phone book, last-number redial list or call list for the phone number of the person you are looking for.
- If the user you want to deflect to is busy, the call will not be deflected. The display reads Busy and your phone still rings.
■ Reject a call during the ringing phase
You do not want to answer a call.
You can reject a call already during the ringing phase

Press Foxmenu > Foxkey Reject or End key.
The connection is rejected and, depending on the system configuration, the caller obtains the busy tone- or he is forwarded to a preconfigured destination.
Send text messages
You want to send a written message to an internal user.
You can send a text message to an internal user. The text message will appear on the person's display.
Requirement: The internal user must have a phone capable of receiving text messages.
You can use one of the text messages stored in the system directly, modify it or create a new message.
Menu

Text message

New




Press Foxmenu > Foxkey Menu.
Scroll to Text message and press the Select Foxkey.
Scroll to New and press Select Foxkey.
Select one of the text messages stored in the system and press Select Foxkey.
Adapt or expand the text and press the Send Foxkey.
Select the destination and press the Select Foxkey.
For user and group: Enter the call number and press the Send Foxkey.
→ The message is sent.
Note:
If the display reads Not available, the message could not be sent.
Read Text Messages
Your display shows New message and the envelope symbol. The right-hand indicator LED is lit.
Show

Read

Delete

Press Foxmenu > Foxkey Show.
→ The display shows the sender and the date/time of the text message.
Read Message:
Select the message you want and press Foxmenu >Foxkey Read.
→ If the message runs over several lines, use the navigation key to scroll.
To delete the message:
Press Foxmenu > Foxkey Delete.
The message is deleted; the next message is retrieved from the memory.
Or:
Press Foxmenu > Menu > Text message > Inbox to select the message and continue as described above.
Picking Up a Call
You hear a phone ringing in your vicinity and want to pick up the call.
With the Pick up function you can pick up the call from the other phone on your own phone.
| Menu | Press Foxmenu >Foxkey Menu. |
| Call features | Scroll to Call features and press the Select Foxkey. |
| Pick up | Scroll to Pick up and confirm Ok with the Foxkey. |
| User | Scroll to User and confirm Ok with the Foxkey. ⇒ The display shows the number of the phone from which you last picked up a call. |
| Enter the number of the phone from which you want to pick up the call and confirm with the Ok Foxkey. ⇒ You are now through to the caller. |
■ Using the DTMF Mode. Activating/deactivating DTMF
You want to be able to use your phone to control other equipment or to access certain services, such as remote polling of an answering machine or telebanking. For these services you need the DTMF mode.
In the DTMF mode each key press generates a tone. If for example you key in a call number during a call, your call partner will hear the tone signals.
You can specify whether the DTMF mode should be generally activated or deactivated (see Chapter "Configuring the DTMF mode", page 50). DTMF is activated as the default dialling mode.
If the DTMF mode is generally deactivated, you can activate it and deactivate it again temporarily during a call.
| You're in a call and the DTMF mode is generally deactivated. You want to activate the DTMF mode temporarily. | |
| DTMF | Press Foxmenu > Foxkey DTMF.⇒ The display shows Enter number DTMF. You can now enter the DTMF characters. |
| Deactivate | Resetting DTMF mode:Press Foxmenu > Foxkey Deactivate. |
| Note:When you hang up, the DTMF mode is automatically deactivated again. |
■ Making a call on a third-party phone
You want to make a call on a third-party phone using your personal settings, for example on a colleague's phone or in a meeting room.
You can activate a third-party phone to make an internal or external call using your personal settings, even if the phone is locked for external calls.
You can activate the phone for a business or private call.
Once you have activated the phone using a */# procedure and your PIN, dialling by your private phone book is available.
The called party's display shows your personal phone number and not the number of the phone from which you are making your call.
Any call charges incurred will be charged to you.

- Enter #36.
- Enter your internal phone number.
- Enter your PIN.
- Enter the internal or external phone number with the exchange access digit.
Pick up the handset.
→ The phone number displayed is dialled.

Note:
When you hang up, dialling by name and your private phone book remain available for a whole minute so you can make another call.
Or:
- Enter #46 for a private call.
- Enter your internal phone number.
- Enter your PIN.
- Enter the external call number directly, without the exchange access digit.
- Pick up the handset.
⇒ The phone is now enabled; the external user is called.
Note:
The factory setting "0000" is not accepted. First change the PIN (see Chapter "Changing the PIN", page 51) or using the */# procedure *47 (see "User's Guide */# Procedures"). If you have forgotten your PIN, your system administrator can reset it to the factory setting.
■ Paging an Internal User
You are unable to reach an internal user and thus want to page them.
If the system is equipped with a paging system (PS), the person can be paged. The paged person can answer from any phone.
Menu

Call features

Page


Press Foxmenu > Foxkey Menu.
Scroll to Call features and press the Select Foxkey.
Scroll to Page and confirm Ok with the Foxkey.
Enter the phone number f the person to be paged and confirm with the Ok Foxkey.
→ The person is paged and sees your phone number on the pager.
Answer the pager
Your pager is ringing and shows the phone number of the person trying to reach you.
You can answer from any internal phone.
Menu

Call features

Pick up

Pager


Press Foxmenu > Foxkey Menu.
Scroll to Call features and press the Select Foxkey.
Scroll to Pick up and confirm Ok with the Foxkey.
Scroll to Pager and confirm Ok with the Foxkey.
Enter your own phone number and confirm with the Ok Foxkey.
→ You are now connected with the person who is trying to reach you.
Note:
You can also answer a pager with the */# procedure *82.
■ Answering a General Bell
Via the general bell, you hear either your personal ringing pattern or the general ringing signal. Calls with the general bell as the destination can be signalled visually or acoustically via an external piece of supplementary equipment. The call can be answered on any terminal.
Ask your system administrator whether a general bell is set up.
You can answer from any internal phone.
Press Foxmenu > Foxkey Menu.
Scroll to Call features and press the Select Foxkey.
Scroll to Pick up and confirm Ok with the Foxkey.
Scroll to General bell and confirm Ok with the Foxkey.
Enter your own phone number and confirm with the Ok Foxkey.
→ You are now connected with the person who is trying to reach you.
Note:
You can also answer a general bell with the */# procedure *83.
■ Activating/Deactivating a Discreet ring
You do not want to be disturbed by your phone ringing. However, you do not want to switch off your phone.
Discreet ringing is available on your phone as an alternative to the usual ringing. If discreet ring is activated, the phone rings only once.
This function must be stored under a function key (see Chapter "Configuring Keys", page 56).

In the idle state:
Press the function key for
→ is displayed.
■ Suppressing your call number from your called party's terminal display
You do not want your call number to appear on the terminal display of a called party in the public network.
You have two possibilities:
• If you never want the phone number to be displayed, set CLIR permanently.
- To suppress your call number display for certain calls only, select the function CLIR per call before dialling your party's call number.
This function must be stored under a function key (see Chapter "Configuring Keys", page 56).
You can also execute the function with a */# procedure (see "User's Guide */# Procedures").

Before the call:
Press the function key for
Notes:
- CLIR works only with external calls.
- This feature depends on the range of services offered by your provider.
■ Tracking a Malicious Call
Your are being threatened or molested by a call. You want to identify the caller.
Using the MCID function (MCID: Malicious Call Identification), the provider records the following call data: Your phone number, the caller's phone number, and the date and time of the call.
MCID has to be enabled by your provider. Your provider will inform you about accessing the recorded call data.
This function must be stored under a function key (see Chapter "Configuring Keys", page 56).

During a call:
Press the function key for MCID (MCID).
After the call do not hang up: press the function key for MCID (MCID) while you hear the busy tone.
■ Personal call routing
You want to specify which of your terminals shall ring when you receive a call.
If your system administrator has set up a phone number with several terminals for you as well as the 5 call routings, you can specify which of your terminals shall signal a call by using the personal call routing. Your system administrator can set up up to 5 call routings. You can only answer a call on terminals where the call is signalled. Contact your system administrator for more information.
You can activate a call routing for all terminals. If you have not configured a call routing, the factory setting (all terminals are ringing) is used as standard.
You can execute this function only with a */# procedure (see "User's Guide */# Procedures").
Ring Alone
You want to specify which of your terminals shall ring acoustically when you receive a call.
When your system administrator has set up a phone number with several terminals, you can define on which terminal a call shall acoustically be signalled using Ring Alone.
When you have activated Ring alone on a terminal, the acoustic ringing tone is deactivated for all other terminals (♪). An incoming call is signalled in the display of all terminals. You can answer the call on each of your terminals.
Note:
When you have activated ring alone but deactivated the personal call routing for a terminal in parallel, an incoming call is not acoustically but only visually signalled.
This function must be stored under a function key (see Chapter "Configuring Keys", page 56).

In the idle state:
Press the function key for
→ Ring Alone is activated/deactivated.
Setting functions by remote control
This section explains how you can alter your phone's settings even if you are not directly at your phone.
You are not at your desk and want to set various functions on your phone from a different phone.
You can activate/deactivate many of your phone's functions by remote control from a different phone.
The remote control is initiated using a special */# procedure. You can then enter the function commands and */# procedures.


Using remote control from a third-party phone:
- Enter */# procedure #36.
- Enter your phone number.
- Enter your PIN.
- Enter the */# procedure for activating/deactivating the function you want.
Pick up the handset.
→ You hear the acknowledgement tone.
Put the handset on-hook.
⇒ The function is now activated/deactivated.
Note:
The factory setting "0000" is not accepted. First change the PIN as described in chapter "Changing the PIN", page 51 or use */# procedure *47 (see "User's Guide */# Procedures"). If you have forgotten your PIN, your system administrator can reset it to the factory setting.
Personalizing Your Phone
These sections explain how to adapt the phone's basic settings to suit your personal requirements.
Display 48
Setting the Ringing Properties (Audio).... 48
General settings 50
Protection 53
Phone Book Management 54
Configuring Voice Mail.... 55
Configuring Keys.... 56
Formulating Functions.... 58
Display
This section explains how to set display properties.
Setting the display
You may find the display is too bright or too dark.
You can adjust the display contrast.
Menu

Settings

Display

Display contrast


Press Foxmenu, then Foxkey Menu.
Scroll to Settings and press the Select Foxkey.
Scroll to Display and press the Select Foxkey.
Scroll to Display contrast and press the Modify Foxkey.
Select the required setting and confirm with the Ok Foxkey. ⇒ The setting is stored.
Setting the Ringing Properties (Audio)
This section explains how to set your phone's ringing tone properties.
Setting the ringing volume during ringing
You want to adjust the ringing volume.
You can adjust the ringing volume while the phone is ringing.


Quieter: Press the --key.
Louder: Press the +-key.
Setting the Volume during a Call
You want to adjust the volume while in a call.
This automatically adjusts the volume of the handset and loudspeaker.
The new volume will remain stored even after the call is ended.

Quieter: Press the --key.

Louder: Press the +-key.
Setting the Ringing Properties
You want to change the way in which your phone rings.
You can set the ringing volume, the ringing melody and the speed.
Note:
Please note that the ringing volume may be reduced if Aastra 5360 is not connected to the power supply.
Menu

Settings

Audio


Press Foxmenu, then Foxkey Menu.
Scroll to Settings and press the Select Foxkey.
Scroll to Audio and press the Select Foxkey.
Scroll to the required audio settings and press the Modify Foxkey.
Select the required setting and confirm with the Ok Foxkey.
→ The setting is stored.
Note:
To list to all the settings, use the Test Foxkey.
General settings
This section explains other settings you can make on your phone.
■ Selecting the language
The display text is not in the language you want.
You can select a different language. The menu item under which you select your language is marked by an "*" in front of the word for "language" in the language of your choice, e.g. "*Language" for English.
Menu

<*Language>


Press Foxmenu, then Foxkey Menu.
Scroll to *Language and press the Modify Foxkey.
→ The set language is displayed with √
Select the required language and confirm with the Ok Foxkey.
→ The display text appears in your selected language.
■ Configuring the DTMF mode
You want to decide whether the DTMF mode is to be activated or deactivated as default on your phone.
Menu

Settings

General

DTMF


Press Foxmenu, then Foxkey Menu.
Scroll to Settings and press the Select Foxkey.
Scroll to General and press the Select Foxkey.
Scroll to DTMF and press the Modify Foxkey.
Activate or deactivate DTMF and confirm Ok with the Foxkey.
→ The setting is stored.
■ Changing the PIN
You want to change the PIN used to lock/unlock your phone (see Chapter "Locking Your Phone", page 36 and "Unlocking Your Phone", page 37).
The factory setting is digit combination "0000"; you can select any 2 to 10-digit combination for your new PIN.
If you have forgotten your PIN, your system administrator can reset it to the factory setting.
Note:
Your PIN applies to all your terminals.

Press Foxmenu, then Foxkey Menu.
Scroll to Settings and press the Select Foxkey.
Scroll to General and press the Select Foxkey.
Scroll to PIN and press the Modify Foxkey.
→ The display reads Old PIN.
Enter the old PIN and confirm with the Ok Foxkey.
→ The display reads New PIN.
Enter the new PIN and confirm with the Ok Foxkey.
→ The display reads Confirm.
Enter the new PIN a second time and confirm with the Ok Foxkey.
→ The new PIN is stored.
Notes:
- For each digit entered, the display shows an "*".
- You can also change the PIN with */# procedure *47 (see "User's Guide */# Procedures").
■ Identifying the communication system
This terminal can be connected to different Aastra communication systems. You can verify to which system your terminal is connected to.

Press Foxmenu, then Foxkey Menu.
Scroll to Settings and press the Select Foxkey.
Scroll to General and press the Select Foxkey.
Scroll to Own ID and press the Select Foxkey.
→ Name, call number and communication system are displayed.
■ Local IP settings (Aastra 5360ip)
The IP-relevant data for your phone is stored in this menu. The input of this data is password-protected; it can therefore only be carried out by your system administrator. You can however call up the data.

Press Foxmenu, then Foxkey Menu.
Scroll to Settings and press the Select Foxkey.
Scroll to General and press the Select Foxkey.
Scroll to Local settings and press the Select Foxkey.
→ IP-relevant settings retrievable.
Protection
This section explains how you can protect yourself against certain types of call.
Do not disturb/Call waiting/Intrusion/Announcement/Forward
You want to protect yourself against certain types of calls.
You can set your phone so that these functions are not permitted on it. Ask your system administrator whether these functions are enabled on the system.
Menu

Settings

Protection



Press Foxmenu, then Foxkey Menu.
Scroll to Settings and press the Select Foxkey.
Scroll to Protection and press the Select Foxkey.
Scroll to the required protection settings and press the Modify Foxkey.
Select the required setting and confirm with the Ok Foxkey.
→ The setting is stored.
Note:
You can deactivate an activated protection using Foxmenu > Menu > Activated features > Foxkey Deactivate.
Phone Book Management
This section explains how to create a new entry in the phone book and how to edit or delete an entry.
■ Creating a New Phone Book Entry
You want to store your own phone numbers. You can store your own phone numbers in the private phone book.

■ Editing or deleting a phone book entry
You want to modify a phone number stored on your private phone book.
Note:
You cannot modify entries in other phone books.

Configuring Voice Mail
This section explains how to set your Voice Mail.
Personal greeting
You have the possibility of recording up to three different greetings. If no personal greeting is activated or if none is available, the global greeting is activated automatically, provided it has been recorded. Contact your system administrator for more information.

Press Foxmenu, then Foxkey Menu.
Scroll to Voice Mail and press the Select Foxkey.
Recording a greeting:
Select the greeting you want and press Foxmenu >Foxkey Record.
Now record your personal greeting text.
Note:
Record your text through the handset.
Listening to the greeting:
Select the greeting you want and press Foxmenu >Foxkey Listen.
→ You can monitor your personal greeting text and re-record it if necessary.
Select the greeting:
Select the greeting you want and confirm with Foxmenu>Foxkey Ok.
→ The announcement last recorded is automatically activated.
Notes:
- To find out how to configure call forwarding to your Voice Mail, refer to the Chapter "Forward to Voice Mail", page 34.
- More information on Voice Mail can be found in the "Operating Instructions for the Voice Mail Systems Ascotel® IntelliGate®".
Configuring Keys
This section explains how to assign phone numbers and functions to a Foxkey or configurable key.
Available keys
You can assign phone numbers or functions to one of the 10 configurable keys. These are accessible at all times.
You can assign each key with a specific type so you can trigger a particular action by simply pressing that key. Choice available:
Number key: To store the phone number;
Function key: Activate/deactivate function;
- Store a phone number under a key – number key
You want to retrieve a frequently used phone number with a single keystroke rather than enter it digit by digit.
On each configurable key you can store two call numbers and the associated names. The key automatically becomes a number key.

To store a phone number under a configurable key:
Press the key and hold it down for a moment.
→ Display shows choice of key types.
Scroll to Number key and press the Select Foxkey.
Enter phone numbers and names and confirm with the Ok Foxkey.
Notes:
- The text mode for letter input is automatically activated.
- You can use the Correction key to delete any incorrect character.
■ Store a function under a key– function key
You want to retrieve a frequently used function - for example "call forwarding on no reply" - using a single keystroke rather than having to enter it by hand. Usually the function is assigned so that you:
- activate the function with the first keystroke,
- and deactivate the command again with a second keystroke.
To store a function under a configurable key:
Press the key and hold it down for a moment.
→ Display shows choice of key types.
Scroll to Function key and press the Select Foxkey.
⇒ The currently set function is displayed with √
Select the function you want and press the Select Foxkey.
The further prompting depends on the function (see Chapter "Supplementary features", page 20). Once you have made all the settings, the function is stored under the key.
Note:
Besides the predefined functions you can also define your own function. For more information please refer to the Chapter "Function Commands", page 58.
Clearing a Key
You want to clear the assignment made to a configurable key.
The No function function is provided specifically for this purpose.
To clear a configurable key:
Press the configurable key and hold it down for a moment.
→ The display shows the key type.
Scroll to No function and confirm Ok with the Foxkey.
→ The key configuration is cleared.
Formulating Functions
This section explains how to activate an individual function, for example call forwarding unconditional, with the aid of function commands and how to assign it to a key.
Function Commands
You can use function commands to define a function to suit your personal requirements. A function can consist of one or more function commands, function codes, and the phone number. You can either carry out a function directly or store it under a function key (select configurable function).
Tab. 1 The following function commands are available:
| "A" Seize line with highest priority |
| "I" Seize line |
| "X" Disconnect |
| "P" Pause 1 second before the next operation |
| "N" Use the phone number entered in call preparation |
| "." Control key function (up-circuit system) |
| "Z" Activate/deactivate DTMF mode |
| "R" Use the phone number last dialled |
| "Y" Disconnect and reseize the line. |
Tab. 2 Examples of how to define a function:
| "IR" | Seize line ("I"), dial phone number last dialled ("R") |
| "I201" Seize line ("I") and | dial phone number 201 |
| "I*21201X" | Seize line ("I"), activate call forwarding unconditional ("*21") to phone number 201, disconnect ("X") |
| Notes:• Text mode has to be activated before you can enter function commands.• Functions that are not available via the menu can be activated using */# procedures (see "User's Guide */# Procedures").• You can either type in a */# procedure directly or store it under a key.• You can only activate certain */# procedures if the same function cannot be obtained via the menu.• The availability of certain */# procedures may be restricted depending on the system and software version. |
\*/# Procedures
A list with all the */# procedures can be found at http://www.aastra.com/docfinder ("User's Guide */# Procedures").
Further information
The following sections contain more useful information about your phone.
Troubleshooting....60
Declaration Open Source Software (Aastra 5360ip).....61
System and Software-Related Functions ....61
Troubleshooting
This section contains a few tips on how to operate your phone if you encounter any problems.
Malfunctions
Your call partner cannot hear you or you cannot hear your call partner
Make sure the handset cord is correctly plugged into both the handset and the phone (see chapter "Installation and First-Time Operation", page 62).
Handset off-hook, no dialling tone, no display
Make sure the phone cord is correctly plugged in to both the phone and the LAN socket (see chapter "Installation and First-Time Operation", page 62).
Display reads "Not configured", handset off-hook, no dial tone
Your phone has not been assigned a call number. Contact your system administrator for more information.
The display reads: "Trying to register"
The telephone cannot be registered. Contact your system administrator for more information.
Display is working, but connection is not possible
Your phone may be locked. Unlock your phone (see chapter "Unlocking Your Phone", page 37).
Freely configurable keys cannot be configured.
The configuration may be locked. Unlock your phone (see chapter "Unlocking Your Phone", page 37). The key for a reconfiguration may be locked in the system. Contact your system administrator for more information.
Insufficient display contrast
The setting for the display contrast is inadequate. Change the setting (see Chapter "Setting the display", page 48).
Note:
For all other messages, faults and questions you may have, contact your system administrator.
Declaration Open Source Software (Aastra 5360ip).
■ About Open Source Software
This product contains Open Source Software from third-party suppliers subject to the GNU licence provisions GPL (GNU General Public License) and LGPL (GNU Library/Lesser General Public License).
The licence texts for the GPL and LGPL and for the source code of the software sections listed below are available at http://www.aastra.com/docfinder ("Public GNU source" document type).
The licence texts for the GPL and LGPL are also stored on the terminal itself and can be viewed using the integrated web interface (URL:
Please read through the text carefully to find out all you need to know about your rights with regard to the licences concerned.
This product contains the following software subject to GPL provisions:
- Linux kernel, available at http://www.kernel.org/
- Busybox, available at http://www.busybox.net/
This product contains the following software subject to the LGPL provisions:
- ucLibc, available at http://www.ucLibc.org/
System and Software-Related Functions
You want to activate a feature described in these Instructions but the system will not let you.
Some systems or system versions do not support all the features. The corresponding text sections are identified by a letter inside square brackets [a]. The list below indicates which system versions support the relevant features. Contact your system administrator for more information.
| 17.5 17.6 17.7 | |||||||
| [a] x | |||||||
| [b] x | |||||||
| [c] x | |||||||
| [d] |
Installation and First-Time Operation
These sections explain the setup options available with your phone.
Equipment provided....63
Options 63
Setting up and mounting the phone....64
Connecting Astra 5360....66
Connecting Astra 5360ip....67
Equipment provided
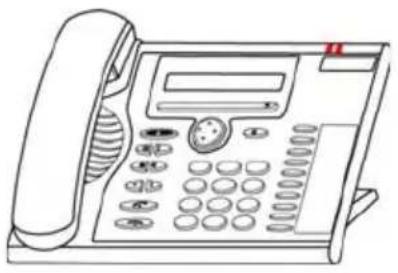
Telephone and handset
natural_image
Line drawing of a classic office telephone with keypad and keypad (no text or symbols)Stand rest; can also be used as a mounting frame for wall mounting
Handset connection cable

Quick User's Guide and safety information
Telephone connection
cable Aastra 5360


natural_image
Pure technical line drawing of a mechanical bracket or housing (no text or symbols)
Options
Plug-in power adapter (if the power supply is not supplied via the LAN, only Astra 5360ip).

natural_image
Simple line drawing of an electrical component with a coiled cable (no text or symbols)Setting up and mounting the phone
With the aid of the supplied stand rest you can set up the phone as a desktop phone or mount it to the wall.
Setting the phone up as a desktop phone
You can set up the phone either at a 40^ or a 25^ angle. To do so, insert the stand rest in different positions into the back of the phone until it snaps into place.
- Insert the stand rest as indicated on the installation diagram until it snaps into place.
- Connecting the handset: Plug the connector on the shorter straight extremity of the handset cord into the socket on the handset. Plug the connector at the loose extremity of the cord into the handset socket on the underside of the phone. To relieve the strain on the cable feed the cable through one of the cable guides on the stand rest.
- Connect the phone as indicated in chapter "Connecting Astra 5360", page 66 and "Connecting Astra 5360ip", page 67.

Wall mounting
You can also mount the phone on the wall. To do so, screw the stand rest onto the wall as a bracket and hook the phone onto the stand rest.
Note:
As there is only a limited amount of space between the sockets on the back of the phone and the wall on which it is mounted, you need to use a ribbon cable with a short connector for the cord. Ask your dealer for a list of suppliers for a suitable ribbon cable (only Astra 5360ip).
- Fit the screws for securing the stand rest and mount the stand rest (Figure A).
- Connect the handset and phone cord to the phone (Figure B). For the correct connection assignment refer to Chapter "Connecting Astra 5360", page 66 and "Connecting Astra 5360ip", page 67.
- Insert the phone into the stand rest horizontally (Figure C-1) and slide downwards (Figure C-2).
- Unscrew the cams for holding the handset (Figures D-1 to D-3).
- Insert the handset.

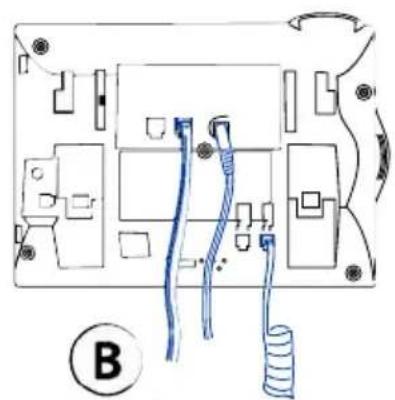
natural_image
Diagram of an electronic device interior with labeled components and wiring (no readable text or symbols)

Dismantling
Desktop phone:
- Disconnect the phone cord and remove.
- Carefully pull the stand rest away in the opposite direction.
Wall set:
- Carefully slide the phone upwards out of the stand rest.
- Disconnect the phone cord and remove.
Connecting Astra 5360
Connections


Telephone connection
Connecting the handset
■ Connecting your phone to the system
- Plug the connector on the phone cord on the underside of the phone into the socket with the phone symbol.
- Desktop installation only: To relieve the strain on the cable feed the cable through one of the cable guides on the stand rest.
- Plug the other end of the cable into the phone socket outlet.
- Set channel selector switch on the underside of the phone. Contact your system administrator for more information.
■ Logging your phone on
Your system administrator has to prepare the system before you can log on your phone.
Connecting Astra 5360ip
Connections

Connecting to the IP network

Connecting the handset

Connecting the power supply
Note:
Your system administration will take care of the IP addressing and the commissioning of the phone. The IP addresses and other information about your phone is available in the setting mode.

■ Connecting your phone to the LAN
This phone communicates via the same connection as your PC (IP network / LAN). This means you do not need a special phone connection. Ask your system administrator if you have any doubts about your phone's connection.
- Connecting the LAN cord (not included in the scope of delivery) to a LAN socket.
- Plug the connector at the loose end on the underside of the phone into the LAN socket.
- Desktop installation only: To relieve the strain on the cable feed the cable through one of the cable guides on the stand rest.
■ Connecting your PC to the LAN
If required, you can connect your PC or another LAN device to the phone, for example a printer.
- Connecting the LAN cord (not included in the scope of delivery) to the PC's network socket.
- Plug the connector at the loose end on the underside of the phone into the PC socket.
- Desktop installation only: To relieve the strain on the cable feed the cable through one of the cable guides on the stand rest.
■ Connecting the power supply
If your LAN supports Power-Over-Ethernet (PoE), the phone will be powered via the LAN cord and you will not require a power adapter.
If your LAN does not support PoE or if you have installed a switch between the LAN and the phone that does not support PoE, you will need the optional power adapter to power the phone.
Note:
Only use the optional original plug-in power adapter.
- Plug the round connector of the power cord on the underside of the phone into the power socket.
- Desktop installation only: To relieve the strain on the cable feed the cable through one of the cable guides on the stand rest.
- Connect the power supply to the mains.
■ Logging your phone on
Your system administrator has to prepare the system before you can log on your phone.
%, *, + ...
*/# Procedures ....58
A
Absence key 3, 32
Accessing the menu 18
Activate / deactivate DTMF mode ..... 40
Activating/Deactivating a Discreet Ring ..... 43
Ambient conditions 5
Announcement 53
Answer the pager 42
Answering a Call 10
Answering a General Bell 43
Answering Call Waiting 26
Audio 48
B
Brokering 29
C
Call duration 10
Call Forwarding on No Reply 34
Call Forwarding Unconditional ..... 33, 34, 35
Call key 3
Call list 23
Call waiting 53
Call waiting on an internal user 26
Changing the PIN 51
Charges 10, 28, 41
Clearing a Key 57
CLIR 44
Communication system 52
Conference Call 30
Configurable Keys .... 3
Configuring Keys 56
Configuring the DTMF mode ....50
Configuring Voice Mail 55
Connect 30
Connecting the power supply 68
Connecting your IP phone to the LAN .....67
Connecting your PC to the LAN 68
Connecting your phone to the system .....66
Connections 66
Correcting your Input 17
Correction key 2
Creating a New Phone Book Entry 54
D
Deflect a call during the ringing phase .....38
Deflection 38
Deleting a phone book entry 54
Desktop phone 64
Dialling 9
Dialling by Name 21
Dialling from external phone books 22
Dialling from the Call List of Answered Calls ... 23
Dialling from the Call List of Unanswered Calls . 23
Dialling from the phone book 21
Dialling with a Configurable Key 24
Dialling with Redial 24
Dialling with the Phone Number ..... 11
Digit keys 16
Dismantling 66
Display 14, 48
Display contrast 48
Display symbols 4
Disposal ....5
Do not disturb 53
Document information 7
DTMF Mode 40
DTMF mode 40, 50
E
Editing a Phone Book Entry 54
End key 3
Ending a Call 10
Enquiry Call During a Call 29
Enters digits 16
Enters letters 16
Equipment provided 63
Expansion key module Aastra M530/M535. 66, 67
F
Finding by paging system 42
First-Time Operation 62
Formulating Functions 58
Forwarding 53
Forwarding a Call 33
Forwarding a Call on No Reply 34
Forwarding to a message 35
Forwarding to Voice Mail 34
Foxkey 2,15
Foxmenu 2
Foxmenu key 15
Function Commands ....58
Function key 57
Function MCID (Malicious Call Identification) .. 44
G
GNU licence provisions 61
|
Installation 62
Intended Purpose ....6
Intrusion 53
IP connections....67
K
Key block 2
L
Labels 3
LED 2,19
Local IP settings 52
Lock 36
Logging the IP phone 68
Logging your phone on 66
Loudspeaker key 3
M
Maintenance 5
Making a Call 9
Making a call on a third-party phone 41
Malfunctions 60
MCID 44
Menu-Guided Navigation 18
Microphone key 3
Mounting the phone 64
Moving the Cursor 17
Muting the Microphone 12
N
Navigating with the navigation key 18
Navigation key 2
Not configured 60
Number key 56
0
Open listening 12
Open Source Software 61
Operating elements 2
Options 63
Organizing an Absence 32
P
Pager 42
Park 31
Personal call routing 45
Personal greeting 55
Phone book 21,22
Phone book key 3
Picking Up a Call 40
PoE 68
Pressing a Key 15
Private call with PIN 28
Protection 53
Q
Quickdial 21
R
Read Text Messages 39
Receiving an Announcement 28
Redial 11,24
Redial key 3
Reject 38
Reject a call during the ringing phase 38
Remote control 46
Requesting a Callback 25
Resetting activated features .....19
Ring Alone 45
Ringing melody 49
Ringing properties 49
Ringing speed 49
Ringing volume 49
S
Safety Information 5
Selecting the Language 50
Send text messages ....38
Set the ringing volume 48, 49
Setting the display 48
Setting the Ringing Properties 48
Setting up the phone 64
Signals 19
Software dependency ....61
Starting an Announcement .....27
Store a function under a key 57
Store a phone number under a key .....56
Supplementary features 20
Suppressing your call number 44
System and Software-Related Functions .....7
System dependency ....61
T
Text mode 16, 17
To answer the callback request .....25
Tracking a Malicious Call ....44
Transferring a Call Partner 30
Troubleshooting 60
Trying to register ....60
U
Unlock 37
Upper and Lower Case 17
User information 6
Using the Display and Operating Elements ..... 13
V
Voice Mail 34
Volume/cursor keys 3
W
Wall mounting 65
Declaration of Conformity
Aastra Technologies Limited hereby declares that the equipment Ascotel® und Ascotel® IntelliGate® and the accessories there to comply with the basic requirements and other relevant stipulations of Directive 1999/5/EC.
You will find the complete text of the declaration of conformity and other documents for this device and the telecommunications systems Ascotel® and Ascotel® IntelliGate® under:
www.aastra.com/docfinder
Ascotel® and IntelliGate® are registered trademarks of Astra.
Technical modifications and product availability subject to change without notice.
Copyright © Astra Technologies Limited
CE



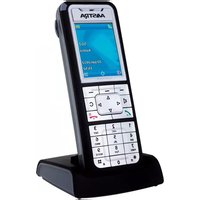
- Aastra Communications Systems
- ■ Operating elements
- Phone book key
- Redialkey
- Microphone key
- Loudspeaker key
- Volume/cursor keys
- Call key
- End key
- Configurable Keys
- Write-on labels
- Operating and Display Elements
- ■ Display symbols
- Safety Information
- Connections
- Mains connection
- Maintenance
- Cost control
- Ambient conditions
- Disposal
- Accessories
- User information
- New
- Intended Purpose
- ■ System and software-related functions
- Disclaimer
- Document information
- Dialling and Phoning 9
- Using the Display and Operating Elements 13
- Supplementary features 20
- Personalizing Your Phone 47
- Further information 59
- Installation and First-Time Operation 62
- Dialling and Phoning
- Answering Calls
- Answering a Call
- Note:
- Ending a Call
- Making calls
- ■ Dialling with the Phone Number
- Or:
- ■ Dialling with Redial
- ■ Using Your Phone in Open Listening Mode
- During a call:
- Deactivating open listening:
- ■ Muting the Microphone
- Switching the microphone off:
- Switching the microphone back on:
- Using the Display and Operating Elements
- Display
- ■ Display symbols and display text
- To see the rest of the text:
- Deleting the display text:
- Function activated:
- Keys
- Pressing a Key
- ■ Using the Foxmenu key
- Pressing the Foxmenu:
- Using the Foxkey
- Input
- Enters digits
- Enter the letters
- Switching between number mode and letter mode during your input:
- Digit keys
- ■ Switching between Upper and Lower Case
- Switching between upper case and lower case in text mode:
- ■ Correcting your Input
- To delete the last character:
- End input without saving:
- ■ Moving the Cursor
- Menu-Guided Navigation
- ■ Accessing the menu
- ■ Navigating with the navigation key
- Horizontal navigation key:
- Vertical navigation key:
- ■ Undoing Actions
- Back to the idle state in the menu:
- ■ Other navigation possibilities
- Scrolling back through the menu:
- ■ Resetting activated features
- Signals
- Indicator LED Signals
- Left LED flashes:
- Right LED flashes:
- Supplementary features
- Making and answering calls
- ■ Dialling by Name - Quickdial
- Notes:
- ■ Dialling from the phone book
- ■ Dialling from external phone books
- ■ Dialling from the Call List of Unanswered Calls
- Calling a user back:
- Clearing the "Missed calls" display:
- ■ Dialling from the Call List of Answered Calls
- ■ Dialling with a Configurable Key
- ■ Requesting a Callback
- You called someone and hear the busy tone or the ring-back tone.
- To activate a callback request:
- Back to the idle state:
- Reset callback:
- ■ To answer the callback request
- To answer the callback request:
- Clear callback:
- ■ Call Waiting on an internal user
- Call waiting
- User is busy:
- ■ Answering Call Waiting
- Answer
- Answering the call:
- Deflect
- Deflect call:
- Reject
- Rejecting the call:
- End call
- Ending a current call:
- ■ Starting an Announcement
- Announcement
- ■ Receiving an Announcement
- To continue the announcement as a phone call:
- To stop the announcement:
- Private call with PIN
- Using functions while in a call
- ■ Enquiry Call During a Call
- Enquiry call
- You are making/taking a call:
- To end the enquiry call:
- ■ Brokering between an Enquiry Call Party and Your Call Partner
- Brokering
- Brokering:
- To terminate the current connection:
- ■ Making a Conference Call
- Conference
- To connect the call party on hold:
- Leaving a conference call:
- ■ Transferring a Call Partner
- Connect
- Connecting with notification:
- Connecting without notification:
- Parking a Call Partner
- To retrieve a parked call party:
- To phone with the handset:
- Organising absences from the desk
- Organising absences using the Absence Key
- Configure the Absence key:
- To activate the last forwarded destination:
- When you are back at your desk:
- ■ Forwarding Calls (Call forwarding)
- ■ Forwarding a Call on No Reply (CFNR)
- Forward to Voice Mail
- Call Forwarding
- Voice Mail
- Forwarding to a message
- Menu
- Forwarding
- Message
- ■ Locking Your Phone
- ■ Unlocking Your Phone
- Functions for special situations
- ■ Deflect a call during the ringing phase
- ■ Reject a call during the ringing phase
- Send text messages
- Text message
- Read Text Messages
- Show
- Read
- Delete
- Read Message:
- To delete the message:
- Picking Up a Call
- ■ Using the DTMF Mode. Activating/deactivating DTMF
- ■ Making a call on a third-party phone
- ■ Paging an Internal User
- Answer the pager
- ■ Answering a General Bell
- ■ Activating/Deactivating a Discreet ring
- In the idle state:
- ■ Suppressing your call number from your called party's terminal display
- Before the call:
- ■ Tracking a Malicious Call
- ■ Personal call routing
- Ring Alone
- Setting functions by remote control
- Using remote control from a third-party phone:
- Personalizing Your Phone
- Setting the display
- Setting the Ringing Properties (Audio)
- Setting the ringing volume during ringing
- Setting the Volume during a Call
- Setting the Ringing Properties
- General settings
- ■ Selecting the language
- ■ Configuring the DTMF mode
- ■ Changing the PIN
- ■ Identifying the communication system
- ■ Local IP settings (Aastra 5360ip)
- Protection
- Do not disturb/Call waiting/Intrusion/Announcement/Forward
- Phone Book Management
- ■ Creating a New Phone Book Entry
- ■ Editing or deleting a phone book entry
- Configuring Voice Mail
- Personal greeting
- Recording a greeting:
- Listening to the greeting:
- Select the greeting:
- Configuring Keys
- Available keys
- - Store a phone number under a key – number key
- To store a phone number under a configurable key:
- ■ Store a function under a key– function key
- To store a function under a configurable key:
- Clearing a Key
- To clear a configurable key:
- Formulating Functions
- Function Commands
- \*/# Procedures
- Further information
- Troubleshooting
- Malfunctions
- Your call partner cannot hear you or you cannot hear your call partner
- Handset off-hook, no dialling tone, no display
- Display reads "Not configured", handset off-hook, no dial tone
- The display reads: "Trying to register"
- Display is working, but connection is not possible
- Freely configurable keys cannot be configured.
- Insufficient display contrast
- Declaration Open Source Software (Aastra 5360ip).
- ■ About Open Source Software
- System and Software-Related Functions
- Installation and First-Time Operation
- Equipment provided
- Options
- Setting up and mounting the phone
- Setting the phone up as a desktop phone
- Wall mounting
- Dismantling
- Desktop phone:
- Wall set:
- Connecting Astra 5360
- ■ Connecting your phone to the system
- ■ Logging your phone on
- Connecting Astra 5360ip
- ■ Connecting your phone to the LAN
- ■ Connecting your PC to the LAN
- ■ Connecting the power supply
- A
- B
- C
- D
- E
- F
- G
- |
- K
- L
- M
- N
- 0
- P
- Q
- R
- S
- T
- U
- V
- W
- Declaration of Conformity
Brand : AASTRA
Model : 5360
Category : Telephone