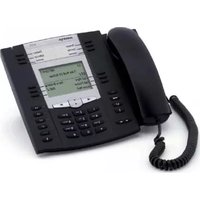
A6737-0131-10-55 - Telephone AASTRA - Free user manual and instructions
Find the device manual for free A6737-0131-10-55 AASTRA in PDF.


| Product Type | IP Business Phone |
| Brand | Aastra (Mitel) |
| Model | A6737-0131-10-55 |
| Display | 3.5-inch Color LCD, 320x240 pixels |
| Number of Lines | Up to 6 SIP lines |
| Network Interface | 10/100/1000 Gigabit Ethernet (2 ports) |
| Power Supply | PoE (IEEE 802.3af) or AC adapter (5V DC, 2A) |
| Dimensions (W x H x D) | 260 x 210 x 160 mm |
| Weight | 1.1 kg |
| Audio Features | Full-duplex speakerphone, HD audio, headset jack |
| Key Features | VoIP, call hold/transfer/conference, programmable keys, XML support |
| Wall Mountable | Yes (optional bracket) |
| Maintenance | Clean with dry, lint-free cloth; avoid liquids |
| Security | TLS, SRTP, HTTPS, 802.1X |
| Spare Parts Available | Handset, cord, power adapter (AC/DC) |
Frequently Asked Questions - A6737-0131-10-55 AASTRA
User questions about A6737-0131-10-55 AASTRA
0 question about this device. Answer the ones you know or ask your own.
Ask a new question about this device
Download the instructions for your Telephone in PDF format for free! Find your manual A6737-0131-10-55 - AASTRA and take your electronic device back in hand. On this page are published all the documents necessary for the use of your device. A6737-0131-10-55 by AASTRA.
USER MANUAL A6737-0131-10-55 AASTRA
natural_image
Office desk with five black office phones and a keypad, arranged in a row against a plain wall (no visible text or symbols)Aastra Model 6737i SIP IP Phone
AASTRA
A Mitel Company
User Guide
Release 3.3.1 SP3
Software License Agreement
Aastra, hereinafter known as "Seller", grants to Customer a personal, worldwide, non-transferable, non-sublicenseable and non-exclusive, restricted use license to use Software in object form solely with the Equipment for which the Software was intended. This Product may integrate programs, licensed to Aastra by third party Suppliers, for distribution under the terms of this agreement. These programs are confidential and proprietary, and are protected as such by copyright law as unpublished works and by international treaties to the fullest extent under the applicable law of the jurisdiction of the Customer. In addition, these confidential and proprietary programs are works conforming to the requirements of Section 401 of title 17 of the United States Code. Customer shall not disclose to any third party such confidential and proprietary programs and information and shall not export licensed Software to any country except in accordance with United States Export laws and restrictions.
Customer agrees to not reverse engineer, decompile, disassemble or display Software furnished in object code form. Customer shall not modify, copy, reproduce, distribute, transcribe, translate or reduce to electronic medium or machine readable form or language, derive source code without the express written consent of the Seller and its Suppliers, or disseminate or otherwise disclose the Software to third parties. All Software furnished hereunder (whether or not part of firmware), including all copies thereof, are and shall remain the property of Seller and its Suppliers and are subject to the terms and conditions of this agreement. All rights reserved.
Customer's use of this software shall be deemed to reflect Customer's agreement to abide by the terms and conditions contained herein. Removal or modification of trademarks, copyright notices, logos, etc., or the use of Software on any Equipment other than that for which it is intended, or any other material breach of this Agreement, shall automatically terminate this license. If this Agreement is terminated for breach, Customer shall immediately discontinue use and destroy or return to Seller all licensed software and other confidential or proprietary information of Seller. In no event shall Seller or its suppliers or licensors be liable for any damages whatsoever (including without limitation, damages for loss of business profits, business interruption, loss of business information, other pecuniary loss, or consequential damages) arising out of the use of or inability to use the software, even if Seller has been advised of the possibility of such damages.
Content
Software License Agreement....ii
Welcome....1
About this Guide ....1
Documentation 1
Phone Features....1
Requirements 2
Installation and Setup 2
Getting Started....3
Plugging in and Starting the Phone....3
Network Connected/Network Disconnected 5
Idle Screen 6
IP Phone Keys....9
Key Panel 9
Key Descriptions 10
Keypad Keys 12
Methods for Customizing Your Phone 13
Phone Options via the IP Phone UI....13
Phone Options via the Astra Web UI 15
Phone Status....18
Phone Status via IP Phone UI 18
Finding Your Phone's IP Address....19
Phone Status via the Aastra Web UI....20
Customizing Your Phone 22
Ring Tones and Tone Sets....22
Contrast Level....25
Backlight....25
Live Dialpad*......26
Set Audio....26
Time and Date....27
User Password 38
Resetting a User Password....39
Restarting Your Phone 40
Phone Lock 40
Defining an Emergency Dial Plan 42
Line Keys and Softkeys 43
Multiple Line and Call Appearances 43
Softkeys 44
State-Based Softkeys 46
Line Key 49
Speeddial Key 51
Editing Speed Dial Keys....57
"Do Not Disturb" (DND) Key 59
Busy Lamp Field (BLF) Key 61
BLF/List Key 62
Automatic Call Distribution (ACD) Key (for Sylantro Servers)....64
XML Key 68
Flash Key....73
Sprecode Key....74
Park/Pickup Keys....75
Last Call Return (LCR) Key (Sylantro Servers only)....78
Call Forward Key 79
BLF/Xfer....80
Speeddial/Xfer 82
Speeddial/Conf....84
Directory Key......86
Callers List Key 88
Redial Key....90
Conference Key....92
Transfer Key....93
Intercom Key 94
Services Key 96
Phone Lock Key....98
Paging Key (Sends the RTP Stream) 100
Empty Key 103
None Key 104
Making Calls 105
Dialing a Number 105
Pre-dialing a Number.... 105
Using Handsfree Speakerphone 106
Using a Headset 106
Using Intercom 108
Redial 109
Mute 109
Receiving Calls....110
Answering an Incoming Call 110
Sending an Incoming Call to Voicemail 110
Handling Calls 111
Placing a Call on Hold 111
Transferring Calls 112
Conferencing Calls 116
Ending Calls 121
Managing Calls 122
Directory List 122
Callers List 132
DND and Call Forward.... 138
Voicemail 154
Additional Features 155
Display DTMF Digits 155
Play Call Waiting Tone 156
Stuttered Dial Tone.... 157
XML Beep Support....158
Status Scroll Delay 159
Switch UI Focus to Ringing Line 160
Call Hold Reminder During Active Calls 161
Call Hold Reminder (on single hold) 162
Call Waiting Tone Period 163
Preferred Line and Preferred Line Timeout 164
Goodbye Key Cancels Incoming Calls 165
Message Waiting Indicator Line 167
Incoming Intercom Call Features 168
Group RTP Paging (receives RTP streams) 170
Shared Call Appearance (SCA) Call Bridging 171
Star Codes....173
Other Features 173
Model M670i and M675i Expansion Modules....174
Using the Expansion Modules 176
Troubleshooting Solutions....178
Limited Warranty ......Warranty-1
Exclusions......Warranty-1
Warranty Repair Services......Warranty-1
After Warranty Service ...... Warranty-1
Limited Warranty (Australia Only)......Warranty-2
Repair Notice......Warranty-2
Exclusions......Warranty-2
Warranty Repair Services......Warranty-3
After Warranty Service ...... Warranty-3
Appendix A - Time Zone Codes....A-1
Index ...... Index-1
Welcome
The Aastra 6737i offers advanced XML capability to access custom applications and is fully interoperable with leading IP-PBX platforms. Featuring a 5-line display, the 6737i supports up to 9 lines with call appearances and allows you to make and receive calls, transfer, conference, and more. The 6737i IP telephone provides communications over an IP Network using the SIP IP telephony protocol.
About this Guide
This guide explains how to use the basic features of your new 6737i phone. Not all features listed are available by default. Contact your system or network administrator to find out which features and services are available to you on your system. Your System Administrator has the ability to customize some features on this phone. For information on more advanced settings and configurations, administrators should refer to the Astra SIP IP Phones Administrator Guide.
Documentation
- Aastra 6737i SIP IP Phone Installation Guide – Installation and set-up instructions, general features and functions, and basic options list customization. The Installation Guide is included with the telephone.
- Aastra 6737i SIP IP Phone User Guide – Describes the most commonly used features and functions for an end user. The User Guide can be downloaded from http://www.aastra.com.
- Astra SIP IP Phones Administrator Guide – Describes how to set the 6737i phone up on the network and contains advanced configuration instructions for the 6737i. The Administrator Guide is intended for the System Administrator and can be downloaded from http://www.aastra.com.
Phone Features
• 11 line graphical LCD screen (144 x 128 pixels) with white backlight
• Built-in-two-port, 10/100/1000 Gigabit Ethernet switch - lets you share a connection with your computer.
• 12 multi-functional softkeys
- 6 Top Keys: Static softkeys (up to 10 programmable functions)
- 6 Bottom Keys: State-based softkeys (up to 20 programmable functions)
• 4 call appearance lines with LEDs
• Supports up to 9 call lines
• HD audio (wideband)
• Full-duplex speakerphone for handsfree calls
- Headset support (modular connector)
• Inline power support (based on 802.3af standard) which eliminates power adapters.
• Enhanced busy lamp fields*
- Set paging*
* Availability of feature dependant on your phone system or service provider.
Requirements
The 6737i IP Phone requires the following environment:
- SIP-based IP PBX system or network installed and running with a SIP account created for the 6737i phone.
- Access to a Trivial File Transfer Protocol (TFTP), File Transfer Protocol (FTP), Hypertext Transfer Protocol (HTTP) server, or Hyper Text Transfer Protocol over Secure Sockets Layer (SSL) (HTTPS).
- Ethernet/Fast Ethernet LAN (10/100 Mbps) (Gigabit Ethernet LAN (1000 Mbps) recommended)
- Category 5/5e straight through cabling (category 6 straight through cabling required for optimum Gigabit Ethernet performance)
- Power source
- For Ethernet networks that supply in-line power to the phone (IEEE 802.3af):
-For power, use the Ethernet cable (supplied) to connect from the phone directly to the network for power. (No 48v AC power adapter required.)
- For Ethernet networks that DO NOT supply power to the phone:
- (optional) For power, use a Power over Ethernet (PoE) power injector or a PoE switch. A PoE power injector is available as an optional accessory from Astra. Contact your Administrator for more information.
Installation and Setup
If your System Administrator has not already setup your 6737i phone, please refer to the Aastra 6737i Installation Guide for basic installation and physical setup information. For more advanced administration and configuration information, System Administrators should refer to the Aastra SIP IP Phones Administrator Guide.
Getting Started
The 6737i must be set up and be configured prior to its first use. This section describes phone behavior and start up screens you may see when the phone is first plugged in, or when it is restarted.

Plugging in and Starting the Phone
The 6737i automatically begins the start up sequence as soon as it is connected. The phone goes through this process the first time you plug in your phone and every time you restart your phone.
The phone displays the following startup screens.
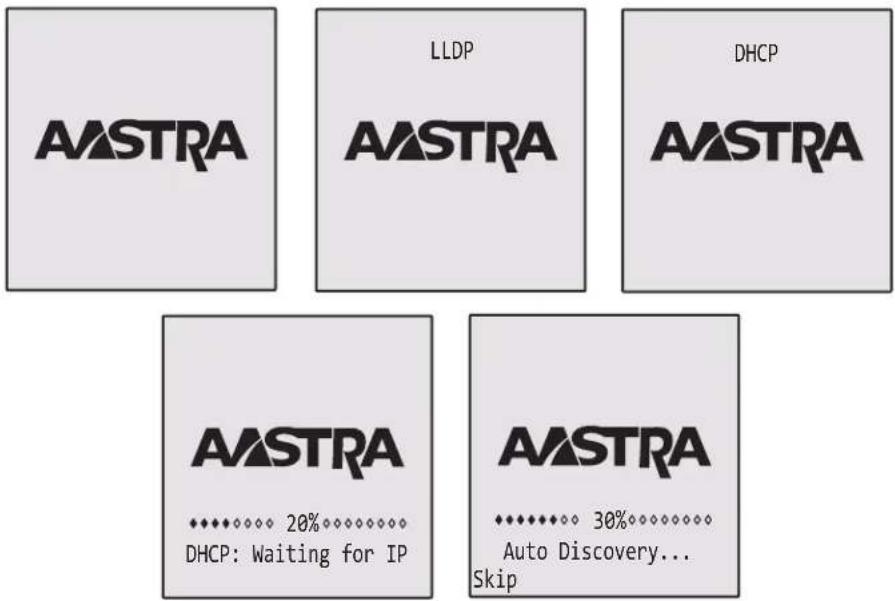
The 6737i phone then checks settings and looks for new configuration and firmware updates for the phone from a server. If a new update is found, the phone displays the message "Updating Configuration". This may take a few moments while the phone downloads the latest updates.

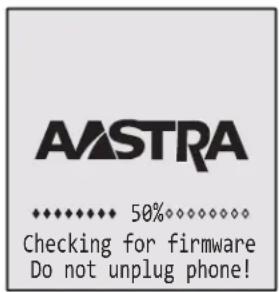
Note:
New updates to your phone can be automatically scheduled from the server. This is set up on the phone system by your System Administrator and should be scheduled during non-business hours or slow call periods.
Important!
Do not unplug or remove power to the phone while it is checking or installing firmware and configuration information.
If language packs were loaded to your phone by your System Administrator, the following screen displays during startup.

When the configuration update is complete, the phone displays the following screens and then displays the Idle screen.
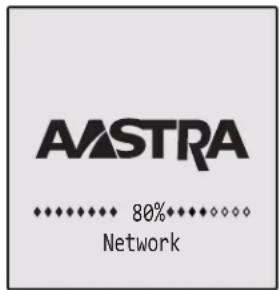


Network Connected/Network Disconnected
If your phone is successful when connecting to the network the following screen displays before changing to the Idle screen.
| Services | Icom |
| Directory | |
| Callers | |
| L1 | John Smith |
| Network Connected | |
| 01/01/14 11:00am | |
If your phone did not successfully connect to the network, the "Network Disconnected" prompt appears on the display and the telephone status light turns on.
| Services | Icom |
| Directory | |
| Callers | |
| L1 | John Smith |
| Network Disconnected01/01/14 11:00am | |
Check that the cables are tightly connected to the phone and to the wall jack. The phone should automatically detect when it is reconnected and displays the "Network Connected" prompt for a few seconds. However, if changes have been made to your phone's network settings, you may need to restart your phone.
For more information about connecting your phone, see the Aastra 6737i IP Phone Installation Guide, the section "Connecting to the Network and to Power".
Check with your system or network administrator for assistance.
Note:
If the phone displays "No Service" you can still use the phone but it is not registered with the Registrar. For more information about registering your phone, see your System Administrator.
Idle Screen
When the phone has successfully updated the configuration and connected to the network, the phone displays the Idle State screen. The idle screen is shown whenever your phone is not in use.
| Services | Icom |
| Directory | |
| Callers | |
| L1 | John Smith |
| 01/01/14 11:00am | |
Note:
Your System Administrator sets up your SIP screen name, line number, and any other administrative features required. If your name does not display on the screen, contact your System Administrator.
The Idle State screen lists your name (SIP screen name) and day, date, and time. In the above screen, the "L1" indicates John Smith is configured on Line 1.
By default, the top softkeys 1 through 4 are configured for Services, Directory, Callers List, and Intercom, respectively. You can configure the 6 top keys with up to 10 functions, and the 6 bottom softkeys with up to 20 functions as required.

Reference
For more information about configuring the top and bottom softkeys, see "Softkeys" on page 44.
For more information about using the Services, Directory, Callers List, Intercom, Dial, Conference, and Transfer keys, see the following sections:
• "Making Calls" on page 105.
• "Handling Calls" on page 111.
• "Managing Calls" on page 122.
Idle Screen With Softkeys Configured
If you or your administrator have configured softkey functions on your phone, the labels for those functions display on the screen. For example, in the following illustration, "Home" was configured as a speed dial key on the bottom set of softkeys and "Do Not Disturb" (DND) was configured on the top set of softkeys.
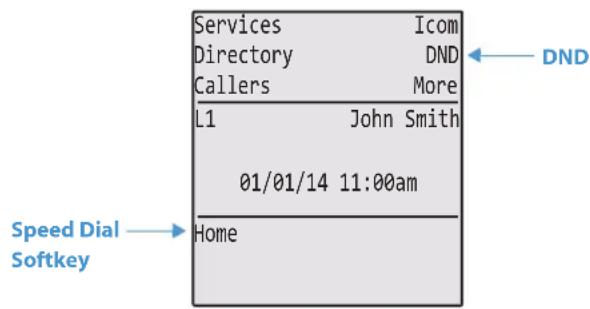
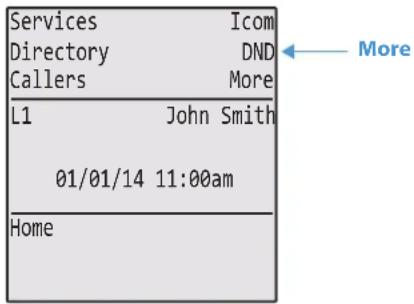
You can configure up to 10 functions on the top set of softkeys. If you have additional functions configured on the top softkeys that do not display on the main idle screen, a "More" displays at the top right of the screen. Pressing the More softkey toggles between the first screen and a second screen of softkeys configured on your phone.
Idle Screen with Voicemail Messages
The envelope icon 📋 displays on the Idle State screen only if you have new messages waiting. The number next to the envelope indicates how many new messages you have.
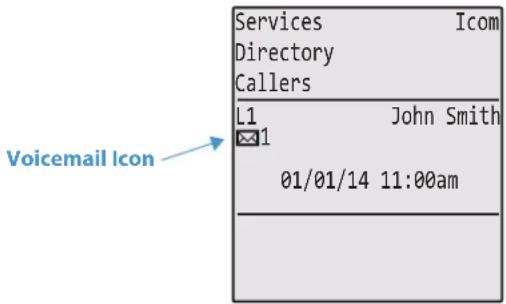
To access your voicemail messages, use the star codes for your system if a voicemail softkey has not been configured on your phone. For more information on your system's star codes, please refer to the documentation for the voicemail system you are using.
Screen Display After Picking Up the Handset
When you pickup the handset, the screen displays as follows:

This screen displays the following keys located on the bottom left of the screen:
• Dial
- Conf (Conference)
• Xfer (Transfer)
A More softkey also displays at the bottom right of the screen if you have configured softkeys other than the default softkeys.
For example, if you configure a bottom softkey for speed dialing to Home, and then you pickup the handset, the screen displays the Dial, Conf, and Xfer default softkeys with a More softkey. You can press the More softkey to toggle between the first and second screens to display all configured softkeys. See illustrations below.
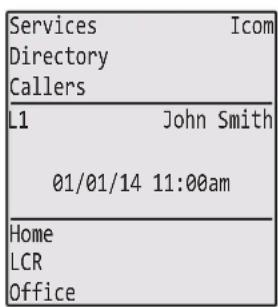
Idle Screen
| Services | Icom |
| Directory | |
| Callers | |
| L1 | John Smith |
| 〉 | |
| Dial | |
| Conf | |
| Xfer | More |
After Handset Pickup
| Services | Icom |
| Directory | |
| Callers | |
| L1 | John Smith |
| 〉 | |
| Home | |
| LCR | |
| Office | More |
After Pressing "More"
Note:
The bottom set of 6 softkeys map to the current state-based configurable softkeys. The top set of 6 softkeys allow you to configure up to 10 functions.
IP Phone Keys
Key Panel
The following sections describe the various 6737i phone key functions on both the symbol and text hardware platforms, and how they help you make and manage your calls and caller information. Images of the symbol keys and the symbol hardware platform are used throughout this document.

| 1 | 6737i Handset | 9 | Four (4) Line Call Appearance Keys |
| 2 | High Quality Speakerphone | 10 | Speakerphone/Headset Key |
| 3 | Message Waiting Lamp | 11 | Mute Key |
| 4 | Goodbye Key | 12 | Navigation Keys |
| 5 | Options Key | 13 | Keypad |
| 6 | Hold Key | 14 | LCD Screen |
| 7 | Redial Key | 15 | Volume Control (+) (-) |
| 8 | Softkeys |
Key Descriptions
The following table identifies the keys on the key panel of your 6737i IP phone that you can use for handling calls.
| Text Keys Symbol Keys Key Description* | ||
 |  | Goodbye key- Ends an active call. The Goodbye key also exits an open list, such as the Options List, without saving changes. |
 |  | Options key- Accesses options to customize your phone. Your System Administrator may have already customized some of your settings. Check with your System Administrator before changing the administrator-only options. |
 |  | Hold key- Places an active call on hold. To retrieve a held call, press the call appearance key beside the light that is flashing. |
 |  | Redial key- Redials up to 100 previously dialed numbers. Pressing the Redial key twice simultaneously redials the last dialed number. |
 | Volume control key- Adjusts the volume for the handset, headset, ringer, and speakerphone. | |
 |  | Line/Call Appearance key- Connects you to a line or call. The Astra 6753i IP phone supports up to 4 line keys. |
 |  | |
 |  | |
 |  | |
 |  | Speakerphone/Headset key- Activates speakerphone/headset for making and receiving calls without lifting the handset. When the audio mode option is set, this key is used to switch between a headset and the speakerphone. |
 |  | Mute key- Mutes the microphone so that your caller cannot hear you (the light indicator flashes when the microphone is on mute). |
Text Keys Symbol Keys Key Description\*

Navigation Keys - Pressing the UP and DOWN arrow keys lets you view different status and text messages on the LCD display (if there is more than 1 line of status/text messages). These keys also let you scroll through menu selections, such as the Options List, and scroll through a remote number that is displayed on the phone. Users can press the scrolling DOWN navigation key to view the rest of the phone number content.
Pressing the LEFT and RIGHT arrow keys lets you view the different line/call appearances. While in the Options List, these keys allow you to exit or enter the current option. When you are editing entries on the display, pressing the LEFT arrow key erases the character on the left; pressing the RIGHT arrow key sets the option.

natural_image
Four identical gray plastic objects arranged in two rows, each with a separate cluster of small protrusions (no text or symbols)Softkeys - 12 softkeys on the 6737i IP Phone.
- 6 Top Keys: programmable static softkeys (up to 10 programmable functions) - 6 Bottom Keys: programmable state-based softkeys (up to 20 programmable functions) These keys also perform as follows:
Callers List Key - Accesses the last 200 calls received.
Conference Key - Begins a conference call with the active call. Xfer Key - Transfers the active call to another number.
Directory Key - Displays up to 200 names and phone numbers (stored in alphabetical order)
Note: For more information about programming the softkeys to perform specific functions, see the Aastra Model 6737i IP Phone User Guide.
*See the Aastra 6737i IP Phone User Guide for more information about each of these keys.
Keypad Keys
The 6737i has a keypad with digits from 0 through 9, a “*” key, and a “#” key. Keys 2 through 9 contain the letters of the alphabet. The 6737i phone keypad includes the following:
| Keypad Key Description | |||||
| 0 | D | i | a | l | s 0 |
| Dials the Operator on a registered phone | |||||
| 1 Dials 1 | |||||
| 2 ABC Dials 2 | When entering text, this key enters A with one press, B with two presses, and C with three presses | ||||
| 3 DEF Dials 3 | When entering text, this key enters D with one press, E with two presses, and F with three presses | ||||
| 4 GHI Dials 4 | When entering text, this key enters G with one press, H with two presses, and I with three presses | ||||
| 5 JKL Dials 5 | When entering text, this key enters J with one press, K with two presses, and L with three presses | ||||
| 6 MNO Dials 6 | When entering text, this key enters M with one press, N with two presses, and O with three presses | ||||
| 7 P QRS | Dials 7When entering text, this key enters P with one press, Q with two presses, R with three presses, and S with four presses. | ||||
| 8 TUV Dials 8 | When entering text, this key enters T with one press, U with two presses, and V with three presses | ||||
| 9 WXYZ | Dials 9When entering text, this key enters W with one press, X with two presses, Y with three presses, and Z with four presses. | ||||
The "*" is called the "star key". The "#" is called the "number sign", "pound key", or "hash key", depending on one's nationality or personal preference. These can be used for special functions such as accessing voicemail. The "star key" and "pound key" functions are dependant on your country's feature availabilities. Contact your System Administrator for more information about available functions using these keys.
These keypad keys can be used for any of the following on the phone:
- Dial a phone number to make a call (see "Dialing a Number" on page 105.)
- Enter digits or letters in the IP Phone user interface.
- Program a speed dial number (see "Speeddial Key" on page 51.)
- Press a speed dial key (see "Speeddial Key" on page 51.)
- Press the keys associated with a called Interactive Voice Response (IVR) system.
Methods for Customizing Your Phone
There are two ways to customize specific options on your phone:
• Using the Options key on the IP Phone
- Using the Astra Web UI in an Internet browser window from your PC.
Phone Options via the IP Phone UI
You can customize your phone by pressing the Options key and accessing the IP Phone UI.
These options allow you to customize the following phone settings.
| Option Number Option | ||||||
| 1 | C | a | I | I | F | o |
| 1. All | ||||||
| 2. Busy | ||||||
| 3. No Answer | ||||||
| The menus that display for Call Forward are dependant on the Call Forward Mode set on the phone. Default is "Account" mode. | ||||||
| 2 Preferences | ||||||
| 1. Tones | ||||||
| - Ring Tone | ||||||
| - Tone Set | ||||||
| 2. Display | ||||||
| - Contrast Level | ||||||
| - Backlight | ||||||
| 3. Speed Dial Edit | ||||||
| 4. Live Dialpad | ||||||
| 5. Set Audio | ||||||
| - Audio Mode | ||||||
| - Headset Mic Vol | ||||||
| - DHSG | ||||||
| 6. Time and Date | ||||||
| - Time Format | ||||||
| - Daylight Savings | ||||||
| - Date Format | ||||||
| - Time Zone | ||||||
| - Time Server 1 | ||||||
| - Time Server 2 | ||||||
| - Time Server 3 | ||||||
| - Set Time | ||||||
| - Set Date | ||||||
| 7. Language | ||||||
| - Screen Language | ||||||
| - Input Language | ||||||
| 3 Phone Status | ||||||
| 1. IP&MAC Addresses | ||||||
| 2. LAN Port | ||||||
| 3. PC Port | ||||||
| 4. Firmware Info | ||||||
| 5. Error Messages | ||||||
| 6. Copyright | ||||||
| 4 User Password | ||||||
| 5 Administrator Menu (Password Protected)* | ||||||
| 6 | R | e | s | t | a | r |
| 7 Phone Lock | ||||||
Note:
*The "Administrator Menu" options are Administrator level functions only, and are not accessible by the user. These options should only be set up and changed by your System Administrator.
Simplified Options Menu
Your System Administrator may configure a simplified options menu for your phone. The following table indicates the options that may appear on your phone if the simplified options menu is applied.
| Option Number Option | ||||||
| 1 | C | a | I | I | F | o r |
| 1. All2. Busy3. No AnswerThe menus that display for Call Forward are dependant on the Call Forward Mode set on the phone. Default is "Account" mode. | ||||||
| 2 Preferences | 1. Tones– Ring Tone– Tone Set2. Display– Contrast Level– Backlight3. Set Audio– Audio Mode– Headset Mic Vol– DHSG | |||||
| 3 Phone Status | 1. IP&MAC Addresses2. LAN Port3. PC Port4. Firmware Info5. Error Messages6. Restart Phone7. Copyright | |||||
| 4 Phone Lock | ||||||
Using the IP Phone UI

IP Phone UI
- Press the Options key on the phone to enter the Options List.
- To go to an Option, use ▲ and ▼ to scroll through the list, or press the number corresponding to the Option.
- Press the Show softkey, the ▶ key, or press the digit number of the corresponding option to select an option.
- Use the softkeys that display for each option to change a selected option.
- Press the Done key to save the change.
- Press the 🔊 key, the ◀ key, or the 🔗 key at any time to exit without saving changes.
References
For more information about customizing your phone using the available options from the IP Phone UI, see the section "Customizing Your Phone" on page 22.
For more information about administrator options, contact your System Administrator.
Phone Options via the Astra Web UI
In addition to the IP Phone UI options, you can also customize additional options on the IP Phone using the Aastra Web UI. In order to access your phone using the Aastra Web UI, you need to know your phone's IP address. To find your phone's IP address, see "Finding Your Phone's IP Address" on page 19.
Using the Aastra Web UI

Aastra Web UI
- Open your web browser, enter the phone's IP address or host name into the address field and press
. The following logon screen displays.

- At the prompt, enter your username and password and click OK. The Status window displays for the IP phone you are accessing.
Note:
For a user, the default username is user and the password field is left blank.
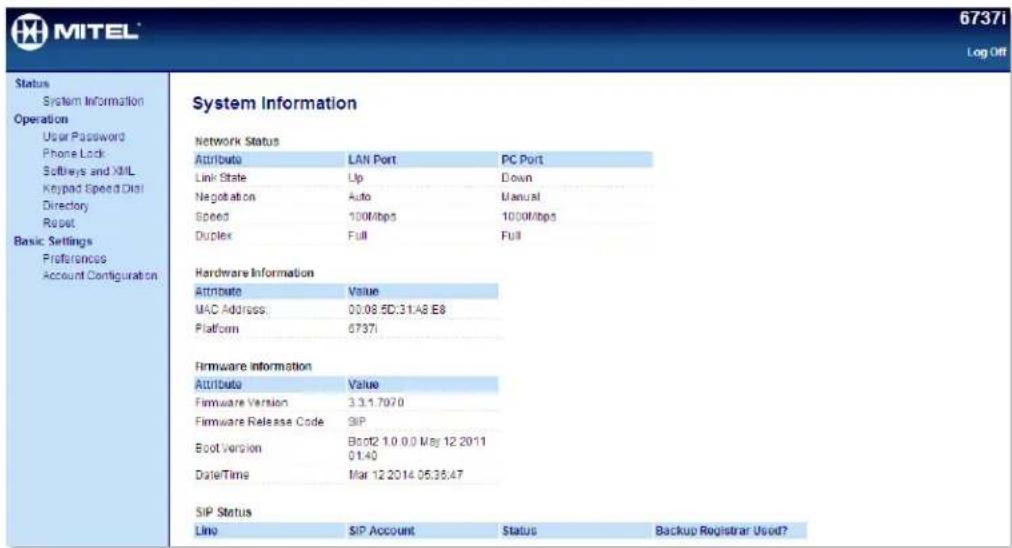
- You can logout of the Aastra Web UI at any time by clicking Log Off.
The following categories display in the side menu of the Aastra Web UI: Status, Operation, Basic Settings.
Headings Descriptions
| Status | The Status section displays the network status and the MAC address of the IP phone. It also displays hardware and firmware information about the IP phone, and information about the SIP account(s) currently configured on the phone. The information in the Network Status window is read-only. | |
| Operation | User Password - Allows you to change user password.Phone Lock - Allows you to assign an emergency dial plan to the phone, lock the phone to prevent any changes to the phone and to prevent use of the phone, and reset the user password.Softkeys and XML - Allows you to configure up to 6 top softkeys and 6 bottom softkeys with functions identified in the list below. You can configure up to 10 functions on the top softkeys and up to 20 functions on the bottom softkeys.Available Functions for SoftkeysNone • BLF/XferLine • Speeddial/XferSpeeddial • Speeddial/ConfDo Not Disturb (DND) • DirectoryBLF (Busy Lamp Field) • Callers ListBLF/List • RedialAuto Call Distribution (ACD) • ConferenceXML (Extensible Markup Language) • TransferFlash • Icom (Intercom)Sprecode • ServicesPark • Phone LockPickup • PagingLast Call Return (LCR) • EmptyCall Forward | |
| Keypad Speed Dial - Allows you to assign a speed dial number to a specific digit on the phone's keypad for speed dialing purposes.Expansion Modules - Allows you to configure an additional 36 softkeys with a M670i Expansion Module, or an additional 60 softkeys with a M675i Expansion Module if an it is attached to the phone. This option displays on the side menu of the Astra Web UI only if an Expansion Module is attached. For more information about the expansion modules see “Model M670i and M675i Expansion Modules” on page 174.Directory - Allows you to copy the Callers List and Directory List from your IP phone to your PC.Reset - Allows you to restart the IP phone when required. | ||
| Basic Settings | Preferences - Allows you to enable/disable the following:Park CallPick Up Parked CallDisplay DTMF DigitsPlay Call Waiting ToneStuttered Dial ToneXML Beep SupportStatus Scroll Delay (seconds)Switch UI Focus to Ringing LineCall Hold Reminder During Active CallsCall Hold ReminderCall Waiting Tone PeriodPreferred LinePreferred Line Timeout (seconds)Goodbye Key Cancels Incoming CallMessage Waiting Indicator LineDND Key ModeCall Forward Key ModeThis category also allows you to configure:Incoming Intercom Call SettingsGroup Paging RTP SettingsRing Tones (global and per-line basis)Time and Date SettingsLanguage SettingsAccount Configuration - Allows you to configure “Do Not Disturb” (DND) and “Call Forwarding” (CFWD) by account. You can have multiple accounts on the 6737i. | |
Phone Status
You can view the status of your phone using the IP Phone UI or the Astra Web UI.
Phone Status via IP Phone UI
The "Phone Status" option on the IP phone displays the status of your phone to the LCD display.
This option allows you to view your phone's:
• Network status including your phone's IP and MAC address
- Local Area Network (LAN) port information
• PC Port information (if PC link exists)
- Firmware version
- Error messages from last reboot or startup
• Copyright information
Use the following procedure to view the status of your phone using the IP Phone UI.

IP Phone UI
- Press on the phone to enter the Options List.
- Select Phone Status.
- Select the option you want to view:
- IP&MAC Address
• LAN Port
• PC Port
- Firmware Info
- Error Messages
- Copyright
The option you select displays to the LCD. Use the ▲ and ▼ keys to scroll the through the LCD display.
Finding Your Phone's IP Address
If you want to access your phone's options using an Internet browser, you need to enter the IP address of the phone in the browser to open the Aastra Web UI. Use the following procedure to find your phone's IP address.

IP Phone UI
-
Press to enter the Options List.
-
Scroll to Phone Status and press Select.
| Services | Icom |
| Directory | |
| Callers | |
| Options List | |
| 1.Call Forward | |
| 2Preferences | |
| 3.Phone Status | |
| 4.Password | |
| Select | |
| Done | |
- Scroll to IP&MAC Addresses and press Select.
| Services | Icom |
| Directory | |
| Callers | |
| Phone Status | |
| 1.IP&MAC Addresses | |
| 2.LAN Port | |
| 3.PC Port | |
| 4.Firmware Info | |
| Select | |
| Done | |
The IP address of your 6737i IP phone displays in the "IP Address" field.
| Services | Icom |
| Directory | |
| Callers | |
| IP&MAC Addresses | |
| IP Address | |
| 192.168.0.100 | |
| MAC Address: | |
| 00447D180326 | |
| Select | |
| Done |
Phone Status via the Astra Web UI
Use the following procedure to view the phone status via the Astra Web UI.

Aastra Web UI
- Open your web browser, enter the phone's IP address or host name into the address field and press
. - In the Username/Password window, enter your username and password and click OK.
The Status window displays for the IP phone you are accessing.
Note:
For a user, the default username is "user" and the password field is left blank.
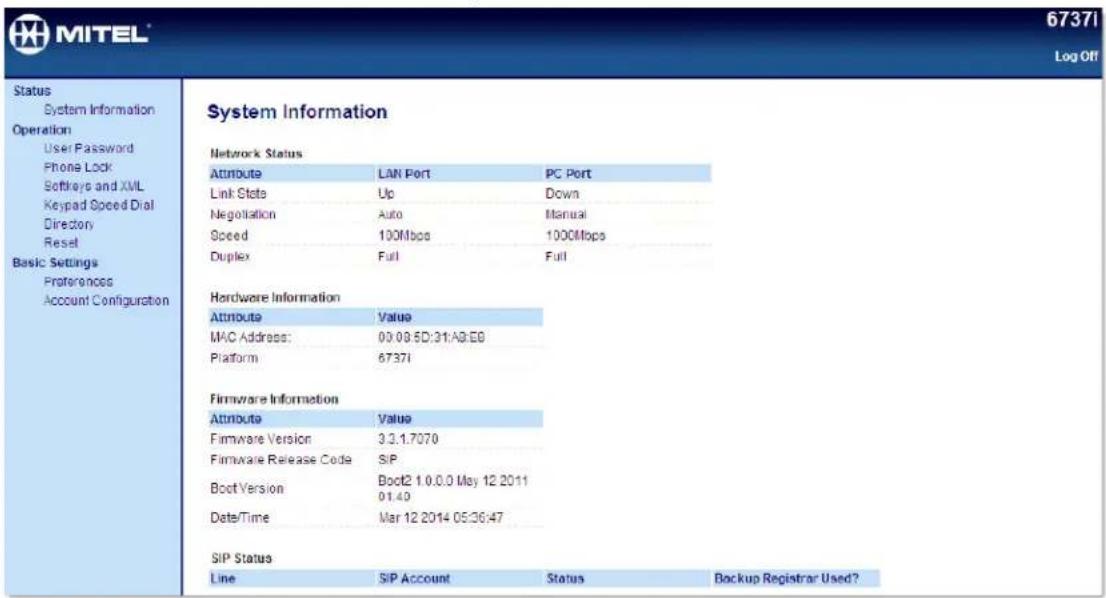
This Status window is read only. It displays the status of your phone which includes the following:
• Network Status
• Hardware Information
- Firmware Information
- SIP Status
SIP Status
The IP Phones show the SIP registration status on the IP Phone's Status screen in the Astra Web UI.
| SIP Status | |||
| Line | SIP Account | Status | Backup Registrar Used? |
| 1 | 650@proxy.com:5060 | Registered | Yes |
| 2 | 651@proxy.com:5060 | Registered | Yes |
| 3 | 652@proxy.com:5060 | Registered | Yes |
| 4 | 653@proxy.com:5060 | 401 | No |
The following table describes the status conditions that can display for the account.
Status Condition Description
Registered Displays this status on accounts that HAVE been registered with the SIP proxy server.
Example:
Backup
Registrar
Line SIP Account Status Used?
1650@proxy.com:5060RegisteredYes
where
Account Number is "1"
SIP Account is "650@proxy.com" on port "5060"
Status is "Registered"
Backup registrar is used ("Yes")
SIP Error Number Displays on accounts when registration fails with the SIP proxy server.
Example:
Backup
Registrar
Line SIP Account Status Used?
4653@proxy.com:5060
401 No
where
Account Number is "4"
SIP Account is "653@proxy.com" on port "5060"
Status is "401" - Unregistered if SIP registration fails.
Backup registrar is used ("No")
Customizing Your Phone
The following paragraphs describe the options available from either the IP Phone UI, the Astra Web UI, or both, and provide procedures applicable to the option.
Ring Tones and Tone Sets
You can configure ring tones and ring tone sets on the IP phone.
Ring Tones
There are several distinct ring tones a user can select from to set on the IP phones. You can enable/disable these ring tones on a global or per-line basis.
The following table identifies the valid settings and default values for each type of configuration method.
Ring Tones Table
| Configuration Method Valid Values Default Value | ||
| IP Phone UI Global | Global Setting: | |
| Tone 1 | Tone 1 | |
| Tone 2 | ||
| Tone 3 | ||
| Tone 4 | ||
| Tone 5 | ||
| Silent | ||
| Astra Web UI Global: | Global Setting: | |
| Tone 1 | Tone 1 | |
| Tone 2 | ||
| Tone 3 | ||
| Tone 4 | ||
| Tone 5 | ||
| Silent | ||
| Lines 1 to 6 Per-Line Setting: | Per-Line Setting: | |
| Global | Global | |
| Tone 1 | ||
| Tone 2 | ||
| Tone 3 | ||
| Tone 4 | ||
| Tone 5 | ||
| Silent | ||
Ring Tone Sets
In addition to ring tones, you can configure ring tone sets on a global-basis on the IP phone. Ring tone sets consist of tones customized for a specific country. The ring tone sets you can configure on the IP phones are:
• Australia
- Brazil
• Europe (generic tones)
• France
• Germany
• Italy
• Italy2
- Malaysia
Mexico
• Russia
• Slovakia
• UK
• US (Default - also used in Canada)
When you configure the country's tone set, the country-specific tone is heard on the phone for the following:
- dial tone
• secondary dial tone - ring tone
- busy tone
- congestion tones
- call waiting tone
- ring cadence pattern
You configure global ring tones and tone sets using the Astra Web UI and the IP Phone UI.
Configuring Ring Tones and Tone Sets

IP Phone UI
Use the following procedures to configure ring tones and tone sets on the IP phone.
Global configuration only
- Press on the phone to enter the Options List.
- Select Preferences.
- Select Tones.
- Select Ring Tone.
- Select the type of ring tone (Tone 1 through Tone 5, or Silent).
- Press Done.
-
Select Tone Set.
-
Select the country for which you want to apply the tone set.
Valid values are Australia, Brazil, Europe, France, Germany, Italy, Italy2, Malaysia, Mexico, Brazil, Russia, Slovakia, UK, and US. Default is US.
- Press Done.
The ring tone and tone set you select is immediately applied to the IP phone.

Aastra Web UI
- Click on Basic Settings->Preferences->Ring Tones.

For global configuration:
- In the "Ring Tones" section, select a country from the "Tone Set" field.
Valid values are Australia, Brazil, Europe, France, Germany, Italy, Italy2, Malaysia, Mexico, Brazil, Russia, Slovakia, UK, and US. Default is US.
- Select a value from the "Global Ring Tone" field.
Note:
See the Ring Tones Table on page 22 for valid values.
For per-line configuration:
-
In the "Ring Tone" section, select a line for which you want to set ring tone.
-
Select a value from the "LineN" field.
Note:
See the Ring Tones Table on page 22 for valid values.
- Click Save Settings.
Contrast Level
The "Contrast Level" option on the IP phone allows you to set the amount of light that illuminates the LCD display. Use this option to set the preference of contrast level.
You can set the contrast level using the IP Phone UI only.
Setting Contrast Level

IP Phone UI
- Press on the phone to enter the Options List.
- Select Preferences.
- Select Display.
- Select Contrast Level.
- Use the ◀ and ▶ navigation keys to increase or decrease the intensity of contrast lighting on the LCD.
- Press Done to save your selection.
Backlight
The "Backlight" option on the IP phone allows you to set the backlight status on the LCD display to the following:
- Off - Backlight is always OFF.
- Auto (Default)- Automatically turns ON the backlight when the phone is in use, and then automatically turns OFF the backlight when the phone is idle after a specified length of time.
Auto backlighting sets the phone to turn off the backlighting after a period of inactivity; the idle period is user definable under the Advanced softkey when you select the Auto mode. In Auto mode, the backlight turns on with a key press or state change on the phone.
Setting the Backlight

IP Phone UI
- Press on the phone to enter the Options List.
- Select Preferences.
- Select Display.
- Select Backlight.
- Use the ▲ and ▼ navigation keys to select the Backlight status for your phone. Default is "Auto". Available options are:
• Off
- Auto (Default)
- If you selected "Off", press Done to save your setting.
- If you selected "Auto", press the Advanced softkey.
- Using the keypad, enter the amount of seconds you want the phone to stay backlit when the phone is idle. Valid values are 1 to 7200 seconds. Default is 600 seconds (10 minutes). When this period of time is reached, the phone turns OFF the backlight.
- Press Enter to save your setting.
Live Dialpad\*
The "Live Dialpad" option on the IP phone turns the Live Dial Pad mode ON or OFF. With live dial pad ON, the 6737i IP phone automatically dials out and turns ON Handsfree mode as soon as a dial pad key or softkey is pressed. With live dial pad OFF, if you dial a number while the phone is on-hook, lifting the receiver or pressing the 📋 initiates a call to that number.
*Availability of feature dependant on your phone system or service provider.
You can enable/disable the live dialpad using the IP Phone UI only.
Enabling/Disabling Live Dialpad

IP Phone UI
- Press on the phone to enter the Options List.
- Select Preferences.
- Select Live Dialpad.
- Use the navigation keys to turn the live dialpad ON or OFF.
- Press Done to save your setting.
Set Audio
The "Set Audio" option on the IP Phone allows you to set the audio mode for your IP phone. It also allows you to set the volume level of the headset microphone and enable/disable DHSG.
You can set Audio on your IP phone using the IP Phone UI only.
Audio Mode
The 6737i allows you to use a handset, a headset, or handsfree mode to handle incoming and outgoing calls. The audio mode option provides different combinations of these three methods to provide maximum flexibility in handling calls. There are four audio mode options you can set:
| Auto Mode Option Description | |
| Speaker | This is the default setting. Calls can be made or received using the handset or hands free speakerphone. In handset audio mode, pressing the ☑key on the phone switches to hands free speakerphone. In Speaker audio mode, lift the handset to switch to the handset. |
| Headset | Choose this setting if you want to make or receive all calls using a handset or headset. Calls can be switched from the handset to headset by pressing the ☑on the phone. To switch from the headset to the handset, lift the handset. |
| Speaker/Headset | Incoming calls are sent to the hands free speakerphone first when the ☑key is pressed. By pressing the key again, you can switch back and forth between the hands free speakerphone and the headset. At anytime, lifting the handset switches back to the handset from either the hands free speakerphone or the headset. |
| Headset/Speaker | Incoming calls are sent to the headset first when the ☑key is pressed. By pressing the key again, you can switch back and forth between the headset and the hands free speakerphone. At anytime, lifting the handset switches back to the handset from either the headset or the hands free speakerphone. |
Headset Mic Volume
The "Headset Mic Volume" option allows you to set the volume level for the headset microphone.
DHSG
The "DHSG" option allows you to enable or disable DHSG headset support.
Note:
A DHSG headset and an expansion module cannot be used concurrently as they both share the same headset port.
Setting Audio Mode, Headset Mic Volume, and DHSG

IP Phone UI
- Press on the phone to enter the Options List.
- Select Preferences.
- Select Set Audio.
- Select Audio Mode.
- Select the audio mode you want to use on your phone. Default is Speaker.
Valid values are:
- Speaker (Default)
- Headset
- Speaker/Headset
-
Headset/Speaker
-
Press Done to save your setting.
- Select Headset Mic Volume.
- Select the Low, Medium, or High volume level. Default is Medium.
-
Press Done to save your selection.
-
Select DHSG.
-
Select the DHSG is OFF or DHSG is ON option. Default is DHSG is OFF.
- Press Done to save your selection.
Time and Date
On the IP phones, you can configure the following:
• Time and date
• Time and date format
- Time zone
- Daylight savings time
- Time Servers
Note:
Only the Time and Date Formats and Time Servers can be set using the Aastra Web UI
Configuring Time and Date
Use the following procedures to configure the time and date settings on the IP phone.

IP Phone UI
Set Time and Time Format
Note:
The time and time format you configure display on the phone's idle screen.
- Press on the phone to enter the Options List.
- Select Preferences.
- Select Time and Date.
- Select Set Time.
- Using the keys on the keypad, enter a time to set on the IP phone. Use the "Backspace" key to move back a space and delete a character. Use the "AM/PM" softkey to specify either AM or PM for the time setting.
- Press Done to save the setting.
- Select Time Format.
- Using the navigation keys set the Time Format to either a 12 hour format or a 24 hour format. Valid values are 12Hour and 24 Hour. Default is 12 Hour.
- Press Done to save the Time Format you selected.
Set Date and Date Format
Note:
The date and date format you configure display on the phone's idle screen.
- Select Preferences.
- Select Time and Date.
- Select Set Date.
- Using the keys on the keypad, enter a date to set on the IP phone. Use the "Backspace" key to move back a space and delete a character.
- Press Done to save the setting.
-
Select Date Format.
-
Select a date format from the list of options. Default is WWW MMM DD. Valid values are:
- Press Done to save the Date Format.
Set Time Zone
- Select Preferences.
- Select Time and Date.
- Select Time Zone.
A list of Time Zones display for different areas of the world.
- Select a Time Zone that applies to your area.
The default Time Zone is US-Eastern.
Note:
For a list of the Time Zones values available on the IP Phone, see 'Appendix A - Time Zone Codes."
- Press Done to save the Time Zone setting.
Daylight Savings Time
- Select Preferences.
- Select Daylight Savings.
- Select a Daylight Savings time from the list of options.
Default is Automatic. Valid values are:
• OFF
• 30 min summertime
- 1h summertime
• Automatic (Default)
- Press Done to save the Daylight Savings value you selected.
Set Time Servers
With a valid time server enabled your IP phone will synchronize the time displayed with the specified configuration server. The phone will use the time from Time Server 1 unless it is not configured or unavailable, in which case it will move on to Time Server 2, and if necessary Time Server 3
- Select Preferences.
- Select Time and Date.
-
Select from Time Server 1, Time Server 2, or Time Server 3.
-
Using the keys on the keypad, enter an IP address or domain name for the time server.
Use the "Backspace" key to move back a space and delete a character. Use the "Dot" softkey to enter dots within the IP address or domain name. Use the "ABC" softkey to toggle between entering numbers and entering letters.
- Press Done to save the time server setting

Aastra Web UI
- Click on Basic Settings->Preferences->Time and Date Setting.
| Time and Date Setting | |
| Time Format | 12h |
| Date Format | WWW MMM DD |
| NTP Time Servers | Enabled |
| Time Server 1 | 0.0.0.0 |
| Time Server 2 | 0.0.0.0 |
| Time Server 3 | 0.0.0.0 |
- In the "Time Format" field, select the time format you want to use on your phone. Valid values are:
• 12h (12 hour format) (default)
• 24h (24 hour format)
Note:
The time and time format you configure display on the phone's idle screen.
- In the "Date Format" field, select the date format you want to use on your phone. Default is WWW MMM DD. Valid
values are:
- WWW MMM DD (default)
- DD-MMM-YY
- YYYY-MM-DD
- DD/MM/YYYY
- DD/MM/YY
- DD-MM-YY
- MM/DD/YY
- MMM DD
- DD MMM YYYY
- WWW DD MMM
• DD MMM - DD.MM.YYYY
Note:
The date and date format you configure display on the phone's idle screen.
- In the "NTP Time Servers" field, enable by checking the checkbox or disable by unchecking the box (default is enabled).
- In the "Time Server 1", "Time Server 2", and "Time Server 3" fields, enter IP addresses or qualified domain names for the primary, secondary, and tertiary time servers.
Note:
Time Servers can only be entered if NTP Time Servers is enabled.
- Click Save Settings.
Language
The IP phones support several different languages. You can have the IP Phone UI and the Astra Web UI display in a specific language as required. When you set the language to use, all of the display screens (menus, services, options, configuration parameters, etc.) display in that language. The IP phones support the following languages:
- English
• Czech
• Catalan
- Valencian
• Welsh
• German
• Danish
- Spanish
- Mexican Spanish
• Finnish
- French
• Canadian French
• Italian
• Dutch
• Dutch (Netherlands)
- Norwegian
- Polish
- Portuguese
- Portuguese Brazilian
- Romanian
• Russian
• Slovak
- Swedish
- Turkish
You can also configure the language to use when inputting values in the Aastra Web UI and the IP Phone UI.
Specifying the Language to Use
Once the language pack(s) are available on your phone from your System Administrator, you can specify which language to use on the phone and/or the Astra Web UI.
Note:
All languages may not be available for selection. The available languages are dependant on the language packs currently loaded to the IP phone.

IP Phone UI
Use the following procedure to specify which language to use for the IP Phone UI.
-
Press on the phone to enter the Options List.
-
Select Preferences.
3. Select Language.
4. Select Screen Language.
The current language setting displays on the IP Phone.
5. To change the language setting, use the ▲ and ▼ keys to scroll through the languages.
Note:
All languages may not be available for selection. The available languages are dependant on the language packs currently loaded to the IP phone. English is the default language and cannot be changed or removed. For more information about loading language packs, see your System Administrator.
6. Press Done to set the language on the phone.
The change is dynamic. When you exit the Options Menu, the phone displays all menu items in the language you selected

Aastra Web UI
Note:
You must have the language pack(s) already loaded to your phone in order to use them. For more information about loading language packs, see your System Administrator.
1. Click on Basic Settings->Preferences->Language Settings.

2. In the "Webpage Language" field, select a language to apply to the Aastra Web UI.
Note:
All languages may not be available for selection. The available languages are dependant on the language packs currently loaded to the IP phone by your System Administrator. English is the default language and cannot be changed or removed.
3. Click Save Settings. The change is dynamic. The Aastra Web UI displays all screens in the language you selected.
Language Input
The 6737i supports text and character inputs in various languages (English, German, French, Spanish, Italian, Portuguese, Russian, and Nordic). Inputting textual or character information into the IP Phone UI can be done using the keypad on the phone. You enable the Language Input feature using the Astra Web UI or the IP Phone UI. You can then use text and characters in a specific language when performing inputs on the phone.
The following tables identify the language characters that you can use to enter text and characters on the 6737i.
Keypad Input Alphabet Tables
English
| Key Uppercase Characters Lowercase Characters | |||||
| 0 | 0 | 0 | |||
| 1 1;=_,-&() 1.;;=_,-&() | |||||
| 2 | A | B | C | 2 | |
| 3 DEF3 def3 | |||||
| 4 | G | H | I | 4 | |
| 5 JKL5 jkl5 | |||||
| 6 | M | N | O | 6 | |
| 7 PQRS7 pqrs7 | |||||
| 8 | T | U | V | 8 | t |
| 9 WXYZ9 wxyz9 | |||||
| * | * | * | |||
| # #/\@ | #/\@ | ||||
French
| Key Uppercase Characters Lowercase Characters | |||
| 0 | 0 | 0 | |
| 1 | 1.:=_,'&() | 1.:=_,'&() | |
| 2 ABC2ÄÄÇÄÄÄE | abc2äaçáåæ | ||
| 3 DEF3ÉÉÉE | def3éèèë | ||
| 4 GHI4ÎÎ | ghi4ÎÎ | ||
| 5 JKL5 jkl5 | |||
| 6 | MNO6ÑÓÒÖÖÖ | mno6ñóòöö | |
| 7 PQRS7 pqrs7 | |||
| 8 TUV8 | tuv8úùùü | ||
| 9 WXYZ9 wxyz9 | |||
| * | * | * | |
| # #/\@ | #/\@ | ||
Spanish
| Key Uppercase Characters Lowercase Characters | ||||||
| 0 | 0 | 0 | ||||
| 1 1.:;=_,-'&( ) 1.:;=_,-'&( ) | ||||||
| 2 ABC2ÀÀÇ abc2ààç | ||||||
| 3 DEF3ÉÈ def3éè | ||||||
| 4 | G | H | I | 4 | Ï | Í |
| 5 JKL5 jkl5 | ||||||
| 6 | M | N | O | 6 | Ñ | Ó |
| 7 PQRS7 pqrs7 | ||||||
| 8 | T | U | V | 8 | Ú | Ü |
| 9 WXYZ9 | wxyz9 | |||||
| * | * | * | ||||
| # #/\@ | #/\@ | |||||
O
German
| Key Uppercase Characters Lowercase Characters | ||||||
| 0 | 0 | 0 | ||||
| 1 1:;=_,-'&( ) 1.:;=_,-'&( ) | ||||||
| 2 | A | B | C | 2 | Ä | Ä |
| 3 DEF3É | def3é | |||||
| 4 | G | H | I | 4 | ||
| 5 JKL5 jkl5 | ||||||
| 6 MNO6Ö | mno6ö | |||||
| 7 PQRS7ß | pqrs7ß | |||||
| 8 | T | U | V | 8 | Ü | |
| 9 WXYZ9 | wxyz9 | |||||
| * | * | * | ||||
| # #/\@ | #/\@ | |||||
g
Italian
| Key Uppercase Characters Lowercase Characters | |||||
| 0 | 0 | 0 | |||
| 1 1:;=_,-'&() 1:;;=_,-'&( ) | |||||
| 2 ABC2ÀCÇ | abc2àcç | ||||
| 3 DEF3ÉÈ€ | def3éèè | ||||
| 4 | G | H | I | 4 | |
| 5 JKL5 jkl5 | |||||
| 6 MNO6ÓÒ mno6óò | |||||
| 7 PQRS7 pqrs7 | |||||
| 8 | T | U | V | 8 | Ù |
| 9 WXYZ9 | wxyz9 | ||||
| * | * | * | |||
| # #/\@ | #/\@ | ||||
g
Portuguese
| Key Uppercase Characters Lowercase Characters | ||||||
| 0 | 0 | 0 | ||||
| 1 1.:;=_,-&() 1.:;=_,-&() | ||||||
| 2 | ABC2A\AA\AC | abc2a\aa\ac | ||||
| 3 DEF3\EE def3\ee | ||||||
| 4 GHI4i ghi4i | ||||||
| 5 JKL5 jkl5 | ||||||
| 6 MNO6O\OO mno6\oo\o | ||||||
| 7 PQRS7 pqrs7 | ||||||
| 8 | T | U | V | 8 | Ü | Ü |
| 9 WXYZ9 wxyz9 | ||||||
| * | * | < | S | PA | C | E |
| ##/\@ | #/\@ | |||||
Russian
| Key Uppercase Characters Lowercase Characters | ||||||
| 0 | 0 | 0 | ||||
| 1 1.:;=_,-&() 1.:;=_,-&() | ||||||
| 2 | A | B | B | Γ | 2 | A |
| 3 ДЕЁЖЭЗDEF | Деёжз3def | |||||
| 4 ИЙКЛ4GHI | ийкл4ghi | |||||
| 5 МНОП5JKL | мноп5jkl | |||||
| 6 | P | C | T | У | 6 | M |
| 7 ФХЦЧ7PQRS7 | фхЧч7pqrs | |||||
| 8 | Ш | Щ | Ъ | Ы | 8 | Т |
| 9 ьзЮЯ9WXYZ | ьзюя9wxyz | |||||
| * | * | < | S | PA | C | E |
| # #/\@ | #/\@ | |||||
Nordic
| Key Uppercase Characters Lowercase Characters | ||||||
| 0 | 0 | 0 | ||||
| 1 1.:;=_,-&() 1.:;=_,-&() | ||||||
| 2 ABC2ÄÄÆÄ | abc2åäæå | |||||
| 3 DEF3É | def3é | |||||
| 4 | G | H | I | 4 | ||
| 5 JKL5 jkl5 | ||||||
| 6 MNO6Ö∅ | mno6öø | |||||
| 7 PQRS7ß | pqrs7ß | |||||
| 8 | T | U | V | 8 | Ü | |
| 9 WXYZ9 | wxyz9 | |||||
| * | * | < | S | PA | C | E |
| # #/\@ | #/\@ | |||||
Configuring Language Input Using the IP Phone UI
You can configure the language you use for inputting on the phone by setting the Input Language option. The default input language setting is English. You can change this setting using the IP Phone UI or the Astra Web UI.

IP Phone UI
Use the following procedure to change the input language using the IP Phone UI.
- Press on the phone to enter the Options List.
- Select Preferences.
- Select Language.
- Select Input Language.
Select the language you want to use when inputting text and characters into the IP Phone UI. Valid values are:
- English (default)
- Français (French)
- Español (Spanish)
- Deutsch (German)
- Italiano (Italian)
- Português (Portuguese)
• Русский (Russian)
• Nordic
Note:
Available input languages are dependent on the configuration enabled by your System Administrator.
- Press Done when you have selected an input language.

Aastra Web UI
Use the following procedure to set the input language using the Aastra Web UI.
- Click on Basic Settings-> Preferences->Language Settings.

-
Select a language from the "Input Language" field. Setting this field allows you to specify the language to use when entering text and characters in the Aastra Web UI and IP Phone UI. Valid values are:
-
English (default)
- Français (French)
- Español (Spanish)
- Deutsch (German)
- Italiano (Italian)
- Português (Portuguese)
• Русский (Russian)
• Nordic
Note:
All languages may not be available for selection. The available input languages are dependant on the configuration enabled by your System Administrator.
- ClickSave Settings. The change is dynamic. The Aastra Web UI and IP Phone UI allow you to enter text and characters in the language you selected.
Latin 2 Character Set
The 6737i includes support for ISO 8859-2 (Latin2) of multi-national languages when displaying and inputting in the IP Phone UI and the Astra Web UI.
UTF-8 is also compatible with XML encoding on the IP Phones.
The following table illustrates the Latin 2 character set used on the 6737i IP Phone.
| -0 | -1 | -2 | -3 | -4 | -5 | -6 | -7 | -8 | -9 | -A | -B | -C | -D | -E | -F | |
| A- | NBSP | A | L | × | L | S | SHY | |||||||||
| OOAO | 0104 | 02D8 | 0141 | 00A4 | 013D | 015A | 00A7 | 00A8 | 0160 | 015E | 0164 | 0179 | OOAD | 017D | 017B | |
| 160 | 161 | 162 | 163 | 164 | 165 | 166 | 167 | 168 | 169 | 170 | 171 | 172 | 173 | 174 | 175 | |
| B- | o | a | l | l' | s | s | s | t' | " | |||||||
| OOBO | 0105 | 02DB | 0142 | 00B4 | 013E | 015B | 02C7 | 00B8 | 0161 | 015F | 0165 | 017A | 02DD | 017E | 017C | |
| 176 | 177 | 178 | 179 | 180 | 181 | 182 | 183 | 184 | 185 | 186 | 187 | 188 | 189 | 190 | 191 | |
| C- | ||||||||||||||||
| 0154 | 00C1 | 00C2 | 0102 | 00C4 | 0139 | 0106 | 00C7 | 010C | 00C9 | 0118 | 00CB | 011A | 00CD | 00CE | 010E | |
| 192 | 193 | 194 | 195 | 196 | 197 | 198 | 199 | 200 | 201 | 202 | 203 | 204 | 205 | 206 | 207 | |
| D- | D | × | T | |||||||||||||
| 0110 | 0143 | 0147 | 00D3 | 00D4 | 0150 | 00D6 | 00D7 | 0158 | 016E | 00DA | 0170 | 00DC | 00DD | 0162 | 00DF | |
| 208 | 209 | 210 | 211 | 212 | 213 | 214 | 215 | 216 | 217 | 218 | 219 | 220 | 221 | 222 | 223 | |
| E- | d' | |||||||||||||||
| 0155 | 00E1 | 00E2 | 0103 | 00E4 | 013A | 0107 | 00E7 | 010D | 00E9 | 0119 | 00EB | 011B | 00ED | 00EE | 010F | |
| 224 | 225 | 226 | 227 | 228 | 229 | 230 | 231 | 232 | 233 | 234 | 235 | 236 | 237 | 238 | 239 | |
| F- | ÷ | |||||||||||||||
| 0111 | 0144 | 0148 | 00F3 | 00F4 | 0151 | 00F6 | 00F7 | 0159 | 016F | 00FA | 0171 | 00FC | 00FD | 0163 | 02D9 | |
| 240 | 241 | 242 | 243 | 244 | 245 | 246 | 247 | 248 | 249 | 250 | 251 | 252 | 253 | 254 | 255 |
User Password
This category allows you to change the user password for your phone. Changing your password ensures that only you can alter your phone settings, and helps keep your system secure. You can change your user password using the IP Phone UI or the Aastra Web UI.
If you change the password Then you need to
using the IP Phone UI, use that new password to log into the Aastra Web UI.
using the Aastra Web UI, use that new password when changing the user password via the IP Phone UI.
Note:
Valid values when creating or changing a password are 0 to 4294967295 (integers only; symbols and alpha characters are not allowed). Default password is an empty string "" (field is blank).
Setting a User Password

IP Phone UI
Notes:
If required, use the following keys while entering a password:
- Backspace softkey moves cursor back a space and deletes characters
-
Cancel softkey cancels the password changing process without saving.
-
Press on the phone to enter the Options List.
- Select User Password and press Select.
- At the "Current Password:" prompt, enter the current user password and press Enter.
- At the "New Password:" prompt, enter the new user password and press Enter.
- At the "Re-enter Password." prompt, re-enter the new user password and press Enter. A message, "Password Changed" displays on the screen.

Aastra Web UI
- Click on Operation->User Password.
Reset User Password
Please enter the current and new passwords
Current Password
New Password
Password Confirm
Save Settings
●●●●●
●●●●●●●
●●●●●●●
- In the "Current Password" field, enter the current user password.
Note:
By default, the user name is "user" (all lowercase) and the password field is left blank.
-
In the "New Password" field, enter the new user password.
-
In the "Password Confirm" field, enter the new user password again.
- Click Save Settings.
Resetting a User Password
If you forget your password, you can reset it and enter a new password. The reset user password feature resets the password to the factory default which is blank (no password).
You can reset a user password using the Astra Web UI only.
Note:
Valid values when creating or changing a password are 0 to 4294967295 (integers only; symbols and alpha characters are not allowed). Default password is an empty string "" (field is blank).
Reset a User Password
Use the following procedure to reset a user password.

Aastra Web UI
1. Click on Operation->Phone Lock.
Phone Lock
Lock or unlock the phone
Emergency Dial Plan
Lock the phone?
Reset User Password
Save Settings
911|999|112|110
Lock
Reset
2. Click on the "Reset User Password" field, click Reset. The following screen displays.
Reset User Password
Please enter the current and new passwords
Current Password
New Password
Password Confirm
Save Settings
●●●●●
●●●●●●●
●●●●●●●●
- In the "Current Password" field, leave this blank.
- In the "New Password" field, enter a new password.
- In the "Password Confirm" field, re-enter your new user password.
- Click Save Settings.
Restarting Your Phone
You may want to restart your phone to check for updates on the server. You may occasionally need to restart your phone to set changes or updates to your phone or network settings. You may also need to restart your phone if you have been asked to do so by your System Administrator, or should you experience any unexpected behavior.

IP Phone UI
-
Press the key on the phone to enter the Options List.
-
Select Restart Phone.
-
When the prompt, "Are you sure you wish to restart the phone?" appears, press the Restart softkey. If you do not wish to restart your phone, press Cancel.
Note:
Your phone is out of service temporarily during the restart and downloading process.

Aastra Web UI
- Click on Operation->Reset.

- Click Restart.
- Click OK at the confirmation prompt.
Phone Lock
You can lock your phone to prevent the phone from being used or configured. You can lock the phone using any of the following:
- At the path Options->Phone Lock on the IP Phone UI.
- At the path Operations->Phone Lock on the Astra Web UI.
- At a configured key on the phone. For more information about configuring a Lock/Unlock key on your phone, see "Making Calls" on page 105.
In the Aastra Web UI, the Operation->Phone Lock path also allows you to perform the following:
- Reset a user password. Clicking on the "Reset" key in the "Reset User Password" field displays a screen that allows you to enter and save a new user password.
- Set an emergency dial plan. An emergency dial plan can be 911, 999, 112, 110 or all of the above. The default emergency dial plan is 911|999|112|110.
The following procedures describe locking the phone, setting an emergency dial plan, and resetting the user password.
Locking/Unlocking a Phone
Use the following procedures to lock an IP phone and prevent it from being used or configured.

IP Phone UI
Lock the Phone
- Press on the phone to enter the Options List.
- Select Phone Lock and press Select.
- At the "Lock the phone?" prompt, press Yes. The message "Phone is locked" displays.
Unlock the Phone
- Press on the phone to enter the Options List.
- At the prompt, "To unlock the phone", enter your user password and press Enter. The phone unlocks

Aastra Web UI
- Click on Operation->Phone Lock.
Phone Lock
Lock or unlock the phone
Emergency Dial Plan
Lock the phone?
Reset User Password
911|999|112|110
Lock
Reset
Save Settings
Lock the Phone
- In the "Lock the Phone?" field, click Lock. The phone locks dynamically and displays the following message: "Phone is locked".
Unlock the Phone
- Click on Operation->Phone Lock.
- In the "Unlock the Phone?" field, click Unlock. The phone unlocks dynamically and displays the following message: "Phone is unlocked".
Defining an Emergency Dial Plan
Public telephone networks in countries around the world have a single emergency telephone number (emergency services number), that allows a caller to contact local emergency services for assistance when required. The emergency telephone number may differ from country to country. It is typically a three-digit number so that it can be easily remembered and dialed quickly. Some countries have a different emergency number for each of the different emergency services.
You can specify the digits to dial on the IP phone for contacting emergency services. Once you specify the emergency number(s) on the phone, you can dial those numbers directly on the dial pad when required and the phone automatically dials to those emergency services.
Note:
Contact your local phone service provider for available emergency numbers in your area.
The following table describes the default emergency numbers on the IP phones.
Emergency Number Description
| 911 A United States emergency number | |
| 999 A United Kingdom emergency number | |
| 112 | An international emergency telephone number for GSM mobile phone networks.In all European Union countries it is also the emergency telephone number for both mobile and fixed-line telephones. |
| 110 | A police and/or fire emergency number in Asia, Europe, Middle East, and South America. |
You can set the emergency dial plan using the Astra Web UI.
Define an Emergency Dial Plan
Use the following procedure to specify the numbers to use on your phone for dialing emergency services in your area.

Aastra Web UI
1. Click on Operation->Phone Lock.

- In the "Emergency Dial Plan" field, enter the 3-digit number used in your local area to contact emergency services.
For multiple numbers, enter a "I" between each emergency number. For example:
911|110
Default for this field is 911|999|112|110.
- Click Save Settings to save the emergency dial plan to your phone.
Reference
For more advanced options you can set on your phone, see "Additional Features" on page 155.
Line Keys and Softkeys
This section describes the Multiple Line/Call Appearance Keys (L1, L2, L3, and L4) located on the bottom-right of the phone, and the customizable softkeys located at the top and bottom of the phone screen.
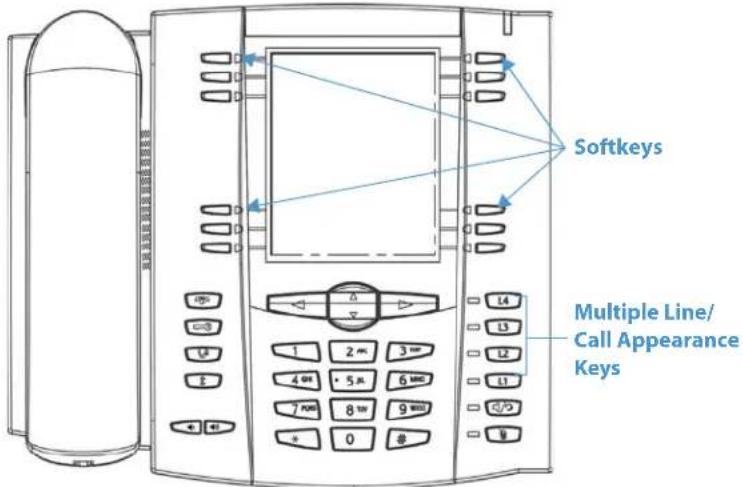
Multiple Line and Call Appearances
The 6737i has 4 hard line/call appearance keys each with a corresponding status light.
These line/call appearance keys and lights can represent physical lines, calls for your extension or calls from a group that your extension is part of. By pressing a line/call appearance key, you connect to the line or a call it represents. The line/call appearance light indicates the status of that line or call. When the phone is taken off-hook, the phone automatically selects a line for you.
| Line/Call Appearance Light Behavior Line/Call Appearance Status |
| Off Idle line or no call activity |
| Light flashes quickly Ringing |
| Light is solid Connected |
| Light flashes slowly Hold |
When you have more than one call, you can use the left and right navigation keys (◀ and ▶) to scroll left and right to the different call information. Icons ◀ and ▶ appear if there is call information either left, right or both sides of the current information you are viewing.
The display shows which line the call information is referring to (L1, L2, L3, L4 etc.), the Caller ID information (name and number, if available), the call status (Connected, Ring, Hold, etc.) and the timer specific to that call.
Softkeys
Your 6737i has 12 multi-functional softkeys:
• 6 Top Keys: static softkeys
(up to 10 programmable functions)
• 6 Bottom Keys: state-based softkeys
(up to 20 programmable functions).

flowchart
graph TD
    A["Services"] --> B["Softkeys"]
    C["Directory"] --> B
    D["Callers List"] --> B
    E["Intercom"] --> B
    F["None"] --> B
    G["None"] --> B
    H["None"] --> B
    I["None"] --> B
    J["None"] --> B
    K["None"] --> B
    L["None"] --> B
    M["None"] --> B
    N["None"] --> B
    O["None"] --> B
    P["None"] --> B
    Q["None"] --> B
    R["None"] --> B
    S["None"] --> B
    T["None"] --> B
    U["None"] --> B
    V["None"] --> B
    W["None"] --> B
    X["None"] --> B
    Y["None"] --> B
    Z["None"] --> B
    AA["None"] --> B
    AB["None"] --> B
    AC["None"] --> B
    AD["None"] --> B
    AE["None"] --> B
    AF["None"] --> B
    AG["None"] --> B
    AH["None"] --> B
    AI["None"] --> B
    AJ["None"] --> B
    AK["None"] --> B
    AL["None"] --> B
    AM["None"] --> B
    AN["None"] --> B
    AO["None"] --> B
    AP["None"] --> B
    AQ["None"] --> B
    AR["None"] --> B
    AS["None"] --> B
    AT["None"] --> B
    AU["None"] --> B
    AV["None"] --> B
    AW["None"] --> B
    AX["None"] --> B
    AY["Services"] --> AZ["Softkeys (state-based)"]
    CAY["Directory"] --> AZ
    CALLERSList --> AZ
Note:
If a M670i or M675i Expansion Module(s) is attached to the phone, you can configure up to an additional 36 softkeys on each M670i Expansion Module and up to 60 softkeys on each M675i Expansion Module. (The 6737i IP Phone allows up to 3 expansion modules on each phone). For more information about expansion modules, see "Model M670i and M675i Expansion Modules" on page 174.
You can use the Aastra Web UI only, to configure key functions.
The following table lists the functions you can set on the softkeys and provides a description for each function.
| Key Function Description | |
| None Indicates the key has no functiona assigned. | |
| Line Indicates the key is configured for line use. | |
| Speeddial Indicates the key is configured for speeddial use. | |
| Do Not Disturb | Indicates the key is configured for Do Not Disturb (DND) functionality. |
| BLF Indicates the key is configured for Busy Lamp Field (BLF) functionality. | |
| BLF/List Indicates the key is configured for BLF/List functionality. | |
| Auto Call Distribution (ACD) (For Sylantro Call Managers) | |
| XML | Indicates the key is configured to accept an XML application for accessing customized XML services. |
| Flash | Indicates the key is set to generate a flash event when it is pressed. The IP phone generates flash events only when a call is connected and there is an active RTP stream (for example, when the call is not on hold). |
| Sprecode | Indicates the key is configured to automatically activate specific services offered by the server. For example, if the sprecode value of *82 is configured, then by pressing the Sprecode key, *82 automatically activates a service provided by the call manager. |
| Key Function | Description |
| Park Indicates the key is configured to park incoming calls when pressed. | |
| Pickup Indicates the key is configured to pick up parked calls when pressed. | |
| Last Call Return (LCR) | Indicates the key is configured for Last Call Return functionality when pressed. |
| Call Forward | Indicates the key is configured as a Call Forward key. When pressed, the IP phone UI displays the Call Forward menus. |
| BLF/Xfer | Indicates the key is configured as a simplified BLF key and a Transfer key. You can use this key to perform the BLF function as well as use it as a transfer key to transfer calls. |
| Speeddial/Xfer | Indicates the key is configured as a simplified speed dial key and a transfer key. You can use this key to perform speed dial functions as well as use it as a transfer key to transfer calls. |
| Speeddial/Conf | Indicates the key is configured as a speed dial key and a conference key. You can use this key to speed dial from within a conference call and add the new call directly to the conference. |
| Directory Indicates the key is configured to access the Directory. | |
| Callers List Indicates the key is configured to access the Callers List. | |
| Redial Indicates the key is configured to access the Redial List. | |
| Conference | Indicates the key is configured to initiate a conference call. |
| Transfer | Indicates the key is configured to initiate a call transfer. |
| Icom | Indicates the key is configured to be used for intercom calls. |
| Services | Indicates the key is set to access Services, such as, Directory List, Callers List, Voicemail, or any other XML applications set up by your System Administrator. |
| Phone Lock | Indicates the key is configured as a phone lock key, allowing you to press this key to lock/unlock the phone. |
| Paging | Indicates the key is configured as a Paging key. When pressed, the phone can send Real Time Transport Protocol (RTP) streams from a preconfigured multicast address without involving SIP signaling. You can also receive RTP streams from preconfigured multicast addresses (can specify up to 5 addresses) using the "Paging Listen Addresses" at the path,Basic Settings->Preferences->Group Paging RTP Settings in the Aastra Web UI. For more information about setting this parameter, see "Group RTP Paging (receives RTP streams)" on page 170. |
| Empty | Indicates the key has no function assigned. |
Note:
Keys can also be set up to quickly to access features such as call return (*69) or voicemail. Quick access features like call return and voicemail must first be configured on your PBX in order to work on your phone. See your System Administrator for more information.
State-Based Softkeys
On the 6737i bottom softkeys, you can configure a specific state to display when a softkey is being used.
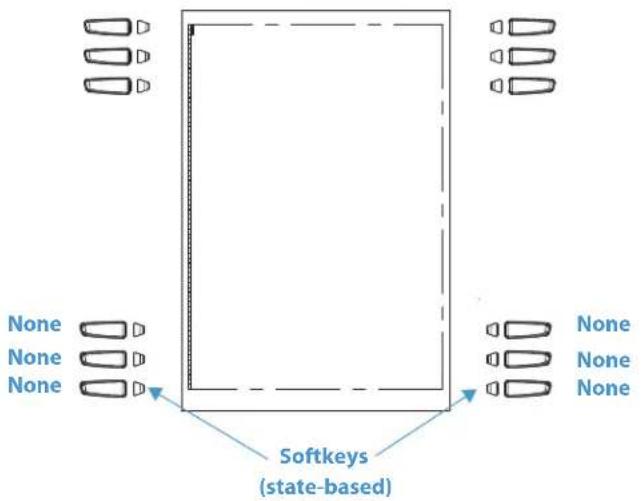
The following table describes the states available to configure for the softkeys.
State Description
| Idle The phone is not being used. |
| Connected The current line is in an active call (or the call is on hold). |
| Incoming The phone is ringing. |
| Outgoing The user is dialing a number, or the far-end is ringing. |
| Busy The current line is busy because the line is in use or the line is set as DND. |
The following table identifies the applicable default states for each softkey type on the IP phone.
Softkey Type Default States
| None All states disabled. |
| Line Idle, Connected, Incoming, Outgoing, Busy |
| Speeddial Idle, Connected, Incoming, Outgoing, Busy |
| DND Idle, Connected, Incoming, Outgoing, Busy |
| BLF Idle, Connected, Incoming, Outgoing, Busy |
| BLF/List Idle, Connected, Incoming, Outgoing, Busy |
| Auto Call Distribution (ACD) | Idle |
| XML | Idle, Connected, Incoming, Outgoing, Busy |
| Flash | All states disabled. |
| Sprecode | Connected |
| Park | Connected |
| Pickup | Idle, Outgoing |
| Last Call Return | Idle, Connected, Incoming, Outgoing, Busy |
| Call Forward | Idle, Connected, Incoming, Outgoing, Busy |
| BLF/Xfer | Idle, Connected, Incoming, Outgoing, Busy |
| Softkey Type | Default States |
| Speeddial/Xfer Idle, Connected, Incoming, Outgoing, Busy | |
| Speeddial/Conf Idle, Connected, Incoming, Outgoing, Busy | |
| Directory Idle, Connected, Incoming, Outgoing, Busy | |
| Callers List Idle, Connected, Incoming, Outgoing, Busy | |
| Redial Idle, Connected, Incoming, Outgoing, Busy | |
| Conference Idle, Connected, Incoming, Outgoing, Busy | |
| Transfer Idle, Connected, Incoming, Outgoing, Busy | |
| Intercom Idle, Connected, Incoming, Outgoing, Busy | |
| Services Idle, Connected, Incoming, Outgoing, Busy | |
| Phone Lock All states disabled. | |
| Paging All states disabled. | |
| Empty | Idle, Connected, Incoming, Outgoing, Busy |
In the Aastra Web UI, the operational states for each softkey display enabled. To disable a state, you uncheck the box for that state.
Key Display Behavior
On the 6737i IP Phone, you can configure up to 20 functions on the bottom softkeys. If you have no softkeys configured on the IP Phone, and you assign softkey functions to higher number keys in the Astra Web UI, the key functions automatically appear in the first available position on the LCD display.
For example, if the bottom softkeys 1 through 20 are set to "None", and you set softkey 12 as the following:
Type: speeddial
Label: LAB
Value: 3456
after saving the settings, the "LAB" label actually appears in position 1 of the LCD.
A softkey function of "None" does not display on the idle screen at all.
The following illustrations show the configuration of Key 12 and how that key displays on the phone.
Softkeys Configuration
| Bottom Keys Top Keys | |||||||||
| Key | Type | Label | Value | Line | Idle | Connected | Incoming | Outgoing | Busy |
| 1 | None | 1 | |||||||
| 2 | None | 1 | |||||||
| 3 | None | 1 | |||||||
| 4 | None | 1 | |||||||
| 5 | None | 1 | |||||||
| 6 | None | 1 | |||||||
| 7 | None | 1 | |||||||
| 8 | None | 1 | |||||||
| 9 | None | 1 | |||||||
| 10 | None | 1 | |||||||
| 11 | None | 1 | |||||||
| 12 | Speeddial | LAB | 3456 | 1 | |||||
| 13 | None | 1 | |||||||
| 14 | None | 1 | |||||||
| 15 | None | 1 | |||||||
| 16 | None | 1 | |||||||
| 17 | None | 1 | |||||||
| 18 | None | 1 | |||||||
| 19 | None | 1 | |||||||
| 20 | None | 1 | |||||||
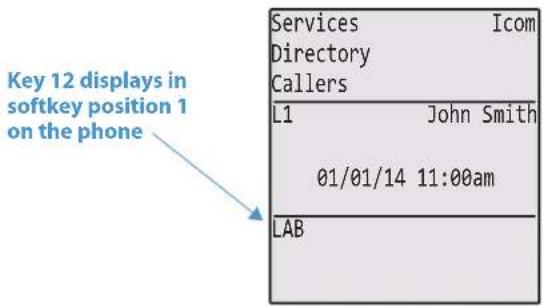
Line Key
You can set a softkey to act as a line/call appearance key on the 6737i. The This key acts as a line that behaves the same as a hard line key (L1, L2, L3, and L4). For more information about the behavior of line keys, see "Multiple Line and Call Appearances" on page 43.
If you configure line keys for the softkeys, the status of the lines/call appearance keys appear on the phone's display as shown in the following image.
| Services | Icom |
| Directory | |
| Callers | |
| L1 | John Smith |
| 01/01/14 11:00am | |
| ☐L5 | L8. |
| ☐L6 | L9. |
| ☐L7 |
Icons next to the softkeys on the phone's display indicate the status for that line or call. The following table provides a description for each icon.
Activity Light Icon Description
| Idle Solid There is no call activity for the line/call appearance softkey. | |||
| Connected | Solid | A call is connected to your phone on this line/call appearance softkey.The equivalent on a line/call appearance hard key is a solid green light. | |
| Ringing | Flashing | A call is ringing on your phone on this line/call appearance softkey.The equivalent on a line/call appearance hard key is a fast flashing green light. | |
| On Hold | Flashing | A call is on hold on your phone on this line/call appearance softkey.The equivalent on a line/call appearance hard key is a slow flashing green light. | |
Depending on how the phone has been configured, the maximum number of total line/call appearances that can be configured is 9 (4 line/call appearance hard keys plus 5 softkeys). If all line/call appearances have been set up between two different numbers, a total of 8 lines can be configured.
This means that when all line/call appearances are in use, 1 call is connected while the rest are on hold. No further outgoing or incoming calls can be made until one of the line/call appearances becomes available.
In active states, such as ringing, conference, connected, etc., all softkeys disappear except softkeys that have been set up as line/call appearances, and any context dependent softkeys required for the active state, such as the Drop softkey in the connected state. Typically, context dependent softkeys appear in the top left position and all line/call appearance softkeys appear in the remaining positions.
Note:
In some situations, such as during a conference call, the line/call appearance softkeys may overwrite some of the context dependent softkeys. In this case, instead of the Previous and Next softkeys, up or down icons, ▲ and ▼ appear on the display. By using the ▲ and ▼ navigation keys, you can access the same functionality as the Previous and Next softkeys.
You use the Astra Web UI to set a softkey as a line.
Configuring a Line Key
You can set a key as an additional line on the 6737i. The key acts as a line that behaves the same as a hard line key. For more information about the behavior of line keys, see "Multiple Line and Call Appearances" on page 43.
You use the Astra Web UI to set a key as a line.

Aastra Web UI
Use the following procedure to set a key to function as a line. The procedure shows the softkey screens as an example.
- Click on Operation->Softkeys and XML. or
Click on Operation->Expansion Module
Softkeys Configuration
| Bottom Keys Top Keys | ||||
| Key | Type | Label | Value | Line |
| 1 | Line | Test | 5 | |
| 2 | Directory | 1 | ||
| 3 | Callers List | 1 | ||
| 4 | Ioom | global | ||
| 5 | None | 1 | ||
| 6 | None | 1 | ||
| 7 | None | 1 | ||
| 8 | None | 1 | ||
| 9 | None | 1 | ||
| 10 | None | 1 | ||
Softkeys
- Select from "Key 1" through "Key 10" on the Top keys. or Select from "Key 1" through "Key 20" on the Bottom keys.
- In the "Type" field, select Line to apply to the key.
- In the "Label" field, enter a label to apply to this key.
- In the "Line" field, select a line to apply to this key. Valid values are 5 through 9.
- (Bottom Softkeys) In the state fields, check (enable) or uncheck (disable) the states you want to apply to this softkey.
Expansion Module Keys
- Select from "Key 1" through "Key 36" (M670i) or Select from "Key 1" through "Key 60" (M675i)
- In the "Type" field, select Line to apply to the key.
- (M675i) In the "Label" field, enter a label to apply to this key.
- In the "Line" field, select a line to apply to this key. Valid values are 5 through 9.
- Click Save Settings.
Speeddial Key
The normal function of the speed dial option allows you to dial a number quickly by pressing a key configured for speed dialing. You can program the keys on the 6737i to speed dial outside numbers, dial directly to another person's line or extension, or set up to quickly access features such as Caller ID (*69), Voicemail.
The speed dial function can be set using the IP Phone UI or the Astra Web UI.
Note:
You can use a speed dial key while on an active call by placing the active call on hold first, and then pressing the speed dial key.
You can create speed dial keys using any of the following methods:
• Using the Astra Web UI at the paths:
- Operation->Softkeys and XML
- Operation->Expansion Module Keys
• Using the IP Phone UI at the path, Options->Preferences->Speed Dial Edit
- By pressing and holding a softkey, keypad key, or expansion module key.
Speed Dial Prefix
The speed dial feature also allows you to specify a preset string of numbers followed by a "+" that the phone dials automatically after pressing the speed dial key. You can use this feature for numbers that contain long prefixes.
For example, if you had the following speed dial configuration in the Astra Web UI:
Key 1
Type=speeddial
Label=Europe Office
Value=1234567+
Line=2
then, after you press key 1 on the phone, the prefix number displays on the phone screen. The phone proceeds to dial the prefix number automatically and pauses for you to enter the remaining phone number using the keypad on the phone.
You can save up to 30 speed dial numbers on the 6737i.
Use the following procedures to set speed dial on the 6737i IP phone.
Press-and-Hold to Create a Speed Dial (applicable to softkeys, keypad keys, expansion module keys)

IP Phone UI
Pressing and holding down a softkey, keypad key, or expansion module key on the phone initiates a speed dial feature.
Note:
When creating a speed dial key from the IP Phone UI, you must select a softkey, keypad key, or expansion module key that has no preassigned function (key must be set to None).
- Press an unconfigured softkey, keypad key, or expansion module key.
The following screen displays:
| Services | Icom |
| Directory | |
| Callers | |
| Enter Name: | |
| Enter Number: | |
| Line: 1 | |
| Save | |
| Backspace | |
| ABC▶ | Cancel |
Note:
You can press the "Cancel" softkey at anytime during the speed dial programming to cancel and not save the speed dial information.
- In the "Enter Name:" field, enter a name to apply to the speed dial key.
Use the keypad keys to enter the name. Continue to press the keypad keys to access the next letter for that key (i.e. press 2 three times to access C). Press ▶ to move to the next space, or wait for the cursor to automatically advance to the next position. To insert a space between letters, press ▶. To backspace and erase a mistake, press the Backspace softkey.
Note:
The phone automatically uses an uppercase letter for the first letter of each word and a lowercase letter for all subsequent letters in the word. If necessary, use the "ABC▶" softkey to specify uppercase letters or lowercase letters when entering the name.
You can enter up to 16 letters in the "Enter Name:" field.
- Press the ▼ key to move to the next field.
In the "Enter Number:" field, enter a number. for the speed dial key using the keypad keys. You can enter up to 16 numbers in the "Enter Number:" field.
| Services | Icom |
| Directory | |
| Callers | |
| Enter Name:John SmithEnter Number:Line: 1 | |
| SaveBackspace123▶ | Cancel |
Note:
When in the "Enter Number:" field, the phone automatically switches to the numbers softkey.
Press the ▼ key to move to the next field.
- In the "Line:" field, select a line to apply to the speed dial key.
| Services | Icom |
| Directory | |
| Callers | |
| Enter Name: | |
| John Smith | |
| Enter Number: | |
| 555-6789 | |
| Line: ▶1 | |
| Save | |
| Change | |
| Cancel |
This is the line that the phone opens to dial the number after you press the speed dial key. By default, the phone uses Line 1 for the speed dial key. If you want to use a different line, press the "Change" key, or press the ▶key to select another line.
- Press the "Save" softkey to save the speed dial information to the speed dial key you selected.
Note:
To delete or remove a speed dial configuration from the phone, you can press the Remove key.
Creating a Speed Dial Using the Speed Dial Edit Option
You can use the IP Phone UI at the path, Options->Preferences->Speed Dial Edit, to create a speed dial key.

IP Phone UI
- Press on the phone to enter the Options List.
- Select Preferences and press Select.
- Select Speed Dial Edit.
The following prompt displays:
"Press SD key"
All current speed dial key LEDs flash RED (for programmable keys). All other function key LEDs turn off, during this process. After you press a speed dial key for editing, the phone restores all key LEDs to their previous state.
Note:
If you select a key that is currently set as a speed dial key, the speed dial information displays for you to edit.
- Press an unconfigured softkey, keypad key, or expansion module key.
The following screen displays:
| Services | Icom |
| Directory | |
| Callers | |
| Enter Name: | |
| Enter Number: | |
| Line: 1 | |
| Save | |
| Backspace | |
| ABC▶ | Cancel |
Note:
You can press the "Cancel" softkey at anytime during the speed dial programming to cancel and not save the speed dial information.
- In the "Enter Name:" field, enter a name to apply to the speed dial key.
Use the keypad keys to enter the name. Continue to press the keypad keys to access the next letter for that key (i.e. press 2 three times to access C). Press ▶ to move to the next space, or wait for the cursor to automatically advance to the next position. To insert a space between letters, press ▶. To backspace and erase a mistake, press the Backspace softkey.
Note:
The phone automatically uses an uppercase letter for the first letter of each word and a lowercase letter for all subsequent letters in the word. If necessary, use the "ABC▶" softkey to specify uppercase letters or lowercase letters when entering the name.
You can enter up to 16 letters in the "Enter Name:" field.
-
Press the ▼ key to move to the next field.
-
In the "Enter Number:" field, enter a number. for the speed dial key using the keypad keys. You can enter up to 16 numbers in the "Enter Number:" field.
| Services | Icom |
| Directory | |
| Callers | |
| Enter Name:John SmithEnter Number:Line: 1 | |
| SaveBackspace123▶ | Cancel |
Note:
When in the "Enter Number:" field, the phone automatically switches to the numbers softkey.
-
Press the ▼ key to move to the next field.
-
In the "Line:" field, select a line to apply to the speed dial key.
| Services | Icom |
| Directory | |
| Callers | |
| Enter Name:John SmithEnter Number:555-6789Line: ▶1 | |
| Save | ChangeCancel |
This is the line that the phone opens to dial the number after you press the speed dial key. By default, the phone uses Line 1 for the speed dial key. If you want to use a different line, press the "Change" key, or press the ▶ key to select another line.
- Press the "Save" softkey to save the speed dial information to the speed dial key you selected.
Note:
To delete or remove a speed dial configuration from the phone, you can press the Remove key.
Creating a Speed Dial Key Using the Softkeys or Expansion Module Keys

Aastra Web UI
Use the following procedure to set a key to function as a speed dial. The procedure shows the softkey screens as an example.
- Click on Operation->Softkeys and XML.
or
Click on Operation->Expansion Module
Softkeys Configuration
| Key | Type | Label | Value | Line |
| 1 | Speedcial | test | 9051234567 | 1 |
| 2 | Directory | 1 | ||
| 3 | Callers List | 1 | ||
| 4 | Ioom | global | ||
| 5 | Phone Lock | 1 | ||
| 6 | None | 1 | ||
| 7 | None | 1 | ||
| 8 | None | 1 | ||
| 9 | None | 1 | ||
| 10 | None | 1 |
Softkeys
- Select from "Key 1" through "Key 10" on the Top keys.
or
Select from "Key 1" through "Key 20" on the Bottom keys. - In the "Type" field, select Speed dial to apply to the key.
- In the "Label" field, enter a label to apply to this key.
- In the "Value" field, enter the phone number, extension, or speed dial prefix to apply to this key. If you enter a speed dial prefix, you must enter the "+" character at the end of the prefix number (for example, "123456+").
- In the "Line" field, select a line to apply to this key. Valid values are 1 through 9.
- (Bottom Softkeys) In the state fields, check (enable) or uncheck (disable) the states you want to apply to this softkey.
Expansion Module Keys
- Select from "Key 1" through "Key 36" (M670i)
or
Select from "Key 1" through "Key 60" (M675i)
- In the "Type" field, select Speeddial to apply to the key.
- (M675i) In the "Label" field, enter a label to apply to this key.
- In the "Value" field, enter the phone number, extension, or speed dial prefix to apply to this key. If you enter a speed dial prefix, you must enter the "+" character at the end of the prefix number (for example, "123456+").
- In the "Line" field, select a line to apply to this key. Valid values are 1 through 9.
- Click Save Settings.
Creating Speed Dial Key Using "Keypad Speed Dial" in the Astra Web UI

Aastra Web UI
- Click on Operation->Keypad Speed Dial.
Keypad Speed Dial
| Key | Value | Line |
| 1 | 9051234567 | 1 √ |
| 2 | 9067654321 | 1 √ |
| 3 | 9050000000 | 1 √ |
| 4 | 1 √ | |
| 5 | 1 √ | |
| 6 | 1 √ | |
| 7 | 1 √ | |
| 8 | 1 √ | |
| 9 | 1 √ |
- Select from "Digit 1" through "Digit 9".
- In the input box, enter the phone number, extension, or speed dial prefix to apply to this Digit key. If you enter a speed dial prefix, you must enter the "+" character at the end of the prefix number (for example, "123456+").
- In the "Line" field, select a line for which to apply the speed dial to. Valid values are 1 through 9.
- Click Save Settings.
Editing Speed Dial Keys
On the 6737i, you can edit a speed dial key using any of the following methods:
• Using the Astra Web UI at the path:
- Operation->Softkeys and XML
- Operation->Expansion Module Keys
• Using the IP Phone UI at the path:
- Options->Preferences->Speed Dial Edit

IP Phone UI
Use the following procedure to edit a speed dial key from the IP Phone UI.
Note:
A speed dial key must be already configured on the phone to edit the key.
- Press on the phone to enter the Options List.
- Select Preferences.
- Select Speed Dial Edit.
All current speed dial key LEDs flash RED (for softkeys and expansion module keys). All other function key LEDs turn off, during this process. After you press a speed dial key for editing, the phone restores all key LEDs to their previous state.
- Press a speed dial key you want to edit.
The speed dial edit screen displays.
Notes:
- If a number on the keypad is setup as a speed dial key, pressing the applicable number in the speed dial editing process also displays the speed dial edit screen. The edit screen allows you to change the Speed Dial Number and Line setting.
-
If you press a key that is NOT setup as a speed dial key, the phone displays an "Invalid Key" message. However, if you press-and-hold an empty digit key, softkey, or expansion module key set to "NONE", it initiates the "Add a speed dial Key" process allowing you to setup a new speed dial key. For more information, see "Press-and-Hold to Create a Speed Dial (applicable to softkeys, keypad keys, expansion module keys)" on page 52.
-
Edit the speed dial information as applicable and press SAVE.
Notes:
- You can cancel out of the speed dial editing process at any time without saving, by pressing the 📄 key, or the Cancel key.
- You can delete a speed dial key by pressing the Remove key.
Editing a Speed Dial on a Softkey or Expansion Module Key

Aastra Web UI
- Click on Operation->Softkeys and XML.
or
Click on Operation->Expansion Module
Softkeys Configuration

- Select the key configured for speed dial.
- In the "Value" field, edit the phone number, extension, or speed dial prefix to apply to this hard key. If you enter a speed dial prefix, you must enter the "+" character at the end of the prefix number (for example, "123456+").
- If required in the "Line" field, select a line for which to apply the speed dial to. Valid values are 1 through 9.
- Click Save Settings.
Note:
You can delete a speed dial key by removing the information from the "Value" field.
Editing a Speed Dial Key Using "Keypad Speed Dial" in the Astra Web UI

Aastra Web UI
- Click on Operation->Keypad Speed Dial.
Keypad Speed Dial
| Key | Value | Line |
| 1 | 9051234567 | 1 |
| 2 | 9067654321 | 1 |
| 3 | 9050000000 | 1 |
| 4 | 1 | |
| 5 | 1 | |
| 6 | 1 | |
| 7 | 1 | |
| 8 | 1 | |
| 9 | 1 |
- Select from "Digit 1" through "Digit 9".
- In the input box, edit the phone number, extension, or speed dial prefix for this Digit key. If you enter a speed dial prefix, you must enter the "+" character at the end of the prefix number (for example, "123456+").
- In the "Line" field, select a line for which to apply the speed dial to. Valid values are 1 through 9.
- Click Save Settings.
"Do Not Disturb" (DND) Key
The IP phones have a feature you can enable called "Do Not Disturb (DND). The DND function allows you to turn DND ON and OFF.
Note:
You can configure DND using the Astra Web UI only.
If DND is ON, callers calling into the phone hear a busy signal or a message, depending on how your System Administrator set up the configuration server. The second line on the screen of the IP phone shows when DND is set.
If the phone shares a line with other phones, only the phone that has DND configured is affected.
You can set DND on the keys using the Aastra Web UI only. DND is not configurable from the IP phone UI.
Configuring a DND Key

Aastra Web UI
Use the following procedure to set a key to function as "Do Not Disturb". The procedure shows the softkey screens as an example.
- Click on Operation->Softkeys and XML.
or
Click on Operation->Expansion Module
Softkeys Configuration
| Bottom Keys Top Keys | ||||
| Key | Type | Label | Value | Line |
| 1 | Do Not Disturb | 1 | ||
| 2 | Pickup | 1 | ||
| 3 | Line | 5 | ||
| 4 | Ioom | global | ||
| 5 | Phone Lock | 1 | ||
| 6 | None | 1 | ||
| 7 | None | 1 | ||
| 8 | None | 1 | ||
| 9 | None | 1 | ||
| 10 | None | 1 | ||
Softkeys
- Select from "Key 1" through "Key 10" on the Top keys.
or
Select from "Key 1" through "Key 20" on the Bottom keys.
-
In the "Type" field, select Do Not Disturb to apply to the key.
-
(Bottom Softkeys) In the state fields, check (enable) or uncheck (disable) the states you want to apply to this softkey.
Expansion Module Keys
- Select from "Key 1" through "Key 36" (M670i)
or
Select from "Key 1" through "Key 60" (M675i)
-
In the "Type" field, select Do Not Disturb to apply to the key.
-
Click Save Settings.
Busy Lamp Field (BLF) Key
The BLF feature on the IP phones allows a specific extension to be monitored for state changes. BLF monitors the status (busy or idle) of extensions on the IP phone.
Note:
BLF feature availability is dependant on your call manager. Contact your System Administrator for more information.
Example
A Supervisor configures BLFs on his phone for monitoring the status of a worker's phone use (busy or idle). When the worker picks up his phone to make a call, a busy indicator on the Supervisor's phone shows that the worker's phone is in use and busy.
On the 6737i, the busy and idle indicators show on the IP phone screen display next to the key programmed for BLF functionality. When the monitored user is idle, an icon with the handset on-hook shows next to the BLF key. When the monitored user is on an active call, a small telephone icon is shown with the handset off-hook.
Note:
You can also use a BLF configured key to dial out. Contact your System Administrator for more information
Configuring a BLF Key

Aastra Web UI
Use the following procedure to set a key to function as "BLF". The procedure shows the softkey screens as an example.
- Click on Operation->Softkeys and XML.
or
Click on Operation->Expansion Module
Softkeys Configuration
| Bottom Keys Top Keys | ||||
| Key | Type | Label | Value | Line |
| 1 | BLF | test | 9051234567 | 1 |
| 2 | Pickup | 1 | ||
| 3 | Line | 5 | ||
| 4 | Ioom | global | ||
| 5 | Phone Lock | 1 | ||
| 6 | None | 1 | ||
| 7 | None | 1 | ||
| 8 | None | 1 | ||
| 9 | None | 1 | ||
| 10 | None | 1 | ||
Softkeys
- Select from "Key 1" through "Key 10" on the Top keys.
or
Select from "Key 1" through "Key 20" on the Bottom keys.
- In the "Type" field, select BLF to apply to the key.
-
In the "Label" field, enter a label to apply to this key.
-
In the "Value" field, enter the phone number or extension you want to monitor.
- In the "Line" field, select a line for which to apply this key. Valid values are:
• Global
• 1 through 9
- (Bottom Softkeys) In the state fields, check (enable) or uncheck (disable) the states you want to apply to this softkey.
Expansion Module Keys
- Select from "Key 1" through "Key 36" (M670i)
or
Select from "Key 1" through "Key 60" (M675i)
-
In the "Value" field, enter the phone number or extension you want to monitor.
-
(M675i) In the "Label" field, enter a label to apply to this key.
-
In the "Line" field, select a line for which to apply this key. Valid values are:
global
• 1 through 9
- Click Save Settings.
BLF/List Key
For use with the BroadSoft Broadworks Rel 13 or higher platform only).
The BLF/List feature on the IP phones is specifically designed to support the BroadSoft Broadworks Rel 13 Busy Lamp Field feature.
This feature allows the IP phone to subscribe to a list of monitored users defined through the BroadWorks web portal.
Note:
Your System Administrator must have BLF/List enabled on the BroadWorks Server. Contact your System Administrator for more information.
In addition to monitoring the idle and busy state, the BLF/List feature also supports the ringing state. When the monitored user is idle, there is a small telephone icon shown with the handset on-hook. When the monitored user is on an active call, a small telephone icon is shown with the handset off-hook.
Note:
You can use a BLF/List configured key to dial out.
Example
A receptionist has a 6737i running Broadsoft firmware that subscribes to a list of extensions from the BroadWorks Application Server. On the 6737i, the key LEDs illuminate either flashing, solid, or turn off depending on the state of those extensions.
Note:
The Broadworks BLF feature is not the same as the Broadworks Shared Call Appearance (SCA) feature and does not permit call control over the monitored extension.
Configuring a BLF List Key
The BLF List function can be configured on the 6737i using the Aastra Web UI only.
If you set a key to use BLF/List, you must also enter a BLF List URI at Operation->Softkeys and XML->Services. The BLF List URI is the name of the BLF/List defined on the BroadSoft BroadWorks Busy Lamp field page for your particular user. For example, sip:9@192.168.104.13. The value of the BLF/List URI parameter must match the list name configured. Otherwise, no values display on the 6737i screen and the feature is disabled.

Aastra Web UI
Use the following procedure to set a key to function as "BLF/List". The procedure shows the softkey screens as an example.
1. Click on Operation->Softkeys and XML.
or
Click on Operation->Expansion Module
Softkeys Configuration
Bottom Keys
Top Keys
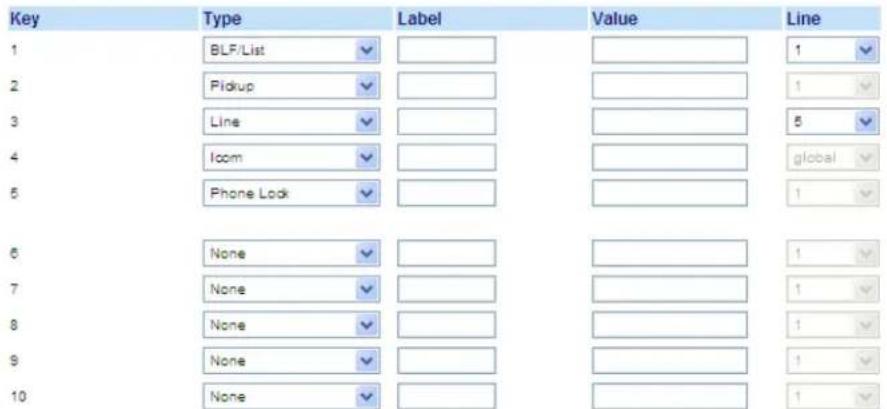
Services
XML Application URI:
XML Application Title:
BLF List URI:
Save Settings
Softkeys
- Select from "Key 1" through "Key 10" on the Top keys.
or
Select from "Key 1" through "Key 20" on the Bottom keys.
-
In the "Type" field, select "BLF/List" (BroadSoft BroadWorks).
-
In the "Line" field, select a line number that is actively registered to the appropriate SIP proxy you are using. Valid values are:
• Global
• 1 through 9
Note:
The "Label" and "Value" field are not required. The BroadWorks BLF/List name is configured in the "BLF List URI" field instead.
-
In the state fields, check (enable) or uncheck (disable) the states you want to apply to this softkey.
-
In the "BLF List URI" field, enter the name of the BLF/List defined on the BroadSoft BroadWorks Busy Lamp field page for your particular user. For example, sip:9@192.168.104.13.
Note:
Contact your System Administrator for the BLF List URI.
Expansion Module Keys
- Select from "Key 1" through "Key 36" (M670i)
or
Select from "Key 1" through "Key 60" (M675i)
- In the "Line" field, select a line for which to apply this key. Valid values are:
global
• 1 through 9
Note:
The "Value" field is not required. The BroadWorks BLF/List name is configured in the "BLF List URI" field instead.
- In the "BLF List URI" field, enter the name of the BLF/List defined on the BroadSoft BroadWorks Busy Lamp field page for your particular user. For example, sip:9@192.168.104.13.
Note:
Contact your System Administrator for the BLF List URI.
10. Click Save Settings.
Automatic Call Distribution (ACD) Key (for Sylantro Servers)
The 6737i and any attached Expansion Modules support Automatic Call Distribution (ACD) for Sylantro servers. The ACD feature allows the Sylantro server to distribute calls from a queue to registered IP phone users (agents).
o use the ACD feature on an IP phone, you must first configure an ACD softkey, programmable key, or expansion module key. When you want to subscribe to a queue (in order to receive incoming calls), you press the ACD key and the IP phone UI prompts you to log in. An "Available" softkey displays allowing you to make your phone available to accept these calls.
When you are on an active call, or you miss a call, the server automatically changes the phone's status to unavailable. The server updates its database with this new information and no longer distributes calls to the phone. The phone remains in this "unavailable" state until:
- you make yourself "available" again by pressing the "Available" softkey.
- an ACD timer expires (set by your System Administrator).
You can also choose to manually change the phone status to unavailable by pressing the "Unavailable" softkey on the phone.
This LED changes when you log into the phone queue and are available to take calls. The LED changes again when you are busy with an active call. The table below shows the status of the LED as they may appear on your IP phone.
| Phone Model | Status: Logged In and Available | Status: Unavailable | Logged Out |
| 6737i Solid Red LED | √ icon | Blinking Red LEDBlinking icon | No LED∅ icon |
Note:
It is recommended you configure no more than a single ACD softkey or expansion module key per IP phone.
Configuring an Automatic Call Distribution (ACD) Key

Aastra Web UI
Use the following procedure to configure ACD on the 6737i IP Phone. The procedure shows the softkey screens as an example.
- Click on Operation->Softkeys and XML.
or
Click on Operation->Expansion Module
Softkeys Configuration
Bottom Keys
Top Keys
| Key | Type | Label | Value | Line |
| 1 | Auto call distribution✓ | Test | 2✓ | |
| 2 | Pickup✓ | 1✓ | ||
| 3 | Line✓ | 5✓ | ||
| 4 | Ioom✓ | global✓ | ||
| 5 | Phone Lock✓ | 1✓ | ||
| 6 | None✓ | 1✓ | ||
| 7 | None✓ | 1✓ | ||
| 8 | None✓ | 1✓ | ||
| 9 | None✓ | 1✓ | ||
| 10 | None✓ | 1✓ |
Softkeys
- Select from "Key 1" through "Key 10" on the Top keys.
or
Select from "Key 1" through "Key 20" on the Bottom keys.
- In the "Type" field, select "Auto call distribution".
- In the "Label" field, enter a label to apply to this ACD key.
- In the "Line" field, select a line to apply Automatic call distribution. Valid values are 1 through 9.
- (Bottom Softkeys) In the state fields, check (enable) or uncheck (disable) the "idle" state for this softkey.
Expansion Module Keys
- Select from "Key 1" through "Key 36" (M670i)
or
Select from "Key 1" through "Key 60" (M675i)
- (M675i) In the "Label" field, enter a label to apply to this ACD key.
- In the "Line" field, select a line to apply Automatic call distribution. Valid values are 1 through 9.
- Click Save Settings.
Using the ACD Key
Use the following procedure to log into a phone queue from your IP phone.

IP Phone UI
- Check with your Administrator to verify the queue linked to your ACD Key.
- Press the ACD-configured Key.
- Press the Log In Key.
| Services | Icom |
| Directory | |
| Callers | |
| Please login | |
| Log In | |
| Cancel | |
- You are logged into the queue and the following screen displays.
| Services | Icom |
| Directory | |
| Callers | |
| Unavailable | |
| Log Off | |
| Avail | Cancel |
- To allow your phone to be available in the queue, press the Available softkey. The following screen displays.
| Services | Icom |
| Directory | |
| Callers | |
| Available | |
| Log Off | |
| Unavail | Cancel |
If your IP phone status is set to "Available" then the server begins to distribute phone calls from this queue to your IP phone. You must manually change the state to "Available" in order to start receiving calls.
- To temporarily stop receiving calls, press the press the Unavailable softkey.
If you are on a call (or miss a call that has been distributed to your phone), your phone status automatically changes to "Unavailable". Your phone remains in the "Unavailable" state until one of the following occurs:
- You use the IP Phone UI to manually switch the IP phone state back to
"Available"
or
- The availability "timer" for your IP phone expires. This only occurs if your Administrator has configured an auto-availability timer on your IP phone. Contact your System Administrator for more information.
- To logout of the queue, press the Log Out softkey. The server no longer distributes phone calls to your IP phone.
XML Key
The 6737i IP phone has a feature you can enable called "XML" (Extensible Markup Language). XML is a markup language much like HTML. Your System Administrator can create customized XML menu services and load them to your IP phone. These services include things like weather and traffic reports, contact information, company info, stock quotes, or custom call scripts. You can configure XML using the Aastra Web UI only.
Using the Aastra Web UI, you can configure a key to access XML applications. Under Operations->Softkeys and XML or Operations->Expansion Module, you can assign a key the type "XML".
After an XML key is configured, you can use the IP phone UI to access the XML applications.
Note:
The XML services must be set up by your System Administrator before you can use the key. Contact your System Administrator for more information.
You can also specify an XML URI and a Services title using the following XML fields:
- XML Application URI
- XML Application Title
The XML Application URI is the URI loaded by your phone when accessing XML services through the Services menu. Contact your System Administrator for the applicable XML URI to enter in the "XML Application URI" field.
Note:
Contact your System Administrator for the applicable URI to enter in this field.
If you use the Services key to access the XML features, the "XML Application Title" is the title that displays on the Services Menu in the IP phone UI.
After the XML application is applied, you can use the IP Phone UI to press the Services key and access the XML services.
By default, the Services key is the first key on the top, left keys.

Configuring XML Services

Aastra Web UI
1. Click on Operation->Softkeys and XML.
or
Click on Operation->Expansion Module
Softkeys Configuration
| Key | Type | Label | Value | Line |
| 1 | Services | Test | 3 | |
| 2 | Pickup | 1 | ||
| 3 | Line | 5 | ||
| 4 | Iom | global | ||
| 5 | Phone Lock | 1 | ||
| 6 | None | 1 | ||
| 7 | None | 1 | ||
| 8 | None | 1 | ||
| 9 | None | 1 | ||
| 10 | None | 1 |
Softkeys
- Select from "Key 1" through "Key 10" on the Top keys.
or
Select from "Key 1" through "Key 20" on the Bottom keys.
- In the "Type" field, select "Services".
- In the "Label" field, enter a label for the Services key.
- (Bottom Softkeys) In the state fields, check (enable) or uncheck (disable) the states you want to apply to this softkey.
- In the "XML Application URI" field, enter an application URI(s).
Note:
Contact your System Administrator for the appropriate value(s) to enter in the "XML Application URI" field.
- In the "XML Application Title" field, enter the title of the service. This title appears in the Services Menu after pressing the Services key. If multiple XML applications are specified in the XML Application URI field, a list of applications displays after pressing the Services key.
Expansion Module Keys
- Select from "Key 1" through "Key 36" (M670i)
or
Select from "Key 1" through "Key 60" (M675i)
- In the "Type" field, select "Services".
- (M675i) In the "Label" field, enter a label for the Services key.
- In the "XML Application URI" field, enter an application URI(s).
Note:
Contact your System Administrator for the appropriate value(s) to enter in the "XML Application URI" field.
- In the "XML Application Title" field, enter the title of the service. This title appears in the Services Menu after pressing the Services key. If multiple XML applications are specified in the XML Application URI field, a list of applications displays after pressing the Services key.
- Click Save Settings.
Configuring an XML Key

Aastra Web UI
Use the following procedure to configure an XML key on the 6737i IP Phone. The procedure shows the softkey screen as an example.
- Click on Operation->Softkeys and XML.
or
Click on Operation->Expansion Module
Softkeys Configuration
Bottom Keys
Top Keys

Softkeys
- Select from "Key 1" through "Key 10" on the Top keys.
or
Select from "Key 1" through "Key 20" on the Bottom keys.
-
In the "Type" field, select "XML".
-
In the "Label" field, enter a label to apply to this key.
-
In the "Value" field, enter a URI(s) to apply to this key.
Note:
Contact your System Administrator for the appropriate value(s) to enter in the "Value" field.
-
(Bottom Softkeys) In the state fields, check (enable) or uncheck (disable) the states you want to apply to this softkey.
-
In the "XML Application URI" field, enter the applicable URI(s).
Note:
Contact your System Administrator for the appropriate value(s) to enter in the "XML Application URI" field.
- In the "XML Application Title" field, enter the title of the service. This title appears on the phone's LCD after pressing the XML key. If multiple XML applications are specified in the XML Application URI field, a list of applications displays after pressing the XML key.
Expansion Module Keys
- Select from "Key 1" through "Key 36" (M670i)
or
Select from "Key 1" through "Key 60" (M675i)
-
In the "Type" field, select "XML".
-
In the "Value" field, enter a URI(s) to apply to this key.
Note:
Contact your System Administrator for the appropriate value(s) to enter in the "Value" field.
-
(M675i) In the "Label" field, enter a label to apply to this key.
-
In the "XML Application URI" field, enter the applicable URI(s).
Note:
Contact your System Administrator for the appropriate value(s) to enter in the "XML Application URI" field.
-
In the "XML Application Title" field, enter the title of the service. This title appears on the phone's LCD after pressing the XML key. If multiple XML applications are specified in the XML Application URI field, a list of applications displays after pressing the XML key.
-
Click Save Settings.
Accessing the XML Service
After an XML application(s) has been saved to your IP phone, and either the Services Menu or a key have been configured to access the XML applications, the customized service is ready for you to use.

IP Phone UI
From the Services Menu
Use the following procedure to access XML applications from the Services Menu. Use the following illustration as a reference.

- Press the Services key.
- Use the ▲ and ▼ to scroll through the items.
- For menu and directory services, select a service to display the information for that customized service. Message services display to the screen after pressing the softkey or expansion module key. For user input services, follow the prompts as appropriate.
- To exit from the "Services" menu, press the Services key again.
From an XML Key
- Press the XML key on the 6737i phone. A "Custom Features" screen displays or the title you specified.
- Use the ▲ and ▼ to scroll through the customized features.
- For menu and directory services, select a service to display the information for that customized service. Message services display to the screen after pressing the softkey. For user input services, follow the prompts as appropriate.
- To exit from the "Customized Features" screen, press the XML key again.
Flash Key
You can set a key to generate a flash event when it is pressed on the 6737i. You do this by setting the key to "flash". The IP phone generates flash events only when a call is connected and there is an active RTP stream (for example, when the call is not on hold).
Configuring a Flash Key

Aastra Web UI
Use the following procedure to configure a Flash key on the 6737i IP Phone. The procedure shows the softkey screen as an example.
- Click on Operation->Softkeys and XML.
or
Click on Operation->Expansion Module
Softkeys Configuration
| Bottom Keys Top Keys | ||||
| Key | Type | Label | Value | Line |
| 1 | Flash | Test | 3 | |
| 2 | Pickup | 1 | ||
| 3 | Line | 5 | ||
| 4 | Ioom | global | ||
| 5 | Phone Lock | 1 | ||
| 6 | None | 1 | ||
| 7 | None | 1 | ||
| 8 | None | 1 | ||
| 9 | None | 1 | ||
| 10 | None | 1 | ||
Softkeys
- Select from "Key 1" through "Key 10" on the Top keys.
or
Select from "Key 1" through "Key 20" on the Bottom keys.
-
In the "Type" field, select "Flash".
-
In the "Label" field, enter a label to display on the phone for the key.
Expansion Module Keys
- Select from "Key 1" through "Key 36" (M670i)
or
Select from "Key 1" through "Key 60" (M675i)
- In the "Type" field, select "Flash".
- (M675i) In the "Label" field, enter a label to display on the phone for the key.
- Click Save Settings.
Sprecode Key
You can set a key to automatically activate specific services offered by the server by setting a key to "sprecode". For example, if the sprecode value of *82 is configured, then by pressing the key, *82 automatically activates a service provided by the server. The value you enter for this field is dependent on the services provided by the server. Contact your System Administrator for information about available services.
Configuring a Sprecode Key

Aastra Web UI
Use the following procedure to configure a Sprecode key on the 6737i IP Phone. The procedure shows the softkey screen as an example.
- Click on Operation->Softkeys and XML.
or
Click on Operation->Expansion Module
Softkeys Configuration
| Bottom Keys Top Keys | ||||
| Key | Type | Label | Value | Line |
| 1 | Sprecode | Test | 3 | |
| 2 | Pickup | 1 | ||
| 3 | Line | 5 | ||
| 4 | Ioom | global | ||
| 5 | Phone Look | 1 | ||
| 6 | None | 1 | ||
| 7 | None | 1 | ||
| 8 | None | 1 | ||
| 9 | None | 1 | ||
| 10 | None | 1 | ||
Softkeys
- Select from "Key 1" through "Key 10" on the Top keys.
or
Select from "Key 1" through "Key 20" on the Bottom keys.
- In the "Type" field, select Sprecode.
- In the "Label" field, enter a label to display on the IP phone for this key.
- In the "Value" field, enter the appropriate value for accessing specific services from the server.
Note:
For values to enter in this field, contact your System Administrator.
- (Bottom Softkeys) In the state fields, check (enable) or uncheck (disable) the "Connected" state for this softkey.
Expansion Module Keys
- Select from "Key 1" through "Key 36" (M670i)
or
Select from "Key 1" through "Key 60" (M675i)
-
In the "Type" field, select Sprecode.
-
(M675i) In the "Label" field, enter a label to display on the IP phone for this key.
-
In the "Value" field, enter the appropriate value for accessing specific services from the server.
Note:
For values to enter in this field, contact your System Administrator.
- Click Save Settings.
Park/Pickup Keys
The 6737i phone has a park and pickup call feature that allows you to park a call and pickup a call when required. The IP phones support the Park/Pickup feature on the Asterisk, BroadWorks, Sylantro, and ININ servers.
The park/pickup feature performs as follows:
- When a call comes in and you pickup the handset, you can press the applicable "Park" key to park the call.
• After the call is parked, you can press the "Pickup" key, followed by the applicable value to pickup the call.
Administrators can configure the park and pickup keys for any line using the configuration files or the Aastra Web UI. Users can make changes to customize the label of the park/pick up keys using the Web UI.
Configuring Park/Pickup Keys

Aastra Web UI
Use the following procedure to configure park/pickup on the 6737i phone.
- Click on Operation->Softkeys and XML.
or
Click on Operation->Expansion Module
Softkeys Configuration
| Bottom Keys Top Keys | ||||
| Key | Type | Label | Value | Line |
| 1 | Park | Test | 3 | |
| 2 | Pickup | Test | 1 | |
| 3 | Line | 5 | ||
| 4 | Ioom | global | ||
| 5 | Phone Lock | 1 | ||
| 6 | None | 1 | ||
| 7 | None | 1 | ||
| 8 | None | 1 | ||
| 9 | None | 1 | ||
| 10 | None | 1 | ||
Softkeys
- Select from "Key 1" through "Key 10" on the Top keys.
or
Select from "Key 1" through "Key 20" on the Bottom keys.
-
In the "Type" field, select Park
-
In the "Label" field, enter a label for the park softkey. Note: The "Value" and "Line" fields are configured by the Administrator.
- Select from "Key 1" through "Key 10" on the Top keys. or Select from "Key 1" through "Key 20" on the Bottom keys.
- In the "Type" field, select Pickup
- In the "Label" field, enter a label for the pickup softkey.
- Click Save Settings.
- Click on Reset, then click Restart to restart the IP phone and apply the changes.
Expansion Module Keys - Select from "Key 1" through "Key 36" (M670i) or Select from "Key 1" through "Key 60" (M675i)
- In the "Type" field, select Park
- In the "Label" field, enter a label for the park softkey. Note: The "Value" and "Line" fields are configured by the Administrator.
- Select from "Key 1" through "Key 10" on the Top keys. or Select from "Key 1" through "Key 20" on the Bottom keys.
- In the "Type" field, select Pickup
- In the "Label" field, enter a label for the park softkey. Note: The "Value" and "Line" fields are configured by the Administrator.
- Click Save Settings.
- Click on Reset, then click Restart to restart the IP phone and apply the changes.
Using the Park Call/Pickup Parked Call Feature
Use the following procedure on the IP phone to park a call and pick up a parked call.
Park a Call
-
While on a live call, press the "Park" key.
-
Perform the following for your specific server:
For Asterisk Server
Server announces the extension number where the call has been parked. Once the call is parked, press the 🔔 key to complete parking.
For BroadWorks Server
After you hear the greeting from the CallPark server, enter the extension where you want to park the call.
For Sylantro Server
Enter the extension number where you want to park the call, followed by "#" key.
For ININ Server
Enter the extension number where you want to park the call, followed by "#" key.

- If the call is parked successfully, the response is either a greeting voice confirming that the call was parked, or a hang up occurs. The parked call party hears music on hold. If the call fails, you can pick up the call (using the next procedure) and press the "Park" key again to retry step 2.
Pickup a Parked Call
- Pick up the handset on the phone.
- Enter the extension number where the call was parked.
- Press the "Pickup" key.
If the call pick up is successful, you are connected with the parked call.
Last Call Return (LCR) Key (Sylantro Servers only)
Using the Aastra Web UI, you can configure the "Last call return" (LCR) function on a key. This feature is for Sylantro servers only. If you configure "LCR" on a key, and a call comes into your phone, after you are finished with the call and hang up, you can press the key configured for "LCR" and the phone dials the last call you received. When you configure an "LCR" key, the label "LCR" displays next to that key on the IP phone. When the Sylantro server detects an "LCR" request, it translates this request and routes the call to the last caller.
Configuring a Last Call Return Key

Aastra Web UI
Use the following procedure to configure a Last Call Return key on the 6737i IP Phone.
- Click on Operation->Softkeys and XML.
or
Click on Operation->Expansion Module
Softkeys Configuration
| Key | Type | Label | Value | Line |
| 1 | Last Call Return | 3 | ||
| 2 | Pickup | 1 | ||
| 3 | Line | 5 | ||
| 4 | Iom | global | ||
| 5 | Phone Lock | 1 | ||
| 6 | None | 1 | ||
| 7 | None | 1 | ||
| 8 | None | 1 | ||
| 9 | None | 1 | ||
| 10 | None | 1 |
Softkeys
- Select from "Key 1" through "Key 10" on the Top keys.
or
Select from "Key 1" through "Key 20" on the Bottom keys.
-
In the "Type" field, select Last Call Return.
-
In the "Line" field, select the line you want to apply to this key.
Valid values are 1 through 9.
- (Bottom Softkeys) In the state fields, check (enable) or uncheck (disable) the states you want to apply to this softkey.
Expansion Module Keys
- Select from "Key 1" through "Key 36" (M670i)
or
Select from "Key 1" through "Key 60" (M675i)
-
In the "Type" field, select Last Call Return.
-
In the "Line" field, select the line you want to apply to this key.
Valid values are 1 through 9.
- Click Save Settings.
Call Forward Key
Using the Aastra Web UI, you can configure the Call Forward (CFWD) function on a softkey or expansion module key. Use call forwarding when you want a specific account on your phone to be forwarded to another number when your phone is in the busy state or the no answer state, or both. Pressing the Call Forward key on the phone accesses the Call Forward Menus. The menus that display are dependant on the Call Forward mode (Account (default), Phone, or Custom) configured for the phone.
For more information about call forwarding and call forwarding modes, see "Call Forward Account-Based Configuration" on page 142.
Configuring a Call Forward Key

Aastra Web UI
- Click on Operation->Softkeys and XML.
or
Click on Operation->Expansion Module
Softkeys Configuration
| Bottom Keys Top Keys | ||||
| Key | Type | Label | Value | Line |
| 1 | Call Forward | 3 | ||
| 2 | Pickup | 1 | ||
| 3 | Line | 5 | ||
| 4 | Ioom | global | ||
| 5 | Phone Lock | 1 | ||
| 6 | None | 1 | ||
| 7 | None | 1 | ||
| 8 | None | 1 | ||
| 9 | None | 1 | ||
| 10 | None | 1 | ||
Softkeys
- Select from "Key 1" through "Key 10" on the Top keys.
or
Select from "Key 1" through "Key 20" on the Bottom keys.
- In the "Type" field, select Call Forward.
- (Bottom Softkeys) In the state fields, check (enable) or uncheck (disable) the states you want to apply to this softkey.
Expansion Module Keys
- Select from "Key 1" through "Key 36" (M670i)
or
Select from "Key 1" through "Key 60" (M675i)
- In the "Type" field, select Call Forward.
- Click Save Settings.
BLF/Xfer
The BLF key allows one or more extensions to be monitored, and once there is any state change with those extensions, the key shows the status of the monitored lines. The Xfer key allows a call to be transferred to other recipients blindly or consultatively. The BLF/Xfer key combines the BLF and Xfer key's functionality together allowing the user to transfer calls or use BLF with one key.
Note:
It is recommended that you enable the "Switch UI Focus to Ringing Line" parameter when using the BLF/Xfer feature. For more information about this parameter, see "Preferred Line and Preferred Line Timeout" on page 164.
BLF/Xfer Key Requirements and Functionality
- BLF/Xfer and BLF
A BLF/Xfer key can be configured for subscribing to an extension and monitor the status of the extension, similar to the BLF key functionality. Changes of the state of the monitored extension are indicated by a LED / Icon.
• BLF/Xfer and Blind Transfer Calls
When the focused line is in the "Connected" state, pressing the BLF/Xfer key transfers the call to the extension unconditionally, disregarding the status of the monitored extension.
- If transferring a call to an extension fails, a message "Transfer Failed" displays on the phone, and you can reconnect the call (get the call back) by pressing the line key again.
• BLF/Xfer and Call Forward
When the focused line is in the "Ringing" state, pressing the BLF/Xfer key forwards the call to the extension unconditionally, disregarding the status of the monitored extension.
• BLF/Xfer and Speed Dial
When the focused line and the monitored extension are idle, pressing the BLF/Xfer key causes the phone to go off-hook and dial the number of the extension.
Configuring a BLF/Xfer Key

Aastra Web UI
1. Click on Operation->Softkeys and XML.
or
Click on Operation->Expansion Module
Softkeys Configuration
| Bottom Keys Top Keys | ||||
| Key | Type | Label | Value | Line |
| 1 | BLF/Xfer | test | 35 | 4 |
| 2 | Directory | 1 | ||
| 3 | Callers List | 1 | ||
| 4 | Ioom | global | ||
| 5 | Phone Lock | global | ||
| 6 | None | 1 | ||
| 7 | None | 1 | ||
| 8 | None | 1 | ||
| 9 | None | 1 | ||
| 10 | None | 1 | ||
Softkeys
- Select from "Key 1" through "Key 10" on the Top keys.
or
Select from "Key 1" through "Key 20" on the Bottom keys.
-
In the "Type" field, select BLF/Xfer.
-
In the "Label" field, enter a label for the BLF/Xfer key.
-
In the "Value" field, enter the monitored extension or the extension to transfer calls to (for example, "35").
-
In the "Line" field, select the line for which you want to use the key functionality.
Valid values are:
• Global
• 1 through 9
- (Bottom Softkeys) In the state fields, check (enable) or uncheck (disable) the states you want to apply to this softkey.
Expansion Module Keys
- Select from "Key 1" through "Key 36" (M670i)
or
Select from "Key 1" through "Key 60" (M675i)
-
In the "Type" field, select BLF/Xfer.
-
(M675i) In the "Label" field, enter a label for the BLF/Xfer key.
- In the "Value" field, enter the monitored extension or the extension to transfer calls to (for example, "35").
- In the "Line" field, select the line for which you want to use the key functionality.
Valid values are:
global
- 1 through 9
- Click Save Settings.
Speeddial/Xfer
The speed dial key allows a number to be dialed quickly by pressing one key configured for speed dialing. The Xfer key allows a call to be transferred to other recipients blindly or consultatively. The Speeddial/Xfer key combines the Speed Dial and Xfer key's functionality together allowing the user to transfer calls or use Speed Dial with one key.
Note:
It is recommended that you enable the "Switch UI Focus to Ringing Line" parameter when using the Speeddial/Xfer feature. For more information about this parameter, see "Preferred Line and Preferred Line Timeout" on page 164.
Speeddial/Xfer Key Requirements and Functionality
The Speeddial/Xfer key has the following capabilities:
• Speeddial/Xfer and Speed Dial
When the phone is in the "Idle" state, pressing the Speeddial/Xfer key causes the phone to go offhook and dial the predefined extension.
• Speeddial/Xfer and Blind Transfer
When the phone is connected to a call, pressing the Speeddial/Xfer key blind transfers the call to the predefined target.
If transferring a call fails, a message "Transfer Failed" displays, and you can reconnect the call (get the call back) by pressing the line key again.
• Speeddial/Xfer and Call Forward
When the phone is in the "Ringing" state, pressing the Speeddial/Xfer key forwards the call to the predefined extension.
Configuring a Speeddial/Xfer Key

Aastra Web UI
1. Click on Operation->Softkeys and XML.
or
Click on Operation->Expansion Module
Softkeys Configuration
| Bottom Keys Top Keys | ||||
| Key | Type | Label | Value | Line |
| 1 | Speeddial/Xfer | Test | 5551212 | 5 |
| 2 | Pickup | 1 | ||
| 3 | Line | 5 | ||
| 4 | Iom | global | ||
| 5 | Phone Lock | 1 | ||
| 6 | None | 1 | ||
| 7 | None | 1 | ||
| 8 | None | 1 | ||
| 9 | None | 1 | ||
| 10 | None | 1 | ||
Softkeys
- Select from "Key 1" through "Key 10" on the Top keys.
or
Select from "Key 1" through "Key 20" on the Bottom keys.
- In the "Type" field, select Speeddial/Xfer.
- In the "Label" field, enter a label for the Speeddial/Xfer key.
- In the "Value" field, enter the speed dial extension or the extension to transfer calls to (for example, "5551212").
- In the "Line" field, select the line for which you want to use the key functionality.
Valid values are:
Global
• 1 through 9
- (Bottom Softkeys) In the state fields, check (enable) or uncheck (disable) the states you want to apply to this softkey.
Expansion Module Keys
- Select from "Key 1" through "Key 36" (M670i)
or
Select from "Key 1" through "Key 60" (M675i)
- In the "Type" field, select Speeddial/Xfer.
- (M675i) In the "Label" field, enter a label for the Speeddial/Xfer key.
-
In the "Value" field, enter the speed dial extension or the extension to transfer calls to (for example, "5551212").
-
In the "Line" field, select the line for which you want to use the key functionality.
Valid values are:
Global
• 1 through 9
- Click Save Settings.
Speeddial/Conf
The 6737i allows you to configure a softkey or expansion module key to be used as a speed dial conference key (Speed-dial/Conf key) while remaining in the current call. This key allows a user on a call to conference another party at a predefined number while remaining in the call.
For example, while on an active call, a user can use the Speeddial/Conf key to dial a recording service and have the resulting conference recorded.
Note:
If currently in a conference, the Speeddial/Conf key is disabled on the active call.
If you configure a softkey or expansion module key as a Speeddial/Conf key and you press this key while on an active call, the focused line changes to the dialing line. A Cancel softkey displays on the phone allowing you to abort the conference speed dial if required. The message "Ringing..." displays below the number when the far end is ringing. The message "Conf. Unavailable" briefly displays when a conference is already in progress. The active call is not put on hold when the speed dial number is dialed.
Note:
This feature is not compatible with centralized conferencing.
Configuring a Speeddial/Conf Key

Aastra Web UI
1. Click on Operation->Softkeys and XML.
or
Click on Operation->Expansion Module
Softkeys Configuration
| Key | Type | Label | Value | Line |
| 1 | Speeddial/Conf | Test | 6551212 | 1 |
| 2 | Pickup | 1 | ||
| 3 | Line | 5 | ||
| 4 | Iom | global | ||
| 5 | Phone Lock | 1 | ||
| 6 | None | 1 | ||
| 7 | None | 1 | ||
| 8 | None | 1 | ||
| 9 | None | 1 | ||
| 10 | None | 1 |
Softkeys
- Select from "Key 1" through "Key 10" on the Top keys.
or
Select from "Key 1" through "Key 20" on the Bottom keys.
- In the "Type" field, select Speeddial/Conf.
- In the "Label" field, enter a label for the Speeddial/Conf key.
- In the "Value" field, enter the speed dial extension or the extension to add to the conference (for example, "5551212").
- In the "Line" field, select the line for which you want to use the key functionality.
Valid values are:
-
global
• 1 through 9 -
(Bottom Softkeys) In the state fields, check (enable) or uncheck (disable) the states you want to apply to this softkey.
Expansion Module Keys
- Select from "Key 1" through "Key 36" (M670i)
or
Select from "Key 1" through "Key 60" (M675i)
- In the "Type" field, select Speeddial/Conf.
- (M675i) In the "Label" field, enter a label for the Speeddial/Conf key.
-
In the "Value" field, enter the speed dial extension or the extension to add to the conference (for example, "5551212").
-
In the "Line" field, select the line for which you want to use the key functionality.
Valid values are:
global
• 1 through 9
- Click Save Settings.
Directory Key
By default, the 6737i has a Directory key configured on key 2 of the top set of keys. However, using the Astra Web UI, you can assign the Directory key to any key on the top or bottom keys on the phone. Pressing the Directory key displays the "Directory List".

The "Directory List" can be used to store a customized list of names with phone numbers and labels. You can also dial directly from an entry in the Directory List.
In addition to creating a Directory softkey, you can also download a Directory List to your PC if required using the Aastra Web UI.
Reference
For more information about the Directory List, see "Directory List" on page 122.
Configuring a Directory Key

Aastra Web UI
Use the following procedure to configure a Directory key on the 6737i IP Phone.
Note:
By default, the Directory key is Key 2 on the Top Softkeys.
- Click on Operation->Softkeys and XML.
or
Click on Operation->Expansion Module
Softkeys Configuration
| Bottom Keys Top Keys | ||||
| Key | Type | Label | Value | Line |
| 1 | Directory | Test | 1 | |
| 2 | Pickup | 1 | ||
| 3 | Line | 5 | ||
| 4 | Ioom | global | ||
| 5 | Phone Lock | 1 | ||
| 6 | None | 1 | ||
| 7 | None | 1 | ||
| 8 | None | 1 | ||
| 9 | None | 1 | ||
| 10 | None | 1 | ||
Softkeys
- Select from "Key 1" through "Key 10" on the Top keys.
or
Select from "Key 1" through "Key 20" on the Bottom keys.
- In the "Type" field, select Directory.
- In the "Label" field, enter a label to apply to this key.
- (Bottom Softkeys) In the state fields, check (enable) or uncheck (disable) the states you want to apply to this softkey.
Expansion Module Keys
- Select from "Key 1" through "Key 36" (M670i)
or
Select from "Key 1" through "Key 60" (M675i)
- In the "Type" field, select Directory.
- (M675i) In the "Label" field, enter a label to apply to this key.
- Click Save Settings.
Callers List Key
By default, the 6737i has a Callers List key configured on key 3 of the top set of keys. However, using the Aastra Web UI, you can assign the Callers List key to any key on the top or bottom keys on the phone. Pressing the Callers List key displays the "Callers List".
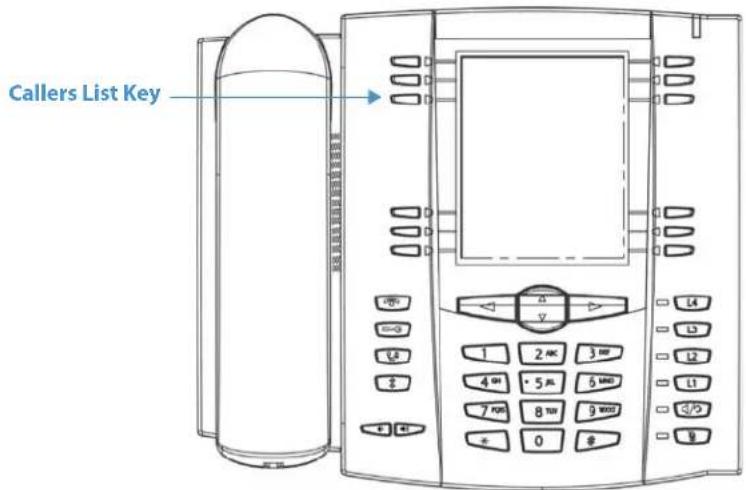
The "Callers List" is a stored log of your incoming calls. You can use the Callers List key to access a list of callers that called your phone.
Note:
Your System Administrator can create a custom Callers List XML application allowing you to access the Callers List via an XML Key instead of the Callers List Key. This allows you to configure the Callers List Key with other functions if required. Contact your System Administrator for more information.
Reference
For more information about the Callers List, see "Callers List" on page 132.
Configuring a Callers List Key

Aastra Web UI
Use the following procedure to configure a Callers List key on the 6737i IP Phone.
Note:
By default, the Callers List key is Key 3 on the Top Softkeys.
- Click on Operation->Softkeys and XML.
or
Click on Operation->Expansion Module
Softkeys Configuration
| Bottom Keys Top Keys | ||||
| Key | Type | Label | Value | Line |
| 1 | Callers List | Test | 1 | |
| 2 | Pickup | 1 | ||
| 3 | Line | 5 | ||
| 4 | Ioom | global | ||
| 5 | Phone Lock | 1 | ||
| 6 | None | 1 | ||
| 7 | None | 1 | ||
| 8 | None | 1 | ||
| 9 | None | 1 | ||
| 10 | None | 1 | ||
Softkeys
- Select from "Key 1" through "Key 10" on the Top keys.
or
Select from "Key 1" through "Key 20" on the Bottom keys. - In the "Type" field, select Callers List.
- In the "Label" field, enter a label to apply to this key.
- (Bottom Softkeys) In the state fields, check (enable) or uncheck (disable) the states you want to apply to this softkey.
- Select from "Key 1" through "Key 36" (M670i)
or
Select from "Key 1" through "Key 60" (M675i) - In the "Type" field, select Callers List.
- (M675i) In the "Label" field, enter a label to apply to this key.
- Click Save Settings.
Redial Key
By default, the 6737i has a dedicated Redial List key. However, using the Astra Web UI, you can assign the Redial List key to any key on the top or bottom keys on the phone. Pressing the Redial List key displays the "Redial List".

The Redial List is a stored log of your outgoing calls. You can use the Redial key to access a list of the most recent calls you placed
Reference
For more information about the Redial List, see "Redial" on page 109.
Configuring a Redial Key

Aastra Web UI
Use the following procedure to configure a Redial List key on the 6737i IP Phone.
- Click on Operation->Softkeys and XML.
or
Click on Operation->Expansion Module
Softkeys Configuration
| Bottom Keys Top Keys | ||||
| Key | Type | Label | Value | Line |
| 1 | Radial | Test | 1 | |
| 2 | Pickup | 1 | ||
| 3 | Line | 5 | ||
| 4 | Ioom | global | ||
| 5 | Phone Lock | 1 | ||
| 6 | None | 1 | ||
| 7 | None | 1 | ||
| 8 | None | 1 | ||
| 9 | None | 1 | ||
| 10 | None | 1 | ||
Softkeys
- Select from "Key 1" through "Key 10" on the Top keys.
or
Select from "Key 1" through "Key 20" on the Bottom keys. - In the "Type" field, select Redial.
- In the "Label" field, enter a label to apply to this key.
- (Bottom Softkeys) In the state fields, check (enable) or uncheck (disable) the states you want to apply to this softkey.
- Select from "Key 1" through "Key 36" (M670i)
or
Select from "Key 1" through "Key 60" (M675i) - In the "Type" field, select Redial.
- (M675i) In the "Label" field, enter a label to apply to this key.
- Click Save Settings.
Conference Key
The 6737i IP phone offers two methods of conferencing:
- Local conferencing (default method)
• Centralized conferencing (for Sylantro and BroadSoft Call managers)
The Conference key allows you to create conference calls when utilizing any one of the method above.
Reference
For more information about creating conference calls, see "Conferencing Calls" on page 116.
Configuring a Conference Key

Aastra Web UI
Use the following procedure to configure a Conference key on the 6737i IP Phone.
- Click on Operation > Programmable Keys.
or
Click on Operation > Expansion Module
Softkeys Configuration
| Bottom Keys Top Keys | ||||
| Key | Type | Label | Value | Line |
| 1 | Conference | Test | global | |
| 2 | Pidup | 1 | ||
| 3 | Line | 5 | ||
| 4 | Ioom | global | ||
| 5 | Phone Lock | 1 | ||
| 6 | None | 1 | ||
| 7 | None | 1 | ||
| 8 | None | 1 | ||
| 9 | None | 1 | ||
| 10 | None | 1 | ||
Softkeys
- Select from "Key 1" through "Key 10" on the Top keys.
or
Select from "Key 1" through "Key 20" on the Bottom keys.
- In the "Type" field, select Conference.
- In the "Label" field, enter a label to apply to this key.
- (Bottom Softkeys) In the state fields, check (enable) or uncheck (disable) the states you want to apply to this softkey.
- Select from "Key 1" through "Key 36" (M670i)
or
Select from "Key 1" through "Key 60" (M675i) - In the "Type" field, select Conference.
- (M675i) In the "Label" field, enter a label to apply to this key.
- Click Save Settings.
Transfer Key
The Transfer key allows you to perform a blind or consultative transfer of an active call to another phone number.
Reference
For more information about the transferring calls, see "Transferring Calls" on page 112.
Configuring a Transfer Key

Aastra Web UI
- Click on Operation > Programmable Keys.
or
Click on Operation > Expansion Module
Softkeys Configuration
| Bottom Keys Top Keys | ||||
| Key | Type | Label | Value | Line |
| 1 | Transfer | Test | global | |
| 2 | Pickup | 1 | ||
| 3 | Line | 5 | ||
| 4 | Room | global | ||
| 5 | Phone Lock | 1 | ||
| 6 | None | 1 | ||
| 7 | None | 1 | ||
| 8 | None | 1 | ||
| 9 | None | 1 | ||
| 10 | None | 1 | ||
Softkeys
- Select from "Key 1" through "Key 10" on the Top keys.
or
Select from "Key 1" through "Key 20" on the Bottom keys. - In the "Type" field, select Transfer.
- In the "Label" field, enter a label to apply to this key.
- (Bottom Softkeys) In the state fields, check (enable) or uncheck (disable) the states you want to apply to this softkey.
- Select from "Key 1" through "Key 36" (M670i)
or
Select from "Key 1" through "Key 60" (M675i) - In the "Type" field, select Transfer.
- (M675i) In the "Label" field, enter a label to apply to this key.
- Click Save Settings.
Intercom Key
By default, the 6737i has an Intercom key configured on key 4 of the top set of keys. However, using the Aastra Web UI, you can assign the Intercom key to any key on the top or bottom keys on the phone.
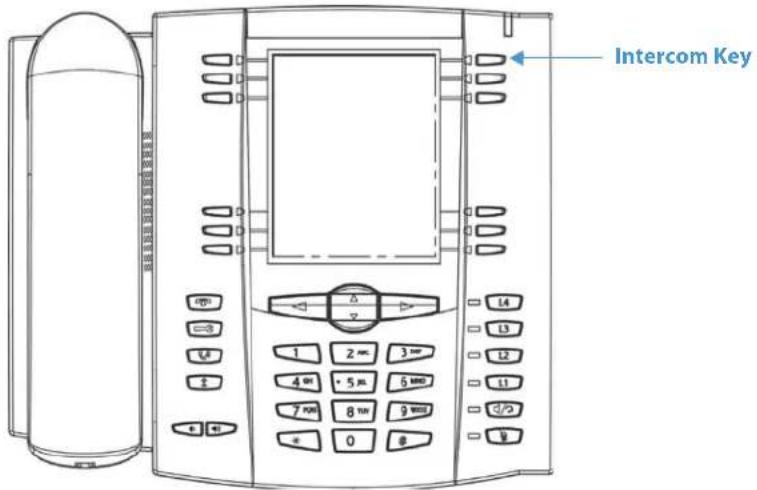
You can use the Intercom key to automatically connect with a remote extension for outgoing calls, and to answer an incoming intercom call.
Reference
For more information about the Intercom key, see "Using Intercom" on page 108.
Configuring an Intercom Key

Aastra Web UI
Use the following procedure to configure a Callers List key on the 6737i IP Phone.
Note:
By default, the Intercom key is Key 4 on the Top Softkeys.
1. Click on Operation->Softkeys and XML.
or
Click on Operation->Expansion Module
Softkeys Configuration
| Bottom Keys Top Keys | ||||
| Key | Type | Label | Value | Line |
| 1 | Ioom | Test | 1 | |
| 2 | Pickup | 1 | ||
| 3 | Line | 5 | ||
| 4 | Do Not Disturb | 1 | ||
| 5 | Phone Lock | 1 | ||
| 6 | None | 1 | ||
| 7 | None | 1 | ||
| 8 | None | 1 | ||
| 9 | None | 1 | ||
| 10 | None | 1 | ||
Softkeys
- Select from "Key 1" through "Key 10" on the Top keys.
or
Select from "Key 1" through "Key 20" on the Bottom keys.
- In the "Type" field, select Intercom.
- In the "Label" field, enter a label to apply to this key.
- (Bottom Softkeys) In the state fields, check (enable) or uncheck (disable) the states you want to apply to this softkey.
Expansion Module Keys
- Select from "Key 1" through "Key 36" (M670i)
or
Select from "Key 1" through "Key 60" (M675i)
- In the "Type" field, select Intercom.
- (M675i) In the "Label" field, enter a label to apply to this key.
- Click Save Settings.
Services Key
By default, the 6737i has a Services key configured on key 1 of the Top keys. However, you can use any key to configure a "Services" key.

The Services key accesses enhanced features and services provided by third parties. Using the "Services" key, you can:
- Select customized (XML) features
- Utilize a Caller List
- Utilize a Directory
- Utilize Voicemail
Note:
Other than the Services Menu, you can also configure the Caller List and Directory List on separate keys.
The XML customized services are created and provided by your System Administrator through the diverse web based language of XML. Availability of these services depends on your phone system or service provider.
Reference
For more information about XML, Caller List, Directory, and Voicemail, see the following:
- "XML Key" on page 68
- "Callers List" on page 132
• "Directory List" on page 122
• "Voicemail" on page 154
Configuring a Services Key

Aastra Web UI
Use the following procedure to configure a Services key on the 6737i IP Phone.
Note:
By default, the Services key is Key 1 on the Top Softkeys.
- Click on Operation->Softkeys and XML.
or
Click on Operation->Expansion Module
Softkeys Configuration
| Bottom Keys Top Keys | ||||
| Key | Type | Label | Value | Line |
| 1 | Services | Test | 1 | |
| 2 | Pickup | 1 | ||
| 3 | Line | 5 | ||
| 4 | Ioom | global | ||
| 5 | Phone Lock | 1 | ||
| 6 | None | 1 | ||
| 7 | None | 1 | ||
| 8 | None | 1 | ||
| 9 | None | 1 | ||
| 10 | None | 1 | ||
Softkeys
- Select from "Key 1" through "Key 10" on the Top keys.
or
Select from "Key 1" through "Key 20" on the Bottom keys.
- In the "Type" field, select Services.
- In the "Label" field, enter a label to apply to this key.
- (Bottom Softkeys) In the state fields, check (enable) or uncheck (disable) the states you want to apply to this softkey.
Expansion Module Keys
- Select from "Key 1" through "Key 36" (M670i)
or
Select from "Key 1" through "Key 60" (M675i)
- In the "Type" field, select Services.
- (M675i) In the "Label" field, enter a label to apply to this key.
- Click Save Settings.
Phone Lock Key
You can configure a key on the IP Phone to use as a lock/unlock key. You assign the function of the key as "Phone Lock".
Configuring a Phone Lock Key

Aastra Web UI
Use the following procedure to configure a Phone Lock key on the 6737i IP Phone. The procedure shows the softkey screen as an example.
- Click on Operation->Softkeys and XML.
or
Click on Operation->Expansion Module
Softkeys Configuration
| Bottom Keys Top Keys | ||||
| Key | Type | Label | Value | Line |
| 1 | Phone Lock | Test | 1 | |
| 2 | Pickup | 1 | ||
| 3 | Line | 5 | ||
| 4 | Do Not Disturb | 1 | ||
| 5 | None | 1 | ||
| 6 | None | 1 | ||
| 7 | None | 1 | ||
| 8 | None | 1 | ||
| 9 | None | 1 | ||
| 10 | None | 1 | ||
Softkeys
- Select from "Key 1" through "Key 10" on the Top keys.
or
Select from "Key 1" through "Key 20" on the Bottom keys.
- In the "Type" field, select Phone Lock from the list of options.
Expansion Module Keys
- Select from "Key 1" through "Key 36" (M670i)
or
Select from "Key 1" through "Key 60" (M675i)
-
In the "Type" field, select Phone Lock from the list of options.
-
Click Save Settings.
Note:
You can lock/unlock the phone using the new key you just configured, using the Astra Web UI at the path Operation->PhoneLock, or using the "Phone Lock" option on the IP Phone UI at the path Options->Phone Lock. For more information about using the lock/unlock feature, see "Locking/Unlocking a Phone" on page 41.
Using the Lock/Unlock Key on the IP Phone
After configuring a key as a lock/unlock key, refer to the following procedure to use the key on the IP phone.
Lock the Phone
1. Press the LOCK key.
The phone locks.
The LED for the key AND the Message Waiting Lamp illuminate steady ON. An "Unlock" label appears next to the key you just pressed.
Unlock the Phone
2. Press the UNLOCK key.
A password prompt displays.
3. Enter your user password and press ENTER.
The phone unlocks.
The LED for the key AND the Message Waiting Lamp go OFF. The "Lock" label appears next to the key you just pressed.
Paging Key (Sends the RTP Stream)
You can configure a Paging key on the phone that allows you to send a Real Time Transport Protocol (RTP) stream to pre-configured multicast address(es) without involving SIP signaling. You enter a multicast IP address(es) and a port number for the Paging key, that when pressed, initiates an outgoing multicast RTP session. This is called Group Paging on the IP phones.
You can also specify group paging RTP addresses that the phone listens for when receiving RTP streams. You can specify up to 5 listening multicast addresses at the path,
Basic Settings->Preferences->Group Paging RTP Settings.
For more information about Group Paging and how it works, and to specify multicast addresses, see "Group RTP Paging (receives RTP streams)" on page 170.
Configuring a Paging Key

Aastra Web UI
1. Click on Operation->Softkeys and XML.
or
Click on Operation->Expansion Module
Softkeys Configuration

Softkeys
- Select from "Key 1" through "Key 10" on the Top keys.
or
Select from "Key 1" through "Key 20" on the Bottom keys.
-
In the "Type" field, select Paging.
-
In the "Label" field, enter a label to apply to this key.
-
In the "Value" field, enter a multicast IP address and a port number for the Paging key. When you press this key, the phone initiates an outgoing multicast RTP session to the specified address using the specified port. (For example, 239.0.1.15:10000).
Notes:
- When you select Paging for the "Type" field, the "Line" field is disabled.
-
The "Value" field allows for one multicast address entry only.
• The valid port range is from 1 to 65535. -
To receive RTP streams for Group Paging, you must also configure the "Paging Listen Addresses" parameter at the path, Basic Settings->Preferences->Group Paging RTP Settings. For more information about setting this parameter, see "Group RTP Paging (receives RTP streams)" on page 170.
Expansion Module Keys
- Select from "Key 1" through "Key 36" (M670i)
or
Select from "Key 1" through "Key 60" (M675i)
- In the "Type" field, select Paging.
- (M675i) In the "Label" field, enter a label to apply to this key.
- In the "Value" field, enter a multicast IP address and a port number for the Paging key. When you press this key, the phone initiates an outgoing multicast RTP session to the specified address using the specified port. (For example, 239.0.1.15:10000).
Notes:
- When you select Paging for the "Type" field, the "Line" field is disabled.
-
The "Value" field allows for one multicast address entry only.
• The valid port range is from 1 to 65535. -
To receive RTP streams for Group Paging, you must also configure the "Paging Listen Addresses" parameter at the path, Basic Settings->Preferences->Group Paging RTP Settings. For more information about setting this parameter, see "Group RTP Paging (receives RTP streams)" on page 170.
-
Click Save Settings.
Using the Paging Key
The following procedure describes the use of the Paging key on the IP Phone. The procedure assumes you have already configured the Paging key using the Astra Web UI.

IP Phone UI
Notes:
- Recipient of a Paging call can set a global "Do Not Disturb" (DND) to ignore any incoming pages.
-
For incoming Paging, the phone uses the Intercom configuration settings. The incoming Page is dependant on the "Allow Barge-In" parameter setting and the "Idling/On Call" state.
-
On the IP Phone, press the softkey or expansion module key you configured for Paging (labeled as "Group 1" in the following illustration).
| Services | Icom |
| Directory | |
| Callers | |
| L1 | John Smith |
| 01/01/14 11:00am | |
| Group 1 | |
| LAB | |
| ACD | |
The phone opens a multicast RTP session and an outgoing OR incoming phone screen displays as follows.
| Services Directory Callers | Icom |
| L1 | John Smith |
| Paging | 00:01 |
| Drop |
- Press the Drop key to end the multicast RTP session and return to the idle screen.
Note:
If you enable global DND on the phone, the incoming multicast RTP session is dropped.
Empty Key
You can set a softkey to force a blank entry on the IP phone display for a specific key. You do this by setting the softkey to "Empty". The keys are added in order (from key 1 to key 20) after any hard-coded keys have been added. If a particular key is not defined, it is ignored.
Configuring an Empty Key

Aastra Web UI
Use the following procedure to configure an Empty softkey on the 6737i phone.
- Click on Operation->Softkeys and XML.
or
Click on Operation->Expansion Module
Softkeys Configuration
| Bottom Keys Top Keys | ||||
| Key | Type | Label | Value | Line |
| 1 | Empty | 1 | ||
| 2 | Pickup | 1 | ||
| 3 | Line | 5 | ||
| 4 | Do Not Disturb | 1 | ||
| 5 | None | 1 | ||
| 6 | None | 1 | ||
| 7 | None | 1 | ||
| 8 | None | 1 | ||
| 9 | None | 1 | ||
| 10 | None | 1 | ||
Softkeys
- Select from "Key 1" through "Key 10" on the Top keys.
or
Select from "Key 1" through "Key 20" on the Bottom keys.
-
In the "Type" field, select Empty.
-
(Bottom Softkeys) In the state fields, check (enable) or uncheck (disable) the states you want to apply to this softkey.
Expansion Module Keys
- Select from "Key 1" through "Key 36" (M670i)
or
Select from "Key 1" through "Key 60" (M675i)
-
In the "Type" field, select Empty.
-
Click Save Settings.
None Key

Aastra Web UI
Use the following procedure to delete a key on the 6737i IP Phone. The procedure shows the softkey screen as an example.
- Click on Operation->Softkeys and XML.
or
Click on Operation->Expansion Module
Softkeys Configuration
| Bottom Keys Top Keys | ||||
| Key | Type | Label | Value | Line |
| 1 | None | 1 | ||
| 2 | Pickup | 1 | ||
| 3 | Line | 5 | ||
| 4 | Do Not Disturb | 1 | ||
| 5 | None | 1 | ||
| 6 | None | 1 | ||
| 7 | None | 1 | ||
| 8 | None | 1 | ||
| 9 | None | 1 | ||
| 10 | None | 1 | ||
Softkeys and Expansion Module Keys
- Choose the key you want to delete from the phone.
- In the "Type" field, select None.
- Click Save Settings.
The key function is deleted from the IP phone memory.
Making Calls
This section describes ways to make calls on your 6737i phone, using your handset, speakerphone or headset.
Dialing a Number
First, take the phone off-hook by:
- lifting the handset
- pressing or
- pressing a line/call appearance key
At the dial tone, enter the number you wish to call.
Note:
After dialing the number, the phone has a short delay before sending the call. To send the call immediately, you can press the "Dial" softkey (if the handset is offhook) or the "#" key immediately after dialing the number. The phone sends the call without delay.
If you are unable to make calls within certain area codes, check with your System Administrator for any toll restrictions placed on your extension that may restrict your access to long distance area codes or dialing prefixes.
When your party picks up, a timer appears on your display that records the length of your call.
If the Live DialPad option is on, as soon as you press the first digit on the dial pad the phone automatically selects the next available line, go off-hook and dial as digits are pressed.
Pre-dialing a Number
| Services | Icom |
| Directory | |
| Callers | |
| 01/01/14 11:00am | |
| 1234 | |
| Dial | Pause |
| Backspace | Quit |
You can also make a call by pre-dialling a number. Pre-dialling lets you view a number before you dial. Use the Backspace softkey to correct any errors.
Using Handsfree Speakerphone
The handsfree feature allows you to speak to someone without using the handset or headset. Your phone must be in either the Speaker or Speaker/Headset audio mode. For more information about setting the audio mode on your phone, see "Audio Mode" on page 26.

IP Phone UI
• To dial using handsfree, first press and enter a number at the dial tone.
• To answer a call on your phone using handsfree, press 📋 or the line/call appearance key.
- If you are in Speaker audio mode, lift the handset and press 📋 to switch between handsfree and handset.
- If you are in Speaker/headset audio mode, press 📋 to switch between handsfree and headset.
- When the handset is on hook, press to disconnect the call.
When handsfree is on, the speaker light turns on.
Using a Headset
The 6737i accepts headsets through the modular RJ22 jack on the back of the phone. Contact your telephone equipment retailer or distributor to purchase a compatible headset.
Note:
Customers should read and observe all safety recommendations contained in headset operating guides when using any headset.
Advanced Volume Controls for the Headset Mic
On the 6737i, there are 3 options for the headset microphone volume. For more information about the headset microphone, see "Headset Mic Volume" on page 26.

IP Phone UI
To change this volume:
- Press to enter the Options list.
- Select Preferences and press Select.
- Use ▼ to scroll down to Set Audio and press Select.
- Press ▼ to scroll down to Headset/Mic Volume and press Select.
- Use ▼ to scroll down the list to select your desired volume.
- Press Enter to save the setting.
- If you do not wish to save changes, press Cancel to return to the previous screen.
Note:
By default, the volume for the headset microphone is set to medium.
To Make and Receive Calls Using a Headset

IP Phone UI
- Ensure that you have selected a headset audio mode by accessing the Options list (under option Preferences->Set Audio->Audio Mode on the IP Phone).
- Plug the headset into the jack.
- Press the 📁 key to obtain a dial tone or to answer an incoming call. Depending on the audio mode selected from the options menu, a dial tone or an incoming call is received on either the headset or the handsfree speaker-phone.
- Press the key to end the call.
Using Intercom
On the 6737i, you can use the Icom key to automatically connect with a remote extension. By default, the Intercom key is configured as Key 4 on the top set of softkeys.

Using the Icom Key

IP Phone UI
- Press the Icom key.
- Enter the extension number of the person you wish to intercom or the BLF key for that extension.
- After a beep tone, your phone automatically connects with the remote extension and you can speak through its speaker.
- To cancel intercom, press or the Cancel key.
- When you are finished speaking, hang up the phone by placing the handset back on-hook or by pressing or the line/call appearance key for the active call. When you hang up, the remote phone also hangs up.
You can set specific incoming Intercom call features on the 6737i IP phone using the Astra Web UI. The following table describes these features.
Incoming Intercom Features in Astra Web UI Description
| Microphone Mute | Allows you to enable or disable the microphone on the IP phone for Intercom calls made by the originating caller. |
| Auto Answer Allows you to enable or disable the IP phone to automatically answer an Intercom call. If auto-answer is enabled on the IP phone, the phone plays a tone (if "Play Warning Tone" is enabled) to alert the user before answering the intercom call. If auto-answer is disabled, the phone treats the incoming intercom call as a normal call. | |
| Play Warning Tone Allows you to enable or disable a warning tone to play when the phone receives an incoming intercom call on an active line. | |
| Allow Barge In Allows you to enable or disable how the phone handles incoming intercom calls while the phone is on an active call. | |
For more information about the incoming Intercom features and for procedures on setting these features, see "Incoming Intercom Call Features" on page 168.
Redial
The redial list is available during active calls. It stores up to the last 100 numbers you called, allowing you to scroll through and select the number you wish to redial.
Note:
Your System Administrator can set your Redial key to speed dial a specific number. Contact your System Administrator for more information.
Accessing the Redial List

IP Phone UI
- Press ☐ to display the most recently dialed number and use ▼ and ▲ to scroll through the list to view the other numbers.
Note:
Press twice to redial the most recently dialed number.
- Press ▼ to see the second most recently dialed number, or ▲ to see the oldest call on your list.
- To dial the displayed number press 📋, or lift the Handset or press any line keys.
- Press the key to cancel.
Deleting from the Redial List

IP Phone UI
- Press

- Press the Delete Key, then press the Delete Key again to erase the item.
Delete All Items

IP Phone UI
- Press

- Press the Delete Key, then press the Delete All Key to erase all items.
Mute
You can use the Mute 🔒 key to mute the handset, headset, or speakerphone. When you use the mute key on your phone, you cannot be heard on an active call or on a conference. For muted calls, the handsfree LED flashes and the Mute key LED is ON.

IP Phone UI
You can use the Mute ☐ key to mute the handset, headset, or speakerphone. The speaker light flashes slowly and you can hear the caller, but they cannot hear you. To switch mute on or off, press .
Note:
If you place a muted call on hold, the phone automatically takes the call off mute when you reconnect to the call.
Receiving Calls
When a call is ringing at your extension, the inbound callers extension and name display to the screen. The line/call appearance light flashes quickly for the incoming call.

Answering an Incoming Call

IP Phone UI
To answer the call
- For handsfree operation, press 📋 or the line/call appearance key for the incoming call.
- Press for handsfree or headset operation.
Note:
The audio mode setting you have selected in the options list under Headset Settings determines if the call goes to handsfree or headset operation. For more information, see the section "Customizing Your Phone" on page 22.
- Lift the handset for handset operation.
If the phone is already connected to a call, pressing the line/call appearance key for the new incoming call automatically places the connected call on hold and answers the new call. To reconnect to a party, press the line/call appearance key for that call.
If you cannot answer the call, the caller goes to voicemail if voicemail has been configured for your extension.
Note:
The key can be used to cancel the call pickup procedure.
Sending an Incoming Call to Voicemail
You can send an incoming call directly to voicemail without answering the call. To do this, press ☐ without picking up the handset. If you're already on the phone your incoming call should go directly to voicemail. Your phone screen displays a voicemail icon (☑) along with the number of waiting messages, if you have unheard messages (example: ✉ x4).
Handling Calls
When you are connected to a call, you can use the softkeys or hard keys on the phone to place a call on hold, transfer a call, or conference.
Placing a Call on Hold
You can place an active call on hold by pressing the Hold key. When you place a call on hold, only your phone can retrieve the call.

IP Phone UI
To place a call on hold
-
Connect to the call (if not already connected).
-
Press the Hold key,
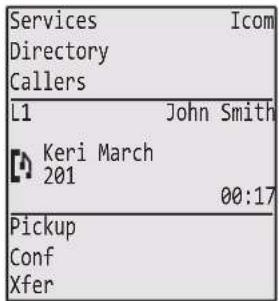
The line/call appearance light begins to flash slowly and after a short time the phone beeps softly to remind you that you still have a call on hold. The screen displays "Call Held" with the line number the call is held at the phone.
Note:
If you are connected to another call, the phone does not beep to remind you that you still have a call on hold.
When on Hold
To let your caller know that they are still on hold, music plays softly (if this has been set up for your system). The call/line appearance light for the line you are on remains solid to indicate that you are still connected.

Automatic Hold
When juggling between calls, you do not have to press the hold key to go from one call to the next. The phone automatically puts your current call on hold as soon as you press a new line/call appearance key. If you have more than one call on hold, you can reconnect to a held call by pressing the line/call appearance key where that call is being held. Press

to disconnect the call.
Retrieving a Held Call
If you have more than 1 call on hold, you can scroll through the held call information by pressing ◀ and ▶ navigation keys. To reconnect to a call press the line/call appearance key where that call is being held. If you press the call/line appearance key again, you disconnect from the call.
Transferring Calls
Blind Transfer
A blind transfer is when you transfer a call directly to another extension without consulting with the person receiving the call. To do this, simply complete the transfer immediately after you have entered the number. The call goes directly to the extension or outside line you transferred to. If the party you are transferring the call to does not answer, the transferred call rings back to your extension.
Consultative Transfer
You also have the option to consult with the person you are transferring the call to, before you complete the transfer. To do this, simply remain on the line until the receiving party answers the call. After consulting with the receiving party, you can either complete the transfer or cancel the transfer to go back to the original call.
Direct Transfer
The 6737i IP phone provides a convenient direct method of transferring an existing call to another existing call. If you have the transfer recipient on hold on another line, you can simply navigate to the recipient and press the Transfer/Xfer key and the direct transfer will be performed.
Pre-Dial & Live Dial Mode
By default, when users are initiating a conference call or transfer, they will not hear a dial tone before dialing begins (predial mode). The phone does not automatically dial out the number until the user presses the "Transfer" (Xfer) key. This allows the users to make changes to the dialing number before initiating the call. Administrators can configure a live dial mode.
In live dial mode, when the user is completing a conference call or transfer, they will hear a dial tone before dialing begins. In addition, the phone will either match the number to the dial plan or wait for the set digit timeout.
In the default pre-dial mode, users are able to edit the destination number prior to dialing, whereas in live dial mode they are not able to, however the "Dial" and "Cancel" softkeys are provided while the user inputs the number.

IP Phone UI
When you lift the handset on the phone, the Xfer key displays on the bottom set of softkeys by default. Use this key to transfer calls.
| Services | Icom |
| Directory | |
| Callers | |
| L1 | John Smith |
| > | |
| Dial | |
| Conf | |
| Xfer | More |
Transferring Calls in Pre-Dial Mode
Use the following procedure to transfer a call to another extension in pre-dial mode.. Use the following illustration as a reference.

- Connect to Party 1 (if not already connected). Party 1 is the party you want to transfer.
- Press the Xfer key. You will not hear a dial tone before dialing begins.
- Enter the extension number (or the outside number) to Party 2. This is the Party for which you want to transfer Party 1.
To cancel the transfer you can either select Cancel on the display screen, press 📞, or hangup the handset.
Note:
Users are able to edit the destination number ("Backspace" softkey is provided and navigation key is functional to move the cursor to the desired location).
- Complete either a blind or consultative transfer:
a) To complete a blind transfer, press the Xfer key again before the receiving end answers.
b) To complete a consultative transfer, press Dial and remain on the line to speak with the Party 2, before either pressing the Xfer key or 📞, or hanging up the handset to transfer Party 1 to Party 2.
Transferring Calls in Live Dial Mode
Use the following procedure to transfer a call to another extension in live dial mode.
- Connect to Party 1 (if not already connected). Party 1 is the party you want to transfer.
-
Press the Xfer key. You should hear a dial tone before the dialing begins.
-
Enter the extension number (or the outside number) to Party 2. This is the Party for which you want to transfer Party 1.
To cancel the transfer prior to the completion of dialing, you can either select Cancel on the display screen, press

Note:
Users are not able to edit the destination number as the phone will either match the inputted number to a dial plan or wait for the set digit timeout.
- Complete either a blind or consultative transfer:
a) To complete a blind transfer, press the Transfer key again, or 📋, or hang-up the handset before the set digit timeout.
b) To complete a consultative transfer, press Dial or wait for the number match or timeout and remain on the line to speak with the Party 2, before either pressing the Xfer key or 📋, or hanging up the handset to transfer Party 1 to Party 2.
ransferring an Existing Call to Another Existing Call
- Ensure you are on an active call with the party you wish to transfer (the transfer recipient should be placed on hold)
- Press the ◀ or ▶ navigation keys to scroll to the party to whom you wish to transfer the active call.
- Press Xfer key.
The active call will be transferred.
Completing a Transfer to a Contact in Phone Directory
Users can complete a blind transfer to a contact in their local directory. If a user is in a call and initiates a transfer, they can navigate to the Directory screen where a new transfer key can be pressed to complete a blind transfer. There is no change to start a consultative call.
When a directory entry is shown, there is a Xfer softkey below the current Dial softkey to trigger a blind transfer. This Xfer softkey is only available if a transfer has been initiated.
If a directory entry has multiple numbers, softkey 2 is used for the Arrange function. If a transfer has been initiated, the Arrange function will be replaced with the Xfer function.


Entry has multiple numbers
To Transfer a Call to a Contact in the Phone Directory:
-
Connect to Party 1 (if not already connected). Party 1 is the party you want to transfer.
-
Press the Xfer key. You should hear a dial tone as a second line opens up.
-
Press the Directory key and select a contact.
-
To complete a blind transfer, press the Transfer key again before the receiving end answers.
To complete a consultative transfer, press Dial to call the contact. Remain on the line to speak with Party 2 before pressing the Transfer key again to transfer Party 1 to Party 2.
To cancel the transfer, select Cancel on the display screen or press
Indication of Transferred Calls
When you transfer an active call, the near-end phone displays a Call Transferred screen when a call is transferred and the far-end call is dropped. The following is the Call Transferred screen on the 6737i phone:

The following procedure describes how to handle the Call Transferred screen on your phone.

IP Phone UI
1. Press the Goodbye

The Call Transferred screen no longer displays.
or
Select any Line key.
The Call Transferred screen no longer displays and is replaced by a dial screen.
Conferencing Calls
The 6737i IP phone offers two methods of conferencing:
- Local conferencing in pre-dial and live dial mode (default method).
- Centralized conferencing (for Sylantro and Broadsoft Servers) (Administrator must enable this method).
When you lift the handset on the phone, the Conference key displays on the bottom set of softkeys by default. Use this key to create conference calls.

Local Conferencing
The 6737i phone supports up to 3 parties (including yourself) in a conference call. This is called Local Conferencing and is the default method of conferencing on the 6737i.
Note:
Your System Administrator can set your Conference key to speed dial a specific number. Contact your System Administrator for more information.
Pre-Dial & Live Dial Mode
By default, when users are initiating a conference call or transfer, they will not hear a dial tone before dialing begins (predial mode). The phone does not automatically dial out the number until the user presses the "Conference" key. This allows the users to make changes to the dialing number before initiating the call. Administrators can configure a live dial mode.
In live dial mode, when the user is completing a conference call or transfer, they will hear a dial tone before dialing begins. In addition, the phone will either match the number to the dial plan or wait for the set digit timeout.
In the default pre-dial mode, users are able to edit the destination number prior to dialing, whereas in live dial mode they are not able to, however the "Dial" and "Cancel" softkeys are provided while the user inputs the number.

IP Phone UI
Using Local Conferencing in Pre-Dial Mode
Use the following procedure to create a conference call using local conferencing in pre-dial mode. Use the following illustration as a reference.
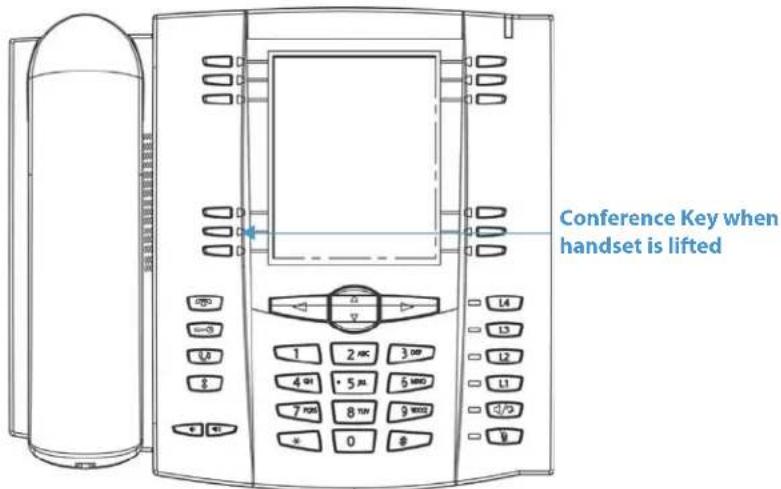
- When you begin a conference, you are the first party in the conference (Party 1). Pickup the handset or press the speakerphone key. A line opens up.
- Call Party 2 by dialing their number (or answer an incoming call of a Party).
- Wait for Party 2 to answer. When Party 2 answers, you can consult with them before adding them to the conference.
- Press the Conf key. You will not hear a dial tone before the dialing begins.
| Services | Icom |
| Directory | |
| Callers | |
| L1 | John Smith |
| 1.# 4161234567 | |
| >2.> 4299 | |
| Dial | Cancel |
| Backspace | |
- Enter the phone number of Party 3.
Note:
Users are able to edit the destination number ("Backspace" softkey is provided and navigation key is functional to move the cursor to the desired location).
- Wait for Party 3 to answer. When Party 3 answers, you can consult with them before adding them to the conference.
- Press the Conf key again to add Party 3 to the conference. Party 1 (which is yourself), Party 2, and Party 3 are all connected to a single conference.
- To drop a party from the conference, use the navigation key to select the party and press the Drop key.
Using Local Conferencing in Live Dial Mode
Use the following procedure to create a conference call using local conferencing in live dial mode.
- When you begin a conference, you are the first party in the conference (Party 1). Pickup the handset or press the speakerphone key. A line opens up.
- Call Party 2 by dialing their number (or answer an incoming call of a Party).
- Wait for Party 2 to answer. When Party 2 answers, you can consult with them before adding them to the conference.
- Press the Conf key. You should hear a dial tone before dialing begins.
| Services | Icom |
| Directory | |
| Callers | |
| L1 | John Smith |
| 1.# 4161234567 | |
| >2.> 4299 | |
| Dial | Cancel |
- Enter the phone number of Party 3.
Note:
Users are not able to edit the destination number as the phone will either match the inputted number to a dial plan or wait for the set digit timeout.
- Wait for Party 3 to answer. When Party 3 answers, you can consult with them before adding them to the conference.
- Press the Conf key again to add Party 3 to the conference. Party 1 (which is yourself), Party 2, and Party 3 are all connected to a single conference.
- To drop a party from the conference, use the navigation key to select the party and press the Drop key.
Note:
You can use ▼ and ▲ to scroll through and see the numbers and names (if available) of the parties in the conference call. When a name is displayed, pressing the Drop softkey drops the displayed party from the call.
Creating a Conference Call by Joining Two Existing Calls
- Ensure you are on an active call with one of the parties with whom you wish to create a conference (the other party should be placed on hold).
- Press the ◀ or ▶ navigation keys to scroll to the party to whom you wish to conference in.
- Press the Conf key.
The two parties will connect with you to form a conference call.
Note:
You can use ▼ and ▲ to scroll through and see the numbers and names (if available) of the parties in the conference call. When a name is displayed, pressing the Drop softkey drops the displayed party from the call.
Centralized Conferencing (for Sylantro and Broadsoft Servers)
The 6737i allows you to create multiple conferences with unlimited participants (depending on your server limitations) when your Administrator enables Centralized Conferencing.
If your Administrator does not enable Centralized Conferencing, then the 6737i uses Local Conferencing by default.
Your Administrator can configure Centralized Conferencing globally on all lines or on specific lines. Although, for the global setting to work, you must configure the lines with the applicable phone number.
Using Centralized Conferencing

IP Phone UI
Note:
When Centralized Conferencing is enabled on your phone, local conferencing (or three-way conferencing) works as indicated in the previous section, "Using Local Conferencing in Pre-Dial Mode" on page 117. Joining two active calls in a conference also works as indicated in the previous section, "Creating a Conference Call by Joining Two Existing Calls" on page 118.
Use the following procedure to create a conference call using centralized conferencing. Use the following illustration as a reference.

Setting Up a Conference and Adding Multiple Parties (for Sylantro and Broadsoft Servers)
Note:
You can have an unlimited number of parties in a conference (dependent on the limitations of the server.
-
When you begin a conference, you are the first party in the conference (Party 1). Pickup the handset or press the Speakerphone Key. A line opens up.
-
Call Party 2 by dialing their number (or answer an incoming call of a Party).
-
Wait for Party 2 to answer. When Party 2 answers, you can consult with them before adding them to Conference 1.
-
Press the Conf Key. A new line opens.
| Services | Icom |
| Directory | |
| Callers | |
| L2 | John Smith |
| > | |
| Dial | |
| Conf | |
| Xfer | More |
- Enter the phone number of Party 3.
- Wait for Party 3 to answer. When Party 3 answers, you can consult with them before adding them to the Conference 1.
- Press the Conf Key again to add Party 3 to Conference 1. Party 1 (which is yourself), Party 2, and Party 3 are all connected to Conference 1.
- Press an available Line Key (or answer an incoming call on an available line). If calling out, call Party 4.
- Wait for Party 4 to answer. When Party 4 answers, you can consult with them before adding them to the conference.
- Press the Conf Key to add Party 4 to Conference 1.
- Press the Line Key that has Conference 1.
- Press the Conf Key to join all parties (Parties 1 through 4) on Conference 1.
- To add more parties, repeat steps 8 through 12.
If any party in the conference hangs up (including the party that began the conference), all other parties in the conference are still connected.
Setting Up Multiple Conferences (for Sylantro Server only)
Note:
The 6737i is limited to 9 conferences (a single conference each on lines 1 through 9).
- Start Conference 1 using the procedures in the previous section, "Setting Up a Conference and Adding Multiple Parties (for Sylantro and Broadsoft Servers)" on page 119.
- When you are finished adding all required parties to Conference 1, press an available Line Key to start Conference 2. You are Party 1 on Conference 2. Call Party 2.
- When Party 2 answers, press the Conf Key.
- Press an available Line Key.
- Call Party 3 for Conference 2.
- When Party 3 answers, press the Conf Key to join Parties 1 (which is yourself), Party 2, and Party 3 on Conference 2. You now have two active conferences on two different lines.
Note:
When you are connected to multiple conference calls, and you put a conference on hold, the conference may be on hold for a limited period of time before it is disconnected. Contact your System Administrator for more information.
If any party in a conference hangs up (including the party that began the conference), all other parties in the conference are still connected.
Joining Additional Parties to Active Conferences
In centralized conferencing, you can join multiple incoming or outgoing calls to active conferences. Before following this procedure, at least one active conference must exist on your phone.
- As Party 1, pickup the handset or press the speakerphone key. A line opens up.
- Call Party 2 by dialing their number (or answer an incoming call of a Party).
- Wait for Party 2 to answer. When Party 2 answers, you can consult with them before adding them to the conference.
- Press the Conf Key.
- Press the Line Key that has the active conference. (For example, Line 1 and Line 2 both have active conferences. Pressing Line 1 joins Party 1 and Party 2 to the conference on Line 1. Pressing Line 2 joins Party 1 and Party 2 to the conference on Line 2.)
- Press the Conf Key again to join the Parties to the active conference.
Ending a Conference and Transferring Remaining Parties
The 6737i allows a Host to drop from a 3-way conference and let the other two parties remain connected by pressing a Transfer key.
Note:
The Caller ID of the dropped Host still displays on the remaining parties' phones.
If you are the Host of a conference and want to leave that conference:
- While in a 3-way conference press the Leave key on the phone.
Your phone leaves the 3-way conference but the remaining parties are still connected to the conference.
Ending Calls

IP Phone UI
To end a call, you first need to connect or reconnect to the call if not already connected (for example, if your caller is on hold). Press 📋 or the line/call appearance key of the active call to end the call. If connected through the handset, you can also place the handset back on hook to end the call.
Managing Calls
The 6737i has several features that make it easier to manage calls, and to keep track of your caller history, as well as your business and personal contacts.
These features include:
- Directory List
- Callers List
• DND and Call Forwarding
• Voicemail
Directory List
The Directory List is your personal phone book, conveniently stored within your phone. You can enter up to 200 entries into the 6737i Directory by adding them manually, or by saving the number and name from other lists stored on your phone. You can also dial directly from a directory entry. On the 6737i, you access the Directory by pressing Key 2 which is the Directory key.
Accessing Your Directory

IP Phone UI
Use the following procedure to access your Directory List. Use the following illustration as a reference.
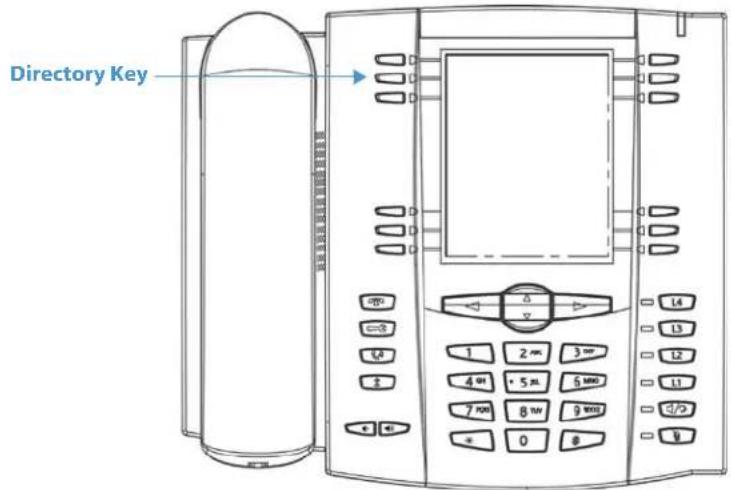
- Press the Directory Key. The directory displays the number of entries in your list. If the Directory list is empty, "Directory Empty/Use Save to add" displays. The following is an example of the Directory List Header screen with 97 entries in the List.

- You can access entries by pressing ▼ and ▲ to scroll through the list.
- To search for an entry by name, press the dial pad number corresponding to the first letter of the name (for example, press 7 for the letter P). Continue to press the dial pad number to access other letters on the same key (for example, press 7 three times for 'Ron'). If there are multiple entries under the same letter, you can use ▼ and ▲ to scroll through the list, or continue to press the next letters of the name to find a better match.
- To dial the displayed number press 📋 or just lift the handset or press any line keys.
- To add new entries, press Add New.
- To delete the entire Directory List, press DeleteList.
- Press the Quit to leave the Directory or press the Directory key again to quit.
Sorting Entries and Quick Search Feature
You can sort multiple numbers according to preference and perform a quick-search feature that allows you to enter the first letter that corresponds to a name in the Directory to find specific line items. The phone displays the first name with this letter.
Note:
The quick-search feature in the Directory List works only when the Directory is first accessed.
Managing the Directory List
From the Directory List in the IP Phone UI, you can perform the following:
- "Adding New Entries to the Directory List" (page 124)
• "Editing Entries in the Directory List" (page 125) - "Deleting Entries from the Directory List" (page 128)
- "Saving Entries to the Directory List" (page 129)
Adding New Entries to the Directory List
You can store a maximum of 7 numbers associated with a unique name. You can apply pre-defined labels to the entry which include, Office, Home, Cell, and Pager, or create your own labels. The following table indicates the maximum characters for each line and field in the Directory List.
Directory List Limitations
| Maximum length of a line 255 characters |
| Maximum length of a name 16 characters |
| Maximum length of a label 14 characters |
| Maximum length of a URI 45 characters |
| Maximum number directory entries in the NVRAM 200 entries |
The following examples illustrate the IP Phone UI screens you can use to add entries in the Directory List.

Screen 1

Screen 2
Adding Names, Numbers, Labels

IP Phone UI
On Screen 1:
• You can add names using the abc softkey.
- You can add numbers (up to 7 numbers per name) using the numbers on the phone's keypad.
• Use the Backspace softkey when required.
- Use the Save softkey when you are finished adding the name and number(s).
- You can exit from Screen 1 at any time without saving by pressing the Cancel softkey.
Note:
Use the ▼ and ▲ keys to toggle between Screen 1 and Screen 2.
On Screen 2:
- You can add a label or URI using the abc softkey; Or you can populate the "Label" field with a predefined label (Office, Home, Cell, Pager) by pressing the Label softkey.
• Use the Backspace softkey when required. - Use the Save softkey when you are finished adding the Label.
- You can exit from Screen 2 at any time without saving by pressing the Cancel softkey.
Editing Entries in the Directory List

IP Phone UI
On Screen 1, when the cursor is in the "Line" field, softkey 5 displays a Change softkey. The following example illustrates a Directory entry for "Steve Smith", with a phone number and an "Office" label. Since the cursor is in the "Line" field, the Change softkey displays.

The following example shows the same Directory entry without a label.

- You can use the Dial softkey to automatically dial the number in the Directory entry.
- You can use the Add Number softkey to add additional numbers to the current Directory entry (up to 7 numbers per name).
- You can use the Delete softkey to delete a number or to delete multiple numbers in an entry (see "Deleting Entries from the Directory List" on page 128.
• You can use the Change softkey to change a number or a name. - You can use the Quit softkey to quit the editing of the current Directory entry.
Scrolling Multiple Screens Per Entry

IP Phone UI
If there are multiple numbers for an entry, the ◀ and ▶ keys display for you to scroll multiple screens. The following examples show Screen 1 as Steve Smith's Office number, Screen 2 as Steve Smith's Home number, and Screen 3 as Steve Smith's Cell number. The first scroll ▶ indicates there are multiple number entries for the name. The ◀ and ▶ indicates you can scroll forward or backward between screens. The ◀ indicates this is the last number entry for the name.
| Services | Icom |
| Directory | |
| Callers | |
| 001 Steve Smith Office 9057609999 Line: 1 | |
| Dial | Delete |
| Arrange | Change |
| Add Number | List |
| Services | Icom |
| Directory | |
| Callers | |
| 001 Steve SmithHome9057608888Line: 1 | |
| Dial | Delete |
| Arrange | Change |
| Add Number | List |
| Services | Icom |
| Directory | |
| Callers | |
| 001 Steve SmithCell9057607777Line: 1 | |
| Dial | Delete |
| Arrange | Change |
| Add Number | List |
Arranging Multiple Screens
You can use the Arrange softkey to move the number/label/line forward or backward between screens for the specified name. If there is a label assigned to the entry, the following screen displays after pressing the Arrange softkey.

- Pressing the Save softkey in the above screen places the Cell label, the Cell number, and line associated with the Cell number, into the one position. So the first screen to display for the entry would be the Cell number screen. If no label is assigned to the entry, the numbers would be arranged in the order you specify.
The following example illustrates the new arrangement of Steve Smith's number.
Note:
The Office label moves to the second position and the Home label moves to the last position.
| Services | Icom |
| Directory | |
| Callers | |
| 001 Steve SmithCell9057607777Line: 1 | |
| Dial | Delete |
| Arrange | Change |
| Add Number | List |
| Services | Icom |
| Directory | |
| Callers | |
| 001 Steve Smith Office9057609999Line: 1 | |
| Dial | Delete |
| Arrange | Change |
| Add Number | List |
| Services | Icom |
| Directory | |
| Callers | |
| 001 Steve SmithHome9057608888Line: 1 | |
| Dial | Delete |
| Arrange | Change |
| Add Number | List |
Deleting Entries from the Directory List
You can delete entries from the Directory List in the following ways:
- Delete a single name or number and all associated numbers and labels.
- Delete specific numbers and labels from a single entry
- Delete all entries in the Directory List
You use the Delete softkey to delete a single or multiple numbers, names, or labels for an individual entry.

IP Phone UI
To delete a single entry from the Directory List:
- Scroll to a name or number in the Directory List.
- Press Delete. The following screen displays.
| Services | Icom |
| Directory | |
| Callers | |
| Delete Item | |
| Delete | |
| Delete All | Cancel |
- Press Yes to delete the directory entry (name, number, label, and line) from the Directory List.
- Press Cancel to cancel the delete function.
To delete specific numbers, names or labels for an entry:
- Scroll to a name or number in the Directory List that has multiple numbers and/or labels assigned to the entry.
- Press Delete. The following screen displays.
| Services | Icom |
| Directory | |
| Callers | |
| Delete number 907609999or delete all SteveSmith entries? | |
| Delete All | |
| Number | Cancel |
- Press Number to delete only a specific number associated with a name.
- Press Entries to delete the entire directory entry (name, all numbers, labels, and lines associated with the name) from the Directory List.
- Press Cancel to cancel the delete function.
To delete all entries from the Directory List:
- Press the Directory key.

- At the "Directory List" top screen, press DeleteList.
Saving Entries to the Directory List
You can save entries (names and numbers) from other sources to your Directory using the following methods:
- Save from the Caller List
- Save from the Redial List
Saving from the Callers List

IP Phone UI
You can save a name, number, and/or label from the Callers List to the Directory List using the following procedure. Use the following illustration as a reference.

- Press the Callers List key.
- Scroll to the entry you want to copy to the Directory List.
- Press Copy. The entry is saved in the Directory List.
Saving from the Redial List

IP Phone UI
You can save a name, number, and/or label from the Redial List to the Directory List using the following procedure. Use the following illustration as a reference.
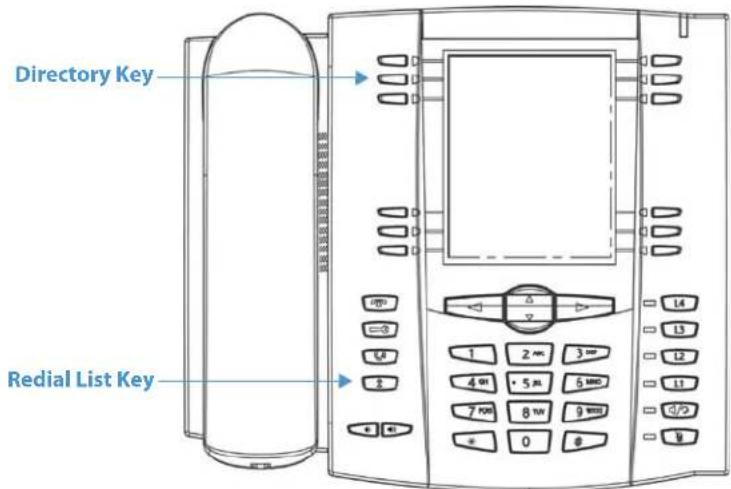
- Press the (Redial List) key.
- Scroll to the entry you want to copy to the Directory List.
- Press Copy. The entry is saved in the Directory List.
Downloading the Directory List to Your PC
You can download the Directory List to your PC via the Astra Web UI. The phone stores the directorylist.csv file to your PC in comma-separated value (CSV) format.
You can use any spreadsheet application to open the file for viewing. The following is an example of a Directory List in a spreadsheet application.
| A | B | C | D | E | F | |
| 1 | John | 41373 | 2 | |||
| 2 | Tim | 41376 | 1 | |||
| 3 | Carol | 4443245 | 1 | |||
| 4 | Tom | 41356 | 3 | |||
| 5 | ||||||
| 6 | ||||||
| 7 | ||||||
| 8 | ||||||
| 9 | ||||||
| 10 | ||||||
| 11 | ||||||
| 12 |
The file displays the name, phone number, and line number for each Directory entry.
Note:
Your System Administrator can populate your IP phone Directory List with server directory files. Contact your System Administrator for more details.
Download the Directory List
Use the following procedure to download the Directory List to your PC using the Aastra Web UI.

Aastra Web UI
1. Click on Operation->Directory.
Directory
Files Available for Download
Directory List
Callers List
Save As.
Save As.
- In the Directory List field, click on Save As. A File Download message displays.
- Click OK.
- Enter the location on your computer where you want to download the Directory List and click SAVE. The directorylist.csv file downloads to your computer.
- Use a spreadsheet application to open and view the Directory List.
Callers List
The Callers list is a stored log of your incoming calls. The 6737i telephone stores information on up to 200 incoming calls in the Callers list. Your telephone logs the number and name (if available) of the caller, when they last called, and the number of times they tried to reach you.
When the Callers list is full, the oldest call records are deleted to accommodate the information of new callers.
If the telephone number of an incoming or outgoing call matches a number that you have programmed with a name in a softkey or the Directory, the Callers list display the name and number.
The display shows you how many callers have been added to the list since you last checked it.
Callers List Screen Display
| Display Item Description | |
| 450-349-0438 Indicates you have returned the call from the Callers list. | |
| N MAR 04 3:30pm 2x "N" indicates a new call. | |
| XX New Callers When you are not on the telephone and not in the Callers list, the display shows you how many callers have been added to the list since you last checked it. | |
 | Indicates an unanswered call in the Callers list. |
 | Indicates an answered call in the Callers list. |
 | Indicates a Call Waiting call in the Callers list. |
 | Indicates an incoming Call Waiting call. |
| John Burns9054550055Jun 8 2:41pm 2X | "2x" indicates this caller has called twice. The display shows the date and time of the last call from that caller. |
You can view, scroll, and delete line items in the Callers List from the IP phone UI. You can also directly dial from a displayed line item in the Callers List.
Access the Callers List

IP Phone UI
Use the following procedure to access the Callers List. Use the following illustration as a reference.

- Press the Callers List key.
- Use the ▼ and ▲ keys to scroll through the line items in the Callers List.
Note:
To the left of a line item, a 📋 icon displays with the handset ON or OFF the receiver. The ON receiver indicates the call came in as a missed call. The OFF receiver indicates the call came in and was answered.
- To delete all entries in the Callers list, press the Delete softkey at the "Callers List" header.
To delete a line item from the Callers List, select the line item you want to delete and press the Delete softkey. - To cancel a delete function, press the ▼ or the ▲ Scroll keys.
- To save a line item to a softkey for speed dialing, press the Save softkey and enter the line number at the "Save to?" prompt that is already configured for speed dialing at a softkey.
- To dial a displayed entry from the Callers List, pick up the handset, press the handsfree key, or press a line key.
- To exit the Callers List, press the Callers List key.
Edit Entries in the Callers List
Important!
The Callers List does not save changes. Editing in the Callers List is generally used if you plan to call the number and need to add a prefix.
In the Callers List, if a dial pad key is pressed when a number and/or a name is displayed, the cursor automatically adds the digit at the left side of the number to enable the entry of the prefix.

IP Phone UI
Use the following procedure to edit the Callers List. Use the following illustration as a reference.

-
Press the Callers List Key.
-
Press ▼ and ▲ to find the entry you want to edit. Press ▼ to view the most recent call, or ▲ to see the oldest call on your list.
-
Press the EditNum softkey to begin editing.
-
Edit the number field using the respective keys on the dialpad.
Notes:
-
Pressing ▶ will move the cursor one character to the right while pressing ◀ will move the cursor one character to the left.
• Use the Backspace softkey to delete characters. -
To dial the displayed number press 📋, or just lift the handset, or press any line keys.
Delete Entries from the Callers List
You can delete individual items from the Callers List, or you can delete all items in the Callers List.

IP Phone UI
Use the following procedure to delete an individual item from the Callers List. Use the following illustration as a reference.

- Press the Callers List Key.
- Use ▼ and ▲ keys to find the item you want to delete.
- Press the Delete softkey.
- Press the Delete softkey again at the prompt to erase the item.

IP Phone UI
Use the following procedure to delete all items from the Callers List.
- Press the Callers List Key.
- Press the Delete softkey.
- Press the Delete softkey again at the prompt to erase all items.
Missed Calls Indicator
The IP phone has a "missed calls" indicator that increments the number of missed calls to the phone. This feature is accessible from the IP phone UI only.
The number of calls that have not been answered increment on the phone's idle screen as "
Accessing and Clearing Missed Calls

IP Phone UI
Use the following procedure to access and clear missed calls from the Callers List. Once you display the Callers List, the "
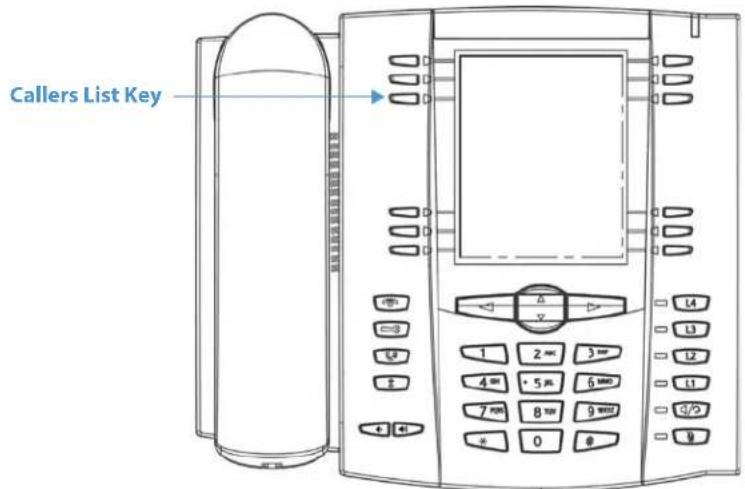
- .Press Callers List key on the phone.
- Use the ▼ and ▲ keys to scroll through the line items in the Callers List to find the line items that have the 🎨 icon with the receiver ON. These are the missed calls to the phone.
- To clear a line item from the Callers List, select the line item you want to delete and press the Clear softkey. The line item is deleted from the Callers List.
Download the Callers List to Your PC
You can download the Callers List to your PC for viewing using the Aastra Web UI. When you download the Callers List, the phone stores the callerlist.csv file to your computer in comma-separated value (CSV) format.
You can use any spreadsheet application to open the file for viewing. The following is an example of a Callers List in a spreadsheet application. This file displays the name, phone number, and the line that the call came in on.
| callersList.csv | ||||||
| A | B | C | D | E | F | |
| 1 | John | 41373 | 2 | |||
| 2 | Tim | 41376 | 1 | |||
| 3 | Carol | 4443245 | 1 | |||
| 4 | Tom | 41356 | 3 | |||
| 5 | ||||||
| 6 | ||||||
| 7 | ||||||
| 8 | ||||||
| 9 | ||||||
| 10 | ||||||
| 11 | ||||||
| 12 | ||||||
Download the Callers List
Use the following procedure to download the Callers List to your PC using the Astra Web UI.

Aastra Web UI
- Click on Operation->Directory.

- In the Callers List field, click on Save As. A File Download message displays.
- Click OK.
- Enter the location on your computer where you want to download the Callers List and click SAVE. The callerslist.csv file downloads to your computer.
- Use a spreadsheet application to open and view the Callers List.
DND and Call Forward
The 6737i has a feature that allows you to configure "Do Not Disturb" (DND) and "Call Forward" (CFWD) for multiple accounts on the phone. You can set specific modes for the way you want the phone to handle DND and CFWD. The three modes you can set on the phone for these features are:
- Account
- Phone
- Custom
The following paragraphs describe account-based DND and CFWD:
• DND Account-Based Configuration
- Call Forward Account-Based Configuration
DND Account-Based Configuration
"Do Not Disturb" (DND) is a feature on the phone that prevents the phone from ringing and receiving incoming calls. When DND is enabled with "call forwarding" (CFWD), any incoming calls can be call forwarded to voicemail or another number. See "Call Forward Account-Based Configuration" on page 142 for more information about call forwarding to other numbers.
On the 6737i, you can set DND on the phone-side for a specific account or for all accounts on the phone. You can set three modes for DND using the Aastra Web UI at the path, Basic Settings->Preferences->General->DND Key Mode:
Account, Phone (default), and Custom. DND performs according to the mode you set.
You can then configure a DND key (for the phone or for an expansion module) using the Aastra Web UI at the path, Operation->Softkeys Keys and XML. You can enable and disable DND by toggling the key, or by setting DND for a specific account at the path, Basic Settings->Account Configuration. Once you enable DND, "DND" displays on the LCD for the applicable account.

Note:
If there is only one account configured on the phone, then the mode setting is ignored and the phone behaves as if the mode was set to "Phone".
The following describes the key behavior for each DND mode.
• Account - DND key toggles the account in focus on the IP Phone UI, to ON or OFF if DND enabled for that account.
- Phone (default) - DND key toggles all accounts on the phone to ON or OFF.
- Custom - DND key displays custom screens on the IP Phone UI. User can select whether to enable/disable DND per account, enable DND on all accounts, or disable DND on all accounts.
The following table describes the key and Message Waiting Indicator (MWI) LEDs when you enable DND on the IP Phone.
Key LED Behavior for All Modes MWI LED Behavior for All Modes
DND key LED RED if current account in focus has DND ON. DND key LED OFF when current account in focus has DND disabled.
MWI LED ON if current account in focus has DND ON. MWI LED OFF if current account in focus has DND OFF.
Note:
If you make changes to the configuration for DND via the IP Phone UI, you must refresh the Astra Web UI screen to see the changes.
Configuring DND
The following describes configuring DND on your phone. To configure a DND key, see the section, "Do Not Disturb" (DND) Key" on page 59.
Note:
If there is no DND key configured or if it is removed, DND is disabled on the IP Phone.
Configuring DND Using the Aastra Web UI

Aastra Web UI
Use the following procedure to configure DND using the Astra Web UI.
1. Click on Basic Settings->Preferences->General.
Preferences
| General | |
| Park Call: | |
| Pick Up Parked Call: | |
| Display DTMF Digits | Enabled |
| Play Call Waiting Tone | Enabled |
| Stuttered Dial Tone | Enabled |
| XML Beep Support | Enabled |
| Status Scroll Delay (seconds) | 5 |
| Switch UI Focus To Ringing Line | Enabled |
| Call Hold Reminder During Active Calls | Enabled |
| Call Hold Reminder | Enabled |
| Call Waiting Tone Period | 0 |
| Preferred line | 1 |
| Preferred line Timeout (seconds) | 0 |
| Goodbye Key Cancels Incoming Call | Enabled |
| Message Waiting Indicator Line | All |
| DND Key Mode | Phone |
| Call Forward Key Mode | Account |
- In the "DND Key Mode" field, select a "do not disturb" (DND) mode to use on the phone. Valid values are: Account, Phone (default), Custom. Default is Phone.
• Account: Sets DND for a specific account. DND key toggles the account in focus on the phone to ON or OFF.
- Phone (default): Sets DND ON for all accounts on the phone. DND key toggles all accounts on the phone to ON or OFF.
- Custom: Sets the phone to display custom screens after pressing the DND key, that list the account(s) on the phone. The user can select a specific account for DND, turn DND ON for all accounts, or turn DND OFF for all accounts.
Notes:
- If there is only one account configured on the phone, then the mode setting is ignored and the phone behaves as if the mode was set to "Phone".
-
Using the Aastra Web UI, if you change the DND Key Mode to "phone", all accounts synchronize to the current setting of Account 1.
-
Click Save Settings. The changes takes affect immediately without a reboot.
- Click on Basic Settings->Account Configuration.
Account Configuration

-
For each account, enable DND by placing a check mark in the box. Disable DND by unchecking the box. Notes:
-
If you selected "Account" or "Custom" mode in step 2, you can enable/disable each account or all accounts as applicable. If you selected "Phone" mode, the first account allows you to change the DND status for all accounts.
-
Number and name of accounts that display to this screen are dependant on the number and name of accounts configured on the phone. In the screen in step 4, Screenname1 is configured on Line 1, Screenname2 is configured on Line 2, and Screenname3 is configured on Line 3. Only your Administrator can create accounts for your phone. Contact your Administrator for more information.
-
Click Save Settings. The changes takes affect immediately without a reboot.
Using DND Modes via the IP Phone UI
After you add a DND key to your phone, you can toggle the DND state using this key on the phone. Use the following procedure to enable/disable DND on the IP Phone.

IP Phone UI
The following procedures assume you have already configured a DND key AND assumes there are three accounts configured on the phone.
Notes:
- If there is no DND key configured or if it is removed, DND is disabled on the IP Phone.
- If there is only one account configured on the phone, then the mode setting is ignored and the phone behaves as if the mode was set to "Phone".
- Using the Aastra Web UI, if you change the DND key mode to "phone", all accounts synchronize to the current setting of Account 1.
DND in Account Mode
- With the account in focus on the IP Phone UI, press the DND key to toggle DND ON or OFF for the account. Use the RIGHT and LEFT arrow keys to scroll through each account.
- Use the RIGHT and LEFT arrow keys to scroll through each account.
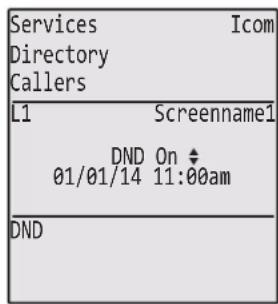
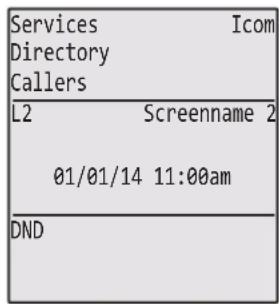

In the above example, Screenname1, Screenname2, and Screenname3, are three accounts configured on the phone. Only Screenname1 and 3 have DND ON. Screenname 2 has DND OFF.
DND in Phone Mode (Default)
- Press the DND key to toggle DND ON or OFF for all accounts on the phone. Toggling to ON enables DND on all accounts on the phone. Toggling to OFF disables DND on all accounts on the phone. Use the RIGHT and LEFT arrow keys to scroll through each account. Use the RIGHT and LEFT arrow keys to scroll through each account.


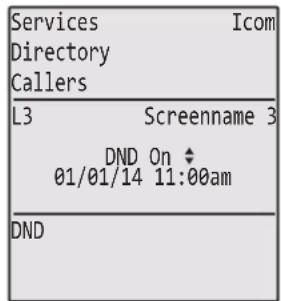
In the above example, toggling Screenname1 to DND ON, enabled DND for Screenname2 and 3 also.
Note:
Enabling DND in "Phone" mode toggles all accounts on the phone to DND ON.
DND in Custom Mode
- Press the DND key on the phone. The screen displays a list of the accounts on the phone and allows you to enable/disable a specific account or all accounts. Use the UP and DOWN arrow keys to scroll through the accounts.

In the above example, Screenshot1 and 3 have DND ON as indicated by a check mark (√). Screenshot2 has DND off as indicated by an X. The ALL ON and ALL OFF softkeys allow you to enable or disable DND on all accounts, respectively.
- You use the CHANGE key to enable or disable DND for a specific account selected.
- Press DONE to save the change.
Call Forward Account-Based Configuration
Call Forward (CFWD) on the IP phone allows incoming calls to be forwarded to another destination.
On the 6737i, you can set Call Forward (CFWD) on the phone-side for a specific account or for all accounts on the phone. You can set a CFWD mode using the Aastra Web UI at the path, Basic Settings->Preferences->General->Call Forward Key Mode: Account (default), Phone, and Custom. CFWD performs according to the mode you set.
You can configure CFWD using the Aastra Web UI at the path, Basic Settings->Account Configuration, OR you can configure CFWD using the IP Phone UI at the path, Options->Call Forward.
Using the Aastra Web UI at the path, Operation->Softkeys and XML, you can also configure a CFWD key for the phone (or for an expansion module) to use as a shortcut for accessing the CFWD menu on the phone.
The following describes the behavior for each CFWD mode.
- Account (default) - The account mode allows you to configure CFWD on a per account basis. Pressing a configured CFWD key applies to the account in focus.
- Phone - The Phone mode allows you to set the same CFWD configuration for all accounts (All, Busy, and/or No Answer). When you configure the initial account, the phone applies the configuration to all other accounts. (In the Aastra Web UI, only the account you configured is enabled. All other accounts are grayed out but set to the same configuration.) Using the Aastra Web UI, if you make changes to that initial account, the changes apply to all accounts on the phone.
- Custom - The Custom mode allows you to configure CFWD for a specific account or all accounts. You can configure a specific mode (All, Busy, and/or No Answer) for each account independently or all accounts. On the 6737i, you can set all accounts to All On, All Off, or copy the configuration for the account in focus to all other accounts using a Cop-ytoAll softkey.
Note:
If there is only one account configured on the phone, then the mode setting is ignored and the phone behaves as if the mode was set to "Phone".
You can enable different CFWD rules/modes independently (for example, you can set different phone numbers for Busy, All, and NoAnswer modes and then turn them on/off individually).
The following table describes the key and Message Waiting Indicator (MWI) LEDs when you enable CFWD on the IP Phone.
Key LED Behavior for All Modes MWI LED Behavior for All Modes
CFWD key LED RED if any CFWD mode is enabled for the account in focus.
CFWD key LED OFF if all CFWD modes are disabled for the account in focus.
MWI LED ON if any CFWD mode is enabled for the account in focus.
MWI LED OFF if all CFWD modes are disabled for the account in focus.
Note:
If you make changes to the configuration for CFWD via the IP Phone UI, you must refresh the Astra Web UI screen to see the changes.
Configuring CFWD Using the Astra Web UI

Aastra Web UI
Use the following procedure to configure CFWD using the Astra Web UI.
Note:
(Optional) You can configure a Call Forward key on your phone to access the Call Forward menus if desired. If you do not configure a Call Forward key, you can still access the Call Forward menu from the IP Phone UI at the path, Options->Call Forward.
- (optional) Click on Operation->Softkeys and XML;
or
Click on Operation->Expansion Module.
Softkeys Configuration
Bottom Keys
Top Keys

Softkeys
- Select from "Key 1" through "Key 10" on the Top keys.
or
Select from "Key 1" through "Key 20" on the Bottom keys.
- In the "Type" field, select Call Forward from the list of options.
- (optional) If required, enable or disable the applicable states for the Call Forward key (Idle, Connected, Incoming, Outgoing, and/or Busy).
Expansion Module Keys
- Select from "Key 1" through "Key 36" (M670i)
or
Select from "Key 1" through "Key 60" (M675i)
-
In the "Type" field, select Call Forward from the list of options.
-
Click Save Settings.
Note:
If there is no CFWD key configured on the phone or it is removed, you can still set the CFWD modes via the IP Phone UI at the path Options->Call Forward.
- Click on Basic Settings->Preferences->General.
Preferences
| General | |
| Park Call: | |
| Pick Up Parked Call: | |
| Display DTMF Digits | Enabled |
| Play Call Waiting Tone | Enabled |
| Stuttered Dial Tone | Enabled |
| XML Beep Support | Enabled |
| Status Scroll Delay (seconds) | 5 |
| Switch UI Focus To Ringing Line | Enabled |
| Call Hold Reminder During Active Calls | Enabled |
| Call Hold Reminder | Enabled |
| Call Waiting Tone Period | 0 |
| Preferred line | 1 |
| Preferred line Timeout (seconds) | 0 |
| Goodbye Key Cancels Incoming Call | Enabled |
| Message Waiting Indicator Line | All |
| DND Key Mode | Phone |
| Call Forward Key Mode | Account |
-
In the "Call Forward Key Mode" field, select a call forward mode to use on the phone. Valid values are: Account, Phone, Custom. Default is Account.
-
Account - (default) The account mode allows you to configure CFWD on a per account basis. Pressing a configured CFWD key applies to the account in focus.
- Phone - The Phone mode allows you to set the same CFWD configuration for all accounts (All, Busy, and/or No Answer). When you configure the initial account, the phone applies the configuration to all other accounts. (In the Aastra Web UI, only the account you configured is enabled. All other accounts are grayed out but set to the same configuration.) Using the Aastra Web UI, if you make changes to that initial account, the changes apply to all accounts on the phone.
- Custom - The Custom mode allows you to configure CFWD for a specific account or all accounts. You can configure a specific state (All, Busy, and/or No Answer) for each account independently or all accounts. On the 6737i, you can set all accounts to All On, All Off, or copy the configuration for the account in focus to all other accounts using a CopytoAll softkey.
Note:
If there is only one account configured on the phone, then the mode setting is ignored and the phone behaves as if the mode was set to "Phone".
- Click Save Settings.
The changes takes affect immediately without a reboot.
11. Click on Basic Settings->Account Configuration.
Account Configuration
| Account | DND | Call Forward | State | Value | No. Rings |
| 1. John Smith | All | ||||
| Busy | 4200 | ||||
| No Answer | 4 | ||||
| 2. J. Smith | All | ||||
| Busy | |||||
| No Answer | 4 |
The illustration above shows 2 accounts configured on the phone. Accounts must be set up by your System Administrator.
- For each account, enable the CFWD state by placing a check mark in one or more of the following "State" fields:
• All
- Busy
- No Answer
The "All" option forwards all incoming calls for this account to the specified phone number regardless of the state of the phone. The phone can be in the Busy or No Answer states, or can be in the idle state. The phone still forwards all calls to the specified number.
The "Busy" option call forwards incoming calls only if the account is in the busy state. The calls are forwarded to the specified phone number.
The "No Answer" option call forwards incoming calls only if the account rings but is not answered in the defined number of rings. The call gets forwarded to the specified number.
Note:
You can use the "Busy" and "No Answer" states together using different forwarding phone numbers. If these states are enabled for an account (the "All" state is disabled), and the phone is in the busy state when a call comes in, the phone can forward the call to the specified phone number (for example, voicemail). If there is no answer on the phone after the specified number of rings, the phone can forward the call to a different specified number, such as a cell phone number.
- For each account, in the "Number" field, enter the phone number for which you want the incoming calls to forward to if the phone is in the specified state.
If using the "Account" mode or "Custom" mode, you can enter different phone numbers for each account.
Notes:
- If you selected "Account" mode in step 5, you can enable/disable each account or all accounts as applicable. You can enter different phone number for each enabled state.
- If you selected "Custom" mode, you can enable/disable each account or all accounts as applicable. You can enter different phone numbers for each enabled state.
- If you selected "Phone" mode, all accounts are set to the same CFWD configuration (All, Busy, and/or No Answer) as Account 1 on the phone. (In the Astra Web UI, only Account 1 is enabled. All other accounts are grayed out but use the same configuration as Account 1.)
- Using the Aastra Web UI, if you make changes to Account 1, the changes apply to all accounts on the phone. Using the IP Phone UI, if you make changes to any other account other then Account 1, the changes also apply to all accounts on the phone. When enabling a CFWD state, you must specify a phone number for the phone to CFWD to. The number you specify applies to all accounts of the same mode.
-
Number and name of accounts that display to this screen are dependant on the number and name of accounts configured on the phone. In the screen in step 7, Screenname1 is configured on Line 1, Screenname2 is configured on Line 2, and Screenname3 is configured on Line 3. The name for the account is specified by your System Administrator. Contact your System Administrator for more information.
-
For the "No Answer" state, in the "No. Rings" field, enter the number of times that the account rings before forwarding the call to the specified number. Valid values are 1 through 20. Default is 3.
When using the "Account" mode or "Custom" mode, you can enter a different number of rings for each account. If you use the Aastra Web UI to change the Call Forward Key Mode to "Phone", all accounts synchronize to Account 1 -
Click Save Settings.
The changes takes affect immediately without a reboot.
Using CFWD via the IP Phone UI
Once CFWD is enabled on your phone, you can access and change the configuration using the IP Phone UI or the Aastra Web UI. You can access the CFWD menus by pressing a pre-configured Call Forward key, or by selecting Options->Call Forward from the IP Phone UI.
The following procedure assumes you have already configured a CFWD key AND assumes there are three accounts configured on the phone.
Notes:
- If there is no CFWD key configured on the phone or it is removed, you can still enable CFWD via the IP Phone UI at the path Options->Call Forward.
- If there is only one account configured on the phone, then the mode setting is ignored and the phone behaves as if the mode was set to "Phone"
- Using the Aastra Web UI, if you change the CFWD key mode to "Phone", all accounts synchronize to the current setting of Account 1.
CFWD in Account Mode
- Use the RIGHT and LEFT arrow keys to scroll through each account.
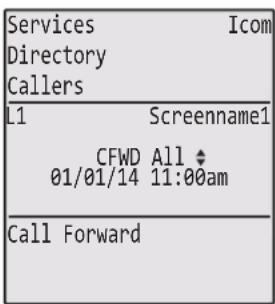
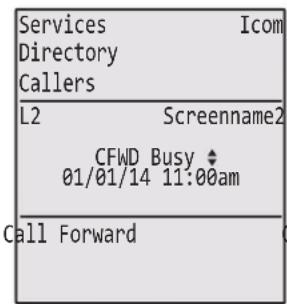

In the above example, Screenname1, Screenname2, and Screenname3, are three accounts configured on the phone. Screenname1 has "CFWD All" enabled, Screenname2 has "CFWD Busy" enabled, and Screenname3 has CFWD disabled as indicated by no message displayed.
- Press the Call Forward key. The Call Forward Mode screen displays for the account you selected. Use the UP and DOWN arrow keys to scroll through each state type.

In the above example, CFWD All is enabled as indicated by a check mark (√), CFWD Busy is enabled but no call forward phone number is configured as indicated by a !, and CFWD NoAns is disabled as indicated by an X.
- Select a state for the account(s) in focus using the UP and DOWN arrow keys.
You can enable/disable any or all of the following states for an account:
- All - Enables CFWD All for an account and forwards all incoming calls for that account, to the specified number.
- Busy - Enables CFWD Busy for an account and forwards incoming calls to a specified number if DND has been enabled for that account OR if the account is currently engaged in another call.
- No Answer - Enables CFWD NoAns for an account and forwards incoming calls to a specified number if the call has not been answered for the specified number of rings.
Note:
If CFWD All AND CFWD Busy AND CFWD NoAns are all enabled (and/or if the account has DND enabled), the CFWD All settings take precedence over CFWD Busy and CFWD NoAns.
You can also use the following keys if required:
- All Off - Disables all CFWD states for the current account in focus.
- All On - Enables all CFWD states for the current account in focus.
- CopytoAll Key - Copies the call forward phone number and state of the Call Forward mode (All, Busy, No Answer) in focus to every Call Forward mode of that account. For example, if you have the cursor pointing at the "All" state and it is enabled and has a call forward phone number configured, pressing the CopytoAll Key enables the Busy state and the NoAns state and assigns the same phone number to both states.
-
Cancel Key - Cancels any configuration you may have made without saving. To cancel a configuration, you must press this CANCEL key before pressing the DONE key.
-
For the CFWD No Answer state, press the CHANGE key for the mode you selected in step 2. This displays the Call Forward State screen.

flowchart
graph TD
    A["Services Icom\nDirectory\nCallers\nCall Forward\nMode No Answer\nState:OFF\nNumber:\nNo. Rings: 1\nChange\nAllAccts Cancel Done"] -->|Change| B["Services Icom\nDirectory\nCallers\nCall Forward\nMode No Answer\nState:ON\nNumber:\nNo. Rings: 1\nChange\nAllAccts Cancel Done"]
    B --> C["Change the State"]
    C --> D["Services Icom\nDirectory\nCallers\nCall Forward\nMode No Answer\nState:ON\nNumber:5551212_<br>No. Rings: 1\nBackspace\nAllAccts Cancel Done"]
    D --> E["Change the Number"]
    E --> F["Services Icom\nDirectory\nCallers\nCall Forward\nMode No Answer\nState:ON\nNumber:5551212\nNo. Rings:3\nChange\nAllAccts Cancel Done"]
    F --> G["Change the No. Rings"]
Note:
You can press the AllAccts key to copy the settings in the current Call Forward Settings screen for a specific call forward mode, to every account on the phone. Every account will have the same settings for that call forward mode.
-
Press the CHANGE key in the CFWD State screen. With the cursor in the "State" field, toggle the state ON and OFF by pressing the CHANGE key.
-
Use the DOWN arrow key to scroll to the "Number" field. Enter a phone number to apply to the current state in focus. When the phone is in the state you specified, and a call comes into the phone, it forwards the call to the number you specify.
Use the BACKSPACE key if required to delete characters.
- Use the DOWN arrow key to scroll to the "No. Rings" field. Press the CHANGE key to select the number of rings to apply to the phone for call forwarding incoming calls. Valid values are 1 to 20. Default is 3.
When the phone receives an incoming call, and call forward is configured on the phone, the phone rings the number of times you specify in the No. Rings screen, and then forwards the call.
-
Press DONE in the CFWD State Screen to save all changes.
-
Press DONE in the CFWD Mode Screen to save all changes.
CFWD in Phone Mode
Use the RIGHT and LEFT arrow keys to scroll through each account.


In the above example, Screenname1, Screenname2, and Screenname3, are three accounts configured on the phone. Screenname1, 2 and 3 have "CFWD All" enabled.
Note:
In "Phone" mode, when you change the call forward configuration for an account, the change applies to all accounts.
- Press the Call Forward key. The Call Forward menu displays. Use the UP and DOWN arrow keys to scroll through each state type.

In the above example, CFWD All is enabled as indicated by a check mark ( ), CFWD Busy is enabled but no call forward phone number is configured as indicated by a , and CFWD No Answer is disabled, as indicated by an X.
- Select a state using the UP and DOWN arrow keys.
You can enable/disable a specific account on the phone with any or all of the following states. However, the configuration you set will apply to all accounts on the phone.
- All - Enables CFWD All on the phone and forwards all incoming calls to the specified number.
- Busy - Enables CFWD Busy on the phone and forwards incoming calls to a specified number if DND has been enabled OR if the phone is currently engaged in another call.
- No Answer - Enables CFWD NoAns on the phone and forwards incoming calls to a specified number if the call has not been answered for the specified number of rings.
Note:
If CFWD All AND CFWD Busy AND CFWD NoAns are all enabled (and/or if the account has DND enabled), the CFWD All settings take precedence over CFWD Busy and CFWD NoAns.
You can also use the following keys if required:
- All Off Key- Disables all CFWD modes.
- All On Key - Disables all CFWD modes.
- CopytoAll Key - Copies the call forward phone number and state of the Call Forward mode (All, Busy, No Answer) in focus to every Call Forward mode. For example, if you have the cursor pointing at the "All" state and it is enabled and has a call forward phone number configured, pressing the CopytoAll Key enables the Busy state and the NoAns state and assigns the same phone number to both states.
-
Cancel Key - Cancels any configuration you may have made without saving. To cancel a configuration, you must press this CANCEL key before pressing the DONE key.
-
In the CFWD No Answer state, press the CHANGE key for the mode you selected in step 2. This displays the Call Forward State screen. In the following example, the CFWD All state is ON.

flowchart
graph TD
    A["Services Icom\nDirectory\nCallers\nCall Forward\nMode No Answer\nState:OFF\nNumber:\nNo. Rings: 1\nChange\nAllAccts"] -->|Change| B["Services Icom\nDirectory\nCallers\nCall Forward\nMode No Answer\nState:ON\nNumber:\nNo. Rings: 1\nChange\nAllAccts"]
    B --> C["Change the State\nChange\nAllAccts"]
    B --> D["Change the Number\nChange\nAllAccts"]
    D --> E["Services Icom\nDirectory\nCallers\nCall Forward\nMode No Answer\nState:ON\nNumber:5551212_<br>No. Rings: 1\nBackspace\nAllAccts"]
    D --> F["Change the No. Rings\nChange\nAllAccts"]
- Press the CHANGE key in the CFWD State screen. With the cursor in the "State" field, toggle the state ON and OFF by pressing the CHANGE key.
- Use the DOWN arrow key to scroll to the "Number" field. Enter a phone number to apply to the current state in focus. When the phone is in the state you specified, and a call comes into the phone, it forwards the call to the number you specify.
Use the BACKSPACE key if required to delete characters.
- Use the DOWN arrow key to scroll to the "No. Rings" field. Press the CHANGE key to select the number of rings to apply to the phone for call forwarding incoming calls. Valid values are 1 to 20. Default is 3.
When the phone receives an incoming call, and call forward is configured on the phone, the phone rings the number of times you specify in the No. Rings screen, and then forwards the call.
- Press DONE in the CFWD State Screen to save all changes.
- Press DONE in the CFWD Mode Screen to save all changes.
Note:
In "Phone" mode, the configuration applies to all the accounts on the phone.
CFWD in Custom Mode
- Use the RIGHT and LEFT arrow keys to scroll through each account.

In the above example, Screenname1, Screenname2, and Screenname3, are three accounts configured on the phone. Screenname1 has "CFWD All" enabled, Screenname2 has "CFWD Busy" enabled, and Screenname3 has CFWD disabled as indicated by no message displayed.
- With the account in focus on the IP Phone UI, press the Call Forward key. The Call Forward Account screen displays which lists all the accounts on the phone. Use the UP and DOWN arrow keys to scroll through each account.
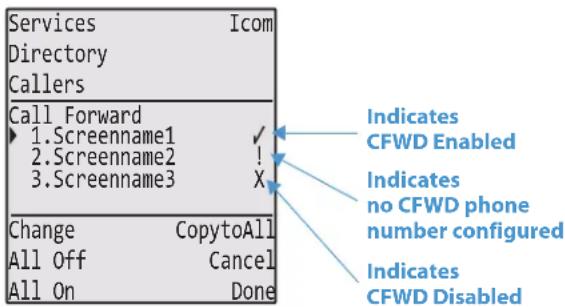
In the above example, Screenname1 has one or more CFWD states enabled as indicated by a check mark (√), Screenname2 has one or more CFWD states enabled but a specific state has no call forward phone number configured as indicated by a !, and Screenname3 has one or more CFWD states disabled as indicated by an X.
- Select an account using the UP and DOWN arrow keys.
You can also use the following keys if required:
- All Off Key- Disables CFWD for all accounts on the phone.
- All On Key - Enables CFWD for all accounts on the phone.
- CopytoAll Key - Copies all settings for the account you select, to all other accounts on the Call Forward Account screen. For example, if you have the cursor pointing at Screenshot1, and you press the CopytoAll key, all of the CFWD settings for Screenshot1 are copied to Screenshot2 and Screenshot3.
- Cancel Key - Cancels any configuration you may have made without saving. To cancel a configuration, you must press this CANCEL key before pressing the DONE key.
4. After selecting an account, press CHANGE.
The Call Forward Mode screen displays for the account you selected. Use the UP and DOWN arrow keys to scroll through each state type.
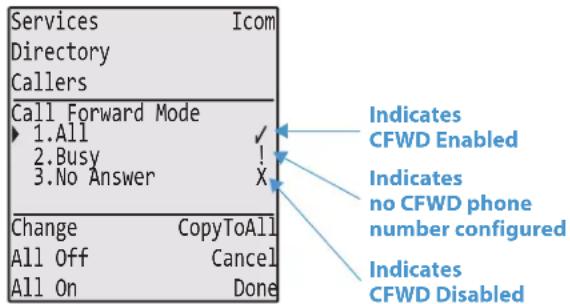
In the above example, CFWD All is enabled as indicated by a check mark (√), CFWD Busy is enabled but no call forward phone number is configured as indicated by a !, and CFWD No Answer is disabled, as indicated by an X. Select a state for the selected account(s) using the UP and DOWN arrow keys.
You can enable/disable any or all of the following states for a specific account or for all accounts (with individual configurations):
- All - Enables CFWD All for an account and forwards all incoming calls for that account, to the specified number. The phone number can be different between accounts.
- Busy - Enables CFWD Busy for an account and forwards incoming calls to a specified number if DND has been enabled for that account OR if that account is currently engaged in another call. The phone number can be different between accounts.
- No Answer - Enables CFWD NoAns for an account and forwards incoming calls to a specified number if the call has not been answered for a specified number of rings. The phone number can be different between accounts.
Note:
If CFWD All AND CFWD Busy AND CFWD NoAns are all enabled (and/or if the account has DND enabled), the CFWD All settings take precedence over CFWD Busy and CFWD NoAns.
You can also use the following keys if required:
- All Off Key- Disables all CFWD states for the selected account.
- All On Key - Enables all CFWD states for the selected account.
- CopytoAll Key - Copies the call forward phone number and state of the selected Call Forward mode (All, Busy, No Answer) to every Call Forward mode of that account. For example, if you have the cursor pointing at the "All" state and it is enabled and has a call forward phone number configured, pressing the CopytoAll Key enables the Busy state and the NoAns state and assigns the same phone number to both states.
-
Cancel Key - Cancels any configuration you may have made without saving. To cancel a configuration, you must press this CANCEL key before pressing the DONE key.
-
Press the CHANGE key for the mode you selected in step 4. This displays the Call Forward State screen. In the following example, the CFWD All state is ON.

flowchart
graph TD
    A["Services Icom\nDirectory\ncallers\nCall Forward\nMode No Answer\nState: OFF\nNumber:\nNo. Rings: 1\nChange\nAllAccts Cancel Done"] -->|Change| B["Services Icom\nDirectory\ncallers\nCall Forward\nMode No Answer\nState: ON\nNumber:\nNo. Rings: 1\nChange\nAllAccts Cancel Done"]
    B --> C["Services Icom\nDirectory\ncallers\nCall Forward\nMode No Answer\nState: ON\nNumber:5551212_<br>No. Rings: 1\nBackspace\nAllAccts Cancel Done"]
    C --> D["Services Icom\nDirectory\ncallers\nCall Forward\nMode No Answer\nState: ON\nNumber:5551212<br>No. Rings: 3\nChange\nAllAccts Cancel Done"]
    D --> E["Change the State"]
    E --> F["Change the Number"]
    F --> G["Change the No. Rings"]
Note:
You can press the AllAccts key to copy the settings in the current Call Forward Settings screen for a specific call forward mode, to every account on the phone. Every account will have the same settings for that call forward mode.
- Press the CHANGE key in the CFWD State screen. With the cursor in the "State" field, toggle the state ON and OFF by pressing the CHANGE key.
- Use the DOWN arrow key to scroll to the "Number" field. Enter a phone number to apply to the current state in focus. When the phone is in the state you specified, and a call comes into the phone, it forwards the call to the number you specify.
Use the BACKSPACE key if required to delete characters.
- Use the DOWN arrow key to scroll to the "No. Rings" field. Press the CHANGE key to select the number of rings to apply to the phone for call forwarding incoming calls. Valid values are 1 to 20. Default is 3.
When the phone receives an incoming call, and call forward is configured on the phone, the phone rings the number of times you specify in the No. Rings screen, and then forwards the call.
- Press DONE in the CFWD State screen to save all changes.
- Press DONE in the CFWD Mode screen to save all changes.
- Press DONE in the CFWD Account screen to save all changes.
Voicemail
The Voicemail feature on the 6737i IP phone allows you to use a line, configured with a phone number for dialing out, to connect to a voicemail server.
For each assigned Voicemail number, there can be a minimum of 0 or a maximum of 1 Voicemail access phone number.
The Voicemail list displays a list of phone numbers assigned to the 6737i that have registered voicemail accounts associated with them.
Note:
The Voicemail list does not display the voicemail access number.
The phone displays up to 99 voicemail messages for an account even if the number of voicemails exceeds the limit.
Registered account numbers/URIs that exceed the length of the screen, either with or without the voicemail icon and the message count, are truncated with an ellipse character at the end of the number/URI string.
The end of the Voicemail list displays the number of new voicemail messages (if any exist).
Contact your System Administrator for lines configured for Voicemail.
Using Voicemail

IP Phone UI
- Press the Services key on the phone.
- Select "Voicemail".
- Use the ▼ and ▲ keys to scroll through the line items in the Voicemail list.
- When you have selected a line item, press the handsfree key, Scroll Right key, or press a line softkey to make an outgoing call using the voicemail access phone number associated with the line for which the voicemail account is registered.
From a selected item in the Voicemail list, you can also lift the handset (go offhook) to make an outgoing call using the voicemail access phone number.
Additional Features
This section describes additional features you can use on the 6737i phone.
Display DTMF Digits
A feature on the 6737i phone allows users to enable or disable DTMF (dual-tone multi-frequency) digits to display to the IP phone when using the keypad to dial, or when dialing from a softkey or expansion module key.
DTMF is the signal sent from the phone to the network that you generate when you press the phone's touch keys. This is also known as "touchtone" dialing. Each key you press on your phone generates two tones of specific frequencies. One tone is generated from a high-frequency group of tones and the other from a low frequency group.
If you enable the Display DTMF Digits parameter, the digits you are dialing from the keypad or from a softkey, display to the IP phone's LCD display. This parameter is disabled by default (no digits display when dialing).
You can enable the "Display DTMF Digits" parameter using the Aastra Web UI.
Configuring Display of DTMF Digits

Aastra Web UI
Use the following procedure to configure the display of DTMF digits on the IP phone.
Note:
"Display DTMF Digits" is disabled by default.
1. Click on Basic Settings->Preferences->General.

- Enable the "Display DTMF Digits" field by checking the check box. Disable this field by unchecking the box). Default is disabled.
- Click Save Settings.
Play Call Waiting Tone
You can enable or disable the playing of a call waiting tone when a caller is on an active call and a new call comes into the phone.
You can configure this feature using the Astra Web UI.
Configuring Call Waiting Tone

Aastra Web UI
Use the following procedures to configure a call waiting tone on the IP phone.
Note:
"Play Call Waiting Tone" is enabled by default.
- Click on Basic Settings->Preferences->General.
Preferences

- The "Play Call Waiting Tone" field is enabled by default. To disable this field, uncheck the box.
- Click Save Settings.
Stuttered Dial Tone
You can enable or disable the playing of a stuttered dial tone when there is a message waiting on the IP phone.
You can configure this feature using the Astra Web UI.
Configuring Stuttered Dial Tone

Aastra Web UI
Use the following procedures to configure stuttered dial tone on the IP phone.
Note:
"Stuttered Dial Tone" is enabled by default.
1. Click on Basic Settings->Preferences->General.
Preferences
| General | |
| Park Call: | |
| Pick Up Parked Call: | |
| Display DTMF Digits | Enabled |
| Play Call Waiting Tone | Enabled |
| Stuttered Dial Tone | Enabled |
| XML Beep Support | Enabled |
| Status Scroll Delay (seconds) | 5 |
| Switch UI Focus To Ringing Line | Enabled |
| Call Hold Reminder During Active Calls | Enabled |
| Call Hold Reminder | Enabled |
| Call Waiting Tone Period | 0 |
| Preferred line | 1 |
| Preferred line Timeout (seconds) | 0 |
| Goodbye Key Cancels Incoming Call | Enabled |
| Message Waiting Indicator Line | All |
| DND Key Mode | Phone |
| Call Forward Key Mode | Account |
- The "Stuttered Dial Tone" field is enabled by default. To disable this field, uncheck the box.
- Click Save Settings.
XML Beep Support
Using the Aastra Web UI, you can enable or disable a beep to be audible when the phone receives an XML application using the "XML Beep Support" field at the path Basic Settings->Preferences->General. If you disable this feature, then no beep is heard when the XML application arrives to the phone.
If your System Administrator has set a value for this feature in a custom XML application or in the configuration files, the value you set in the Aastra Web UI overrides the Administrator's setting. Setting and saving the value in the Aastra Web UI applies to the phone immediately.
Configuring XML Beep Support

Aastra Web UI
Use the following procedures to configure an XML beep on the IP phone.
Note:
"XML Beep Support" is enabled by default.
1. Click on Basic Settings->Preferences->General.
Preferences
| General | |
| Park Call: | |
| Pick Up Parked Call: | |
| Display DTMF Digits | Enabled |
| Play Call Waiting Tone | Enabled |
| Stuttered Dial Tone | Enabled |
| XML Beep Support | Enabled |
| Status Scroll Delay (seconds) | 5 |
| Switch UI Focus To Ringing Line | Enabled |
| Call Hold Reminder During Active Calls | Enabled |
| Call Hold Reminder | Enabled |
| Call Waiting Tone Period | 0 |
| Preferred line | 1 |
| Preferred line Timeout (seconds) | 0 |
| Goodbye Key Cancels Incoming Call | Enabled |
| Message Waiting Indicator Line | All |
| DND Key Mode | Phone |
| Call Forward Key Mode | Account |
- The "XML Beep Support" field is enabled by default. To disable this field, uncheck the box.
- Click Save Settings.
Status Scroll Delay
Using the Aastra Web UI, you can specify a scroll delay option that allows you to set the time delay, in seconds, between the scrolling of each status message on the phone. You can specify this setting in the "Status Scroll Delay (seconds)" field at the path Basic Settings->Preferences->General. The default time is 5 seconds for each message to display before scrolling to the next message. You can increase or decrease this time as required. Setting and saving the value in the Aastra Web UI applies to the phone immediately.
Configuring Status Scroll Delay

Aastra Web UI
Use the following procedures to specify a status scroll delay on the IP phone.
1. Click on Basic Settings->Preferences->General.

- Enter a value in the "Status Scroll Delay (seconds)" field. Valid values are: 1 to 25 seconds. Default is 5 seconds.
- Click Save Settings to save our changes.
Switch UI Focus to Ringing Line
You can configure a feature on the 6737i that controls the behavior of the phone when it receives an incoming call when it is already in a connected call. When a call comes into the phone, and the phone is already on a connected call, the phone switches focus to the ringing line to enable the user to see who is calling them. You can turn off this functionality so that the phone stays focused on the connected call. You can do this using the Switch Focus to Ringing Line parameter in the Astra Web UI.
Configuring "Switch Focus to Ringing Line" Using the Astra Web UI

Aastra Web UI
Use the following procedure to enable or disable the "Switch Focus to Ringing Line" using the Astra Web UI.
Note:
"Switch Focus to Ringing Line" is enabled by default.
- Click on Basic Settings->Preferences->General.
Preferences
| General | |
| Park Call: | |
| Pick Up Parked Call: | |
| Display DTMF Digits | Enabled |
| Play Call Waiting Tone | Enabled |
| Stuttered Dial Tone | Enabled |
| XML Beep Support | Enabled |
| Status Scroll Delay (seconds) | 5 |
| Switch UI Focus To Ringing Line | Enabled |
| Call Hold Reminder During Active Calls | Enabled |
| Call Hold Reminder | Enabled |
| Call Waiting Tone Period | 0 |
| Preferred line | 1 |
| Preferred line Timeout (seconds) | 0 |
| Goodbye Key Cancels Incoming Call | Enabled |
| Message Waiting Indicator Line | All |
| DND Key Mode | Phone |
| Call Forward Key Mode | Account |
- The "Switch Focus to Ringing Line" field is enabled by default. To disable this field, uncheck the box.
- Click Save Settings.
Call Hold Reminder During Active Calls
The IP phones allow you to enable or disable the ability for the phone to initiate a continuous reminder tone on the active call when another call is on hold. For example, when this feature is enabled, and the call on Line 1 is on hold, and then the you answer a call on Line 2 and stay on that line, a reminder tone is played in the active audio path on Line 2 to remind you that there is still a call on hold on Line 1.
When this feature is disabled, a ring splash is heard when the active call hangs up and there is still a call on hold. You can enable or disable this feature using the "Call Hold Reminder During Active Calls" in the Aastra Web UI.
Configuring "Call Hold Reminder During Active Calls"

Aastra Web UI
Use the following procedure to configure "Call Hold Reminder During Active Calls" on the IP phone.
Note:
"Call Hold Reminder During Active Calls" is disabled by default.
1. Click on Basic Settings->Preferences->General.

- The "Call Hold Reminder During Active Calls" field is disabled by default. To enabled this field, check the box. When this feature is enabled, a reminder tone is heard on the active call when another call is on hold. When disabled, a ring splash is heard when the active call hangs up and there is still a call on hold.
- Click Save Settings.
Call Hold Reminder (on single hold)
In previous releases, the call hold reminder ring splash was triggered when you hung up a call and there was at least one other call on hold. The reminder ring splash timer started only when the active call hung up and there was still another call on hold.
On the IP phones, you can enable or disable a feature that would start the reminder ring splash timer as soon as you put a call on hold (even when no other calls are active on the phone). When enabled, the phone initiates a reminder ring splash periodically for the single call on hold. When disabled, no reminder ring splash is audible.
You can enable or disable this feature using the "Call Hold Reminder" parameter in the Aastra Web UI.
Configuring "Call Hold Reminder"

Aastra Web UI
Use the following procedure to configure "Call Hold Reminder" on the IP phone.
Note:
"Call Hold Reminder" is disabled by default.
1. Click on Basic Settings->Preferences->General.
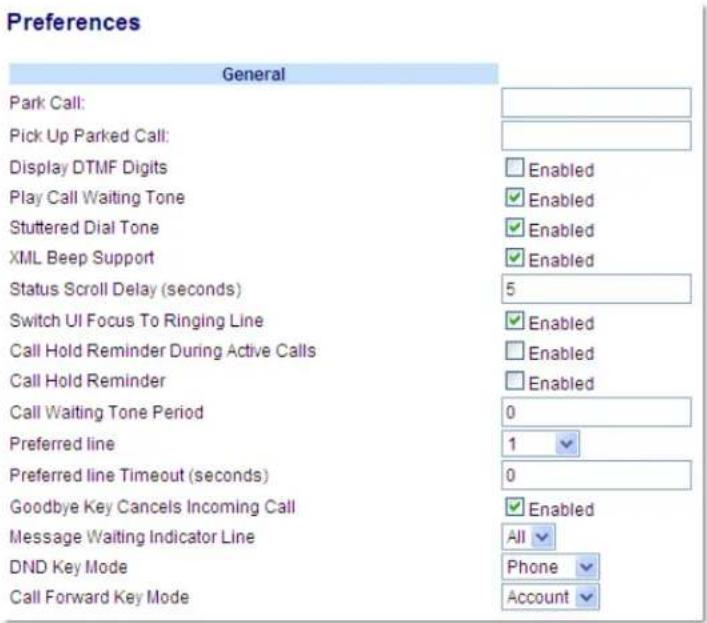
- The "Call Hold Reminder" field is disabled by default. To enabled this field, check the box.
When this feature is enabled, the reminder ring splash timer starts as soon as you put a call on hold (even when no other calls are active on the phone). The phone initiates a reminder ring splash periodically for the single call on hold. When disabled, no reminder ring splash is audible.
3. Click Save Settings.
Call Waiting Tone Period
You can specify a specific time period (in seconds) for the call waiting tone to play at regular intervals on an active call using the parameter "Call Waiting Tone Period". A value of "0" is the default and plays the call waiting tone only once on the active call. When the incoming caller hangs up, the call waiting tone stops on the existing active call.
You can enable or disable this feature in the Astra Web UI.
Configuring "Call Waiting Tone Period"

Aastra Web UI
Use the following procedure to configure "Call Waiting Tone Period".
1. Click on Basic Settings->Preferences->General.

- In the "Call Waiting Tone Period" field, enter a time period, in seconds, that the call waiting tone will be audible on an active call when another call comes in. Default is 0 seconds.
- When enabled, the call waiting tone plays at regular intervals for the amount of time set for this parameter. For example, if set to "30" the call waiting tone plays every 30 seconds. When set to "0", the call waiting tone is audible only once on the active call.
- Click Save Settings.
Preferred Line and Preferred Line Timeout
The 6737i has a feature called "preferred line" and "preferred line timeout". If you enable the preferred line parameter on your phone, after a call ends (incoming or outgoing), the display switches back to the preferred line. Next time you go off-hook to make another call, you pickup on the preferred line. You can enable the preferred line parameter using the Aastra Web UI at the location, Basic Settings->Preferences->General. You can also set a preferred timeout parameter that specifies the number of seconds it takes for the phone to switch back to the preferred line.
Note:
You can configure "Preferred Line" and "Preferred Line Timeout" using the Astra Web UI only.
The following table provides the behavior of the preferred line focus feature with other features on the phone.
Phone Feature Preferred Line Behavior
| call return The phone switches back to the focused line immediately after the call ends. | |
| speed dial | The line is already specified when the speed dial is created. The phone switches back immediately after the call ends. |
| conference For incoming calls, the phone switches back immediately after the call ends. | |
| transfer | For incoming or outgoing calls, the current behavior is that the same line used to transfer the call does not change. For incoming calls, the phone switches back immediately after the call transfers. |
| blf The phone switches back immediately after the call ends. | |
| park The phone switches back immediately after the call ends. | |
| voicemail The phone switches back immediately after the call ends. | |
| redial The phone switches back immediately after the call ends. | |
| dialing | For incomplete dialing on a non-preferred line, the focus does not change if some digits are entered. If no digits are entered or digits were cleared, the focus changes to preferred line after the time out has passed without activities. |
| caller id | If the "Switch UI Focus To Ringing Line" parameter is disabled, the User is able to see the Caller ID when the phone switches the focus to the ringing line. |
| factory default | Factory default and recovery mode clears the "preferred line" and "preferred line timeout" parameters, and the phone operates in a non-preferred line mode. |
Notes:
- If you specify a value of "0" for the preferred line parameter, it disables the preferred line focus feature.
- If you specify a value of "0" for the preferred line timeout parameter, the phone returns the line to the preferred line immediately.
Configuring "Preferred Line" and "Preferred Line Timeout" Using the Aastra Web UI

Aastra Web UI
Use the following procedure to configure the Preferred Line and Preferred Line Timeout feature using the Astra Web UI.
1. Click on Basic Settings->Preferences->General.

- In the "Preferred Line" field, select a preferred line to switch focus to after incoming or outgoing calls end on the phone. Default is 1. Valid values are:
- None (disables the preferred line focus feature)
• 1 to 9
For example, if you set the preferred line to "1", when a call (incoming or outgoing) ends on the phone (on any line), the phone switches focus back to Line 1.
- In the "Preferred Line Timeout" field, enter the amount of time, in seconds, that the phone switches back to the preferred line after a call (incoming or outgoing) ends on the phone, or after a duration of inactivity on an active line.
Default is 0. Valid values are:
- 0 to 999
- Click Save Settings.
Goodbye Key Cancels Incoming Calls
The 6737i has a feature that allows you to configure the Goodbye key to drop a second incoming call or ignore incoming calls presented to the phone when you are on an active call. The parameter is called "Goodbye Key Cancels Incoming Call" and is configurable via the Astra Web UI.
If you enable this parameter, which is the default, pressing the Goodbye key rejects calls coming into the phone while you are on an active call. When you disable this parameter, pressing the Goodbye key hangs up the active call.
If you disable this feature, and the phone receives another call when an active call is already present., the phone displays a softkey 1 as "Answer" and softkey 2 as "Ignore".
Configuring Goodbye Key to Cancel Incoming Calls

Aastra Web UI
Use the following procedure to configure the Goodbye key to cancel incoming calls on the IP phone.
Note:
"Goodbye Key Cancels Incoming Call" is enabled by default.
- Click on Basic Settings->Preferences->General.
Preferences
| General | |
| Park Call: | |
| Pick Up Parked Call: | |
| Display DTMF Digits | Enabled |
| Play Call Waiting Tone | Enabled |
| Stuttered Dial Tone | Enabled |
| XML Beep Support | Enabled |
| Status Scroll Delay (seconds) | 5 |
| Switch UI Focus To Ringing Line | Enabled |
| Call Hold Reminder During Active Calls | Enabled |
| Call Hold Reminder | Enabled |
| Call Waiting Tone Period | 0 |
| Preferred line | 1 |
| Preferred line Timeout (seconds) | 0 |
| Goodbye Key Cancels Incoming Call | Enabled |
| Message Waiting Indicator Line | All |
| DND Key Mode | Phone |
| Call Forward Key Mode | Account |
- The "Goodbye Key Cancels Incoming Call" field is enabled by default. To disable this field, uncheck the box.
- Click Save Settings to save your settings.
Using the Goodbye Key to Cancel Incoming Calls Feature

IP Phone UI
IF THEN
| "Goodbye Key Cancels Incoming Call" is enabled AND a second call comes in while you are on an active call, | press theGoodbyekey to reject the second incoming call. |
| "Goodbye Key Cancels Incoming Call" isdisabled AND a second call comes in while you are on an active call, | press theGoodbyekey to hang up on the active call so you can answer the second incoming call. |
| "Goodbye Key Cancels Incoming Call" isdisabled AND a second call comes in while you are on an active call, | press the "Ignore" softkey to ignore the second incoming call and remain on the active callORpress the "Answer" softkey to answer the second incoming call. |
Message Waiting Indicator Line
You can configure the Message Waiting Indicator (MWI) to illuminate for a specific line or for all lines. For example, if you configure the MWI LED on line 3 only, the LED illuminates if a voice mail is pending on line 3. If you configure the MWI LED for all lines, the LED illuminates if a voice mail is pending on any line on the phone (lines 1 through 9).
You configure the MWI indicator using the Astra Web UI.
Configuring Message Waiting Indicator Line

Aastra Web UI
Use the following procedure to configure the message waiting indicator on a specific line or on all lines on the IP phone.
Note:
"Message Waiting Indicator Line" parameter is set to ALL lines by default.
1. Click on Basic Settings->Preferences->General.

- The "Message Waiting Indicator Line" field is set to ALL lines by default. If required, change the setting to a specific line by selecting a line from the list. Valid values are All and lines 1 through 9.
- Click Save Settings.
Incoming Intercom Call Features
By default, the IP phone allows incoming intercom calls to be automatically answered without having to set up an Icom key on your phone. The phone automatically plays a warning tone when it receives an incoming intercom call. It also mutes the microphone. If the intercom call comes into the phone while an active call is already present, the phone puts the active call on hold and answers the intercom call.
You can change the behavior of how the phone handles incoming intercom calls by enabling/disabling specific parameters using the Astra Web UI.
- Auto Answer
- Microphone Mute
- Play Warning Tone
- Allow Barge In
Auto-Answer/Play Warning Tone
The auto-answer feature on the IP phone allows you to enable or disable automatic answering for an Intercom call. If "Auto-Answer" is enabled, the phone automatically answers an incoming intercom call. If "Play Warning Tone" is also enabled, the phone plays a tone to alert you before answering the intercom call. If "Auto-Answer" is disabled, the phone treats the incoming intercom call as a normal call. "Auto-Answer" and "Play Warning Tone" are enabled by default.
Note:
Your Administrator can set a time period delay before the phone automatically answers. Contact your System Administrator for more information.
Microphone Mute
You can mute or unmute the microphone on the IP phone for intercom calls made by the originating caller. If you want to mute the intercom call, you enable this feature. If you want to unmute (or hear the intercom call), you disable this feature. "Microphone Mute" is enabled by default.
Allow Barge In
You can configure whether or not the IP phone allows an incoming intercom call to interrupt an active call. The "Allow Barge In" parameter controls this feature. When you enable the this parameter, which is the default value, an incoming intercom call takes precedence over any active call, by placing the active call on hold and automatically answering the intercom call. When you disable this parameter, and there is an active call, the phone treats an incoming intercom call like a normal call and plays the call warning tone. "Allow Barge In" is enabled by default.
Configuring Incoming Intercom Settings

Aastra Web UI
Use the following procedure to configure incoming intercom call settings on the IP phone.
1. Click on Basic Settings->Preferences->Incoming Intercom Settings.
| Incoming Intercom Settings | |
| Auto-Answer | Enabled |
| Microphone Mute | Enabled |
| Play Warning Tone | Enabled |
| Allow Barge In | Enabled |
- The "Auto-Answer" field is enabled by default. The automatic answering feature is turned on for the IP phone for answering Intercom calls. To disable this field, uncheck the box.
Note:
If the Auto-Answer field is not checked (disabled), the phone treats the incoming intercom call as a normal call.
- The "Microphone Mute" field is enabled by default. The microphone is muted on the IP phone for Intercom calls made by the originating caller. To disable this field, uncheck the box.
- The "Play Warning Tone" field is enabled by default. If "Auto-Answer" is enabled, the phone plays a warning tone when it receives in incoming intercom call. To disable this field, uncheck the box.
- The "Allow Barge In" field is enabled by default. If "Allow Barge In" is enabled, the phone puts an active call on hold and answers the incoming Intercom call. To disable this field, uncheck the box.
- Click Save Settings.
Group RTP Paging (receives RTP streams)
You can configure the phone to allow it to receive a Real Time Transport Protocol (RTP) stream from pre-configured multicast address(es) without involving SIP signaling. This is called Group Paging on the IP phones. You can specify up to 5 multicast addresses that the phone listens for on the network. This feature is configurable using the Astra Web UI only.
The 6737i in the local network listens for RTP on the preconfigured multicast address. The Phone displays the "Paging" message to the phone's LCD. It uses the G711 uLaw CODEC for multicast RTP.
The recipient can drop the incoming page if required. The recipient can also set Do Not Disturb (DND) to ignore any incoming pages.
For incoming RTP multicasts, the ringing display is dependant on the setting for the "Allow Barge-In" parameter. (See "Allow Barge In" on page 168.) If this parameter is disabled, and there is no other call on the phone, then the paging is automatically played via the default audio device.
If there is an existing call on the phone, the call initially displays in the ringing state. The user has the option to accept/ignore the call. If the "Allow Barge-In" parameter is enabled, the RTP multicast call barges in, and any existing calls are put on hold.
If an RTP multicast session already exists on the phone, and the phone receives another incoming RTP multicast session, the priority is given to the first multicast session and the second multicast session is ignored. The behavior for the incoming calls in this case is also based on the setting for the "Allow Barge-in" parameter. The incoming call is handled as if there were an existing call already on the phone.
Configuring Group RTP Paging

Aastra Web UI
Use the following procedure to configure RTP streaming on the receiving end for Paging applications using the Aastra Web UI.
- Click on Basic Settings->Preferences->Group Paging RTP Settings.
Group Paging RTP Settings
Paging Listen Addresses
- In the "Paging Listen Addresses" text box, enter the multicast IP address(es) and port number on which the phone listens for incoming multicast RTP packets.
Enter the IP address in dotted decimal format (for example, 239.0.1.15:10000,239.0.1.20:15000). You can enter up to 5 listening multicast addresses (The valid port range is from 1 to 65535).
If this field is blank, the Paging Listening capability is disabled on the phone.
Notes:
- Recipient of a Paging call can set a global "Do Not Disturb" (DND) to ignore any incoming pages.
-
For incoming Paging, the phone uses the Intercom configuration settings. The incoming Page is dependant on the "Allow Barge-In" parameter setting and the "Idling/On Call" state.
-
Click Save Settings.
Shared Call Appearance (SCA) Call Bridging
Shared Call Appearance (SCA) is when incoming calls are presented to multiple phones simultaneously. For example, it is the ability to assign the boss' extension to a key on the secretary's phone. Calls can be transferred between two phones with the same extension key by simply putting the call on hold at one phone and picking it up on the other. Status LEDs light and flash in unison, allowing all people sharing the extension to see the status at a glance.
The phones include an enhanced SCA for the servers that support call bridging and allows two or more SCA users to be connected in a call with a third party.
Refer to the following example.
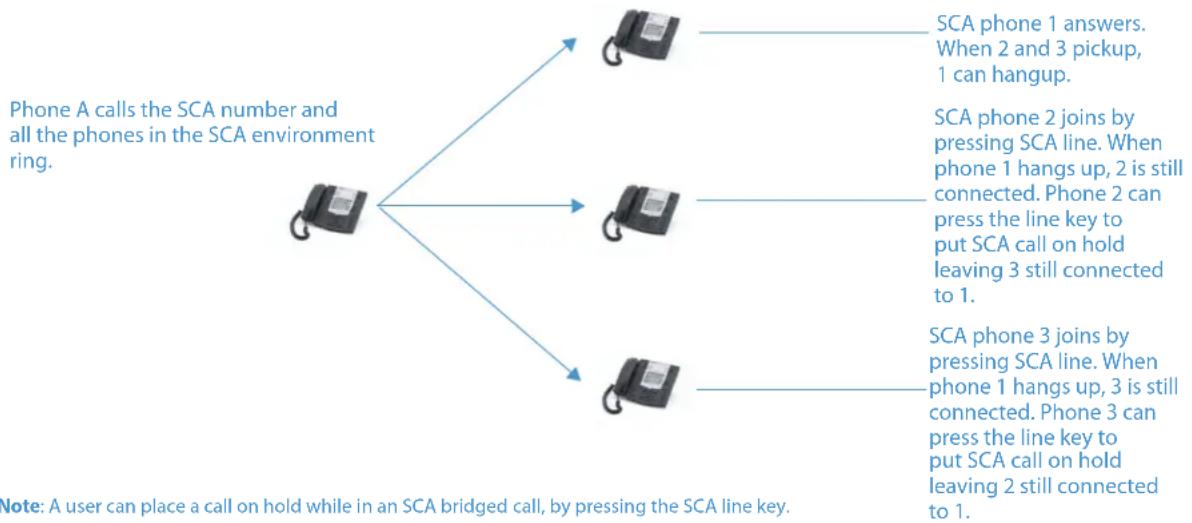
flowchart
graph TD
    A["Phone A calls the SCA number and all the phones in the SCA environment ring."] --> B["Phone 1: SCA phone 1 answers. When 2 and 3 pickup, 1 can hangup."]
    A --> C["Phone 2: SCA phone 2 joins by pressing SCA line. When phone 1 hangs up, 2 is still connected. Phone 2 can press the line key to put SCA call on hold leaving 3 still connected to 1."]
    A --> D["Phone 3: SCA phone 3 joins by pressing SCA line. When phone 1 hangs up, 3 is still connected. Phone 3 can press the line key to put SCA call on hold leaving 2 still connected to 1."]
Using the example above, when a call comes into Phone 1, Phone 2 and Phone 3 can pickup the same call by pressing the SCA line key. Phone 2 and 3 display the call they are bridging into on the LCD of the phones. Existing SCA parties in a bridge or one-to-one call hear an audible beep when another party has joined the call.
Note:
Your Administrator must enable/disable the beep on the server-side.
If a phone is configured for SCA bridging and it attempts to join a call, but the account on the server does not have this functionality enabled, an error message displays to the LCD on the phone.
The SCA call bridging feature is disabled by default on all phones. Your Administrator can enable/disable this feature if required. Contact your System Administrator for more information.
Keys States and LED Behavior
There are two call states on the phones that support SCA bridging:
- Bridge-active - A bridged call is in progress
- Bridge-held - The 3rd-party (i.e., non-SCA party) in the bridge is on hold.
The following tables provide the key states and LED behavior in an SCA bridge call for users involved in an SCA call and users not involved in the SCA call.
Line Keys and Idle Screens
| State | Call LED | Call Caller ID | Non-Call LED | Non-Call Caller ID |
| Idle N/A N/A Off N/A | ||||
| Seized | Solid Green | None | Solid Red | None |
| Progressing (outgoing call) | Green | Called Party | Solid Red | None |
| Alerting (incoming call) | Blinking Unselected Red | N/A | ||
| Active | Solid Green | Far-end | Solid Red | Far-end |
| Held | Slow Flashing Green | Far-end | Slow Flashing Red | Far-end |
| Hold private | Slow Flashing Green | Far-end | Solid Red | Far-end |
| Bridge-active | Solid Green | Far-end | Solid Red | Far-end |
| Bridge-held | Slow Flashing Green | Far-end | Solid Red | Far-end |
Softkey Line Keys
| State | Call Icon | Call LED | Non-Call Icon | Non-Call LED |
| Idle | Small circle | None | Small Circle | None |
| Seized | N/A | N/A | Solid Circle | Solid Red |
| Progressing (outgoing call) | Empty circle | Solid Red | Solid Circle | Solid Red |
| Alerting (incoming call) | Empty blinking circle | Flashing Red | N/A | N/A |
| Active | Empty circle | Solid Red | Solid Circle | Solid Red |
| Held | Reverse empty blinking circle | Slow Flashing Red | Solid Reverse Circle | Slow Flashing Red |
| Hold private | Reverse empty blinking circle | Slow Flashing Red | Solid Circle | Solid Red |
| Bridge-active | Empty circle | Solid Red | Solid Circle | Solid Red |
| Bridge-held | Reverse empty blinking circle | Slow Flashing Red | Solid Circle | Solid Red |
Line key Phone Behavior
| State | Call Line Key Pressed | Non-Call Line Key Pressed |
| Idle | N/A | Attempt to seize the line |
| Seized | Hang up | Ignore |
| Progressing | Hang up | Ignore |
| Alerting | Answer | N/A |
| Active | Hold | Bridge |
| Held | Retrieve | Bridge |
| Hold private | Retrieve | Ignore |
| Bridge-active | Hold | Bridge |
| Bridge-held | Retrieve | Bridge |
SCA Voicemail Indicators
Visual indicators for voicemail messages on SCA lines can be enabled by your System Administrator. When an SCA-configured line has a pending voicemail message, your Administrator has the option of configuring the phone to display an envelope icon ☑ and the number of pending messages beside the softkey's label corresponding to the line. Additionally, the softkey's LED will be illuminated.
Alternatively, the display can be configured to only show the envelope icon beside the softkey's label (i.e. no indication of the number of pending messages). Contact your System Administrator for more information.
Star Codes
All of the main call handling and extension management features using star codes can be set on your phone by your Administrator. Contact your System Administrator for more information.
If these have not been set up, you can dial any star code commands on the 6737i phone the same way you would on a regular telephone.
Other Features
A multitude of other features are available depending on whether or not your System Administrator has configured them for use. Contact your System Administrator for feature availability and usage information.
Model M670i and M675i Expansion Modules
The 6737i IP Phone offers optional M670i and M675i Expansion Modules that attach to the right side of the phone to provide additional softkeys.
The 6737i phone supports up to 3 expansion modules (either M675i or M670i) when powered via an optional power adapter. When using a PoE power source, 1 expansion module is supported.
Model M670i

The M670i provides 18 softkeys in each column (totalling 36 keys) on the keypad. Each key provides an LED for indicating call status. The M670i provides a paper label for convenient key labelling.
Model M675i
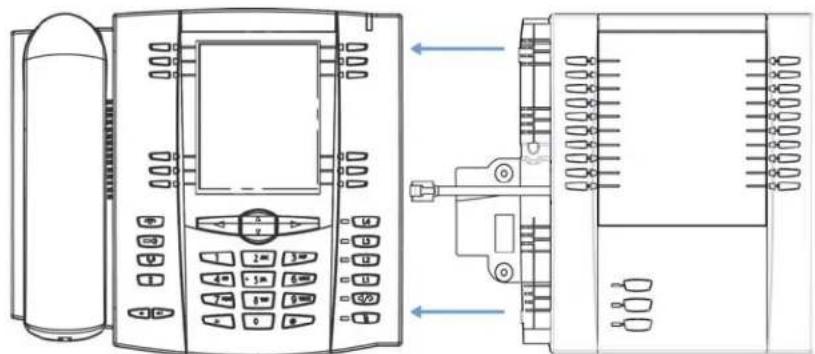
natural_image
Technical line drawing of a telephone receiver with control panel and keypad (no text or symbols)The M675i provides 10 softkeys in each column (totalling 20 keys) on the keypad. The M675i also provides 3 keys at the bottom left of the unit. These keys represent "Page 1", "Page 2", and "Page 3" of the LCD display. The M675i has 20 keys available on each page (totalling 60 softkeys). Each key provides an LED for indicating call status. The M675i provides an LCD for displaying key labels.
Reference
For more information about using the M675i with your phone, see "Using the Expansion Modules" on page 176.
The Expansion Module keys support the following functions:
- None • BLF/Xfer
• Line • Speeddial/Xfer
- Speeddial • Speeddial/Conf
- Do Not Disturb (DND) - Directory
- BLF (Busy Lamp Field) • Callers List
- BLF/List - Redial
• Auto Call Distribution (ACD) • Conference
- XML (Extensible Markup Language) • Transfer
- Flash • Icom (Intercom)
- Sprecode • Services
- Park • Phone Lock
- Pickup • Paging
- Last Call Return (LCR)
- Empty
- Call Forward
You can configure the keys using the Aastra Web UI at the path, Operation->Expansion Module
Reference
For more information about configuring the expansion module keys with these functions, see the "Softkeys" on page 44.
Using the Expansion Modules
M670i Expansion Module
After configuring the softkeys on the M670i Expansion Module, you can record the name of the softkey on the paper labels provided with the Expansion Module. Press the softkey you want to use when applicable.
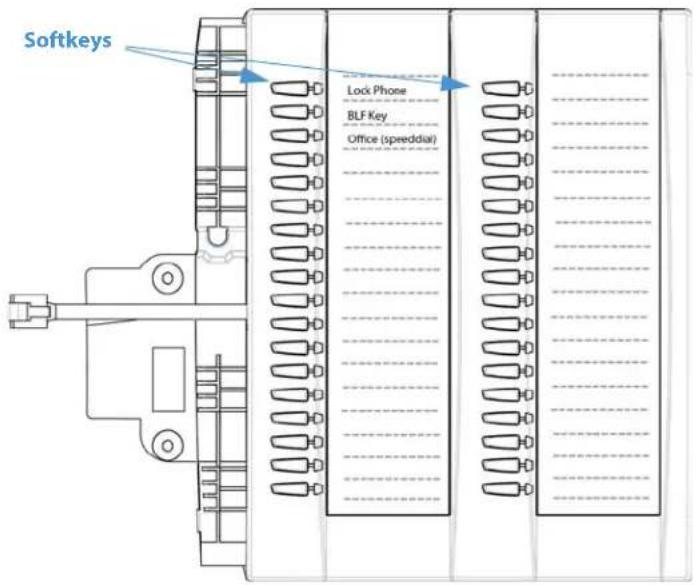
M675i Expansion Module
The M675i Expansion Module screen displays softkeys in column format. The function keys on the bottom left of the Module allow you to display 3 full screens of softkeys. Each screen consists of 2 columns with the following default headings on each page:
Page 1 "List 1" and "List 2"
Page 2 "List 3" and "List 4"
Page 3 "List 5" and "List 6".
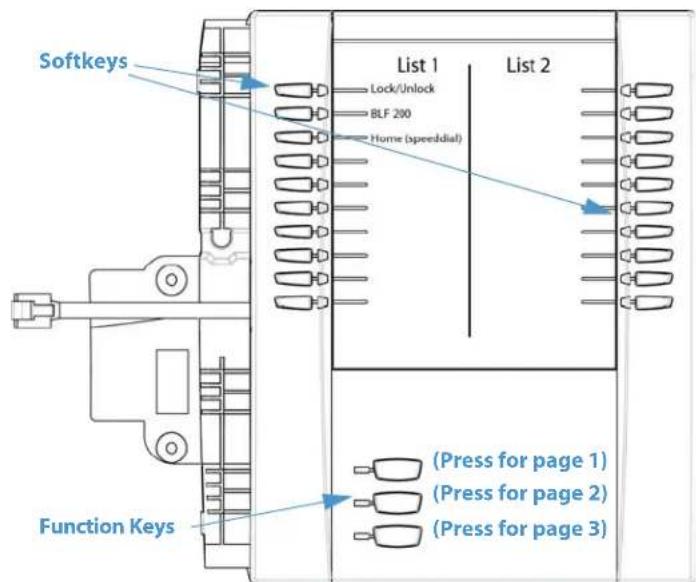
Page 1 Screen
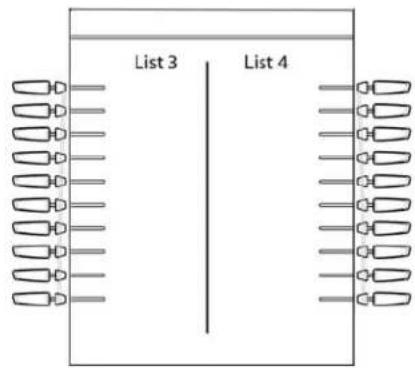
Page 2 Screen
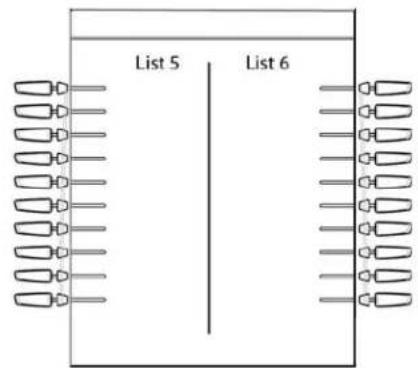
Page 3 Screen
To use the M675i, press the function key for the page you want to display to the LCD (page 1, page2, or page 3), and press the applicable softkey.
Note:
Your System Administrator can customize the headings on each M675i Expansion Module screen. Contact your System Administrator for more information.
References
For more information about configuring softkeys, see Softkeys on page 44.
For more information about installing M670i and M675i modules on your phone, see the
Aastra 6737i SIP IP Phone Installation Guide.
Press-and-Hold to Create a Speed Dial Key
You can press and hold an expansion module key to create a speed dial key and configure it the same way you configure a speed dial key on the phone.
For a procedure on creating a speed dial key, see "Press-and-Hold to Create a Speed Dial (applicable to softkeys, keypad keys, expansion module keys)" on page 52.
Troubleshooting Solutions
Why is my display blank?
Ensure that power is being provided to your phone. If your network does not provide inline power over Ethernet, you can obtain an additional accessory, the Aastra PoE (Power over Ethernet) inline power supply, to provide power over Ethernet locally to your phone. See the section "Connecting to the Network and to Power" in the Aastra 6737i Installation Guide for details.
Why is my speakerphone not working?
If you press the 📋 key and the speaker light flashes and you do not hear dial tone through the speaker phone, the Set Audio option in the phone's Options list has been set up for headset use. Press 📋 a second time and if the light goes out, the phone has been set up to be used only with a headset or handset. If the light stays on steady and you hear dial tone, the phone has been set up so that you can alternate between the speakerphone and the headset by pressing 📋. See the section "Set Audio" on page 26 for instructions on how to change the Set Audio option.
Why can't I get a dial tone?
Check for any loose connections and that the phone has been installed properly. For installation instructions, please refer to the "Installation and Setup" section in the Aastra 6737i Installation Guide provided with your phone.
Why doesn't my phone ring?
Check the ring volume on your phone. It may be turned down or turned off. To adjust the ringer volume setting, press the volume key when the phone is on-hook and idle. For more information, refer to the "Adjusting Volume section" in the Aastra 6737i Installation Guide provided with your phone.
Why is the light not coming on with a new Voice Mail Message?
Your phone system or service provider must provide "Visual" Message Waiting service for this function to work. Check with your System Administrator for more information.
Why is my handset not working?
Check to ensure that the handset cord is fully connected to both the phone and handset. See the section "Connecting a Handset or Headset" in the Aastra 6737i Installation Guide for information.
What are services, and how do I use them?
Services on the IP phone include:
- XML Applications
- Callers List
- Directory List
• Voicemail
See the section, "Services Key" on page 96 more information about the options available under "Services".
How do I find the IP address of my phone?
Instructions on where to find the IP address of your phone can be found in this guide in the section, "Finding Your Phone's IP Address" on page 19.
Why does my phone display the "No Service" message?
The phone displays the "No Service" message if the SIP settings have not been set up correctly.
Contact your System Administrator for more information.
How do I change my user password?
You can change the user password from the IP phone UI or the Aastra Web UI. See "User Password" on page 38 for more information.
Why does my phone display "Bad Encrypted Config"?
The IP phone displays "Bad Encrypted Config" because encrypted configuration files are enabled but the decryption process has failed. Report this error to your System Administrator.
How do I restart the IP phone?
You can restart the phone from the IP phone UI or through the Astra Web UI. See "Restarting Your Phone" on page 40 for more information.
How do I lock my phone?
You can lock your phone to prevent the phone from being used or configured. You can lock the phone using any of the following:
- At the path Options->Phone Lock on the IP Phone UI. See "Phone Lock" on page 40 for more information.
- At the path Operations->Phone Lock on the Aastra Web UI. See "Phone Lock" on page 40 for more information.
- At a configured key on the phone. For more information about configuring a Lock/Unlock key on your phone, see "Phone Lock Key" on page 98.
Limited Warranty
(Not applicable in Australia – see below for Limited Warranty in Australia)
Aastra warrants this product against defects and malfunctions in accordance with Aastra's authorized, written functional specification relating to such products during a one (1) year period from the date of original purchase ("Warranty Period"). If there is a defect or malfunction, Aastra shall, at its option, and as the exclusive remedy, either repair or replace the product at no charge, if returned within the Warranty Period. If replacement parts are used in making repairs, these parts may be refurbished, or may contain refurbished materials. If it is necessary to replace the product, it may be replaced with a refurbished product of the same design and color. If it should become necessary to repair or replace a defective or malfunctioning product under this warranty, the provisions of this warranty shall apply to the repaired or replaced product until the expiration of ninety (90) days from the date of pick up, or the date of shipment to you, of the repaired or replacement product, or until the end of the original Warranty Period, whichever is later. Proof of the original purchase date is to be provided with all products returned for warranty repairs.
Exclusions
Aastra does not warrant its products to be compatible with the equipment of any particular telephone company. This warranty does not extend to damage to products resulting from improper installation or operation, alteration, accident, neglect, abuse, misuse, fire or natural causes such as storms or floods, after the product is in your possession. Aastra will not accept liability for any damages and/or long distance charges, which result from unauthorized and/or unlawful use.
Aastra shall not be liable for any incidental or consequential damages, including, but not limited to, loss, damage or expense directly or indirectly arising from the customer's use of or inability to use this product, either separately or in combination with other equipment. This paragraph, however, shall not apply to consequential damages for injury to the person in the case of products used or bought for use primarily for personal, family or household purposes.
This warranty sets forth the entire liability and obligations of Aastra with respect to breach of warranty, and the warranties set forth or limited herein are the sole warranties and are in lieu of all other warranties, expressed or implied, including warranties or fitness for particular purpose and merchantability.
Warranty Repair Services
Should the product fail during the Warranty Period;
• In North America, please call 1-800-574-1611 for further information.
- Outside North America, contact your sales representative for return instructions.
You will be responsible for shipping charges, if any. When you return this product for warranty service, you must present proof of purchase.
After Warranty Service
Aastra offers ongoing repair and support for this product. This service provides repair or replacement of your Aastra product, at Aastra's option, for a fixed charge. You are responsible for all shipping charges. For further information and shipping instructions:
• In North America, contact our service information number: 1-800-574-1611.
• Outside North America, contact your sales representative.
Note:
Repairs to this product may be made only by the manufacturer and its authorized agents, or by others who are legally authorized. This restriction applies during and after the Warranty Period. Unauthorized repair will void the warranty.
Limited Warranty (Australia Only)
The benefits under the Aastra Limited Warranty below are in addition to other rights and remedies to which you may be entitled under a law in relation to the products.
In addition to all rights and remedies to which you may be entitled under the Competition and Consumer Act 2010 (Commonwealth) and any other relevant legislation, Aastra warrants this product against defects and malfunctions in accordance with Aastra's authorized, written functional specification relating to such products during a one (1) year period from the date of original purchase ("Warranty Period"). If there is a defect or malfunction, Aastra shall, at its option, and as the exclusive remedy under this limited warranty, either repair or replace the product at no charge, if returned within the Warranty Period.
Repair Notice
To the extent that the product contains user-generated data, you should be aware that repair of the goods may result in loss of the data. Goods presented for repair may be replaced by refurbished goods of the same type rather than being repaired. Refurbished parts may be used to repair the goods. If it is necessary to replace the product under this limited warranty, it may be replaced with a refurbished product of the same design and color.
If it should become necessary to repair or replace a defective or malfunctioning product under this warranty, the provisions of this warranty shall apply to the repaired or replaced product until the expiration of ninety (90) days from the date of pick up, or the date of shipment to you, of the repaired or replacement product, or until the end of the original Warranty Period, whichever is later. Proof of the original purchase date is to be provided with all products returned for warranty repairs.
Exclusions
Aastra does not warrant its products to be compatible with the equipment of any particular telephone company. This warranty does not extend to damage to products resulting from improper installation or operation, alteration, accident, neglect, abuse, misuse, fire or natural causes such as storms or floods, after the product is in your possession. Aastra will not accept liability for any damages and/or long distance charges, which result from unauthorized and/or unlawful use.
To the extent permitted by law, Astra shall not be liable for any incidental damages, including, but not limited to, loss, damage or expense directly or indirectly arising from your use of or inability to use this product, either separately or in combination with other equipment. This paragraph, however, is not intended to have the effect of excluding, restricting or modifying the application of all or any of the provisions of Part 5-4 of Schedule 2 to the Competition and Consumer Act 2010 (the ACL), the exercise of a right conferred by such a provision or any liability of Astra in relation to a failure to comply with a guarantee that applies under Division 1 of Part 3-2 of the ACL to a supply of goods or services.
This express warranty sets forth the entire liability and obligations of Aastra with respect to breach of this express warranty and is in lieu of all other express or implied warranties other than those conferred by a law whose application cannot be excluded, restricted or modified. Our goods come with guarantees that cannot be excluded under the Australian Consumer Law. You are entitled to a replacement or refund for a major failure and for compensation for any other reasonably foreseeable loss or damage. You are also entitled to have the goods repaired or replaced if the goods fail to be of acceptable quality and the failure does not amount to a major failure.
Warranty Repair Services
Procedure: Should the product fail during the Warranty Period and you wish to make a claim under this express warranty, please contact the Astra authorized reseller who sold you this product (details as per the invoice) and present proof of purchase. You will be responsible for shipping charges, if any.
Manufacturer: Astra Telecom Australia Pty Ltd
745 Springvale Road
Mulgrave VIC 3170
ABN 16 140 787 195
Phone: +61 3 8562 2700
Limitation of Liability for Products not of a kind ordinarily acquired for personal, domestic or household use or consumption (e.g. goods/services ordinarily supplied for business-use)
1.1 To the extent permitted by law and subject to clause 1.2 below, the liability of Aastra to you for any non-compliance with a statutory guarantee or loss or damage arising out of or in connection with the supply of goods or services (whether for tort (including negligence), statute, custom, law or on any other basis) is limited to:
a) in the case of services:
i) the resupply of the services; or
ii) the payment of the cost of resupply; and
b) in the case of goods:
i) the replacement of the goods or the supply of equivalent goods; or
ii) the repair of the goods; or
iii) the payment of the cost of replacing the goods or of acquiring equivalent goods; or
iv) the payment of the cost of having the goods repaired.
1.2 Clause 1.1 is not intended to have the effect of excluding, restricting or modifying:
a) the application of all or any of the provisions of Part 5-4 of Schedule 2 to the Competition and Consumer Act 2010 (the ACL); or
b) the exercise of a right conferred by such a provision; or
c) any liability of Aastra in relation to a failure to comply with a guarantee that applies under Division 1 of Part 3-2 of the ACL to a supply of goods or services.
After Warranty Service
Aastra offers ongoing repair and support for this product. If you are not otherwise entitled to a remedy for a failure to comply with a guarantee that cannot be excluded under the Australian Consumer Law, this service provides repair or replacement of your Aastra product, at Aastra's option, for a fixed charge. You are responsible for all shipping charges. For further information and shipping instructions contact:
Aastra Telecom Australia Pty Ltd
745 Springvale Road
Mulgrave VIC 3170
ABN 16 140 787 195
Phone: +61 3 8562 2700
Note:
Repairs to this product may be made only by the manufacturer and its authorized agents, or by others who are legally authorized. Unauthorized repair will void this express warranty.
Appendix A - Time Zone Codes
The following table identifies the time zone name and time zone code to use on the IP phone.
Time Zone Name/Time Zone Code Table
| Time Zone Name Time Zone Code | |
| AD-Andorra | CET |
| AE-Dubai | GST |
| AG-Antigua | AST |
| Al-Anguilla | AST |
| AL-Tirane | CET |
| AN-Curacao | AST |
| AR-Buenos Aires | ART |
| AS-Pago Pago | BST |
| AT-Vienna | CET |
| AU-Lord Howe | LHS |
| AU-Tasmania | EST |
| AU-Melbourne | EST |
| AU-Sydney | EST |
| AU-Broken Hill | CST |
| AU-Brisbane | EST |
| AU-Lindeman | EST |
| AU-Adelaide | CST |
| AU-Darwin | CST |
| AU-Perth | WST |
| AW-Aruba | AST |
| AZ-Baku | AZT |
| BA-Sarajevo | EET |
| BB-Barbados | AST |
| BE-Brussels | CET |
| BG-Sofia | EET |
| BM-Bermuda | AST |
| BO-La Paz | BOT |
| BR-Noronha | FNT |
| BR-Belem | BRT |
| BR-Fortaleza | BRT |
| BR-Recife | BRT |
| BR-Araguaina | BRS |
| BR-Maceio | BRT |
| BR-Sao Paulo | BRS |
| BR-Cuiaba | AMS |
| BR-Porto Velho | AMT |
| BR-Boa Vista | AMT |
| BR-Manaus | AMT |
| BR-Eirunepe | ACT |
| BR-Rio Branco | ACT |
| BS-Nassau | EST |
| BY-Minsk | EET |
| BZ-Belize | CST |
| CA-Newfoundland | NST |
| CA-Atlantic | AST |
| CA-Eastern | EST |
| CA-Saskatchewan | EST |
| CA-Central | CST |
| CA-Mountain | MST |
| CA-Pacific | PST |
| CA-Yukon | PST |
| CH-Zurich | CET |
| CK-Rarotonga | CKS |
| CL-Santiago | CLS |
| CL-Easter | EAS |
| CN-Beijing | CST |
| CO-Bogota | COS |
| CR-Costa Rica | CST |
| CU-Havana | CST |
| CY-Nicosia | EES |
| CZ-Prague | CET |
| DE-Berlin | CET |
| DK-Copenhagen | CET |
| DM-Dominica | AST |
| DO-Santo Domingo | AST |
| EE-Tallinn | EET |
| ES-Madrid | CET |
| ES-Canary | WET |
| FI-Helsinki | EET |
| FJ-Fiji | NZT |
| FK-Stanley | FKS |
| FO-Faeroe | WET |
| FR-Paris | CET |
| GB-London | GMT |
| GB-Belfast | GMT |
| GD-Grenada | AST |
| GE-Tbilisi | GET |
| GF-Cayenne | GFT |
| GI-Gibraltar | CET |
| GP-Guadeloupe | AST |
| GR-Athens | EET |
| GS-South Georgia | GST |
| GT-Guatemala | CST |
| GU-Guam | CST |
| GY-Guyana | GYT |
| HK-Hong Kong | HKS |
| HN-Tegucigalpa | CST |
| HR-Zagreb | CET |
| HT-Port-au-Prince | EST |
| HU-Budapest | CET |
| IE-Dublin | GMT |
| IS-Reykjavik | GMT |
| IT-Rome | CET |
| JM-Jamaica | EST |
| JP-Tokyo | JST |
KY-Cayman EST
Time Zone Name Time Zone Code
| LC-St Lucia | AST |
| LI-Vaduz | CET |
| LT-Vinius | EET |
| LU-Luxembourg | CET |
| LV-Riga | EET |
| MC-Monaco | CET |
| MD-Chisinau | EET |
| MK-Skopje | CET |
| MQ-Martinique | AST |
| MS-Montserrat | AST |
| MT-Malta | CET |
| MU-Mauritius | MUT |
| MX-Mexico City | CST |
| MX-Cancun | CST |
| MX-Merida | CST |
| MX-Monterrey | CST |
| MX-Mazatlan | MST |
| MX-Chihuahua | MST |
| MX-Hermosillo | MST |
| MX-Tijuana | PST |
| NI-Managua | CST |
| NL-Amsterdam | CET |
| NO-Oslo | CET |
| NR-Nauru | NRT |
| NU-Niue | NUT |
| NZ-Auckland | NZS |
| NZ-Chatham | CHA |
| OM-Muscat GST | |
| PA-Panama | EST |
| PE-Lima | PES |
| PL-Warsaw | CET |
| PR-Puerto Rico | AST |
| PT-Lisbon | WET |
| PT-Madeira | WET |
| PT-Azores | AZO |
| PY-Asuncion | PYS |
| RO-Bucharest | EET |
| RU-Kaliningrad | EET |
| RU-Moscow | MSK |
| RU-Samara | SAM |
| RU-Yekaterinburg | YEK |
| RU-Omsk | OMS |
| RU-Novosibirsk | NOV |
| RU-Krasnoyarsk | KRA |
| RU-Irkutsk | IRK |
| RU-Yakutsk | YAK |
| RU-Vladivostok | VLA |
| RU-Sakhalin | SAK |
| RU-Magadan | MAG |
| RU-Kamchatka | PET |
| RU-Anadyr | ANA |
| SE-Stockholm | CET |
| SG-Singapore | SGT |
| SI-Ljubljana | CET |
| SK-Bratislava | CET |
| SM-San Marino | CET |
| SR-Paramaribo | SRT |
| SV-El Salvador | CST |
| Time Zone Name Time Zone Code | |
| TR-Istanbul | EET |
| TT-Port of Spain | AST |
| TW-Taipei | CST |
| UA-Kiev | EET |
| US-Eastern | EST |
| US-Central | CST |
| US-Mountain | MST |
| US-Pacific | PST |
| US-Alaska | AKS |
| US-Aleutian | HAS |
| US-Hawaii | HST |
| UY-Montevideo | UYS |
| VA-Vatican | CET |
| YU-Belgrade | CET |
Index
Numerics
6737i
additional features of 155
features of 1
keys and key descriptions 9
line settings 43
making calls 105
requirements of 2
A
Aastra Web UI
Operation parameters 16
phone status 16
about this guide ....1
ACD key 64
allow barge-in, for intercom ....168
answering incoming calls....110
auto-answer, for intercom 168
B
backlight, setting 25
bad encrypted config 179
BLF key 61
BLF List key 62
BLF List, setting softkey for 63
BLF, setting softkey for 61
BLF/Xfer 80
BLF/Xfer key 80
BLF/Xfer, softkeys for 81, 83
C
Call Forward key 79
call forwarding, softkeys for 79
call hold reminder 162
call hold reminder during active calls....161
call waiting tone 156
call waiting tone period 163
callers list 132
deleting entries in 135
downloading to phone 131, 137
editing 133
using 133
using on phone 133
Callers List key 88
callers list, softkey for 89
calls receiving ....110
calls, ending 121
calls, transferring 112
conferencing ending 121
local 116
pre-dial and live dial mode 116
transfer remaining parties 121
conferencing calls 116
contrast level, setting 25
D
dditional 155
deleting a key 104
dial plan, emergency 42
dial tones, stuttered 157
dialing pre-dialling a number ....105
dialing a number 105
dialpad, live 26
Directory key 86
directory key 91, 92, 93
directory key, softkey for 87
directory list 122
adding and editing entries 124
arranging entries 127
deleting numbers and labels for an entry 128
downloading to PC 130
limitations for 124
scrolling multiple screens 126
sorting 123
DND key 59
DND, enabling/disabling 138, 142
do not disturb, setting softkey for 60
documentation ....1
DTMF digits, displaying 155
E
emergency dial plan, defining 42
Empty key 103
empty key, softkey for 103
expansion module, 675i ....174
expansion module, M670i and M675i 174
F
Flash key 73
G
getting started 3
Goodbye key cancels incoming call 165
configuring 166
using....166
group RTP paging 170
H
handling calls 111
headset mic 106
headset mode 26
headset, using 106
headset/speaker mode 26
held calls, retrieving 112
hold, automatic 112
I
idle screen 6
Indication of transferred calls 115
Installation 10
installation and setup, 9122i 2
intercom calls
incoming call features 168
Intercom key 94
Intercom key, softkey for 95
Intercom, using 108
Introduction ....1
IP address, finding 19, 20, 178
K
Key Description 10
Keypad Keys 12
keys
ACD key 64
BLF key 61
BLF List key 62
BLF/Xfer key 80
Call Forward key 79
Callers List key 88
deleting 104
Directory key 86, 90, 92, 93
DND key 59
Empty key 103
Flash key 73
Intercom key 94
Last Call Return (lcr) 78
Paging key 100
Park and Pickup keys 75
Phone Lock key 98
Services key 96
Speeddial/Conf key 84
Speeddial/Xfer key 82
Sprecode key 74
XML key 68
L
language
latin 2 character set ....37
overview 31
specifying on IP phone 31
last call return, softkeys for 78
LCR key 78
line, setting a softkey for 49
lock/unlock the phone 40,179
M
M670i 174
M675i 174
making calls 105
managing calls 122
message waiting indicator, configuring 167
microphone mute, for intercom 168
microphone volume, headset 26
missed calls indicator
accessing and clearing 136
overview 135
multiple line call appearances ....43
N
network disconnected ....5
no service 179
0
on-hold calls 111
Optional Accessories 10
options
setting via the phone UI 13
setting via the Web UI 15
P
Paging key 100
paging, softkeys for 100
Park key 75
park/pickup
using on the IP phone 77
password, resetting user's 39
phone lock 40
Phone Lock key 98
plugging in the phone ....3
preferred line 164
preferred line timeout 164
R
redial 109
restarting the phone 40
ring tone sets 23
ring tones 22
RTP paging, group 170
S
Services key 96
softkeys 44
as line/call appearances ....49
as speeddials 51
speaker mode 26
speaker/headset mode 26
Speeddial
creating using function keys 55
creating using Keypad Speeddial 56
creating using Speed Dial Edit 53
editing 58
speeddial
creating from Keypad Speeddial in Web UI 56
prefix for 51
Speeddial key
press-and-hold 52
speeddial keys, editing 57
Speeddial/Conf, softkeys for 85
speeddial/Xfer 82
Speeddial/Xfer key 82
Sprecode key 74
sprecode, setting key for 74
star codes 173
starting up the phone 3
status scroll delay 159
switch UI focus to ringing line 160
T
time and date 27
time and date format 28
transferr calls
indication of 115
transferring calls
blind 112
consultative 112
pre-dial and live dial mode 112
troubleshooting solutions ....178
changing user password 179
display blank 178
finding IP address 178
handset not working 178
locking/unlocking phone 179
no dial tone 178
no ring 178
no speakerphone 178
phone displays "Bad Encrypted Config" 179
phone displays "No Service" 179
restarting the phone 179
using services 178
VM message light not working 178
U
user password 38
using your phone 43
V
voicemail 110,154
W
warning tone, for Intercom 168
warranty exclusions 1
Web UI, using 15
X
XML application title 68
XML application URI 68
XML beep support 158
XML key 68
XML services accessing 72
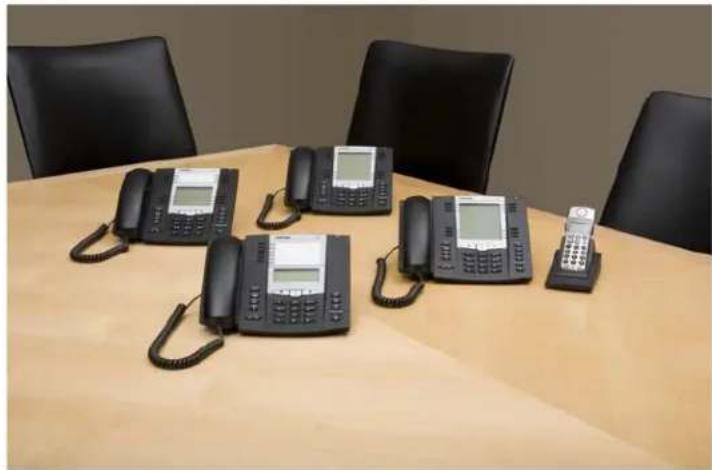
natural_image
Five office telephones arranged on a wooden table with black chairs in the background (no visible text or labels)Disclaimer
Aastra will not accept liability for any damages and/or long distance charges, which result from unauthorized and/or unlawful use. While every effort has been made to ensure accuracy, Aastra will not be liable for technical or editorial errors or omissions contained within this documentation. The information contained in this documentation is subject to change without notice.
Copyright © 2014 Mitel Networks Corporation, www.aastra.com.


- User Guide
- Software License Agreement
- Content
- Software License Agreement....ii
- Welcome....1
- Getting Started....3
- IP Phone Keys....9
- Methods for Customizing Your Phone 13
- Phone Status....18
- Customizing Your Phone 22
- Line Keys and Softkeys 43
- Making Calls 105
- Receiving Calls....110
- Handling Calls 111
- Managing Calls 122
- Additional Features 155
- Welcome
- About this Guide
- Documentation
- Phone Features
- Requirements
- Installation and Setup
- Getting Started
- Plugging in and Starting the Phone
- Note:
- Important!
- Network Connected/Network Disconnected
- Idle Screen
- Reference
- Idle Screen With Softkeys Configured
- Idle Screen with Voicemail Messages
- Screen Display After Picking Up the Handset
- IP Phone Keys
- Key Panel
- Key Descriptions
- Text Keys Symbol Keys Key Description\*
- Keypad Keys
- Methods for Customizing Your Phone
- Phone Options via the IP Phone UI
- Simplified Options Menu
- Using the IP Phone UI
- IP Phone UI
- References
- Phone Options via the Astra Web UI
- Using the Aastra Web UI
- Aastra Web UI
- Phone Status
- Phone Status via IP Phone UI
- Finding Your Phone's IP Address
- Phone Status via the Astra Web UI
- SIP Status
- Status Condition Description
- Example:
- Line SIP Account Status Used?
- where
- Customizing Your Phone
- Ring Tones and Tone Sets
- Ring Tones
- Ring Tone Sets
- Configuring Ring Tones and Tone Sets
- Global configuration only
- For global configuration:
- For per-line configuration:
- Contrast Level
- Setting Contrast Level
- Backlight
- Setting the Backlight
- Live Dialpad\*
- Enabling/Disabling Live Dialpad
- Set Audio
- Audio Mode
- Headset Mic Volume
- DHSG
- Setting Audio Mode, Headset Mic Volume, and DHSG
- Time and Date
- Configuring Time and Date
- Set Time and Time Format
- Set Date and Date Format
- Set Time Zone
- Daylight Savings Time
- Set Time Servers
- Language
- Specifying the Language to Use
- Select Language.
- Select Screen Language.
- To change the language setting, use the ▲ and ▼ keys to scroll through the languages.
- Press Done to set the language on the phone.
- Click on Basic Settings->Preferences->Language Settings.
- In the "Webpage Language" field, select a language to apply to the Aastra Web UI.
- Click Save Settings. The change is dynamic. The Aastra Web UI displays all screens in the language you selected.
- Language Input
- Keypad Input Alphabet Tables
- Latin 2 Character Set
- User Password
- If you change the password Then you need to
- Setting a User Password
- Notes:
- Reset User Password
- Resetting a User Password
- Reset a User Password
- Click on Operation->Phone Lock.
- Phone Lock
- Click on the "Reset User Password" field, click Reset. The following screen displays.
- Restarting Your Phone
- Locking/Unlocking a Phone
- Lock the Phone
- Unlock the Phone
- Defining an Emergency Dial Plan
- Define an Emergency Dial Plan
- Line Keys and Softkeys
- Multiple Line and Call Appearances
- Softkeys
- State-Based Softkeys
- Key Display Behavior
- Line Key
- Configuring a Line Key
- Expansion Module Keys
- Speeddial Key
- Speed Dial Prefix
- Creating a Speed Dial Using the Speed Dial Edit Option
- Editing Speed Dial Keys
- "Do Not Disturb" (DND) Key
- Configuring a DND Key
- Busy Lamp Field (BLF) Key
- Example
- Configuring a BLF Key
- BLF/List Key
- Configuring a BLF List Key
- Click on Operation->Softkeys and XML.
- Softkeys Configuration
- Bottom Keys
- Top Keys
- Services
- Click Save Settings.
- Automatic Call Distribution (ACD) Key (for Sylantro Servers)
- Configuring an Automatic Call Distribution (ACD) Key
- Using the ACD Key
- XML Key
- Configuring XML Services
- Configuring an XML Key
- Accessing the XML Service
- From the Services Menu
- From an XML Key
- Flash Key
- Configuring a Flash Key
- Sprecode Key
- Configuring a Sprecode Key
- Park/Pickup Keys
- Configuring Park/Pickup Keys
- Using the Park Call/Pickup Parked Call Feature
- Park a Call
- For Asterisk Server
- For BroadWorks Server
- For Sylantro Server
- For ININ Server
- Pickup a Parked Call
- Last Call Return (LCR) Key (Sylantro Servers only)
- Configuring a Last Call Return Key
- Call Forward Key
- Configuring a Call Forward Key
- BLF/Xfer
- BLF/Xfer Key Requirements and Functionality
- - BLF/Xfer and BLF
- • BLF/Xfer and Blind Transfer Calls
- • BLF/Xfer and Call Forward
- • BLF/Xfer and Speed Dial
- Configuring a BLF/Xfer Key
- Speeddial/Xfer
- Speeddial/Xfer Key Requirements and Functionality
- • Speeddial/Xfer and Speed Dial
- • Speeddial/Xfer and Blind Transfer
- • Speeddial/Xfer and Call Forward
- Configuring a Speeddial/Xfer Key
- Speeddial/Conf
- Configuring a Speeddial/Conf Key
- Directory Key
- Configuring a Directory Key
- Callers List Key
- Configuring a Callers List Key
- Redial Key
- Configuring a Redial Key
- Conference Key
- Configuring a Conference Key
- Transfer Key
- Configuring a Transfer Key
- Intercom Key
- Configuring an Intercom Key
- Services Key
- Configuring a Services Key
- Phone Lock Key
- Configuring a Phone Lock Key
- Using the Lock/Unlock Key on the IP Phone
- Press the LOCK key.
- Press the UNLOCK key.
- Enter your user password and press ENTER.
- Paging Key (Sends the RTP Stream)
- Configuring a Paging Key
- Using the Paging Key
- Empty Key
- Configuring an Empty Key
- None Key
- Making Calls
- Dialing a Number
- Pre-dialing a Number
- Using Handsfree Speakerphone
- Using a Headset
- Advanced Volume Controls for the Headset Mic
- To change this volume:
- To Make and Receive Calls Using a Headset
- Using Intercom
- Using the Icom Key
- Redial
- Accessing the Redial List
- Deleting from the Redial List
- Delete All Items
- Mute
- Receiving Calls
- Answering an Incoming Call
- To answer the call
- Sending an Incoming Call to Voicemail
- Handling Calls
- Placing a Call on Hold
- To place a call on hold
- When on Hold
- Automatic Hold
- Retrieving a Held Call
- Transferring Calls
- Blind Transfer
- Consultative Transfer
- Direct Transfer
- Pre-Dial & Live Dial Mode
- Transferring Calls in Pre-Dial Mode
- Transferring Calls in Live Dial Mode
- ransferring an Existing Call to Another Existing Call
- Completing a Transfer to a Contact in Phone Directory
- Indication of Transferred Calls
- Press the Goodbye
- Conferencing Calls
- Local Conferencing
- Using Local Conferencing in Pre-Dial Mode
- Using Local Conferencing in Live Dial Mode
- Creating a Conference Call by Joining Two Existing Calls
- Centralized Conferencing (for Sylantro and Broadsoft Servers)
- Using Centralized Conferencing
- Setting Up a Conference and Adding Multiple Parties (for Sylantro and Broadsoft Servers)
- Joining Additional Parties to Active Conferences
- Ending a Conference and Transferring Remaining Parties
- Ending Calls
- Managing Calls
- Directory List
- Accessing Your Directory
- Sorting Entries and Quick Search Feature
- Managing the Directory List
- Adding New Entries to the Directory List
- On Screen 1:
- On Screen 2:
- Arranging Multiple Screens
- Deleting Entries from the Directory List
- To delete a single entry from the Directory List:
- To delete specific numbers, names or labels for an entry:
- Saving Entries to the Directory List
- Downloading the Directory List to Your PC
- Download the Directory List
- Click on Operation->Directory.
- Directory
- Callers List
- Access the Callers List
- Edit Entries in the Callers List
- Delete Entries from the Callers List
- Missed Calls Indicator
- Download the Callers List to Your PC
- DND and Call Forward
- DND Account-Based Configuration
- Configuring DND
- Configuring DND Using the Aastra Web UI
- Click on Basic Settings->Preferences->General.
- Using DND Modes via the IP Phone UI
- DND in Account Mode
- DND in Phone Mode (Default)
- DND in Custom Mode
- Call Forward Account-Based Configuration
- Key LED Behavior for All Modes MWI LED Behavior for All Modes
- Configuring CFWD Using the Astra Web UI
- Click on Basic Settings->Account Configuration.
- Using CFWD via the IP Phone UI
- CFWD in Account Mode
- CFWD in Phone Mode
- CFWD in Custom Mode
- After selecting an account, press CHANGE.
- Voicemail
- Using Voicemail
- Additional Features
- Display DTMF Digits
- Configuring Display of DTMF Digits
- Play Call Waiting Tone
- Configuring Call Waiting Tone
- Preferences
- Stuttered Dial Tone
- Configuring Stuttered Dial Tone
- XML Beep Support
- Configuring XML Beep Support
- Status Scroll Delay
- Configuring Status Scroll Delay
- Switch UI Focus to Ringing Line
- Call Hold Reminder During Active Calls
- Call Hold Reminder (on single hold)
- Configuring "Call Hold Reminder"
- Click Save Settings.
- Call Waiting Tone Period
- Configuring "Call Waiting Tone Period"
- Preferred Line and Preferred Line Timeout
- Goodbye Key Cancels Incoming Calls
- Message Waiting Indicator Line
- Configuring Message Waiting Indicator Line
- Incoming Intercom Call Features
- Auto-Answer/Play Warning Tone
- Microphone Mute
- Allow Barge In
- Configuring Incoming Intercom Settings
- Click on Basic Settings->Preferences->Incoming Intercom Settings.
- Group RTP Paging (receives RTP streams)
- Configuring Group RTP Paging
- Shared Call Appearance (SCA) Call Bridging
- Keys States and LED Behavior
- SCA Voicemail Indicators
- Star Codes
- Other Features
- Model M670i and M675i Expansion Modules
- Model M670i
- Model M675i
- Using the Expansion Modules
- M670i Expansion Module
- M675i Expansion Module
- Aastra 6737i SIP IP Phone Installation Guide.
- Press-and-Hold to Create a Speed Dial Key
- Troubleshooting Solutions
- Why is my display blank?
- Why is my speakerphone not working?
- Why can't I get a dial tone?
- Why doesn't my phone ring?
- Why is the light not coming on with a new Voice Mail Message?
- Why is my handset not working?
- What are services, and how do I use them?
- How do I find the IP address of my phone?
- Limited Warranty
- (Not applicable in Australia – see below for Limited Warranty in Australia)
- Exclusions
- Warranty Repair Services
- After Warranty Service
- Limited Warranty (Australia Only)
- Repair Notice
- Limitation of Liability for Products not of a kind ordinarily acquired for personal, domestic or household use or consumption (e.g. goods/services ordinarily supplied for business-use)
- Appendix A - Time Zone Codes
- Index
- Numerics
- A
- B
- C
- D
- E
- F
- G
- H
- I
- K
- L
- M
- N
- 0
- P
- R
- S
- T
- U
- V
- W
- X
- Disclaimer
Brand : AASTRA
Model : A6737-0131-10-55
Category : Telephone