
ZASHD - Digital decoder TELEVES - Free user manual and instructions
Find the device manual for free ZASHD TELEVES in PDF.


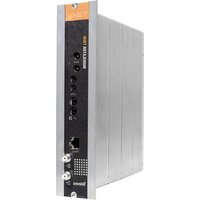
| Product Type | Digital Decoder |
| Brand | Televes |
| Model | ZASHD |
| Dimensions (approx.) | 150 x 100 x 30 mm |
| Weight (approx.) | 200 g |
| Power Supply | 5 V DC via external adapter |
| Power Consumption | Less than 5 W |
| Video Output | HDMI, Composite (RCA) |
| Audio Output | HDMI, Coaxial, Analog (RCA) |
| Supported Video Standards | DVB-C / DVB-T2 / DVB-S2 (check regional variant) |
| Decoding Formats | MPEG-2, MPEG-4, H.264 |
| Channel Memory | Up to 1000 channels |
| USB Port | Yes, for media playback and PVR (external storage) |
| Remote Control | Included (model: standard IR) |
| Electronic Program Guide (EPG) | Supported (7-day) |
| Parental Control | Yes (PIN protected) |
| Update Method | OTA (over-the-air) or USB |
| Safety Certification | CE, RoHS |
| Material | ABS plastic |
| Maintenance | Clean with a soft, dry cloth; avoid liquids |
| Spare Parts Available | Remote control, power adapter, user manual |
| Operating Temperature | 0°C to +40°C |
| Country of Origin | Spain (likely) |
Frequently Asked Questions - ZASHD TELEVES
User questions about ZASHD TELEVES
0 question about this device. Answer the ones you know or ask your own.
Ask a new question about this device
Download the instructions for your Digital decoder in PDF format for free! Find your manual ZASHD - TELEVES and take your electronic device back in hand. On this page are published all the documents necessary for the use of your device. ZASHD by TELEVES.
USER MANUAL ZASHD TELEVES
High Definition TV Satellite Receiver
User Manual
zAs HD SATELLITE
Index
- Safety recommendations 4
- General Information 5
2.1. Summary of features 5
2.2.Contents 5
2.3. ZAS HD SAT general operation 5
- Description of connetions 6
3.1. Remote Control Unit 7
- Setting-up 8
4.1. TV set connection 8
- First steps 9
- Basic functions 11
6.1. TV or Radio selection 11
6.2. Selection of programs 11
6.3. Program information 11
6.4. Volume / Mute control 12
6.5. Quick Menu 13
6.6. Teletext 14
-
Electronic Program Guide (EPG) 15
8.Main menu 16 -
Channel list menu 17
9.1. FTA TV channels 17
9.2. FTA Radio channels 17
9.3.Complete TV list 17
9.4.Complete Radio list 18
9.5. Favorites 18
-
Timers 19
-
Installation and Configuration Setting-up 20
11.1. Preferences 20
11.2. Output settings 20
11.3. Regional Settings 21
11.4. Language Settings 21
11.5. Access Control 22
11.6. Channels Searching 24
11.7. Maintenance 29
-
System Information 30
-
Recording Wizard 31
- Recording 32
- Media Browser 34
- Glossary 36
Menu structure 37
Technical specifications 38
Troubleshooting 39
1. Safety recommendations

; Read carefully this manual before attempting to install or handle this receiver!
The ZAS HD SAT just purchased has been manufactured according to international safety standards.
Dispose of electronics you no longer need in a friendly environment and in accordance with relevant regulations.
We recommend you read the following safety tips.
POWERING:
Mains adapter 230V\~ / 12V ---
This adapter becomes the means to switch off the receiver.
The mains socket that is going to be used to connect the equipment should be located nearby and should be easily accessible
OVERLOADING:
Do not overload sockets, extensions or adapters to avoid the risk of fire or electric shock.
LIQUIDS:
The equipment must not come into contact with water or even be splashed by liquids. Do not place containers with water on or near the equipment if it is not adequately protected.
SMALL OBJECTS:
Avoid proximity of small metallic objects. They may enter the slots or connectors on the receiver and cause serious damage.
CLEANING:
Do not attempt to clean the receiver without first unplugging it.
Do not use liquid, abrasive, solvent or aerosol cleaners to clean the receiver, it may be damaged. Just make use of a soft cloth slightly moistened with water.
VENTILATION:
Place the receiver in a well ventilated area without blocking the vents.
Avoid exposure to sunlight, heat or flame.
Do not place other equipment on the receiver.
CONNECTIONS:
Make connections only recommended to avoid possible damage
LNB CONNECTION:
Unplug the receiver before connecting or disconnecting the LNB.
COULD OTHERWISE DAMAGE THE LNB.
TV CONNECTION:
Unplug the receiver before connecting or disconnecting the TV set.
COULD OTHERWISE DAMAGE THE TV SET.
LOCATION:
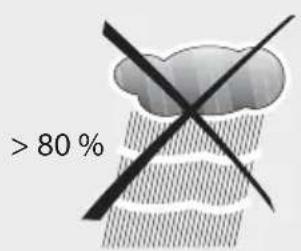
Place the receiver in a room inside, protected from shock, rain or direct sunlight.



natural_image
Abstract geometric design with intersecting lines and a central circle (no text or symbols)
natural_image
Illustration of a vase with dandelion flowers placed on a flat surface, no text or symbols present
natural_image
Simple line drawing of a tool crossed over a device (no text or symbols)2. General Information
The Digital Satellite TV Receiver ZAS HD SAT is a product that lets you view a variety of programs supplied by one or more satellites.
This manual explains how to install the ZAS HD SAT and the steps needed to use its various functions.
For the installation of the receiver, as for its correct use, be sure to read the manual and save it for future reference.
2.1. Summary of features
- FTA satellite channels receiver.
DiSEqC 1.2 compatible.
■ LNB unicable compatible.
MPEG2 and MPEG4/H.264 compatible.
USB PVR ready. - Allows direct recording on both external hard drive and pen drive (FAT 32) by USB*.
■ Time Shift function by USB with recording option.
Multimedia function.
■ HDMI (Auto, 576i, 576p, 720p, 1080i, 1080p and Highest) output.
■ Optic audio output (TOSLINK).
■ Multi-video output - CVBS, RGB (SCART).
■ Advanced functions for playing (Forward / Rewind, Previous/ Next File, Pause, Go to). - User friendly menu.
Guided Initial installation.
■ Pre-programmed channel list.
6 List of Favourites (A, B, C, D, E, F). - Up to 5000 programmes can be stored.
■ Quick and easy software upgrading via USB port.
■ Timer function for programmes recording.
Electronic Programme Guide (EPG).
■ Supports OSD, Teletext and Subtitle (standard and TXT) functions.
■ Supports VBI teletext.
Parental lock
■ Automatically saves the last programme.
Low power consumption.
2.2. Package contents
Verify that the following parts are included in the package:
- 1 x HD SAT receiver ZAS.
- 1 x Remote control unit.
- 1 x Power Adapter.
- 1 x HDMI Cable.
- 2 x Batteries "AAA".
- Instructions for use.

natural_image
Line drawings of various household appliances and devices including a refrigerator, keyboard, phone, and open box (no text or symbols)2.3. ZAS HD SAT general operation
Throughout this manual you will see that the use of the ZAS HD SAT receiver is based on a variety of menus easy to use.
These menus will help you enjoy your Televes receiver, guiding for: installation, channel scan, display ... and many other functions.
It is necessary to note that new software may change the functionality of the receiver.
If you have any problems with the operation of your receiver, see "Troubleshooting" before you call your installer or technical support of Televés.
3. Description of connections
Receiver Front Panel

| No. | Name Function description | |
| 1 | HOST USB Connection for a PEN DRIVE, memory card reader or external hard drive (FAT 32) with separate powering. | |
| 2 | LED Operating LED (Red: Standby; Green: power ON). | |
| 3 | I R IR sensor. | |
Receiver Rear Panel

| No. | Name Function description | |
| 1 RF- | OUT | RF output signal loop for connecting another receiver. |
| 2 | RF-IN | Input signal from the satellite antenna (powering +13, 18V/250mA select. by menu) |
| 3 SCART TV-OUT | TV set connection via SCART. | |
| 4 | HDMI | High Definition Multimedia Interface. |
| 5 OPTICAL | Optical audio output | |
| 6 DC-IN 12V Input for connecting the AC adapter 220 Vac/12 Vdc | ||
3.1. Remote Control Unit
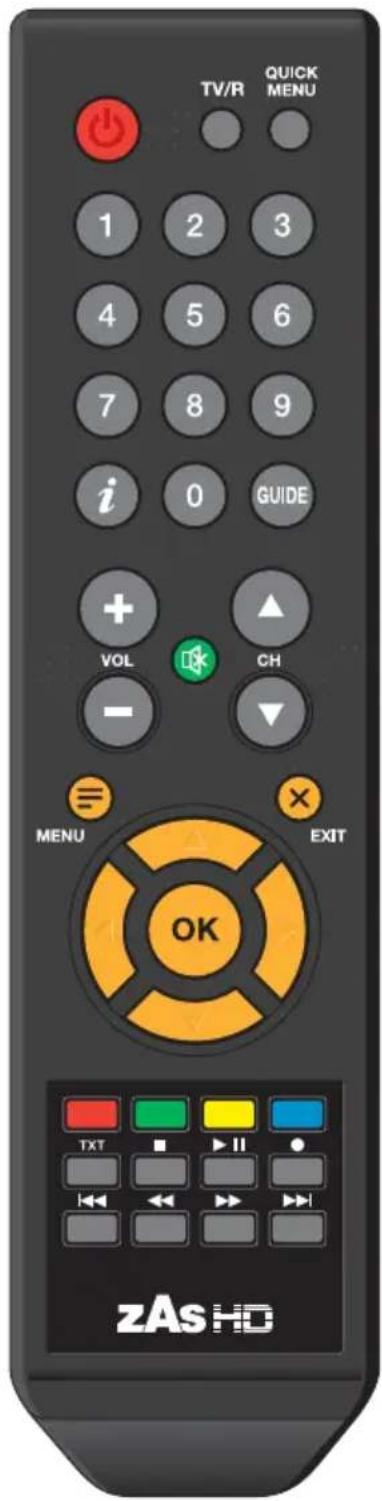
| Button Function description | |
| Switches between “power ON” and “STANDBY” mode. | |
| TV/R Switches between TV and Radio. | |
| QUICK MENU | Direct access to functions: Subtitles, Language, Screen format and SCART switching-off . |
| 0 ... 9 | To select a desired program number.Direct data entry on the menu. |
| i | Press to display the programme information. |
| GUIDE Activates the Electronic Programme Guide (EPG). | |
| VOL+/VOL- TV/Radio volume adjustment (increase/reduce) | |
| Press this button to temporarily switch-off the sound. | |
| CH ▲ / CH ▼ | Channel UP/DOWN in both TV and Radio modes. |
| (MENU) | Activates the OSD function (On-Screen-Display menu). |
| (EXIT) | Return to the previous menu or exit the menu completely.In normal mode, return to the previous channel. |
| ▲ / ▼ | Lets you move through the different options in each menu.Changes channel (UP/DOWN) in TV or Radio modes. |
| ◀/▶ | Lets you choose from different configurations of the selected option (in the case of the questions to be confirmed).Adjusts volume in TV and Radio modes. |
| Keys that are functional as the menu in question.Quick access to Teletext mode. | |
| TXT Activates teletext for the displayed channel. | |
| Recording/Playing stop. | |
| ▶ II | Play/Pause the selected fi le. |
| Starts recording the selected channel. | |
| Jumps 30 sec. back in play. | |
| Fast reverse play mode (x2, x4, x8, x16, x32). | |
| Fast forward play mode (x2, x4, x8, x16, x32). | |
| Jumps 30 sec. forward in play. | |

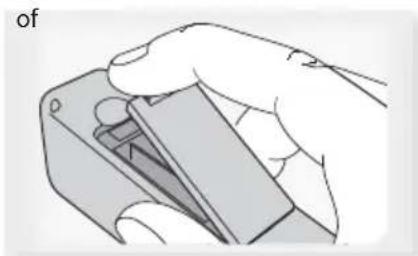
- Do not dispose batteries into the trash or fi re. Place them in a container for the purpose.
- Keep batteries away from heat, sunlight or fire.
Buttons ⏻, VOL+/VOL- and CH▲CH are marked in Braille.
natural_image
Illustration of a hand holding a small electronic device with a handle (no text or symbols visible)
natural_image
Diagram of a battery holder with two batteries and directional arrows indicating internal components (no text or symbols)4. Setting-up
Different types of TVs and other devices can be connected to your ZAS HD SAT.
This manual lists the most common ways to connect it. If you have any problem connecting your receiver please contact your dealer
There are two ways you can connect the receiver ZAS HD SAT to your TV:
- via SCART or
• via HDMI (high definition).
If your TV has an HDMI connector, use this type of
connection as you will get the best image quality.
When the connection is made using a SCART cable, the receiver ZAS HD SAT may provide signal RGB or CVBS (composite video). By default (factory set), the ZAS HD SAT is configured to provide the CVBS signal as there are some TVs that do not support RGB output. However, for higher image quality is recommended that you select RGB (if your TV is compatible with these signals).
To change configuration settings from CVBS to RGB, do so via the menu "Format Scart Video" (see Section 11.2. Output Settings).
4.1. TV set connection
■ Connect the signal from the antenna to the RF IN ZAS HD SAT (simple installation).
Connect the video and audio signals between the receiver ZAS HD SAT and the TV set by means of a SCART or a HDMI extender.
■ Turn-on the equipments.
■ Power the receiver ZAS HD SAT using its mains adapter unit.

- Televés recommends an HDMI cable category 2 (high speed).
- If your TV has only a DVI connector, use an HDMI-DVI adapter. Connect an audio cable for sound output.

- All cables used to wire the receiver will be shielded.
- Do not plug the mains adapter of the receiver until all the other connections have been made.

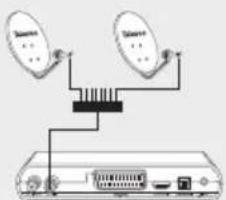
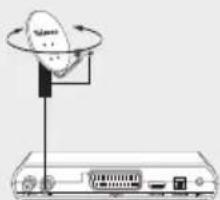
Other Installation Options
DiSEqC Switch
2 - 4 - 8 ports

Motor
natural_image
Diagram of a satellite dish mounted on a device with a circular antenna and ports (no text or symbols)Unicable

5. First steps
After the wiring is complete, the mains adapter plugged, and the ZAS HD SAT powered ON with the RCU (press button it needs some time to make a self-check and be ready to work.
The front LED flashes during this period. Do not switch off the receiver or press any key.
The welcome screen is activated automatically and will guide you in confi guring the menus and in searching channels.
You must first specify the language in which you want to display on-screen menus.
- Choose the language in which menus are displayed on screen using the cursor keys ◀ or ▶
■ Press OK to confi rm.
On the next screen you must specify the geographical area where the receiver is installed and the TV display format you need (4:3 or 16:9).
Location must be correct because of this data depends a correct indication of the time displayed on the menus.
- Select one of these options using the cursor keys▲ or ▼, and in each one, change the value using the cursor keys ◀ or ▶.
■ Press OK to confirm the values and continue.
This receiver features a preprogrammed list of channels which can be activate at this time. This list may already contain all the channels you want, so it would not be necessary to perform a full channel search.
Depending on the country selected in the previous section, select the appropriate list.
- Press OK key to accept the pre-programmed list and finish the installation, or press EXIT key to make a full search.

- The load of the list of pre-programmed channel is designed for a simple configuration, consisting only of antenna and LNB.
If your installation does not correspond to it (has additional elements like DiSEqC, Motor,... etc.) we recommend performing a full satellite search.


This screen will indicate if you have a DiSEqC, Motor or Unicable device in your antenna installation.
If you have a simple installation, ie an antenna connected directly to the receiver, keep the option "None."
In paragraph Satellite, you must indicate the satellite your antenna is pointing.
If your installation does not correspond to this, see. 11.5 .- Channel search => Antenna Setup.
■ Select one of these options using the cursor keys ▲ or
▼, and in each one, change the value using the cursor keys
or.
The level bars will show you if you have satellite signal and what is the strength and quality for each TV channel.

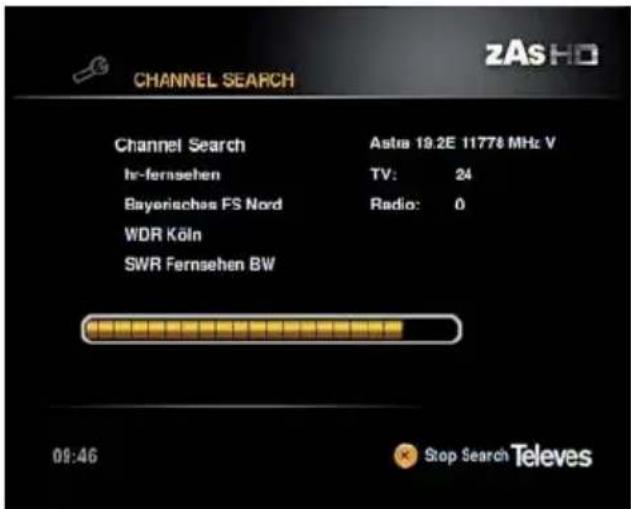
The automatic channel searching starts.
This process may take some time. Please wait.
- You can stop the search at any time by pressing OK.
Finally, a summary of the channels found is displayed.
■ Press OK to continue. Press again this key to start viewing the channels found.

- If the receiver was not able to found any channels at the end of the searching, a warning message will appear. Press OK to continue. Check connections, press OK to perform another searching or modify any parameter. (For more information, see par. 11.5. Channels searching => Antenna Setup).
6.1. TV or Radio selection
■ While watching a TV channel, press TV / R on the remote control unit to switch between TV and Radio channels.
- Pressing this key again, you return to the previous mode.
6.2. Selection of programs
To select a program, use CH▲ / CH▼ keys, ▲ / ▼ cursor keys or the numeric keypad (0 ... 9) of the remote control unit.
In addition, the receiver features another way to change the program in a simple and visual manner. While watching TV or Radio, press the OK key on the remote control unit. The list of channels will be displayed. Select a new program from the list with the keys ▲, ▼ on ▶ and then press OK.
■ By pressing the key i, the technical information for the selected program will be displayed.
- You can return to the last program you were watching by pressing EXIT.

Each time you change your program, you will see information about it for a few seconds at the bottom of the screen (banner).
While watching a program, you can view this information at any time by pressing the button i on the remote control unit.
By pressing this key again, the program information (banner) displayed will be expanded showing then a short summary of the content. If the current text spans more than one page, use the or keys ▲ o ▼ to scroll. Use keys ◀ or ▶ to show the next event information.
In addition to indicating the number and name of the channel, current time, start time and ending both the current and the next event, the "banner" may have the following icons:

Estimated time display of current event in relation to the total length of the same.

Indication of classification by age.

Channel information

: Indicates that the channel audio in Dolby Digital Plus format.

: Indicates that the channel transmits several audios.

: Indicates that the channel provides subtitles.

: Indicates that the channel provides teletext.

- The EPG information is only available when provided by the supplier.
- Press EXIT to go out.
6.4. Volume / Mute control
Volume control
To increase or decrease the volume, use keys VOL+ / VOL- or ◀/▶ of your remote control unit.

- The volume can also be controlled through the volume of your TV.
Mute
To mute the sound, press on the remote control unit. To restore the sound, press this key once more.
- You can also restore the sound by pressing either the VOL+ / VOL- or ◀/▶ on the remote control unit.

natural_image
Close-up of green grass blades against a black background, no text or symbols visible6.5. Quick menu
A quick way to access some of the functions of ZAS HD SAT such as the subtitle language, audio language, the image format or disabling the SCART, by pressing the QUICK MENU.
The selected option appears highlighted. Use keys▲ or ▼ to scroll and select another.
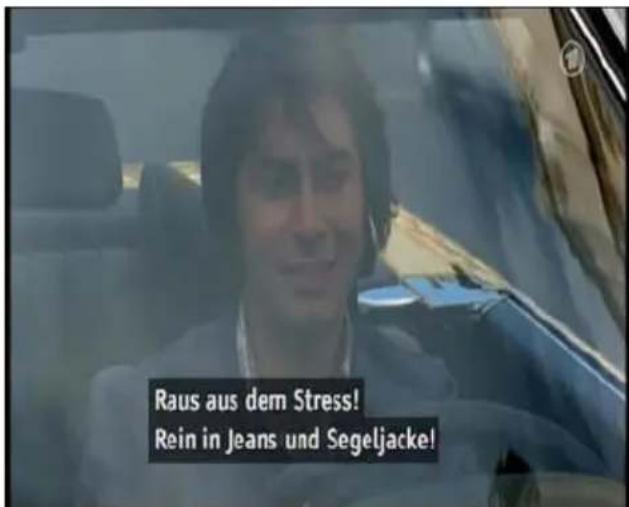
Subtitles language
- Select subtitle language between "Disable" and one of the options available using keys ◀ or ▶.
If the transmission offers this service, subtitles are displayed at the bottom of the screen. If the transmission does not have this service, it shows the "Disable" option and then changes are not allowed. - By default, this option is disabled.
Audio language
- Select the audio language from those available through the ◀ keys.
If transmission has not several audios, then the default option will be displayed and no changes will be allowed.
Screen format
Select the format for the display between "Automatic", "Zoom", "Full" or "Black Borders" for a 16:9 ratio, and "Automatic", "Full", "Letter Box" or "Pan & Scan" for 4:3 ratio, using the keys ◀ or ▶. To change the aspect ratio see menu "Output Settings".
SCART disabling
This option lets you to disable the signal that informs the TV when the receiver is turned ON and thus avoiding turn ON the TV.
■ Select option SCART disabled and press OK.

- Not all suppliers provide information about the subtitle or audio languages.

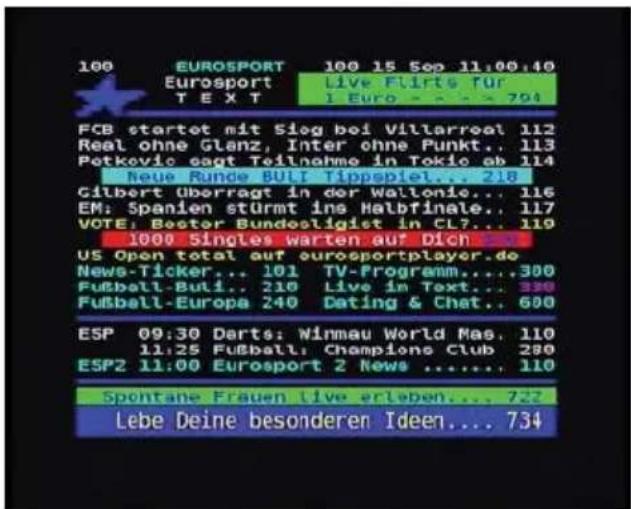
The ZAS HD SAT allows you to select all teletext services provided by the service provider.
■ To activate Teletext, press the TXT key on the remote control unit.
A second press of the key TXT, makes the background transparent to see the image at the same time as the Teletext.
- Teletext services are displayed in the usual way. Use the ▲ or ▼ keys to move forward or backward page by page, or directly enter the page number on the keypad.
On pages that run automatically, press the OK key to stop the progress and see the page longer. The “=” indication is displayed beside the page number. Press OK again to run the page.
The control of the ZAS HD SAT features coloured buttons that facilitate fast access to teletext pages.
Even if your TV does not have Teletext decoder, you can view it on the screen since the ZAS HD SAT is able to generate the teletext automatically.
To exit teletext, press the TXT until it disappears from the screen.

- If you are using the TimeShift function, or playing a previously recorded program on the hard drive, teletext will not be available.
The ZAS HD SAT provides the "Program Guide" for the user to access the TV guide (and also radio guide), which displays information on current programming (or subsequent) of different channels such as name, start time, end time, a brief summary ...
To view the information of the electronic program guide (EPG), press the GUIDE key on the remote control unit while watching a channel.
The screen will display information in two separate columns. On the left is the list of channels and the right is the list of programs for the selected channel.
- Scroll through the list of channels or programs using the ▲ or ▼keys. To switch between channel list and program list, use keys ◀or .
By using red and green keys, you can access information regarding coming days.
■ After selecting a program, pressing the OK key will display a screen where you see the extended description of it. To return to the previous screen press the OK or EXIT.
By pressing the blue button on one of the programs of the list, it automatically creates a new timer with the program, and displays the "√" symbol beside the name, thus indicating this state.
For more information on how to schedule an event, see paragraph 10. Timers.
■ Finally, press EXIT to leave the guide.

- The information contained in the guide is provided by the service provider, so it sometimes may not be available.
- If the current program does not provide data to the guide "no data available for this channel" indication is displayed.


■ Press MENU to activate the main menu.
This menu includes six submenus as shown in the picture:
- Channel Lists
-
Timers
- Installation and Setup
- System Information
- Recording Assistant
-
Media Browser
-
Select from the menu options with the keys ▲ or ▼ and press OK to accept.
- Press EXIT or MENU to exit to previous menu, and finally exit the menus.

9. Channel list menu
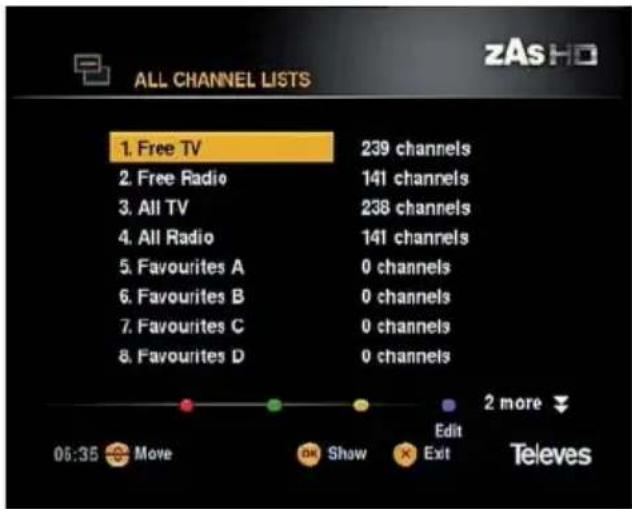
■ Press MENU, select 'Channel List' with ▲ or ▼ keys and press OK. It shows all the lists of available channels.
The lists are editable by the user, i.e., a personalised list can be created. Use this option to order the channels to your convenience.
9.1. FTA TV channels
The FTA TV channels list shows all FTA TV channels that have been found during the 'Channel Search'.
Use the keys ▲, ▼, ◀ and ▶ to select a channel from the list, then press OK on the selected channel to watch it immediately.
By pressing the i key on the name of a channel it will be displayed information about it. To close the information window press EXIT or press the key i.
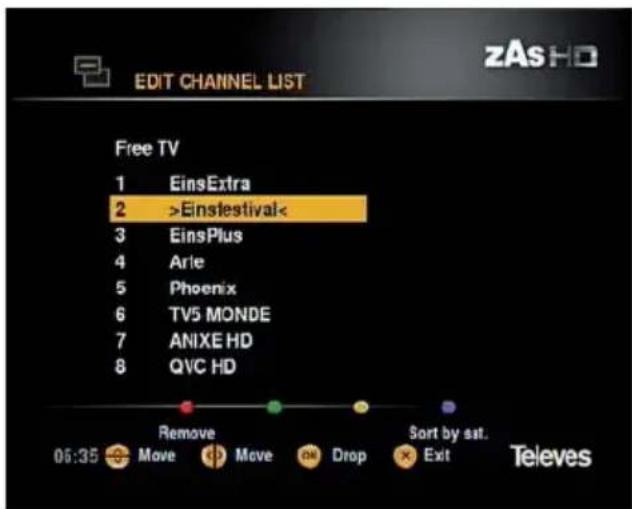
Edit
Choose the "Free TV Channel"-list with ▲or ▼ and press the blue key to enter the edition menu.
- To move a channel from its position on the list, press OK on the desired channel. This one will be shown between the signs "> <". With the keys ▲, ▼ or ▶ place the channel on its new position and press again OK.
- Pressing the red key on the selected channel, this one will be deleted.
- If you want to sort the satellite channel list, press the blue key.

- Please note that this kind of sorting is irreversible.
9.2. FTA Radio channels
The list FTA Radio channels contains all free radio channels that have been found during the Channel searching.
The management of radio channels is equal to that of TV channels.
9.3. Complete TV list
The complete list of TV shows all the TV channels (free+ scrambled) that have been found during the "channel searching".
The management of these channels is equal to the "FTA channels".
You will not be able to watch encrypted channels.

The complete list of Radio shows all the radio channels that have been found during the "channel searching".
The management of these channels is equal to the "FTA channels".
You will not be able to hear encrypted channels.
9.5. Favourites
■ Select one of the lists of favourites with the ▲ or ▼ keys and press the blue key to access the editing menu.
Then it will show two columns, one with all channels found, and one empty column (to the right of the first) to which you can gradually add the channels in the order you want them to appear by pressing the OK button on the remote control normal mode (viewing a program).
■ Use the remote control unit ▲ or ▼ keys to move up and down the list.
- Use the ◀ or ▶ keys to change from one list to another.
■ Use the OK key of the remote control unit to add channels to the list of favourites.
At the same list, you can add channels both TV and Radio. To select one of the available lists press the red keys (previous list) and green (following list).
Once the list of favourite channels has been made, its channels can be ordered to your convenience by moving their position. To do this select a channel to be moved, press OK and with the ▲or▼ keys move it to its new position. Press OK to save it.
To delete some of the channels added to the list, press the red key on the remote control over the selection to be deleted.
By pressing the blue key you access the next list of favorites. Following the process described above, you can add channels to the list. To select one of the above lists, press the yellow key.
■ Press the EXIT key to exit the previous menu and save the list or lists of favourites.


- Selecting a channel from one of the lists (either TV, radio or favourites) makes the list active. This means that, if you create a list of favourites with fi ve channels, for example, and select one of them from the Favourites menu, each time the OK key is pressed in normal mode (watching a programme) only the list of these fi ve channels is shown.
To be able to see all the channels, select one from the Complete TV List (Menu => Channel Lists => Complete TV List)
10. Timers
Through this menu you will be able to make the ZAS HD SAT record an event at a programmed time. Up to 20 different events can be programmed.
The list is displayed empty if no event is created.

This function is only possible if you have an external drive formatted with FAT 32, a pen drive (memory stick) or a memory card reader.
Create/Add an event
keys or and press OK to confirm.
To add a new event, press the OK key over the option Timer on the Main Menu.
- Select one of the timers with the cursor▲ or ▼keys and press OK to confirm.
Channel: Indicate the channel to be recorded once the receiver is turned on. By default, it displays the current channel. Select another one with the keys or .
Date: Enter the date for the event.
Starting Time: Enter the starting time for recording.
Ending Time: Enter the time off for recording
Repeat: Indicate whether this process is performed only once ("No Repeat"), "Everyday" or "Every week."
Finally, press OK on the remote control unit o activate the timer.
Delete an event
A list of programmed events will appear on the "Timer" menu in both manual format as well as through the EPG. See par. 7. Electronic Program Guide (EPG).
To delete an existing event, position the cursor over the EPG and press the red key.

- The time shown on the adapter is sent by the service provider. Very rarely, it might happen that this time is not correct. Check this before programming an event.
- During the procedure of a Timer only programmes of the same Multiplex can be seen.
- Events cannot be created if the start or end times are lower than the current ones.
- Events cannot be created if the time overlaps.


11. Installation and Configuration Setting-up
This menu lets you customize the functions of the ZAS HD SAT to suit your preferences.
11.1. Preferences
Time bar information
Between 1 and 10 seconds, select the time to show the "banner" on the screen every time you change channels using or keys.

11.2. Output settings
HDMI output
Select the video output resolution using the keys or ▶Possible values are Auto, 576i, 576p, 720p, 1080i, 1080p and Highest (the ZAS SAT HD automatically adjusts the signal to the maximum resolution that gives the TV).

- See your TV manual for more information
SCART video format:
- Select the video output mode between CVBS or RGB, using the keys ◀ or ▶
Aspect ratio
■ Select the screen format between 4:3 or 16:9 with ◀ or ▶ keys.
Image format
■ Within each mode you can select the following formats: Automatic, Full, Black Borders, Zoom (16:9) and Automatic, Full, Pan & Scan, Letter Box (4:3).
Audio delay
Between 0 and 250 ms, select the delay will be applied to the audio relative to video signal by means of ◀ or ▶ keys.
Digital audio
Select the audio output mode between Stereo or Multichannel using the keys ◀ or ▶

11.3. Regional Settings
Through this menu you can select the zone where is the receiver and how to select the time zone.
Country
■ Select the country where the receiver is installed with the keys ◀ or ▶. Available options are: Spain, Portugal, United Kingdom, Germany, France and Italy.
Timezone selection:
■ Selectbetween"Automatic"and"Manual"withkeys
◀ or ▶. In the Automatic option, the receiver displays the time supplied by the service provider. In Manual mode you can change the off set time sent by the supplier and adapt it to local time.

EN
11.4. Language Settings
This menu allows you to select the language in which menus are displayed on the screen, the default language for audio, and the language for subtitles.
Menu language
- Select with ◀ or ▶ the language in which menus are displayed onscreen after press the MENU key.
Available languages are: Spanish, Italian, Portuguese, French, German and English.
Language 1/ Language 2 Subtitles
- Select a language among those available for the subtitle using the keys ◀ or ▶. If the language 1 chosen is not available, we will use the selected language 2.
If the program does not have the desired language for subtitles, by default it will use the first language transmitted.

Subtitles
If you have either hearing problems or are in a noisy environment, select the 'diminished hearing' with the keys A or B. In this way on-screen text lines are narrating what is happening in the scene.
This will happen when the service provider offers this feature.
Language 1/ Language 2 Audio
Select a language among those available for the audio using the keys ◀ or ▶. If the language 1 chosen is not available, we will use the selected language 2. If the program does not have the desired language for audio, by default it will use the first language transmitted.
Audio
If you have any vision problems or are in an environment of low visibility, select the "Low Vision" with keys◀ or ▶. This way will give some indications of what is happening in the image by means of a voice.
This will happen when the service provider offers this feature.
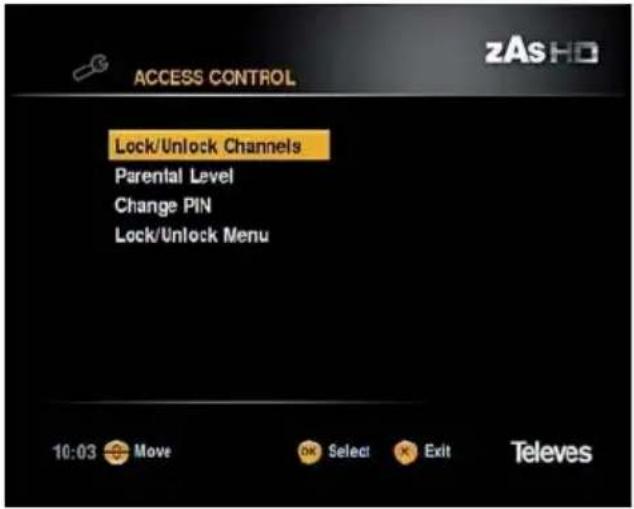
11.5. Access control
Using this menu you can:
- limit access to any channel that you consider inappropriate.
- restrict access to them by age.
• or require password to access the menu.
For accessing locked contents, you are prompted to enter your password.
Default password is: 0 0 0 0.
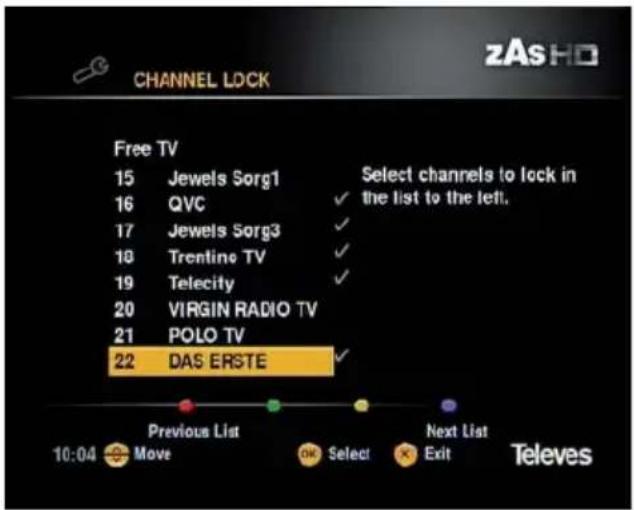
Locking / Unlocking channels
- Select the option "Lock / Unlock Channels" and press OK.
To select the channels from the list that will be locked, scroll through it and press OK on the selected channel. The selected channel will be marked with "✓". Use the CH▲ / CH▼ if you want to move the list page by page.
To select a previous list to the list in use, press the red key. Press the blue key to select a list after it.
To unlock a channel, place the cursor on the channel and press OK. Then the mark indicating its condition disappears.
■ Press EXIT on the remote control unit to confirm.
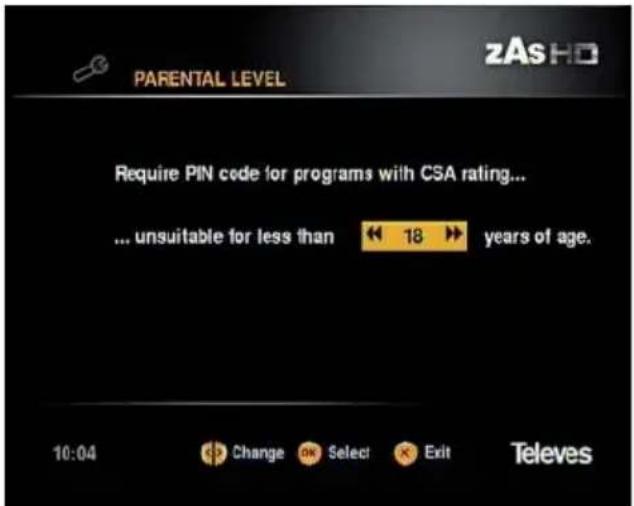
Parental lock level
- Select "Parental Control Level", then press OK.
■ Enable this option so that when a program is delivered by the information age rating, the receiver will ask you to enter your password if the program exceeds the selected limit. - Using the cursor keys◀ or ▶, select one of the options and press OK to accept.
The options are: "Never" and "Not suitable for children under 4, 5, ..., 17 and 18". - Press EXIT on the remote control unit to confirm.
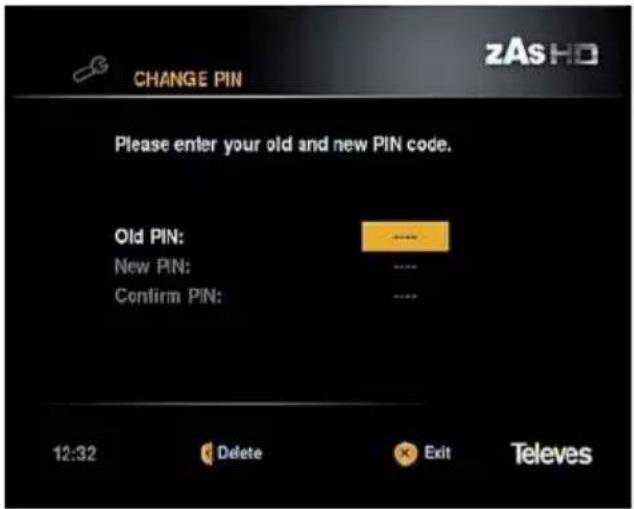
Change PIN:
- Select "Change PIN" and press OK.
To change the PIN code, enter first the current code using the keypad.
■ Then type the new PIN code.
■ Finally retype your new PIN to confirm.
Locking / Unlocking menu
- Select "Lock / Unlock Menu" and press OK.
■ Enable or disable the lock for the menus using the or keys.
■ Each time you access this menu, you are prompted to enter your password.

- The password is entered with the numeric keypad (0 ... 9) on the remote control.
- The parental lock aff ects the access control menus, channel search, maintenance and locked programmes.
- Don't forget your new password. Without it, you will not be able to access the menus and/or locked programmes.
- If you forget your password, or if you have any questions, or send us your suggestions and feedback, contact us at the email address "asistenciatecnica@televes.com."
11.6. Channels searching
This section describes the steps required for configuring the installation, the channel searching or maintaining lists of channels.
Antenna confi guration
This menu lets you configure the receiver according to your installation (simple, DiSEqC, Motor, Unicable).
▲ and ▼ keys let you to scroll through the choices.
Select your installation with the keys ◀ or ▶ Possible options are:
None
Your installation is a simple installation, i.e. the receiver is connected directly to the antenna.
In "Satellite" option, select the satellite to which the antenna is oriented.
The level bars will tell you if you have the satellite signal and what is the strength and quality for each TV channel.
By pressing the yellow key is shown the LNB Setup submenu, where you can modify the off set of the LNB (+1 V).
By pressing the blue key displays the submenu where you can select Advanced Settings values "Auto", 1, 2, 3, 4 and 5 for the "Repeat DiSEqC" option.
2 way splitter
Your installation has a 2 input DiSEqC switch, each connected to an antenna oriented to different satellites.
Select one of the two ports of the switch in the "DiSEqC port" option and assign a satellite to that port on the "Satellite" option. Then select the other port and assign another satellite. The level bars will tell you if you have the satellite signal and what is the strength and quality for each TV channel.
By pressing the yellow key is shown the LNB Setup submenu, where you can modify the off set of the LNB (+1 V).
By pressing the blue key displays the submenu where you can select Advanced Settings values "Auto", 1, 2, 3, 4 and 5 for the "Repeat DiSEqC" option.
4 way splitter
Your installation has a 4 input DiSEqC switch, each connected to an antenna oriented to different satellites.
It works the same as the 2 inputs.


8 way splitter
Your installation has a 8 input DiSEqC switch, each connected to an antenna oriented to different satellites.
It works the same as the 2 inputs.
Motor
Your facility has a motor to move the antenna and point it automatically to the selected satellite*.
- Select the first position for the motor in the "Motor Position Index". It has 255 positions that can record up to 255 different satellite positions (each satellite has a different orbital position).
■ Then assign a satellite to this position.
By pressing the red or green keys move the antenna, either East or West until you find the desired satellite. The level bars will help you find the satellite position.
■ Press TXT to memorize this position. - Select the second position and perform the same process above. Repeat these steps for each satellite.
The level bars will tell you if you have the satellite signal and what is the strength and quality for each TV channel.
By pressing the yellow key is shown the LNB Setup submenu, where you can modify the off set of the LNB (+1 V).
By pressing the blue key displays the submenu where you can select Advanced Settings values "Auto", 1, 2, 3, 4 and 5 for the "Repeat DiSEqC" option.
This menu shows more options for Motor:
After setting all positions of the satellites, it must be set limits that restrict the movement of the antenna at each end of the arc (East - West).
■ Move the antenna towards the West, beyond the last position saved by pressing the red key.
Set this position as "West Limit" by pressing the yellow key. Then, move the antenna to the East, beyond the last position saved by pressing the green key. Set this position as "East limit" by pressing the blue key.
- Press TXT to erase the limits marked.
■ Press ■ to recalculate all positions from the new limits.

If no limits are set for East and West, there would be a risk of damaging motor components or the antenna itself.


Unicable
Your facility has a Unicable system, where you can connect up to 8 receivers in a single cable.
In the "IF Channel" option, select one of the 8 IF channels for your receiver.
If the center frequency for the selected channel is not correct, select another in the "Center Frequency" option.
- Select one of the two ports on the "DiSEqC port" option and assign a satellite to this port on the "Satellite" option.
The level bars will tell you if you have the satellite signal and what is the strength and quality for each TV channel.
By pressing the yellow key is shown the LNB Setup submenu, where you can modify the off set of the LNB (+1 V).
By pressing the blue key displays the submenu where you can select Advanced Settings values "Auto", 1, 2, 3, 4 and 5 for the "Repeat DiSEqC" option.

Automatic channel searching
Using this menu option, it automatically searches for all available channels in the band.
Select "Automatic Channel Search" option and press OK.
If your antenna configuration has a DiSEqC device, you must indicate which satellite you want for searching channels, then press OK.
If in your antenna configuration, you selected "None", the search begins immediately.
The search may take a few moments. Please wait.
■ To stop the search at any time, press EXIT.
■ After the search, the screen will show the number of channels found of both TV and Radio.
■ Press OK to start watching the channels.

Search manual channels
This menu lets you making a search in a given transponder belonging to a transponder list or add new transponders to the list.
Satellite: Indicate the satellite to which the antenna is aimed.
Frequency: With the◀ key, delete digits shown and enter the new frequency for the transponder.
- Polarisation: Indicate whether the search is performed on the polarity Horizontal, Vertical or both (None).
Symbol rate: Use the ◀ key to delete digits shown and enter the new symbol rate.
■ FEC: Select a value for this option between: 1 / 2, 2 / 3, 3 / 4, 5 / 6, 7 / 8 and Auto.
■ Modulation system: Indicate whether the modulation of the transponder to look for is DVB-S or DVB-S2.
■ Network searching: This type of search, the receiver reads the NIT and list all channels that appear in it.

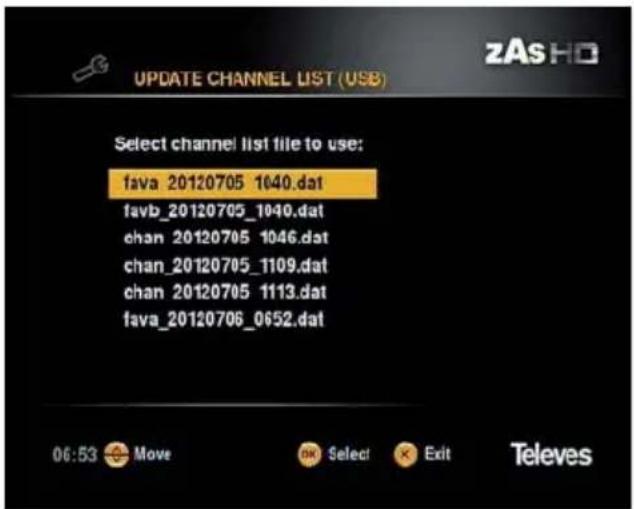
Update channels list
If you have an updated list of channels and wish to update the ZAS HD SAT, proceed as follows:
Copy the list in a memory stick (pen drive) FAT 32 in the root directory. You can select option "Export channel list (USB)".
■ Connect the memory stick to the receiver (front USB connector).
- Select the option "Update channel list" and press OK.
- Choose the file that you want to update on the channel list and press OK.
■ Move the cursor to "YES" and press OK.
■ The update may take a few moments. Please wait.
If there are no fi les avaliable, the message "No channel fi les found" will appear.
Export channel list (USB)
If you want to have your channel list on other receivers without having to search, export it.
Connect a memory stick (pen drive) FAT 32 to the receiver (front USB connector).
- Select "Export channel list (USB)" option and press OK.
- Select the list you want to export and press OK.
■ Move the cursor to "YES" and press OK.
The ZAS HD SAT shall record the channel list of the memory stick.
The recording may take a few moments. Please wait.

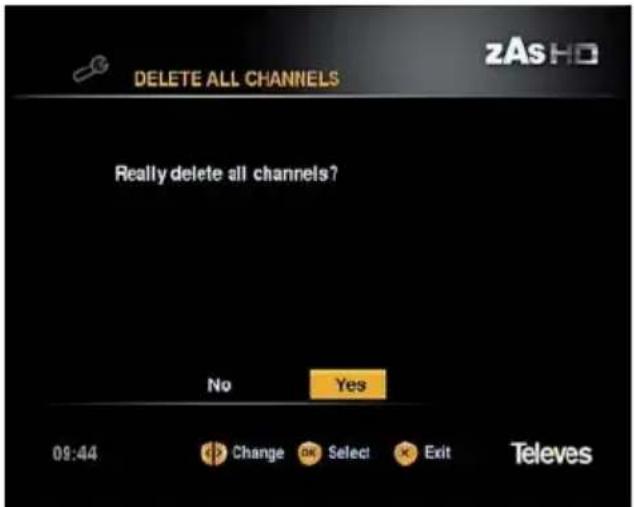
Delete all channels
To delete all channels from the list of your receiver, select the "Delete all channels" option and press OK.
- Confirm delete the list of channels by moving the cursor to "YES" and press OK.

- To watch the channels you will need to perform a new search.

11.7. Maintenance
This section describes the steps required to update the software on your HD ZAS SAT or reset to factory defaults.
Update Software (OTA)
Option for updating the receiver software through the antenna signal.
Only if an updated software version is available over the air.
Update Software (USB)
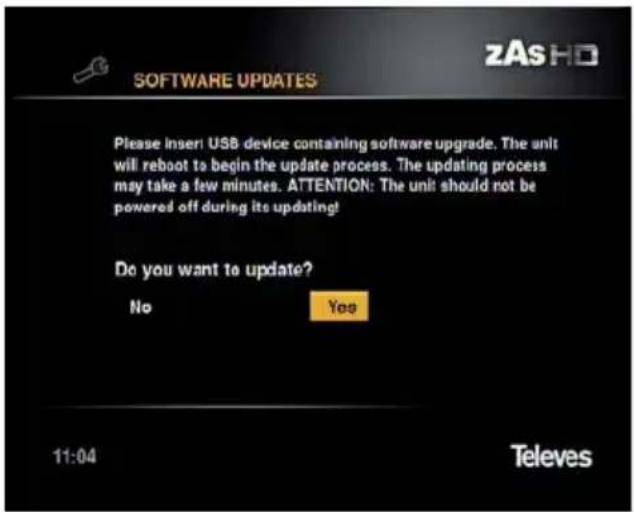
If you have an updated software version and wish to update the ZAS HD SAT, proceed as follows:
- Copy the software in a empty memory stick (pen drive) FAT 32 in the root directory.
■ Connect the memory stick to the receiver (front USB connector). - Select "USB Software Update" option and press OK.
■ The ZAS HD SAT will look for the update and proceed with its installation.
The update may take a few moments. Please wait.

- This operation involves losing all data and configurations on the receiver.
Factory Settings
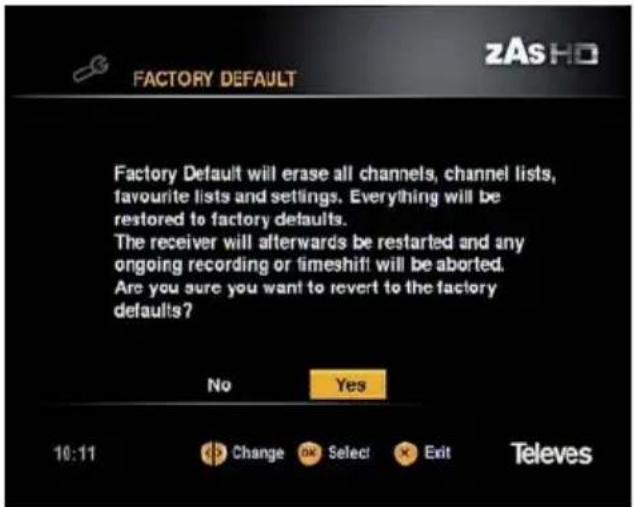
This menu allows you to delete all channels and return the ZAS HD SAT to the initial state (factory default).
- Select the "Factory Settings" option and press OK.
It then shows a warning message informing of the consequences of carrying out this option. If you really want to return the receiver to factory settings select "YES" with the keys ◀ or ▶ and press OK to confirm.
After reset, the receiver displays the Welcome window.
To exit the menu without changing anything press EXIT or select "NO" and press OK.

- This operation involves losing all data and configurations on the receiver.
- This does not affect the recordings stored.
- This operation involves losing all data and configurations on the receiver. - This does not affect the recordings stored.
12. System information
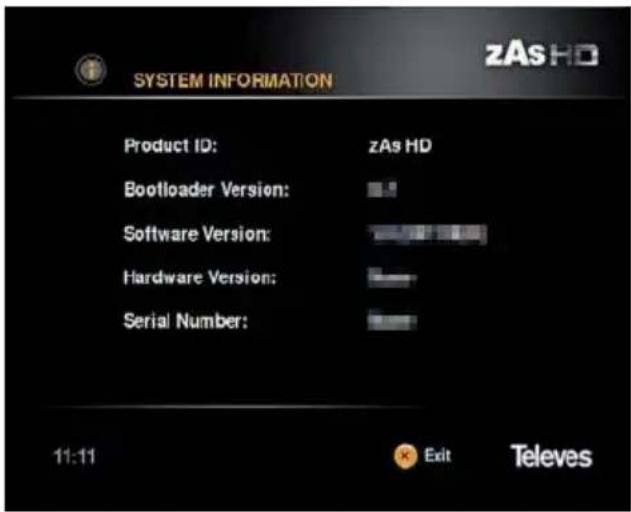
This feature allows you to display information about the receiver such as name, software and hardware versions, serial number, ... etc.
- Select the "System Information" option using the ▲ or ▼ keys, and press OK.
A screen with the current values is displayed.
■ Press EXIT to leave and return to previous menu.
13. Recording Wizard
This menu allows you to manage the information available on disk or pen drive (memory stick).
- Select "Recording Wizard" and click OK. It then shows a list of recorded files on the external drive and free space on it. If the list is longer than one screen page, use the CH▲/CH▼ forward or backward page by page.
■ Using ▲ or ▼ keys, scroll through the list of recordings one by one. It will show information about each one as the program name, recording date and time recorded.
Playing fi les
-
Select one of the files in the list and press OK to play.
If the selected fi le had not fi nished playing, in the popup menu you can select to play the fi le from the beginning or continue at the point where playback was stopped. Select one of the options with ▲ or ▼ keys and press OK.
When playing a file: -
Pressing▶▶ key allows you to fast forward picture.
• key allows fast image viewer backwards.
• Key forwards in time 30 sec.
• Key backward in time 30 sec. - ▶ky stops the picture (press it again to resume playing.)
- Pressing the OK button while playing, it displays a blinking cursor on the bottom right corner where you should enter the value of time where you want to jump, then press OK. This value should be within the total time of the file that is played.
■ To stop playing at any time, press the ■ key or EXIT.
Other operations that can be carried out in this menu are:
■ Format: Press the red button to format the disk or USB pen. After a warning message select "YES" (OK) to format, or "NO" (EXIT) to exit without changes.
■ Autoplay: Press the green button to play all files in the folder.
■ Remove: Deletes the selected file from the list.
Sort: Sequentially pressing the blue button, it changes the way you display the list, ordered by channel, Name or Date.
- Press EXIT to exit this menu.

If data support (hard disk, pen drive, ... etc.) contains multiple partitions, they will disappear, and this support will be configured as a single FAT 32 partition. The support should not be greater than 2TB (2 terabytes).
14. Recording
The ZAS SAT HD lets you record a program on an external drive in two ways: a) real-time, b) using the "Timer".

For this feature be possible, you must have an external disk formatted with FAT 32, a pen drive (memory stick) or a memory card reader.
Real-time recording
- Press to record the program you are viewing. If the EPG has information on this program, the recording length is defined as the time remaining to complete the program. If no information is in the EPG, or if you press the key, the recording time will be 30 minutes. You can increase this period of recording, in steps of 30 minutes with each press of the key, up to 4 hours. From here, each press will increase 1 hour to a maximum of 8 hours.
- During recording, if the signal level come down, or disappear, it would show the message "No Signal" and stop recording. Recording will resume once the signal returns.
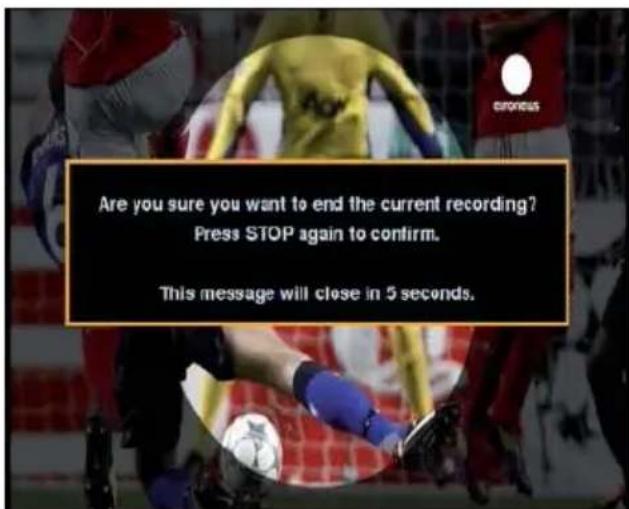
- To stop recording, press the ■ key. It will display a warning message to confirm the intention to stop recording when you press the ■ key.

- You can only record one program while you can watch another belonging to the same multiplex.
- The maximum recording time depends on the available space on the external drive.

Recording with timer
- There are two ways of programming a recording. Using the information of the EPG or directly in the Timers option.
- For information on how to create events, indicating the start time of the recording finish time program, ... etc, see par. 10. Timers.
TimeShift function
For this function be possible, you must have an external disk or a USB drive (memory stick) formatted FAT 32.
The time lapse between the real time video and that recorded onto disc is called TimeShift.
- Press the key ▶ while watching a TV programme. The image freezes and the indication "■ -XXs" is displayed on the screen, where XX is the time that the pause lasts. From now on, all the information is stored in the memory of the receiver.
- To continue watching the programme from the same point where it was paused, press the ▶■ key. Use the keys ◀◀/▶if you wish to navigate the time bar to search for a particular scene.
- If you press the ■ key it pauses the TimeShift function and returns to real time watching mode.
- Before fi nishing the function, a window appears and will ask if you wish to save the recording made from the TimeShift function in the hard drive.

- The maximum time provided for this function will depend on the capacity of the external hard drive connected.
- During the TimeShift function, the subtitle and teletext will not be available.
- During the TimeShift function you will not be able to change programme. This function must be stopped first.

EN

15. Media Browser
This option allows you to watch video fi les into formats AVI, MKV and MP4, listen to audio fi les in MP3 format, or display image fi les in JPEG format from a USB device or a card reader SD / MMC.

To make possible this feature, you must have an external drive, pen drive (memory stick) or a memory card reader connected to the receiver with the fi les to play.
Movies
- By using the keys ▲ or ▼, select the 'Movies' parameter and press OK to confirm.
- By using the keys ▲ or ▼, select the directory where are the movie files. Click OK to accept the folder, or EXIT to go up a level in the directory.
- Only are shown video files in the directory or folder.
- You can sort the list of movies by date or by name, by pressing the blue button.
- You can delete the selected movie from the list by pressing the yellow key.
- To play a movie, select it and press the key ▶ or OK. If you want to play all movies in cascade, press the green button.
- If the USB device is not compatible with the receiver, press the red button to format it.
- While playing a movie, the key lets you fast forward (8x, 16x and 32x), the key allows fast reverse (8x, 16x and 32x), the key advances the playback 30 seconds, the key pushes back the playback 30 sec, and the key freezes the picture.
- Press the OK key to jump to a specific position in the timeline. In the popup window you must enter the value of time where to jump and press OK. This value should be within the total time of the movie being watched.
- If the image does not fit your TV screen, press the QUICK MENU to access the menu 'Format Picture' and select one of the options available.
- To stop playing at any time press the ■ key or EXIT.

- Depending on the type of compression, not all files in AVI, MKV and MP4 can be played.

![MEDIA BROWSER merda pcm.AVI merda.AVI mkv avc h264 aac.mkv mkv divx ac3.mkv mkv divx mp2.MKV mkv divx mp3.mkv mkv divx xvid mp2.MKV mkv h264 ac3.mkv 18 GB free of 30 GB mkv divx mp3.mkv 0h 08m 12:27 Format Autoplay RemoveSort [By name] Move OK Play Exit Televes](/content/2026/06/1258874/images/300f3b47c505c43f02c9b626c51922cf4a3293cc102d5e2008eb28f29ad88585.jpg)
Music
- By using the keys ▲ or ▼, select the 'Music' parameter and press OK to confirm.
- By using the keys▲ or ▼select the directory where are the audio files. Click OK to accept the folder, or EXIT to go up a level in the directory.
- Only are shown audio files in the directory or folder.
- You can sort the list of audio tracks by date or by name, by pressing the blue button.
- You can delete the selected audio track from the list by pressing the yellow key.
- If the USB device is not compatible with the receiver, press the red button to format it.
- To play a track, select it in the list and press the key ▶ or OK.
- If the list offers more than one page, press the keys for to move forward page by page.
- While listening a track, the button jumps to the next track, the button jumps to the previous track, and the key stops playing.
- To stop playing at any time press the key or EXIT.
![MEDIA BROWSER 12. Invisible Light Alex Gaudino ft Kelly Ro mp3 192 mp3 32 mp3 320 Pitbull ft. Marc Anthony - Ready Steady Go [remix] XXXXXXXXXXXXXX 18 GB free of 10 GB Alex Gaudino ft Kelly Rowand - What a Feeling (Radio Edit) 6.8 MB 00:00:14 / 00:02:59 Format RemoveSort [By name] 12:29 Move Play Exit Play](/content/2026/06/1258874/images/5967ea67d7eae756cd119160dd83d816a7f8dbdb1283647e29dc393c8d8a1dc1.jpg)
Photos
- By using the keys ▲ or ▼, select the 'Photos' parameter and press OK to confirm.
- By using the keys▲ or ▼select the directory where are the photo files. Click OK to accept the folder, or EXIT to go up a level in the directory.
- Only are shown photo files in the directory or folder.
- You can sort the list of photo files by date or by name, by pressing the blue button.
- You can delete the selected photo from the list by pressing the yellow key.
-To watch a photo, select it and press the key OK. If you want to watch sequentially all photos, press the green button or the ▶ II button. - When you see one of the images on screen, keys red and green allow zooming the image (red, zoom +; green, zoom -). The yellow key rotates the image 90 degrees anticlockwise on each pulse.
- To stop watching at any time press the key or EXIT.
![MEDIA BROWSER 1/ musica/ Nueva carpeta/ 3000 4752x3168 5315x3543 BDp20Collision hires 18 GB free of 30 GB BDp20Collision 3600x2409 2008-09-06 Format Slide Show RemoveSort [By name] 12:30 Move Play Exit Televes](/content/2026/06/1258874/images/c52ec55e5c4eed9de482d243072ddcb98786e7d21a17553b4079ca6a67dbe640.jpg)
16. Glossary
DVB: Digital Video Broadcasting.
Consortium of various international organizations and companies whose objective is the realization of standards worldwide aimed at the development of digital television.
EPG: Electronic Programme Guide.
Guide that provides the user with a list of events to be broadcast in each of the programs, the time of emission of them and a description of its contents.
Letterbox: One way to present in 4:3 screen TV, programs broadcast with 16:9 aspect ratio.
This is done by using black bars on the top and bottom of the screen on the TV to create a window with the desired aspect ratio.
OSD: On Screen Display.
Screen menu system.
Digital: Sound that has been transformed into numerical values. For digital sound, you should use the SPDIF or HDMI connectors. These jacks send the sound via multiple channels, instead of just two channels as analog.
HDMI: High Definition Multimedia Interface.
High-Definition Multimedia Interface that allows the use of standard video, enhanced, or high definition and digital multichannel audio in one cable.
USB: Universal Serial Bus
Port used to connect peripherals.
PVR: Personal Video Recorder
Interactive device for recording digital TV.
SPDIF: Sony/Philips Digital Interface Format
Hardware level protocol for transmission of PCM modulated digital stereo audio signals, between devices and stereo components.
It is a device used for receiving signals from satellites. Located in the focus of the dish, converts the microwave signal at a lower frequency signal, that can be distributed via coaxial cable. This band is called Intermediate Frequency (IF).
Transponders: Automatic devices that receive, amplify, and retransmit a signal on a different frequency.
DiSEqC: Digital Satellite Equipment Control
It is a special communications protocol to be used between a satellite receiver and a device such as a multi-antenna switch, a rotor of a small antenna, or a multi-LNB holder.
JPEG: Joint Photographic Experts Group
It is a compression and coding standard for still images. It is the most common image format used by digital cameras and other devices to record pictures.
MPEG4/MP4:
Family of compression standards for digital audio / video used by the DVB.
MKV: Matroska
It is an extensible, open source, open standard multimedia container; a computer fi le that can contain an unlimited number of video fi les, audio fi les, subtitle fi les and stereoscopic/3D video fi les..
MMC/SD: MultiMediaCard/ Secure Digital
Memory card formats.
FAT 32: File Allocation Table
It is a file system developed for MS-DOS.
Menu structure
Menu
Channels list
FTA TV channels
FTA Radio channels
Complete TV list
Complete Radio list
Favourites A
Favourites B
Favourites C
Favourites D
Favourites E
Favourites F
Timers
Installation and Configuration Setting-up
Preferences
Time bar information
Output settings
HDMI output
SCART video format
Aspect ratio
Image format
Audio delay
Digital audio
Regional Settings
Country
Timezone Selection
Language Settings
Language menu
Language 1 subtitles
Language 2 subtitles
Subtitles
Language 1 audio
Language 2 audio
Audio
Access control
Lock/Unlock channels
Parental lock level
Change PIN
Lock/Unlock menu
Channels searching
Antenna configuration
Automatic channels searching
Search manual channels
Update channels list
Export channles list (USB)
Delete all channels
Maintenance
Software updating (OTA)
Software updating (USB)
Factory reset
System information
Recording wizard
Media browser
Technical specifications
LNB / Tuner
Input connector A.... 1 x F
Output connector 1 x F
Input frequency 950 - 2150 MHz
Input level 30 to 90 dB
LNB powering 13/18V, max. 250mA
Demodulation...... DVBS (QPSK), DVBS2 (QPSK, 8PSK)
FEC 1/2, 2/3, 3/4, 5/6, 7/8, Auto
Symbol rate 1 to 45 MS/s in DVB-S mode. 1 to 30 MS/s in DVB-S2 mode
Compatible with .... Unicable (SCR Technology), DiSEqC, Motor
Digital video
Compatible with ...... MPEG-2, MPEG-4, H.264
Profile and level ...... MPEG-2: MP @ ML / MPEG-4: ASP @ L5 / H.264/AVC: HP @ L4.0
Video bit Rate 40 Mbit/s Max.
Image format 4:3, 16:9
Video resolution 1080p, 1080i, 720p, 576p, 576i
Audio
Audio decoder ...... MPEG/MusiCam Layer I & II, AC3, AAC, AAC+, Dolby+, Dolby digital
Teletext DVB Compatible
Memory
Flash memory 32 Mb
RAM memory 512 Mb
A/V input/output
SCART x 1:
- RGB video output 1 x SCART socket
- CVBS video output 1 x SCART socket
- Analog audio output 1 x SCART socket
Optical Optical fibre
HDMI Video/Audio digital output
Multimedia format
Video MP4, MKV, AVI
Audio MP3
Photo JPEG
ZAS receiver power
Input voltage 12 V. DC
Max. electrical consumption 375 mA without LNB / 450 mA powering an universal LNB
Stand-by consumption (max) ..... 10 mA
Power Adapter
Mains voltage 100-240 Vac, 50/60 Hz
Output voltage 12 Vdc
Type ...... switched-mode
Physical specifications
Dimension (W x H x D) 180 mm x 29 mm x 130 mm
Weight (approx) 300 grs
Ambient specifications
Operating temperature ..... from -5°C to 45°C
Troubleshooting
Before getting in touch with your local service, be sure to follow the instructions below.
If your receiver does not work correctly after reading the list of troubleshooting, please contact your local dealer or service center.
| What is happening Possible why What to do | ||
| The front panel LED is OFF | (I) Power cord not connected (I) Make sure the adapter is plugged in and connected to the receiver | |
| The front panel LED glows red | (I) The receiver is in stand-by mode | (I) Press the ⏻ key on the remote contro unit (RCU) to power ON the receiver. |
| The RCU does not work (I) | Battery exhausted.(II) The RCU is not pointed adequately to the Receiver | (I) Check the battery status(II) Point the RCU towards your receiver(III) Be sure to that there are no obstacles between the receiver and the RCU. |
| When is first installed the receiver, after completing the channel search, a message reads “No channels were found,” or some of the channels do not appear in the list of channels. | (I) Your antenna is not properly installed(II) The LNB is not being powered | (I) Make sure your antenna is properly connected to your receiver.(II) Make sure that you have connected the cable from the LNB to the receiver input connector, and the options selected in the “Setting antenna” menu correspond to the installation |
| Ther is no picture (I) The receiver is OFF(II) HDMI and/or SCART cables are not firmly connected(III) The antenna from the LNB is not connected to your receiver | (I) Press the ⏻ key on the RCU to turn on your receiver(II) Make sure the connections between all interconnected devices are correctly and securely made(III) Be sure to connect the cable from the antenna to your receiver | |
| You have carried the receiver to another home and cannot watch digital channels | (I) The antenna is not aiming to the same satellite(II) The installation of the house is not adequate to receive digital satellite channels | (I) Make a new Searching of channels (see par. 11.5. Channels searching)(II) Ask your installer |
| The image is broken and appears in blocks (pixeling) | (I) If your installation is too complex, maybe the signal strength is not sufficient(II) Damaged cables and connectors can affect signal quality | (I) Try connecting your receiver the simplest way possible (receiver + TV) by directly connecting the antenna to your receiver. If the image is no longer interrupted, then its signal does not have enough power to use a facility so complex. Ask your installer(II) Change the connectors or cables |
| What is happening Possible why What to do | ||
| There is no sound or sound is too low | (I) The volume of your TV and / or receiver is very low or at a minimum.(II) Your TV and / or receiver is in “Mute” status.(III) SCART or HDMI cable is not firmly connected | (I) Check the volume on your TV and / or Receiver(II) Press the “Mute” button on your TV and / or Receiver.(III) Make sure the connections between all interconnected devices are correctly and securely made |
| Sometimes the image appears distorted or moved sideways | (I) Display format set to 4:3.When a program is being broadcast in 16:9, some TV sets get out of sync | (I) Change the display format to “Letterbox” or “Pan & Scan”, for this go to “Output Settings” menu |
| The image is pixelated (like blocks) every few seconds | (I) The antenna is poorly oriented satellite(II) The signal quality is not good enough(III) There is a phenomenon of saturation in the installation | (I) You need adjust the installation, get in touch with an installer |
DOLBY. DIGITAL PLUS
Dolby and the double-D symbol are trademarks of Dolby Laboratories.
Manufactured under license from Dolby Laboratories.
HDMI ^TM HIGH DEFINITION MULTIMEDIA INTERFACE
The acronym HDMI, the HDMI logo and High Definition Multimedia Interface are trademarks of HDMI Licensing LLC.
EN

Treatment of electrical and electronic equipment at the end of its useful life (applicable in the European Union and European countries with selective residual collection systems).
This symbol on the equipment or packaging indicates that this product may not be treated as conventional household waste, but may be delivered to the corresponding collection point for electrical and electronic equipment. Please ensure that this product is disposed of correctly. This way you will be helping to protect the environment and avoid the negative effects on human health and safety that could derive from inappropriate handling of this product. Recycling materials helps preserve natural resources. To receive detailed information on recycling this product, please contact your local authorities, your nearest collection point or the distributor where you purchased this product.
Garantee
Televés S.A. offers a two year guarantee from the date of purchase for EU countries. In non EU member countries legal guarantee is currently in force at the time of purchase. Please keep the receipt to determine this date.
Televés S.A. under the terms of this guarantee undertakes to repair or substitute any defective equipment.
Damage caused by incorrect use, wear and tear, third party handling, catastrophes or any other cause out of the control of Televés S.A.
Televes
DECLARATION OF CONFORMITY N° 110627131724
DECLARACIÓN DE CONFORMIDAD DECLARAÇÃO DE CONFORMIDADE DECLARATION DE CONFORMITE DICHIARAZIONE DI CONFORMITA DEKLARACJA ZGODNOŚCI DECLARATIE DE CONFORMITATE KONFORMITETSERKLÆRING CONFORMITEITSVERKLARING VASTAVUSE SERTIFIKAAT
KONFORMITÄTSERKLÄRUNG ПИЗТОПОННТКО SYMMОРФАЗИЗ FÖRSAKRAN OM ÖVERENSTÄMMELSE VAATIMUSTENMUKAISUUSVAKUUTUS ATTITIKIES DEKLARACIJA ДЕКЛАРАЦИЯ СООВТЕСТВИЯ MEGFELELŐSÉGI NYILATKOZAT BEKREFTEELSE ДЕКЛАРАЦИЯ ВІДІНОВІДНОСТИ
Manufacturer / Fabricante / Fabricante / Fabricant / Fabbricante / Fabrikant / Kavaomevaevig / Tillverkure / Valmistuja / Producent / Gamintojas / Изомовитељ / Producer / Gydtó / Fabrikant / Produenta / Fabrikant / Варобих / Valmistaja:
Televes S.A.
Rua Benéfica de Conxo, 17 - 15706 - Santiago de Compostela - Spain
Declare under our own responsibility the conformity of the product / Declara bajo su exclusiva responsabilidad la conformidad del producto / Declara sob sua exclusiva responsabilidade a conformidade do produto / Déclare sous notre propre responsabilidade la conformité de ce produit / Dichiara sotto la sua exclusiva responsabilita la conformita del prodotto / Wir übernehmen die Verantwortung für die Konformität des Produktes / Thercassouique je daxà jus eutihvý výv csuqáquanov výv ayolóvtróg / Fístäkrar om överstümmelse enligt tillverkarents eget anvar für produkten / Vakuutamme yskinomaan omalla vastuallamme tuotteen yhdenmukaisuus / Otwiadczamy na wlasną odpowiedzialność zgodność wyrobu / Deklaruojame savo atsakomybe, kad produktas yra attitikamas / Zamaizum c novotú comoú omaemcmaenuocmuo o coomaemcmauu npodygma / Declaram pe propria raspundere ca produstul este in conformitate cu cerintele esentiale si celalalte prevederi aplicabile / Suját felelősségünkre kijelentjük, hogy a termék megfelet / Erklærer under vores eget ansvar overensstemmelse for produktet / Erklærer under várt eget ansvaroverenstemmelsen for produktet / Wij nemen de verantuoording voor de conformiteit van het product / Zamaizac s nomano comoú sidnoisidasnácmo ujo do sidnoisiduocmi npodygma / Kinnizame toute vastavust:
Referencu / Referencia / Referência / Référence / Articolo / Artikelnummer / Szilamiem / Referensi / Referenssi / Numer Katalogowy / Produkto numeris / Apmukyl / Referinta / Termékszám / Varenummer / Varenummer / Artikelnummer / Apmukyl / Viide:
7175XX
European technology Made in EUROpe

- zAs HD SATELLITE
- Index
- Safety recommendations
- POWERING:
- OVERLOADING:
- LIQUIDS:
- SMALL OBJECTS:
- CLEANING:
- VENTILATION:
- CONNECTIONS:
- LNB CONNECTION:
- TV CONNECTION:
- LOCATION:
- General Information
- Summary of features
- Package contents
- ZAS HD SAT general operation
- Description of connections
- Remote Control Unit
- Setting-up
- TV set connection
- First steps
- TV or Radio selection
- Selection of programs
- Volume / Mute control
- Volume control
- Mute
- Quick menu
- Subtitles language
- Audio language
- Screen format
- SCART disabling
- Channel list menu
- FTA TV channels
- Edit
- FTA Radio channels
- Complete TV list
- Favourites
- Timers
- Create/Add an event
- Delete an event
- Installation and Configuration Setting-up
- Preferences
- Time bar information
- Output settings
- HDMI output
- SCART video format:
- Aspect ratio
- Image format
- Audio delay
- Digital audio
- Regional Settings
- Country
- Timezone selection:
- Language Settings
- Menu language
- Language 1/ Language 2 Subtitles
- Subtitles
- Language 1/ Language 2 Audio
- Audio
- Access control
- Locking / Unlocking channels
- Parental lock level
- Change PIN:
- Locking / Unlocking menu
- Channels searching
- Antenna confi guration
- None
- way splitter
- way splitter
- way splitter
- Motor
- Unicable
- Automatic channel searching
- Search manual channels
- Update channels list
- Export channel list (USB)
- Delete all channels
- Maintenance
- Update Software (OTA)
- Update Software (USB)
- Factory Settings
- System information
- Recording Wizard
- Playing fi les
- Recording
- Real-time recording
- Recording with timer
- TimeShift function
- For this function be possible, you must have an external disk or a USB drive (memory stick) formatted FAT 32.
- Media Browser
- Movies
- Music
- Photos
- Glossary
- Menu structure
- Menu
- Channels list
- Timers
- Installation and Configuration Setting-up
- Preferences
- Output settings
- Regional Settings
- Language Settings
- Access control
- Channels searching
- Maintenance
- System information
- Recording wizard
- Media browser
- Technical specifications
- LNB / Tuner
- Digital video
- Memory
- A/V input/output
- Multimedia format
- ZAS receiver power
- Power Adapter
- Physical specifications
- Ambient specifications
- Troubleshooting
- DOLBY. DIGITAL PLUS
- HDMI TM HIGH DEFINITION MULTIMEDIA INTERFACE
- Garantee
- Televes
- DECLARATION OF CONFORMITY N° 110627131724
- Televes S.A.
- 7175XX
- European technology Made in EUROpe
Brand : TELEVES
Model : ZASHD
Category : Digital decoder