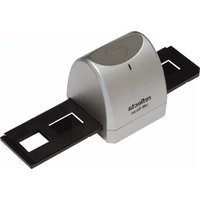
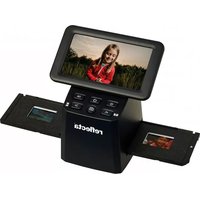
xM-Scan - Scanner Reflecta - Free user manual and instructions
Find the device manual for free xM-Scan Reflecta in PDF.


| Product Type | Film & Slide Scanner |
| Model | xM-Scan |
| Brand | Reflecta |
| Dimensions (approx.) | 260 x 150 x 60 mm |
| Weight | 1.2 kg |
| Power Supply | USB 2.0 (5V, 500mA) or optional AC adapter |
| Scanning Resolution | Up to 3600 dpi optical |
| Scanning Speed | Approx. 10 seconds per frame at 3600 dpi |
| Supported Media | 35mm film strips and slides |
| Software Included | Reflecta ScanSuite (Windows & Mac) |
| Interface | USB 2.0 |
| Operating Systems | Windows 7/8/10/11, macOS 10.12 or later |
| Cleaning Instructions | Use a soft, lint-free cloth with lens cleaner for the optical elements; avoid abrasive materials. |
| Safety Precautions | Keep away from moisture and direct sunlight; do not open the casing. |
| Spare Parts Availability | Contact Reflecta customer service for replacement parts (e.g., film holders, lamps). |
| Repair Information | Refer to authorized service centers; do not attempt self-repair. |
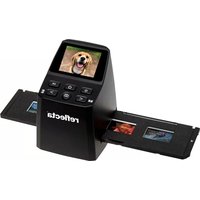
| General Information | Designed for digitizing 35mm film negatives and slides with high resolution and color accuracy. |
Frequently Asked Questions - xM-Scan Reflecta
User questions about xM-Scan Reflecta
0 question about this device. Answer the ones you know or ask your own.
Ask a new question about this device
Download the instructions for your Scanner in PDF format for free! Find your manual xM-Scan - Reflecta and take your electronic device back in hand. On this page are published all the documents necessary for the use of your device. xM-Scan by Reflecta.
USER MANUAL xM-Scan Reflecta
natural_image
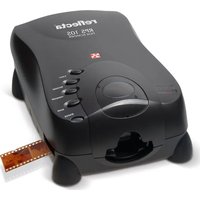
Exterior view of a reflective mechanical component with black plates and a circular top (no text or symbols visible)User manual
For customers in North and South America
For customers in USA
This device complies with Part 15 of the FCC rules. Operation is subject to the following two conditions:
Digital Camera

Tested To Comply With FCC Standards
FOR HOME OR OFFICE USE
(1) This device may not cause harmful interference.
(2) This device must accept any interference received, including interference that may cause undesired operation.
For customers in Canada
This Class B digital apparatus meets all requirements of the Canadian Interference-Causing Equipment Regulations.
For customers in Europe

“CE” mark indicates that this product complies with the European requirements for safety, health, environment and customer protection. “CE” mark cameras are intended for sales in Europe.
1. Name of parts

Note: This film scanner supports Windows XP SP2 / Vista and 7 via USB 2.0 only.
Please make sure your film negatives/mounted slides and cover trays are clean before inserting into the scanner as well. Dust or dirt from the negatives and cover trays will affect the quality of your scanned images.
We strongly suggest using a clean, dry, non-alcohol cotton swab or the cleaning brush that is included with your unit to insert into the film scanner slot and clean the glass surface periodically to produce a clear image.
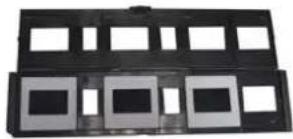
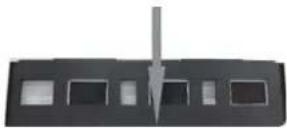
2 How to install slides and film into the tray holder
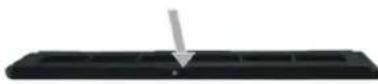
a. Open the film holder as illustrated


b. Put a film/slide in the film/slide slot as shown.
Note: Do not flip the film/slide. If flipped, the pictures will be scanned backwards.
natural_image
Black plastic tray with multiple square cutouts, no visible text or symbols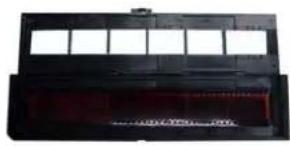
natural_image
Black plastic enclosure with rectangular cutouts and a red interior panel (no visible text or symbols)c. Close the film/slide holder
-3-
Cleaning the dust from the film scanner lens:
Open the MediaImpression 2 software as if you were about to convert a picture.
Do not insert any slides or negatives into the film converter slot. You will be able to see the dust that is on the lens from the MediaImpression 2 live view window. (See the example shown below) Then you can use the cleaning brush to wipe the dust.

natural_image
Blank image canvas with no visible text, symbols, or discernible content
natural_image
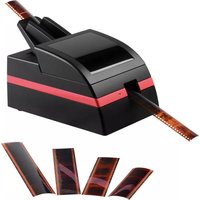
Exterior view of a reflective mechanical device (no text or symbols visible on body)We strongly suggest using a clean, dry, non-alcohol cotton swab or the cleaning brush that is included with your unit to insert into the film scanner slot and clean the glass surface periodically to produce a clear image.
3. Installing the software
- Insert the installation CD into the CD-ROM drive and the installation CD menu should appear.
- When you see the following screen, choose
"Arcsoft Software" to install the software.

Windows XP and Windows Vista directions:
- Media Impression will start the installation.
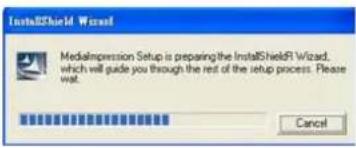
- Click Next to continue.
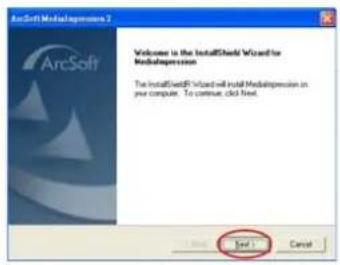
-
Click Next to have Media Impressions download into your Programs
-
Click on Yes to agree to the terms and conditions

- Click Next to continue

- Media Impressions will start the setup. process

- Once you get this screen select "Clear All"
so that MedialImpressions does not take
over the files on your computer.

8、Click on Finish to complete and restart the computer.
![ArcSoft Media Expression 2 Associated File Format Checked Image Text will open in the MediaExpression Photo Views. Checked video and audio Text will open in the MediaExpression Media Files. A: PDF 1.psd - [main] B: Windows Bitmap (*.bmp) C: Tagged Image Files (*.gif, *.gif) D: Portable Network, Groovee (*.bmp) E: PC Macintosh (*.cmd) F: Quick Pro (*.psd) G: Quick Pro PDF (*.pdf) H: CompScope GIF (*.gif) I: Targa Files (*.gif) Select All Close All Find it Cancel](/content/2026/06/1258518/images/69f176258a8ab42082e53db554e2914a74879a35a9a9c5654ed5139ae9f38d8f.jpg)

- The installed software will automatically create a "Media Impression 2" logo on your desktop. Restart the computer and remove the installation disk.
Note: If a "Code 10 error" appears on your screen when using the program, please do not unplug your device from the USB port of your computer. Please restart your computer and resume running the Media Impression program.
4. Using the slide and film converter.
- Connect the device via USB to your computer, which will find a USB imaging device(no driver is needed)

natural_image
Diagram of a USB cable inserted into a server rack socket (no text or symbols visible)- Then double-click the icon on the desktop to open the software, the main interface is shown as bellow:

There are 4 buttons for options, respectively:
*Pictures: to open an existing image
*Acquire: for negative film shooting
*Easy Fix: for fast processing image
*Photo Editing Tool: photo editing tools
- Click Acquire in the Arcsoft MediaImpression interface option (if it is the first use, do not put the negative film until the system automatically obtains the data for calibration, then click OK), Pop-up settings dialog box is shown in the following figure.

As in the figure:
1) Select the device, the default FS500 can not be changed.
2) “format” defines your Save settings, which provides jpg and tif. “quality” for image quality setting, which provides highest, high, normal and low levels. The higher the level, the better the picture quality is and it also requires more storage space. “save to this location” stands for the selection of a save path to store your photos.
3) scan option: “slide”, “negative” and “B&W negative”, which stand respectively for positive, negative and back and white negative films, from which users may select according to their requirements. Color Depth is set as 24, which is unchangeable. Dpi stands for photo resolution which provides 1800 and 3600 as an option. In practical application, photos with 1800 resolution offers the size of 2520* 1680 (pixels) and 3600 5040* 3360 (pixels).
NOTE: if the photos you take give obvious dead pixels, you can clear them in two ways.
1) First remove the film clip, then click to calibrate it.
2) Cleaning the dust from the film scanner lens
- When the above settings are over, click 'Acquire' at the lower right corner on the interface of Acquire from Scanner, from where you get to the following shooting window shown as
bellow.

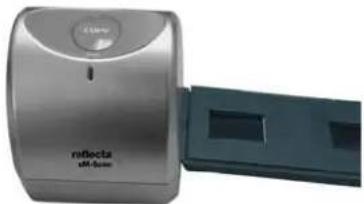
- Insert the loaded film jacket into the device, a corresponding films preview will appear in the shooting window.
natural_image
Exterior view of a reflective UV flash unit (no text or symbols visible on the device body)- Upon adjusting the film location, click Capture to shoot the photo.

Setting Buttons
Single click to open the earlier described setting dialog box Acquire from Scanner.

Adjustment
Single click to open the dialog box, drag the slider to set the parameters like the RGB scale, exposure, brightness, contrast and saturation for your photos.

Press OK one by one to confirm the result after modification and press ' Lose' to close the shooting window after shooting.
5. Introduction to software features
\*Pictures
At initial page, click 'pictures' to preview the photos as in the following figure.

Choose the storage location by finding the right folders, then the corresponding photos are displayed on the right side of the previewing window.
A row of shortcut buttons are shown as in the fig. below.

Their functions (from the left to the right) are presented as:

Rotate Left
Left turn of the photo

Rotate Right
Right turn of the photo

Batch
Batch processing, which has three pull-down menu.
- Batch convert, to batch convert photos and select the storage path of the converted.
- Batch resize, to batch convert the sizes of the photos and select the storage path of the converted.
- Batch rename, to batch rename photos and select the storage path of the converted.

Attach Rating
To add the appropriate rating to your photos, which has five rating levels to facilitate the classification or search by rating.

Auto Rating
Make automatic rating, which the system will automatic adds according to the photo attributes like the sizes, etc.

Attach Tags
Add tags of events or holidays, etc. to photos for classification and easy search.

Auto Face Tagging
Identify the face of the photo, you may choose the photos with the same faces for unified tagging, which facilitates easy classification and search.

Auto Scene Tagging
Automatic tagging for different scenes of the photos, which will facilitate easy classification and search.

Delete
Delete the corresponding photos.

Group By
Grouping options, which is based on folders, year, month, date, etc.

Sort By
Sort buttons, which helps the classification by the size of both the files and photos.

View By
Two kind of display modes to select: the thumbnail and list.
You can enter the names to search the photos.


Select All
Click once to select all, re-click to cancel it.

Users can click the narrow picture on the left, and enlarge the photos by click bigger on the right side, or move the slider to choose the right size.
Three buttons below Photo review interface, which provides pages switch. Users can

\*Easy Fix
At initial page, choose "Easy Fix" to enter. The page is almost the same as Pictures" except


The options features are introduced respectively as follows.
Make all fixes
Select all fixes, click it for all fixing procedures and click "next" to complete the relevant steps.
Straighten it
Options for the rotation, users may slightly adjust the tilt of the photo according to their needs.
Crop it
Users may crop photos at the proportion of 4:6 or 5:7.
Fix Red—Eye
Remove red-eye option by which users can fix the 'red-eye' due to the flash light.
Add Brightness and contract
Every option is provided with 0-5 levels, one of which may be chosen according to user's need.
Sharpen it
Adjustment of sharpness with 0-5 levels available.
Adjust the color
Color adjustment by which users may drag the slider for RGB and black/white color.
Make the subject Stand out
The main subject is automatically selected from the photo. The user can adjust the boundary line sharpness and ambiguity by dragging the slider.
Saving Your Results
Edit photos by order, the user can cancel it, if not satisfied with the result by clicking cancel. Once the edit is over, click "Save as" to save them then click "close" to complete easy fix.
\*Photo Editing Tools
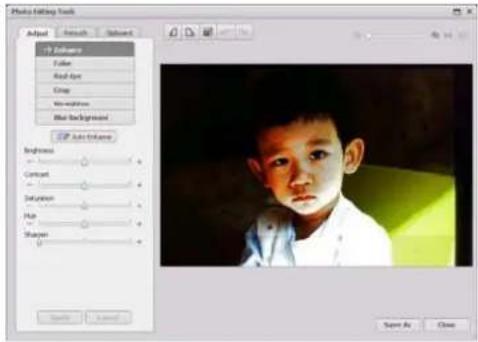
-18-
Photo Editing Tools has three option taps “Adjust” “Retouch” “Clipboard”, of which the functions are introduced respectively as follows.
Adjust
The option has 6 submenus, which are described respectively as follows.
Enhance
The Enhance feature includes two types of controls:

Auto Enhance
Click the "Auto Enhance" button to improve the overall quality of your pictures with a single click.
Manual Fix
For precise image enhancement control, adjust the brightness, contrast, saturation, Hue and sharpen.
How to enhance a photo manually:
- Move the sliders to adjust the level of brightness and contrast and to make the image sharper.
- Use the zoom slider to get a closer look at how the adjustment affects the photo.
- Click "Apply" if you like the result. Click "Cancel" if you do not.
Color
This feature is designed to fix digital photos that have unnatural color or appear too dark. It's
also great for fixing scanned versions of old prints that have faded or whose colors have changed after many years of neglect.
How to fix the color of a photo:
- Drag the color balance sliders to make the photo color appear more natural. Add red or yellow to make the photo warmer. Add blue or green to make the photo cooler.
- Drag the Lighter/Darker slider to the left to reveal details hidden in a dark photo or to the right to make a faded photo look new again.
- Click "Apply" if you like the result. Click "Cancel" if you do not.
Red-Eye
This feature makes it easy for you to fix a red eye - a common problem in flash photography. There are two ways to fix redeye:

Auto Fix
- Simply click the "Fix Red-Eye" button to automatically find and fix all red-eye.
- If not all of the red eye is fixed, use the "Click to Fix" method.
Manual Fix
- Use the zoom slider on the toolbar to zoom in on the photo.
- Drag the small white box inside the zoom navigator to move over a red eye.
- Place your cursor directly over the red eye and click.
- Repeat the process until all the red eyes are fixed.
- Click "Undo" if you make a mistake or don't like the result.
Crop
This feature enables you to trim photos for a dramatic effect or cut off the distracting parts of a picture.
How to use the crop function:
- Choose the crop orientation (portrait or landscape).
- Select a fixed proportion for the crop rectangle (4:6, 5:7, 8:10) or choose "Custom" if you want to use a different proportion.
- Resize the crop rectangle by clicking and dragging the red lines.
- Move the crop rectangle into position by clicking and dragging inside the red box.
- Click "Crop". The area inside the rectangle will be kept, the area outside will be trimmed away.
- Click "Undo" if you make a mistake or don't like the result.
Straighten
This feature enables you to fix photos that appear to be tilted.
How to use Straighten:
- Move the slider (or click the rotate buttons) until the photo appears straight.
- Use the superimposed grid lines for vertical and horizontal reference.
- Click "Apply" if you like the result. Click "Cancel" if you do not.
Blur Background
This feature can be used in a subtle way -- to tone down un-important background details, or
for dramatic effect -- by making the main subject of a photo "pop out" of the picture.
How to use the Blur Background:
- With your cursor, trace a line around the person or object you want to stand out. When you release the mouse button, the area outside the traced line will become slightly blurred.
- Drag the first slider to make the transition between the blurred and non-blurred area sharp or smooth.
- Drag the second slider to increase or decrease the amount of blur.
- Click "Apply" if you like the result. Click "Cancel" if you do not.
Saving Your Results
When you're done editing a photo, click Save As to save your results. You can choose to overwrite the original file or save a new one.
Click "Close" to exit the Photo Editing Module.
Retouch

Healing Brush
The Healing Brush is good for fixing dust, scratches and removing skin blemishes.
How to use the Healing Brush to fix a skin blemish:
-
Establish a source point for the Healing Brush by holding the Shift key and clicking on an area of the skin that is close in color and texture to the area you want to heal.
-
Use the zoom control to zoom in on the blemish.
- Adjust the size of the healing brush so the cursor (circle) is only slightly larger than the blemish.
- Paint over the blemish. The area will be healed.
Click "Undo" if you make a mistake or don't like the result.

Clone
The Clone tool is good for removing unwanted elements from a photo. It can also be used for a fun effect, like moving a nose from one person to another.
How to use the Clone tool to remove a telephone pole from the background of a photo:
- Establish a source point for the Clone tool by holding the Shift key and clicking on an area of the sky that you want to use to paint over the telephone pole.
- Adjust the brush size so the cursor (circle) is only slightly larger than the widest part of the telephone pole.
- Click and hold your mouse button and carefully paint over the telephone pole. Do not release the mouse button until the job is done. The sky will be cloned into place.
Click "Undo" if you make a mistake or don't like the result.

Lighten/Darken
The Lighten/Darken tool is good for adjusting specific areas of a photo.

Smudge
Simulate the smearing of wet paint. Please click and drag the sliders below to change the brush size and sharpness.

Sharpen
Sharpen blurry areas. Please click and drag the sliders below to change the brush size and transparency.

Blur
Smooth out rough areas. Please click and drag the sliders below to change the brush size and intensity.

Paint Brush
Let you to "paint" on your image when you click and drag the mouse. Please click and drag the sliders below to change the brush size and transparency.

Line
Draw a straight line in the photo. Please click and drag the sliders below to change the line width and transparency.

Eraser
Simulate an eraser, removing the image painting by paintbrush and line tools from your photo. Please click and drag the sliders below to change the eraser size and effect.
Saving You Results
When you're done, click "Save As" button to save your results. You can overwrite the original file or save it as a new one. Or click "Cancel" to exit without saving.
Click "Close" to exit the Photo Editing Module.
Clipboard

Rectangular select
Select a rectangular area

Elliptical select
Select an elliptical area

Freehand select
Select a freehand area

Magic wand
Select an area with a tolerance range by the color

Magnetic select
Automatically capture the boundary line to select a suitable area
New
Set up a new selected area
Add
Add a selected area
Subtract
Subtract a selected area

select all
Select all photos

Inverse
Select the part other than the selected area

select none
Cancel the selected area

copy to clipboard
Copy the selected area

Paste form clipboard
Paste the selected area

delete
To delete an image for the clipboard
Saving You Results
When you're done, click "Save As" button to save your results. You can overwrite the original file or save it as a new one. Or click "Cancel" to exit without saving.
Click "Close" to exit the Photo Editing Module.
Note: For more detailed information, please refer to the [Help] of the program.
- Specification
| Interface: USB 2.0 | |
| Image Sensor: 1/1.8" inch 5 mega CMOS sensor (5,174,400 pixels) | |
| Lens: F no.=5.0, 2G+2P elements , View angle=55° | |
| Frame Rate (Max.): 5 Megapixel (2520x1680) 2 fps | |
| Focus Range: Fixed focus | |
| Exposure Control: Automatic | |
| Color Balance: Automatic | |
| Scan high resolution | 5 Megapixel equal to 1,800 dpi (enhances to 3,600 dpi via interpolation) |
| Data Conversion 10 bits per color channel | |
| Scan Method Single pass | |
| Light Source Back light (3 white LED) | |
| Power: Powered from USB port | |
| Dimensions(LxHxW) 94 X 100 X 96 mm | |
| Weight | 350g |
| Software Language | ArcSoft MediaImpression 2.0 will support the following 13 languages:Chinese Simplified, Chinese Traditional, Dutch, English, French, German, Italian, Japanese, Korean, Portuguese (Brazilian), Russian, Spanish, Swedish |
| Operating Systems | Windows XP SP2 above / VISTA / Win 7 |
Computer System Requirement:
CPU: Pentium IV 1.6GHz or equivalent AMD Athlon (Intel core 2 Duo 2.0 GHZ or equivalent
AMD Athlon X2 processor recommended)
RAM: 512 MB (1GB or higher recommended)
Hard Disk: 300MB available hard disk space
Operation System: Windows XP SP2, Windows Vista and Windows 7

- For customers in USA
- For customers in Canada
- For customers in Europe
- Name of parts
- How to install slides and film into the tray holder
- Cleaning the dust from the film scanner lens:
- Installing the software
- Using the slide and film converter.
- Setting Buttons
- Adjustment
- Introduction to software features
- \*Pictures
- Rotate Left
- Rotate Right
- Batch
- Attach Rating
- Auto Rating
- Attach Tags
- Auto Face Tagging
- Auto Scene Tagging
- Delete
- Group By
- Sort By
- View By
- Select All
- \*Easy Fix
- Make all fixes
- Straighten it
- Crop it
- Fix Red—Eye
- Add Brightness and contract
- Sharpen it
- Adjust the color
- Make the subject Stand out
- Saving Your Results
- \*Photo Editing Tools
- Adjust
- Enhance
- Auto Enhance
- Manual Fix
- Color
- Red-Eye
- Auto Fix
- Crop
- Straighten
- Blur Background
- Retouch
- Healing Brush
- Clone
- Lighten/Darken
- Smudge
- Sharpen
- Blur
- Paint Brush
- Line
- Eraser
- Saving You Results
- Clipboard
- Rectangular select
- Elliptical select
- Freehand select
- Magic wand
- Magnetic select
- New
- Add
- Subtract
- Inverse
- select none
- copy to clipboard
- Paste form clipboard
- Computer System Requirement:
Brand : Reflecta
Model : xM-Scan
Category : Scanner