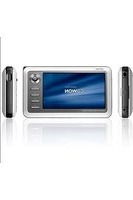
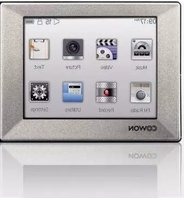
IAUDIO A2 - Mp3 player COWON - Free user manual and instructions
Find the device manual for free IAUDIO A2 COWON in PDF.


| Product Type | Portable Media Player |
| Brand | Cowon |
| Model | iAudio A2 |
| Dimensions | 118 x 68 x 15 mm |
| Weight | 180 g |
| Display | 2.2-inch TFT LCD, 320x240 pixels |
| Storage Capacity | 20GB / 30GB Hard Drive |
| Power Source | Internal Rechargeable Li-Polymer Battery |
| Battery Life | Up to 10 hours video, 20 hours audio |
| Audio Formats | MP3, WMA, OGG, FLAC, WAV |
| Video Formats | MPEG-4, AVI, ASF, DivX, XviD |
| Main Functions | Music & Video Playback, Photo Viewer, FM Radio, Voice Recorder, Text Viewer |
| Connectivity | USB 2.0, TV-Out (Composite) |
| Maintenance | Clean with a soft, dry cloth. Avoid liquids. |
| Safety Precautions | Keep away from magnetic fields. Do not disassemble. |
| Spare Parts | Replacement battery, USB cable, earphones |
| Repairability | Hard drive and battery are replaceable. |
| Certifications | FCC, CE |
Frequently Asked Questions - IAUDIO A2 COWON
User questions about IAUDIO A2 COWON
0 question about this device. Answer the ones you know or ask your own.
Ask a new question about this device
Download the instructions for your Mp3 player in PDF format for free! Find your manual IAUDIO A2 - COWON and take your electronic device back in hand. On this page are published all the documents necessary for the use of your device. IAUDIO A2 by COWON.
USER MANUAL IAUDIO A2 COWON
• COWON is a registered trademark of COWON SYSTEMS, Inc.
• This product is for home use only and cannot be used for commercial purposes.
- The copyright for this manual belongs exclusively to COWON SYSTEMS, Inc., and unauthorized distribution of this manual, or any portion of it is prohibited without prior written permission.
- JetShell and JetAudio are copyrights of COWON SYSTEMS, Inc., and unauthorized distribution of this manual, or any portion of it, and commercial use is prohibited without prior written permission of COWON SYSTEMS, Inc.
- The conversion feature of JetShell or JetAudio must be used for personal purpose only. It is against the copyright laws to use them for commercial purposes or services.
- COWON SYSTEMS, Inc. complies with the laws and regulations related to records, videos and games. Complying with all other codified laws is the responsibility of the actual users.
• In order for you to receive specialized iAUDIO services, we recommend that you complete customer registration at http://www.COWON.com to register as
an official customer. Various specialized benefits are only available to registered users who have completed the customer registration.
- Users who do not complete the customer registration are regarded that they do not wish to receive special benefits only for registered users, and may be restricted from some services.
- The examples, texts, drawings, and pictures contained in this manual are subject to change without prior notice according to improvements of the product.
- Product features or specifications contained in this manual are subject to change without prior notice according to improvements of the product.
BBE Related
• BBE is produced under the license of BBE Sound, Inc.
- BBE Sound, Inc. has the licensing rights for BBE under USP4638258, 5510752 and 5736897.
- BBE and the BBE symbol are the registered trademarks of BBE Sound, Inc.
DIGITAL PRIDE

All rights reserved by COWON SYSTEMS, Inc.
Table of Contents
Precautions for Using this Product 4
1) Before Using this Product 5
- What is COWON A2?
- Package Components
- Names of Parts
- Power Connection and Charging
- Connecting to your PC
- Charging with your PC
- Windows 98 Driver Setup
- Saving Files and Disconnecting A2
- Upgrading Firmware
2)Basic Features 14
- Running Files
- Button Controls
3) Advanced Features 16
- File Browser
- Playlist
- USB Host Connection
- Radio Mode
- Record Mode
- AV OUT
- Wallpaper
- Setup Mode
4) Setup Features 23
- Setup List
- Display
- Sound
- System
- Information
- Movie Player
- Music Player
- Radio
- Recorder
- Product Specifications
- Installation CD
- Converting Files with JetAudio VX
Troubleshooting 35
Precautions for Using this Product
- Do not use this product for other purposes than those described in this guide.
- Do not view videos, pictures and texts stored in your player while driving a vehicle for your safety. Operating other features of the player is also dangerous and may cause fatal accidents while driving.
- Do not use detergent or other chemicals on the product surface due to decolorization. In this case, wipe the polluted area carefully with a soft cloth.
- Do not expose the player in either cold weather of under 0°C or hot temperature places over 40°C such as inside automobiles. This may cause fatal damage to your player.
- Do not expose your player to water or keep it in a damp or humid place for long periods. If the player is damaged from moisture as described above, product failure is then classified as failure
by submersion, and no longer covered by warranty. Moreover, your player may not be possible be repaired with charged for services, and you may no longer be able to use your player.
- Do not attempt to disassemble or reconstruct the player. Any defects resulting from this will void any warranty, and the unit may be permanently disqualified from any after service.
- Do not mix directions when connecting cables to your player or PC. Connecting cables incorrectly may damage your player or PC. Do not bend or press connection cables with heavy objects.
- If you smell the player burning or find it overheating while in use, remove the battery and contact our A/S Center as soon as possible.
- Touching the player with wet hands may cause damage and malfunctions. Handle the power plug only with dry hands (otherwise an electric shock may occur).
- Listening at high volumes for extended periods may harm your hearing.
• Using the player in places with high occurrences of static electricity may cause malfunctions. - Stored data may get lost by physical impact, damage or error, therefore always backup important files. All data stored in the player may become deleted when being serviced. Our A/S center does not backup files while repairing players. Please note that COWON SYSTEMS, Inc. is not responsible for any data loss from products entrusted to us for service.
- Only use the AC power adapter and USB cable provided by COWON SYSTEMS, Inc.
- When connecting to a PC, use only USB ports on the mother board or a USB Host card. Using an external USB hub may not guarantee proper operation. (e.g. USB ports on a keyboard or an external USB hub)
- When formatting the built-in hard disk, select FAT32 as the file system. Firmware must be reinstalled according to 'Upgrading Firmware' procedures after format.
- Be sure to disconnect the power supply to the PC and AC adapter during lightning or thunderstorms, to prevent danger to the user or the risk of fire hazards.
- Keep the player away from magnets and direct magnetic fields, as they can cause malfunctions.
- Do not connect the line-in/out jacks of the cradle (or sub-pack) and the USB port simultaneously. The power of the player may be turned off or cause malfunctions. Only connect the required jacks or ports.
- Do not drop or subject the product to any hard impact This may result in malfunctions and/or unit failure and void the warranty.
- Price of the player may fluctuate due to unexpectedly commercial conditions. In this case, COWON SYSTEMS, Inc. has no responsibility to compensate for the price fluctuation.
Before Using this Product
What is COWON A2?
COWON A2 is a portable multimedia player developed and manufactured by COWON SYSTEMS, Inc. Equip with a clear, wide LCD screen, users are able to enjoy realistic movies and also record or watch TV programs through an AV in/output jack.
Moreover, BBE technology used in high-tech digital devices are adopted to restore sound sources to its original clear sound during the digital processing. The player also supports photo view, text reading, FM radio listening/recording, as well as voice recording and direct encoding through a built-in microphone and line-in input jack.
Wide and vivid color LCD
480 x 272 pixels, 26 M color 4 inch Wide TFT-LCD presents operation status for easy confirmation and to high-quality images anywhere and anytime.
Continuous playback with embedded battery
The ultra power-saving circuit of COWON A2 enables up to 10 hours of video and 18 hours of audio continuous playback with its built-in, fully charged, 4300 mAh battery.
Movie playback
DivX, XviD, WMV Codec is pre-installed into the player to play almost all movie file formats without additional conversion procedures. Movie file formats that are not supported at first try are easily viewable after a simple conversion step using JetAudio VX.
Movie recording
Directly record with external AV devices (TV, VCR, camcorder), and then store to enjoy. Immediately record by connecting to external AV OUT jack and your A2 with the AV cable included in your package.
Powerful audio format support
Supports MP3, OGG, WMA (ASF) and WAV file formats and restores damaged harmonics of digital music to its original clear sound with the BBE technology applied to enjoy music at its best condition.(JetEffect is not supported during OGG playback.)
Voice recording and direct encoding
COWON A2 allows professional level voice recordings through its built-in high-fidelity microphone and direct encoding through a line-in cable. You can record important lectures or directly transmit sounds from CD players or other audio devices with the line-in cable and save them in your A2.
Text and image viewer
4 in. wide screen allows comfortable view of text files and image files (JPG, PNG, BMP). Images can be viewed in slide show mode or be magnified for easy view. Now your precious memories can always be viewed and carried along in a digital photo frame.
Listening/Recording of FM broadcasts
FM listening comes with useful features such as auto frequency scanning, country settings, 25 preset frequencies, immediate and scheduled recording, and more.
Before Using this Product
Most Powerful Sound Fields Recognized Worldwide
COWON's delicate but yet powerful sound is already approved by many professionals.
EQ: 5 Band,7 Set
BBE: Sound field effects that provide the clearest music.
Mach3Bass: A bass booster that enhances super low-end bass.
MP Enhance: Sound field effects that compensate for missing sound segments.
3D Surround: Three-dimensional surround sound effect.
Portable disk and USB HOST features
USB 2.0 support allows fast file storage to the built-in hard disk, and the "USB HOST" port allows photos to be directly transmitted and stored from a digital camera (with UMS support) to your A2.
Logo and wallpaper screen
Images files of logos and wallpapers can be created by the user to present a unique style like no other.
Comfortable clock feature
Basic clock feature is included, also with easy clock view, alarm and scheduled recording notices and more.
Easy Upgrade with Firmware Download
Easily upgrade your player with the firmware download feature. We provide new firmware versions incorporating improvements from the actual requirements and suggestions of users.
JetAudio VX included
Build a powerful multimedia desktop environment with the world famous integrated multimedia playback software, JetAudio Basic VX. Movie file formats that are not supported by A2 can easily be converted for view with simple conversion features of JetAudio VX.
Before Using this Product
Package Components

COWON A2 Body


Hand StrapCarrying Case

Install CD (JetShell, JetAudio)
User's Manual
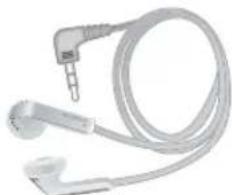
Bundle Earphones
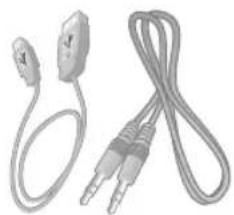
USB 2.0 Cable, Line-in Recording Cable
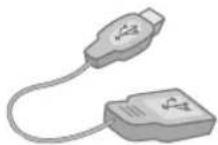
USB Host Cable
![graph TD A["1: Device"] --> B["2: Key switch"] B --> C["3: Rotation Mechanism"] C --> D["4: Device"]](/content/2026/06/1257160/images/6125ad72be61676240dda66373f581859a5a491e2cbbc9e650f8b5db0e50075e.jpg)


AC Power Adapter
Before Using this Product
Names of Parts


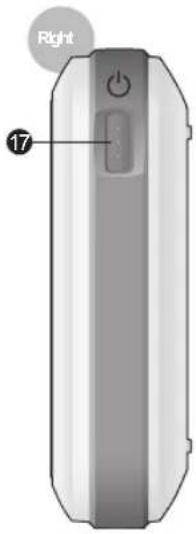

Before Using this Product
① Earphone jack : Connect the bundled earphone or any earphone with a standard 3.5 mm plug
② AV OUT : Connect the AV cable to send A2 still/video images to external AV devices (TV etc.).
3 AV IN : Connect the AV cable and line-in cable to record contents playing on external AV devices with your A2 player.
4 USB DEVICE : Connect your A2 and computer with the USB 2.0 cable to transfer files.
⑤ USB HOST : Connect your A2 and other USB compatible devices with the USB Host cable.
6 DC Adapter Jack : Connect the adapter to either turn on or charge A2.
⑦ Microphone : Voice recording with the built-in microphone.
⑧ Speaker : Listen to audio without earphones with the built-in stereo speaker.
⑨ Strap holder : Holder to connect various straps and accessories.
⑩ TFT LCD : Displays information and playback screens.
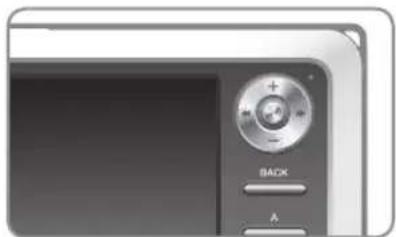
11 Joggle Lever : Moves up, down, left and right and either selects or runs files when pressed.
12 LED : Indicates basic player status.
13 BACK button : Clear selections or exit from current mode.
14 A, B, C buttons : Runs A, B and C features below the screen.
15 RESET hole : Cuts off power when the player is malfunctioning. Does not influence player operations.
16 LCD, AV OUT, HOLD switch : Selects items on the screen and also selects Button Hold and USB Charge conditions.
Power switch : Short press to temporarily turn off the LCD screen. Long press to turn on and off the player.
Power Connection and Charging

- Connect the AC adapter to the outlet and the DC adapter jack on the side of the player.
- LED turns on red while the player is charged.

-
LED turns off after the player is fully charged.
-
Fully charge the player before first use or after the player was not used for a long period of time.
- If the player was discharged for a extended period of time, the player will not immediately operate when the adapter is connected. The LED may not light up red, but the player will charge normally. A sufficient amount of time is needed to fully charge the player.
- For your safety, only use the adapter included with your player at purchase. The adapter is 110/220V.
Before Using this Product
Connecting to your PC

- Connect the device's "USB DEVICE" and the USB port of the computer with the provided USB cable.

- If properly connected, the following appears on the LCD.

- Check the recently added drive from My Computer and Windows Browser.
Charging with your PC
Connect your computer when the HOLD switch beneath the player is at LCD or AV OUT. The player can be charged through "USB DEVICE" depending on the HOLD switch position.

If the HOLD switch is at LCD
The player is recognized as a portable storage device. Battery will be used and not be charged.

If the HOLD switch is at AV OUT
The player is recognized as a portable storage device and will be charged. Battery will be slightly consumed but the recognition delay will be slow.

If the HOLD switch is at HOLD
The computer will not be able to recognize the player and will only charge it through the USB port. Fully charging the player will take about 15 hours.
- When using your player as a portable storage device, connect the adapter for stable power supply.
- If the player is connected to an USB hub, the player may not charge properly or malfunction. Be sure that to connect your player to the USB port on the back side of your computer.
Before Using this Product
Windows 98 Driver Setup
If you are using Windows 98 or 98 SE, you will need to install a separate driver when the player is connected to the computer for the first time.
- Insert the installation CD, included in your package, in the CD-ROM drive of the computer. If you don't have the CD, download it from www.COWON.com.
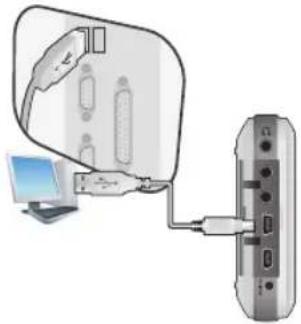
- Connect the device's "USB DEVICE" and the USB port of the computer with the provided USB cable.

- The following Add New Hardware Wizard window will appear. Click Next.
![Add New Hardware Wizard What do you want Windows to do? Search for the best driver to your device [Recommended] Display a lot of all the drivers in a specific location, as you can select the driver you want. < Back Next > Cancel](/content/2026/06/1257160/images/418bca4a44d242d1b9f7aef9ee2cd018d75a91f598080cbd8cfed85461a28b68.jpg)
- Click Search for the best driver for your device. (Recommended). then click Next.

- Click Specify a location and click the Browse button.

- Select the "Win98" folder in the installation CD and then click the OK button.

- After the search location is specified, click Next.
Before Using this Product
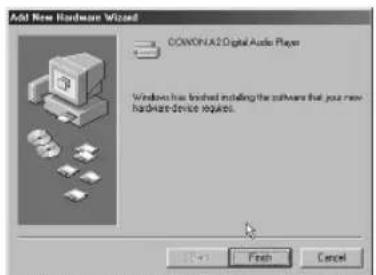
- Click the 'Finish' button to complete the driver installation.
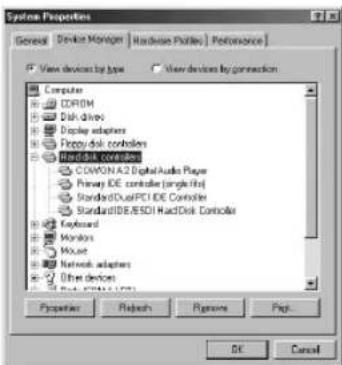
- Check the recently added drive from Windows Browser.
Saving Files and Disconnecting A2
- Open Windows Browser or run JetShell while COWON A2 is connected to your computer.
- Save video, music and other files in your COWON A2.
- After all files are saved, click the icon from the PC tray.
- Click the following popup message when it appears.

- When the Safe To Remove Hardware window appears, separate the USB cable.

- The player must be disconnected from the computer after checking the Safe To Remove Hardware message because of the player contains a hard disk.
- If the following message appears, run Safe To Remove Hardware after a few minutes. This is not a malfunction.

- If your operating system does not display the 'Safe To Remove Hardware' window, disconnect the player after all transfer operations are completed.
- Only simple file transfer operation is available for Linux and Mac OS.
Upgrading Firmware
Firmware is a program embedded in the hardware. Firmware update may provide the player with feature enhancements and/or bug fixes. Firmware versions may have bugs that will be fixed in the next version.
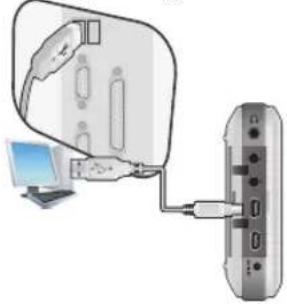


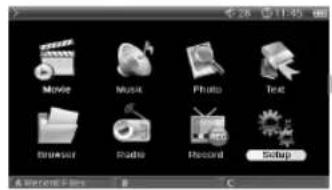

Upgrading Firmware
- Visit our home page at www.COWON.com, and download the latest firmware version.
- Connect A2 and your computer with the provided USB cable.
- Extract the downloaded file and copy it to the top level folder (Root folder) of the A2.
- After disconnecting A2 from your computer, remove the USB cable.
- When A2 is powered off, press the Joggle lever to the middle with your left hand and the Power button with your right hand at the same time to display the firmware upgrade image.
- Remove your hand and wait for the upgrade to complete.
- When the initial Menu screen automatically appears, go to 'Setting' -> 'Info' and check to see if the firmware version and application version matches.
-
Upgrade is complete.
-
If you are unable to operate the player because the System folder is deleted, upgrade the firmware to solve this problem.
- Also upgrade the firmware when the hard disk in A2 is formatted.
- Fully charge the player battery before upgrading the firmware.
- Do not turn off the player before firmware upgrade is complete.
- Data saved in the hard disk of A2 may be deleted while upgrading firmware. Therefore, backup any important files to your computer before upgrade. The manufacturer shall not be liable for any data loss of files that were not backed up.
Basic Features
Running Files
- Connect the earphones to A2. (No need to connect the earphones if you want to listen through the speakers.)
- Press and hold the power switch to turn on the player.
- To play a file, press the lever in either Movie, Music, Photo or Text mode.
- Use the lever to move the cursor to + or - and press the lever to open a folder that contains the file to be played.
- Press the lever on a desired file and the file will start to play.
- Adjust the volume, toggle through the file playlist or scan through files by joggling the lever during playback.
- When the lever is pressed during playback, the file will pause. To restart playback, press the lever again.
- Shortly press the "BACK" button during playback and the File Browser will appear. Press the "BACK" button again to go to the Mode Selection screen.
- Press and hold the power switch to turn off the player.
Ex.) Play a music file.
![graph TD A["Input Device"] --> B["Action: Click to Screen"] B --> C["Play Button: Record & Setup"] C --> D["Audio Player: Audio Song, COMON, AUDIO"] D --> E["Play Button: Audio Song, COMON, AUDIO"] E --> F["Play Button: Audio Song, COMON, AUDIO"] F --> G["Play Button: Audio Song, COMON, AUDIO"] G --…](/content/2026/06/1257160/images/5da3be473ed1468c1e08f99deac1b84183077fa2df3b05f1beeb80ab67fa3ec4.jpg)
- Only the list of files that are playable per mode is displayed for each Movie, Music, Photo, Text mode. Files are played in the same method for each mode.
- Press and hold "BACK" button anytime during playback to pause.
- Speaker is turned on only when the Speaker setting in Setup – Sound – General is set to Auto-Off or On.
- To view subtitles while playing video, Subtitle setting must be set to On. FYR, file names (excluding extension) of subtitle and the video file must be the same, and both files must be located in the same folder.
- Video file formats that are not supported can be viewed using the conversion feature of JetAudio VX.
Button Controls
| Button Description | ||
 | Press and hold when the player power is off to turn on the player. • Press and hold when the player power is on to turn off the player.Short presses will turn the LCD on and off. • If the player does not work properly, press and hold for 9 seconds to it turn off. | |
 | Increases volume during file playback.Moves up through the File Browser and Setting items.Moves to the top of the enlarged screen in image viewer. | |
 | Decreases volume during file playback.Moves down through the File Browser and Setting items.Moves to the bottom of the enlarged screen in photo viewer. | |
 | Returns to the start or previous file during file playback.Press and hold to browse files during file playback.Moves to the upper folder in File Browser. • Adjusts values in setting items.Moves to the left of the enlarged screen in photo viewer. • Moves to the previous page in text viewer. | |
 | Skips to the next file during file playback. • Press and hold to browse files during file playback.Open a folder in File Browser. • Shows the popup menu of a file in File Browser.Adjusts values in setting items or moves categories. • Moves to the right of the enlarged screen in photo viewer.Moves to the next page in text viewer. | |
 | Pauses file playback. • Opens a folder in File Browser.Plays the file selected in File Browser when pressed.Applies and exits settings. • Functions as a 4X magnifier in photo viewer. | |
 | File Browser appears when pressed during file playback. • Mode Selection screen appears when pressed in File Browser.Cancels popup menus and setting items when pressed. • Press and hold to stop movie, music or radio. | |
A | Runs A, B and C operations below the LCD screen.Movie A Change Mode B Show PlaylistMusic A Change Mode B Show PlaylistRadio A Delete Preset Settings Start RecordBrowser A ... .B Enable USB Host | |

※“BACK” button operates in all modes at anytime.
Advanced Features
File Browser
A2 provides 8 modes. Movie, Music, Photo, Text and Browser modes can be navigated by the File Browser.
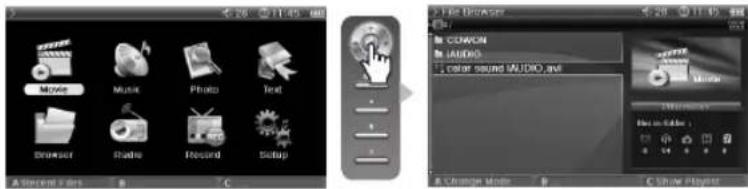
■ Opening File Browser
Press the lever in Movie, Music, Photo, Text or Browser mode and the File Browser will appear.
By default, only playable files in each mode can be viewed and selected. All files appear in Browser mode.

■ Moving a File Browser Item
Move the lever towards + or - to move through items up and down.
Press move the lever towards >> to open a folder.
Move the lever towards << to exit the folder. Returns to the Mode Selection screen in the root folder.

■ Selecting a File Browser Item
Press or move the lever towards >> on a folder to open it.
Pressing the lever on a file will start playback and moving the lever towards >> will open a popup menu.
Advanced Features
■ File Browser Popup Menu
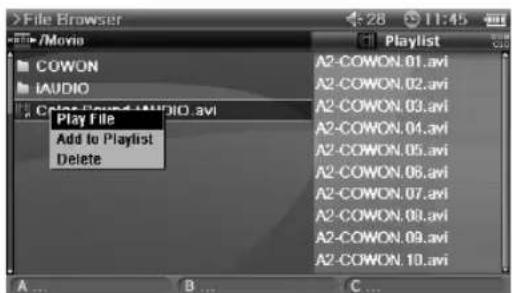
Move the lever towards >> on a file to open a popup menu for the appropriate mode.
Move the lever towards + or - to select a desired item, then press or move the lever towards >> again to select.
Press the "BACK" button to cancel the popup window.
Play File, Add to Playlist and Delete popup menu is the same for Movie, Music and Text modes. For Photo mode, Slideshow and Set Wallpaper are added. Only Play File and Delete popup menus appear in Browser mode.
Press the "BACK" button to close the File Browser screen and return to the Mode Selection screen.
Playlist Usage
The Playlist is a feature that contains only files you want to play.
■ Opening, Closing and Switching Playlist
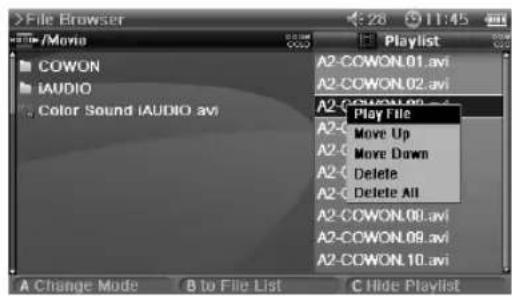
Press the "C" button in the File Browser of Movie, Music, Photo or Text mode to open a playlist. Press the "C" button again to close the playlist. Press the "B" button to switch between playlist and file list.
■ Add/Delete a File in Playlist
To add a file to a playlist, move the lever towards >> to the desired file in File Browser and select Add to Playlist from the popup menu.
To delete a file in a playlist, move the lever towards >> to the desired file in the playlist and select Delete from the popup menu.
To delete all files in a playlist, move the lever towards >> in a playlist and select Clear Playlist.
When playing files from a playlist, after a file is played the next file on the list will start to play.
Playlists in Movie and Text mode can contain up to 50 files, and in Music and Photo mode up to 100 files.
Advanced Features
USB Host Connection and Usage
USB Host can copy and delete files and folders in USB compatible devices (digital camera, iAUDIO, etc.).

■ Connecting USB Host
Connect the USB Host cable to the "USB HOST" on your A2 and the USB port of the USB compatible device.

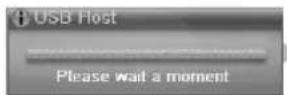

■ Starting USB Host
To start USB Host, press the "C" button in Browser mode after connecting the USB compatible device.
If the device is compatible, list of folders and files in the device will appear on the right of the screen.
Select a folder or file to copy and press the "A" button, then a popup menu will appear and select "Copy".
Press the "B" button to move between A2 and the USB compatible device list.
Press the "C" button again to end USB Host mode.
■ USB Host Compatible Device
Digital cameras, MP3 players and other UMS supported devices are compatible. For more information on compatible devices, see our product introduction at www.COWON.com.
Radio Mode Usage
Listen or record FM radio broadcasts in Radio mode.
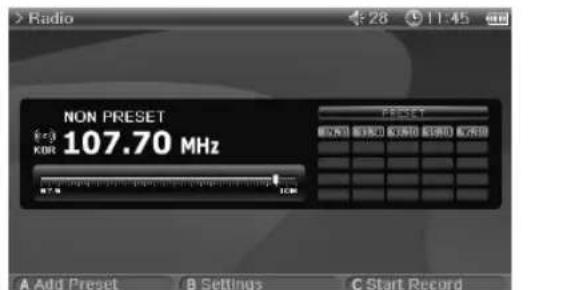

■ Radio Listening
Select Radio mode to listen to FM radio.
Shortly move the lever towards << or >> to move through channels. Long pushes will scan channels.
Press and hold the "BACK" button to stop the radio.
■ Preset Setting and Usage
Press the "A" button on a desired frequency and the frequency will be saved.
Press the lever to enter to Preset mode and move the lever towards << or >> to move through saved frequencies.
Press the "A" button in preset mode to delete a saved frequency.
Record Mode Usage
Record using the AV or Line-in cable and the built-in microphone.
■ Connecting a Cable
![graph LR A["Connecting a Cable"] --> B["AC"] B --> C["AV In (Record)"] C --> D["CD PLAYW"] D --> E["Audio In (Record)"] E --> F["CD"]](/content/2026/06/1257160/images/e6d18bdb3df9f0e3c2827a525368a5e5622e57511a5109afca5d3efdc2b2ae6e.jpg)
COWON A2
Advanced Features
Connect the AV cable to the "AV IN" of your A2 and the "AV OUT (Video OUT, Audio OUT)" of the external AV device. Connect the line-in cable to the "AV IN" of your A2 and the Line Out (or earphone) jack of the external audio device.
■ Recording

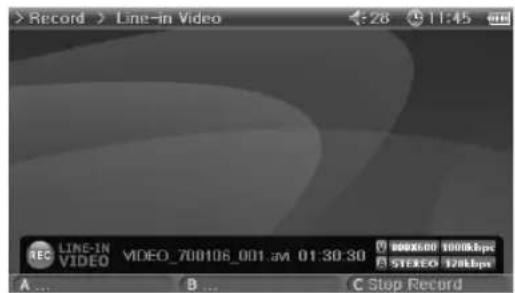
There are four modes, Video, Audio, Radio and Built-in Mic when Record mode is selected.
Select the desired mode for recording and press the "C" button to start recording.
The recording file can be played in Movie and Music mode.
Recorded Video screen does not appear on the LCD.
When recording, battery consumption is higher than during normal operation, therefore fully charge the player before recording.
■ Scheduled Recording
Moe to Setup – System – Alarm mode.
There are three alarm modes (Movie Player, Music Player, FM Radio) and four scheduled recording modes.
When setting a scheduled recording, the power of the play automatically turns on at the specified time and recording starts by the specified setting.
For details, see 4. Setup feature description—4. See the System section also.
AV OUT Usage
Connect external AV devices (TV, VTR, etc.) using the AV cable.

■ Connecting a Cable
Connect the AV cable to the "AV IN" of your A2 and the "AV IN (Video IN, Audio IN)" of the external AV device.
Change the AV device mode to an external input channel. For more information see the AV device manual.
Move the switch at the bottom of A2 to "AV OUT" and the screen from A2 will be displayed on the external AV device.
- If the screen does not display properly check the following.
- Check to see of the switch on the bottom of A2 is set to "AV OUT".
- Settings in Setup – Display – TV Standard are valid. (Select either NTSC or PAL)
- Make sure the connection cable is connected properly.
- Ensure the input jack and input channel are the same. (If connected to external input 1, must be set to external channel 1 for properly operation.)
Advanced Features
Wallpaper Usage
Set a desired image as the wallpaper.
■ Wallpaper Image Type
jpg, png and bmp of 480 x 272 size can be set as the wallpaper. Larger images will be resized and smaller images will be positioned in the center of the screen. Maximum image capacity supported is 1 million pixels.
■ Setting Wallpaper
Select the desired file to use as the wallpaper in Photo mode and move the lever towards >> and select Set Wallpaper from the popup menu. If wallpaper is not set, enable wallpaper in Setup – Display – Wallpaper. Wallpaper is unable to be set during movie or music playback.
Setup Mode Usage
Press the lever in Setup mode and 8 modes will be displayed again.
Move to the desired mode, press the lever and the Detailed Setting screen will appear.
Move the lever towards + or - to move up and down in the Detailed Setting screen. Move the lever towards << or >> to set values.
Some items are categorized depend on the mode in the Detailed Setting screen. To move between categories, move the lever towards << or >> when the cursor is placed on a category.
After setting an item, press the lever to apply and return to the Setup mode setting screen.
Press the "BACK" button to cancel the value set and return to the Setup mode setting screen.
For details on Setup items, see 4. See Setup feature descriptions.
Setup Features
- Setup List
| Display | General LCD Brightness |
| TV Standard | |
| Wallpaper Wallpaper | |
| Brightness | |
| Preview | |
| Appearance UI Language | |
| Text Scroll Speed | |
| Sound | General Speaker |
| Volume | |
| LR Balance | |
| Stereo | |
| JetEffect Equalizer | |
| BBE | |
| Mach3Bass | |
| MP Enhance | |
| 3D Surround | |
| System | General Set Time |
| Boot Resume | |
| Browser Resume | |
| Alarm Alarm Mode | |
| Wakeup Time | |
| Duration | |
| Recuming Mode | |
| Power Sleep Timer | |
| LCD Off | |
| System Off |
| Information | |
| Movie Player | General Aspect Ratio |
| Subtitle | |
| Music Player | General Boundary |
| Repeat | |
| Shuffle | |
| Display Lyrics | |
| Time Display | |
| Radio | Genera Stereo |
| Region | |
| Recorder | General Line-in Volume |
| Mic. Volume | |
| Mic. AGC | |
| Video Video Quality | |
| Audio Quality | |
| Audio Channel | |
| Audio Line-in Quality | |
| Line-in Channel | |
| Radio Quality | |
| Radio Channel | |
| Mic Quality | |
Setup Features
2. Display
General

LCD Brightness
- Adjust brightness of the LCD. Brightness levels range from 1 to 9.
TV Standard
- Set TV output. Select from NTSC and PAL
Wallpaper

Wallpaper
- You can choose whether to use the wallpaper feature. Brightness
- Adjust brightness of the wallpaper. Brightness levels range from -9 to 9. Preview
- Currently set wallpaper is displayed.
- To set an image as the wallpaper, open the popup menu of the file to be used as the wallpaper in Photo mode and select Set Wallpaper.
Appearance

UI Language
- You can choose which language to use for UIs. Text Scroll Speed
- Adjust the scrolling speed of the text displayed in the File Browser.
Setup Features
3. Sound
General
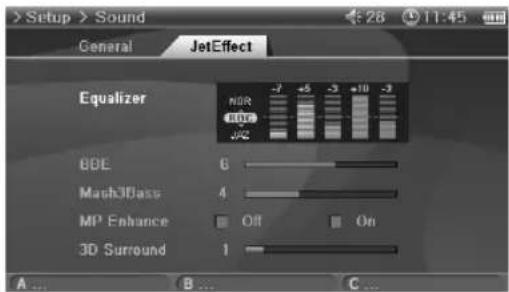
JetEffect
4. System
General

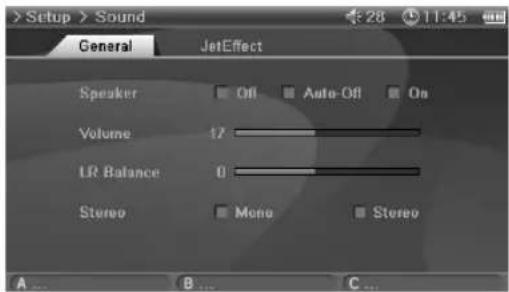
Speaker
- Adjust the built-in speaker settings.
- If set to Off, the speaker is turned off. If set to Auto-Off, speaker is quiet only when the earphones are connected. If set to On, the speaker is always turned on.
Volume - Adjust the volume. Volume levels range from 0 to 40.
- Adjust the volume by moving either +, - in the playback screen.
LR Balance - Adjust the left and right balance of the speaker and the earphones.
Stereo - Set to either Stereo or Mono.
Equalizer
- Either choose preset EQ or customizable 5 Band EQ.
BBE - BBE is the sound field effect that provides clear music.
Mach3Bass - Mach3Bass is the base booster that enhances the super low-end bass.
MP Enhance - MP Enhance is the sound field effect that compensate for missing sound segments.
3D Surround
• 3D Surround provides three-dimensional sound effects.
Set Time
- Sets the current time.
Boot Resume - Automatically continues to resume from the end of the last file played when set to On.
Browser Resume - Remembers the Browser location and cursor moves to the selected location when re-enabled.
Setup Features
Alarm
Power

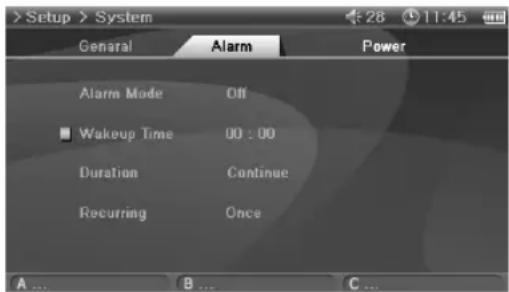
Alarm Mode
- Select Alarm mode.
- Power automatically turns on at a specified time for Movie Player, Music Player and FM Radio features, and starts to play the last file or frequency played.
- For Record settings, power turns on at the specified time and recording starts.
- When recording, battery consumption is higher than during normal operation, therefore fully charge the player before recording.
- More power is used than other features. Always check to see if there is enough power. Wakeup Time
- Select Alarm time.
Duration
- Sets how long the alarm operates and automatically turns of the player after the specified time has elapsed.
Recurring Mode - Select Alarm period.
- If set to Once, the alarm only operates only once. If set to Daily, alarm operates every day and when set to Weekdays, alarm only operates from Monday to Friday.
Sleep Timer
- Automatically turns off the player after the preset time has elapsed to save power.
• After the preset time has elapsed, the player will turn off even when in use.
LCD Off
- Automatically turns off the LCD after the preset time has elapsed to save power.
- When any button is pressed, the LCD is turns on. This feature does not function during video file playback.
System Off
- When the player is in a halt and no action is taken after the specified time period has elapsed, this feature will automatically turn off the player.
- This feature does not function during file playback.
5. Information
General
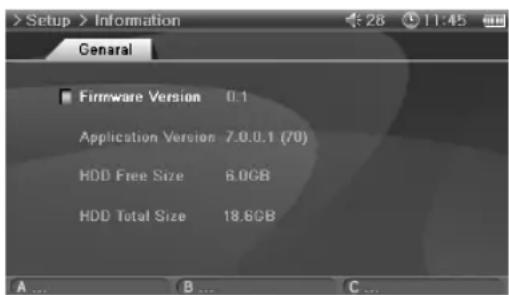
Firmware Version
- Current firmware version.
Application Version
- Current software version.
HDD Free Size
• Free space left on the hard disk.
HDD Total Size
• Total space of the hard disk.
6. Movie Player
General

Aspect Ratio
- Selects the aspect ratio of movie files.
- If set to Auto, the aspect ratio is set to original percent. If set to either 16:9 or 4:3, original percent is ignored and the selected ratio will be indicated.
- If 4:3 ratio is selected, please use during AV OUT.
Subtitle (enabled)
- If there is a subtitle file (.smi), subtitle will be displayed on the screen with the image.
- In this case, the both names of the subtitle file and the video file to play must be the same and in the same folder location.
Setup Features
7. Music Player
General

Boundary
- Set the playback area of files or folders.
- If set to ALL, all music files are played and if set to Folder, only files within the selected folder are played.
- If set to Sub-folder, files within the selected folder and its subdirectories are played and if set to Playlist, only files listed in the Playlist are played.
- When files in the Playlist are played, the Boundary feature will automatically change to Playlist, and when files in a common folder are played again, feature automatically returns to the previous Boundary.
Repeat
- Within the range specified in Boundary, repeat playback can be set.
- If set to On, playback is repeated after all files within the range are played. If set to Current, only one file is played.
- Within the range specified in Boundary, random playback can be set.
- If set to On, files within the range are randomly played.
Shuffle
Display
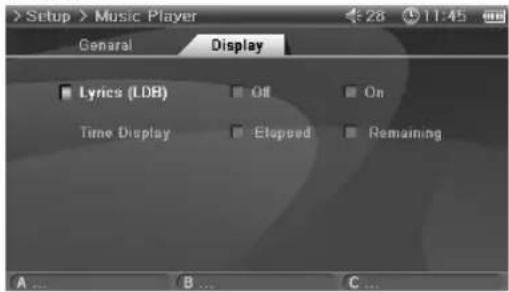
Lyrics (LDB)
- Set to display lyrics of music files that contain lyric information.
- Music files without lyric information will not display lyrics even if this feature is set to On.
- For more information on lyrics, see our beginner's guide at www.COWON.com.
- Sets the time display of playing music files.
- If set to Elapsed, the elapsed playback time will appear and if set to Remain, the remaining playback time will be displayed.
Time Display
Setup Features
8. Radio
General

Stereo
- Select from Stereo and Mono when listening to FM Radio.
- Radio broadcasts that only support mono, will not support the Stereo feature.
- If set to Stereo, unwanted static noise may be heard. In this case, select and use Mono.
- Choose the appropriate country where you are listening FM radio.
Region
9. Recorder
General

Line-in Volume
- Adjust the volume level coming into the AV IN.
Mic. Volume (Built-in Volumes) - Adjust the volume level coming into the built-in microphone.
• Sound increases as much as the number goes higher.
• Automatically adjust the high and low sounds of the recordings. - Responses sensitively as the number increases.
Mic. AGC
Video

Video Quality
- When recording Video, set the quality of the video file recording through the AV IN.
- Higher the bps and resolution is better the quality of video, but the size of the file becomes larger and more battery power is used.
- When recording Video, set the quality of the audio file recording through the AV IN.
- Higher the bps is better the quality, but the size of the file becomes larger and more battery power is used.
- When recording Video, set the channel of the audio file recording through the AV IN.
Audio Quality
Audio Channel
Setup Features
Audio

Line-in Quality
- When recording Audio, set the quality of the audio file recording through the AV IN.
- Higher the bps is better the quality of recordings, but the size of the file becomes larger and more battery power is used.
- When recording Audio, set the channel of the audio file recording through the AV IN.
- When recording Radio, set the quality of the recording file.
- Higher the bps is better the sound quality, but the size of the file becomes larger and more battery power is used.
- When recording Radio, set the channel of the recording file.
- Set the quality of the file recorded with the built-in microphone.
- Higher the bps is better the quality of recordings, but the size of the file becomes larger and more battery power is used.
Line-in Channel
Radio Quality
Radio Channel
Mic Quality
Hardware
| General features | Size 133.4(W)x78.5(H)x22(T)mm | |
| Weight 298g (common for 20 G/30 G) | ||
| Operation temperature range | 0°C ~ 40°C | |
| Video | Display 4 in., 480x272 resolution, 0.183 mm pixel pitch, 16 mega color Digital TFT LCD | |
| Video format NTSC/PAL | ||
| Audio | Channel Stereo | |
| Frequency range 20Hz ~ 20KHz | ||
| Headphone output Stereo, left 32mW + right 32mW (16W earphones) | ||
| Signal to noise ratio 95dB | ||
| Built-in speaker Stereo | ||
| Built-in microphone Mono | ||
| FM radio | Frequency range 76~108 MHz (Country-specific frequency settings, 25 preset stations supported) | |
| Antenna Earphone cord antenna | ||
| Powersupply | Built-in battery Lithium polymer 4300mAh | |
| Battery charge time About 5 hours after AC adapter connection | ||
| AC adapter DC 5.0V, 2A | ||
| Storage device | Hard disk 1.8 in. 20G / 30G, FAT32 File System | |
| USB Interface | USB Device | USB 2.0 High Speed (max. 480Mbps) |
| USB Host | USB 2.0 Full Speed (max. 12Mbps) | |
| PC environment | CPU : Pentium III 200Mhz or higherOS : Windows XP / 2000 / ME / 98SERAM : 128MB or moreCD-ROM DriveUSB Port DirectX 9 or higherWindows Media Player 9 or higherQuickTime 6 or higher | |
Product Details
Applications
-Application specifications may change according to performance improvements.
| Movie Player | File format AV,ASF,WMV | |
| Video codec DivX 3.11/4/5, XviD, MPEG4, WMV9 MP@LL Note1 | ||
| Video resolution | Max. 720x576, 30 fps | |
| Audio codec | MP3, AC3 6.1 channel down-mix, WMA | |
| Audio resolution | Max. 48KHz, 448 Kbps | |
| Subtitles | SMI format | |
| Continuous playback time | Max. 10 hr. Note2 | |
| Music Player | File format MP3, WMA(ASF), OGG, WAV | |
| Audio codec MPEG 1 Layer 3, WMA(ASF), Ogg Vorbis, Wave | ||
| Audio resolution 8Kbps ~ 1.4Kbps (OGG supports up to Q10) | ||
| ID3 Tag ID3 V1, ID3 V2.2/V2.3/V2.4 | ||
| Lyrics LDB | ||
| EQ 5 bands, 7 sets (Normal, Rock, Jazz, Classic, Pop, Vocal, User) | ||
| Sound field JetEffect (BBE, Mach3Bass, MP3 Enhance, 3D Surround) Note3 | ||
| Visual effect Sound spectrum Note3 | ||
| Music playback time Max. 18 hr. Note4 | ||
| Photo Viewe | File format JPG, BMP, PNG | |
| Resolution JPG – Max. 4 million pixels | PNG – Max. 3 million pixelsBMP – Max. 4 million (24 bit), 6 million (16 bit), 12 million (8 bit) pixels | |
| Text Viewer | File format TXT (EUC-KR (Korean), EUC-JP (Japanese), GB2312 (Simplified Chinese), Big5 (Traditional Chinese), ISO-8859-1 (Latin)), UTF-8 (Auto-detection for Unicode Documents with BOM Header), Unlimited file size | |
Note1 Videos created with MPEG4 QPEL (Quarter-pixel Motion Estimation) or GMC (Global Motion Compensation) options cannot be played in this player. WMV9 video supports 352 x 288 resolutions in Main Profile-Low Level format.
Note2 Video: MPEG4 SP, 480x272 / 24fps, Volume 20, Earphone output
Note3 Doesn't apply to OGG playback.
Note4 Audio: MP3 / 44KHz / 128kbps, Volume 20, Earphone usage, LCD Off
Record
Recording
TV, Line-in
- specifications may change according to performance improvements.
Installation CD
The installation CD contains the world famous integrated multimedia program JetAudio VX and a file management program JetShell. A2 software, multimedia sample files and driver file for Windows 98 SE are also included in the CD.
Converting Files with JetAudio VX
- Install and then run JetAudio VX.

![Preferewas | Skin JetAudio RIP CD CONVERSION RECORDING BURN BROADCASTING laudio song.wma [[재상 목복 - 파일 올기]] WMA 32Kbps ALBUM- DISC FILE 1000 POP JAZZ CLASSIC VOCAL FLAT USER TOTAL CURRENT TIME 04 04 0:00:20 VISUAL SNOW LYTH TIMER ALARM 11.05 22 02-26 # Action Set START RESET ALBUM PLAYUST](/content/2026/06/1257160/images/99882a4d5c21abed48492808e1b2f0181c3bfe65876137f7f31a145132158947.jpg)
Product Details
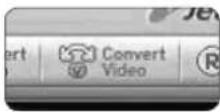
- Click "Convert Video" on the top to convert the video file.
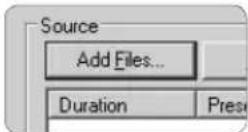
- From the Convert Video window, click "Add File" to select the files to convert.
- Check the selected video files in the list.

- After checking the folder location to save the converted files and presetting, press "Start" on the upper right corner to start conversion.

- Clicking "Preview" to check the converted screen without saving the file.
- To convert the file with subtitles or to change settings, click "Convert Options".

- Not all files are convertible. Files initially damaged before conversion may not be viewed on A2 even though conversion was successful.
Troubleshooting
| Symptom Explanation | |
| Power does not turn on or is not working properly. | ·If the built-in battery is or has been discharged, use the adapter to fully recharge it before use.·If the player does not turn on after it is charged, press the “RESET” button on the bottom side of the player and then turn on.·If the System folder is deleted, upgrade the firmware before use.·Check to see if the switch on the bottom side of the player is placed to “HOLD”. If it is on “HOLD”, the power button will not function. |
| Screen does not turn on even after the player is powered on. | Check to see if the switch on the bottom side of the player is placed to “AV OUT”. If it is on “AV OUT”, move the switch to “LCD”. |
| Buttons do not function properly. | Check to see if the switch on the bottom side of the player is placed to “HOLD”. If it is on “HOLD”, the buttonx will not function. |
| Speaker does not work properly. | ·Go to Setup – Sound – Speaker and check to see if it is set to Auto-Off or On. If it is set to Off, no sound is heard from the speaker.·Check to see if the volume is set to “0”, then adjust the volume. |
| Button operation does not respond quickly during movie or music playback. | This is because the player was set to Power Save mode to save battery power. Buttons will operate normally after 3 to 4 seconds. |
| Nothing is heard from FM radio. | ·FM radio reception may be poor or static may be heard depending where the player is used, such as inside buildings, subways or moving vehicles. Listening to FM radio may be impossible in areas shaded from radio transmissions.·Check to see if the earphone is connected to the player. This player does not have a separate antenna, therefore uses earphones as antennas to receive radio reception. |
| Noise is heard from recordings. | A small-sized hard disk is installed in the body of the player which may make noise that can be picked up during recording. Recording sound may not be even due to the characteristics of the digital device. |
| Video files do not play properly. | Play the video file on your computer. If the file plays on the computer without any problems convert it with JetAudio VX and then try playing it on your player again. |
| Cannot find files stored in the player. | Each mode only displays files that can be played in the corresponding mode. To view all files stored on the player, select Browser mode. |
| YComputer cannot recognize the player when connected. | ·A separate driver must be installed on operating systems other than Windows 2000 and XP for the computer to recognize your player.·If the USB cable is connected to an USB port at the front of your computer or a separate USB hub, connect it to the USB port at the back of your computer. |
| There is a difference between the actual hard disk space and the indicated space. (e.g. 20 GB is indicated as 18.6 GB) | If the player disk space is 20 GB, then the player will normally have about 18.6 GB space. This is because the space recognized by both the hard disk manufacturer and your computer is different, and the space used for system files for normal player operation has influence in the actual disk space. |
| After saving hundreds of files in the Root folder, A2 does not work or malfunctions. | A2’s hard disk uses FAT32 format. Due to the limitations of FAT, avoid saving too many files in the Root directory. |
DIGITAL PRIDE.

COWON SYSTEMS, Inc.
■ Address : 7th Fl. 448-2, Dogok-Dong, Gangnam-Gu,
■ Homepage : www.cowonamerica.com

- BBE RELATED
- TABLE OF CONTENTS
- PRECAUTIONS FOR USING THIS PRODUCT 4
- BEFORE USING THIS PRODUCT 5
- 2)BASIC FEATURES 14
- ADVANCED FEATURES 16
- SETUP FEATURES 23
- TROUBLESHOOTING 35
- PRECAUTIONS FOR USING THIS PRODUCT
- BEFORE USING THIS PRODUCT
- WHAT IS COWON A2
- WIDE AND VIVID COLOR LCD
- CONTINUOUS PLAYBACK WITH EMBEDDED BATTERY
- MOVIE PLAYBACK
- MOVIE RECORDING
- POWERFUL AUDIO FORMAT SUPPORT
- VOICE RECORDING AND DIRECT ENCODING
- TEXT AND IMAGE VIEWER
- LISTENING/RECORDING OF FM BROADCASTS
- MOST POWERFUL SOUND FIELDS RECOGNIZED WORLDWIDE
- PORTABLE DISK AND USB HOST FEATURES
- LOGO AND WALLPAPER SCREEN
- COMFORTABLE CLOCK FEATURE
- EASY UPGRADE WITH FIRMWARE DOWNLOAD
- JETAUDIO VX INCLUDED
- POWER CONNECTION AND CHARGING
- CONNECTING TO YOUR PC
- CHARGING WITH YOUR PC
- IF THE HOLD SWITCH IS AT LCD
- IF THE HOLD SWITCH IS AT AV OUT
- IF THE HOLD SWITCH IS AT HOLD
- WINDOWS 98 DRIVER SETUP
- SAVING FILES AND DISCONNECTING A2
- UPGRADING FIRMWARE
- BASIC FEATURES
- RUNNING FILES
- ADVANCED FEATURES
- FILE BROWSER
- PLAYLIST USAGE
- USB HOST CONNECTION AND USAGE
- RADIO MODE USAGE
- RECORD MODE USAGE
- RECORDING
- SCHEDULED RECORDING
- AV OUT USAGE
- CONNECTING A CABLE
- WALLPAPER USAGE
- SETUP MODE USAGE
- SETUP FEATURES
- DISPLAY
- LCD BRIGHTNESS
- WALLPAPER
- UI LANGUAGE
- SOUND
- SYSTEM
- SPEAKER
- EQUALIZER
- SET TIME
- ALARM
- POWER
- ALARM MODE
- SLEEP TIMER
- INFORMATION
- MOVIE PLAYER
- MUSIC PLAYER
- BOUNDARY
- REPEAT
- SHUFFLE
- LYRICS (LDB)
- TIME DISPLAY
- RADIO
- STEREO
- REGION
- RECORDER
- LINE-IN VOLUME
- MIC. AGC
- VIDEO QUALITY
- AUDIO QUALITY
- AUDIO CHANNEL
- AUDIO
- LINE-IN QUALITY
- LINE-IN CHANNEL
- RADIO QUALITY
- RADIO CHANNEL
- MIC QUALITY
- PRODUCT DETAILS
- RECORD
- INSTALLATION CD
- CONVERTING FILES WITH JETAUDIO VX
- TROUBLESHOOTING
Brand : COWON
Model : IAUDIO A2
Category : Mp3 player