LW055 - Router SWEEX - Free user manual and instructions
Find the device manual for free LW055 SWEEX in PDF.


| Product Type | Wireless Router |
| Model | LW055 |
| Brand | Sweex |
| Dimensions (W x D x H) | 180 x 130 x 30 mm |
| Weight | 280 g |
| Power Supply | DC 5V/1A via included adapter |
| Wireless Standards | IEEE 802.11b/g/n |
| Frequency Band | 2.4 GHz |
| Wireless Speed | Up to 300 Mbps |
| Number of LAN Ports | 4 x 10/100 Mbps |
| Number of WAN Ports | 1 x 10/100 Mbps |
| Antennas | 2 x fixed external antennas |
| Encryption | WPA / WPA2 |
| Firewall | NAT, SPI |
| LED Indicators | Power, WAN, LAN (x4), WLAN |
| Buttons | Reset, WPS |
| Operating Temperature | 0°C to 40°C |
| Storage Temperature | -20°C to 60°C |
| Humidity | 10% to 90% (non-condensing) |
| Maintenance | Clean with a dry cloth; keep away from water and dust |
| Security | Use strong passwords; keep firmware updated |
| Spare Parts / Repairability | Power adapter and antennas are replaceable; contact support for other parts |
| General Information | Designed for home or small office use, easy setup via web interface |
Frequently Asked Questions - LW055 SWEEX
User questions about LW055 SWEEX
0 question about this device. Answer the ones you know or ask your own.
Ask a new question about this device
Download the instructions for your Router in PDF format for free! Find your manual LW055 - SWEEX and take your electronic device back in hand. On this page are published all the documents necessary for the use of your device. LW055 by SWEEX.
USER MANUAL LW055 SWEEX

MEDION®
WiFi Range Extender
P89137 (MD 86738)
Warranty Details
The product is guaranteed to be free from defects in workmanship and parts for a period of 12 months from the date of purchase. Defects that occur within this warranty period, under normal use and care, will be repaired, replaced or refunded at our discretion. The benefits conferred by this warranty are in addition to all rights and remedies in respect of the product that the consumer has under the Competition and Consumer Act 2010 and similar state and territory laws.
Our goods come with guarantees that cannot be excluded under the Australian Consumer Law. You are entitled to a replacement or refund for a major failure and for compensation for any other reasonably foreseeable loss or damage. You are also entitled to have the goods repaired or replaced if the goods fail to be of acceptable quality and the failure does not amount to a major failure.

Table of Contents
Warranty Details ...... 1
Notes on how to use these instructions .... 4
Symbols and key words used in these instructions ....4
Proper use....6
Safety instructions 6
Power supply 8
Notes on conformity 9
Before use 10
Check package contents 10
System requirements 10
Overview of the device ....11
Overview of the LED displays 12
Initial operation ......16
Setting the operating mode 16
Operating mode ......16
Installation as range extender (repeater) 16
Installation as a client 24
Installation as an AP (access point) 31
The Web Interface 40
Calling up the web interface 40
Manually setting up DHCP on a Windows PC ...... 41
Home page 44
Quick setup 46
WPS settings 47
Advanced settings 50
Medion Finder Tool 53
After Sales Support
Do you need more help? 55
Cleaning 56
Disposal 57
Technical data 58
Glossary 59
Repair and Refurbished Goods or Parts Notice 64
Notes on how to use these instructions

Read these operating instructions carefully before using the device for the first time. Note the warnings on the device and in the operating instructions.
Always keep the operating instructions close to hand. If you sell the device or give it away, make sure you also hand over these instructions and the guarantee card.
Symbols and key words used in these instructions

DANGER!
Warning: immediate mortal danger!
WARNING!
Warning: possible mortal danger and/or serious irreversible injuries!

CAUTION!
Please follow the guidelines to avoid injuries and/or property damage!
ATTENTION!
Please follow the guidelines to avoid property damage!
 | PLEASE NOTE!Additional information on using the device |
 | PLEASE NOTE!Please follow the guidelines in the operating instructions! |
 | WARNING!Warning: danger of electric shock! |
| • | Bullet point/information on occurrences during operation |
| ► Tasks to be performed | |
Proper use
This device is designed to amplify the signal in a wireless network. In addition, the device can be used as an access point for devices that communicate wirelessly or as a client for devices which do not have their own wireless adaptor. Never use the device for any other purpose. Only use the device indoors.
The device is intended for private use only and is not suitable for commercial purposes.
Safety instructions
Please read through this section and all of the documentation carefully and follow all of the instructions given. The instructions will help you to operate the device reliably and help increase its service life.
Always keep these operating instructions near at hand to the device, but store them safely so that you can pass them on to a new owner should you sell the device Should you have any problems with the device, please only contact our authorised service partner.
Operational safety
- This device is not intended for use by people (including children) with reduced physical, sensory or mental abilities or by those without experience and/or knowledge, unless they are supervised by a person responsible for their safety or they have been instructed in its use by that person. Children should be supervised to ensure they do not play with this
After Sales Support
device.
- Please also follow the operating instructions for any devices that you connect to the WiFi Range Extender.
- Do not place liquid-filled containers, such as vases, on or near the device. The container may tip over and the liquid may impair the electrical safety of the device.
- Keep the device away from moisture and from water in droplet or spray form. Avoid vibrations, dust, heat and direct sunlight in order to prevent malfunctions. The operating temperature is 5 °C to 35 °C.
- Never open the casing. This invalidates the warranty and may render the device unusable.
- After transporting the device, wait until it has reached room temperature before switching it on. Major fluctuations in temperature or humidity can lead to condensation which could cause an electrical short-circuit.
- The device is designed to be connected to computers with power supply fuse protection (limited power source according to EN60950).
- Position the cable so that it cannot be stepped on or tripped over.
- To avoid damaging the cable, do not place any objects on it.
- To avoid static charges, you should not operate the device in extremely dry conditions.
- In circumstances where there are electrostatic discharges, the device could malfunction. In this case, the device must be reset to the factory settings.
Data backup
We do not accept any liability for claims for compensation due to loss of data or any damages that are incurred.
Before every update, back up your files on external media (e.g. CD-R).
Power supply
- Even when the ON/OFF switch is set to OFF, some of the components in the device may still be live. To disconnect the power from your device or to completely isolate the device from voltage sources, unplug the device completely from the mains.
- Only operate the WiFi Range Extender from an easily accessible and earthed socket with an AC 100-240 V\~50/60 Hz power supply.
Notes on conformity
Your device fulfils the requirements for electromagnetic compatibility and electrical safety.
Conformity information as per R&TTE
Medion AG hereby declares that these devices conform to the fundamental requirements and the remaining pertinent regulations of the 1999/5/EC Directive. Full declarations of conformity are available at http://www.medion.com/conformity.
C € 2200 Ⓞ
In France, please operate the device inside buildings only!
Before use
Check package contents
Please check your purchase to ensure all items are included and contact us within 14 days of purchase if any components are missing.
After unpacking, ensure that the following parts have been supplied:
- WiFi Range Extender
- LAN cable
- Software CD
- Operating instructions and guarantee documents

DANGER!
Keep the plastic packaging out of the reach of children as it can cause suffocation!
System requirements
• LAN connection or wireless card that supports the wireless standard 802.11b/g/n.
- Windows XP SP3, Vista SP1 or Windows 7
- CD-ROM drive
• 100 MB free space on the hard drive
Overview of the device
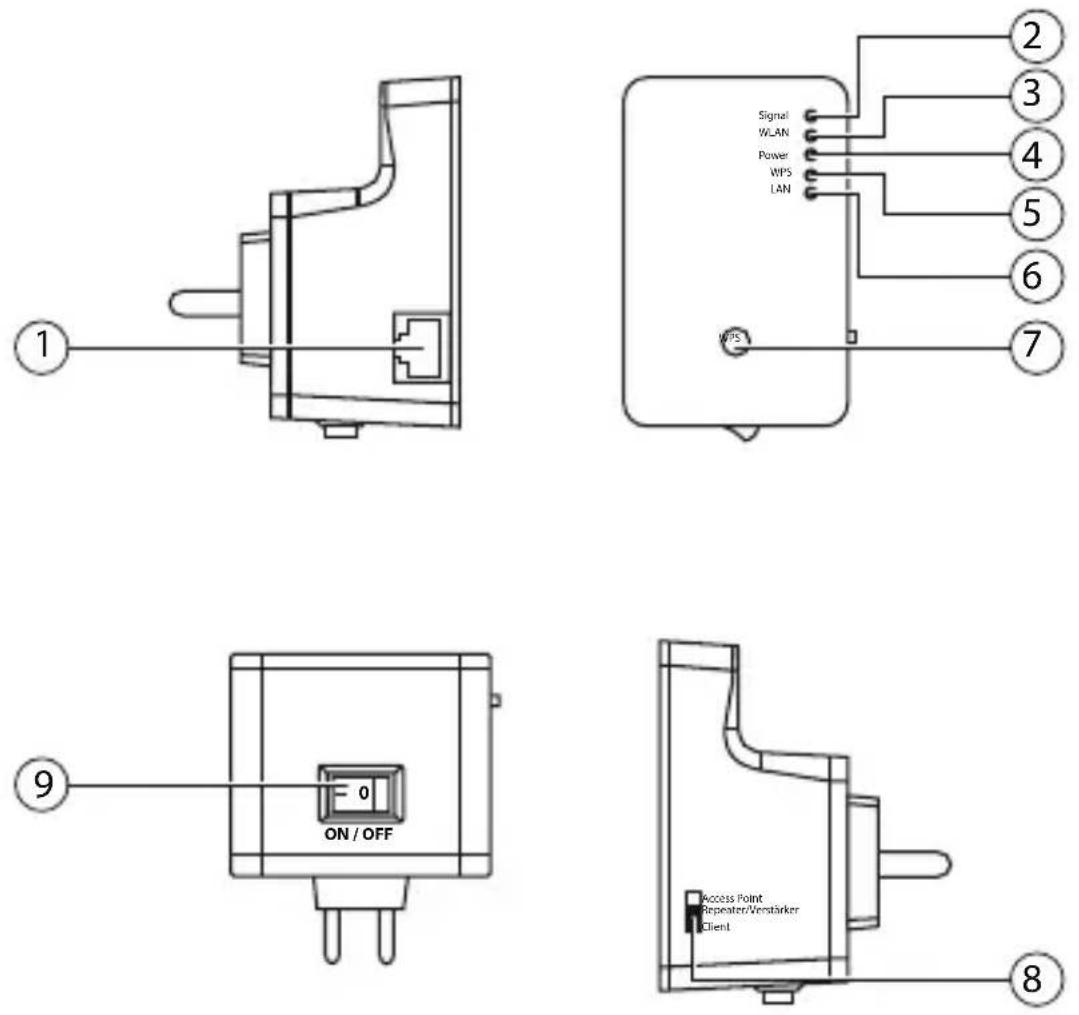
1) LAN connection
2) Wireless signal strength LED
3) WLAN: Wireless LED
4) Power LED
5) WPS LED
6) LAN LED
7) WPS button/reset button
8) Mode selector (access point; repeater/amplifier; client)
9) On/off switch
Overview of the LED displays
| LED Colour Status Description | |||
| Wireless signal strength LED | Orange | On constantly | Good reception (signal strength 100 – 50%) |
| Flashes | Normal reception: Flashes slowly (50 – 25%)Poor reception: Flashes quickly (< 25%) | ||
| Off | No reception or LED Off mode has been selected | ||
| Wireless Green | Flashes | Connection to a wireless router or AP (access point) is active (data are being transmitted) | |
| Off | The wireless network is switched off or the LED Off mode has been selected | ||
| POWER Green | On constantly | The repeater is switched on. In LED Off mode, all LEDs are deactivated apart from the POWER LED. Via the web interface, the LED Off mode can also be set so the POWER LED is also deactivated. | |
| Flashes slowly | The device can now be reset to the factory settings. | ||
| Off | The repeater is switched off | ||
| WPS Green | On constantly | Once a WPS connection has been successfully made, the WPS LED lights up for 5 minutes. | |
| Flashes slowly | A WPS connection is being established or the device is waiting for the WPS signal from another device. The WPS LED flashes for 2 minutes while the connection is being established | ||
| Flashes quickly | Error during WPS connection | ||
| Off | No WPS connection active or the LED Off mode has been selected | ||
| LAN Green | On constantly | LAN connection has been established | |
| Flashes | LAN connection is active (data are being transmitted) | ||
| Off | No LAN connection or the LED Off mode has been selected | ||
Initial operation
Setting the operating mode
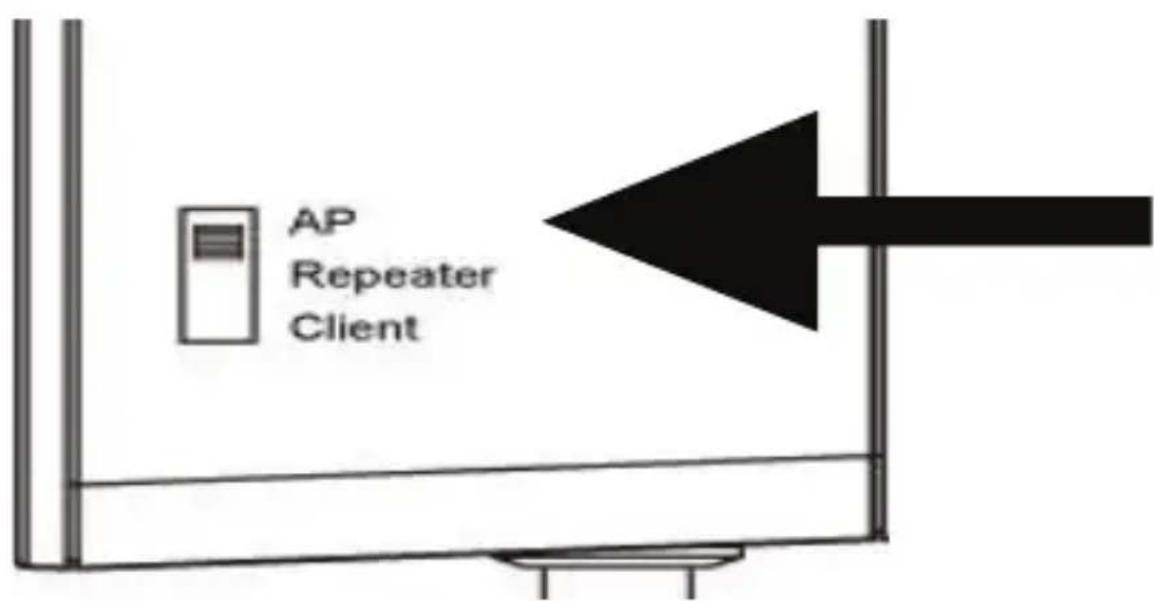
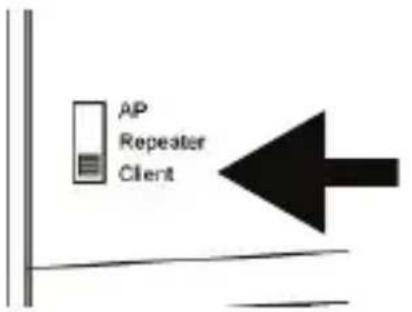
Use the mode switch on the WiFi Range Extender to switch the device to the operating mode that you wish to use. The usage possibilities are described in the following chapter.
Operating mode
Installation as range extender (repeater)
Use the repeater mode to use the WiFi Range Extender to extend the range of your wireless network. This will reduce the data transmission rate of the wireless network by half as the repeater must also communicate with the clients and the wireless access point.

PLEASE NOTE!
When using the device as a repeater for the first time, place the repeater as close as possible to the access point to which it is to be connected. After successful installation, you can reposition the repeater where the signal is to be amplified.
How to set up the WiFi Range Extender for operation as a range extender (repeater):
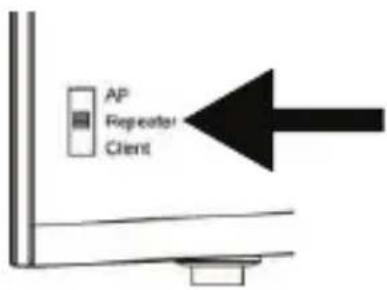
Set the mode selection switch to REPEATER.
Connect the repeater to an easily accessible mains socket.
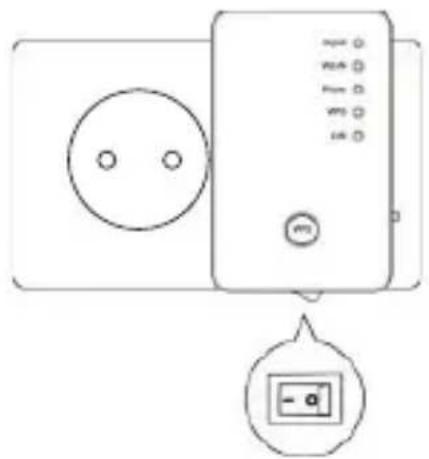
▶ Switch on the repeater by pressing the POWER button. The POWER LED lights up.
Installation as repeater via the WPS button
The quickest, easiest and most secure way of establishing a wireless connection between the repeater and the wireless router is by using the WPS button.

PLEASE NOTE!
This connection method presupposes that both devices have a WPS button.
▶ Press and hold the WPS button on the repeater for 3 seconds. The WPS LED starts to flash.
Now press the WPS button on the device that you wish to connect to the repeater. This step must be carried out within two minutes.
The connection is established and network information is exchanged.
▶ Once the connection has been established, the WPS LED lights up for 5 minutes.
After Sales Support
If the WPS LED flashes, there has been an error during connection. Wait two minutes until the LED goes out and restart the connection process.
▶ After the connection has been completely set up, the signal LED will indicate the quality of the connection.
To make further settings after the successful establishment of a WPS connection or to set up the WPS connection manually after a failed connection attempt, use the web interface (see page 40).
Manual installation as repeater via the web interface
WiFi Range Extender basic settings in repeater mode
- Before the WiFi Range Extender is configured via the web interface, DHCP for wireless and LAN is activated.
- The SSID is set to “repeater” and no encryption is set.
- After the WiFi Range Extender has been set up via the Quick Setup menu and connected to the home router, the WiFi Range Extender restarts.
- Following the restart, DHCP is deactivated on the WiFi Range Extender. The WiFi Range Extender now receives the IP addresses from the router and passes these on to any devices that are connected to the WiFi Range Extender.
Installation
Using the supplied LAN cable, connect the LAN port on your computer to the LAN port on the repeater. OR
Alternatively, you can use the wireless interface on your computer. Search in the available wireless networks for the network “repeater” and click on “CONNECT”.
▶ Afterwards, open your web browser and enter either “http://repeater” or the IP address “192.168.66.254”.

The repeater's login window appears. Enter the default user name "admin" and the default password "1234". Then click "OK".

The Quick Setup menu appears.
All available wireless access points are listed. Select the access point that you would like to connect to the repeater and click “NEXT”
Quick Setup
This quick setup helps you to build wireless connection. Please select one Access Point you want to connect.
| Select | SSID | Channel | Encryption | Signal |
| VXHOME_WIMAX | 6 | WPA-PSK | 68 | |
| WLBARN23-00-0A-79-CS-CC-EB | 1 | WEP | 16 | |
| Refresh | Next | |||

PLEASE NOTE!
If the desired access point is not listed, ensure that it is active and move the repeater closer to the access point. Then click on “UPDATE” to update the list of available wireless access points.
The login window for the selected access point appears.
Enter the network key and click on "NEXT".
Security
Please input wireless security key of your connected Access Point.

The repeater now displays the connection information. If all of the connection data are correct, click “ACCEPT”.
Save settings successfully!
Please press APPLY button to restart the system to make the changes take effect.
Connected Access Point SSID : VXHOME_WIMAX
Device SSID : VXHOME_WIMAX
Security : WPA-shared key
APPLY

PLEASE NOTE!
The “Device SSID” is the network call sign of the repeater and, as default, is set to the same SSID as the access point to which the repeater is connected. You can, however, enter a different SSID here if you wish.
- Wait a few seconds while the repeater restarts. After the restart is complete, you can connect the computer to the repeater's access point via the list of available networks.
System Restarting! Please wait for a while!
21%

PLEASE NOTE!
After configuration, the repeater's DHCP server is deactivated and the DHCP server of the access point whose signal is being amplified is used instead.
After configuration
▶ You can remove the LAN cable from the WiFi Range Extender.

PLEASE NOTE!
You can also connect a LAN cable to the LAN port on the WiFi Range Extender to connect to the network for the access point whose signal is being amplified by the WiFi Range Extender.
You can reposition the repeater at any location within the range of the access point (home router). Please pay attention here to the status of the wireless LED (lights up when reception is good, flashes for poor reception).
- Clients (other computers or wireless-capable devices) within the range of the repeater can now be connected to the WiFi Range Extender (by entering the network key or via the WPS button).

PLEASE NOTE!
To call up the Quick Setup menu again at any time, press down the WPS button for about 10 seconds, until the POWER LED flashes. The repeater is now reset to the factory settings and you can carry out the installation again. See also „The Web Interface“ on page 40.
Installation as a client
Use the client mode to use the WiFi Range Extender as a wireless adaptor. This allows you to register devices that only have a LAN port (e.g. set-top boxes, printers...) to the network via wireless.
WiFi Range Extender basic settings in client mode
- Before the WiFi Range Extender is configured via the web interface, DHCP for wireless and LAN is activated.
- After the WiFi Range Extender has been set up via the Quick Setup menu and connected to the home router, the WiFi Range Extender restarts.
- After the restart, DHCP for LAN and wireless is deactivated on the WiFi Range Extender. The WiFi Range Extender now receives IP addresses from the router.
Connecting as a client to a wireless AP (Wireless router) using the WPS button
The quickest, easiest and most secure way of establishing a wireless connection between the repeater (in client mode) and the wireless router is by using the WPS button.

PLEASE NOTE!
This connection method presupposes that both devices have a WPS button or WPS function in their menu.
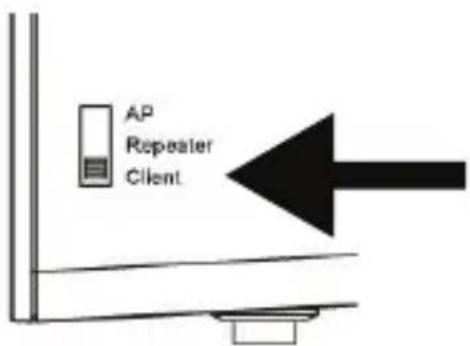
▶ Set the mode selection switch to CLIENT.
Connect the repeater to an easily accessible AC 230 V 50/60 Hz mains socket.
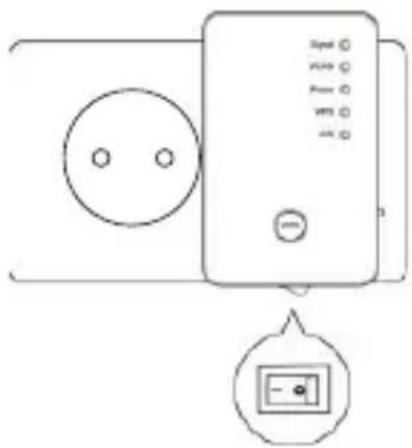
▶ Switch on the repeater by pressing the POWER button. The POWER LED lights up.
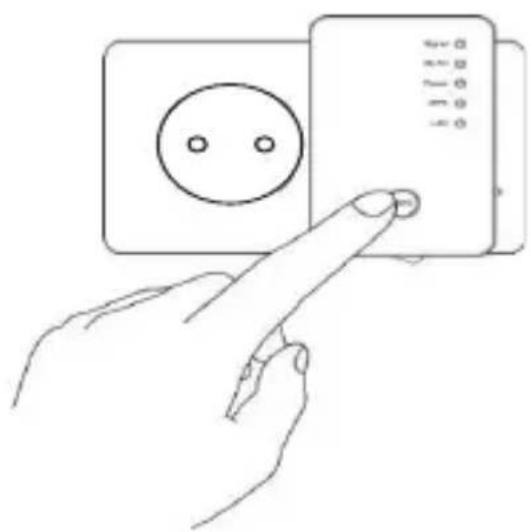
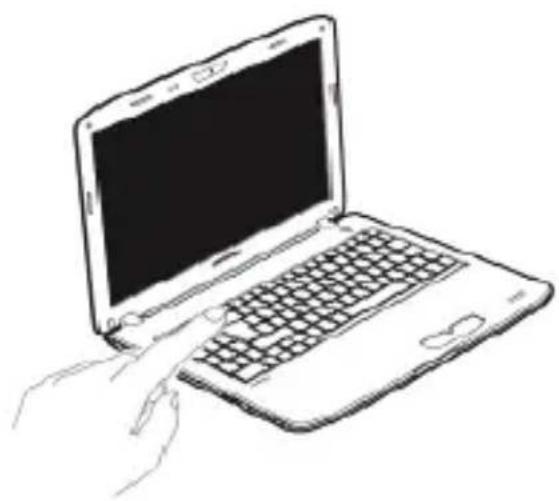
▶ Press and hold the WPS button on the repeater for 3 seconds. The WPS LED starts to flash.
Now press the WPS button on the router with which you would like to connect the repeater. This step must be carried out within two minutes.
The connection is established and network information is exchanged.
▶ Once the connection has been established, the WPS LED lights up for 5 minutes.
If the WPS LED flashes, there has been an error during connection. Wait two minutes until the LED goes out and restart the connection process.
▶ After the connection has been completely set up, the signal LED will indicate the quality of the connection.
To make further settings after the successful establishment of a WPS connection or to set up the WPS connection manually after a failed connection attempt, use the web interface (see page 40).
▶ After the repeater has been successfully configured via the WPS button, you can use the LAN cable to connect the repeater to the LAN port on the device that is to be connected via wireless to the network.
▶ Bear in mind the range of the access point (home router). The Wireless LED lights up when reception is good and flashes for poor reception.
Installation as a client via the web interface
▶ Set the mode selection switch to CLIENT.

Connect the repeater to an easily accessible AC 230 V 50/60 Hz mains socket.
▶ Switch on the repeater by pressing the POWER button. The POWER LED lights up.
Using the supplied LAN cable, connect the LAN port on your computer to the LAN port on the repeater.



PLEASE NOTE!
Your computer's LAN connection needs to be set to "Obtain IP addresses automatically via DHCP".
▶ Open your web browser and enter either “http://repeater” or the IP address “192.168.66.253”.
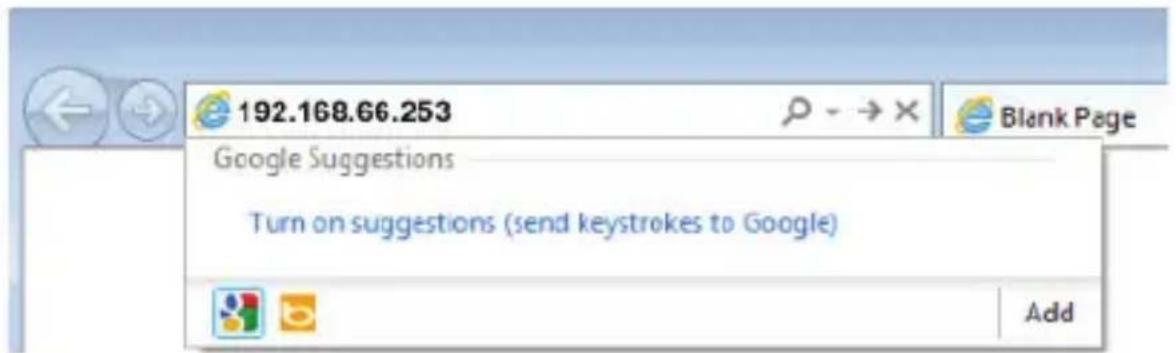
The repeater's login window appears. Enter the default user name "admin" and the default password "1234". Then click "OK".

The Quick Setup menu appears. All available wireless access points are listed. Select the access point that you would like to connect to the repeater and click “NEXT”
Quick Setup
This quick setup helps you to build wireless connection. Please select one Access Point you want to connect.
| Select | SSID | Channel | Encryption | Signal |
| VIXHOME_WIMAX | 6 | WPA-PSK | 68 | |
| WLBARN23-00-0A-T9-C5-CC-EB | 1 | WEP | 16 | |
| Refresh | Next |

PLEASE NOTE!
If the desired access point is not listed, ensure that it is active and move the repeater closer to the access point. Then click on “UPDATE” to update the list of available wireless access points.
The login window for the selected access point appears.
Enter the network key and click on "NEXT".
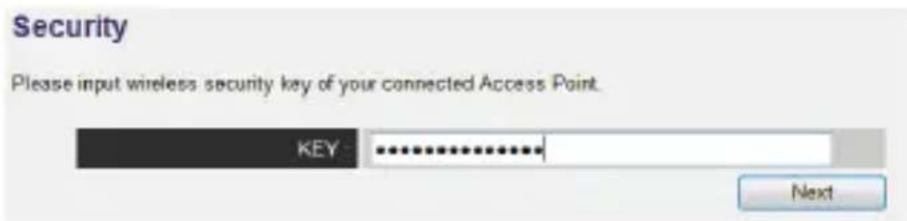
The repeater now displays the connection information. If all of the connection data are correct, click “ACCEPT”.
Save settings successfully!
Please press APPLY button to restart the system to make the changes take effect.
Connected Access Point SSID : varioxmnet
Security : WPA-shared key
▶ Wait a few seconds while the repeater restarts. After the restart is complete, you can connect the computer
via the repeater to a wireless access point from the list of available networks.
System Restarting! Please wait for a while !
21%

PLEASE NOTE!
To call up the Quick Setup menu again at any time, press down the WPS button for about 10 seconds, until the POWER LED flashes. The repeater is now reset to the factory settings and you can carry out the installation again.
Installation as an AP (access point)
Select AP mode, if you want to operate the repeater as a wireless access point. In this mode, the repeater acts as a wireless interface for communication with the network. For example, you can connect the repeater to a network router that has no wireless interface so that devices can now access the network router via the repeater.
Configuration as an AP
▶ Set the mode selection switch to AP.

Connect the repeater to an easily accessible AC 230 V 50/60 Hz mains socket.
▶ Switch on the repeater by pressing the POWER button. The POWER LED lights up.
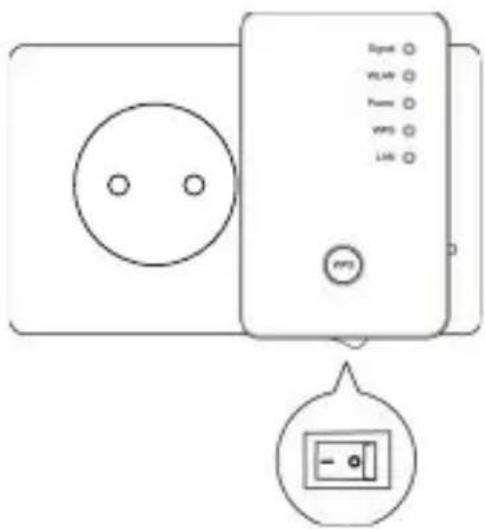
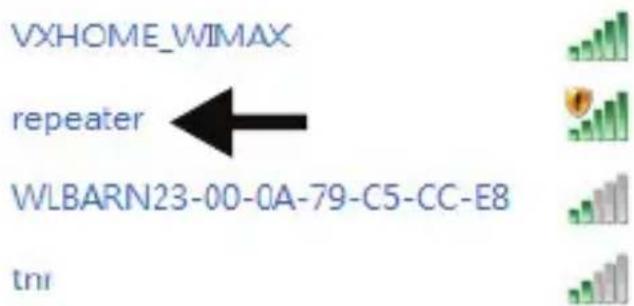
▶ Search in the available wireless networks for the unsecured network “repeater” and click on “CONNECT”.
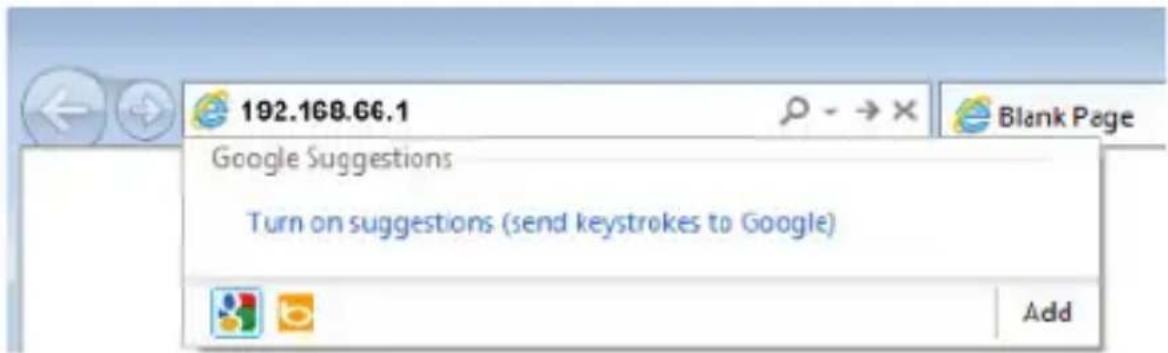
▶ Open your web browser and enter either “http://repeater” or the IP address “192.168.66.1”.
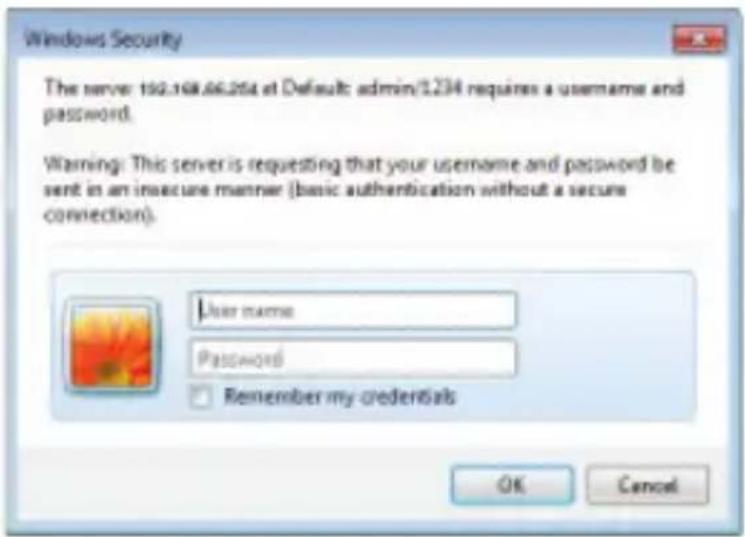
The repeater's login window appears. Enter the default user name "admin" and the default password "1234". Then click "OK".
The Quick Setup menu appears.
Enter an SSID (network identification) by which the repeater can be identified as an AP in the network. Click on “NEXT”.
The default SSID is "repeater".
Quick Setup
This quick setup helps you to build wireless connection. You can change default device SSID.
Device SSID : repeater
The "Security" window appears.
Select a network encryption type. The encryption types are as follows: WEP, WPA pre-shared key or WPA RADIUS.
Security
Please input wireless security key of your connected Access Point.

If all of the connection data are correct, click "ACCEPT".
Save settings successfully!
Please press APPLY button to restart the system to make the changes take effect.
device SSID : repeater
Security : Disable
APPLY
Wait a few seconds while the repeater restarts. After the restart has been completed, the repeater is available as a wireless access point.
System Restarting! Please wait for a while!
21%
Now use the supplied LAN cable to connect the LAN port on the WiFi Range Extender to the LAN port on the home router or a network socket for your home network.
Clients (other computers or wireless-capable devices) within the range of the repeater can now be connected to the WiFi Range Extender (by entering the previously defined network key or via the WPS button).
Connecting to the repeater's access point using the WPS button
The quickest, easiest and most secure way of establishing a wireless connection between the repeater and the device that is to be connected to the access point is by using the WPS button.
To connect to the AP using the WPS button, proceed as follows:

▶ Press the WPS button on the repeater twice. The WPS LED starts to flash.
Now press the WPS button on the device that you wish to connect to the repeater's AP. This step must be carried out within two minutes.
The connection is established and network
information is exchanged.
▶ Once the connection has been established, the WPS LED lights up for 5 minutes.
If the WPS LED flashes, there has been an error during connection. Wait two minutes until the LED goes out and restart the connection process.
▶ After the connection has been completely set up, the signal LED will indicate the quality of the connection.
To make further settings after the successful establishment of a WPS connection or to set up the WPS connection manually after a failed connection attempt, use the web interface (see page 40).
Configuring the repeater as an access point (AP) via a LAN connection
▶ Set the mode selection switch to AP.

Connect the repeater to an easily accessible AC 230 V 50/60 Hz mains socket.
▶ Switch on the repeater by pressing the POWER button. The POWER LED lights up.
Using the supplied LAN cable, connect the LAN port on your computer to the LAN port on the repeater.
▶ Open your web browser and enter either “http://repeater” or the IP address “192.168.66.1”.


The repeater's login window appears. Enter the default user name "admin" and the default password
"1234". Then click "OK".

The Quick Setup menu appears.
Enter an SSID (network identification) by which the repeater can be identified as an AP in the network.
Click on "NEXT".
The default SSID is "repeater".
Quick Setup
This quick setup helps you to build wireless connection. You can change default device SSID.
Device SSID : repeater
The "Security" window appears.
Select a network encryption type. The encryption types are as follows: WEP, WPA pre-shared key or WPA RADIUS.
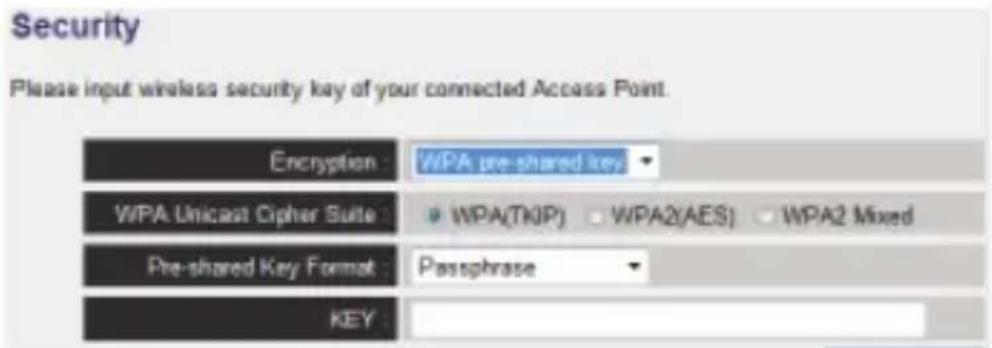
If all of the connection data are correct, click "ACCEPT".

Wait a few seconds while the repeater restarts. After the restart has been completed, the repeater is available as a wireless access point.
System Restarting! Please wait for a while!
21%
The Web Interface
You can use the web interface to configure the repeater and set it up to suit your needs or, if the connection via WPS was not successful, to make a connection.
The appearance of the web interface will change for each selected mode, as options will be hidden or shown depending on whether they are required for the selected mode.
Calling up the web interface
After being configured, the repeater is only accessible via the management IP. The method for calling up the web interface differs depending on the operating mode.
Access point: 192.168.66.1
Repeater/amplifier: 192.168.66.254
Client: 192.168.66.253

PLEASE NOTE!
If the repeater has already been configured, the transfer of the IP address of the PC via which you want to access the repeater must be set to manual. See next section.
Manually setting up DHCP on a Windows PC
In AP operation, the management IP address of the repeater is set to 192.168.66.1. Please ensure that the IP address of your PC is in the range 192.168.66.2\~192.168.66.252.
To log in via the web interface, the IP address of your PC must be manually set to a value in this range. The procedure for this is described in the next section.
Setting the IP address in Windows XP
▶ Click on the START button on the task bar and then on Control Panel.
▶ Double-click on Network Connections and then click on Display connection status.
▶ Select Local Internet settings. The window Local area connection status appears. Click on properties.
▶ Select the entry Internet Protocol (TCP/IP) – General and then enter the IP address as described below:
- IP address: 192.168.66.x (where x can be any number between 2 and 200. If more than one computer is using this access point, each computer must use its own number)
- Subnet mask: 255.255.255.0
▶ To finish, click on OK.
Setting the IP address in Windows Vista/7
▶ Click on the START button on the task bar and then Control Panel.
▶ Click on Network and Sharing Centre. Click on Change adapter settings.
▶ Click on LAN connection with the right mouse button and then select Properties.
The LAN properties window appears. Select Internet Protocol Version 4 (TCP/IPv4) and then click on Properties.
Select the entry “Use following IP address” and then enter the IP address as described below:
- IP address: 192.168.2.x (where x can be any number between 2 and 200. If more than one computer is using this access point, each computer must use its own number)
- Subnet mask: 255.255.255.0
▶ To finish, click on OK.
Logging on to the web interface
▶ Enter the relevant management IP in your browser for the currently set operating mode.
The repeater's login window appears. Enter the default user name "admin" and the default password "1234". Then click "OK".
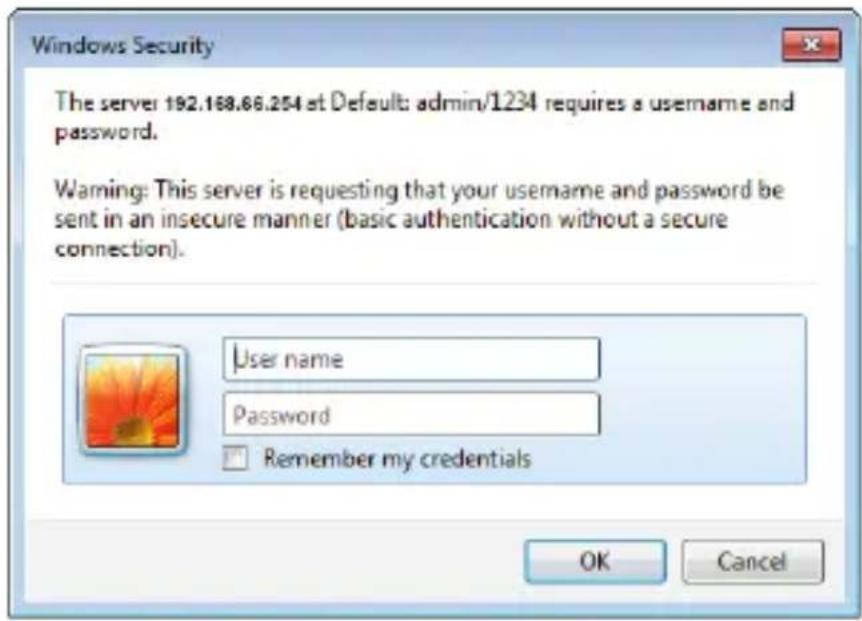
The start page of the configuration menu for the WiFi Range Extender opens.

On the left margin, you will find four menu options for configuring the repeater. The content of the individual menus differ depending on which mode the repeater is set to.
Home page
On the home page, you will find all information about the repeater and its settings.
System
Operating time
This shows the operating time since the unit was last switched on.
Device version
This shows the version of the device.
Firmware version
This shows the version of the firmware.
Wireless settings
Mode
In the MODE line, the currently set mode is displayed:
AP; Universal repeater or Station infrastructure (client mode).
The information displayed is identical for all three modes.
ESSID
This shows the SSID that the WiFi Range Extender has adopted from the wireless network.
Channel
This shows the channel that the WiFi Range Extender is transmitting on.
Security
This shows what encryption method the WiFi Range Extender is set to use. If no encryption has been set, the entry displays “Deactivated”.
BSSID (MAC)
This shows the MAC address of the repeater's wireless adaptor.
Attached clients
In client mode, the line Attached clients does not appear. Instead, the line State is shown which shows the repeater's connection status.
▶ To show a list of all attached devices, click on the button Show active clients to see a table of all active clients in a new window.

PLEASE NOTE!
If you are using a pop-up blocker, deactivate this first otherwise the window cannot be shown.
LAN settings
IP address
This shows the WiFi Range Extender's IP address.
Subnet mask
This shows the subnet mask which the WiFi Range Extender is set to.
Standard gateway
This shows the standard gateway which the WiFi Range Extender is set to.
MAC address
This shows the MAC address of the repeater's LAN adaptor.
Quick setup
Repeater and client mode
▶ Start by selecting the access point to which you would like to connect the repeater.
▶ Then enter the network key for the selected access point.
The next window displays the repeater's connection data.
In repeater mode, you can set the SSID for the repeater in the next window. The SSID of the access point is shown automatically.
▶ Click theACCEPT, button to finish the process. The data are saved and the repeater restarts.
▶ After the restart of the repeater is completed, the home page of the web interface will reappear. You can now close the browser.
Access Point mode
▶ Start by selecting an SSID for the access point.
In the next step, you can make the security settings for the access point.
▶ Select the required method in the option Encryption.
▶ Depending on the encryption method selected, further input and selection fields will be displayed.
▶ Finish making your settings by clicking on the CONTINUE button.
▶ Check the selected settings again and click on ACCEPT, to finish the process.
The data are saved and the repeater restarts.
▶ After the restart of the repeater is completed, the home page of the web interface will reappear. You can now close the browser.
WPS settings
In the WPS settings menu, you can configure the repeater's WPS function.
▶ WPS functionality is activated by default. To deactivate this function, remove the tick from the Activate WPS box.
Wi-Fi protected setup information
You will find a list of the WPS settings under the heading Wi-Fi Protected Setup Information.
- WPS status: Shows the status of the security settings. If you have not yet made any settings in Quick Setup, the notification Unconfigured will appear.
- Self PIN code: Shows the WPS Self PIN code. This code is used during PIN-style WPS pairing mode: it must be provided for all wireless clients.
- SSID: This shows the WiFi Range Extender's network password.
- Authentication mode: This shows the selected encryption mode.
• Pass phrase key: Here you can see whether a network key is being used. If a network key has been set, this is shown by asterisks (****) in place of the actual key.
Device configuration
Under the heading Device configuration, you have the option to configure the WPS settings:
- Configuration mode: Here you can set the WiFi Range Extender as either enrollee or registrar for WPS permissions in the network.
- Configuration via push button method: Here you can execute the WPS function via the software. This button corresponds to the WPS button on the device.
- Enter client PIN: This code is used in PIN-style WPS pairing mode. If you want to connect a device that is secured by PIN-style WPS, enter the PIN code of the device here.
Advanced settings

ATTENTION!
The advanced settings are only for experienced users with sufficient wireless knowledge. You should not change any of these settings if you do not know what effect this will have on the router.
Here is a list of the menu options and their meaning:
| Menu option Meaning | |
| Fragment threshold | The fragment threshold setting is used for the transmission of fragmented data packets. The default value is 2346. |
| RTS threshold This setting is used to define the RTS value. The default value is 2347. | |
| Beacon interval | This setting defines the interval for sending out the beacon. The standard value is 100. |
| DTIM period | This setting defines the interval for sending out the DTIM signal. The standard value is 3. |
| Data rate | This setting defines the speed of data transmission. |
| N data rate | This setting defines the speed of data transmission. |
| Channel width Channel width setting. | |
| Preamble type | This setting defines the type of preamble signal. |
After Sales Support
| Menu option Meaning | |
| Broadcast ESSID | This setting defines whether the ESSID is broadcast or not. |
| WMM | This setting defines whether the WMM function is activated or deactivated. |
| CTS protect | This setting defines the type of CTS signal. |
| TX power | This setting defines a value for regulating the transmitting power of radio systems. |
▶ You can switch off the LEDs on the device. To do this, put a tick in the check box LED Off mode.
The two selection options allow you to define more precisely which LEDs are to be switched off.
MAC filter
If you want to use MAC address filtering, you can use this menu option to make the required settings.
Device settings
This menu option allows you to the set the password for the web interface, configure the IP address and set up the DHCP functionality.
Configuration
This menu option allows you save the menu settings in a file so that you will not have to completely re-enter them following a restart of the device.
You can also update the WiFi Range Extender's firmware or reset the device to the factory settings.
Medion Finder Tool
On the supplied CD-ROM, you will find a Finder Tool that will make access to the web interface easier. Double-click on the file Medion-Finder.exe to start the Finder Tool.

PLEASE NOTE!
The repeater can only be found by the Finder Tool during the initial installation.
Your computer must be configured as DHCP client (“Obtain IP addresses automatically via DHCP”)

Insert the CD-ROM into the CD drive of your computer. Double-click on the file Medion-Finder.exe to start the Finder Tool.

If you do not want to use the Finder, open your web browser and enter either "http://repeater" or the IP address corresponding to the selected mode.
Do you need more help?
If the above suggestions did not solve your problem, please contact us. To make it easier for us to help you, please have the following information to hand:
• What external devices are connected?
- When operating the device, at which step did the problem occur?
- What steps have you already taken to try and rectify the problem?
- Please provide your customer number if you have one.
Cleaning
You can increase the lifespan of your device with the following measures:
- Always unplug the device and disconnect all cables before cleaning.
- Do not use solvents, corrosive detergents or aerosol detergents to clean the device.
- Clean the device with a soft, lint-free cloth.
Store the packaging material in a safe place; only use this box to transport the device.

ATTENTION!
None of the parts inside the device require cleaning or maintenance.
Disposal
Packaging

Your device has been packaged to protect it against transportation damage. Packaging materials are raw materials and can therefore be reused or recycled.
Device

At the end of its life, the device should not be disposed of in the normal household rubbish! Please consult your local authority for advice on correct and eco-friendly methods of disposal.
Technical data
Input: AC 100 - 240 V \~ 50/60 Hz
Wireless standard: 802.11 b/g/n
Dimensions
see
diagram

Total weight (approx.) 86 g
Operating temperature 5°C to 35°C
Humidity 5% to 65%
during operation
Subject to technical and optical changes as well as printing errors.

N26968
Glossary
Access Point (AP), Wireless AP
Also known as a base station, this is an electronic device that functions as an interface for wireless communications devices. End devices make a radio connection to the wireless access point via a wireless adapter. The access point can also be connected by cable to a permanently installed communications network.
Operating system
Software via which the user and the other software installed on the system can communicate with the computer hardware and the hard drive.
BSSID (MAC)
The basic service set identification (BSSID) corresponds to the MAC address of the wireless access point.
Client mode
Client mode is an operating mode of a wireless access point (here: the WiFi Range Extender) in which the device behaves like a wireless adaptor towards the higher level AP. Via an AP operated in client mode, individual computers can be connected to a higher level network without their own wireless adaptor.
DHCP – Dynamic Host Configuration Protocol
A protocol to assign an IP address to devices in the
network. Dynamic addresses give the device a different IP address each time it connects to a network. In some systems, the IP addresses changes automatically while the device is connected. DHCP also supports a combination of static and dynamic IP addresses. See also Protocol.
DNS – Domain Name Service
A system that a network name server uses to translate text host names into numerical IP addresses to uniquely identify a device connected to the Internet.
Enrollee
The device that searches via the WPS function after logging into a network. The enrollee always searches for a registrar.
Ethernet
A standard method of connecting a computer to a local network (LAN).
ESSID
By providing different network call signs, it is possible to operate various wireless at the same location. The SSID is set at the base station. To connect several base stations to the same network, they need to be set to the same SSID; this is then known as an ESSID (extended SSID).
Gateway
The standard gateway is provided by the computer/router in the network in which all queries are made which have
no address in the local network (queries in the Internet). It forwards these queries to a computer/router that may be able to answer these queries. Normally, you enter the IP address of your home router (DSL router) as the standard gateway.
IP Address
A binary 32-bit number that uniquely identifies any computer connected to the internet.
LAN - Local Area Network
A system in which computer users are connected within a company or an organisation and are often also connected to central data collections stored on LAN servers.
MAC address
The MAC address (media access control address) is the hardware address of every individual network adapter. It serves as a unique identifier for the device in a computer network.
Pass phrase key
The network key that is used for authentication on a WEP/WPA2 encrypted network.
Registrar
The device that publishes and withdraws WPS permissions within a network. A registrar can be integrated into a wireless access point or be separate from the access point (AP).
Self PIN code
The PIN code that is provided by the registrar for completing a connection via the WPS function.
SSID
By providing different network call signs, it is possible to operate various wireless at the same location. The SSID is set at the base station. To connect several base stations to the same network, they need to be set to the same SSID; this is then known as an ESSID (extended SSID).
Subnet mask
A subnet is a subordinate part of a network. It collates several consecutive IP addresses by means of a subnet mask.
TCP/IP
Transmission control protocol/Internet protocol. A series of protocols used for communication via connected networks. The standard for data transmission via networks. See also Protocol.
WPS
Wi-Fi Protected Setup (WPS) is a standard used to simply add devices to an existing network without the often laborious setting up of an adequate encryption.
Your device supports the following WPS methods:
PIN entry:
The device has a sticker or a display for a PIN that must
be provided to the registrar (e.g. the access point) when connecting to a network.
Push Button Configuration(PBC):
The access point and the devices to be connected to it all have a physical or virtual (software-based) button to set up a connection. When this is pressed, a two-minute phase starts in which the devices can join the network.

MEDION®
Wireless Range Extender P89137 (MD 86738)
Repair and Refurbished Goods or Parts Notice
Unfortunately, from time to time, faulty products are manufactured which need to be returned to the Supplier for repair.
Please be aware that if your product is capable of retaining user-generated data (such as files stored on a computer hard drive, telephone numbers stored on a mobile telephone, songs stored on a portable media player, games saved on a games console or files stored on a USB memory stick) during the process of repair, some or all of your stored data may be lost. We recommend you save this data elsewhere prior to sending the product for repair.
You should also be aware that rather than repairing goods, we may replace them with refurbished goods of the same type or use refurbished parts in the repair process.

Please be assured though, refurbished parts or replacements are only used where they meet ALDI's stringent quality specifications.
If at any time you feel your repair is being handled unsatisfactorily, you may escalate your complaint. Please telephone us on 1 300 884 987 or write to us at:
MEDION Australia Pty Ltd
St. Leonards, NSW 2065
Australia
MEDION Help Desk 1300 884 987
(Operating Hours : Mon-Fri 08 :30AM to 06 :00PM EST)
Email: australia@medion.com

MEDION Australia Pty Ltd
St Leonards, NSW 2065
Australia
Hotline: 1300 884 987
Opening hours: Mon - Fri 08:30AM to 06:00PM EST
Internet
www.medion.com.au
E-mail Support
australia@medion.com


- MEDION®
- WARRANTY DETAILS
- TABLE OF CONTENTS
- WARRANTY DETAILS ...... 1
- NOTES ON HOW TO USE THESE INSTRUCTIONS .... 4
- SAFETY INSTRUCTIONS 6
- BEFORE USE 10
- OVERVIEW OF THE DEVICE ....11
- INITIAL OPERATION ......16
- OPERATING MODE ......16
- THE WEB INTERFACE 40
- MEDION FINDER TOOL 53
- AFTER SALES SUPPORT
- NOTES ON HOW TO USE THESE INSTRUCTIONS
- SYMBOLS AND KEY WORDS USED IN THESE INSTRUCTIONS
- DANGER
- CAUTION
- ATTENTION
- PROPER USE
- SAFETY INSTRUCTIONS
- OPERATIONAL SAFETY
- DATA BACKUP
- POWER SUPPLY
- NOTES ON CONFORMITY
- CONFORMITY INFORMATION AS PER R&TTE
- C € 2200 Ⓞ
- BEFORE USE
- CHECK PACKAGE CONTENTS
- SYSTEM REQUIREMENTS
- OVERVIEW OF THE DEVICE
- OVERVIEW OF THE LED DISPLAYS
- INITIAL OPERATION
- SETTING THE OPERATING MODE
- OPERATING MODE
- INSTALLATION AS RANGE EXTENDER (REPEATER)
- PLEASE NOTE
- HOW TO SET UP THE WIFI RANGE EXTENDER FOR OPERATION AS A RANGE EXTENDER (REPEATER)
- INSTALLATION AS REPEATER VIA THE WPS BUTTON
- MANUAL INSTALLATION AS REPEATER VIA THE WEB INTERFACE
- WIFI RANGE EXTENDER BASIC SETTINGS IN REPEATER MODE
- INSTALLATION
- QUICK SETUP
- SECURITY
- SAVE SETTINGS SUCCESSFULLY
- SYSTEM RESTARTING! PLEASE WAIT FOR A WHILE
- AFTER CONFIGURATION
- INSTALLATION AS A CLIENT
- WIFI RANGE EXTENDER BASIC SETTINGS IN CLIENT MODE
- CONNECTING AS A CLIENT TO A WIRELESS AP (WIRELESS ROUTER) USING THE WPS BUTTON
- INSTALLATION AS A CLIENT VIA THE WEB INTERFACE
- INSTALLATION AS AN AP (ACCESS POINT)
- CONFIGURATION AS AN AP
- CONNECTING TO THE REPEATER'S ACCESS POINT USING THE WPS BUTTON
- CONFIGURING THE REPEATER AS AN ACCESS POINT (AP) VIA A LAN CONNECTION
- THE WEB INTERFACE
- CALLING UP THE WEB INTERFACE
- MANUALLY SETTING UP DHCP ON A WINDOWS PC
- SETTING THE IP ADDRESS IN WINDOWS XP
- SETTING THE IP ADDRESS IN WINDOWS VISTA/7
- LOGGING ON TO THE WEB INTERFACE
- HOME PAGE
- SYSTEM
- OPERATING TIME
- DEVICE VERSION
- FIRMWARE VERSION
- WIRELESS SETTINGS
- MODE
- ESSID
- CHANNEL
- BSSID (MAC)
- ATTACHED CLIENTS
- LAN SETTINGS
- IP ADDRESS
- SUBNET MASK
- STANDARD GATEWAY
- MAC ADDRESS
- REPEATER AND CLIENT MODE
- ACCESS POINT MODE
- WPS SETTINGS
- WI-FI PROTECTED SETUP INFORMATION
- DEVICE CONFIGURATION
- ADVANCED SETTINGS
- MAC FILTER
- DEVICE SETTINGS
- CONFIGURATION
- MEDION FINDER TOOL
- DO YOU NEED MORE HELP
- CLEANING
- DISPOSAL
- PACKAGING
- DEVICE
- TECHNICAL DATA
- GLOSSARY
- ACCESS POINT (AP), WIRELESS AP
- OPERATING SYSTEM
- CLIENT MODE
- DHCP – DYNAMIC HOST CONFIGURATION PROTOCOL
- DNS – DOMAIN NAME SERVICE
- ENROLLEE
- ETHERNET
- GATEWAY
- LAN - LOCAL AREA NETWORK
- PASS PHRASE KEY
- REGISTRAR
- SELF PIN CODE
- SSID
- TCP/IP
- WPS
- PIN ENTRY
- PUSH BUTTON CONFIGURATION(PBC)
- WIRELESS RANGE EXTENDER P89137 (MD 86738)
- REPAIR AND REFURBISHED GOODS OR PARTS NOTICE
Brand : SWEEX
Model : LW055
Category : Router