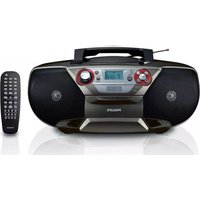
AZ5740 - Cd player/recorder PHILIPS - Free user manual and instructions
Find the device manual for free AZ5740 PHILIPS in PDF.


| Product Type | Portable CD Player/Recorder |
| Brand | Philips |
| Model | AZ5740 |
| Dimensions (Approx.) | 250 x 150 x 50 mm |
| Weight (Approx.) | 1.2 kg |
| Power Supply | AC 220-240V, 50/60Hz or DC 6V (6 x R14/LR14 batteries) |
| Power Consumption | 15 W |
| Playable Discs | CD, CD-R, CD-RW |
| Recording Media | CD-R, CD-RW |
| Audio Output | 3.5 mm headphone jack, RCA line out (L/R) |
| Audio Input | 3.5 mm line in (for recording) |
| Built-in Speakers | 2 x 5 W (stereo) |
| Display | LCD with backlight |
| Main Functions | Play, Pause, Stop, Skip, Repeat (1/All), Shuffle, Program, Record |
| Recording Source | Built-in CD player, external line input |
| Maintenance | Clean lens with dedicated CD lens cleaner; wipe exterior with dry cloth |
| Safety | Keep away from water; do not disassemble; use only specified power supply |
| Spare Parts | Optional remote control, power adapter available from Philips service |
| Repairability | Professional repair only; refer to qualified service center |
Frequently Asked Questions - AZ5740 PHILIPS
User questions about AZ5740 PHILIPS
0 question about this device. Answer the ones you know or ask your own.
Ask a new question about this device
Download the instructions for your Cd player/recorder in PDF format for free! Find your manual AZ5740 - PHILIPS and take your electronic device back in hand. On this page are published all the documents necessary for the use of your device. AZ5740 by PHILIPS.
USER MANUAL AZ5740 PHILIPS
natural_image
Black handheld electronic device with a digital display and control panel, next to a remote control (no visible text or symbols)EN User manual
English
1 Important
Safety
Important Safety Instructions
① Read these instructions.
② Keep these instructions.
③ Heed all warnings.
④ Follow all instructions.
⑤ Do not use this apparatus near water.
⑥ Clean only with dry cloth.
⑦ Do not block any ventilation openings. Install in accordance with the manufacturer's instructions.
⑧ Do not install near any heat sources such as radiators, heat registers, stoves, or other apparatus (including amplifiers) that produce heat.
⑨ Protect the power cord from being walked on or pinched, particularly at plugs, convenience receptacles, and the point where they exit from the apparatus.
⑩ Only use attachments/accessories specified by the manufacturer.
⑪ Use only with the cart, stand, tripod, bracket, or table specified by the manufacturer or sold with the apparatus.
When a cart is used, use caution when moving the cart/ apparatus combination to avoid injury from tip-over.

natural_image
Silhouette of a person climbing a ladder inside a circular frame (no text or symbols)⑫ Unplug this apparatus during lightning storms or when unused for long periods of time.
⑬ Refer all servicing to qualifi ed service personnel.
Servicing is required when the apparatus has been damaged in any way, such as power-supply cord or plug is damaged, liquid has been spilled or objects have fallen into the apparatus, the apparatus has been exposed to rain or moisture, does not operate normally, or has been dropped.
⑭ Battery usage CAUTION – To prevent battery leakage which may result in bodily injury, property damage, or damage to the unit:
• Install all batteries correctly, + and - as marked on the unit.
• Do not mix batteries (old and new or carbon and alkaline, etc.).
- Remove batteries when the unit is not used for a long time.
⑮ Apparatus shall not be exposed to dripping or splashing.
⑯ Do not place any sources of danger on the apparatus (e.g. liquid filled objects, lighted candles).
⑰ This product may contain lead and mercury. Disposal of these materials may be regulated due to environmental considerations. For disposal or recycling information, please contact your local authorities or the Electronic Industries Alliance: www.eiae.org.
⑱ Where the MAINS plug or an appliance coupler is used as the disconnect device, the disconnect device shall remain readily operable.

Warning
Never remove the casing of this apparatus.
Never lubricate any part of this apparatus. •
Never place this apparatus on other electrical equipment.
Keep this apparatus away from direct sunlight, naked • flames or heat.
• Never look into the laser beam inside this apparatus.
Ensure that you always have easy access to the power cord, plug or adaptor to disconnect this apparatus from the power.
Notice
Any changes or modifications made to this device that are not expressly approved by Philips Consumer Lifestyle may void the user's authority to operate the equipment.

Your product is designed and manufactured with high quality materials and components, which can be recycled and reused.

When this crossed-out wheeled bin symbol is attached to a product it means that the product is covered by the European Directive 2002/96/EC.
Please inform yourself about the local separate collection system for electrical and electronic products.
Please act according to your local rules and do not dispose of your old products with your normal household waste. Correct disposal of your old product helps to prevent potential negative consequences for the environment and human health.

Your product contains batteries covered by the European Directive 2006/66/EC, which cannot be disposed with normal household waste. Please inform yourself about the local rules on separate collection of batteries because correct disposal helps to prevent negative consequences for the environmental and human health.
Environmental information
All unnecessary packaging has been omitted. We have tried to make the packaging easy to separate into three materials: cardboard (box), polystyrene foam (buffer) and polyethylene (bags, protective foam sheet.)
Your system consists of materials which can be recycled and reused if disassembled by a specialized company. Please observe the local regulations regarding the disposal of packaging materials, exhausted batteries and old equipment.
Recording and playback of material might require consent. See Copyright Act 1956 and The Performer's Protection Acts 1958 to 1972.

The making of unauthorized copies of copy-protected material, including computer programs, files, broadcasts and sound recordings, may be an infringement of copyrights and constitute a criminal offence. This equipment should not be used for such purposes.

Manufactured under license from Dolby Laboratories. Dolby and the double-D symbol are trademarks of Dolby Laboratories.
This apparatus includes this label:

Windows Media and the Windows logo are trademarks, or registered trademarks of Microsoft Corporation in the United States and/or other countries.
2 Your DVD Soundmachine
Congratulations on your purchase, and welcome to Philips! To fully benefit from the support that Philips offers, register your product at www.philips.com/welcome.
Introduction
With this unit, you can enjoy:
• Video from DVD/VCD/SVCD or USB devices. Audio from discs, radio, tape, or USB devices. • Pictures from Kodak/JPEG discs, or USB devices. •
The unit supports the following media formats:
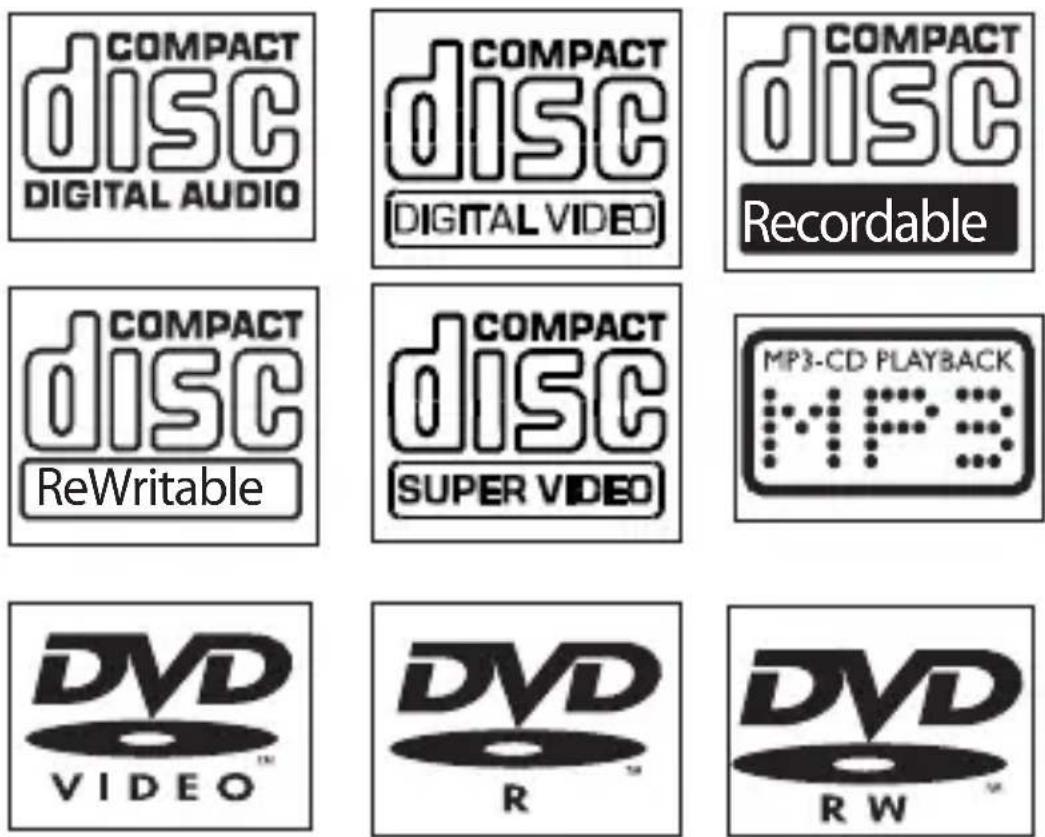
You can play DVD discs with the following region codes:
DVD region code Countries

Latin America
What's in the box
Check and identify the contents of your package:
- Main unit
Remote control •
AC power cord•
Composite AV cable
User manual •
Quick start guide •
Overview of the main unit

① LIFT TO OPEN
- Open/close the disc compartment.
② TUNING
- Tune to radio stations.
③ SUBTITLE
• Select a subtitle language.
④ VOLUME
- Adjust volume.
⑤ AUDIO
• For CD/MP3 discs, select an audio mode.
For DVD, select an audio language. •
⑥ Display panel
• Show current status.
7
• Jack for a USB mass storage device.
⑧ MODE
- Select a play mode.
9
Stop play.
⑩

Start or pause play.
- SEARCH
Skip to the previous/next track.
Search within a track/disc/USB.
• ALBUM ▼▲
Skip to the previous/next album.
⑪ IR
• The remote control sensor.
⑫ Source selector
• Turn on or off the unit, or select a source.
⑬ Tape controls
- RECORD Start to record.
- PLAY Start tape play.
- SEARCH | Fast rewind/forward the tape.
- STOP/OPEN ■ / ▲ Stop the tape play or open the tape door.
• PAUSE II Pause tape play or pause recording.
14
- Jack for headphone.
⑮ AC MAINS
- Socket for the power cord.
⑯ AV OUT
Transmit audio/video to a connected device.
⑰ Telescopic antenna
- Improve FM reception.
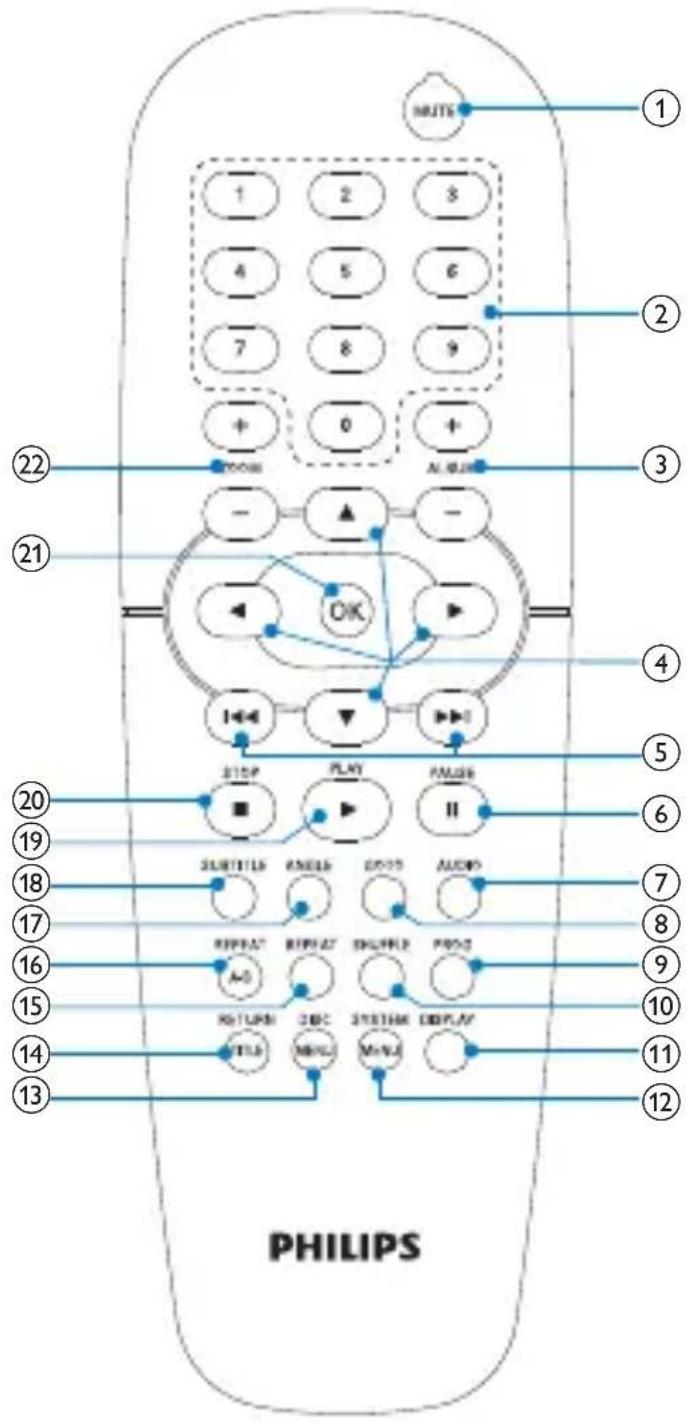
Overview of the remote control
flowchart
graph TD
    A["PHILIPS"] --> B["1"]
    A --> C["2"]
    A --> D["3"]
    A --> E["4"]
    A --> F["5"]
    A --> G["6"]
    A --> H["7"]
    A --> I["8"]
    A --> J["9"]
    A --> K["+"]
    A --> L["0"]
    A --> M["+"]
    A --> N["OFF"]
    A --> O["AL, GUI"]
    A --> P["21"]
    A --> Q["22"]
    P --> R["STOP"]
    P --> S["PLAY"]
    P --> T["AMUX"]
    P --> U["II"]
    P --> V["20"]
    P --> W["19"]
    P --> X["18"]
    P --> Y["17"]
    P --> Z["16"]
    P --> AA["15"]
    P --> AB["14"]
    P --> AC["13"]
    Q --> AD["STARTERS"]
    Q --> AE["ENGLS"]
    Q --> AF["ON/OFF"]
    Q --> AG["AUDIO"]
    Q --> AH["RIPERT"]
    Q --> AI["DELIVER"]
    Q --> AJ["PROD"]
    Q --> AK["A=0"]
    Q --> AL["RETURN"]
    Q --> AM["CDBC"]
    Q --> AN["SYSTEM"]
    Q --> AO["DISPLAY"]
    Q --> AP["TLB"]
    Q --> AQ["MINS"]
    Q --> AR["MINS"]
① MUTE
- Mute volume.
② Numeric keypad
- Select a track/title/fi le directly. Input password.
③ ALBUM +/-
- Skip to the previous/next album.
④
• / ▲ ▼ ◀ ▶
Navigate through the menu.
For JPEG discs, rotate the picture.
Move an enlarged picture up/down/left/right.
• / ◀️
For DVD/MP3/VCD/SVCD/CD discs, search backward or forward.
5
- Skip to the previous/next chapter/track.
⑥ PAUSE
• Pause or resume playback.
⑦ AUDIO
• For CD/MP3 discs, select an audio mode.
For DVD, select an audio language. •
⑧ GOTO
• For DVD/SVCD/VCD, go to the desired title, chapter or time.
• For CD/MP3, go to the desired album/track.
⑨ PROG
• Program tracks.
⑩ SHUFFLE
• Play in random order.
⑪ DISPLAY
• Show current status. For pictures, select slide show mode. •
⑫ SYSTEM MENU
• Display/exit the system menu.
⑬ DISC MENU
• For DVD, display the root menu.
For VCD/SVCD, select PBC ON/OFF.
⑭ RETURNTITLE
• Return to the previous menu.
15 REPEAT
• Play a track repeatedly.
⑯ REPEAT A-B
- Repeat a specific section within a track/disc.
⑰ ANGLE
- Selects a different viewing angle of a DVD.
⑱ SUBTITLE
• Select a subtitle language.
19
- Start play
20
Stop play.
⑳ OK
• Confirm a selection.
⑳ ZOOM+/-
- Zoom into or out of an image.
3 Get started

Caution
Use of controls or adjustments or performance of procedures other than herein may result in hazardous radiation exposure or other unsafe operation.
Always follow the instructions in this chapter in sequence.
If you contact Philips, you will be asked for the model and serial number of this apparatus. The model number and serial number are on the bottom of the apparatus. Write the numbers here:
Model No. ____
Serial No.
Install remote control batteries

Caution
Risk of explosion! Keep batteries away from • heat, sunshine or fi re. Never discard batteries in fi re.
Risk of decreased battery life! Never mix different brands or types of batteries.
- Risk of product damage! When the remote control is not used for long periods, remove the batteries.
1 Open the battery compartment.
2 Insert 2 AA batteries with correct polarity (+/-) as indicated.
3 Close the battery compartment.

Connect TV
1 Connect the black end of the supplied video cable to the AV OUT socket on this unit.
2 Connect the yellow plug to the VIDEO INPUT socket on the TV.
3 Connect the red plug to the AUDIO INPUT socket marked "R".
4 Connect the white plug to the AUDIO INPUT socket marked “L”.

Connect power

Caution
Risk of product damage! Ensure that the power • supply voltage corresponds to the voltage printed on the bottom of the unit.
The type plate is located on the bottom of the main unit.
Before connecting the AC power cord, ensure you have completed all other connections.
1 Switch the voltage selector at the bottom of the unit to the local power line voltage.
2 Connect the AC power cable to:
the main unit.
the wall socket.

natural_image
Line drawing of a plug connected to an electronic device (no text or symbols present)Turn on
1 Push the source selector on the main unit to DISC/USB/FM/TAPE.
Turn off
1 Push the source selector on the main unit to OFF.
Find the correct viewing channel
1 Push the source selector to DISC to switch to disc mode.
2 Turn on the TV and switch to the correct video-in channel in one of the following ways:
Go to the lowest channel on your TV, then press the • Channel Down button until you see the blue screen.
- Press the source button repeatedly on the remote control of your TV.

Tip
The video-in channel is between the lowest and highest channels and may be called FRONT, A/V IN, VIDEO etc. See the TV user manual on how to select the correct input on the TV.
Select TV system that match the connected TV
This DVD player is compatible with both NTSC and PAL. For the playback of a DVD disc on this DVD soundmachine, the color systems of the TV set and DVD player should match.
1 Press SYSTEM MENU.
2 Select [SYSTEM SETUP] >[TV SYSTEM], and then press
3 Press ▼/▲ to select one of the options below and then press OK.
[NTSC] For TV with NTSC color system.
[PAL] For TV with PAL color system.
[AUTO] For TV with multiple color systems.
4 Press SYSTEM MENU to exit.
Change system menu language
1 Press SYSTEM MENU.
2 Press ◀/▶ keys to select [LANGUAGE SETUP] page, then press ▼.
3 Press ▼/▲ keys to highlight one of the options below, then press ▶.
• [OSD LANGUAGE]: Select this to change the language of this DVD soundmachine screen display menu.
- [MENU LANG] : Select this to change the language of disc menu.
4 Press ▼/▲ keys to select a language and press OK.
5 Press SYSTEM MENU to exit the menu.

Note
- Depending on the DVD or VIDEO CD, some operations may be different or restricted.
- If the “INVALID KEY” appears on the TV screen when a button is pressed, it means the function is not available on the current disc or at the current time.
4 Play
Play disc
1 Push the source selector on the main unit to DISC.
2 Lift to open the disc compartment.
3 Insert a disc with the printed side facing up, then close the disc compartment.
4 Press to start play.
• To pause/resume play, press PAUSE II.
• . To stop play, press
• / . To skip to a track, press
• To search within a track/disc, press and hold◀▶, then release to resume normal play.
Use the disc menu
When you load a (S)VCD disc, a menu may be displayed on the TV screen.
To access or exit the menu manually:
1 Press DISC MENU.
For VCD with PlayBack Control (PBC) feature (version 2.0 only):
With the PBC feature, you can play VCD interactively according to the menu screen.
1 During play, press DISC MENU to enable/disable PBC.
When PBC is enabled, the menu screen is displayed.
When PBC is disabled, normal play is resumed.
• To return to the previous menu, press RETURN.
For DVD
1 During playback, press DISC MENU to return to disc menu.
If the current disc/title has a menu, the menu will ↩ appear on the screen. Otherwise, the disc menu will be displayed.
2 Press ▲/▼/◄/► to select the desired title or chapter, and then press ► or OK.
Playback start from the selected title or chapter.
Select an audio language
You can select an audio language on DVDs with multiple sound tracks or VCDs with multiple audio channels.
1 During play, press AUDIO repeatedly to select a language.

Tip
If the selected audio channel is unavailable, the default disc audio channel is used.
Select a subtitle language
You can select a subtitle language only on DVDs.
• During play, press repeatedly SUBTITLE to select different subtitle languages.
→The feature is disc dependant.
Play from USB

Note
Ensure that the USB device contains playable audio • contents for supported formats. (See “USB playability information”)
1 Flip open the USB socket cover.
2 Plug the USB device into the socket.
3 Push the source selector on the main unit to USB.
4 Press to start play.
• To pause/resume play, press PAUSE II.
• To stop play, press ■.
• To search within an audio file, press and hold◀▶, then release to resume normal play.
Play tape

Note
- When you play or record a tape, the sound source cannot be changed.
1 Push the source selector on the main unit to TAPE.
2 Open the tape button cover.
3 Press STOP/OPEN ■ / ▲ on the main unit to open the tape door.
4 Load the tape with the open side upward and the full spool to the left.
5 Press PLAY ◀ on the main unit to start play.
• To pause/resume play, press PAUSE II on the main unit.
- SEARCHewind or fast-forward, press on the main unit.
• To stop play, press STOP/OPEN ■ / ▲ on the main unit.
Listen to a radio station

Tip
- Position the antenna as far as possible from TV, VCR or other radiation source.

Note
- For optimal reception, fully extend and adjust the position of the antenna.
1 Push the source selector on the main unit to FM.
2 Turn TUNING to tune to a radio station.
5 Play options
Adjust volume
1 During play, turn VOLUME to increase/decrease the volume level.
Mute sound
1 During play, press MUTE to mute/unmute sound.
Select repeat mode
1 During play, press REPEAT repeatedly to select different repeat mode.
To repeat a specific section,
1 During play, press REPEAT A-B at the start point.
2 Press REPEAT A-B again at the end point.
The selected section starts to play repeatedly.
3 To resume normal play, press REPEAT A-B one more time.

Tip
- The section A and B can be set only within the same track.
Search by time or chapter/track number
1 During video/audio play, press GOTO until a time field or track fi eld is displayed.
• For the time fi eld, enter the play position in hours, minutes and seconds.
• For the track fi eld, enter the track number.
Play starts automatically at your selected point.
Display play information
1 During play, press DISPLAY repeatedly to select different play information.
Preview pictures
1 During play, press ■ Play stops and content in the current folder displays.
2 Pass / to select a picture you want to preview.
Zoom in/out image
1 During video play, press ZOOM+/- repeatedly to zoom in/out the image.
Rotate picture
1 During play, press ▲/▼ to flip the picture vertically or horizontally.
2 Press ◀/▶ to rotate the picture anti-clockwise or clockwise.
Change the audio channel

Note
This feature is only available for CD/MP3 play. •
1 During play, press AUDIO repeatedly to select an audio channel available on the disc:
• Mono Left Mono Right Stereo
6 Adjust settings
To maximize your play experience, use SYSTEM MENU to fine tune your settings.
1 Press SYSTEM MENU.
→ The system menu is displayed.
2 Press ▲/▼ or ◀/► to navigate through the menu and press ► to select an option.
3 press OK to confirm.
4 Press RETURN to go back to previous menu level.
5 Press SYSTEM MENU to exit.
Some of the features in the System Menu Options are described in “Get Started”.
System Setup
On the [SYSTEM SETUP] page, you can set the following options:
[SCREEN SAVER]
Turn on or off the screen saver mode. It helps to protect the TV screen from being damaged due to over exposure to static image for being too long.
• [ON] - Set the screen saver active after 10 minutes of inactivity (for example, in the pause or stop mode)
• [OFF]- Disable screen saver mode.
[PICTURE MUSIC]
To turn on/off the background music.
• [ON] - Select a track first and then select a picture. The picture is displayed with background music.
• [OFF] - The picture is displayed without background music.
[SLIDE TIME]
To set the amount of time that a picture is shown.
• [15 SEC] - Pictures switch in 15 seconds.
[30 SEC] - Pictures switch in 30 seconds.
[45 SEC] - Pictures switch in 45 seconds.
[PASSWORD]
You can change the four-digit code used as Password.
1 Use the numeric keys (0-9) to enter your current four-digit code, then press OK.
The password supplied by default is 0000.
2 Press, then enter the new four-digit password.
3 press OK to confirm.
![PHILIPS AZ5740 - [PASSWORD] - 1](/content/2026/06/1251518/images/93f0fb76224508097a9f6bb1c994c21e726b610da436251e006b2cd3f793a8e6.jpg)
Note
If you forget the password, enter '0000' before you set a new password.
[RATING]
Restricts access to discs that are unsuitable for children. These types of discs must be recorded with ratings.
1 Go to [PASSWORD] to enter the password.
2 Go to [RATING] and press ▶.
3 Select a rating level, then press OK.
4 Press the numeric keys (0-9) to enter the password.
Rating explanations
| [1 KID SAFE] | Kids material; recommended especially for children and viewers of all ages. |
| [2 G] | General Audience; recommended as acceptable for viewers of all ages. |
| [3 PG] | Parental Guidance suggested. |
| [4 PG13] | Material is unsuitable for children under age 13. |
| [5 PG-R] | Recommend parents to restrict children under 17 to view. |
| [6 R] | Restricted. Recommend parent to guide children under 17 to view. |
| [7 NC-17] | No children under age 17; not recommended for children under age 17. |
| [8 ADULT] | material for adults only; viewed only by adults due to graphic sexual scenes, violence, or language. |
![PHILIPS AZ5740 - [RATING] - 1](/content/2026/06/1251518/images/45eb6dd6001d52037092d77e5b4e88b8d4d114e1bfd8987e5b3aa9cabcd30ed0.jpg)
Note
- Rated discs above the level you set in [RATING] require a password to be played.
- The ratings are country-dependent. To allow all discs to play, select [8 ADULT].
- Some discs have ratings printed on them but are not recorded with ratings. This function has no effect on such discs.
[DEFAULT]
Resets all the settings of this unit to factory default, except for the password and parental settings.
Language Setup
On the [LANGUAGE SETUP] page, you can set the following options:
[OSD LANGUAGE]
Select the preferred language for on-screen display.
[MENU LANG]
Select the preferred language for disc menu.
Audio setup
On the [AUDIO SETUP] page, you can set the following options:
[DOWNMIX]
This option is for speaker setup and can only be setup under disc mode.
• [LT/RT]: Select this option if your DVD player is connected to a Dolby Pro Logic decoder.
- [STEREO] : Select this when output delivers sound from only the two front speakers.
[NIGHT MODE]
Make loud sound level softer and soft sound level louder so that you can watch the DVD movies at a low volume, without disturbing others.
• [ON] – enjoy quiet viewing at night (DVDs only).
• [OFF] – enjoy surround sound with its full dynamic range.
[DYNAMIC RANGE]
Select the Dynamic Rang to fit the individual listening situation of the audience. The variable range is from FULL, 6/8\~2/8 or OFF.
[FULL] Audio with fully compressed Dynamic Range.
[6/8\~2/8] Audio with partially compressed Dynamic Range.
[OFF] Audio with uncompressed Dynamic Range.
Video setup
On the [VIDEO SETUP] page, you can set the following options: [TV SYSTEM]
Change this setting if the video does not appear correctly. By default, this setting matches the most common setting for TVs in your country.
[NTSC] For TV with NTSC color system.
[PAL] For TV with PAL color system.
[AUTO] For TV that is compatible with both PAL and NTSC.
[TV TYPE]
The TV format determines the aspect ratio of display according to the type of TV you have connected.

natural_image
Illustration of stylized mountains with birds flying above clouds (no text or symbols)4:3 Pan Scan (PS)

natural_image
Simple grayscale illustration of a mountain range with clouds and sun (no text or symbols)4:3 Letter Box (LB)
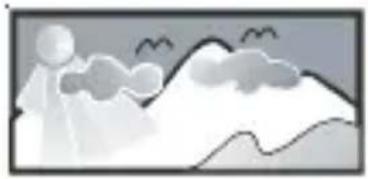
natural_image
Simple grayscale illustration of a person standing on a mountain with clouds and hills in the background (no text or symbols)16:9 (Wide Screen)
| [4:3PS] (pan scan) | If you have a normal TV and want both sides of the picture to be trimmed or formatted to fit your TV screen. |
| [4:3LB] (letter box) | If you have a normal TV. In this case, a wide picture with black bands on the upper and lower portions of the TV screen will be displayed. |
| [16:9] (wide screen) | If you have a widescreen TV. |
Record

Note
To record, use only “Normal” (IEC type I) tapes • on which the write-protect notches (tabs) are not broken.

Tip
When you play or record a tape, the sound source cannot be changed.
The best recording level is set automatically. Change of volume and sound effect does not affect recording.

Note
The quality of recorded sound can differ depending on the source and the tape used.
Record from disc to tape
1 Press STOP/OPEN ■ / ▲ to open the tape door.
2 Load a tape.
3 Push the source selector on the main unit to DISC to select disc source.
4 Load a disc.
5 Start disc playback.
6 Press RECORD ● to start recording.
• To stop recording, press STOP/OPEN ■ / ▲.
Record from radio to tape
1 Press STOP/OPEN ■ / ▲ to open the tape door.
2 Load a tape.
3 Push the source selector on the main unit to FM.
4 Adjust VOLUME to tune to the desired radio station.
5 Press RECORD ● to start recording.
• To stop recording, press STOP/OPEN ■ / ▲.
Record from USB
1 Press STOP/OPEN ■ / ▲ to open the tape door.
2 Load a tape.
3 Push the source selector on the main unit to USB.
4 Connect a USB device.
5 Start play the USB device and then press RECORD ● to start recording.
• To stop recording, press STOP/OPEN ■ / ▲.
Listen through headphone
1 Plug a headphone into the ⏻ socket on the unit.
8 Product information

Note
Product information is subject to change without prior notice.
| Specifications | |
| Disc | |
| Laser Type Semiconductor | |
| Disc Diameter 12 cm/8 cm | |
| Support Disc DVD, DVD-RW, DVD-R, CD-DA, CD-R, CD-RW, MP3-CD,WMA-CD | |
| Audio DAC 24 Bits / 44.1 kHz | |
| Total Harmonic Distortion <1% | |
| Frequency Response | 60 Hz -16 kHz |
| S/N Ratio | >62 dBA |
FM
Tuning Range 87.5 - 108 MHz;
Tuning grid 50 kHz
Total Harmonic Distortion <3%
Signal to Noise Ratio >50 dB
Tape deck
Frequency response
- Normal tape (type I)
125 - 8000 Hz (8 dB)
Signal-to-noise ratio
- Normal tape (type I)
40 dBA
Wow and fl utter <0.4% JIS
General
Power supply Input: 110-127 V, 220-240
V; 50/60 Hz
Operation Power Consumption 16 W
Standby Power Consumption ≤ 1.2 W
Dimensions
401 × 172 × 243 mm
- Main Unit (W × H × D)
Weight 3 kg
Supported MP3 disc formats
ISO9660, Joliet •
Maximum title number: 512 (depending on fi le name • length)
• Maximum album number: 255
Supported sampling frequencies: 32 kHz, 44.1 kHz, 48 kHz
• Supported Bit-rates: 32\~256 (kbps), variable bit rates
USB playability information
Compatible USB devices:
• USB flash memory (USB 2.0 or USB1.1)
USB flash players (USB 2.0 or USB1.1) •
memory cards (requires an additional card reader to work with this apparatus)
Supported formats:
• USB or memory fi le format FAT12, FAT16, FAT32 (sector size: 512 bytes)
• MP3 bit rate (data rate): 32-320 Kbps and variable bit rate
• WMA v9 or earlier Directory nesting up to a maximum of 8 levels•
Number of albums/ folders: maximum 99•
Number of tracks/titles: maximum 999 •
ID3 tag v2.0 or later•
- File name in Unicode UTF8 (maximum length: 128 bytes)
Unsupported formats:
• Empty albums: an empty album is an album that does not contain MP3/WMA fi les, and is not be shown in the display.
Unsupported file formats are skipped. For example, Word documents (.doc) or MP3 files with extension .dlf are ignored and not played.
• AAC, WAV, PCM audio fi les
DRM protected WMA files (.wav, .m4a, .m4p, .mp4, •.aac)
• WMA fi les in Lossless format
Maintenance
Clean the cabinet
Use a soft cloth slightly moistened with a mild detergent solution. Do not use a solution containing alcohol, spirits, ammonia or abrasives.
Clean discs
- When a disc becomes dirty, clean it with a cleaning cloth. Wipe the disc from the centre out.

natural_image
Illustration of hands holding a CD or DVD disc with a stylus, no text or symbols presentDo not use solvents such as benzene, thinner, • commercially available cleaners, or antistatic spray intended for analogue records.
Clean the disc lens
• After prolonged use, dirt or dust may accumulate at the disc lens. To ensure good play quality, clean the disc lens with Philips CD lens cleaner or any commercially available cleaner. Follow the instructions supplied with cleaner.
Clean the heads and the tape paths
• To ensure good recording and play quality, clean the heads A, the capstan(s) B, and pressure roller(s) C after every 50 hours of tape operation.
• Use a cotton swab slightly moistened with cleaning fluid or alcohol.

You can also clean the heads by playing a cleaning tape • once.
Demagnetise the heads
Use a demagnetising tape available at your dealer.
9 Troubleshooting

Warning
Never remove the casing of this apparatus.
To keep the warranty valid, never try to repair the system yourself. If you encounter problems when using this apparatus, check the following points before requesting service. If the problem remains unsolved, go to the Philips web site (www.philips.com/welcome). When you contact Philips, ensure that the apparatus is nearby and the model number and serial number are available.
No power/No sound
- Ensure that the AC power plug of the unit is connected properly.
- Ensure that there is power at the AC outlet. Ensure that the batteries are installed correctly. • Adjust the volume. •
• The file is a non-audio one. Select an audio file.
No picture
- Check the video connection.
• Turn on the TV to the correct Video-In channel.
This channel is usually near channel 00. Or, you may have a button on the TV remote control that selects Auxiliary or A/V IN channel. See your TV owner's manual for details. Or, change channels at the TV until you see DVD screen on the TV.
• Progressive scan is activated but the TV does not support progressive scan.
Black and white or distorted picture
• The disc does not match the TV color system standard (PAL/NTSC).
Sometimes a slight picture distortion may appear. This is not a malfunction.
Clean the disc. •
A distorted picture may appear during progressive scan • setup.
No disc detected
Insert a disc. •
Check if the disc is inserted with the print side facing • inward.
Wait until the moisture condensation at the lens has cleared.
Replace or clean the disc. •
Use a fi nalized CD or correct format disc.
No response from the unit
- Disconnect and reconnect the AC power plug, then turn on the unit again.
The aspect ratio of the TV screen cannot be changed even though you have set the TV display format.
• The aspect ratio is fixed on the loaded DVD disc.
The aspect ratio may not be possible to change for some • TV systems.
Disc does not play
Insert a readable disc and ensure that the label side faces up.
Check the disc type, color system and regional code. Check for any scratches or smudges on the disc.
- Press SETUP to exit the system setup menu.
Disable the password for parental control or change the rating level.
Moisture has condensed inside the system. Remove the disc and leave the system turned on for about an hour. Disconnect and reconnect the AC power plug, and then turn on the system again.
Poor radio reception
Increase the distance between the unit and your TV or • VCR.
Fully extend and adjust the FM antenna. •
Audio or subtitle languages cannot be set
The disc is not recorded with sound or subtitles in multiple languages.
The audio or subtitle language setting is prohibited on the disc.
Cannot display some fi les in USB device
The number of folders or files in the USB device has exceeded a certain limit. This phenomenon is not a malfunction.
The formats of these fi les are not supported. •
Cannot record/play tape
Clean deck parts. •
Use only NORMAL tape. •
Apply a piece of adhesive tape over the missing tab space. •
USB device not supported
The USB device is incompatible with the unit. Try another • one.



- English
- Important
- Safety
- Important Safety Instructions
- Warning
- Notice
- Environmental information
- Your DVD Soundmachine
- Introduction
- DVD region code Countries
- What's in the box
- ① LIFT TO OPEN
- ② TUNING
- ③ SUBTITLE
- ④ VOLUME
- ⑤ AUDIO
- ⑥ Display panel
- 7
- ⑧ MODE
- 9
- ⑩
- - SEARCH
- • ALBUM ▼▲
- Overview of the remote control
- ① MUTE
- ② Numeric keypad
- ⑭ RETURNTITLE
- ⑳ ZOOM+/-
- Get started
- Caution
- Install remote control batteries
- Connect TV
- Connect power
- Turn on
- Turn off
- Find the correct viewing channel
- Tip
- Select TV system that match the connected TV
- Press SYSTEM MENU to exit.
- Change system menu language
- Note
- Play
- Play disc
- Use the disc menu
- For DVD
- Select an audio language
- Select a subtitle language
- Play from USB
- Play tape
- Listen to a radio station
- Play options
- Adjust volume
- Mute sound
- Select repeat mode
- Search by time or chapter/track number
- Display play information
- Preview pictures
- Zoom in/out image
- Rotate picture
- Change the audio channel
- Adjust settings
- System Setup
- [SCREEN SAVER]
- [PICTURE MUSIC]
- [SLIDE TIME]
- [PASSWORD]
- [RATING]
- [DEFAULT]
- Language Setup
- [OSD LANGUAGE]
- [MENU LANG]
- Audio setup
- [DOWNMIX]
- [NIGHT MODE]
- [DYNAMIC RANGE]
- Video setup
- Record
- Record from disc to tape
- Record from radio to tape
- Record from USB
- Listen through headphone
- Product information
- FM
- Tape deck
- General
- Supported MP3 disc formats
- USB playability information
- Compatible USB devices:
- Supported formats:
- Unsupported formats:
- Maintenance
- Clean the cabinet
- Clean discs
- Clean the disc lens
- Clean the heads and the tape paths
- Demagnetise the heads
- Troubleshooting
- No power/No sound
- No picture
- Black and white or distorted picture
- No disc detected
- No response from the unit
- Disc does not play
- Poor radio reception
- Audio or subtitle languages cannot be set
- Cannot display some fi les in USB device
- Cannot record/play tape
- USB device not supported
Brand : PHILIPS
Model : AZ5740
Category : Cd player/recorder