
DECT 6172 - Cordless phone PHILIPS - Free user manual and instructions
Find the device manual for free DECT 6172 PHILIPS in PDF.


| Product Type | Cordless DECT Phone |
| Brand | Philips |
| Model | DECT 6172 |
| Handset Dimensions (H x W x D) | Approx. 150 x 45 x 25 mm |
| Base Station Dimensions (H x W x D) | Approx. 60 x 100 x 100 mm |
| Handset Weight | Approx. 110 g (including battery) |
| Base Station Weight | Approx. 80 g |
| Power Supply | Base: AC 230V, 50Hz; Handset: 2 x AAA NiMH rechargeable batteries |
| Display | Backlit LCD with 1.5 inch monochrome screen |
| Phonebook Capacity | Up to 100 entries with name and number |
| Caller ID | Yes, with call history (up to 50 records) |
| Speakerphone | Yes, handsfree mode on handset |
| Range | Up to 50 m indoors, up to 300 m outdoors |
| Answering Machine | Digital with up to 20 minutes recording time |
| Number of Handsets Supported | Up to 4 (expandable) |
| Intercom | Yes, between handsets |
| Battery Type | 2 x AAA NiMH 550 mAh (included) |
| Battery Life | Up to 10 hours talk time, 100 hours standby |
| Charging Time | Approx. 8 hours |
| Cleaning Instructions | Wipe with a soft, dry cloth. Do not use liquid cleaners. |
| Safety Features | Low radiation, auto-standby, hearing protection (maximum volume limit) |
| Spare Parts & Repairability | Replacement batteries available; base station and handset not user-serviceable. Contact Philips support. |
| General Information | DECT 6.0 digital technology, eco-friendly power saving mode. User manual available online. |
Frequently Asked Questions - DECT 6172 PHILIPS
User questions about DECT 6172 PHILIPS
0 question about this device. Answer the ones you know or ask your own.
Ask a new question about this device
Download the instructions for your Cordless phone in PDF format for free! Find your manual DECT 6172 - PHILIPS and take your electronic device back in hand. On this page are published all the documents necessary for the use of your device. DECT 6172 by PHILIPS.
USER MANUAL DECT 6172 PHILIPS
The pilot key allows you to browse the menus. Up [1] to go left in the menus and down [2] to go right in the menus & options.
Press to select a menu or an option and validate a setting. It is also used as shortcut to menus
Answer/end a call
Make a call
Read Call log
Redial a number
Call from phonebook
Add a name in the phonebook
Adjust the earpiece volume during a call
Adjust the handset loudspeaker volume
Mute and unmute the microphone
Transfer a call/Intercom (if there are at least 2 handsets)
Read an event
Set the date and time
Set the handset external ring tone
Activate/deactivate the answer machine
Predial number & or and dial number
up and browse
up and browse and
down, browse through the list and
Predial number and select scroll to Stock and select Enter the name and press OK
Scroll up to increase the volume, scroll down to decrease the volume
During a handsfree call, up to increase, down to decrease
During a call press +[] Options, press +[] Mute press end mute
Press + number phone
Press 📄
Press to enter the carousel, scroll to Handlet and select. scroll to Date and time and select Press to select Set date and enter the current date, press OK. Scroll to Set time and enter the current time, press ON
Press to enter the carousel, scroll to Sounds and select. I press to select Handset ring tones.
Press to select External ring tone Browse through the list to hear the ring tones and select your ring tone
Press on the base station to switch the answer machine ON or OFF
DECT 613/DECT 617
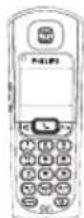
Handset
New event indicator
Blinking when there are new events

Pilot key
+[] Press to enter the carousel or select a menu or an option
Scroll to move through the menus & options
Move the cursor left/right
Scroll up to access the Call
Log from idle mode
Scroll down to access the
Phonebook from idle mode
A long press to unlock the keypad
Loudspeaker
- Short press to take the line or to activate the handset loudspeaker during a call
- Long press to activate the base loudspeaker (DECT 617 only)
Keypad lock & Editing
- Short press to insert *
- Long press to lock/unlock the keypad in idle mode
- Long press to insert R (in between-digit pause) when dialling
- Long press to enter multitap system or Eatoni® editor when entering text
- A short press to change the letter when editing in Eatoni®.
SMS key
- Short press to directly access Send new SMS from idle mode
- Short press from the Phonebook or the Call log menu to edit an SMS
Earpiece
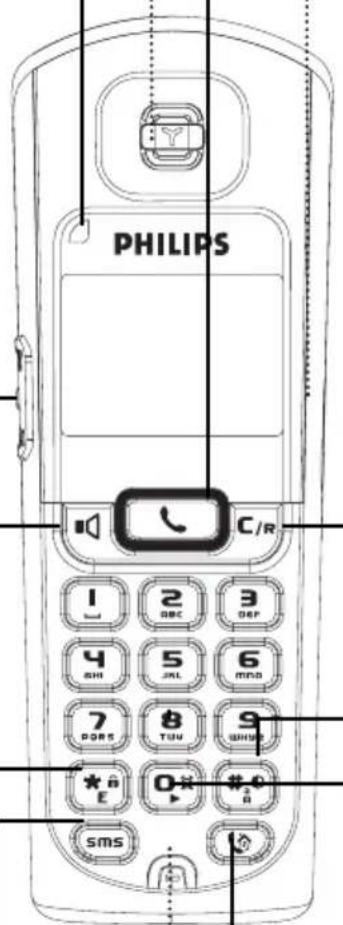
Microphone
Headset plug
Talk
Press to take the line, answer a call or hang up.
Clear/Recall
- To correct a digit when predialling or a character when editing
- Short press to go back one menu when navigating
- Long press to return to idle mode when navigating
- To insert R for operator services when on line
Do not disturb & case mode
- Short press to insert # when dialling
- Long press to activate/deactivate the "Do Not Disturb" mode
- Long press to insert a pause (P) when dialling
- Press to switch case mode when editing
Alarm clock
- A short press to dial 0
- A long press to activate/deactivate the alarm clock
Call transfer/Intercom
- Short press to initiate or cancel internal call
- Short press during internal call to transfer the call or switch between internal call and External call
- Short press to answer an internal call or to release an internal call
Icons on the handset display
The display gives information about the operation of your telephone

On first use, it is sometimes necessary to wait for a few minutes of charge before seeing icons on the display.
When charging, the battery bars scroll from empty to full status. When the handset discharges, the battery shows the status: Full ☐, ☐, ☐ and empty ☐
The answer machine is activated (DECT 617). When blinking, this symbol indicates that there is a new message on the answer machine or on the operator voice mailbox. When fast blinking it shows that the answer machine is full.
The ringtone is deactivated.
An external call is in progress. When blinking, this symbol indicates that there is an incoming external call in progress or that the line is already busy.
An internal call is in progress. When blinking, this symbol indicates that there is an internal incoming call.
The handset loudspeaker is activated. When blinking, this symbol shows that the base loudspeaker is activated (only for DECT 617).
The SMS function is activated. When blinking, this symbol indicates that a new SMS has been received. When fast blinking, it indicates that the SMS memory is full.
The handset is registered and in range of the base. When blinking, this symbol indicates that the handset is not registered to the base.


Paging key
The paging key enables you to locate a missing handset. Press the key until the handset starts to ring. Once retrieved, press any key on the handset to end paging.
Dect 617 base station

New message indicator
When blinking, it indicates that there is a new message. When fast blinking, it indicates that the answer machine memory is full.

ON/OFF key
Press to switch the answer machine ON or OFF

Play/Pause key
Short press to play new message Short press to pause a message while listening to a message

Stop key
Short press to stop listening
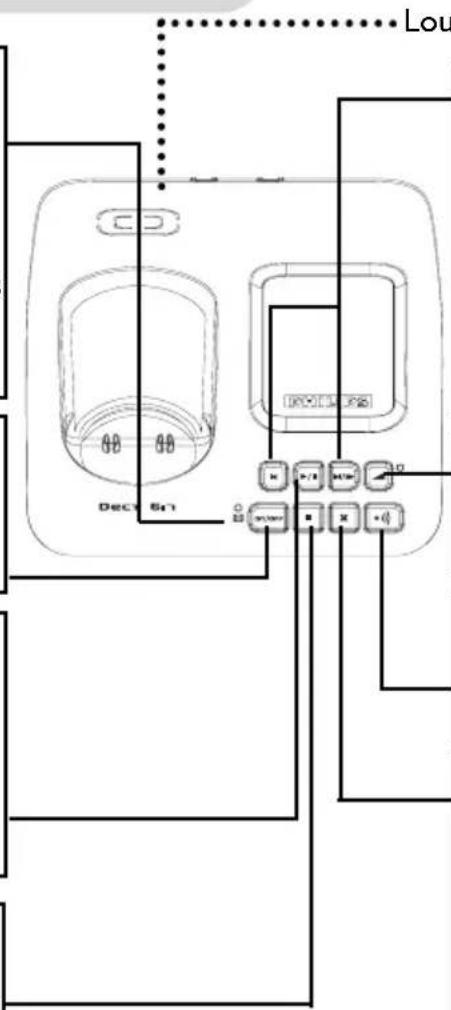
Loudspeaker

/ Back/Skip/Fast
forward key
Short press to go to the next or previous message while listening
Long press to fast forward the current message while listening

Volume key
To adjust the base volume level

Paging key
Press to locate all handsets

Delete key
Short press to delete current message Long press to delete all the messages (except unread ones)
Table of contents
Quick start guide |
DECT 613 / DECT 617 handset 2
Icons on the handset display 3
DECT 613 / DECT 617 base stations 4
Table of Contents 5-6
Menu structure 7-11
Conformity, Environment and Safety 12
Declaration of conformity
Using GAP standard compliance 13
Installing the DECT 613/617
Unpacking your DECT 613 14
Unpacking your DECT 617 14
Installing the base station 15
Installing and replacing the batteries in the handset 15
Battery life and range 15
Introduction
Philips screen saver 16
Idle mode 16
Understanding the menu system 16
How to navigate in the menus 16
Basic principles 17
In-call features 18
Editing systems 19-20
SMS
Send new SMS 21
Read SMS 22
SMS settings 25
Handset
Babysit mode 28
Registration 28
Rename handset 29
Date & time 29
Display contrast 30
Backlight 30
Screen saver 30
Answer machine
Saved messages 31
Record a memo 36
Outgoing messages 33
Answerphone settings 33
Intercom
Internal call 37
Call transfer 37
Conference call 38
Babysit mode 38
Phonebook
Add new 39
View 39
Call log
View 42
Delete all 44
Call log settings 44
Operator services 45
Extra
Call duration 46
Alarm clock 46
"Do Not Disturb" mode 47
Sounds
Handset ring tones 48
Base ring tones 48
Group ring tones 49
Handset ring tone volume 49
Base ring tone volume 49
My ring tones 50
Record personal melody 50
Settings 51
Base
Enable registration 53
Line settings 53
Service code settings 55
FAQ 56
Troubleshooting 58
Index
Menu structure
By using the “Pilot key” on the side of the handset, you can scroll through the menus.

flowchart
graph TD
    A["Menu"] --> B["SMS"]
    B --> C["Send new SMS"]
    C --> D["Choose SMS box*"]
    D --> E["Send SMS to phone"]
    B --> F["Read SMS"]
    F --> G["Choose SMS box*"]
    G --> H["View SMS"]
    G --> I["View number"]
    G --> J["Reply"]
    G --> K["Forward"]
    G --> L["Send again"]
    G --> M["Delete SMS"]
    G --> N["Copy to phonebook"]
    G --> O["Call"]
    B --> P["SMS Settings"]
    P --> Q["Mode"]
    Q --> R["On or Off"]
    P --> S["SMS boxes*"]
    P --> T["SMS centre"]
    P --> U["Handset"]
    U --> V["Babysit mode"]
    V --> W["On or Off"]
    U --> X["Registration"]
    X --> Y["Register handset"]
    Y --> Z["Enter RC code"]
    U --> AA["Rename handset"]
    AA --> AB["Enter name"]
    U --> AC["Date & time"]
    AC --> AD["Set date"]
    AC --> AE["Set time"]
    U --> AF["Display contrast"]
    AF --> AG["Levels (1 to 5)"]
    U --> AH["Backlight"]
    AH --> AI["Off / 10s / 20s"]
    U --> AJ["Screensaver"]
    AJ --> AK["Off / Logo/Eco mode"]
* only available in the UK

flowchart
graph TD
    A["Answer machine"] --> B["Saved messages"]
    B --> C["Play"]
    B --> D["Next"]
    B --> E["Previous"]
    B --> F["Call"]
    B --> G["Delete"]
    B --> H["Store"]
    B --> I["Send SMS"]

    A --> J["Record a memo"]
    A --> K["Outgoing messages"]
    K --> L["Answ. machine mode"]
    L --> M["Answer and record with personalised OGM"]
    L --> N["Answer only with personalised OGM"]
    L --> O["Answer and record with predefined OGM"]
    L --> P["Answer only with predefined OGM"]
    K --> Q["Record outgg msg"]
    Q --> R["Standard OGM for answ. & record mode"]
    Q --> S["Standard OGM for answer mode only"]
    Q --> T["Group A"]
    Q --> U["Group B"]
    Q --> V["Group C"]

    A --> W["Answerphone settings"]
    W --> X["Mode"]
    X --> Y["On or Off"]
    W --> Z["Rings before answer"]
    Z --> AA["Toll saver / 3 / 5 / 7"]
    W --> AB["Voice prompts"]
    AB --> AC["Message & date/ Message only/Off"]
    W --> AD["Voice language"]
    AD --> AE["List"]
    W --> AF["Call screening"]
    AF --> AG["Recording quality"]
    AG --> AH["High / Standard"]
    W --> AI["Remote control"]
    AI --> AJ["Mode (On or Off)"]
    AI --> AK["Change code"]

    A --> AL["Intercom"]
    AL --> AM["Call all"]
    AL --> AN["Handset list"]

flowchart
graph TD
    A["Phonebook"] --> B["View"]
    A --> C["Add new"]
    B --> D["Call"]
    B --> E["Change number"]
    B --> F["Change name"]
    B --> G["Define the group"]
    G --> H["A / B / C"]
    I["Call log"] --> J["View"]
    I --> K["Delete all"]
    J --> L["Play"]
    J --> M["Call"]
    J --> N["View number"]
    J --> O["Store"]
    J --> P["Delete"]
    J --> Q["Send SMS"]
    R["Operator services"] --> S["Call forward"]
    R --> T["Cancel call forward"]
    R --> U["Call forward when line busy"]
    R --> V["Cancel call forward when line busy"]
    R --> W["Call forward when unanswered"]
    R --> X["Cancel call forward when unanswered"]
    R --> Y["Voice mail"]
    R --> Z["Cancel call back"]
    R --> AA["Withhold identity"]
    D --> AB["A / B / C"]
    M --> AC["Call"]
    N --> AD["View number"]
    O --> AE["Store"]
    P --> AF["Delete"]
    Q --> AG["Send SMS"]
    L --> AH["All calls"]
    M --> AI["Unanswered calls only"]
    N --> AJ["Calls with answer machine message only"]
    O --> AK["No call"]
    P --> AL["All calls"]
    Q --> AM["No call"]
Menu structure


flowchart
graph TD
    A["Extra"] --> B["Call duration"]
    A --> C["Alarm clock"]
    C --> D["Activation On or Off"]
    D --> E[" "]
    C --> F["Set day"]
    F --> G["Set time"]
    G --> H["Settings"]
    H --> I["Ring tones"]
    I --> J["Ring tone volume"]
    J --> K["Low/Medium/High"]
    C --> L["Do not disturb mode"]
    L --> M["Activation"]
    M --> N["On or Off"]
    M --> O["Set day"]
    O --> P["Start time"]
    P --> Q["Stop time"]
    Q --> R["Allowed caller choice A / B / C"]


flowchart
graph TD
    A["Sounds"] --> B["Handset ring tones"]
    A --> C["Base ring tones"]
    A --> D["Group ring tones"]
    A --> E["Handset ring tone volume"]
    A --> F["Base ring tone volume"]
    A --> G["My ring tones*"]
    G --> H["Handset"]
    G --> I["Base"]
    G --> J["Record melody"]
    J --> K["Play"]
    J --> L["Record new"]
    J --> M["Delete"]
    A --> N["Settings"]
    N --> O["Base loudspeaker volume"]
    N --> P["Earpiece tone"]
    N --> Q["Key & feedback tones"]
    N --> R["Notification beep"]
    N --> S["Music on hold"]
    B --> T["External ring tones"]
    B --> U["Internal ring tones"]
    T --> V["Ring tone list"]
    U --> W["A / B / C"]
    H --> X["Rename"]
    H --> Y["Delete"]
    I --> Z["Rename"]
    I --> AA["Delete"]
* only available in the UK

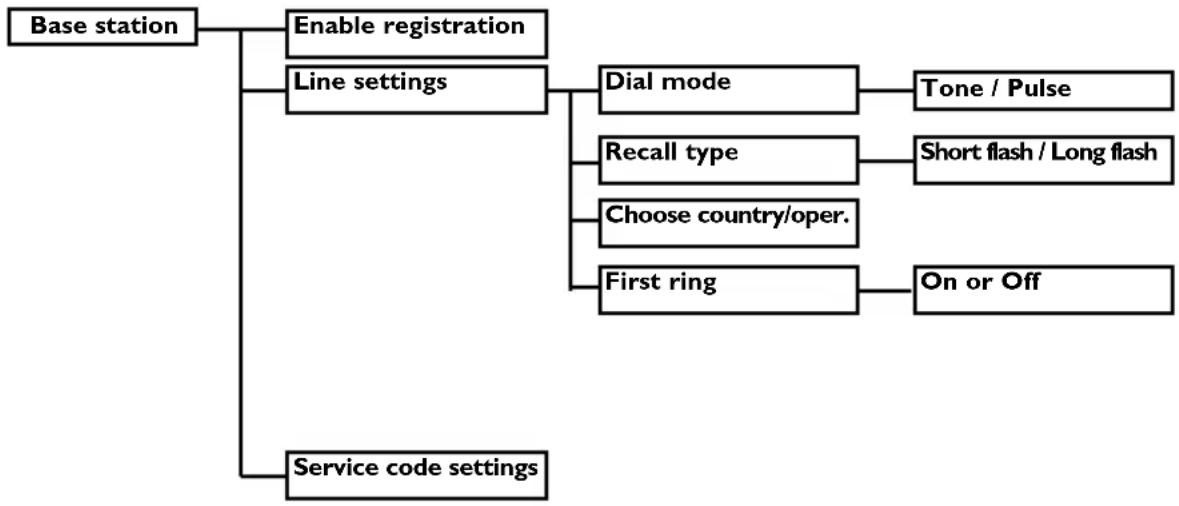
flowchart
graph TD
    A["Base station"] --> B["Enable registration"]
    A --> C["Service code settings"]
    B --> D["Line settings"]
    D --> E["Dial mode"]
    E --> F["Tone / Pulse"]
    D --> G["Recall type"]
    G --> H["Short flash / Long flash"]
    D --> I["Choose country/oper."]
    I --> J["First ring"]
    J --> K["On or Off"]
Conformity, Environment and Safety
Safety information
This equipment is not designed to make emergency calls when the power fails. An alternative has to be made available to allow emergency calls.
Conformity
Hereby, Philips declares that the DECT 613xx and DECT 617xx are in compliance with the essential requirements and other relevant provisions of Directive 1999/5/EC. This product can only be connected to the analogue telephone network of the UK and Ireland.
Power requirements
This product requires an electrical supply of 220-240 volts, alternating monophased power, excluding IT installations defined in standard EN 60-950. In case of power failure, the communication can be lost.
Warning !
The electrical network is classified as hazardous according to criteria in the standard EN 60-950. The only way to power down this product is to unplug the power supply from the electrical outlet. Ensure the electrical outlet is located close to the apparatus and is always easily accessible.
Telephone connection
The voltage on the network is classified as TNV-3 (Telecommunication Network Voltages), as defined in the standard EN 60-950.
Safety precautions
Do not allow the handset to come into contact with water. Do not open the handset or the base station. You could be exposed to high voltages. Do not allow the charging contacts or the battery to come into contact with conductive materials.
Handsfree activation could suddenly increase the volume in the earpiece to a very high level. Make sure the handset is not too close to your ear.
Environmental care
Please remember to observe the local regulations regarding the disposal of your packaging materials, exhausted batteries and old phone and where possible promote their recycling.
Declaration of conformity
We
Philips Consumer Electronics
Route d'Angers
72081 Le Mans Cedex 9
France
Declare that the products DECT 613xx and DECT 617xx are in compliance with the Annex III of the R&TTE-Directive 1999/5/EC and then with the following essential requirements:
Article 3.1.a (protection of the health & the safety of the user): EN 60950-1 (10/2001)
Article 3.1.b (protection requirements with respect to electromagnetic compatibility: ETSI EN 301 489-6 VI.2.1 (08/2002) & ETSI EN 301 489-1 VI.4.1 (08/2002)
Article 3.2 (effective use of the radio spectrum) EN 301 406 (2003)
The presumption of conformity with essential requirements regarding Council Directive 1999/5/EC is ensured.

Date : 08/09/2004 Le Mans
Quality Manager, Home Communication
Using GAP standard compliance
The GAP standard guarantees that all DECT™ GAP handsets and base stations comply with a minimum operating standard irrespective of their make. Your DECT 613/617 handset and base station are GAP compliant, which means the minimum guaranteed functions are : register a handset, take the line, receive a call and dial. The advanced features may not be available if you use another handset than a DECT 613/617 with your base station.
To register and use your DECT 613/617 handset with a GAP standard base station of a different make, first follow the procedure described in the manufacturer's instructions, then follow the procedure page 28.
To register a handset from another make to the DECT 613/617 base station, place the base station into registration mode (page 28), then follow the procedure in the manufacturer's instructions.
Philips has marked the battery and packaging with standard symbols designed to promote the recycling and appropriate disposal of your eventual waste.
A financial contribution has been paid to the associated national recovery & recycling system.
The labelled packaging material is recyclable.
DECT ^™ is a Trade Mark of ETSI registered for the benefit of the implementers of the DECT technology.
Installing the DECT 613/617
Unpacking your DECT 613
The DECT 613 package contains:


NiMh 2HR
AAA 600 mAh rechargeable batteries

A user guide A guarantee



Unpacking your DECT 617
The DECT 617 package contains:
One DECT 617 base station One

DECT 617 handset
NiMh 2HR
AAA 600 mAh rechargeable batteries

A user guide A guarantee


A power supply A line cord


In DECT 613 and DECT 617 multi-handset packs, you will also find one or more additional handsets, chargers with their power supply and additional rechargeable batteries.
Installing the base station
Situate your product close enough to the telephone and mains power sockets so that the cables will reach. To properly install the base station, plug the line cord and the power cable into the base station. Plug the cord and the cable into the wall. A beep indicates that the phone is properly installed (only available for DECT 617). If you have a broadband DSL Internet Installation, please make sure you have one DSL filter plugged directly on each line socket used in the house and check the modem and the phone are plugged in the correct filter slot (one specific for each).
Warning! The electrical network is classified as dangerous according to criteria in the standard EN 60-950. The only way to power down this product is to unplug the power supply from the electrical outlet. Ensure the electrical outlet is located close to the apparatus and is always easily accessible.
Please take care that the power supply and telephone line are connected to the correct sockets as incorrect placement could damage your equipment.
Warning! Always use the cables provided with the product.

Installing and replacing the batteries in the handset

natural_image
Technical line drawing of a device casing with internal components and external housing (no text or symbols)To insert the batteries, open the battery cover, place the batteries as indicated and put the battery cover back. When the handset is placed on the base station the 3 battery bars scroll (if charge is needed). Allow the handset to charge for 24 hours to reach full charge. On first use it may be necessary to wait for a few minutes before seeing symbols on the display.
In case you need to change the batteries, the following type is mandatory 2HR AAA NiMh 600 mAh. Warning: the base station must always be plugged into the mains when charging or when in use. Always use rechargeable batteries.

Batteries should not be disposed of with general household waste.
Battery life and range
A battery low alert will inform you that the batteries have to be recharged. If it happens during a call, the communication will be shortly cut. Optimal battery life is reached after 3 cycles of complete charge & discharge. When reaching the range limit and the conversation becoming crackly, move closer to the base. To reach optimal range, place the base station away from electrical appliances.
| Battery life in standby mode | Battery life in communication | Indoor range Outdoor range |
| up to 200 hours up | to 15 hours up to 50 metres up to 300 metres |
Introduction
Philips screen saver
After 2 minutes of inactivity, the screen saver is displayed:
You can deactivate it (see p.30)
Idle mode
In idle mode, the DECT 613/617 display shows various information:
- The date & time, the name of the handset and the instructions to access the menu.
- Missed calls new SMS or new messages (answer machine) or network voicemailbox message any.
- "Do Not Disturb" mode and the alarm clock, if activated.
To activate/deactivate these functions press


Understanding the menu system

To access the carousel menu from idle mode, press on the side of the handset The carousel represents a loop of icons that gives access to the different first level menus.


Scroll up or down to reach the desired menu and select
The sub menus are listed and represented by little squares □ at the bottom of the display. To reach one particular sub-menu use the "pilot key" card press to validate your choice.
A "tick" shows the selected sub-menu or option. The shows the option you are browsing.

Note: some menus are also directly accessible via a dedicated key on the keypad like the SMS menu with or the Intercom with.

Handset
Babysit mode

How to navigate in the menus

Press to access the carousel menu

Scroll to Sounds, and select

Scroll to Handset ring tone vol. and select

The current level is heard, browse to hear other levels

Browse through the levels and select one
Sounds
Handset ring tone vol.

Basic principles
To make and to answer a call
Pre dialling
Direct dialling
Answer a call

Dial the number

Press the key
When ringing

Make the call

Dial the number

Take the line
To call from the phonebook

Scroll down to directly access Phonebook
Choose a name in the list
Make the call or press to select Call in the options
Phonebook
Paula Jameson
014181098765...
Options
To store a name from predial

Dial the number
Press to enter the options
Scroll to Store and select
Enter the name and press 0*
Options
Store
□□

To store an SMS

Dial the number
Press to enter the options
Scroll to Send SMS and select
Select your SMS box* (only if you have created several SMS boxes).
To create a SMS box please refer to SMS settings page 25
Enter the Destination box* and press 0*
Enter the text and press
Scroll to Store and select
Options
Send SMS
□□
Destination box:
♦ OK
0243184341
Store
□
Redial from call log

Scroll up to directly access Call log and select
Choose an entry in the list
Make the call or press to select Call in the options
Gregory Mills
Call
□?□□□□
In call features
During an external call, some other options are available. Press ✦ to enter Options.
To mute the handset microphone

Press to enter Options
Press to select Mute (the caller can no longer hear you)
Press again to resume the conversation (End mute)

Intercom (available only if you have at least two handsets)
During an external call, you can use the intercom in-call option to call another handset and for example transfer the call to this handset.

Press to enter Options
Scroll to Intercom (the caller can no longer hear you)
If there is only one additional handset it rings automatically, otherwise select a handset from the list.
Press Transfer when the second handset has taken the line.

Other options are available such as Switch and Conference call (see page 38).
To record a conversation (DECT 617 only)

Press to enter Options
Scroll to Record and select
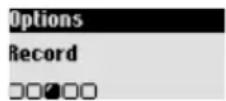
To listen to the conversation, go to the call log menu or the messages list
To switch the handset loudspeaker ON/OFF
Press to activate or deactivate the handset loudspeaker
(The louspeaker is not available when the headset is plugged).
To switch the base loudspeaker ON/OFF (DECT 617 only)
Long press to activate or deactivate the base loudspeaker
To increase/decrease the handset & earpiece/loudspeaker volume during a call

Scroll up to increase or down to decrease the volume when on line
There are 6 volume levels available. The last setting is stored for the next calls.
Caller Line identification and Call waiting
If you subscribe to the Call waiting service, a beep in the earpiece informs you of a second incoming call. The name or number of the second caller may be displayed if you also subscribe to Caller Display service. To answer that second call, use f_in (according to your network, the code may be different). Please contact your network provider for more details.
Editing systems
Case mode
By default, the first letter of a sentence is in upper case. Use to change the case mode:
- all letters in upper case (AB)
- all letters in lower case (ab) or
- the first letter in upper case and the rest of the word in lower case (Ab).
Punctuation and mathematical marks are available through and while other special characters are also available on (see table page 20).
Scroll to move the cursor left or right. Press to delete a character; a long press deletes the whole text.
DECT 613/617 uses two editing systems: Multi-tap and Eatoni®. While editing, a long press on enables you to switch between the two systems.
The standard multi-tap system
This system allows you to enter the text character by character, pressing the corresponding key as many times as necessary to reach the desired character.
The Eatoni® system is a predictive editing system designed to help you to write an SMS. A little E in the header helps you to know the mode you are using.
Eatoni ^® is a word editor that chooses the most probable letter.
The operation of the Eatoni ^® system is the following:
Press the key that displays the character you want to edit. The character that is most likely to be correct is displayed on the screen. If it does not match the expected letter, press to display the next most probable character available on the key.
Let's compare Multitap and Eatoni® systems to write "Peter".
Keypad Keys Multi-tap Sequence
| To write “Peter” with multi-tap I | [space] I @ _ # = < > ( ) & £ £ $ ¥ [ ] { } ∝ § | |||
| Press | 7 | once : | 2 | a b c 2 à ä ç å æ |
| DOWS | 3 | d e f 3 è é Δ φ | ||
| Press | 3 | twice : | 4 | g h i 4 i Γ |
| DEF | 5 | j k l 5 ∧ | ||
| Press | 8 | once : | 6t | m n o 6 ñ ò õ |
| TUV | p q r s 7 β Π θ Σ | |||
| Press | 3 | twice : | 7 | t u v 8 ù ü |
| DEF | 8 | w x y z 9 φ Ω ≃ Ψ | ||
| Press | 7 | three times : Peter | 9 | . 0 , / : ; " ' ! i ? i * + - % \ ^ ~ | |
| 0 | ||||

Eaton® & LetterWise are trademarks of Eatoni Ergonomics, Inc. and used by Philips under license.

SMS
□ Send new SMS
Read SMS
☐ SMS settings
SMS menu is also accessible via the carousel or 📣
Important information are also available on the SMS leaflet in the box
SMS stands for Short Message Service. To benefit from this service you must subscribe to the Caller Line Identification Service (CLI) together with the SMS service from your network provider. SMS can be exchanged with a phone (mobile or compatible fixed lines) provided the receiver has also subscribed to the CLI & SMS services.
Your DECT 613/617 factory settings correspond to the main national operator. If you wish to send or receive SMS through another service provider you must set the corresponding numbers (see page 27 and the SMS leaflet).
A password can protect your SMS box*, but it is not compulsory.
To send an SMS to the receiver's own SMS box*, you must know his destination box.
Send new SMS
To send an SMS to a phone
Press to directly reach Send new SMS and select
Select your SMS box* (only if you have created several SMS boxes). To create a SMS box please refer to SMS settings page 25
Enter the password if any and press 🔊 (optional)
Enter the phone number directly and press 📄 or press to 📋] retrieve the number from the Phonebook
Enter the Destination box* number (optional), press ➕ OK. Note: the destination box is the SMS box of the receiver.
Enter the text and press (see page 19)
Press to select Send now, otherwise
if you want to store your SMS, scroll to Store and select: The SMS stored can be later retrieved from Read SMS

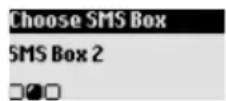


The sent SMS can be up to a maximum of 160 characters long. The special characters €, ] and [count for 2. The DECT 613/617 can store 60 SMS for the 10 boxes*.
Read SMS
The SMS list contains the stored and received SMS.
The received SMS are shown by and the stored SMS are shown.
To read an SMS/to view the number

Press to directly reach Send new SMS
Scroll to Read SMS and select
Select your SMS box* (only if you have created several SMS boxes).
To create a SMS box please refer to SMS settings page 25
Enter the password if any and press 🔊 (optional)
Browse the list of SMS and select
Press to select Read SMS
or scroll to View number and select
SMS
Read SMS
□?□
Bobby
Read SMS
□□□□□□
Bobby
View number
0?□□□□□□
When reading the list of received SMS, some options are only available for SMS received from a phone.
Those options are Reply, Forward, Copy to phonebook, Call and View number. The options Reply and Copy to phonebook use the sender's own sub-address.
To save a ring tone only available in the UK
This option enables to save a downloaded ring tone in your handset or in your base station received through an SMS. This saved ring tone will be then inserted in the menu Sounds in the list of My ring tones (see p. 50).

Press to directly reach Send new SMS
Scroll to Read SMS and select
Select your SMS box* (only if you have created several SMS boxes).
To create a SMS box please refer to SMS settings page 25
Enter the password if any and press 🔊 (optional)
Browse the list of SMS and select the SMS containing the ring tone
Press to select Read SMS
Press to select Save ring tone
Press to select Handset or scroll to Base station and select
SMS
Read SMS
□?□
Read SMS
Mozart
Save ring tone
♦| OK
Save ring tone
Handset
□


To reply to an SMS
Press to directly reach Send new SMS
Scroll to Read SMS and select
Select your SMS box* (only if you have created several SMS boxes). To create a SMS box please refer to SMS Settings page 25
Enter the password if any and press 🔊 (optional)
Browse the list of SMS and select the one you want to reply to
Scroll to Reply and press
Enter the text and press ✦
Press to select Send now
SMS
Read SMS
□□
Choose SMS Box
SMS Box 2
□□□
Read SMS
0471028541
13/04 11:00 Options
Read SMS
Hello!
Bobby
Reply
□□□□□□□□
To forward an SMS
Press to directly reach Send new SMS
Scroll to Read SMS and select
Select your SMS box* (only if you have created several SMS boxes). To create a SMS box please refer to SMS Settings page 25
Enter the password if any and press 🔊 (optional)
Browse the list of SMS and select the one you want to forward
Scroll to Forward and press
Bobby
Forward
000?0000
Enter the number and press
Enter the Destination box* number (if any) and press +0K
You can modify the text if necessary or select
Press to select Send now
Warning: for copyright reasons, it is strictly forbidden to forward a downloaded melody
To send again
Press to directly reach Send new SMS
Scroll to Read SMS and select
Select your SMS box* (only if you have created several SMS boxes).
To create a SMS box please refer to SMS Settings page 25
Enter the password if any and press 🔊 (optional)
Browse the list of SMS and select the one you want to send again
Scroll to Send again and press
To delete an SMS
Press to directly reach Send new SMS
Scroll to Read SMS and select
Select your SMS box* (only if you have created several SMS boxes).
To create a SMS box please refer to SMS Settings page 25
Enter the password if any and press ✪ (optional)
Browse the list of SMS and select the one you want to delete
Scroll to Delete SMS and press
Press 📁 to confirm
To copy a number to the phonebook
Press to directly reach Send new SMS
Scroll to Read SMS and select
Select your SMS box* (only if you have created several SMS boxes).
To create a SMS box please refer to SMS Settings page 25
Enter the password if any and press ⚪ (optional)
Browse the list of SMS and select
Scroll to Copy to phonebook and select
Enter the name and press
To call from the SMS list


Press to directly reach Send new SMS
Scroll to Read SMS and select
Select your SMS box* (only if you have created several SMS boxes).
To create a SMS box please refer to SMS Settings page 25
Enter the password if any and press ⚠️ (optional)
Browse the list of SMS and select
Scroll to Call and select or make the call

Bobby
Call
□□□□□□□
SMS settings
To set the SMS mode
If there are 2 SMS-enabled phones on your telephone line, you will have to deactivate the SMS feature on 1 of the devices.


Press to directly reach Send new SMS
Scroll to SMS settings and select
Press to select Mode
Press to select On or ⬆ scroll to OFF and select ✦
SMS
SMS Settings
□□?
SMS Settings
Mode
□□□


To set your personal SMS boxes only available in the UK
Press to directly reach Send new SMS
Scroll to SMS settings and select
Scroll to SMS boxes and select
Scroll to Add new and select
Enter the SMS box number and press 📄
Enter the password twice and press 🔊 (optional)
SMS Settings
SMS boxes
□□□
Choose SMS Box
Add new
□2(XX)
To change the password of an SMS box only available in the UK


Press to directly reach Send new SMS
Scroll to SMS settings and select
Scroll to SMS boxes and select the one for which you want to change the password
Press to select Change password
Enter the old password and press
Enter the new password twice and press 📄
SMS Box 1
Change password

Note: If you forgot your password you can delete the corresponding SMS box
To delete an SMS box only available in the UK


Press to directly reach Send new SMS
Scroll to SMS settings and select
Scroll to SMS boxes and select the one you want to delete
Scroll to Delete and select
Press 📁 to confirm
SMS Box 1
Delete

Warning: when an SMS box is deleted, all the SMS contained in this box are deleted at the same time.
To choose by default an SMS centre


Press to directly reach Send new SMS
Scroll to SMS settings and select
Scroll to SMS centre and select, choose an SMS centre
Press to select Choose by default
SMS Settings
SMS centre

SMS centre 1
Choose by default

To set the SMS centre number(s)
The SMS are sent through a centre. To receive an SMS from another operator, you must set the corresponding numbers.


Press to directly reach Send new SMS
Scroll to SMS settings and select
Scroll to SMS centre and select
Choose an SMS centre and select
Scroll to Edit incoming number and select
Enter the number and press
Scroll to Edit outgoing number and select
Enter the number and press


Handset
□ Babysit mode
□ Registration
Rename handset
Date & time
□ Display contrast
Backlight
□ Screen saver
Babysit mode
if there are at least 2 handsets
This feature allows you to monitor the baby's room. Place the handset in the room to be monitored and you will hear the noise coming from the room on the additional handset.
To activate/deactivate the babysit mode

Press to enter the carousel menu

Scroll to Handset and select

Press to select Babysit mode

Select OH or scroll CD to OFF and select

Handset
Babysit mode
□□□□□□
An intercom is necessary to monitor the room (see page 38).
Note: during an intercom, you can still answer a call or make a call with the handset
Registration
Up to 8 handsets can be registered to the base station. I handset can be registered to 4 bases.
Warning: If you wish to associate non Philips handsets to the DECT 613 or DECT 617 base station, make sure that this handset is GAP compliant otherwise it will not operate properly (see p 13).
To register a handset
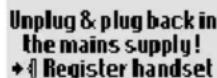
Unplug and plug back in the mains lead to put the base in registration mode


With the additional handset, press 📄 → start the registration
Enter the 4-digit RC code written on the sticker
placed under the base station and press
Enter RC code :
→OK

To unregister a handset

Press to enter the carousel menu
Scroll to Handset and select

Scroll to Registration and select

Scroll to Un-register handset and select

Choose the handset to un-register from the list and press

Enter the 4-digit RC code and press
Registration
Un-register handset

Note: should you have your handset serviced alone, please make sure it is unregistered from the base station before taking it back to the repair centre.
To select a base station

Press to enter the carousel menu

Scroll to Handset and select

Scroll to Registration and select

Scroll to Base selection and select
Choose the base from the list and press
Registration
Base selection

Rename handset
To rename a handset

Press to enter the carousel menu

Scroll to Handset and select

Scroll to Rename handset and select

Long press to delete the current name

Enter the name and press
Handset
Rename handset

Date & time
To set the date and time

Press to enter the carousel menu

Scroll to Handset and select

Scroll to Date & time and select

Select Set date

Enter the current date and press

Handset
Date & time

Date & time
Set date


Scroll to Set time and select
Enter the current time and press

Date & time
Set time

Warning: If your phone is connected to an ISDN line through an adaptor, the date & time may change after each call. Please check the date & time settings in your ISDN system. Please contact your network provider (see FAQ p.56).
Display contrast
To set the display contrast

Press to enter the carousel menu

Scroll to Handset and select

Scroll to Display contrast and select

Browse through the levels and select the appropriate one
Handset
Display contrast

Backlight
To set the display backlight duration or deactivate it

Press to enter the carousel menu

Scroll to Handset and select

Scroll to Backlight and select

Browse through the durations OFF / 10 / 20 seconds and select
Handset
Backlight

Backlight
10 seconds

Screen saver
After 2 minutes of inactivity, the screen saver is displayed. If you choose the Eco mode function the screen is switched off when the handset is out of the base station.
To activate or deactivate the screen saver

Press to enter the carousel menu

Scroll to Handset and select

Scroll to Screen saver and select

Press to select OFF or scroll to Ⓐ0 Logo and select ➕1 or scroll to Ⓐ0 Eco mode and select ➕1
Handset
Screen saver


Answer machine
□ Saved messages
Record a memo
☐ Outgoing messages
☐ Answerphone settings
The DECT 617 includes an answer machine that records the calls when it is activated. You can reach the answer machine from the base station or the handset.
By default, the answer machine is activated. It can store up to 95 messages within the maximum recording time of 40 minutes. A message can be up to 3 minutes long.
To switch the DECT 617 Telephone Answer Machine ON/OFF
From the handset

Press to enter the carousel menu

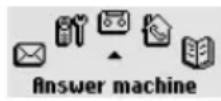
Scroll to Answer machine and select

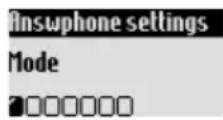
Scroll to Answphone settings and select

Press to select Mode

Press to select ON or scroll to OFF and select
From the base station
A press on activates or deactivates the answer machine. Once activated, the red indicator is lit.
Saved messages
You can listen to new or saved messages via the handset or the base station.
To listen to new message(s) via the handset
The display shows that there is 1 or more new messages(s) (1回)
Press ➕ to view.
The message is automatically played.

Note: the entry shows the number of times the caller tried to reach you. If you have subscribed to the Caller Identification Service (CLI), the display shows the name of the caller and its group if activated (see page 39).
To play and browse through saved message(s) via the handset

Press to enter the carousel menu

Scroll to Answer machine and select

Select Saved messages, the message which was recorded first is automatically played

Press to access the Options

Press to select Play
To go to next or previous messages, scroll to Next message or
Previous message and select
Answer machine
Saved msg
2000
Gregory Mills
Play
2000000
Note: you can listen to the message(s) via the Call log. Scroll up to access Call log and scroll to choose the message from the call log list. The entry is marked (see page 42).

To play and go to next saved message(s) via the base station
Press to play a message and press once again to stop a message while listening
Press to go to the next message while listening. Make a long press to fast forward the messages while listening
Note : The Stop, Back & Volume keys are also available on the base station.
To delete a message via the handset

Press to enter the carousel menu

Scroll to Answer machine and select

Select Saved messages, the message which was recorded first is automatically played

Press to access the Options

Scroll to Delete and select

Press 📁 to confirm
Gregory Mills
Delete
□□□□□□
To delete a message via the base station
Press to delete the current message.
Make a long press to delete all the messages (except unread ones)
The other options available from the handset are Call (if number is displayed), Store (if number is displayed) and Send SMS (if number is displayed).
Settings
To select the answer mode and the outgoing message (OGM) type
You can select among 2 answer modes :Answer only (when no messages can be left) and Answer & record (when messages can be left). For each mode, 2 outgoing message types are available: predefined or personal message. By default the answer machine is set to Answer & Record with predefined OGM.

Press to enter the carousel menu
Scroll to Answer machine and select
Scroll to Outgoing Messages and select
Select Answ. machine mode
Choose the appropriate mode among the 4 options above (2 answer modes and 2 outgoing message types) and select ➕
Answer machine
Outgoing Messages

Outgoing Messages
Answ. machine mode

Note: a predefined message cannot be deleted
To record your personal outgoing message (OGM)
You can record 5 different personal OGM: a specific personal OGM for Answer & record mode for each group (A, B or C), the standard OGM for Answer & record mode for normal callers (not belonging to any group) and the standard OGM for Answer only mode for all callers. It is possible to record specific messages for specific groups only if you subscribe to the Caller Line Identification service (CLI) and if you have set the groups in the phonebook (see page 41).
You can also download outgoing messages through an online service (see Leaflet "Download of ring tones and answerphone messages")*.

Press to enter the carousel menu
Scroll to Answer machine and select
Scroll to Outgoing Messages and select
Scroll to Record outgg msg and select
Choose between the different type of OGMs and the various groups and press
Scroll to Record new and select
Press to start recording and once again to stop recording
Answer machine
Outgoing Messages

Outgoing Messages
Record outgg msg

Record outgg msg
Standard OGM for mode Answ. & Record

Std OGM Answer only
Record new

The message is automatically played back. You can delete and/or record it again. The personal message can be up to 1 minutes long
Note: Select Standard OGM for answer only mode or Standard OGM for Answ. & Record mode if you have no CLI subscription.
Warning: Please make sure that you have selected the appropriate answering machine mode (refer to page 33 "To select the answer mode and the outgoing message type")
To set the number of rings before answering
You can set the answer machine to start playing the outgoing message after a given number of rings (3, 5, 7 or Toll saver). The toll saver option (activated by default) is useful when using the remote access. The answer machine will start playing the outgoing message after 3 rings if there are new messages. If there is no new message the outgoing message will be played after 5 rings. Hang up after the 4th ring if you want to check if you have any messages at no cost.

Press to enter the carousel menu

Scroll to Answer machine and select

Scroll to Answphone settings and select

Scroll to Number of rings before answering and select

Choose between Toll saver, 3 rings, 5 rings or 7 rings and select +
Answphone settings
Number of rings
before answering
□□□□□□
To set the voice prompts & voice language
Select whether you want to be informed or not of the date & time of the messages Select between Messages & Date, Messages or Off
You can also choose the language of the pre-recoded messages.
Answphone settings
Voice language
000?000
To set the call screening
This feature allows you to activate or deactivate the base station loudspeaker so that you can choose whether to hear or not the callers leaving a message.
You can set permanent call screening on the base station.

Press to enter the carousel menu

Scroll to Answer machine and select

Scroll to Answphone settings and select

Scroll to Call screening and select
Answphone settings
Call screening
□□□□?□□

Press to select OFF or scroll through the list and select the appropriate setting.

Note: the default setting is OFF. Activate this feature if you want to be able to screen the calls.
Call screening “call by call” on the handset is also possible. While the caller is leaving a message, press 📄 listen and press again to stop listening. Adjust the volume with .
To set the recording quality
There are 2 recording qualities: standard and high. In standard quality the total capacity is 40 minutes and in high quality the capacity is around to 20 minutes.
+
C
C
C:0
C:0
Press to enter the carousel menu
Scroll to Answer machine and select
Scroll to Answphone settings and select
Scroll to Recording quality and select
Choose between High or Standard and select ➕
Answphone settings
Recording quality
00000
Recording quality
High
√□
To activate and deactivate the remote control
+
C
C
C
+ : ]
+ : ]
Press to enter the carousel menu
Scroll to Answer machine and select
Scroll to Answphone settings and select
Scroll to Remote control and select
Select Mode
Press to select OH or scroll to OFF and select
Answphone settings
Remote control
□□□□□
Note: the default setting is OFF. Activate this feature if you want to be able to remotely use the answer machine.
To remotely control your answer machine
To remotely access your answer machine :
- from another phone dial home
- if your answer machine is on, during or after the message press the star key on the handset; if your answer machine is off, you will hear a beep after 9 rings, then press the star key
- dial your remote control code (the default code is the registration code RC)
- if you have new messages they will be automatically played.
The following table indicates the features available when remotely accessing the answer machine.
Record memo dial
0
Play previous message dial
I
Play message dial
2
Play next message dial
3
Listen again
dial 5
Delete dial
6
Activate answer machine dial
7
Stop
dial 8
Deactivate
dial 9
To change the remote control code
The default code is the registration code. We advise you to personalize it.

Record and listen to a memo
This feature allows you to leave local messages for your family on the answer machine. A memo is represented by the call log and can last up to 3 minutes.
To record a memo

To listen to a new memo
The display shows there is I new local message (1 ☐). Press ➕ to View. The message is automatically played. Delete is also available in the options (see page 32)
To listen to a saved memo
You can use the Answer machine sub menu Saved messages and select Play or listen to a new or a saved memo through the base station (see page 32).

Intercom
□ Call all
□ Handset list
Intercom
menu is accessible via the carousel or
Using the Intercom (if there are at least 2 handsets)
This feature allows you to make free internal calls, transfer external calls from one handset to another, use the conference option and the babysit feature (room monitoring).
Internal call

Press to call the selected handset + handset number (for example
Hang up
Note: If the handset does not belong to the Philips DECT 613/617 range, this function may not be available.
Fast call transfer when on line
During a call you can transfer the call without waiting for the other handset to pick up. All the handsets will then ring.
Press to call the other handset
Hang up
Note: the person on hold hears music. A press on allows you to switch between the 2 calls.
Call transfer to a specific handset when on line
During a call you can transfer the call to a specific handset.
Press to call the selected handset + handset number (for example
Hang up
Note: the person on hold hears music. A press on allows you to switch between the 2 calls.
Call transfer via the in-call options
During a call you can transfer the call via the in call options.

Press to enter the options (with handset I).
Scroll to Intercom and select
If there is only one additional handset, it rings automatically. Otherwise:
Browse through the handset list and select the one you want to transfer the call to

The called handset rings. The external call is put on hold. If there is no answer from the called handset you can resume the call on the first handset.
Take the line on the called handset, both internal callers can talk
Press to select Transfer (with handset I)
Scroll to Switch and come back to the external caller
Note: to answer the call on the second handset you can press
Conference call via the in-call options
Conference call allows one external call to be shared with two handsets (in intercom). The 3 people can share the conversation. No operator subscription is needed.

Press to enter the options (with handset I)
Scroll to Intercom and select
If there is only one additional handset, it rings automatically. Otherwise:
Browse through the handset list and select the one you want to call.
The called handset rings. The external call is put on hold. If there is no answer from the called handset you can resume the call on the first handset.
Take the line on the called handset, both internal callers can talk
Scroll to the Conference call option and select:
The 3 people can share the conversation.
Note: to answer the call on the second handset you can press
To initiate the babysit (room monitoring) if there are at least two handsets
To use the babysit mode feature you need to activate it (see page 28) & initiate an intercom. Place the handset in the room to be monitored and you will hear the noise coming from the room on the additional handset.

Press to enter the options
Scroll to Intercom and select
If there is only one additional handset, it rings automatically. Otherwise:
Browse through the handset list and select the one you want to call. The called handset rings.
Take the line on the called handset, the room monitoring can start.

Phonebook
□ Add new
□ View
Phonebook menu is accessible via the carousel or
250 names and numbers can be stored in the phonebook.
The phonebook contains all the information related to the callers, especially the group settings. The names and numbers are shared with all the handsets registered to your base.
Group settings
There are 3 groups (group A, group B and group C). When ringing, the ring tone helps you identify the caller's group (see p.49) and the screen shows the caller's name. A subscription to the Caller Line identification is needed.
Add new
The names are stored in alphabetical order.
To add a name to the phonebook

To store a name and number from predial
Once the number is dialled, press to reach the options, scroll to Store and select . Enter the name and press
View
To quickly reach a name in the list, enter the first character (browse through the list if several names start with the same letter).
To call

Scroll down to directly reach the list of names

Browse through the list of names and select a name

Make the call
Paula Jameson
Call
2000000

Or press to reach the options

And press again to select Call
To change a number

Scroll down to directly reach the list of names

Browse through the list of names and select a name

Scroll to Change number and select
Paula Jameson
Change number
000000

Press to erase the current number
Enter the new number and press
Note: it is possible to erase the current number with .You can simply change any digit by moving the cursor to reach the digit and press
To change a name

Scroll down to directly reach the list of names

Browse through the list of names and select

Scroll to Change name and select
Paula Jameson
Change name
□□□□□□□

Press to erase the current name

Enter the new name and press
Note: it is possible to erase the current name with You can simply change any letter by moving the cursor to reach the letter and press
To define a group for a name and number (see Group settings p.39)


Scroll down to directly reach the list of names
Browse through the list of names and select a name
Scroll to Select group and select
Browse through the groups and select
Paula Jameson
Select group
0000000


To change the SMS box number only available in the UK
Scroll down to directly reach the list of names
Browse through the list of names and select a name
Scroll to Change SMS box and select
Enter the destination box number and press
Paula Jameson
Change SMS box
0000000


To delete an entry
Scroll down to directly reach the list of names
Browse through the list of names and select
Scroll to Delete and select
Press ✪ to confirm
Paula Jameson
Delete
0000000
To send an SMS from the phonebook
Scroll down to directly reach the list of names
Browse through the list of names and select
Scroll to Send SMS and select
Select your SMS box* (only if you have created several SMS boxes).
To create a SMS box please refer to SMS settings page 25
Paula Jameson
Send SMS
000000?


Enter the password and press 🔊 (optional)
Enter the Destination box* number (optional), press ✦OK
Enter the text and press 📁 (see page 19)
Press to select Send now
Note: once in the list of names, press to directly edit an SMS

Call log
□ View
□ Delete all
☐ Call log settings
Call log menu is accessible via the carousel or 📄
The call log can store up to 40 entries
- unanswered calls - : outgoing calls
- memo or recorded conversation* - : answered calls
- *messages* - : messages (operator voice mail) operator
sends the information)
* DECT 617 only
The call log shows the list of incoming & outgoing calls.
If you have subscribed to the Caller Line Identification (CLI), the name (or number) of the callers will be displayed. The date & time of the call are also shown. If you have no subscription the display shows “Unknown caller” as well as the date & time of the call.
View
To view the call log
C
C4
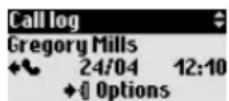
Scroll up to directly reach the calls list
Browse through the list and read the information
To listen to a message (DECT 617 only)
C4
C:0
Scroll up to directly reach the calls list
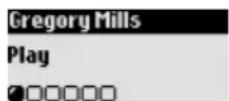
Browse through the list and select ➕:the entry marked with ➕:
+
Select Play in the options
To call / redial
CQ
C:0
C
*[]
Scroll up to directly reach the calls list
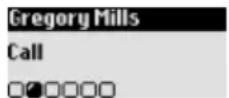
Browse through the list and select an outgoing call entry** Press to call
Or press to select Call in the options
** Note : to be able to call back a correspondent in the case of an incoming call, you need to subscribe to the Caller Line Identification service.
To view the number

Scroll up to directly reach the calls list
Gregory Mills

Browse through the list and select an entry
View number

Scroll to View number and select
00?000
To store the caller's number

Scroll up to directly reach the calls list
Gregory Mills

Browse through the list and select an entry
Store

Scroll to Store and select
□□□?□□

Enter the name and press
To delete a name and a number

Scroll up to directly reach the calls list
Gregory Mills

Browse through the list and select an entry
Delete

Scroll to Delete and select
□□□□?□

Press 📁 to confirm your choice
Warning: if a message is associated to the entry, it is also erased from the answer machine (DECT 617 only).
To send an SMS from the call log

Scroll up to directly reach the calls list
Gregory Mills

Browse through the list and select an entry
Send SMS

Scroll to Send SMS and select
00000

Select your SMS box* (only if you have created several SMS boxes).

To create a SMS box please refer to SMS settings page 25

Enter the password and press ✪ (optional)

Enter the Destination box* number (optional), press ♦OK


Enter the text and press 📄 (see page 19)
Press to select Send now
Note: Once in the list of names, press to directly edit an SMS
Delete all
To delete all the call log

Press to enter the carousel menu

Scroll to Call log and select

Scroll to Delete all and select

Press to confirm OK-1
Call-log
Delete all

Warning: entries with unread messages will also be deleted (DECT 617 only).
Call log settings
You can set the call log to store information about incoming calls and/or outgoing calls.

Press to enter the carousel menu

Scroll to Call log and select

Scroll to Call log settings and select
Call-log
Call-log Settings

Press to select Incoming calls or scroll to Ⓐ Outgoing calls and select ✦


Browse through the options and select the one that suits you
Call-log Settings
Incoming calls


Network
This feature allows you to activate or deactivate operator services that are subscription dependent. You need to set up codes (see page 55).
Contact your network operator for more details. You can usually subscribe to Call forward, operator voice mailbox etc...
Example of service: Call forward
Calls can be redirected to another phone number. Set the code (see page 55) and activate it when necessary.
To activate call forward


Press to enter the carousel menu
Scroll to Operator services and select
Press to select Call forward
Enter or retrieve from the phonebook the number to which
the calls are to be forwarded and press
The number is automatically chained to the call forward prefix and the system dials the number.
Hang up
Operator Services
Call forward
200000000
Thu 13 May 04 08:00
Call forwarded
+View
From now on the calls will be redirected to the assigned phone number.
To deactivate call forward


Press to select 📄
Press to select Cancel
Hang up
Forwarded to :
0243184341
→Cancel

Extra
□ Call duration
Alarm clock
Do Not Disturb mode
Call duration

Press to enter the carousel menu
Scroll to Extra and select
Press to select Call duration
The total communication time is displayed
Press +1 to Reset the counter
Extra
Call duration

Alarm clock
To activate / deactivate the alarm clock
A long press on activates/deactivates the alarm clock with your own settings.
To set the alarm clock

Press to enter the carousel menu
Scroll to Extra and select
Scroll to Alarm clock and select +
Scroll to Set day and select + choose a day.
Scroll to Set time and select
Enter the time and press
Extra
Alarm clock

Set time
07:00

When the alarm rings, press any key to stop it. The snooze is then activated (will ring again every 5 minutes). To definitely stop it press ✦
To set the alarm ring tone type and ring tone volume

Press to enter the carousel menu

Scroll to Extra and select

Scroll to Alarm clock and select

Scroll to Settings and select

Press to select Ring tones

Choose among the available ring tones and select

Scroll to Ring tone volume and select

Choose among the available volume levels and select
Alarm clock settings
Ring tones

Alarm clock settings
Ring tone volume

Do not Disturb mode
This feature allows you to screen calls after a certain time in the evening or when you do not want to be disturbed. Enter the time and select the group(s) allowed to call you. If none of the 4 groups is selected but the feature is activated, then nobody will be able to reach you. If the caller does not belong to an allowed group, the handset and base station will remain silent, while the caller will hear ringing. The answer machine (if activated) or the operator voice mail (network dependent) will answer the call. The feature is deactivated by default. You need to subscribe to the Caller Line Identification service (CLI).
A long press on activates/deactivates this mode with your own settings.
To set the Do not Disturb mode

Press to enter the carousel menu

Scroll to Extra and select

Scroll to Do not disturb mode and select

Scroll to Set day and select the day and press

Scroll to Start time, enter the time and press

Scroll to Stop time, enter the time and press 408

Scroll to Allowed caller choice, activate the callers group(s) allowed to call you and select
Extra
Do Hot Disturb mode

Set day
Tuesday

Start time
08:00

Stop time
12:00

Allowed caller choice
Group A

Warning! only allowed callers will be able to reach you during the selected day & time

Sounds
□ Handset ring tones
□ Base ring tones
□ Group ring tones
☐ Handset ring tone volume
☐ Base ring tone volume
My ring tones
□ Record personal melody
□ Settings
Handset ring tones
To set the external ring tone (ring tone for external calls)

Press to enter the carousel
Scroll to Sounds and select
Press to select Handset ring tones
Press to select External ring tone
Browse through the list of ring tones and select ▶ode
Sounds
Handset ring tones
□□□□□□
Handset ring tones
External ring tone
□
To set the internal ring tone (ring tone for internal calls)

Press to enter the carousel
Scroll to Sounds and select
Press to select Handset ring tones
Scroll to Internal ring tone and select
Browse through the list of ring tones and select tone
Handset ring tones
Internal ring tone
□
Base ring tones
only available for DECT 617

Press to enter the carousel
Scroll to Sounds and select
Scroll to Base ring tones and select
Browse through the list of ring tones and select tone
Sounds
Base ring tones
0000000
Group ring tones
To set the group ring tones
There are 3 groups of callers (see p 39 Group settings). You can associate I ring tone to a group.

Press to enter the carousel

Scroll to Sounds and select

Scroll to Group ring tones and select

Scroll through the 3 different groups and select ♦one

Browse through the list of ring tones and select
Sounds
Group ring tones

Group ring tones
Group A

Handset ring tone volume

Press to enter the carousel

Scroll to Sounds and select

Scroll to Handset ring tone vol. and select

The current level is heard, browse through the levels to hear them

Press to select the appropriate volume
Sounds
Handset ring tone vol.

Base ring tone volume
only available for DECT 617

Press to enter the carousel

Scroll to Sounds and select

Scroll to Base ring tone vol. and select

The current level is heard, browse through the levels to hear them

Press to select the appropriate volume
Sounds
Base ring tone volume

My ring tones
only available in the UK
This menu gives access to all available downloaded ring tones. These ring tones can be set on your handset or on your base station (see page 22). You can store up to 3 downloaded ring tones.
To rename a downloaded ring tone (set on handset or on base station)


Press to enter the carousel
Scroll to Sounds and select
Scroll to My ring tones and select
Press to select Handset or scroll to Base station and select
Browse through the list of downloaded ring tones and select ➕:
Press to select Change name

My ring tones
□□□□□□□

Change name
□
To delete a downloaded ring tone


Press to enter the carousel
Scroll to Sounds and select
Scroll to My ring tones and select
Press to select Handset or scroll to Base station and select
Browse through the list of downloaded ring tones and select ➕:
Scroll to Delete and select

Delete
□
Record personal melody
only available for DECT 617
To play a recorded melody


Press to enter the carousel
Scroll to Sounds and select
Scroll to Record pers. melody and select
Press to select Play

Record pers. melody
□□□□□□□

Play
□□
To record a new melody


Press to enter the carousel
Scroll to Sounds and select
Scroll to Record pers. melody and select

Record pers. melody
□□□□□□□

Scroll to Record new and select
Press to start recording
Record pers. melody
Record new
□□
To delete a recorded melody

Press to enter the carousel
Scroll to Sounds and select
Scroll to Record pers. melody and select
Scroll to Delete and select
Press ✪ to confirm
Record pers. melody
Delete
□□
Settings
To set the base loudspeaker volume only available for DECT 617

Press to enter the carousel
Scroll to Sounds and select
Scroll to Settings and select
Press to select Base loudspeaker vol.
Press to select the appropriate volume
Sounds
Settings
□□□□□□□
Settings
Base loudspeaker vol
□□□□
To set the earpiece tone

Press to enter the carousel
Scroll to Sounds and select
Scroll to Settings and select
Scroll to Earpiece tone and select
Browse through the options and select the appropriate setting
Settings
Earpiece tone
□□□□□
To set the key & feedback tones

Press to enter the carousel

Scroll to Sounds and select

Scroll to Settings and select

Scroll to Key & feedback tones and select

Press to select ON or scroll to OFF and select
Settings
Key & feedback tones

To set the notification beep

Press to enter the carousel

Scroll to Sounds and select

Scroll to Settings and select

Scroll to Notification beep and select

Press to select ON or scroll to OFF and select
Settings
Notification beep

To activate/deactivate the music on hold
The feature allows the caller to hear music when the call is put on hold when transferring a call from one handset to the other.

Press to enter the carousel

Scroll to Sounds and select

Scroll to Settings and select

Scroll to Music on hold and select

Press to select ON or scroll to OFF and select
Settings
Music on hold


Base station
□ Enable registration
☐ Line settings
□ Service code settings
Enable registration
This feature allows you to register a DECT peripheral without keypad. Some DECT peripherals, such as repeaters, do not have any keypad. A special menu-operated procedure is used to register such peripherals to the base station. Also use the peripheral instructions to register it to the base
To register a DECT peripheral

Press to enter the carousel menu
Scroll to Base station and select
Press to select Enable registration
Enter the peripheral code (RC code) and press
Follow the instructions in the peripheral manual
Base Station
Enable registration

Line settings
To change the dial mode

Press to enter the carousel menu
Scroll to Base station and select
Scroll to Line settings and select
Press to select Dial mode
Press to select Tone or scroll to Pulse and select
Base Station
Line settings

Line settings
Dial mode

Note: this setting allows you to select pulse dialling (also called “Loop disconnect” and used in countries without DTMF tone dialling capability or using old PABX)
To change the recall type

Press to enter the carousel menu

Scroll to Base station and select

Scroll to Line settings and select

Scroll to Recall type and select

Recall type


Press to select Short flash or scroll to ☐ Long flash and select ✦
Note: this setting is useful when using operator services. The use of some services accessed with C_IR + 1 , +2 and +3 (call waiting, call forward...) will depend on the flash setting (short/long) according to your installation type (ISDN, Public, PABX).
To change the country setting & operator type

Press to enter the carousel menu

Scroll to Base station and select

Scroll to Line settings and select

Scroll to Choose country/Oper. and select

Browse through the options and select the country and your operator

Choose country/Oper.

To activate and deactivate the first ring
To prevent the phone from ringing when receiving an SMS, the first ring tone is deactivated. You can activate it.

Press to enter the carousel menu

Scroll to Base station and select

Scroll to Line settings and select

Scroll to First ring and select

Choose between OH or OFF and select

First ring

Service code settings
When you subscribe to extra services with your operator you may need to set some codes in your phone. The default codes are the codes used by the main national operator.
If you subscribed to another operator you may need to change the codes.
Contact your network operator for more information on the services.


Press to enter the carousel menu
Scroll to Base station and select
Scroll to Service code settings and select
Browse the list of services and select ✦
Enter the code and press 📄

FAQ
I/ I have no dialling tone after having installed my phone. How do I solve this problem?
Check that you have connected your phone using the supplied line cable and not the one from any previous phone (they are often wired differently).
Check that you have fully charged the handset according to the instructions given for the phone.
Check that the aerial icon (radio link with the base station) is displayed. If the handset is not registered you may need to register it (see p.28).
2/ Can the handset be left on the base all the time?
Yes there is no “memory effect”. The handset can be left on the base station for all current models using NiMh batteries.
3/ Will my phone lose all recorded data (phonebooks entries, recorded messages) in the case of a general power cut?
No it will not. The data recorded in your phone is not deleted in the case of a general power failure or when you unplug your base station or when you replace the batteries.
4/ I have set up the date & time on my phone and the information given after a call is not correct. Why?
If you have a ISDN phone installation, these parameters (date & time) may be transferred directly through the ISDN to the phone. If you did not set-up the ISDN correctly this can explain why the information transmitted is not correct. Set-up the date & time directly on the ISDN phone installation or, if this is not possible, call the Operator/dealer who provided and installed the ISDN.
5/ I cannot use the answering machine of my Philips phone together with my Fax plugged into the same line, why is this?
To avoid this, it is recommended to set up the number of rings before the answering machine switches on.
Example: if the network mail box or a fax is set to answer the calls after 4 rings, please set up your answering machine on 3 rings. To set up the number of rings, please see p 34.
6/ What is CLI and how do I make it work?
CLI stands for Caller Line Identification and it is a special service that you may subscribe to from your network operator. Once you have subscribed to the service, a CLI enabled phone will display the callers number (unless withheld) as the phone rings so that you may decide whether or not to take the call.
7/ The CLI service does not work on my Philips phone, on my digital phone installation (ISDN, ADSL). How do I solve this problem?
Our products are designed to work on an analogue network. If you plugged your PHILIPS phone into a digital installation, the CLI may not be displayed upon incoming calls. Digital phone installations (ISDN) are not always compatible with analogue phones as far as operator services are concerned.
You may find the information regarding compatibility in the user guide of your ISDN. If not, please contact the ISDN manufacturer to check if the device is designed to display CLI on analogue phones. ISDN over 2 or 3 years old are generally not compatible with analogue phones for the CLI Service.
Note that the filters used with some ADSL lines can filter out part of the CLI signal and prevent the phone from displaying CLI correctly. It is possible to purchase better ADSL filters that do not cause this problem.
8/ What is CNIP (Caller Name Identification)?
As with the CLI service this new feature is dependent on the Network and it has to be activated by your Operator (by subscription). It will allow you to have the name of the caller displayed upon an incoming call.
This service may not be available from all Operators yet. We advise you to check with your Operator.
NB. If the name of the caller is registered in your phonebook upon an incoming call it will be the name you have registered which will be displayed and not the one provided by the Operator. The data in your phonebook will have priority over the Operator's data in this particular case.
The CNIP uses the same technology as for the CLI. Therefore the limits of this service are identical (please refer to the questions related to CLI if the service is not working properly). Remember that it only works with alphanumeric display.
9/ How many telephones can I have?
All items of telephone equipment have Ringtone Equivalence Number* (REN), which is used to calculate the number of items which may be connected to any one telephone line.
Your DECT 613/617 has a REN of 1.A total REN of 4 is allowed, if the total REN of 4 is exceeded, the telephones may not ring.
With different telephone types there is no guarantee of ringing, even when the REN is less than 4.
10/ My answering machine does not record the messages left by my correspondents. How do I solve this problem?
Check the operator voice mail box is not activated. If it is activated, set the answering machine so that it starts recording first (set up the number of rings before the answering machine switches on).
| | Which are the conditions required to be able to send an SMS ?
You must first have a subscription to Caller Display (CLI) service from your network operator as well as an SMS service subscription from the appropriate provider.
12/ Is it possible to write, read send or receive an SMS when the other handset is in communication (DECT 613 and DECT 617 multi-handset packs only)?
No it is not possible.
13/ What happens if I send an SMS to a fixed line with no SMS phone?
The correspondent could receive a vocal message (SMS provider dependent).
14/ Is it possible to send an SMS to a fixed line in another country?
This feature depends on your provider. Please contact your provider for more details.
15/ How can I get the SMS centre number?
One SMS centre number at least is pre-programmed in your DECT 613/DECT 617. However, should you need to store another number, other numbers can be set into the phone from the menu SMS/ SMS Settings/ SMS centre. Please check the incoming and outgoing centre numbers with the SMS provider or from the enclosed addendum to your phone user manual.
16/ What is the destination box\* useful for?
This is the number of a personal SMS box. It is a way to send an SMS to someone's personal box instead of sending it to the default box, which is a kind of common box. If you send an SMS without specifying an SMS box number (destination box), then the SMS will be sent to the default box if the receiver's phone deals with multi-boxes features (provider dependent).
17/ When using my SMS-enabled Philips phone with another SMS-enabled phone on the same line, can it cause any problems?
Yes, this will prevent the phones from receiving SMS. You need to deactivate the SMS feature on one of the phones. Your DECT 613/DECT 617 has a feature which enables you to turn the SMS feature off. Go to menu
SMS/SMS Settings/Mode/OFF
FAQ
Telephone troubleshooting
| PROBLEMS | CAUSES | SOLUTIONS |
| The icon does not scroll when the handset is placed on the base | - Bad battery contact- Dirty contact- Battery is full | - Move the handset slightly- Clean the contact with a cloth moistened with alcohol- No need to charge |
| No dialling tone | - No power- Batteries are empty- You are too far from the base station | - Check the connections. Reset the phone : unplug and plug back in the mains- Charge the batteries at least 24 hours- Move closer to the base station- Make sure you are using the cables provided in the box |
| No ring tone | - The ring tone is deactivated- The Do not Disturb mode is ON | - Increase the volume (page 49)- Deactivate it (page 47) |
| The icon does not appear | - No mains power- The handset is too far from the base station | - Check connections- Move closer to the base station |
| The icon is blinking | - Handset not registered to the base station | - Register the handset to the base (page 28) |
| - Crackling on the line | - You are too far from the base station- The base station is too close to electrical appliances, reinforced concrete walls or metal door-frames | - Move closer to the base station- Move the base station to find a better place (the higher the better) |
| The handset displays ‘not available’- when attempting to add another handset to the base station- when using a handset | - The procedure to add a handset has failed, try again- Maximum number of handsets (8) has been reached- Base station is already busy with another handset (ie : phonebook) | - Disconnect and connect the base station power supply. Follow the procedure to register a handset (page 28)- Un-register a handset- Wait until it is available |
| Noise interference on your radio or television | The DECT 613/617 base station or mains power pack are too close to electrical appliances | Move the power pack or base station as far as possible |
| Caller Line Identification (CLI) service does not work | - The service is not activated | - Check your subscription with your network operator |
Troubleshooting
PROBLEMS CAUSES SOLUTIONS
| A phonebook entry cannot be memorised | The phonebook is full | Delete an entry to free memory |
| No new SMS are received | - SMS memory is full- The SMS mode is deactivated | - Delete old SMS- Activate it (p 25) |
| No SMS can be sent or received | - The outgoing or incoming SMSC number is not set or is wrong- The destination box* is wrong- SMS mode is OFF- You have no subscription- Another SMS-enabled phone is also on your line- There is a problem of compatibility between operators- The identity is withheld | - Refer to the SMS leaflet to get the correct SMSC's numbers- See point 16 page 57- Activate SMS mode (page 25)- Contact your provider for more information- Deactivate the SMS mode on one of the device.- Contact your provider for more information- Show identity |
| No caller Id/ poor audio quality/Poor connection quality with broadband DSL internet | - DSL filter(s)/splitter missing or insufficient number of filters- Modem &/or phone plugged in the wrong DSL filter slot- Defective DSL filter(s) | - Make sure you have one DSL filter plugged directly on each line socket used in the house- Check the modem and the phone are plugged in the correct filter slot (one specific for each)- The filter(s) can be defective. Replace it/them and make another test |
* only available in the UK
Answer machine troubleshooting
| PROBLEMS CAUSES | SOLUTIONS | |
| The answer machine does not record messages | - The memory is full- The answer only mode is activated- The Answer & record is not activated | - Delete messages- Select the Answer & record mode- Press [IMAGE] |
| The remote control access does not work | The remote control access is not activated | Activate the remote control access (page 35) |
| It is not possible to record an outgoing message | The memory is full | Delete messages |
| The DECT 617 hangs up during remote access | - 3 failed attempts to send a code- Duration is too long | - Enter the correct code- Manage the remote control quicker |
| The answer machine stops automatically | - The memory is full- Message exceeds 3 mn | - Play & delete messages- Messages must not exceed 3 mn |
A
Add new (phonebook) 39
Alarm clock 46
Answer a call 1, 17
Answer machine settings 33
B
Babysit mode 28, 38
Base keys 4
Base installation 15
Batteries & battery life 15
C
Call duration 46
Call forward 45
Call log settings 44
Call transfer 37
Change name 40
Change number 40
Choose country operator 54
Conference call 38
Conformity 12
Copy to phonebook 24
D
Date and time 29
Declaration of conformity 13
Define groups 41
Delete all (call log) 44
Delete call log entry 27
Delete an entry (phonebook) 41
Delete an SMS 24
Destination box 57 (n°17)
Dial mode 53
Display contrast 30
Do Not Disturb mode 47
E
Earpiece tone 51
Edition mode 19
Enable registration (DECT peripheral) 53
F
FAQ 56
First ring 54
Forward SMS 23
G
GAP 13
Groups 39, 49
H
Handset keys 2
Handset ring tone 48
|
Idle mode 16
Intercom 18, 37
K
Key & feedback tones 52
Keypad lock/unlock 2
L
Line settings 53
Listening to messages (Answer machine) 31
Local message (Memo) 36
Loudspeaker 2, 18
M
Make calls 17, 25, 40, 42
Music on hold 52
Mute 18
N
Navigation in menus 16
Notification beeps 52
0
Outgoing messages 33
P
PABX/PSTN 54
Phonebook 39
Predial 17
Pulse 53
R
Range 15
Read SMS 22
Recall type 54
Recording quality 35
Record conversation 18
Record a memo 36
Record personal melody 50
Recording personal outgoing message 33
Redial 17
Register handset 28
Remote access to answer machine 35
Remote control code (answer machine) 36
Rename handset 29
Ring tone type (alarm) 47
Ring tone volume (alarm) 47
Rings before answering (Answer machine) 34
s
Screening calls 34
Screen saver 16, 30
Send new SMS 21
Send SMS (from phonebook) 41
Send SMS (from call log) 43
Service codes settings 55
SMS box 25
SMS centre 26, 27
SMS mode 25
SMS settings 25
T
Toll saver (Answer machine) 34
Tone 53
U
Unpacking your DECT 613/617 14
Unregister handset 28
v
View the call log 42
Voice prompts 34
Volume (earpiece) 18
Volume (ring tone) 49


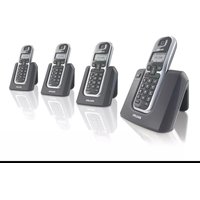
- DECT 613/DECT 617
- Handset
- New event indicator
- Pilot key
- Loudspeaker
- Keypad lock & Editing
- SMS key
- Microphone
- Headset plug
- Talk
- Clear/Recall
- Do not disturb & case mode
- Alarm clock
- Call transfer/Intercom
- Icons on the handset display
- Paging key
- Dect 617 base station
- New message indicator
- ON/OFF key
- Play/Pause key
- Stop key
- / Back/Skip/Fast
- forward key
- Volume key
- Delete key
- Table of contents
- Quick start guide |
- DECT 613 / DECT 617 handset 2
- Icons on the handset display 3
- DECT 613 / DECT 617 base stations 4
- Table of Contents 5-6
- Menu structure 7-11
- Conformity, Environment and Safety 12
- Declaration of conformity
- Using GAP standard compliance 13
- Installing the DECT 613/617
- Introduction
- Basic principles 17
- SMS
- Answer machine
- Intercom
- Phonebook
- Call log
- Operator services 45
- Extra
- Sounds
- Base
- Index
- Menu structure
- Conformity, Environment and Safety
- Safety information
- Conformity
- Power requirements
- Warning !
- Telephone connection
- Safety precautions
- Environmental care
- Using GAP standard compliance
- Unpacking your DECT 613
- Unpacking your DECT 617
- Installing the base station
- Installing and replacing the batteries in the handset
- Battery life and range
- Philips screen saver
- Idle mode
- Understanding the menu system
- How to navigate in the menus
- Basic principles
- To make and to answer a call
- Pre dialling
- Direct dialling
- Answer a call
- To call from the phonebook
- To store a name from predial
- To store an SMS
- Redial from call log
- In call features
- To mute the handset microphone
- Intercom (available only if you have at least two handsets)
- To record a conversation (DECT 617 only)
- To switch the handset loudspeaker ON/OFF
- To switch the base loudspeaker ON/OFF (DECT 617 only)
- To increase/decrease the handset & earpiece/loudspeaker volume during a call
- Caller Line identification and Call waiting
- Editing systems
- Case mode
- The standard multi-tap system
- Your DECT 613/617 factory settings correspond to the main national operator. If you wish to send or receive SMS through another service provider you must set the corresponding numbers (see page 27 and the SMS leaflet).
- Send new SMS
- To send an SMS to a phone
- Read SMS
- To read an SMS/to view the number
- Bobby
- To save a ring tone only available in the UK
- Save ring tone
- To reply to an SMS
- Choose SMS Box
- To forward an SMS
- To send again
- To delete an SMS
- To copy a number to the phonebook
- To call from the SMS list
- SMS settings
- To set the SMS mode
- To change the password of an SMS box only available in the UK
- SMS Box 1
- To delete an SMS box only available in the UK
- To choose by default an SMS centre
- SMS centre 1
- To set the SMS centre number(s)
- Babysit mode
- To activate/deactivate the babysit mode
- Registration
- To register a handset
- To unregister a handset
- To select a base station
- Rename handset
- To rename a handset
- Date & time
- To set the date and time
- Display contrast
- To set the display contrast
- Backlight
- To set the display backlight duration or deactivate it
- Screen saver
- To activate or deactivate the screen saver
- To switch the DECT 617 Telephone Answer Machine ON/OFF
- Saved messages
- To listen to new message(s) via the handset
- To play and browse through saved message(s) via the handset
- To play and go to next saved message(s) via the base station
- To delete a message via the handset
- To delete a message via the base station
- Settings
- To select the answer mode and the outgoing message (OGM) type
- To record your personal outgoing message (OGM)
- To set the number of rings before answering
- To set the voice prompts & voice language
- To set the call screening
- To set the recording quality
- To activate and deactivate the remote control
- To remotely control your answer machine
- To change the remote control code
- Record and listen to a memo
- To record a memo
- To listen to a new memo
- To listen to a saved memo
- Using the Intercom (if there are at least 2 handsets)
- Internal call
- Fast call transfer when on line
- Call transfer to a specific handset when on line
- Call transfer via the in-call options
- Conference call via the in-call options
- Group settings
- Add new
- To add a name to the phonebook
- To store a name and number from predial
- View
- To call
- To change a number
- To change a name
- To define a group for a name and number (see Group settings p.39)
- Paula Jameson
- To change the SMS box number only available in the UK
- To delete an entry
- To send an SMS from the phonebook
- To view the call log
- To listen to a message (DECT 617 only)
- To call / redial
- To view the number
- To store the caller's number
- To delete a name and a number
- To send an SMS from the call log
- Delete all
- To delete all the call log
- Call log settings
- Network
- Example of service: Call forward
- To activate call forward
- To deactivate call forward
- Call duration
- To activate / deactivate the alarm clock
- To set the alarm clock
- Set time
- To set the alarm ring tone type and ring tone volume
- Alarm clock settings
- Do not Disturb mode
- To set the Do not Disturb mode
- Set day
- Start time
- Stop time
- Allowed caller choice
- Handset ring tones
- To set the external ring tone (ring tone for external calls)
- To set the internal ring tone (ring tone for internal calls)
- Base ring tones
- Group ring tones
- To set the group ring tones
- Handset ring tone volume
- Base ring tone volume
- My ring tones
- To rename a downloaded ring tone (set on handset or on base station)
- To delete a downloaded ring tone
- Record personal melody
- To play a recorded melody
- To record a new melody
- To delete a recorded melody
- To set the earpiece tone
- To set the key & feedback tones
- To set the notification beep
- To activate/deactivate the music on hold
- Base station
- Enable registration
- To register a DECT peripheral
- Line settings
- To change the dial mode
- To change the recall type
- To change the country setting & operator type
- To activate and deactivate the first ring
- Service code settings
- FAQ
- 8/ What is CNIP (Caller Name Identification)?
- 9/ How many telephones can I have?
- 10/ My answering machine does not record the messages left by my correspondents. How do I solve this problem?
- | | Which are the conditions required to be able to send an SMS ?
- 12/ Is it possible to write, read send or receive an SMS when the other handset is in communication (DECT 613 and DECT 617 multi-handset packs only)?
- 13/ What happens if I send an SMS to a fixed line with no SMS phone?
- 14/ Is it possible to send an SMS to a fixed line in another country?
- 15/ How can I get the SMS centre number?
- 16/ What is the destination box\* useful for?
- 17/ When using my SMS-enabled Philips phone with another SMS-enabled phone on the same line, can it cause any problems?
- SMS/SMS Settings/Mode/OFF
- A
- B
- C
- D
- E
- F
- G
- H
- |
- K
- L
- M
- N
- 0
- P
- R
- s
- T
- U
- v
Brand : PHILIPS
Model : DECT 6172
Category : Cordless phone