
99-7367HG - Car accessories Metra - Free user manual and instructions
Find the device manual for free 99-7367HG Metra in PDF.


| Type of Product | Dash Installation Kit |
| Compatible Vehicles | Select Honda models (e.g., Civic, CR-V, Accord) - refer to vehicle fitment guide |
| Material | ABS Plastic |
| Color | Black |
| Dimensions (Approx.) | 7.0 x 4.0 x 0.5 inches |
| Weight | 0.2 lb |
| Included Components | Dash bracket, mounting screws, wire harness adapter (if applicable) |
| Main Function | Enables installation of an aftermarket single-DIN or double-DIN stereo |
| Installation Difficulty | Moderate - requires basic hand tools and removal of factory radio |
| Mounting Type | Screw-in bracket with factory clip retention |
| Safety Features | No sharp edges; designed to match factory fit and finish |
| Maintenance | Wipe clean with a damp cloth; avoid abrasive cleaners |
| Repairability | Non-repairable; replace if damaged |
| Warranty | 1-year limited warranty against manufacturing defects |
Frequently Asked Questions - 99-7367HG Metra
User questions about 99-7367HG Metra
0 question about this device. Answer the ones you know or ask your own.
Ask a new question about this device
Download the instructions for your Car accessories in PDF format for free! Find your manual 99-7367HG - Metra and take your electronic device back in hand. On this page are published all the documents necessary for the use of your device. 99-7367HG by Metra.
USER MANUAL 99-7367HG Metra
Installation instructions for part 99-7368
Kia Rio 2016-up
(without factory push to start)
99-7368
KIT FEATURES
• ISO DIN radio provision with pocket
• ISO DDIN radio provision
• 99-7368B - Painted matte black
• 99-7368HG - Painted gloss black
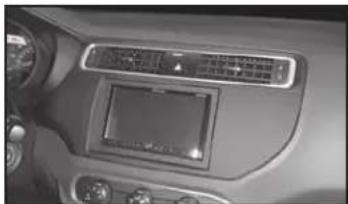
natural_image
Interior view of a car dashboard with air conditioner and touchscreen (no visible text or symbols)KIT COMPONENTS
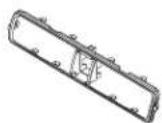
- A) Radio housing trim panel • B) Radio brackets • C) Vent trim ring • D) Pocket • E) (2) #8 x 3/8" Phillips screws
A

B DC E



WIRING & ANTENNA CONNECTIONS (sold separately)
Wiring Harness: • 70-7304
Antenna Adapter: • Not required
TOOLS REQUIRED
- Panel removal tool - Phillips screwdriver
Table of Contents
Dash Disassembly 2-3
Kit Preparation....4
Kit Assembly
- ISO DIN radio provision with pocket 5
- ISO DDIN radio provision 6
CAUTION! All accessories, switches, climate controls panels, and especially air bag indicator lights must be connected before cycling the ignition. Also, do not remove the factory radio with the key in the on position, or while the vehicle is running.

99-7368
Dash Disassembly
- Unclip and remove the factory radio trim panel including the a/c vents. (Figure A)
Note: Remove the (8) retaining clips to be reused in Kit Assembly.
- Remove (4) Phillips screws securing the radio in the dash.
Continued on the next page

natural_image
Interior view of a car dashboard with air vent and steering wheel (no text or symbols)(Figure A)

99-7368
Dash Disassembly
- Remove the (6) Phillips screws securing the a/c vents then unclip and remove them from the radio trim panel. (Figure B)
- Unclip and remove the hazard switch. (Figure B)
Continue to kit preparation

(Figure B)
99-7368
Kit Preparation
- Place the vent trim ring into the radio housing trim panel and mount the vents using the factory screws removed in disassembly. Attach the hazard switch into the completed assembly. (Figure A)
- Install the (8) panel clips removed in disassembly onto the radio housing trim panel.
Continue to kit assembly

natural_image
Technical line drawing of a car air vent assembly with mounting brackets and control panel (no text or symbols)(Figure A)

99-7368
Kit Assembly
ISO DIN radio provision with pocket
- Mount the pocket to the radio brackets with the (2) #8 x 3/8" Phillips screws supplied. (Figure A)
- Remove the metal DIN sleeve and trim ring from the aftermarket radio.
- Slide the radio between the radio brackets and secure with screws supplied with the radio. (Figure B)
- Locate the factory wiring harness in the dash. Metra recommends using the proper mating adapter from Metra or AXXESS. Re-connect the negative battery terminal and test the radio for proper operation.
- Reassemble the dash in reverse order of disassembly.

natural_image
Technical line drawing of a mechanical bracket assembly (no text or symbols)(Figure A) (Figure B)
natural_image
Technical line drawing of a device housing with mounting holes and internal components (no text or symbols)
99-7368
Kit Assembly
ISO DDIN radio provision
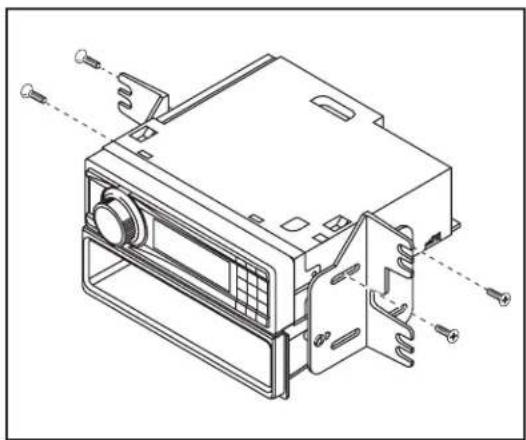
- Mount the radio brackets to the radio with the screws supplied with the radio. (Figure A)
- Locate the factory wiring harness in the dash. Metra recommends using the proper mating adapter from Metra or AXXESS. Re-connect the negative battery terminal and test the radio for proper operation.
- Reassemble the dash in reverse order of disassembly.
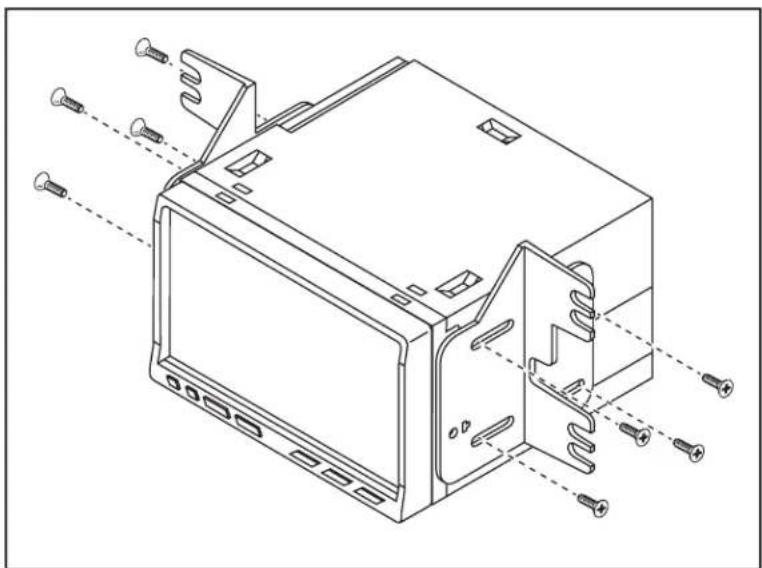
natural_image
Technical line drawing of an electronic device casing with mounting holes and screw fasteners (no text or symbols)(Figure A)
Metra
99-7368

Installation instructions for part 99-7368

IMPORTANT
If you are having difficulties with the installation of this product, please call our Tech Support line at 1-800-253-TECH. Before doing so, look over the instructions a second time, and make sure the installation was performed exactly as the instructions are stated. Please have the vehicle apart and ready to perform troubleshooting steps before calling.

KNOWLEDGE IS POWER
Enhance your installation and fabrication skills by enrolling in the most recognized and respected mobile electronics school in our industry. Log onto www.installerinstitute.com or call 800-354-6782 for more information and take steps toward a better tomorrow.

Metra recommends MECP certified technicians

Brand : Metra
Model : 99-7367HG
Category : Car accessories