
DZ-HV584EW - Camera HITACHI - Free user manual and instructions
Find the device manual for free DZ-HV584EW HITACHI in PDF.


| Product Type | Camcorder |
| Brand | Hitachi |
| Model | DZ-HV584EW |
| Sensor Resolution | 0.8 MP (800k pixels) CCD |
| Optical Zoom | 25x |
| Digital Zoom | 1000x |
| Display | 2.7" LCD (123k pixels) |
| Recording Media | 8 cm DVD-R/RW/RAM, SD/SDHC card |
| Video Format | MPEG-2 (Standard Definition) |
| Maximum Video Resolution | 720 x 480 (NTSC) / 720 x 576 (PAL) |
| Still Image Resolution | Up to 2.0 megapixels (interpolated) |
| Image Stabilization | Electronic (EIS) |
| Night Mode | Infrared NightShot |
| Auto Focus | TTL contrast detection |
| White Balance | Auto, Presets (Indoor, Outdoor) |
| Exposure Control | Auto, Manual (aperture and shutter priority) |
| Digital Effects | Multiple scene modes and effects |
| Input/Output | AV out (composite), USB 2.0, DC in |
| Power Source | Lithium-ion battery (7.2 V, typical ~1200 mAh), AC adapter |
| Battery Life | Approx. 80 minutes (LCD on) |
| Dimensions (W x H x D) | Approx. 122 x 85 x 60 mm (4.8 x 3.3 x 2.4 in) |
| Weight | Approx. 400 g (0.88 lb) without battery |
| Operating Temperature | 0°C to 40°C (32°F to 104°F) |
| Accessories Included | AC adapter, battery, remote control, AV cable, USB cable, software CD |
Frequently Asked Questions - DZ-HV584EW HITACHI
User questions about DZ-HV584EW HITACHI
0 question about this device. Answer the ones you know or ask your own.
Ask a new question about this device
Download the instructions for your Camera in PDF format for free! Find your manual DZ-HV584EW - HITACHI and take your electronic device back in hand. On this page are published all the documents necessary for the use of your device. DZ-HV584EW by HITACHI.
USER MANUAL DZ-HV584EW HITACHI
natural_image
Black Hitachi II digital camera with visible lens and control buttons (no text or symbols on body)Table of Contents
Preface.... v
About this manual....
Copyright....v
Precautions.... vi
Before You Start....viii
1 Introducing the camera....1
1.1 System requirements.... 1
1.2 Features....1
1.3 Unpacking the video camera....2
1.4 About the camera....3
1.4.1 Front view....3
1.4.2 Top view....3
1.4.3 Bottom view....
1.4.4 Right view....4
1.4.5 Back view 5
1.4.6 LCD Panel 5
1.4.7 Adjusting the LCD display 6
1.4.8 About the LEDs....9
2 Getting started....10
2.1 Inserting an SD card.... 10
2.2 Inserting the batteries....11
2.3 Charging the battery....12
2.4 Turning on the video camera.... 13
2.5 Changing modes.... 13
2.6 Before you start.... 13
2.6.1 Setting the date and time 13
2.6.2 Setting the language....14
2.6.3 Setting the beep 15
2.7 Shoot/Playback video.... 16
2.7.1 Shooting a video clip....16
2.7.2 Playing the video clip....18
2.8 Taking/viewing pictures....19
2.8.1 Taking a still picture.... 19
2.8.2 Viewing images.... 20
Connecting to a computer.... 21
10 Connecting to a standard TV.... 21
1 Connecting to an HDTV.... 22
3 Using the camera....23
3.1 Movie mode 23
3.1.1 Movie mode....23
3.1.2 Using the macro function.... 24
3.1.3 Using the zoom function.... 25
3.1.4 Using the LED light 25
3.1.5 Quick access controls 25
3.2 Photo mode 26
3.2.1 Photo mode icons.... 26
3.2.2 Using the macro function.... 27
3.2.3 Using the zoom function.... 27
3.2.4 Using the LED light.... 27
3.2.5 Quick access controls 27
3.3 Movie Playback mode.... 28
3.3.1 Movie Playback mode icons 28
3.4 Photo Playback mode 30
3.4.1 Photo Playback mode icons.... 30
3.5 Thumbnail mode 31
3.6 USB mode 31
4 Using the menus 32
4.1 Movie menu 32
4.1.1. White balance....32
4.1.2. Video resolution.... 33
4.1.3. Colour effect 34
4.1.4. Night mode 35
4.1.5. Video quality 36
4.2 Movie playback menu.... 37
4.2.1 Delete 37
4.2.2 Protect 39
4.2.3 Autoplay 40
4.2.4 Volume.... 41
4.3 Photo menu 42
4.3.1 White balance 42
4.3.2 Resolution.... 43
4.3.3 Colour effect 44
4.3.4 Night mode.... 45
4.3.5 Selítimer.... 46
4.3.6 Photo quality 47
4.4 Photo playback menu.... 48
4.4.1 Delete 48
4.4.2 Protect 50
4.4.3 Slide show....51
4.5 System menu 52
4.5.1 Setting the beep 52
4.5.2 Date/time 52
4.5.3 Auto power off 52
4.5.4 TV standard 53
4.5.5 Format....54
4.5.6 Default 55
4.5.7 Language 55
4.5.8 Frequency 56
Appendix....57
Specifications.... 57
Troubleshooting.... 60
Preface
Congratulations on your purchase of this advanced video camera. Ensure that you read this manual carefully and keep it in a safe place for future reference.
About this manual
Every effort has been made to ensure that the contents of this manual are correct and up to date. However, no guarantee is made regarding the accuracy of the contents. If the contents of this manual do not tally with the camera, please take the camera as a criterion, and our company reserves the right to change the contents or technical rules without notice in advance. Also, the manufacturer reserves the right to change the technical specification in advance without notice.
If the accessories do not tally with the actual package, please take the actual package as a criterion.
Copyright
© Copyright 2009.
All rights reserved. No part of this publication may be reproduced, transmitted, transcribed, stored in a retrieval system or translated into any language or computer language, in any form or by any means, electronic, mechanical, magnetic, optical, manual or otherwise, without the prior written permission of the manufacturer.
Precautions
General precautions
- Do not use or store the product in dusty, dirty, or sandy areas, as its components may be damaged.
- Do not store the product in a hot environment. High temperatures can shorten the life of electronic devices, damage batteries and warp or melt certain plastics.
- Do not store the product in cold areas. When the product warms up to its normal temperature, moisture can form inside, which may damage the electronic circuits.
- Do not attempt to open the casing or attempt your own repairs. High-voltage internal components create the risk of electric shock when exposed.
- Do not drop or knock the product. Rough handling may damage the internal components.
- Do not use harsh chemicals, cleaning solvents or strong detergents to clean the product. Wipe the product with a slightly damp soft cloth.
- Do not fire the white LED light while it is too close to the subject's eyes. Intense light from the flash can cause eye damage if it is fired too close to the eyes. When using the white LED light, the camera should be at least one meter from the eyes of the subject.
- Do not open battery cover while an image is being recorded. Doing so will not only make storage of the current image impossible, it can also corrupt other image data already stored in file.
- If the product or any of its accessories are not working properly, take them to your nearest qualified service center. The personnel there will assist you and if necessary, arrange for the product to be repaired.
• Test for proper operation before using the camera.
Notes on the LCD Screen
Be very careful to ensure the fluid contained in the LCD screen does not escape if the screen becomes cracked or damaged. If this occurs, follow these steps:
- If the fluids make contact with skin, wipe it with a clean cloth then rinse with a large amount of water.
- If the fluid makes contact with eyes, wash eyes with clean water for at least 15 minutes and go to the hospital as soon as possible.
- If the fluid is swallowed, first rinse mouth with water, then drink a large amount of water and induce vomiting. Go to the hospital as soon as possible.
Operation conditions
• This camera is designed for use in temperatures ranging from 0irc C to 40irc C ( 32irc F to 104irc F).
- Do not use or keep the camera in the following areas:
- In areas subject to direct sunlight
- In areas subject to high humidity or dust
- Near air conditioners, heaters, or other areas subject to temperature extremes
- Inside of a closed vehicle, especially one parked in the sun.
- In areas subject to strong vibration
Power supply
- Use only the type of battery that came with your camera. Using any other type of battery may damage the equipment and invalidate the warranty.
- Ensure the battery is inserted correctly. Inserting the battery incorrectly can cause damage to the product and possibly start a fire.
- Remove the battery to avoid the fluid leakage if the camera is not going to be used for a long time.
• If the battery is crushed or damaged, remove it immediately to avoid the battery fluid leakage and abnormal expansion.
Before You Start
Take some test shots before performing a formal recording.
Before taking pictures with this DV camera in any important occasion (such as a wedding ceremony or an overseas trip), do test the DV camera beforehand to ensure that it functions properly. Any additional loss caused by the malfunction of this product (such as costs of photography or any loss of benefit generated by the photography) is not the responsibility of the manufacturer and no compensation will be given for it.
Copyright information
Take care to observe 'No Photography' notices in certain locations. In these cases, you cannot record any live performance, improvisation or exhibits, even for personal purposes. Any transfer of pictures or memory card data must be conducted under the constraints of copyright law.
1 Introducing the camera
Read this section to learn about the features and functions of the video camera. This chapter also covers system requirements, package contents, and descriptions of the hardware components.
1.1 System requirements
The video camera requires a PC with the following specifications:
- Windows® 7 / Vista / XP operating system
- Intel® / AMD Dual-Core CPU or higher
- At least 1 GB of RAM or higher
• At least DirectX 9 video card, DirectX 10 is recommended
• Standard USB 1.1 port or higher - At least 2GB or greater available hard disk
Note: A USB 1.1 port will enable you to transfer files to and from your host PC, but transfer speeds will be much faster with a USB 2.0 port.
1.2 Features
The video camera offers a variety of features and functions including:
• Full HD Digital camcorder
• Digital camera (max. 12 Megapixels)
• HDMI audio-video output
• Max. 4X digital zoom
• Mass storage device
• 3" TFT LCD Touch Display (16:9)
1.3 Unpacking the video camera
The following items should be present in the package. If any item is missing or appears damaged, contact your dealer immediately.

Video camera

Pouch


Strap

HDMI cable

Li-ion battery

Battery

CD-ROM
(Application software
+User's Manual)
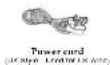

Power cord
| European Style
Used for Pan Europe 601
- Do not use the European power cord in the UK.
1.4 About the camera
Refer to the following illustrations to familiarize yourself with the buttons and controls of this video camera.
1.4.1 Front view

1.4.2 Top view

1.4.3 Bottom view

1.4.4 Right view

1.4.5 Back view
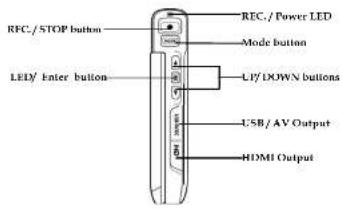
1.4.6 LCD Panel

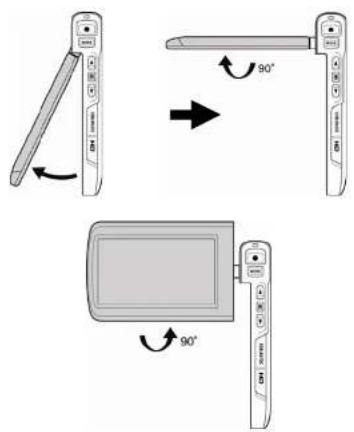
1.4.7 Adjusting the LCD display
Flip and twist the LCD screen as shown while capturing a still image or recording a video clip.
See the table below for a description of each button's function.
| Button | Name | Function |
| Power button | Press to turn power on/off. | |
| Menu button | Press to display main OSD menus. | |
| Mode button | Use to toggle Movie, Photo, and SET modes. | |
| Up/Down buttons | In Movie and Photo modes, press to zoom in and out.In Movie Playback mode:1. Press the Up/Down buttons to browse stored movies.2. While playing a movie, press the Up/Down buttons to rewind / fast forward the movie.3. In the thumbnail mode, press the Up/Down buttons to select the video clip and then press the ENTER button to show the video clip.In Photo Playback mode:1. Press the Up/Down buttons to browse stored images.2. In the thumbnail mode, press the up and down to select the thumbnail images and then press the ENTER button to view the |
7
| image in full screen mode.3.In SET mode, press Up/Down buttons to highlight menu items,and the ENTER button to select. | ||
| REC. / STOP button | In Movie mode, press to record video clip.In Movie Play back mode, press to pause the video playback. Press the REC. / STOP button again to resume video playback.In Photo mode, press to take a photo. | |
| Macro switch | Move the switch to the Position to enable Macro mode. | |
| Playback button | In Movie and Photo mode, press to enter playback mode. |
1.4.8 About the LEDs
The following table describes the camera LEDs:
| LED Power/Rec. | Colour | Definition |
| Green | Power-on | |
| Red Blinking Recording | ||
| Red | Camera but | |
| Green Blinking Self-timer is activated | ||
| Green Blinking Rapidly | 2 seconds self-timer remaining. | |
| Self-timer | Green Blinking Self-timer is activated. | |
| Green Blinking Rapidly | 2 seconds self-timer remaining. | |
2 Getting started
Read this section to learn how to start using the video camera. This section covers basic functions such as switching on, inserting the battery and memory cards, and configuring preliminary settings. See later chapters for advanced functions.
2.1 Inserting an SD card
An SD card can be installed in the video camera to provide additional storage space for still images, video clips, or other files.
- Open the SD card compartment cover.

- Insert the SD card as shown. Make sure the contacts are facing downwards.

- Press down the SD card compartment cover then inwards to close it.

2.2 Inserting the batteries
This video camera is designed for use with a rechargeable Li-Ion battery. Only use the batteries supplied or similar batteries recommended by the manufacturer or your dealer.
- Open the battery compartment cover and insert the batteries as shown.

- Close the battery compartment cover.

Note: Installing the battery incorrectly could cause damage to the camera and possibly start a fire.
2.3 Charging the battery
You can charge the battery with the charging unit provided. Follow the below steps to charge your battery.
- Insert the Li-ion battery into the charging bay. Connect one end of the power cord to the charging unit and then plug the other end to the wall outlet as shown.
- The red LED will light up for proper charging.
- After full charge, the LED turns to green.
- It takes about 120 minutes to achieve full charge. Actual charging time depends on current battery capacity and charging conditions.
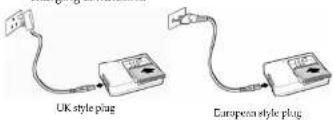
Note: You may also charge the battery by connecting the video camera to a computer with the USB cable provided. When the video camera is turned off, connecting to PC starts charging. When the video camera is powered on, connecting it to PC goes to USB mode. It takes about 150 minutes to achieve full charge.
A full charged battery can support: Photo shooting - 120 photos; Video recording - 60 minutes Photo playback - 100 photos; Video playback - 60 minutes
2.4 Turning on the video camera
Press and hold the power button or flip open/close the LCD touch screen to turn the video camera on/off.
2.5 Changing modes
The video camera can operate in three modes, Movie, Photo, and SET. Press the Mode button to toggle different modes.
2.6 Before you start
Before you start using the video camera, some basic settings such as date and time, languages and beep function need to be configured.
2.6.1 Setting the date and time
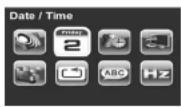
- Turn on the video camera, and press the Mude button to go to SET mode. Press the Up/Down buttons or tap the screen to highlight Date / Time. Press the ENTER button or tap the screen to enter the Date/Time menu.
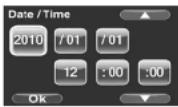
- Tap the screen or press the REC./STOP button to select a field.
-
Adjust each value by pressing the Up/Down buttons or tap √▲ ▼
-
Press the ENTER button or tap Ok to save your changes and leave the Date/Time menu.
2.6.2 Setting the language
- Turn on the video camera, and press the Mode button to go to SET mode. Press the Up/Down buttons or tap the screen to highlight or tap the screen to highlight Language. Press the ENTER button or tap the screen to enter the Language menu.
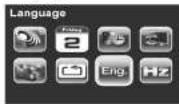
- Press the Up/Down buttons or tap the screen to select the following language options: English, German, French, Italian, Spanish, Portuguese, Dutch, Simplified Chinese, Traditional Chinese, Korean, Turkish, Japanese, Russian, and Arabic. Tap ▲/to go to the previous/next page. After the language is selected, press the ENTER button or tap Ok confirm.

2.6.3 Setting the beep
- Turn on the video camera, and press the Mode button to go to SET mode. Press the ENTER button or tap the screen to enter the Beep menu.

- Press the Up/Down buttons or tap the screen to select Off or On options. Press the ENTER button or tap Ok to confirm.

2.7 Shoot/Playback video
2.7.1 Shooting a video clip
- Turn on the video camera and it starts in Movie mode.
Movie mode
- Use the LCD screen to frame the video.
- Press the REC./STOP button to start recording.
- Press the REC./ STOP button again to stop recording.
- The video clip is automatically saved with a unique file name.
Notes:
- The maximum length of each video recording file is 3.66 GB. When the maximum length is reached, the recording will automatically be saved as separate files.

2.7.2 Playing the video clip
- In Movie mode, press the Playback button and the most recent file displays on the LCD screen.
Movie playback mode indicator
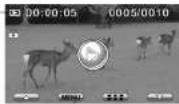
- Press the Up/Down buttons or tap 📄/to browse the video clips. Press the ENTER button or tap the screen to play back the video clip.
- To pause while playing back the video clip, press the REC./STOP button.
- When viewing the video clip, press MENU button to display the Volume option, and then use the Up/Down buttons or tap ▲/ to adjust the volume.
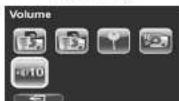

- Press Up/Down buttons to fast rewind /forward.
- Press the ENTER button to stop playing.
- Press the Playback button again to return to Movie mode.
2.8 Taking/viewing pictures
2.8.1 Taking a still picture
- Turn on the camera and move the mode dial to Photo mode.
Photo mode

-
Use the LCD screen to frame the picture.
-
Press the REC./STOP button to capture the image.
-
The picture is automatically saved with a unique file name.
2.8.2 Viewing images
- In Photo mode, press the Playback button and the most recent image displays on the LCD screen.
Playback mock

- Press the Up/Down buttons or tap /to browse the images.
- In thumbnail mode, press the ENTER button or tap Ok to view the image in full screen mode.
- Press the Playback button again to return to Photo mode.
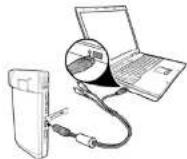
2.9 Connecting to a computer
Read this section to learn how to transfer files to a PC, show the
video clips or photos on PC
Connect the video camera to a computer with the USB cable provided.
2.10 Connecting to a standard TV
Connect the video camera to a standard TV as shown with the AV cable provided.

2.11 Connecting to an HDTV
Read this section to learn how to show the video clips or photos on an HDTV. Connecting to an HDTV offers the high resolution for displaying the video clips or photos.
Connect the video camera to an HDMI as shown with an HDMI cable.

Notes: 1. Photo capturing and movie recording are not supported when connected to an HDTV and TV. 2. When connected to HDTV and TV, go to Playback mode and press the REC, key to view video clips or photos in thumbnails.
3 Using the camera
Read this section to learn how to use the camera.
3.1 Movie mode
Use this mode to capture video clips and store them in internal memory or on an SD card.
3.1.1 Movie mode
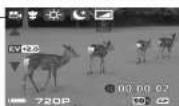
Use the following picture to familiarize yourself with the Movie mode icons and symbols.

Movie mode:
See the table below for a description of each icon and symbol.
| 1 | Movie mode indicator | |
| 2 | Zoom indicator | |
| 3 | Macro indicator | |
| White balance indicator | ||
| Night mode indicator | ||
| Effect indicator | ||
| 4 | ●00:00:02 | Recorded time indicator |
| 5 | Memory status indicator: indicates an SD card is inserted and the available storage capacity of the SD card indicates no inserted SD card and the available internal memory | |
| 6 | 90b | Remaining memory capacity |
| 7 | 720P | Resolution indicator |
| 8 | Battery indicator | |
| 9 | EV compensation indicator |
3.1.2 Using the macro function
This function can capture subjects close to the lens. In macro mode, subjects can be as close as 20-21 cm.
While in Photo mode, move the Macro switch on the side of the video camera to activate macro function, and an icon 🌐 displays on the LCD screen.
Move the macro switch again to return to normal mode.
3.1.3 Using the zoom function
The camera is equipped with 4x digital zoom.
Press the Up button to get closer to a subject.
Press the Down button to move away from a subject.
Note: 1080p and QVGA do not support zoom function.
3.1.4 Using the LED light
Use the LED light to illuminate subjects in dark environments.
Press the LED button to choose from the following lighting options:
Off and On mudes.
3.1.5 Quick access controls
You can also make adjustments to exposure and lighting settings by tapping the LCD touch screen.
In Movie modes, tap▲ / ▼ on screen to adjust the EV compensation setting.
3.2 Photo mode
Use Photo mode to capture still pictures and store them in the
internal memory or on an SD card.
3.2.1 Photo mode icons
Use the following picture to familiarize yourself with the Photo
mode icons and symbols.

See the table below for a description of each icon and symbol.
| 1 | Photo mode indicator | |
| 2 | Zoom indicator | |
| 3 | 0042 | Remaining number of photos |
| 4 | Macro indicator | |
| White balance indicator | ||
| Night mode indicator | ||
| Effect indicator | ||
| 5 | Memory status indicator: indicates an SD card is inserted and the available storage capacity of the SD card indicates no inserted SD card and the available internal memory | |
| 6 | SM | Tile size indicator |
| 7 | Battery indicator | |
| 8 | Self timer indicator | |
| 9 | ▲ | EV compensation indicator |
3.2.2 Using the macro function
See section 3.1.2 "Lising the macro function".
3.2.3 Using the zoom function
See section 3.1.3" Using the zoom function".
3.2.4 Using the LED light
See section 3.1.4 "Using the LED light".
3.2.5 Quick access controls
See section 3.1.5 "Quick access controls".
3.3 Movie Playback mode
Use Movie Playback mode to review all the movie files stored in the video camera.
3.3.1 Movie Playback mode icons
Refer to the following picture to familiarize yourself with the Movie Playback mode icons and symbols.

See the table below for a description of each icon and symbol.
| 1 | Movie playback mode indicator | |
| 2 | 00:00:05 | The length of every video clip |
| 3 | 0005/0010 | Displays the number of current movie / total number of recorded video clips |
| 4 | Playback icon. Tap to start playing the video clip. | |
| 5 | Up/Down icons. Tap to go to the previous/next video clips. | |
| 6 | Thumbnail icon. Tap to view all video clips in thumbnails. | |
| 7 | MENU | MENU icon. Tap to enter movie playback menu. |
| 8 | File protect indicator |
3.4 Photo Playback mode
Use Photo Playback mode to review all the image files stored in the video camera.
3.4.1 Photo Playback mode icons
Refer to the following picture to familiarize yourself with the Photo Playback mode icons and symbols.

See the table below for a description of each icon and symbol.
| 1 | Playback mode indicator | |
| 2 | Displays the number of current image / the total number of saved images | |
| 3 | Tap to view the previous/next image | |
| 6 | Thumbnail icon. Tap to view all pictures in thumbnails. | |
| 7 | MENU icon. Tap to enter photo playback menu. | |
| 8 | File protect indicator |
3.5 Thumbnail mode
When in Photo Playback or Movie Playback modes, tap on screen to show images as thumbnails.

- Turn on the video camera and make sure it is in Photo Playback or Movie Playback mode.
- The most recent image /video clip displays on the screen. Press the zoom button left to view six thumbnail images /video clips on the LCD screen.

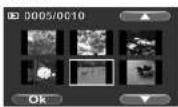
- Press the Up/Down buttons or tap the screen to highlight an image or a video clip. Tap ▲ / □ to view the previous or next page.
-
Press the ENTER button or tap Ok to view the image or playback the video clip in full screen.
-
Tap again to return to thumbnail view.
3.6 USB mode
You can use USB mode to connect to a host PC. When connected to a host PC, the video camera is shown as a removable drive in Windows Explorer.
4 Using the menus
Read this section to learn how to configure the camera settings and use the advanced features.
4.1 Movie menu
When in Movie mode, press the MENU button to show the Movie options menu.
4.1.1. White balance
Use this option to correct colour difference for different lighting conditions. When white balance is set to Auto, the video camera automatically compensates for different lighting conditions.
- Turn the video camera on and ensure it is in Movie mode. Press the MENU button to display the menu options.
- Tap the screen to highlight the White Balance option. Press the ENTER button or tap the screen to display the submenu.
- Use the Up/Down buttons or tap the screen to select Auto, Sunny, Cloudy, Fluorescent, or Tungsten. Press the ENTER button or tap Ok to confirm.

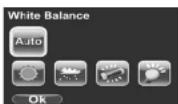
- Press the MENU button again or tap 📄 to exit the menu.
4.1.2. Video resolution
Use the resolution option to determine the resolution of the captured video. The larger screen size requires more memory storage space.
- Turn the video camera on and ensure it is in Movie mode. Press the MENU button to display menu options.
- Use the Up/Down buttons to highlight the Resolution option. Press the ENTER button or tap the screen to display the submenu.
- Use the Up/Down buttons or tap the screen to select 1080P, 720P, WVGA, or QVGA. Press the ENTER button or tap Ok to confirm.
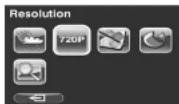

- Press the MENU button again or tap ← to exit the menu.
Notes:
- The LCD displays the 16:9 ratio while setting the video resolution to WVGA, 720P or 1080P.
-
The LCD displays the 4:3 ratio while setting the video resolution to QVGA. QVGA (120 fps) high frame rate mode, is suitable for shooting fast motion videos such as sport activities and traffic flow. The video plays back in silent slow motion video.
-
1080p and QVGA mode do not support Digital Zoom function.
4.1.3. Colour effect
The camera can capture standard colour images, black and white images, or sepia time to give an old-fashioned look.
- Turn the video camera on and ensure it is in Movie mode. Press the MENU button to display the menu options.
- Use the Up/Down buttons to highlight the Effect option. Press the ENTER button or tap the screen to display the submenu.
- Use the Up/Down buttons or tap the screen to select Colour, B&W or Sepia. Press the ENTER button or tap Ok to confirm.


- Press the MENU button again or tap ☐ to exit the menu.
4.1.4. Night mode
Use this function to shoot a better video clip quality in dark environments.
- Turn the video camera on and ensure it is in Movie mode. Press the MENU button to display the menu options.
- Use the Up/Down buttons to highlight the Night Mode option. Press the ENTER button or tap the screen to display the submenu.
- Use the Up/Down or tap the screen to select Off or On option. Press the ENTER button or tap Ok to confirm.


- Press the MENU button again or tap ☐ to exit the menu.
4.1.5. Video quality
Use this function to record video clips. Higher quality video requires more memory storage space and higher speed SD card
- Turn the video camera on and ensure it is in Movie mode.
- Press the MENU button to display the menu options.
- Use the Up/Down buttons to highlight the Quality option. Press the ENTER button or tap the screen to display the submenu.
- Use the Up/Down buttons or tap the screen to select Fine or Normal options. Press the ENTER button or tap Ok to confirm.
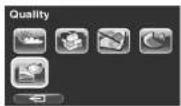
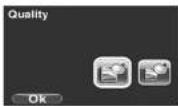
- Press the MENU button again or tap ☐ to exit the menu.
4.2 Movie playback menu
Use the playback menu to manage the files stored in the internal memory or on the SD card.
4.2.1 Delete
Use this function to delete files.
- Turn the video camera on and ensure it is in Movie mode. Press the Playback button and then press the MENU button or tap the screen to display the Movie Playback menu.
- Use the Up/Down buttons or tap the screen to select Delete One or Delete All options.
If you select Delete One, the playback screen appears again. Use the Up/Down buttons or tap 📄/ 📃 to select the file you want to delete. Press the ENTER button or tap the Delete icon to delete the selected video clip.
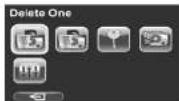
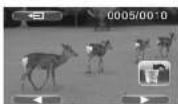
If you select Delete All, use the Up/Down buttons or tap the Delete icon and press the ENTER button or tap Ok to delete all video clips.
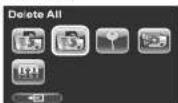
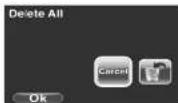
- Press the MENU button again or tap 📄 to exit the menu.
Note: Once deleted, files cannot be recovered so make sure you have a backup before you delete. Files that have been protected will not be deleted. You have to unlock the files first before deleting them.
4.2.2 Protect
Use this function to lock files to prevent accidental deletion.
- Turn the video camera on and ensure it is in Movie mode. Press the Playback button and then press the MENU button or tap the screen to display Movie Playback menu.
- Use the Up/Down buttons or tap the screen to select the Protect option. Then playback screen appears again.
- Use the Up/Down buttons or tap / to select the file you want to protect.
- Press the ENTER button or tap the Protect icon to confirm. A lock 🔒 icon is displayed to show that the file is protected.
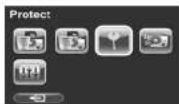

Note: To unlock a file, repeat the above steps. The lock icon disappears when the file is unlocked.
- Press the MENU button again or tap → to exit the menu.
4.2.3 Autoplay
Use this function to continuously play all movie clips stored in the memory card.
- Turn the video camera on and ensure it is in Movie mode. Press the Playback button and then press the MENU button or tap the screen to display the Movie Playback menu.
- Use the Up/Down buttons or tap the screen to select the Autoplay option. The video camera starts continuous playing of movie clips.


- Press the REC./STOP button to pause the movie clip. Press the REC./STOP button again to resume the playback. Press the ENTER button or tap the screen to stop and return to Movie Playback mode.
Note: You may also use on-screen icons to rewind / pause / fast-forward / stop while playing the video clip.
4. Press the MENU button again or tap 📋 to exit the menu.
4.2.4 Volume
Use this function to adjust the volume of the video clips in playback mode.
- Turn the video camera on and ensure it is in Movie mode. Press the Playback button and then press the MENU button or tap the screen to display the Movie Playback menu.
- Use the Up/Down buttons highlight the Volume option. Press the ENTER button or tap the screen to display the submenu.
- Use the Up/Down buttons or tap ▲/ to increase/decrease the volume. Press the ENTER button or tap OK to confirm.
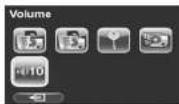

- Press the MENU button again or tap 📄 to exit the menu.
4.3 Photo menu
In Photo mode, press the MENU button to show the Photo Options menu.
4.3.1 White balance
Use this option to correct colour difference due to lighting conditions.
- Turn the video camera on and ensure it is in Photo mode. Press the MENU button to display the menu options.
- Use the Up/Down buttons to highlight the White Balance option. Press the ENTER button or tap the screen to display the submenu.
- Use the Up/Down buttons or tap the screen to select Auto, Sunny, Cloudy, Fluorescent, or Tungsten. Press the ENTER button or tap Ok to confirm.


- Press the MENU button again or tap 📄 to exit the menu.
4.3.2 Resolution
Use this option to set the size of the captured image. Larger images contain more details and therefore use more memory space.
- Turn the video camera on and ensure it is in Photo mode.
- Press the MENU button to display the menu options.
- Use the Up/Down buttons to highlight the Resolution option. Press the ENTER button or tap the screen to display the submenu.
- Use the Up/Down buttons or tap the screen to select 3M, 5M or 12M. Press the ENTER button or tap Ok to confirm.
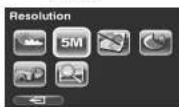

- Press the MENU button again or tap → to exit the menu.
4.3.3 Colour effect
The camera can capture standard colour images, black and white images, or spia tone to give an old-fashioned look.
- Turn the video camera on and ensure it is in Photo mode.
- Press the MENU button to display the menu options.
-
Use the Up/Down buttons to highlight the Effect option. Press the ENTER button or tap the screen to display the submenu.
-
Use the Up/Down buttons or tap the screen to select Colour, B & W, or Sepia. Press the ENTER button or tap Ok to confirm.


- Press the MENU button again or tap 📄 to exit the menu
4.3.4 Night mode
Use this function to shoot a better photo clip quality in dark environments.
- Turn the video camera on and ensure it is in Photo mode.
- Press the MENU button to display the menu options.
- Use the Up/Down buttons to highlight the Night Mode option. Press the ENTER button or tap the screen to display the submenu.
- Use the Up/Down buttons or tap the screen to select Off or On option. Press the ENTER button or tap Ok to confirm.


- Press the MENU button again or tap → to exit the menu.
4.3.5 Seltimer
Use the self timer function to take a photo of yourself.
- Turn the video camera on and ensure it is in Photo mode.
- Press the MENU button to display the menu options.
- Use the Up/Down buttons to highlight the Selftimer option. Press the ENTER button or tap the screen to display the submenu.
- Use the Up/Down buttons or tap the screen to select Off, 5 seconds, or 10 seconds options. Press the ENTER button or tap Ok to confirm.


- Press the MENU button again or tap ☑ to exit the menu.
4.3.6 Photo quality
Use this set the photo quality. Higher quality pictures requires more memory storage space and higher speed SD card
- Turn the video camera on and ensure it is in Photo mode.
- Press the MENU button to display the menu options.
- Use the Up/Down buttons to highlight the Quality option. Press the ENTER button or tap the screen to display the submenu.
- Use the Up/Down buttons or tap the screen to select Fine or Normal options. Press the ENTER button or tap Ok to confirm
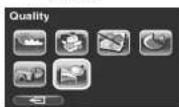

- Press the MENU button again or tap → to exit the menu.
4.4 Photo playback menu
4.4.1 Delete
Use this function to delete files.
- Turn the video camera on and ensure it is in Photo mode. Press the Playback button and then press the MENU button or tap the screen to display the Photo Playback menu.
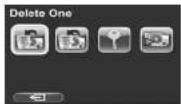
- Use the Up/Down buttons or tap the screen to select Delete One or Delete All options.
If you select Delete One, the playback screen appears again. Use the Up/Down buttons or tap 📄/ 📈 to locate the file you want to delete. Press the ENTER button or tap the Delete icon to delete the selected image.

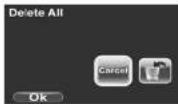
If you select Delete All, use the Up/Down buttons or tap the Delete icon and press the ENTER button or tap Ok to delete all images.

- Press the MENU button again or tap 📄 to exit the menu.
Note: Once deleted, files cannot be recovered so make sure you have a backup before you delete. Files that have been protected will not be deleted. You have to unlock the files first before deleting them.
4.4.2 Protect
Use this function to protect files.
- Turn the video camera on and ensure it is in Photo mode. Press the Playback button and then press the MENU button or tap the screen to display the Photo Playback menu.
- Use the Up/Down buttons or tap the screen to select the Protect option. Then playback screen appears again.
- Use the Up/Down buttons or tap / to select the file you want to protect.
- Press the ENTER button or tap the Protect icon to confirm. A lock 🔒 icon is displayed to show that the file is protected.


Note: To unlock a file, repeat the above steps. The lock icon disappears when the file is unlocked.
- Press the MENU button again or tap → to exit the menu.
4.4.3 Slide show
The camera includes a slide show function, which displays each image in turn with a regular interval between pictures.
- Turn the video camera on and ensure it is in Photo mode. Press the Playback button and then press the MENU button or tap the screen to display the Photo Playback menu.
- Use the Up/Down buttons to select the Autoplay option and press the ENTER button or tap the screen to confirm The images will be displayed automatically.


-
Press the ENTER button or tap the screen to stop the slideshow.
-
Press the MENU button again or tap ☑ to exit the menu.
4.5 System menu
The system menu is used to configure miscellaneous camera
functions.
4.5.1 Setting the beep
See section 2.6.3 "Setting the Beep".
4.5.2 Date/time
See section 2.6.1 "Setting the date and time"
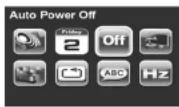
4.5.3 Auto power off
Use this function to switch the camera off automatically after a
period of inactivity for power saving.
- Turn on the video camera and press the Mode button to go to SET mode.
- Use the Up/Down buttons or tap the screen to highlight the Auto Power Off option. Press the ENTER button or tap the screen to display the submenu.
- Use the Up/Down buttons or tap the screen to select Off, 1 minute, or 5 minutes. Press the ENTER button or tap Ok to confirm.

4.5.4 TV standard
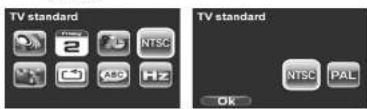
Use the TV option to set the TV system for the area.
- Turn on the video camera and press the Mode button to go to SET mode.
- Use the Up/Down buttons to highlight the TV standard option. Press the ENTER button or tap the screen to display the submenu.
- Use the Up/Down buttons or tap the screen to select NTSC or PAL, and press the ENTER button or tap Ok to confirm.
4.5.5 Format
Use this function to format the current storage media. This format action will delete everything on the media.
- Turn on the video camera and press the Mode button to go to SET mode.
- Use the Up/Down buttons to highlight the Format option. Press the ENTER button or tap the screen to display the submenu.
- Use the Up/Down buttons to select Cancel, or SD, and press the ENTER button or tap Ok to confirm.
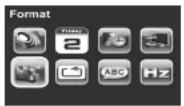

- The current media (memory card or internal memory) is formatted.
Note: When no SD card is inserted, internal memory option will be displayed in the Format submenu.
4.5.6 Default
Use this option to reset all settings to the default settings.
- Turn on the video camera and press the Mode button to go to SET mode.
- Use the Up/Down buttons to highlight the Default option. Press the ENTER button or tap the screen to display the submenu.
- Use the Up/Down buttons or tap the screen to select Cancel or Ok, and press the ENTER button or tap Ok to confirm.


4.5.7 Language
See section 2.6.2 "Setting the language".
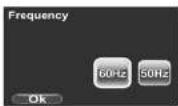
4.5.8 Frequency
Use the Frequency option to set the frequency system for your area.
To set the frequency:
- Turn on the video camera and switch to SET mode.
- Use the Up/Down buttons or tap the screen to highlight the Frequency option. Press the ENTER button or tap the screen to display the submenu.
- Use the Up/Down buttons or tap the screen to select NTSC or PAL. Press the ENTER button or tap Ok to confirm.

Appendix
Specifications
| General | |
| Imaging sensor | 1/3.2" CMOS 5.0 Megapixel sensor |
| Active pixels | 5.0 Megapixel |
| Storage media | Built-in 128 MB flash memory (approx. 75 MB available for image storage)SD Card, SDHC compatible (up to SDHC 16GB Class 6) |
| Sensor sensitivity | Auto |
| Colour effects | Colour/B&W/Sepia |
| Lens | Fixed lensWide: F/3.2, f=5.1mm |
| Focus range | Normal: 1.5m~infinityMacro: 20-21cm |
| Still image Formats: JPEG (EXIF 2.2), DCFResolution: 3M, 5M, 12M (Firmware interpolation) | |
General
| Movie clips Format: H.264 (AVI) | |
| Resolution: QVGA (120 fps), WVGA (60 fps), HD 720p (30 fps), HD 1080p (30 fps) | |
| Zoom Movie: Digital Zoom 4X (except 1080p and QVGA) | |
| Camera: Digital Zoom 4X | |
| TFT Monitor 3" TFT LCD Touch Display (960 x 240 pixels) (16:9) | |
| LED Light < 1.0 m range | |
| White balance | Auto/Sunny/Cloudy/Tungsten/ Fluorescent |
| EV compensation | -2.0 EV~+2.0 EV |
| Self-timcr | Off, 5, 10 seconds |
| PC interface M | SDC: USB 2.0 (high speed) |
| TV out format | NTSC/PAL / HDMI |
| Shutter speed | Still: 2 ~ 1/4000 secondVideo: 1/15 ~ 1/2000 second |
| Auto power off | Off, 1 min., 5 min. |
| Power supply | Li-ion Battery or DC-in via USB |
General
| Dimension 17 | (W) x 107 (H) x 57 (D) mm | |
| Weight | Approx. | 97±5g (without batteries) |
Troubleshooting
| Problem Possible Cause Solution | ||
| Cannot turn on the video camera. | The batteries are not inserted correctly.The batteries have no power. | Insert the batteries correctly. (See 2.2 Inserting the batteries.)Replace the batteries |
| The camera suddenly turns off. | The auto power off function was enabled.The camera is running out of battery power. | Turn the power on again.Replace the batteries. |
| The captured image is not stored in memory. | Before the image is saved the power has been cut off. | When the battery indicator turns red, replace the batteries immediately. |
| The camera turns off when capturing image using self-timer. | The camera is running out of battery power. | Replace the batteries. |
| The image is out of focus. | The subject is beyond focus range. | Please take a picture within the available focus range and choose normal or macro mode.(See 3.2.2 Using the macro function). |
| Memory card cannot be used. | The memory card is protected.The memory card contains non-DCF images taken by other cameras. | Unlock the memory card.Format the memory card. (See 4.5.5 Format.)Before formatting the card, ensure you back up the files. |
| All buttons are inactive. | Short circuit occurred when connecting the camera with other devices. | Remove the batteries from the camera and insert again. |

SDHC Logo is a trademark of SD-3C, LLC.
ArcSoft Total Media™ HDCam 2.0

Quick Start Guide
Introduction
ArcSoft Total Media™ HDCam is a desktop software that combines media management and playback capabilities.
Media management
You can import the media files from the device to edit, upload, and produce photo books and album pages.
Playback capability
You can view pictures and play video clips using ArcSoft Total Media™ HDCam.
System Requirements
Operating System : Windows XP SP2, Vista, and Windows 7
CPU: Intel / AMD Dual-Core or above
Memory: At least 1GB
Graphic Card: DirectX 9 or DirectX 10 (recommended)
Interface: Standard USB 1.1 port or higher
Hard Disk: At least 2GB of available disk space
Installation
To install Total Media™ HDCam:
-
Connect your device to the desktop or notebook PC.
-
Insert the installation CD into the DVD-ROM/CD-ROM
drive.
-
The CD runs automatically.
-
Follow the instructions to complete the installation.
If the CD does not automatically run, follow the steps below to install the software:
- Double click My Computer.
- Use the mouse to point to the DVD-ROM/CD-ROM drive.
- Right click the mouse then click Open.
- Double click TotalMediaHDCam.exe.
- A wizard appears to guide you through the installation procedure.
- Follow the instructions to complete the installation.
To Uninstall
To uninstall Total Media™ HDCam:
-
Click Start > Programs > ArcSoft Total Media HDCam >
Uninstall. -
A wizard appears to guide you through the uninstall procedure.
-
Follow the instructions to complete the uninstall.
Language
To change the interface language after installation:
-
Click Options > Preferences on the main screen.
-
Select a language then click OK.
Registration and Upgrade
To register or upgrade
-
Click 📋 on the main screen to connect to Information
Center. -
Select Upgrade, Patches, or Registration.
Media Browser

| # | Area Function | |
| 1 | View Mode Area | Provides three modes to view media files. |
| 2 | Preview Area Selects | and displays file thumbnails and detailed information. |
| 3 | Function Bar Lists main function buttons. | |
View media files
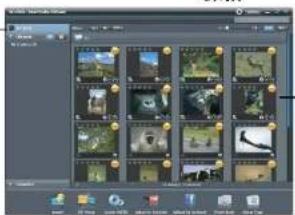
Follow the instructions below to view the media files in your
device:
-
Connect the device to the computer.
-
The device code appears on the top of View Mode Area.
-
Click the device code to display all media files in the device.
Device code
Media files in the device
• To play a video clip, double click the clip or click
• To pause / stop / continue a video clip, click 📄/ 📋/ ▶.
• To play the previous or next clip, click /
• To delete a file, select the file then elie
• To trim a video clip, click.
• To rate a file, click on the file.
• To view a file's properties, click 1 on the file.
• To preview a picture in a new window, double click the
picture.
• To preview the previous or next picture, click the right/left
button.
View modes
Three view modes are available to view media files: Library View,
Calendar View, and Browser View
Note: To view media files in your device using Library or
Calendar View, you need to import media files first.
Library View
The Library View lists My Creation folder and other folders
created while importing files.
• To switch to Library View
-
Click Libraries to expand Libraries window.
-
Select the desired folder.
-
Click to switch to Library View.
• To view or edit a folder's properties, select the folder then click 4 .
• To delete a folder, select the folder then click.
Calendar View
The Calendar View uses the file creation date to organize media files.
• To switch to Library View
-
Click Libraries to expand Libraries window.
-
Select the desired folder.
-
Click to switch to Calendar View.

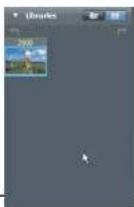
Three modes are available in Calendar View: Year, Month, and Day mode.
To switch between different modes:
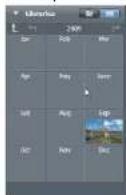
• Click the picture under the desired year to enter Month mode.
• Click → to change to the previous or next year if
available.
• Click the picture under the desired month to enter Day mode.
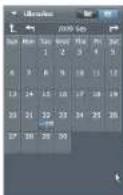
- Click → to change to the previous or next month if
available.
- Click L to return to the previous mode.

Browser View
The Browser View enables you to browse for media files in your computer using the tree view.
To switch to Browser View:
-
Click Computer to expand Computer window.
-
Select the desired folder in your computer to view media
files.
- To refresh the list of media files, click
Preview Area
In Preview Area, several options are available to select and display
file thumbnails and detailed information. See the table below for a description of each option:
| Option | Name | Function |
| Rating filter Displays the media | files according to the selected rating. | |
| New filter Displays the media | files which are new. | |
| Type filter Displays the media | files according to the selected type. | |
| Quick search Displays the media | files according to the typed characters. | |
| Thumbnail slider Adjusts the | thumbnail size by moving the slider. | |
| Thumbnail | Displays thumbnails. | |
| Details | Displays thumbnails with detailed information. | |
Function Bar
The Function Bar lists main function buttons. Click the button to
access the function. See the table below for a description of each
button.
| Button | Name | Function |
| imports media files to the computer from a camera, camcorder, or storage device. | ||
| File Merge | Produces movies with your video files. | |
| Create AVCHD | Bums AVCHD discs with your video files. | |
| YouTube | Upload YouTube | Uploads files to your YouTube account. |
| Upload Facebook | Uploads files to your Facebook account. | |
| Photo Book | Produces photo books with your pictures. | |
| Album Page | Produces album pages with your pictures. | |
Importing media files
To import media files to your computer:
- Select the desired folder.
- Select the desired files.
- Click Import. The import window appears
- Select Import New Scenes, Import
Selected Scenes, or Import All Scenes. - Select or type a folder name.
- Click OK to import files.
Merging video clips

To merge video clips:
- Click File Merge. The work area appears.
- Click and drag the desired video clips into the work area.
- Double click clips to preview and edit, if necessary.
- Click Next to merge the clips.
- Select the device and path to save the merged clip.

Burning AVCHD discs
To burn AVCHD discs:
- Click Create AVCHD. The work area appears.
- Click and drag the desired video clips into the work area.
- Double click clips to preview and edit, if necessary.
- Click Next
- Select the drive to burn the AVCHD disc or select the path to save the files in your computer.


Editing video clips
To edit a video clip:
- Double click a video clip in the work area. The Editing windows

-
Click to select the beginning of the trimmed clip.
-
Click ✗ to select the end of the trimmed clip.
-
Click to save the trimmed clip.

See the table below for a brief description of other tools in the
Editing window
| Button | Name | Function |
Uploading files to YouTube
To upload files to YouTube:
1. Click Upload to YouTube. The work area appears.
2. Click and drag the desired file into the work area.
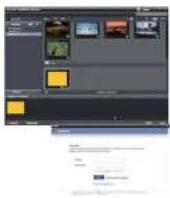
3. Click Next. The YouTube Login window appears.
4. Type your YouTube user name and password.
5. Click Login to sign in to YouTube.
6. Follow YouTube's instructions to upload the file.
Uploading files to Facebook
To upload files to Facebook:
1. Click Upload to Facebook.
The work area appears.
2. Click and drag the desired
file into the work area.
3. Click Next. The Facebook Login window appears.
4. Type your Facebook Email and password.
5. Click Login to sign in to Facebook.
6. Follow Facebook's instructions to upload the file.

Producing photo books
To produce photo books:
-
Click Photo Book. The work area appears.
-
Drag the desired pictures into the work area.
-
Click Next to launch the ArcSoft Print Creations application.
-
Select photo book categories to view photo books.
-
Select a photo book.
-
Click Next to enter Photo Book Design screen.


- See the illustration below for descriptions of photo book

Producing album pages
To produce photo books:
- Click Album Page. The work area appears.
- Drag the desired picture into the work area.
- Click Next to launch the ArcSoft Print Creations application.

- Select album page categories to view album pages.
- Select an album page.
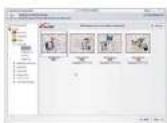
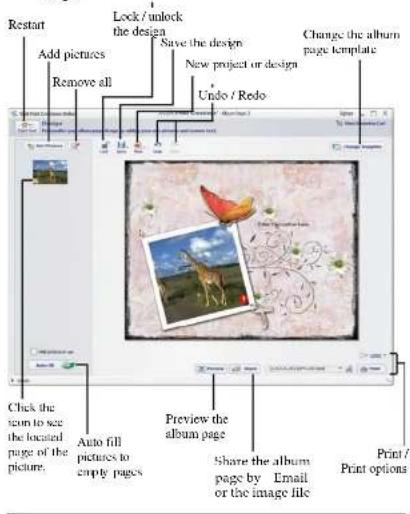
- Click Next to enter Album Page Design screen.

- See the illustration below for descriptions of album page design:
Appendix
IMPORTANT
The mains lead on this equipment may be supplied with a moulded plug incorporating a fuse, the value of which is indicated on the pin face of the plug. Should the fuse need to be replaced, an ASTA or BSI approved BS 1362 fuse must be used of the same rating. If the fuse cover is detachable never use the plug with the cover omitted, if a replacement fuse cover is required, ensure it is of the same colour as that visible on the pin face of the plug. Fuse covers are available from your dealer.
DO NOT cut off the mains plug from this equipment. If the plug fitted is not suitable for the power points in your home or the cable is too short to reach a power point, then obtain an appropriate safety approved extension lead or consult your dealer.
Should it be necessary to change the mains plug, this must be carried out by a competent person, preferably a qualified electrician.
If there is no alternative to cutting off the mains plug, ensure that you dispose of it immediately having first removed the fuse, to avoid a possible shock hazard by inadvertent connection to the mains supply.
IMPORTANT
The wires in this mains lead are coloured in accordance with the following code:
Blue : NEUTRAL
Brown : LIVE
As these colours may not correspond to the coloured markings identifying the terminals in your plug, proceed as follows:
The wire coloured BLUE must be connected to the terminal marked with the letter N or coloured BLUE or BLACK. The wire coloured BROWN must be connected to the terminal marked with the letter L or coloured BROWN or RED.
On no account connect either of these wires to the terminal marked E or by the earth symbol 12 or coloured green or green and yellow.
Alternatively, this equipment may be supplied with a rewretable plug already fitted, which may be removed if not suitable and an alternative fitted in accordance with the preceding instructions.
SOME DOS AND DON'TS ON THE SAFE USE OF EQUIPMENT
This equipment has been designed and manufactured to meet international safety standards but, like any electrical equipment, care must be taken if you are to obtain the best results and safety is to be assured.
\*\*\*\*\*\*\*\*\*\*\*\*\*\*\*
DO read the operating instructions before you attempt to use the equipment.
DO ensure that all electrical connections (including the mains plug, extension leads and interconnections between the pieces of equipment) are properly made and in accordance with the manufacturer's instructions. Switch off and withdraw the mains plug before making or changing connections
DO consult you
DO be careful with glass panels or doors on equipment.
DO route the mains lead so that it is not likely to be walked on, crushed, chafed, or subjected to excessive wear and tear or heat.
\*\*\*\*\*\*\*\*\*\*\*\*\*\*\*
DON'T remove any fixed cover as this may expose dangerous voltages.
DON'T obstruct the ventilation openings of the equipment with items such as newspapers, tablecloths, curtains, etc. Overheating will cause damage and shorten the life of the equipment.
DON'T allow electrical equipment to be exposed to dripping or splashing, or objects filled with liquids, such as vases, to be placed on the equipment.
DON'T place hot objects or naked flame sources such as lighted candles or nightlights on, or close to equipment. High temperatures can melt plastic and lead to fires.
DON'T use makeshift stands and NEVER fix legs with wood screws - to ensure
complete safety always fit the manufacturer's approved stand or legs with the fixings
provided according to the instructions.
DON'T use equipment such as personal stereos or radios so that you are distracted from
the requirements of traffic safety. It is illegal to watch television while driving. DON'T listen to headphones at high volume, as such use can permanently dem
DON: 1 small to large house at high volume, as such use can permanently damage your housing.
DON'T
D-31.4: a real-equilibrium transition on which it is distinguished unless it is specifically stated, that it is designed for unprepared operation or has a standby mode. Switch off, using the
that it is designed for unassessed operations of that unit by mail. Switch over using the switch on the equipment and make sure that your family know how to do this. Special
arrangements may need to be made for infirm or handicapped people.
DON'T continue to operate the equipment if you are in any doubt about it working.
normally, or if it is damaged in any way - switch off, withdraw the mains plug and consult
ABOVE ALL
— NEVER let anyone especially children push anything into holes, slots or any other opening in the case - this could result in a fatal electrical shock;
— NEVER guess or take chances with electrical equipment of any kind
— it is better to be safe than sorry!

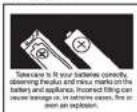
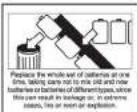
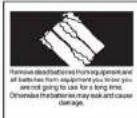
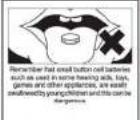
Used correctly, domestic batteries are a safe and dependable source of portable power. Problems can occur if they are misused or abused — resulting in leakage or, in extreme cases, fire or explosion. Here are some simple guidelines to safe battery use designed to eliminate any such problems.




SD Card Capacity & Approximate Number of Recordable Pictures:
| Memory Card Capacity | Photo Resolution | Quality | Approximate number of Recordable Pictures | Occupied Capacity (MB) | Residual Capacity (KB) |
| 1G | 3M | Fine | 911 | 960 | 16384 |
| 5M | 506 | 953 | 18841.6 | ||
| 12M | 253 | 946 | 27136 | ||
| 2G | 3M | Fine | 1712 | 1915 | 14438.4 |
| 5M | 997 | 1915 | 19353.6 | ||
| 12M | 652 | 1905 | 23654.4 | ||
| 4G | 3M | Fine | 3814 | 3860 | 14336 |
| 5M | 2131 | 3850 | 19148.8 | ||
| 12M | 1028 | 3788 | 26419 | ||
| 8G | 3M | Fine | 6817 | 7567 | 14336 |
| 5M | 3920 | 7567 | 18841.6 | ||
| 12M | 1968 | 7557 | 27545.6 | ||
| 16G | 3M | Fine | 13805 | 15462 | 14233.6 |
| 5M | 8629 | 15360 | 19046.4 | ||
| 12M | 4042 | 15360 | 25804.8 |
*The maximum number of photos can only be displayed 9990 on the camera but the actual photoscan be exceeding over 10,000 according to capacity of memory card.
SD Card Capacity & Approximate Recording Time:
| Memory Card Capacity | Video Resolution | Video Quality | Approximate Recordable Time (Minutes) | Occupied Capacity (MB) | Residual Capacity (KB) |
| 1G | QVGA | Fine | 69 | 356 | 276.54 |
| WVGA | 23 | 356 | 709.38 | ||
| 720P | 11 | 356 | 1483.25 | ||
| 1680P | 9 | 356 | 1812.86 | ||
| QVGA | Normal | 67 | 356 | 243.52 | |
| WVGA | 53 | 356 | 307.84 | ||
| 720P | 30 | 356 | 543.86 | ||
| 1680P | 16 | 356 | 1018.73 | ||
| 2G | QVGA | Fine | 116 | 1904 | 280.13 |
| WVGA | 51 | 1904 | 637.16 | ||
| 720P | 23 | 1904 | 1412.82 | ||
| 1680P | 18 | 1904 | 1805.27 | ||
| QVGA | Normal | 161 | 1904 | 201.83 | |
| WVGA | 88 | 1904 | 369.26 | ||
| 720P | 47 | 1904 | 691.38 | ||
| 1680P | 25 | 1904 | 1299.90 | ||
| 4G | QVGA | Fine | 236 | 3829 | 276.90 |
| WVGA | 95 | 3829 | 680.71 | ||
| 720P | 46 | 3829 | 1420.60 | ||
| 1680P | 37 | 3829 | 1766.17 | ||
| QVGA | Normal | 250 | 3829 | 233.44 | |
| WVGA | 208 | 3829 | 314.17 | ||
| 720P | 109 | 3829 | 599.53 | ||
| 1680P | 51 | 3829 | 1281.34 | ||
| 8G | QVGA | Fine | 483 | 7506 | 276.64 |
| WVGA | 193 | 7506 | 963.65 | ||
| 720P | 89 | 7506 | 1438.16 | ||
| 1680P | 73 | 7506 | 1754.69 | ||
| QVGA | Normal | 349 | 7506 | 233.27 | |
| WVGA | 414 | 7506 | 306.38 | ||
| 720P | 213 | 7506 | 806.60 | ||
| 1680P | 113 | 7506 | 1133.90 | ||
| 16G | QVGA | Fine | 837 | 13257 | 316.27 |
| WVGA | 396 | 13257 | 659.21 | ||
| 720P | 182 | 13257 | 1471.10 | ||
| 1680P | 148 | 13257 | 1759.36 | ||
| QVGA | Normal | 958 | 13257 | 271.70 | |
| WVGA | 817 | 13257 | 318.71 | ||
| 720P | 429 | 13257 | 656.96 | ||
| 1680P | 243 | 13257 | 1071.54 |

The above mark is in compliance with the Waste Electrical and Electronic
Equipment Directive 2002/96/EC (WEEE)
The mark indicates the requirement NOT to dispose the equipment
including any spent or discarded batteries as unsorted municipal waste,
but use the return and collection systems available. If the batteries or
accumulators included with this equipment display the chemical symbol Hg.
Cd or Pb, then it means that the battery has a heavy metal content of more
than 0.0005% Mercury, or more than 0.002% Cadmium or more than, 0.004%
Lead.
"Kesa is responsible for after service."
Kesa Electricals S.A.S., 153 rue de Courcelles 75017,
Paris, France.
HITACHI Inspire the Next
www.hitachidigitalmedia.com

- Table of Contents
- Using the menus 32
- Preface
- About this manual
- Copyright
- Precautions
- General precautions
- Notes on the LCD Screen
- Operation conditions
- Power supply
- Before You Start
- Take some test shots before performing a formal recording.
- Copyright information
- Introducing the camera
- System requirements
- Features
- Unpacking the video camera
- About the camera
- Front view
- Top view
- Bottom view
- Right view
- Back view
- LCD Panel
- Adjusting the LCD display
- About the LEDs
- Getting started
- Inserting an SD card
- Inserting the batteries
- Charging the battery
- Turning on the video camera
- Changing modes
- Before you start
- Setting the date and time
- Setting the language
- Setting the beep
- Shoot/Playback video
- Shooting a video clip
- Playing the video clip
- Taking/viewing pictures
- Taking a still picture
- Viewing images
- Connecting to a computer
- Connecting to a standard TV
- Connecting to an HDTV
- Using the camera
- Movie mode
- Movie mode
- Using the macro function
- Using the zoom function
- Using the LED light
- Quick access controls
- Photo mode
- Photo mode icons
- Using the macro function
- Using the zoom function
- Using the LED light
- Quick access controls
- Movie Playback mode
- Movie Playback mode icons
- Photo Playback mode
- Photo Playback mode icons
- Thumbnail mode
- USB mode
- Using the menus
- Movie menu
- White balance
- Video resolution
- Notes:
- Colour effect
- Night mode
- Video quality
- Movie playback menu
- Delete
- Protect
- Autoplay
- Volume
- Photo menu
- White balance
- Resolution
- Colour effect
- Night mode
- Seltimer
- Photo quality
- Photo playback menu
- Delete
- Protect
- Slide show
- System menu
- Setting the beep
- Date/time
- Auto power off
- TV standard
- Format
- Default
- Language
- Frequency
- Introduction
- System Requirements
- Installation
- To Uninstall
- Language
- Registration and Upgrade
- Media Browser
- View media files
- View modes
- Calendar View
- Browser View
- To switch to Browser View:
- Preview Area
- Function Bar
- Importing media files
- To merge video clips:
- Burning AVCHD discs
- Editing video clips
- Uploading files to YouTube
- Uploading files to Facebook
- Producing photo books
- Producing album pages
- IMPORTANT
- SOME DOS AND DON'TS ON THE SAFE USE OF EQUIPMENT
- \*\*\*\*\*\*\*\*\*\*\*\*\*\*\*
- HITACHI Inspire the Next
Brand : HITACHI
Model : DZ-HV584EW
Category : Camera