
ADVD-321 - Unspecified AIWA - Free user manual and instructions
Find the device manual for free ADVD-321 AIWA in PDF.


| Product Type | DVD Player / Home Theater System |
| Brand | Aiwa |
| Model | ADVD-321 |
| Dimensions (W x H x D) | 430 x 55 x 300 mm |
| Weight | 3.5 kg |
| Power Supply | AC 110-240V, 50/60 Hz |
| Power Consumption | 25 W (standby < 1 W) |
| Disc Playback Formats | DVD, DVD+R/RW, DVD-R/RW, CD, CD-R/RW, MP3, JPEG |
| Video Output | Composite, S-Video, Component (YUV) |
| Audio Output | Stereo RCA, Coaxial Digital, Optical Digital |
| Audio Formats Supported | Dolby Digital, DTS, MP3, WMA |
| Remote Control | Included (battery type: AAA) |
| Display | Front panel LED |
| Progressive Scan | Yes (480p/576p) |
| Parental Control | Yes (rating levels) |
| Maintenance & Cleaning | Clean with soft dry cloth; do not use solvents. Use lens cleaning disc for optical pickup. |
| Safety Features | Automatic power off, overheat protection, laser safety class 1 |
| Spare Parts / Repairability | Remote control, power cord, AV cable available. Repairs by qualified technicians only. |
| General Information | Compatible with PAL and NTSC; multi-region playback possible (check user manual). |
Frequently Asked Questions - ADVD-321 AIWA
User questions about ADVD-321 AIWA
0 question about this device. Answer the ones you know or ask your own.
Ask a new question about this device
Download the instructions for your Unspecified in PDF format for free! Find your manual ADVD-321 - AIWA and take your electronic device back in hand. On this page are published all the documents necessary for the use of your device. ADVD-321 by AIWA.
USER MANUAL ADVD-321 AIWA
natural_image
Black electronic device with ports and control buttons, no visible text or symbols on bodyInstruction Manual
Contents
Safety Information 1
Controls And Functions 2
What's In The Box? 7
Instructions Guide 8
Getting Started 8
DVD Operation 8
USB Operation 9
Playing JPEG/Picture CD discs and MP3 discs ..... 10
System Set-up 11
Menu 1: General Set-up.... 12
Menu 2: Audio Set-up....14
Menu 3: Dolby Digital Set-up.... 14
Menu 4: Video Set-up .15......
Menu 5: Preference Set-up....16
Troubleshooting 17
Specification 18
Safety Information
1. Read these instructions.
- Keep these instructions.
- Heed all Warnings
- Follow all instructions
- Do not clean the apparatus near or with water
- Do not block any ventilation openings. Install in accordance with the manufacturer's instructions
- Do not install near any heat sources such as radiators, heat registers, stoves, or other apparatus (including amplifiers) that produce heat.
- Protect the power cord from being walked on or pinched particularly at plugs, convenience receptacles, and the point where they exit from the apparatus.
- Only use attachments/accessories specified by the manufacturer.
- Unplug this apparatus during light storms or when unused for long periods of time.
- Refer all servicing to qualified service personnel. Servicing is required when the apparatus has been damaged in any way, such as power-supply cord or plug is damaged, liquid has been spilled or objects have fallen into the apparatus, the apparatus has been exposed to the rain or moisture, does not operate normally or has been dropped.
- No naked flame sources, such as lit candles, should be placed on the apparatus.
- Dispose of used electrical products and batteries safely according to your local authority and regulations.
- This product is not intended for use by persons (including children) with reduced physical, sensory or mental capabilities, or lack of experience and knowledge, unless they have been given supervision or instruction concerning use of the product by a person responsible for their safety.
- This product is not a toy! Children should be supervised to ensure that they do not play with the product.
CAUTION
RISK OF ELECTRIC SHOCK DO NOT OPEN

ADDITIONAL WARNINGS
The apparatus shall not be exposed to dripping or splashing and no objects filled with liquid, such as vases, shall be placed on the apparatus.
Main plug is used to disconnect device and it should remain readily operable during intended use. In order to disconnect the apparatus from the supply mains completely, the mains plug should be disconnected from the main socket outlet completely.
Battery shall not be exposed to excessive heat such as sunshine, fire or the like.
RECYCLING ELECTRICAL PRODUCTS
You should now recycle your waste electrical goods and in doing so help the environment.

This symbol means an electrical product should not be disposed of with normal household waste. Please ensure it is taken to a suitable facility for disposal when finished with.
IMPORTANT: Please read all instructions carefully before use and keep for future reference.

Risk of electric shock. Do not open

Read all instructions carefully before use and keep for future reference

When servicing, use only identical replacement parts

IMPORTANT: Please read all instructions carefully before use and keep for future reference
ATTENTION
RISQUE D'ELECTROCUTION NE PAS OU VRIR

Controls And Functions
Front Panel

-
Power On/Standby
-
Disc Tray
-
Open/Close Disc Tray
-
Play/Pause
-
Stop
-
L/R Audio
-
Remote Sensor
-
LED Display
-
USB Port
Rear Panel

(Y.Pb/Cb.Pr/Cr) Output 11. HDMI Output
-
2.0 CH Audio Output10. Component Video
-
Composite Video Output
Controls And Functions
Remote Control

Controls And Functions
1. POWER
Press to Power On, press again for Standby mode.
2. OSD
Press for information of the disc to display
3. STEP
Press to play picture by picture. Press Play to return to normal playback.
4. DVD/USB
Press to switch between disc and USB playback (if media is inserted).
5. MUTE
Mute sound during playback
6. TITLE
When using DVDs, press to return to the title menu.
7. LEFT (<)
Left direction within selection menu
8. SETUP
Press to access Setup menu
9. L/R
Use for VCD discs. Press this button to change audio output mode:left,right, stereo or mixer soundtrack
10. PREVIOUS (I<<)
In DVD mode, press to go to previous chapter. With SVCD, VCD, CD, MP3 discs, press to go to previous track.
11. VOLUME DOWN (-)
Decrease volume
12. NEXT (>>I)
In DVD mode, press to go to next chapter. With SVCD, VCD, CD, MP3 discs, press to go to next track.
13. PLAY/PAUSE
Press once to pause, press again to play
14. VIDEO
Press this button to switch between CVBS (composite) and YUV (component) video outputs.
15. PROGRAMME
Customise the playback sequence, if the disc has multiple tracks / chapters / titles. Press this button, then input the number of the track, title or chapter. Use the direction buttons to move the cursor to the Start Button and press 'Enter' to start programmed play.
16. REPEAT
Press repeatedly in DVD mode to scroll through: repeat a title, chapter, track or to the beginning. In SVCD, VCD or CD mode: track repeat, all repeat or repeat cancel.
17. PBC
VCD mode: Playback control
Controls And Functions
18. LANGUAGE
Press to select on-screen display language options
19. SUBTITLE
Press to begin showing subtitles
20. OPEN/CLOSE
Press to load and remove discs. Place disc into tray with the title side facing up. Press button again to close.
21. NUMBERS 0-9/10+
While playing DVD/VCD/CD/MP3 discs, use key to select desired track/chapter in menu selection.
22. TIME
Press to manually set up the time on the DVD player display unit
23. MENU
Enter menu settings in DVD mode
24. UP (∧)
Up direction within selection menu
25. RIGHT (>)
Right direction within selection menu
26. ENTER
Confirm your selection
27. ZOOM
Press to zoom in, press again to zoom out. Use arrow keys to move picture.
28. DOWN
Down direction within selection menu
29. N/P
Press to switch the TV system between NTSC and PAL. Australia uses PAL.
30. REWIND
Press for rewind search
31. VOLUME UP (+)
Increase volume
32. FASTFORWARD
Press for quick forward search
33. STOP
Press to stop media. Press the Play/Pause button to resume.
34. A-B
Press to repeat certain sections. Press button on start point (A) and the end point (B) to select section. Cancel by pressing button a third time.
35. CLEAR
Press to clear input selections
36. SLOW
Press to select slow speed playing.
37. RETURN
Press to return to VCD menu.
38. RESET
Press to reset your DVD player settings
39. ANGLE
Change viewing angle during DVD playback (disc-dependent function)
Controls And Functions
Remote Control Operation
Insert the batteries into the battery compartment. 2 x AAA batteries are required.
Point the remote at the remote sensor in front of the player and make sure there are no obstacles in the way between the remote and the player. The distance between the remote and the sensor must not exceed 3m.
To prevent damage to the remote control, please remove the batteries when not in use for long periods of time.
What's In The Box?
Box Contents
- AIWA DVD Player
- Remote Control
-
warranty card
-
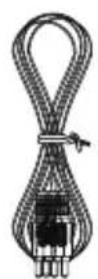
RCA AV cable
-
Instruction Manual
-
AIWA DVD Player

natural_image
Line drawing of a rectangular electronic device with ports and indicator lights (no text or symbols)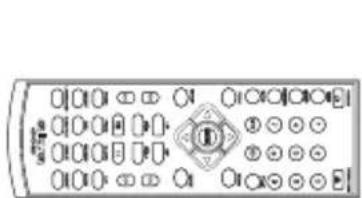
natural_image
Front view of a classic remote control with no visible text or symbols on the device surface- Remote Control

4. Instruction Guide
-
RCA AV Cable
-
warranty card

Instructions Guide
Getting Started
Setting Up
Connect the power plug of the DVD player to a wall outlet. The power indicator will illuminate.
Follow the below guidance for cable connections to get your DVD player set up:
Cable Connection Options:
Option 1: Using an HDMI cable (not provided), connect the HDMI Output on the rear of the DVD player to an HDMI input on your TV or other display.
Option 2: Connect the 3 Component Video Outputs on the DVD player to the corresponding inputs on your TV, using Component video (RCA) cable. You will also need an audio connection - connect the Audio Outputs (L & R) to the corresponding inputs on your TV, using the provided RCA cable.
Option 3: Using the provided RCA cable, connect the Composite Video Output and Audio Outputs (L & R) to the corresponding inputs on your TV.
DVD Operation
Once your DVD player has been connected to the TV and to a power source, the product is ready for use.
The following DVD formats can be played: DVD, DVD-R-RW, CD Video, Mpeg4, DivX.
Please follow the steps below to complete the set up of the DVD player:
-
Ensure that your TV is set to the correct mode for DVD playback.
-
Plug in the DVD player and press the 'Power' button to turn the unit on. You can do this on the unit or via the remote (Rem.1).
When the machine is switched on, pressing the POWER button on the remote control will make it go into standby mode. Press the button again and the machine will switch on.
WARNING: If the product is not going to be used for a long period of time, it is advisable to unplug it for safety
-
Press the Open/Close button on the front panel or on the remote control (Rem.20) and place a DVD disc on the disc tray. Press the Open/Close button again to close the tray.
-
The DVD will read the DVD disc and begin play. You can control the playback and settings via the buttons of the remote control.
USB Operation
This product has a USB port on the front panel for MP3/ Movies playback.
Insert a USB into the USB port on the front panel of the DVD player.
Press the DVD/USB button on the remote control (Rem.4) to enter the USB source. The DVD player will read and display the file list off the USB unit.
Browse the file list by pressing the ▲/▼/◄/► buttons (Rem. 7, 24, 25, 28) on the remote control. Select a file by pressing the Enter button ( Ref the remote control.
The Max capacity for USB device can not exceed 16GB.
Playing JPEG/Picture CD discs and MP3 discs
Playing JPEG/Picture CD discs
The following formats can be played: Jpg, Jpeg, CD Photo
Press the STOP button and 12 small pictures will show on the TV screen.
Press the ▲/▼/◄/► buttons to select the desired picture to view.
To access instructions menu, use the ▲buttons to 'Instruction' and then press the ENTER button to confirm. The following options will display:
- PROG - Select to change picture transform mode
- STOP - Entering picture preview mode
- PREV - Previous picture
- NEXT - Next picture
- PLAY - Play picture
- UP - Mirror image in vertical
- DOWN - Mirror image in horizontal
- LEFT - Rotate 90 degrees anticlockwise
- RIGHT - Rotate 90 degrees clockwise
- ZOOM - Change zoom mode
- FAST FORWARD - Zoom in the picture
- FAST REWIND - Zoom out the picture
- ▲/▼/◄/► - Move zoom focus for picture.
Playing MP3 Discs
The following formats can be played: Mp3, WMA, CD Audio, CD-R-RW, CD
Whilst an MP3 disc is playing, there is a menu screen on the TV. Press the ▲/▼ buttons (Rem. 24/28) to scroll through tracks or folders. Press the ENTER button to select the track or folder.
Press the PROG button in files play mode. The screen will then display the total track number and the current playing track. Use the digit buttons (Renhe2/in and select the track or use the ▲/▼/◄/► buttons to shift to the track and press the ENTER button to play the track.
System Setup
Menu Operation
Press the SETUP button (Rem.8) on the remote control and the SETUP menu will display.
There are five different menus in the setup: General, Audio, Dolby, Video and Preference. Follow the instructions in the individual paragraphs for a choice of set up options:
- Menu 1: General
- Menu 2: Audio
- Menu 3: Dolby
- Menu 4: Video
- Menu 5: Preference
After accessing the SETUP menu, press the ▲/▼/◄/► buttons to your chosen sub-menu. Follow by pressing the ENTER button to confirm your selection.
To end the setup, press the SETUP button again.
Follow the below guidance for General, Audio, Dolby, Video and Preference settings.
Menu 1: General Setup
- Press SETUP, then press the ▲/▼/◄/► buttons on the remote control to open the 'General' menu.
- Seven submenus will appear that you can select between. Press the ▲/▼ buttons on the remote control to scroll between the sub-menus:
a) TV Display
Different values will show here depending on your TV set:
• 4:3/PS: When connecting to an older 4:3 TV, the wide-screen image shows on the full screen, but some part is cut off.
- 4:3/LB: When connecting to an older 4:3 TV, the wide-screen image shows and black bars appear on the top and bottom of screen.
• 16:9: Use this item when the unit is connected to the wide-screen TV set.
b) Angle Mark
In DVD mode, use to view DVD from different angles (disc dependent).
c) OSD Lang
Select a language for the on-screen display language (English, French, German, Italian, Spanish or Portuguese).
d) Captions
The default setup is Caption off. You can display closed captions (if available).
e) Screen saver
Select a screen saver for when the TV display goes into standby or a disc is not played for several minutes. Press any button on the remote control to wake it up.
f) HDCD
Select an output audio signal. You can select the digital filter to be 1x or 2x.
g) Last Memory
If the last memory is set when the unit is on and the unit is switched off, the last position on the DVD player will be memorised.
- When you enter a sub-menu, a number of options will appear for the entered sub-menu.
Menu 2: Audio Setup
-
Press SETUP, then press the buttons on the remote control to open the 'Audio' menu.
-
Two different submenus will appear on the menu. Press the ▲/▼ buttons on the remote control to scroll to browse between the sub-menus to select the stereo output:
a) LT/RT:
The audio output is Left and Right channels format. Switch between left/right audio channels.
b) Stereo:
Select to play the audio in Stereo mode.
Menu 3: Dolby Digital Setup
-
Press SETUP, then press the buttons on the remote control to open the 'Dolby' menu.
-
Two different submenus will appear on the menu. Press the ▲/▼ buttons on the remote control to scroll to browse between the sub-menus to select the stereo output:
a) Dual Mono
- Stereo: sets audio output to the stereo output
• L-Mono: sets audio output to the mono-left channel
• R-Mono: sets audio output to the mono-right channel - Mix-Mono: sets audio output to the Mix mono channel
b) Dynamic
This mode is recommended for reduced sound to avoid disturbance during night time viewing. This setting can dynamically lower the volume and still keep the original tone quality.
Menu 4: Video Setup
- Press SETUP, then press The buttons on the remote control to open the 'Video' menu.
- Two different submenus will appear on the menu. Press the ▲/▼ buttons on the remote control to scroll to browse between the sub-menus to select the stereo output:
a) Component
Adjust the video output when connecting to video terminals.
YUV: set video output in analogue component video format when connecting to Component Video outputs.
b) Resolution (HDMI output)
You can choose the following resolution levels from the HDMI output: 480I/576I/576P/720P(50Hz)/720P(60Hz)/1080I(50Hz)/1080I(60Hz)/1080P(50Hz)/1080P (60Hz)
c) Quality
You can set the sharpness, brightness and contrast according to your preference.
d) HDMI Setup
HDMI: factory default setting is ON, you can reset to OFF if necessary. AUDIO Source: You can choose between Auto and PCM.
Menu 5: Preference Setup
-
Press SETUP, then press the buttons on the remote control to open the 'Preference' menu.
-
Two different submenus will appear on the menu. Press the ▲/▼ buttons on the remote control to scroll to browse between the sub-menus to select the stereo output:
a) TV Type
This unit is suitable for all makes for TV's. You can select PAL or NTSC if necessary. PAL needs to be selected for use in Australia.
b) Audio
These are the initial settings for your preference. If a setting is supported by disc content, it will alter audio settings.
c) Subtitle
These are the initial settings for your preference. If a setting is supported by disc content, it will alter subtitles. Alternatively, press the SUBTITLE button.
d) Disc Menu
These are the initial settings for your preference. If a setting is supported by disc content, it will alter the disc menu.
e) Parental
Select to control parental control settings. Any disc with the parental level higher than the set level will not be played.
f) Password Set-up
The initial factory password is 0000. You can change the password here.
g) Default Set-up
Select to revert to original factory set up on this unit.
Note: all settings will be reset to default.
Troubleshooting
Troubleshooting
| Malfunction Possible | causes/measures |
| No power / function | Check whether the power is switched on or off at the wall.Check whether the power adaptor is properly connected to power outlet or not. |
| No video | Make sure that the video cables are connected correctly.Check that the input selection on the TV is correct.Reset the DVD Player to factory settings (Setup > Preferences > Default) |
| No audio | Make sure that the audio cables are connected correctly.Make sure that the coaxial connected stereo is powered on.Reset the DVD Player to factory settings (Setup > Preferences > Default) |
| Distorted video | Clean DVD disc from dust/dirtThe playback is fast winding backward/forward. |
| Unable to play | Place a DVD disc in the disc tray.Place the disc the correct side upClean DVD disc from dust/dirtClose the disc tray of the DVD player.Check that the file is compatible with the unit. |
| Remote Control does not work | Aim the Remote Control towards the front panel of the DVD player.Use the Remote Control closer to the DVD player.Check the battery level of the batteries |
Specifications
Specification
| Power Supply | AC 100-240V |
| Frequency Response | ~50/60Hz |
| Power Consumption | 10W |
| AV Connections | HDMI outputComponent Video outputComposite Video outputStereo (L/R) Audio outputUSB input |
| Compatible Formats DVD: DVD, DVD-R-RW, CD Video, Mpeg4, DivXAUDIO: Mp3, WMA, CD Audio, CD-R-RW, CDPHOTO: Jpg, Jpeg, CD Photo | |
| Dimension (WxHxD) | 36 X 17.5 X 3.8cm |
aiwa
- Contents
- Safety Information
- Read these instructions.
- CAUTION
- ADDITIONAL WARNINGS
- RECYCLING ELECTRICAL PRODUCTS
- ATTENTION
- Controls And Functions
- Front Panel
- Rear Panel
- Remote Control
- POWER
- OSD
- STEP
- DVD/USB
- MUTE
- TITLE
- LEFT (<)
- SETUP
- L/R
- PREVIOUS (I<<)
- VOLUME DOWN (-)
- NEXT (>>I)
- PLAY/PAUSE
- VIDEO
- PROGRAMME
- REPEAT
- PBC
- LANGUAGE
- SUBTITLE
- OPEN/CLOSE
- NUMBERS 0-9/10+
- TIME
- MENU
- UP (∧)
- RIGHT (>)
- ENTER
- ZOOM
- DOWN
- N/P
- REWIND
- VOLUME UP (+)
- FASTFORWARD
- STOP
- A-B
- CLEAR
- SLOW
- RETURN
- RESET
- ANGLE
- Remote Control Operation
- What's In The Box?
- Box Contents
- Instructions Guide
- Getting Started
- Setting Up
- Cable Connection Options:
- DVD Operation
- USB Operation
- Playing JPEG/Picture CD discs and MP3 discs
- Playing JPEG/Picture CD discs
- Playing MP3 Discs
- System Setup
- Menu Operation
- Menu 1: General Setup
- a) TV Display
- b) Angle Mark
- c) OSD Lang
- d) Captions
- e) Screen saver
- f) HDCD
- g) Last Memory
- Menu 2: Audio Setup
- Menu 3: Dolby Digital Setup
- b) Dynamic
- Menu 4: Video Setup
- a) Component
- b) Resolution (HDMI output)
- c) Quality
- d) HDMI Setup
- Menu 5: Preference Setup
- g) Default Set-up
- Troubleshooting
- Specifications
Brand : AIWA
Model : ADVD-321
Category : Unspecified