
SL300R T - Camera CONTAX - Free user manual and instructions
Find the device manual for free SL300R T CONTAX in PDF.
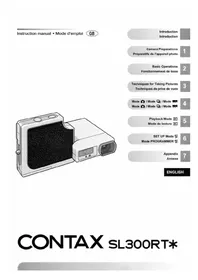


| Product Type | Digital Camera |
| Brand | Contax |
| Model | SL300R T |
| Effective Megapixels | 3.2 MP |
| Optical Zoom | 3x |
| Digital Zoom | 2x |
| LCD Screen | 1.5-inch TFT |
| Lens | 6.3-18.9mm f/2.8-4.7 |
| Shutter Speed | 1/2 - 1/2000 sec |
| ISO Sensitivity | 100, 200, 400, 800 |
| Storage Media | SD/MMC card |
| Power Source | 2 AA batteries (NiMH recommended) |
| Dimensions (W x H x D) | 94 x 57 x 33 mm |
| Weight (without batteries) | 145 g |
| Interface | USB 1.1 |
| Video Output | NTSC / PAL |
| Flash | Built-in (Auto, On, Off, Red-eye reduction) |
| Self-Timer | 10 sec |
| Cleaning | Use a soft, dry cloth. Avoid solvents. |
| Safety | Do not disassemble. Keep away from water. |
| Spare Parts / Repairability | Contact authorized service centers for parts. |
| General Information | Manual available at notice-facile.com |
Frequently Asked Questions - SL300R T CONTAX
User questions about SL300R T CONTAX
0 question about this device. Answer the ones you know or ask your own.
Ask a new question about this device
Download the instructions for your Camera in PDF format for free! Find your manual SL300R T - CONTAX and take your electronic device back in hand. On this page are published all the documents necessary for the use of your device. SL300R T by CONTAX.
USER MANUAL SL300R T CONTAX
Techniques for Taking Pictures
CONTAX SL300RT*
FCC COMPLIANCE STATEMENT FOR AMERICAN USERS
KYOCERA DIGITAL STILL CAMERA

Tested To Comply With FCC Standards
FOR HOME OR OFFICE USE
FCC Statement
This device complies with Part 15 of the FCC Rules. Operation is subject to the following two conditions:
(1) This device may not cause harmful interference, and (2) this device must accept any interference received, including interference that may cause undesired operation.
NOTE
This equipment has been tested and found to comply with the limits for a Class B digital device, pursuant to Part 15 of the FCC Rules. These limits are designed to provide reasonable protection against harmful interference in a residential installation. This equipment generates, uses and can radiate radio frequency energy and, if not installed and used in accordance with the instructions, may cause harmful interference to radio communications. However, there is no guarantee that interference will not occur in a particular installation. If this equipment does cause harmful interference to radio or television reception, which can be determined by turning the equipment off and on, the user is encouraged to try to correct the interference by one or more of the following measures:
- Change the direction of the radio or TV antenna. Move the equipment or the radio or TV. For example, if the equipment is to the right of the TV, move it to the left of the TV. Or, move the equipment farther away from the radio or TV.
- Plug the equipment into a different outlet. Do not plug your radio or TV into the same circuit as your equipment.
- Ensure that all expansion slots (on the back or side of the equipment) are covered. Also, ensure that all metal retaining brackets are tightly attached to the equipment.
- If these suggestions do not help, consult your equipment dealer or experienced radio/TV technician for help.
CAUTION
If you modify the camera in any way, without getting approval from KYOCERA CORPORATION, your camera may violate FCC regulations. Violation of FCC regulations may cause the FCC to void your right to use the modified camera. Shielded cables must be used for this equipment to comply with the relevant FCC regulation.
For customers in Canada CAUTION
Thank you for purchasing this Contax product.
The Contax SL300R T* is a powerful, high-resolution digital camera featuring an ultra-slim body and 3X optical zoom lens.
Before using the camera, please read this Instruction Manual carefully to ensure that you use the camera correctly and continue to enjoy this Contax product for many years to come.
Test Photos and Warranties
Make it a practice to take test shots before beginning any important photography session, in order to confirm that images are being recorded properly. Contax will not be held responsible for failure of photographs to be recorded or transmitted to a computer as the result of any defects in recording media (SD memory card or Multi-Media Card (MMC)).
Notes on Copyright
Photographs taken of professional performances, exhibitions, displays, or copyrighted materials may be used only for your own personal enjoyment, and only with the consent of the copyright holders. Other use may constitute violation of applicable copyright laws. Be aware that some performances, exhibitions, or displays may impose restrictions on photographic or other recording even when the purpose of such recordings are personal enjoyment.

• The SD logo is a registered trademark. - MultiMediaCard™ is a registered trademark of Infineon Technologies AG (Germany), licensed to MMCA (MultiMediaCard Association). - Microsoft and Windows are registered trademarks of Microsoft Corporation in the United States and/or other countries. - Macintosh, Mac OS, QuickTime™, and the QuickTime logo are registered trademarks of Apple Computer, Inc. - PRINT Image Matching is trademark of Seiko Epson Corporation. The PRINT Image Matching logo is a trademark of Seiko Epson Corporation. - All other corporate and brand names are the registered trademarks or trademarks of their respective owners.
PRINT Image Matching
* This product supports PRINT Image Matching II. When used in combination, PRINT Image Matching II enabled digital still cameras, printers and software help photographers to produce images more faithful to their intentions.
Contents
Introduction....3
Test Photos and Warranties.... 3
Notes on Copyright 3
How to Use this Instruction Manual....7
Caution and Warning Symbols.... 8
Handling Precautions 8
Nomenclature → Names of camera controls and reference pages ...... 12
A World of Possibilities....13
1 Camera Preparations.... 1-1
Inserting the Battery Pack 1-2
Removing the Battery Pack 1-2
Charging the Battery 1-3
Loading the Memory Card 1-3
Removing the Memory Card 1-4
Switching the Camera On 1-5
Setting the Date and Time....1-6
Using the Accessories 1-7
2 Basic Operations 2-1
Taking Pictures – Shooting Still Images ......2-2
Shooting Movies 2-4
Viewing Images – Still Image Playback ....2-6
Viewing Images – Movie Playback 2-6
Displaying Information for Playback Images – INFORMATION......2-7
Checking Photography Data and Erasing Images – Manual REC Review .....2-8
Deleting Unwanted Images – Erasing Images ......2-8
When the Memory Card is Full....2-10
Connecting the Camera to a Computer 2-11
Computer hardware and software requirements ......2-11
Connecting to a Windows PC....2-12
Installing the USB drivers (Windows 98 and Windows 98SE only) ...... 2-12
Viewing images on a Windows PC....2-13
Disconnecting the USB cable from a Windows PC 2-16
Uninstalling the driver software (Windows 98 and Windows 98SE only) 2-18
Connecting to a Macintosh 2-20
Viewing images on a Macintosh computer 2-20
Disconnecting the USB cable from a Macintosh computer 2-22
Digital Printing on a Printer 2-23
3 Techniques for Taking Pictures 3-1
Using Focus Lock to Take Pictures 3-2
Using the Zoom Button – Optical Zoom and Digital Zoom 3-3
Setting the Best Camera Mode for the Scene Shot – SCENE Button 3-4
Displaying the Scene Mode menu 3-4
Shooting modes 3-5
Using Continuous Shooting Mode 3-7
Switching the LCD Monitor Icon Display and Backlight On and Off 3-8
Specifying the settings 3-8
Conserving Battery Power....3-9
4 Using Camera Mode, Continuous Shooting Mode and
Movie Mode 4-1
Using the Flash 4-2
Flash modes....4-2
Setting the flash mode....4-3
[©] Taking Pictures Using the Self-Timer 4-4
[Selecting the Number of Pixels (Image Size) 4-5]
[€] Selecting the Quality (Compression Ratio)......4-6
Using Exposure Compensation....4-8
[WB] Determining the White Balance 4-9
[ft]Setting the Frame Rate 4-10
[dV] Setting Detailed Functions in the SET DETAILES .....4-11
[SOUND] Shooting Movies with Sound (or without Sound) 4-11
[COLOR MODE] Selecting Color, Black & White or Sepia 4-13
[CHROMA] Changing the color intensity....4-14
[SHARPNESS] Enhancing the image outlines 4-15
[WB PRESET] Setting Your Own Value for White....4-16
[AE MODE] Selecting the Exposure Setting Method....4-17
[FOCUSING] Selecting the focusing method 4-19
Setting the focusing method....4-19
Determining the shooting distance with manual focusing (MF) 4-20
[LONG EXP.] Using Slow Shutter Speeds 4-21
[ISO] Changing the Sensitivity to Photograph Fast Moving Subjects......4-22
[METERING] Selecting the Area Used for Setting the Exposure .....4-23
[DIGITAL ZOOM] Switching the Digital Zoom ON and OFF ....4-24
5 Using the ▶ Playback Mode Functions.... 5-1
[PLAYBACK ZOOM] Viewing Your Images Enlarged 5-2
Playing Back Movies 5-2
[MULTI] Viewing Multiple Images....5-3
Using MULTI playback 5-3
Erasing images in the MULTI playback screen 5-4
Reverting to normal playback (SINGLE playback) 5-5
[POSTRECORDING] Adding Voice Messages to Images....5-5
Recording a message 5-5
Erasing voice messages 5-7
Playing back a recorded message 5-7
[PROTECT] Protecting Images from Accidental Erasing....5-8
Protecting an image 5-8
Unprotecting images 5-9
[ERASE] Erasing Individual Images....5-9
[ERASE ALL] Erasing All Images....5-10
[RESIZE] Resizing and Trimming Images 5-11
Resizing an image....5-11
Checking and erasing resized images 5-13
Resizing all the images 5-14
Erasing all resized images 5-14
[ROTATE] Rotating an Image ....5-15
[AUTO PLAY] Displaying Images Automatically as a Slideshow....5-16
Setting AUTO PLAY 5-16
Starting and ending an AUTO PLAY slideshow 5-18
PRINT SETTINGS Specifying DPOF Print Settings 5-19
Specifying DPOF settings 5-19
Specifying index print settings....5-21
Deleting all the DPOF print settings 5-22
6 SET UP Using the SET UP Mode Functions 6-1
[AF MODE] Setting AF mode 6-2
[AF METHOD] Setting AF method 6-2
[BRIGHT CNTRL] Adjusting the LCD Monitor Brightness 6-3
[BACKLIGHT] Changing the Monitor Backlighting Brightness....6-4
[DATE] Setting the Camera's Date and Time 6-4
[INSERT DATE] Writing the Date onto Image Files 6-4
[FORMAT] Initializing Memory Cards 6-5
[POWER SAVE] Switching the Camera Off Automatically to Save Power 6-6
[MODE LOCK] Preserving Your Function Settings 6-7
[BEEP] Adjusting the Volume of the Camera Button Beep 6-8
[SHUTTER VOL] Adjusting the Volume of the Shutter Sound 6-9
[COLOR SELECT] Selecting the Menu Color 6-9
[START SCREEN] Selecting the Startup Screen 6-10
[REC REVIEW] Checking Images Right After You Shoot Them 6-11
[LANGUAGE] Selecting the Menu Language 6-12
[FILE NO.] Starting Image File Numbers from 0001 6-13
[MODE RESET] Resetting Function Settings 6-14
7 Appendix 7-1
Troubleshooting 7-2
Problems and Solutions 7-2
Messages and Responses 7-3
Mode-locked Menu Options and Default Settings 7-4
LCD Monitor Information and Names of Icons 7-5
Display when the Camera 📄, Continuous Shooting 📋 or Movie 🏠 mode is selected....7-5
Display when Playback ▶ mode is selected....7-6
Image Information Display....7-6
LED indicators 7-7
Self-timer LED (red) 7-7
Card access LED (orange)....7-7
Caution LED (red) 7-8
Basic Glossary of Digital Camera Terms 7-9
How to Use this Instruction Manual
Camera Preparations: This chapter tells you what you have to do to get the camera ready for taking pictures and covers topics such as inserting and charging the battery pack, loading memory cards, and switching the camera on.
Basic Operations: This chapter covers the basics of using your digital camera, including taking pictures, viewing your pictures, erasing images and connecting the camera to a computer. If you use a digital camera for the first time, read these sections carefully in order to learn how to use it properly.
Techniques for Taking Pictures: This chapter describes some more advanced photography techniques, including photographing subjects that are difficult for the camera to focus on, using the zoom to compose shots, selecting the best shooting mode for the subject, and using continuous shooting. This section is intended for those who have understood the basic operations of the camera and have become used to camera operations.
Using "☐" Camera Mode, "☐" Continuous Shooting Mode and "☐" Movie Mode: This chapter describes various aspects of photography using a digital camera, such as using the flash, setting the number of pixels and image quality, and setting white balance.
Using the "▶" Playback Mode Functions: This chapter describes the camera's Playback mode, in which you can check images you have shot on the LCD monitor. In Playback mode, you can also record sound onto your images, and resize, trim and rotate photographed images in 90° increments.
"SET" Using the SET UP Mode Functions: This chapter describes how to set up some of the camera's more advanced functions, such as specifying the AF (Auto Focus) settings, adjusting the LCD monitor brightness, and initializing memory cards.
Appendix: This chapter provides a range of technical information, including measures for dealing with camera problems, the names of the icons displayed on the LCD monitor, the operation of the LEDs and a glossary of digital camera terms.
- The digital camera is referred to in this Instruction Manual as "camera".
- In this manual, SD Memory Cards and Multimedia cards are referred to generically as "memory cards".

IMPORTANT
• These provide important cautionary information that should be observed when using this product. Always read these.

NOTE
• These provide additional explanations or references to assist in the use of this product.
Caution and Warning Symbols
These Operating Instructions feature the following caution and warning symbols to indicate items of special importance. Be sure to read the contents of these warnings carefully, and use the features correctly.
| ⚠ DANGER | This symbol indicates procedures which have a high likelihood of resulting in death or serious personal injury if not followed properly. |
| ⚠ WARNING | This symbol indicates handling procedures which may result in death or personal injury if not followed properly. |
| ⚠ CAUTION | This symbol indicates procedures which may result in injury to the user, or physical damage to the product if not followed properly. |
Handling Precautions
| ⚠ WARNING | If camera or batteries become hot, emit smoke or a burning smell, or display other abnormal symptoms, remove them from the camera immediately to prevent fire. When handling the batteries, take precautions to avoid being burned.Never attempt to disassemble or modify the camera, since you may receive a severe electric shock.Do not operate the electronic flash at close proximity to a person’s eyes (especially those of an infant), since eye damage may result.Do not attempt to take pictures while driving or walking since you may cause an accident.When taking pictures, remain aware of your surroundings and what is happening around you. |
| ⚠ CAUTION | Clean the camera well after using it at the beach or other locations subject to large concentrations of sand or dust. Salt air may promote corrosion of metal components and damage or short circuits in electronic parts, causing the camera to emit smoke or catch fire. Sand inside the camera may result in internal damage and operating malfunctions.If the camera is brought quickly from a cold place to a warm room, condensation may form on the lens and internal parts. Such condensation may result in damage or short circuits in electronic parts, causing the camera to emit smoke or catch fire. Whenever possible, avoid subjecting the camera to sudden changes in temperature, and if condensation occurs, turn off the camera power quickly and leave it off until all condensation is gone.This camera is a precision electronic instrument, and should be protected from impacts and falls that might cause damage to internal parts or the shorting of circuitry.This camera is an electronic device which uses a high-performance IC. The heat emitted from IC may make the camera hot during use. It is not a failure.When taking the camera overseas or using it to record important events, check its operating condition and take test pictures beforehand to confirm proper operation. |
- This camera is not designed to be waterproof, and cannot be used in the rain or under water. If the camera should inadvertently be exposed to water, it should be taken quickly to a Kyocera/Yashica Service Center for inspection.
- Take great care to keep the photography lens and light sensor clean since soiling such as fingerprints can affect the accuracy of the camera's metering and focusing functions. If these areas become soiled and require cleaning, wipe them gently with a third-party lens cleaning cloth. Any dust should be removed using a blower or lens brush.
- Clean the camera body by wiping with soft cloth. Never use benzene, thinner, or other volatile solvents or cleansers, since such substances will damage the body materials.
- Do not remove the SD memory card or Multi-Media Card (MMC) while the card access LED is flashing.
- Interference may occur in recorded or played back images when the camera is used in areas subject to strong electromagnetic interference (e.g., near a television set or stereo speakers).
- Do not direct the camera lens directly toward the sun when shooting, since the CCD element may be damaged.
- If the camera is dropped, it may be damaged internally or parts may have been dislodged even when there is no visible external damage. The camera must be taken to a Kyocera/Yashica Service Center for checking.
- Do not attempt to touch the insides of the memory card slot, since damage or malfunction may result.
This camera incorporates a safety circuit to protect its microcomputer against strong external static electricity. Though rarely, it may fail to function because this safety circuit has come into action. In this case, turn off the camera's power, remove the batteries, reload them and use the camera again.
For best performance, we recommend the use of genuine Kyocera accessories. Kyocera is not responsible for any accidents or damage caused by the use of accessories made by other manufacturers or fashioned by the user.
| CAUTION | • Store the camera in a well-ventilated location, avoiding damp or dusty areas, drawers or boxes containing mothballs, or in laboratories or other locations where chemicals are handled. Exposure to such chemical fumes can result in damage to the camera's circuitry, resulting in short circuits and causing the camera to emit smoke or catch fire. |
- Do not place the camera in places that may be exposed to high temperatures for extended periods of time (the beach in summer, a closed car under bright sun, etc.). Such high temperatures may cause adverse affects or damage to the camera, batteries, or memory cards.
- Remove the battery pack before storing the camera for extended periods of time, to prevent battery leakage and resulting damage.
| ⚠ CAUTION | Rubbing or pressing strongly on the LCD monitor screen can result in damage or malfunctions. If there is dust or dirt on the LCD monitor, blow it off with a blower brush. Heavy soiling should be wiped off using soft cloth.If the LCD monitor should become broken, take precautions to prevent personal injury from glass fragments.If the LCD monitor breaks and its liquid contacts your skin, quickly wipe away any remaining liquid and wash the skin with soap and water. If the liquid should enter the eyes, wash with clean running water for at least 15 minutes, then seek medical attention immediately. |
- Due to the innate characteristics of LCD panels, a few pixels may appear permanently lighted or may not light at all. This is not a malfunction, and does not affect the recorded image in any way.
- The LCD monitor may appear difficult to see in some outdoor lighting situations.
| ⚠ DANGER | Do not recharge or place batteries near sources of high heat (near flames, heaters, or in direct sunlight, etc.), or in places exposed to flammable gasses, since the batteries may generate heat, emit smoke, or rupture.Do not allow the positive (+) and negative (−) terminals of batteries to be shortcircuited by metallic wires or object, since batteries may generate heat or emit smoke or flames.Do not store batteries together with keys, necklaces, coins or other metallic objects, since the objects may contact the battery terminals, causing short-circuits.Do not try to heat batteries, or dispose of them in fire, since they may generate heat, emit smoke or flame, or rupture.Do not attempt to disassemble or modify batteries, since they may generate heat, emit smoke or flame, or the internal battery liquid may enter your eyes, causing blindness or other personal injury. If battery liquid should enter the eyes, wash the eyes with clear running water and seek medical attention immediately.This battery pack has been designed for exclusive use with this camera. Always use the camera to recharge the battery pack. Do not use the battery pack in any device other than this camera and do not attempt to recharge it using a third-party charger as the battery pack may generate heat or smoke, catch fire or explode. |
| ⚠ WARNING | Never place batteries in a microwave oven or other container exposed to high-voltage, since battery liquid may leak, or the battery pack may generate heat, emit smoke or flame, or rupture.Do not use leaking batteries. Battery liquid may contact your skin, causing personal injury. In the event battery liquid does contact skin, wash immediately with clean water.Do not use broken or ruptured batteries, since they may generate heat, emit smoke or flame, or cause electrical shock. |
| ⚠ CAUTION | Do not place batteries in water of any kind, or allow them to become wet, since the batteries may generate heat, emit smoke or flame, or cause electrical shock.Do not use or attempt to recharge wet batteries, since they may generate heat, emit smoke or flame, or cause electrical shock.Do not store batteries in locations accessible to small children, since injury could result.Do not throw batteries or subject them to strong impacts, since they may be damaged and leak battery fluid.Whenever possible, use batteries at room temperature ( 20°C ± 5°C ). The battery capacity and usable time between recharging may be reduced in situations of extreme heat or cold, such as during mid-summer or deep winter weather, or when batteries are left in a hot location (e.g., inside a closed car exposed to sun). Such conditions may also shorten the usable service life of the battery.When not using batteries, store them in a cool, dry location. |
Lithium-Ion Battery Pack.
Please recycle after its service life has finished.
| ⚠ WARNING | Be sure that AC adapter plugs are connected securely before use. Loose plugs and poor contacts can cause generation of heat, fire, and electrical shock.Do not attempt to modify the AC adapter's cords, or subject them to unreasonable force. Damage to the cords can cause fires and electrical shock. If cords become so damaged that their wire cores are exposed, discontinue use and consult your dealer or Kyocera/Yashica Service Center.Do not attempt to remove covers, disassemble, repair or modify AC adapter, since dangerous electrical shock could result.AC adapter plugs that have become laden with dirt or household dust should not be used or approached with metal objects, since electricity might be transmitted through the metal, causing fire or personal electrical shock. In the event of heavy soiling of a plug, remove it from its outlet and clean away the dirt before reusing.In the event that AC adapter plug emits smoke or unusual smell or sound, or if it is damaged by impact or falling, cease use immediately. Continuing to use a damaged plug could result in fire danger. In the event of damage to a plug, consult your dealer or Kyocera/Yashica Service Center.Do not connect the AC adapter to any sources of power other than a household AC outlet (AC 100V to 240V; 50/60Hz). Using the adapter with other voltages or ratings may cause the hazard of fire or electrical shock. |
| ⚠ CAUTION | Use only the dedicated AC adapter supplied with the digital camera. Using other adapters may result in accidents and fire danger.Never attempt to splice the AC adapter cord, or subject it to severe twisting, bending, or stretching.Do not connect or disconnect the AC adapter with wet hands, since personal electrical shock could result.Always grasp the plug body (not cord) when removing the AC adapter plugs from camera and power outlet. Pulling on the cords could cause breakage or other damage to the wires, resulting in danger of fire or electrical shock.The AC adapter has been designed for exclusive use with this camera. To prevent the danger of fire and electrical shock, do not use the adapter with products other than the specific digital camera for which it was designed.If you notice any damage to the AC adapter, including broken wires or faulty plug connections, stop using the AC adapter and consult your dealer or Kyocera/Yashica Service Center as soon as possible. |
- Prolonged use may cause the AC adapter to feel warm; this is a normal phenomenon and not a malfunction.
- When not using the AC adapter for an extended period of time, first remove the plug from the camera body, then disconnect the adapter from its AC outlet.
- If you wish to use the AC adapter while batteries are loaded in the camera, first set the camera's power switch to OFF, then connect the AC adapter before turning on the camera again.
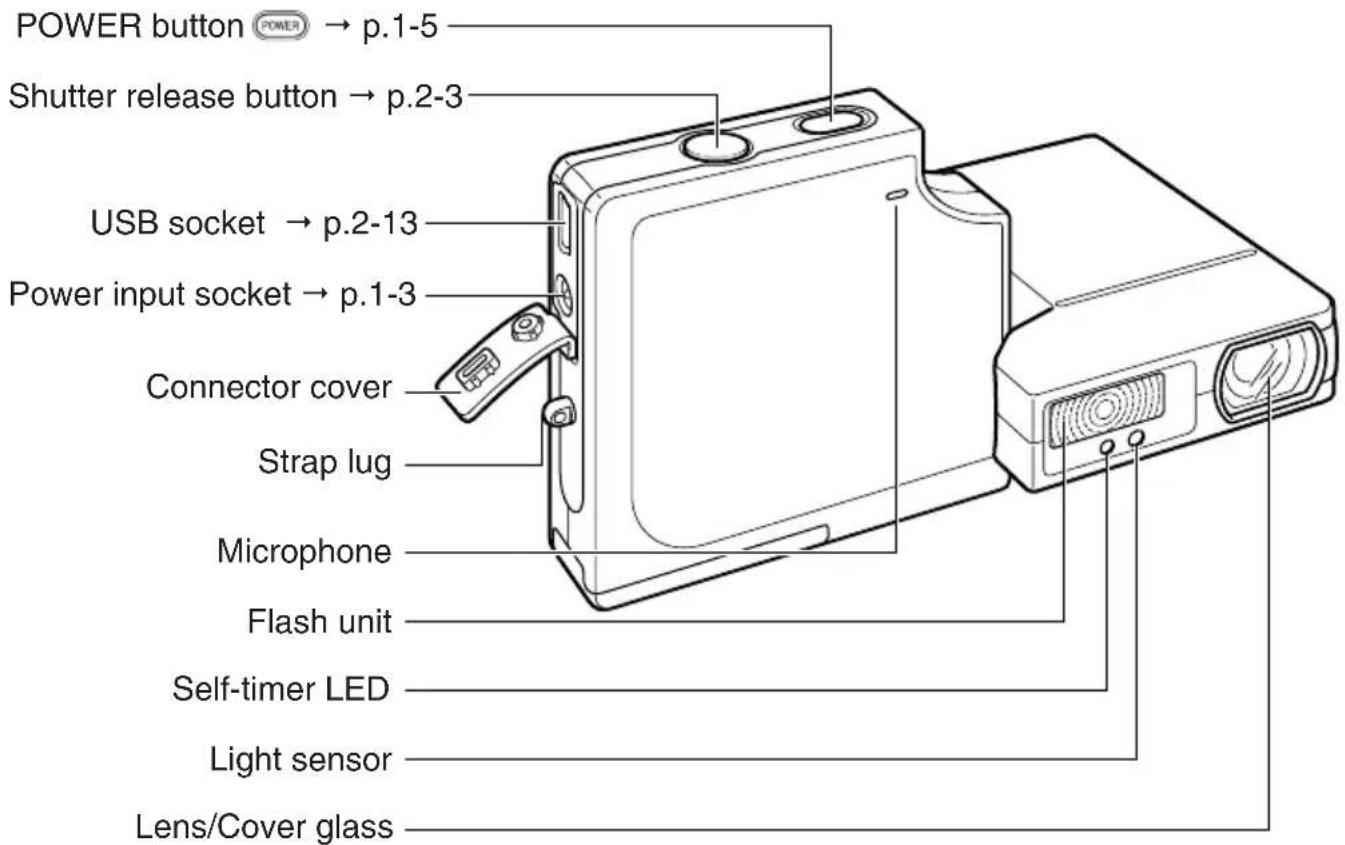
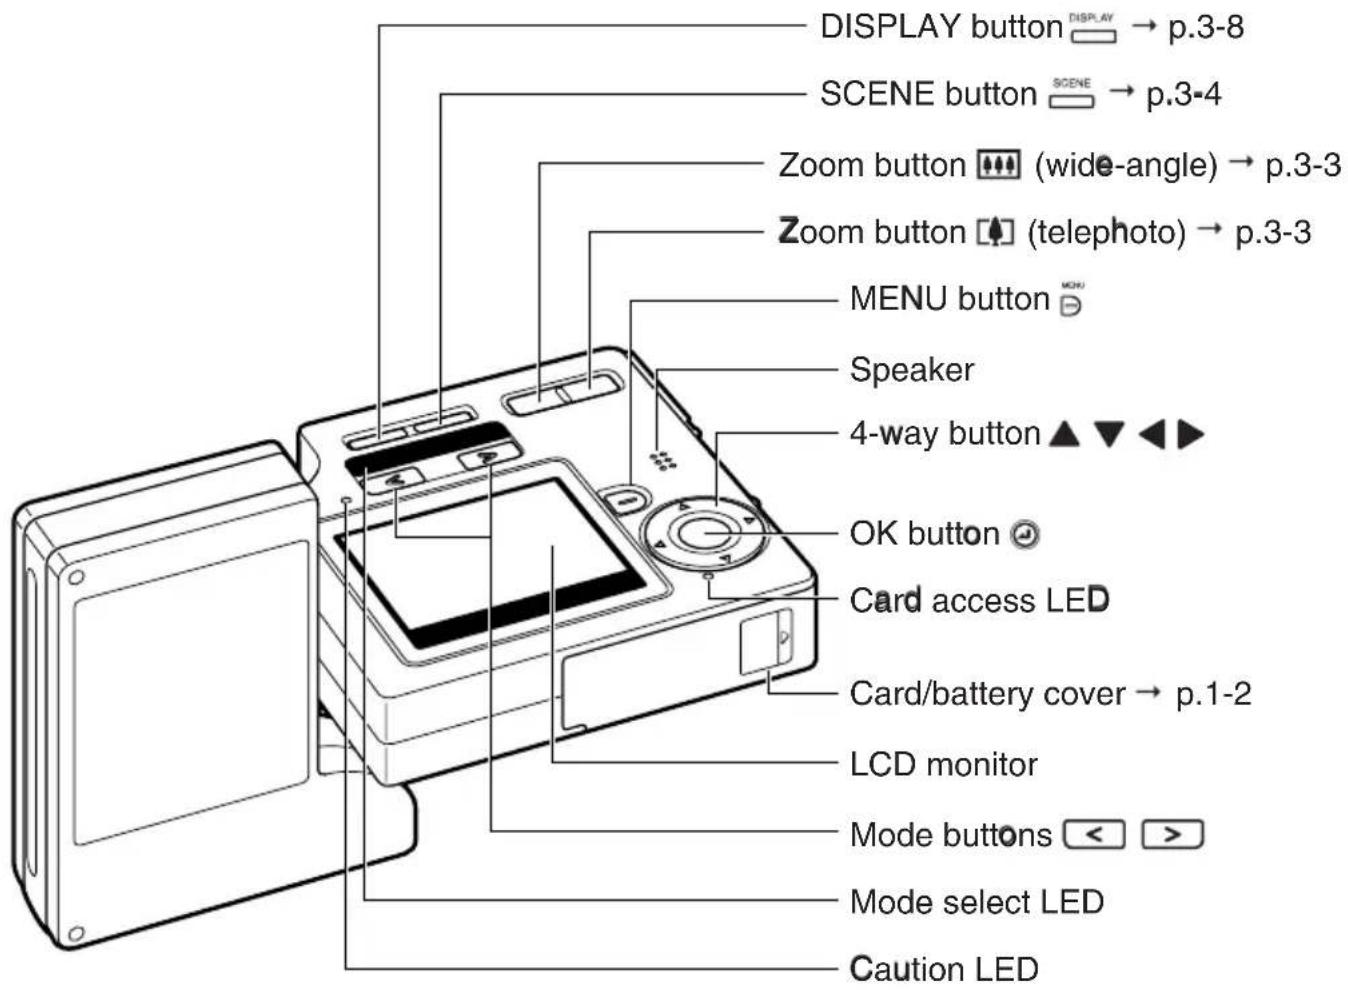
Nomenclature → Names of camera controls and reference pages
A World of Possibilities
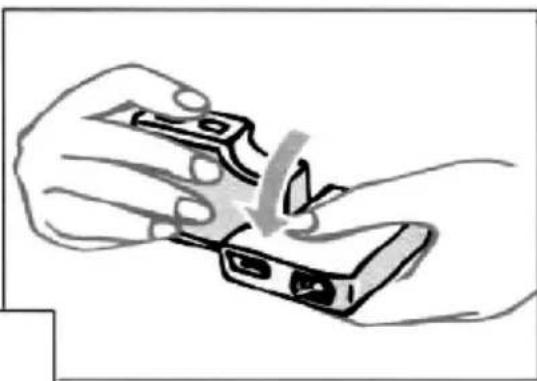
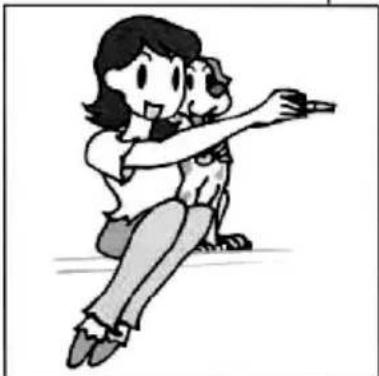
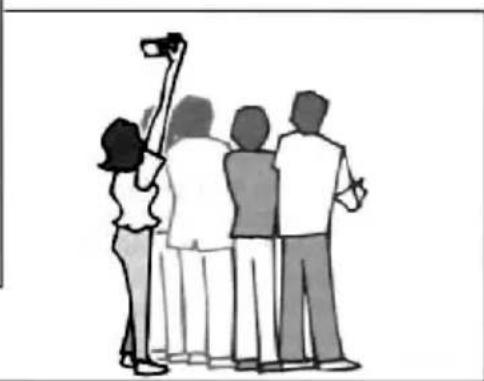
This digital camera, with its slimline body and rotatable lens and LCD monitor units, can be used in various ways not possible with conventional digital cameras.
● Stylish Slimline Body
The ultra-slim body of the Contax SL300R T* is only 16 mm (0.6") thick. You can slip it into your pocket so it's ready to use anytime, anywhere.

● Rotating lens unit and LCD monitor
You can rotate the lens unit and LCD monitor unit to any position through 120° in either direction.
By pointing the lens unit at yourself, you can take your own picture (self portrait) while watching the image on the LCD monitor.
By changing the angle of the lens unit, you can use the camera like a periscope to take pictures over the heads of a crowd while you view the image on the LCD monitor.
● Flat body makes it easy to put down
If you rotate the lens unit and LCD monitor back to their original positions, the flat camera body offers superb stability.
This is really useful when you need the camera to be stable so you can take pictures using the self-timer or the macro function while you check the image by looking at the LCD monitor from above.

● Camera Functions
You can access the wide selection of camera functions by pressing the mode buttons above the LCD monitor to switch between modes.
There is also a SCENE button that lets you take pictures using camera settings tailored to a range of different scenes.
![graph TD A["Shooting (still images)<br>The 3.2 megapixel high-performance CCD enables you to shoot high-quality still images. (→ p.2-2)"] --> B["DISPLAY button<br>Alternately displays or hides the icons on the LCD monitor or switches the backlight ON and OFF. (→ p.3-8)"] C["Shooting (continuous shoo…](/content/2026/06/1245158/images/ba39f11af770070890b5a6f2f297914437571f1b2dbd78886198231c22f82f1c.jpg)
Digital cameras also offer the user a range of other options, including connecting to a computer, sending images directly to a printer and getting your images printed at a print processing store.
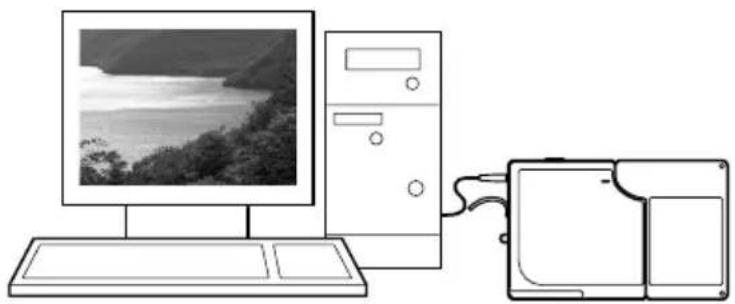
Connecting to a computer
Connecting your camera to a computer using the dedicated USB cable gives you access to a wide range of uses for your images, including using image retouching software to edit your images on the computer and sending them as attachments via e-mail. (→ p.2-11)
* Windows 98 and Windows 98SE users must install the USB driver from the CD-ROM provided with the camera.
Digital printing
You can either print out your images directly on a printer or download them onto a memory card and take them to your local print processing store for printing.
* Consult your local print processing store for details of the print services offered. (→ p.5-19)
![graph TD A["Photo Frame"] --> B["Device"] B --> C["Interior Cabinet"] style A fill:#f9f,stroke:#333 style B fill:#ccf,stroke:#333 style C fill:#cfc,stroke:#333](/content/2026/06/1245158/images/04f0aab29b8916fb013d9956e41a4acfa6d71e092cb990a4950c3321e52c1c02.jpg)
1
Camera Preparations
This chapter tells you what you have to do to get the camera ready for taking pictures and covers topics such as inserting and charging the battery, loading memory cards, and switching the camera on.
Inserting the Battery Pack
1. Open the card/battery cover.
Slide the card/battery cover in the direction of the arrow (△) to open it.
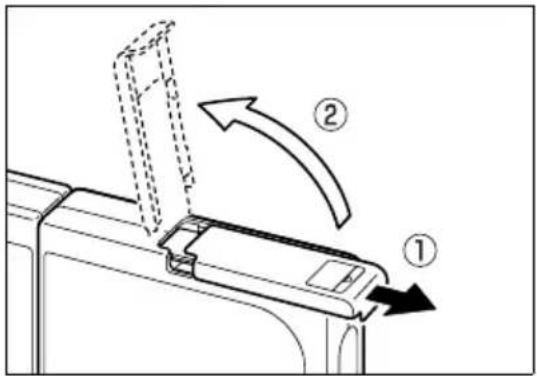
2. Insert the battery pack (BP-780S) supplied with the camera.
Check that the Ⓤ and markings are oriented correctly.
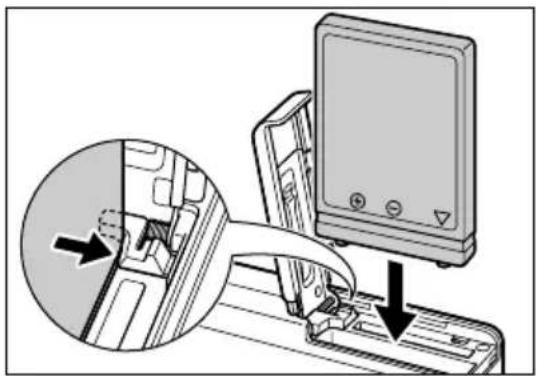
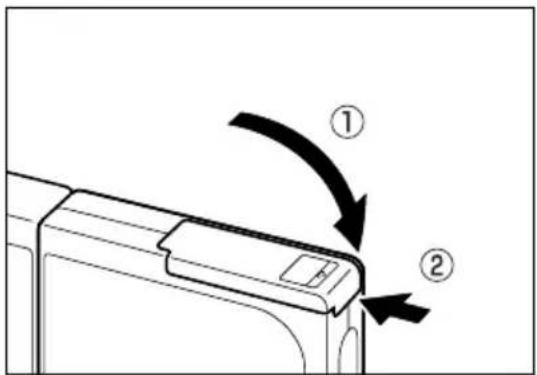
3. Close the card/battery cover.
Close the cover and slide it in the opposite direction to the arrow (△) to lock it.
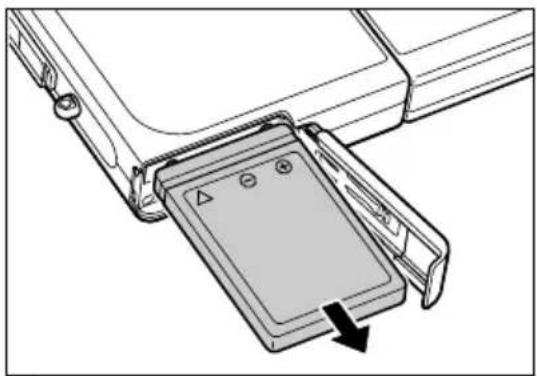
Removing the Battery Pack
1. Check that the camera is switched off and then open the card/battery cover.
2. Use your fingertip to slide the catch retaining the battery pack sideways and release the catch.
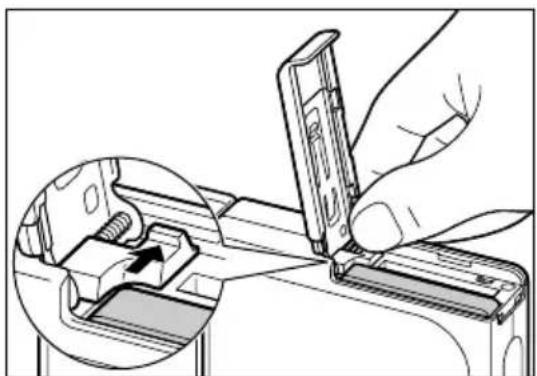
3. Grip the battery pack and pull it out of the camera.
IMPORTANT
• Take care not to drop the battery pack. Strong impacts caused by being dropped can cause the battery pack to leak fluid.

NOTE
- If you do not intend to use the battery pack for a long period, store it in a cool, dark place.
Charging the Battery
IMPORTANT
- Before charging, check that the battery pack is in the camera.
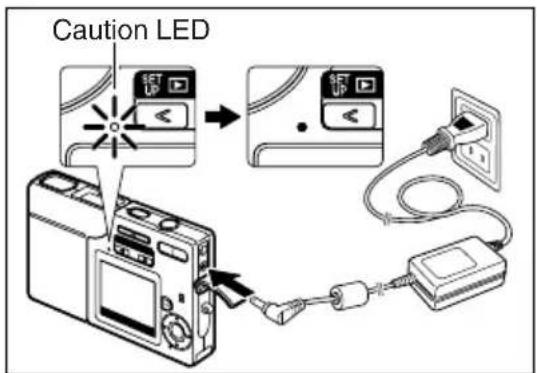
Connect the AC adapter to the camera to charge the battery pack.
Full charging takes around 3 hours.
Turn the camera off during charging.
The caution LED (red) lights during charging and goes off after roughly 2 hours, at which point the battery pack is 90% charged. Leaving the AC adapter connected for another hour charges the battery pack fully.
IMPORTANT
- When you first purchase the camera, you need to charge the battery fully. • Leaving or repeatedly charging the battery pack or the camera with the battery pack installed in a hot location may impair battery pack performance and reduce the number of shots that can be taken. When this occurs, purchase a new battery pack.
- You can check the battery level by switching the camera on. (→ p.1-6)
Loading the Memory Card
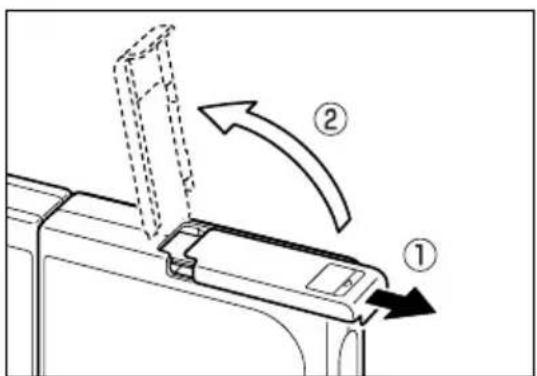
1 Check that the camera is switched off and then open the card/battery cover.
Slide the card/battery cover in the direction of the arrow (△) to open it.
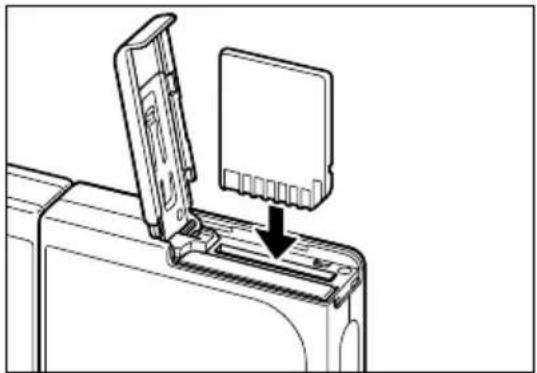
2 Load the memory card.
Make sure the side with the label attached is facing the LCD monitor.
To load the card, push it into the slot until it makes a clicking sound and stops.
IMPORTANT
- If the card does not slide in smoothly, you may be loading the card upside down. Check that the card is the right way up and do not try to force it into the slot.
- Do not attach stickers of any sort to the memory card as this may jam the card in the slot so that you cannot remove it.
3. Close the card/battery cover.
Close the cover and slide it in the opposite direction to the arrow (△) to lock it.
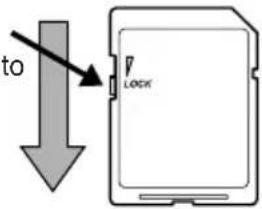
■ Write protect switch (SD Memory Cards only)
SD Memory Cards are provided with a write protect switch.
Sliding this switch downward prevents any more data from being recorded onto the card and protects the images and data already stored on the card.
When you load a write-protected card into the camera in “☐”, “☐” or “☐” mode, the “WRITE PROTECT” message appears on the LCD monitor.
You cannot use a write-protected card to take pictures. You cannot erase images on a write-protected card either.
Write-protect switch Slide this switch down to write-protect the card.
![AUTO 2048 F 0 WRITE PROTECT [ ]](/content/2026/06/1245158/images/036439d2b6b3a6623fddfd9cf0d70f86a64044ed6beb77f64019d3a48925b8a4.jpg)
Removing the Memory Card
1. Check that the camera is switched off and then open the card/battery cover.
Slide the card/battery cover in the direction of the arrow (△) to open it.
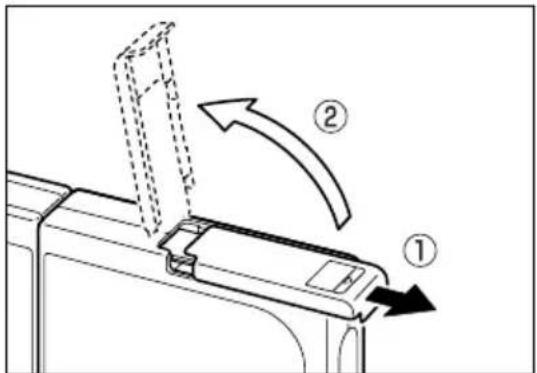

IMPORTANT
- When the card access LED is flashing, images are being recorded onto the memory card. Do not open the card/battery cover or remove the memory card while the LED is flashing as this could cause data corruption or, in some cases, camera damage.
2Push the memory card in gently with your fingertip.
If you push the memory card in slightly, it pops back out and you can then pull it out completely.
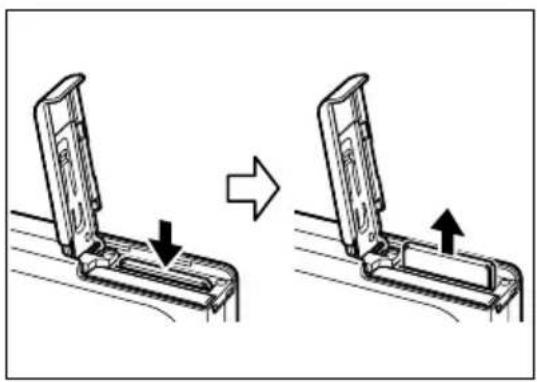
3Close the card/battery cover.
Close the cover and slide it in the opposite direction to the arrow ( ) to lock it.
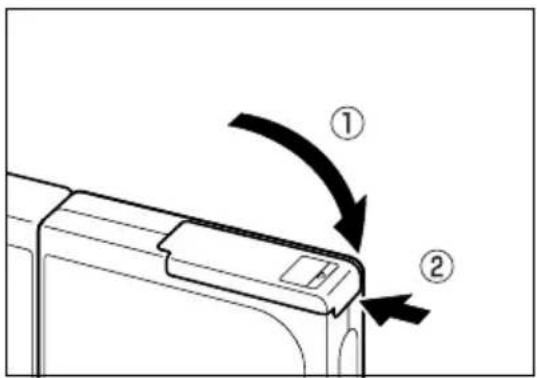
Switching the Camera On

IMPORTANT
- Check that a memory card is loaded in the camera before switching the camera on.
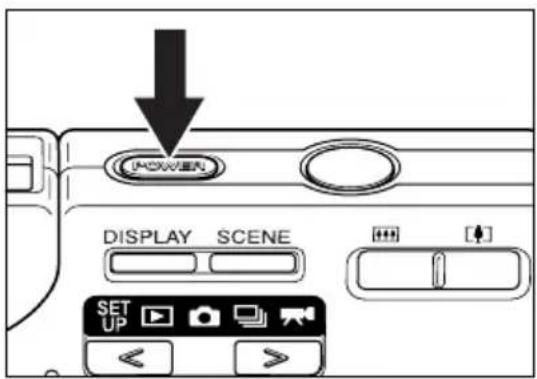
Press the POWER button POWER.
The startup screen is displayed for a few seconds and then the normal shooting mode screen appears.

NOTE
- While the camera is switched on, pressing the POWER button (POWER) switches the camera off.
■ Viewing the battery level and charging guide
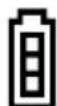
Fully charged At least
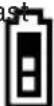
half used.
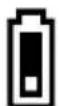
Charge low. Charge the battery soon.
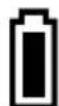
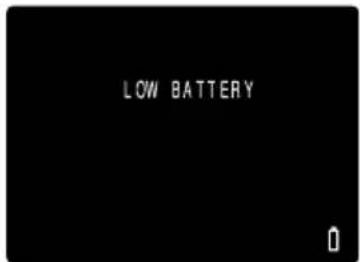
Camera will not function. Charge the battery.
When the battery charge is completely depleted, the
"LOW BATTERY" message appears on the LCD monitor.
Depending on the environment in which the digital camera is being used, the amount of power consumed may increase.
Even if the battery level icon is displayed, the camera may switch itself off in some camera operating conditions.
When this occurs, charge the battery.
Setting the Date and Time
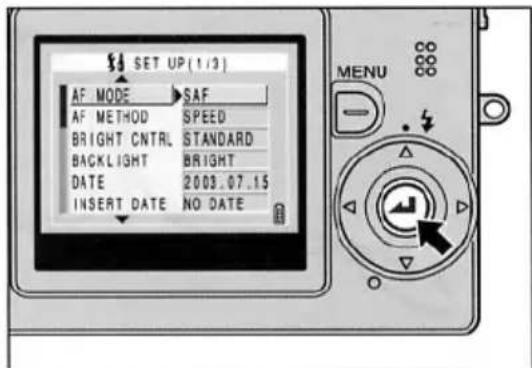
The first time you use your digital camera, you must set the date and time. The date and time settings may also be cleared when you remove the battery pack or if you leave the camera unused for a long period. If this happens, reset the date and time.
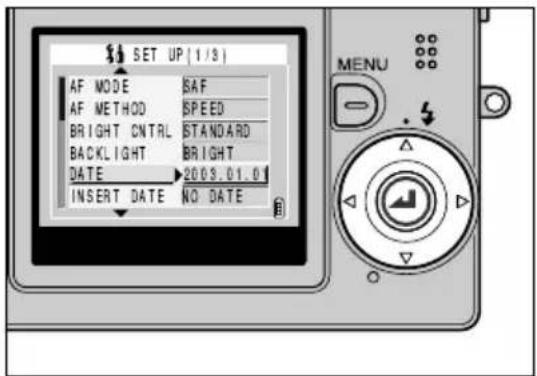
1Press the < or > on the mode button until the “SET” icon lights on the mode select LED.
The setup menu appears.
![SET UP[1/3] AF MODE SAF AF METHOD SPEED BRIGHT CNTRL STANDARD BACKLIGHT BRIGHT DATE 2009.01.01 INSERT DATE NO DATE MENU](/content/2026/06/1245158/images/ff622190c49d46df8fbccea580e5475ee1d4dc31bab601cd80fe1cc25eefff57.jpg)
2Press ▲ or ▼ on the 4-way button to select [DATE] and then press ▶.
3 You can use ◀ and ▶ on the 4way button to cycle through the options as follows: Year ⇔ Month ⇔ Day ⇔ Hour ⇔ Minute ⇔ Date display format.
Use ▲ and ▼ to change the values set and select the display format.
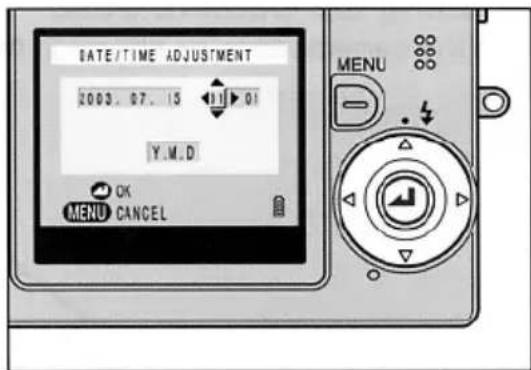
Date display format
This refers to the order in which the year, month and day are shown. The 3 available formats are shown on the right.
Choose your preferred display format. Dates inserted on prints of your images are inserted in the format selected here. (→ p.6-4)
| Order | Sample display |
| Y.M.D | 2003.08.21 |
| M.D.Y | 08.21.2003 |
| D.M.Y | 21.08.2003 |
4 When you have completed all the settings, press the OK button ⏻ to exit the settings.
■ The date and time must be set.
On a digital camera, the date and time of shooting are stored on the memory card along with the image data. This information is useful for organizing your images into albums for viewing on a computer.
Using the Accessories
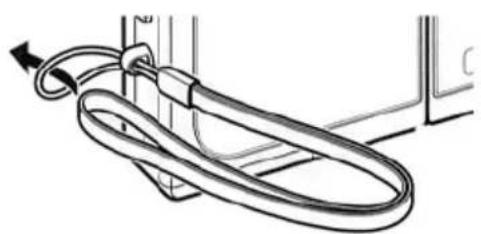
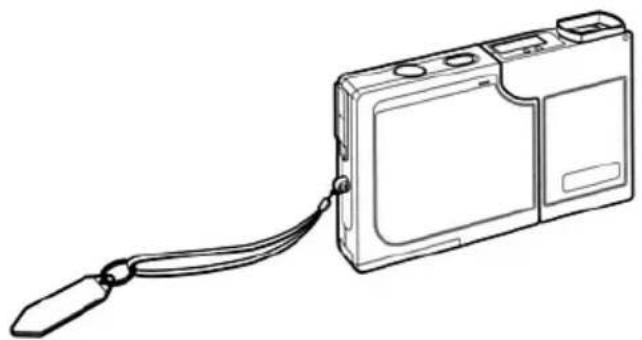
● Attaching the Hand Strap
Attach the supplied hand strap as shown.
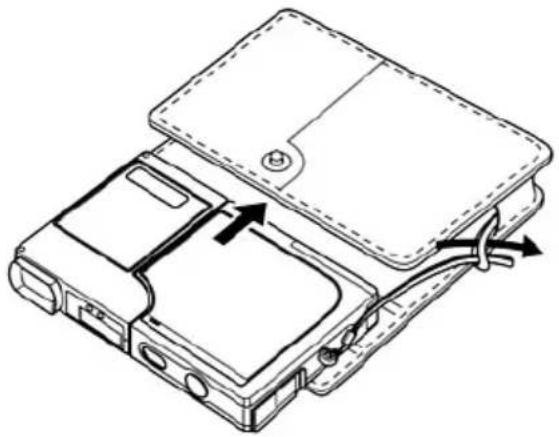
● Using the Camera Case
Use the camera case as shown in the illustration.
● Using the Cleaning Pad
Attach the cleaning pad to the hand strap as shown in the illustration. Clean the lens and LCD monitor with the side to which the cleaning cloth is attached.
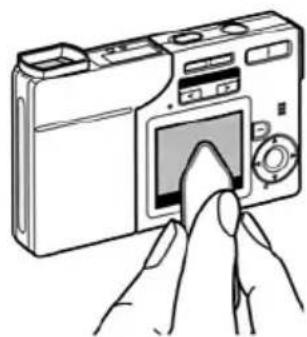
When cleaning the lens, remove the lens hood before wiping the lens with the cleaning pad. To remove the lens hood, grip the hood with your fingertips and turn it counterclockwise.
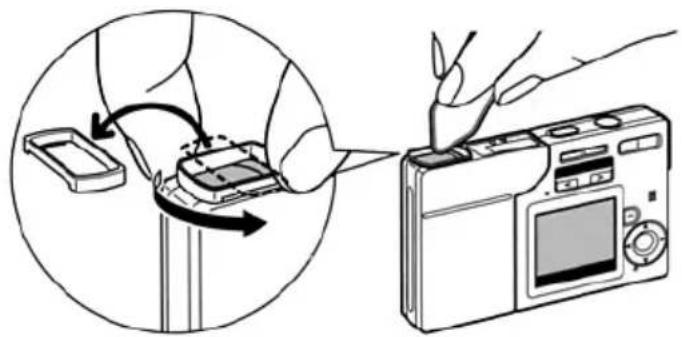
● Mounting the filter adapter
Remove the lens hood and then mount the filter adapter by turning it clockwise. Use commercially available 28 mm diameter filters.
IMPORTANT
• Notes on using filters 1. Do not use the flash (Flash Off mode) as the exposure will be incorrect. 2. Some types of filter affect the exposure or focusing. Check this before using the filter.

NOTE
- When removing the lens hood, take care not to touch the lens directly. • Take care not to lose the lens hood.
2
Basic Operations
This chapter covers the basics of using your digital camera, including taking pictures, viewing your pictures, erasing images and connecting the camera to a computer.
Taking Pictures — Shooting Still Images
1Take the camera out of the case. 2Hold the camera in both hands.
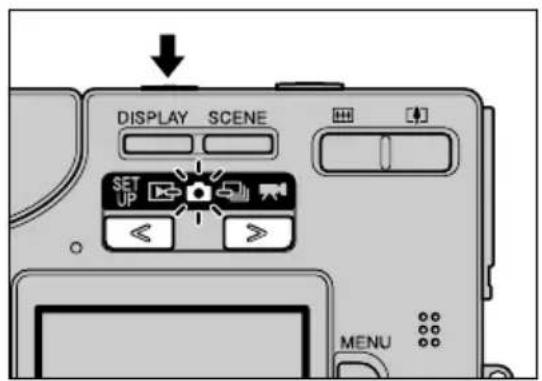
3Press the POWER button 📄 to switch the camera on and then press < or > on the mode button until the “☐” icon lights on the mode select LED.
After the startup screen, the date is displayed for roughly 3 seconds. Check that the date is correct.
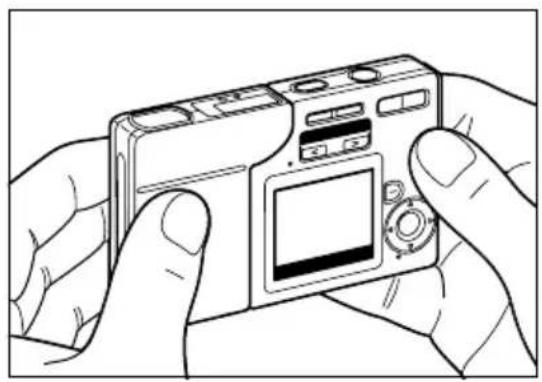
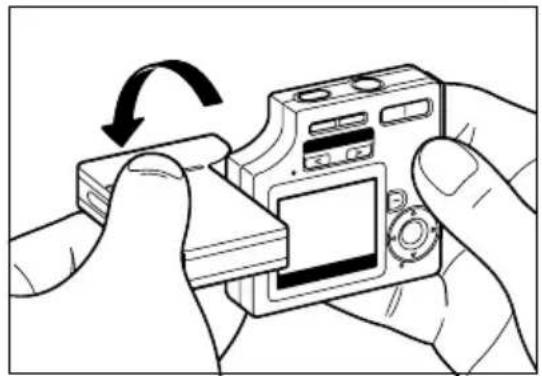
4With the LCD monitor facing towards you, gently turn the left side of the camera (lens unit).
Holding the LCD monitor at a good angle for viewing, twist the lens unit until the lens points at the subject.
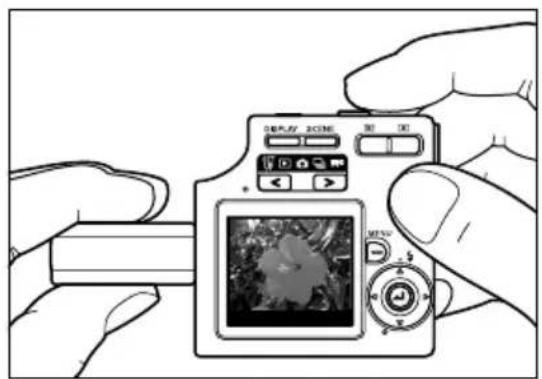
5Use the LCD monitor to compose your shot.

IMPORTANT
• Take care to avoid camera shake. (→ p.4-4)

NOTE
- Press the ▲ side of the zoom button to enlarge the image and the ▼◀◀ side to return the enlarged image to its original size. (→ p.3-3)
■ Holding the camera
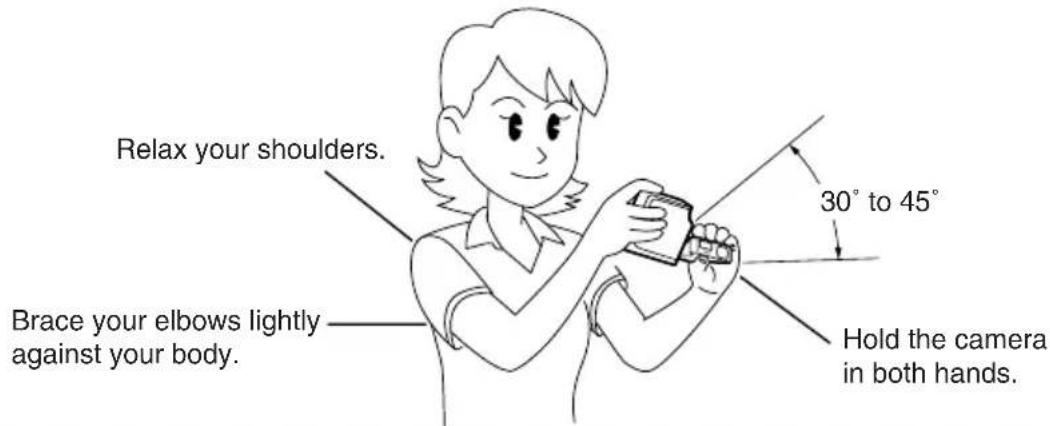
With the LCD monitor facing towards you, hold the lens unit with your left hand and the section with the LCD monitor in your right hand. Take care that your fingers do not obstruct the lens, flash or light sensor. The camera is easier to hold if the lens unit and LCD monitor unit are at an angle of between 30° and 45° to each other.

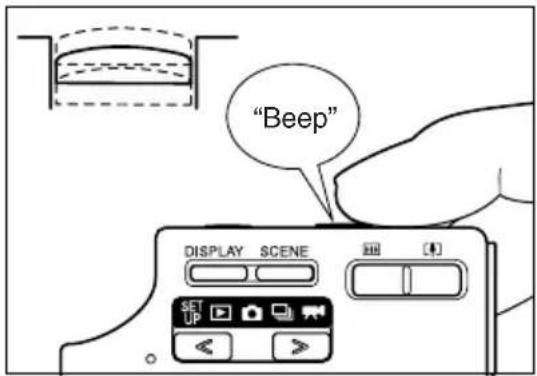
Press the shutter release button down half way to set exposure and focus.
The camera gives a short beep and the green shooting mark “●” lights on the LCD monitor to indicate that the exposure and focus have been set.

NOTE
- A flashing shooting mark “●” indicates that the camera cannot set the exposure and focus. Press the shutter release button half way again until the shooting mark “●” stays lit and the focus is set.
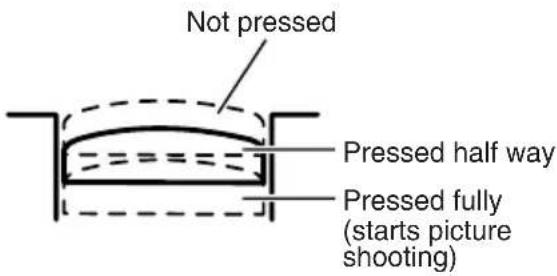
- Pressing the shutter release button half way
When you press the shutter release button, it stops at a point on the way down to the fully pressed position. At this point, it is said to be pressed half way and the camera determines the exposure and focus in readiness for taking a picture. If you then continue pressing the shutter release button the rest of the way down, the camera takes the picture.
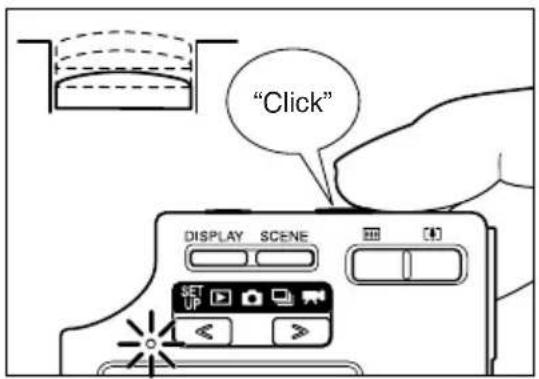
7 When you press the shutter release button down fully, the camera emits the shutter sound and takes a picture.

IMPORTANT
- Press the shutter release button lightly with the soft pad of your fingertip. Pressing the button roughly will result in camera shake. (See “Avoiding camera shake” → p.4-4.)
- When the caution LED flashes rapidly before the picture is taken, this indicates that there is a risk of camera shake occurring. Place the camera on a steady surface (table, etc.) and use the self-timer or, depending on the subject, use the flash. (See “Avoiding camera shake” on p.4-4 and “Using the Flash” on p.4-2.)
- When the caution LED flashes relatively slowly after the shot is taken, this indicates that the flash is charging. Wait until the LED goes off before taking the next shot. (See “Using the Flash” → p.4-2.)
- When the card access LED is flashing, this indicates that the image is being recorded onto the memory card. Do not open the card/battery cover or remove the memory card while the LED is flashing as this could cause data corruption or, in some cases, camera damage.
- You can take pictures while the card access LED is flashing.
Shooting Movies
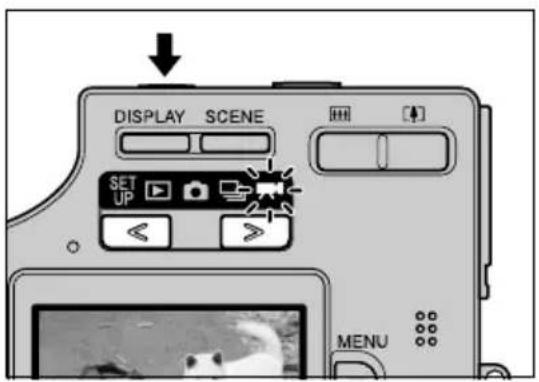
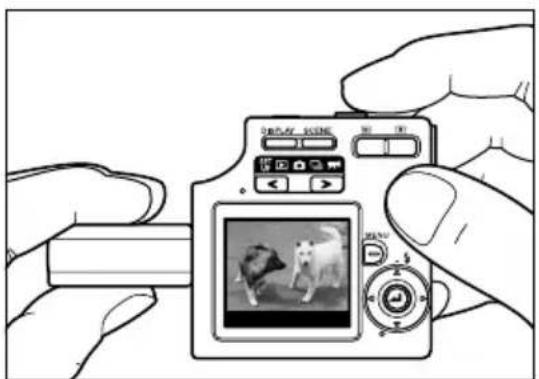
1 Press the POWER button ☐ to switch the camera on and then press < or > on the mode button until the “◀” icon lights on the mode select LED.
2 Use the LCD monitor to compose your shot.
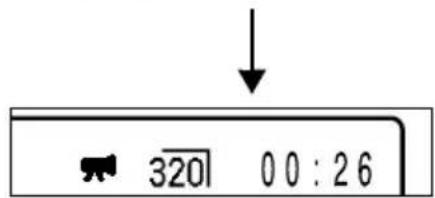
The remaining number of seconds of movie shooting is shown in the top-right corner of the LCD monitor.
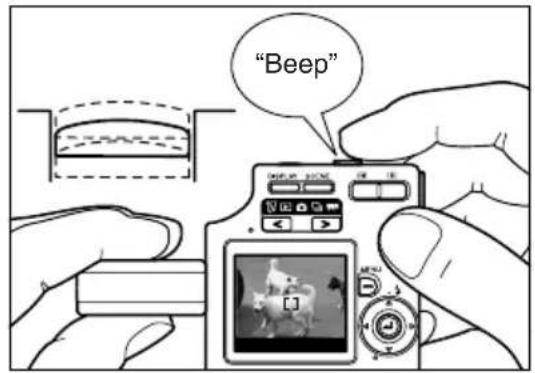
3 Press the shutter release button half way to set the exposure and focus for the subject.
"Beep"
- During movie shooting, the exposure is adjusted according to the ambient conditions, but the focus does not change. The movie is shot using the focus set just before shooting started.
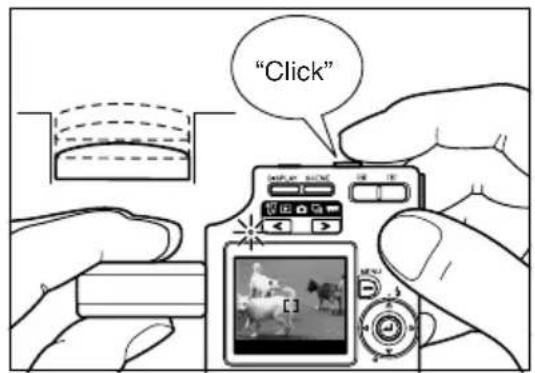
4 When you press the shutter release button down further, the camera makes a clicking sound and shooting begins.
"Click"
Pressing the shutter release button displays the seconds counter. The red shooting mark “ B ” also lights during movie shooting.
The table below shows the number of seconds that can be shot for each image size when a 16MB memory card is used to record a movie with sound. (Frame rate: 30 fps; new or formatted memory card used)
Image Size Seconds Counter
640 × 480: 0 to 6 sec.
320 × 240: 0 to 26 sec.
160 × 120: 0 to 104 sec.
- Movie shooting can continue until the memory card is full.
- For more information on the number of seconds of movie shooting that are available for each image size, see the “Accessories and Specifications” provided separately.
5. Press the shutter release button half way to finish shooting.
- If you do not press the shutter release button half way, shooting continues until the memory card is full.
Viewing Images — Still Image Playback
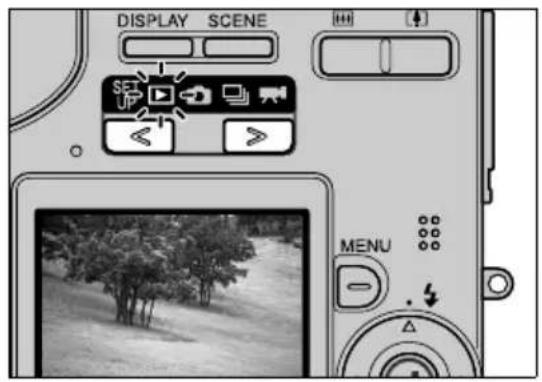
1. Press < or > on the mode button until the “▶” icon lights on the mode select LED.
The photographed image appears on the LCD monitor.
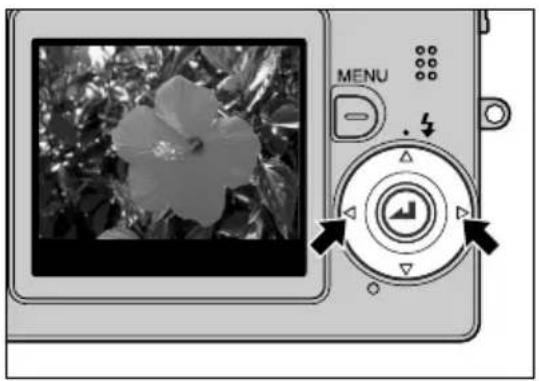
2. Press ▶ on the 4-way button to scan forward through the photographed images. Press ◀ to scan backward through the images.
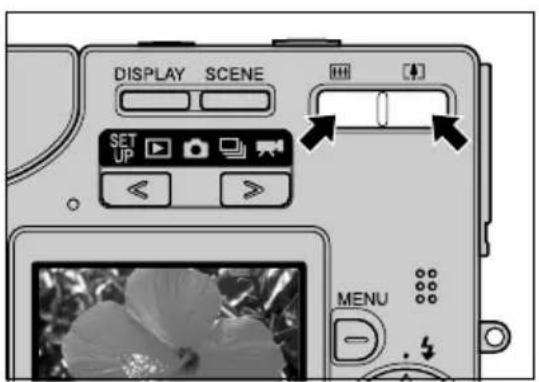
3. Press the [▲] side of the zoom button to enlarge the image and the [▼] side to return the enlarged image to its original size.
After zooming in, you can use the 4-way button to select the area displayed.

NOTE
- Revert the image back to its original size before you scan forwards or backward through your images.
Viewing Images – Movie Playback
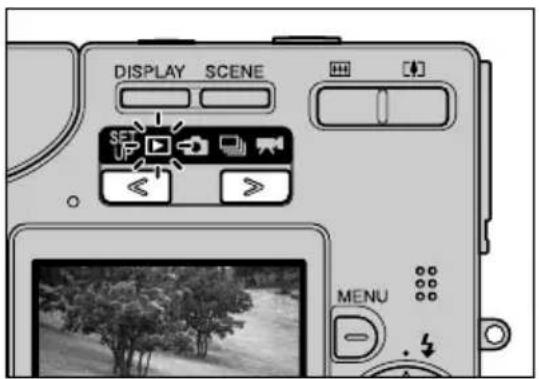
1. Press < or > on the mode button until the “▶” icon lights on the mode select LED.
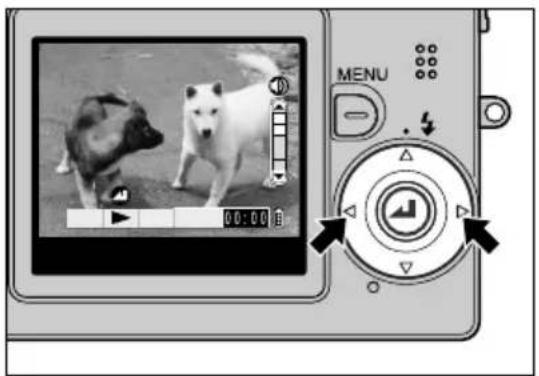
2. Press ◀ or ▶ on the 4-way button to select the movie to be viewed.
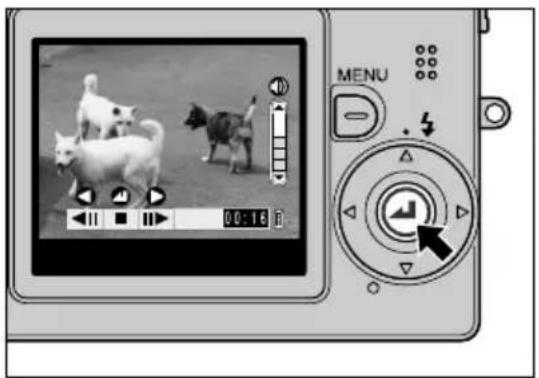
3. Press the OK button Ⓞ to begin playback.

NOTE
• See p.5-2 for more information on playing back movies.
Displaying Information for Playback Images – INFORMATION
This feature allows you to check information such as the aperture and shutter speed settings for the image (still image) being played back.
1. Press ▼ on the 4-way button during image playback.
The information for the currently displayed image appears.

NOTE
• See p.7-6 for detailed information on the screen displayed.
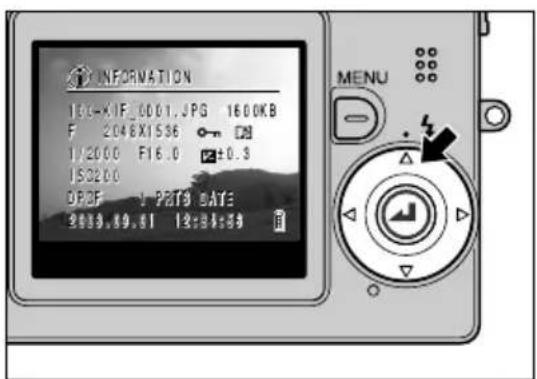
2. Press ▼ again to clear the information display screen and return to the original display.
Checking Photography Data and Erasing Images — Manual REC Review
This feature allows you to check data such as the aperture and shutter speed settings for an image you have just shot and to erase the image.
1 Immediately after taking a picture in “☐” mode, press ▼ on the 4-way button.
The last image you shot appears on the LCD monitor.
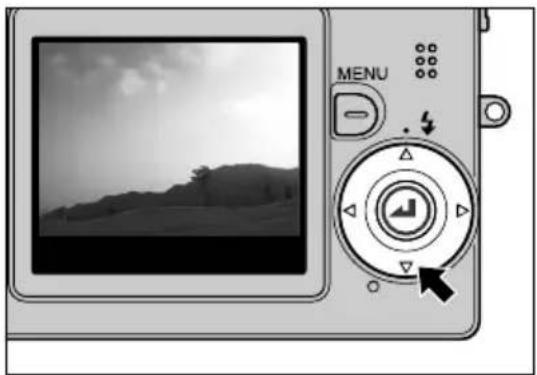

NOTE
- If you press ▼ again while a photographed image is displayed, a message screen appears asking you to confirm whether you want to erase the image. To erase the image, use ▲ to select [EXECUTE] and then press the OK button ⓐ.
2 Press ▲ on the 4-way button.
The photography data is displayed.

NOTE
• See p.7-6 for detailed information on the screen displayed.
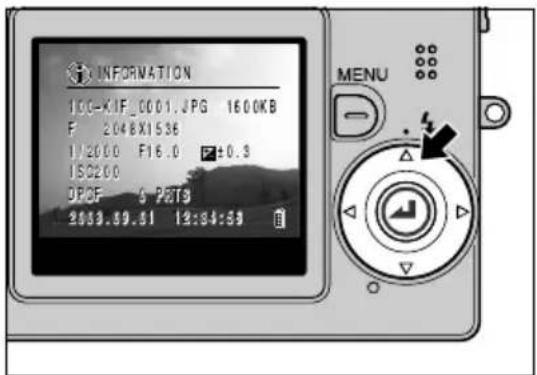
3 Press the shutter release button half way to return the camera to the original shooting mode.
Deleting Unwanted Images – Erasing Images
1 Press < or > on the mode button until the “▶” icon lights on the mode select LED.
The last image you shot appears on the LCD monitor.

NOTE
- Press ▶ on the 4-way button to select the image to be erased.
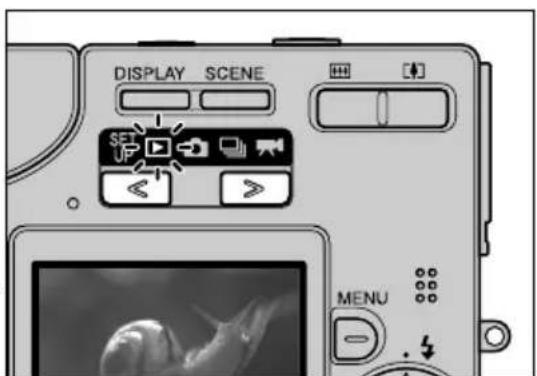
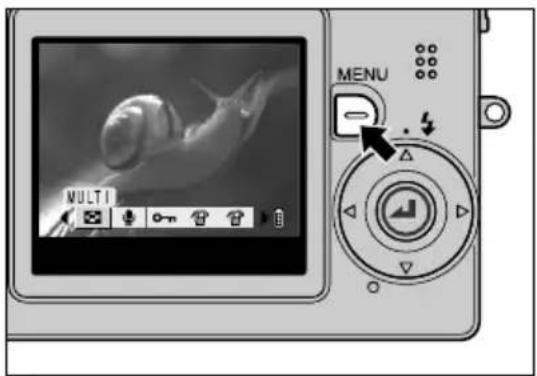
2Press the MENU button MENU.
The menu icons appear.
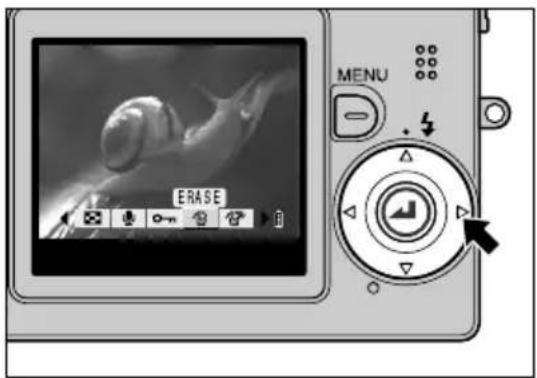
3Press ▶ on the 4-way button to select ERASE [💡]
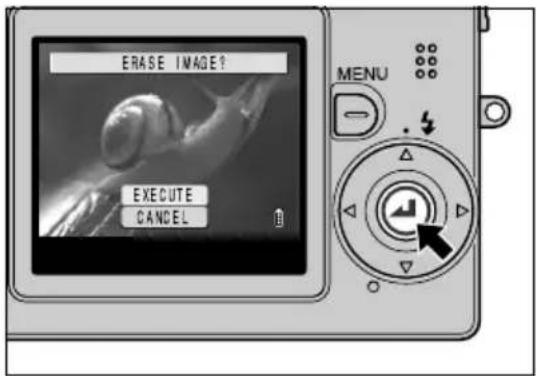
4Press the OK button
The erase confirmation message screen appears.
5Press ▲ on the 4-way button to select [EXECUTE].
![CONTAX SL300R T - 5Press ▲ on the 4-way button to select [EXECUTE]. - 1](/content/2026/06/1245158/images/7853c3b4c3e691423b2a2b3af0fe3dbfd78ff6f1c998654fbd5a4251377101df.jpg)
NOTE
- Use ◀ and ▶ on the 4-way button to select the image to be erased.
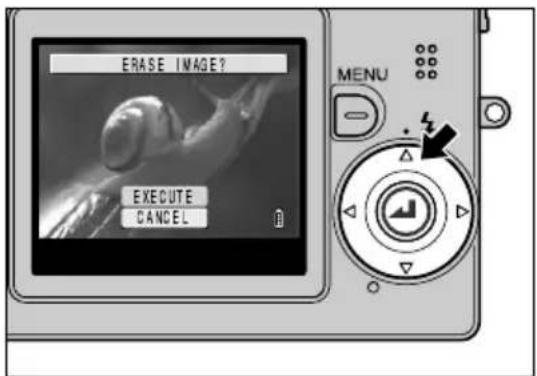
6Press the OK button 🔒 to erase the image.
The saved image that follows the erased image appears on the LCD monitor.
To erase another image, repeat the procedure from step 5.
If there are no further images, the "NO IMAGE" message appears.
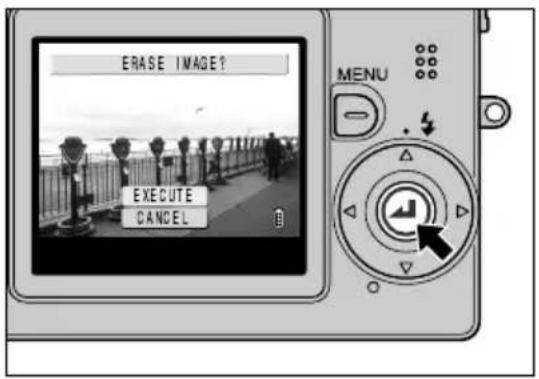
7Press the MENU button to finish the erase procedure.
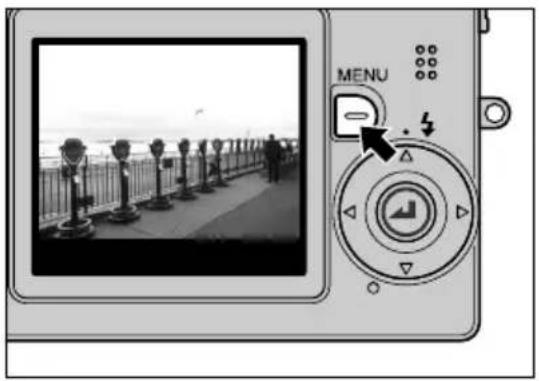

NOTE
- The image erasing procedure is the same for still images and movies.
When the Memory Card is Full...
When you cannot record any more images on a memory card, the "MEMORY CARD FULL" message appears on the LCD monitor. When this happens, insert a new card or save the images on the card to your computer and then erase the images on the card.
![AUTO 2048 F 0 MEMORY CARD FULL [ ]](/content/2026/06/1245158/images/fc99d8fa51e8a8eead03c31a5ac7bbc93dbadb05596b3e3163c55909e5d96c39.jpg)
To save images to a computer, use the exclusive USB cable supplied with the camera. See p.2-11 for details. To erase all the images on a memory card, you can select either ERASE ALL or FORMAT. For more information, see p.5-10 for ERASE ALL and p.6-5 for FORMAT.
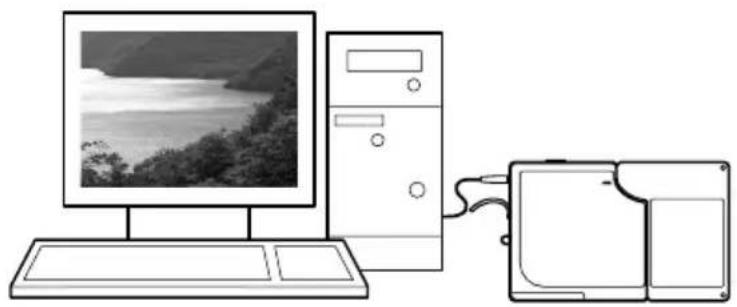
Connecting the Camera to a Computer
You can view images you have shot with this camera on a computer, copy the images to a computer and edit them, and then send them from the computer via e-mail.
First check the operating system software on your computer and then read the relevant sections for your software.
![graph TD A["Computer operating system"] --> B["Windows 98 or 98SE"] A --> C["Windows Me\nWindows 2000\nWindows XP\nMac OS 9.0 to 9.2.x\nMac OS 10.0 to 10.2.x"] B --> D["Install the USB drivers."] C --> E["Connect the USB cable."] D --> E E --> F["View the images on the computer."]](/content/2026/06/1245158/images/d324385d7874e5970b9cc4f17a2068a8173ab520c51dd96a9a47eeab9279405c.jpg)
Computer hardware and software requirements
- Must be equipped with a USB port as standard (required for camera connection)
- Must be equipped with a CD-ROM drive (required for installation)
● Windows computers
Must have Windows 98, Windows 98SE, Windows Me, Windows 2000 Professional, Windows XP (Home Edition or Professional) pre-installed.
● Macintosh computers
Must have Mac OS 9.0 to 9.2.x or Mac OS 10.0 to 10.2.x (excludes OS X server) pre-installed.
* Successful operation is not guaranteed on systems where the software has been upgraded to the versions listed above.
Connecting to a Windows PC
Installing the USB drivers (Windows 98 and Windows 98SE only)
If you are using Windows 98 or Windows 98SE, you will need to install the USB drivers, which are included on the CD-ROM bundled with the camera.
IMPORTANT
- Do not connect the USB cable until USB driver installation is completed. Connecting the USB cable prior to installation will prevent successful USB driver installation. If you have mistakenly connected the USB cable, see “Uninstalling the driver software” on p.2-18.
1. Switch the PC on and start up Windows. 2. Load the bundled CD-ROM into the CD-ROM drive. 3. Double-click [My Computer] and then the [CD-ROM icon] to open the CD-ROM window. 4. Double-click the [SETUP.exe] icon to begin the installation. Proceed with the installation as directed by the on-screen instructions.
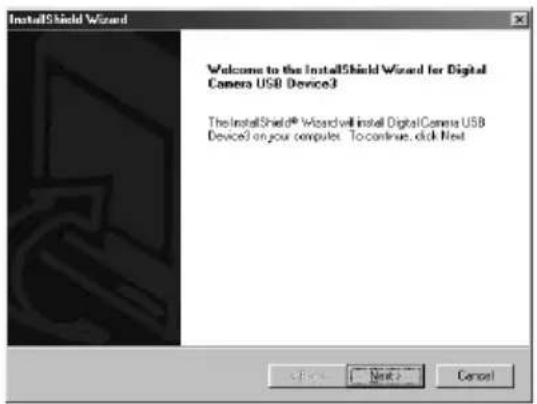
5. When the “InstallShield Wizard Complete” message appears, check that the “Yes, I want to restart my computer now” option is selected and then click [Finish].
Installation ends and the PC restarts.
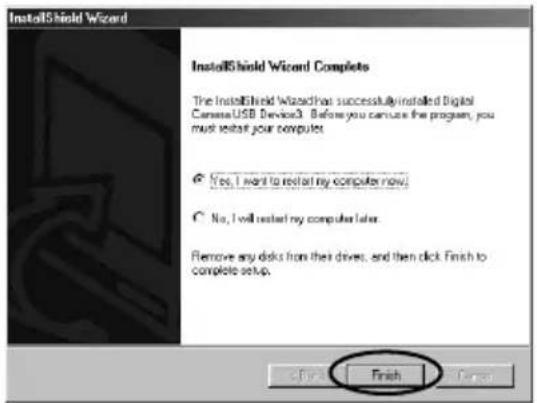
IMPORTANT
- If installation fails, uninstall the software as described in “Uninstalling the driver software” on p.2-18 and then re-install the drivers.
Viewing images on a Windows PC
IMPORTANT
- If you are using Windows 98 or Windows 98SE, install the USB drivers before connecting the USB cable. (→ p.2-12)
- If you are using Windows Me, Windows 2000 or Windows XP, no driver installation is needed. Connect the USB cable without installing the drivers.
- To view images on your PC, you must have image-viewing software already installed. (To play movies, QuickTime 4.1 or later must be installed.)
1. Load the memory card into the camera. (→ p.1-3)
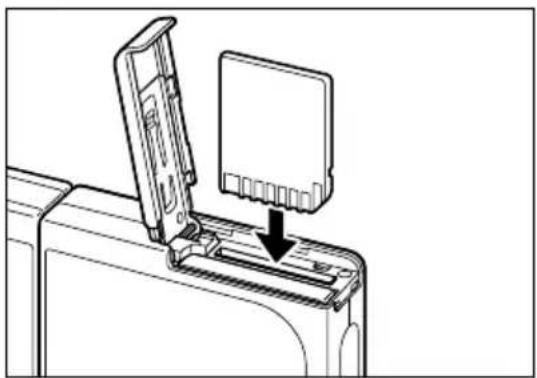
IMPORTANT
- You cannot check images on your PC unless there is a memory card in the camera.
2 Connect the AC adapter to the camera.
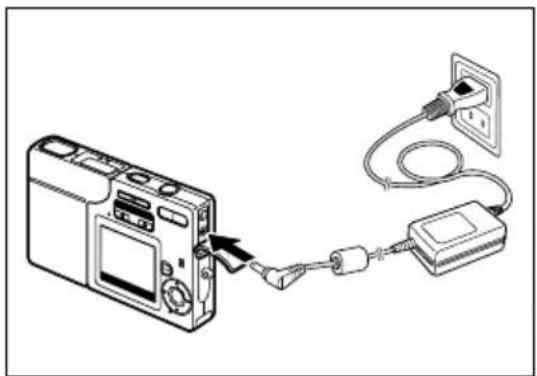
3 Connect the camera to your PC using the dedicated USB cable and then start up the PC.
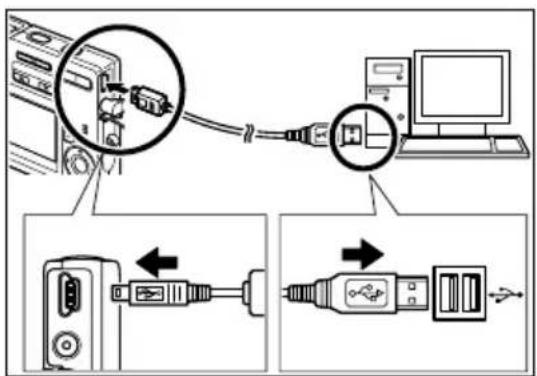
IMPORTANT
- Check the size of the USB connectors. The small connector plugs into the camera and the large connector plugs into the USB port on your PC.
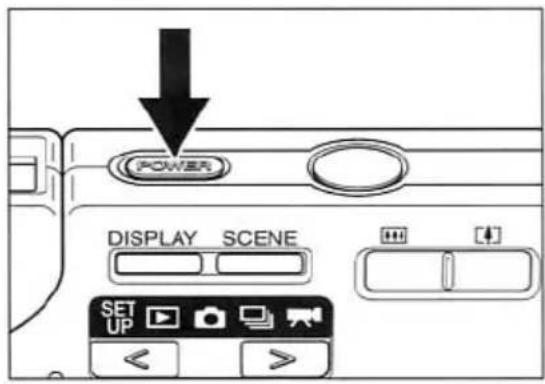
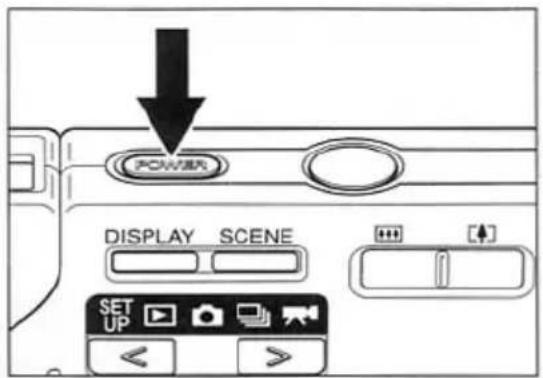
4 Press the POWER button to switch the camera on.
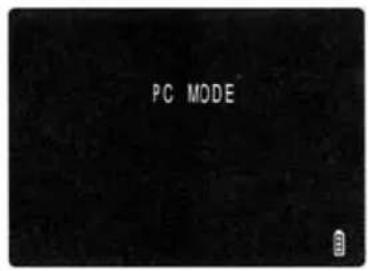
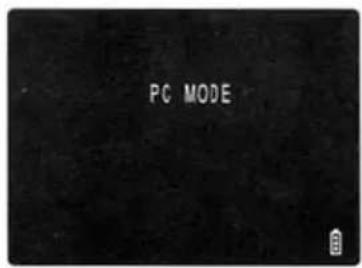
[PC MODE] is displayed on the LCD monitor and you can check the images stored on the camera's memory card on your PC and copy the images to your PC.
IMPORTANT
- In Windows XP, the Scanner and Camera Wizard window may appear. If it does, click the Cancel button to close the window.
- When the camera is connected to a computer and you are viewing or copying images, the card access LED flashes. Do not disconnect the USB cable or switch the computer off while viewing or copying images.

NOTE
- When the camera is connected to the PC and the two are communicating so that data can be exchanged, the self-timer LED lights.
- The procedure for disconnecting the USB cable once the camera and PC are communicating differs according to the version of Windows you are using. (→ p.2-16)
5 A [Removable Disk] icon appears in the [My Computer] window. Double-click the icon to open the disk window.
![CONTAX SL300R T - A [Removable Disk] icon appears in the [My Computer] window. Double-click the icon to open the disk window. - 1](/content/2026/06/1245158/images/9662d01afb787b4f1b945e93e32241a92d371ea983c681001df889694d54b474.jpg)
Removable Disk (F:)
IMPORTANT
- If [PC MODE] is displayed on the LCD monitor but no [Removable Disk] icon appears in the [My Computer] window, check that the USB cable is securely connected.
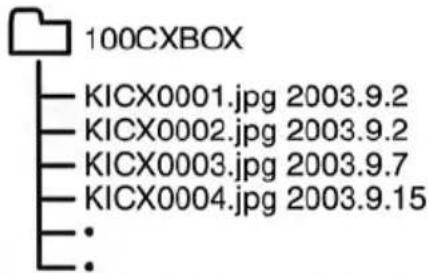
6. Open the [100CXBOX] or [RESIZE] folder in the DCIM folder, then select the image you want to view from the files and double-click the image.
![CONTAX SL300R T - Open the [100CXBOX] or [RESIZE] folder in the DCIM folder, then select the image you want to view from the files and double-click the image. - 1](/content/2026/06/1245158/images/1d5bbb6dc81ee7c0934754c7207a53b604a5cd298e8ce66a373f19bacb3f9e00.jpg)
NOTE
- A number between 100 and 999 is substituted for "100" in the [100CXBOX] folder name. (→ p.6-13)
■ Memory card folder configuration
On Windows PCs, the folders for camera memory cards are configured as shown below.
Removable disk![graph TD A["DCIM*1"] --> B["100CXBOX"] B --> C["KICX0001.jpg"] B --> D["KICX0002.jpg"] B --> E["KICX0003.avi"] B --> F["KICX0004.jpg"] B --> G["KICX0005.jpg"] C --> H["Still image/Movie"] D --> H E --> H F --> H G --> H H --> I["The same file name cannot be used in the same folder. If one of the ima…](/content/2026/06/1245158/images/1fa53b06b3b97218769f263d4cc1bd2da26f21aed88a89f7fb42860d03c34c7d.jpg)
*1 DCIM: Digital Camera IMAGE *2 MISC: Miscellaneous
IMPORTANT
- Do not delete image data on a memory card on your PC. Erase images on the camera.
- The same file name cannot be used in the same folder. If one of the images is erased on the camera, that file name is skipped.
- If you use the Suspend-Resume function or wake your PC up from sleep mode, it may not be possible to resume communication.
- When you want to edit an image (resizing, rotating, etc.), do not forget to copy the image to your PC beforehand. If you directly edit the image on the memory card, the image will no longer be viewable in the camera.
- Do not format memory cards in your PC as this may result in you being unable to use the memory card on the camera.
Disconnecting the USB cable from a Windows PC
Use the procedure below when disconnecting the USB cable from a Windows PC.
● Windows Me users
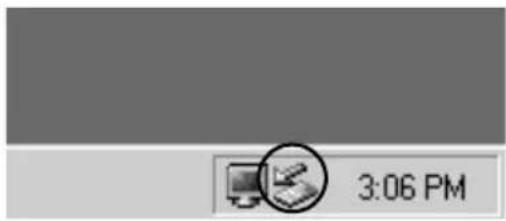
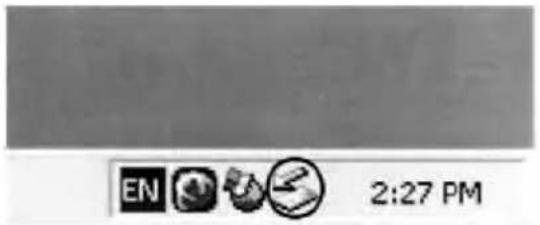
1 Double-click the [Unplug or Eject Hardware] icon in the task bar in the lower-right corner of the desktop.
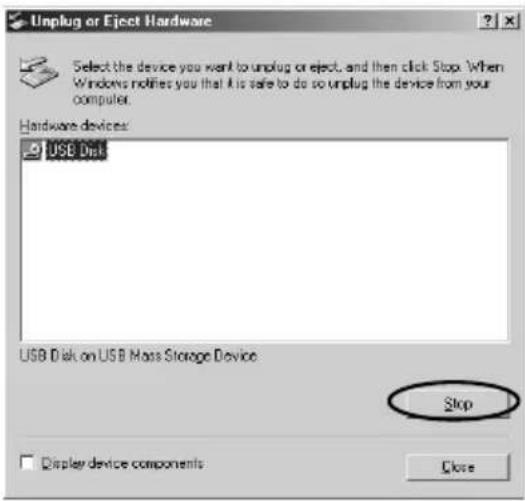
2 Select [USB Disk] and then click [Stop].
3 Select [USB Disk] and then click [OK].
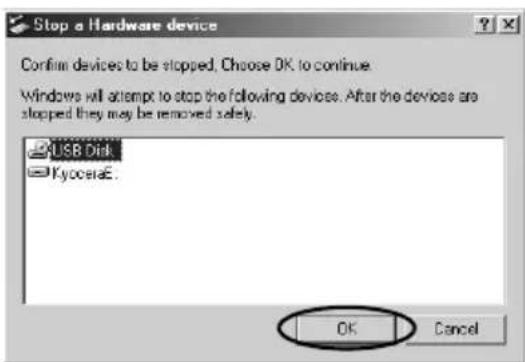
4 When the “The ‘USB Disk E:’ device can now be safely removed from the system” message appears, click [OK].
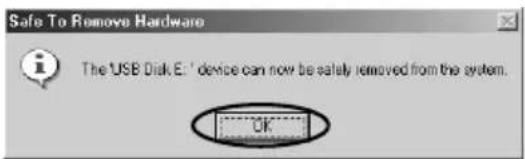
5 Disconnect the USB cable from PC and camera.
● Windows 2000 or Windows XP users
1 Double-click the [Unplug or Eject Hardware] icon in the task bar in the lower-right corner of the desktop.
2 Select [USB Mass Storage Device] and then click [Stop].
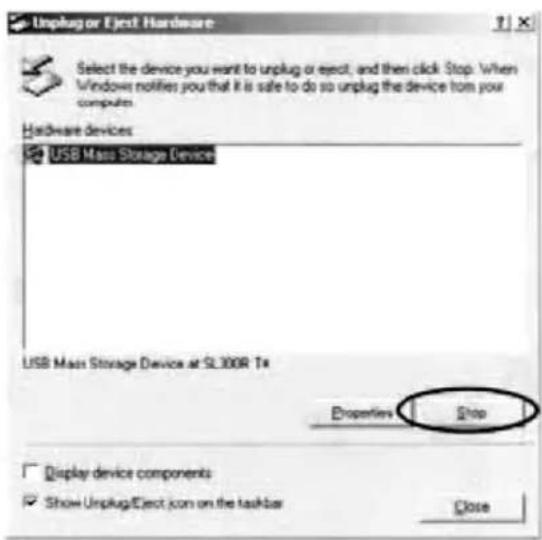
3 Select [Kyocera CONTAX SL300R T* USB Device] and then click [OK].
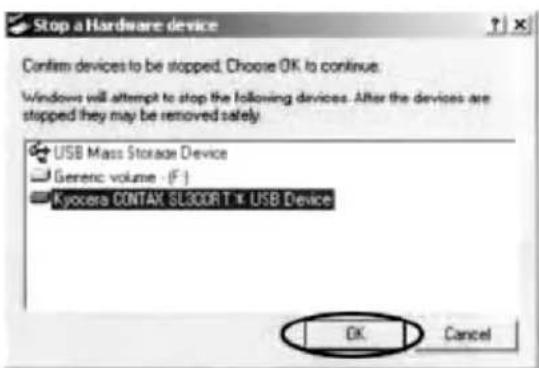
4 When the "The 'USB Mass Storage Device' can now be safely removed from the system" message appears, click [OK].
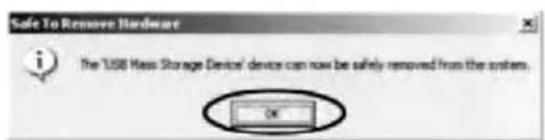
5 Disconnect the USB cable from PC and camera.
● Windows 98 or Windows 98SE users: Switch off the camera and then disconnect the USB cable.
Uninstalling the driver software (Windows 98 and Windows 98SE only)
If the driver software is not installed successfully, the PC will be unable to recognize the camera. If this occurs, use the procedure below to uninstall the drivers. Then use the procedure on p.2-12 to re-install the drivers.
* Note that this procedure is only required for Windows 98 and Windows 98SE.
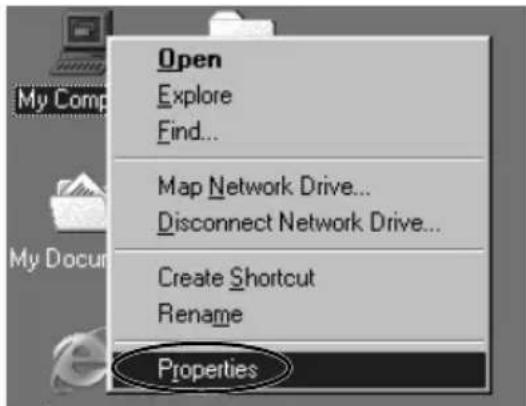
1. Load the memory card into the camera. (→ p.1-3) 2. Connect the AC adapter to the camera. 3. Connect the camera to your PC using the dedicated USB cable and then start up the PC. 4. Press the POWER button to switch the camera on. 5. Right-click [My Computer] and select [Properties].
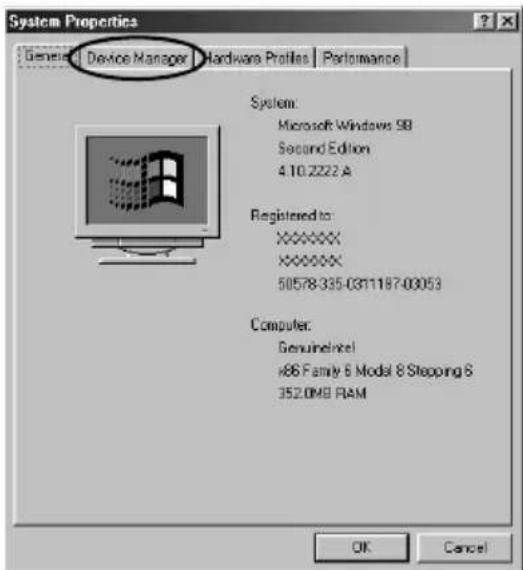
6. When the System Properties window opens, click the [Device Manager] tab.
7. Select "CONTAX SL300R T*" marked with a question mark in [Other devices] and then click [Remove].
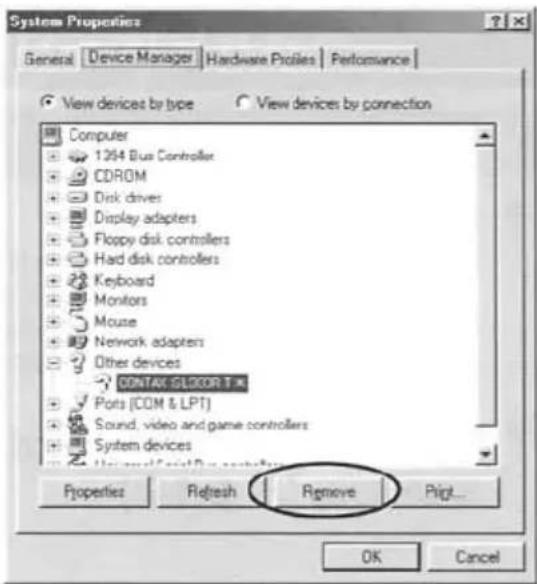
8. When the device deletion confirmation message appears, click [OK]. 9. Switch the camera off, disconnect the USB cable and then restart your PC.
Connecting to a Macintosh
Viewing images on a Macintosh computer

IMPORTANT
- You do not need to install the USB drivers on a Macintosh computer. Connect the USB cable without installing any drivers.
- To view images on your Macintosh, you must have image-viewing software already installed. (To play movies, QuickTime 4.1 or later must be installed.)
1. Load the memory card into the camera. (→ p.1-3)
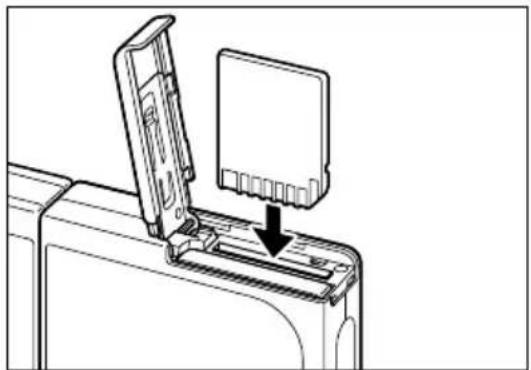

IMPORTANT
- You cannot check images on your Macintosh unless there is a memory card in the camera.
2 Connect the AC adapter to the camera.
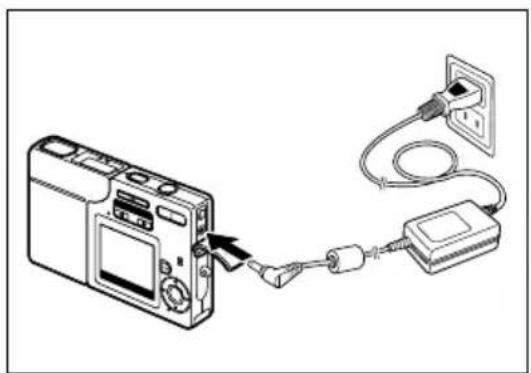
3 Connect the camera to your Macintosh using the dedicated USB cable and then start up the Macintosh.
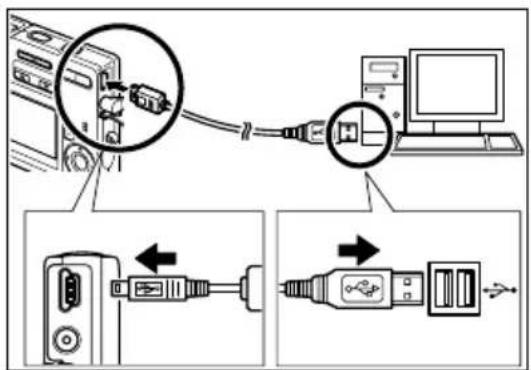

IMPORTANT
- Check the size of the USB connectors. The small connector plugs into the camera and the large connector plugs into the USB port on your Macintosh.
4 Press the POWER button to switch the camera on.
[PC MODE] is displayed on the LCD monitor and you can check the images stored on the camera's memory card on your Macintosh and copy the images to your Macintosh.
IMPORTANT
- When the camera is connected to a computer and you are viewing or copying images, the card access LED flashes. Do not disconnect the USB cable or switch the computer off while viewing or copying images.

NOTE
- When the camera is connected to the Macintosh and the two are communicating so that data can be exchanged, the self-timer LED lights.
5 An [untitled] disk icon appears on the desktop. Double-click the icon to open the disk window.
* Displayed as [NO_NAME] in Mac OS 10.0 to 10.3.x.
IMPORTANT
- If [PC MODE] is displayed on the LCD monitor but no [untitled] or [NO_NAME] icon appears, check that the USB cable is securely connected.
6 Open the [100CXBOX] or [RESIZE] folder in the DCIM folder, then select the image you want to view from the files and double-click the image.
![CONTAX SL300R T - Open the [100CXBOX] or [RESIZE] folder in the DCIM folder, then select the image you want to view from the files and double-click the image. - 1](/content/2026/06/1245158/images/3dc1144c7db410d71ff46facd317196c0976aa1c9d926ce97cd362cc653d616f.jpg)
NOTE
- A number between 100 and 999 is substituted for "100" in the [100CXBOX] folder name. (See p.6-13)
Memory card folder configuration
On Macintosh computers, the folders on camera memory cards are configured as shown below.
![graph TD A["untitled"] --> B["DCIM*1"] B --> C["100CXBOX"] C --> D["KICX0001.jpg"] C --> E["KICX0002.jpg"] C --> F["KICX0003.avi"] C --> G["KICX0004.jpg"] C --> H["KICX0005.jpg"] D --> I["Still image/Movie"] E --> I F --> I G --> J["MISC*2"] J --> K["This folder is created when DPOF print settings a…](/content/2026/06/1245158/images/5bbd9c0edf366c59089e35b8a48126826f67e6837264810866fcbdf61a142cfd.jpg)
*1 DCIM: Digital Camera IMage *2 MISC: Miscellaneous

IMPORTANT
- Do not delete image data on a memory card on your Macintosh. Erase images on the camera.
- The same file name cannot be used in the same folder. If one of the images is erased on the camera, that file name is skipped.
- If you use the Energy Saver function and wake your Macintosh up from sleep mode, it may not be possible to resume communication.
- When you want to edit an image (resizing, rotating, etc.), do not forget to copy the image to your Macintosh beforehand. If you directly edit the image on the memory card, the image will no longer be viewable in the camera.
- Do not format memory cards on your Macintosh as this may result in you being unable to use the memory card on the camera.
Disconnecting the USB cable from a Macintosh computer
Drag the [untitled] (Mac OS 9) or [NO_NAME] (Mac OS X) folder on the desktop to the Trash. Check that the "It is now safe to disconnect the device" message is displayed or that the [untitled] (Mac OS 9) or [NO_NAME] (Mac OS X) icon is no longer displayed on the desktop before disconnecting the USB cable.
Digital Printing on a Printer
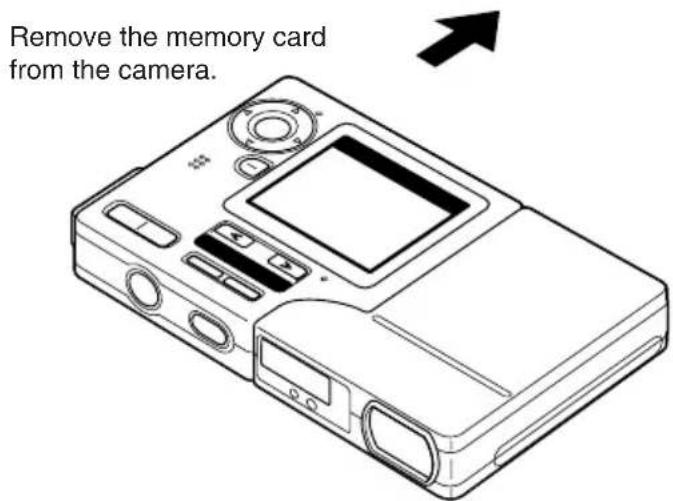
You can print out your images as specified in the DPOF settings (→ p.5-19).

NOTE
- This feature can only be used with DPOF-compatible printers (third-party). Refer to the instructions provided with your DPOF-compatible printer for details of the printing procedure.
- Where date insertion is specified in the DPOF settings, the date may not be printed on some printer models.
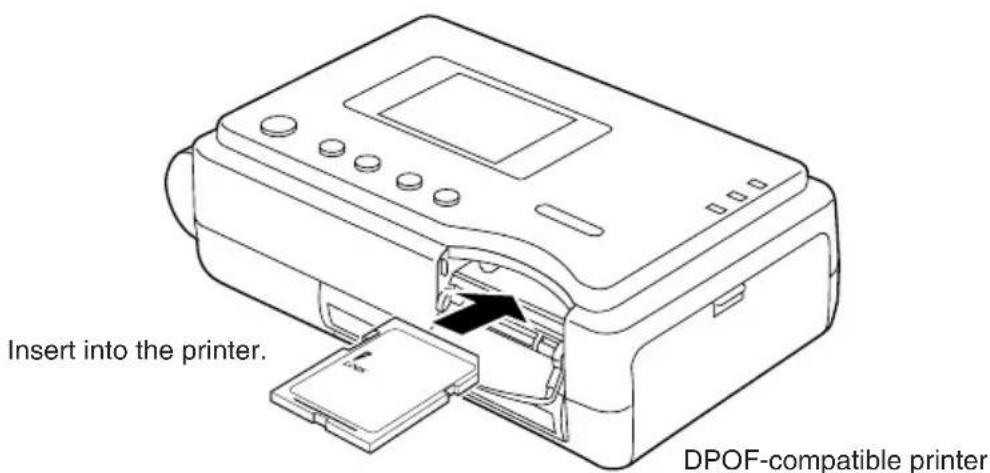
DPOF-compatible printer (third-party)
3
Techniques for Taking Pictures
This chapter describes some more advanced photography techniques, including photographic subjects that are difficult for the camera to focus on, using the zoom to compose shots, selecting the best shooting mode for the subject, and using continuous shooting.
Using Focus Lock to Take Pictures
Use Focus Lock in situations where the subject you want to focus on is not in the center of the LCD monitor, or when you want to compose a shot where the focal point is not in the center of the shot.
1 Position the focusing frame in the center of the screen over the subject you want to focus on and press the shutter release button half way.
When the camera gives a short beep and the green shooting mark “●” lights on the LCD monitor, exposure and focus setting is completed. The focus and exposure are then locked (Focus Lock, AE Lock).

NOTE
- A flashing shooting mark “●” indicates that the camera cannot set the exposure and focus and that Focus Lock cannot be used. Press the shutter release button half way again until the shooting mark “●” stays lit and the focus is set, or use a different subject to set the focus.
2 With the shutter release button still half-pressed, move the camera until the shot is composed as you want it and then press the shutter release button down fully to take the shot.
Removing your finger from the shutter release button releases the Focus Lock and AE Lock.
■ Subjects that are difficult to focus on
The camera has difficulty focusing on the following types of subject. Lock the focus on another object at the same distance from the camera as the desired subject and then take the picture.
- Low contrast subjects
- Objects that consist of the same pattern repeated
- Dark subjects
- Subjects made up only of horizontal lines • Extremely bright or glossy subjects
- Subjects where there is a strong light source in or near the field of view, or when there is strong light such as sunlight in the LCD monitor image
- Two or more subjects in or near the center of the field of view that are at different distances from the camera
- Moving subjects
Using the Zoom Button – Optical Zoom and Digital Zoom
Use the zoom button to take pictures when you are at events such as sports meets or talks where you cannot get close to your subject, or when you want to compose a wide-angle shot of distant scenery.
Pressing the [▲] side of the zoom button enlarges the image (telephoto).
Pressing the 🏠️ side returns the zoomed image to its original size and lets you include a larger area in the shot (wide angle).
As well as an optical zoom that changes the image magnification using the lens, this camera also features a digital zoom that uses electronic control to enlarge the image. While digital zooming degrades image quality, when combined with the optical zoom it allows image magnifications up to 6×.
To use the digital zoom, press the [▲] side of the zoom button to zoom in fully on the subject, then briefly release the zoom button and press it again.

NOTE
- You can also disable the digital zoom so that it is not used. (→ p.4-24)
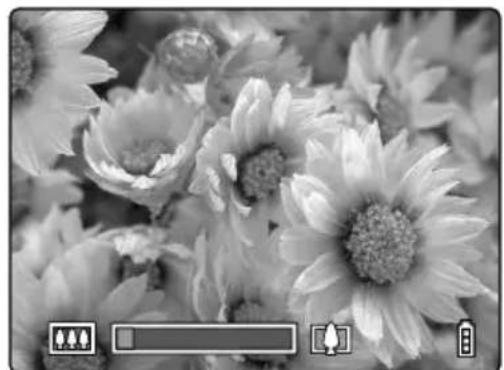
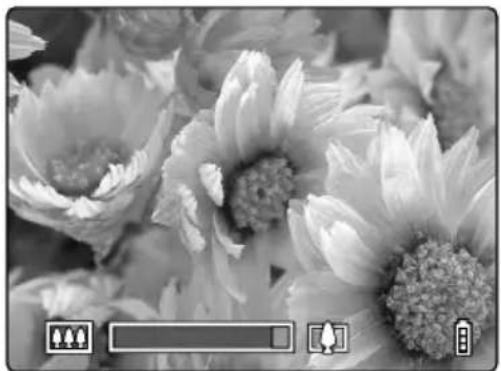
1. Press the [▲] side of the zoom button until the image is fully zoomed.
When you press the zoom button, the zoom bar appears at the bottom of the screen.
The indicator in the zoom bar moves right as you zoom in and left as you zoom out.
The zoom bar remains on the screen for roughly 2 seconds after you stop pressing the zoom button.
![CONTAX SL300R T - Press the [▲] side of the zoom button until the image is fully zoomed. - 2](/content/2026/06/1245158/images/f7d4957858d9c694d4f8bb231a3a1088cbacc3af1df0aa0f180aea5ed9d2bf4f.jpg)
![CONTAX SL300R T - Press the [▲] side of the zoom button until the image is fully zoomed. - 4](/content/2026/06/1245158/images/6d1ed2b88036a75770ca41614ad03a7336fba5ccf4d5182b759851ee45c99675.jpg)
2. Briefly release the zoom button and then press the [▲] side of the zoom button again.
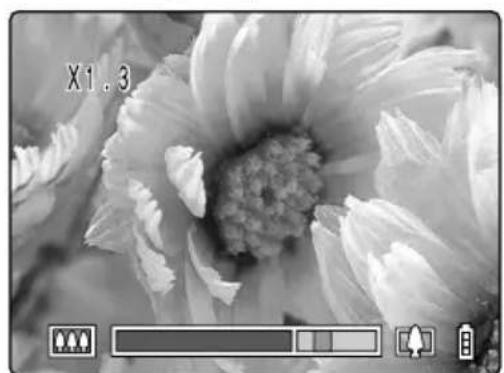
The image is enlarged sequentially by ×1.3, ×1.6 and ×2.0.
While you are using the digital zoom, a dedicated zoom bar for the digital zoom is displayed to the right of the optical zoom bar.
Setting the Best Camera Mode for the Scene Shot — SCENE Button SCENE
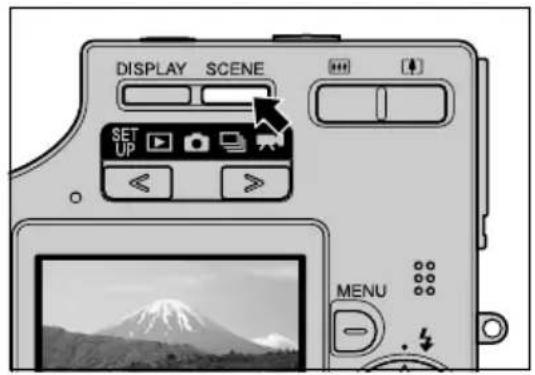
This camera features a SCENE button ☐ that allows you to set the optimum shooting mode for the subject.
Displaying the Scene Mode menu
1. With the camera in shooting mode, press the SCENE button SCENE.

NOTE
- With the camera switched on, check that “☐”, “☐” or “☒” is displayed on the mode select LED. (→ p.2-2)
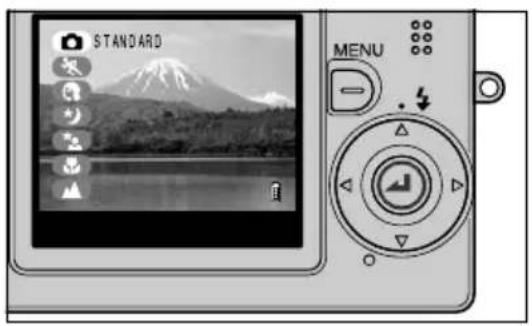
2. The Scene Mode menu appears on the LCD monitor.
3. Press ▲ or ▼ on the 4-way button to select the best shooting mode for the subject.
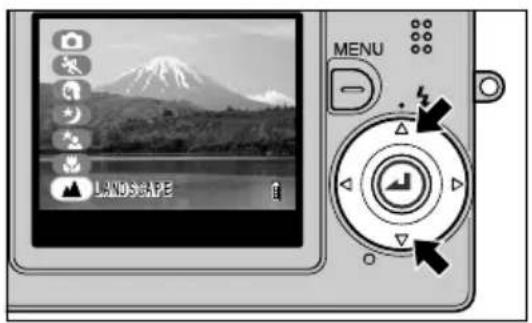
4. Press the OK button Ⓞ.
The Scene Mode menu disappears and you can take the picture using the selected shooting mode.
Shooting modes
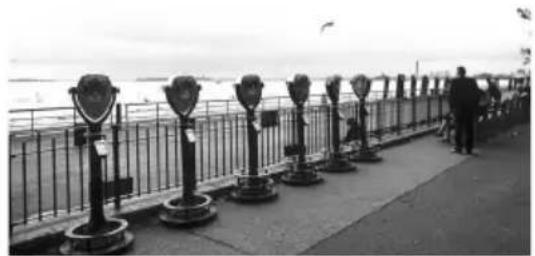
This camera features 7 shooting modes to suit different subjects. All 7 modes are available in “☐” mode and “☐” mode. In “☐” mode, only Standard, Macro and Landscape modes can be selected.


Standard
(Applicable mode: 📄/马/页)
Use this mode for normal photography. In "☐" Continuous Shooting mode, the flash is set to Flash Off mode.

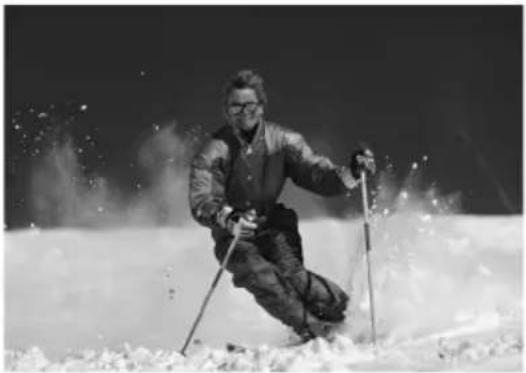
Sports Action (Applicable mode: 📄/☐)
This is the best shooting mode for scenes with a lot of movement, such as sporting events. The focus is set to [CAF] (→ p.6-2) mode in which the camera adjusts the focus continuously so that the image remains focused while you track moving subjects.

Portrait (Applicable mode: 📄/☐)
Use this shooting mode for photographs of people. In this mode, the white balance is optimized to give exquisite skin tones, and the ISO sensitivity (→ p.4-22) is set to 100 to allow you to capture fine details.


Night View (Applicable mode: 📄/☐)
This is the best shooting mode for shots of scenery at night. The camera is set not to use the flash and the focus is fixed at infinity. Full opened aperture is set so that the fastest possible shutter speed can be used in dark locations.
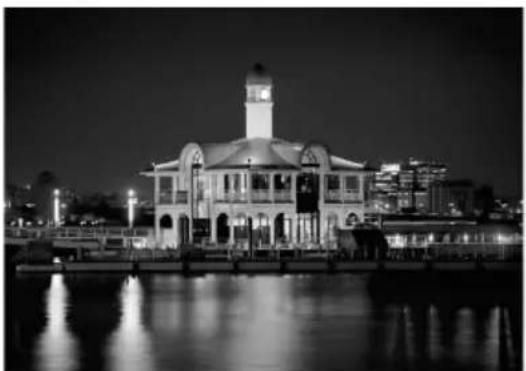

Night Portrait (Applicable mode: 📄)
This shooting mode is set up particularly for shots of people taken against nighttime scenery. The flash fires automatically according to the ambient light levels, and the [Red-eye Reduction Auto mode] setting (→ p.4-2) can also be used to prevent the subject's eyes from appearing red.
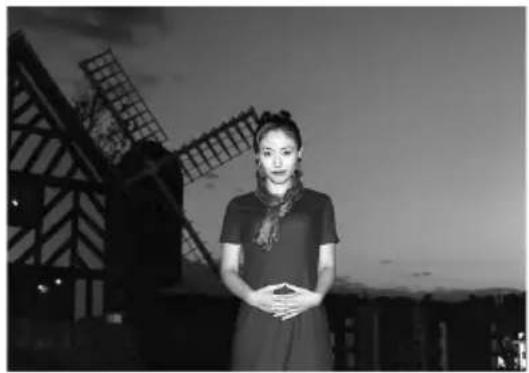

Macro (Applicable mode: 📄/马/贝)
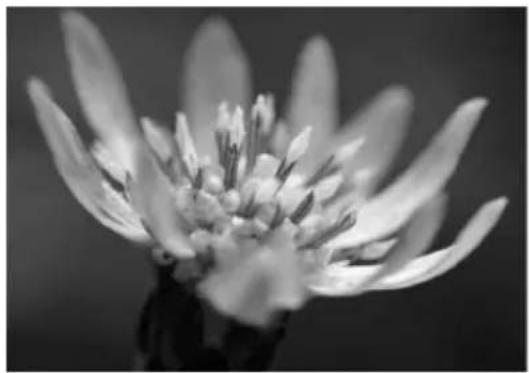
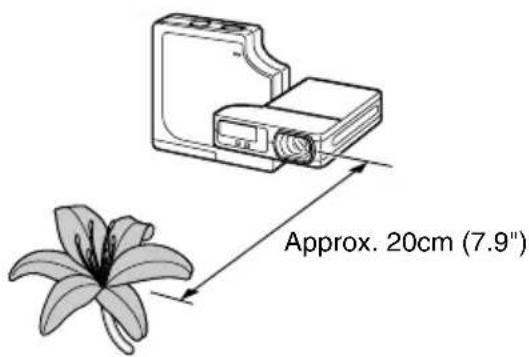
Macro mode allows you to take close-up pictures at distances as close as approx. 20 cm (7.9") from the subject. Because the focal length of the lens is locked in the wide-angle position (shortest focal length), the zoom does not function.
As flash mode, you can select either Fill-in Flash mode, in which the flash fires for every shot, or Flash Off mode, in which the flash never fires. (See "Using the Flash" on p.4-2.)
*1 Distance measured from the glass cover plate on the lens to the subject. *2 Only the digital zoom can be used.
Using macro mode
Compose the shot and press the shutter release button half way.
When the camera gives a short beep and the green shooting mark “●” lights on the LCD monitor, the exposure and focus are set. Then, taking care not to move the camera, release the shutter to take the picture.

Landscape (Applicable mode: 📄/ 📋/ 📌)
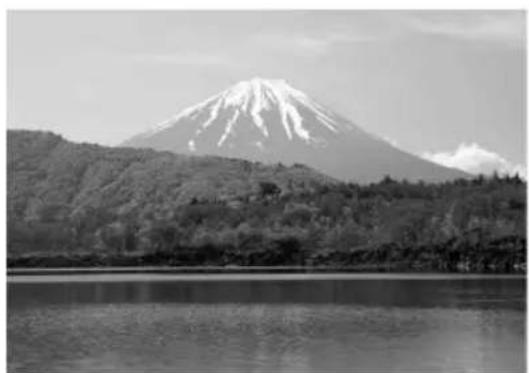
This shooting mode is ideal for shots of scenery where the main subjects of the picture are in the far distance. The flash is set not to fire and focus is fixed at infinity.

IMPORTANT
- Because slow shutter speeds are used in Night View and Night Portrait modes, you should place the camera on a stable surface and use the self-timer to take pictures. (→ p.4-4) • To prevent camera shake in Macro mode where high magnifications are used, you should place the camera on a stable surface and use the self-timer to take pictures. • Take care to avoid camera shake in other modes also.
Using Continuous Shooting Mode
This camera is capable of taking continuous shots at up to approx. 3.5 frames per second. This feature is useful for photographing moving subjects and for situations where you do not want to miss a snapshot opportunity.

NOTE
- For self-portrait shooting, the shooting speed is set to approx. 2 frames per second.
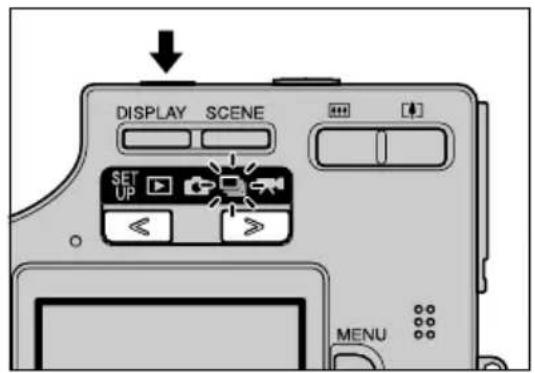
1 Press the POWER button Ⓞ to switch the camera on and then press < or > on the mode button until the “☐” icon lights on the mode select LED.
2 Use the LCD monitor to compose your shot.
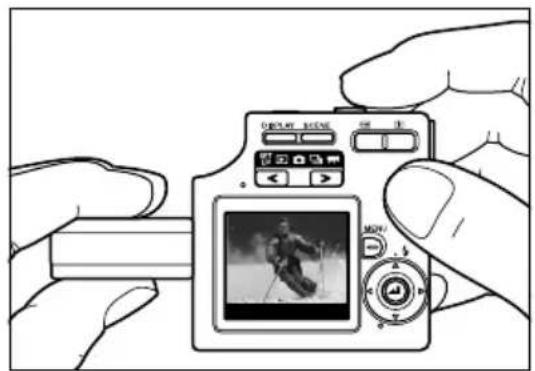
3 Press the shutter release button half way to set exposure and focus. 4 Press the shutter release button down further to begin continuous shooting.
The camera shoots continuously until the shutter release button is released.

IMPORTANT
- The number of continuous shots that can be taken varies depending on the capacity of the memory card in the camera.
- Continuous shooting stops when the memory card is full of recorded images.
- The exposure and focus are not reset during continuous shooting. The continuous shots are all taken using the exposure and focus set immediately before continuous shooting began.
- The speed at which data is written to a memory card varies according to the type of card used.
- If you use an SD memory card that is intended for high-speed recording, you can use continuous shooting to shoot at approx. 3.5 frames per second until the memory card is full.
- To ensure that you obtain true approx. 3.5 frame per second performance, format the SD memory card on the camera (→ p.6-5) beforehand.
- If you repeatedly shoot and erase frames, the continuous shooting speed may drop. If this occurs, save the images on your PC and then format the memory card on the camera before continuing.
- If the subject is dark so that slower shutter speeds are used, the continuous shooting speed may be slower than approx. 3.5 frames per second.
- If you use the flash, you can only shoot one frame.

NOTE
- If you use the self-timer with continuous shooting, 3 pictures are taken at one-second intervals after the specified time has elapsed. (See “Taking Pictures Using the Self-Timer” on p.4-4.)
Switching the LCD Monitor Icon Display and Backlight On and Off
In “☐” mode, “☐” mode and “☐” mode, a large number of icons are displayed on the LCD monitor. If the icons are an annoyance when you are taking pictures, or if you want to conserve power, you can use the DISPLAY button ☐ to turn the icon display and the LCD monitor backlighting on and off as required.
Specifying the settings
With “☐”, “☐” or “☐” selected and the camera ready to shoot, press the DISPLAY button to cycle through the LCD monitor display modes, as shown below.
![graph TD A["LCD monitor backlighting ON"] --> B["Auto 2048 F 2 ISO200F2.8 SAF +1.0"] B --> C["No icons displayed. Flash mode, scene mode (→ p.3-4) and the focusing gauge (when MF is selected) are displayed."] D["LCD monitor backlighting ON"] --> E["Auto [ "]] E --> F["No icons displayed. Flash mode,…](/content/2026/06/1245158/images/69d4825eed1607091e394bdaa13ea86ae8e13343e064d86c30874464825ffc18.jpg)
Conserving Battery Power
There are several ways to limit the amount of power the camera uses when you are traveling or you are in a location where you cannot readily recharge the camera battery. As well as switching the camera off promptly after you finish using it, you can turn off the LCD monitor backlighting, set the Power Save function, and select SAF as the AF mode.
● Switching the camera off promptly
Digital cameras consume battery power simply by being switched on. Switch the camera off as soon as you finish taking pictures.
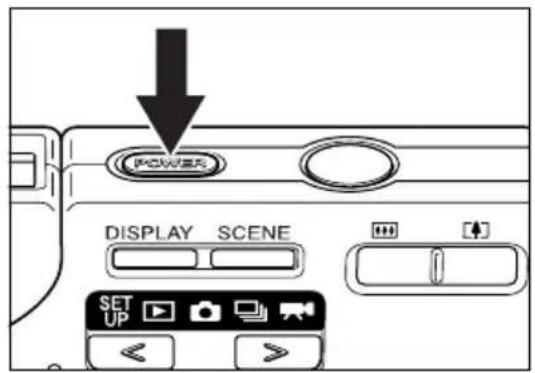
● Switching the LCD monitor backlighting off
The LCD monitor is normally backlit. You can greatly reduce the camera's power consumption simply by switching this backlighting off. To switch the backlighting off, press the DISPLAY button ☐ twice while LCD monitor backlighting is switched on. (→ p.3-8)
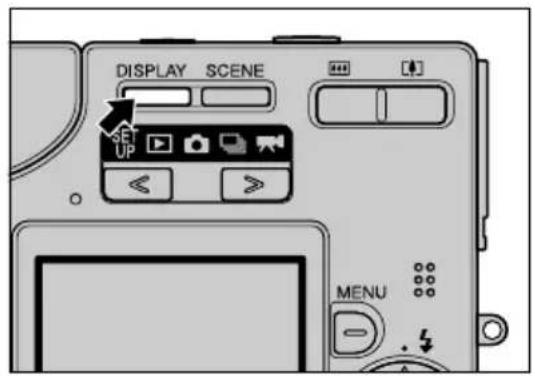

NOTE
- Even when backlighting is switched off, the image from the camera lens is displayed on the LCD monitor and can be used to compose shots and take pictures in well-lit locations.
● Setting the Power Save function
This camera has a Power Save function that you can set so that it automatically switches the camera off if none of the camera's controls are used for a set period of time. (→ p.6-6) You can select 1, 3 or 6 minutes as the delay before the camera switches to sleep mode after it was last used. After 2 minutes in sleep mode, the camera is switched off.
● Setting the AF mode to SAF
CAF mode, in which the camera continually resets the focus, is suitable for subjects involving a lot of movement, such as sporting events, but this mode also consumes more power. If you are shooting subjects with little or no movement, you should select SAF mode, which consumes very little power. (→ p.6-2)

IMPORTANT
- This camera uses a dedicated battery pack (BP-780S). Commercially available batteries cannot be used in this camera. Ensure that the battery is fully charged before going out.
- Take care to check the battery level indicator on the LCD monitor while you are taking pictures. (→ p.1-6)
4
Using Camera Mode, Continuous Shooting Mode and Movie Mode
This chapter describes various aspects of photography using a digital camera, such as using the flash, setting the number of pixels and image quality, and setting white balance.
The icons below each of the function headings in this chapter provide a quick reference guide to the modes in which that function can be used. The meanings of the icons are shown below.
- Applicable mode: 📄 Can be used in 📋 camera mode.
- Applicable mode: 📄 Can be used in 📄 movie mode.
- Applicable mode: ☐ Can be used in ☐ continuous shooting mode.
Using the Flash
Applicable mode:

This camera features an Automatic Flash function that determines whether or not the flash is needed based on the ambient light level.
There are also ways of using the flash to good effect even in bright conditions. This section describes how to use the flash in situations such as those where conditions are bright but you still want to use the flash or where you don't want to use the flash even though it's dark.

IMPORTANT
- When using the flash for close-up shots, you should set the ISO sensitivity to 200 or less. If you set the sensitivity to a high ISO setting and then take close-up shots, the image will be overexposed.
Flash modes

AUTO Auto Flash mode

: default
The camera detects the ambient light level and determines whether flash is required.

AUTO Red-eye Reduction Auto mode
When people's eyes appear red in a photograph, this is referred to as the ‘red-eye effect’ (→ p.4-3). In this mode, the flash reduces the red-eye effect by firing twice: once just before the picture is taken and again when the picture is taken.

IMPORTANT
- The shot is taken the second time the flash fires, not the first time. Take care to ensure that neither the camera nor the subject moves after the flash fires for the first time.

Flash Off mode

: default
In this mode, the flash never fires, regardless of the ambient light levels. This mode is best for shots of sunsets or shots where you want to retain an indoor ambiance. Because the shutter speed used may be slow, depending on the light levels, you should place the camera on a stable surface and use the self-timer (→ p.4-4) to prevent camera shake when the shot is taken.

IMPORTANT
- If the photographed image is too dark, use the exposure compensation (→ p.4-8) or ISO sensitivity (→ p.4-22) settings to adjust the brightness.

Fill-in Flash mode
In this mode, the flash fires regardless of the ambient light conditions. When you take a picture in strong sunlight or when the subject is backlit, the subject tends to be dark. In such situations, this mode allows you to take a picture that clearly shows both the subject and the background.

Fill-Flash with Red-eye Reduction mode
* Only when a long exposure is set.
This mode can only be set for long-exposure shots (→ p.4-21) and should only be used when long-exposure shots are always taken using the flash. To reduce red-eye, the flash fires once just before shooting and a second time when the shot is taken.

IMPORTANT
- For long-exposure shots, always place the camera on a stable surface to take the shot.
- The shot is taken the second time the flash fires, not the first time. Take care to ensure that neither the camera nor the subject moves after the flash fires for the first time.
- Exposure compensation (→ p.4-8) when the flash is used is limited to between -1.0 and +1.0 EV.
- If the flash is used in Continuous Shooting mode, only one photograph can be taken.

Red-eye effect
Red-eye is an effect whereby the subject's pupils appear red in a photograph because the light entering the eye is reflected off the retina.
Setting the flash mode
1. Switch the camera on and press < or > on the mode button until the “☐” or “☐” icon lights on the mode select LED.
2. Press ▲ on the 4-way button until the icon for the desired mode appears on the LCD monitor.
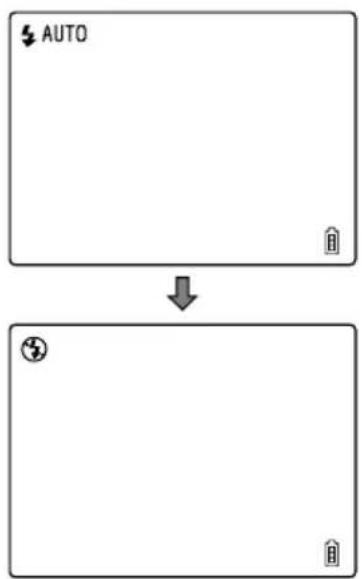
The flash mode icon changes through the cycle shown below each time ▲ on the 4-way button is pressed.
![graph LR A["→ AUTO"] --> B["→ AUTO"] B --> C["→"] C --> D["→"]](/content/2026/06/1245158/images/0d47ff841a0896f2a536eeaabf83e017d775afd81e20d5fba3ec4220057d3850.jpg)

IMPORTANT
- This setting reverts to the default when the camera is switched off. To retain the setting, set Mode Lock (→ p.6-7) to ON.
● Flash settings in each mode using the scene button SCENE
Some restrictions apply to the flash modes that are available in the shooting modes selected using the scene button ☐ (→ p.3-4).
| Scene Mode Available flash modes | |
| Standard | AUTO Auto Flash mode, Red-eye Reduction Auto mode, Flash Off mode, Fill-in Flash mode |
| Sports Action | |
| Portrait | |
| Night View Flash Off mode only | |
| Night Portrait Auto Flash mode, Red-eye Reduction Auto mode | |
| Macro Flash Off mode, Fill-in Flash mode | |
| Landscape Flash Off mode only | |
Effective flash range
The effective flash range varies depending on parameters such as the zoom, ISO sensitivity and AE mode settings.
When taking pictures, refer to the distances shown in the figure at right.
* For more details, see the “Accessories and Specifications” provided separately.
(See p.4-22 for information on the ISO settings.)
ISO: AUTO
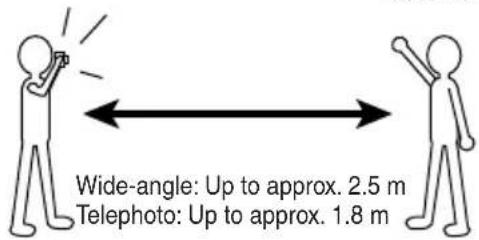
Avoiding camera shake
Camera shake refers to the effect of images appearing blurred or out of focus because the camera moved when the picture was taken. This is particularly likely to occur at slow shutter speeds and in macro shots. This applies particularly to macro shots with high magnifications, where the subject's depth of field is extremely shallow and even slight camera movements when the shutter release button is pressed can have a large impact on the image.
In situations of this sort, place the camera on a stable surface to take the shot. Using the self-timer (→ p.4-4) also is effective in preventing camera movement when the shutter release button is pressed.

Taking Pictures Using the Self-Timer
Applicable mode:


The self-timer is used for shots such as those where the photographer is included in the shot. In this mode, the shutter releases either 2 seconds or 10 seconds after the shutter release button is pressed. A self-timer delay of 2 seconds is useful for preventing camera shake when you are using Macro or Night View mode.
1 Switch the camera on and press < or > on the mode button until the “☐”, “☐” or “☐” icon lights on the mode select LED. 2 Press the MENU button Ⓓ to display the menu icons.
3 Use ◀ or ▶ on the 4-way button to select SELF TIMER [💡] and then press the OK button 🔒.
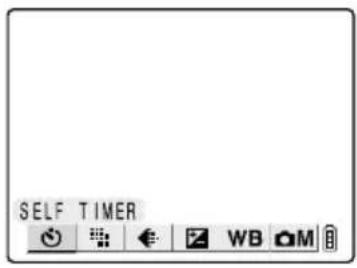
4 Press ▲ or ▼ on the 4-way button to select the desired delay time and then press the OK button 🔒.
[Sets a self-timer delay of 10 seconds.
[Sets a self-timer delay of 2 seconds.
OFF: Normal photography (default)
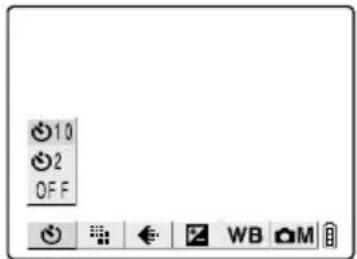
5 The [ ] or [ ] icon2 appears on the LCD monitor to show the selected delay.

NOTE
- Press the MENU button Ⓓ to clear the menu icons and make picture taking easier.
![10 [ ]](/content/2026/06/1245158/images/a42b628e92ed05eb6fe313edea3428d48326fef62ea323765153f46768ddd8b0.jpg)
Press the shutter release button.
The self-timer runs for the selected delay time and then releases the shutter.

IMPORTANT
- This mode is cancelled after you take the picture. To continue using the self-timer, select self-timer mode again.
- Place the camera on a stable surface.
- To interrupt the self-timer once it has started running, press the shutter release button.
Selecting the Number of Pixels (Image Size)
Applicable mode: /马/
The number of pixels refers to the number of individual dots used to make up the image. The larger this number, the better the image quality. However, this also increases the size of the image file so that fewer pictures can be taken. Choose the number of pixels that best suit the intended use of the shot. (→ p.4-7)
Switch the camera on and press < or > on the mode button until the “☐”, “☐” or “☐” icon lights on the mode select LED.
Press the MENU button ☑ to display the menu icons.
Use ◀ or ▶ on the 4-way button to select PIXELS [ ] and then press the OK button ⓐ.
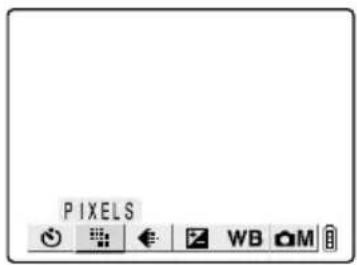
Press ▲ or ▼ on the 4-way button to select the desired image size and then press the OK button ⓐ.
| 2048 × 1536 (default) | 640 × 480 |
| 1600 × 1200 | 320 × 240 (default) |
| 1280 × 960 | 160 × 120 |
| 640 × 480 |
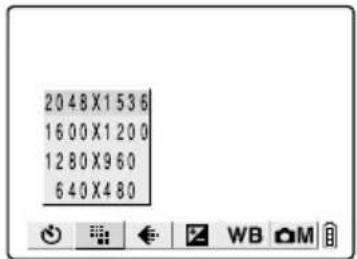
The selected number of pixels ([ ]280c.) appears on the LCD monitor.

NOTE
- Press the MENU button D254 to clear the menu icons and make picture taking easier.
![1280l [ ]](/content/2026/06/1245158/images/4df12cb51d1779892875db1a0fdd23f326c93092a726659431750db1237be119.jpg)

IMPORTANT
- Because this setting is retained even when the camera is switched off, you need to restore the original setting or otherwise modify the setting to suit the scene or subject being shot.
[←] Selecting the Quality (Compression Ratio)
Applicable mode:
![CONTAX SL300R T - [←] Selecting the Quality (Compression Ratio) - 1](/content/2026/06/1245158/images/c780706e70461ea264e2c02c2d2698bc3f749f297c10c4a7c9e0859662437381.jpg)
You can select Normal (high compression) or Fine (low compression) as the Quality (compression ratio) setting. While lower compression ratios give better image quality, they also increase the file size so that fewer images can be recorded. As with the image size, you should choose the quality that best suits the intended use of the shot. (→ p.4-7)
1 Switch the camera on and press < or > on the mode button until the “☐” or “☐” icon lights on the mode select LED. 2 Press the MENU button 📋 to display the menu icons.
3 Use ◀ or ▶ on the 4-way button to select QUALITY [ ] and then press the OK button ⓐ.
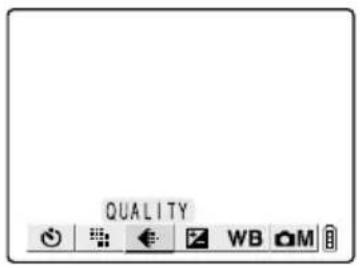
4 Press ▲ or ▼ on the 4-way button to select the desired image quality and then press the OK button ⓐ.
[F] (Fine): Shoots images at a low compression ratio. [N] (Normal): Shoots images at a high compression ratio. (default)
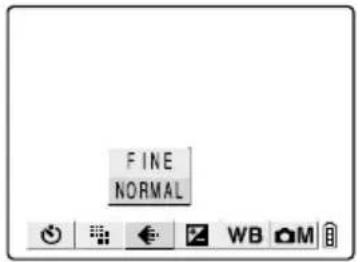
5 The selected image compression ratio ([F] or [N]) appears on the LCD monitor.
![CONTAX SL300R T - [←] Selecting the Quality (Compression Ratio) - 4](/content/2026/06/1245158/images/d261515d3182196c0e48880314a8c88c049807614d2b149fba3ea49a21da6d87.jpg)
NOTE
- Press the MENU button Ⓓ to clear the menu icons and make picture taking easier.
![[ ] WB WB M](/content/2026/06/1245158/images/afcf7936596c548325150e06f4f5870458fae104a23010d69f2c72c07926237a.jpg)

IMPORTANT
- Because this setting is retained even when the camera is switched off, you need to restore the original setting or otherwise modify the setting to suit the scene or subject being shot.
● Available shots and capacities for different image size/quality (compression ratio) combinations
Refer to the separate information sheet "Accessories and Specifications" for the available shots and capacities.
■ Guide to choosing image size and image quality
For high-quality printing or to give priority to image quality, choose a large image size. For files you want to send as e-mail attachments, choose a small image size to keep the file size small.
When image quality is particularly important, select [F] (Fine) as the Quality setting. Otherwise, choosing the [N] (Normal) setting will give smaller file sizes and increase the number of pictures you can shoot.
[+] Using Exposure Compensation
Applicable mode:
![CONTAX SL300R T - [+] Using Exposure Compensation - 1](/content/2026/06/1245158/images/1e8ed66fef665e826b69deb925de00af00eb0fadf81c1448389afc3b8c1b0311.jpg)
Use exposure compensation to adjust the brightness of your images. This function is especially useful for shots where you did not get the ideal exposure because subject and background brightness differed a lot, and for images that you deliberately want to shoot under- or overexposed.
This camera allows you to adjust the brightness up to plus or minus 2.0 EV in 1/3 EV increments.
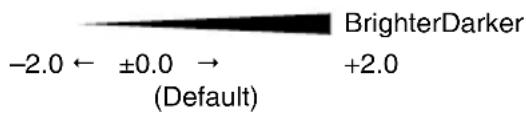
1. Switch the camera on and press < or > on the mode button until the “☐”, “☐” or “☐” icon lights on the mode select LED.
2. Press the MENU button MENU to display the menu icons.
3. Use ◀ or ▶ on the 4-way button to select EXP. COMP. [1] and then press the OK button ⏻.
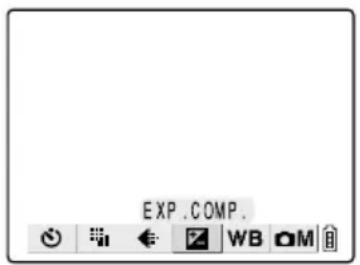
4. Press ▲ or ▼ on the 4-way button to select the desired compensation setting and then press the OK button ⏻.
-2.0 EV to +2.0 EV
(13 levels in 1/3-EV increments)
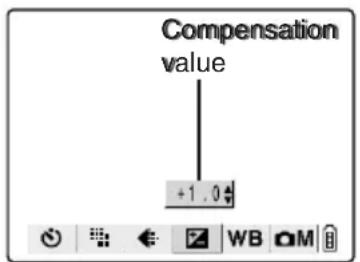
The compensation setting ([+1.0], etc.) appears on the LCD monitor.
![CONTAX SL300R T - [+] Using Exposure Compensation - 5](/content/2026/06/1245158/images/def1a11ed042a1511be06a2006f404efe9f8c45944f8c47c607ea17686a781f0.jpg)
NOTE
Press the MENU button to clear the menu icons and make picture taking easier.
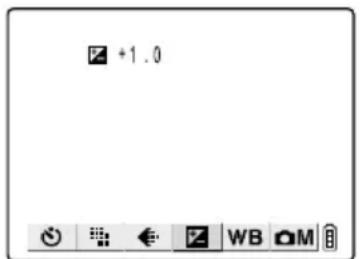

IMPORTANT
- The exposure compensation setting does not change after a shot is taken. (For example, if compensation of +0.3 is set, all images shot subsequently will have an exposure compensation of +0.3.)
- This setting reverts to the default value (±0.0) when the camera is switched off. To retain the setting, set Mode Lock (→ p.6-7) to ON.
- Exposure compensation when the flash is used is limited to between -1.0 and +1.0 EV.
- When the EVALUATION metering mode (→ p.4-23) is used, the exposure compensation may differ from the specified setting for some subjects.
[ WB ] Determining the White Balance
Applicable mode: /马/
The color of a subject varies depending on the light source used. This applies particularly to white. White balance is the process of ensuring that a white object actually appears white under a given light source.
Switch the camera on and press < or > on the mode button until the “☐”, “☐” or “☐” icon lights on the mode select LED.
Press the MENU button to display the menu icons.
Use ◀ or ▶ on the 4-way button to select WHITE BALANCE [W] and then press the OK button ⓐ.
Press ▲ or ▼ on the 4-way button to select the desired function and then press the OK button ⓐ.
| AUTO | Automatic | Automatically sets the white balance to suit the ambient conditions. (default) |
| Daylight | Specifies the light source. | |
| Incandescent | ||
| Cloudy | ||
| Fluorescent | ||
| Preset | Uses the white balance specified in SET DETAILS. This value must be set beforehand. (→ p.4-16) |
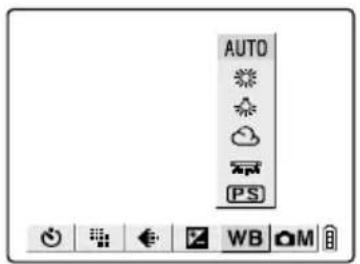
An icon such as [ ] appears on the LCD monitor.
![CONTAX SL300R T - [ WB ] Determining the White Balance - 3](/content/2026/06/1245158/images/ecbac465948821ab52edb71c9f212dc145dd6f8cd0e7d4cf21124f79e75f00ce.jpg)
NOTE
- Press the MENU button Ⓓ to clear the menu icons and make picture taking easier.

IMPORTANT
- This setting reverts to the default (AUTO) when the camera is switched off. To retain the setting, set Mode Lock (→ p.6-7) to ON.
[ fps ] Setting the Frame Rate
Applicable mode:
![CONTAX SL300R T - [ fps ] Setting the Frame Rate - 1](/content/2026/06/1245158/images/bd2e5839ec29825fb71c75987c284fd6d671fa16a67f746a0b58f0165d790c51.jpg)
The frame rate refers to the number of frames shot per second in a movie. The available frame rate settings are 30 frames per second (30fps) and 15 frames per second (15fps). Movement in movies with a frame rate of 30 fps is smooth, but the large image file sizes mean that they cannot be as long as movies shot at 15 fps.
1. Switch the camera on and press < or > on the mode button until the “◀” icon lights on the mode select LED.
2. Press the MENU button 📋 to display the menu icons.
3. Use ◀ or ▶ on the 4-way button to select FRAME/SEC [f] and then press the OK button 🔒.
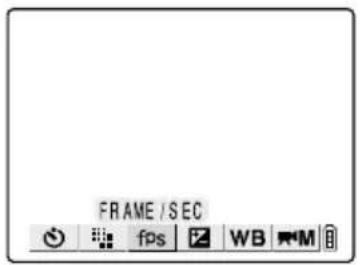
4. Press ▲ or ▼ on the 4-way button to select the desired frame rate and then press the OK button ⏻.
[15fps] Shoots at 15 fps [30fps] Shoots at 30 fps (default)
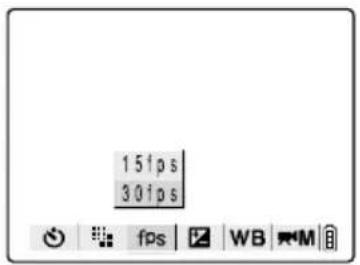
5. The selected frame rate ([30fps], etc.) appears on the LCD monitor.
![CONTAX SL300R T - [ fps ] Setting the Frame Rate - 4](/content/2026/06/1245158/images/234d2f7ebfafe8aad135c1060961c8f82afb3e7dea75239efba7f4dfce436213.jpg)
NOTE
- Press the MENU button to clear the menu icons and make picture taking easier.

IMPORTANT
- Because this setting is retained even when the camera is switched off, you need to restore the original setting or otherwise modify the setting to suit the scene or subject being shot.
The detailed settings discussed here can be used to set functions similar to those found on conventional cameras, such as AE and long exposure settings, as well as settings specific to digital cameras such as color and chroma.
| Detail menu Details and Usage Mode Page | |||
| SOUND | Used to specify whether or not movies are shot with sound. | 4-11 | |
| COLOR MODE | Can be set to COLOR, B/W or SEPIA. | 4-13 | |
| CHROMA Can be | set to +, STANDARD or -. + gives more intense colors while - gives paler colors. | 4-14 | |
| SHARPNESS | Can be set to +3, +2, +1, STANDARD or -1. Positive values give sharper outlines around the subject. | 4-15 | |
| WB PRESET | Allows you to set your own reference value for white using a sheet of white paper, etc. | 4-16 | |
| AE MODE | The available settings are aperture values of F2.8 and F7.5 and PROGRAM. When the aperture is set, the camera automatically selects the shutter speed. | 4-17 | |
| FOCUSING | Can be set to auto focus settings of WIDE AF and SPOT AF and to manual focusing MF. | 4-19 | |
| LONG EXP. | Can be set to shutter speeds of 8SEC, 4SEC or 2SEC or to OFF. | 4-21 | |
| ISO | The available settings are AUTO, 100, 200, 400 and 800. For fast moving subjects, select 400. For better image quality, select 200 or 100. | 4-22 | |
| METERING | Allows you to select EVALUATION, CENTER or SPOT AREA as the method used by the camera to set the exposure. | 4-23 | |
| DIGITAL ZOOM | Select ON to use the digital zoom or OFF to disable digital zooming. | 4-24 | |
[SOUND]
Shooting Movies with Sound (or without Sound)
Applicable mode:

You can choose whether to shoot your movies with sound or without sound.

IMPORTANT
- To prevent the sound of the zoom operating being recorded, the specifications for this camera are such that zooming is disabled when a movie with sound is being shot. Compose the shot with the zoom before you start shooting or use the digital zoom (→ p.3-3). To use the digital zoom, zoom in fully with the optical zoom before taking the picture. If the movie is shot without sound, the optical zoom can be used during shooting.

Switch the camera on and press < or > on the mode button until the “◀” icon lights on the mode select LED.
2Press the MENU button to display the menu icons. 3Use ◀ or ▶ on the 4-way button to select SET DETAILS [ ] and then press the OK button.
4Press ▲ or ▼ on the 4-way button to select [SOUND] and then press ▶.
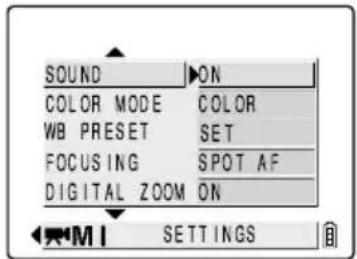
5Press ▲ or ▼ on the 4-way button to select the desired setting and then press the OK button.
[ON: Shoots movies with sound. (default)
[OFF: Shoots movies without sound.
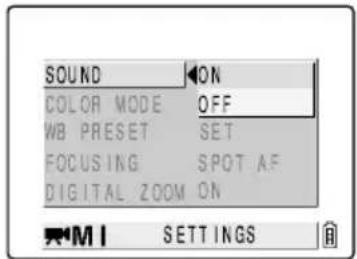
6Press the MENU button MENU to clear the menu.
7An icon such as [] appears on the LCD monitor.
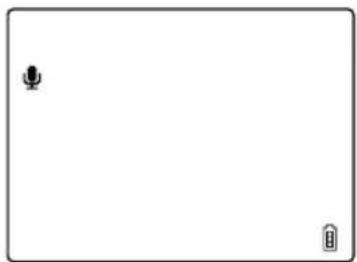
IMPORTANT
- Because this setting is retained even when the camera is switched off, you need to restore the original setting or otherwise modify the setting to suit the scene or subject being shot.
[COLOR MODE] Selecting Color, Black & White or Sepia
Applicable mode: /马/
This feature allows you select colors so that your images resemble photos taken using sepia tone or monochrome film.
1Switch the camera on and press < or > on the mode button until the “☐”, “☐” or “☐” icon lights on the mode select LED.
2Press the MENU button ☑ to display the menu icons.
3Use ◀ or ▶ on the 4-way button to select SET DETAILS [☐] and then press the OK button ⏻.
If you selected "×" in step 1, select [東]are.
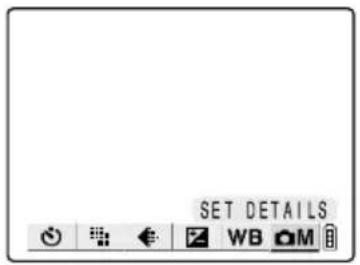
4Press ▲ or ▼ on the 4-way button to select [COLOR MODE] and then press ▶.
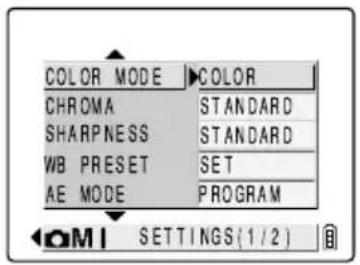
5Press ▲ or ▼ on the 4-way button to select the desired color mode and then press the OK button ⏻.
[No icon] COLOR (default)
[B/W] B/W
[SEPIA] SEPIA
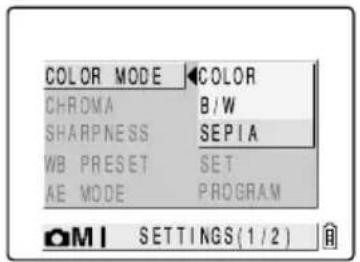
6Press the MENU button to clear the menu.
7The selected setting ( , GERA) appears on the LCD monitor.
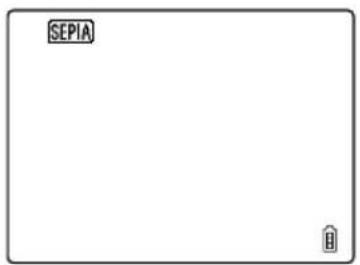
![CONTAX SL300R T - [COLOR MODE] Selecting Color, Black & White or Sepia - 5](/content/2026/06/1245158/images/6ac87e47f50d63955f26ddd24d3418ca8295e093b49964007dc3c18923bb6fb7.jpg)
NOTE
- The color mode reverts to the default setting of COLOR when the camera is switched off.
[CHROMA] Changing the color intensity
Applicable mode:
![CONTAX SL300R T - [CHROMA] Changing the color intensity - 1](/content/2026/06/1245158/images/c6022fca21699c1fba38b6b10aac9ca9a99b034db1ca55fefa9c9af05ec5b029.jpg)
The CHROMA setting lets you take pictures in which the intensity of the colors is increased (brighter colors) or decreased (paler colors).
1Switch the camera on and press < or > on the mode button until the “☐” or “☐” icon lights on the mode select LED.
2Press the MENU button to display the menu icons.
3Use ◀ or ▶ on the 4-way button to select SET DETAILS [ ] and then press the OK button.
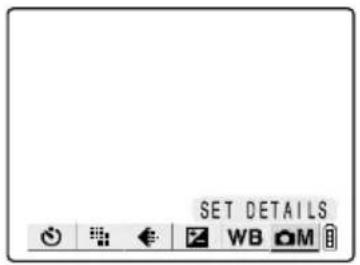
4Press ▲ or ▼ on the 4-way button to select [CHROMA] and then press ▶.
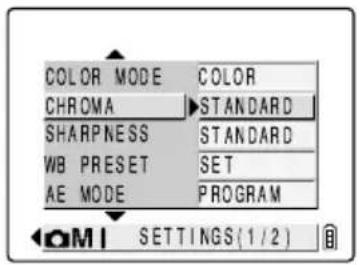
5Press ▲ or ▼ on the 4-way button to select the desired chroma and then press the OK button.
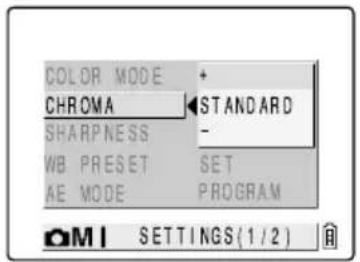
[1] +: Increases the color intensity. [No icon] STANDARD : Default setting. [∅1] - : Decreases the color intensity.
6 Press the MENU button to clear the menu.
7 The selected setting (e.g., [+2]) appears on the LCD monitor.
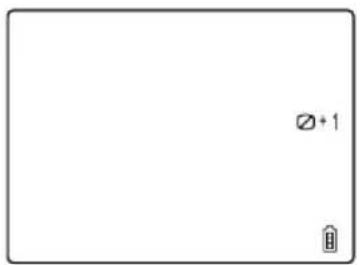
IMPORTANT
- Because this setting is retained even when the camera is switched off, you need to restore the original setting or otherwise modify the setting to suit the scene or subject being shot.
[SHARPNESS]
Enhancing the image outlines
Applicable mode:

This setting enables you to take pictures in which the subject's outline is sharpened or softened.
1 Switch the camera on and press < or > on the mode button until the “☐” or “☐” icon lights on the mode select LED.
2 Press the MENU button to display the menu icons.
3 Use ◀ or ▶ on the 4-way button to select SET DETAILS [☐] and then press the OK button.
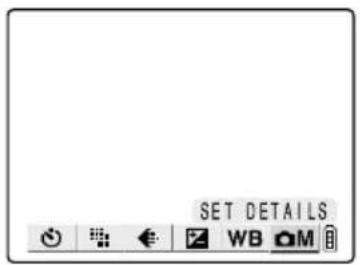
4 Press ▲ or ▼ on the 4-way button to select [SHARPNESS] and then press ▶.
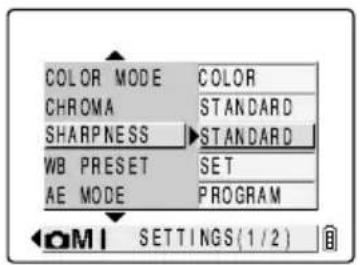
5 Press ▲ or ▼ on the 4-way button to select the desired sharpness and then press the OK button.
[3] +3 Sharper outlines
[0+ 2 ] + 2
[No icon] STANDARD (default)
[⊕1] -1 Softer outlines
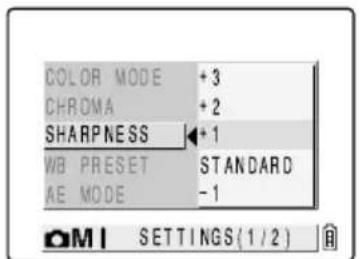
Press the MENU button to clear the menu.
The selected setting (e.g., [📄]) appears on the LCD monitor.
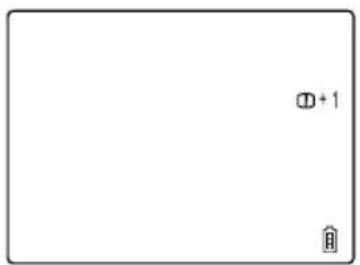
IMPORTANT
Because this setting is retained even when the camera is switched off, you need to restore the original setting or modify the setting to suit the scene or subject being shot.
[WB PRESET] Setting Your Own Value for White
Applicable mode: /马/
Use this mode when there are multiple light sources or when you want to set the white value very precisely.
Switch the camera on and press < or > on the mode button until the “☐”, “☐” or “☐” icon lights on the mode select LED.
Press the MENU button to display the menu icons.
Use ◀ or ▶ on the 4-way button to select SET DETAILS [ ] and then press the OK button ⓐ.
If you selected “✗” in step 1, select [京] here.
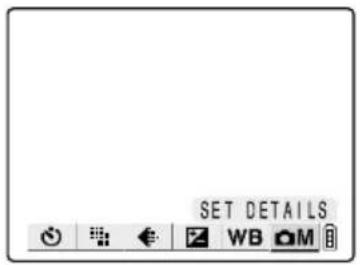
Press ▲ or ▼ on the 4-way button to select [WB PRESET] and then press ▶.
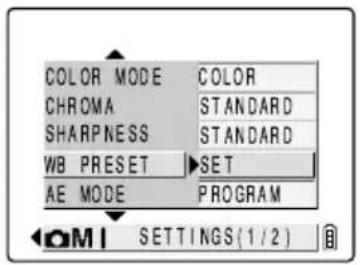
5 Position your prepared white sample so that it fills the frame on the screen and then press ▲ or ▼ on the 4-way button to select [SET]. Then press the OK button ⓐ.
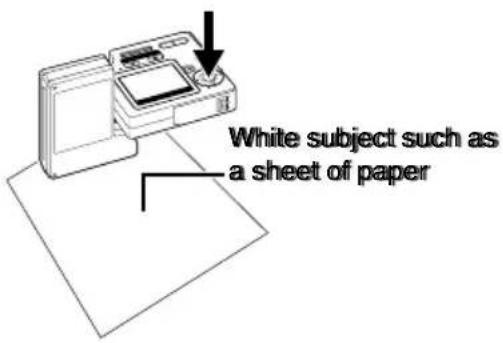
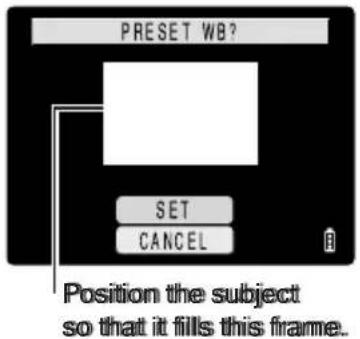
6 Press the MENU button ☑ to clear the menu.
7 [ ] appears on the LCD monitor.
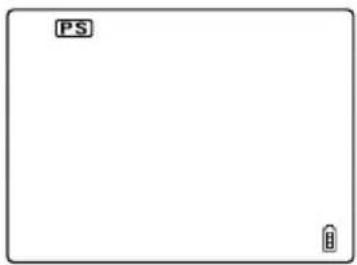
IMPORTANT
- Because this setting is retained even when the camera is switched off, you need to restore the original setting or otherwise modify the setting to suit the scene or subject being shot. - Specify this setting for “☐” camera mode, “☐” Continuous Shooting mode and “☑” Movie mode.
[AE MODE] Selecting the Exposure Setting Method
Applicable mode:
![CONTAX SL300R T - [AE MODE] Selecting the Exposure Setting Method - 1](/content/2026/06/1245158/images/64ba8500df2f3991ea60265cddb5a3a19964a2562bea8bc70e705808fd878d1a.jpg)
The available AE mode settings are [PROGRAM], in which the camera automatically sets aperture and shutter speed, and [F2.8] or [F7.5], in which the aperture is fixed and the camera sets the optimum shutter speed. The higher the aperture, the greater the area centered on the subject that is sharply focused (depth of field).
1 Switch the camera on and press < or > on the mode button until the “☐” or “☐” icon lights on the mode select LED.
2 Press the MENU button 📋 to display the menu icons.
3 Use ◀ or ▶ on the 4-way button to select SET DETAILS [☐] and then press the OK button ⏻.
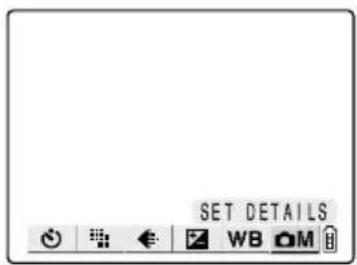
4 Press ▲ or ▼ on the 4-way button to select [AE MODE] and then press ▶.
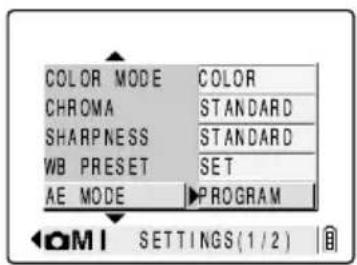
5 Press ▲ or ▼ on the 4-way button to select the desired setting and then press the OK button ⓐ.
[No icon] PROGRAM: The camera sets the optimum shutter speed and aperture settings for the subject. (default)
[F2.8] F2.8 : The area in sharp focus (depth of field) is shallow so that the subject stands out clearly from the background.
[F7.5] F7.5: The area in sharp focus (depth of field) is deep so that both the subject and background (or foreground) are sharp.
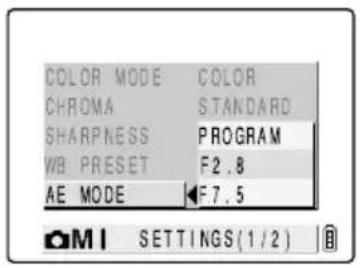
IMPORTANT
- When [F7.5] is selected, take care to avoid camera shake.
6. Press the MENU button to clear the menu.
7. The selected setting ([F2.8], etc.) appears on the LCD monitor.
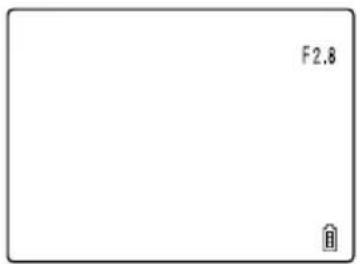
IMPORTANT
- Because this setting is retained even when the camera is switched off, you need to restore the original setting or otherwise modify the setting to suit the scene or subject being shot.
[FOCUSING] Selecting the focusing method
Applicable mode: //
This mode allows you to specify the camera's focusing method.
There are 2 automatic focusing modes (WIDE AF* and SPOT AF*), and a manual focus mode (MF) that allows you to set the shooting distance yourself.
* AF: Auto Focus
![[ ]](/content/2026/06/1245158/images/06c58de0ce1f36b44e724f9967654118f6f1dc4afa7ab204ce22d6273235496a.jpg)
WIDE AF: Uses a wide focusing frame.
![[ ]](/content/2026/06/1245158/images/e0997c14df8657e5a58f4151eba42636abbf039fbbecb5aca6c0e50b15897d72.jpg)
SPOT AF: Uses a narrow focusing frame. (default)
![CONTAX SL300R T - [FOCUSING] Selecting the focusing method - 3](/content/2026/06/1245158/images/3909b4ad5d33a0cf9fa9eda81f612b7a3c7a5d7431e3b562482825034261fa4e.jpg)
MF: The photographer decides the shooting distance and sets the focus.
Setting the focusing method
1. Switch the camera on and press < or > on the mode button until the “☐”, “☐” or “☐” icon lights on the mode select LED.
2. Press the MENU button to display the menu icons.
3. Use ◀ or ▶ on the 4-way button to select SET DETAILS [☐] and then press the OK button Ⓞ.
If you selected “只” in step 1, select [東]re.
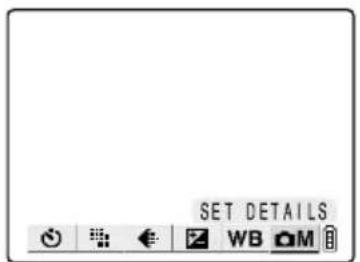
4. Press ▲ or ▼ on the 4-way button to select [FOCUSING] and then press ▶.
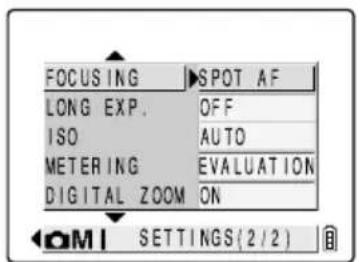
5. Press ▲ or ▼ on the 4-way button to select the desired setting and then press the OK button ⓐ.
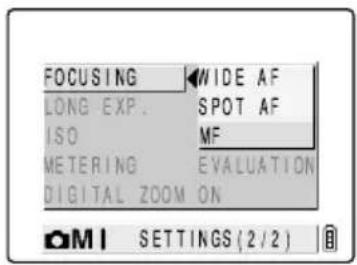
6. Press the MENU button to clear the menu.
7. The focusing frame (for WIDE AF and SPOT AF) or focusing gauge (for manual focusing) appears on the LCD monitor.
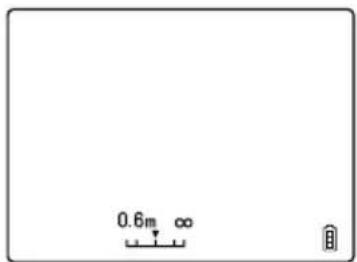
Determining the shooting distance with manual focusing (MF)
Use ◀ or ▶ on the 4-way button to set the distance.
If the shooting mark “●” appears when you press the shutter release button half way, you can take pictures at the specified distance.
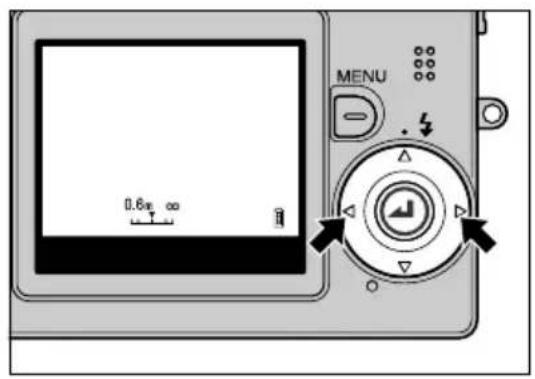
■ Approximate shooting distances using the focusing gauge
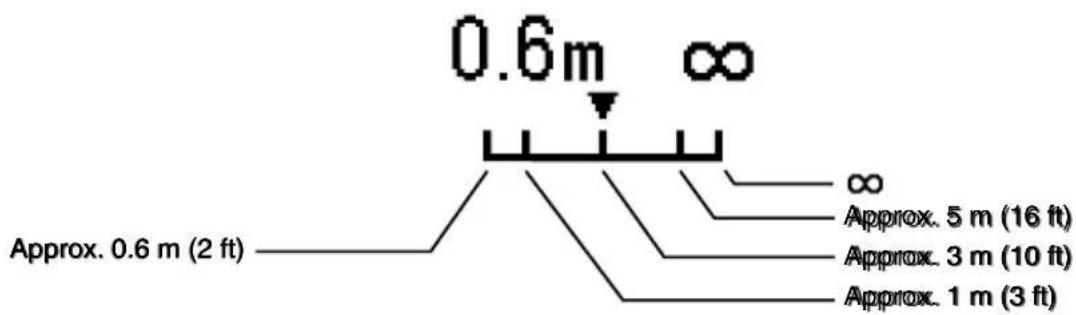
IMPORTANT
- Because this setting is retained even when the camera is switched off, you need to restore the original setting or otherwise modify the setting to suit the scene or subject being shot.
[LONG EXP.] Using Slow Shutter Speeds
Applicable mode:
![CONTAX SL300R T - [LONG EXP.] Using Slow Shutter Speeds - 1](/content/2026/06/1245158/images/46bac7960399ace9c6f8e25643719c41e4dcbf4503e1d3de52d07528df6b1e90.jpg)
When you take pictures of subjects such as stars at night or weak lights in a dark situation (e.g. candles), a slow shutter speed is used. The shutter speed refers to the length of time the shutter stays open. The longer this time, the longer the subject's image is exposed.
![CONTAX SL300R T - [LONG EXP.] Using Slow Shutter Speeds - 2](/content/2026/06/1245158/images/c11e14ca89e975c544afbf503b3790822dab04fd7f98cbb9da3e344778e90b74.jpg)
IMPORTANT
- For long-exposure shots, always place the camera on a stable surface to take the shot.

NOTE
- The time that should be set differs depending on the subject. Check this by taking a few trial shots.
1Switch the camera on and press < or > on the mode button until the “☐” or “☐” icon lights on the mode select LED.
2Press the MENU button MENU to display the menu icons.
3Use ◀ or ▶ on the 4-way button to select SET DETAILS [☐] and then press the OK button Ⓗ.
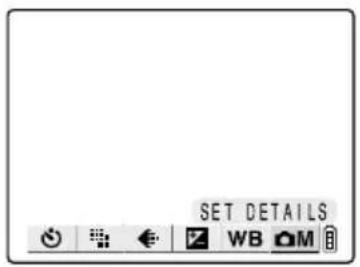
4Press ▲ or ▼ on the 4-way button to select [LONG EXP.] and then press ▶.
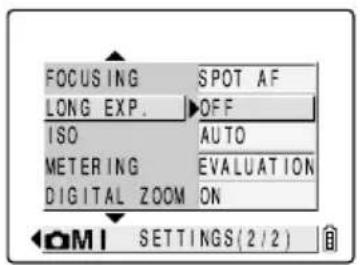
5Press ▲ or ▼ on the 4-way button to select the desired exposure time and then press the OK button Ⓜ.
[No icon] OFF: Normal photography (between 1 sec. and 1/2000 sec.) (default)
[LT2S] 2SEC: Shutter speed of 2 seconds
[LT4S] 4SEC: Shutter speed of 4 seconds
[LT8S] 8SEC: Shutter speed of 8 seconds
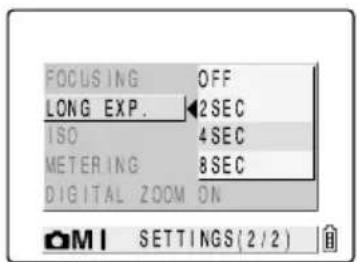
6Press the MENU button to clear the menu.
7The selected setting (e.g., [LT4S]) appears on the LCD monitor.
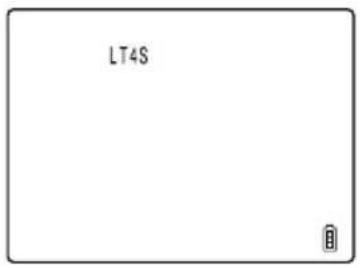
IMPORTANT
- Setting a slow shutter speed may result in 'noise' in the image.
- When you switch the camera off, the long exposure setting is cancelled and the camera reverts to normal shooting (default). • Take care to avoid camera shake. (→ p.4-4)
[ISO] Changing the ISO Sensitivity to Photograph Fast Moving Subjects
Applicable mode:
![CONTAX SL300R T - [ISO] Changing the ISO Sensitivity to Photograph Fast Moving Subjects - 1](/content/2026/06/1245158/images/b93520a9b9f743af848fb9c26c0f64e35c1c1e7c6f320be968747a109d41fb02.jpg)
The ISO setting corresponds to the ISO value of conventional film and indicates sensitivity to light.
The ISO can be set to AUTO, 100, 200, 400, or 800, with the image quality deteriorating as the number increases. Increasing the camera's sensitivity to light allows you to take pictures in dark locations or use fast shutter speeds. It also slightly increases the effective range of the flash. The default ISO setting is AUTO, in which case the camera sets the ISO sensitivity to suit the ambient conditions.
1Switch the camera on and press < or > on the mode button until the “☐” or “☐” icon lights on the mode select LED.
2Press the MENU button to display the menu icons.
3Use ◀ or ▶ on the 4-way button to select SET DETAILS [☐] and then press the OK button ⏻.
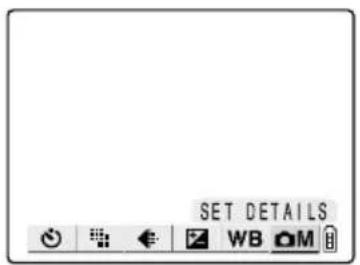
4Press ▲ or ▼ on the 4-way button to select [ISO] and then press ▶.
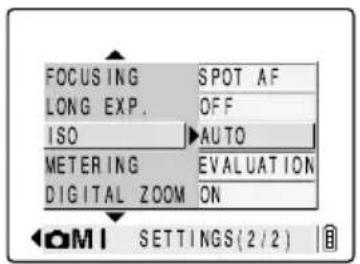
5Press ▲ or ▼ on the 4-way button to select the desired ISO setting and then press the OK button ⏻.
[No icon] AUTO: The camera sets the ISO sensitivity to suit the ambient conditions. (default)
[ISO100] 100: Fixed at ISO 100
[ISO200] 200: Fixed at ISO 200
[ISO400] 400: Fixed at ISO 400
[ISO800] 800: Fixed at ISO 800
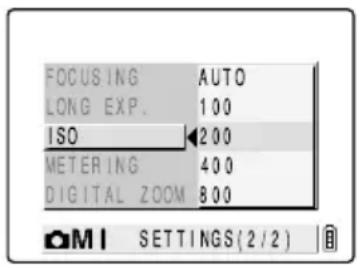
6Press the MENU button to clear the menu.
7The selected setting ([ISO200], etc.) appears on the LCD monitor.
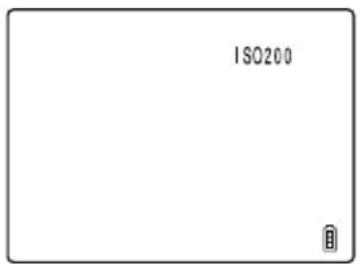
IMPORTANT
- Because this setting is retained even when the camera is switched off, you need to restore the original setting or otherwise modify the setting to suit the scene or subject being shot.
[METERING] Selecting the Area Used for Setting the Exposure
Applicable mode:
![CONTAX SL300R T - [METERING] Selecting the Area Used for Setting the Exposure - 1](/content/2026/06/1245158/images/2bde5b0b0c2e5943b9535df51d934529d283cb3c44acfd464d005406abaad51f.jpg)
This setting allows you to select the area that the camera uses when setting the exposure. The available settings are [EVALUATION], [CENTER] and [SPOT AREA]. Use the setting that best suits your subject.
1Switch the camera on and press < or > on the mode button until the “☐” or “☐” icon lights on the mode select LED.
2Press the MENU button to display the menu icons.
3Use ◀ or ▶ on the 4-way button to select SET DETAILS [☐] and then press the OK button.
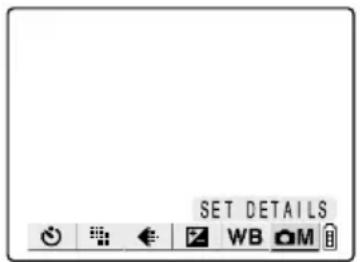
4Press ▲ or ▼ on the 4-way button to select [METERING] and then press ▶.
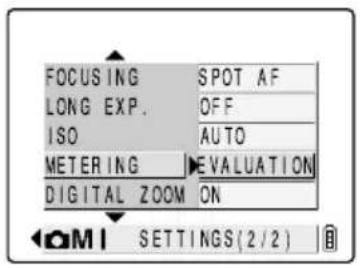
5Press ▲ or ▼ on the 4-way button to select the desired metering mode and then press the OK button ⓐ.
[No icon] EVALUATION: The entire screen is partitioned into 64 zones and the light in each zone is measured to determine the optimum exposure for the subject. (default)
☐ CENTER: Light is measured with greater weight given to the central part of the screen (an area larger than that used for spot metering).
SPOT AREA: Light is measured at the center of the screen.
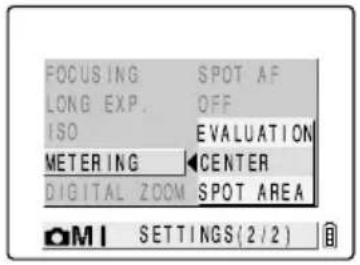
6Press the MENU button ☑ to clear the menu.
7The icon for the selected exposure mode appears on the LCD monitor.
IMPORTANT
- Because this setting is retained even when the camera is switched off, you need to restore the original setting or otherwise modify the setting to suit the scene or subject being shot.
[DIGITAL ZOOM] Switching the Digital Zoom ON and OFF
Applicable mode: /马/
When you are composing a shot, if you press the [▲] side of the zoom button until the maximum zoom is reached and then press the [▲] side of the zoom button again, digital zooming begins (→ p.3-3). To disable digital zooming, use the procedure below to set digital zooming to OFF.
1Switch the camera on and press < or > on the mode button until the “☐”, “☐” or “☐” icon lights on the mode select LED.
2Press the MENU button 📋 to display the menu icons.
3Use ◀ or ▶ on the 4-way button to select SET DETAILS [☐] and then press the OK button ⏻.
If you selected "×" in step 1, select [here].
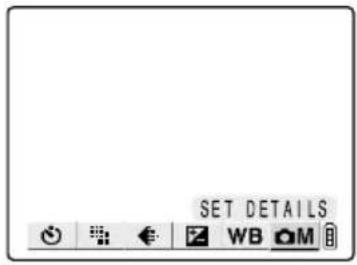
4. Press ▲ or ▼ on the 4-way button to select [DIGITAL ZOOM] and then press ▶.
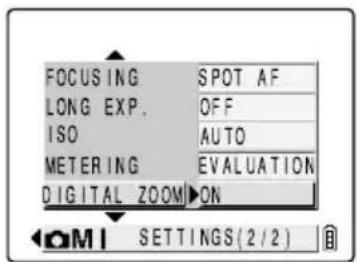
5. Press ▲ or ▼ on the 4-way button to select the desired setting and then press the OK button ⏻.
ON: Digital zooming can be used. (default)
OFF: Digital zooming is disabled.
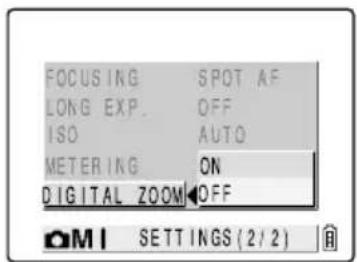
6. Press the MENU button MENU to clear the menu.
IMPORTANT
- Because this setting is retained even when the camera is switched off, you need to restore the original setting or otherwise modify the setting to suit the scene or subject being shot.
- Using the digital zoom to take pictures lowers the quality of the images slightly.
5
Using the ▶ Playback Mode Functions
This chapter describes the camera's Playback mode, in which you can check images you have shot on the LCD monitor. In Playback mode, you can also record sound onto your images, and resize, trim and rotate photographed images in 90° increments.
[PLAYBACK ZOOM] Viewing Your Images Enlarged
You can use the zoom buttons to enlarge an image during playback. (Still images only)
1. Switch the camera on and press < or > on the mode button until the "▶" icon lights on the mode select LED.
2Use ◀ or ▶ on the 4-way button to select the image to be played back.
3Press the [▲] side of the zoom button to enlarge the image.
The image is enlarged as follows each time you press the [+] button: 2X → 4X → 8X.
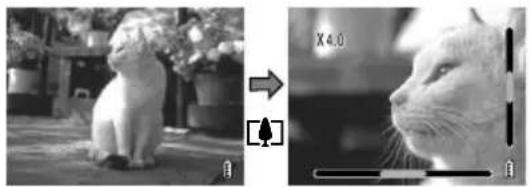
![CONTAX SL300R T - [PLAYBACK ZOOM] Viewing Your Images Enlarged - 2](/content/2026/06/1245158/images/e9c2f7896054e49da5851e4b2c3eb14e52f88066134f5f9f999e5898e78fa4df.jpg)
NOTE
- During zoomed playback, scroll bars appear at the bottom and on the right side of the screen. The scroll bars act as a guide to which part of the original image is currently displayed.
4With the image enlarged, use ▲▼ ◀▶ on the 4-way button to scroll the screen up, down, left or right in the image.
5Press the □side of the zoom button to retrun the enlarged image to its original size.
The image reverts to the original size each time you press the 🖱️ button, as follows: 4X → 2X → Original size.
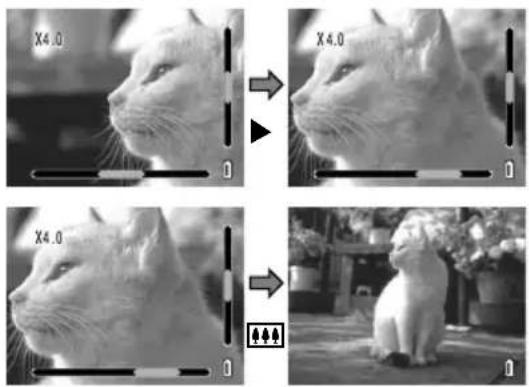
Playing Back Movies
While playing movies, you can pause normal playback, frame advance and adjust the volume.
1Switch the camera on and press < or > on the mode button until the “▶” icon lights on the mode select LED.
2Use ◀ or ▶ on the 4-way button to select the movie to be played back and use ▲ or ▼ to adjust the volume.

NOTE
• The volume can be adjusted during movie playback.
3Press the OK button 🔒 to begin playback.
The table below shows the operations that can be performed during playback.
| Button | Description |
| ▲ | Increases the volume. |
| ▼ | Decreases the volume. |
| ◀ | Press once to stop the movie and begin scanning backwards through the movie frame by frame. After that, scanning moves one frame back each time you press the button. |
| ▶ | Press once to stop the movie and begin scanning forwards through the movie frame by frame. After that, scanning moves one frame forward each time you press the button. |
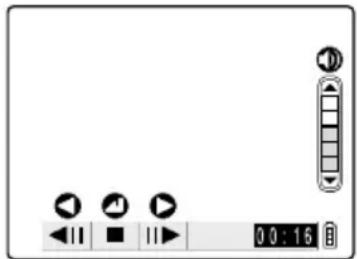
4Press the OK button to stop movie playback.
[MULTI] Viewing Multiple Images
Supported images: Still images/movies
MULTI playback allows you to view 6 thumbnail images on the LCD monitor at once. This is useful when you want to compare images side by side or locate a particular image.
![CONTAX SL300R T - [MULTI] Viewing Multiple Images - 1](/content/2026/06/1245158/images/1cc96018213bdf66749ae96d62b8f000bc65c9d0f0b14b9e62d101368c48b1ad.jpg)
NOTE
- The postrecording, protect, erase, erase all, resize, slide show and DPOF settings can all be specified from the MULTI display screen.
Using MULTI playback
1Switch the camera on and press < or > on the mode button until the "▶" icon lights on the mode select LED.
2Press the MENU button MENU to display the menu icons.
3Use ◀ or ▶ on the 4-way button to select MULTI [+ and then press the OK button.
The MULTI playback screen appears.
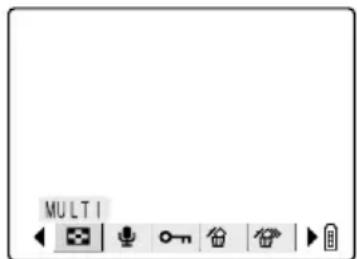
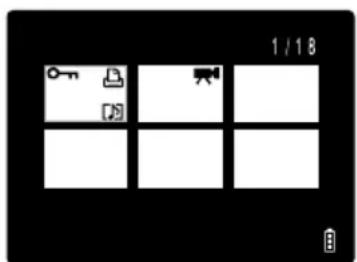
● Using the MULTI playback screen
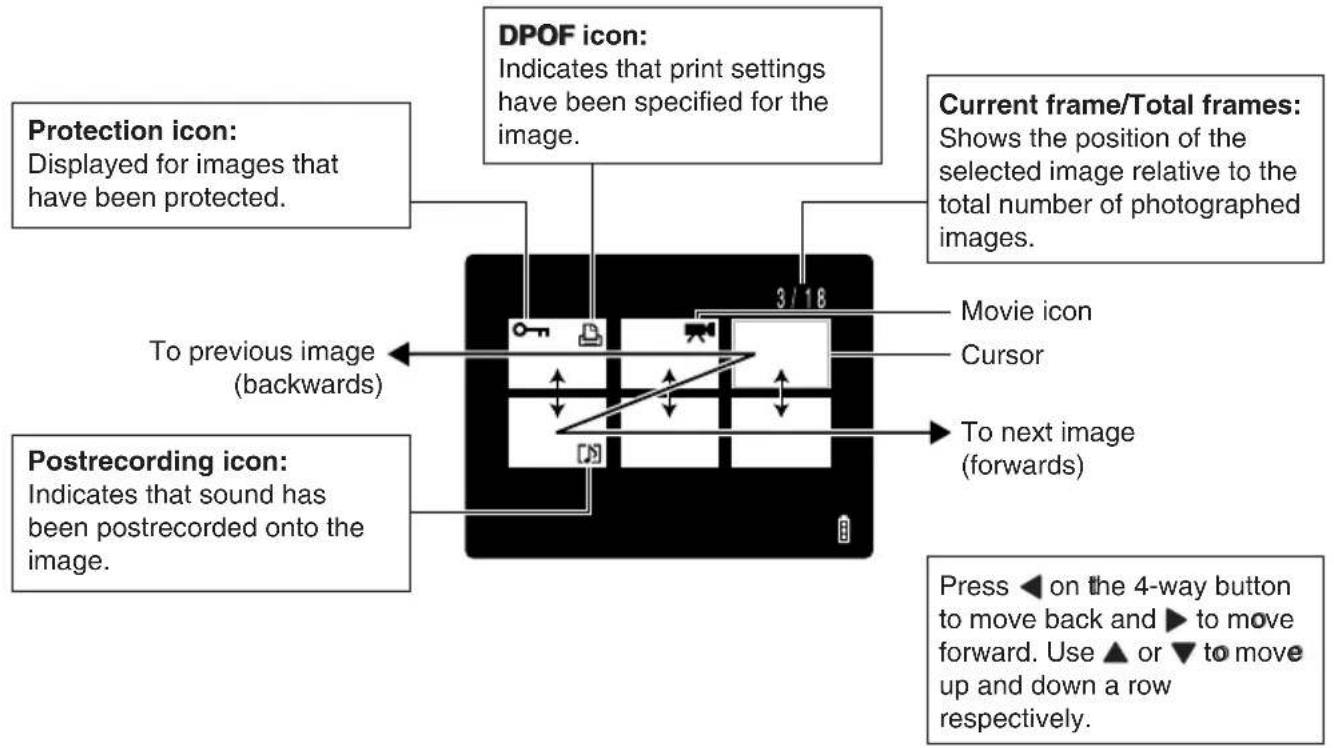
Erasing images in the MULTI playback screen
1 Press the MENU button MENU to display the menu icons.
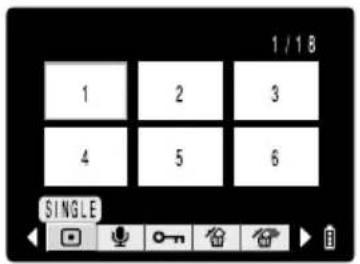
Use ◀ or ▶ on the 4-way button to select ERASE [1] and then press the OK button ⏻.
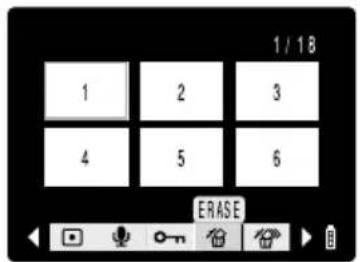
Use ◀ or ▶ on the 4-way button to position the cursor on the image to be erased.
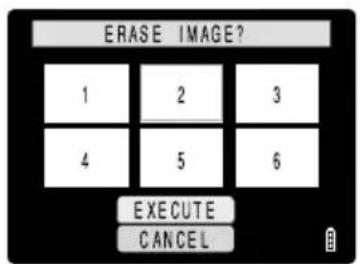
Use ▲ on the 4-way button to select [EXECUTE] and then press the OK button ⏻.
The image is erased.
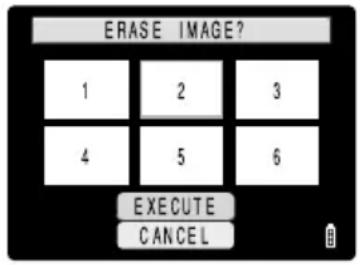
![CONTAX SL300R T - Use ▲ on the 4-way button to select [EXECUTE] and then press the OK button ⏻. - 2](/content/2026/06/1245158/images/ce374c48c4811412fdb0e28e326c2953c10d1074f44d090f7219b79e6f5da286.jpg)
NOTE
To continue erasing images, repeat steps 3 and 4.
Press the MENU button ☑ to return to the MULTI playback screen.
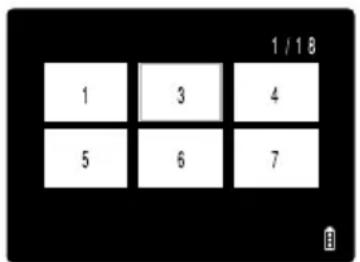
Reverting to normal playback (SINGLE playback)
Use ▲▼◀▶ on the 4-way button to position the cursor on the image you want to view in normal playback mode.
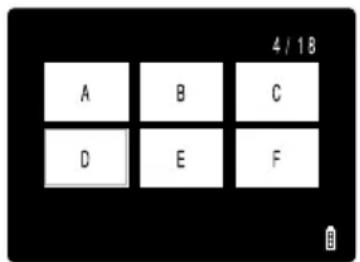
Press the OK button Ⓞ to change to normal playback.
[POSTRECORDING] Adding Voice Messages to Images
Supported images: Still images only
This feature allows you to add or remove recorded voice in photographed images (still images only).
Recording a message
Switch the camera on and press < or > on the mode button until the “▶” lights on the mode select LED.
Press the MENU button to display the menu icons.
Use ◀ or ▶ on the 4-way button to select POSTRECORDING [ ] and then press the OK button.
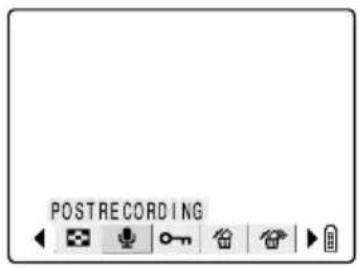
Use ◀ or ▶ on the 4-way button to select the image to which you want to add a voice message.
Use ▲ on the 4-way button to select [EXECUTE] and then press the OK button to begin voice recording.
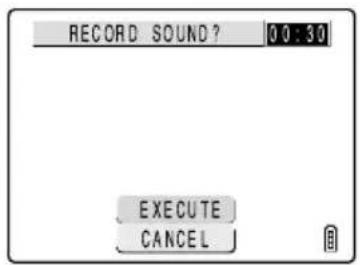
Dictate your message into the camera's microphone.
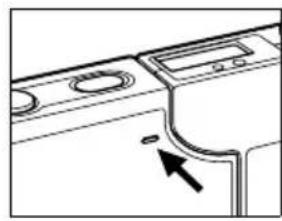
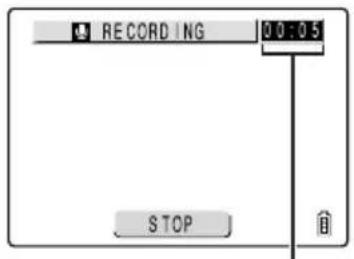
A countdown timer shows the seconds remaining during recording.
Messages up to 30 seconds long can be recorded.
To stop a recording mid way through, press the OK button. The screen in step 3 reappears.
Press the MENU button to clear the menu icons and return to the normal playback screen.
IMPORTANT
- It may not be possible to record a voice message if there is insufficient space available on the memory card. • Postrecording cannot be used for movies.
Erasing voice messages
Use the procedure below to erase a postrecorded voice message. Proceed carefully since erased messages cannot be recovered.
From step 3 in "Recording a message" on p.5-5:
Use ◀ or ▶ on the 4-way button to select the image from which you want to erase the voice message.
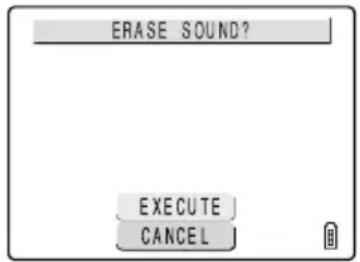
Use ▲ on the 4-way button to select [EXECUTE] and then press the OK button ⏻.
The voice message is erased and the "RECORD SOUND?" message appears.
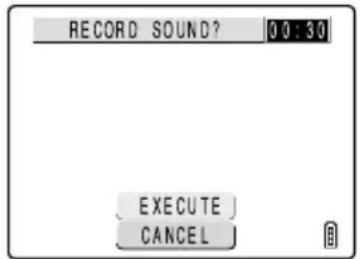
Press the MENU button to return to the normal playback screen.
Playing back a recorded message
Use the following procedure to play back an image with a postrecorded message.
Switch the camera on and press < or > on the mode button until the "▶" icon lights on the mode select LED.
Use ◀ or ▶ on the 4-way button to select the image with the message to be played back.
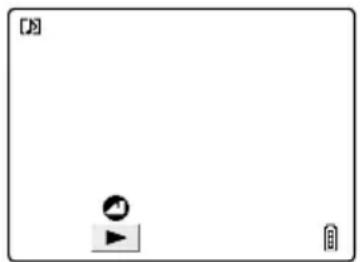
Press the OK button Ⓜ to begin message playback.
The table below shows the operations that can be performed during message playback.
| Button | Description |
| ▲ | Increases the volume. |
| ▼ | Decreases the volume. |
| ◀ | Hold down to play back the message at half speed.Release the button to return to normal playback. |
| ▶ | Hold down to play back the message at double speed.Release the button to return to normal playback. |
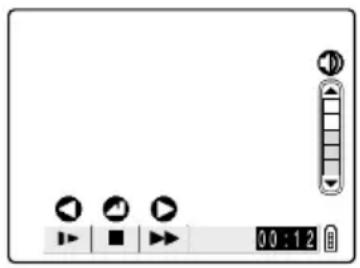
Press the OK button ⏻ to stop voice message playback.
[PROTECT] Protecting Images from Accidental Erasing
Supported images: Still images/movies
This feature allows you to protect your images to ensure that they are not inadvertently erased.
Protecting an image
Switch the camera on and press < or > on the mode button until the "▶" icon lights on the mode select LED.
2 Press the MENU button to display the menu icons.
3 Use ◀ or ▶ on the 4-way button to select PROTECT [☐] and then press the OK button ⓐ.
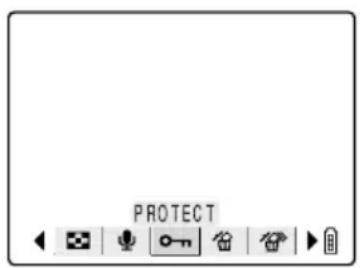
4 Use ◀ or ▶ on the 4-way button to select the image to be protected.
5 Use ▲ on the 4-way button to select [SET] and then press the OK button Ⓐ to set the image protection.
The [ð] icon appears on protected images.
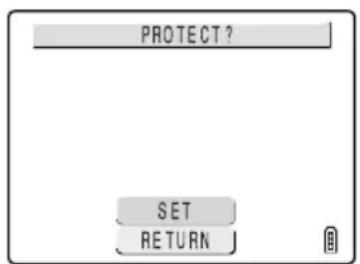

NOTE
• To protect another image, repeat steps 4 and 5.
6 Press the MENU button ☑ to return to the normal playback screen.

IMPORTANT
- The [ERASE ALL] function (→ p.5-10) does not erase protected images. However, [FORMAT] (→ p.6-5) erases all the images on the card, including protected images.
Unprotecting images
From step 3 in "Protecting an image" on p.5-8:
4 Use ◀ or ▶ on the 4-way button to select the image you want to unprotect.
5 Use ▲ on the 4-way button to select [EXECUTE] and then press the OK button ⏻ to remove the image protection.
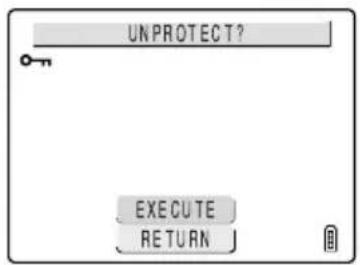

NOTE
• To unprotect another image, repeat steps 4 and 5.
6 Press the MENU button to return to the normal playback screen.
[ERASE] Erasing Individual Images
Supported images: Still images/movies
1 Switch the camera on and press < or > on the mode button until the “▶” icon lights on the mode select LED.
2 Press the MENU button to display the menu icons.
3 Use ◀ or ▶ on the 4-way button to select ERASE [ ] and then press the OK button Ⓤ.
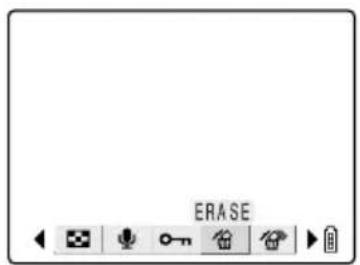
4 Use ◀ or ▶ on the 4-way button to select the image to be erased.
5 Use ▲ on the 4-way button to select [EXECUTE] and then press the OK button Ⓜ to complete erasing.
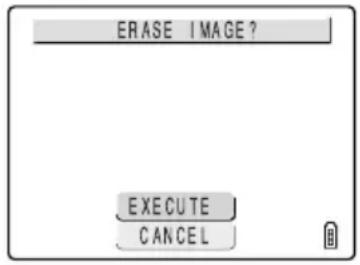
![CONTAX SL300R T - [ERASE] Erasing Individual Images - 3](/content/2026/06/1245158/images/070240ab3247ab5fe9410505e2eb14e42ff4ba167cae86eca4e7cbdb3dfedcef.jpg)
NOTE
• To erase another image, repeat steps 4 and 5.
6 Press the MENU button ☐ to return to the normal playback screen.

IMPORTANT
- When you erase an image with a postrecorded voice message (→ p.5-5), the message is also erased.
- This function cannot be used to erase protected images (→ p.5-8).
[ERASE ALL] Erasing All Images
Supported images: Still images/movies
Use this function to erase all the images recorded on a memory card.
![CONTAX SL300R T - [ERASE ALL] Erasing All Images - 1](/content/2026/06/1245158/images/d562ac270c0d6b436857288c8dda02eadddb051eab89d02780daa2e21fdc824e.jpg)
IMPORTANT
- This function cannot be used to erase protected images (→ p.5-8).
1. Switch the camera on and press < or > on the mode button until the “▶” icon lights on the mode select LED.
2. Press the MENU button to display the menu icons.
3. Use ◀ or ▶ on the 4-way button to select ERASE ALL [ ] and then press the OK button.
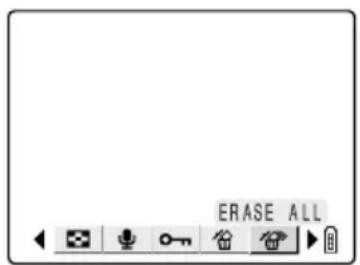
4. Use ▲ on the 4-way button to select [EXECUTE] and then press the OK button.
All the images are erased and the "NO IMAGE" message appears.
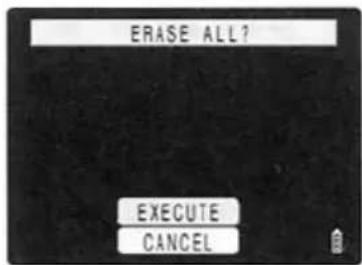
IMPORTANT
- If there are images still shown after you use ERASE ALL, those images may be protected. To forcibly erase all the images, format the memory card. (→ p.6-5)
- Postrecorded voice messages (→ p.5-5) are also erased with the corresponding images.
[RESIZE] Resizing and Trimming Images
Supported images: Still images only
You can use the procedure described below to change the number of pixels (resize) in photographed images and trim off any unwanted portions. Resized or trimmed images are saved as new image files, so the original images are left untouched.
IMPORTANT
- Images shot on a third-party digital camera cannot be resized.
NOTE
- Resized images are stored as shown below.
![graph TD A["DCIM"] --> B["100CXBOX"] B --> C["KICX0001.jpg"] B --> D["KICX0002.jpg"] E["RESIZE"] --> F["R00_0001.jpg"] G["New folder created."] --> H["Resized image file"]](/content/2026/06/1245158/images/752821ea236c7c9799e3e636cf58a0f156f27bda070ec70de67072e78e0b4d4c.jpg)
Resizing an image
1. Switch the camera on and press < or > on the mode button until the “▶” icon lights on the mode select LED. 2. Press the MENU button Ⓓ to display the menu icons. 3. Use ◀ or ▶ on the 4-way button to select RESIZE [☐] and then press the OK button Ⓞ.
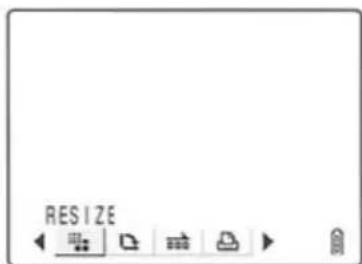
4. Use ▲ or ▼ on the 4-way button to select [EXECUTE RESIZING] and then press the OK button ⏻.
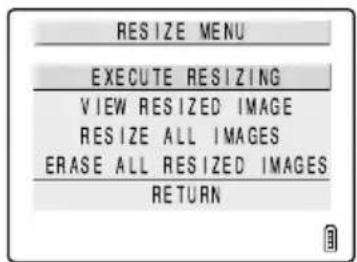
5. Use ◀ or ▶ on the 4-way button to select the image to be resized. When you have selected the image, press ▲, select [OK] and then press the OK button ⓐ.
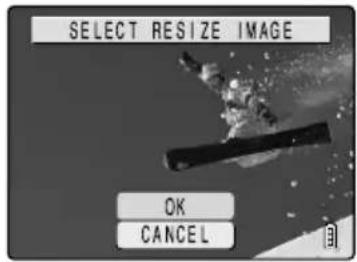
6. Set the new image size.
To simply change the number of pixels, press the OK button Ⓜ.
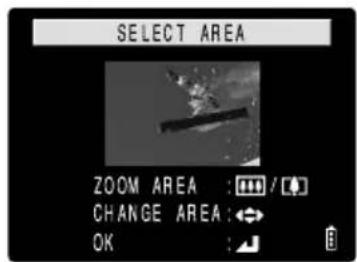
To enlarge an area, press the [▲] side of the zoom button to enlarge the image by 2X or 4X and then use ▲ ▼ ◀ ▶ on the 4-way button to select the area. Then press the OK button Ⓔ.
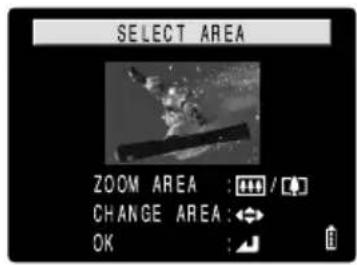
7. Use ▲ or ▼ on the 4-way button to select the image size and then press the OK button ⓐ.
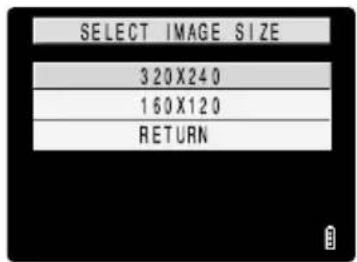
8. The name of the resized image is displayed. Check the image and then press the OK button ⓐ.
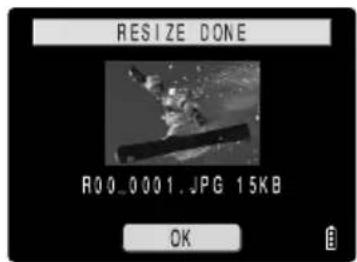
9. Press the MENU button ☑ to return to the normal playback screen.

IMPORTANT
• Movies cannot be resized. - Resizing may not be possible if there is too little space available on the memory card.
Checking and erasing resized images
You cannot use normal image playback to check resized images. Use the following procedure to view resized images.
From step 3 in "Resizing an image" on p.5-11:
4Use ▲ or ▼ on the 4-way button to select [VIEW RESIZED IMAGE] and then press the OK button ⏻.
The resized image is displayed.
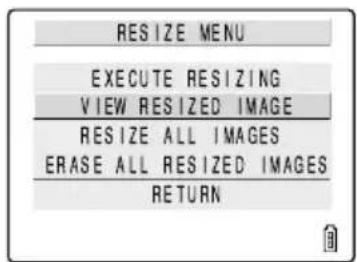
![CONTAX SL300R T - 4Use ▲ or ▼ on the 4-way button to select [VIEW RESIZED IMAGE] and then press the OK button ⏻. - 3](/content/2026/06/1245158/images/15ed4df214d6f0d146ea309221a37b99bc2ba0651a6d85671ea4fc2b9c3b9eb9.jpg)
NOTE
- If there are multiple resized images, use ◀ and ▶ on the 4-way button to switch between images.
5To erase the image, press ▲ on the 4-way button to select [ ] and then press the OK button Ⓞ.
![CONTAX SL300R T - 5To erase the image, press ▲ on the 4-way button to select [ ] and then press the OK button Ⓞ. - 2](/content/2026/06/1245158/images/f8692fb7b5ac9e95b8ab822954e2c87a89004e742e2dc9f8ff6c1af697dc812f.jpg)
NOTE
- The images cannot be erased if you select [RETURN] and then press the OK button Ⓜ.
6Press the MENU button ☑ to return to the normal playback screen.

IMPORTANT
- Resized images cannot be protected.
Resizing all the images
You can use this procedure to resize all the images recorded on a memory card.
From step 3 in "Resizing an image" on p.5-11:
4Use ▲ or ▼ on the 4-way button to select [RESIZE ALL IMAGES] and then press the OK button ⏻.
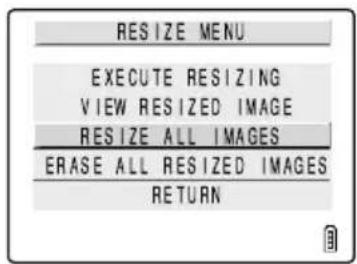
5Use ▲ or ▼ on the 4-way button to select the image size and then press the OK button ⓐ.
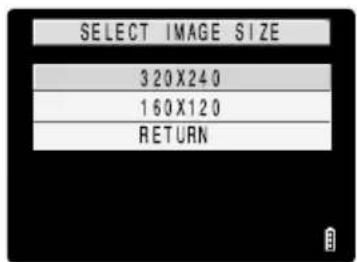

NOTE
- You can interrupt resizing in progress by pressing the MENU button ☐, but some of the images will be saved at the new size.
6The number of resized images are displayed. Check the images and then press the OK button ⓐ.
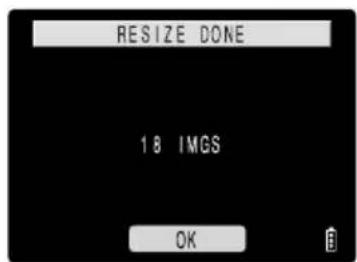

IMPORTANT
- If the memory card becomes full during resizing of all the images, resizing stops and only the images resized up to that point are saved.
- Resizing of a specified area (trimmed images) is not possible. • Movies are not resized.
7Press the MENU button ☑ to return to the normal playback screen.
Erasing all resized images
This procedure erases all resized images.
From step 3 in "Resizing an image" on p.5-11:
4Use ▲ or ▼ on the 4-way button to select [ERASE ALL RESIZED IMAGES] and then press the OK button ⓐ.
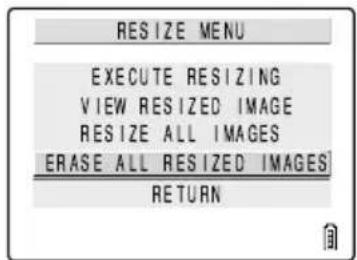
5Press ▲ on the 4-way button to select [EXECUTE] and then press the OK button ⏻.
All resized images are erased.
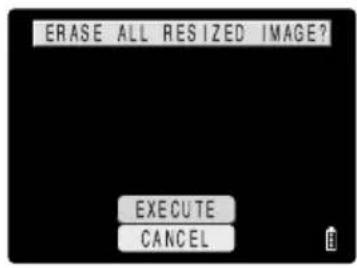
6Press the MENU button ☑ to return to the normal playback screen.
[ROTATE] Rotating an Image
Supported images: Still images only
Use the procedure below to rotate an image 90° left or right.
1Switch the camera on and press < or > on the mode button until the “▶” icon lights on the mode select LED.
2Press the MENU button 📋 to display the menu icons.
3Use ◀ or ▶ on the 4-way button to select ROTATE [1] and then press the OK button ⏻.
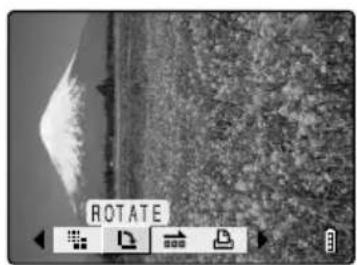
4Use ◀ or ▶ on the 4-way button to select the image to be rotated.
5Use ▲ or ▼ on the 4-way button to select a setting and then press the OK button ⓐ.
[90°]: Rotates the image 90° to the left (counterclockwise) [90°] Rotates the image 90° to the right (clockwise) [RETURN]: Cancels the operation and returns you to the menu icon screen.
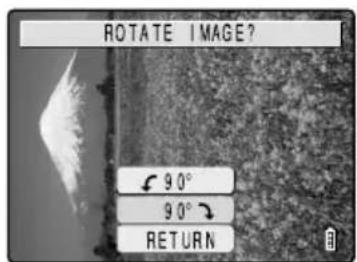
6The rotated image is displayed.
![CONTAX SL300R T - [ROTATE] Rotating an Image - 3](/content/2026/06/1245158/images/ece7438c5ff1e0932e1ece7b656851e2f4cffa0c771a7f3174d41f55383e9af7.jpg)
NOTE
• To rotate another image, repeat steps 4 and 5.
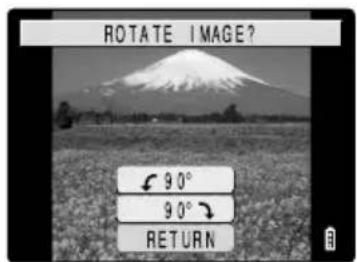
7. Press the MENU button ☑ to return to the normal playback screen.
[AUTO PLAY] Displaying Images Automatically as a Slideshow
Supported images: Still images/movies
This function displays your images at set intervals in the order in which they were photographed. This can be used to play back both still images and movies and you can even specify the effect used for the transition between images.
Setting AUTO PLAY
For AUTO PLAY slideshows on this camera, use the procedure below to set the delay before the next image appears (INTERVAL), select the first image in the slideshow (START FRAME), choose whether to play postrecorded voice messages and movies, and choose the effect used for the transition between images.
1. Switch the camera on and press < or > on the mode button until the “▶” icon lights on the mode select LED.
2. Press the MENU button ☑ to display the menu icons.
3. Use ◀ or ▶ on the 4-way button to select AUTO PLAY [→] and then press the OK button ⏻.
4. Use ▲ or ▼ on the 4-way button to select [INTERVAL] and then press ▶.
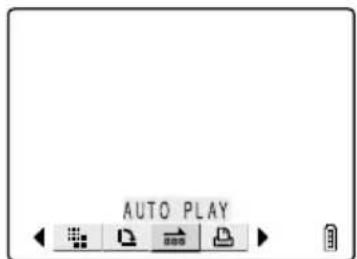
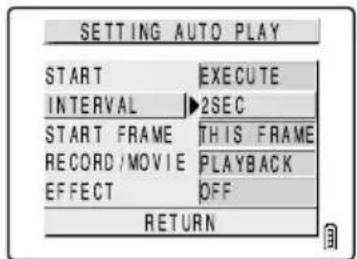
5. Use ▲ or ▼ on the 4-way button to select the interval duration and then press the OK button ⓐ.
You can choose an interval of 2, 10, 15 or 30 seconds.

NOTE
- The recording times for movies and postrecording take priority over this setting.
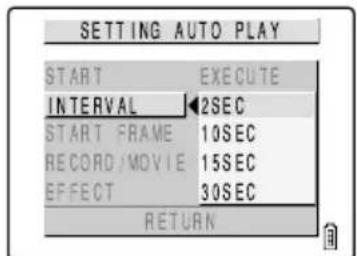
6Use ▲ or ▼ on the 4-way button to select [START FRAME] and then press ▶.
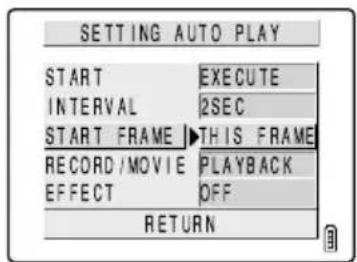
7Use ▲ or ▼ on the 4-way button to select [THIS FRAME] or [1ST FRAME] and then press the OK button ⓐ.
If you select [THIS FRAME], the slideshow begins from the currently displayed frame.
If you select [1ST FRAME], the slideshow begins from the frame with the lowest number in the file name.
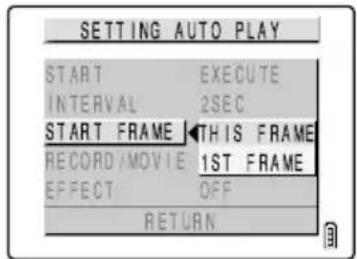
8Use ▲ or ▼ on the 4-way button to select [RECORD/MOVIE] and then press ▶.
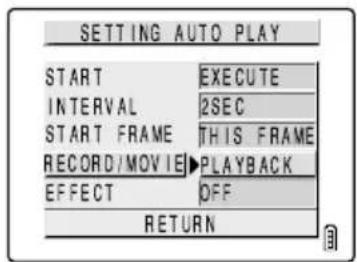
9Use ▲ or ▼ on the 4-way button to select a setting and then press the OK button Ⓜ.
[PLAYBACK]: Postrecorded voice messages and movies are included in the slideshow.
[NOPLAYBACK]: Postrecorded voice messages and movies are not included in the slideshow.
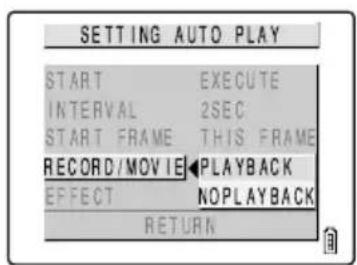
10 Use ▲ or ▼ on the 4-way button to select [EFFECT] and then press ▶.
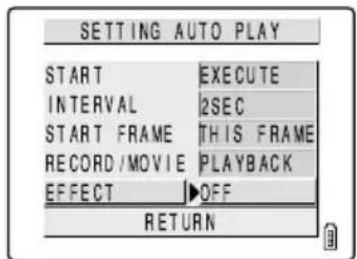
11 Use ▲ or ▼ on the 4-way button to select a setting and then press the OK button Ⓙ.
OFF: No effect is set.
FADE: The previous image gradually darkens while the next image gradually brightens until it is fully displayed.
OVERLAP: The new image slides over the top of the current image and replaces it.
SHUTTER: Black curtains close from the top and bottom of the screen to erase the current image, after which the black curtains open again towards the top and bottom to reveal the next image.
WIPE: The current image disappears as if wiped away from the left and is replaced by the new image.
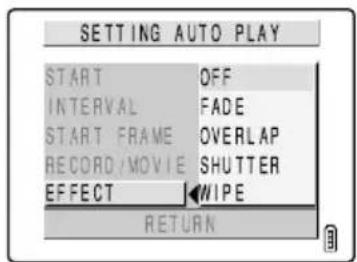
Starting and ending an AUTO PLAY slideshow
From step 3 or step 11 in "Setting AUTO PLAY": on p.5-16
12 Use ▲ or ▼ on the 4-way button to select [START] and then press the OK button ⏻ to begin the slideshow.
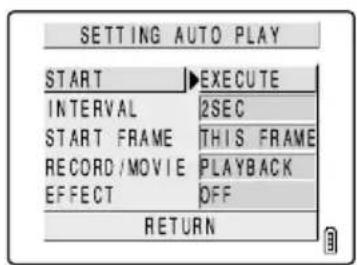
The table below shows the operations that can be performed during an AUTO PLAY slideshow.
| Button | Description | ||
| Movie | Still image with postrecorded message | Still image | |
| ▲ | Increases the volume. Increases the volume. Not applicable. | ||
| ▼ | Decreases the volume. Decreases the volume. Not applicable. | ||
| ◀ | Press once to stop the movie and begin scanning backwards through the movie frame by frame. After that, scanning moves one frame back each time you press the button. | Hold down to play back the message at half speed. Release the button to return to normal playback. | Not applicable. |
| ▶ | Press once to stop the movie and begin scanning forwards through the movie frame by frame. After that, scanning moves one frame forward each time you press the button. | Hold down to play back the message at double speed. Release the button to return to normal playback. | Not applicable. |
13 To end the slideshow, press the MENU button Ⓗ.
[PRINT SETTINGS] Specifying DPOF Print Settings
Supported images: Still images only
DPOF (Digital Print Order Format) is a printing standard for images shot on digital cameras that allows the images to be printed on a consumer printer or at a print processing outlet. The DPOF settings specify which images are to be printed and how many copies of each image. They also support other basic settings such as date imprinting, etc. Check that your printer or your local print processing shop provides a DPOF printing service. For more information on DPOF settings, refer to the instruction manual provided with your DPOF-compatible printer.
![graph TD A["Image processing"] --> B["Photo lab"] B --> C["DPOF-compatible printer (third-party)"] C --> D["Photolibration unit"] D --> E["Water bath"] style A fill:#f9f,stroke:#333 style E fill:#bbf,stroke:#333](/content/2026/06/1245158/images/4cf480c17162401ffddb93ce44a4d7c0b860a9aa0a5f5a40d9b98ce9f0ec2df1.jpg)
Specifying DPOF settings
1 Switch the camera on and press < or > on the mode button until the “▶” icon lights on the mode select LED.
2 Press the MENU button ☐ to display the menu icons.
3 Use ◀ or ▶ on the 4-way button to select PRINT [ ] and then press the OK button 🔒.
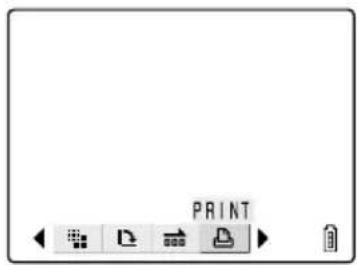
4 Use ▲ or ▼ on the 4-way button to select [PRINT] and then press ▶.
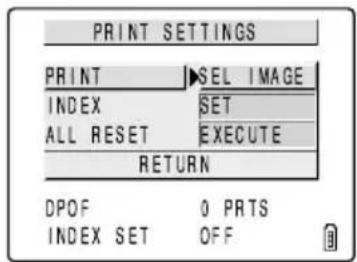

NOTE
- Select [RETURN] and press the OK button ⏻ to return to the normal playback screen.
5 Use ◀ or ▶ on the 4-way button to select the image for which you want to specify the print settings.
6 Press ▲ on the 4-way button, select [OK], and then press the OK button ⏻.
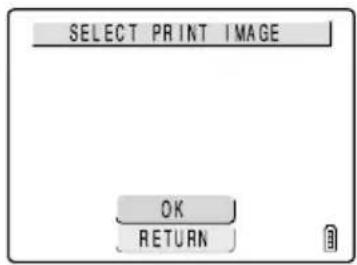
7 Specify the number of prints. Use ▲ or ▼ on the 4-way button to select [PRINT QTY.] and then press ▶.
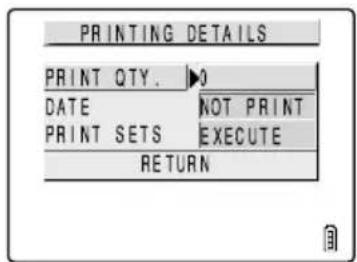
8 Use ▲ or ▼ on the 4-way button to set the number of prints and then press the OK button 🔒.
The number of prints is set.
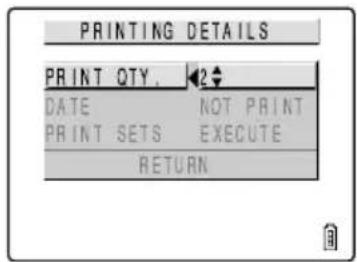
9 Specify the setting for date imprinting. Use ▲ or ▼ on the 4-way button to select [DATE] and then press ▶.
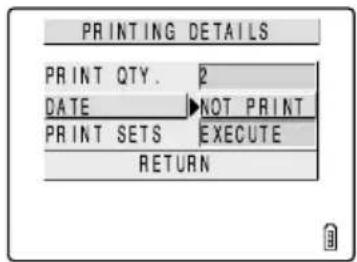
IMPORTANT
- If you select [PRINT] for [DATE] here for an image for which [WITH DATE] was selected for [INSERT DATE] (→ p.6-4) when the shot was taken, the dates will be printed on top of each other.
10 Use ▲ or ▼ on the 4-way button to select [PRINT] or [NOT PRINT] and then press the OK button ⓐ.
Date imprinting is then set.
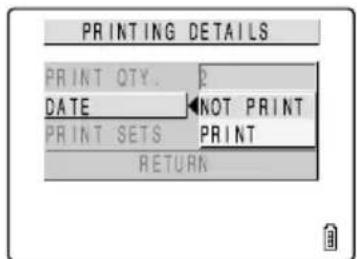
11 Use ▲ or ▼ on the 4-way button to select [PRINT SETS] and then press ▶ to apply the DPOF settings.
The screen in step 4 reappears.
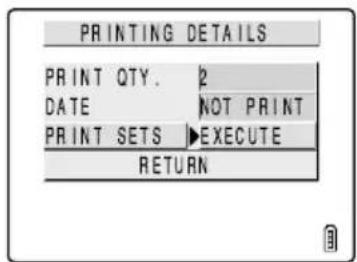
![CONTAX SL300R T - Use ▲ or ▼ on the 4-way button to select [PRINT SETS] and then press ▶ to apply the DPOF settings. - 2](/content/2026/06/1245158/images/608a8879cf073d24142e357272ec8abbaaecbbede019ab7b03504b9263cff7bf.jpg)
NOTE
• To specify DPOF settings for another image, repeat steps 4-11. - Selecting [RETURN] cancels the details set up to step 11 and returns you to the step 4 screen.
Specifying index print settings
This function produces a single print showing thumbnail versions of the images recorded on the memory card.
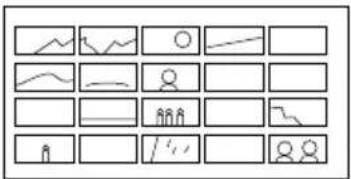
From step 3 in "Specifying DPOF settings": on p.5-19
4. Use ▲ or ▼ on the 4-way button to select [INDEX] and then press ▶.
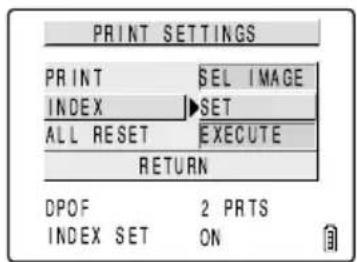
5. Use ▲ or ▼ on the 4-way button to select [SET UP INDEX PRINT] and then press the OK button ⏻.
Index printing is then set and the step 4 screen reappears.
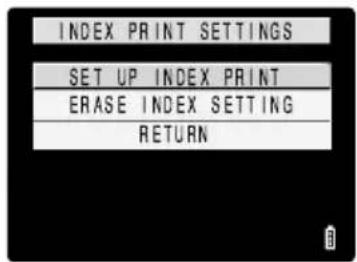
![CONTAX SL300R T - Use ▲ or ▼ on the 4-way button to select [SET UP INDEX PRINT] and then press the OK button ⏻. - 2](/content/2026/06/1245158/images/bfcf1182f5f9ce333ae826e60c234ce5639981edeba2a89c17ebca8c776b030e.jpg)
NOTE
- Selecting [ERASE INDEX SETTING] and pressing the OK button Ⓞ deletes the index print settings and returns you to the step 4 screen.
- Select [RETURN] to stop the procedure and return to the step 4 screen.
Deleting all the DPOF print settings
From step 3 in "Specifying DPOF settings": on p.5-19
4. Use ▲ or ▼ on the 4-way button to select [ALL RESET] and then press ▶.
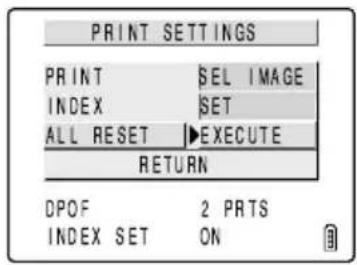
5. Use ▲ on the 4-way button to select [EXECUTE] and then press the OK button 🔒.
All the print settings are deleted and the step 4 screen reappears.
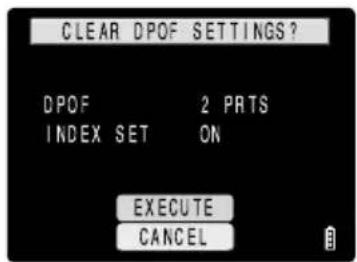
● Tips on erasing images using [PROTECT] and [ERASE ALL]
For example, if you have 100 recorded images and you want to keep just 5 or 6 of those, erasing the images one by one would be very time consuming. In cases like this where you have a large number of images recorded and only want to keep a few, [PROTECT] and [ERASE ALL] can be used very effectively to make the process much simpler.
![graph TD A["KIF_0001.JPG"] --> B["..."] C["KIF_0002.JPG"] --> B D["KIF_0003.JPG"] --> B E["KIF_0004.JPG"] --> B F["KIF_0099.JPG"] --> G["..."] H["KIF_0100.JPG"] --> G I["KIF_0003.JPG"] --> J["..."] K["KIF_0006.JPG"] --> J L["KIF_0015.JPG"] --> J M["KIF_0032.JPG"] --> J N["KIF_0034.JPG"] --> J](/content/2026/06/1245158/images/a4ecd2be82c62361b5e379ccef86648400cda12009f8872e9d7654e06b270cfb.jpg)
Begin by protecting the images you want to keep.
1. In the MULTI playback screen (→ p.5-3), press the MENU button to display the menu icons and then select PROTECT [O—n].
2. Use ◀ or ▶ on the 4-way button to select an image you want to keep. Then select [SET] and press the OK button to protect the image. Repeat this step to protect the other images you want to keep.
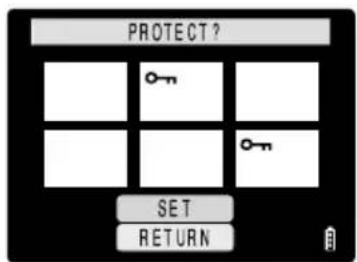
Next, use ERASE ALL.
3. Press the MENU button to display the menu icons. Select ERASE ALL [ ] from the menu and press the OK button. The “ERASE ALL?” message appears.
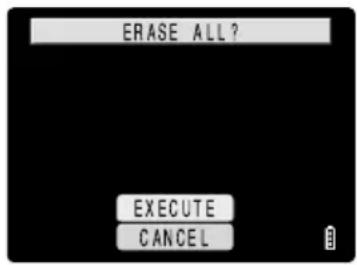
4. Select [EXECUTE] and press the OK button.
5. The protected images are left untouched and all the other images are erased.
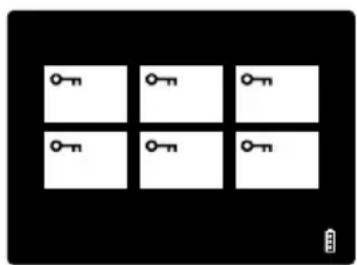
SET UP Using the SET UP Mode Functions
This chapter describes how to set up some of the camera's more advanced functions, such as specifying the AF (Auto Focus) settings, adjusting the LCD monitor brightness, and initializing memory cards.
[AF MODE] Setting AF mode
The AF MODE setting allows you to set the camera's AF (Auto Focus) operating mode to SAF, which is best for shooting still subjects, or CAF, which is ideal for subjects involving lots of movement, such as sports events.
1. Switch the camera on and press < or > on the mode button until the “SET” icon lights on the mode select LED.
2. Press ▲ or ▼ on the 4-way button to select [AF MODE] and then press ▶.
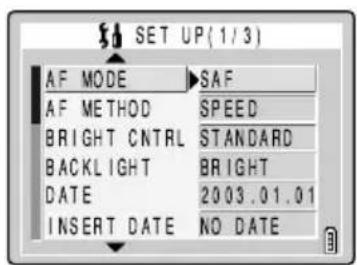
3. Press ▲ or ▼ on the 4-way button to select the desired setting and then press the OK button.
SAF (single auto focus): AF operates just once when you press the shutter release button half way. (default)
CAF (continuous auto focus): In “☐” mode and “☐” mode, auto focus operates continuously. In “☐” mode, auto focus only operates until just before shooting starts.
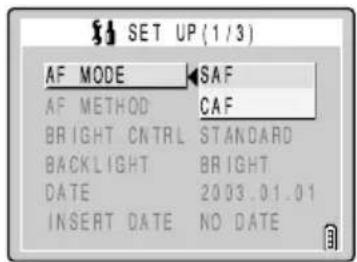
4The selected AF mode is set and the screen in step 2 reappears.
[AF METHOD] Setting AF method
This option sets the speed of AF operation. The SPEED setting gives faster focusing, but the image on the LCD monitor freezes during focusing. With the FRAME setting, focusing is not as fast as the SPEED setting, but you can continue to check the image on the LCD monitor during focusing. Choose the setting that best suits the subject of your shot.
1Switch the camera on and press < or > on the mode button until the “SET” icon lights on the mode select LED.
2Press ▲ or ▼ on the 4-way button to select [AF METHOD] and then press ▶.
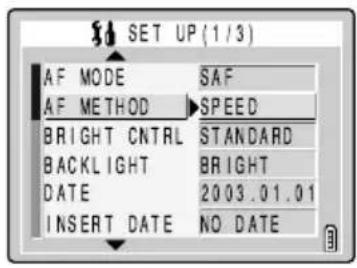
3Press ▲ or ▼ on the 4-way button to select the desired setting and then press the OK button ⏻.
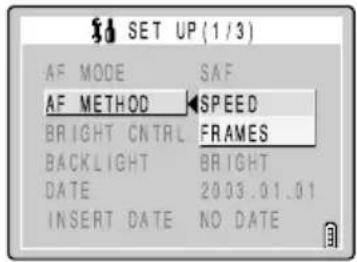
4 The selected AF method is set and the screen in step 2 reappears.
[BRIGHT CNTRL] Adjusting the LCD Monitor Brightness
You can adjust the LCD monitor brightness through 5 levels. Set the brightness to your preferred level.
1Switch the camera on and press < or > on the mode button until the “SET” icon lights on the mode select LED.
2Press ▲ or ▼ on the 4-way button to select [BRIGHT CNTRL] and then press ▶.
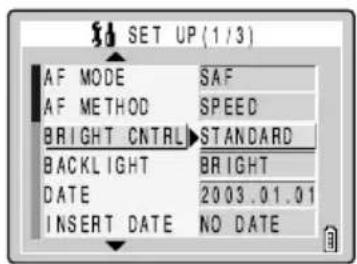
3Press ▲ or ▼ on the 4-way button to select the desired setting and then press the OK button Ⓜ.
+2: Sets the maximum brightness. +1: Sets the brightness slightly higher than normal. STANDARD: Normal level of brightness. (default) -1: Sets the brightness slightly lower than normal. -2: Sets the minimum brightness.
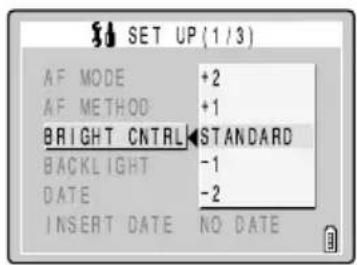
The selected brightness is set and the screen in step 2 reappears.
[BACKLIGHT] Changing the Monitor Backlighting Brightness
Use this procedure to adjust the brightness of the LCD monitor backlighting.
1. Switch the camera on and press < or > on the mode button until the “SET” icon lights on the mode select LED. 2. Press ▲ or ▼ on the 4-way button to select [BACKLIGHT] and then press ▶.
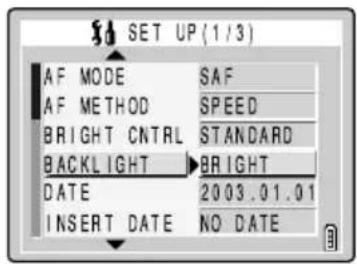
3. Press ▲ or ▼ on the 4-way button to select [BRIGHT] or [LOW POWER] and then press the OK button ⏻.
BRIGHT: Gives brighter backlighting
LOW POWER: Restricts the backlight brightness to save power.
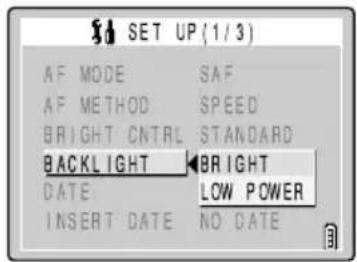
4. The selected brightness setting is applied and the screen in step 2 reappears.
[DATE] Setting the Camera's Date and Time
See "Setting the Date and Time" (→ p.1-6) in Chapter 1.
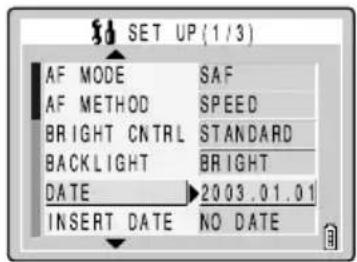
[INSERT DATE] Writing the Date onto Image Files
Use this procedure to specify whether the date is inserted on your images.
![CONTAX SL300R T - [INSERT DATE] Writing the Date onto Image Files - 1](/content/2026/06/1245158/images/d15c393911ae89d3f492c50831aba49ae1c91701e1a2d51395ebaff2dcf3c3b9.jpg)
IMPORTANT
- If images that were shot with [INSERT DATE] set to [WITH DATE] are then printed with [PRINT] selected for [DATE] in [PRINT SETTINGS] (→ p.5-19), the dates will be printed on top of each other.
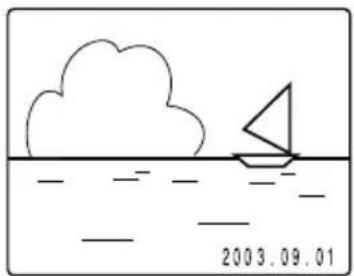

NOTE
- The date is inserted in the lower-right corner of the image. You cannot erase an inserted date only.
1. Switch the camera on and press < or > on the mode button until the “SET” icon lights on the mode select LED.
2. Press ▲ or ▼ on the 4-way button to select [INSERT DATE] and then press ▶.
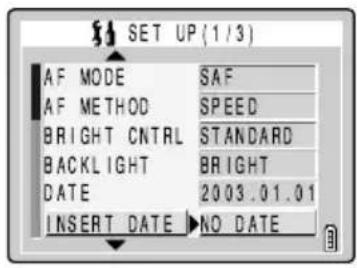
3. Press ▲ or ▼ on the 4-way button to select [NO DATE] or [WITH DATE] and then press the OK button ⓐ.
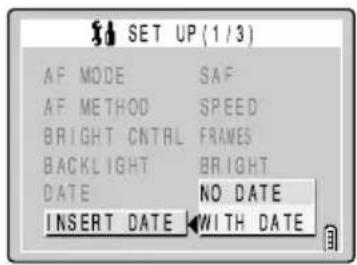
4. Date insertion is set and the screen in step 2 reappears.

NOTE
- The default setting for this function is [NO DATE].
- If you set [WITH DATE], the date is permanently displayed in the lower-right corner of the LCD monitor during shooting.
- If the background where the date is inserted is a bright color such as white or yellow, the numbers in the date may be difficult to read.
[FORMAT] Initializing Memory Cards
This function should be used to initialize new memory cards before you use them or when you want to erase all the data (including images) on a card.
![CONTAX SL300R T - [FORMAT] Initializing Memory Cards - 1](/content/2026/06/1245158/images/a0a8ae9c9c744ef6b84ba54a506a4ac45f9eb31607739a2f806bc374377d75ee.jpg)
IMPORTANT
- To ensure that you get the best possible performance from this camera, cards should be formatted on the camera.
- Note that initializing a card also erases protected images.
1. Switch the camera on and press < or > on the mode button until the “SET” icon lights on the mode select LED.
2Press ▲ or ▼ on the 4-way button to select [FORMAT] and then press ▶.
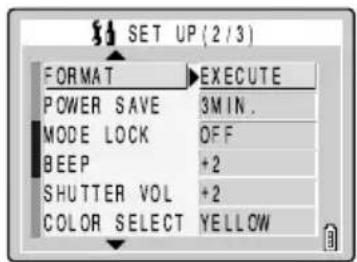
3Press ▲ on the 4-way button to select [EXECUTE] and then press the OK button ⏻.
Card initialization begins.
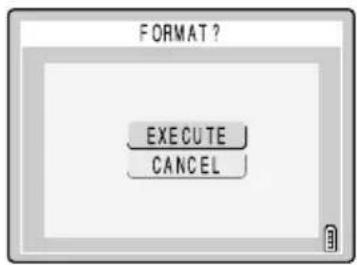
4 When initialization is completed, the screen in step 2 reappears.
[POWER SAVE] Switching the Camera Off Automatically to Save Power
Forgetting to switch the camera off can cause the camera's battery charge to fall to a low level. For this reason, the camera features a Power Save function that automatically switches the camera off after several minutes if it is left switched on. You can specify the delay until the camera is switched off.
1Switch the camera on and press < or > on the mode button until the “SET” icon lights on the mode select LED.
2Press ▲ or ▼ on the 4-way button to select [POWER SAVE] and then press ▶.
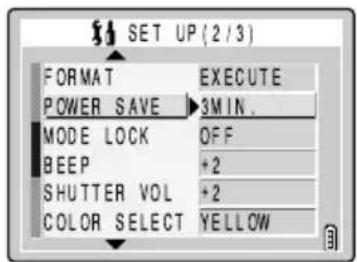
3Press ▲ or ▼ on the 4-way button to select the delay until the camera switches off and then press the OK button ⏻.
NO PWR OFF: The camera is not automatically switched off. Take care to remember to switch the camera off yourself.
1MIN.: The camera switches to sleep mode after 1 minute and switches off 2 minutes later.
3MIN.: The camera switches to sleep mode after 3 minutes and switches off 2 minutes later. (default)
6MIN.: The camera switches to sleep mode after 6 minutes and switches off 2 minutes later.
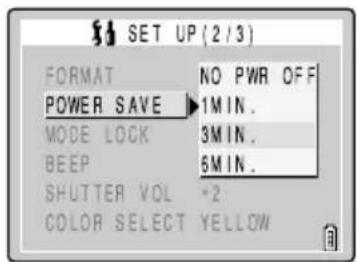
4The delay time is set and the screen in step 2 reappears.
Notes on using power save in “☐” mode, “☐” mode and “☐” mode
If you set the Power Save function when using the camera in “☐” mode, “☐” mode or “☐” mode, the camera operates as follows:
When [POWER SAVE] is set to [1MIN.], [3MIN.] or [6MIN.].
If the camera is left switched on for the set delay time or longer, it automatically enters sleep mode for two minutes.
While the camera is in sleep mode, it can be quickly returned to its original shooting mode by pressing the shutter release button half way or by pressing any of the other function buttons. However, after the two minutes have passed, the camera is switched off.
When [POWER SAVE] is set to [NO PWR OFF].
If the camera is left switched on for six minutes or more, it automatically enters sleep mode. In this case, the camera remains in the sleep mode and is not switched off. To return the camera to its normal shooting mode, press the shutter release button half way or press any of the other function buttons.
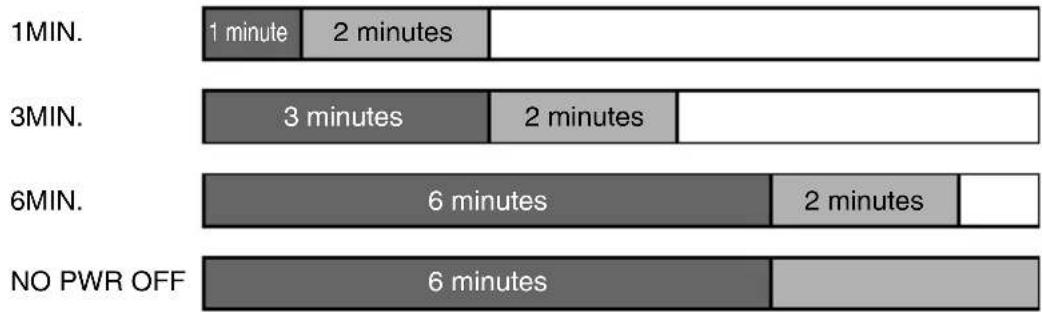

* The LCD monitor goes blank while the camera is in sleep mode, but the camera is not switched off. To reduce power consumption, switch the camera off promptly.
[MODE LOCK] Preserving Your Function Settings
Mode Lock is a function which ensures that the settings you have specified in “☐”, “☐”, “☐” and “SET” modes are retained when the camera is switched off. (→ p.7-4)
1Switch the camera on and press < or > on the mode button until the “SET” icon lights on the mode select LED.
2Press ▲ or ▼ on the 4-way button to select [MODE LOCK] and then press ▶.
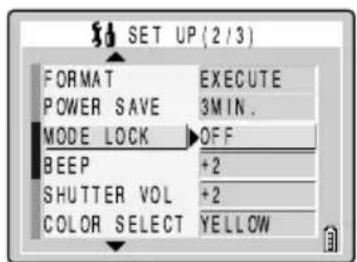
3Press ▲ or ▼ on the 4-way button to select [OFF] or [ON] and then press the OK button ⓐ.
OFF: Settings revert to their default values when the camera is switched off. ON: Settings remain valid when the camera is switched off.
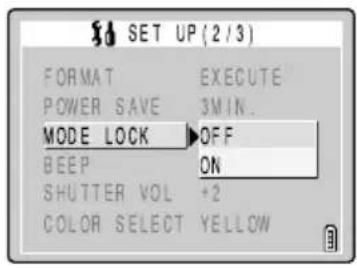
4The selected settings are applied and the screen in step 2 reappears.
[BEEP] Adjusting the Volume of the Camera Button Beep
Use this procedure to adjust the volume of the operation beep emitted when a camera button is pressed or activation beep emitted when the camera is switched on.
1. Switch the camera on and press < or > on the mode button until the “SET” icon lights on the mode select LED.
2. Press ▲ or ▼ on the 4-way button to select [BEEP] and then press ▶.
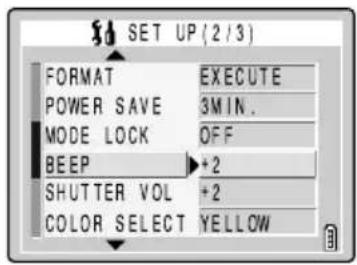
3. Press ▲ or ▼ on the 4-way button to select the desired button beep volume and then press the OK button ⓐ.
+3: Maximum volume +2: Medium volume (default) +1: Low volume OFF: No button beep
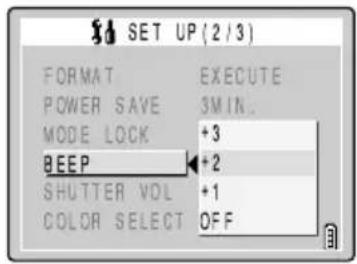
4. The selected settings are applied and the screen in step 2 reappears.
[SHUTTER VOL] Adjusting the Volume of the Shutter Sound
Use this procedure to adjust the volume of shutter sound.
1. Switch the camera on and press < or > on the mode button until the “SET” icon lights on the mode select LED.
2. Press ▲ or ▼ on the 4-way button to select [SHUTTER VOL] and then press ▶.
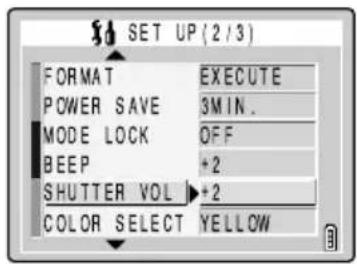
3. Press ▲ or ▼ on the 4-way button to select the desired shutter sound volume and then press the OK button Ⓞ.
+3: Maximum volume +2: Medium volume (default) +1: Low volume
OFF: No shutter sound
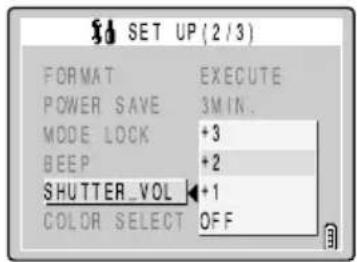
4. The selected settings are applied and the screen in step 2 reappears.
[COLOR SELECT] Selecting the Menu Color
Use this procedure to change the highlight color of a selected menu item. The available colors are yellow (default), red, purple and blue.
1. Switch the camera on and press < or > on the mode button until the “SET” icon lights on the mode select LED.
2. Press ▲ or ▼ on the 4-way button to select [COLOR SELECT] and then press ▶.
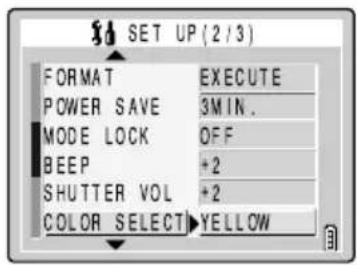
3. Press ▲ or ▼ on the 4-way button to select the desired color and then press the OK button ⏻.
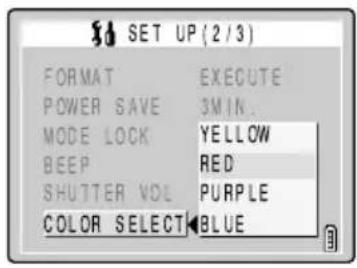
4. The selected settings are applied and the screen in step 2 reappears.
[START SCREEN] Selecting the Startup Screen
This procedure sets the startup screen displayed when you switch the camera on. In addition to the default Kyocera logo screen, you can also select a startup screen from the images saved on a memory card in the camera.
1. Switch the camera on and press < or > on the mode button until the “SET” icon lights on the mode select LED.
2. Press ▲ or ▼ on the 4-way button to select [START SCREEN] and then press ▶.
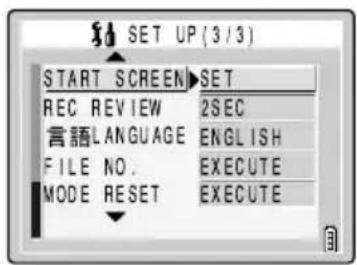
3. Press ◀ or ▶ on the 4-way button to select the desired screen.
KYOCERA logo screen: Default
User-defined screen: Allows you to set an image stored on a memory card.
OFF screen: Plain blue background
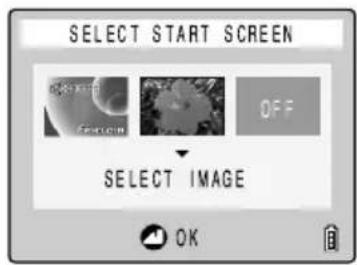
- If either the Kyocera logo screen or OFF screen was selected in step 3
4. Press the OK button Ⓞ to finish the settings.
●If a user-defined screen was selected in step 3
4Press ▼ on the 4-way button to switch to the image selection screen.
The still images recorded on the memory card appear.
5Press ◀ or ▶ on the 4-way button to select the desired image and then press the OK button ⓐ.
Selecting [RESET] restores the settings in step 3.
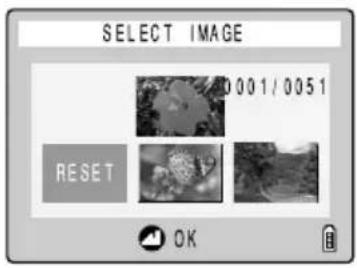
6Use ▲ on the 4-way button to select [SET] and then press the OK button ⓐ.
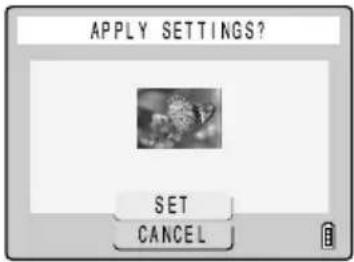
7Press ◀ or ▶ on the 4-way button to select the middle image and then press the OK button ⏻.
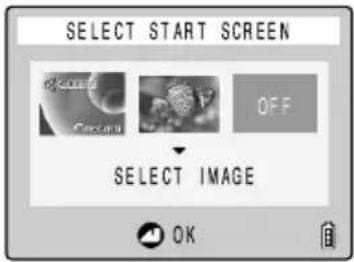
8The screen for step 2 reappears.
![CONTAX SL300R T - [START SCREEN] Selecting the Startup Screen - 6](/content/2026/06/1245158/images/d32646096d281bf7602cfb3e21a909a46e855057d51e66e26ac3c2c2d1c3795b.jpg)
NOTE
- Because the selected image is stored in the camera's memory, switching memory cards or erasing the image from the memory card does not affect the image set in the startup screen.
[REC REVIEW] Checking Images Right After You Shoot Them
Use this procedure to have the camera display images for several seconds immediately after you shoot them.
1Switch the camera on and press < or > on the mode button until the “SET” icon lights on the mode select LED.
2Press ▲ or ▼ on the 4-way button to select [REC REVIEW] and then press ▶.
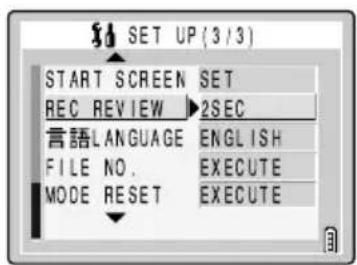
3Press ▲ or ▼ on the 4-way button to select the desired setting and then press the OK button ⏻.
2SEC: Images are displayed for 2 seconds right after shooting.
4SEC: Images are displayed for 4 seconds right after shooting.
OFF: Images are not displayed right after shooting. (default)
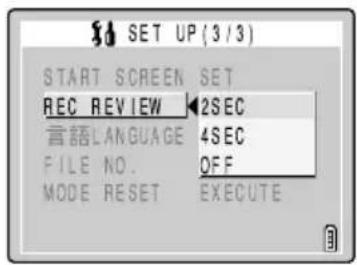
The selected settings are applied and the screen in step 2 reappears.
[LANGUAGE] Selecting the Menu Language
You can choose Japanese, English, French, German, Spanish or Chinese (simplified) as the displayed language.
Switch the camera on and press < or > on the mode button until the “SET” icon lights on the mode select LED.
Press ▲ or ▼ on the 4-way button to select [LANGUAGE] and then press ▶.
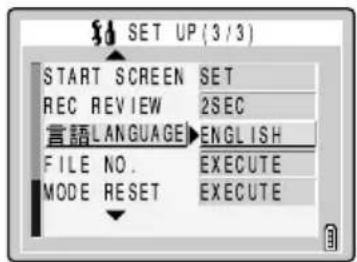
Press ▲ or ▼ on the 4-way button to select the desired language and then press the OK button.
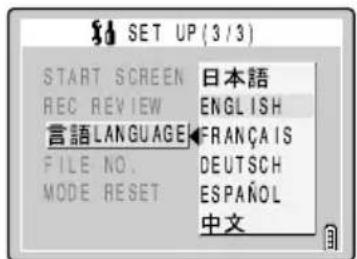
The selected settings are applied and the screen in step 2 reappears.
[FILE NO.] Starting Image File Numbers from 0001
Images shot on the camera are assigned file names that consist of sequential numbers before being saved in a folder called 100CXBOX.
Executing FILE NO. creates a second folder called 101CXBOX and the numbering of the file names for images shot subsequently starts again from 0001.
Resetting the file number in this way is useful when you want to store shots of a particular scene in a different folder.
![graph TD A["100CXBOX"] --> B["KICX0001.jpg"] A --> C["KICX0002.jpg"] A --> D["KICX0003.avi"] B --> E["Image 1"] C --> F["Image 2"] D --> G["Image 3"] H["New folder"] --> I["101CXBOX"] I --> J["KICX0001.jpg"] I --> K["KICX0002.jpg"] J --> L["Image 1"] K --> M["Image 2"] L --> N["Image 3"] M --> O["Im…](/content/2026/06/1245158/images/7f0b19db47245b14ff03f82a8d92e3de79d046857170b5cb74ab067b3c42133d.jpg)
Switch the camera on and press < or > on the mode button until the “SET” icon lights on the mode select LED.
2 Press ▲ or ▼ on the 4-way button to select [FILE NO.] and then press ▶.
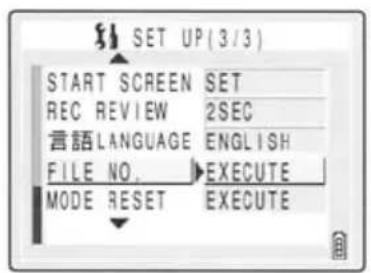
3 Press ▲ on the 4-way button to select [EXECUTE] and then press the OK button ⏻.
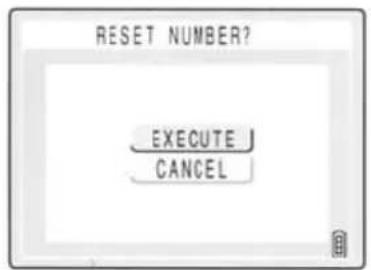
4 The settings are reset and the screen in step 2 reappears.
IMPORTANT
- Folders "100CXBOX" to "999CXBOX" can be created.
- To reset the folder numbers and begin again from "100CXBOX", reset the file numbers without inserting the memory card and insert a formatted memory card before shooting.
[MODE RESET]
Resetting Function Settings
Use this function when you want to reset modes and menu settings that you have specified back to their default settings.
1 Switch the camera on and press < or > on the mode button until the “SET” icon lights on the mode select LED.
2 Press ▲ or ▼ on the 4-way button to select [MODE RESET] and then press ▶.
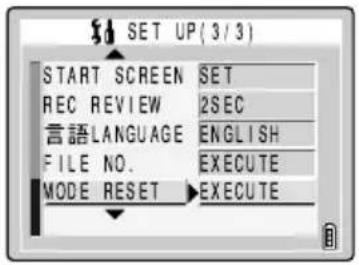
3 Press ▲ on the 4-way button to select [EXECUTE] and then press the OK button Ⓜ.
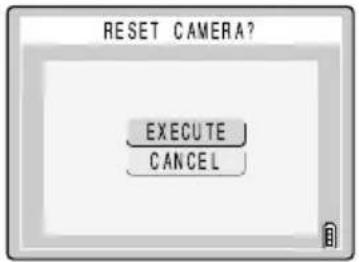
4 The settings are reset and the screen in step 2 reappears.
7
Appendix
This chapter provides a range of technical information, including measures for dealing with camera problems, the names of the icons displayed on the LCD monitor, the operation of the LEDs, and a glossary of digital camera terms.
Troubleshooting
Check the items listed below before deciding that your camera is faulty.
Problems and Solutions
| Problem Cause | Solution | |
| Nothing appears on the LCD monitor. | The lithium-ion battery pack is flat or is not inserted. | Load a lithium-ion battery pack into the camera and re-charge it. |
| The Power Save function has switched the camera off. (→ p.6-6) | Press the POWER button (POWER) again to switch the camera back on. | |
| There is no image on the LCD monitor. | If you leave the camera for a while without using it, the camera goes into Sleep mode. | Press the shutter release button half way or press any other camera button to restore the camera to Shooting mode. The details vary depending on the Power Save function settings. See p.6-6 for details. |
| There is something generating a magnetic field (such as a magnet or TV) close to the camera. | Move the camera further away from the magnetic object. | |
| The number of available shots did not change when I took a picture. | This is because the photographed image size is small. | This is dependent on factors such as the quality mode and the subject and is not a problem. |
| I cannot erase an image. The [icon] appears. | The image is protected. Unprotect the image. (→ p.5-9) | |
| I cannot erase an image. | The image file was recorded using a different device. | The image cannot be erased using this camera. You can use FORMAT to erase the image, but this will erase all the images on the card. (→ p.6-5) |
| The number of available shots did not increase after I erased an image. | This is because the erased image size is small. | This is dependent on factors such as the quality mode and the subject and is not a problem. |
| I cannot charge the battery. | There is no lithium-ion battery pack loaded in the camera. | Load a lithium-ion battery pack into the camera. |
| The lithium-ion battery pack poles (+ and -) are the wrong way round. | Reload the lithium-ion battery pack correctly. | |
| The AC adapter is not connected correctly. | Check that the adapter is securely connected to the camera and the power socket. | |
| The battery pack terminals are soiled. | Wipe the terminals with a soft clean cloth. | |
| I cannot charge the battery. Or charging stops. The caution LED flashes slowly. | The charging protection circuit was activated and halted charging because the ambient temperature is too high or too low. | Charge the battery when the ambient temperature is between 10°C and 30°C. (Charging is possible between 5°C and 40°C but will take slightly longer.) |
| The camera gets hot. A | strong current flows through the camera when the LCD monitor is used so the camera gets hot if the LCD monitor is used for an extended period. | While this is not a fault, you should leave the camera for a time before using it again. |
| The caution LED flashes slowly. | The flash is charging. Briefly take your | finger off the shutter release button and wait. |
| The caution LED flashes quickly. | This is the camera shake warning. The shutter speed is slow. | Place the camera on a stable surface to take the picture. |
| The camera will not focus. The shooting mark flashes. | The subject is a type that is not suited to autofocus. (→ p.3-2) | Use focus lock to focus on a strongly contrasting part of the subject, then compose the shot and take the picture. (→ p.3-2) |
| The picture came out completely white. | The image is overexposed. Set LONG | EXP to OFF or reset the camera settings. |
| I can’t rotate or protect the image or specify DPOF settings. | The SD memory card is write-protected. | Release the write-protection for the card. (→ p.1-4) |
Messages and Responses
| Message Cause | Response | |
| MEMORY CARD FULL | There is not enough recording space available on the memory card. | Insert a new memory card or erase some unwanted images. Alternatively, changing the image size or quality may enable you to take the picture. |
| NO CARD There is no | memory card inserted. Insert a memory card. | |
| WRITE PROTECT The | SD memory card is write-protected. | Release the write-protection for the card (→ p.1-4) or use another memory card. |
| CARD ERROR or UNSUPPORTED FORMAT | You are using a card that was formatted on another device. | Format the memory card in the camera. (→ p.6-5) |
| The format of the memory card is not compatible with this camera. | Insert a new memory card or format this memory card. | |
| The card is not inserted correctly. Re-insert the memory card. | ||
| NO IMAGE Nothing is recorded on the memory card. | Insert a memory card that has been used to take pictures. | |
Mode-locked Menu Options and Default Settings
| Mode Menu | Mode lock | After OFF | Default Page | ||
| Camera Mode/Continuous Shooting Mode/Movie Mode | Flash○Locked AUTO 4-2 | ||||
| Flash○Locked Flash OFF 4-2 | |||||
| Scene mode | × | Default | STANDARD | 3-4 | |
| SELF TIMER | × | Default | OFF | 4-4 | |
| PIXELS | × | Previous | 2048 × 1536 | 4-5 | |
| PIXELS | × | Previous | 320 × 240 | 4-5 | |
| FRAME/SEC | × | Previous | 30 fps | 4-10 | |
| QUALITY | × | Previous | NORMAL | 4-6 | |
| EXP.COMP. | ○ | Locked | ±0.0 | 4-8 | |
| WHITE BALANCE | ○ | Locked | AUTO | 4-9 | |
| SET DETAILS → SOUND | × | Previous | ON | 4-11 | |
| SET DETAILS → COLOR MODE | × | Default | COLOR | 4-13 | |
| SET DETAILS → CHROMA | × | Previous | STANDARD | 4-14 | |
| SET DETAILS → SHARPNESS | × | Previous | STANDARD | 4-15 | |
| SET DETAILS → WB PRESET | × | Previous | White balance set by you | 4-16 | |
| SET DETAILS → AE MODE | × | Previous | PROGRAM | 4-17 | |
| SET DETAILS → FOCUSING | × | Previous | SPOT AF | 4-19 | |
| SET DETAILS → LONG EXP. | × | Default | OFF | 4-21 | |
| SET DETAILS → ISO | × | Previous | AUTO | 4-22 | |
| SET DETAILS → METERING | × | Previous | EVALUATION | 4-23 | |
| SET DETAILS → DIGITAL ZOOM | × | Previous | ON | 4-24 | |
| SETUPSetup Mode | AF MODE | × | Previous | SAF | 6-2 |
| AF METHOD | × | Previous | SPEED | 6-2 | |
| BRIGHT CNTRL | × | Previous | STANDARD | 6-3 | |
| BACKLIGHT | × | Previous | BRIGHT | 6-4 | |
| DATE | × | Previous | Date set by you | 1-6 | |
| INSERT DATE | × | Previous | NO DATE | 6-4 | |
| FORMAT | × | — | — | 6-5 | |
| POWER SAVE | × | Previous | 3MIN. | 6-6 | |
| MODE LOCK | × | Previous | OFF | 6-7 | |
| BEEP | × | Previous | +2 | 6-8 | |
| SHUTTER VOL | × | Previous | +2 | 6-9 | |
| COLOR SELECT | × | Previous | YELLOW | 6-9 | |
| START SCREEN | × | Previous | Kyocera logo screen | 6-10 | |
| REC REVIEW | × | Previous | OFF | 6-11 | |
| LANGUAGE | ×Previous | Language set by you | 6-12 | ||
| FILE NO. | × | — | — | 6-13 | |
| MODE RESET | × | — | — | 6-14 | |
After OFF: Menu setting after the camera is switched off. Locked: As specified in MODE LOCK. Default: Reverts to the default setting. Previous: Saves the setting specified before the camera was switched off. —: Not applicable.
LCD Monitor Information and Names of Icons
Display when the Camera, Continuous Shooting, or Movie mode is selected
Camera Mode / Continuous Shooting Mode![AUTO X 2.0 1.0 2048 F 1234 ISO 200 F 2.8 SAF +1 +1 10 11 12 13 14 15 [ ] 0.6m ∞ 20 03 . 0 9 . 0 1 16 17 18 19 20 21 22](/content/2026/06/1245158/images/b1251da3e3543c90e79baf86316b638df0375598bcf5367960b6ea8bc0e9ae16.jpg)
![Movie Mode 23 ② ④ ⑦ X 2.0 +1.0 320 00:00 30 fps SAF 24 25 11 16 17 18 19 20 21 22 [[ ]] 0.6m ∞ 2003.09.01](/content/2026/06/1245158/images/4611c07592bf59a30d2a5f4247c2c3dbf236c164315995e28655cea9438cc880.jpg)
① Flash mode (page 4-2) ② White balance mode/color mode (page 4-9 / page 4-13) ③ Metering mode (page 4-23) ④ Shooting mark ⑤ Continuous shooting (page 3-7) ⑥ ISO Sensitivity (page 4-22) ⑦ Pixels (page 4-5) ⑧ Image quality (page 4-6) ⑨ Number of recordable images ⑩ Autoexposure mode (page 4-17) ⑪ AF mode (page 6-2) ⑫ Sharpness (page 4-15) ⑬ Chroma (page 4-14) ⑭ Focus frame (wide AF) (page 4-19)
⑮ Focus frame (Spot AF) (page 4-19) ⑯ Scene mode (page 3-4) ⑰ Self-timer (page 4-4) ⑱ Digital zoom (page 4-24) ⑲ Long Exposure/Exposure compensation (page 4-21/page 4-8) ⑳ Focus gauge (appears when focus mode is set to [MF]) (page 4-20) ㉑ Date ㉒ Battery indicator ㉓ Audio mode (page 4-11) ㉔ Remaining seconds that can be recorded for movies ㉕ Frame rate (page 4-10)
Display when the MENU button is pressed
Menu icons are displayed.
Camera Mode / Continuous Shooting Mode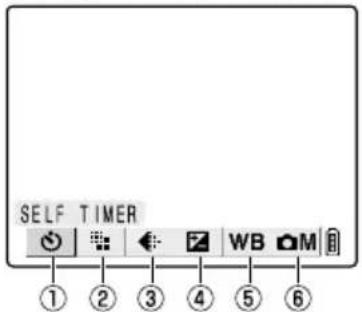
① SELF TIMER (page 4-4) ② PIXELS (page 4-5) ③ QUALITY (page 4-6) ④ EXP.COMP. (page 4-8) ⑤ WHITE BALANCE (page 4-9) ⑥ SET DETAILS (page 4-11)
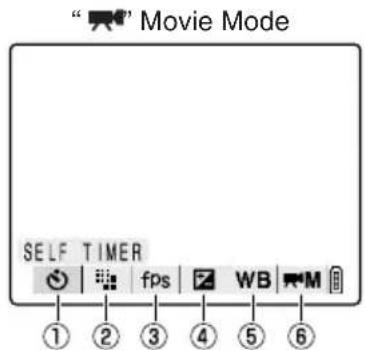
① SELF TIMER (page 4-4) ② PIXELS (page 4-5) ③ FRAME/SEC (page 4-10) ④ EXP.COMP. (page 4-8) ⑤ WHITE BALANCE (page 4-9) ⑥ SET DETAILS (page 4-11)
Display when Playback ▶ mode is selected
● Display when the MENU button 📋 is pressed
Menu icons are displayed.
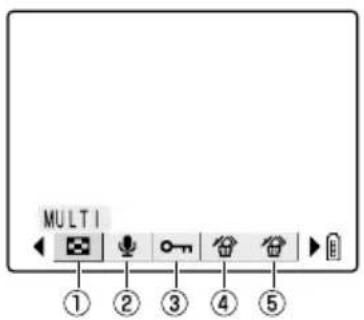
① MULTI (page 5-3) ② POSTRÉCÓRDÍNG (page 5-5) ③ PROTECT (page 5-8) ④ ERASE (page 5-9) ⑤ ERASE ALL (page 5-10)
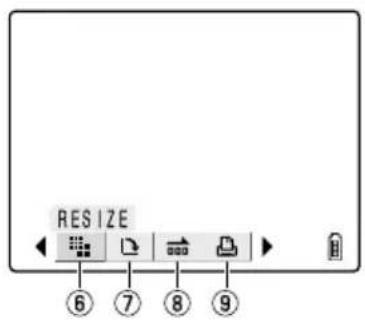
⑥ RESIZE (page 5-11) ⑦ ROTATE (page 5-15) ⑧ AUTO PLAY (page 5-16) ⑨ PRINT (page 5-19)
Image Information Display
● INFORMATION display (Playback mode)
![INFORMATION 100-KIF_0001.JPG 1600KB F 2048X1536 [J] 1/2000 F16.0 ±0.3 ISO200 DPOF 1 PRTS DATE, 2003.09.01 12:34:56](/content/2026/06/1245158/images/3d21be732463d92af2750679a64850b2fdb082fdbabc8f78db60534169c2af67.jpg)
① Folder name and file name (page 2-15) ② File size ③ Quality (compression ratio) (page 4-6) ④ Number of pixels (page 4-5) ⑤ Protection status ⑥ Whether or not voice is used ⑦ Shutter speed (page 7-11)
● Manual REC Review display (Camera mode)
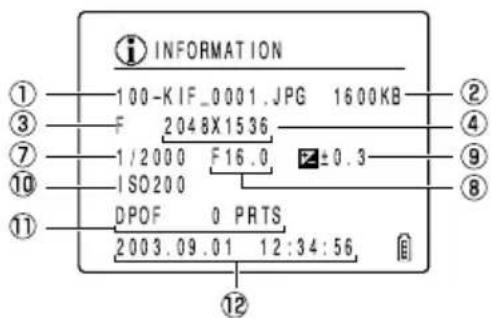
⑧ Aperture (page 7-9) ⑨ Exposure compensation setting (page 4-8) ⑩ ISO sensitivity (page 4-22) ⑪ DPOF settings (page 5-19) ⑫ Photography date and time
LED indicators
There are 3 LEDs on the camera.
Each LED indicates the status of the camera depending on how it lights or flashes.
Self-timer LED (red)
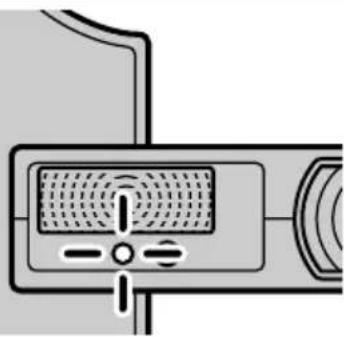 Flashes Flashes | While using the self-timer |
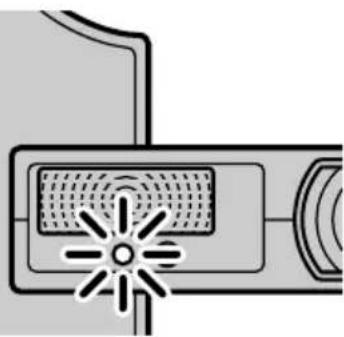 Lights Lights | When a movie is being shot |
| When the shutter operates and shooting ends | |
| When the camera is connected to a PC |
Card access LED (orange)
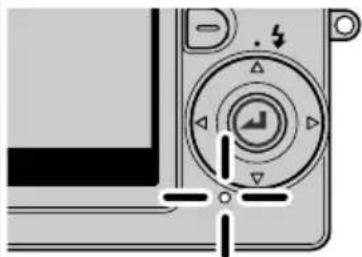 Flashes Flashes | Flashes while the camera is accessing the memory card, such as recording images to memory card or reading data.While the LED is flashing, do not open the card/battery cover or remove the memory card. |
Caution LED (red)
| Camera mode/Continuous Shooting mode/Movie mode |  Flashes rapidly Flashes rapidly | As the shutter speed is slow, you need to take care of camera shake. |
 Flashes slowly Flashes slowly | As the flash is being charged, you need to wait to take the next picture until the LED stops flashing. | |
| Battery recharging | 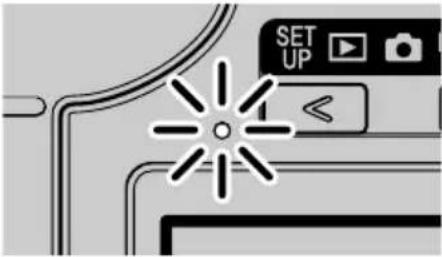 Lights Lights | Now recharging |
 Flashes Flashes | There is an error on the battery pack, AC adapter or camera. |
Basic Glossary of Digital Camera Terms
AE (Auto Exposure)
This refers to automatic exposure, which is the mechanism by which the camera automatically adjusts the exposure.
AF (Auto Focus)
The mechanism by which the camera automatically focuses images.
Aperture
This is a mechanism inside the camera lens that controls the amount of light passing through the lens by changing the size of an opening.
Aperture setting
A number that indicates the size of the aperture opening. Settings are displayed as numbers such as F2.8, and the higher the aperture setting, the smaller the opening and the less light that passes through the lens.
Aperture-priority AE
This is a type of automatic exposure where the photographer selects the aperture setting and the camera then automatically sets the optimum shutter speed for the shot. By setting the aperture, the photographer can control the depth of field in the shot.
CCD (Charge Coupled Device)
This is a device used as the imaging element in a digital camera. Strictly speaking, a CCD is used for transferring electrical signals and is governed by a semiconductor device called a phototransistor that converts light into electrical signals. The integrated unit made up of the phototransistor and the CCD that transfers the electrical signals is called a CCD imaging element and is the heart of any digital camera.
DCF (Design rule for Camera File system)
This is a standard adopted by the Japan Electronics and Information Technology Industries Association (JEITA) that stipulates items such as the file formats for digital cameras and related devices. In principle, digital cameras that conform to the DCF standard can freely exchange images, even when the images were shot on a different brand of camera. This camera complies with the DCF standard.
Depth of field
When a subject is in focus, the depth of field refers to the area in front of and behind the subject that is also in focus. The depth of field increases when the aperture setting is high. Such shots are said to have a large depth of field. Conversely, lower aperture settings give a narrow range in which objects are in focus. This is referred to as a small depth of field. The depth of field becomes smaller when the subject is closer to the camera.
DPOF (Digital Print Order Format)
DPOF is a standard used for printing images photographed using a digital camera on a home printer or at a commercial print processing store. When the number of prints of photographed images that are required and the format of those prints are specified in the DPOF settings on a DPOF-compatible camera, those prints can then be produced as specified in the DPOF settings using a DPOF-compatible printer or by a commercial print processing store that provides a DPOF print service. This camera is DPOF compatible.
EV (Exposure Value)
An EV is a number that denotes exposure. EV=1 when the aperture setting is F1 and the shutter speed is 1 second. Each time the exposure then halves, the EV number increases by 1 (EV=2, EV=3...).
Conversely, when the exposure is double the EV=1 level, the EV becomes -1. When the exposure is doubled again, EV=-2, and so on.
In general parlance, when we “change the exposure by 1 step” we are in fact referring to this EV.
Exposure
This refers to the light of the image projected through the lens striking the camera's CCD or film for the optimum amount of time only. Generally speaking, exposure refers to the combination of shutter speed and aperture setting that will give the correct image.
Flash
This is a device that produces a bright flash of light by releasing an internally stored high-voltage current. Flash units use relatively large amounts of power and tend to deplete the camera battery if used frequently.
Focal length
This is the distance from the center of the lens (secondary focal point) to the plane onto which the image is projected (focal plane) when the image of a subject at an infinite distance from the camera is clearly focused. The focal length of a lens relates to its magnification, with longer focal lengths giving more enlarged images of distant objects.
Focus
This term refers to the focal point of a lens, but is more broadly used to refer to the condition whereby the subject of a photograph is seen most clearly. When the focusing is correct and the subject is clearly visible, the shot is said to be “in focus”. When this is not the case, the shot is “out of focus”.
Format
The initialization of a memory card.
Infinity
Once the subject of a photograph is further than a set distance away from the camera lens, moving still further away requires no adjustment to the focus. The distance at which the subject is so far away that no change in the focus occurs is referred to as “infinity”.
Initialization (formatting)
This is a process that organizes the internal structure of a memory card so that data can be recorded on the card. Initialization erases all the existing files on a memory card.
ISO (sensitivity)
This is a number that indicates the sensitivity of film to light, with higher values indicating greater sensitivity. This is generally expressed as “ISO 100”, etc. Film with higher ISO sensitivity is more sensitive to light and can be used to take pictures in low-light conditions. Even in digital cameras, which do not use film, sensitivity is still expressed in terms of ISO numbers.
JPEG (Joint Photographic Experts Group)
This is a file format used for compressing and saving color images. The compression ratio is variable, with higher compression ratios giving smaller image file sizes but poorer image quality.
Memory card
A recording medium that uses flash memory on which data can be electrically erased (rewritten). SD memory cards and Multimedia cards can be used with this camera.
MF (Manual Focus)
Focusing performed manually rather than using AF.
Program AE
This is a type of AE in which the camera automatically selects a combination of shutter speed and aperture setting according to the brightness of the subject.
Shooting mark
The “●” mark displayed on the LCD monitor when the camera is ready to take the picture.
Shutter speed
This refers to the time for which the shutter opens and allows the light for the picture to strike the film or CCD.
Subject
This term refers to the person or object photographed by the camera. In portrait shots, the subject is the person. In shots of landscapes, the subject is the scenery.
TFT color LCD monitor
Refers to an LCD monitor that uses a thin film transistor (TFT). TFT monitors provide good resolution and excellent responsiveness.
White balance
To the human eye, the light from a white incandescent light globe or a fluorescent tube does not appear to differ particularly from sunlight. In fact, however, they are a quite different in color from the light of the sun. Without some adjustment, shots taken under an incandescent light globe have an orange cast, while shots taken under fluorescent lights have a blue or green cast. There is a range of methods for correcting the color casts caused by different light sources, but on digital cameras a white subject is used as a reference. For this reason, the function is referred to as “white balance”.
Zoom lens
This is a lens in which the photography scale can be changed gradually. In a zoom lens, the photography scale is varied by gradually changing the focal length.
Zooming
This refers to the gradual changing of the photography scale. Gradual enlargement of the subject is called “zooming in”, while gradual reduction of the subject is called “zooming out”.

- CONTAX SL300RT
- FCC COMPLIANCE STATEMENT FOR AMERICAN USERS
- FCC STATEMENT
- NOTE
- CAUTION
- FOR CUSTOMERS IN CANADA CAUTION
- TEST PHOTOS AND WARRANTIES
- NOTES ON COPYRIGHT
- PRINT IMAGE MATCHING
- CONTENTS
- INTRODUCTION
- CAMERA PREPARATIONS
- BASIC OPERATIONS
- TECHNIQUES FOR TAKING PICTURES
- USING CAMERA MODE, CONTINUOUS SHOOTING MODE AND
- MOVIE MODE
- USING THE ▶ PLAYBACK MODE FUNCTIONS
- SET UP USING THE SET UP MODE FUNCTIONS
- APPENDIX
- HOW TO USE THIS INSTRUCTION MANUAL
- IMPORTANT
- CAUTION AND WARNING SYMBOLS
- HANDLING PRECAUTIONS
- LITHIUM-ION BATTERY PACK
- NOMENCLATURE → NAMES OF CAMERA CONTROLS AND REFERENCE PAGES
- A WORLD OF POSSIBILITIES
- ● STYLISH SLIMLINE BODY
- ● ROTATING LENS UNIT AND LCD MONITOR
- ● FLAT BODY MAKES IT EASY TO PUT DOWN
- ● CAMERA FUNCTIONS
- CONNECTING TO A COMPUTER
- DIGITAL PRINTING
- INSERTING THE BATTERY PACK
- OPEN THE CARD/BATTERY COVER
- INSERT THE BATTERY PACK (BP-780S) SUPPLIED WITH THE CAMERA
- CLOSE THE CARD/BATTERY COVER
- REMOVING THE BATTERY PACK
- GRIP THE BATTERY PACK AND PULL IT OUT OF THE CAMERA
- CHARGING THE BATTERY
- CONNECT THE AC ADAPTER TO THE CAMERA TO CHARGE THE BATTERY PACK
- LOADING THE MEMORY CARD
- CHECK THAT THE CAMERA IS SWITCHED OFF AND THEN OPEN THE CARD/BATTERY COVER
- LOAD THE MEMORY CARD
- WRITE PROTECT SWITCH (SD MEMORY CARDS ONLY)
- REMOVING THE MEMORY CARD
- PUSH THE MEMORY CARD IN GENTLY WITH YOUR FINGERTIP
- SWITCHING THE CAMERA ON
- PRESS THE POWER BUTTON POWER
- VIEWING THE BATTERY LEVEL AND CHARGING GUIDE
- SETTING THE DATE AND TIME
- DATE DISPLAY FORMAT
- USING THE ACCESSORIES
- ● USING THE CAMERA CASE
- ● USING THE CLEANING PAD
- ● MOUNTING THE FILTER ADAPTER
- TAKING PICTURES — SHOOTING STILL IMAGES
- HOLDING THE CAMERA
- PRESS THE SHUTTER RELEASE BUTTON DOWN HALF WAY TO SET EXPOSURE AND FOCUS
- PRESSING THE SHUTTER RELEASE BUTTON HALF WAY
- SHOOTING MOVIES
- PRESS THE SHUTTER RELEASE BUTTON HALF WAY TO SET THE EXPOSURE AND FOCUS FOR THE SUBJECT
- WHEN YOU PRESS THE SHUTTER RELEASE BUTTON DOWN FURTHER, THE CAMERA MAKES A CLICKING SOUND AND SHOOTING BEGINS
- PRESS THE SHUTTER RELEASE BUTTON HALF WAY TO FINISH SHOOTING
- VIEWING IMAGES — STILL IMAGE PLAYBACK
- VIEWING IMAGES – MOVIE PLAYBACK
- DISPLAYING INFORMATION FOR PLAYBACK IMAGES – INFORMATION
- CHECKING PHOTOGRAPHY DATA AND ERASING IMAGES — MANUAL REC REVIEW
- DELETING UNWANTED IMAGES – ERASING IMAGES
- PRESS THE MENU BUTTON MENU
- PRESS ▶ ON THE 4-WAY BUTTON TO SELECT ERASE [💡]
- PRESS THE OK BUTTON
- PRESS ▲ ON THE 4-WAY BUTTON TO SELECT [EXECUTE]
- PRESS THE OK BUTTON 🔒 TO ERASE THE IMAGE
- PRESS THE MENU BUTTON TO FINISH THE ERASE PROCEDURE
- WHEN THE MEMORY CARD IS FULL
- CONNECTING THE CAMERA TO A COMPUTER
- COMPUTER HARDWARE AND SOFTWARE REQUIREMENTS
- ● WINDOWS COMPUTERS
- ● MACINTOSH COMPUTERS
- CONNECTING TO A WINDOWS PC
- INSTALLING THE USB DRIVERS (WINDOWS 98 AND WINDOWS 98SE ONLY)
- VIEWING IMAGES ON A WINDOWS PC
- LOAD THE MEMORY CARD INTO THE CAMERA. (→ P.1-3)
- CONNECT THE AC ADAPTER TO THE CAMERA
- CONNECT THE CAMERA TO YOUR PC USING THE DEDICATED USB CABLE AND THEN START UP THE PC
- PRESS THE POWER BUTTON TO SWITCH THE CAMERA ON
- A [REMOVABLE DISK] ICON APPEARS IN THE [MY COMPUTER] WINDOW. DOUBLE-CLICK THE ICON TO OPEN THE DISK WINDOW
- OPEN THE [100CXBOX] OR [RESIZE] FOLDER IN THE DCIM FOLDER, THEN SELECT THE IMAGE YOU WANT TO VIEW FROM THE FILES AND DOUBLE-CLICK THE IMAGE
- MEMORY CARD FOLDER CONFIGURATION
- DISCONNECTING THE USB CABLE FROM A WINDOWS PC
- ● WINDOWS ME USERS
- UNINSTALLING THE DRIVER SOFTWARE (WINDOWS 98 AND WINDOWS 98SE ONLY)
- CONNECTING TO A MACINTOSH
- VIEWING IMAGES ON A MACINTOSH COMPUTER
- CONNECT THE CAMERA TO YOUR MACINTOSH USING THE DEDICATED USB CABLE AND THEN START UP THE MACINTOSH
- AN [UNTITLED] DISK ICON APPEARS ON THE DESKTOP. DOUBLE-CLICK THE ICON TO OPEN THE DISK WINDOW
- DISCONNECTING THE USB CABLE FROM A MACINTOSH COMPUTER
- DIGITAL PRINTING ON A PRINTER
- USING FOCUS LOCK TO TAKE PICTURES
- POSITION THE FOCUSING FRAME IN THE CENTER OF THE SCREEN OVER THE SUBJECT YOU WANT TO FOCUS ON AND PRESS THE SHUTTER RELEASE BUTTON HALF WAY
- WITH THE SHUTTER RELEASE BUTTON STILL HALF-PRESSED, MOVE THE CAMERA UNTIL THE SHOT IS COMPOSED AS YOU WANT IT AND THEN PRESS THE SHUTTER RELEASE BUTTON DOWN FULLY TO TAKE THE SHOT
- SUBJECTS THAT ARE DIFFICULT TO FOCUS ON
- USING THE ZOOM BUTTON – OPTICAL ZOOM AND DIGITAL ZOOM
- PRESS THE [▲] SIDE OF THE ZOOM BUTTON UNTIL THE IMAGE IS FULLY ZOOMED
- BRIEFLY RELEASE THE ZOOM BUTTON AND THEN PRESS THE [▲] SIDE OF THE ZOOM BUTTON AGAIN
- SETTING THE BEST CAMERA MODE FOR THE SCENE SHOT — SCENE BUTTON SCENE
- DISPLAYING THE SCENE MODE MENU
- WITH THE CAMERA IN SHOOTING MODE, PRESS THE SCENE BUTTON SCENE
- THE SCENE MODE MENU APPEARS ON THE LCD MONITOR
- PRESS ▲ OR ▼ ON THE 4-WAY BUTTON TO SELECT THE BEST SHOOTING MODE FOR THE SUBJECT
- PRESS THE OK BUTTON Ⓞ
- SHOOTING MODES
- STANDARD
- SPORTS ACTION (APPLICABLE MODE: 📄/☐)
- PORTRAIT (APPLICABLE MODE: 📄/☐)
- NIGHT VIEW (APPLICABLE MODE: 📄/☐)
- NIGHT PORTRAIT (APPLICABLE MODE: 📄)
- MACRO (APPLICABLE MODE: 📄/马/贝)
- USING MACRO MODE
- LANDSCAPE (APPLICABLE MODE: 📄/ 📋/ 📌)
- USING CONTINUOUS SHOOTING MODE
- SWITCHING THE LCD MONITOR ICON DISPLAY AND BACKLIGHT ON AND OFF
- SPECIFYING THE SETTINGS
- CONSERVING BATTERY POWER
- ● SWITCHING THE CAMERA OFF PROMPTLY
- ● SWITCHING THE LCD MONITOR BACKLIGHTING OFF
- ● SETTING THE POWER SAVE FUNCTION
- ● SETTING THE AF MODE TO SAF
- USING CAMERA MODE, CONTINUOUS SHOOTING MODE AND MOVIE MODE
- USING THE FLASH
- FLASH MODES
- AUTO AUTO FLASH MODE
- AUTO RED-EYE REDUCTION AUTO MODE
- FLASH OFF MODE
- FILL-IN FLASH MODE
- FILL-FLASH WITH RED-EYE REDUCTION MODE
- RED-EYE EFFECT
- SETTING THE FLASH MODE
- ● FLASH SETTINGS IN EACH MODE USING THE SCENE BUTTON SCENE
- EFFECTIVE FLASH RANGE
- AVOIDING CAMERA SHAKE
- TAKING PICTURES USING THE SELF-TIMER
- SELECTING THE NUMBER OF PIXELS (IMAGE SIZE)
- [←] SELECTING THE QUALITY (COMPRESSION RATIO)
- [+] USING EXPOSURE COMPENSATION
- [ WB ] DETERMINING THE WHITE BALANCE
- [ FPS ] SETTING THE FRAME RATE
- [SOUND]
- SHOOTING MOVIES WITH SOUND (OR WITHOUT SOUND)
- [COLOR MODE] SELECTING COLOR, BLACK & WHITE OR SEPIA
- [CHROMA] CHANGING THE COLOR INTENSITY
- [SHARPNESS]
- ENHANCING THE IMAGE OUTLINES
- [WB PRESET] SETTING YOUR OWN VALUE FOR WHITE
- [AE MODE] SELECTING THE EXPOSURE SETTING METHOD
- PRESS ▲ OR ▼ ON THE 4-WAY BUTTON TO SELECT THE DESIRED SETTING AND THEN PRESS THE OK BUTTON Ⓐ
- PRESS THE MENU BUTTON TO CLEAR THE MENU
- THE SELECTED SETTING ([F2.8], ETC.) APPEARS ON THE LCD MONITOR
- [FOCUSING] SELECTING THE FOCUSING METHOD
- SETTING THE FOCUSING METHOD
- DETERMINING THE SHOOTING DISTANCE WITH MANUAL FOCUSING (MF)
- [LONG EXP.] USING SLOW SHUTTER SPEEDS
- [ISO] CHANGING THE ISO SENSITIVITY TO PHOTOGRAPH FAST MOVING SUBJECTS
- PRESS ▲ OR ▼ ON THE 4-WAY BUTTON TO SELECT THE DESIRED ISO SETTING AND THEN PRESS THE OK BUTTON ⏻
- THE SELECTED SETTING ([ISO200], ETC.) APPEARS ON THE LCD MONITOR
- [METERING] SELECTING THE AREA USED FOR SETTING THE EXPOSURE
- PRESS ▲ OR ▼ ON THE 4-WAY BUTTON TO SELECT [METERING] AND THEN PRESS
- PRESS ▲ OR ▼ ON THE 4-WAY BUTTON TO SELECT THE DESIRED METERING MODE AND THEN PRESS THE OK BUTTON Ⓐ
- PRESS THE MENU BUTTON ☑ TO CLEAR THE MENU
- THE ICON FOR THE SELECTED EXPOSURE MODE APPEARS ON THE LCD MONITOR
- [DIGITAL ZOOM] SWITCHING THE DIGITAL ZOOM ON AND OFF
- SWITCH THE CAMERA ON AND PRESS < OR > ON THE MODE BUTTON UNTIL THE “☐”, “☐” OR “☐” ICON LIGHTS ON THE MODE SELECT LED
- [PLAYBACK ZOOM] VIEWING YOUR IMAGES ENLARGED
- PLAYING BACK MOVIES
- PRESS THE OK BUTTON 🔒 TO BEGIN PLAYBACK
- PRESS THE OK BUTTON TO STOP MOVIE PLAYBACK
- [MULTI] VIEWING MULTIPLE IMAGES
- USING MULTI PLAYBACK
- ● USING THE MULTI PLAYBACK SCREEN
- ERASING IMAGES IN THE MULTI PLAYBACK SCREEN
- USE ▲ ON THE 4-WAY BUTTON TO SELECT [EXECUTE] AND THEN PRESS THE OK BUTTON ⏻
- PRESS THE MENU BUTTON ☑ TO RETURN TO THE MULTI PLAYBACK SCREEN
- REVERTING TO NORMAL PLAYBACK (SINGLE PLAYBACK)
- [POSTRECORDING] ADDING VOICE MESSAGES TO IMAGES
- RECORDING A MESSAGE
- ERASING VOICE MESSAGES
- PLAYING BACK A RECORDED MESSAGE
- PRESS THE OK BUTTON Ⓜ TO BEGIN MESSAGE PLAYBACK
- PRESS THE OK BUTTON ⏻ TO STOP VOICE MESSAGE PLAYBACK
- [PROTECT] PROTECTING IMAGES FROM ACCIDENTAL ERASING
- PROTECTING AN IMAGE
- UNPROTECTING IMAGES
- [ERASE] ERASING INDIVIDUAL IMAGES
- [ERASE ALL] ERASING ALL IMAGES
- USE ▲ ON THE 4-WAY BUTTON TO SELECT [EXECUTE] AND THEN PRESS THE OK BUTTON
- [RESIZE] RESIZING AND TRIMMING IMAGES
- RESIZING AN IMAGE
- CHECKING AND ERASING RESIZED IMAGES
- FROM STEP 3 IN "RESIZING AN IMAGE" ON P
- USE ▲ OR ▼ ON THE 4-WAY BUTTON TO SELECT [VIEW RESIZED IMAGE] AND THEN PRESS THE OK BUTTON ⏻
- TO ERASE THE IMAGE, PRESS ▲ ON THE 4-WAY BUTTON TO SELECT [ ] AND THEN PRESS THE OK BUTTON Ⓞ
- PRESS THE MENU BUTTON ☑ TO RETURN TO THE NORMAL PLAYBACK SCREEN
- RESIZING ALL THE IMAGES
- ERASING ALL RESIZED IMAGES
- PRESS ▲ ON THE 4-WAY BUTTON TO SELECT [EXECUTE] AND THEN PRESS THE OK BUTTON ⏻
- [ROTATE] ROTATING AN IMAGE
- [AUTO PLAY] DISPLAYING IMAGES AUTOMATICALLY AS A SLIDESHOW
- SETTING AUTO PLAY
- USE ▲ OR ▼ ON THE 4-WAY BUTTON TO SELECT A SETTING AND THEN PRESS THE OK BUTTON Ⓙ
- STARTING AND ENDING AN AUTO PLAY SLIDESHOW
- USE ▲ OR ▼ ON THE 4-WAY BUTTON TO SELECT [START] AND THEN PRESS THE OK BUTTON ⏻ TO BEGIN THE SLIDESHOW
- TO END THE SLIDESHOW, PRESS THE MENU BUTTON Ⓗ
- [PRINT SETTINGS] SPECIFYING DPOF PRINT SETTINGS
- SPECIFYING DPOF SETTINGS
- USE ▲ OR ▼ ON THE 4-WAY BUTTON TO SELECT [PRINT SETS] AND THEN PRESS ▶ TO APPLY THE DPOF SETTINGS
- SPECIFYING INDEX PRINT SETTINGS
- USE ▲ OR ▼ ON THE 4-WAY BUTTON TO SELECT [INDEX] AND THEN PRESS
- USE ▲ OR ▼ ON THE 4-WAY BUTTON TO SELECT [SET UP INDEX PRINT] AND THEN PRESS THE OK BUTTON ⏻
- DELETING ALL THE DPOF PRINT SETTINGS
- [AF MODE] SETTING AF MODE
- [AF METHOD] SETTING AF METHOD
- [BRIGHT CNTRL] ADJUSTING THE LCD MONITOR BRIGHTNESS
- [BACKLIGHT] CHANGING THE MONITOR BACKLIGHTING BRIGHTNESS
- [DATE] SETTING THE CAMERA'S DATE AND TIME
- [INSERT DATE] WRITING THE DATE ONTO IMAGE FILES
- [FORMAT] INITIALIZING MEMORY CARDS
- WHEN INITIALIZATION IS COMPLETED, THE SCREEN IN STEP 2 REAPPEARS
- [POWER SAVE] SWITCHING THE CAMERA OFF AUTOMATICALLY TO SAVE POWER
- SWITCH THE CAMERA ON AND PRESS < OR > ON THE MODE BUTTON UNTIL THE “SET” ICON LIGHTS ON THE MODE SELECT LED
- PRESS ▲ OR ▼ ON THE 4-WAY BUTTON TO SELECT [POWER SAVE] AND THEN PRESS
- PRESS ▲ OR ▼ ON THE 4-WAY BUTTON TO SELECT THE DELAY UNTIL THE CAMERA SWITCHES OFF AND THEN PRESS THE OK BUTTON ⏻
- THE DELAY TIME IS SET AND THE SCREEN IN STEP 2 REAPPEARS
- NOTES ON USING POWER SAVE IN “☐” MODE, “☐” MODE AND “☐” MODE
- WHEN [POWER SAVE] IS SET TO [1MIN.], [3MIN.] OR [6MIN.]
- WHEN [POWER SAVE] IS SET TO [NO PWR OFF]
- [MODE LOCK] PRESERVING YOUR FUNCTION SETTINGS
- PRESS ▲ OR ▼ ON THE 4-WAY BUTTON TO SELECT [MODE LOCK] AND THEN PRESS
- [BEEP] ADJUSTING THE VOLUME OF THE CAMERA BUTTON BEEP
- [SHUTTER VOL] ADJUSTING THE VOLUME OF THE SHUTTER SOUND
- [COLOR SELECT] SELECTING THE MENU COLOR
- [START SCREEN] SELECTING THE STARTUP SCREEN
- [REC REVIEW] CHECKING IMAGES RIGHT AFTER YOU SHOOT THEM
- [LANGUAGE] SELECTING THE MENU LANGUAGE
- [FILE NO.] STARTING IMAGE FILE NUMBERS FROM
- [MODE RESET]
- RESETTING FUNCTION SETTINGS
- TROUBLESHOOTING
- MODE-LOCKED MENU OPTIONS AND DEFAULT SETTINGS
- LCD MONITOR INFORMATION AND NAMES OF ICONS
- DISPLAY WHEN THE CAMERA, CONTINUOUS SHOOTING, OR MOVIE MODE IS SELECTED
- DISPLAY WHEN THE MENU BUTTON IS PRESSED
- DISPLAY WHEN PLAYBACK ▶ MODE IS SELECTED
- ● DISPLAY WHEN THE MENU BUTTON 📋 IS PRESSED
- IMAGE INFORMATION DISPLAY
- ● INFORMATION DISPLAY (PLAYBACK MODE)
- ● MANUAL REC REVIEW DISPLAY (CAMERA MODE)
- LED INDICATORS
- SELF-TIMER LED (RED)
- CARD ACCESS LED (ORANGE)
- CAUTION LED (RED)
- BASIC GLOSSARY OF DIGITAL CAMERA TERMS
- AE (AUTO EXPOSURE)
- AF (AUTO FOCUS)
- APERTURE
- APERTURE SETTING
- APERTURE-PRIORITY AE
- CCD (CHARGE COUPLED DEVICE)
- DCF (DESIGN RULE FOR CAMERA FILE SYSTEM)
- DEPTH OF FIELD
- DPOF (DIGITAL PRINT ORDER FORMAT)
- EV (EXPOSURE VALUE)
- EXPOSURE
- FLASH
- FOCAL LENGTH
- FOCUS
- FORMAT
- INFINITY
- INITIALIZATION (FORMATTING)
- ISO (SENSITIVITY)
- JPEG (JOINT PHOTOGRAPHIC EXPERTS GROUP)
- MEMORY CARD
- MF (MANUAL FOCUS)
- PROGRAM AE
- SHOOTING MARK
- SHUTTER SPEED
- SUBJECT
- TFT COLOR LCD MONITOR
- WHITE BALANCE
- ZOOM LENS
- ZOOMING
Brand : CONTAX
Model : SL300R T
Category : Camera