Playon!DVR HD - Media player AC Ryan - Free user manual and instructions
Find the device manual for free Playon!DVR HD AC Ryan in PDF.

User questions about Playon!DVR HD AC Ryan
0 question about this device. Answer the ones you know or ask your own.
Ask a new question about this device
Download the instructions for your Media player in PDF format for free! Find your manual Playon!DVR HD - AC Ryan and take your electronic device back in hand. On this page are published all the documents necessary for the use of your device. Playon!DVR HD by AC Ryan.
USER MANUAL Playon!DVR HD AC Ryan
natural_image
Black PlayStation TV player with control buttons and indicator lights (no readable text or symbols beyond branding)Contents
Introduction ...... 3
Usage Precautions....3
Specifications 4
Functionality 5
MultiMedia Player Function....6
Package Contents 7
Product Description 8
-
How to Install a Hard Disk? 10
-
Connecting Audio & Video Cable to TV 11
2.1 Connect Video Cable....11
2.2 Connect Audio Cable....12
-
Using the remote control 13
-
Initial Setup....15
-
Setup Menu....17
-
TV / AV-IN & RECORD SCHEDULE 25
6.1 Direct Record/ Time-Shift / EPG / Time-Scheduling / AV-IN Record. ..... 25
-
MULTIMEDIA 32
-
FILE MANAGER 36
-
Files Management as an USB storage device 39
9.1 Supported Platforms....39
10. Setup a sharing folder in Windows 40
10.1 Windows 2000....41
10.2 Windows XP 43
10.3 Windows Vista....46
11. File Streaming from the network connected PCs 49
11.1 Stream by Wired LAN or Wireless Connection....49
11.2 Wireless Connection....55
12. Remote Web-Access & Torrent Download .... 58
12.1.1. System Info....59
12.1.2. File Browser 60
12.1.3. Record Schedule....61
12.1.4. Record History 65
12.1.5. Torrent Download....66
13. FTP Server 67
13.1.1. Accessing Playon!DVR ^HD (FTP Server) with a web-browser. 68
13.1.2. Accessing Playon!DVRHD (FTP Server) with a FTP Client Program. .. 69
14. Firmware Upgrade 70
15. Appendixes ...... 71
15.1 Frequently Asked Questions 71
15.2 Copyrights and Trademarks 73
15.3 Warranty 73
15.4 GPL Statement 73
Introduction
Usage Precautions
Please read the following carefully for the proper use of this product.
| Copyright | A.C.Ryan is not responsible for any recorded programs, files created or distributed for the purpose of illegal commercial or transactional activities. The party or parties who record or distribute the contents shall bear all the responsibilities (Civil or Criminal) directly or indirectly. |
| Supported codec | The Playon!DVR ^ may not play some media files. Please check the codec types. Also it may not play or run properly depending on the file characteristics or parameters used in encoding. |
| USB Device | Connect & turn on the power adapter as well when you connect the Playon!DVR.C.Playon!DVR ^ may not be connected if the USB cable is more than 3 meters (9.8 feet).We recommend you to use the supplied USB cable.If the USB cable is too long, the transfer speed and connection may not be good.If you connect this device to a USB1.1 Host Adapter, the transfer speed is limited to USB1.1 (Max. 12Mbps), we recommend you to connect to USB2.0 for full speed of max. 480Mbps. |
| USB Host | The USB Host ports may not be compatible with all USB storage devices. Please check the compatibility before you purchase or use the USB storage device. |
| HDD Type | Only 3.5" SATA type HDD can be used. |
| Interference | The Playon!DVR ^ may cause radio interference, we recommend not to use any services related to human safety when this product is in use. |
| Data Backup | We strongly recommend that you back up your data to another storage media. We are not responsible for any data lost or corruption in the internal HDD. |
| Drop & Shock | Do not drop the Playon!DVRIt may cause severe damage to the product and/or the internal HDD. |
| Foreign Materials | Do not insert conductive materials (coin, etc) or other objects that may cause defects to the Playon!DVR |
| Disassemble / Remodel | Do not try to disassemble or remodel the Playon!DVRmay cause malfunction & void the product warranty. |
| Stacking | Do not place any heavy objects on the Playon!DVR |
| Exposure to water, moisture, etc | Do not expose the Playon!DVRto oil, water, dust, moisture or rain and wind.If the Playon!DVRis wet, unplug the power cable from the unit immediately. Do not operate until the product is dry. |
| Heat | Keep the Playon!DVRaway from heated areas. Operate the product in well-ventilated places. |
| Magnetic Materials | Keep all magnetic materials away from the Playon!DVRMagnetic materials such as speakers or magnets may erase or cause damage to the data stored in the internal HDD. |
* A.C.Ryan does not assume any responsibility for any damaged HDD.
Specifications
| Product Name | AC Ryan Playon!DVR ACR-PV75100 / ACR-PV75120 |
| Main CPU | Realtek RTD1283DD 400Mhz processor |
| Power | 12V 3A |
| Weight | Approx. 840g (without HDD inside) |
| Dimension | 185(L) x 158(W) x 57(H) mm |
| Front VFD Display | Colorful VFD Display |
| Supported OS | Windows 98SE or higher, Mac OS 9.0 or higher, Linux 2.4 or higher |
| USB Slave | Slave Port x 1, USB2.0 (USB1.1 compatible) |
| USB Host | Host Port x 2, USB2.0 (USB1.1 compatible)Supports USB devices like external USB storage devices, ODD, Flash Drive, Card Reader |
| e-SATA | e-SATA port x 1 |
| Wired LAN | 10/100Mbps LAN (RJ-45) x 1 |
| Wireless Dongle (optional) | AC Ryan Playon! Wireless N USB adapter |
| HDD Type | 3.5" SATA HDD |
| HDD File System | NTFS (Read & Write for file Copying, Recording, Time-Shift, EPG function) |
| TV Type | PAL / NTSC |
| Video Format | MKV, MPG, ASF, AVI, WMV, VOB, TP, TS, TRP, DAT, ISO, IFO, M2T, M2TS, MOV, FLV(RM, RMVB up to 720p)H.264, MPEG1/2/4, DivX, XviD, WMV9(MP@HL), VC-1(AP@L3) |
| Audio Format | MP3, OGG, WMA, AAC, AC3, WAV, Dolby, FLAC, DTS |
| Photo Format | JPG / JPEG(HD), BMP, PNG, GIF, TIF |
| Subtitles | SRT, SMI, SSA, ASS, IDX/SUB, SUB |
| Video Output | CompositeComponent Y, Pb, Pr (480p, 720p, 1080i)HDMI1.3 (480p, 720p, 1080i, 1080p) |
| Audio Output | Analogue: Stereo L & RS/PDIF Digital Output: Coaxial / Optical |
| AV-IN / Tuner | PV75100: Composite AV-In / Single Hybrid TunerPV75120: Composite AV-In / Dual DVB-T Tuner |
| Memory | Flash - 512MB, DDRII - 256MB |
| Cooling Fan | 25 x 25 Brushless Micro Fan |
| Language | English, Spanish, French, Germany, Italian, Dutch, Russian (Other languages will be added) |
| Working Temperature | 0°C ~ 60°C |
| Working Humidity | 10% ~ 50% |
Functionality
* In order to use the recording functions (Direct Record, Time-Shift, Time-Scheduling Record, EPG Record), Remote Web-Access and Torrent Download, you should do the HDD Formatting via Playon!DVR ^0 (Not through a PC).
Playon!DVR ^® has a built-in Single Hybrid/Dual DVB-T tuner and fully records Analogue (PAL) & Digital (DVB-T) TV channels as well as supporting media playing functions.
(The above mentioned may differ from your model)
| Direct Record | The Playon!DVR ^HD has direct recording function.If you want to record the channel you are watching now, just press [RECORD] button on the front panel or on the remote control and it will record the current channel. |
| Time-Scheduling Record | You can schedule record your programs by using the Time-Scheduling Record on the unit directly or through web-access to the unit remotely. |
| EPG The Playon!DVR | ^HD supports 'EPG Recording'. |
| Time-Shift | 'Time-Shift' function allows you to pause & record live TV programs to a storage medium & resume playback at a more convenient time. Example, being interrupted while watching live TV programs (such as picking up calls, answering the door, etc), all you need to do is to press the [TIMESHIFT] button on the remote to record the program for a period of time and then later press [PLAY] button again to resume from where you left off. |
| Torrent Download | Playon!DVR ^HD supports Remote Torrent Download through the Remote Web-Access Control. |
| AV-IN | You can digitize analogue contents such as video tapes into the internal HDD via AV-In or record the digital signal from Cable Set-Top-Box, Satellite Set-Top-Box, etc which has AV-Out.Playon!DVR ^HD supports Composite AV-In. |
* The Playon!DVR ^HD will detect a new HDD you installed and will prompt if you would like to format it.
* We highly recommend that you format the internal HDD through the Playon!System for full intended functionalities.
* Make sure that your TV is switched to the correct [AV INPUT] mode.
MultiMedia Player Function
The Playon!DVR ^D is a stand-alone, multimedia HDD (Hard Disk Drive) player that plays digital videos, music, photos and DVD files on your TV and home entertainment system. You can enjoy the digital contents at home without having to burn discs or having to play it back on a DVD or CD player.
| MultiMedia Player | The Playon!DVR^HD can playback videos, music, photos from the internal HDD, an external USB storage device or via shared network locations. |
| High-Definition | The Playon!DVR^HD supports HD videos (up to 1920x1080p) and photos by using HDMI connection. |
| HDMI up to 1080p | By using a single HDMI cable connection, you can enjoy the high quality of both digital video and audio. |
| LAN | Provides 10/100Mbps network connection for media streaming from a PC and file transfer from/to a PC and Remote Web-Access, FTP Server, Client, etc. |
| Wireless | With the optional 802.11n wireless USB dongle, you can enjoy content streaming wirelessly.(Some high bitrate contents may not play smoothly with wireless streaming). |
| e-SATA Connects e-SATA devices. | |
| USB2.0 | With the two USB2.0 Host connections, you can attach additional external USB storage devices to further extend your storage capacities. |
Package Contents
The Playon!DVR ^HD package includes the below items and may be different from the actual contents.
| Part Quantity | |
| AC Ryan Playon!DVR ^5 | 1 |
| Remote control 1 | |
| Remote control Batteries 2 | |
| Composite A/V cable 2 | |
| Component YPbPr cable 1 | |
| AC Ryan HDMI cable 1 | |
| DVB-T Antenna 1 | |
| AC/DC adapter 1 | |
| AC/DC adapter power cord 1 | |
| USB cable 1 | |
| Mounting screws (Pack) 1 | |
| User manual (Printed) 1 | |
| Quick installation guide (Printed) | 1 |
| AC Ryan Playon! Wireless N USB adapter | 1 (optional) |
Note:
The actual contents in the package may be different from the packing contents in this manual.
Product Description
The Playon!DVR ^HD has some basic button controls on the front panel as well as on the remote controller.
< Front View >

text_image
① ③ ④ ONOR MIN MAX REMOTE PLAY REC STOP ② ⑤ ⑥ ⑦| Front View | 1 POWER Power ON / OFF button. | |
| 2 IR Receives the remote controller signal. | ||
| 3 WFD Display Colorful display for status of the unit. | ||
| 4 OK [ENTER]Navigation | OK (Enter) or Select button.Volume Up / Down knob.Left / Right Navigation knob. | |
| 5 PLAY Play the files (contents) button. | ||
| 6 REC Direct Record Button. | ||
| 7 STOP Stop playback button. |
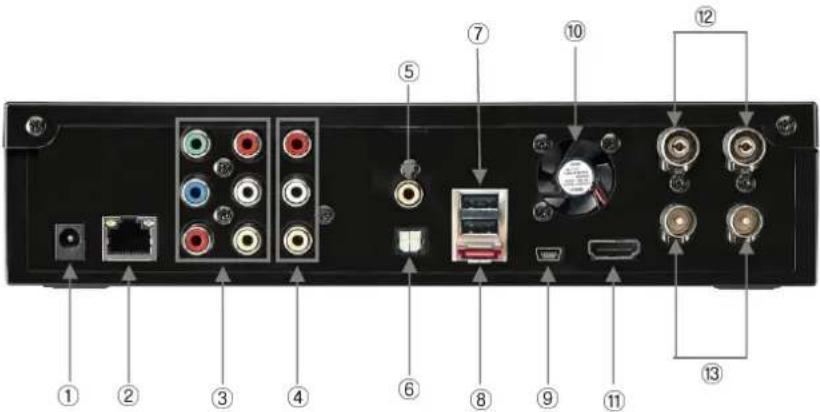
< Back View >
text_image
Back panel diagram with numbered labels pointing to various electronic components and connectors*Your product may be different from the above image
| Back View | 1 Power Jack Connects the power adapter. |
| 2 LAN Wired LAN connection to a PC for file streaming/transfer. | |
| 3 AV-OUT Connects Playon!DVR ^D to TV (Composite / Component). | |
| 4 AV-IN Connects an external AV device for recording. | |
| 5 Coaxial Coaxial cable for 5.1CH Digital audio output. | |
| 6 Optical Optical cable for 5.1CH Digital audio output. | |
| 7 USB Host Connects to an external WiFi USB dongle or storage device. | |
| 8 e-SATA Connects e-SATA device. | |
| 9 USB Slave Connects Playon!DVR ^D to a PC by USB cable. | |
| 10 Cooling Fan Exhausts heat from internal. | |
| 11 HDMI Connects HDMI Cable to TV. | |
| 12 Antennarin (Optional) Connects the coaxial cable from your wall antenna socket. | |
| 13 Antenna Out (Optional) Connects the coaxial cable from the Playon!DVRto TV. |
▶ Depending on your model, there may be more than one built-in tuner.
1. How to Install a Hard Disk?
√ Use a 3.5" SATA Hard Disk for installation.

natural_image
Back panel of a black electronic device showing ports, connectors, and a central display (no visible text or labels)
natural_image
Back view of a black electronic device with multiple colored connectors and ports (no visible text or symbols)① Unscrew the top 2 thumbscrews and open the cover by pulling in an upwards direction.
② Attach the power and SATA connector to HDD, secure with the screws provided.

natural_image
Back panel of a black electronic device showing ports, connectors, and a central display (no visible text or labels)③ Close the cover & complete assembly by securing the 2 thumbscrews.
*Your product may be different from the above image
2. Connecting Audio & Video Cable to TV
2.1 Connecting Video Cable
The Playon!DVR ^® supports three types of video output; “Composite, Component and HDMI” and you can connect using one of these connections.

text_image
Back panel of a computer interface showing ports, connectors, and labeled parts (①, ②, ③)*Your product may be different from the above image
① HDMI: HDMI Cable.
HDMI Connects HDMI Input Jack of TV
② Composite: Yellow RCA cable.

flowchart
graph LR
    A["Yellow (CVBS)"] --> B["Yellow (CVBS)"]
    C["Yellow (CVBS)"] --> B
    D["Yellow (CVBS)"] --> B
    B --> E["Connects to Composite Input (CVBS) Jack of TV"]
③ Component: Y,IPB, Pr component cable.

flowchart
graph TD
    A["Red (Pr)"] --> B["Blue (Pb)"]
    C["Green (Y)"] --> D["Blue (Pb)"]
    E["Red (Pr)"] --> F["Blue (Pb)"]
    G["Green (Y)"] --> H["Blue (Pb)"]
    I["Red (Pr)"] --> J["Blue (Pb)"]
    K["Green (Y)"] --> L["Blue (Pb)"]
    M["Red (Pr)"] --> N["Blue (Pb)"]
    O["Green (Y)"] --> P["Blue (Pb)"]
    Q["Red (Pr)"] --> R["Blue (Pb)"]
    S["Green (Y)"] --> T["Blue (Pb)"]
    U["Red (Pr)"] --> V["Blue (Pb)"]
    W["Green (Y)"] --> X["Blue (Pb)"]
    Y["Red (Pr)"] --> Z["Blue (Pb)"]
    AA["Green (Y)"] --> AB["Blue (Pb)"]
    AC["Red (Pr)"] --> AD["Blue (Pb)"]
    AE["Green (Y)"] --> AF["Blue (Pb)"]
    AG["Red (Pr)"] --> AH["Blue (Pb)"]
    AI["Green (Y)"] --> AJ["Blue (Pb)"]
    AK["Red (Pr)"] --> AL["Blue (Pb)"]
    AM["Green (Y)"] --> AN["Blue (Pb)"]
    AO["Red (Pr)"] --> AP["Blue (Pb)"]
    AQ["Green (Y)"] --> AR["Blue (Pb)"]
    AS["Red (Pr)"] --> AT["Blue (Pb)"]
    AU["Green (Y)"] --> AV["Blue (Pb)"]
    AW["Red (Pr)"] --> AX["Blue (Pb)"]
    AY["Red (Pr)"] --> AZ["Blue (Pb)"]
    BA["Green (Y)"] --> BB["Blue (Pb)"]
    BC["Red (Pr)"] --> BD["Blue (Pb)"]
    BE["Green (Y)"] --> BF["Blue (Pb)"]
    BG["Red (Pr)"] --> BH["Blue (Pb)"]
    BI["Green (Y)"] --> BJ["Blue (Pb)"]
    BK["Red (Pr)"] --> BL["Blue (Pb)"]
    BM["Green (Y)"] --> BN["Blue (Pb)"]
    BO["Red (Pr)"] --> BP["Blue (Pb)"]
    BQ["Green (Y)"] --> BR["Blue (Pb)"]
    BS["Red (Pr)"] --> BT["Blue (Pb)"]
    BU["Green (Y)"] --> BV["Blue (Pb)"]
    BW["Red (Pr)"] --> BX["Blue (Pb)"]
    BY["Green (Y)"] --> BZ["Blue (Pb)"]
    CA["Red (Pr)"] --> CB["Blue (Pb)"]
    CC["Green (Y)"] --> CD["Blue (Pb)"]
    DD["Red (Pr)"] --> DE["Blue (Pb)"]
    DF["Green (Y)"] --> DG["Blue (Pb)"]
    DH["Red (Pr)"] --> DI["Blue (Pb)"]
    DJ["Green (Y)"] --> DK["Blue (Pb)"]
√ If you cannot see any display after connecting a video cable, please check the following;
On TV: switch to the same video input mode as the video connection to your Playo!DVR
For more details, please refer to your TV user manual.
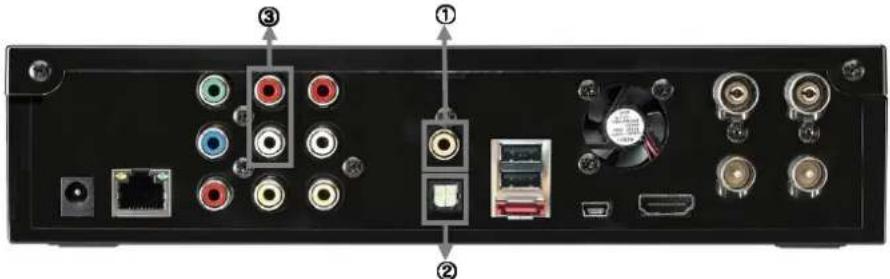
2.2 Connecting Audio Cable
The Playon!DVR ^HD supports three types of audio output; "Stereo, Coaxial and Optical".
Use an audio connection that your TV or external set supports. Most TV usually supports stereo audio connection, which is supplied in your package.
text_image
Back panel diagram with labeled ports and connectors, showing audio and media connections*Your product may be different from the above image
① Coaxial: Coaxial cable for Digital 5.1Ch

② Optical: Optical Cable for Digital 5.1Ch

√Don't connect optical and coaxial cable together at the same time.
③ Stereo: Red & White RCAcCable.

flowchart
graph LR
    A["Red (STEREO-R)"] --> B["White"]
    C["Red (STEREO-R)"] --> D["White"]
    E["Red (STEREO-L)"] --> F["White"]
    G["Red (STEREO-L)"] --> H["White"]
    I["Red (STEREO-L)"] --> J["White"]
    K["Red (STEREO-L)"] --> L["White"]
    M["Red (STEREO-L)"] --> N["White"]
    O["Red (STEREO-L)"] --> P["White"]
    Q["Red (STEREO-L)"] --> R["White"]
    S["Red (STEREO-L)"] --> T["White"]
    U["Red (STEREO-L)"] --> V["White"]
    W["Red (STEREO-L)"] --> X["White"]
    Y["Red (STEREO-L)"] --> Z["White"]
    AA["Red (STEREO-L)"] --> AB["White"]
    AC["Red (STEREO-L)"] --> AD["White"]
    AE["Red (STEREO-L)"] --> AF["White"]
    AG["Red (STEREO-L)"] --> AH["White"]
    AI["Red (STEREO-L)"] --> AJ["White"]
    AK["Red (STEREO-L)"] --> AL["White"]
    AM["Red (STEREO-L)"] --> AN["White"]
    AO["Red (STEREO-L)"] --> AP["White"]
    AQ["Red (STEREO-L)"] --> AR["White"]
    AS["Red (STEREO-L)"] --> AT["White"]
    AU["Red (STEREO-L)"] --> AV["White"]
    AW["Red (STEREO-L)"] --> AX["White"]
    AY["Red (STEREO-R)"]
    AZ["Red (STEREO-R)"] --> BA["Connects to R Jack of TV."]
    BB["Red (STEREO-R)"] --> BC["Connects to R Jack of TV."]
    BD["Red (STEREO-R)"] --> BE["Connects to R Jack of TV."]
    BF["Red (STEREO-R)"] --> BG["Connects to R Jack of TV."]
    BH["Red (STEREO-R)"] --> BI["Connects to R Jack of TV."]
    BJ["Red (STEREO-R)"] --> BK["Connects to R Jack of TV."]
    BL["Red (STEREO-R)"] --> BM["Connects to R Jack of TV."]
    BN["Red (STEREO-R)"] --> BO["Connects to R Jack of TV."]
    BP["Red (STEREO-R)"] --> BQ["Connects to R Jack of TV."]
    BR["Red (STEREO-R)"] --> BS["Connects to R Jack of TV."]
    BT["Red (STEREO-R)"] --> BU["Connects to R Jack of TV."]
    BV["Red (STEREO-R)"] --> BW["Connects to R Jack of TV."]
    BX["Red (STEREO-R)"] --> BY["Connects to R Jack of TV."]
    BZ["Red (STEREO-L)"]
    CA["Red (STEREO-L)"]
    CB["Red (STEREO-L)"]
    CC["Red (STEREO-L)"]
    CD["Red (STEREO-L)"]
    CE["Red (STEREO-L)"]
    CF["Red (STEREO-L)"]
    DG["Red (STEREO-L)"]
    DH["Red (STEREO-L)"]
    DI["Red (STEREO-L)"]
    DJ["Red (STEREO-L)"]
    DK["Red (STEREO-L)"]
    DL["Red (STEREO-L)"]
    DV["Red (STEREO-L)"]
    DW["Red (STEREO-L)"]
    DX["Red (STEREO-L)"]
    DXB["Red (STEREO-L)"]
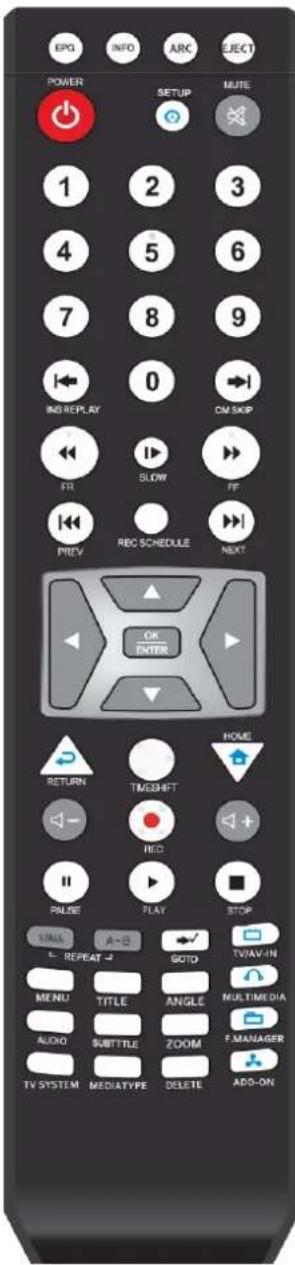
3. Using the remote control
Functions of the remote control buttons.
| EPG Displays EPG program info | |
| INFO Displays the information of the content | |
| ARC Aspect Ratio Control | |
| EJECT Reserved for adding function later | |
| POWER Power On / Off the unit | |
| SETUP Set up the various configurations of the unit | |
| MUTE Turns off the audio | |
| Numeric Key Insert a number | |
| INS REPLY Backwards per 10 seconds frame | |
| CM SKIP Forwards per 30 seconds frame | |
| FR Fast Rewinding (2x, 4x, 6x, 8x, 16, 32x) | |
| SLOW Playback in slow motion | |
| FF Fast Forwarding (2x, 4x, 6x, 8x, 16, 32x) | |
| PREV. Previous chapter or file | |
| Rec Schedule Set up the Scheduled Recording time | |
| NEXT | Next chapter or file |
| UP / DOWN | Up & Down navigation button |
| LEFT / REW | Left navigation button / Rewind |
| RIGHT / FF | Right navigation button / Fast Foward |
| OK / Enter | OK [ENTER] button. |
| RETURN | Return to the previous screen / folder |
| Time Shift | Time-Shift recording of the live channel |
| HOME | Go to the Home Menu page |
| Vol + | Volume up |
| REC. | Direct Record button / Select a file Copy or Move |
| Vol - | Volume down |
| PAUSE | Pause the playback |
| PLAY | Play a content |
| STOP | Stop playback |
| Repeat (1/ALL) | Repeat one file or all files |
| Repeat (A<->B) | Repeat the selected section |
| GOTO Jump to a specific time frame of a content | |
| TV / AV-IN | Watch & Record TV channels |
| Select input source (Composite / ATV / DTV) | |
| MENU Displays the DVD Menu if available | |
| TITLE | Displays the Title Menu of a DVD if available |
text_image
EPG INFO ARC ELECT POWER SETUP MUTE 1 2 3 4 5 6 7 8 9 ING REPLAY 0 DM SKIP FR SLOW FF PREY REC SCHEDULE NEXT OK ENTER RETURN TIMESHFT HOME REC + PULSE PLAY STOP LIME A-B GOTO TVAV-IN REPEAT TITLE ANGLE MULTIMEDIA MENU TITLE ZOOM F.MANAGER AUDIO SUBTITLE DELETE ADD-ON TV SYSTEM MEDIATYPE DELETE ADD-ON| ANGLE | Display the Teletext of DVB-T channels / Add the files to PlayList |
| MULTIMEDIA Access the contents of HDD, USB, Network | |
| AUDIO Select an audio track | |
| SUBTITLE Select a subtitle | |
| ZOOM Zoom video / image playback | |
| F. MANAGER | Copy / Move / Delete contents between HDD, USB Network |
| TV SYSTEM Switches TV-OUT modes | |
| MEDIA TYPE Automatic file filtering by Movie, Audio, Photo | |
| DELETE Rename / Delete a file | |
| ADD-ON Reserved for adding function later | |
[Tip]: If you lost the display or having any problems to see the display on TV & do not know what to do, then press [HOME] or [RETURN] button on the remote.
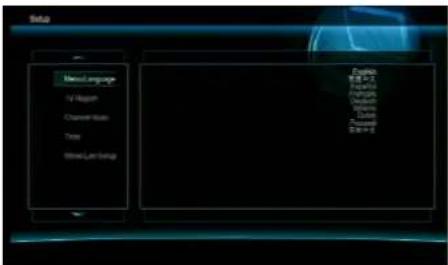
4. Initial Setup
When you first power on your Playon!DV On your display, you will see the Initial Setup page.
text_image
New Language N: N Margin Channel Mode Time Block Let Stop Picture Ctrl+1 Ctrl+2 Ctrl+3 Ctrl+4 Ctrl+5 Ctrl+6 Ctrl+7 Ctrl+8 Ctrl+9 Ctrl+10① [Menu Language]: Select a language.
text_image
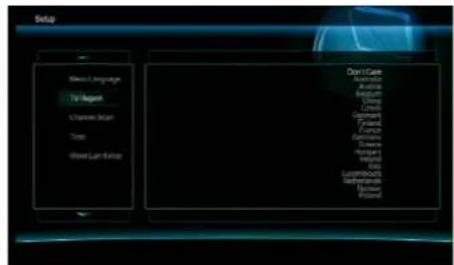
Menu Language To-Regal Chrome Scan Tool Green Light Color Don't Care Florida Alabama Michigan Utaher Ukraine Guatemala Florida California Georgia Michigan Texas Luxembourg Saunderstan Montana Pennsylvania② [TV Region]: Select a country.
text_image
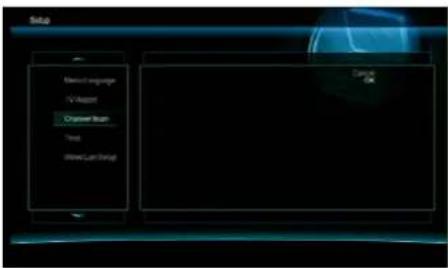
Setup Menu language TV Agent Custom Menu Time Direct Load Setup Cancel OK③ [Channel Scan]: Scans the TV channels.

text_image
Sela Menu Display No Report Channel Scan Test Show Lan Setup Manual Auto/Get On④ [Time]: Set up the current time manually or automatically through DTV signal.

text_image
Setup Show Language To Support Custal to Start Show Show: Live Group Manual OK OK Cancel OK OK OK OK OK OK OK OK OK OK OK OK OK OK OK OK OK OK OK OK OK OK OK OK OK OK OK OK OK OK OK OK OK OK OK OK OK OK OK OK OK OK OK OK OK OK OK OK OK OK Ok Ok⑤ [Time]: After setting up the time, press [Confirm].

text_image
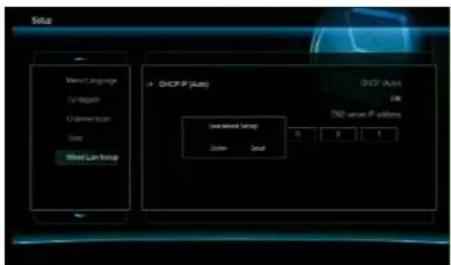
Setup Menu Language To Target Crossover Brain Time Other/Lien Group Cancel DISCS @ Auto F2.1.1 (Show) Other/Lien Group⑥ [Wired Lan Setup]: Obtain an IP address automatically by DHCP(Auto) or manually keying in a fixed IP address.

text_image
Setup Internal language For-lagging Engineer server Tools Wind Let Setup DHCP IP slots DHCP Units OK DNS server IP address 07 0 0 1⑦ [DHCP IP (Auto)]: Obtain an IP address automatically.⑧ [DHCP IP (Auto)]: After selecting [OK], select [Confirm] to save Network Settings.
text_image
Setup Internal Language For Register Engine Manager Name Wire LAN Setup DHCP IP (plus) DHCP Active OK DNS server IP address Load network Setup 0 0 1 Custom DefaultV.8 [DHCP IP (Auto)]: After selecting [OK], select [Confirm] to save Network Settings.

text_image
Salar Main Language TV language Channel Reason Stop Bikei Lao Setup DHCP IP Player Switch DHCP Player OK Data server IP address 0 0 1⑨ [DHCP IP (Auto)]: The Playon!DVRs testing your network connection and will obtain an IP address automatically from your AP router.
text_image
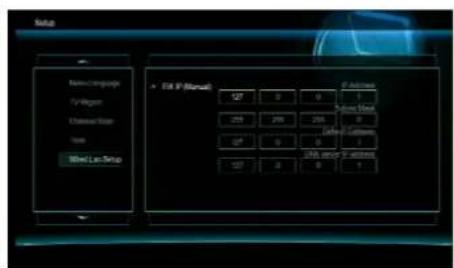
Sub Menu Language By Region Channel User Item Wire Lec Shop • EIA (P Manual) 127 0 0 1 258 258 253 0 247 0 0 1 167 0 0 1 IF Address New Area Local Center IHA or by IP address⑩ [FIX IP (Manual)]: You can manually key in your own static IP address / Subnet Mask / Default Gateway / DNS server IP address.

text_image
A.C.Ryan PLAYON:0VR™ Multimedia Browser⑪ [Home Menu Page]: After completing setup, you will see the Home Menu page.
5. Setup Menu
Before you use the Playon!DVR, please go to [SETUP] menu to configure to your requirement.
text_image
A.C.Ryan PLAYON!OVR™ Setup① At the Home Menu page, select [SETUP] menu.

text_image
Setup 2019/2023 Time 2023 TV Audio Video MTC Mastercard Synthem MSYG RT Regan Davil Case MOSG Audio Audio Grip Cyclo Cyber Cyber Cyber Cyber Cyber Cyber Cyber Cyber Cyber Cyber Cyber Cyber Cyber Cyber Cyber Cyber Cyber Cyber Cyber Cyber Cyber Cyber Cyber Cyber Cyber Cyber Cyber Cyber Cyber Cyber Cyber Cyber Cyber Cyber② [TV] => TV Region: Select a country.

text_image
Setup TV Audio Video REC Research Systems WISC Channel Bus Cable AUTO SCAN SUPPORT 14.00② [TV] => Channel Scan => AUTO SCAN: Scans the TV2 [TW] => Channel Scan => AUTO SCAN: During auto channels automatically. It will start scanning analogue TVscanning, press the [OK] button on the remote to cancel signals first, followed by digital TV signals. the channel scanning.

text_image
TV Scanning Found 0 PS DTV Scanning default Found 0 PS OK(If you are using DVB-T only model, then it scans for digital TV signals only).
text_image
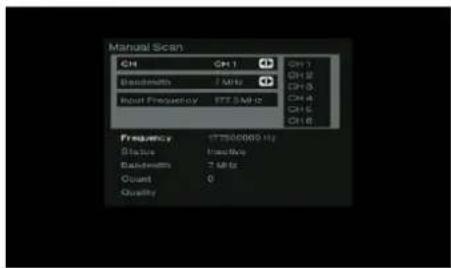
Manual Scan CH GH1 GH1 Bandwidth MHz CH3 Input Frequency F77.5MHz CH4 CH5 CH6 Frequency 17780000 Hz Status Inactive Bandwidth 2 MHz Count 0 Quality② [TV] => Channel Scan => MANUAL SCAN: You can input your channel manually and press the [OK] button on the remote.
text_image
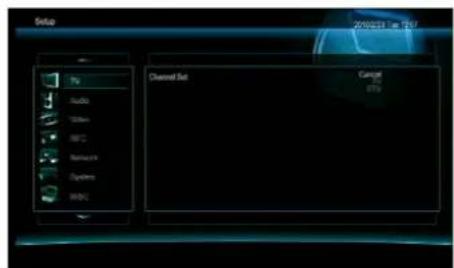
Setup Audio Video MIPS Serial 23 Systems BIRC Channel Set Cancel BTS② [TV] => Channel Set: You can select to fine tune analogue or digital TV signal.
text_image
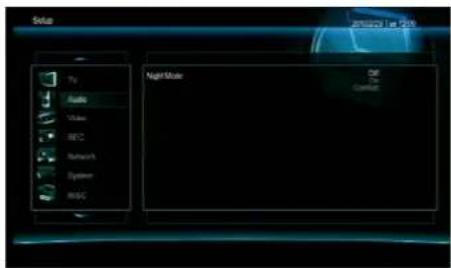
Selsus Audio Voice REC Network System RISC Night Mode OM Connection③ [Audio] => Night Mode Compatible digital audio
text_image
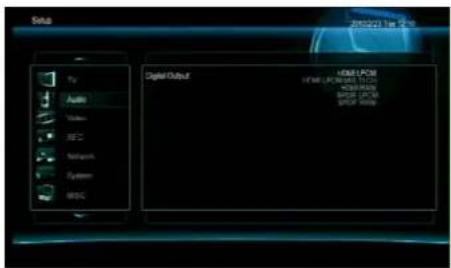
Sub 2018/2/21 Tue 2018 File Audio Video Network System Media Digital Output HDMI-PCM HDMI-PCM HDMI-PCM HDMI-PCM HDMI-PCM③ [Audio] => Digital Output Select HDMI or SPDIF (Coaxial
soundtracks will be dynamically compressed. Turn on foror Optical). good dialogues even at low volume.
Comfort : The basleve is limited to a comfort lev.

text_image
Data 2018/03/01:16:12 Ttl Audio Video RTC Retroom System NBC Aspect Ratio Fan Scan 4.0 cation Size 4.0 10.75④ [Video] => Aspect Ratio: Select a screen resolution.
text_image
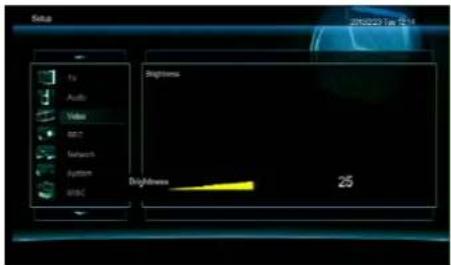
Sasa Audio Video Wire Network System Wire Brightness Brightness 25④ [Video] => Brightness: Adjust the brightness level.
text_image
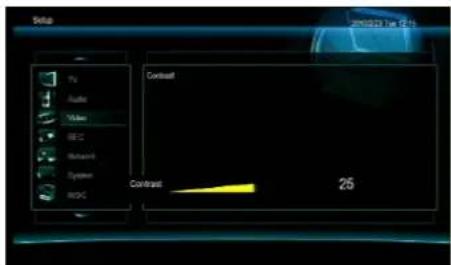
Beta Audio Video MOS Network System MOSC Contrast Contrast 25④ [Video] => Contrast: Adjust the contrast level.
text_image
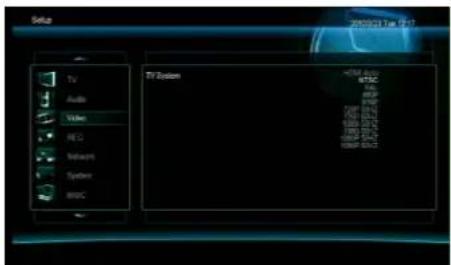
Setup TV Audio Video MEG Media System MOSC TV System +USB Audio eESC USB USBP USB USB USB USB USB USB USB USB④ [Vided] => TV System: Select one of the modes to best suit your TV.

text_image
Setup TV Audio Media REC Network System BNSC USBF242 On On
text_image
Setup Quality OK④ [Video] => 1080P 24Hz: Turn on to allow playing videos [REC] => Quality: Select a recording quality. The higher at 24Hz. This function is dependent on your video & TV the quality, the more HDD space it consumes. support

text_image
Setup TV Audio Video REC Network System BESC Renamed Tempill OK OK⑤ [REC] => Permanent Time-shift: If you select [ON] then the time-shift function is running automatically when you turn on the Playon!DVR.
Press the [Pause] button and then press [PLAY] button on the remote to watch from the last paused time frame.
** If you select [OFF], you will need to press the [TIMESHIFT] button to pause & play the live program.
text_image
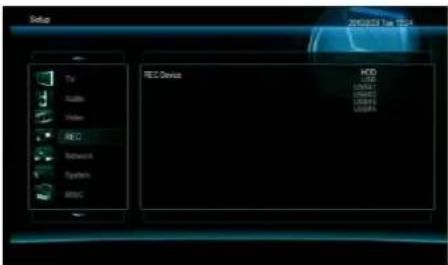
Setup TV Audio Video REC Network System MASC REC Device HDD USB USB2 USB4 USB5 HDD USB2 USB4
text_image
Setup Wind Linux Setup > DHCP IP (Auto) [NET Auto] OR [NET] serve IP address GIF 3 6 4⑤ [REC] => REC Device: Select the default storage you want to record to. You can choose to record to an internal HDD or to an external USB storage device.
6 [Network] => Wired Lan Setup => DHCP IP (Auto): Using a wired network connection, the Playon!DVR will obtain an IP address automatically from your DHCP-enabled AP router.

text_image
Setup 2010/2011 Top 2.4.4 WindLum Setup Windows Setup OK: 102, SEK 1.139 CUT: DHCP/Not switch ...⑥ [Network] => Wired Lan Setup => DHCP IP (Auto): Displays the IP address once connected.

text_image
Setup TV Audio Video VCC Network Cyberics WISC Single Line Setup > 100% (R/W) 187 9 11 1 205 250 235 2 Default Setup 187 9 11 205 250 235 2 Default Setup 187 9 11 2 205 250 235 2⑥ [Network] => Wired Lan Setup => FIX IP (Manual): You can manually input your own static IP address / Subnet Mask / Default Gateway / DNS server IP address.
text_image
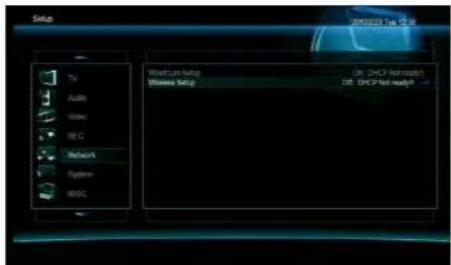
Setup TV Audio Video REC Network System WDC Windows Setup On: DHCP Net load/1 Off: DHCP Net load/1⑥ [[Network] => Wireless Setup: You can connect the Playon!DVR ^H0 to an AP router or to a PC directly.
text_image
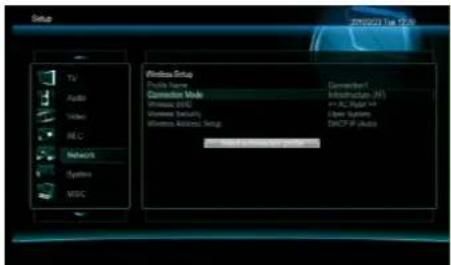
Setup TV Audio Video REC Network System WDC Windows Setup Profile Name Connector Mode Windows SIM Wireless Security Wireless Address Setup Connect key Connect key Internet (JF) 40.0% (Simplified) Open System DSCP 9 Access⑥ [Network] => Wireless Setup: Setting up a connection profile.
text_image
Setup Windows 96.72 Audio VISA VPC Network System WISC Desktop Setup → Windows SSD AC/Server 123 42.0 WISP 123.0 WISP WISP⑥ [Network] => Wireless Setup :
-. Profile Name: Select any one.
- Connection Mode: Select Infrastructure (AP) or Peer to Peer (Ad-hoc). In infrastructure mode, you can connect the Playon!DVR ^LD to an AP router and in Peer to Peer mode, you can directly connect the Playon!DVR a PC.
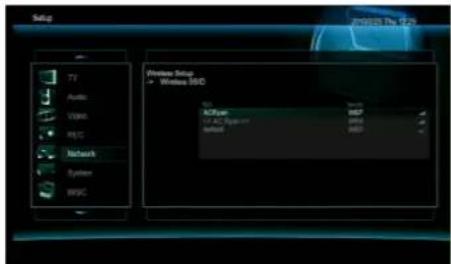
- Wireless SSID: Select this to scan for all available wireless networks within range. Choose the correct one to connect to.
text_image
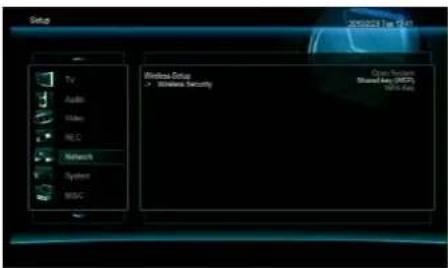
Setup TV Audio Video REC Network System MOSC Windows Drive • Windows Security Open Services Shared Web (MOSC) 100% Area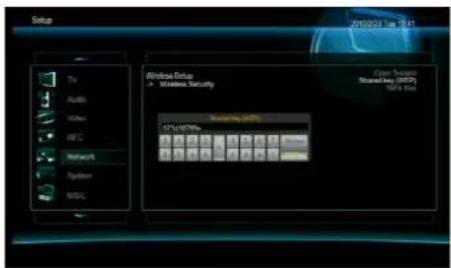
text_image
Setup 2018/03/20 16:41 Windows Setup - Windows Security Percentage (A/C) 17% / 107.9% Open Settings Standard Dev (MSP) N/A free⑥ [Network] => Wireless Setup => Wireless Security.
- . Open System: Select this if your AP router does not require a password to connect.
- Shared Key(WEP): Select this if your AP router is secured with a WEP password and input using the on-screen keyboard.
-. WPA: Select this if your AP router is secured with a WPA password and input using the on-screen keyboard.
- OK(Open) / OK(Skey): Please check your wireless security configuration of the AP router first and then select the appropriate option.

text_image
Setup TV Audio Windows RTC Network System BOSC Windows Drive • Windows Address Setup Check (Access) USB (Access)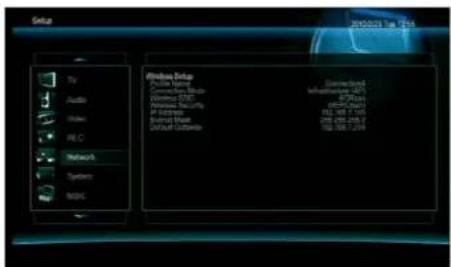
text_image
Setup TV Audio Video REC Networks Systems MIPS Windows Setup A Window Name Current Web Module Windows 8001 Windows Security IP Express Signal Base Default Outperform Downloaded Information API 467.2001 access... URL NET 1105 200-000-0057 URL NET 2.004⑥ [[Network] => Wireless Setup => Wireless Address Setup: You can obtain an IP address automatically or manually key in your own IP address.
6 [Network] => Wireless Setup => Wireless Address Setup: After setup, press [Select a connection profile] and the Playon!DVR ^HD will obtain an IP address and connect to the AP router or PC.

text_image
Setup TV Audio VR/RC REC Network System MBC Wireless Setup Wireless Setup OK: CHAP Net Adapter OK: 102.168.110K →⑥ [Network] => Wireless Setup: Displays the IP address and signal strength once connected

text_image
Setup Audio Video REC Network System BPG Text Decoding Unloaded / PPS 自定义 (100%) 视频中心 (100%) 音频 Video Control Litter Audio Audio Audio RT Expansion⑦ [System] => Text Encoding: Select the appropriate language encoding option to display the movie subtitles (text-based) correctly.
text_image
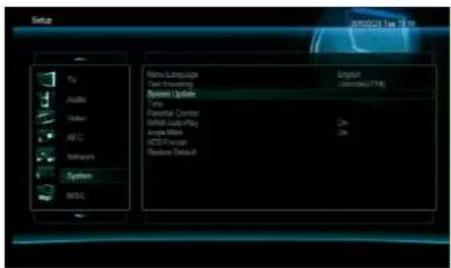
Setu 2018/03/17 19:19 TV Audio Video REC Shiny System MOSC Matrix Language Text Language System Update Time Parental Control SARID Audio Play Acrylic White eCOS-Event Random Default English Controlled (F19) On On⑦ [[System] => System Update: The PlayonIDVR searches for an upgrade file on a USB flash drive and automatically upgrade if it found one.
text_image
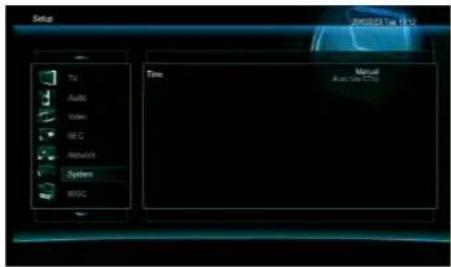
Setup Audio Video REC Network System BDC Time Manual Auto (GB/T12)⑦ [System] => Time: You can manually set up the system time or automatically obtain it from DTV signal.

text_image
Setup TV Audio Video RIO Software System AISC Parental Control Input Password⑦ [System] => Parental Control: Setup restriction levels for DVD disc and DVB-T ratings.
text_image
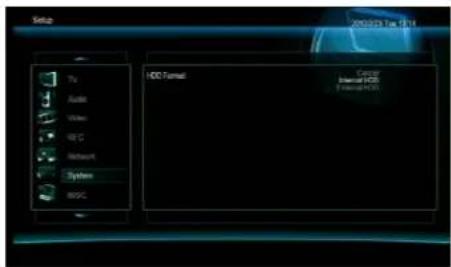
Setup Audio Video WiFi Network System BOSC LCD Format General Internal HDD Fissings HDD⑦ [System] => HDD Format: It is recommended to format the internal HDD using the Playon!DVR system.
*** Back up any existing important data before you start formatting the HDD.
text_image
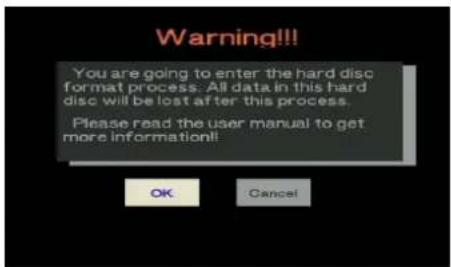
Warning!! You are going to enter the hard disc format process. All data in this hard disc will be lost after this process. Please read the user manual to get more information! OK Cancel[System] => HDD Format: Select [OK] to proceed with the formatting process.

text_image
Step1Timeshift Buffer Disc Capacity Press 4% key to adjust the capacity Total Hard Disc Free Space: 488Bytes 10 HOUR thr = 4Gb Max = 4hr Back Next⑦ [System] => HDD Format: You can assign the capacity for Time-Shift function.
text_image
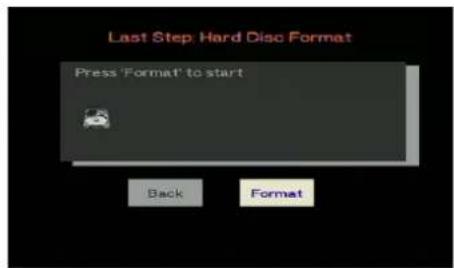
Last Step Hard Disc Format Press 'Format' to start Back Format[System] => HDD Format: This is the last step to format the HDD. Select [Format] to start the format.

text_image
Last Step: Hard Disc Format Press 'Format' to start Back Format⑦ [System] => HDD Format: Formatting in progress. Please do not power off or interrupt the process.
text_image
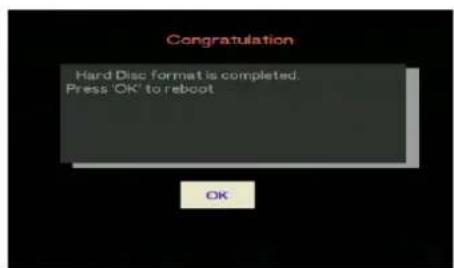
Congratulations Hard Disc format is completed. Press 'OK' to reboot OK⑦ [System] => HDD Format: Select [OK] after the format is completed.
[Note]
After HDD Format, the unit will automatically re-boot. Please wait until you see the Home Menu.
![AC Ryan Playon!DVR HD - [Note] - 1](/content/2026/06/1244104/images/7b537ac600b6cdf2876fad468313e0a7c8e614d7b19181001c83c9730f410f34.jpg)
text_image
Setup Audio Index MOS Network System MASC Resume Play Off On⑧ [MISC] => Resume Play: If you select [ON], then the Playon!DVR ^ID will prompt you to resume from the previously stopped frame.
![AC Ryan Playon!DVR HD - [Note] - 2](/content/2026/06/1244104/images/377593738b913fb48a07307aa0fa557bcc9057eb97fa1f45af39ff6176c5a51a.jpg)
text_image
Setup Audio Video REC Software System SiO2 Show Now Timing Off 1. Audio 2. Audio 3. Audio 4. Audio 5. Audio 6. Audio 7. Audio 8. Audio 9. Audio⑧ [MISC] => Slide Show Timing: Select the interval timing for the Photo Slide Show.
![AC Ryan Playon!DVR HD - [Note] - 3](/content/2026/06/1244104/images/9a2e5ddb61876cb30d24e4ac27f51aed12aeabda1c4115438a92fe5803bb1304.jpg)
text_image
Setup Audio Video MCC Network Systems MSC Transition Effect COM Cinema Tracks LMT to Memory Line to Software Internet Internet All Other Channels Only to Open All Other Channels⑧ [MISC] => Transition Effect: Select the transition effects [[MISC]] => Background Music:
in between photos when playing slide show.
![AC Ryan Playon!DVR HD - [Note] - 4](/content/2026/06/1244104/images/f08bb7c879a4b98383bd7f2ccbe0705351d760794789241252a41a1b7e52c518.jpg)
text_image
Setup TV Audio Video AEC Networks Systems MDC Background Music F/4 Transfer Worker- Folder: Plays the audio files in the same folder of your photos.
-. Playlist: Plays the audio files in your playlist.
![AC Ryan Playon!DVR HD - [Note] - 5](/content/2026/06/1244104/images/6eb0c7e7f5135d6b05f8419592c640880eb8aece3ae9dd7f87801ba425a94871.jpg)
text_image
Setup Audio Video REC Network System MASC Balance Save OK OK⑥ [MSC] => Screen Saver: Selecting [ON] will display the screen saver when the Playon!DVR is inactive for 5 minutes.
![AC Ryan Playon!DVR HD - [Note] - 6](/content/2026/06/1244104/images/3d5c3a6c1495cebd755017fbf1b4be666639acb312f7b2981b1cd10a36ec52cf.jpg)
text_image
Setup 2018/2/17 Top 3/7 TV Audio Video REC Software Systems MDC Music Possible All On[MSC] => Movie Preview: Selecting [ON] allows you to preview your videos when they are selected.
6. TV / AV-IN & RECORD SCHEDULE
6.1 Direct Record/ Time-Shift / EPG / Time-Scheduling / AV-IN Record.
Please ensure that the Playon!DVRs connected to your TV and switched to the appropriate AV mode. While you are watching one channel, you can also record another channel or both channels at the same time (This function is only available with dual DVB-T tuners model).
6.1.1. Direct Recording.
text_image
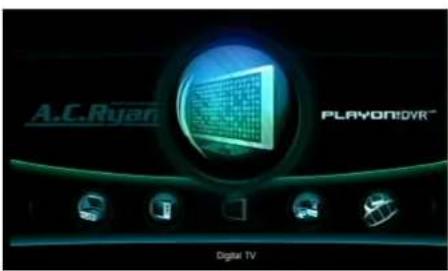
A.C.Rajan PLAYON!OVR™ Digital TV① At the Home Menu page, select [Analog TV], [Digital TV] Press the [Record] button on the remote to record a live or [AV-IN]. TV program and a record symbol appears at the top left

natural_image
Woman in a dark blue dress posing in front of a crowd with cameras and a red light source (no visible text or symbols)TV] Press the [Record] button on the remote to record a live TV program and a record symbol appears at the top left corner as show
text_image
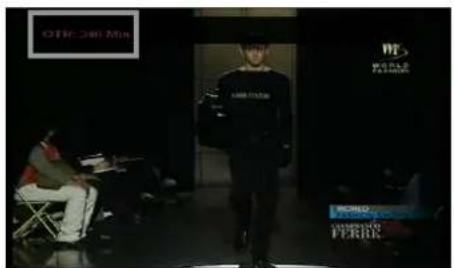
OTC: 240 Min WEGRO FEBRER HORIO GEMBOO FERRE③ Pressing the [Record] button on the remote continuously Press the [Stop] button on the remote to stop the real will turn on the OTR, one-touch-recording feature and willtime recording. record in lengths of 30 / 60 / 90 / 120 / 180 / 240 minutes.

natural_image
Group photo of formally dressed individuals at an event (no visible text or symbols)
text_image
A.C.Ryari PLAYON!DVR™ AV-05⑤ To playback your recorded ATV, DTV or AV-In programs, enter the [Playback Recording] menu of the Home Menu page.
text_image
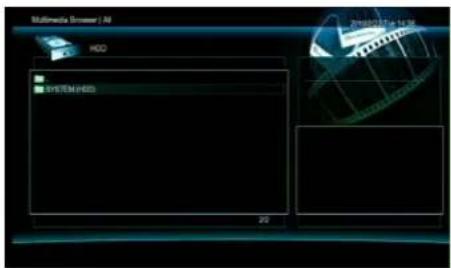
Multimedia Browser | All HDD SYSTEM (HDD) 20 2018/03/14 14:16⑥ You can also select [HDD] => [System HDD] or select another storage which you have recorded to.
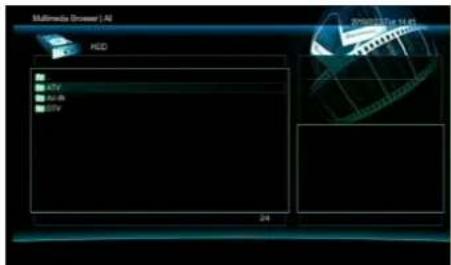
text_image
Multimedia Browser / AI HDD AVTV AU-IR OSTV 24⑦ Navigate to the [REC] folder where the recorded programs are stored by default.

⑧ Select your desired program and press [OK] or [PLAY] button on the remote to play it.

text_image
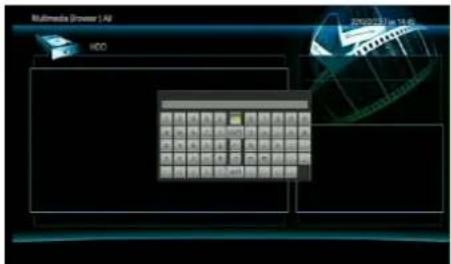
Multimedia Browser 1:40 HDC 2018/03/04 2500 rpm 2018/03/04 2500 rpm 2018/03/04 2500 rpm 2018/03/04 2500 rpm 2018/03/04 2500 rpm 2018/03/04 2500 rpm 2018/03/04 2515 rpm 2018/03/04 2515 rpm 2018/03/04 2515 rpm 2018/03/04 2515 rpm 2018/03/04 2515 rpm 2018/03/04 2515 rpm 2018/03/04 2645 rpm 2018/03/04 2645 rpm 2018/03/04 2645 rpm 2018/03/04 2645 rpm 2018/03/04 2645 rpm 2018/03/04 2645 rpm 2018/03/04 1975 rpm 2018/03/04 1975 rpm 2018/03/04 1975 rpm 2018/03/19 1475 rpm SICC SICC SICC SICC SICC SICC SICC SICC SICC SICC SICC SICC SICC SICC SICC SICC SICC SICC SICC SICC SICC SICC SICC SICC SICC SICU⑨ You can choose to rename or delete the selected file by An on-screen keyboard will appear when you choose to pressing on the [DELETE] button on the remote. rename your file.
text_image
Multimedia Browser / All HDD 2019-07-24 in 14:006.1.2. Time-Shift Record.

text_image
A.C.Ryan PLAYON!OVR™ Digital TV
text_image
world FASHION SHOWS 13.08.04 13.08.04/13.24.18 Max size: 39.0M 85① At the Home Menu page, select [Analog TV], [Digital TV] Press the [Time-Shift] button on the remote and the current frame will pause and a progress bar will appear at or [AV-IN].
text_image
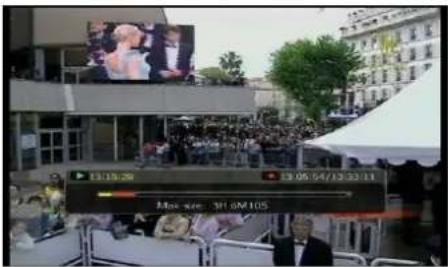
13:15:29 13.05.04/13:33:11 Max 10:00 105
text_image
13:15:28 13:05:54/13:33:11 Max size: 3H 6M10S③ Press the [PLAY] button on the remote to resume playback from the last paused frame. To exit time-shift, press the [STOP] button on the remote.
④ Progress bar explanation.

: Play progress bar.
: Time-Shift progress bar.
6.1.3. EPG Record.

text_image
A.C.Ryan PLAYON!OVR™ Digital TV
text_image
E P G Channel Date Program① At the Home Menu page, select [Analog TV], [Digital TV] Press the [EPG] button on the remote and you will see or [AV-IN]. the EPG information of the current channel. [EPG may not be available in all analogue/digital channels]
text_image
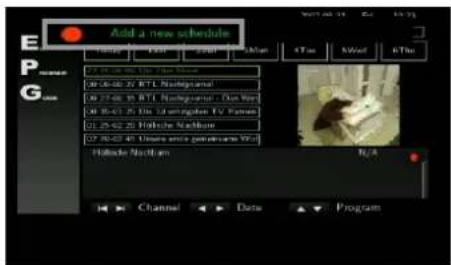
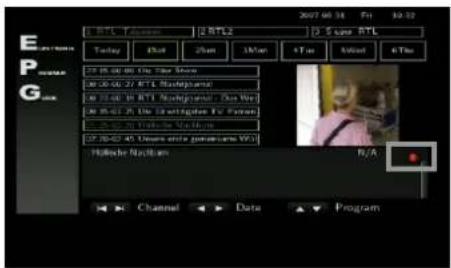
Add a new schedule Channel PSR PSU KMan 4Tus MWeI RThe 27:06:08 20: The View Date 00:06:08 20: RTL Nostegansal 00:07:08 15: RTL Nostegansal - Das Ryo 00:08:01 25: His Lärungsten TV Partner 01:25:02 20: Holische Nostbun 07:30:02 40: Umsere undz gemensare Vio Holische Nostbun N/A Channel Data Program③ Select the day & program that you want to record by pressing [OK] or [REC] button on the remote. A new schedule will be automatically be added.
text_image
2007 06 14 Fri 10:12 E P G Channel Data Program 1 RTL Taperon 2 RTL2 3 Lacer RTL Today 15:00 25am 10am 4pm Mixed 6:15 27:05:00 @ The New York 30:00:00 27 RTL Newspaper 40:00:00 @ RTL Newspaper, Das We 40:00:00 @ The Newspaper TV System 50:00:00 @ The New York 27:00:00 @ Deser und geworden Wt Multice Nucleum R/A④ The selected program will display a record symbol at the right bottom side.

text_image
A.C.Ryan PLAYON!DVR™ AV-05⑤ Top playback your recorded ATV, DTV or AV-In programs, enter the [Playback Recording] menu of the Home Menu page.

text_image
Multimedia Browser (AI) HCD ATV AV-R STV 24 R300000x 16:00⑥ Navigate to the [REC] folder where the recorded programs are stored by default.
6.1.4. Time-Scheduling Record.

text_image
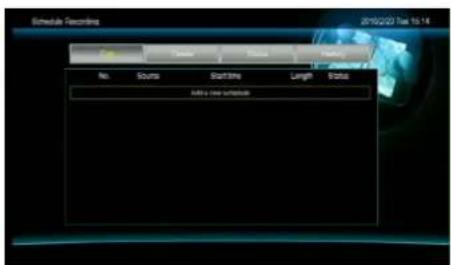
A.C.Ryari PLAYON:DVR™ Schedule Recording① At the Home Menu page, select [Schedule Recording].② Press the [REC SCHEDULE] button on the remote or select [Schedule Recording] menu and you will see the Time-Scheduling-Record page as above.
text_image
Schedule Preferences 2015/2/23 Fax 15:14 No. Seconds Starttime Length Details Add to new seconds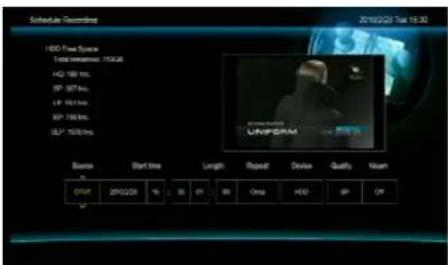
text_image
Schedule Recording 2018/2/29 Tue 15:30 HSD Power Source Total frequency: MHz/Hz HZ: 160 hrs. IP: 307 hrs. LF: 95 hrs. IP: 740 hrs. SL: 150 hrs. Voltage On: Current Length Repeat Device Quality Noise GND SP ON 0% SP 0% SP 0%③ Set up your desired TV Channel / Start Time / Length Repeat period / Recording device / Quality / Nicam

text_image
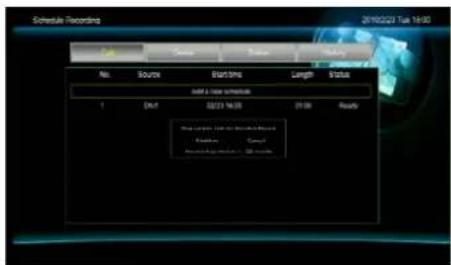
Schedule Settings 2010Q23 Task 19:30 HES Free Space Total minutes: 750kb 400 ms SP: 367 ms LP: 281 ms RF: 750 ms SLP: 200ms Source: Date: Start Time: Length: Request: Device: Quality: Mean: EDAY 19M233 % 35% #1 #2 Stop +OS SP OKAfter setup, press the [OK] button on the remote to display the confirmation window. Select [Confirm] to save the schedule.
text_image
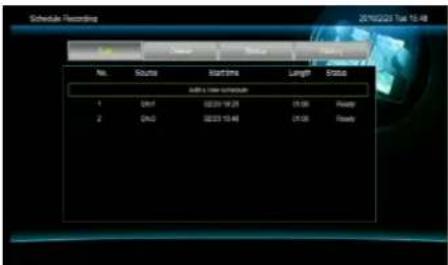
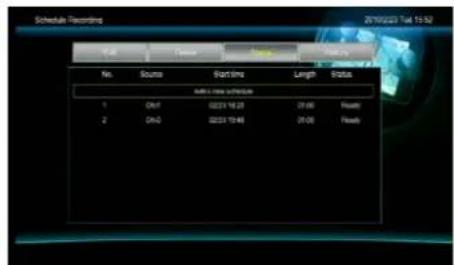
Schedule Recording 2016G2015 Test 13:48 No. Status Event Date Length Status Start & Start Record 1 0x01 00:01-10:29 01:00 Ready 2 0x02 00:02-10:48 01:00 Ready⑤ All added schedules will be displayed.

text_image
Schedule Recording 2010/2023 Full: 13:49 No. Sums Starting Length Status end a new schedule 1 DnA 08:51 16:25 21:48 Ready 2 DnS 08:51 16:48 21:50 Ready⑥ If you want to delete any schedule, go to the [Delete] menu, select the schedule and press the [OK] button on the remote

text_image
Schedule Recording 2016Q21 Tue 13:51 No. Scales Startings Length BtSta Add a new schedule 7 24/7 Remove from Play Left Cancel Delete the scheduled schedule? Delete all schedules⑦ You will be prompted to delete the selected schedule delete all schedule
text_image
Schematic Recording 2010/2021 Fax 15:54 No. Source Starting Length Status A#E & W#E Schematic 1 OnT 00231 16:28 29:00 Passive 2 OnD 00231 19:48 29:00 Passiveor To dcheck on the recording status, go to the [Status] menu
text_image
Schedule Recording 2010/2/27 Tue 18:00 No. Source Starting Length Status Start & New Record 1 Date: 02/21/16/25 20:00 Ready Stop long, Last for Breakdown Record Registration Cancel Microsoft Windows 1234988888⑥ A message will appear seconds before a scheduled recording starts. Select [Confirm] or ignoring it will start the recording automatically after the timer countdown.

natural_image
Group photo of formally dressed individuals at an event, no visible text or symbols⑨ To stop a scheduled recording, press the [Stop] button on the remote and then select [Confirm].

text_image
A.C.Ryan PLAYON:DVR™ AV-05⑤ Top playback your recorded ATV, DTV or AV-In programs, enter the [Playback Recording] menu of the Home Menu page.
text_image
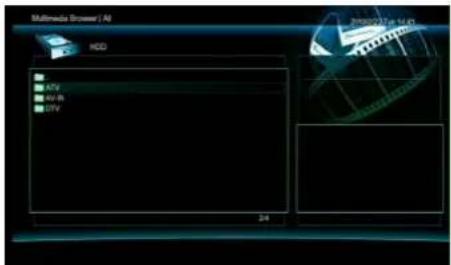
Multimedia Browser | AI HDD ATV AV-R DTV 2019/07/14 (1):⑥ Navigate to the [REC] folder where the recorded programs are stored by default.
6.1.5. AV-IN Record.

text_image
A.C.Ryaon PLAYON:DVR™ ARVAC① At the Home Menu page, select [AV-IN].

text_image
AV.IN ON THE RED② Press the [TV:AV-IN] button on the remote until you see the [AV-IN] source on your display which you have connected the Playon!DVR with. e.g. Set-Top box, VCR, video camcorder. e
text_image
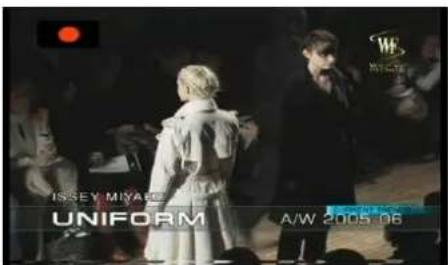
ISSEY MIYAGE UNIFORM A/W 2005.06③ Press the [Record] button on the remote to start
text_image
VIVIENNE WESTWOOD UNIFORM A/W 2005-08④ To stop the recording, press the [STOP] button on the
recording the program from your external AV-IN source. remote
7. MULTIMEDIA
You can play contents (Movie, Music, Photo) from the internal HDD, external USB storage devices, networked shared locations and connected UPnP servers.

text_image
A.C.Ryan PLAYON!0VR™ Multimedia Browser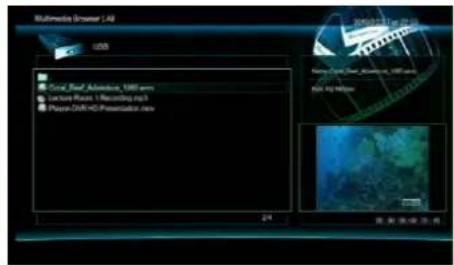
text_image
Multimedia Browser 1.48 USB Gross Book Advisors, 1000 items Capture Room 1 Recording page3 PlayOut/HD Presentation.com 24 2016/07/20 09:00 AM Name: C#e#_D#e#_A#s#nt##_1000 items File: 52 MB 播放系统状态① [Multimedia Browser]: Select this menu at the Home ^2 Menu page or press the [MULTIMEDIA] button on the remote.
[[MultiMedia] => USB: You can play the contents from external USB storage devices. At times, you may need to connect the power to your USB device.

text_image
Multimedia Browser : A6 HEO SYSTEM HDD 2/2
text_image
Multimedia Browser / AB NET My Shortcuts My Neolithic EACNE ACTUAR 1.5③ [Multimedia Browser] => SYSTEM HDD: You can play the contents from the internal HDD.
[ Multimedia Browser] => NET: The Playon!Dvean search for connected PCs in the same network and can
-. [BT]: Downloaded torrent files will be saved in this default folder
stream the contents from a shared folder. To do so, you need to create a shared folder on your PC.
Please refer to Chapter 12 for more detailed procedures on how to create the shared folders.
[TIP] To filter and display only ALL / MUSIC / PHOTO / MOVIES file types, press the [MEDIA TYPE] button on the remote to switch through the filtering.
Example, only movie file types will be displayed in a folder of mixed files when you filter to MOVIES.

text_image
Multimedia Browser / All JPN E:\GENE NOTES\Users 205 [Multimedia Browser] => UPNP: The Playon!DVR supports UPnP client to connect to devices that operates as a UPnP server. The Playon!DVR can discover and stream the supported contents from the UPnP server devices.
See the below procedure on how to install a UPnP server application on your PC.
How to install a UPnP server application on your PC?
- In this example, we are using XBMC media center. Go to http://xmpc.org/down, select the proper media center application based on the OS you are using and then install the program as follow;

text_image
XBMc Media Center Setup Welcome to the XBMc Media Center Setup Wizard This wizard will guide you through the installation of XBMc Media Center. It is recommended that you close all other applications before starting setup. This will make it possible to update network system files without being restored your computer. Click Next to continue.→

text_image
XEMU Media Center Setup License Agreement Please review the license terms before installing XEMU Media Center. Press Page Down to see the rest of the agreement. Copyright use, distributed and copy XEMU under the terms of XEMU General Public License version 2, which is displayed below. XEMU GENERAL PUBLIC LICENSE Version 6 June 1991 Copyright (C) 1995, 1991 from Software Foundation, Inc. 55 Temple Place, Suite 320, Boston, MA 02111-1307 USA If you accept the terms of the agreement, click I Agree to continue. You must accept the agreement to install XEMU Media Center. < Back Upgrade Cancel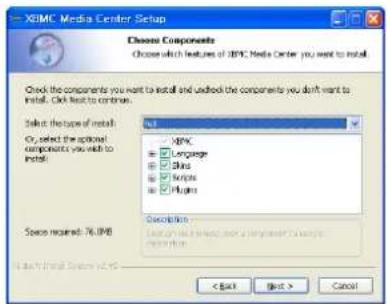
text_image
XIMC Media Center Setup Choose Components Choose which features of XIMC Media Center you want to install. Check the components you want to install and unlock the components you don't want to install. Click next to continue. Select the type of install: Or, select the optional components you wish to install Space required: 76.0M < Back Next > Cancel⇒

text_image
XIMC Media Center Setup Choose Install Location Choose the folder in which to install XIMC Media Center. Setup will install XIMC Media Center in the following folder. To install in a different folder, click Browse and select another folder. Click Next to continue. Destination Folder XIMC Media Center Space required: 76.0MB Space available: 40.0GB < Back Next > Cancel
text_image
XEMC Media Dealer Setup Choose Profile Path Choose where XEMC should store it's data. Store data in C:\Documents and Settings\MFC\CH\Application Data\XEMC\MFC default mode, XEMC stores all data and play in the user profile directory. Store data in C:\Program Files\XEMC\MFC\MFC default mode, XEMC stores every ring in the XEMC installation directory. Note: This will require XEMC started with administrator rights. Next > Cancel→
text_image
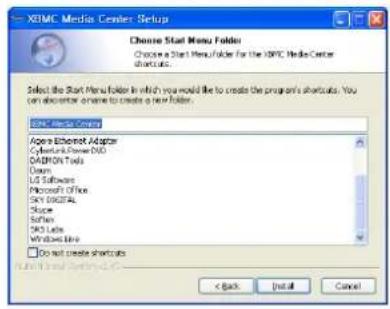
XDMC Media Center Setup Choose Start Menu Folder Choose a Start Menu folder for the XDMC Media Center startouts. Select the Start Menu folder in which you would like to create the program's startouts. You can also enter or create a new folder. XDMC Media Center Apache Ethernet Adapter CyberLink Power Disk DADRON Tools Open USB Software Microsoft Office SAP DIGITAL Skype Software MSL Labs Windows Help Do not create shortcuts < Back Install Cancel
text_image
XOMC Media Center Setup Installing Please wait while XOMC Media Center is being installed. Extracts Textures dir... 100% Show details Help Finish Cancel→
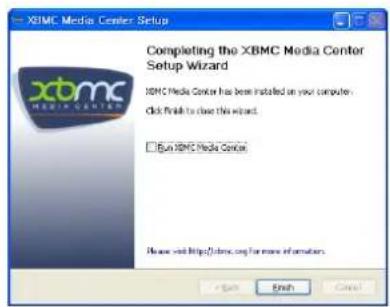
text_image
XBMc Media Center Setup Completing the XBMc Media Center Setup Wizard XBMc Media Center has been installed on your computer click finish to close this wizard. □ Run XBMc Media Center Please visit https://xbm.c.org for more information. Finish Cancel
text_image
Multimedia Browser - All HDD 91. Newell's port - $20.8 m/s 92. 60 - $10.8 m/s 93. State - $10.8 m/s 94. (R:400, L####hldm) 95. Gains with my baby - A## m/s 96. You don't miss! I've left us - L## m/s 97. 98. 100000000000000000000000000000000000000000000000000000000000000000000000000000 98. I've lost my home - A## m/s 99. I've lost my home - $15.8 m/s 100. I've lost my home - $15.8 m/s 11. I've lost my home - $15.8 m/s 6/126 [PLAYLIST] => PLAYLIST: Select the files on the internal HDD you would like to add to the PLAYLIST. Press the [REC] button on the remote to select or deselect the files
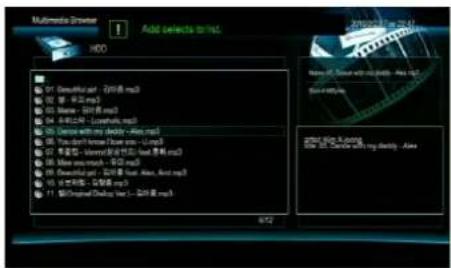
text_image
Multimedia Browser Add selects to list. HDD 01: Beautiful ear (2000 ms) 02: 等 300 ms 03: None (500 ms) 04: 400-240 (Low/high ms) 05: Dense with my keyboard - High ms 06: You don't know (I have own - Low ms) 07: 星期 (- Internet 2400 ms) (最大 1.8 ms) 08: None ms/300 ms 09: Beautiful ear (2000 ms) (最大 1.8 ms) 10: 100 ms (最大 1.8 ms) 11: Original Display time > 50 ms⑦ [[PLAYLIST] => PLAYLIST: After you have finished selecting the files, press the [ANGLE] button on the remote and these files will be added to the PLAYLIST

text_image
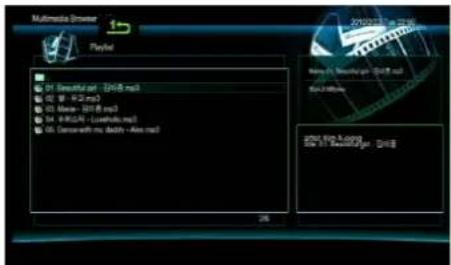
Submedia Player / All Playful 01 Swahili - 2018.mp3 02 UI - 2018.mp3 03 Main - 2018.mp3 04 Mobile - Livetime.mp3 05 Durne with my body - Alex.mp3 16⑧ [PLAYLIST] => PLAYLIST: Entering the [PLAYLIST] menu now will display the files you have just added.
text_image
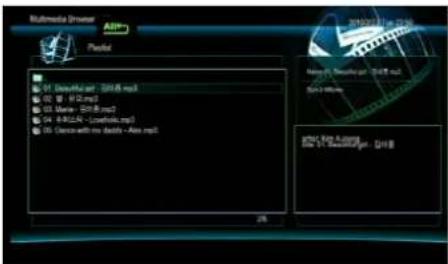
Multimedia Browser 15 Player 2010.03.18 - 2010 Playful D1: SmoothStar - 2016 ms3 D2: V-4.2 ms3 D3: Mean - 2016 ms3 D4: M-8.0 (Lowest ms3) D5: Sense with my death - Max ms3 2010.03.18 - 2010 Playful D1: SmoothStar - 2016 ms3 D2: V-4.2 ms3 D3: Mean - 2016 ms3 D4: M-8.0 (Lowest ms3) D5: Sense with my death - Max ms39 [PLAYLIST] => PLAYLIST: By pressing the [1:/ALL] button on the remote, you can switch repeat modes for playing a single or all files, or turn off the repeat function. Also, by pressing the [A-B] button on the remote, you can repeat playback of the selected segment.
text_image
Multimedia Browser AOP+ Pixel 2019/07/18 - 22:30 Name: MPD Size: 500.0 Audio: 500.0 Audio: 500.0 Audio: 500.0 Audio: 500.0 Audio: 500.0 Audio: 500.0 Audio: 500.0 Audio: 500.0 Audio: 500.0 Audio: 500.0 Audio: 500.0 Audio: Audio: 500.0 Audio: 500.0 Audio: 500.0 Audio: 500.0 Audio: 500.0 Audio: 500.0 Audio: 500.0 Audio: 500.0 Audio: 500.0 Audio: 500.0 Audio: 500.0 AOP: Audio: 500.0 Audio: 500.0 Audio: 500.0 Audio: 500.0 Audio: 500.0 Audio: 500.0 Audio: 500.0 Audio: 500.0 Audio: 500.0 Audio: 500.0 Audio: 500.0
text_image
Macromedia Browser Playoff GB 2016 12:30 AM 12:31 AM 12:32 AM 12:33 AM 12:34 AM 12:35 AM 12:36 AM 12:37 AM 12:38 AM 12:39 AM 12:40 AM 12:41 AM 12:42 AM 12:43 AM 12:44 AM 12:45 AM 12:46 AM 12:47 AM 12:48 AM 12:49 AM 12:50 AM 12:51 AM 12:52 AM 12:53 AM 12:54 AM 12:55 AM 12:56 AM 12:57 AM 12:58 AM 12:59 AM 12:60 AM 12:61 AM 12:62 AM 12:63 AM 12:64 AM 12:65 AM 12:66 AM 12:67 AM 12:68 AM 12:69 AM 12:70 AM 12:71 AM 12:72 AM 12:73 AM 12:74 AM 12:75 AM 12:76 AM 12:77 AM 12:78 AM 12:79 AM 12:80 AM 12:81 AM 12:82 AM 12:83 AM 12:84 AM 12:85 AM 12:86 AM 12:87 AM 12:88 AM 12:89 AM 12:90 AM 12:91 AM 12:92 AM 12:93 AM 12:94 AM 12:95 AM 12:96 AM 12:97 AM 12:98 AM 12:99 AM 13:00 AM8. FILE MANAGER
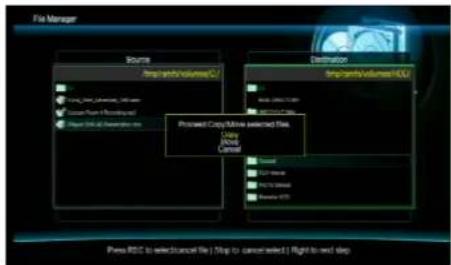
You can copy / move / delete any files from the Playon!DVR to and from the internal HDD, external USB storage devices and networked locations without the need of a PC.
text_image
A.C.Ryan PLAYORIDVR™ File Manager
text_image
File Manager Source USB H2D DVD NET Destination USB H2D NET Touchbox Press REC to select selected files (e.g. to convert select) Right to next step① [File Manager]: Select [FILE MANAGER] menu at the ^2 [[File Manager]: Source / Destination.
Home Menu page or press the [F.MANAGER] button -. Source: Location to copy / move / delete from.
on the remote.
- Destination: Location to copy / move / delete to.
-. NET: Networked location to copy / move / delete.
- Trash Can: Delete thselectecfiles to the trash ca
Example, if you want to copy or move files from an external USB storage device to the internal HDD.

text_image
File Manager Source USB H39 DVD NET Destination USB H39 NET Twinclam Press REC to select/cancel file (*.bg to cancel select) Right to next step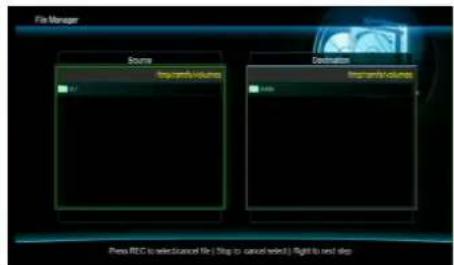
text_image
Fire Manager Source Imigrands Volume Air Destination Imigrands Volume Air Press REC to select selected file (http to cancel select) flight to next step3 [File Manager]: Select [USB] at the Source section, press the [OK] button on the remote and then at the Destination section, select [HDD] and press the [OK] button on the remote.
4 [File Manager]: Select the drive letter of your USB storage device if you have more than one partitions, and press the [OK] button on the remote.

text_image
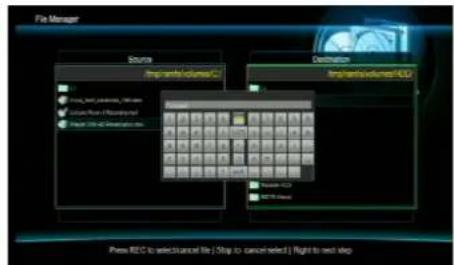
File Manager Source Imprarch/volumes/CU File List: New, New York, 100.00 Function Server - Revising Help Program SQL Server Destination Imprarch/volumes/CU File List: New, New York, 100.00 Function Server - Revising Help Program SQL Server Destination File List: New, New York, 100.00 Function Server - Revising Help Program SQL Server Destination File List: New, New York, 100.00 Function Server - Revising Help Program SQL Server Destination File List: New, New York, 100.00 Function Server - Revising Help Program SQL Server Destination File List: New, New York,100.00 Function Server - Revising Help Program SQL Server Destination File List: New, New York, 100.00 Function Server - Revising Help Program SQL Server Destination File List: New, New York, 100.00 Function Server - Revising Help Program SQL Server Destination File List: New, New York, 100.00 Function Server- Revising Help Program SQL Server Destination File List: New, New York, 100.00 Function Server- Revising Help Program SQL Server Destination File List: New, New York, 100.00 Function Server- Revising Help Program SQL Server Destination File List: New, New York, 100.00 Function Server- Revising Help Program SQL Server Distribution File List: New, New York, 100.00 Function Server- Revising Help Program SQL Server Distribution File List: New, New York, 100.00 Function Server- Revising Help Program SQL Server Distribution File List: New, New York, 100.00 Function Server- Revising Help Program SQL Server Distribution5 [File Manager]: Press the [REC] button on the remote to select or deselect. Press [STOP] to cancel. The selected files will be marked with a symbol.

text_image
File Manager Source Importable Volume/CD C:\Users\MOS\MOS\MOS\MOS\MOS\MOS\MOS\MOS\MOS\MOS\MOS\MOS\MOS\MOS\MOS C:\Users\MOS\MOS\MOS\MOS\MOS\MOS\MOS\MOS\MOS\MOS\MOS\MOS\MOS Importable Volume/CD C:\Users\MOS\MOS\MOS\MOS\MOS\MOS\MOS\MOS\MOS\MOS\MOS\MOS Importable Volume/CD C:\Users\MOS\MOS\MOS\MOS\MOS\MOS\MOS\MOS\MOS\MOS\MOS Importable Volume/CD C:\Users\MOS\MOS\MOS\MOS\MOS\MOS\MOS\MOS\MOS\MOS Importable Volume/CD C:\Users\MOS\MOS\MOS\MOS\MOS\MOS\MOS\MOS\MOS Importable Volume/CD C:\Users\MOS\MOS\MOS\MOS\MOS\MOS\MOS\MOS Importable Volume/CD C:\Users\MOS\MOS\MOS\MOS\MOS\MOS\MOS Importable Volume/CD C:\Users\MOS\MOS\MOS\MOS\MOS\MOS Importable Volume/CD C:\Users\MOS\MOS\MOS\MOS\MOS\nUSTO MISO\nUSTO MISO\nUSTO MISO\nUSTO MISO\nUSTO MISO\nUSTO MISO\nUSTO MISO\nUSTO MISO\nUSTO MISO\nUSTO MISO\nUSTO MISO\nUSTO MISO\nUSTO MISO\nUSTO MISO\nUSTO MISO\nUSTO MISO\nUSTO MISO\nUSTO MISO\nUSTO MISO\nUSTO MISO\nUSTO MUSD\nUSTO MUSD\nUSTO MUSD\nUSTO MUSD\nUSTO MUSD\nUSTO MUSD\nUSTO MUSD\nUSTO MUSD\nUSTO MUSD\nUSTO MUSD\nUSTO MUSD\nUSTO MUSD\nUSTO MUSD\nUSTO MUSD\nUSTO MUSD\nUSTO MUSD\nUSTO MUSD\nUSTO MUSD\nUSTO MUSD\nUSTO MUSD\nUSTO MUSN\nUSTO MUSN\nUSTO MUSN\nUSTO MUSN\nUSTO MUSN\nUSTO MUSN\nUSTO MUSN\nUSTO MUSN\nUSTO MUSN\nUSTO MUSN\nUSTO MUSN\nUSTO MUSN\nUSTO MUSN\nUSTO MUSN\nUSTO MUSN\nUSTO MUSN\nUSTO MUSN\nUSTO NUSN\nUSTO NUSN\nUSTO NUSN\nUSTO NUSN\nUSTO NUSN\nUSTO NUSN\nUSTO NUSN\nUSTO NUSN\nUSTO NUSN\nUSTO NUSN\nUSTO NUSN\nUSTO NUSN\nUSTO NUSN\nUSTO NUSN\nUSTO NUSN\nUSTO NUSN\nUSTO NUSN\nUNNT\nUNNT\nUNNT\nUNNT\nUNNT\nUNNT\nUNNT\nUNNT\nUNNT\nUNNT\nUNNT\nUNNT\nUNNT\nUNNT\nUNNT\nUNNT\nUNNT\nUNNT\nUNNT\nUNNT\nUNNT\nUNNT\nUNNT\nUNNT\nUNNT\nUNNT\nUNNT\nUNNT\nUNNT\nUNNT\nUNNT\nUNNT\nUNNT\nUNNT[File Manager]: Press the [RIGHT] button on the remote and press [OK] to display the contents on your internal HDD.

text_image
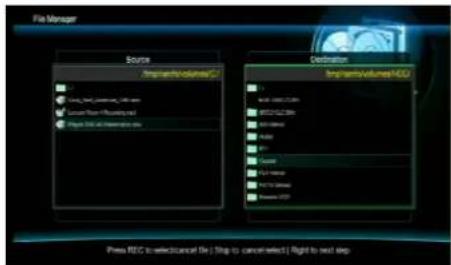
File Manager Source Imported volume(C) Body text, software, USB drive Language server - Recording log Paper 01.12 Properties file Destination Imported volume(C) AutoCADT1397 BISCUFT252 (80) BISCUFT252 AutoCAD AutoCAD FCA-100000 FCA-100000 FCA-100000 FCA-100000 FCA-100000 FCA-100000 Press REC to select menu file (Stop to cancel select) Right to next step⑦ [File Manager]: Select [NEW-DIRECTORY] if you want to copy / move the files to a new folder on your internal HDD.
text_image
File Manager Sources Import volume(s) Import volume(s) Destination Import volume(s) Press REC to selectancel file (Step to cancel select) Right to next step Press REC to selectancel file (Step to cancel select) Right to next step8 [FileManager]: By using the on-screen keyboard, you can name your new folder and press the [OK] button to create the new folder.
text_image
File Manager Source ImpractiveVolumes/DJ C:\Users\My Documents\Lab.exe C:\Users\My Documents\Lab.exe C:\Users\My Documents\Lab.exe Destination ImpractiveVolumes/DCJ C:\Users\My Documents\Lab.exe C:\Users\My Documents\Lab.exe C:\Users\My Documents\Lab.exe C:\Users\My Documents\Lab.exe C:\Users\My Documents\Lab.exe Press REC to select cancel the .Step to cancel select Right to next step9 [File Manager]: Navigate to the new folder you have just created, enter and press the [RIGHT] button on the remote.
text_image
File Manager Source Amp.com/volumes/U C:\Users\My Documents\Instruments C:\Users\My Documents\Instruments C:\Users\My Documents\Instruments C:\Users\My Documents\Instruments Destination Amp.com/volumes/U C:\Users\My Documents\Instruments C:\Users\My Documents\Instruments C:\Users\My Documents\Instruments C:\Users\My Documents\Instruments C:\Users\My Documents\Instruments C:\Users\My Documents\Instruments C:\Users\My Documents\Instruments C:\Users\My Documents\Instruments C:\Users\My Documents\Instruments C:\Users\My Documents\Instruments C:\Users\My Documents\In instruments C:\Users\My Documents\In instruments C:\Users\My Documents\In instruments C:\Users\My Documents\In instruments C:\Users\My Documents\In instruments C:\Users\My Documents\In instruments C:\Users\My Documents\In instruments C:\Users\My Documents\In instruments C:\Users\My Documents\In instruments C:\Users\My Documents\In instruments C:\Users\My Documents\In units C:\Users\My Documents\In units C:\Users\My Documents\In units C:\Users\My Documents\In units C:\Users\My Documents\In units C:\Users\My Documents\In units C:\Users\My Documents\In units C:\Users\My Documents\In units C:\Users\My Documents\In units C:\Users\My Documents\In units C:\Users\My Documents\In unit C:\Users\My Documents\In unit C:\Users\My Documents\In unit C:\Users\My Documents\In unit C:\Users\My Documents\In unit C:\Users\My Documents\In unit C:\Users\My Documents\In unit C:\Users\My Documents\In unit C:\Users\My Documents\In unit C:\Users\My Documents\In unit C:\Users\My Documents\In units C:\Users\My Documents\In units C:\Users\My Documents\In units C:\Users\My Documents\In units C:\Users\My Documents\In units C:\Users\My Documents\In units C:\Users\My Documents\In units C:\Users\My Documents\In units C:\Users\My Documents\In units C:\Users\My Documents\In Units C:\Users\My Documents\In units C:\Users\My Documents\In units C:\Users\My Documents\In units C:\Users\My Documents\In units C:\Users\My Documents\In units C:\Users\My Documents\In units C:\Users\My Documents\In units C:\Users\My Documents\In units C:\Users\My Documents\In units C:\Users\My Documents\In entities C:\Users\My Documents\In entities C:\Users\My Documents\In entities C:\Users\My Documents\In entities C:\Users\My Documents\In entities C:\Users\My Documents\In entities C:\Users\My Documents\In entities C:\Users\My Documents\In entities C:\Users\My Documents\In entities C:\Users\My Documents\In entities C:\Users\My Documents\In units C:\Users\My Documents\In units C:\Users\My Documents\In units C:\Users\My Documents\In units C:\Users\My Documents\In units C:\Users\My Documents/INunits C:\Users/INunits/INunits C:\Users/INunits/INunits C:\Users/INunits/INunits C:\Users/INunits/INunits C:\Users/INunits/INunits C:\Users/INunits/INunits C:\Users/INunits/INunits C:\Users/INunits/INunits C:\Users/INunits/INunits C:\Users/INunits/INunits C:\Users/INunit/INunits/INunits C:\Users/INunit/INunits/INunits C:\Users/INunit/INunits/INunits C:\Users/INunit/INunits/INunits C:\Users/INunit/INunits/INunits C:\Users/INunit/INunits/INunits C:\Users/INunit/INunits/INunits C:\Users/INunit/INunits/INunits C:\ C:\ D:\ E:\ F:\ G:\ H:\ I:\ J:\ K:\ L:\ M:\ N:\ O:\ P:\ Q:\ R:\ S:\ T:\ U:\ V:\ W:\ X:\ Y:\ Z:\ A:\ B:\ C:\ D:\ E:\ F:\ G:\ H:\ I:\ J:\ K:\ L:\ M:\ N:\ O:\ P:\ Q:\ R:\ S:\ T:\ U:\ V:\ W:\ X:\ Y:\ Z:\ A:\ B:\ F:\ G:\ H:\ I:\ J:\ K:\ L:\ M:\ N:\ O:\ P:\ Q:\ R:\ S:\ T:\ U:\ V:\ W:\ X:\ Y:\ Z:\ A:\ B:\ F:\ G:\ H:\ I:\ J:\ K:\ L:\ M:\ N:\ O: \ P:\ Q:\ R:\ S:\ T:\ U:\ V:\ W:\ X:\ Y:\ Z:\ A:\ B:\ F:\ G:\ H:\ I:\ J:\ K:\ L:\ M:\ N:\ O: \ P:\ Q:\ R:\ S:\ T:\ U:\ V:\ W:\ X:\ Y: \ A: A: A: A: A: A: A: A: A: A: A: A: A: A: A: A: A: A: A: A: A: A: A: A: A: A: A: A: A: A: A: A: A: A: A: A: A: A: A: A: A: A: A: A: A: A: A: A: A: A: A:10 [File Manager]: Select Copy or Move.
text_image
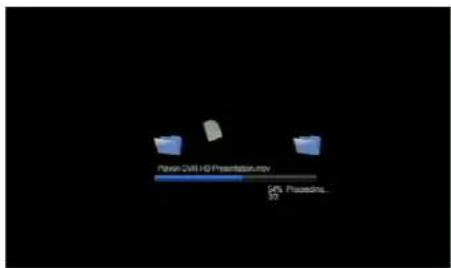
Presentator.mp 5% Procedure. 5011) [File Manager]: Your selected files are now copying movinto the designated locatic.
text_image
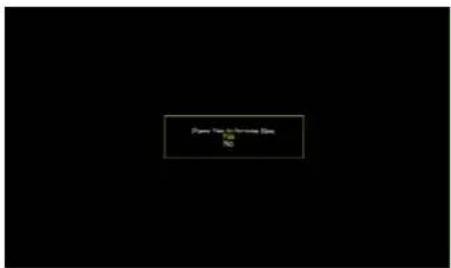
Player Title: American Top Title: NO[File Manager]: Selecting [Yes] will bring you back to [MULTIMEDIA] menu and selecting [No] will bring you back to the [File Manager] menu.
text_image
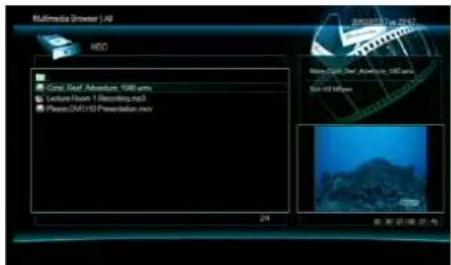
Multimedia Browser / All HDO Circal Roof Adventure, 1580 rpm Lecture Room 1 Recording.mp3 Please:04110 Presentation.mov 24 2000/2017 in 2017 Semi-Camp, Open, Ablation, HDO and 50x 60 Million 新宏存储设备13 [File Manager]: Copied / Moved files are now in your new folder
9. Files Management as an USB storage device
Playon!DVR ^D will perform as an external hard disk drive when you connect it to a PC via the USB connection. You can manage the files / folders of the internal HDD easily with your PC.
* Please take note to power on the Playon!DWhen you are connecting to a PC.
9.1 Supported Platforms
Playon!DVR ^HD is automatically detected as a storage device with Windows 2000/XP and above or Mac OS 9.0 and above. No installation is needed for these OS versions.
Installing on Windows 98SE
√ First you have to install the Windows 98 Driver before connecting to a PC.
The driver is located in the supplied CD.
After installation is completed, power on and connect the PlayStation RPC via the supplied USB cable.
10. Setup a Sharing Folder in Windows
After you connect your Playon!DVR ^® by wired or wireless connection to your local network, you need to configure your networked PC individually to enable sharing.
The following sections explain how to set up a sharing folder on Windows 2000 / XP / Vista platform.
Certain programs or applications running in the background such as antivirus with firewall protection or internet / network security will need to be configured to allow network connections to the Playon!DMR configuring is unsure and you need to access the Playon!DVRia network for a brief period of time, you may want to disable your firewall / network security application and turn it back on when you are done.
A.C.Ryan is not responsible for configuring your network for sharing and do not recommend to disable your firewall application unless necessary.
10.1 Windows 2000
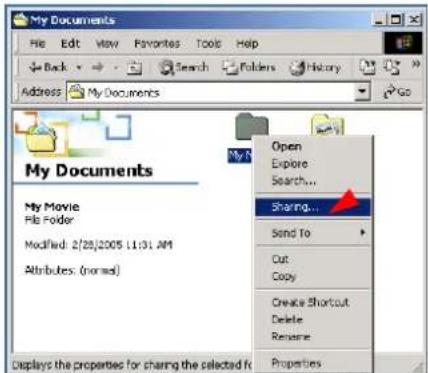
1) Select a folder which you want to share. Right-click the folder and select 'Sharing' in the popup menu.
text_image
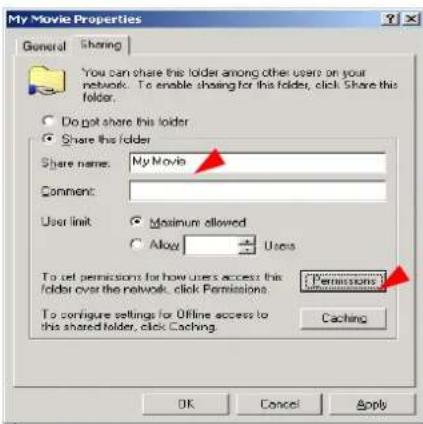
My Documents File Edit View Favorites Tools Help Back Search Folders History Address My Documents Go My Documents My Movie File Folder Modified: 2/28/2005 11:31 AM Attributes: (normal) Open Explore Search... Sharing... Send To Cut Copy Create Shortcut Delete Rename Properties Displays the properties for sharing the selected f2) Check 'Share this folder' and write 'Name' For example, "My Movie"
√ Make sure you do not to provide a long 'Share name'.
text_image
My Movie Properties General Sharing You can share this folder among other users on your network. To enable sharing for this folder, click Share this folder. Do not share this folder Share this folder Share name: My Movie Comment: User limit: Maximum allowed Alloy Users To set permissions for how user's access this folder over the network, click Permissions. Permissions To configure settings for Offline access to this shared folder, click Caching Caching OK Cancel Apply"Everyone" account is selected or not. If not, add "Everyone" account.
√ We recommend only to check 'Read>Allow' at Permissions.

text_image
Permissions for My Movie Share Permissions Name Everyone Add Remove Permissions: Allow Dendy Full Control Change Read OK Cancel Apply4) After that, the shared folder will be displayed with a sharing icon.

My Movie
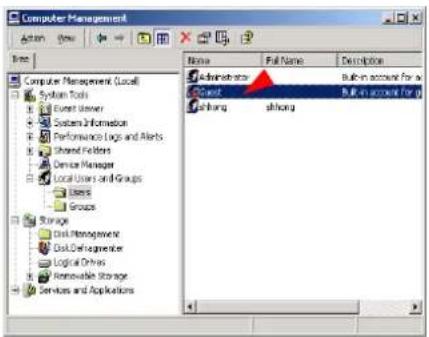
5) Go to [Settings>Control Panel>Administrative Tools>Computer managementLocal Users and Groups>Users], and double click 'Guest'.
text_image
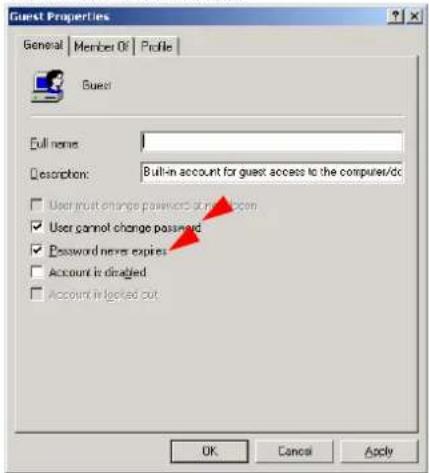
Computer Management Name Full Name Description Administrative Bull-in account for w Start Bull-in account for p shhang sihang System Tools Event server System Information Performance Logs and Alerts Shared holders Device Manager Local Users and Groups Users Groups Storage Disk Management Disk De-segmenter Logical Drivers Renewable Storage Services and Applications6) Check 'User cannot change password' and 'Password never expires'.
text_image
Guest Properties General | Member Of | Profile | Guest Full name: Description: Bull-in account for guest access to the computers/dc User fruit change password or password User cannot change password Password never expires Account is disabled Account is locked out OK Cancel Apply7) Go to [Control Panel>Network and Dial-up Connections], right click on 'Local Area Connections' and select Properties.
text_image
✓If you see two or more 'Local area connections', select the one that you will use for connecting to Playon!DVR®.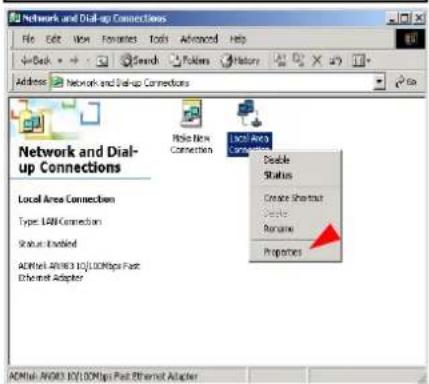
text_image
Network and Dial-up Connections File Edit View Favorites Tools Advanced Help Address Network and Dial-up Connections Local Area Connection Type: LAN Connection Status: Enabled ADModel: ANSYS 10/100Mbps Fast Ethernet Adapter Local Area Connection Enable Status Create Shortmax Delete Rename Properties ADModel: ANSYS 10/100Mbps Fast Ethernet Adapter8) Double click on 'Internet Protocol (TCP/IP)'.

text_image
Local Area Connection Properties General Connect using ADMtek AN983 10/100Mbps Fast Ethernet Adapter Configure Components checked are used by this connection: Client for Microsoft Networks File and Printer Sharing for Microsoft Networks Internet Protocol /TCP/IPT Install... Uninstall Properties Description Transmission Control Protocol/Internet Protocol. The default wide area network protocol that provides communication across diverse interconnected networks. Show icon in taskbar when connected OK Cancel9) Check 'Use the following IP address', and write 'IP address' & 'Subnet mask' that you want to use.
For example,
IP address: 192.168.1.3
Subnet mask: 255.255.255.0
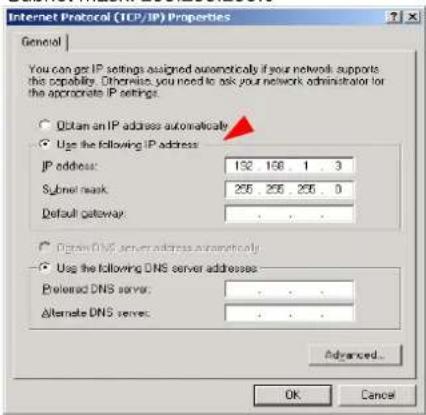
text_image
Internet Protocol (TCP/IP) Properties General You can get IP settings assigned automatically if your network supports this capability. Otherwise, you need to ask your network administrator for the appropriate IP settings. ○ Obtain an IP address automatically ● Use the following IP address: IP address: 132 156 1 3 Subnet mask: 255 255 255 0 Default gateway: ○ Obtain DNS server address automatically ● Use the following DNS server addresses: Preferred DNS server: Alternate DNS server: Advanced... OK Cancel√ If you select 'Obtain an IP address automatically', you don't need to provide a specific IP address.
10.2 Windows XP
1) Select a folder which you want to share. Right-click the folder and select 'Sharing and Security' in the popup menu.

text_image
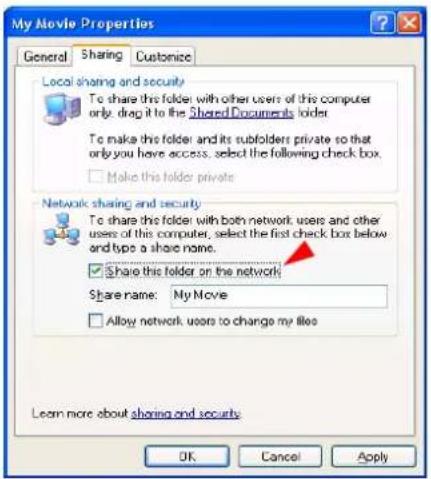
My Documents File Edit View Favorites Tools Help Back Search Folders Address My Documents File and Folder Tasks Remove the Folder Move the Folder Copy the Folder Publish this Folder to the Web Share the Folder E-mail the Folder's Files Delete this Folder Other Places Desktop Shared Documents My Computer My Movie Open Explore Search... Sharing and Security... Send To Cut Copy Create Shortcut Delete Rename Properties2) Check 'Share this folder on the network' and write 'Share name'.
For example, "My Movie"
√ Make sure you do not to provide a long 'Share name'.
text_image
My Movie Properties General Sharing Customize Local sharing and security To share this folder with other users of this computer only, drag it to the Shared Documents folder. To make this folder and its subfolders private so that only you have access, select the following check box. Make this folder private Network sharing and security To share this folder with both network users and other users of this computer, select the first check box below and type a share name. Share this folder on the network Share name: My Movie Allow network users to change my files Learn more about sharing and security. OK Cancel Apply3) After that, the shared folder will be displayed with a sharing icon.

My Movie
4) Go to [Settings>Control Panel>Administrative Tools>
Computer management>
Local Users and Groups>Users], and double click 'Guest'.
√This step is for Windows XP Professional. For Windows XP Home users, please skip to step number 6.
√ If you can't find 'Administrative Tools' at Control Panel, click "Switch to classic view" option in the left pane of your screen.

text_image
Computer Management File Action View Window Help Computer Management (Local) System Tools Event Viewer Shared Folders Local Users and Groups Users Groups Performance Logs and Alerts Device Manager Storage Removable Storage Cell Dehydrogenator Cell Management Services and Applications Name Full Name Description Administrator Bull-to account for at Planes Bull-to account for at Weblessington Share Desktop... Account for Providing Shang SUPPORT_31... Cow-Microsoft Co... This is a vendor's save5) Check 'User cannot change password' and 'Password never expires'.
See next page

text_image
Guest Properties General Member Of Profile Guest Full name: Description: Full-in account for guest access to the computer/dc User must change password at this region User cannot change password Password never expires Account is unsigned Account is locked out OK Cancel Apply6) Go to [Control Panel>Network connections], and right click on 'Local Area Connections' and select Properties.

text_image
If you can't find 'Administrative Tools' at Control Panel, click "Switch to classic view" option in the I pane of your screen. If you see two or more 'Local area connections' select the one that you will use for connecting to Playon!DVF\( ^{14} \).7) Double click on 'Internet Protocol (TCP/IP)'.

text_image
Local Area Connection Properties General Authentication Advanced Connect using ADNtek AN983 10/100 PCI Adapter Configure... This connection uses the following items: Client for Microsoft Networks File and Printer: Sharing for Microsoft Networks QoS Packet Scheduler Internet Protocol [TCP/IP] Install... Uninstall Properties Description Transmission Control Protocol/Internet Protocol. The default wide area network protocol that provides communication across diverse inconnected networks. Show icon in notification area when connected OK Cancel8) Check 'Use the following IP address', and write 'IP address' & 'Subnet mask' that you want to use.
For example,
IP address: 192.168.1.3
Subnet mask: 255.255.255.0

text_image
Internet Protocol (TCP/IP) Properties General You can get IP settings assigned automatically if your network supports the capability. Otherwise, you need to ask your network administrator for the appropriate IP settings. Obtain an IP address automatically Use the following IP address: IP address: 132 . 168 . 1 . 3 Subnet mask: 255 255 255 0 Default gateway : . Obtain DNS server address automatically Use the following DNS server addresses: Preferred DNS server: . Alternate DNS server: . Advanced OK Cancel9) Click on 'Advanced' Tab and disable 'Internet Connection Firewall'.

text_image
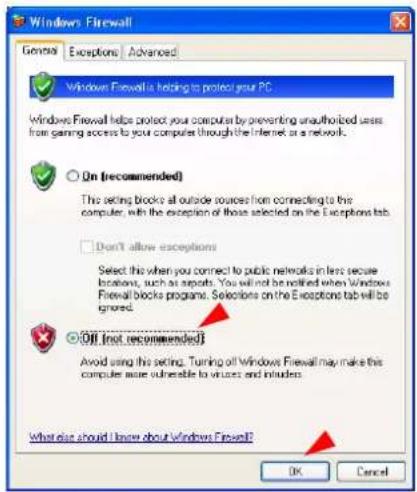
Local Area Connection Properties General Authentication Advanced Internet Connection Firewall □ Protect my computer and network by limiting or preventing access to this computer from the Internet Learn more about Internet Connection Firewall If you're not sure how to set these properties, use the Network Setup Wizard instead OK Cancel√ If you use service pack 2, refer to the following figures. Click 'Settings' at 'Windows Firewall'
Check 'Off' and click 'OK'
text_image
Windows Firewall General Exceptions Advanced Windows Firewall is holding to protect your PC. Windows Firewall helps protect your computer by preventing unauthorized users from gaming access to your computer through the Internet as a network. On (recommended) The setting blocks all outside sources from connecting to the computer, with the exception of those selected on the Exceptions tab. Don't allow exceptions Select this when you connect to public networks in less secure locations, such as airports. You will not be notified when Windows Firewall blocks programs. Selections on the Exceptions tab will be ignored. Off (not recommended) Avoid using this setting. Turning off Windows Firewall may make this computer more vulnerable to viruses and intruders. What else should I know about Windows Firewall? OK Cancel
text_image
Local Area Connection Properties General Authentication Advanced Windows Firewall Protect any computer and network by limiting or preventing access to this computer from the Internet Settings If you're not sure how to set these properties, use the Network. Setup Wizard instead. OK Cancel10.3 Windows Vista
There are 3 sections to configure for correct Network sharing in Windows Vista.
10.3.1 Setup of User Accounts and Family safety
text_image
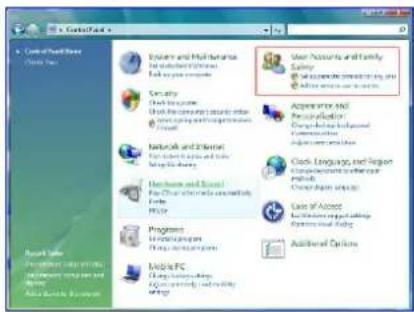
Create/Build Create Us Options and Maintenance Build your own computer Security Build your security Build your security Networks and Groups Build your own security Data Edit Edit Home and Book1 Edit Other information security File Programs Edit Programming Edit Programming Mobile PC Edit Programming Edit Programming User Resources and Family Safety Build your own computer to access ACADEMISTRY AND REPORTATION Connect the following: Accessories and Settings Class: Language, and Region Management & Software Category: Software Use of Access Add Options for Applications Add Options for Applications Additional Options1) Click Start > Settings > Control Panel > Users Accounts and Family safety

text_image
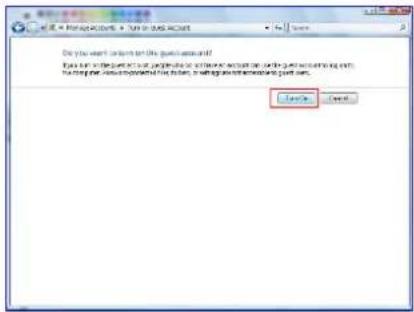
Choose the account you would like to change Save Text Comments Send Comments Event Attendance off Details for access IFC Connection Additional Options Card Set up Active Users Get back Home User Page2) Select the "Guest" accou
text_image
Do you want to start on this quick account? Yes then use your computer or project to access your account on the quick account with for using your computer to get home, or to access your computer to get out.3) If the "Guest" account is off, switch it to "On".
10.3.2. Disable the "Firewall"
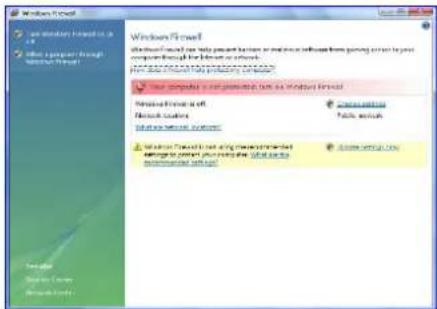
text_image
Windows FrontPage installed status: 1.0 installed status: 1.0 installed status: 1.0 installed status: 1.0 installed status: 1.0 installed status: 1.0 installed status: 1.0 installed status: 1.0 installed status: 1.0 installed status: 1.0 installed status: 1.0 installed status: 1.0 installed status: 1.0 installed status: installed status: installed status: installed status: installed status: installed status: installed status: installed status: installed status: installed status: installed status: installed status: installed status: installed status: installed status: installed status: installed status: installed status: installed status: installed status: installed status: installed status: installed status: installed status: installed status: installed status: installed status: installed status: installed status: installed status: installed status: installed status: installed status: installed status: all installed as well all installed as well all installed as well all installed as well all installed as well all installed as well all installed as well all installed as well all installed as well all installed as well all installed as well all installed as well all installed as well all installed as well all installed as well all installed as well all installed as well all installed as well all installed as well all installed as well all installed as well1) Click Start > Setting > Control Panel > Security > Windows Firewall on / off

text_image
Windows Notepad Source: Windows Notepad Windows Notepad (Notepad) Windows Notepad (Notepad) Windows Notepad (Notepad) Windows Notepad (Notepad) Windows Notepad (Notepad) Windows Notepad (Notepad) Windows Notepad (Notepad) Windows Notepad (Notepad) Windows Notepad (Notepad) Windows Notepad (Notepad) Windows Notepad (Notepad) Windows Notepad (Notepad) Windows Notepad (Notepad) Windows Notepad (Notepad) Windows Notepad (Notepad) Windows notepad (Notepad) Windows notepad (Notepad) Windows notepad (Notepad) Windows notepad (Notepad) Windows notepad (Notepad) Windows notepad (Notepad) Windows notepad (Notepad) Windows notepad (Notepad) Windows notepad (Notepad) Windows notepad (Notepad) Windows notepad (Notepad) Windows notepad (Notepad) Windows notepad (Notepad) Windows notepad (Notepad) Windows notepad Windows notepad Windows notepad Windows notepad Windows notepad Windows notepad Windows notepad Windows notepad Windows notepad Windows notepad Windows notepad Windows notepad Windows notepad Windows notepad Windows notepad Windows notepad Windows notepad Windows notepad Windows notepad Windows notepad Windows notepad Windows notepad Windows notepad Windows notepad Windows notepad Windows notepad2) Click 'Off (not recommended)
10.3.3 Setup of Network and Sharing Center
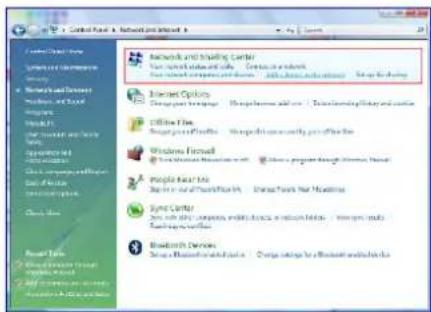
text_image
Network and Building Center Your network status is safe. Does not use network Your network configuration is available. Any other configuration is available.1) Click Start > Setting > Control Panel > Network and Internet > Network and Sharing Center.

text_image
Network and Internet Network and Network Center Data Computation Tools Connect to network Database and Internet Database and Internet Database and Internet Access (the Web/2.0.0.0.0.0) Access Location Local and Local Network-Based Connection (http://www.boc) Signal-based Protocol External Sharing and Security Network Economy 8 On Localizing 9 On Public Networking 8 On (optional request) Networking 8 On (optional request) Personal network settings: 8 On Other network settings in any particular setting or regardless of the computer non-continued, the problem, creating this remote, adding the link time. To use any people, you can use all proposed settings. Test of personal network settings 8 On (optional request)2) Select "Password Protected sharing" and select "Turn off password protected sharing".

text_image
Options Options Start 2% List to Windows Media Player List Play with Windows Media Player Options 开始菜单 New or new product list 开始菜单 开始菜单 Save To Help Copy Create Outlook Delete Rename Properties3) Select a folder which you want to share. Right-click the folder and select 'Share' in the popup menu.
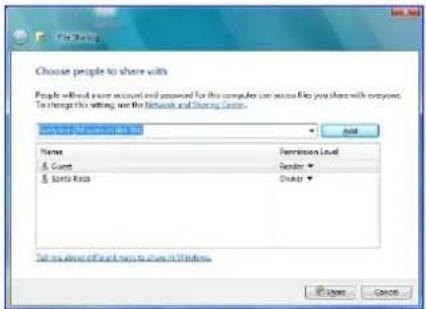
text_image
Choose people to share with People without more account and approved for the computer can access file you share with everyone. To change this setting, use the Network and Sharing Center. Everyone Share Center is this file Name Guest Santa Ross Partners in Level Senior Owner Not sure that any way to share in Windows © Store Cancel...4) You will see a popup "Choose people to share with" then select "Everyone (All users in this list) and press "Add" butt

text_image
Choose people to share with People without a user account and password for this computer can access to file you about with messages. To change this setting, or the Network and Sharing Center Name Permanent Level All Customers Rather▼ Read Rather▼ Paste Plus Cross▼ Text on about all other sites to share in Windows © Share Cancel5) After you register the user account, then click "Share" button.

text_image
Your folder is shared. You may log these links to notify people that you have shown all files or up the links under the Windows Explorer, where you can paste from into any program you choose. Capture C:\WINDOWS\PC\Software\Microsoft\Windows\My Documents Show us all the lines last sharing.11. File Streaming from the network connected PCs
11.1 Stream by Wired LAN or Wireless Connection
You can stream contents to your Playon!DV from a PC (PCs) by Wired or Wireless network connection.
11.1.1 Connecting through a local network router.
You can use a network cable to connect Playon!DVR your router as illustrated below.
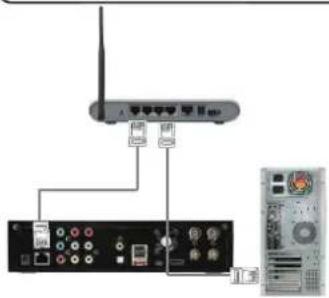
text_image
Diagram showing wireless router connected to a CD-ROM interface with ports and labelsConnect a network cable to an available port behind the router to the Playon!DVR
Connect another network cable between the router and your PC.
Follow these steps.

text_image
A.C.Ryan PLAYORIDVR™ Setup
text_image
Setup Wind Lam Setup On: 163 KB8.1.101 Wireless Setup Off: DHCP Smart smart - -① At the Home Menu page, select [SETUP] or press the ② Select [Network] => [Wired LAN Setup]. [SETUP] button on the remote.

text_image
Setup Wind Lim Setup Audio Video REC Network Systems MSPG Cancel SHOP IP (RANK) F12.07.2019③ Select DHCP IP (AUTO).
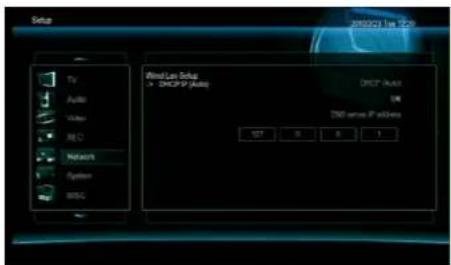
text_image
Setup Wind Line Setup + DHCP (Auto) DHCP Auto ON DNS versus IP address SET 0 0 1④ Select [OK] to obtain an IP address from your router automatically.

text_image
Setup TV Audio Video REC Network System BSPC Wire Lam Setup DHCP P (Multi) SNP (Multi) DCM (non-SNP) (Multi) Non-SNP (Multi) 0 P 1⑤ Select [Confirm] to test the network connection.
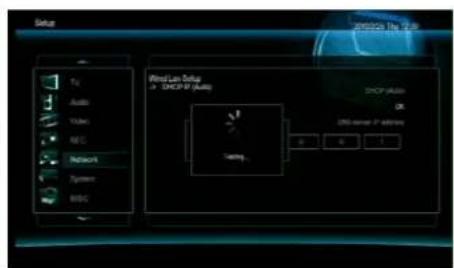
text_image
Setup Wind-Lane Setup > DHCP IP (Auto) DHCP IP (Auto) OK DNS server IP (Windows) 0 0 1 Network...⑥ The Playon!DVR ^HD is now testing the network connection.

text_image
Setup TV Audio Video REC Network System MSS Wire Lan Setup Wireless Setup On: 102 MB-1.5V Off: DHCP port switch -1.5V⑦ Once connected and obtained an IP address from your Go to the Home Menu page and select [MULTIMEDIA router. The IP address will be displayed. BROWSER] menu.

text_image
A.C.Ryan PLAYON!OVR™ Multimedia Browser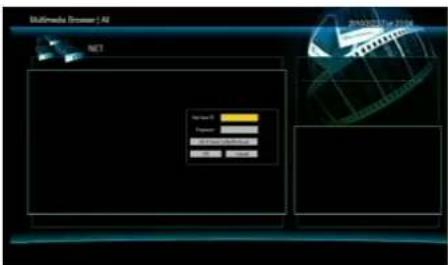
text_image
Multimedia Browser : All NET Net Count: 3 Project: 1 2015 Microsoft Browser⑨ Select [NET] and you will see all your available local network connections. Select the network you wish to connect to. A menu may appear as seen above. [Note] If your PC does not require any ID & Password, the above menu will not appear and you can directly access the shared folders.
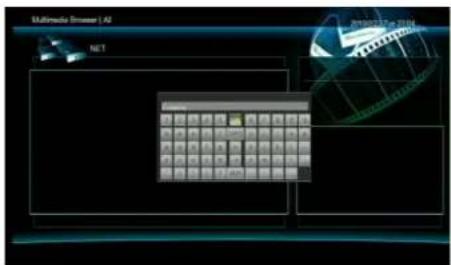
text_image
Multiscale Browser / All NET 2018/07/24 - 2019 2018/07/24 - 2019⑩ Key in the same PC logon ID & Password and select the [OK] button to save it.
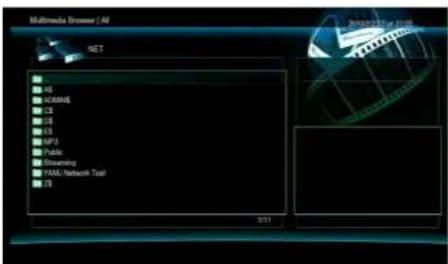
text_image
Multimedia Browser / All NET AS ACAMR$ CE CE ES MP3 Public Document YAM/Network Tool IT SSTI⑪ The shared folders will be now be displayed.
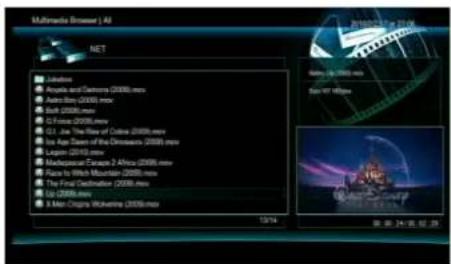
text_image
Multimedia Browser | All NET ● Locus ● Acacia and Daimma (2008) mice ● Axon Box (2008) mice ● Black (2008) mice ● CS Asia (2008) mice ● Q1. Jia The Flow of Cabe (2008) mice ● Ice Age States of the Dinosaurs (2008) mice ● Leptan (2010) mice ● MacKeaton's Cascade 2 Africa (2008) mice ● Race to Wind Mountain (2008) mice ● The Final Distribution (2008) mice ● 10. 2008 mice ● 3-Met-Origin: Wolters (2008) mice 13/14 © 2015/11/26⑫ Select the content that you wish to stream over your network.
11.1.2 Direct connection between Playon!DVR your PC.
You can use a "Cross" network cable to directly connect Playon. Do your PC as illustrated below.
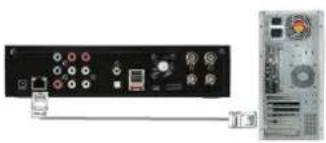
natural_image
Back panel of a computer interface showing ports and connectors, connected to a tower-mounted tower (no visible text or labels)Connect a cross network cable between the Playon!DVR ^ND and your PC.
[TIP] If your current PC network port is already connected to a modem for internet access, you can install additional network card to your PC and use it to connect to the Playon!DVR.
Follow these steps.

text_image
A.C.Ryan PLAYONIDVR™ Setup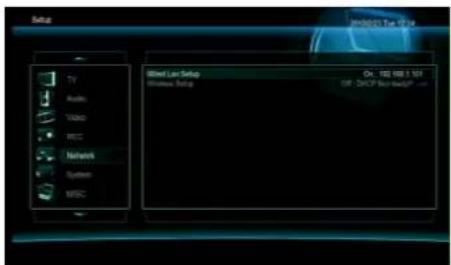
text_image
Setup Audio Video WEC Network System MISC Wire Lane Setup On: 102 KB 3.101 Windows Setup Off: SHOP Scan weight① At the Home Menu page, select [SETUP] or press the ② Select [Network] => [Wired LAN Setup]. [SETUP] button on the remote.
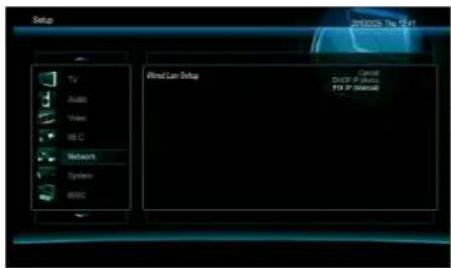
text_image
Setup TV Audio Video REC Network System WISC Wind Cam Setup General Dyne IP / Music FIS IP / Music③ Select FIX IP (Manual).
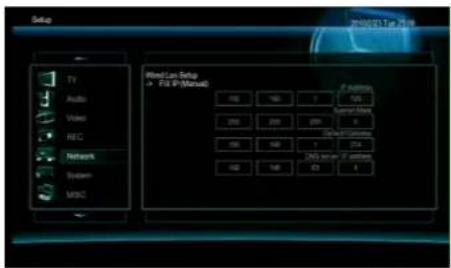
text_image
Setup TV Audio Video REC Network System MISC Wind Las Setup → FX (F-3/2016) FX (F-3/2016) FX (F-3/2016) FX (F-3/2016) FX (F-3/2016) FX (F-3/2016) FX (F-3/2016) FX (F-3/2016) FX (F-3/2016) FX (F-3/2016) FX FX (F-3/2016) FX (F-3/2016) FX (F-3/2016) FX (F-3/2016) FX (F-3/2016) FX (F-3/2016) FX (F-3/2016) FX (F-3/2016) FX (F-3/2016) F - Audio F - 1 F - 5 F - 8 F - 1 F - 4 F - 7 F - 10 F - 14 F - 18 F - 22 F - 26 F - 30 F - 34 F - 38 F - 42 F - 46 F - 50 F - 54 F - 58 F - 62 F - 66 F - 70 F - 74 F - 78 F - 82 F - 86 F - 90 F - 94 F - 98 F - 102 F - 106 F - 110 F - 114 F - 118 F - 122 F - 126 F - 130 F - 134 F - 138 F - 142 F - 146 F - 150 F - 154 F - 158 F - 162 F - 166 F - 170 F - 174 F - 178 F - 182 F - 186 F - 190 F - 194 F - 198 F - 202 F - 206 F - 210 F - 214 F - 218 F - 222 F - 226 F - 230 F - 234 F - 238 F - 242 F - 246 F - 250 F - 254 F - 258 F - 262 F - 266 F - 270 F - 274 F - 278 F - 282 F - 286 F - 290 F - 294 F - 298 F - 302 F - 306 F - 310 F - 314 F - 318 F - 322 F - 326 F - 330 F - 334 F - 338 F - 342 F - 346 F - 350 F - 354 F - 358 F - 362 F - 366 F - 370 F - 374 F - 378 F - 382 F - 386 F - 390 F - 394 F - 398 F - 402 F - 406 F - 410 F - 414 F - 418 F - 422 F - 426 F - 430 F - 434 F - 438 F - 442 F - 446 F - 450 F - 454 F - 458 F - 462 F - 466 F - 470 F - 474 F - 478 F - 482 F - 486 F - 490 F - 494 F - 498 F - 502 F - 506 F - 510 F - 514 F - 518 F - 522 F - 526 F - 530 F - 534 F - 538 F - 542 F - 546 F - 550 F - 554 F - 558 F - 562 F - 566 F - 570 F - 574 F - 578 F - 582 F - 586 F - 590 F - 594 F - 598 F - 602④ Keylin the static IP address, Subnet Mask, Default Gateway, DNS IP address of the Playon!DVR

text_image
Setup TV Audio Video REC Network System BSC Blind Log Setup - FIA IP (Network) 100 100 1 20 Show Before Settings Pre 0.0 Show After Settings 1 0.4 Show Before Settings Close 0.0 Close 0.0 0.1 1⑤ Select [Confirm] to test the network connection.

text_image
Setup Wind Line Setup > IP IP (Microsoft) IP Address 100 200 300 400 500 600 700 800 900 1000 1100 1200 1300 1400 1500 1600 1700 1800 1900 2000 2100 2200 2300 2400 2500 2600 2700 2800 2900 3000 3100 3200 3300 3400 3500 3600 3700 3800 3900 4000 4100 4200 4300 4400 4500 4600 4700 4800 4900 5000 5100 5200 5300 5400 5500 5600 5700 5800 5900 6000 6100 6200 6300 6400 6500 6600 6700 6800 6900 7000 7100 7200 7300 7400 7500 7600 7700 7800 7900 8000 8100 8200 8300 8400 8500 8600 8700 8800 8900 9000 9100 9200 9300 9400 9500 9600 9700 9800 9900 1 1 1 1 1 1 1 1 1 1 1 1 1 1 1 1 1 1 1 1 1 1 1 1 1 1 1 1 1 1 1 1 1 1 1 1 1 1 1 1 1 1 1 1 1 1 1 1 1 1 1⑥ The PlayonIDVR ^HD is now testing the network connection.

text_image
Setup TV Audio Video REC Network System MMC Wind Can Setup Windows Setup On: 102 KB 8.109 SP: 34/CF Macrosetup.com⑦ Once connected, the IP address will be displayed.

text_image
A.C.Ryan PLAYON10VR™ Multimedia Browser⑧ Go to the Home Menu page and select [MULTIMEDIA BROWSER] menu.

text_image
Multimedia Browser | All NET Internet: 12 Language: Image: 0.000000000000000000000000000000000000000000000000000000000000000000000000000000000000000000 Analog: 12 Analog: 12 Analog: 12 Analog: 12 Analog: 12 Analog: 12 Analog: 12 Analog: 12 Analog: 12 Analog: 12 Analog: 12 Analog: 12 Analog: 12 Analog: 12 Analog: 12⑨ Select[NET] and you will see all your available local network connections. Select the network you wish to connect to. A menu may appear as seen above. [Note] If your PC does not require any ID & Password, the above menu will not appear and you can directly access the shared folders.

text_image
Multimedia Browser - AI NET 2018-06-24 - 2018⑩ Key in the same PC logon ID & Password and select the [OK] button to save it.
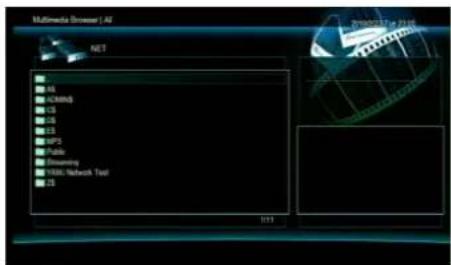
text_image
Multimedia Browser / All NET AS AC/AR/BS CS ES EPS PUBS Public Economy YRML Network Test JS 1:1⑪ The shared folders will be now be displayed.
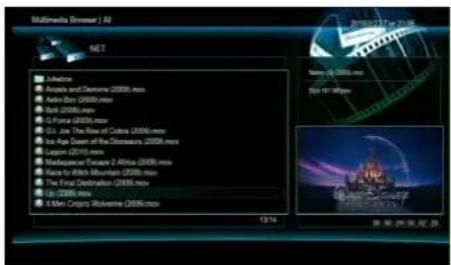
text_image
Multimedia Browser | All NET • Jilahama • Androids and Diagnostics (2008) mice • Aetex Bay (2008) mice • Bank (2008) mice • Oil Finance (2008) mice • G.J. Joe, The Rise of Canada (2008) mice • Ice-Age Desert of the Diverside (2008) mice • Leopan (2010) mice • Microsoft's Exchange 2 Africa (2008) mice • Race for Witch Mountain (2008) mice • The First Destination (2008) mice • U.S. (2008) mice • X-Men Chicago Private (2008) mice 19/14 New York Times12 Select the content that you wish to stream over your network.
11.2 Wireless Connection
Playon!DVR ^D supports two types of wireless structure; 1) Ad-Hoc mode & 2) Infrastructure mode.
The wireless USB dongle is optional and may not be supplied in your package. Please refer to your local vendor if you wish to purchase one.
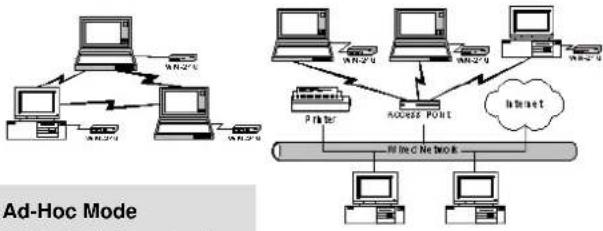
flowchart
graph TD
    subgraph Client_Accident
        A1["Computer"] -->|W-2.75| B1["Server"]
        A2["Computer"] -->|W-2.75| B2["Server"]
        A3["Computer"] -->|W-2.75| B3["Server"]
    end
    subgraph Ad_Hoc_Mode
        C1["Printer"] --> D1["Access Point"]
        D1 --> E1["Internet"]
        D1 --> F1["Desktop"]
        D1 --> G1["Desktop"]
        D1 --> H1["Desktop"]
    end
    I["Ad-Hoc Mode"] --> J["Network Port"]
    style I fill:#f9f,stroke:#333
    style J fill:#bbf,stroke:#333
1) Ad-Hoc Mode
Direct 1 to 1 wireless network connection between a wireless PC and the Playon!DVR without going through a wireless AP router.
2) Infrastructure Mode
Requires a wireless AP router to wirelessly connect to your network.
√ Note
Playon!DVR ^ID is compatible with IEEE 802.11N, G & B standard. We recommend using IEEE 802.11N connection for best wireless network performance.
Connecting in Infrastructure Mode with your wireless AP router.

text_image
A.C.Ryan PLAYON!OVR™ Setup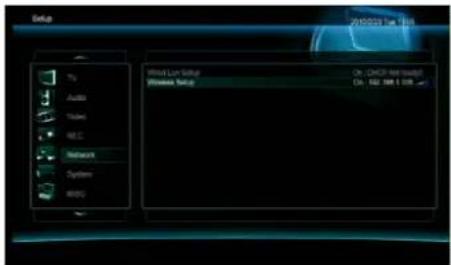
text_image
Setup Windows Setup Audio Sound Wire Network System WIFI Wind Lux Setup On: CHAP-Net/Max/Min Windows Setup On: 102.000.1.105① At the Home Menu page, select [SETUP] or press the ② Select [Network] => [Wireless Setup]. [SETUP] button on the remote.
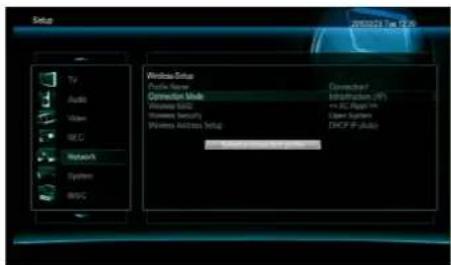
text_image
Setup TV Audio Video WCC Network System WPG Windows Setup Power Name Connection Mode Windows Setup Windows Setup Windows Address Setup Connectout Infrastructure (.IF) +1.2C Regular TX Users System DHCP (P-Link) © 2018/03/2019③ At the [Connection Mode], you can select [Infrastructure (AP)] or [Peer to Peer (Ad Hoc). Select [Infrastructure (AP)] mode here.
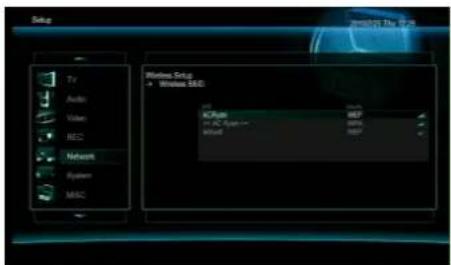
text_image
Setup TV Audio Video REG Network System MAC Wireless Setup - Wireless SSD USB ICPU PC Adapter Internet 807 806 805 804④ At the [Wireless SSID], you can search for all available wireless network and select the one you want to connect.
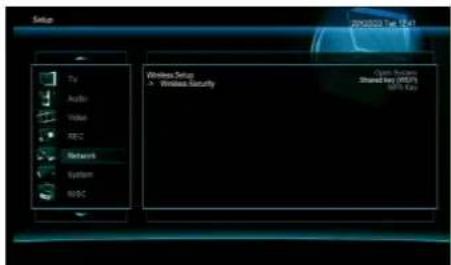
text_image
Setup TV Audio Value REC Network System WDC 20000000000000000000000000000000000000000000000000000000000000000000000000000000000000 Wireless Setup ▲ Wireless Security Open Setup Shared key (MSP) SAP Set⑤ At the [Wireless Security], select [Open System], [Shared Key (WEP)] or [WPA Key]. [Note]: You need to know which wireless security mode your router is setup with before choosing the correct options.

text_image
Setup TV Audio Video REC Network Systems WISC Windows Setup • Windows Security Open Security Shared Low (TCP) High Low⑥ Key in the wireless security password as you have setup on your router.
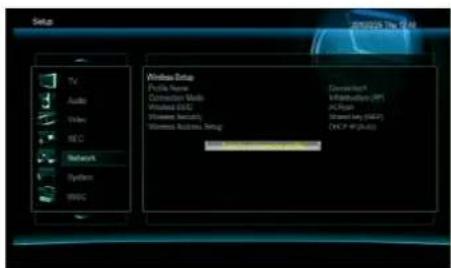
text_image
Setup TV Audio Video REC Network Systems WISC Windows Setup Media Name Connection Mode Windows (UCC) Windows Security Windows Audio, Setup Download In-Web: 100% (HP) AC/Bit Smart Sky (USB) HCP - IP (CPU)⑦ Press [Select a connection profile].

text_image
Setup TV Audio Video WC Network System BSC Windows Setup ▶ Select a connection profile Switch...⑧ ThePlayon!DVR is now trying to connect to your wireless AP router.

text_image
Setup TV Audio Video REC Network System MSG Window Color Form Name: Windows Connection Mode: Windows 100% Connection Security: or Options or Network Mask Default Settings Downloaded Internet: Windows 100% Accessories: Windows 100% USB: USB 1.0 GB USB: USB 2.0 GB USB: USB 3.0 GB⑨ Once connected, the network information will be displayed.

text_image
A.C.Ryan PLAYON!OVR™ Multimedia BrowserGo to the Home Menu page and select [MULTIMEDIA BROWSER] menu.
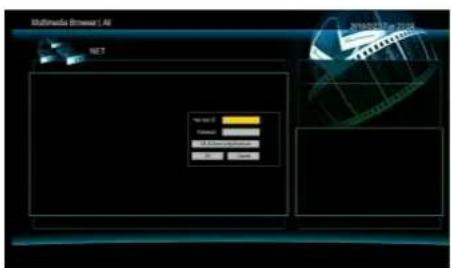
text_image
Multimedia Browser 1. All NET Net 2017 Color: 50%Advanced Options:
OK Cancel⑪ Select [NET] and you will see all your available local network connections. Select the network you wish to connect to. A menu may appear as seen above. [Note] If your PC does not require any ID & Password, the above menu will not appear and you can directly access the shared folder.
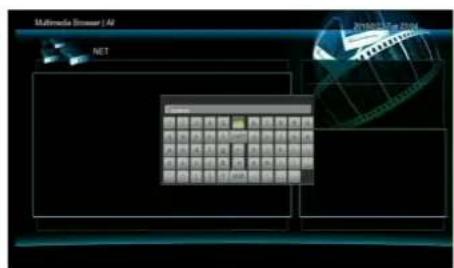
text_image
Multimedia Browser / AI NET Internet⑫ Key in the same PC logon ID & Password and select the [OK] button to save it.
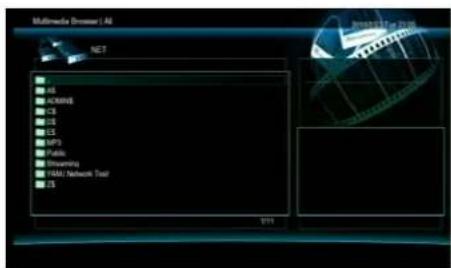
text_image
Multimedia Browser / ALE NET ALE ACM/BS CS USB ES MP3 Public Unimaging TAM1 Networks Tool JIS 1/11⑬ The shared folders will be now be displayed.
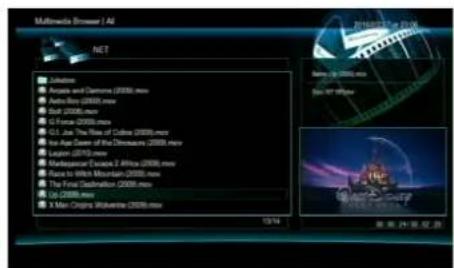
text_image
Multimedia Browser 1 AE NET ■ Linkbase ■ Arcade and Damore (2008) mice ■ AstroBox (2008) mice ■ Sall (2008) mice ■ G. Funch (2008) mice ■ G.I. Jane The Rise of Cadre (2008) mice ■ Ice Age Dawn of the Dinosaurs (2008) mice ■ Legal (2013) mice ■ MacArthur's Exceed 7 Africa (2008) mice ■ Race to White Mountain (2008) mice ■ The Final Destination (2008) mice ■ US (2008) mice ■ X Men's Origin Wolverine (2008) mice 12/14 Name: U-2008 mice Size: 16" x 8" x 9" MacArthur's Exceed 7 Africa (2008) mice US (2008) mice 美国《冰岛》杂志⑭ Select the content that you wish to stream over your network.
12. Remote Web-Access & Torrent Download
[Remote Web-Access] function is an unique feature of the Playon!DVR
You can access your Playon!DVRremotely through a web-browser and can
1) Manage the files from the Playon!DVR ^HD to a local connected PC.
2) Set up the time-scheduling recording of your Playon!DVR
3) Check the recording status of your Playon!DVR.
4) Download Torrent files directly to your Playon!DVR
In order to use this feature, you need to connect your Playon!DVRo a router and do [Port Forwarding /
Port number: 80] or [DMZ Server] on the router. For more information on how to setup [Port Forwarding],
please refer to your router manual.
On your Playon!DVR ^ID , you need to set up the following;
- IP Address: Assign a fixed IP address to your Playon!DVR
-. Subnet Mask: 255.255.255.0
-. Default Gateway: Key in the local IP address of your router
(If your router is using a dynamic IP address then you need to enable DDNS function).
-. DNS Server IP Address: For Bittorrent download, you need to input the DNS server IP address.
![AC Ryan Playon!DVR HD - [Remote Web-Access] function is an unique feature of the Playon!DVR - 1](/content/2026/06/1244104/images/410747bf750ab4afe9d2174efe40758785d5bb90608e32b5483e626899f6c2e0.jpg)
text_image
A.C.Ryan PLAYON!OVR™ Setup![AC Ryan Playon!DVR HD - [Remote Web-Access] function is an unique feature of the Playon!DVR - 2](/content/2026/06/1244104/images/330a95cfde049b3e1c3cd8bb86acf44522c3592f32de99bbb02224dd477866eb.jpg)
text_image
Setup 2016/2017 Tun 2018 TV Audio Video REC Network System MISC Wind Lan Setup = FGA (P-Manual) IP Address 192 183 1 150 250 255 255 9 Default Subsea 192 186 1 254 DNS version IP address 192 198 63 1To remotely access your Playon!DVR, launch a web browser on your PC such as Internet Explorer or Firefox, etc and key in the following in the address bar.
Example: http://123.456.789.123:8080 where 123.456.789.123 is your router external IP address and 8080 is the port number you have assigned for port forwarding. Please refer to your router setup page for obtaining the external IP address and port number.
12.1.1. System Info.
You can access your Playon!DVR through a web-browser and check on status such as the total or used capacity of each partition, recording result, system time information, etc.
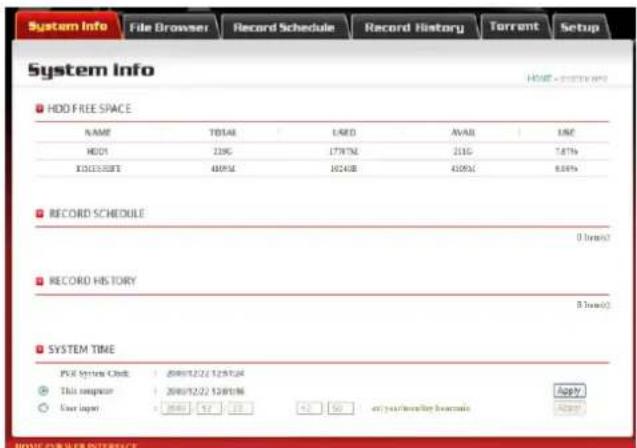
text_image
System Info File Browser Record Schedule Record History Torrent Setup System Info HOME - 2000-2001 HDD FREE SPACE NAME TOTAL LOAD AVAIL LINE HDDI 220G 1797M 211G 7.81% EXCELISITE 405M 1024GB 450% 6.04% RECORD SCHEDULE ( years) RECORD HISTORY B rows() SYSTEM TIME PVR System Clock 2001/2/22 12:57:24 This register 2001/2/22 12:01:06 Use input 360 47 22 43 50 on your normal home/sales happy A##? HOME FOR WEB INTERFACE■ HDD FREE SPACE
- . Name: The name of each partition - . Total: The total capacity of each partition
- . Used: Used capacity of each partition - . Avail: Available capacity of each partition
- . Use: The used percentage of each partition
- HDD1: This is the main partition of your internal HDD which can be accessed from your PC for files management and Bittorrent download / Recorded programs will be saved to this partition.
- Time Shift: The capacity for time-shift function and the temporarily recorded program is written into this partition.
■ RECORD SCHEDULE
The Time-Scheduling Recording Lists or AV-IN Recording lists are shown in this field.
HISTORY LIST
It shows the recording result as "OK" or "Fail".
■ SYSTEM TIME
- PVR System Clock: The current time information of the Playon? You are using now.
- This Computer: The current time information of the PC you are using now.
- User Input: If you want to change the current time of the Playon!DV then check this to set up manually and press the [Apply] button to change the time information.
12.1.2. File Browser
[File Browser]: Access the internal HDD of your Playon!DV and allow you to copy the desired files to the PC you are accessing from.

text_image
System Info File Browser Record Schedule Record History Torrent Setup FILE BROWSER HOME FILE LIST SHOW FILE LIST HCP FOLDER / FILE NAME LAST MODIFY SIZE # RT REC core 2016/11/21:33 128K core.1102 2016/11/22:57 436K core.2007 2016/11/20:09 392K core.2504 2016/11/20:47 412K core.3027 2016/11/21:11 416K core.319 2016/11/19:00 394K core.4524 2016/11/21:32 414K core.782 2016/11/22:45 403K core.883 2016/11/23:15 413KFor example, if you click [HDD1] folder you can access to the HDD1 folder as below;
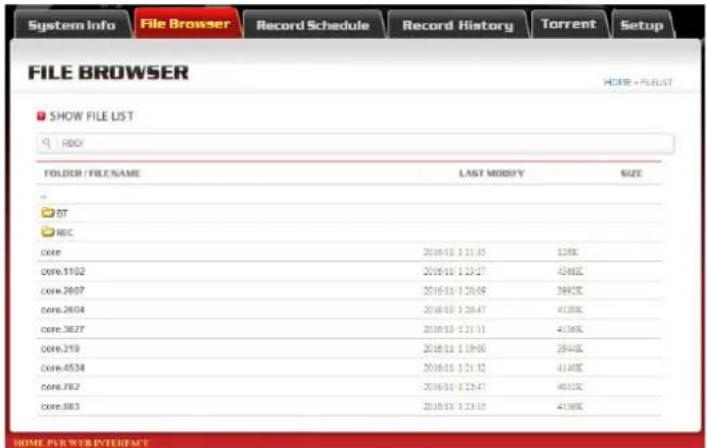
text_image
System Info File Browser Record Schedule Record History Torrent Setup FILE BROWSER SHOW FILE LIST RBOY FOLDER / FILE NAME LAST MODIFY SIZE DT REC core 2018-10-11 13:15 128K core.1102 2018-10-11 13:27 458K core.2607 2018-10-11 13:09 384K core.2604 2018-10-11 13:47 413K core.3627 2018-10-11 13:11 413K core.319 2018-10-11 13:00 264K core.4534 2018-10-11 13:32 414K core.782 -2018-10-11 13:47 463K core.883 2018-10-11 13:32 416K HOME FILE WEB INTERFACESelect a file to download to your local PC you are remotely accessing your Playon.
12.1.3. Record Schedule
You can remotely add a new time-scheduling record using the Record Schedule menu.
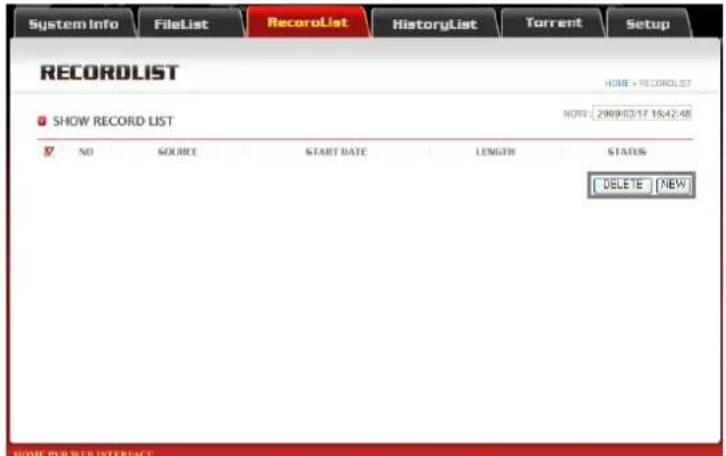
text_image
System Info FileList RecordList HistoryList Torrent Setup RECORDLIST SHOW RECORD LIST NO SOURCE START DATE LENGTH STATUS DELETE [NEW] HOME POWER INTERFACE[New]: Add a new time-scheduling recording list
[Delete]: Delete the scheduled list.
If you press the [New] button you will see the below menu.

text_image
System Info File Browser Record Schedule Record History Torrent Setup RECORD SCHEDULE HOME > RECOROUST SHOW RECORD LIST NO SOURCE START DATE LENGTH STATUS DELETE NEW HOME > POWER INTERFACE
text_image
System Info File Browser Record Schedule Record History Torrent Setup RECORD SCHEDULE HORN - RECORD LIST SHOW RECORD LIST NUMBER Select Input SOLVED Select TV CA SOURCE Select DTV CA START TIME 2009 12 22 13 25 EQ your secondary source LENGTH 8 0 ex-Source RESET Select Repeat Type DEVICE HDD QUALITY Select Quality Submit HOME POWER INTERFACE- . Source: Select input source AV-IN, Analogue TV or Digital TV.
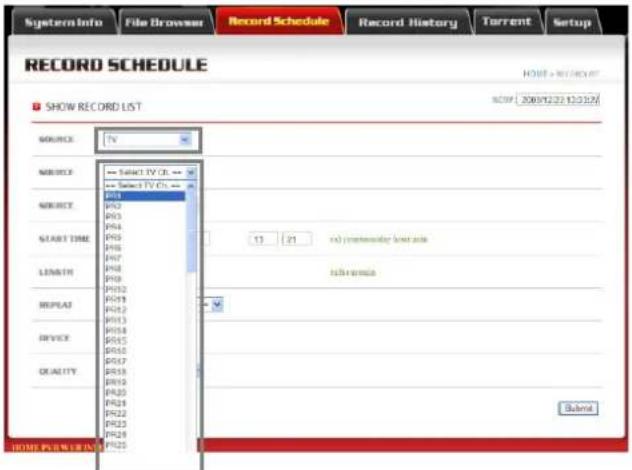
text_image
System Info File Browser Record Schedule Record History Torrent Setup RECORD SCHEDULE HOST > RECORDER SHOW RECORD LIST SOURCE TV SOURCE SELECT TV OR SELECT TV OR START TIME R13 R12 R11 R10 R9 R8 R7 R6 R5 R4 R3 R2 R1 R0 R1 R2 R3 R4 R5 R6 R7 R8 R9 R10 R11 R12 R13 R14 R15 R16 R17 R18 R19 R20 R21 R22 R23 R24 R25 R26 R27 R28 R29 R30 R31 R32 13 21 x) counterable (last site) Subnet REPLACE R19 R18 R17 R16 R15 R14 R13 R12 R11 R10 R9 R8 R7 R6 R5 R4 R3 R2 R1 SHEMORANIA-. Source: Select the channel to time-schedule record.
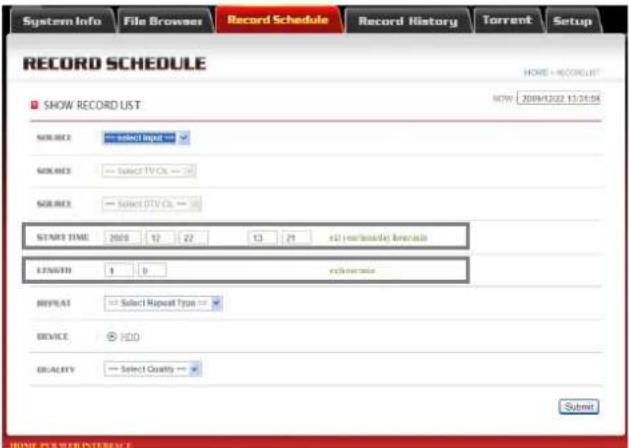
text_image
System Info File Browser Record Schedule Record History Torrent Setup RECORD SCHEDULE HOME = RECORD LIST SHOW RECORD LIST SOURCE = select Input SOURCE = Select TV Chn = 10 SOURCE = Select DTV Chn = 10 START TIME 2019 12 22 13 21 x10 my/mbtu records LENGTH 1 0 inches RESET = Select Repeat Type = DEVICE = FDD QUALITY = Select Quality = Submit HOME POWER INTERFACE- Start Time: Set up the recording period in year / month / date / hour / minutes
- Length: Set up the recording length in hour / minutes
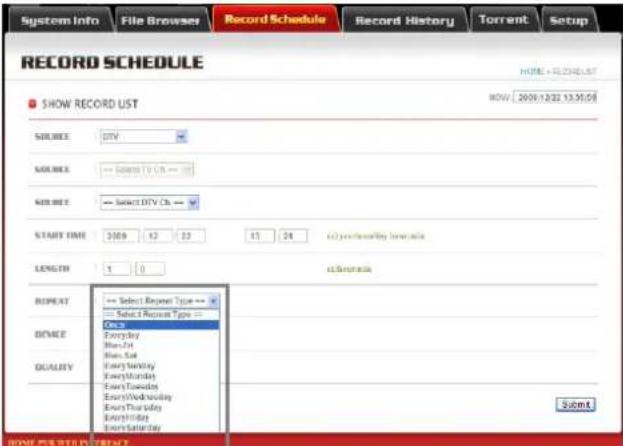
text_image
System Info File Browser Record Schedule Record History Torrent Setup RECORD SCHEDULE HORE = ORDER LIST SHOW RECORD LIST SOURCES DVY SOURCES -- Select TV Ch -- SOURCES -- Select TV Ch -- START TIME 3009 42 53 11 24 (a) precreening features LENGTH 1 0 REFERENCE REPEAT -- Select Repeat Type -- --- Select Repeat Type -- --- Everyday --- Every-Set --- Every Sunday --- Every Thursday --- Every Wednesday --- Every Thursday --- Every Friday --- Every Saturday DEVICE QUALITY COME Everyday Every-Set Every Sunday Every Thursday Every Friday Every Saturday Submit HOME PRESENT OUTPUT-.Repeat: Set up any repeating schedule such as once, everyday, every-Fri, etc as seen above.
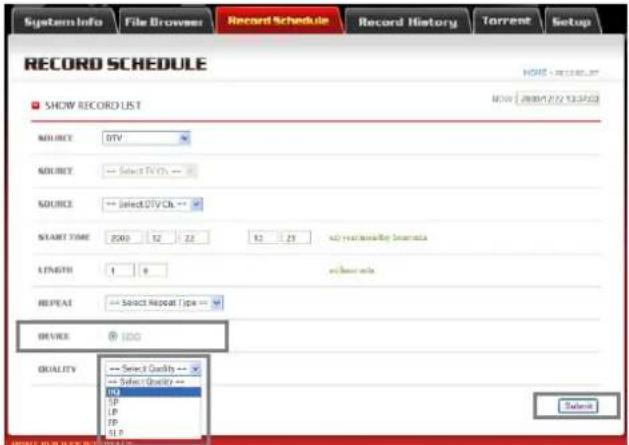
text_image
System Info File Browser Record Schedule Record History Torrent Setup RECORD SCHEDULE SHOW RECORD LIST NOURC DTV SOURCE Select TV Ch SOURCE Select DTV Ch START TIME 200 12 22 10 25 and reactivity information LENGTH 1 0 and size info REPEAT Select Repeat Type DEVICE 100 QUALITY Select Quality Select Quality FP LP FP FLP Options- Device: Select a device to record the programs. The default is HDD.
- . Quality: Select a quality of the recording.
After you have set up all the configurations for the recording, press the [Submit] button.
You will now see a new requested recording list as below;

text_image
System Info File Browser Record Schedule Record History Torrent Setup RECORD SCHEDULE HOME 18:00:00 SHOW RECORD LIST NO SOURCE START DATE LENGTH STATUS □ 1 Ctrl 12/23 13:51 62.00 Ready □ 2 Ctrl 12/23 13:24 81.00 Ready DELETE KEY HOME PUBLISHED INTERFACE12.1.4. Record History
Check the recording history using this menu.

text_image
RECORD HISTORY HOME > HISTORY LIST SHOW RECORD LIST NO RESULT SOURCE START DATE LENGTH DEVICE 1 OK Time 12/21 19:43 00:01 HDD 2 OK Time 12/21 20:55 01:00 HDD 3 OK Time 12/21 21:59 01:00 HDD 4 OK Time 12/21 22:53 01:00 HDD 5 OK Time 12/22 00:55 01:00 HDD 6 OK Time 12/22 01:33 01:00 HDD 7 OK Time 12/22 03:54 01:00 HDD 8 OK Time 12/22 05:54 01:00 HDD DELETE HOME POWER INTERFACETo delete any recording history, check the boxes next to the No. and the click on the [DELETE] button.
12.1.5. Torrent Download
[Note]:
To download Torrent files with your Playon!DVR, you should put the unit to power standby mode. The Torrent will not download if your Playon!DVRs powered-off.
How to download Torrent Files?
[Step 1]: Search for your torrent files on the internet.
[Step 2]: Download your selected .torrent file to a folder of your PC.
[Step 3]: Click the [Torrent] button at the Web-Access page as below, Add new torrent and press the [Start] button.
![AC Ryan Playon!DVR HD - [Note]: - 1](/content/2026/06/1244104/images/73c20cd37217933342a0ba73953ee89e345876a96f94f6d43843eeb136072d89.jpg)
text_image
SystemInfo File Browser Record Schedule Record History Torrent Setup TORRENT Start Stop XDelete Refresh 安全 Setting + Add new target No Target file name Size(M) Priority Percent Peers Speed(R) Detail Prints Filebox Extra Current output box Pushbox Image Path Showbox Select[Step 4]: Torrent will start downloading immediately after adding and will continue to do so even after you power down the Playon!DVR ^ID to standby mode.
-. [Delete Job]: Delete the Torrent file from the Playon!BVR
-. [Delete Job and File]: Delete the Torrent file including the temporary files and also downloaded parts as well.
13. FTP Server
Multi-users can access to the Playon!DVRFTP Server) at the same time.
You can use your Playon!DVRas a FTP server to upload / download files.
In order to use this feature, you need to connect your Playon!D ^V to a router and do [Port Forwarding / Port number: 21] or [DMZ Server] on the router. For more information on how to setup [Port Forwarding], please refer to your router manual.
On your Playon!DVR, you need to set up the following:
- IP Address: Assign a fixed IP address to your Playon!DVR
-. Subnet Mask: 255.255.255.0 - Default Gateway: Key in the IP address of your router
(If your router is using a dynamic IP address then you need to enable DDNS function).

text_image
A.C.Ryan PLAYONiOVR™ Setup
text_image
Setup TV Audio Video REC Network System MSC Wire Lin Setup + Fix (Manual) 100 140 1 125 200 275 275 300 140 1 1 100 140 1 1 200 user: if addressButtons
User Name: Input Camera Control Camera13.1.1. Accessing Playon!DVR ^HD (FTP Server) with a web-browser.
[Step 1]: Launch a Web-Browser, example Internet Explorer.
[Step 2]: Type [ftp://id:password@FTP server IP address].
e.g. ftp://admin:admin@123.456.789.123

text_image
File://172.16.37.174/ main(D): fsc:/admin:admin@172.16.37.174 ALLMEDIA Movie MUSIC PHOTO Recycled System Volume 1... Content[Step 3]: You can now access the Playon! DV Rollers to download / upload any files from your remote PC.
13.1.2. Accessing Playon!DVR ^HD (FTP Server) with a FTP Client Program.
[Step 1]: Install a FTP client program on your PC, example FileZilla
[Step 2]: Launch the FTP client program.
[Step 3]: Key in the Host: FTP Server IP address / Username / Password
(The default port is "21")
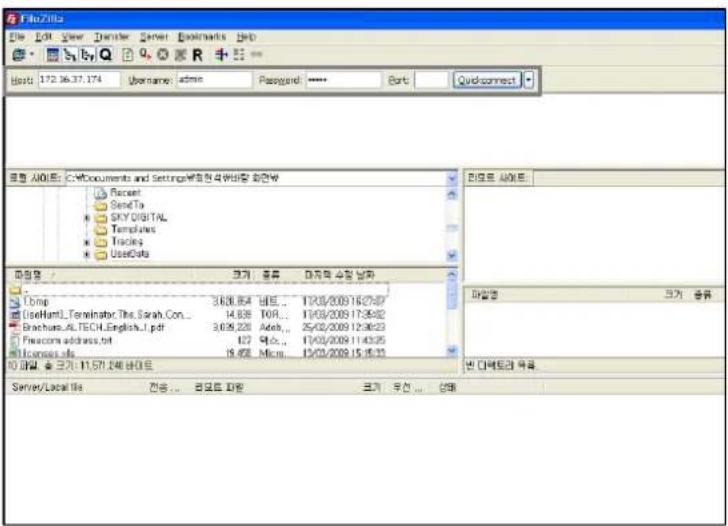
text_image
File-Zinita Edit Edit View Render Server Bookmarks Help Host: 172.36.37.174 Username: admin Password: **** Sort: Quickconnect 我的 HTML: C:\Documents and Settings\新经典版式会社\新经典 Recent SendTo SKY DIGITAL Templates Tracks UserData 网络名 颜色: 红色 默认的大小/大小/英寸 [com] 368.854 MB... 17/03/2009 16:27:47 [UseHunt].Terminatbc.Thes.Sarah.Con... 14.838 TOP... 17/03/2009 17:39:42 Brachus.Al.TECH.English.l.pdf 3.099.220 Adeb... 25/02/2009 12:30:23 Freecom address.txt 127 Adeb... 17/03/2009 11:43:25 Licenses.xls 18.452 Micm... 15/03/2009 15:16:31 可编辑 <-->> 11.57.124 MBID Server\Local file 新经典... 原版式会社 颜色: 胤色... 缩进... 文件(F) 编辑(E)[Step 4]: Your PC can now access to your Playon!DV(RTP Server).
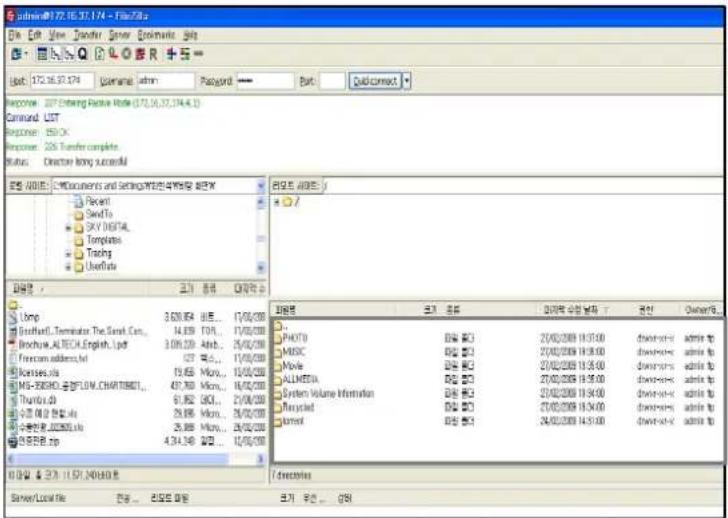
text_image
admin172.16.37.174 - File28.x Edit View Transfer Server Bookwrite Help Edit: 172.16.37.174 Username: admin Password: Edit: Quick connect Response: 207 Ordering Passive Mode (172.16.37.174.4.1) Command: LIST Response: 150 OK Response: 226 Transfer complete Status: Direction long successful 文件夹 (A) [C] Documents and Settings (M) [W] [V] [W] [E] [E] [E] Recent SendTo SKY DIGITAL Templates Teaching UserInfo [ ] Document and Settings (M) [W] [W] [E] [E] [E] [ ] Report SendTo SKY DIGITAL Templates Teaching UserInfo [ ] Report SendTo SKY DIGITAL Templates Teaching UserInfo [ ] Report SendTo SKY DIGITAL Templates Teaching UserInfo [ ] Report SendTo SKY DIGITAL Templates Teaching UserInfo [ ] Report SendTo SKY DIGITAL Templates Teaching UserInfo [ ] Report SendTo SKY DIGITAL Templates Teaching UserInfo14. Firmware Upgrade
Please visit www.acryan.com for more information on the latest firmware updates.
Do not power off the Playon!DVR when firmware upgrading is in progress.
How to upgrade the new firmware?
You can download the new firmware and place it in the root directory of the internal HDD or an external USB storage device.

text_image
A.C.Ryan PLAYON!DVR™ Setup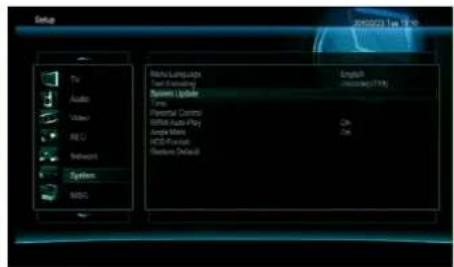
text_image
Setup TV Audio Video REC Network System MUSIC Language Text Language System Update Time Parental Control Audio Audio Play Audio Mask and Other Audio Resource Details English Unrealized (F19) On On[Step 1] At the Home Menu page, select [SETUP]. [Step 2] Select [System] => [System Update].
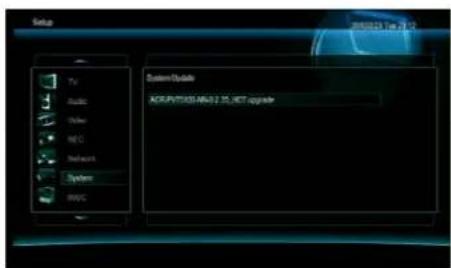
text_image
Setup 2018/03/19 Tue 20:12 System Details ACR/PV70203-MSU2.15-JUST upgrade[Step 3] The Playon!DVR automatically searches for an upgrade file and displays it when found.

text_image
Setup TV Audio Video WBC Network System WBC System Update set user to open https... Order Send[Step 4] Press the [OK] button on the remote to confirm the firmware upgrade.
[Step 5] It takes about 2 minutes or more to complete the firmware upgrade. After upgrading is completed, the Playon!DVR will reboot and defaults back to the initial setup page.
15. Appendixes
15.1 Frequently Asked Questions
Question 1. I find new file names and folder names that I never created before or they have strange gibberish names. Answer:
Most likely, the player's file allocation table (FAT) has been corrupted. This might be due to the player shuttling down (due to low battery power) while reading or writing to your computer by the USB connection. Windows and Macintosh often write extra files to the hard disk such as finder.def or System volume info. These are normal and will not do any harm to the player.
Question 2. My files have disappeared from the player.
Answer:
Make sure that you browse your files via the correct browser mode which means correct filtered views such as Photos, Music, or Movies.
Question 3. During power on, why does the TV will have a short flashing, blue screen or screensaver?
Answer:
This is normal, when the system initializes, it will setup the corresponding parameters so it can output the correct video signal to the TV, during the initializing time, the TV will receive incorrect signals or the signals will not be stable and will cause the TV screen to flash, some TV's will treat this as no signal, and will display a blue screen or screensaver.
Question 4. Why when I switch to Y/Pb/Pr 480p, 576p, 720p, 1080i, and 1080p, does the TV screen display an unwatchable picture?
Answer:
Please check if your TV supports Y/Pb/Pr 480p, 576p, 720p, 1080i, and 1080p output, if your TV does not support, please use the A/V signal display instead, press the TV SYSYEM button on the remote control, then switch the TV's video input to NTSC or PAL.
Question 5. Why is there no sound on movie or music playback when using Y/Pb/Pr component output?
Answer:
Y/Pb/Pr output is a video output only, and does not include sound signals. When using Y/Pb/Pr output, please plug the A/V OUT or the S/PDIF jack to output sound.
Question 6. I cannot get SSID name, the screen always displays: 'Can't get any SSID!!'
Answer:
When the WLAN USB Adapter is connected to the player, it needs some time to get initialized. Please wait for about 1\~2 minutes and try refreshing the SSID list again.
Question 7. I cannot see files shared on my computer via MULTIMEDIA->NET menu.
Answer:
Please check following items:
- Connect the player to network and obtain an IP address first;
- Please enable NetBIOS of TCP/IP on computer;
- Please check your PC's firewall settings;
- Please enable your PC's 'Guest' account;
- Please share the folders which you wish to browse on your PC, and make sure that 'Everyone' or 'Guest' has the right to access.
Question 8. I configured everything correctly, but still cannot get the wireless network or UPnP function to work.
Answer:
Are you using a firewall such as Norton Internet Security, McAfee Personal Firewall, Zone Alarm, etc. or even the built-in firewall of Windows XP? (Don't forget that Service Pack 2 for Windows XP automatically upgrades your firewall and turn it on by default)
If you have a firewall, it may need to be configured or have exceptions created to allow you to see and communicate with the player on the network. To test if your firewall is preventing network communication (including PING and access shared folders), try disabling it to see if you can connect. If you can connect with the firewall disabled, you may need to add the player to the 'Trusted' list or configure the firewall for local intranet access. Worst-case, disable your firewall long enough to use the player, then enable it again when done.
Question 9. I am using the 802.11n Wi-Fi dongle with an 802.11n wireless router, why the speed is still 802.11g 54Mbps rather than 300Mbps?
Answer:
The IEEE 802.11n Draft standard prohibits using high throughput with WEP or TKIP as the unicast cipher. If you use these encryption methods (e.g. WEP, WPA-TKIP), your data rate will drop to 54 Mbps. You may contact the Access Point or router manufacturer to download the latest firmware, or try other encryption methods (WPA2-AES or WPA2-TKIP), or choose to configure an unsecured profile, but this option is not recommended.
15.2 Copyrights and Trademarks
Copyrights
All rights reserved. No part of this manual may be reproduced, or transmitted in any form or by any means, whether by electronically or mechanically, without the express written permission from the copyright holder.
Copyrighted materials, such as software, music files, or movies, are protected by local law, and may not be illegally copied or used without permission from the copyright owner.
Trademarks
Microsoft and Windows are registered trademarks of Microsoft Corporation.
All other trademarks are property of their respective holders.


Manufactured under license under U.S. Patent #'s: 5,451,942; 5,956,674; 5,974,380; 5,978,762; 6,487,535 & other U.S. and worldwide patents issued & pending. DTS and the Symbol are registered trademarks, & DTS 2.0+ Digital Out and the DTS logos are trademarks of DTS, Inc. Product includes software. © DTS, Inc. All Rights Reserved.
MANUFACTURED UNDER LICENSE FROM Dolby Laboratories.
DIGITAL
Dolby and the double-D symbol are registered trademarks of Dolby Laboratories.
15.3 Warranty
What your warranty does not cover:
-Acts of nature, such as fire, static discharge.
-Damage from unauthorized repair, alteration or accident.
-Damage from misuse or neglect.
-A unit that has been modified or incorporated into other products or is used for institutional or other commercial purposes.
-Loss of customer's software, firmware, information, or memory data.
-Improper handling or installation.
15.4 GPL Statement
This product contains free software which is licensed under the GNU General Public License. After you purchase this product, you may procure, modify or distribute the source code of the GPL/LGPL software that is used in this product.
To obtain a copy of our open source software, please contact our support center and we will provide you with a CD-ROM of the source code that is used, charging only the actual expense involved. However, please be noted that we cannot provide guarantee with the source code, and there is also no technical support for the source code from us.