
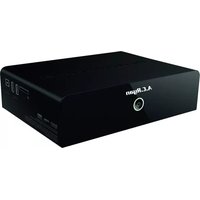
Playon!HD3 Mini ACR-PV73920 - Media player AC Ryan - Free user manual and instructions
Find the device manual for free Playon!HD3 Mini ACR-PV73920 AC Ryan in PDF.


| Product Type | Media Player |
| Brand | AC Ryan |
| Model | Playon!HD3 Mini ACR-PV73920 |
| Dimensions (W x D x H) | 120 mm x 80 mm x 25 mm |
| Weight | 200 g |
| Power Supply | 5V DC, 2A |
| Video Output | HDMI 1.4, Composite (AV out) |
| Audio Output | HDMI, Optical S/PDIF, Stereo RCA |
| Supported Video Formats | MKV, MP4, AVI, MOV, TS, M2TS, WMV, FLV |
| Supported Audio Formats | MP3, FLAC, WAV, AAC, OGG, WMA |
| Supported Image Formats | JPEG, PNG, BMP, GIF |
| Network Connectivity | 10/100 Ethernet, 802.11 b/g/n Wi-Fi |
| Storage | 1 x USB 2.0 Host, 1 x SD/SDHC Card Reader |
| Max Video Resolution | 1080p Full HD |
| Subtitles Support | SRT, SUB, SSA, ASS |
| Menu Language | English, French, German, Spanish, etc. |
| Remote Control | IR remote included |
| Cleaning Instructions | Wipe with dry cloth; avoid liquids |
| Safety Information | Use only supplied power adapter; keep away from moisture |
| Spare Parts and Repairability | Contact AC Ryan support for spare parts; not user-serviceable |
| General Notes | Supports UPnP, NFS, Samba network streaming |
Frequently Asked Questions - Playon!HD3 Mini ACR-PV73920 AC Ryan
User questions about Playon!HD3 Mini ACR-PV73920 AC Ryan
0 question about this device. Answer the ones you know or ask your own.
Ask a new question about this device
Download the instructions for your Media player in PDF format for free! Find your manual Playon!HD3 Mini ACR-PV73920 - AC Ryan and take your electronic device back in hand. On this page are published all the documents necessary for the use of your device. Playon!HD3 Mini ACR-PV73920 by AC Ryan.
USER MANUAL Playon!HD3 Mini ACR-PV73920 AC Ryan
Click on the section's title for a faster navigation.
1 User Information 3
1.1 Caution 3
2 Product Introduction 5
2.1 Product Overview 5
2.2 Package Contents 6
2.3 Connection 7
2.4 Front Panel 11
2.5 Back Panel 12
2.6 First Time Usage 12
2.7 Remote Control 14
3 Main Functions 16
3.1 Setup Menu 16
3.2 Movie Library 29
3.3 Photo Library 33
3.4 Music Library 36
3.5 File Manager 38
3.6 Playlist management 43
3.7 Files operation 44
3.8 Internet Media 46
3.9 Torrent function 47
3.10 Jukebox 48
3.11 SAMBA Server and Client 51
3.12 FTP Server 52
4 Upgrading the Firmware 55
5 Appendixes 56
5.1 Specifications 56
5.2 Frequently Asked Questions 57
6 Copyrights and Trademarks 59
7 Warranty 60
8 GPL Statement 60
9 Disclaimer 60
1 User Information
1.1 Caution
This player is designed and manufactured with safety in mind. In order to safely and effectively use this player, please read the following before usage.
1.1.1 Usage cautions
User should not modify this player. If commercial hard disk is being used, the environmental temperature should be within +5 \~ +35.
1.1.2 Power
The player's power voltage: DC 5V.
When using this player, please connect the supplied AC adapter or AC adapter cable to the player's power jack. When placing the adapter cable, make sure it will not get damaged or be subject to pressure. To reduce the risk of electric shock, unplug the adapter first before cleaning it. Never connect the adapter to the player in a humid or dusty area. Do not replace the adapter or cable's wire or connector.
1.1.3 Radio interference/compatibility
- If not properly shielded, almost all electronic devices will get radio interference. Under some conditions, your player might get interference.
- The design of this player complies with CE standards, and adheres to the following rules:
(1) This player may not cause harmful interference
(2) This player may receive some interference, that may cause undesired operation.
1.1.4 Repair
If the player has a problem, you should take it to an appointed repair center and let the specialists do the repair. Never repair the player yourself as you might damage the player or endanger yourself or your data.
1.1.5 Disposing of the player
When you dispose of the player, be sure to dispose of it appropriately. Some countries may regulate disposal of electrical devices, please consult with your local authority.
1.1.6 Others
When using this player, please do not let the player come into contact with water or other liquid, if water is accidentally spilled on the player, please use a dry cloth to absorb the spillage.
Electronic products are vulnerable, when using please avoid the following:
- Do not let the player come into contact with water or other liquid.
- Do not disassemble the player, repair the player or change the design of the player, any damage done will not be included in the repair policy.
• Do not press the buttons of the player too hard. - Avoid hitting the player with hard object, avoid shaking the player, and stay away from magnetic fields.
During electrostatic discharge or when exposed to a strong electromagnetic field, the product will malfunction. If this happens, then unplug the power cable and the product will return to normal performance next time it is powered on.
2 Product Introduction
2.1 Product Overview
Thank you for purchasing an AC Ryan Playon!HD Mini 3 Media Player. Store, stream and play your entire media collection in 3D Full HD. The ultimate in home entertainment, this player has the following functionality:
Network Feature
- A/V streaming/transmission via Ethernet(10M/100M/1000M) & built-in Wi-Fi (802.11b/g/n)
• A/V streaming via UPnP Media Server
• File sharing via Samba server - FTP Server
• Internet Radio (SHOUTcast)
• BT download (Transmission) - Video podcast
Media Library
• Quick-Search, search files by keywords.
• A powerful search engine, allows you to browse multimedia files with ease.
Movie Jukebox
- A great feature that allows you to view your Movie files by using Movie Photo thumbnails.
Movie Playback
- Fast forward/rewind
• View subtitle
• Supports major audio formats (1080p HD video decoding) - Subtitle control: color/offset/size
• Movie format: ASF/AVI/BD-ISO/DAT/DVD-ISO/FLV/IFO/MPG/MP4/M2TS/MKV/MOV/M4V/TP/TS/TRP/WMV/VOB/RM/RMVB
Music Playback
- Fast forward/rewind
- Shuffle
- Repeat
• Music format: AAC/LC-AAC/HE-AAC/MP2/MP3/FLAC/WAV/MS-ADPCM/WMA (DRM and Advance Profile or lossless not supported)/OGG Vorbis/PCM/LPCM/COOK/RA-Lossless
Photo Viewing
- You can view photos in slide show mode with background music and/or transition effects.
- Zoom in/out, Rotate
• Photo format: JPEG/HD JPEG/BMP/GIF/TIF/PNG
USB 3.0 & 2.0 Support
• 1x USB 3.0 HOST port (for Super-Speed USB storage devices)
• 1x USB 2.0 HOST port (for USB storage devices)
File Copy
• Supports copying & moving files from external USB drive and Network.
Note: All the information contained in this manual was correct at the time of publication. However, as our engineers are always updating and improving the product, your device's software may have a slightly different appearance or modified functionality than presented in this manual
2.2 Package Contents
| Part Quantity | |
| Player 1 | |
| Remote Control 1 | |
| Remote Control Battery 2 | |
| AC/DC adaptor 1 | |
| Quick Installation Guide 1 | |
| Composite cable 1 | |
| HDMI Cable 1 | |
Note: The actual contents in the package might be different from the packing list in this manual.
2.3 Connection
2.3.1 Power connection
- Follow the picture and connect the AC adaptor to the player's DC IN jack;
- Follow the picture and plug in the AC adaptor to the power outlet

2.3.2 USB Mass Storage Device (USB stick, USB HDD etc.) Connection
- Make sure the player is powered on;
- Plug in the USB stick or USB HDD etc. to one of the USB host ports of this player.
- To safely remove the USB device use the EJECT button on the remote control.

natural_image
Diagram showing connection between a USB device and an external network interface (no text or symbols visible)2.3.3 TV connection
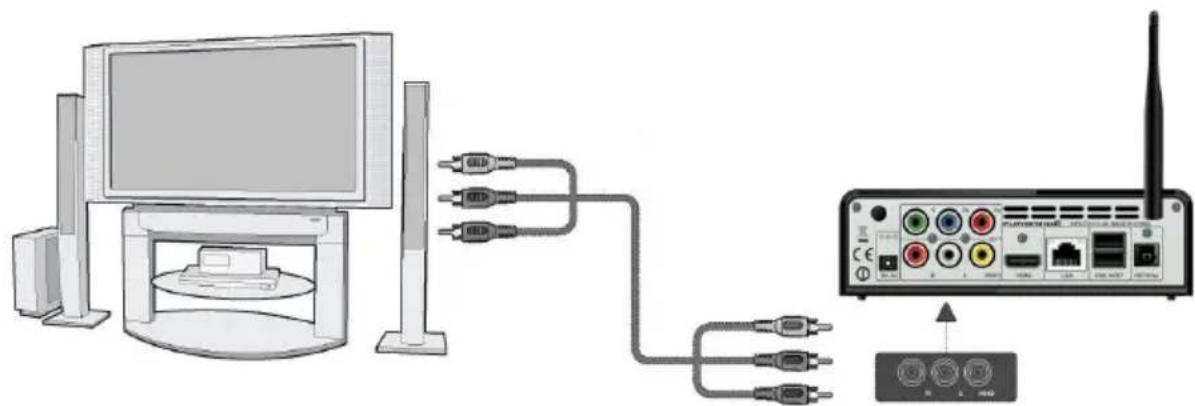
2.3.3.1 A/V OUT
- Follow the picture and plug in the 3 color connector to the player's A/V OUT jack:
- Follow the picture and plug in the 3 color connector to the TV's A/V IN jack. This allows you to connect the content in the player to your TV or other display devices.
natural_image
Diagram showing connections between a computer monitor, cable ports, and a wireless router (no text or symbols present)2.3.3.2 Y/Pb/Pr Component OUT
- Follow the picture and plug in the connector of the YUV cable to the player's Y/Pb/Pr jack:
- Follow the picture and plug in the 3 color connector to the TV's Y/Pb/Pr jack.
Audio Connection while using Y/Pb/Pr Video out:
First method: use the audio output from the A/V OUT jack;
Second method: use the audio output from the S/PDIF Coaxial or Optical jack.

natural_image
Diagram showing connections between a computer monitor, cable ports, and an electronic device with a wireless signal (no text or symbols present)This allows you to enjoy your media content in the player, on your TV.
2.3.3.3 HDMI OUT
- Follow the picture and plug one connector on your HDMI cable to the player's HDMI jack;
- Follow the picture and plug the other connector on your HDMI cable to the TV's HDMI jack.

natural_image
Diagram showing connection between a computer monitor, USB cable, and network device (no text or symbols present)This allows you to enjoy your media content in the player, on your TV.
2.3.4 Digital Audio Device connection
- Follow the picture and plug in the RCA connector on your coaxial cable to the player's S/PDIF Coaxial jack. Or if you use optical fiber, please plug in the Toslink connector on your optical fiber to the player's S/PDIF Optical jack; (not supplied)
- Follow the picture and plug in the other connector on your coaxial cable or optical fiber to the digital audio device. (not supplied)

natural_image
Diagram showing audio equipment connections: two speakers connected to a CD-ROM and a wireless router with USB port (no text or symbols)2.3.5 Connecting to a LAN
To connect to a LAN (Local Area Network) you require a cat5, cat5e or cat6 network cable (not supplied).
- Connect one of the crystal plugs on the cable to the player's RJ45 LAN socket;
- Connect the other crystal plug on the cable to a RJ45 LAN port on your router, switch, or hub devices.

2.3.6 Connecting to a WLAN
- Make sure the player is powered on;
- Search for your router's SSID and then key in the correct security key if necessary.
Note: (Please refer to '3.1.4 Changing Network Settings' for more details about wireless setup)
2.4 Front Panel
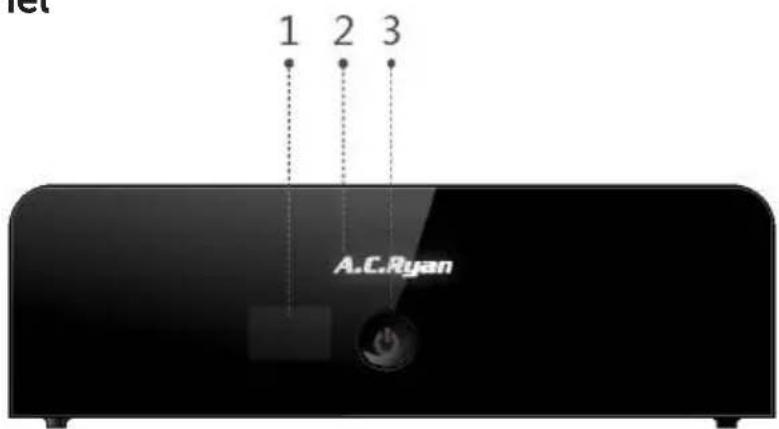
- Infrared receiver window
-
Working indicator
-
Power button & indicator
2.5 Back Panel
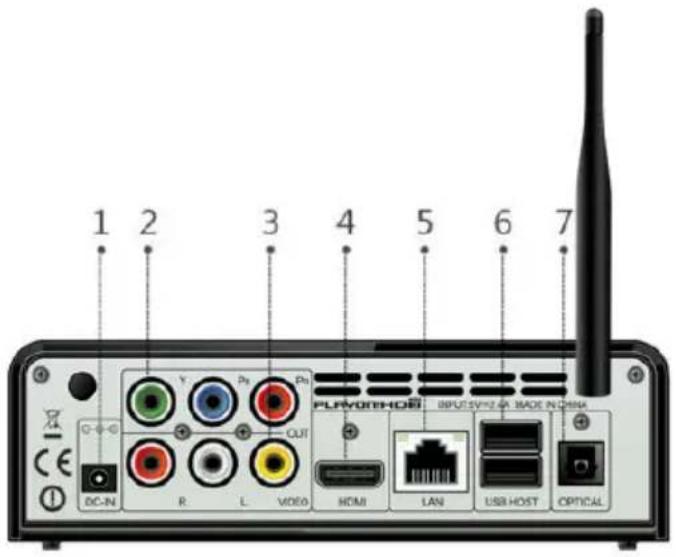
-
DC-IN jack
-
RJ45 LAN socket
-
Y/Pb/Pr OUT jack
-
USB 3.0/2.0 HOST port
-
A/V OUT jack
-
S/PDIF Optical jack
-
HDMI jack
2.6 First Time Usage
2.6.1 Power On / Off
Power On
After connecting the DC IN jack, press the power button on the front panel. The indicator will gradually turn to white. And the player will enter the home screen soon.
Power Off
Press the power button on the front panel, the player will soon enter standby mode. At the same time the working indicator will gradually turn red. Then unplug the power cord to cut off the power supply.
2.6.2 Menu language
The system language of this player can be set to English or other languages. Change the language you wish in the setup menu, the selected language will take effect immediately.

2.7 Remote Control
- Power 2. Numeric but- tons
- Zoom 4. Red/Select
- Green/6. VOL+ Confirm
- VOL- 8. Home
- OK /Enter 10. Navigational buttons
- Menu 12. FRWD
- Play 14. Slow
- Pause 16. Repeat
17.Goto 18. A-B - Angle 20. TV Sys.
- Eject 22. Files
- Edit 24. Blue
- Yellow 26. Prev
- Info 28. Next
- Mute 30. Return
- Setup 32. FFWD
- Stop 34. Subtitle
- Audio 36. CM skip
- Replay

| No. | Button Function | |
| 1 | Power Press to enter standby mode or wake up. | |
| 2 | Numeric buttons Press to enter channel numbers or numeric input when changing settings. | |
| 3 | Zoom Press to zoom the image (photo or video). | |
| 4 | Rod/Select Press to select files in file selecting menu. | |
| 5 | Green/Confirm Function is available in virtual keyboard. | |
| 6 | VOL+ Press to increase the volume. | |
| 7 | VOL- Press to decrease the volume. | |
| 8 | Home Press to enter the home screen. | |
| 9 | OK/Enter Press OK button to confirm. | |
| 10 | Navigational buttons | Press the arrow buttons to select menu options, and the OK button to confirm. |
| 11 | Menu Press to enable the option menu, where you can change the review mode of file manager and media library. Press to display or hide the option menu during playback. | |
| 12 | FRWD | Press to fast rewind the current playback. Press repeatedly to select speeds. |
| 13 | Play Press to begin playback. | |
| 14 | Slow | Press to play back in slow motion. Press the PLAY button to resume regular playback. |
| 15 | Pause Press to pause playback or slideshow. | |
| 16 | Repeat Press to set repeat option. | |
| 17 | Goto Press to jump to a specific point on a title. Specify the point using Title, Chapter and Time. | |
| 18 | A-B | Press to set the beginning and end points of a section to repeat. |
| 19 | Angle Press to change the view angle during DVD (with multi-angle) playback. | |
| 20 | TV SYS. | Press to switch between NTSC, PAL, 480P, 576P, 720P, 1080I, and 1080P. |
| 21 | Eject Press to safely remove the USB device. | |
| 22 | Files | Press to enter file manager. |
| 23 | Edit | Press to enter file editing menu in file manager. Press to enter file selecting menu in media library. |
| 24 | Blue | Press to open/close USB DVD-ROM. |
| 25 | Yellow | Display / close text console in the browser/internet media. |
| 26 | Prev | Press to view the previous file / page up. |
| 27 | Info | Press to display current status. Press during playback, an on-screen display appears showing track number and time elapsed/remaining. |
| 28 | Next Press to view the next file / page down. | |
| 29 | Mute Press to mute audio output, and press again to resume. | |
| 30 | Return | Press to return to the previous screen while navigating menus. |
| 31 | Setup | Press to enter the setup menu. |
| 32 | FFWD | Press to fast forward the current playback. Press repeatedly to select speeds. |
| 33 | Stop Press to stop playback. | |
| 34 | Audio Press to select an audio track. | |
| 35 | Subtitle | Press to set subtitle options. You can change the color/size/offset/text encoding of subtitle. |
| 36 | CM Skip | Press to advance 30 seconds of the current playback. |
| 37 | Replay | Press to rewind 10 seconds of the current playback. |
3 Main Functions
3.1 Setup Menu
The Setup menu allows you to personalize and configure the preferences for your player. Select the Setup icon on the home screen or press Setup button on the remote control. There are five setup options, including System, Audio, Video, Network and Misc. Use the Prev/Next (Chapter) buttons to switch categories.
3.1.1 Changing System Settings
Use this menu to configure system settings.

Menu Language
- Select to choose the OSD (On-Screen Display) language.
Text Encoding
- Select to set the text encoding option (subtitle display and .cue playback)
Change system font
- Select to change system font.
- Create a folder named "Resource" in the root directory of your USB or HDD, rename your font as 'font.ttf' and then copy it to the folder.
Change Desktop
- Select to change the photo of main menu.
- Create a folder named "Resource" in the root directory of your USB or HDD, rename your photo as 'desktop.png' and then copy it to the folder.
DVD Auto-Play
- Select to turn on/off DVD auto-play.
Show all files
- Select to display all hidden files (non-media files).
Screen Saver
- Timing Select to change timing of screen saver.
- Options Select to change screen saver.
DLNA DMR
• Digital Media Renderer, can play content received from a digital media controller (DMC), which will find content from a digital media server (DMS)
Host Name
- Select to name DLNA DMR (default is PLAYON!HD3)
Keyboard input method
- Select to change the desired virtual keyboard input language.
Clear History
- Select to clear the database of indexed movies/music/photos.
Scan storage
- Select to set the scan mode of media library.
Resume Play
- Select to turn on / off resume playback (auto-bookmarking) feature for movies.
BD-Lite Menu
• Select to display Bluray Lite Menu's
Restore Default
- Select to restore factory defaults.
3.1.2 Changing Audio Settings
Use this menu to configure audio settings.

Night Mode
- Choose among Off / On / Auto. If the option is turned on, the audio output volume will be decreased or choose auto to auto-adjust dialogues and background audio at a normalised level.
HDMI Output
- Choose among RAW, LPCM and Auto.
SPDIF Output
- Choose among LPCM, RAW.
Note: In pass-through mode, Dolby TrueHD, Dolby Digital Plus, Dolby Digital and DTS sound can be bypassed to the HDMI TV or Digital amplifier.
Due to the bandwidth requirement, Dolby TrueHD and Dolby Digital Plus sound only can be bypassed brought HDMI cable, also the TV system must be 720p or above.
3.1.3 Changing Video Settings
Use this menu to configure video settings.

Aspect Ratio
- Pan Scan 4:3: Displays a wide picture on the entire screen and cuts off the redundant portions. Select when a standard 4:3 TV is connected.
- Letter Box 4:3: Displays a wide picture with two black borders on the top and bottom of 4:3 screen. Select when a standard 4:3 TV is connected.
• 16:9: Compress the image to convert the whole image. Select when a 16:9 TV is connected.
• 16:10: Select when a 16:10 TV is connected.
TV SYSTEM
- Select to adjust video output resolution. This setting depends on your display type and its compatible modes.
480P/576P - Choose this if your player is connected via composite A/V cables to a conventional (CRT) TV.
720P/1080i - Choose this if your player is connected via component cables or HDMI cable to a display that does not support Full HD resolution.
1080P/HDMI Auto - Choose this if your player is connected via HDMI cable to your display that supports Full HD resolution.
1080p 24Hz
- Choose this option to enable or disable 1080P 24Hz support. A TV display that supports 1080P 24Hz (24P) mode is required for this to function correctly.
Plasma Mode

- Help to protect your plasma TV by reducing the level of brightness. Choose between Dark / Dim / Light for the best results.
Deep Color
- Provides more detailed level of color depth, and makes continuous color change smoother. You can get more vivid color effects with this setting. A TV display with deep color support is required for the best results.

Screen Size
- Adjust the video output size according to the size of your display screen. And press Zoom button to Fit the screen size you have set during video playback.
3.1.4 Network
Use this menu to configure your local network settings.

Wired Lan Setup
• DHCP IP (AUTO)
Select to obtain IP address automatically (DHCP must be enabled on your Router).
• FIX IP (MANUAL)
Select to manually input the IP Address, Subnet Mask, Default Gateway, and DNS Server IP Address.
Wireless Setup
There are 3 modes for you to select, Infrastructure (AP) and Peer to Peer (Ad Hoc) and WPS (AP) mode. Follow the prompting message on the screen and press Play button to choose Peer to Peer (Ad Hoc) or WPS (AP) mode.
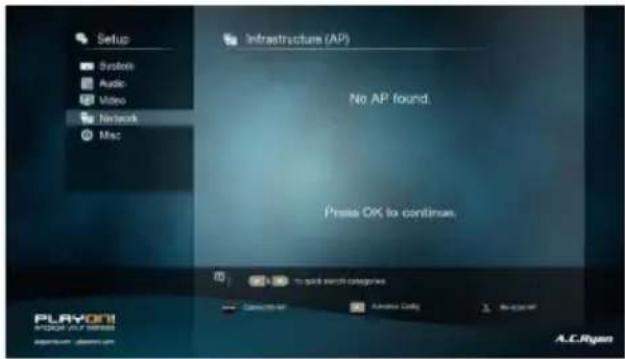
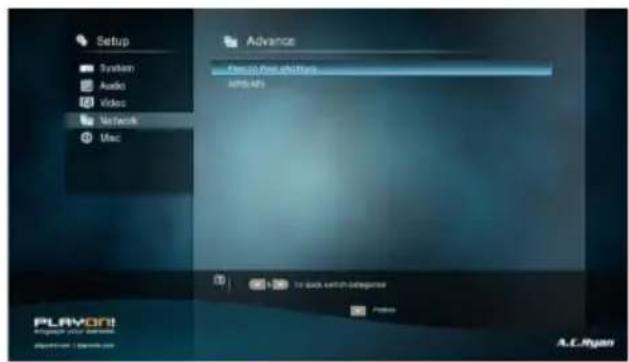
This player can store up to three wireless network connections. Press OK to connect, press Return to cancel, press Zoom to rescan the AP's and press Play button to choose Peer to Peer (Ad Hoc) or WPS (AP).

Infrastructure (AP)
- Infrastructure mode is used to connect computers with wireless network adapters. Also known as wireless clients to an existing wired network with the help of a wireless router or access point. Please take the following steps to configure your wireless network.
Step 1, Scanning AP (Access Point) in your network
Follow the prompting message on the screen and press the Zoom button to select Infrastructure (AP) mode and update the access points list, and all SSID will be displayed on the screen.


Step 2, Input WEP / WPA key
Press OK to input encryption keys via the virtual keyboard. Press the navigational buttons to select, OK to input, FFWD to move cursor left, FRWD to move cursor right, Zoom to switch between uppercase and lowercase, Stop to delete a character, Play to make more symbols available, Green to change the language of the virtual keyboard, OK to confirm and to start testing the connection.


The testing process will take a while, please be patient. If the test is ok, the network information (Profile Name, IP address, Subnet Mask, Gateway, etc.) will be displayed on the screen.
Peer to Peer (Ad Hoc)
- Peer to Peer mode, which is also called Ad Hoc mode or computer-to-computer mode, is used to connect wireless and wired clients directly together, without the need for a wireless router or access point.

Step 1, Specify your SSID name
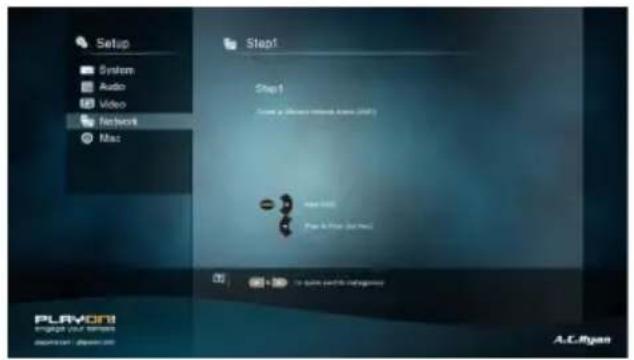

Step 2, Specify your host IP


WPS (AP)
- WPS, Wi-Fi Protected Setup, is used to connect a wireless router directly, without searching SSID and inputting password. In this mode, you just need to configure the parameters of your router which support WPS function. There are two modes for you to select, PBC mode and PIN mode.

PBC
First press the WPS button on the router or select the button mode in the configuration menu of the router, then select the PBC mode, the connection process will take a while, please be patient.
PIN
Input the pin code when you configure your router, then select the PIN mode, the connection process will take a while, please be patient.
PPPOE Setup
- Input the ADSL account and password in this menu, system will obtain IP address automatically from the server based on PPPOE protocol.
Step 1, Select the connection interface, wired or wireless

Step 2, press Right button to input your ADSL account

Step 3, press Right button to input your password and start to test the connection.
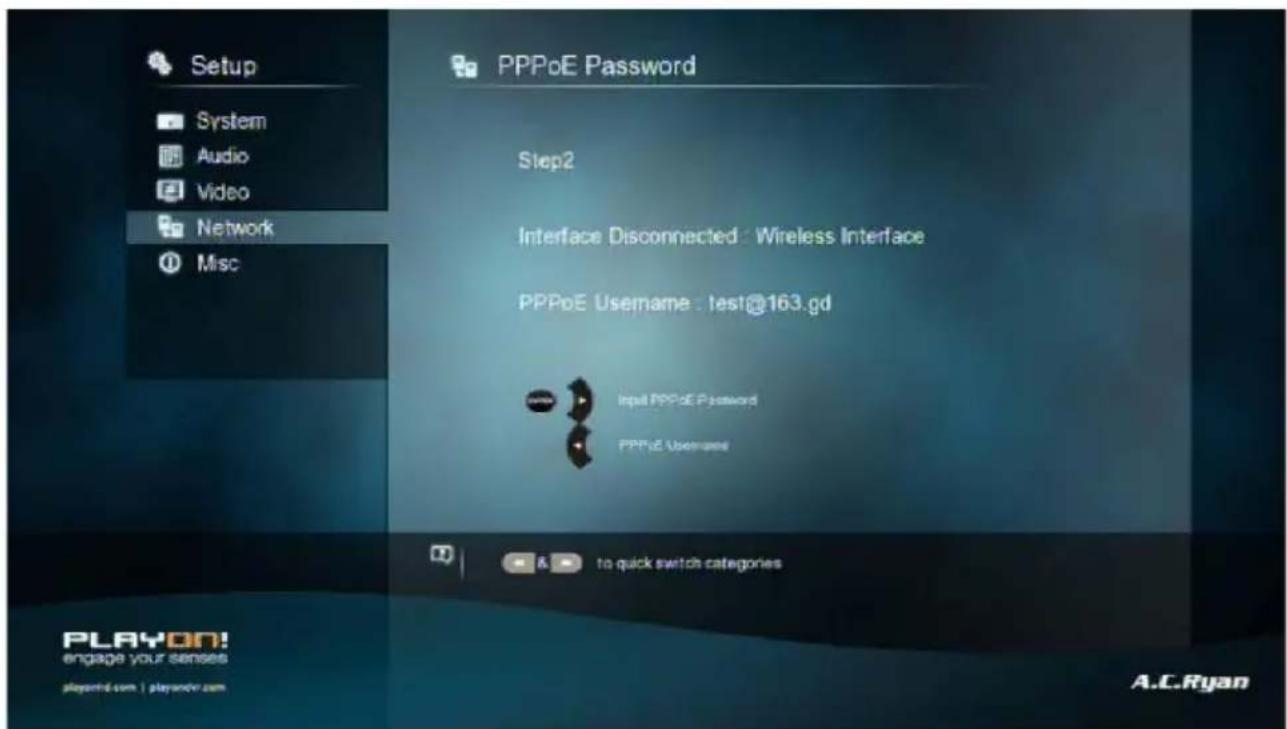
SAMBA Process
- Select to turn NAS function to On/Off. Please refer to 'SAMBA Server' for more details on NAS function of this product.
Transmission
- Select to turn Transmission Torrent Client On/Off. Please refer to 'Transmission Download' for more details on this feature.
FTP
- Select to turn on / off FTP services and to configure your desired login User Name and Password. Please refer to 'FTP Server' for more details on this feature.
UPnP Server
- Select to turn On/Off the built-in UPnP Server NOTE: the UPnP Server will be default Off after reboot!
3.1.5 Miscellaneous
Use this menu to adjust miscellaneous settings.
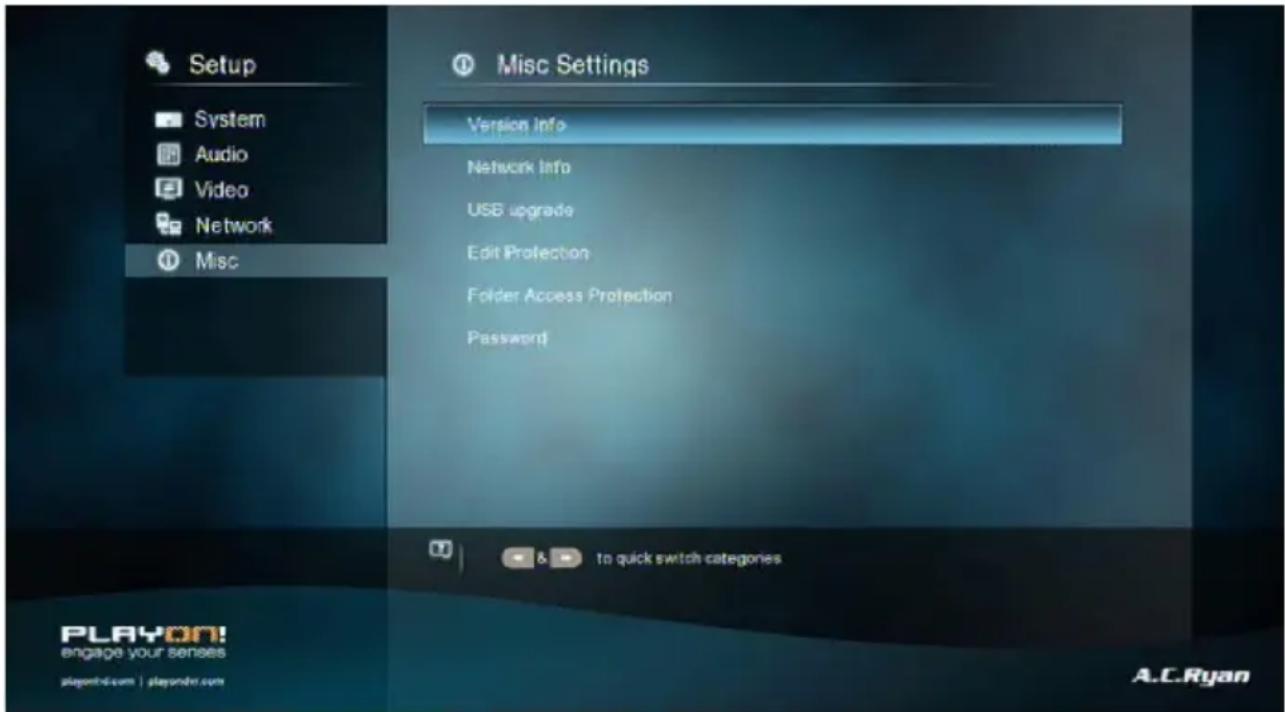
Version Info
- This tab shows you information about the software version installed and the material components of your player.
Network Info
- This tab shows you information about your network, MAC Address, IP address Gateway, Subnet.
USB Upgrade
- Select to update the firmware via a USB stick.
- Copy 'install.img' or extension files to the root directory of a FAT32 formatted USB stick, and connect it to the USB HOST port of the player.
- Press OK to confirm.
Edit Protection
• To prevent deleting files and formatting HDD by asking for a password.
The default password is '0000'. Press the numerical buttons to input, and the OK button to confirm.
Password
• Change the password.
The default password is '0000'. Press the numerical buttons to input, and the OK button to confirm.
Autoplay
- Create a folder and name it "autoplay" (without the quotation marks) and copy your media file types you wish to automatically play. If you have mixture of media types in the same folder, please select the type that you wish to autoplay in the setup menu.
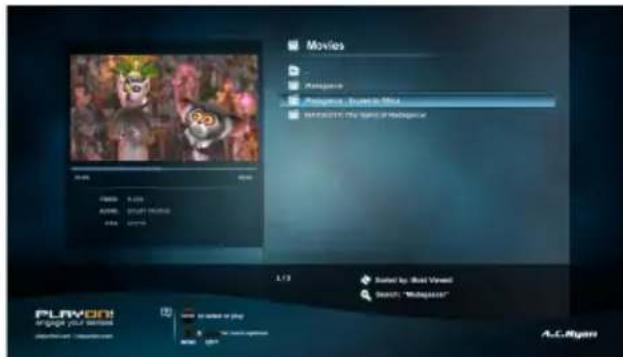
3.2 Movie Library
Enter into movie interface, only supported files will be displayed. Please refer to Appendixes in chapter '5.1 Specifications' for more details about the supported files.

3.2.1 Movie Library Options
In movie library, press the Menu button to display the option menu, the following functions are available through the option menu.
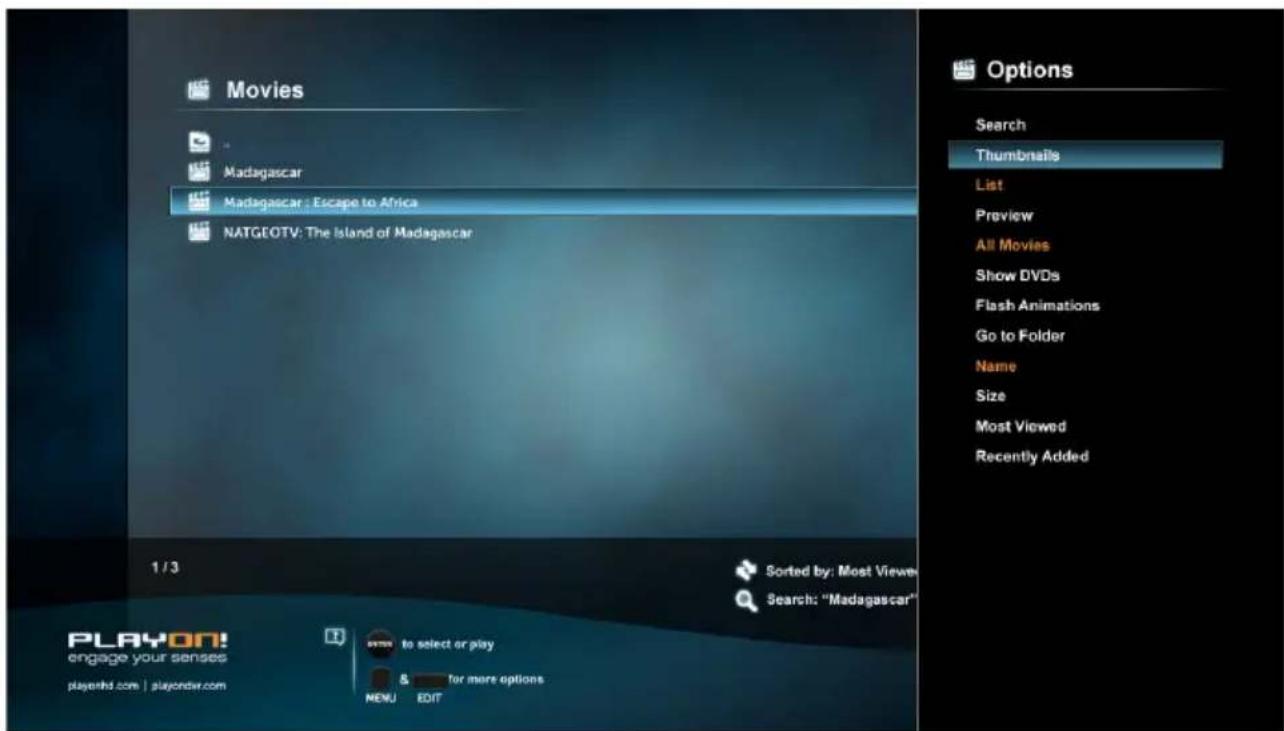
Quick-Search
- Choose the Search option in the option menu, you can search for a media file by filter media library to locate the specific media file.
Layout Mode
- Choose a layout mode by Thumbnails, List and Preview from option menu.
Sorting Mode
- Choose to sort by Name, Size, Most Viewed or Recently Added from option menu.
Show BD/DVD
- Choose to display DVD IFO, BD MV and ISO files directly in media library.
Flash Animation
- Choose to display .swf file format in media library.
Go to Folder
- Choose to locate the file in file manager.
3.2.2 Movie Playback Control
You can access the following functions during playback.
| Button Function | |
| Play Start or resume the playback. | |
| Pause Pause the current playback. | |
| Prev/Next View the previous or next file/chapter. | |
| FRWD/FFWD Fast rewind or fast forward. Press repeatedly to select the speed. | |
| Slow Play back in slow motion. | |
| Goto Jump to a specific point on a title. Specify the point using Title, Chapter and Time. | |
| Menu Display or hide the option menu during playback. | |
| Stop Stop playback. | |
| VOL+/- Increase/decrease the volume. | |
| Audio Select an audio track. | |
| Subtitle Select a subtitle and change the color/size/offset/text encoding of subtitle. | |
| Repeat Set the repeat option. | |
| Zoom Zoom in the image. | |
| Info View the media information. | |
| CM Skip Press to advance 30 seconds of the current playback. | |
| Replay Press to rewind 10 seconds of the current playback |
3.2.3 Movie Playback Options
During movie playback, press Menu button to display or hide the option menu at the side of the screen.
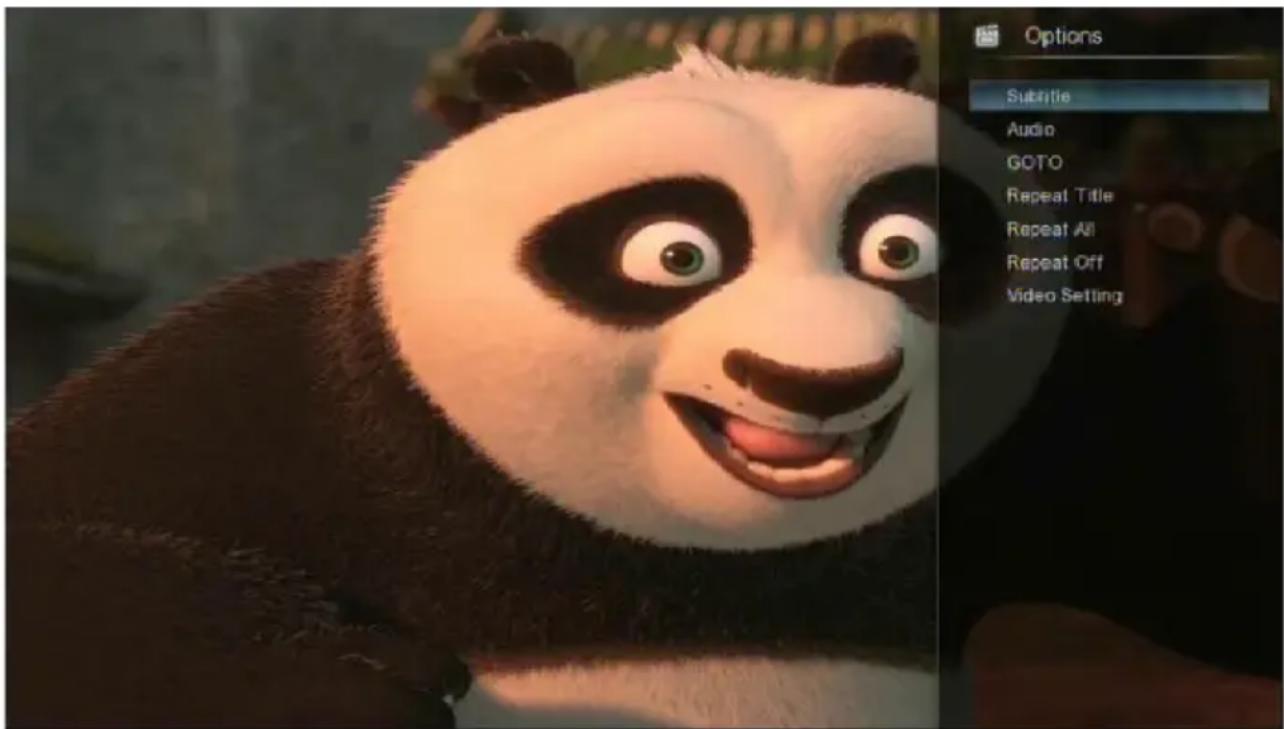
You can also access functions such as audio track, subtitle and repeat mode through the Option Menu during video playback.
DVD Menu
- Select to return to the navigation menu during DVD IFO or ISO playback.
- Title Menu / Root Menu return to the main menu of entire disc during DVD playback.
BD Menu
- Top Menu / Menu - Select to return to the Title Menu or Main Menu
2D/3D (3D display required)
- Select 3D simulation to convert your 2D video into 3D.
- Select 3D if you are playing a 3D file, such as a bluray 3D title.
- Select 3D Side by Side or 3D Top Bottom if your video file is already encoded in one of these formats.
3.3 Photo Library
Enter the photo interface, only supported image files will be displayed. This player supports JPEG/HD JPEG/BMP/GIF/TIF/PNG files.


3.3.1 Photo Library Options
In photo library, press Menu button to display the option menu, you can access the following functions trought the option menu.

Quick-Search
- Choose the Search option in the option menu, you can search for a photo by filter photo library to locate the specific photo.
Layout Mode
- Choose a layout mode by Thumbnails, List and Preview from option menu.
Sorting Mode
- Choose to sort by Name, Recently Added or Recently Played from option menu.
Folder Directory
- Choose to show all folders.
Leaf Folder View
- Choose to show all folders that included photo.
Date View
- Choose to view photo by date.
3.3.2 Photo Playback Control
You can access the following functions during photo playback.
| Button Function | |
| Prev / Next View the previous or next photo. | |
| Up / Down Rotate a photo in any angle. | |
| Menu View the previous or next file/chapter. | |
| Stop Stop playback. | |
| Zoom Zoom in on the image. | |
| Info Display picture information | |
| Play Play / pause a slideshow | |
| Pause Play / pause a slideshow |
3.3.3 Photo Playback Options
During photo playback, press Menu button to display or hide the option menu at the bottom of the screen. The following functions are available through the Option menu during photo playback.

Slide Timing
- Select to choose the Interval and start a slideshow.
Slide Transition
- Select to choose the Transition effects
Repeat Mode
- Choose a repeat mode among Repeat off, Repeat all and Shuffle Loop from option menu.
Select Music
- Select to turn on/off background music during slideshow playback.
- Select a special music as the background music during photo playback
2D/3D (3D display required)
- Select 3D Auto to convert your 2D image into 3D.
- Select 3D Side by Side or 3D Top Bottom if your image file is already encoded in one of these formats.
Video Setting
- Select to adjust the value of Brightness, Contrast, Saturation and Hue.
3.4 Music Library
Enter music interface, only supported audio files will be displayed. This player supports AAC/LC-AAC/HE-AAC/MP2/MP3/FLAC/WAV/MS-ADPCM/OGG/Vorbis/PCM/LPCM/COOK/RA-Lossless/WMA Standard audio files.Vorbis/PCM/LPCM/ COOK/RA-Lossless/WMA Standard audio files.
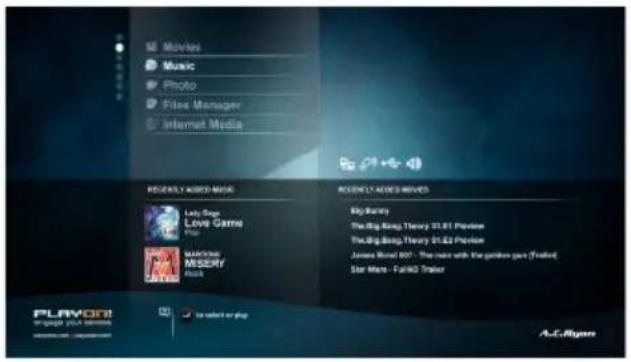
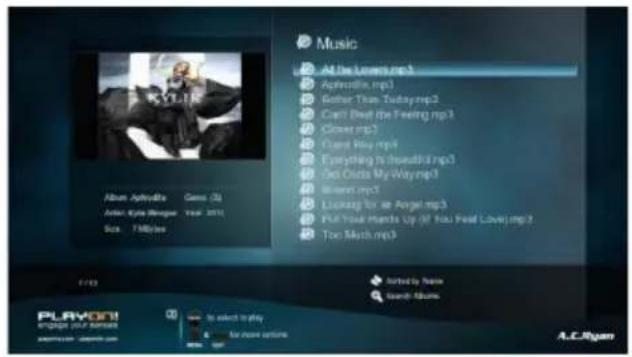
3.4.1 Music Library Options
In music library, press Menu button to display the option menu, the following functions are available through the option menu.

Quick-Search
- Choose the Search option in the option menu, you can search by filter music library to locate the specific music.
Layout Mode
- Choose a layout mode by Thumbnails, List and Preview from option menu.
Filter options
- Choose Albums to search for music files by album.
- Choose Artists to search for music files by artist.
- Choose Genres to search for music files by genre.
- Choose Years to search for music files by year.
- Choose Playlists to search for playlists.
Sorting Mode
- Sort your music by Name, Recently Added or Recently Played from option menu.
Go to Folder
- Choose to locate the file in file manager.
3.4.2 Music Playback Control
You can access the following functions during music playback.
| Button Function | |
| Play/Pause Begin/Pause playback. | |
| FRWD / FFWD Fast rewind or fast forward. Press repeatedly to select the speed. | |
| Prev / Next View the previous or next movie. | |
| Menu Display or hide the option menu during playback. | |
| VOL+/- Increase/Decrease the volume. | |
| Repeat Set the repeat option. | |
| CM Skip Press to advance 30 seconds of the current playback. |
3.4.3 Music Playback Options
During music playback, press Menu button to display or hide the option menu at the side of the screen. Access the following functions trought the Option menu during music playback.

Repeat Mode
- Choose a repeat mode among Repeat off, Repeat one, Repeat all and Shuffle Loop from option menu.
3.5 File Manager
The file manager allows you to browse and play music, photo and movie files stored on an external USB device or network.
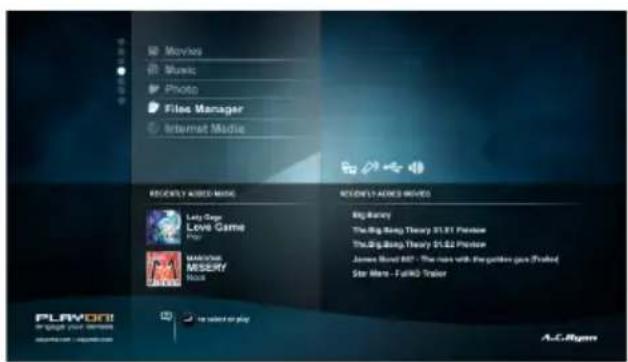
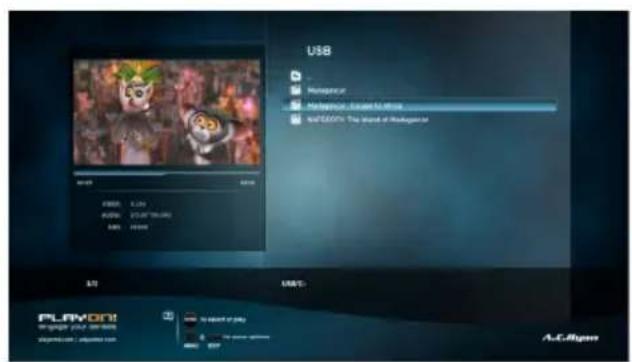
In file manager, press Menu button to display the option menu and access the following functions brought the option menu.

Layout Mode
- Choose a layout mode by Thumbnails, List and Preview from option menu.
Filter options
- Choose All Media to display all the supported media files in current directory.
- Choose Movies to display all the the supported video files in current directory.
- Choose Photos to display all the supported image files in the current directory.
- Choose Music to display all the supported audio files in the current directory.
3.5.2 A/V Streaming via Network
In file manager, go to the Network selection to start searching for available network host names in your local network setup.
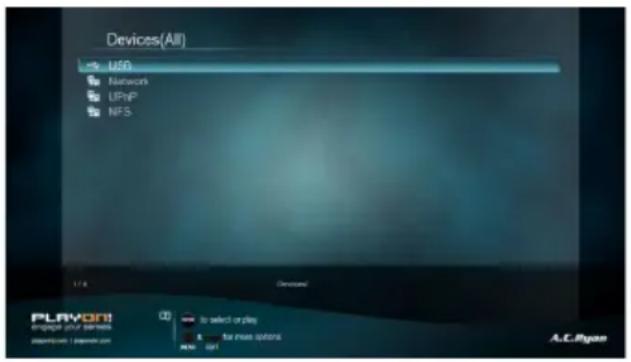

You can stream your media files shared on the home network. Please refer to '3.1.4 Changing Network Settings' for more details on network settings.
There are two ways to locate media files shared on your local network in the Network menu. One is to browse through Workgroup; the other way is to browse through 'My Shortcuts'.
3.5.2.1 Browsing through workgroup
You can choose the workgroup which your PC belongs to from the workgroup list, find your PC name, and press the OK button to confirm. Then you can select and play the shared media files that you want to browse.
Note:
- Due to different network conditions, sometimes the workgroup might not be accessed or shown in the list. And then you need to use 'My Shortcuts' to browse shared files.
3.5.2.2 Browsing through 'My Shortcuts'
You can set 'Specific File Server IP' and access it from 'My Shortcuts' in the menu.
- Press the Menu button and a pop-up menu appears.
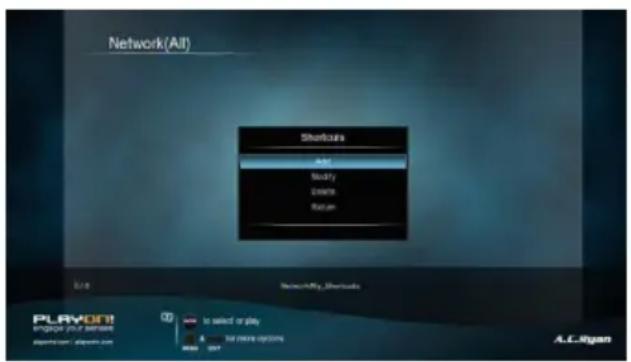

- Select Add to open a popup menu where you can input Label, Net User ID, Net Password, Domain, Host Name, and Specific File Server IP. Select OK to confirm, Cancel to cancel, and Simple / Detail to switch between simple and advanced options.
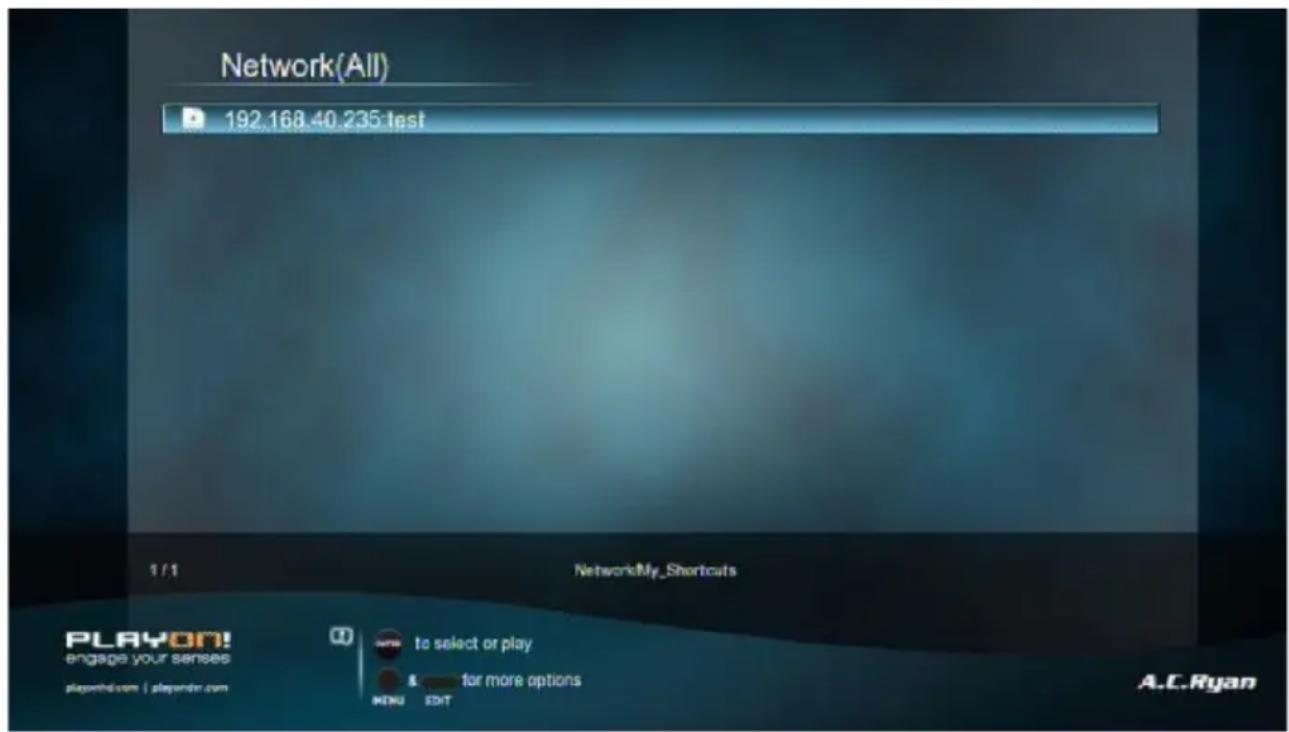
- Select the shortcut you have added and press the OK button to confirm. Then you can select and play the shared media files on the destination computer.
3.5.3 A/V Streaming via UPnP-server
A built-in UPnP (Universal Plug and Play) client has been integrated on the system, which enables the player to auto-detect UPnP Media Servers on the network to browse and stream media files from them.
3.5.3.1 Installing UPnP Media Server on your PC
There are a lot of free and commercial UPnP Media Server software, such as Windows Media Connect, Windows Media Player 11, XBMC Media Center (Linux/Mac/Windows), MediaTek (Linux), etc. Please install one of them on your computer. In the following chapters, we will take Windows Media Player on Microsoft Windows 7 as an example.
3.5.3.2 Sharing Media on your PC
The Media Sharing feature of Windows Media Player lets you enjoy the contents of your Windows Media Player library from anywhere in your home.
- Open Windows Media Player, click Organize -> Manage libraries to add or remove media files from the library.as an example.

- Click Stream -> More streaming options, then you can allow or deny devices to access the media library. Click Allow to authorize your player.
3.5.3.3 Streaming Media on your Player
- Connect your player to the home network (LAN or WLAN).
- Visit File Manager -> UPnP menu on the player, select the UPnP-server, and press OK.


- Then you can browse the media library shared by Windows Media Player.
Note:
• Make sure your player and your computer are on the same local area network and subnet.
- Firewalls may prevent your player communicating with your computer. Please open the ports manually and add your player to the 'trusted' list, or disable the firewall temporarily.
3.6 Playlist management
The file manager allows you to browse and play music, photo and movie files stored in the external USB device or network.
3.6.1 Music playlist
To create a playlist you can browse to your music files via the 'Music' shortcut in main menu or via the file manager. Press the Edit Button on one of your music files and select 'Multiple Select'. Add the files you wish, press the Edit Button and choose 'Save Playlist'.
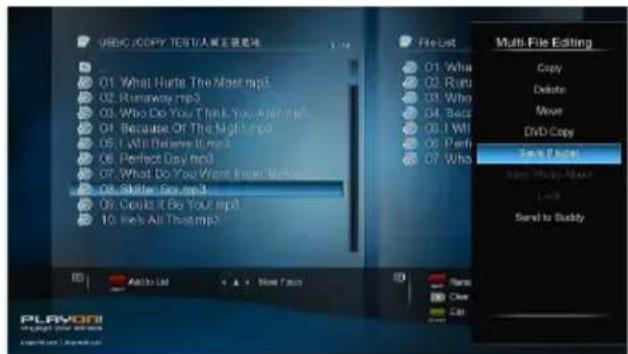

Enter music library, press Menu button and choose Playlists to show your music playlists available on your external USB devices.
3.6.2 Photo Album
To create a photo album you can browse to your photo files via the 'Photo' shortcut in main menu or via the file manager. Press the Edit Button on one of your photo files and select 'Multiple Select'. Add the files you wish, press the Edit Button and choose 'Save Photo Album'.


Enter photo library, press Menu button and choose Albums to show your photo albums available on your external USB devices.
3.7 Files operation
• On a file or folder, press the Edit button and select Multiple Select.
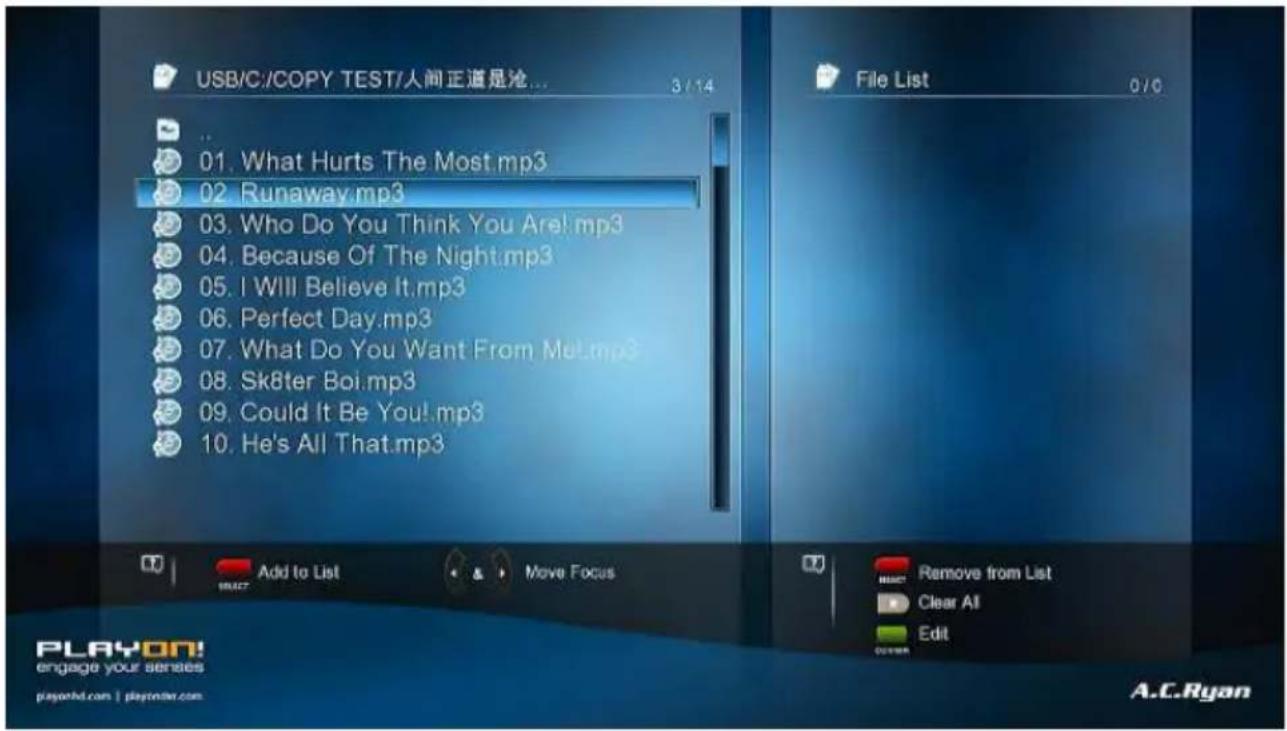
- Press Red button to select file or folder which you want to copy to the list.
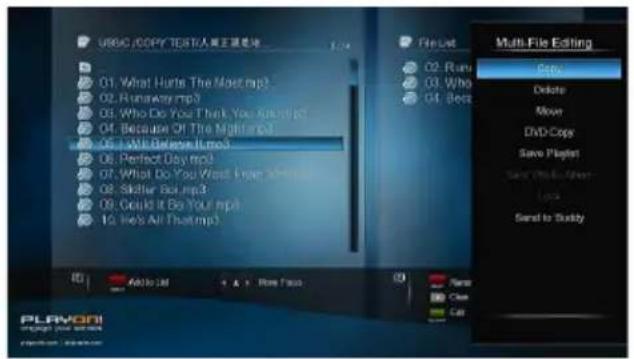
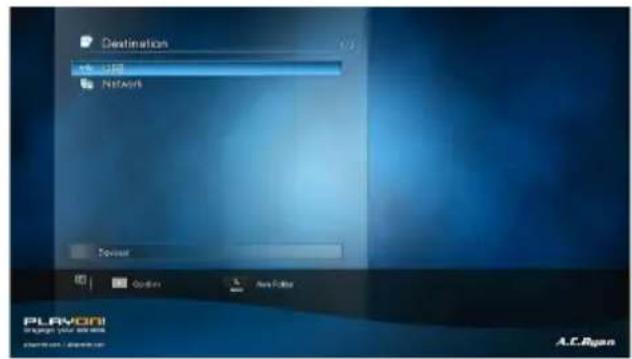
- When you are done selecting, press Green button to confirm.
- Select mode of operation, and then follow the prompt on screen to finish the process.
3.7.1 Single file operation
On a file or folder, press the Edit button to display the file editing menu, choose Copy and follow the prompt on screen to finish the process. If you want to select more files and folders, please choose Multiple Select to enter the file selecting menu as explained earlier.

3.8 Internet Media
This feature is an additional function. All content and services provided through this feature are from third-party service providers, our company does not offer any content and services of this feature and therefore is not responsible for any content and services provided under this feature. Our company is not responsible for any operational stability of the content and services, for example, if you cannot access a certain trough for video streaming or news broadcast, or the content of a trough has been changed etc, the third party service provider controls and is responsible for this. If you find that these features cannot operate properly, please contact our customer service or visit our company website to obtain the relevant information.
Please find following the instructions for SHOUTcast radio.
3.8.1 SHOUTcast Radio
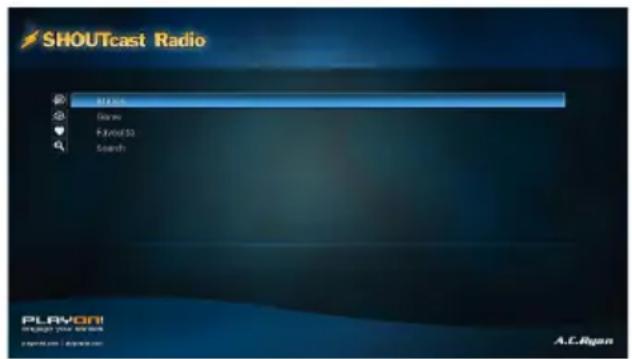
Select SHOUTcast Radio icon to get all free internet radio stations, press OK to select and play radio station, press Return to go back to the previous level.

Note:
- When you enter the Digital Radio menu for the first time, it will take several seconds to download data from the Internet, please be patient;
• For more about SHOUTcast, please refer to the website: www.shoutcast.com.
Station
• All downloaded stations will be listed under this menu.
Genre
• You can search for stations by genre (pop, rock, jazz, etc.) under this menu.
Favorite
- Your favorite stations can be kept under this menu..
Search
- You can search for stations with the on-screen virtual keyboard under this menu.
3.9 Torrent function (using Transmission client)
Once Transmission is enabled in SETUP -> NETWORK -> Transmission 'On' you are able to access the Transmission web control via your favorite browser on port 9091. For example: 192.168.1.20:9091 (where 192.168.1.20 is the IP address of your player connected to your router) Here you can add / remove / pause / start your torrent downloads. You are also able to edit your settings for the current session by clicking on the smaller symbol on the bottom left corner off the screen.

3.10 Jukebox
(YetAnother) MovieJukebox is a command line tool, written in Java, which recursively scans your video library for video files (AVI, MKV, VIDEO_TS, BluRay, etc.) and analyzes these files in order to extract information like: year, language, subtitles, container, part, fps, audio and video codecs. Other movie and television information like, director, rating, etc. are collected using various plugins for online databases such as IMDb, TheMovieDB, TheTVDB, Allocine, FilmAffinity, FilmWeb, etc.
MovieJukebox then generates the indexes that are compatible for displaying in the AC Ryan Playon! series media boxes.
Getting Started
1. Launch YAMJ for AC Ryan
Please download the latest version from our support page at (http://www.acryan.com/support/)
Launch the program by double clicking on the icon on your desktop or from the Start Menu, AC Ryan MovieJukebox

The program will prompt you to install Java runtime if it does not detect any Java installation in your system.
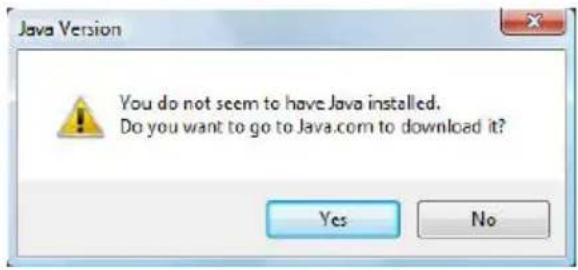
Please select Yes to proceed with the installation of Java.
2. Running YAMJ for AC Ryan
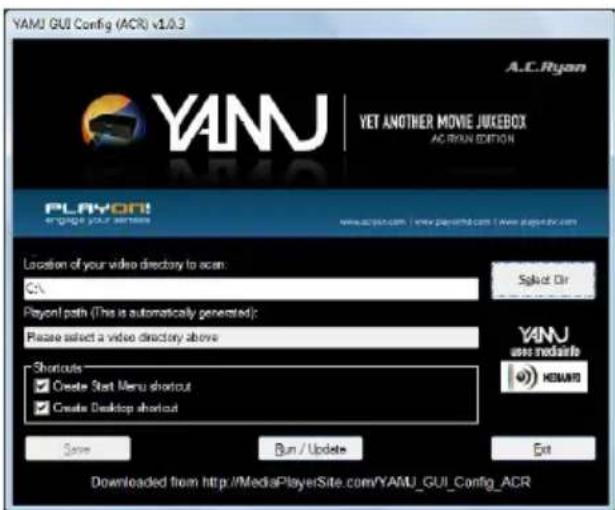

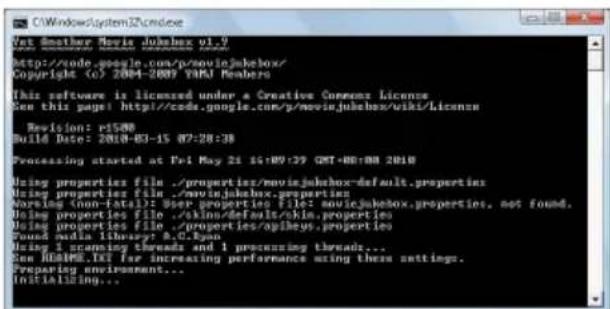

2.1 Select the directory of your stored movies on any external USB storage device or network attached storage (NAS) which you will use to run the Movie Jukebox on the player.
Note: Generating the necessary information to a network device may take a longer time than doing the same via USB.
2.2 Press the Save button to save the directory information. Press Ok to close the dialog box.
2.3 Press Run/Update to start generating the Jukebox. An active internet connection is required to obtain the movie information.
2.4 Press any key to close the command window after the generation is completed.
3 Updating existing Jukebox
You can update the existing Jukebox if you have add/remove movies to the previously saved directory.
Launch Run or Update YAMJ by double clicking on the icon on your desktop or from the Start Menu, AC Ryan Movie Jukebox

Running Movie Jukebox
From the Home menu screen, select Jukebox icon to enter the Movie Jukebox menu.
Go to the location of your Jukebox where it was generated with YAMJ for AC Ryan.

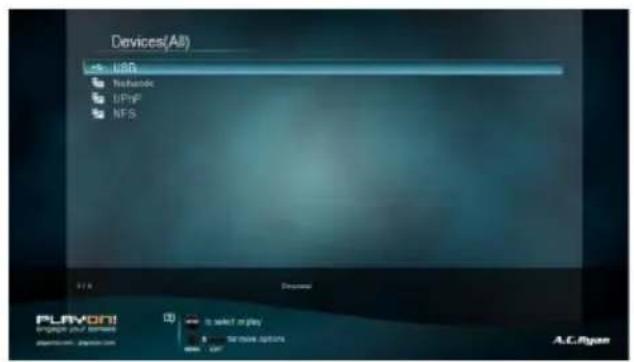
Upon entering the location, the system will search and display all generated Jukebox information for loading (if you have more than one)
A message box will ask if you want to update the selected Jukebox
- Choose OK if you are loading it for the first time or made any changes.
- Choose Cancel to continue loading for the second time or if you did not do any changes.
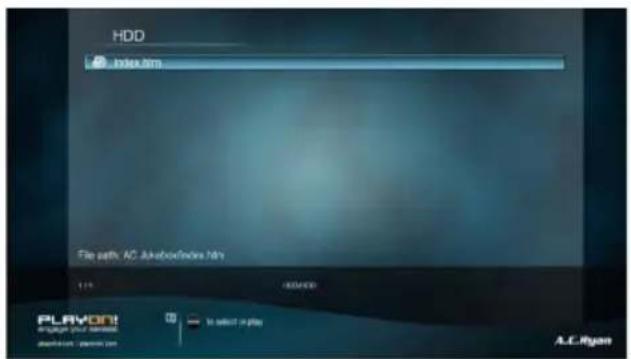
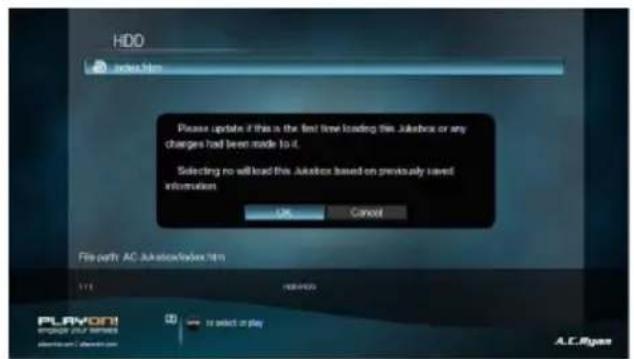
*: Updating the Jukebox for the first time may take a while depending on the location of your stored Jukebox and the amount of movies this Jukebox has. You can speed load the same Jukebox again the next time by selecting Cancel.
If you have added/removed any new contents to your current Jukebox, please generate again with Run or Update YAMJ and then select Yes to update and load with the new Jukebox information. Choosing Yes is also required for loading Jukebox for the first time.


Selecting Other – All from the category page will display all cover arts in the Jukebox in a thumbnail layout. You can also use the category page to sort and display your movies according to Genres, Title, Rating, Year, etc.
Selecting any movie from the thumbnail will display the movie details as well as the movie synopsis, star rating, etc as generated by YAMJ for AC Ryan Press the OK button on your remote control to start playing the movie. Enjoy.
3.11 SAMBA Server and Client
This player can be used either as a SAMBA Server or as a client.
3.11.1 SAMBA Client
You can stream media files shared on the home network. Please refer to '3.5.2 A/V Streaming via Network' for more details.
3.11.2 SAMBA Server
This product functions as a NAS (Network Attached Storage) device when it is attached to the home network via WLAN. This feature allows users to store and retrieve large amounts of data from their own local network.
- When the network connection is done correctly and ready for use, please turn on SAMBA function in the setup menu in advance (refer to 3.1.4 Changing Network Settings for more details), and then type in: \IP Address or \Host name in the Run window (click Run in the start menu) or in the address bar of a web browser, for example Internet Explorer on your PC (if the IP address of the product is 192.168.0.9, please type in: \192.168.0.9), and click OK or press the Enter button on the keyboard.

Under Windows Vista and Windows 7, please type in at the search bar:
\192.168.0.9
Then press the Enter button on the keyboard.
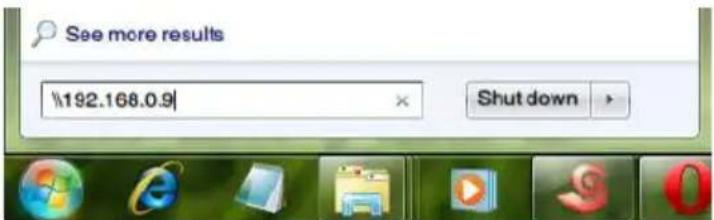
You can then manage the files stored on the internal hard disk of the product. In this way, you can also playback and copy files via network between your PC and the internal hard disk of this product.
Note:
• Make sure the player is connected properly to your network, please refer to '3.1.4 Changing Network Settings' for more details;
3.12 FTP Server
This product can also function as a FTP Server when it is attached to your home network via wired or wireless connection.
3.12.1 FTP Server Configuration
- You can configure the username and password of the FTP Server. Please refer to '3.1.4 Network setup' on doing so.
On your product
- Assign a manual Fixed IP address for the product, for example 192.168.0.9 when you connect to your router either via wired or wireless connection.
- Assign the same subnet mask as your router, usually 255.255.255.0 and the gateway of your router (router's local IP address, usually 192.168.xxx.xxx). Please refer to your router documentation on getting this information from your router.
• Key in your router DNS IP address (primary or secondary)
On your router,
- Configure FTP Server within your router's Virtual Server setting and key in the above IP address in example, 192.168.0.9 and change the public port to 21 and private port to 21 which is by default.
- For your convenience, you can also choose to enable Dynamic DNS and sign up for a free DDNS domain at any of the website providing such free services. An example would be www.dyndns.com
- At your router's DDNS page, key in your host name and enter the same user name and password when you create a DDNS account. Please refer to your router documentation on getting this information from your router.
3.12.2 Accessing from a FTP program
Using your favorite FTP application on your PC, an example would be ALFTP, which can be downloaded from http://www.altools.com/ALTools/ALFTP.aspx
At the FTP program connection page, you can either connect using your router's WAN IP address or via your DDNS host name.
Be sure to start the FTP service with your User Name and Password as discussed at FTP, '3.1.4 Network'

FTP Address: Your router's WAN IP address
User ID: Key in the same user name as entered on the player.
Password: Key in the same password as entered on the player.

FTP Address: Your DDNS host name
User ID: The User Name which was set under FTP, '3.1.4 Network'
Password: The Password which was set under FTP, '3.1.4 Network'
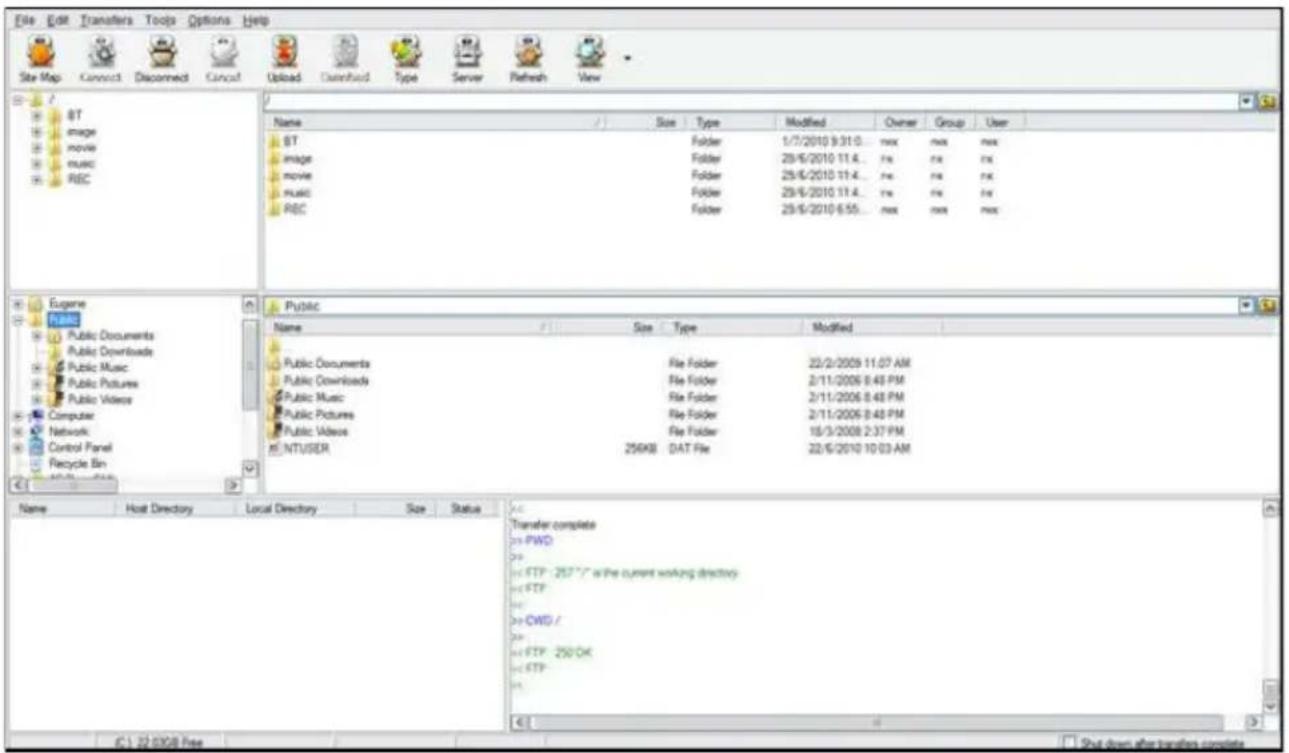
After login is successful, you will be able to upload/download files via FTP Server.
4 Upgrading the Firmware
The firmware is the operating system (OS) installed on the device. Firmware upgrades can bring new features, improvements and bug fixes.
- Step 1, download the firmware from our website www.acryan.com and extract it.
- Step 2, Copy 'install.img' to the root directory of a FAT32 formatted USB stick, and connect it to one of the USB HOST ports of the player (the player must be turned off!)
- Step 3, Press and hold the power / standby button on the front panel, and do not loosen.
- Step 4, wait for about 15 seconds, and then loosen your finger on the power / standby button; Firmware installation will start.
- Step 5, DO NOT remove the power cord during the firmware process. This might damage your player and result in an incorrect firmware flash!
Firmware installation will start. There is another way for upgrading. Please refer to USB Update in chapter '3.1.5 Miscellaneous' for more details.
5 Appendixes
5.1 SPECIFICATIONS
• I/O INTERFACES SUPPORTED:
• Gigabit Network Adapter
• 2x USB HOST port (1x USB 2.0 / 1x USB 3.0)
• Composite (CVBS) A/V jack
• Component Y/Pb/Pr jack
• HDMI V1.4 interface
• S/PDIF Optical jack
- DC-IN 5V 2.4A
NETWORK FEATURE
• 10/100/1000Mbps Auto-Negotiation Ethernet
(for high performance Full HD streaming, 10/100Mbps for data transfer)
• Built-in 802.11b/g/n Wireless Adapter
FILE SYSTEM SUPPORTED:
• Pass-through & down-mix to stereo:
• Dolby Digital AC3 5.1,
• Dolby Digital Plus 5.1/7.1
• Dolby TrueHD 5.1/7.1
• DTS Digital Surround 5.1
• Core DTS 5.1 pass-through & down-mix to stereo:
• DTS-HD High Resolution 5.1/7.1
• DTS-HD Master Audio 5.1/7.1
• Multi-channel pass-through & down-mix to stereo:
- AAC 5.1/7.1
- FLAC 5.1/7.1
SUBTITLE FORMATS SUPPORTED:
• SRT, SMI, SSA,SUB, IDX+SUB, PGS
Note: The specifications and design of this product are subject to change without notice.
5.2 Frequently Asked Questions
Question 1. Why is the Torrent Option in the Player not working?
Answer:
The torrent client (Transmission) requires available storage space on an attached USB storage device such as a flash drive or an external HDD device.
Question 2. Why can't I see my network workgroup and/or other PC's on the network?
Answer:
Make sure you have your player properly connected to your network and put the right settings in the Setup menu under 'Network'. Check if the player has a correct IP address (e.g. 192.168.1.5). Also control your settings on the computer and eventually disable your Windows / Router firewall, or set it up correctly to allow the player to connect to your network. Alternatively you can setup a Shortcut (see 3.5.2.2).
Question 3. I want to use USB sticks and/or external USB HDD's – how do I connect and remove them properly?
Answer:
It is recommend to use only external USB HDD's that have their own power supply! Connect the USB HDD / stick to one of the USB Host Ports in the player and press the power button to start the player. If you are done please use the 'Eject' button on the remote control or alternatively the 'Delete' button on an attached keyboard, to safely remove the USB drive before turning the player off! The file system on the HDD's or USB sticks might get corrupted when not using safe removal.
Question 4. My files have disappeared from the players USB devices.
Answer:
Make sure that you browse your files via the correct browser mode which means correct filtered views such as Photos, Music, or Movies.
Question 5. During power on, why does the TV have a short flashing, blue screen or screensaver?
Answer:
This is normal, when the system initializes, it will setup the corresponding parameters so it can output the correct video signal to the TV, during the initializing time, the TV will receive incorrect signals or the signals will not be stable and will cause the TV screen to flash, some TV's will treat this as no signal, and will display a blue screen or screensaver.
Question 6. Why is my subtitle that is auto searched by the player not in sync with my video?
Answer:
The player queries a third party subtitle hosting website and provides you with results that are available for your video title. Please make sure that you have selected the correct subtitles that matches the same frame rates as your video file. For example if your video framerate is 23.976fps, this will get out of sync if you have selected subtitles that are not of the same framerate.
Question7. Why I can't find my USB drive in file manager?
Answer:
Try to replace a short USB cable or plug in the power cable to your USB drive. You are suggested to plug in one USB drive at the same time.
Question 8. Where can I register the product I purchased?
Answer:
You can register your product online, please go to http://www.acryan.com/sg/acr/support/registration
6 Copyrights and Trademarks
Copyrights
All rights reserved. No part of this manual may be reproduced, or transmitted in any form or by any means, whether by electronically or mechanically, without the express written permission from the copyright holder.
Copyrighted materials, such as software, music files, or movies, are protected by local law, and may not be illegally copied or used without permission from the copyright owner.
Trademarks
Microsoft and Windows are registered trademarks of Microsoft Corporation. All other trademarks are property of their respective holders.

dts ^TM
2.0+Digital Out
Manufactured under license under U.S. Patent #'s:5,451,942; 5,956,674; 5,974,380; 5,978,762; 6,487,535 & other U.S. and worldwide patents issued & pending. DTS and DTS 2.0 + Digital Out are registered trademarks and the DTS logos and Symbol are trademarks of DTS, Inc. © 1996-2008 DTS, Inc. All Rights Reserved.

DOLBY.
DIGITAL
Manufactured under license from Dolby Laboratories.
Dolby and the double-D symbol are trademarks of Dolby Laboratories.
7 Warranty
What your warranty does not cover:
-Acts of nature, such as fire, static discharge.
-Damage from unauthorized repair, alteration or accident.
-Damage from misuse or neglect.
-A unit that has been modified or incorporated into other products or is used for institutional or other commercial purposes.
-Loss of customer's software, firmware, information, or memory data.
-Improper handling or installation.
8 GPL Statement
This product contains free software which is licensed under the GNU General Public License. After you purchase this product, you may procure, modify or distribute the source code of the GPL/LGPL software that is used in this product.
To obtain a copy of our open source software, please contact our support center and we will provide you with a CD-ROM of the source code that is used, charging only the actual expense involved. However, please be noted that we cannot provide guarantee with the source code, and there is also no technical support for the source code from us.
9 Disclaimer
All images and text included in this manual are for guidance purposes only. AC Ryan releases updated firmware for our media players on a regular basis, so cannot be held responsible for inaccuracies in the manual. If you require additional support, please visit www.acryan.com/support.
PLAYON!HDB mini
www.acryan.com
Rev. Mar 2013
A.C.Ryan
Defining Digital Entertainment
- User Information
- Caution
- Usage cautions
- Power
- Radio interference/compatibility
- Repair
- Disposing of the player
- Others
- Product Introduction
- Product Overview
- Network Feature
- Media Library
- Movie Jukebox
- Movie Playback
- Music Playback
- Photo Viewing
- USB 3.0 & 2.0 Support
- File Copy
- Package Contents
- Connection
- Power connection
- USB Mass Storage Device (USB stick, USB HDD etc.) Connection
- TV connection
- A/V OUT
- Y/Pb/Pr Component OUT
- HDMI OUT
- Digital Audio Device connection
- Connecting to a LAN
- Connecting to a WLAN
- Front Panel
- Back Panel
- First Time Usage
- Power On / Off
- Power On
- Power Off
- Menu language
- Remote Control
- Main Functions
- Setup Menu
- Changing System Settings
- Menu Language
- Text Encoding
- Change system font
- Change Desktop
- DVD Auto-Play
- Show all files
- Screen Saver
- DLNA DMR
- Host Name
- Keyboard input method
- Clear History
- Scan storage
- Resume Play
- BD-Lite Menu
- Restore Default
- Changing Audio Settings
- Night Mode
- HDMI Output
- SPDIF Output
- Changing Video Settings
- Aspect Ratio
- TV SYSTEM
- 1080p 24Hz
- Deep Color
- Screen Size
- Network
- Wired Lan Setup
- • DHCP IP (AUTO)
- • FIX IP (MANUAL)
- Wireless Setup
- Infrastructure (AP)
- Step 1, Scanning AP (Access Point) in your network
- Step 2, Input WEP / WPA key
- Peer to Peer (Ad Hoc)
- WPS (AP)
- PBC
- PIN
- PPPOE Setup
- SAMBA Process
- Transmission
- FTP
- UPnP Server
- Miscellaneous
- Version Info
- Network Info
- USB Upgrade
- Edit Protection
- Password
- Autoplay
- Movie Library
- Movie Library Options
- Quick-Search
- Layout Mode
- Sorting Mode
- Show BD/DVD
- Flash Animation
- Go to Folder
- Movie Playback Control
- Movie Playback Options
- DVD Menu
- BD Menu
- 2D/3D (3D display required)
- Photo Library
- Photo Library Options
- Folder Directory
- Leaf Folder View
- Date View
- Photo Playback Control
- Photo Playback Options
- Slide Timing
- Slide Transition
- Repeat Mode
- Select Music
- Video Setting
- Music Library
- Music Library Options
- Filter options
- Music Playback Control
- Music Playback Options
- File Manager
- A/V Streaming via Network
- Browsing through workgroup
- Note:
- Browsing through 'My Shortcuts'
- A/V Streaming via UPnP-server
- Installing UPnP Media Server on your PC
- Sharing Media on your PC
- Streaming Media on your Player
- Playlist management
- Music playlist
- Photo Album
- Files operation
- Single file operation
- Internet Media
- SHOUTcast Radio
- Station
- Genre
- Favorite
- Search
- Torrent function (using Transmission client)
- Jukebox
- Getting Started
- Launch YAMJ for AC Ryan
- Running YAMJ for AC Ryan
- Updating existing Jukebox
- Running Movie Jukebox
- SAMBA Server and Client
- SAMBA Client
- SAMBA Server
- FTP Server
- FTP Server Configuration
- On your product
- Accessing from a FTP program
- Upgrading the Firmware
- Appendixes
- SPECIFICATIONS
- FILE SYSTEM SUPPORTED:
- SUBTITLE FORMATS SUPPORTED:
- Frequently Asked Questions
- Answer:
- Copyrights and Trademarks
- Copyrights
- Trademarks
- Warranty
- What your warranty does not cover:
- GPL Statement
- Disclaimer
Brand : AC Ryan
Model : Playon!HD3 Mini ACR-PV73920
Category : Media player