
AZ1027 - Cd player/recorder PHILIPS - Free user manual and instructions
Find the device manual for free AZ1027 PHILIPS in PDF.

| Product Type | CD Soundmachine (CD player/recorder) with FM/MW radio and cassette recorder |
| Brand | Philips |
| Model | AZ1027 |
| Dimensions (W x H x D) | 291 x 146 x 243 mm (11.5 x 5.8 x 9.6 inches) |
| Weight | 1.8 kg (3.8 lb) |
| Power Supply | AC 230V, DC 9V 1.5A (6 x 1.5V R14/UM-2/C-cell batteries) |
| Power Consumption | Active: 12W, Standby: < 2W |
| Output Power | 2 x 1W RMS |
| Disc Playback | Audio CD, CD-R, CD-RW (except copy-protected discs) |
| Radio Bands | FM, MW |
| Cassette Recorder | Play and record from CD or radio (Normal IECI tape) |
| Play Modes | Repeat (track/disc), Shuffle, Program (up to 20 tracks) |
| Sound Enhancement | Dynamic Bass Boost (DBB) |
| Inputs | LINE-IN (3.5mm) |
| Operating Temperature | -10°C to +50°C (14°F to 122°F) |
| Safety Protections | Polarized plug, fuse (3 Amp BS1362), no user-serviceable parts |
| Cleaning | Dry cloth only; clean laser lens with fiber cloth from center to edge |
| Disposal | Complies with WEEE and Battery Directives; separate collection for recycling |
Frequently Asked Questions - AZ1027 PHILIPS
User questions about AZ1027 PHILIPS
0 question about this device. Answer the ones you know or ask your own.
Ask a new question about this device
Download the instructions for your Cd player/recorder in PDF format for free! Find your manual AZ1027 - PHILIPS and take your electronic device back in hand. On this page are published all the documents necessary for the use of your device. AZ1027 by PHILIPS.
USER MANUAL AZ1027 PHILIPS
Register your product and get support at
www.philips.com/welcome
AZ1027

natural_image
Black-and-white photo of a Philips 3600 portable radio with visible grille and control buttons (no text beyond brand name)EN User manual
1 Important
Safety
Important notes for users in the U.K.
Mains plug
This apparatus is fitted with an approved 13 Amp plug. To change a fuse in this type of plug proceed as follows:
① Remove fuse cover and fuse.
② Fix new fuse which should be a BS1362 3 Amp, A.S.T.A. or BSI approved type.
③ Refi t the fuse cover.
If the fitted plug is not suitable for your socket outlets, it should be cut off and an appropriate plug fitted in its place.
If the mains plug contains a fuse, this should have a value of 3 Amp. If a plug without a fuse is used, the fuse at the distribution board should not be greater than 3 Amp.
Note: The severed plug must be disposed off to avoid a possible shock hazard should it be inserted into a 13 Amp socket elsewhere.
How to connect a plug
The wires in the mains lead are coloured with the following code: blue = neutral (N), brown = live (L).
As these colours may not correspond with the colour markings identifying the terminals in your plug, proceed as follows:
- Connect the blue wire to the terminal marked N or coloured black.
Connect the brown wire to the terminal marked L or coloured red.
- Do not connect either wire to the earth terminal in the plug, marked E (or e) or coloured green (or green and yellow).
Before replacing the plug cover, make certain that the cord grip is clamped over the sheath of the lead - not simply over the two wires.
Copyright in the U.K.
Recording and playback of material may require consent. see Copyright Act 1956 and The performer's Protection Acts 1958 to 1972.
Important safety instructions
① Read these instructions.
② Keep these instructions.
③ Heed all warnings.
④ Follow all instructions.
⑤ Do not use this apparatus near water.
⑥ Clean only with dry cloth.
⑦ Do not block any ventilation openings. Install in accordance with the manufacturer's instructions.
⑧ Do not install near any heat sources such as radiators, heat registers, stoves, or other apparatus (including amplifiers) that produce heat.
⑨ For countries with a polarized mains, do not defeat the safety purpose of the polarized or grounding-type plug. A polarized plug has two blades with one wider than the other. A grounding type plug has two blades and a third grounding prong. The wide blade or the third prong are provided for your safety. If the provided plug does not fit into your outlet, consult an electrician for replacement of the obsolete outlet.
Caution: To prevent electric shock, match the wide blade of the plug to the wide slot, fully insert.
⑩ Protect the power cord from being walked on or pinched, particularly at plugs, convenience receptacles, and the point where they exit from the apparatus.
⑪ Only use attachments/accessories specified by the manufacturer.
⑫ Use only with the cart, stand, tripod, bracket, or table specified by the manufacturer or sold with the apparatus. When a cart is used, use caution when moving the cart/ apparatus combination to avoid injury from tip-over.

⑬ Unplug this apparatus during lightning storms or when unused for long periods of time.
14
Refer all servicing to qualified service personnel. Servicing is required when the apparatus has been damaged in any way, such as power-supply cord or plug is damaged, liquid has been spilled or objects have fallen into the apparatus, the apparatus has been exposed to rain or moisture, does not operate normally, or has been dropped.
⑮ Battery usage CAUTION – To prevent battery leakage which may result in bodily injury, property damage, or damage to the unit:
• Install all batteries correctly, + and - as marked on the unit.
- Do not mix batteries (old and new or carbon and alkaline, etc.).
- Remove batteries when the unit is not used for a long time.
⑯ Apparatus shall not be exposed to dripping or splashing.
⑰ Do not place any sources of danger on the apparatus (e.g. liquid filled objects, lighted candles).
⑱ This product may contain lead and mercury. Disposal of these materials may be regulated due to environmental considerations. For disposal or recycling information, please contact your local authorities or the Electronic Industries Alliance: www.eiae.org.

Warning
Never remove the casing of this Soundmachine.
Never lubricate any part of this Soundmachine.
Never place this Soundmachine on other electrical equipment.
- Keep this Soundmachine away from direct sunlight, naked flames or heat.
- Never look into the laser beam inside the Soundmachine. Ensure that you always have easy access to the power cord plug or adaptor to disconnect the Soundmachine from the power.

Caution
Use the controls or adjustments or performance of procedures other than herein may result in hazardous radiation exposure or other unsafe operation.
Notice

This product complies with the radio interference requirements of the European Community.
Any changes or modifications made to this device that are not expressly approved by Philips Consumer Lifestyle may void the user's authority to operate the equipment.

The making of unauthorized copies of copy-protected material, including computer programs, files, broadcasts and sound recordings, may be an infringement of copyrights and constitute a criminal offence. This equipment should not be used for such purposes.
This Soundmachine includes this label:
Recording and playback of material may require consent. See Copyright Act 1956 and The Performer's Protection Acts 1958 to 1972.
Disposal of old equipment and Used batteries
Information for Users on Collection and Disposal of Old Equipment and Used Batteries

chemical
Chemical symbols for Pb, Hg, Cd and a recycling symbolThese symbols on the products, batteries, packaging, and/or accompanying documents mean that used electrical and electronic products and batteries should not be mixed with general household waste. For proper treatment, recovery and recycling of old products and used batteries, please take them to applicable collection points, in accordance with your national legislation and the Directives 2002/96/EC and 2006/66/EC.
By disposing of these products and batteries correctly, you will help to save valuable resources and prevent any potential negative effects on human health and the environment which could otherwise arise from inappropriate waste handling.
For more information about collection and recycling of old products and batteries, please contact your local municipality, your waste disposal service or the point of sale where you purchased the items.
Information on Disposal in other Countries outside the European Union
These symbols are only valid in the European Union. If you wish to discard these items, please contact your local authorities or dealer and ask for the correct method of disposal.
Note for the battery symbol
This symbol might be used in combination with a chemical symbol. In this case it complies with the requirement set by the Directive for the chemical involved.
Environmental information
All redundant packing material has been omitted. We have done our utmost to make the packaging easily separable into mono materials.
Please observe the local regulations regarding the disposal of packing materials.
2 Your CD Soundmachine
Congratulations on your purchase, and welcome to Philips! To fully benefit from the support that Philips offers, register your product at www.Philips.com/welcome.
Introduction
With the CD Soundmachine you can play audio discs and listen to FM/MW radio. You can also program the play sequence of tracks. Dynamic Bass Boost (DBB) helps you to maximizes music enjoyment.
What's in the box
Check and identify the contents of the package:
• CD Soundmachine
AC power cord•
User Manual•
Overview of the Soundmachine
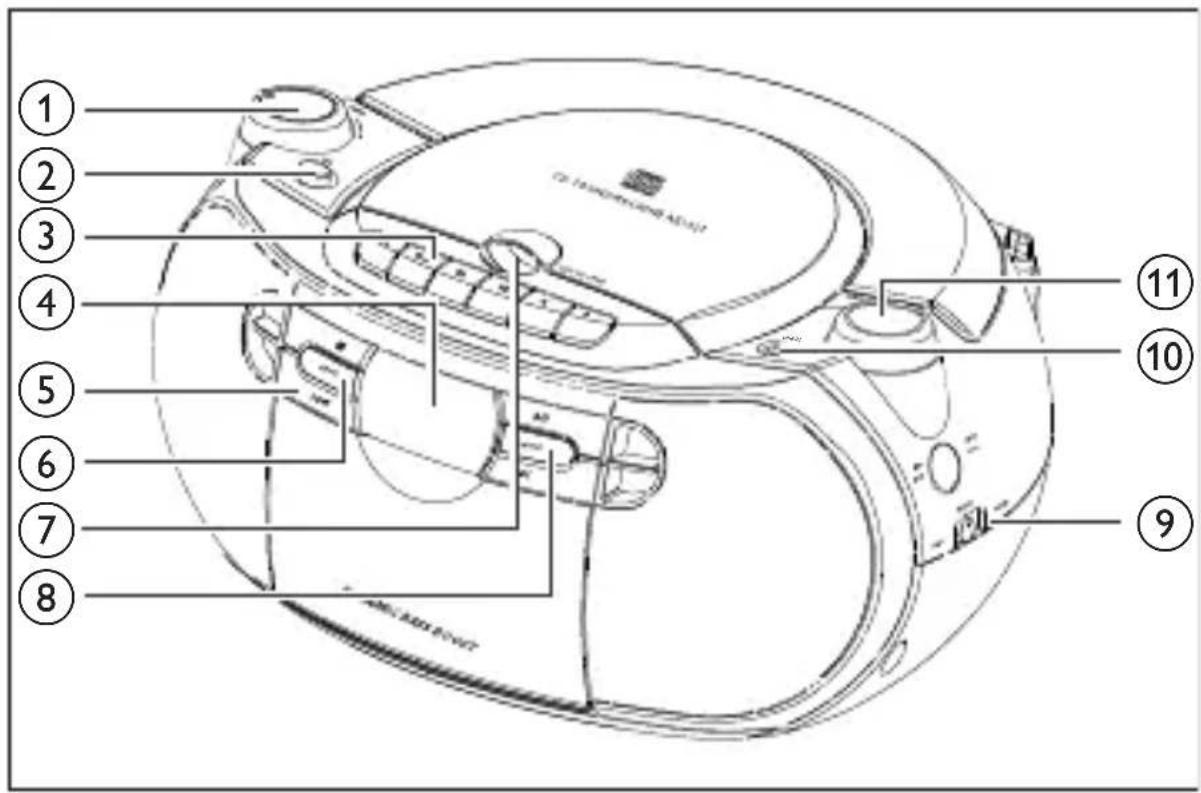

① VOLUME
- Adjust volume level
② DBB
• Turn the bass enhancement on/off
③ Cassette recorder buttons
• II
Pause play or record
• ■
Stop cassette play or record
Open the cassette holder
• / ◀◀◀▶
Fast forward/rewind cassette
•
Start cassette play
.
Start cassette record
④ Display
⑤ CD Buttons
.
Stop CD play
Erase a CD program
• ▶ II
Start or pause CD play
• /|◀◀◀▶▶|
Select the previous/next track
Fast search backward/forward within the current track
⑥ PROG
• Program tracks and browse the program
⑦ LIFT TO OPEN
• Open/Close the CD compartment
⑧ MODE
• Select a play mode: REPEAT or SHUFFLE
⑨ BAND
- Select a wave band
⑩ LINE-IN
- Socket for audio input
⑪ TUNING +/-
- Tune to radio stations
⑫ Telescopic antenna
- Improve FM reception
⑬ AC MAINS\~
- Socket for the power cord
⑭ Battery door
⑮ Source selector: CD, TUNER, LINE-IN, TAPE/OFF
- Select sound source Switch to standby mode
3 Get started

Caution
Use the controls only as stated in this user manual.
Always follow the instructions in this chapter in sequence.
If you contact Philips, you will be asked for the model and serial numbers. Find the model number and serial number of this
Soundmachine at the back or the bottom of your Soundmachine.
Write these numbers here:
Model No. ____
Serial No.
Install batteries
1 Open the battery compartment.

2 Insert 6 × 1.5V R14/UM-2/C-cell batteries with correct polarity (+/-) as indicated.
3 Close the battery compartment.

Tip
If you want to save battery life, use the supplied power cord.
●
Connect AC power

Warning
Risk of product damage! Ensure that the power supply voltage corresponds to the voltage printed on the back or the underside of the Soundmachine.
- Risk of electric shock! When you unplug the AC adaptor, always pull the plug from the socket. Never pull the cord.

Note
Install the unit near the power supply socket and where the AC power plug can be easily reached.
●
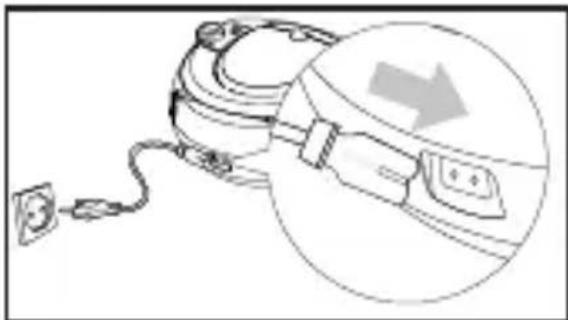
natural_image
Line drawing of a device with plug and cable, showing a circular arrow pointing to a button (no text or symbols)1 Connect the power cord to the AC MAINS\~ socket on the Soundmachine and to the power supply socket.
• To switch the Soundmachine off completely, disconnect the power cord from the power supply socket.

Tip
To save energy: After use, set the source selector to TAPE/OFF.
4 Use your Soundmachine
Play a CD

Note
You cannot play CDs encoded with copyright protection technologies.
You can play commercially available audio:
CDs
CD-Recordables (CD-R)•
CD-Rewritables (CD-RW) •
1 Switch the source selector to CD.
2 Lift the lid of the CD compartment.
3 Insert a CD with the printed side facing up.
4 Close the CD lid gently.
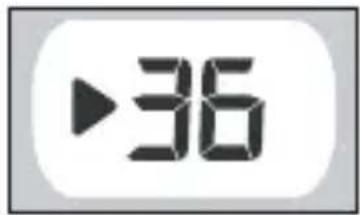
The total number of tracks is displayed.
5 Press▶II to start play.
→ ▶ is displayed.
To pause CD play, press
• againTo resume CD play, press
• . To stop CD play, press
Select a track
1 During play, press |◀◀/▶▶ to select a track.
Find a passage within a track
1 During play, press and hold ◀◀◀/▶▶. The CD is played at high speed and with reduced volume.
2 Release ◀◀◀/▶▶ to resume normal play.

Tip
When search reaches the end of the last track, the CD stops.
Program play sequence
You can store up to 20 tracks in the desired sequence.
1 In stop mode, press PROG to start to program play sequence.
[PROG] and [00] are displayed.

2 Press ◀◀◀/▶▶ to select a track.
3 Press PROG to store the track.
4 Repeat steps 2 to 3 to select and store all tracks. When all 20 tracks are stored, no more tracks can be selected and the display shows [---].
5 To play program, press .
• PROGn stepeantedly,tpresowse stored tracks.
- twice to cancel program, press

Tip
When program play stops, the Soundmachine returns to normal play. To play program again, repeat steps 1 to 5.
●
Select play modes
Repeat play
You can repeat a track, a disc, or a program.
• [→] – plays the current track continuously
• [→ ALL] – repeats the entire CD/program
1 During play, press MODE repeatedly until the display shows the repeat icon.
- Repeat one track.

Repeat the entire CD.

• To stop repeat play, press MODE repeatedly until the repeat icon is no longer displayed.
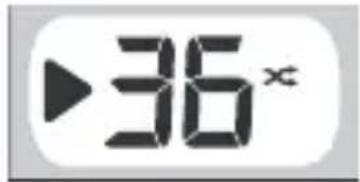
Shuffle play
You can play all tracks in random order.
1 During play, press MODE repeatedly until the display shows
the shuffle icon.
• To stop shuffle play, press MODE again.
Listen to radio
1 Switch the source selector to TUNER.
2 Switch BAND to FM or MW.
3 Press and hold TUNING +/- until the frequency in the display starts to run.
When the Soundmachine finds a station with strong signals, it begins to broadcast that station.
4 Repeat step 3 until you find a station.
• TUNING t/nerepawedly station, press until you find optimal reception.

Tip
To improve FM reception, you can extend, incline or turn the telescopic antenna for best reception.
• To improve MW reception, turn the Soundmachine to face a different direction.
Play cassette recorder
1 Switch the source selector to TAPE/OFF.
2 Press ■▲ to open the cassette holder, insert a cassette tape, and then close the cassette holder.
3 Press to start play.
• . To pause play, press
• . To stop the play, press
Find a passage within a tape
1 During stop, press ◀◀▶▶ to search for a desired passage in a tape.
2 To stop fast search, press ▲.
Record from CD
1 Switch the source selector to CD.
2 Insert a CD with the printed side facing up.
3 If you want to record tracks in the desired sequence, program the desired tracks (see 'Program play sequence') .
4 Press ■▲ to open the cassette holder.
5 Insert a blank cassette.
6 Close the holder.
7 Press to start to record.
The disc/program starts automatically from the beginning.
To pause, press • .
• To resume, press again.
• To stop, press .
Record from radio
1 Switch the source selector to TUNER.
2 Tune to a radio station (see 'Listen to radio').
3 Press to open the cassette holder.
4 Insert a blank cassette.
5 Close the holder.
6 Press to start to record.
• . To pause, press
• To resume, press again.
5 Troubleshooting

Warning
Never remove the casing of this Soundmachine.
To keep the warranty valid, never try to repair the system yourself.
If you encounter problems when using this Soundmachine, check the following points before requesting service. If the problem remains unsolved, go to the Philips web site (www.Philips.com/support), or contact Philips (see Contact information). When you contact Philips, ensure that your Soundmachine is nearby and the model number and serial number are available (see ‘Get started’).
No power
Ensure that the power cord is connected securely. •
Ensure that there is power at the power supply socket. •
• Ensure that the batteries are installed correctly.
No sound
- Adjust the volume.
- Ensure that the track played is of a compatible format.
Display does not function properly./No reaction to operation of any of the controls.
1 Disconnect the AC power cord.
2 Connect the AC power cord after a few seconds.
Cannot play disc
Ensure that the disc label is inserted with the printed side • facing up.
- Wipe the disc with fibre cleaning cloth from the centre to the edge in a straight line.
This disc may be defective. Play another disc. •
• Ensure that the CD is a finalised CD/CD-R/CD-RW.
Ensure that the laser lens is clean. •
Ensure that the CD is not encoded with copyright protection technologies.
The CD skips tracks
Ensure that the CD is not damaged or dirty. •
• Ensure that program/shuffle mode is deactivated.
Poor cassette sound quality
• Ensure that heads in the cassette holder are clean.
- Ensure that a NORMAL (IECI) cassette tape is used for record.
Cassette does not work for record
• Ensure that cassette tabs are not broken.
6 Product information

Note
Product information is subject to change without prior notice.
| Dimensions (Main unit) | 291 × 146 × 243 mm |
| (W × H × D) | 11.5 × 5.8 × 9.6 inches |
| Weight (Main unit) 1.8 kg | |
| 3.8 pound | |
| Power supply DC 9V 1.5 A | |
| AC 230V | |
| Power consumption Active 12W | |
| Standby < 2W | |
| Power output 2 × 1W RMS | |
| Operating temperature range | -10°C - +50°C |
| 14°F - 122°F |

All rights reserved.
AZ1027_05_UM_V3.0


- Important
- Safety
- Important notes for users in the U.K.
- Mains plug
- How to connect a plug
- Copyright in the U.K.
- Important safety instructions
- Warning
- Caution
- Notice
- Disposal of old equipment and Used batteries
- Information on Disposal in other Countries outside the European Union
- Environmental information
- Your CD Soundmachine
- Introduction
- What's in the box
- Get started
- Install batteries
- Tip
- Connect AC power
- Note
- Use your Soundmachine
- Play a CD
- Select a track
- Find a passage within a track
- Program play sequence
- Select play modes
- Repeat play
- Shuffle play
- Listen to radio
- Play cassette recorder
- Find a passage within a tape
- Record from CD
- Record from radio
- Troubleshooting
- No power
- No sound
- Cannot play disc
- The CD skips tracks
- Poor cassette sound quality
- Cassette does not work for record
- Product information
Brand : PHILIPS
Model : AZ1027
Category : Cd player/recorder