
CEMIPROG1200 - Electric heater CORBERO - Free user manual and instructions
Find the device manual for free CEMIPROG1200 CORBERO in PDF.

| Product Type | Electric Radiator with Digital Display |
| Model | CEMIPROG1200 |
| Power Supply | 230V ~ 50Hz |
| Nominal Heating Power | 1200 W (adjustable models: 500, 750, 1000, 1200, 1500, 1800 W) |
| Heating Modes | Comfort, Night, Antifreeze, Vacation, Crono, Countdown, Turbo/Boost, ECO |
| Control Type | Electronic with weekly timer |
| Display | Digital LCD with icons |
| Temperature Range | 7°C to 32°C |
| Open Window Detection | Yes, automatically stops heating for 30 min upon sudden temperature drop of 5°C in 30 min |
| Adaptive Start Control (ASC) | Yes, preheats up to 2 hours before set time in Crono mode |
| Baby Care Function | Reduces surface temperature with selectable duty cycle (30%, 40%, 50%, 60%) |
| Child Lock | Yes, activates by holding Mode button for 3 seconds |
| Consumption Measurement | KWh meter with daily, weekly, monthly, yearly, and total readings |
| Standby Power Consumption | 0.369 W |
| Installation | Wall-mounted using provided stencil; professional installation recommended |
| Safety Features | Overheat protection, thermal fuse, anti-frost mode |
| Warranty | 3 years from date of invoice (from January 1, 2022) |
| Recycling | Complies with WEEE Directive 2012/19/EU; do not dispose with household waste |
Frequently Asked Questions - CEMIPROG1200 CORBERO
User questions about CEMIPROG1200 CORBERO
0 question about this device. Answer the ones you know or ask your own.
Ask a new question about this device
Download the instructions for your Electric heater in PDF format for free! Find your manual CEMIPROG1200 - CORBERO and take your electronic device back in hand. On this page are published all the documents necessary for the use of your device. CEMIPROG1200 by CORBERO.
USER MANUAL CEMIPROG1200 CORBERO
flowchart
graph TD
    A["Robot Arm 1"] --> B["Arrow to Top"]
    C["Robot Arm 2"] --> D["Arrow to Bottom"]
    style A fill:#f9f,stroke:#333
    style C fill:#f9f,stroke:#333
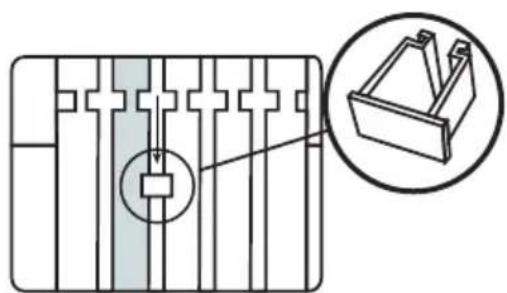
ES - Marcar, retirar plantilla y taladrar
PT - Marque, remova o modelo e fure
EN - Marking, stencil removal and drilling
natural_image
Diagram of a mechanical component with a circular component and an inset view showing a bracket (no text or symbols)Elemento
ES - Colocar el separador en la parte trasera del emisor
PT - Coloque o espaçador na parte traseira do radiador
EN - Place the spacer at the rear of the radiator

ES - Medida del suelo a plantilla 540 mm
PT - Meça do chão ao modelo 540 mm
EN - Floor to insole measurement 540 mm
natural_image
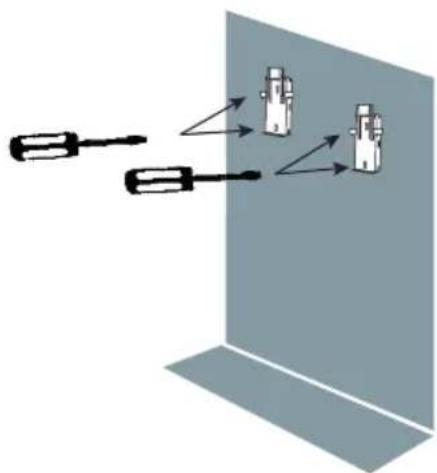
Diagram showing two screwdrivers interacting with a wall-mounted device (no text or symbols present)ES - Atornillar
PT - Aparafuse
EN - Screw


Atención!
ES - Colocar el emisor inclinándolo levemente
PT - Coloque o emissor inclinando-o ligeiramente
EN - Position the radiator at a slight angle
PRESENTACIÓN
Modo Confort Modo Apagado / Stand-By
Modo Confort
Intervalos de 1h (12h a 24h) Intervalos de 1 día (1 a 40)
Modo Crono

Modo Anti gelo

Intervalos de 1h (12h a 24h) Intervalos de 1 dia (1 a 40)
Modo Crono

Before proceeding with the installation of the product, you must read very carefully all the instructions and recommendations detailed in this manual, since the manufacturer will not be responsible for any breakdown or damage caused by non-compliance. Once installed, keep this manual in a safe place so that it can be consulted at any time and in case of doubt.
¡VERY IMPORTANT!
- Read the installation manual before assembling the radiator.
- Read the manual carefully to operate the radiator.
- Observe the warnings carefully.
• Install the radiator in a place where air can circulate. - The installation of the device must be carried out by specialized personnel.

Once the device has been unpacked, the remains of the packaging must be removed responsibly since all elements have been designed for recycling. If, once unpacked, you detect apparent damage to the device, you should consult with your supplier before proceeding with the installation and electrical connection within a period of less than 24 hours.
Assembly and installation must be carried out following the instructions detailed in this manual.
RECYCLING
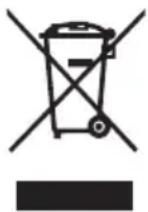
Warnings for the correct disposal of the product as established by European Directive 2012/19/EU. At the end of its useful life, the product should not be disposed of with municipal waste. It can be delivered to specific differentiated collection centers arranged by municipal administrations or to distributors who provide this service. Disposing of an appliance separately means avoiding possible negative consequences for the environment and health resulting from improper disposal and allows the materials that make it up to be recycled, thus obtaining significant energy and resource savings. To
underline the obligation to collaborate with selective collection, the product appears marked as a warning not to use traditional containers for disposal. For more information, contact your local authority or the store where you purchased it for disposal.
IMPORTANT SAFETY NOTES
The placement of the heating device must be chosen correctly and carried out according to the rules and in accordance with the standard.
The radiator should be kept away from any flammable objects and children should not be left near the radiator without being supervised.
This appliance can be used by children aged 8 years and above and persons with reduced physical, sensory or mental capabilities or lack of experience and knowledge if they have been given appropriate supervision or training regarding use of the appliance in a safe manner and understand the instructions dangers it entails.
Children from 3 years old and under 8 years old should not plug in, regulate and clean or perform maintenance operations.
Children under 3 years of age should be kept out of reach of the appliance unless continually supervised.
Children from 3 years of age and under 8 years of age should only turn the appliance on/off provided that it has been placed and installed in its intended normal operating position and that they are supervised or have received instructions regarding use of the appliance in a safe and secure manner. understand the risks that the device has.
Children should be supervised to ensure that they do not play with the appliance. Cleaning and maintenance to be carried out by the user should not be carried out by children without supervision.
Caution: Some parts of this product may become very hot and cause burns. Particular attention should be paid when children and vulnerable people are present.
The radiator should under no circumstances be covered by clothing, containers or any other object, nor placed under a closet or any other obstacle that prevents the circulation of hot air.
WARNING: To avoid overheating, DO NOT COVER the heating device.

The heating appliance must not be placed immediately below or in front of a socket outlet.
Avoid using extension cords as these can cause overheating and pose a risk of fire.
If the appliance is a dry type, it may be connected only to a supply with a system impedance of no more than 0.24 . If necessary, consult your supplying authority for information on system impedance.
The radiator should not be installed in places where there is a risk of splashing water, such as bathtubs, sinks, etc. The radiator must be installed in such a way that the switches, thermostat, and power
outlet cannot be touched directly or indirectly by a person who is in the bathtub or shower (respect the prohibition distances according to REBT).
The connection cables of the heater itself must not come into contact with the surface of the device.
If the power cable is damaged, it can only be replaced by the Technical Assistance Service, in order to avoid risks.
Always respect safety measures when placing the radiator on the wall.
The electrical installation must have a switch with fuses or magnet-to-thermal protection. Likewise, differential protection against ground faults is advisable. The voltage and frequency values of the power supply network must be the same as those indicated on the nameplate.
It is possible that the radiator causes slight noises at the beginning of its operation, this is normal due to expansions and contractions. As the days go by, this noise disappears.
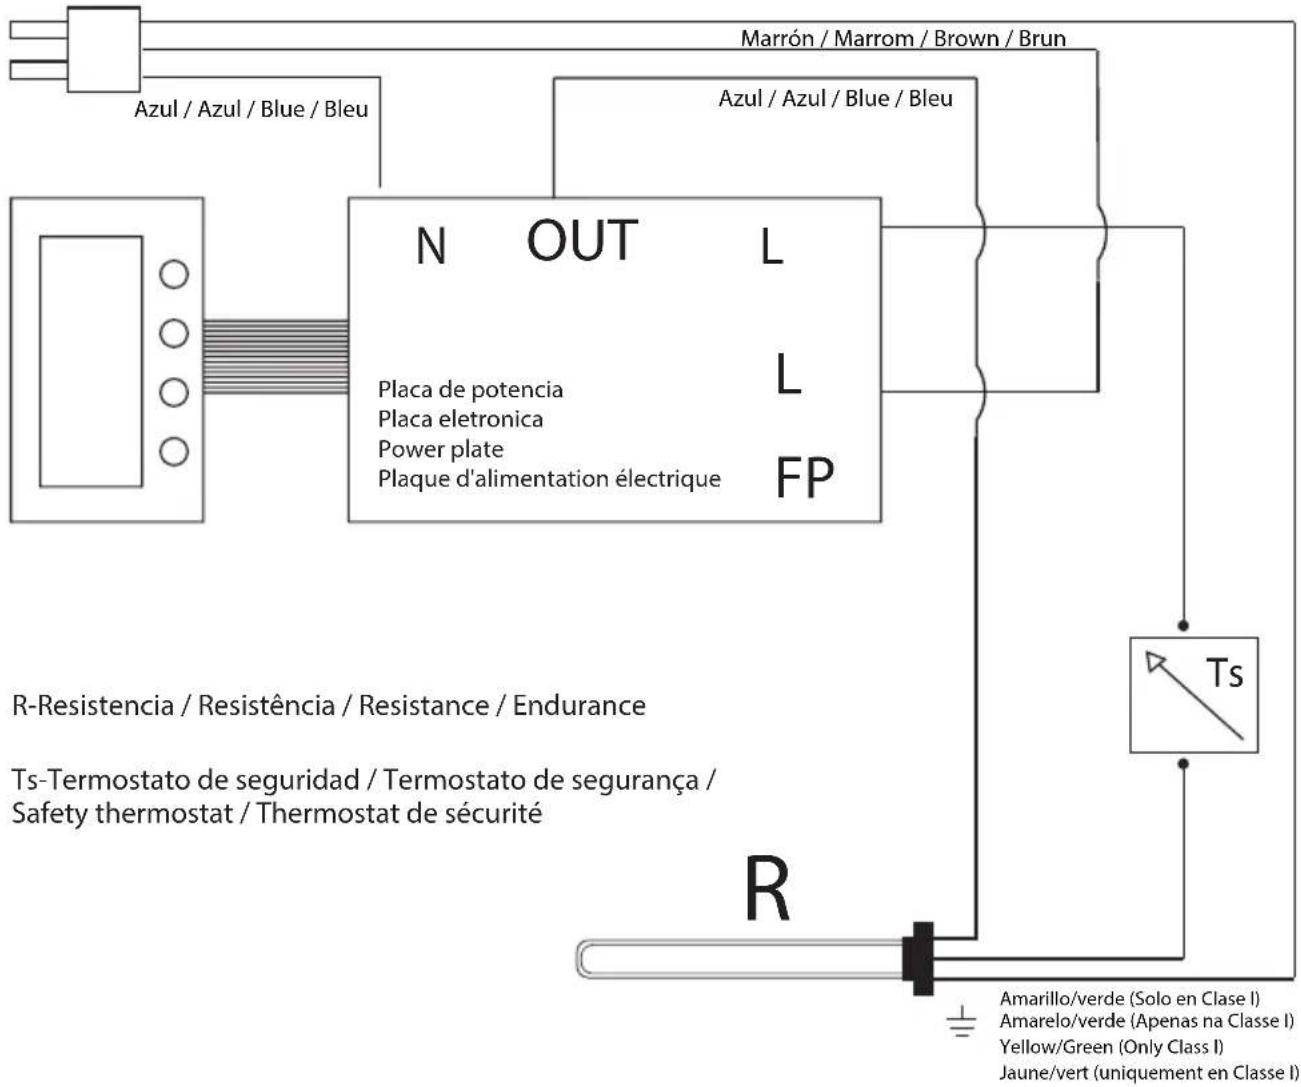
ELECTRIC CONNECTION
- If the radiator you have purchased does not have a plug incorporated into the power cable, you must follow the instructions below regarding its electrical installation and the connection must be made by a qualified installer.
- In the electrical connection of the appliance, disconnection means must be incorporated into the fixed installation in accordance with the installation regulations in force in the country in which it will be installed.
• For safety, before proceeding with the connection, verify that there is no voltage in the network. - Before connecting the device to the electrical network, you must ensure that the supply voltage is that indicated on the nameplate 230V.
- The device must be connected to the protective conductor of the fixed installation.
- Any incident arising from failure to follow these instructions will invalidate the warranty.
- When connecting, what is indicated in the electrical diagram must be strictly observed, with special attention to the colors of the cables.
ELECTRIC SCHEME
HOW TO USE THE ELECTRIC RADIATOR
Display:
-
Responsible consumption indicator
-
Active resistance indicator
-
Baby Care
-
Device lock
-
Detection of open windows
-
ASC
-
ECO Mode (17°C)
-
Off / Stand-By Mode
-
Comfort Mode
-
Night Mode
-
Antifreeze Mode
-
Pilot Wire Mode*
-
Vacation Mode
-
Crono Mode
-
Consumption meter
-
Weekdays
-
Time zones
-
Temperature value / Time / Consumptio n
-
Programas
-
Programming / Turbo-Boost Mode
-
On/Off Button (Stand-By)
-
Control buttons (+) y (-)
-
Crono button
-
Mode button

Pilot Wire Mode: This operating mode is deactivated so the device will operate as in Comfort Mode*
FIRST INSTALLATION
By pressing the On/Off button (💡) it will sound 1 long beep when turning on and 2 short beeps when
turning off the product.
Date and time setting
To set the date and time, put the device in the Off/Stand-By screen by pressing the On/Off button ( ) (icon will be displayed on the screen).
Comfort Mode Off / Stand-By Mode
Press and hold the Crono button (.) for 3s until the options are displayed. Scroll with the (+) and (-) buttons and select the "ted" option with the Crono button (.)
Use the control buttons to set a value and confirm with the Crono button (💡) to advance to the next option. The values that can be edited will flash.
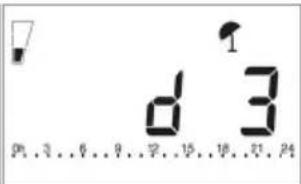
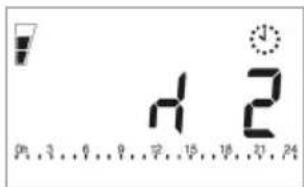
DATE

Image 1 Image 2

Image 3 Image 4
Image 1: Indicate the year.
Image 2: Indicate the month.
Image 3: Indicate the day of the month.
Image 4: Indicate the day of the week. On the right side of the screen select the day of the week (1=Monday, 2=Tuesday, 3=Wednesday, 4=Thursday, 5=Friday, 6=Saturday, 7=Sunday)
HOUR
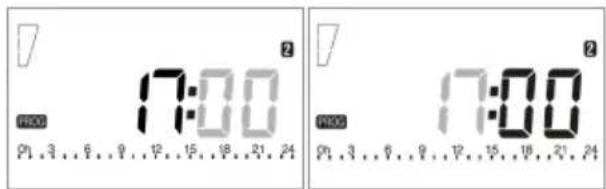
Image 5 Image 6
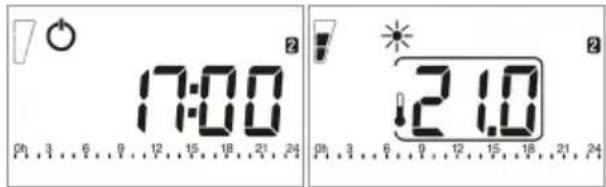
Image 7 Image 8
Image 5: Indicate the time.
Image 6: Indicate the minutes.
Image 7: Press the Crono button (💡) again to return to the Off/Stand-By screen.
Image 8: Press the Crono button (💡) to turn the device back on.
WORK MODES
Your radiator has several operating modes (Comfort Mode, Night Mode, Antifreeze Mode, Vacation Mode, Crono Mode, Countdown Mode, Turbo/Boost Mode and ECO Mode).
• To select each of these modes press the Mode button (☐). The icon for each will appear at the top of the screen.
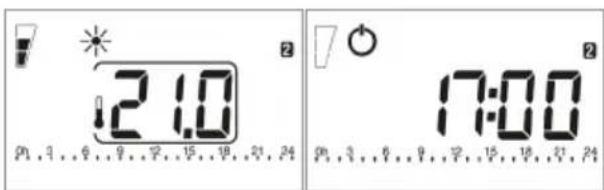
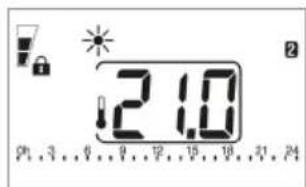
Comfort Mode

In this mode, the radiator will operate according to a set temperature established by the user. You can set this temperature by pressing the (+) or (-) buttons. The minimum temperature value that can be selected in this mode is 0.5^ C more than the Night Mode temperature. The maximum value is 32^ C.
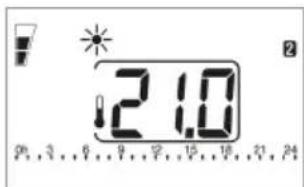
Comfort Mode
If the icon ⚡ flashes, the device will display the set set temperature. If this icon does not flash, the room temperature appears on the screen.
The temperature selected in this mode will be the Comfort temperature for the programs in Crono Mode.
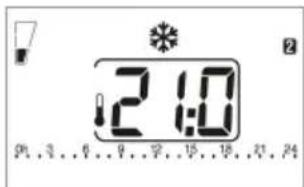
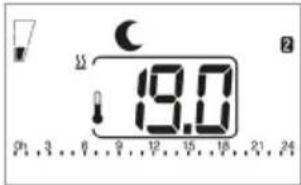
Night Mode

In this mode, the radiator will operate according to a set temperature lower than that of the Comfort Mode established by the user. You can set this temperature by pressing the (+) or (-) buttons. The minimum temperature value that can be selected in this mode is 7^ C. The maximum value is 0.5^ C less than the Comfort Mode temperature.

Night Mode
As in Comfort Mode if the icon ⚠ flashes The device will display the set set temperature. If this icon does not flash, the room temperature appears on the screen.
The temperature selected in this mode will be the Night temperature for programs in Crono Mode.
Antifreeze Mode

Selecting this mode, the device turns on when the room temperature drops below 7°C.
Antifreeze Mode
The Antifreeze Mode temperature cannot be modified. On the other hand, if we want to adjust the temperatures of Comfort Mode and Night Mode we will have to keep in mind that they cannot be reversed in order. Antifreeze the lowest temperature (7°C), Intermediate Night and Comfort the highest.
Vacation Mode

In this mode the radiator enters Antifreeze Mode for a period of time established by the user. With the control buttons (+) and (-) select the time between 12h and 40 days. Between 12h and 24h the time will increase by 1h. From 24h onwards the time will increase in days up to 40.
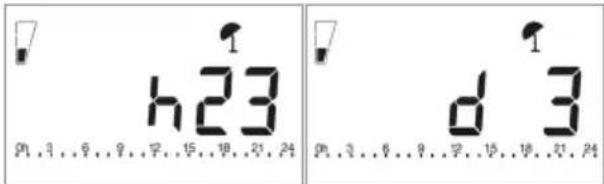
1h intervals (12h to 24h) 1 day intervals (1 to 40)
Crono Mode

The radiator works according to a daily/weekly program established by the user. With the Crono button () select between programs P1, P2 and P3. Programs P1 and P2 are set at the factory and cannot be modified. On the other hand, the P3 program is customizable (to configure it, go to page 31).
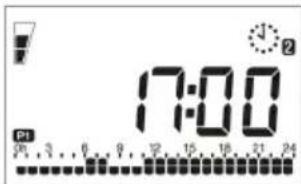
Crono Mode (P1)
A bar graph at the bottom will indicate the program layout (two bars indicate a Comfort temperature period and one bar indicates a Night temperature period). The flashing bar indicates the current time. (For more information go to page 45).
To cancel Crono Mode select a different mode using the Mode button (→)
Countdown Mode

In this mode the sender performs a countdown defined by the user. The radiator stops heating and once finished returns to the previously selected operating mode.
With the (+) and (-) buttons select the time period between 1h and 9h. The device will start counting automatically.
Countdown Mode
Turbo / Boost Mode

In this mode the radiator operates at maximum power (without exceeding the temperature of 32^ C) for a time established by the user of between 5 and 120 minutes. Using the (+) and (-) buttons select the time interval. The device will start counting automatically and once finished it will return to the previously selected mode.

Turbo / Boost Mode
If the Baby Care function is activated, it will remain active during Turbo / Boost Mode and when it ends.
ECO Mode

In this mode the radiator maintains a fixed temperature of 17^ C that cannot be modified.

ECO Mode
OTHER FUNCTIONS AND ICONS
To activate, deactivate or edit the values of the following three functions, put the radiator in the Off / Stand-By screen by pressing the On/Off button (☐)
This icon will appear on the screen ( ). Press the (+) button for 3s. The functions will appear below. If you want to exit press the Crono button ( ) until you return to the Off / Stand-By screen.
Detection of open windows

When the radiator detects a sudden drop in temperature (5°C in a 30min interval) it stops heating for 30min. If it detects that the temperature rises by 1°C, the device will return to the previously selected mode. If not, it will remain deactivated for an additional 30 min.
When this function is activated this icon will appear. It will not work if the device is in the Off / Stand-By screen.
- (On = Activate, Off = Deactivate): To activate or deactivate it, press the (+) button. Then press the Crono button ( ) to advance to the next function. Default value: OFF.

Detection of open windows
ASC (Adaptive Temperature Control) ASC
This function allows the radiator to activate before the set time (maximum 2h) to ensure that the room will have the programmed temperature at the set time.
When this function is activated the icon will appear onscreen. This feature is only available in Crono Mode.
- (On = Activate, Off = Deactivate): To activate or deactivate it, press the (+) button. Then press the Crono button () to advance to the next function. Default value: OFF.

ASC function
Baby Care
This function allows the device to reduce the surface temperature of the radiator. The percentage of time with which the radiator works is established by the user (30%, 40%, 50%, 60%).
- (On = Activate, Off = Deactivate): To activate or deactivate it, press the (+) button.
- If you activate the function and press the Crono button (.) it will now select the percentage of team time (with the (+) and (-) buttons select between 30%, 40%, 50%, 60%). Once the percentage has been selected, press the Crono button (.) again to return to the Off / Stand-By screen.
- If you deactivate the function, the device will automatically go to the Off / Stand-By screen. Default value: OFF.

Select % of timeBaby Care disabled
Responsible consumption indicator
This icon appears at the top left of the screen. Depending on the temperature we have selected, it will show three different levels:
From 23°C to 32°C ( ), From 19,5°C to 22,5°C ( ) and From 17,5°C to 19°C ( ).
Lock function

This function allows you to lock the buttons. To activate it, press the Mode button (3) for at least 3s. The icon will appear on the screen.
To deactivate it, press the Mode button (☐) again for at least 3s.
Lock function activated
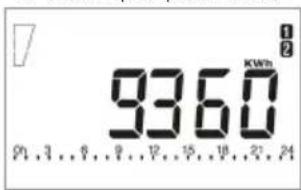
Consumption measurement KWh
The device allows you to read the radiator consumption expressed in KWh. Previously we must choose the power of our device so that the reading is correct. To do this, first unplug the device from the power outlet. Press the (+) and (-) buttons simultaneously, plug the device in again and wait 5s. On this screen, select the power with the (+) and (-) buttons.

Select the power of your radiator
Press the Crono button (💡) to return to the previously selected screen. You only need to do it once. This step will not change the power of the radiator, it is only done for a correct measurement.
To view the consumption, put the device on the Off / Stand-By screen by pressing the On/Off button (☐). Then press the (-) button for 3s.
With the (+) and (-) buttons you can scroll through the consumption menu. On the right side of the screen, numerical icons will be displayed that indicate the time period of consumption shown on the screen (1=Current day, 2=Previous day, 3=Current week, 4=Previous week, 5=Month current, 6=Previous month, 7=Current year, 1+2=Previous year, 1+3=Total, 1+7=Radiator power indicator). To exit press the Mode button (☐)
Active resistance indicator

This indicator shows when the radiator's resistance is consuming energy. The icon will be displayed on the screen.
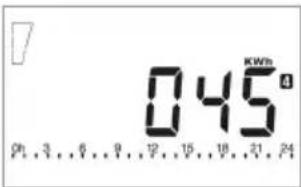
4 = Consumption previous week
1+2 = Consumption previous year
Active resistance indicator

Attention: If "ALL" appears on the display, the temperature sensor is broken or damaged and the radiator does not work. Contact technical service.
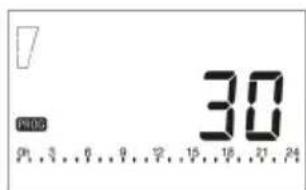
P3 PROGRAM SETUP
The radiator can work with 3 different programs P1, P2 and P3. Programs P1 and P2 are configured at the factory and cannot be modified. This device allows you to edit one of the operating programs, P3, so that the user can personalize the temperature in a daily / weekly time slot.
The temperatures used in these programs are those selected for Comfort Mode and Night Mode.
To edit this P3 program, first press the On/Off button (💡) to put the device in the Off / Stand-By screen.
Then press the Crono button ( ) for 3s.
Once in the menu, scroll with the (+) button.
Select the "prog" option with the Crono button ( ).
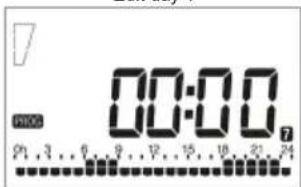
With the (-) button you activate Night Mode and with the (+) button you activate Comfort Mode. Each time you press one of these buttons it will move through the time slot in 1 hour intervals until you reach midnight on the first day (Monday).
Once the first day is over, if you want to edit the following days, repeat the previous process. If you want to copy the programming for the rest of the days, press the Crono button ( ) and select the days you want to copy the schedule to. Once the programming of the last day (24 hours on Sunday) is finished, press the Crono button ( ) again to return to the Off / Stand-By screen.
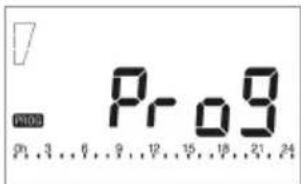
Select the "prog" option

Edit day 1
Edit the following days
To use these programs press the On/Off button ( ) to turn on the device and move with the Mode button ( ) to Crono Mode.
The icon will appear at the top. Once in this mode by pressing the Crono button ( ) you can choose between programs P1, P2 and P3 (The icon for each program will be displayed at the bottom left of the screen).

Seleccione el programa
Once selected, the radiator will begin to work immediately with the selected program. These P3 program settings are saved automatically.
Below we detail the information of each of the pre-established programs for every day of the week. The configuration in Comfort Mode will be displayed and in the remaining hours the device will operate in Night Mode:
| Monday Tuesday Wednesday Thursday Friday Saturday Sunday | ||||||
| P1 | From 06h to 08hFrom 11h to 23h | From 06h to 08hFrom 11h to 23h | From 06h to 08hFrom 11h to 23h | From 06h to 08hFrom 11h to 23h | From 06h to 08hFrom 11h to 23h | From 07h to 23h From 07h to 23h |
| P2 | From 05h to 08hFrom 11h to 14hFrom 17h to 22h | From 05h to 08hFrom 11h to 14hFrom 17h to 22h | From 05h to 08hFrom 11h to 14hFrom 17h to 22h | From 05h to 08hFrom 11h to 14hFrom 17h to 22h | From 05hto 08hFrom 11h to 14hFrom 17h to 22h | From 07h to 23h From 07h to 23h |
CALIBRATION OF THE TEMPERATURE PROBE
This adjustment, if necessary, must be made after a normal day of operation of the thermal radiator at constant temperature, following the following steps:
- Place a thermometer (calibrated) in the center of the room or room, placing it at a height of approximately 1.5m. After 1 hour, check the temperature on your thermometer.
- Once the previous step has been completed, check the temperature displayed on your radiator. If there is a temperature difference, access this menu parameter and select it.
- To access this parameter and calibrate the temperature probe, press the On/Off button ( ) and put the device in the Off / Stand-By screen. Then press and hold the Crono button ( ) for 3s.
- Once in the menu, scroll with the (+) button. Then select the "ofst" option with the Crono button ( ).
- Using the (+) and (-) buttons select the previously measured temperature difference. Once selected press the Crono button ( ) to confirm and return to the Off / Stand-By screen.
Radiator POWER ADJUSTMENTS
To adjust the radiator power press the On/Off button() and put the device in the Off / Stand-By screen. Then press and hold the Crono button for 3s ()
Once in the menu, scroll with the (+) button. Then select the "pouu" option with the Crono button (√).
With the (+) and (-) buttons select the power of your radiator in Watts. Once selected press the Crono button ( ) to confirm and return to the Off / Stand-By screen.
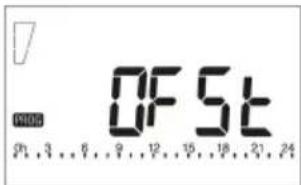
Select the "ofst" option
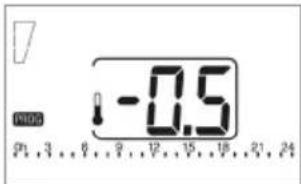
Set the temperature difference

Select the "pouu" option

Select the power of the radiator
| EN - FREQUENTLY ASKED QUESTIONS | |
| Can you view the programming carried out (P3)? | No, if we enter the programming again we can only modify or copy the programming made. You can change the day momentarily in the settings to see that day's schedule. Then remember to put in the current day again. |
| How to cycle on - "off"? | The programming does not allow you to switch between on or off status, what you can do is switch between Comfort Mode and Night Mode. For the device to generate on and "off" cycles, we will configure it as follows: In Comfort Mode we will choose our desired temperature and in Night Mode we will choose 7°C. (minimum configurable temperature). In this way, with the radiator in Crono Mode, the hours programmed with Night Mode will only activate the radiator if the room temperature drops below 7°C (something unusual). |
| If I unplug it or the power goes out, will the configuration be lost? | If the power goes out, the time is maintained for 2h. If more than 2h pass, you will have to reconfigure the time and date (the time when turned on will appear at 00:00), however the programming will be saved indefinitely. |
| What is the difference between Countdown and Boost Mode? | During the time configured in Countdown Mode, the device maintains the temperature that is configured in Comfort Mode instead of operating at maximum power. It subsequently turns off instead of returning to the last selected mode. |
| What is the difference between the radiator power setting ("pouu") and the consumption measurement function? | The radiator power adjustment ("pouu") and the consumption measurement function are the same function. It can be accessed in two different ways: When the device is turned on or in the configuration menu. If the value is changed on one side it automatically changes on the other. |
| My radiator is not working | Check if the computer is connected to the network.If the radiator has an on/off switch (located on the back or bottom of the product) verify that it is turned on.Check if the outlet has power by connecting another electrical device to it. |
| The product and/or packaging have arrived damaged | Contact the seller within 24 hours of receiving the radiator and take photographs of the box, inside of the box, carrier label, radiator, any damage, and the radiator serial number. |
| The temperature of the room does not correspond to that of the program | Check if the size of the room is compatible with the power of the radiator.Check the clock time.Check the Comfort and Night set temperatures.Calibrate the temperature probe correctly. Go to page 32 of the manual. |
| The computer seems to stop working sometimes | Check if you have the open windows feature enabled.Check if you have the ASC function activated. |
The presentation of the purchase invoice accompanied by this guarantee certificate is essential.
Covered Risks.
This appliance is guaranteed against any malfunction, provided that it is intended for domestic use, proceeding to its repair within the warranty period and only bythe authorized SAT network. Our Corberó appliances have the manufacturer's legal warranty that covers any breakdown or defect for 36 months, from the invoice date of January 1, 2022. If necessary, we take care of any possible incident whenever it is due to a defective component or manufacturing fault. Warranty Exceptions
Warranty Exceptions
• That the date of the certificate does not coincide with the date of sale of the original invoice.
- Faults produced by blow, by fall or any other cause of force majeure.
- If the device has been manipulated by unauthorized personnel.
- Faults produced or derived as a consequence of improper use, installation defects, or modifications to the device that alter its operation.
• Start-up, maintenance, cleaning, components subject to wear, lamps, aesthetic parts, oxidation, plastics, rubbers, housings and crystals.
- Microwave ovens (except for built-in ones) and tabletop ovens, in the event of any operating incident, must be taken to the customer's nearest technical service. They are not collected or repaired at home. This exception of not picking it up at home and having to take it to technical service is also for the following devices: Electric Oil Radiator, Electric Convector with Mechanical Thermostat, Electric Convector with Display, PTC Portable Heater, Programmable Fluid Thermal Emitter.
Electric thermos guarantee. 3-year warranty including travel and labor costs that correspond to the repair of the product, having to have maintenance once every 12 months. Especially if you have installed a gas appliance, keep in mind as the owner of the installation, the obligation to carry out a complete review of the equipment, (according to Royal Decree 238 / 2013, of April 5. RITE. IT3, M. Lo thermos electrical and boilers that include hot water storage tanks, for the benefit of the Guarantee to apply, it is mandatory that the magnesium anode is operational and that it performs the protection function adequately. For this, it is recommended that the anode be checked biannually by the Official Service and is renewed when necessary Periodicity that must be annual in those areas with critical waters (CaCO3 content greater than 200mg/L, that is, from 20°fH of hardness) Deposits without the correct state of the protection anode are not covered by the warranty Regardless of the type of tank or product, ali heating or DHW overpressure valves must be channeled to avoid damage and n the house due to water discharges. The product warranty does not cover damages caused by not channeling the water spilled by this valve. Guarantee of Gas Stoves, it is necessary to have the start-up accreditation from Corberó SAT, to benefit from the 3-year guarantee service.
"THESE EXCEPTIONS VOID THE WARRANTY, THE REPAIR BEING CHARGED TO THE CUSTOMER"
Period covered in devices according to the law of guarantees in the sale of consumer goods Current law is "RD 7/2021"
Official Technical Service: 911 08 08 08
Hours of operation Monday to Friday from9h00 a 19h00. Telephone contact_911 08 08 08 Contact email_info@corbero.es web_ www.corbero.es Official Technical Service Address_Vidal i Ribes 8-1 O 08950 Esplugues de Llobregat Barcelona
| Partida - Elemento - Element Unidad - Unidade - Unit | |
| Tipo de control de potencia - Tipo de controle de energia - Power control type | |
| Control eléctrico de temperatura interior y temporizador semanalControle eletrônico de temperatura interna e cronômetro semanalElectric interior temperature control and weekly timer | Sí / Sim / Yes |
| Otras opciones de control - Outras opções de controle - Other control options | |
| Control de temperatura interior con detecção de ventanas abiertasControle de temperatura interna com detecção de janela abertaIndoor temperature control with open window detection | Sí / Sim / Yes |
| Con control de puesta en marcha adaptable / Com controle de partida adaptável / With adaptive launch control | Sí / Sim / Yes |
| Con limitación de tiempo de funcionamiento / Com limitação de tempo de operação / With operating time limitation | Sí / Sim / Yes |
| Información de contacto: Ver contraportada - Informação de contato: Veja a contracapaContact information: See back cover | |
| Datos - Dados - Data - Données Valor - Valor - Worth - Valeur | ||||||||
| Partida - Elemento - Element - Élément | Símbolo Símbolo Symbol Symbole | Unidad Unidade Unit Unité | 500 750 | 1000 | 1200 | 1500 | 1800 | |
| Potencia calorífica - Potência de aquecimento - Heating power - Puissance de chauffage | ||||||||
| Potencia calorífica nominal Potência nominal de aquecimento Nominal heating power | P_nom | kW 0,50 | 0,75 | 1,00 | 1,20 | 1,50 | 1,80 | |
| Potencia calorífica mínima (indicativa) Potência mínima de aquecimento (indicativa) Minimum heating power (indicative) | P_min | kW 0 0 | 0 | 0 | 0 | |||
| Potencia calorífica máxima continuada Potência máxima de aquecimento contínuo Maximum continuous heating output | P_max,c | kW 0,50 | 0,75 | 1,00 | 1,20 | 1,50 | 1,80 | |
| Consumo auxiliar de electricidad - Consumo de eletricidade auxiliar - Auxiliary electricity consumption - Consommation électrique auxiliaire | ||||||||
| A potencia calorífica nominal Na potência nominal de aquecimento At nominal heating power | el_max | kW 0,50 | 0,75 | 1,0 | 1,2 | 1,50 | 1,80 | |
| A potencia calorífica mínima Na potência mínima de aquecimento At minimum heating power | el_min | kW 0 0 | 0 | 0 | 0 | |||
| En modo de espera - Em modo de espera - In standby mode | el_SB | W 0.369 | 0.369 | 0.369 | 0.369 | 0.369 | 0.369 | |
Corberō
Kurbin Lane S.L. Paseo del Ferrocarril 335 08860 Castelldefels
BARCELONA (ESPAÑA)
- PRESENTACIÓN
- Modo Crono
- ¡VERY IMPORTANT!
- RECYCLING
- IMPORTANT SAFETY NOTES
- ELECTRIC CONNECTION
- ELECTRIC SCHEME
- HOW TO USE THE ELECTRIC RADIATOR
- Display:
- FIRST INSTALLATION
- Date and time setting
- WORK MODES
- Comfort Mode
- Night Mode
- Antifreeze Mode
- Vacation Mode
- Crono Mode
- Countdown Mode
- Turbo / Boost Mode
- ECO Mode
- OTHER FUNCTIONS AND ICONS
- Detection of open windows
- ASC (Adaptive Temperature Control) ASC
- Baby Care
- Responsible consumption indicator
- Lock function
- Consumption measurement KWh
- Active resistance indicator
- P3 PROGRAM SETUP
- CALIBRATION OF THE TEMPERATURE PROBE
- Radiator POWER ADJUSTMENTS
- Covered Risks.
- Warranty Exceptions
- Official Technical Service: 911 08 08 08
- Corberō
Brand : CORBERO
Model : CEMIPROG1200
Category : Electric heater