ZG0205 - Television Cello - Free user manual and instructions
Find the device manual for free ZG0205 Cello in PDF.

User questions about ZG0205 Cello
0 question about this device. Answer the ones you know or ask your own.
Ask a new question about this device
Download the instructions for your Television in PDF format for free! Find your manual ZG0205 - Cello and take your electronic device back in hand. On this page are published all the documents necessary for the use of your device. ZG0205 by Cello.
USER MANUAL ZG0205 Cello
natural_image
Illustration of a laptop computer with a blank screen and glossy base (no text or symbols)TABLE OF CONTENTS
IMPORTANT SAFETY INSTRUCTIONS
PRECAUTIONS AND REMINDERS
BUTTON CONTROL AND PERIPHERAL CONNECTION
OPERATING INSTRUCTIONS
SPECIFICATIONS
TROUBLESHOOTING
1) Read the instructions.
2) Keep the instructions.
3) Consider all warnings.
4) Follow all instructions.
5) Do not use this apparatus near water.
6) Clean only with dry cloth.
7) Do not block any ventilation openings, install in accordance with the instructions.
8) Do not install near any heat sources such as radiations, heat registers, stoves, or other apparatus (including amplifiers) that produce heat.
9) Do not damage the safety purpose of the polarized plug. If the provided plug does not fit into your outlet, consult an electrician for replacement.
10) Protect the power cord from being walked on or pinched. Particularly at plugs, convenience receptacles, and the point where they exit from the apparatus.
11) Only use attachments/accessories specified by the manufacturer.
12) Unplug this apparatus during lightning storms or not made use of for long period of time.
13) Contact for maintenance with qualified service personnel. Maintenance is required when the apparatus has been damaged in any way, such as power-supply cord or plug is damaged, liquid has been spilled or objects have fallen into the apparatus, the apparatus has been exposed to rain or moisture, does not operate normally, or has been dropped.
14) Main plug is used as to disconnect the device, it shall still remain electrified.
15) The ventilation openings should not be covered with items, such as newspapers, table-cloth, curtains, etc.
16) Avoid direct heat sources, such as lighted candles, should be placed on the apparatus.
17) The procedure of disposing batteries should be exercised in an environmental friendly method.
18) The use of apparatus in moderate climate.
19) The apparatus shall not be exposed to dripping or splashing and that no objects filled with liquids, such as vases, shall be placed on the apparatus.

CAUTION
RISK OF ELECTRIC SHOCK
DO NOT OPEN

CAUTION: CAUTION: TO AVOID THE RISK OF ELECTRIC SHOCK. DO NOT REMOVE COVER (OR BACK). NO USER-SERVICEABLE PARTS INSIDE. REFER SERVICING TO QUALIFIED SERVICE PERSONNEL.

This symbol is intended to alert the user to avoid the risk of electric shock, do not disassemble this equipment by anyone except a qualified service personnel.

This symbol is intended to alert the user to the presence of important operating and maintenance instructions in the literature accompanying the equipment.
WARNING:
To reduce the risk of fire or electric shock, do not expose this apparatus to rain or moisture.
WARNING:
The batteries shall not be exposed to excessive heat such as sunshine, fire or the like.

This symbol indicates that this product incorporates double insulation between hazardous mains voltage and user accessible parts. Maintenance shall only be with identical replacement parts.


This marking indicates that this product should not be disposed with other household wastes throughout the EU. To prevent potential harm to the environment or human health from waste disposal, recycle it responsibly. The sustainable reuse of material resources. To return your used device, please use the return and collection systems or contact the retailer where the product was purchased.
natural_image
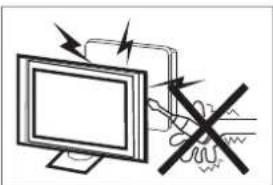
Illustration of a computer monitor with an electrical circuit diagram and a crossed-out resistor (no text or symbols)High voltages are used in the operation of this product. Do not open the product's casing. Refer servicing to qualified service personnel.
natural_image
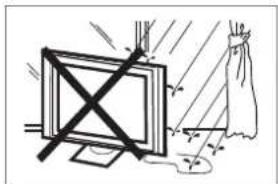
Simple line drawing of a monitor with a cross mark and a cloth, no text or symbols presentTo prevent fire or electrical shock hazard, do not expose the main unit to moisture. Do not place objects filled with liquids, such as vases, on the TV.

natural_image
Simple line drawing of a computer monitor with a cross symbol and stars (no text or labels)Do not drop or push objects into the television cabinet slots or openings. Never spill any kind of liquid on the television receiver.
natural_image
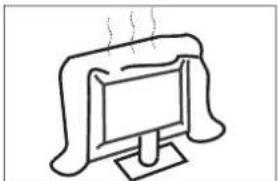
Simple line drawing of a computer monitor with a curved top and base, emitting steam (no text or symbols)Do not block the ventilation holes in the back cover. Ventilation is essential to prevent failure of electrical components.
natural_image
Simple line drawing of a flat-screen monitor mounted on a stand with a diagonal line crossing (no text or symbols)Do not trap the power supply cord under the television receiver.
text_image
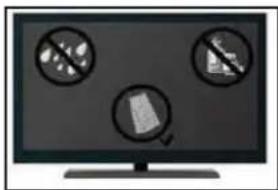
Computer monitor displaying three prohibition symbols: no restrictions, document, and document iconIf you plan to clean the product. Unplug the TV, use soft fabric. Never use water or chemicals.
natural_image
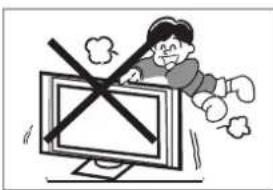
Cartoon illustration of a person running away from a computer monitor with a crossed-out X symbol (no text or symbols present)Never stand on, lean on or suddenly push the product or its stand. You should pay special attention to children.
natural_image
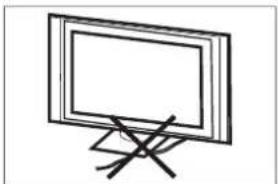
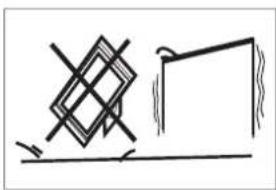
Simple line drawing of a geometric object and a rectangular block on a horizontal surface (no text or symbols)Do not place the main unit on an unstable cart stand, shelf or table. Serious injury to an individual, and damage to the television, may result if it should fall.

natural_image
Illustration of a woman reacting to a computer screen with a circular diagram showing a document (no text or symbols present)When the product is not used for an extended period of time, it is advisable to disconnect the AC power cord from the AC outlet.

natural_image
Simple line drawing of a monitor with a crossed X mark and a broken circle, next to a distressed lamp (no text or symbols)Avoid exposing the main unit to direct sunlight and other sources of heat. Do not install the television receiver directly on other products which give off heat. Do not place direct heat sources, such as lighted candles on the television.

text_image
Minimum distances 10cm 20cm 10cm 5cmIf the television is to be built into a compartment or similar enclosure, the minimum distances must be considered. Heat build-up can reduce the usability your television. Nevertheless, it can be dangerous.
Note: the use of apparatus must be in moderate climates.
OLRTNOC NOTTUB
OK/
In the standby mode, press the OK/∅ to turn on the TV. In the boot state, long press the OK/∅ to shut down. Under the menu page, function equivalent to the OK key.
V / ∧
In the non-menu page, you can adjust the TV channel under the program addition and subtraction; Under the menu page, you can move the cursor up and down.
< / >
In the non-menu page, Under the menu page, press the left and right keys to adjust the volume addition and subtraction.
PERIPHERAL CONNECTION

text_image
1 2 3 4 5 6 7 8 9 10 11 12- RJ45
- OPTICAL out terminal.
- HDMI1(ARC) input terminal.
- HDMI2 input terminal.
- HDMI3 input terminal.
- Audio&Video input terminal.
- Earphone terminal.
- LNB IN.
- RF antenna.
- USB 1&2: Connect USB device, such as flash disk.
- Cl slot.
- YPbPr(MINI) input terminal.
USING THE REMOTE CONTROL

text_image
1. ,@ 2 abcdef 456 jkl mno 7 pqs 8 tuv 9 wxyz INFO 0 GUIDE NETFLIX YouTube FreeviewPlay prime video HOME MENU OK BACK EXIT + VOL ^ CH - SOURCE TEXT SUBT AUDIO| Item Descriptions | |
| Power | Press to turn the TV on or off. When your TV is still electrified. For a complete disconnected TV, unplug the power cord. |
| elgo Assistant | Press to open the google assistant or start a voice search. |
| 0~9 number | Press to enter a TV channel number |
| INFO Press | to display the channel information. |
| Guide | Enter electronic program guide.(Used for models with DTV function only) |
| NETFLIX | Press to open the NETFLIX. |
| YouTube | Press to open the YouTube. |
| FreeviewPlay | Press to open the Freeview Play. |
| Prime video | Press to open the prime video. |
| HOME | Press to open the Home Page. |
| MENU | Press to open or close the on-screen menu. |
| ▲▼◀▶ | Press to navigate the on-screen menu. |
| OK | Enter the selected option or perform the selected operation. |
| BACK Return | to the previous menu. |
| EXIT It depends on the actual function | |
| VOL+/VOL- | Press VOL+ or VOL- to adjust volume level. |
| CH+/CH- | Press CH+ or CH- to change TV channels. |
| MUTE | Press to switch the sound on or off. |
| SOURCE | Press to open the input source list. |
| COLOR BUTTONS | Press to access directly to the corresponding function in APP service. |
| ◀◀(reverse) | Press to reverse playback in multimedia & Timeshift mode. |
| ▶ (play) | Press to play in multimedia mode &Timeshift mode. |
| ▶▶ (forward) | Press to fast forward in multimedia &Timeshift mode. |
| PVR | Press to record Live TV |
| II (Pause) | Press to pause in multimedia mode&Timeshift mode. |
| ■ (stop) | Press to stop multimedia playback, REC& Timeshift mode. |
| Text | Press to enter the Teletext mode. |
| SUBT | Open or close subtitle. |
| AUDIO | Press to select the DTV audio. |
INITIAL SETUP
Please follow the instructions accordingly for the first setup.
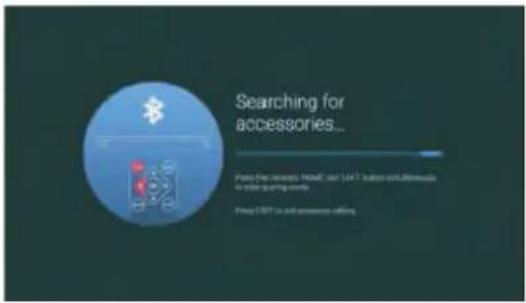
This is an necessary function for the remote pair control pair code. After pairing the code successfully, you will have access on the remote control in order to operate the TV. Please press and hold the "HOME" and "LEFT" buttons simultaneously for 5 seconds. Then press the "OK" button. Eventually, the "TV_BLE_Remote" displays in the upper right corner of the screen.

text_image
Searching for accessories... Press the remote HOME and LIFT button simultaneously to enter joining creation. A device was found and will automatically put in 5 seconds Press BACK key to exit accessory adding Searching for accessories... Press the remote HOME and LIFT button simultaneously to enter joining creation Press BACK key to exit accessory addingHOME SCREEN
After initial setup, press EXIT to exit the initial setup, and enter the HOME screen.

text_image
Click to speak Netflix YouTube Disney+ MYS prime video TV Guide STRANGER THINGS TOP BOY HOLDEN'S MYSTEN① Open the google assistant or start a voice search.
② The applications installed are displayed, the icons for the favorite applications are shown inside here. (favorite applications can be added, changed or deleted)
Apps: Icon to be redirected for all the listed applications
③ On-screen Menu: In order to navigate or configure with convenience
④ Notifications: Display the notifications
Inputs: Icon to select an input source.
Network&Interent: Icon for network settings. (Wifi)
Settings: Icon for the configuration of various settings.
For more detailed explanation regarding the settings, please check the next page
INPUT SOURCE
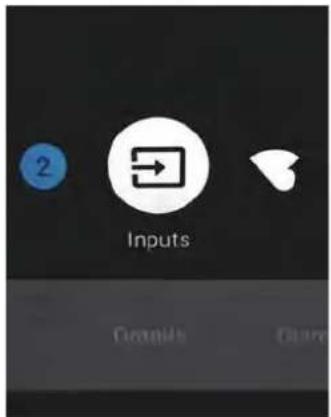
- The HOME interface displays the "Input" icon in the upper right corner. Press ▲/▼ or ◀/▶ buttons in order to select the "Inputs" icon. Please press OK in order to open all the optional input sources. Then press ▲/▼ buttons to select a desired source. Eventually press the OK button in order to confirm the input source.
text_image
2 Inputs Create Copy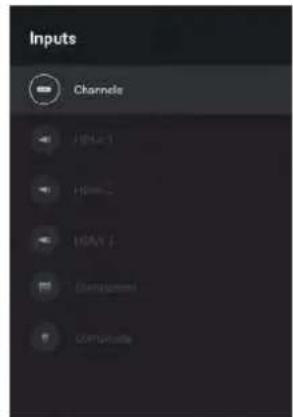
text_image
Inputs Channels HUA1 Home2 HAVA Components Compounds- Press on the "SOURCE" button on the remote control while on the LIVE TV source or press 2 times on the "SOURCE" button to be redirected directly for all the listed input sources.
text_image
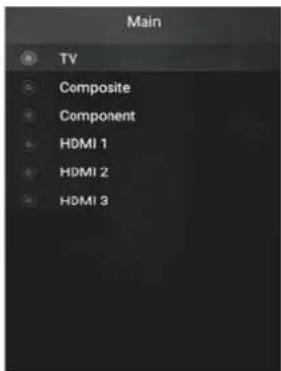
Main TV Composite Component HDMI 1 HDMI 2 HDMI 3NAVIGATING THE ON-SCREEN MENU
This TV includes 2 separate version of an on-screen menu
- Firstly, please open the Live TV source. Please read the chapter "Input source" if it is not clear. Then press the "HOME" button for the on-screen menu. Eventually press the ◄/▶ buttons and select a desired configuration.
- Secondly, browse the Home interface with buttons. Select the menu icon and press OK. Eventually press buttons ▲/▼ and confirm the desired configuration option.

text_image
TV options Playtime Power Do Card Audio/100 Information Options Settings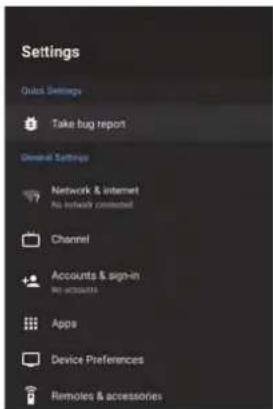
text_image
Settings Quick Settings Take bug report General Settings Network & internet No link to connected Channel Accounts & sign-in My accounts Apps Device Preferences Remoles & accessoriesNetwork
- Press the "Network&Internet" icon.
- Browse the desired configuration/Network.
- Press the OK button to save and return to the previous menu.

text_image
Network & Internet WiFi Available networks 3686 ChinaNet-Wepx iServer-CTS See all Other options Add new network Scanning always available LiuGoogler's location service and other apps scan for networks, run when WiFi is off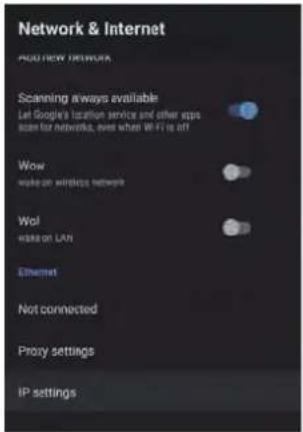
text_image
Network & Internet NOU NEW NETWORKS Scanning always available Let Google's location service and other apps scan for networks, even when WiFi is off Wow wake on wireless network Wol wake on LAN Ethernet Not connected Proxy settings IP settingsLive TV Guide
The Guide is to help you navigate through all the possible Live TV viewing options.
The Guide supplies information such as programme listings, start and end times for all available services. In addition, detailed information about the programme is often available in the Guide (the availability and amount of programme information will vary, depending on the particular broadcaster).
This function can be used only when the Guide information is broadcast by broadcasting companies. The Guide displays the programme details for the next 7 days.

text_image
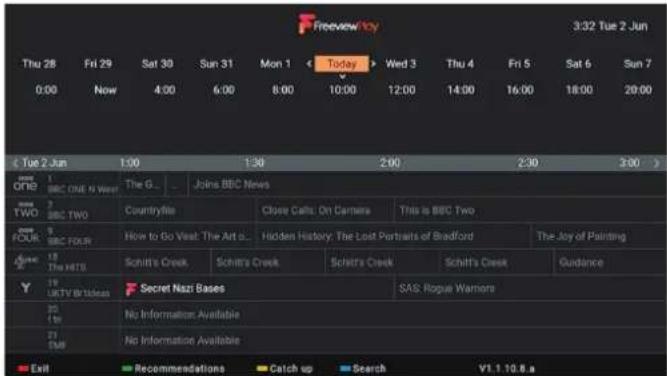
Weather for the Week Ahead 02/06/2020 1:10 - 1:15 5 mins Detailed weather forecast. t : Tue 2 Jun 1:00 1:30 2:00 2:30 3:00 > ONE S TWO BBC TWO Countryfile Close Cells On Camera This is BBC Two FOUR BBC FOURS How to Be Vive The Art e.g. Hidden History The Lost Portraits of Bradford The Joy of Painting JAMES 18 The HIT's Schist's Creek Schist's Creek Schist's Creek Guidance UK TV Website Secret Nazl Bases SAS: Rogue Warriors 21 TNO No Information Available 21 TNO No Information Available Schedule Recommendations Catch Up Search V1.1.10.8.a InfoAccessing the Guide Using the Remote
There are many ways to access the Guide. It can be accessed by pressing the GUIDE button on the remote control or by using Google Assistant by saying 'Show the TV Guide'.
Accessing the Guide from the Home Screen
To access the Guide from the Home Screen, highlight FREEVIEW PLAY TV GUIDE and press OK.
Selecting a Programme from the Guide
Press the ▲▼◀▶ buttons to select the desired programme. Press the OK button and your TV will switch to your selected programme.
Selecting a Day in the Programme Guide
You can select any day to view 7 days before or after the current day using the Schedule option. 1. While viewing the Guide press the RED button. 2. Press the ◀▶ buttons to scroll to your desired day. 3. Press the ▼ button to select the time then press the OK button. The guide will now display the programmes for your chosen day and time.
text_image
Freeview 10:00 Thu 28 Fri 29 Sat 30 Sun 31 Mon 1 Today Wed 3 Thu 4 Fri 5 Sat 6 Sun 7 0:00 Now 4:00 6:00 8:00 10:00 12:00 14:00 16:00 18:00 20:00 TUE 2 Jun 1:00 1:30 2:00 2:30 3:00 > ONE BBC ONE & Week The G... Joints BBC News TWO BBC TWO Countryfile Close Calls: On Camera This is BBC Two FOUR SBC FOUR How to Go Visit: The Art o... Hidden History: The Lost Portraits of Bradford The Joy of Painting THE HITS Schitt's Creek Schitt's Creek Schitt's Creek Guidance UKTV @Bios Secret Nazi Bases SAS: Rogue Warners No Information Available SMB No Information Available Exit Recommendations Catch up Search V1.1.10.8.aRecommended Programmes
While viewing the Guide press the GREEN button. Scroll down the list or categorises to see recommended programmes for each category. Select the programme that you wish to view. Press the BACK button to return to the Guide.

text_image
iTV 3:34 Tue 2 Jun Little Boy Blue Series 1: Episode 4 60 mins • Missing out Crime drama based on real events. Mercer and his associates are tried for their roles in Rhys's murder, but the verdict fails to bring closure for Mel and Steve. Featured Comedy Drama & Soaps Entertainment Factual Kids Lifestyle Movies Sport Boxsets Little Boy Blue Series 1 Episode 4 Bake Off: The Professionals 1 Ministive Classics and a 1. Big Zou/8 Big Eats Series 1 Episode 3 The Real Housewives o... Series 11-6: A Storm in An E... The Inbetweisers 2 120 mins Harrow Series 2 Episode 4 The Only Way to Essex June 11 June Stumdog Millionaire 1995 The Architecture The R... June 2 May 5Catch Up Services
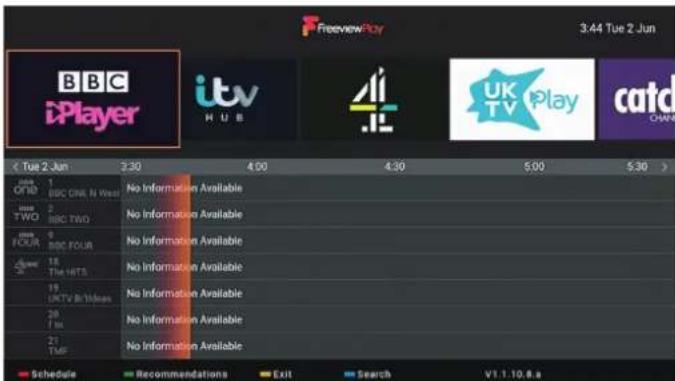
If you would like to search for content in a particular catch up then press the YELLOW button. Then press the
◀▶ buttons to scroll to your desired catch up service and press OK to enter it.
Press the YELLOW button again to exit the Catch up search and return to the Guide.
text_image
Freeview Play 3:44 Tue 2 Jun BBC iPlayer itv H U B UK TV Play catd CHAW 1 Offie 1 BBC ONE N West 2 BBC TWO No Information Available No Information Available No Information Available No Information Available No Information Available No Information Available No Information Available Schedule Recommendations EXIT Search V1.1.10.8.aSearching for a Programme in the Guide
If you would like to search for a specific programme you can search for it by typing in the programme name. Press the BLUE button. Then start typing the programme name, as you type a list will start to appear.
To view the programme you have search for, highlight the programme in the list and press OK. The catch up service will open and your programme will be displayed.

text_image
Preview 2.1x 3:44 Tue 2 Jun A B C D E F G H I J K L M N O P Q R S 1 V V W X Y Z 0 1 2 3 4 5 6 7 8 9 CLEAR ALL SPACE DEL Sibethyle Recommendations Catch up Exit VT.1.10.8 x- While watching a TV channel press the LIVE TV button. Programme information will be displayed.
- Press the button and the Mini Guide will appear. The top line of the Mini Guide shows a list of channels, your current channel will be highlighted.
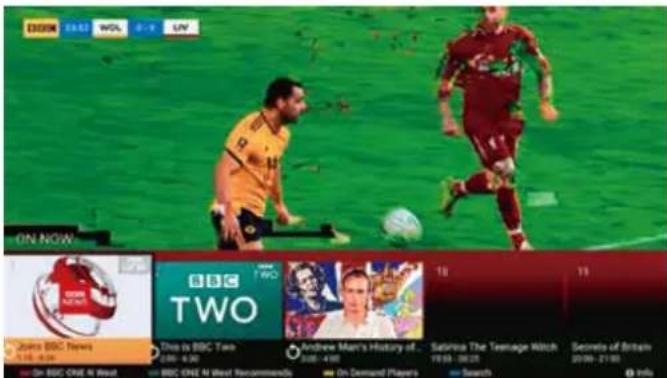
Freeview Play ON NOW Guide
Press the FreeviewPlay button to access the ON NOW guide. Here you will be able to see what's on while still
text_image
ON NOW BBC NEWS 17:30-24:00 On BBC ONE N West BBC ONE N West Recommendations BBC TWO Dru to BBC Two 2:00-6:30 Andrew Mann's History of... 5:00-4:00 Salvira The Teenage Witch 19:00-28:25 Secrets of Britain 20:00-21:00 Info
On [TV channel selected]
[TV channel selected] Recommends
On Demand Players
Search
Channel List
The Channel list show a list of all TV and Radio channels/stations that are available on your TV.
- To access the CHANNEL LIST press the OK button while watching a TV channel.
- To view a channel from the list scroll up or down the list, highlight your chosen channel and press the OK button.
- Press the RED and GREEN buttons to scroll a page at a time, to make finding a channel quicker.

text_image
Preview/boy Channel list - Broadcast 1 BBC ONE N West 2 BBC TWO 3 9 BBC FOUR 4 18 The HITS 5 19 UKTV Broadcast 6 20 1m 7 21 TMF Page up Page down Select more Favorites List
text_image
Freeview/Key Channel list - Broadcast Digital Radio Free Encrypted Analogue Favorite NetworkSelecting More Channels from the Channel List
To help you narrow your search for a channel you can use the SELECT MORE option. Here you can choose the SELECT TYPE option to view a selected list of channels e.g. just Free channel, or choose the FIND option where you can type in the name or number of the channel you're looking for.
- While viewing the Channel List press the YELLOW button. The SELECT MORE menu will be displayed.
- Highlight SELECT TYPE and press the OK button. A list of channel types will be displayed. Highlight the type of channel that you are looking for and press OK. You'll now be shown a list of channels to choose from that appear in your selected channel type.
Red Button + (Interactive services)
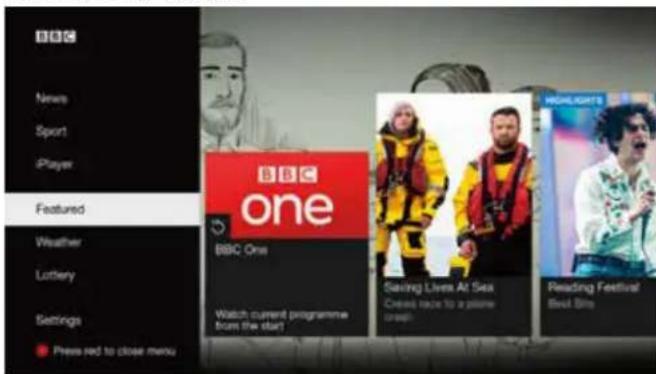
Red button + services are available on BBC TV and Radio channels. The services are gradually changing to an internet based service rather than the conventional over air (though your aerial). To make the most out of the Red Button + services make sure your TV is connected to the internet. You can also access BBC iPlayer through RED button +.
Accessing the Information
- While watching Live TV press the TEXT button to display the main information page. You may see slightly different looking pages depending if your TV is accessing the page over air or via the internet.
- Follow the instructions on the interactive services page and move around the page by pressing, OK, RED, GREEN, YELLOW, BLUE or 0-9 buttons etc.
- Press TEXT to exit.
text_image
BBC News Sport iPlayer Featured Weather Lottery Settings Press red to close menu BBC One Watch current programme from the start? Saving Lives At Sex Cubed race to a prize Bragg Reading Festival Best BitsListening to the Radio
You can listen to radio stations through your Live TV or by asking Google Assistant to play a radio station.
While watching Live TV Press the GUIDE button. Navigate to a radio station, they are usually towards the end of the Guide in channel numbers 700+.
Ask Google Assistant, press the GOOGLE ASSISTANT button and ask for a radio station.
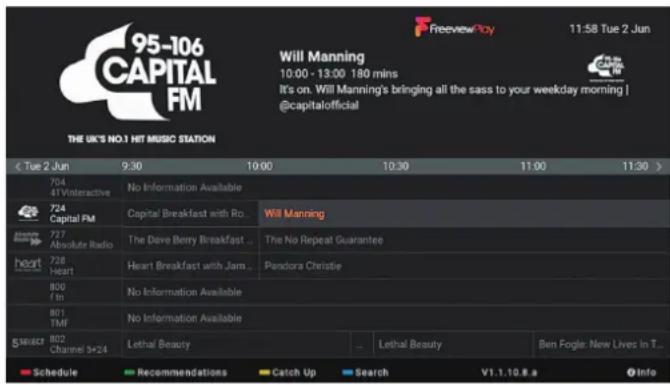
text_image
95-106 CAPITAL FM THE UK'S NO.1 HIT MUSIC STATION Will Manning 10:00 - 13:00 180 mins It's on. Will Manning's bringing all the sass to your weekday morning | @capitalofficial ( Tue 2 Jun 9:30 10:00 10:30 11:00 11:30 ) 704 47 Vinteractive No Information Available 724 Capital FM Capital Breakfast with Ro... Will Manning 727 Absolute Radio The Dave Berry Breakfast ... The No Repeat Guarantee 728 Heart Heart Breakfast with Jam... Pandora Christie 800 f In No Information Available 801 TMF No Information Available SELECT 802 Channel 5+24 Lethal Beauty ... Lethal Beauty Ben Fogle New Lives In T... Schedule Recommendations Catch Up Search V1.1.10.8 a InfoViewing Channels with Subtitles
While you are watching live TV you can select subtitles by pressing the SUBT button.
- Press the SUBT button, the SUBTITLE menu will be displayed.
- Press the button to highlight DIGITAL SUBTITLE and press OK.
- Press the button to highlight ON and press OK.
- In a few seconds the subtitles will appear on the screen.
- To switch Subtitles off repeat the process but select OFF.

text_image
Subtitle Analogue Subtitle Off Digital Subtitle Off Subtitle tracks Off Digital Subtitle Language Language Second Digital Subtitle Language English Subtitle Type Normal
text_image
Digital Subtitle Off OnPausing Live TV (Time Shift Recording onto a USB Storage Device)
This function allows you to pause live TV. The picture will pause and the programme will begin recording so you don't miss any of the programme. You will have to have a USB storage device attached to the USB socket for Time Shift Recording to work.
Activating Time Shift
- Time shift mode is not switched on as default. While watching live TV press the MENU button.
- Press the ▼ button to scroll down to the RECORD menu, then press button to highlight TIME SHIFT MODE. Then Press OK.
- Press OK to activate TIME SHIFT MODE.
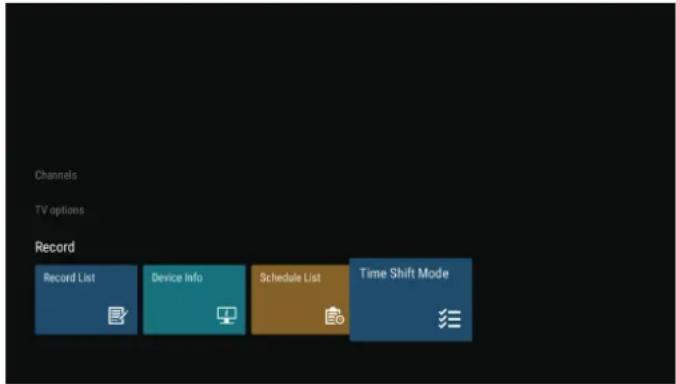
text_image
Channels TV options Record Record List Device Info Schedule List Time Shift ModeDisk Setup for Time Shifting
Your USB storage device will need to be setup for time shifting.
- Press the PAUSE button on your remote control and the DISK SETUP screen will appear.
- Highlight AUTO and press OK. Your TV will now check and setup your USB device. Once done press EXIT.
- Your USB device is now setup and you can now pause live TV by pressing the PAUSE button.
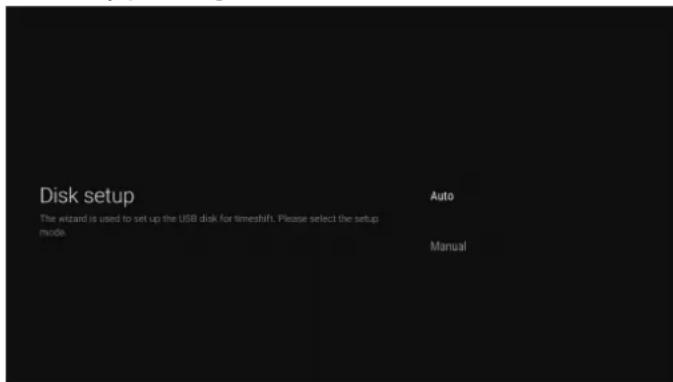
text_image
Disk setup The wizard is used to set up the USB disk for timeshift. Please select the setup mode. Auto ManualRecording a TV Programme onto a USB Storage Device
Use this function to record the TV programmes you are watching on the main screen and save it for future viewing. The recording from timer programme or direct recording may have a little bit of delay when it starts to record the broadcast programme. Please make sure the USB device is inserted. If not, a warning message will pop up. You can only record the programme that you are currently watching.
-
Press the RECORD button to record the programme that you are currently watching.
-
To stop a recording press the STOP button.
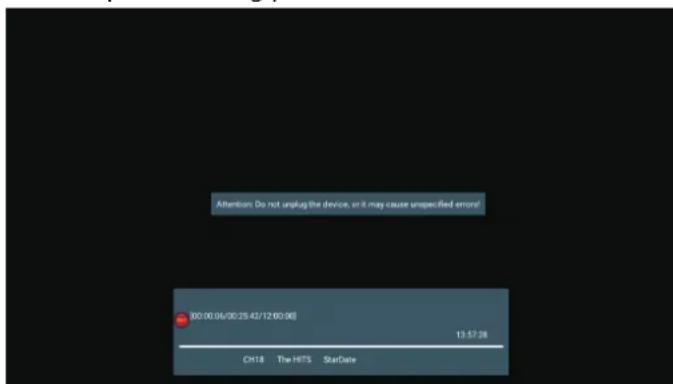
text_image
Attention: Do not unplug the device, or it may cause unspecified error! 00:00:06/00:25 43/12 00:00 13:57:28 CH18 The HITS StarDateSetting a Timed Recording (Schedule list) Deleting a Timed Recording
If you would like to record a future programme you can set your TV to record it, and watch it back at a later date that suits you. The recording may have a little bit of delay when it starts to record the broadcast programme. Please make sure the USB device is inserted and it has enough space for the recording. If not, a warning message will pop up.
- While watching live TV press the MENU button.

text_image
Channels TV options Source Picture Mode Display Mode Speakers Power CI Card Record- Scroll down to the RECORD menu and highlight SCHEDULE LIST and press OK.

text_image
Channels TV options Record Record List Device Info Schedule List Time Shift Mode- Press the RECORD button to start adding a scheduled recording to the list. The SCHEDULE LIST will be displayed, enter all the information in to the list then select ADD and press OK to confirm your scheduled recording.
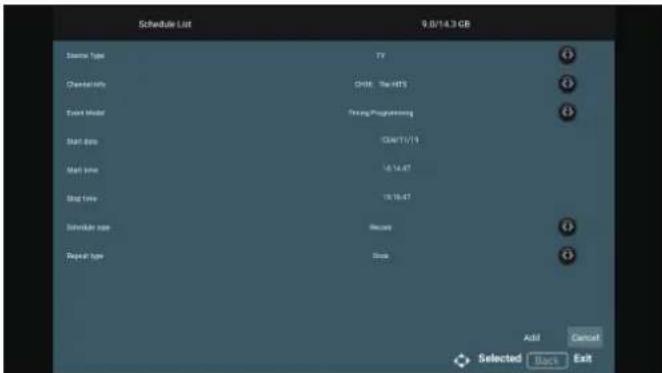
text_image
Schedule List 9.0/14.3 GB Event Type TV Chemistry CHIE The HITS Event Model Testing/Programming Start Date GUN/11/14 Start Time 15:14:47 Stop Time 15:15:47 Schedule icon Recurs Repeat type Free Add Cancel Selected Starts ExitEditing a Timed Recording
If you need to change any of the setting in a Schedule list, select the SCHEDULE LIST from the RECORD menu. Then select the recording you would like to edit, you'll now be able to change any of the setting.
If you need to delete any of the Scheduled recordings in the list, select the SCHEDULE LIST from the RECORD menu. Then select the recording you would like to delete, you'll now be able to select Delete.
Playing Recorded Programmes
All of your recording are stored in RECORD LIST.
- While watching live TV press the MENU button.

text_image
Channels TV options Source Picture Mode Display Mode Speakers Power CI Card Record- Scroll down to the RECORD menu and highlight RECORD LIST and press OK.

text_image
Channels TV options Record Record List Device Info Schedule List Time Shift Mode- Highlight the recording that you would like to watch and press OK. The recording will start to play.
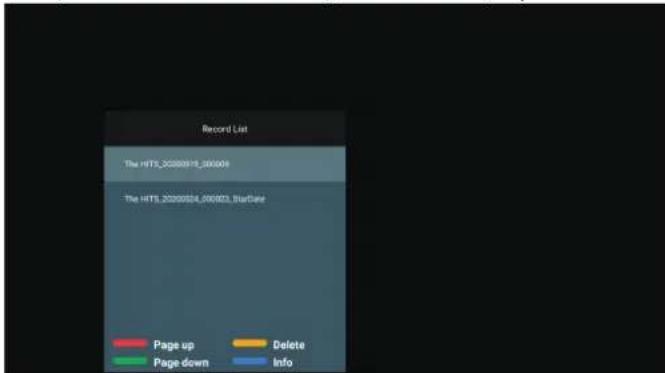
text_image
Record List The HTS_2000018_000006 The HTS_2000034_000023_BusDate Page up Delete Page down InfoDeleting a Recording
Enter the RECORD LIST, highlight the recording that you would like to delete and press the YELLOW button. Then confirm you would like to delete the recording.
DEVICE PREFERENCES
ABOUT
text_image
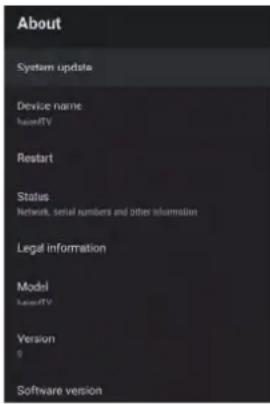
About System update Device name base#TV Restart Status Network, serial numbers and other information Legal information Model base#TV Version 9 Software versionIn this menu, you can read the information and settings of TV.
- Press ▲/▼ button to select what you want set.
- Press OK button to adjust.
- After finishing your adjustment, Press BACK button to return to the previous menu.
DATE&TIME
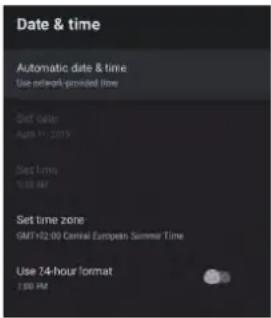
text_image
Date & time Automatic date & time Use network provided time Set date: April 17, 2019 Set time: 1:30 AM Set time zone GMT+32:00 Central European Summer Time Use 74-hour format 1:00 PMAutomatic date & time – Press ▲/▼button to select the option then press OK button to enter the sub-menu.
(Optional: Use network-provided time, Off)
NOTE
- Manually adjusting date & time settings will automatically change the Automatic date & time to OFF.
Set date – Press ▲/▼ button to select the option then press OK button to enter the sub-menu.
Set time – Press ▲/▼ button to select the option then press OK button to enter the sub-menu.
Set time zone – Press ▲/▼ button to select the option then press OK button to enter the sub-menu.
Use 24-hour format – Press ▲/▼ button to select the option then press OK button to choose ON/OFF.
TIMER

text_image
Timer Power On Timer Type off Power On Timer Stop Power Off Timer Type off Power Off Timer HoldPower On Timer Type -Press▲/▼ button to select the option then press OK button to choose ON/OFF/ONCE.
Power On Timer – Press ▲/▼ button to select the option then press OK button to enter the sub-menu.
Power Off Timer Type – Press▲/▼ button to select the option then press OK button to choose ON/OFF/ONCE.
Power Off Timer – Press ▲/▼ button to select the option then press OK button to enter the sub-menu.
LANGUAGE

text_image
English Español Frangais English Español Frangais Hrvatski IndonesiaLanguage – Press ▲/▼ button to select the option then press OK button to enter the select language.
KEYBOARD

text_image
Keyboard Current keyboard Gboard Gboard Settings Manage keyboardsCurrent keyboard – Press ▲/▼button to select the option then press OK button to enter the sub-menu. Gboard Settings – Press ▲/▼button to select the option then press OK button to enter the sub-menu. Manage keyboards – Press ▲/▼button to select the option then press OK button to enter the sub-menu.
INPUTS

text_image
Inputs HDMI 3 HDMI 2 HDMI 1 Composite Composite Component Component
text_image
Inputs Component Component Consumer Electronic Control(CEC) HDMI control Allow the TV to controlHDMI devices Device auto power off Power off HDMI devices with the TV TV auto power on Power on the TV with HDMI device HDMI FEDD Version CEC Device ListInputs – Press ▲/▼button to select the option then press OK button to enter the sub-menu. HDMI control – Press ▲/▼button to select the option then press OK to choose ON/OFF. Device auto power off – Press ▲/▼button to select the option then press OK button to choose ON/OFF. TV auto power on – Press ▲/▼button to select the option then press OK button to choose ON/OFF HDMI EDID Version – Displays EDID version. CEC Device List – Press ▲/▼button to select the option then press OK button to enter the sub-menu.
POWER

text_image
Power Sleep Timer Off Picture off Switch off timer Off No Signal Auto Power Off 15 MinutesSleep Timer – Press ▲ button to select the option then press OK button to enter the sub-menu. (Optional: OFF, 10 minutes, 20 minutes, 30 minutes, 40 minutes, 50 minutes, 60 minutes, 90 minutes, 120 minutes)
Picture OFF – Press ▲/▼ button to select the option then press OK button to choose ON/OFF.
Switch off timer – Press ▲/▼button to select the option then press OK button to enter the sub-menu. (Optional: OFF, 30 minutes, 60 minutes, 90 minutes, 120 minutes, 150 minutes, 180 minutes, 210 minutes, 240 minutes)
No Signal Auto Power Off – Press ▲/▼ button to select the option then press OK button to enter the sub-menu. (Options: 5, 10, 15, 30 or 60 minutes)
PICTURE

text_image
Picture Picture Mode Blue Doby Vision Notification Backlight 50 Brightness 50 Contrast 90 Saturation 90 HUE 0 Sharpness 12 Gamma
text_image
Picture Sharpness Gamma Mode Color Temperature HDR on Advanced Video Color Tuner 11 Point White Balance Correction Reset to DefaultPicture Mode – Press ▲/▼ button to select the option button to enter the sub-menu. (Options: User, Standard, Vivid, Sport, Movie, Game, Energy saving).
Backlight/Brightness/Contrast/Saturation/HUE/ Sharpness – Press ▲/▼ button to select the option. Press ◀ to decrease the parameter. Press ▶ to increase the parameter. Gamma – Press ▲/▼ button to select the option then press OK button to enter the sub-menu. (Options: Dark, middle, Bright).
Color Temperature – Press▲/▼ button to select the option then press OK button to enter the sub-menu.
Picture format – Press ▲/▼ button to select the option then press OK button to enter the sub-menu. (Options: Automatic/Super zoom/4:3/Movie expand 14:9/Movie expand 16:9/Wide screen/Full/Unscaled). (Options: ON/OFF)
Advanced Video – Press ▲/▼ button to select the option then press OK button to enter the sub-menu. Color Tuner – Press ▲/▼ button to select the option then press OK button to enter the sub-menu. 11 Point White Balance Correction – Press ▲/▼ button select the option then press OK button to enter the sub-menu.
Reset to Default – Resets all settings to the factory defaults.
SOUND

text_image
Sound Sound Style Balance Bass Treble Sound Surround Speakers Digital Output FCA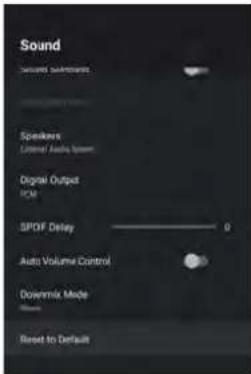
text_image
Sound Sound Substruts Speakers External Audio System Digital Output PCM SPOF Delay 0 Auto Volume Control Dovermix Mode Reset to DefaultSound style – Press ▲/▼ button to select the option then press OK button to enter the sub-menu.
(Optional: User, Standard, Vivid, Sports, Movie, Music, News).
Balance/ Bass/ Treble – Press ▲/▼ button to select the option.
Press to decrease the parameter.
Press to increase the parameter.
Sound Surround – Press ▲/▼ button to select the option then press OK button to choose ON/OFF.
Equalizer Detail – Press ▲/▼ button to select the option then press OK button to enter the sub-menu.
Speakers – Press ▲/▼ button to select the option then press OK button to enter the sub-menu.
(Optional: TV Speaker or external Audio System).
Digital Output – Press ▲/▼ button to select the option then press OK button to enter the sub-menu.
(Optional:Auto,Bypass,PCM,Dolby Digital Plus,Dolby Digital).
SPDIF Delay - Press ▲/▼ button to select the option.
Press ◆ to decrease the parameter.
Press to increase the parameter.
Auto Volume Control – Press ▲/▼ button to select the option then press OK button to choose ON/OFF.
Downmix Mode – Press ▲/▼ button to select the option then press OK button to enter the sub-menu.
(Optional:Stereo,Surround).
Reset to Default – Reset all settings to the factory defaults.
STORAGE
text_image
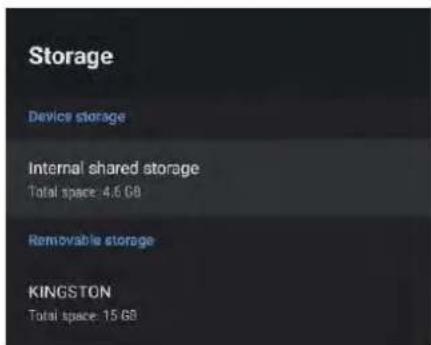
Storage Device storage Internal shared storage Total space: 4.6 GB Removable storage KINGSTON Total space: 15 GBInternal shared storage - Press ▲/▼ button to select the option then press OK button to enter the sub-menu.
Removable Storage – Press ▲/▼ button to select the option then press OK button to enter the sub-menu.
(Note: Show external devices if available).
HOME SCREEN

text_image
Home screen Channels Customize channels Enable video previews Enable audio previews Apps Reorder apps Reorder games Open source licenses Android TV Home Android TV Core ServicesIn this menu, you can set channels, apps, open source licenses.
-
Press ▲/▼ button to select what you want set.
-
Press OK button to adjust.
-
After finishing your adjustment, Press BACK button return to the previous menu.
STORE MODE

text_image
Retail Mode Retail ModeRetail mode – Press ▲/▼ button to select the option then press OK button to choose ON/OFF.
GOOGLE

text_image
Google View permissions Searchable apps Select which apps to include in search results SafeSearch filter Block offensive words Open source licensesIn this menu, you can set searchable apps, safe search filter, block offensive words, open source licenses.
- Press ▲/▼ button to select what you want set.
- Press OK to adjust.
- After finishing your adjustment, press BACK to return to the previous menu.
CHROMECASTBUILT-IN

text_image
Chromecast built-in About Open source licenses Version number 1.36 145507In this menu, you can read the information and settings of Chromecast
- Press ▲/▼ to select what you want set.
- Press OK to adjust.
- After finishing your adjustment, press BACK to return to the previous menu.
SCREEN SAVER
text_image
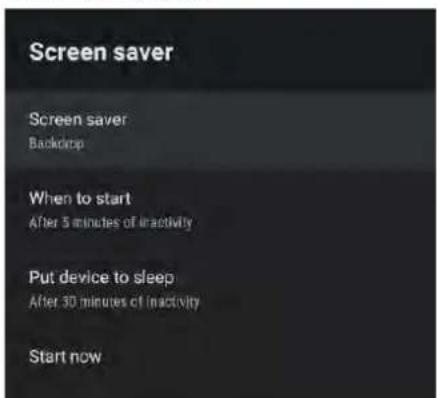
Screen saver Screen saver Backdrop When to start After 5 minutes of inactivity Put device to sleep After 30 minutes of inactivity Start nowScreen saver – Press ▲/▼ to select the option then press OK to enter the sub-menu.
(Optional: Turn screen off, Backdrop, Colors).
When to Start – Press ▲/▼ to select the option then press OK to enter the sub-menu. (Optional: 5, 15, 30 minutes, 1, 2 hours.).
Put device to sleep – Press ▲/▼ to select the option then press OK to enter the sub-menu. (Optional: 30 minutes, 1, 3, 6, 12 hours, Never).
Start now – Press ▲/▼ to select the option then press OK to enter screen saver.
LOCATION

text_image
Location Location status Use Wi-Fi to estimate location Recent location requests No apps have requested location recentlyLocation status – Press ▲/▼ to select the option then press OK to enter the sub-menu.
(Optical: Use Wi-Fi to estimate location, Off)
USAGE & DIAGNOSTICS
text_image
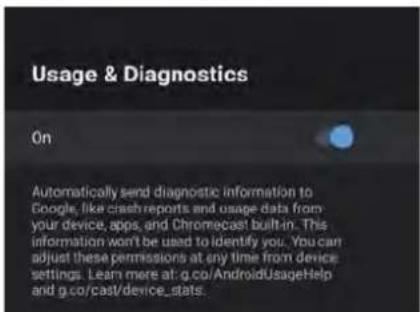
Usage & Diagnostics On Automatically send diagnostic information to Google, like crash reports and usage data from your device, apps, and Chromecast built-in. This information won't be used to identify you. You can adjust these permissions at any time from device settings. Learn more at: g.co/AndroidUsageHelp and g.co/cast/device_stats.Usage & diagnostics – Press ▲/▼ to select the option then press OK to choose ON/OFF.
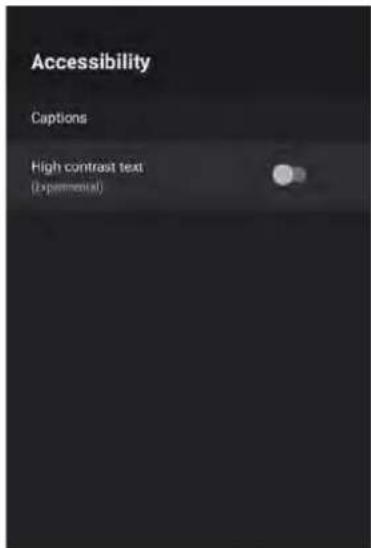
ACCESSIBILITY
text_image
Accessibility Captions High contrast text (Experimental)Captions – Press ▲/▼ button to select the option then press OK to enter the sub-menu.
High contrast text – Press ▲/▼button to select the option then press OK to choose ON/OFF.
RESET
Press OK to enter the sub-menu.
Reset-Erase everything.
REMOTE&ACCESSORIES ADD AND USE OF MULTI MEDIA PLAYER
text_image
Searching for accessories... Pass the next session HOME and LIFT button on all items in order to bring money. Prep USB or soft accessory calling.
text_image
TV BLE Remote 30:AE:7B:07:22:9EIn this menu, you can pair Bluetooth devices.
- Press the "HOME" and "LEFT" buttons at the bottom of the remote control for 5 seconds.
- When the LED stars to flash, release it. The remote controller will send the pairing signal to the TV and display the information of the remote control on the right side of the screen.
- Press the OK button to display the pairing. If the paired is displayed, the connection is successful.
- If the couldn't pair appears, the connection fails. Wait 30 seconds and then press the
"HOME" and "LEFT" buttons at the bottom of the remote control for 5 seconds to repeat the previous steps.
- Press BACK or EXIT button return to the previous menu.
text_image
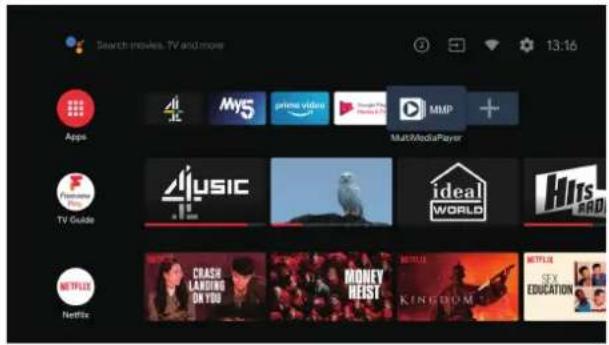
Search-movies. TV and more 13:16 Apps My5 prime video MMP Multi/MediaPlayer Music ideal world Hits RAD TV Guide CRASH LANDING ON YOU MONEY REAST KING FROM Netflix NFLX EDUCATION- In the HOME interface, select the + icon in the APPcolumn to add the application, and click OK. Press up and down to select the DigitalMediaPlayer application, and click OK to add it to the HOME interface.
text_image
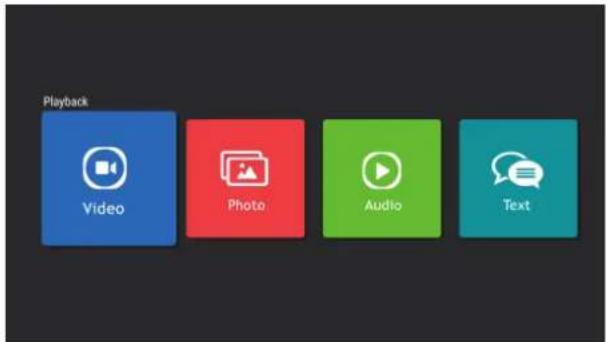
Playback Video Photo Audio Text- Select OK key to enter DigitlMediaPlayer and display Video, Photo, Audio Text. After inserting the usb flash drive, you can view the corresponding files in the usb flash drive.
NOTE
The menu may be different depending on when you purchased the TV.
| Panel System | 50 inch LED Panel |
| Display Resolution | 1920(H) x 1080(V) pixels |
| Television System | PAL / BG / DK / SECAMBG / DK |
| Brightness | 230cd/m2 |
| Contrast Ratio | 4000:1 |
| Power Source | AC100~240V |
| RAM | 1GB |
| Built in Flash memory | 8GB |
| Operating System | Android 9 |
| Energy Efficiency Class | A+ |
| Screen Size (measured diagonally) | Approx.127c50 (inch) |
| Operating Power Consumption | 71W |
| Average Annual Energy Consumption | 104kWh |
| Standby Power Consumption | <0.5 W |
| Operating Temperature | 0°C – 50°C |
| Vesa Wall mounting size | 200 x 200mm(M6 x 10) |
| Speaker Power | 8 W + 8 W |
| Dimension (W x D x H)without base | 1122 x 83 x 647mm |
| Dimension (W x D x H) with base | 1122 x 190 x 686mm |
| Weight (Net) | 10.1 kg |
Features and specifications are subject to change without prior notice.
This TV has been tested against the European standards for Energy efficiency using the standard signals and conditions specified in the standard. The result is shown on the energy efficiency label. This is the energy that you would expect the TV to consume under normal working conditions when measured over a period of time. At some times the TV will use more power than this and at some times less. The factors that cause this fluctuation are the actual signals being received, and the Volume setting. Generally speaking the mains voltage, brightness / contrast settings and other settings have a very small effect on energy usage and can to all intense and purposes be ignored. The difference between the power consumed when receiving a high bit rate channel with the volume at max and a low bit rate channel with volume at zero is usually less than 3 watts.
Careful and regular cleaning can prolong the life of your TV.

Be sure to Disconnect the mains cable from the mains socket before any cleaning.
- Use a soft dry cloth to wipe away the dust from the screen and surfaces.
- If the surfaces are extremely dirty, clean the TV with a cloth which has been dipped in a weak soapy water. Wring the cloth until it is almost dry, then use it to wipe the TV.
- Ensure there is no excess water on the screen. Allow any water or dampness to evaporate before switching the TV on.

Never use alcohol, benzine, paint-thinner, cleaning fluid or other chemicals. Do not use compressed air to remove dust.

natural_image
Illustration of a hand holding a computer monitor with a blank screen (no text or symbols)Trouble shooting
The following table contains various hints and tips to get the best performance from your TV.
| The TV does not respond when pressing any buttons | · The TV may freeze up during use. Disconnect the mains cable from the mains socket for a few minutes. Reconnect the mains cable and try to operate it again as usual. |
| TV cannot be switched on | · Check that the TV is connected to the mains supply· Make sure all connected AV devices are switched off before switching on your TV. |
| The remote control does not work | · Check to see if there are any objects between the TV and the remote control causing an obstruction. Ensure that you are pointing the remote control directly at the TV.· Ensure that the batteries are installed with the correct polarity (+ to +, - to -).· Install new batteries. |
| Power is suddenly turned off | · Check the power of the TV. The mains supply maybe interrupted.· Check if the sleep timer is set.· Check whether the Auto Standby is activated. |
| The video function does not work. | |
| No Picture & No Sound | · Check whether the TV is switched on.· Try another channel. The problem may be caused by the broadcaster. |
| Picture appears slowly after switching on | · This is normal, the image is muted during the TV startup process. Please contact your service centre, if the picture has not appeared after five minutes. |
| No or poor colour or poor picture | · Adjust the settings in the PICTURE menu.· Try another channel. The problem may be caused by the broadcaster.· Check if the video cables are connected properly. |
| Horizontal / Vertical bar or picture shaking | · Check for local interference such as an electrical appliance or power tool. |
| Poor reception on some channels | · Station or cable channel may be experiencing problems, tune to another station.· Station signal is weak, reposition the aerial for better reception.· Check for sources of possible interference. |
| Lines or streaks in pictures | · Check aerial (Change the position of the aerial.) |
| No pictures when connecting HDMI | · Check if the input source is HDMI. |
Trouble shooting
The audio function does not work.
| Picture OK but no sound | Press the VOL + / - buttons.Sound muted? Press the Mute button.Try another channel. The problem may be caused by the broadcaster. |
| No output from one of the speakers | Adjust the Balance settings in the SOUND menu. |
| Unusual sound from Inside the TV | A change in ambient humidity or temperature may result in an unusual noise when the TV is switched on or off and does not indicate a fault with the TV. |
| No sound when connecting HDMI | Check if the input source is HDMI. |
| Audio noise | Keep the RF coaxial cable away from the other connected cables. |
FAQs (Frequently Asked Questions)
| Why have I lost some / all of my channels? | It happens sometimes, if you have a weak signal. Usually it just means you'll need to rescan your digital box or TV. Don't worry, it easy to do. And once you've done it, you should get all the Freeview channels available to you. If problems persist you may need to get your aerial checked. Talk to your retailer or contact your local aerial installer. |
| Why do I get 'blocking' on my digital picture? | In most cases, blocking is caused by a reception problem - either the signal is too weak or there is some kind of interference. Talk to your retailer or contact your local aerial installer.Blocking can also be caused by a digital signal that is too strong. If you are still experiencing blocking and the signal is strong, consult your local aerial installer for advice. |
| Can I watch Freeview using a portable set-top aerial? | Some, but only a few, homes may be able to use a set top aerial. However, for a much better reception, we strongly recommend that you use a rooftop aerial.If you do not have access to a rooftop aerial - for example, if you rent a flat and the aerial is the responsibility of your landlord, or if you're using a second TV in the bedroom and don't want the hassle and expense of using extension cables, a set - top aerial may be your only option. |
| What type of aerial do I need? | If you are installing a new aerial, we recommend a wideband rooftop aerial rather than a loft aerial. Loft aerials generally receive a weaker digital signal and are more likely to get interference from other electrical devices in the home. We suggest you have an aerial survey done before getting an aerial upgrade.Talk to your retailer or contact your local aerial installer. |

Packaging materials are not toys. Please keep away from children. Plastic bags can cause suffocation when pulled over the head.
Waste Electrical Recycling
Correct disposal of Product

This sign indicates that this product may not be disposed of with your regular household waste. The recycling and separate collection of such products is your responsibility. Please drop off the above mentioned waste at a designated place for recycling waste electrical and electronic equipment. If you do not know where to drop off your waste equipment for recycling, please contact your local city office or household waste collection service.

The crossed out wheeled dust bin symbol indicates that batteries and/or accumulators must be collected and disposed of separately from household waste.
If the battery or accumulator contains more than the specified values of lead (Pb), mercury (Hg), and/or cadmium (Cd) defined in the Battery Directive (2006/66/EC), then the chemicals symbols for lead(Pb), mercury (Hg) and/or cadmium (Cd) will appear below the crossed out wheeled dust bin symbol.

By participating in separate collection of batteries, you will help to assure the proper disposal of products and batteries thus help to prevent potential negative consequences for the environment and human health.
For more detailed information about the collection and recycling programmes available in your country, please contact your local city office or the shop where you purchased this product.

This appliance complies with European Safety and Electrical directives.
EN 55022:2006+A1:2007
EN 55013:2001+A1:2003+A2:2006
EN 61000-3-2:2006+A1:2009+A2:2009
EN 61000-3-3:2008
EN 55024:1998+A1:2001+A2:2003
EN 55020:2007