
KADMMPCGASC - Wall air conditioner Kogan - Free user manual and instructions
Find the device manual for free KADMMPCGASC Kogan in PDF.

| Product Type | Dual Monitor Mount (Full Motion Gas Spring) |
| Brand | Kogan |
| Model | KADMMPCGASC |
| Max Load Capacity per Monitor | 10 kg (22 lbs) |
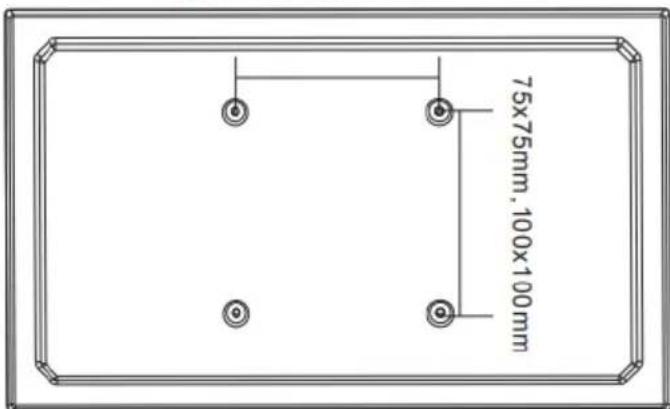
| VESA Compatibility | 75x75 mm and 100x100 mm |
| Mounting Options | Clamp (desk edge) or Grommet (through desk) |
| Gas Spring Adjustment | Height adjustment with hex key (tension adjustment for monitor weight) |
| Tilt Angle | Adjustable via M6 wrench |
| Swivel Rotation | Adjustable via hex key |
| Materials | Steel, plastic, rubber (anti-slip pads) |
| Included Components | Screws (M4, M5, M6), washers, hex keys (4mm, 5mm), M6 wrench, cable cover, arm connector, clamp support, grommet accessories |
| Desk Thickness Compatibility (Clamp) | Select position based on desk thickness |
| Cable Management | Yes, with cable cover |
| Indoor Use Only | Yes |
| Installation Requirements | Minimum two people, safety gear required |
| Maintenance | Check and tighten joint screws every two months |
| Safety Warning | Do not exceed 10 kg per monitor; choking hazard from small parts |
Frequently Asked Questions - KADMMPCGASC Kogan
User questions about KADMMPCGASC Kogan
0 question about this device. Answer the ones you know or ask your own.
Ask a new question about this device
Download the instructions for your Wall air conditioner in PDF format for free! Find your manual KADMMPCGASC - Kogan and take your electronic device back in hand. On this page are published all the documents necessary for the use of your device. KADMMPCGASC by Kogan.
USER MANUAL KADMMPCGASC Kogan
natural_image
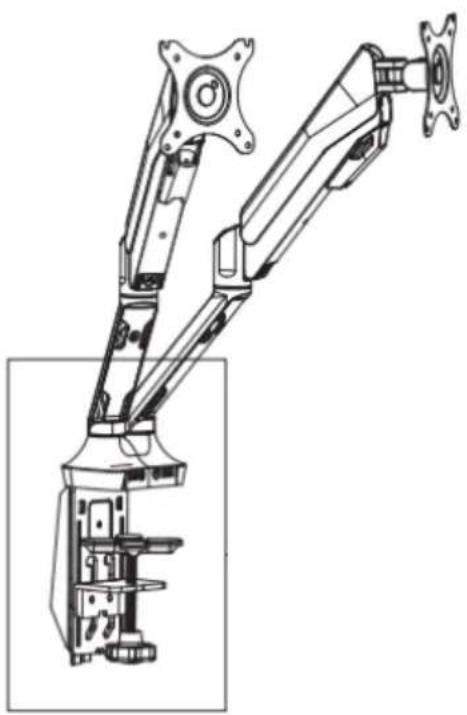
Technical line drawing of a mechanical arm with articulated joints and mounting base (no text or symbols)KOGAN FULL MOTION GAS SPRING DUAL MONITOR MOUNT
KADMMPCGASC
SAFETY & WARNINGS
This product contains small items that could be a choking hazard if swallowed. Keep these items away from young children.
- Make sure these instructions are read and completely understood before attempting installation. If you are unsure of any part of this installation, please contact a professional installer for assistance.
- The desk or mounting surface must be capable of supporting the combined weight of the mount and the display; otherwise, the mounting point must be reinforced.
- Safety gear and proper tools must be used. A minimum of two people is required for this installation. Failure to use safety gear can result in property damage, serious injury or death.
• Every two months, check the screws in the joints and tighten them as necessary
This product was designed to be installed on a desk. Before installing, make sure the mount will support the combined load of the equipment and the hardware. Never exceed the maximum load capacity 10KG or else it may result in product failure or personal injury.
Note:
This product is intended for indoor use only. Use of this product outdoors could lead to product failure or personal injury.
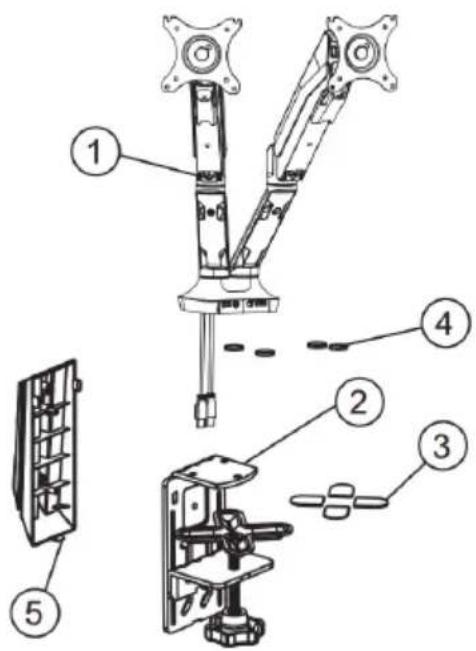
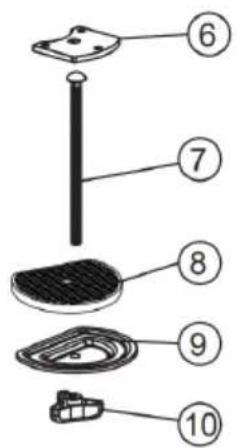
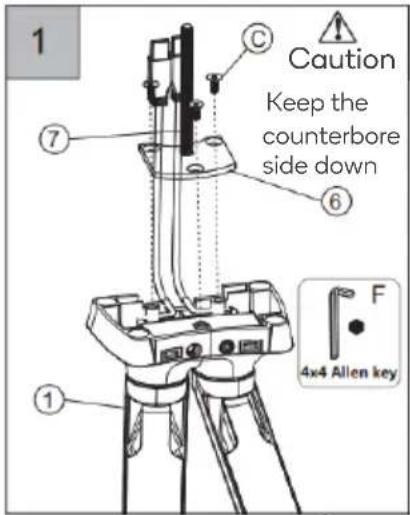
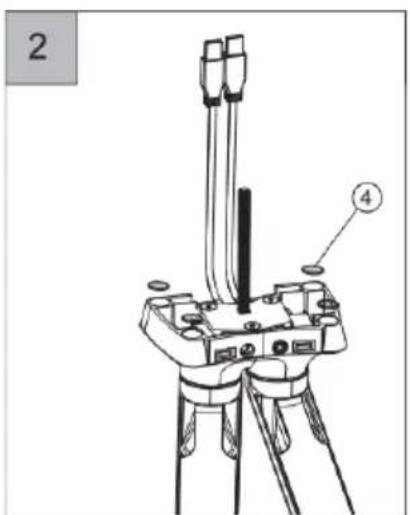
COMPONENTS
 |  |  |  |
| M4x12mm A (8PCS) | M5x12mm B (8PCS) | M6x12mm C (3PCS) | 6.5x 13x2 D (16PCS) |
 |  | 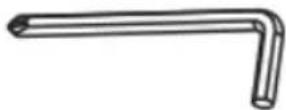 |  |
| M6 Wrench E (1PCS) | 4x4 Allen Key F(1PCS) | 5x5 Allen Key F(1PCS) | Required for Assembly (Not Included) |
4x4 Allen Key F (1PCS)
5x5 Allen Key F (1PCS)
Grommet Accessories
| 1 | Arm Connector |
| 2 | Clamp Support |
| 3 | Anti-Slip Rubber 1 |
| 4 | Anti-Slip Rubber 2 |
| 5 | Cable Cover |
| 6 | Bottom Support |
| 7 | Grommet Support - Screw |
| 8 | Anti-Slip Rubber 3 |
| 9 | Grommet Support - Washer |
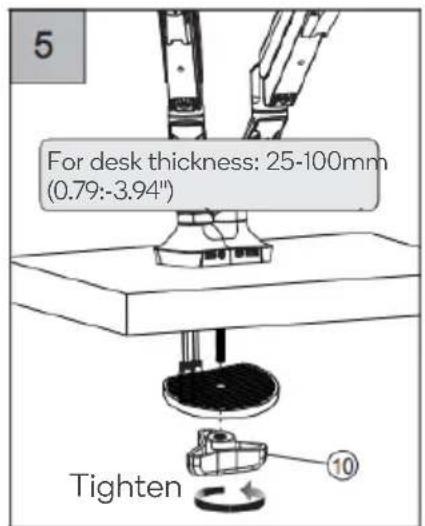
| 10 | Grommet Support - Knob |
ASSEMBLY
Step 1:
Preparation before monitor installation
- Make sure there are VESA holes 100x100mm or 75x75mm in the monitor. If not, the mount couldn't be installed.
- Remove the original fixed base from monitor. Be careful not to scratch the screen.
75x75mm,100x100mm
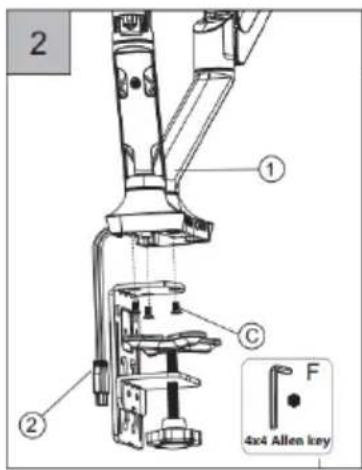
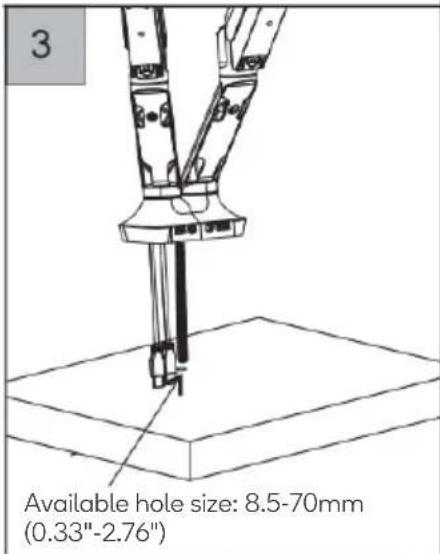
Step 2-A:

Caution
Select proper position according to the thickness of the desk
natural_image
Three-step diagram showing a device with internal components before and after assembly, no text or symbols present.Option 1: Clamp
natural_image
Technical line drawing of a mechanical arm with mounting brackets and housing (no text or symbols)

Step 2-B:
Option 2: Grommet
 |  |  |
 |  |
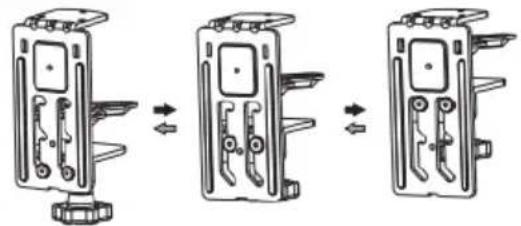
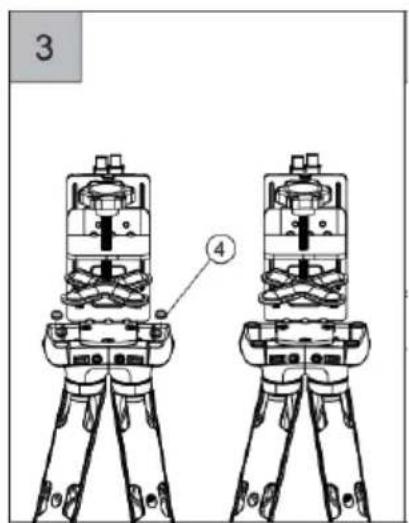
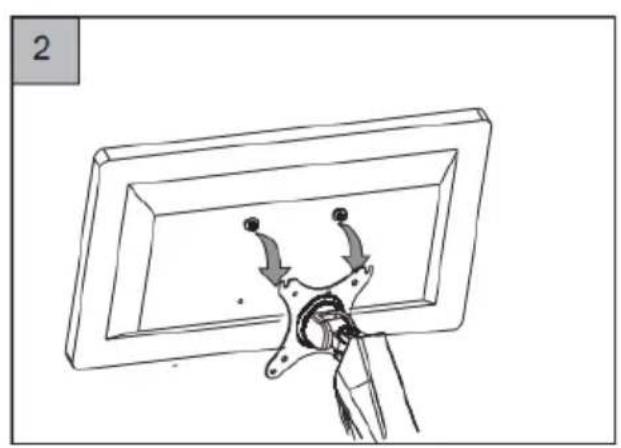
Step 3:
Install the monitor onto the mount

natural_image
Line drawing of a dual-panel computer arm with directional arrows indicating motion (no text or symbols)
natural_image
Line drawing of a mechanical assembly with arrows indicating motion, no text or symbols present
Step 4:
Adjust the monitor
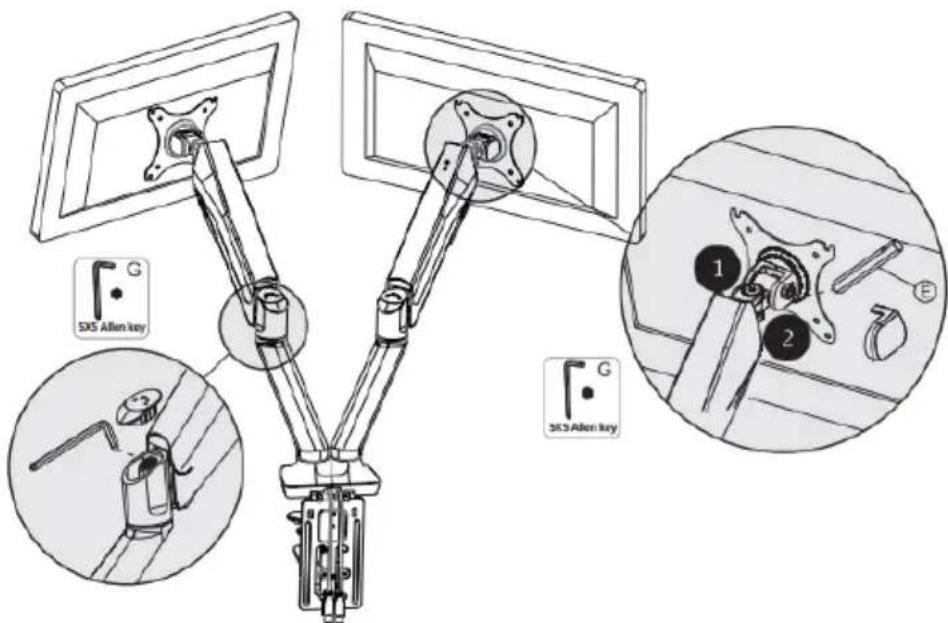
If the monitor does not stop at any height, please use the 5x5 hex key (G) to adjust the screw on the arm.
Please adjust the screw in the "-" direction when the monitor is up and the "+" direction when it is down.
In the factory it is typically set to suit a monitor around 4-5KG, so it will need to be adjusted to suit your monitors weight.
Caution:
The swivel function marked 1 is adjusted by using the hex key (G). The tilt function marked 2 is adjusted using the M6 box wrench (E).
Using Cord Management:

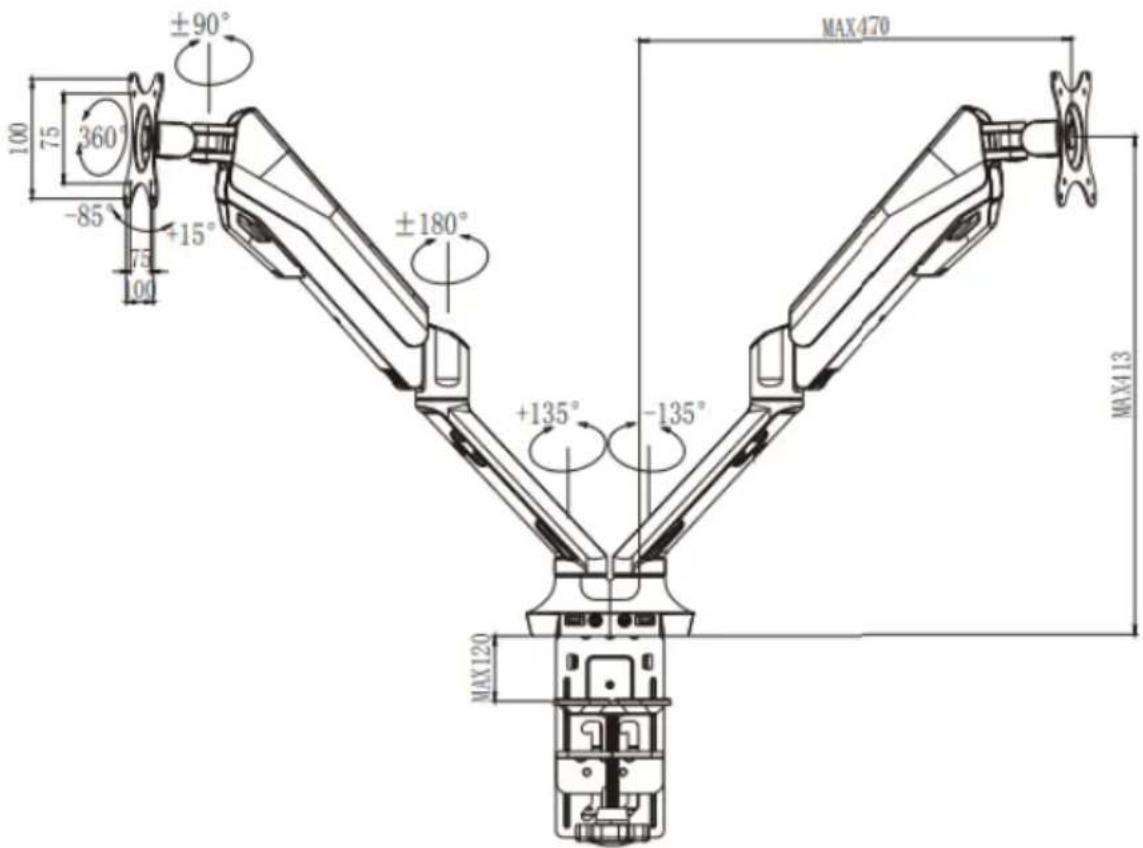
Dimensions:
Need more information?
We hope that this user guide has given you
the assistance needed for a simple set-up.
For the most up-to-date guide for your product,
as well as any additional assistance you may require,
head online to help.kogan.com
kōgan

Brand : Kogan
Model : KADMMPCGASC
Category : Wall air conditioner