Air Revolve VX29 - Vacuum Cleaner VAX - Free user manual and instructions
Find the device manual for free Air Revolve VX29 VAX in PDF.

User questions about Air Revolve VX29 VAX
0 question about this device. Answer the ones you know or ask your own.
Ask a new question about this device
Download the instructions for your Vacuum Cleaner in PDF format for free! Find your manual Air Revolve VX29 - VAX and take your electronic device back in hand. On this page are published all the documents necessary for the use of your device. Air Revolve VX29 by VAX.
USER MANUAL Air Revolve VX29 VAX
Basic safety precautions
Please keep instructions for further use and use only as instructed in this guide. This vacuum cleaner is intended for household use only and NOT for commercial or industrial use
- Only use the vacuum cleaner indoors on dry surfaces and keep the area you're cleaning well lit
- Keep fingers, hair and loose clothing away from moving parts and openings whilst using the vacuum cleaner

Don'ts
✗ Don't use this vacuum cleaner if it has been dropped, damaged or left outdoors
✗ Don't run over the power cord or use vacuum cleaner if the power cord or plug is damaged. Please contact our Customer Care Line on: AU: 1300 361 505 NZ: 0800 800 900 (Mon-Fri: 8.30am to 5pm)
✗ Don't handle the plug or use the vacuum cleaner with wet hands
✗ Don't pull or carry this vacuum cleaner by the power cord. Don't use the power cord as a handle, pull the power cord around corners, sharp edges or close a door over the power cord. Don't unplug vacuum cleaner by pulling on the power cord
✗ Don't vacuum plaster dust, concrete dust or any other building or vitreous materials.
✗ Don't vacuum flour, baking soda or any other powder-based carpet refresher or deodoriser.

Do's
√ Turn off all controls on the vacuum cleaner before disconnecting or connecting the power cord
√ Always keep the power cord away from the brushes whilst using your vacuum cleaner. After use always wrap the power cord around the cord clips provided
√ Always make sure all filters are in place before use
√ Always make sure the brushbar is set to hard floor when using your vacuum on the stairs and take extra care when positioning the vacuum cleaner on the stairs
- This appliance is not intended for use by children and persons with reduced physical, sensory or mental capabilities or lack of experience and knowledge, unless they have been given supervision or instruction concerning use of the appliance in a safe way and understand the hazards involved
- Only Vax recommended tools should be used with this vacuum cleaner
• Vax recommends the use of a Residual Current Device rating of 30mA or less - If the supply cord is damaged, it must be replaced by the manufacturer, or similarly qualified person in order to avoid a hazard, or invalidating the warranty
✗ Don’t vacuum up any flammable or combustible materials (lighter fluid, petrol, kerosene etc.) or use the vacuum cleaner in an area with explosive vapours or liquid
✗ Don't vacuum up hot coals, ash, cigarette butts, matches or smoking hot burning items or use in an area where there may be harmful fluids (chlorine, bleach, and ammonia drain cleaner)
✗ Don't attempt to remove blockages with sharp objects as this may cause damage to your vacuum cleaner
✗ Don't vacuum up hard or sharp objects such as glass, nails, screws or coins etc
✗ Don't use the vacuum cleaner with incorrect voltage as this may result in damage or injury to the user. The correct voltage is listed on the machine rating label
CAUTION: This hose contains electrical connections:
- Do not use to suck up water
- Do not immerse in water for cleaning
- The hose should be checked regularly and must not be used if damaged
√ Always switch off the vacuum cleaner before disconnecting or connecting the hose and accessories
√ Keep all openings clear and free from debris as this may affect the airflow/suction
√ Use only SAA approved 10amp extension cords, non-approved extension cords may overheat. Care should be taken to arrange the extension cord as it could be a trip hazard
√ Store the vacuum cleaner in a cool, dry area. If filters have been cleaned as per instructions in this user guide, ensure they are thoroughly dry before storing away
Thank you for buying this AirRevolve Pet.
Taking care of your carpets and hard floors
The AirRevolve Pet is designed to make vacuuming carpets and hard floors regularly as effective and efficient as possible and this user guide will help you get the most out of your machine. Maintaining your carpets will ensure they keep their appearance for longer. You've chosen the carpets and hard floors for your home for a reason and Vax will help you take good care of them.
Taking care of your AirRevolve Pet
Also inside this guide are instructions on maintaining your new machine, so that it's always ready when you are to tackle your carpets and hard floors.
We're here if you need us
For troubleshooting simply visit or call:
Australia: 1300 361 505* New Zealand: 0800 800 900*
vax.com.au
vax.co.nz
*Monday – Friday: 8:30am -5:00pm
Calls are charged at the standard local rate. Please make note of the serial number and model number of the product before calling.

Performance is everything.
Contents

Let's talk safety

Getting to know your machine

Getting started

Using your machine

Taking care of your machine

Let's talk technical

What to do if it goes wrong

Getting in touch

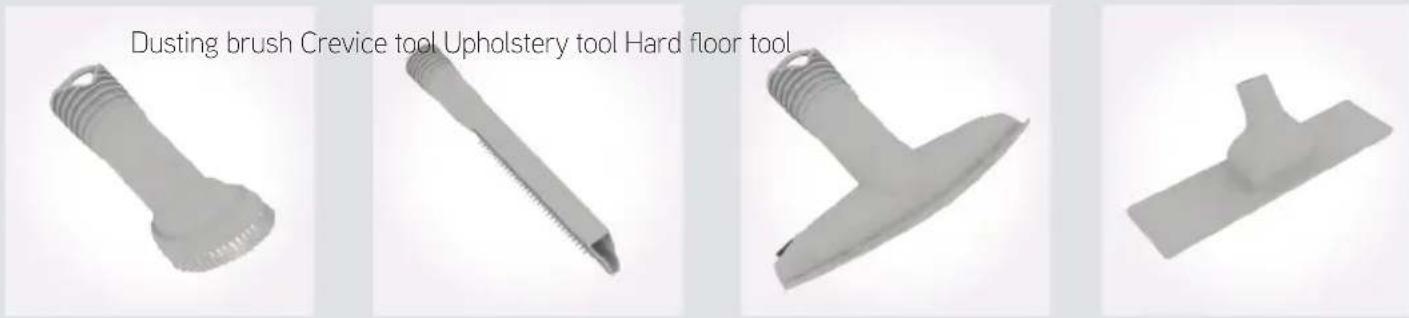
Accessories

Notes
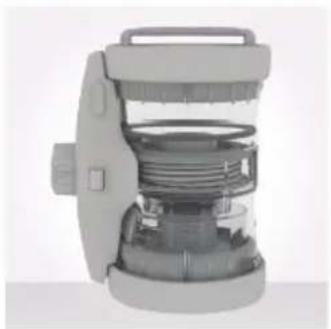
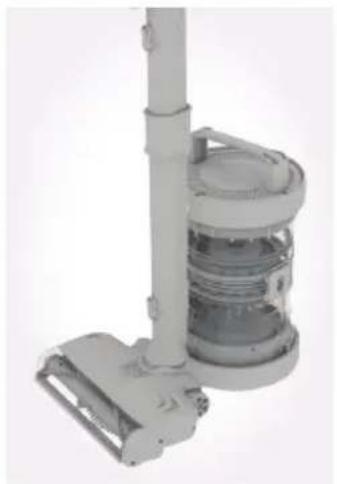
AirRevolve Pet
Included with your machine
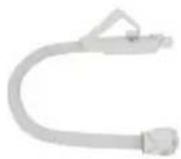
Accessory hose and handle

natural_image
Exterior view of a mechanical device with a cylindrical component and a handle (no visible text or symbols)Powered head

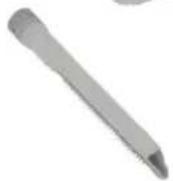
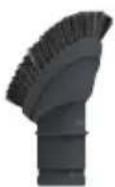
Dusting brush
Crevice tool

Upholstery tool

natural_image
Simple 3D-rendered gray mechanical part with a T-shaped cutout (no text or symbols)Hard floor tool
natural_image
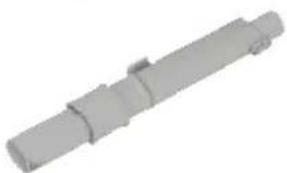
3D rendered image of a cylindrical mechanical component with no visible text or symbolsTelescopic extension tube & parking clip
Filters (housed inside cylinder)
Pre-motor filter
Pre-Motor sponge
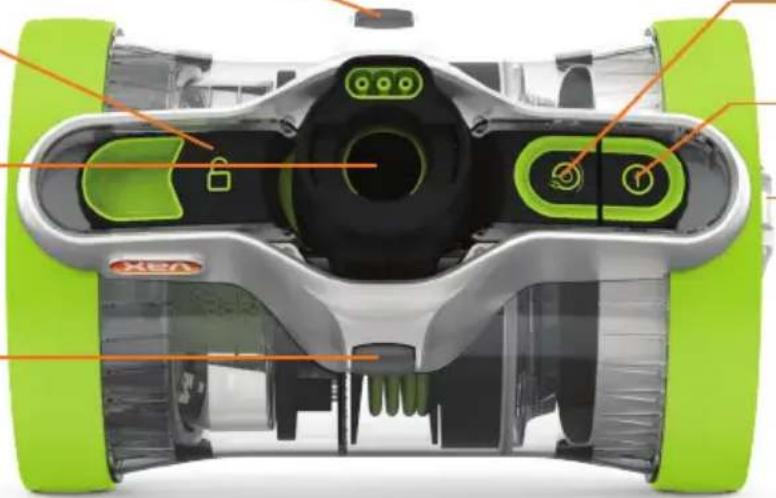
Getting to know your machine
Castor wheel
Dirt container release button
Hose entry point
Castor wheel
Wheel
natural_image
Top-down cutaway view of a green and silver robotic device with labeled components (no text or symbols beyond branding)Cord rewind button
On/Off button
Carry handle

natural_image
Cutaway view of a green and black robotic device showing internal components (no text or symbols visible)Separator and shroud
Technical Specification
Name VAX AirRevolve Pet
Model no. VX29
Wattage 750W
Voltage 220-240V \~ 50Hz
Cord length 6m
Weight 5.2kg
Capacity 1.2L
Subject to technical change without notice.
Motorised Powerhead Attachment
Wattage 120W
Voltage 220-240V \~ 50Hz
Accessories & Consumables
Filter pack model no. VX29F
*To purchase consumables and accessories, please visit vax.com.au / vax.co.nz
PLEASE READ 'LET'S TALK SAFETY' AT THE BEGINNING BEFORE USE
CAUTION: Always switch off the vacuum cleaner before connecting or disconnecting the hose/attachments, or removing and emptying the dirt container.
IMPORTANT: The vacuum cleaner is equipped with a thermal cut-out. If for any reason the vacuum cleaner does overheat the thermostat will automatically turn the vacuum cleaner off. If this happens, switch the vacuum cleaner off and unplug. Remove and empty the dirt container also check the vacuum cleaner for blockages. Allow the vacuum cleaner to cool for approximately 1 hour (if you have cleaned the filter please wait at least 24 hours for the filter to fully dry before putting back into the machine).
If the vacuum cleaner is blocked, switch off and unplug before removing the blockage.
Assembling your vacuum cleaner

natural_image
Illustration of a hand inserting a component into a cylindrical device (no text or symbols visible)Line up hose connector with hose entry point. Squeeze both buttons on either side of hose connector.

natural_image
Illustration of a hand pressing down on a mechanical component with an orange arrow indicating motion (no text or symbols present)Push hose connector into hose entry point until hose connector clicks and locks into place.

natural_image
Illustration of two hands holding a tool with an arrow indicating direction (no text or symbols)Line up hose handle with telescopic tube. Push hose handle into telescopic tube until clicks and locks into place.

natural_image
Diagram of a hairdryer with orange arrows indicating compression or disassembly process (no text or symbols)Line up and push the other end of the telescopic tube into the powered head until it clicks into place.

natural_image
Illustration of two hands holding a ruler with an orange arrow indicating measurement direction (no text or symbols)Slide the adjuster on the telescopic extension tube and select required length.
Using your accessories
text_image
Dusting brush Crevice tool Upholstery tool Hard floor toolChoose an accessory and push onto the telescopic extension tube or hose handle until it clicks and/or locks into place. For most efficient results on hard floors replace the powerhead with the specialist hard floor tool.
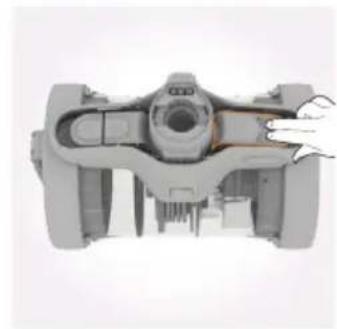
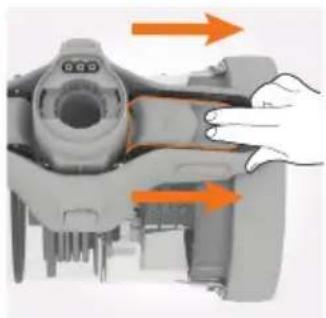
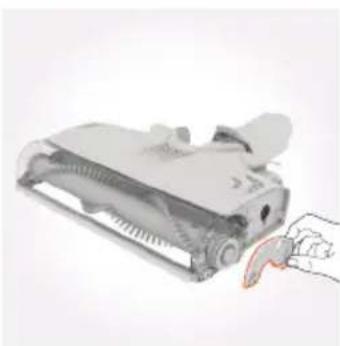
Carrying your machine
natural_image
Two views of a mechanical device showing internal components and a hand adjusting the top part (no text or symbols visible)Always use the carry handle to lift and carry the machine. Never stand the machine with the carry handle on the floor.
CAUTION: The power cord must always be completely unwound, do not pull further than the black marker.
CAUTION: When the vacuum and powered head are switched on, never leave the powered head in one position for long periods of time. The powered head brush should be ON for carpets and OFF for hard floors.

natural_image
Close-up of hands using a tool to adjust or install a mechanical component (no visible text or symbols)Unwind the power cord. Do not pull further than the black marker.
natural_image
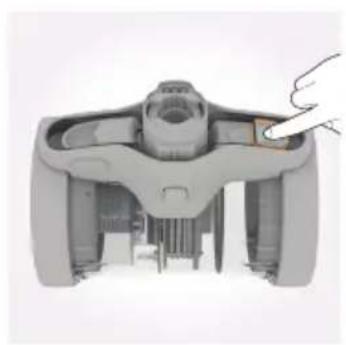
Top-down view of a mechanical device with a hand pointing to a component (no visible text or symbols)Plug into the mains and press the On/Off button (①) on the machine, or on the hose handle to switch the machine on.
natural_image
Illustration of a hand holding a small object on a surface, no text or symbols present
natural_image
3D diagram of a mechanical component with an orange arrow indicating a specific part (no text or symbols present)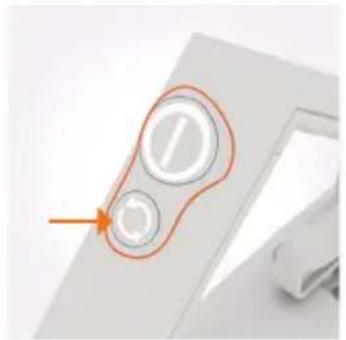
natural_image
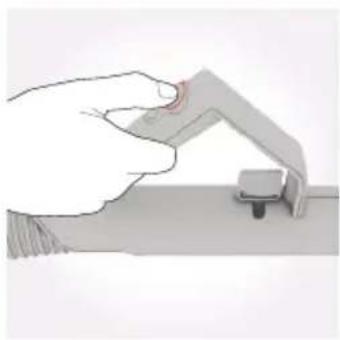
Close-up of a computer mouse with two circular buttons and an orange arrow pointing to the button (no text or symbols visible)Press the powered head brush On/Off button once, the brushes on the powered head will spin. Press again and the brushes will stop.

natural_image
Illustration of a hand holding a small object on a surface, with no visible text or symbolsSlide the vent cover on the hose handle to reduce suction if required.
Using your machine on the stairs

natural_image
Exterior view of a modern kitchen blender with internal components (no text or symbols visible)
natural_image
3D rendered mechanical component with internal structure and mounting base (no visible text or symbols)
When cleaning stairs to prevent the vacuum cleaner falling, always stand the vacuum cleaner upright with the carry handle at the top.
CAUTION: The plug must be removed from the socket-outlet before cleaning or maintaining the appliance.
Emptying and cleaning the dirt container
natural_image
3D rendered mechanical component with internal spring and handle (no text or symbols visible)Do not over-fill the machine. Stand the machine vertically to check whether the max fill line has been reached.
natural_image
Top-down view of a mechanical device with a hand pointing to the side (no visible text or symbols)Place the machine hose side up. Pull and slide dirt container release button.

natural_image
Close-up of a mechanical assembly with orange arrows indicating direction (no text or symbols visible)Pull to remove dirt container from main body.
natural_image
Illustration of hands pouring liquid from a glass container into a bowl (no text or symbols)Hold dirt container over a bin and press the dirt release clip on the bottom of the dirt container, allowing dirt/debris to fall out.
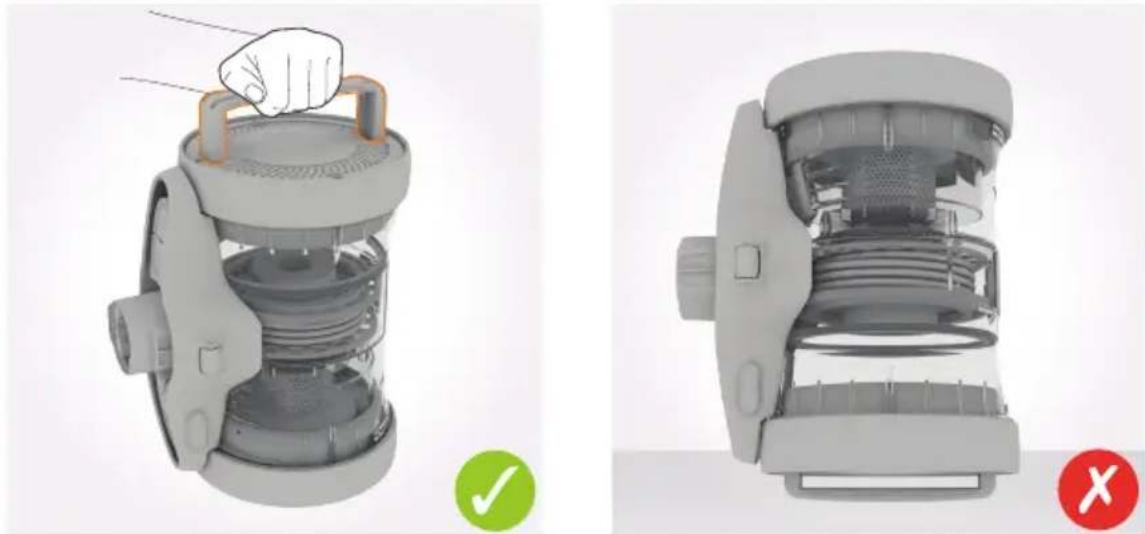
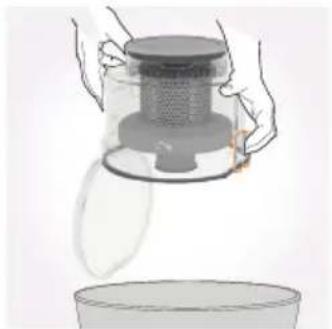
Cleaning the shroud and separator

natural_image
Hand holding a circular mechanical component with an arrow indicating rotation (no text or symbols)Twist the shroud clockwise to unlock.

natural_image
Illustration of a hand holding a vacuum cleaner with orange arrows indicating force or movement (no text or symbols)Pull to remove the shroud out of the dirt container.

natural_image
Illustration of a hand pouring liquid into a container (no text or symbols)Tap the shroud over a bin to remove any dirt/debris. Using a soft brush remove any remaining dirt/debris from the shroud.

natural_image
Hand holding a small object through a circular opening, no visible text or symbolsWipe the dirt container and separator with a damp cloth to remove dirt/debris.

natural_image
Hand pressing a button into a circular component with an orange arrow indicating rotation (no text or symbols)Line up the tabs on the separator into the dirt container. Twist the separator anti-clockwise to lock into place.
natural_image
Mechanical assembly diagram showing internal components with orange arrows indicating direction (no text or symbols)Line up dirt container with marked arrows and push firmly into main body of vacuum cleaner.
Taking care of your machine
CAUTION: For best cleaning results filters require cleaning every 3-6 months or more frequently depending upon level of use of vacuum cleaner. Discoloured or damaged filters need replacing. Unplug and switch off the vacuum cleaner before performing maintenance or troubleshooting checks.
IMPORTANT: Do not use your vacuum cleaner with a clogged filter and without the filter in place.
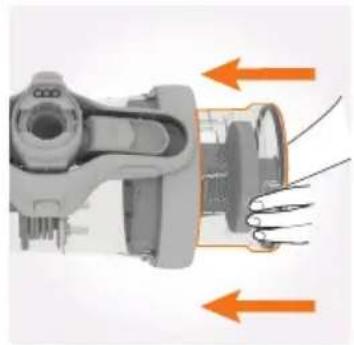
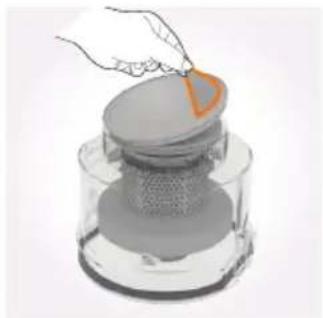
Cleaning the pre-motor filter
natural_image
Close-up of a mechanical device with orange arrows indicating motion or force direction (no text or symbols visible)Pull and slide the dirt container release button. Pull to remove dirt container from main body.
natural_image
Illustration of a hand placing a small orange object onto a layered gray surface, resembling a mechanical or industrial component (no text or symbols visible)Pull the tab on the pre-motor filter to remove the pre-motor filter from the base of the dirt container.
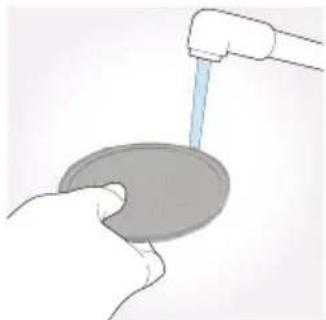
natural_image
Illustration of a hand holding a circular object with a water tap inserted (no text or symbols)Tap the pre-motor filter and sponge over a bin to remove any dirt/debris. Wash the filter and sponge under running water (40°C max).
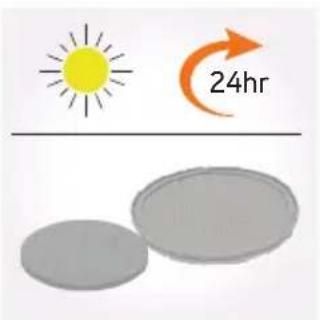
text_image
24hrLeave for at least 24hrs or until fully dry before re-fitting.
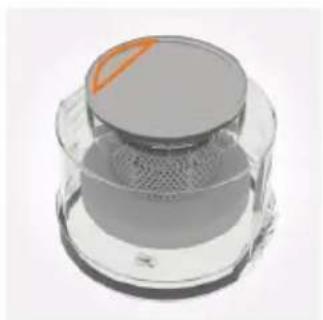
natural_image
3D rendering of a transparent cylindrical device with a circular top and mesh chamber (no text or symbols visible)Make sure the tab on the pre-motor filter is visible when re-fitting the pre-motor filter and sponge into the dirt container.

natural_image
Mechanical assembly diagram showing a shaft and housing with orange arrows indicating direction (no text or symbols)Line up dirt container with marked arrows and push firmly into main body of vacuum cleaner.
Removing hose, telescopic extension tube and accessories
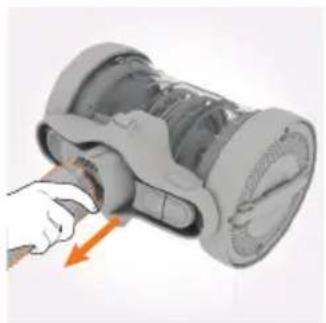
natural_image
Illustration of a hand inserting a component into a cylindrical device (no text or symbols visible)Squeeze both buttons on either side of hose connector. Pull to remove hose.

natural_image
Illustration of a hand holding a tool with an orange arrow indicating direction (no text or symbols)Press release clip on hose handle, pull to remove telescopic tube.
natural_image
Diagram of a mechanical component with two upward arrows indicating motion or force, no text or symbols present.Press release clip on telescopic extension tube, pull to remove accessory.
Taking care of your machine
CAUTION: Remove the accessory from the hose or telescopic extension tube before performing any maintenance or troubleshooting checks.
Storing your vacuum cleaner

natural_image
3D rendering of a mechanical device with a hand pointing to a component (no visible text or symbols)Press cord rewind button to retract cord into vacuum cleaner.
natural_image
Exterior view of a vacuum cleaner with attached circuit board (no text or symbols visible)Stand the vacuum cleaner upright with the carry handle at the top. Place the floorhead parking clip into the semi-circular slot on the top of the vacuum cleaner.
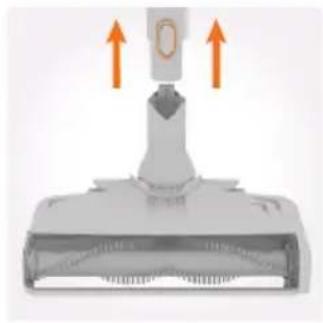
Removing blockages from the powered head
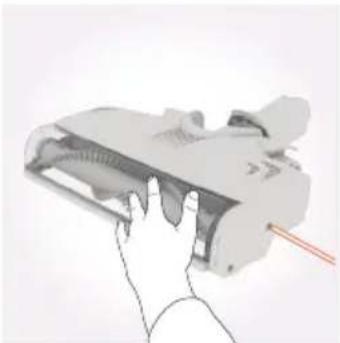
natural_image
Hand holding a device with a red pointer, no visible text or symbolsUsing a crosshead screwdriver, remove 3 screws from the side of the floorhead and remove end cap belt cover.

natural_image
Hand holding a small object near a device (no visible text or symbols)Pull and remove the brushbar location plate.

natural_image
3D rendering of a mechanical device with a highlighted internal component (no text or symbols visible)Remove the belt.
natural_image
Illustration of a handheld device with a hand holding a paper airplane (no text or symbols visible)Lift and remove the top part of the brushbar side cover.

natural_image
Illustration of hands holding a pen or tool, no text or symbols visiblePull brushbar and remove.

natural_image
Illustration of hands using scissors to cut a wave signal (no text or symbols present)Use scissors to remove any blockages before replacing back into the machine.
IMPORTANT: The powered head has a 5 second delay when the brushbar is halted/jammed. Turn off and resume power after 5 seconds.
Removing blockages from the hose

natural_image
White plastic soap dispenser with coiled tube and handle (no text or symbols visible)Remove the hose from the vacuum cleaner and telescopic extension tube. Remove any blockage by inserting a wire coat hanger into the hose. NOTE: Check for blockages on a regular basis and do not use if damaged.
CAUTION: The hose contains electrical connections. Do not use to suck up water or immerse in water for cleaning.
SolutionProblem
There is an accessory missing.
- Check the 'This pack contains' panel on the box to make sure the part is included with your vacuum cleaner.
Why does my vacuum cleaner have no power?
- The plug may not be fully pushed into the electrical socket.
- The On/Off button on the vacuum cleaner or the hose handle has not been turned on. Go to 'Using your machine'.
- The motor thermostat may have tripped. If this has happened, unplug the vacuum cleaner. Remove and empty the dirt container and check the hose for blockages. Clean the filter and allow the vacuum cleaner to cool for approximately 1 hour (if you have washed the filter you will need to wait 24 hours for the filter to fully dry before refitting back into the vacuum cleaner).
Why won't the vacuum cleaner pick up?
- The dirt container may not be correctly fitted, remove the dirt container from the vacuum cleaner and check it's assembled correctly, refit ensuring it's locked into place. Go to 'Taking care of your machine'.
- The brushes on the powered head have not been turned on. Go to 'Using your machine'.
- The filter may be clogged, clean the filter. Go to 'Taking care of your machine'.
- The dirt container, shroud or separator may be blocked, empty and clean the dirt container. Go to 'Taking care of your machine'.
- There may be a blockage in the hose/telescopic extension tube/power head. Disconnect from the vacuum cleaner and carefully remove any blockages. Go to 'Let's talk technical'.
Why won't the powered head brush turn?
- Activate powered head brush by pressing powered head brush On/Off button. Go to 'Using your machine'.
- The powered head may be blocked. Go to 'Removing blockages from the powered head'.
Why is dust escaping from the vacuum?
- The filter may be clogged, clean the filter. Go to 'Taking care of your machine'.
Taking care of you
We're here if you need us. For trouble shooting, simply call or visit:
Australia: 1300 361 505*
vax.com.au
New Zealand: 0800 800 900*
vax.co.nz
*Monday-Friday 8.30am to 5.00pm
Don't forget your accessories!
Order at: www.vax.com.au / www.vax.co.nz
Pro Cleaning Kit
Model no. VPCK
Crevice tool
For awkward gaps and crevices.
Upholstery attachment
Gently cleans large areas of upholstery, curtains, sofas and chairs.
Pet hair removal attachment
Tackles stubborn pet hair on furniture, rugs and carpets.
Stubborn dust brush attachment
Removes built up dust from skirting, banisters and corners.
Radiator Tool
Long slim design, is perfect for cleaning behind and inside the radiator.

Up Top Tool
Ideal for reaching those hard to reach high areas.

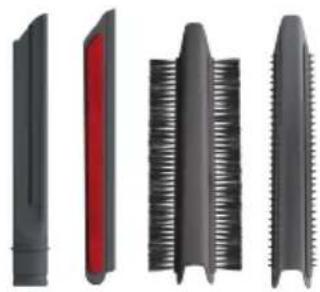
natural_image
Four different types of saw blade profiles shown in black, red, black, and black with serrated edges (no text or symbols)Mattress Tool
Quickly and easily removes embedded dust from mattresses.

Soft Brush
Gently removes dust and dirt from delicate surfaces such as tiles and glass without scratching.
Filter Pack
Model no. VX29F
Includes pre-motor filter and pre-motor sponge.
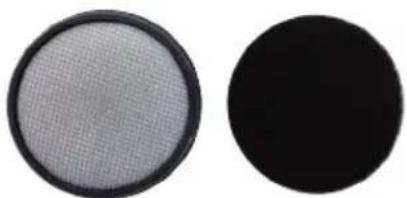
natural_image
Two circular objects: a mesh-patterned circular object and a solid black circle, both without any text or symbols.
text_image
vax®Performance is everything."
Distributed by Techtronic Industries Australia Pty. Ltd.
31 Gilby Road, Mt Waverley, VIC 3149 Australia.
Careline AU: 1300 361 505 www.vax.com.au
Careline NZ: 0800 800 900 www.vax.co.nz