
TFTV558LED - Television Palsonic - Free user manual and instructions
Find the device manual for free TFTV558LED Palsonic in PDF.

| Product Type | LED TV with DVB-T |
| Screen Size | 21.6 inches (55 cm) |
| Resolution | 1920 x 1080 (Full HD) |
| Power Consumption | 36 W |
| Power Supply | 12V DC, 3A (external adaptor) |
| Input Connectors | 1x RF, 1x HDMI, 1x VGA, 1x YPbPr, 1x Composite Video, 2x Audio L/R, 1x PC Audio, 1x USB |
| Output Connectors | 1x Headphone, 1x Coaxial (SPDIF) |
| Tuner | DVB-T (digital terrestrial) |
| Recording Function | PVR (USB recording) and Timeshift |
| Multimedia Playback | Photo, Music, Movie, eBook via USB |
| Remote Control | Infrared with full functionality |
| Safety Features | Child lock, hotel mode, auto power off, sleep timer |
| Cleaning Instructions | Use soft dry cloth; avoid chemicals like benzene, thinner, or alcohol |
| Standby Power | Less than 1 W (typical) |
| Weight (approx.) | 2.5 kg (with stand) |
| Dimensions (without stand) | Approx. 510 x 310 x 40 mm |
| Repairability | No user-serviceable parts; refer to qualified service personnel |
| Warranty | Contact Palsonic Customer Service: 1300 657 888 (Australia) |
Frequently Asked Questions - TFTV558LED Palsonic
User questions about TFTV558LED Palsonic
0 question about this device. Answer the ones you know or ask your own.
Ask a new question about this device
Download the instructions for your Television in PDF format for free! Find your manual TFTV558LED - Palsonic and take your electronic device back in hand. On this page are published all the documents necessary for the use of your device. TFTV558LED by Palsonic.
USER MANUAL TFTV558LED Palsonic
The AUSTRALIAN Company
55cm(21.6") LED TV WITH DVB-T
INSTRUCTION MANUAL TFTV558LED

natural_image
Line drawing of a rectangular frame with a blank whiteboard and two small feet at the bottom, labeled 'Palsonic' at the bottom (no other text or symbols)


"Where available
"Where available


Power Supply.... 1
Installation.... 2
Use and Maintenance.... 3
Important Safety Instructions 4-5
Overview(Front View) / Accessories 6
Overview(Back View) 7
Remote control 8-9
Basic Operation 10
OSD Menu
- PICTURE Menu 11
- SOUND Menu 12
- CHANNEL Menu 13-14
- FEATURE Menu 15-16
- SETUP Menu 17
Multimedia Operation
Multimedia Operation 18-20
Recording Operation
Recording Operation 21-23
Simple Troubleshooting 24
Specifications 25
Warnings
Do not touch the power plug with wet hands.
- Doing so may result in electric shock.
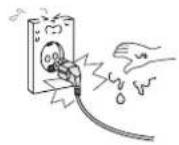
Do not use a damaged power cord or plug or a loose outlet.
- Doing so may result in fire or electric shock.

Do not plug several devices into the same outlet.
- Doing so may cause the outlet to overheat and start a fire.

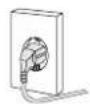
Insert the power plug fully into the outlet.
• A loose or improperly inserted power plug may result in fire.
Do not bend the power cord excessively or place heavy objects on it.
- Doing so may result in fire or electric shock.
Be sure to ground the unit.
- Failing to do so may lead to electric shock when a short circuit or overload occurs. If necessary, install a ground fault circuit breaker. Never ground to a telephone line, lightning rod, or metal gas pipe. (Doing so may result in fire, electric shock, or other hazards.)
Cautions
When disconnecting the power cord from an AC outlet, always grasp it by the plug.
- Pulling on the cord can damage the internal wire and may result in fire.

Always unplug the unit before cleaning.
• Not doing so may result in fire or electric shock.
The purpose of these precautions is to ensure user safety and prevent property damage.
Be sure to read and observe all safety precautions.

Warnings
Do not place containers with liquids such as flower vases, soft drink cans, or medicine bottles or small metallic objects on top of the unit.
- If liquid enters the unit or any metal object falls into the unit, it may result in short-circuit, fire, or electric shock.

Do not place the unit where it is exposed to rain, excessive moisture or grease.
- Doing so may result in fire, electric shock, malfunction, or deformation.

Do not use or store flammable or combustible materials near the unit.
- Doing so may result in fire or explosion.

Do not place the unit on an unstable surface, such as a wobbly stand or sloped table, or on any surface whose area is smaller than the bottom area of the unit.
- If a child climbs on the unit, it could topple and fall onto the child, resulting in serious injury to the child or damage to the unit. Place the unit on a flat stable surface.
Do not place a burning candle, burning anti-mosquito incense, or lighted cigarette on top of the unit. Do not place the unit near any heat source such as a fireplace or space heater.
- Doing so poses a serious risk of fire.
Do not place the unit in a poorly ventilated enclosure, such as a cabinet.
- Doing so poses a serious risk of fire.
Do not run power cords near heat-producing appliances such as radiators, stoves, or irons.
• The excessive heat could melt the insulation and expose live wires, resulting in fire or electric shock.

Install the antenna away from high-voltage power lines and communication cables and make sure it is installed securely.
- If the antenna touches a power line, contact with the antenna could result in fire, electric shock, serious injury, or death.

Cautions
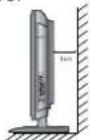
Install the unit at an adequate distance from the wall to ensure sufficient ventilation.
- If the temperature inside the unit rises, it may result in fire.
Do not cover the unit with a tablecloth, curtain, or other material.
- If the temperature inside the unit rises, it may result in fire.

Be sure to place the unit on a level surface.

⚠️Warnings
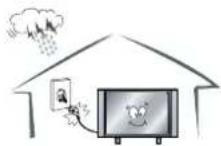
Form a drip loop where the coaxial antenna cable enters your building to prevent rainwater from traveling along the cable and coming in contact with the antenna input terminal.
- If rainwater finds its way inside the unit, it may result in fire or electric shock.
● The following precautions are divided into "Warnings" and "Cautions".
Warning: Ignoring this precaution may result in death or serious injury.
Caution: Ignoring this precaution may result in injury or property damage.
Warnings
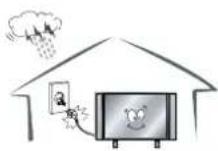
Disconnect the power cord from the wall outlet during an electrical storm.
• Not doing so may result in fire or electric shock.
Do not insert any metal objects, such as a screwdriver, paper clip, or bent wire into the ventilation openings or A/V terminals.
- Doing so poses a serious risk of fire or electric shock.

Do not allow children to climb or hang on the unit.
• The unit could topple over onto a child and result in serious injury.

Never disassemble or modify the unit in any way. Do not attempt to service the unit yourself.
- Doing so may result in fire or electric shock. If the unit requires repair, contact the service center.

Cautions
When not using the unit for long periods of time, disconnect the power cord from the wall outlet.
- Dust could accumulate over time on the unit and cause it to generate heat and ignite, or deteriorate insulation, which in turn may result in an electrical fire.

When moving the unit, be sure to turn off the unit and unplug the power cord from the wall outlet.
- Moving the unit with the power cord connected to the outlet may cause damage to the cord, resulting in fire or electric shock.
If you notice any unusual odors or smoke around the unit, immediately disconnect the unit from the outlet and contact the service center.
- Failure to do so may result in fire or electric shock.
⚠ Warnings
When removing the batteries from the remote control, make sure children do not swallow them. Keep the batteries out of the reach of infants and children.
• If a child has swallowed a battery, seek medical attention immediately.

Always use two or more people to lift or move the unit.
- If the unit is dropped, it could be damaged or otherwise cause injury.

Wipe off any moisture, dirt, or dust on the power plug pins with a clean dry cloth.
- Failure to do so may result in fire or electric shock.

It is advisable to clean the interior of the unit at least once a year. Contact the store of purchase or service center for information.
- Continuing to use the unit without cleaning off the dust build-up inside it may result in fire or electric shock.

Always turn off the unit and unplug the power cord when cleaning the unit. Use a soft dry cloth to clean the unit.
- Never clean with industrial strength polish, wax, benzene, paint thinner, air freshener, lubricant, detergent, or other such chemicals. Also, do not clean with a damp cloth.
Important Safety Instructions
Warnings and Precautions
To prevent any injuries, the following safety precautions should be observed in the installation, use, servicing and maintenance of this equipment.
Before operating this equipment, please read this manual completely, and keep it for future reference.
1) Read these instructions.
2) Keep these instructions.
3) Heed all warnings.
4) Follow all instructions.
5) Do not use this apparatus near water.
6) Do not clean with strong chemical agents
7) The appliance is intended for household use only, and not for commercial or industrial use.
8) Do not block any of the ventilation openings. Install in accordance with the manufacturer's instructions.
9) Do not install near any heat sources such as radiators, heat registers, stoves, or other apparatus (including amplifiers) that produce heat.
10) Care required with the use of this apparatus in tropical climates. Do not use the appliance under temperatures over 40°C.
11) Protect the power cord from being walked on or pinched particularly at plugs, convenience receptacles, and the point where they exit from the apparatus.
12) Only use the attachments/accessories specified by the manufacturer.
13) Use only with a stand, or bracket, specified by the manufacturer, or sold with the apparatus.
14) Unplug this apparatus during lightning storms or when unused for long periods of time.
15) Do not operate the unit if it is not working normally or has been damaged in anyway. Turn the unit off, unplug it from the power source and consult service personnel. Do not attempt to service this unit yourself.
16) Refer all servicing to qualified service personnel. Servicing is required when the apparatus has been damaged in any way, such as power supply cord or plug is damaged, liquid has been spilled or objects have fallen into the apparatus, the apparatus has been exposed to rain or moisture, does not operate normally, or has been dropped.
17) Do not listen to headphones at high volumes; the excessive sound pressure from earphones can cause hearing loss.
18) Keep the player clean and never store it next to a heat source or in dirty, humid or wet places. Keep it out of direct sunlight.
19) Press the Player's button gently. Pressing them or the screen too hard can damage the player.
20) Do not subject the product to harsh impacts. Do not drop the appliance. This may result in damage to the product.
Do not touch, push or rub the surface of the LCD screen with any sharp or hard objects.
When the surface of the LCD screen becomes dusty, wipe it ently with an absorbent cotton cloth or other soft material like chamois. Do not use acetone, toluene or alcohol to clean the surface of the screen. These chemicals will cause damage to the surface.
21) Please observe the local regulations regarding the disposal of packaging materials, exhausted batteries and old equipment.
WARNING: To reduce the risk of fire or electric shock, this apparatus shall not be exposed to dripping or splashing and no objects filled with liquids, such as vases, shall be placed on the apparatus.

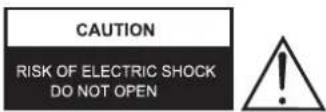
CAUTION: TO REDUCE THE RISK OF ELECTRIC SHOCK, DO NOT REMOVE COVER (OR BACK), NO USER-SERVICEABLE PARTS INSIDE. REFER SERVICING TO QUALIFIED SERVICE PERSONNEL.

The lightning flash with an arrowhead symbol, within an equilateral triangle is intended to alert the user to the presence of uninsulated "dangerous voltage" within the product's enclosure that may be of sufficient magnitude to constitute a risk of electric shock to persons.

The exclamation point within an equilateral triangle is intended to alert the user to the presence of important operating and maintenance (servicing) instructions in the literature accompanying the appliance.
5B-En
Apparatus with Class I construction shall be connected to a Mains socket outlet with a protective earthing connection.
WARNING
TO PREVENT DAMAGE WHICH MAY RESULT IN FIRE OR ELECTRIC SHOCK HAZARD, DO NOT EXPOSE THIS APPLIANCE TO RAIN OR MOISTURE.
Caution :
- These servicing instructions are for use by qualified service personnel only.
To reduce the risk of electric shock, do not perform any servicing other than that contained in the operating instructions unless you are qualified to do so.
- Any changes or modifications not expressly approved by the party responsible for compliance could void the user's authority to operate the equipment.
Front View
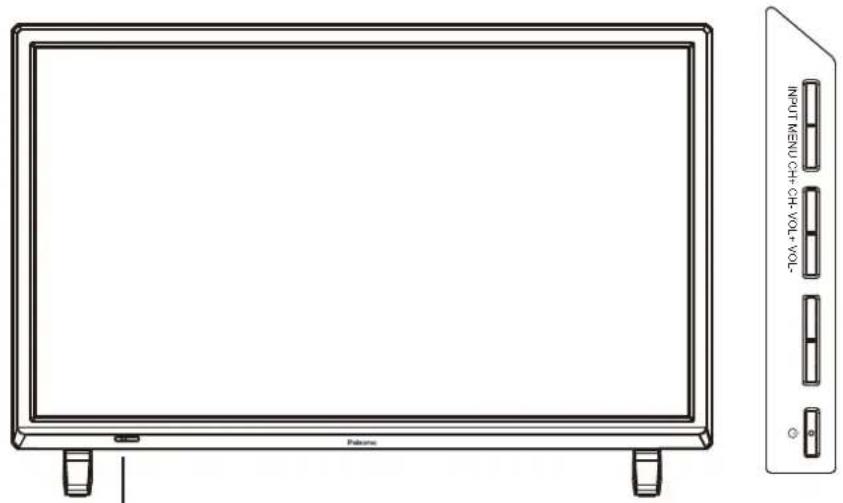
LED Indicator
Remote Control Sensor (keep clear)
INPUT: Display the input source menu.
MENU: Display/exit the OSD menu.
CH+/-: Scan through channels.
VOL+/-: Adjust the volume.
◎ : Turn on/standby the TV set.
Accessories
● The configuration of the components may look different from the following illustration.

User's Guide
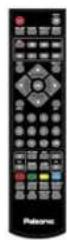
Remote Control
)AAAx2(sirettaB Power Adaptor
Back View

POWER: Connect to the power.
HEADPHONE: Connect it to your headphone or other audio equipment.
Video: Connect it to video output terminal of DVD.
L/R in: Connect them to audio output terminals of DVD, shared with YPbPr.
PC IN: Connect it to the audio output terminal of PC.
VGA: For PC display. Connect it to the D-Sub 15 pins analog output connector of the PC.
HDMI: Connect it to the HDMI of DVD or other equipment.
COAX: Digital output to AV receiver.
RF: Connect antenna or cable 75 Ohm coaxial to receive TV signal.
USB: USB jack for Recording and Media.
YPbPr: Connect them to the YPbPr video output terminal of DVD.
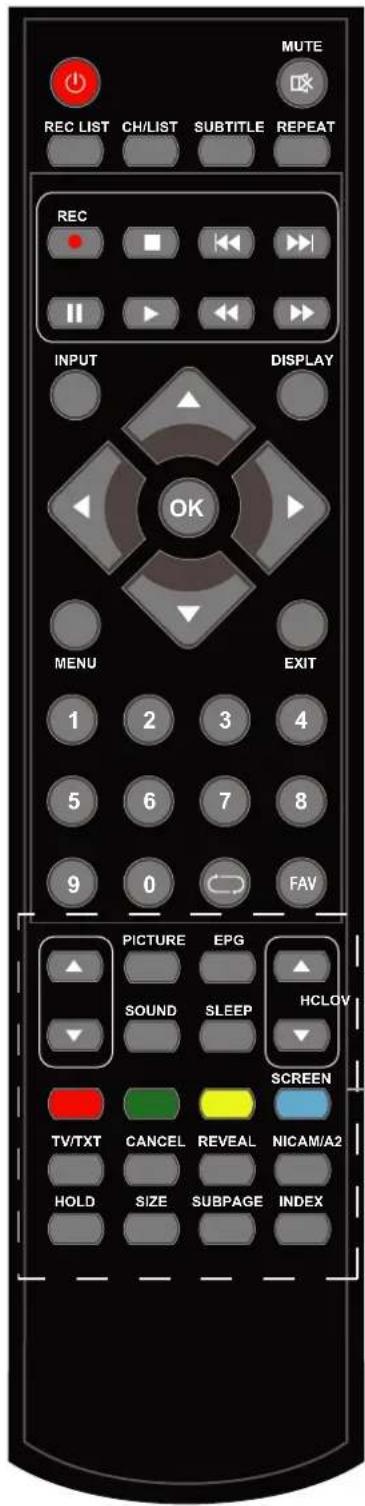
●Functions of remote control buttons
The remote control is using Infra-Red (IR). Point it towards the front of the TV. The remote control may not work correctly if it is operated out of range or out of angle.
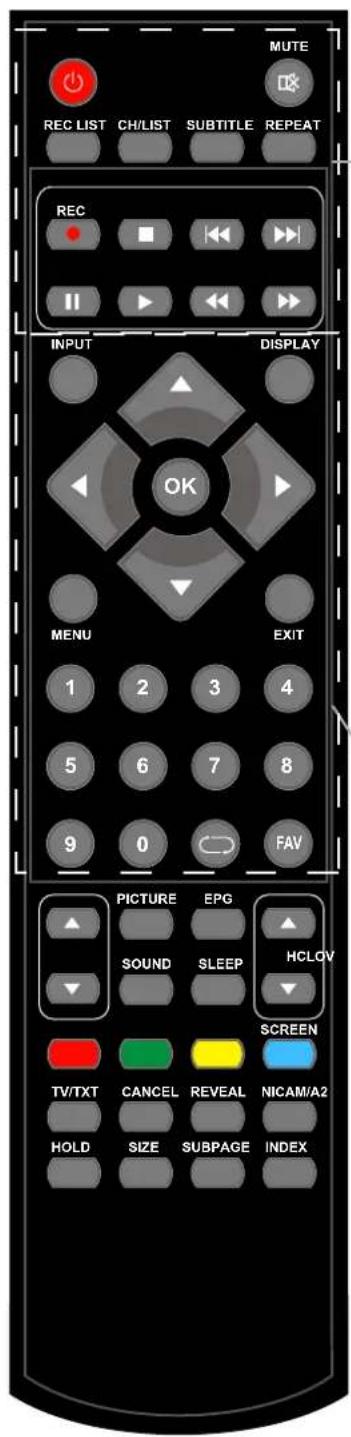
: Turn the TV on/standby.
MUTE: Press to mute the sound, press again or press VOL+ to unmute.
REC LIST: Record List.
CH/LIST: Display the programs list.
SUBTITLE: Turn on/off the subtitle display in DTV mode.
REPEAT: Repeat playing the title or chapter.
• REC: Press to start record the program in DTV mode.
■ : Stop program.
◀◀ : Previous chapter.
▶: Next chapter.
II : Pause program.
▶ : Play program.
◀ : Fast reverse.
▶: Fast forward.
INPUT: Press to display the input source menu.
DISPLAY: Display current mode information.
* In DTV mode, play display one time, display the basic information. Play a second time, display the detail information. Play a third time to exit.
Cursor left/right/up/down: Cursor buttons used in menus.
▲▼: In the ATV/DTV Channel,Press" ▲"or "▼", you can ajust the channel.
◀▶ : In the ATV/DTV Channel,Press“◀”or“▶”, you can ajust the volume.
OK: CONFIRM BUTTON for menu.
MENU: System setup menu.
EXIT: Exit the OSD menu.
NUMBER BUTTONS: Choose channel directly. Press number buttons and press OK button to play the channel.
→ : Return to the previous channel viewed.
FAV: Display the favorite program list.
CH▲/▼: Scan through channels.
VOL▲/▼: Adjust the volume.
PICTURE: Select the picture mode.
EPG: Press to enter the EPG menu directly.
SOUND: Select the sound mode.
SLEEP: Standby timer.
SCREEN: Turn on/off the screen.
TV/TXT: Turn off/on the Teletext display.
CANCEL: Cancel the Teletext display.
REVEAL: Reveal any hidden text.
NICAM/A2: TV Nicam/A2 select.
HOLD: Hold or carry on the current subpage.
SIZE: Press to see top half of page double size, Press again to see the bottom
half of page double size. Press again for normal size.
SUBPAGE: Press to enter subpages, pressagain to cancel.
INDEX: Go to index.
Colour buttons: Short cuts-follow the coloured links .
Power on/off
- Connect to the power supply with an adaptor.
- -To turn on the TV
Press button on the TV or remote control.
-To turn off the TV
Press 📊 button on the TV or remote control.
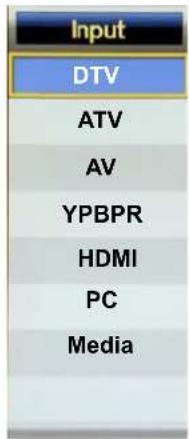
Input Source select
Press INPUT button on the TV set or remote control to display the input source menu, and use CH+/- button on the TV set or ∧/∨ button on remote control to select the input source, press OK button on the remote control to enter.
Note: Before you select the input source, make sure the connections are prepared.
Basic OSD Menu operation
Press MENU button to display the OSD menu as below:
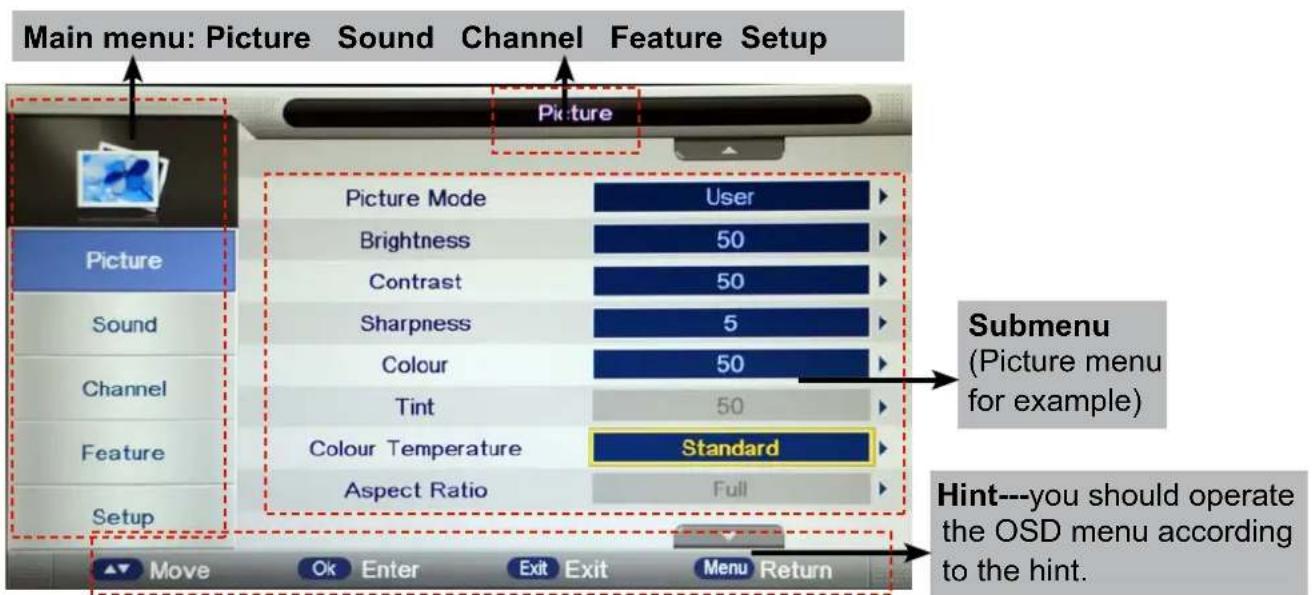
Use /∧ ∨ button to select the main menu, and press > / OK button to enter the submenu. In the submenu, use ∧ / ∨ button to select the function item, press > / OK button to enter the setup menu, then press < /> button to adjust, or press ∧ / ∨ to select and press OK / < /> button to confirm.
* (Press MENU / < button to return to the upper menu.)
* (Press EXIT button to exit the menu display.)
Note1: Only when you input the suitable signal, the relevant items can be activated Note2: Please operating the OSD menu according to hint on the bottom of the banner.
1. Picture menu
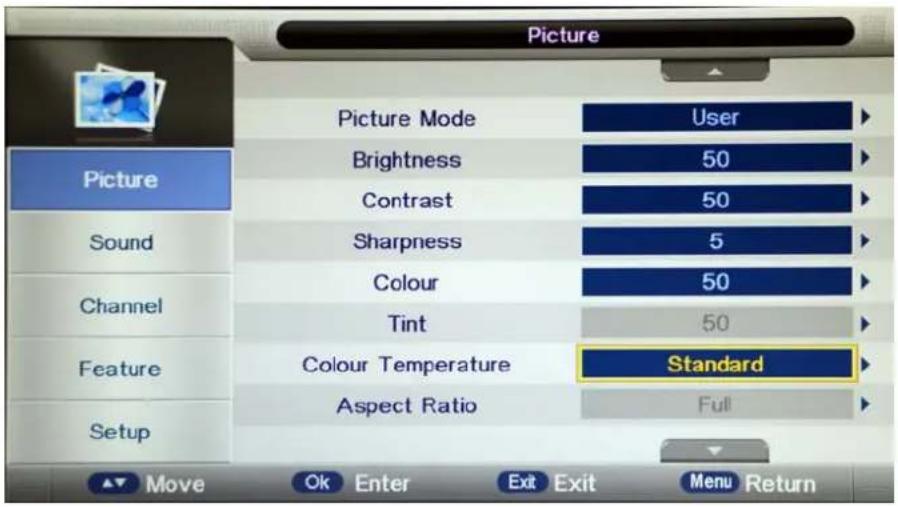
Description
Picture Mode: Select your desired picture mode from Dynamic, Standard, Mild and User.
Brightness: Adjust image black level.
Contrast: Adjust image contrast.
Sharpness: Adjust the sharpness(Gray and invalid in VGA/PC mode).
Colour: Adjust image colour from black and white.
Tint: Control the tint (NTSC mode only).
Colour Temp.: Select an optimum color temperature mode to suit your eyes for viewing from Warm, Cool, Standard.
Aspect Ratio: Change the aspect for the screen from 4:3,16:9, full, Zoom1, Zoom2 etc...
Noise Reduction: If the broadcast signal received is weak, you can select the Noise Reduction option to reduce the video noise level between Off, Low, Middle and High.
2. Sound menu
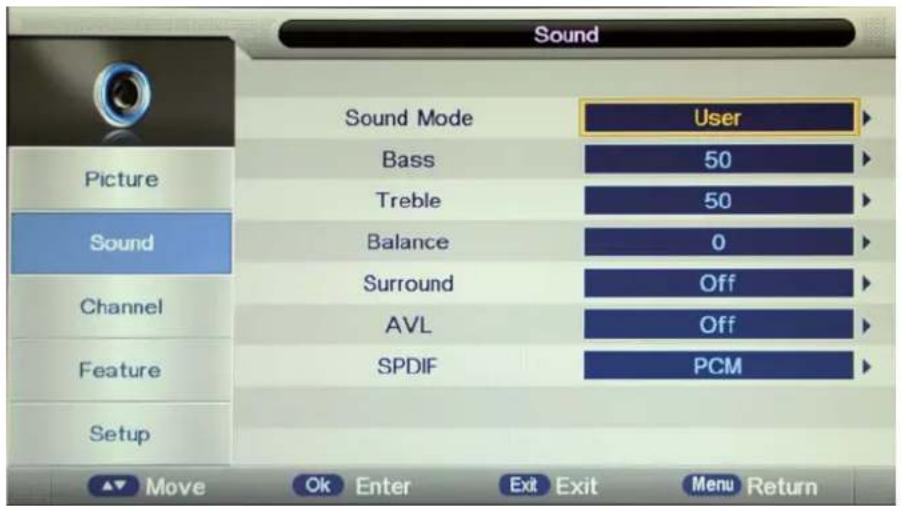
Description
Sound Mode: Select your desired sound mode from Standard, Movie, Music, Speech and User.
Bass: Adjust the level of the lower-pitched sounds.
Treble: Adjust the level of the higherpitched sounds.
Balance: Adjust the audio output between left and right speakers.
Surround: Turn on/off the surround sound function.
Auto Volume Level (AVL): The volumes of all sources will be maintained when the function's on.
SPDIF: Select the spdif mode for the TV from off, PCM and Auto.
3. Channel menu(In ATV/DTV mode)
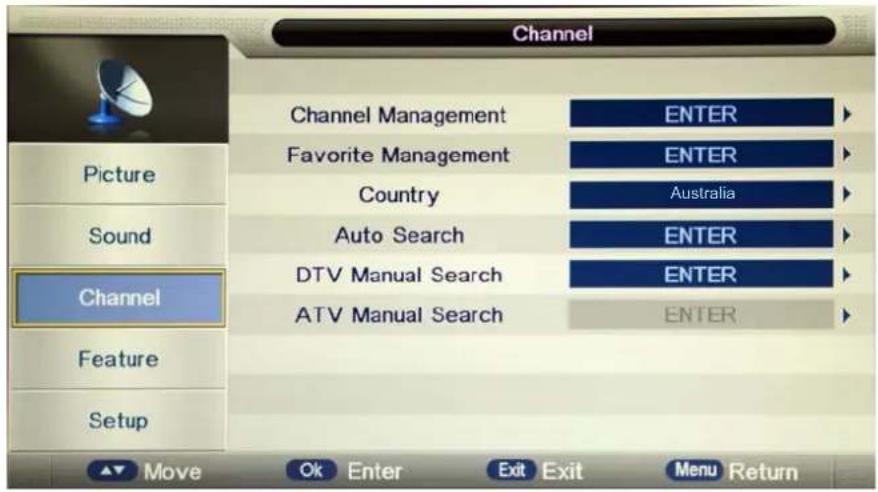
Description
Channel Management: Enter the Channel management menu to edit the channels.

Press Ref. Button to sign the channels you want to delete, it will hint you when you exit.
Lock: User must set the "Lock enable" (Feature-Lock- Lock enable) at ON to active this function. Press GREEN button to sign(lock) or cancel(unlock) the channel. And you have to enter the password to view the program.
Skip: Press YELLOW button to skip the channel or cancel the setting, and the program will not be programmed by CH+/- button.
Swap: Press BLUE button to sign the channel, press ∧/∨ button to move, and press OK button to swap the position.
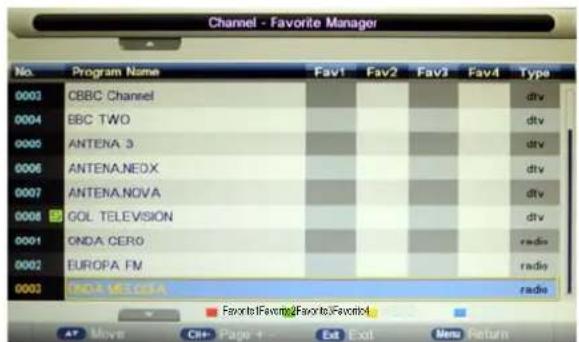
Favorite Management: Add or remove favourite channels by the colour buttons. Up to 4 favourite lists are available, RED-Favorite1, GREEN-Favorite2, YELLOW-Favorite3, BLUE-Favorite4.
Country: Select the country.
When the Child Lock is on, please enter the Password (Lock Password in Feature menu) to start Auto and Manual Search.
Auto Search: Press OK button to enter the Auto Search menu, select search mode, and press OK button to start auto search.

Note:
-
ALL: Auto search channels for DTV, ATV and Radio. DTV: Auto search channels for DTV and radio. ATV: Auto search channels for ATV.
-
When the TV is auto-tuning, you could press MENU button to stop auto-tuning and return to preview menu.
DTV Manual Search : Enter the DTV Manual Search menu.
Press ∧/∨ button to select the "Channel" item, and press </ > button to select the channel, then press ∧/∨ button to select the "Start" item, and press </ > button to manual search.

ATV Manual Search : Enter the ATV Manual Search menu.

Current Channel: Select the current channel for manual searching.
Search: Press OK button to enter the search menu, and manual search the frequency by < / > button.
Fine Tune: Press OK button to enter the Fine tune menu, and fine tune the frequency by < / > button.
Color/Sound System: Select the Color/Sound system for the program.
4. Feature menu

Description
Lock: This menu allows you to lock certain features of the television so that they can not be used or viewed. For example if you don't want certain channels viewed by children or if the television is to be used in a hotel and you want certain channels be locked.
When you enter the system lock menu you will be asked for a password. As default it is 0000.
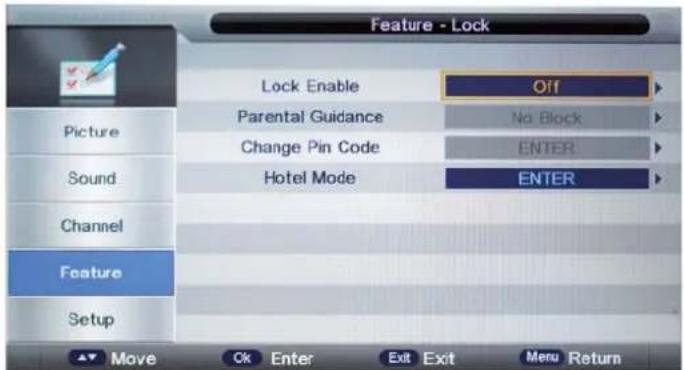
Lock Enable - Turn on/off the Lock Channel function.
Note: When it is be turned on, the functions of Parental Guidance and Change Pin code below will be locked, and the functions Lock(in Channel Management), Auto Search, DTV Manual Search, ATV manual Search in Channel menu will also be locked.
Parental Guidance - Select the Parental Guidance mode, or turn off the function.
Change Pin Code – Press OK button to enter, first enter the current code, then enter your new code and confirm your new code.
Hotel Mode - Enter the Hotel Setting menu.
| Hotel Setting | |
| Hotel Lock | On |
| Channel Lock | Off |
| Picture Lock | Off |
| Sound Lock | Off |
| Feature Lock | Off |
| Setup Lock | Off |
| Key Lock | Off |
| Source Lock | --> |
| Set Source | Off |
| Channel Number | 0 |
| Max Volume | 100 |
| Default Volume | 30 |
| Next Page | --> |
| Hotel Setting | |
| Clear Lock | --> |
| DataBase Export | --> |
| DataBase Import | --> |
| Previous Page | --> |
Hotel Lock: Turn on/off the Hotel Lock function.
Channel Lock: Disable the Channel menu in OSD.
Picture Lock: Disable the Picture menu in OSD.
Sound Lock: Disable the Sound menu in OSD.
Feature Lock: Disable the Feature menu in OSD.
Setup Lock: Disable the Setup menu in OSD.
Key Lock: Disable the buttons on the TV set.
Source Lock: Disable the input source you desired.
Set Source: Select the default source when you turn on the TV.
Channel Number: Select the default channel number when you turn on the TV.
Max Volume: Set the Max volume for the TV.
Default Volume: Set the default volume when the program is on.
Clear Lock: Clear all the locks above, it means set all the locks to OFF and max volume to 100.
Database Export: Export all Hotel Settings to the USB device.
Database Import: Import all Hotel Settings from the USB device.
Language: Lets you adjust the different language options available.
Clock: Allows you to set the time zone (as default the information is taken automatically from the digital signal).
Sleep Timer: Lets you set the sleep timer so the television automatically switches off after a certain amount of time.
Auto Power Off: The TV will switch off itself automatically if no change in status within the time you select. You can choose 1H, 2H, 4H or off.
Hearing Impaired: You can switch on the hearing impaired feature, this provides additional information and subtitles
PVR/Timeshift: Setup menu for recording, please see the Recording Operation section.
5. SETUP menu
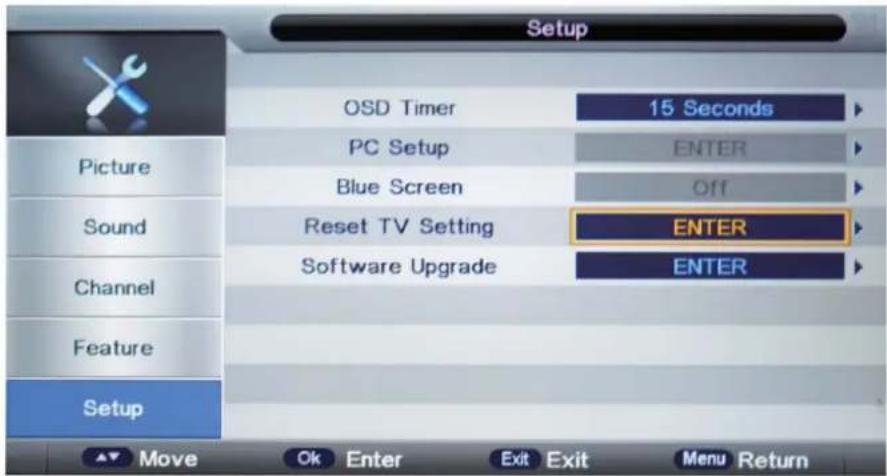
Description
OSD Timer: Lets you adjust the amount of time the On Screen Menu stays on the screen before disappearing.
PC Setup: Change the PC Settings in PC mode.

Auto Adjust: Setup the parameter of the screen automatically.
H/V-Position: Adjust the transverse/vertical position of the screen.
Phase: Adjust the phase of the ADC sampling clock relative to the sync signal, until a stable image is obtained.
Clock: Adjust the pixel clock frequency, until the image size is maximized for the screen.
Blue Screen: Changes the background when there is no input between clear and a blue background (Only available in some sources).
Reset TV Setting - This clears all the TV settings for the television.
Software Upgrade: From time to time we may release new firmware to improve the running of the television (available to download). This menu lets you upgrade that software onto the television. Further details of how to do this will be issued with the firmware. Contact the helpline or refer to the ‘product support’ section of the website.
Multimedia Operation
Basic Operation
1). Press the INPUT button on the remote control to display the input source menu, select Media source by the ▲ / ▼ buttons, and press OK button to enter the Multimedia menu as shown below.
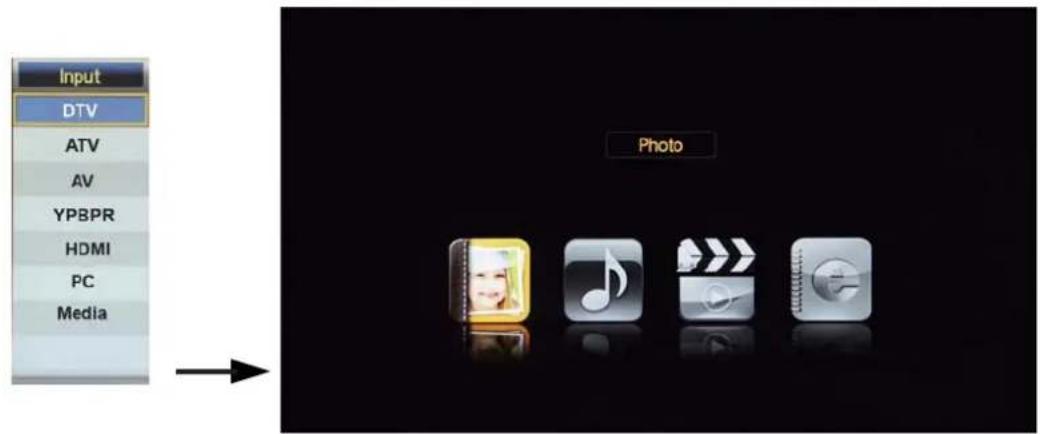
2). Insert USB device, and select the Media mode form Photo, Music, Movie and eBook, then you will find the name of the device display on the screen as shown below.

Hints for operation
3). Press ∧/∨ button to select the USB device and press OK button to enter the file list as shown below.
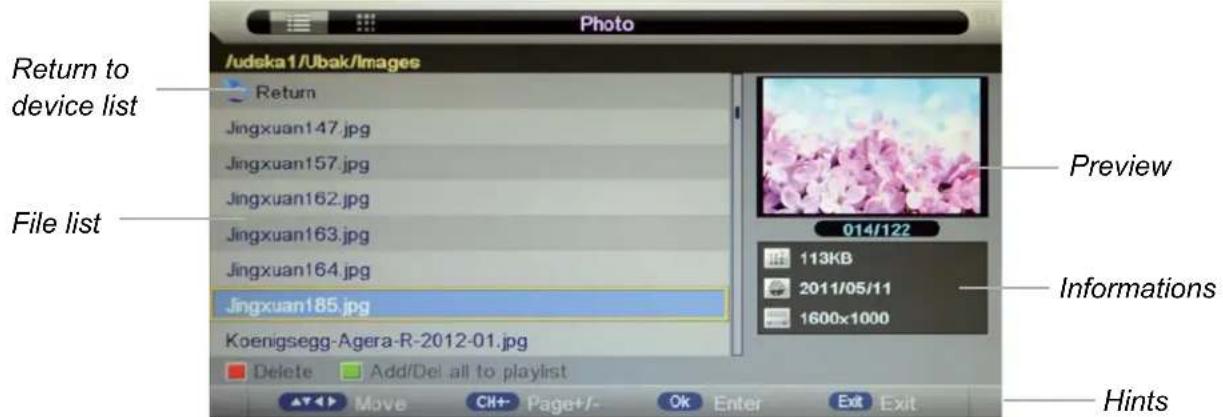
Press ∧/∨ buttons to move (press OK button to select the file or unfold the folder);
Press RED button to delete the file; Press GREEN button to sign or cancel all the files to playlist;
Press OK button to sign or cancel the selected file to playlist.
Press < button to previous menu, Press EXIT button to select the file view type: list(<) or thumbnails(>).
Press Exit again to return to the root MENU.
Then press ▶ button to program the files (be signed) you select or the files in the fold you select.
Press ■ button to stop and exit the full screen program, please notes the hints on the bottom.
Multimedia Operation
1. Photo
Play the photo

natural_image
Weather scene with a snowman wearing a red hat and black square button, surrounded by icons (no readable text or symbols)Press ◀/▶ button to select the option on the table, and press OK button to change. Note: You could press OK button to display the option table when it disappears.
▶/II Play/Pause the photo playing.
■ Stop and exit the full screen program.
◀ ▶ Play the previous or next file directly.
(2) Ratate the picture(0, 90, 180, 270).
Zoom in/out the picture, you could move the picture by Cursor left/right/up/down button in Zoom mode.
i Display the information of the current file.
Display the photo setup menu, and select the Repeat mode, Background Music, Slide Time, Effect.
■ Display the playing list.
2. Music
Play the music

Press ◀/▶ button to select the option on the table, and press OK button to change.
▶/II Play/Pause the music playing.
■ Stop and exit the music playing.
◀◀ ▶▶ Play fast backword or forward.
|◀▶| Play the previous or next file directly.
Input the time and start playing directly.
ALL Select the repeat mode for playing music.
Switch the window between "Information" and "Playlist".
Switch off the screen displaying (BLUE button as quick button), and it will be turned on by exepet power button).
Multimedia Operation
3. Movie
Play the movie

Press ◀/▶ button to select the option on the table, and press OK button to change.
Note: You could press OK button to display the option table when it disappears.
▶/II Play/Pause the movie playing.
■ Stop and exit the full screen program.
◀◀ ▶▶ Play fast backword or forward.
▶ Play the movie in slow mode.
▶ Play the movie in step mode.
Set the A-B repeat playing mode.
Play the previous or next file directly.
■ Display the playing list.
i Display the information of the current file.
Display the movie setup menu, and setup the Program, Subtitle, Audio, Repeat mode.
Goto mode, Input the time and start playing directly.
4. eBook
Play the text
![8,12I have □35□ match(es) for □robin hobb□ in listfile:□ MAJECKI_MAIN□. Type □@majeckibiglist□ to obtain the whole list Imajecki Robin Hobb - [The Tawny Man 01] - Fool's Errand (v0.9) [rtf].rar -------- 409.53 KB Imajecki Robin Hobb - [The Tawny Man 01] - Fool's Errand [covers & map].rar -------- 255.8 KB](/content/2026/06/1224510/images/7b8618a984a15d717fbe7008b4155cadd4be475098c430bd67c41b4a18e67af9.jpg)
◀◀ ▶▶ Turn to previous/next page of the text.
RED button: Add or delete the bookmark.
GREEN button: Goto the appoint page.
YELLOW button: Display the bookmark list.
BLUE button: Display the playlist.
Recording Operation
PVR settings
Press the MENU button select Feature-PVR/Timeshift menu, press OK button to enter the menu as below.

1). Record File Format
Select Record File Format mode from TS and PS for storing in the USB device.
2). Partition Select
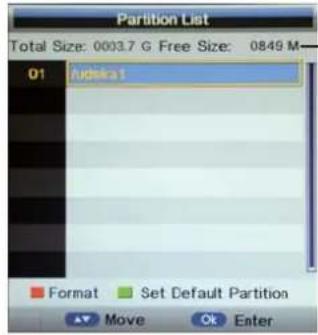
USB device informations
Format: Press RED button to format the selected USB device.
Set Default Partition: Press GREEN button to set the focus partition as the default partition. The recorders are stored in the default partition. It need to be reset if the default partition is full in recording progress.
Enter the Timer menu to setup the timer recording settings.
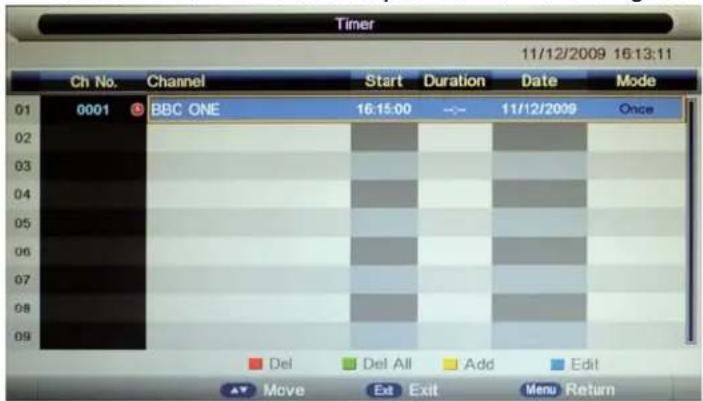
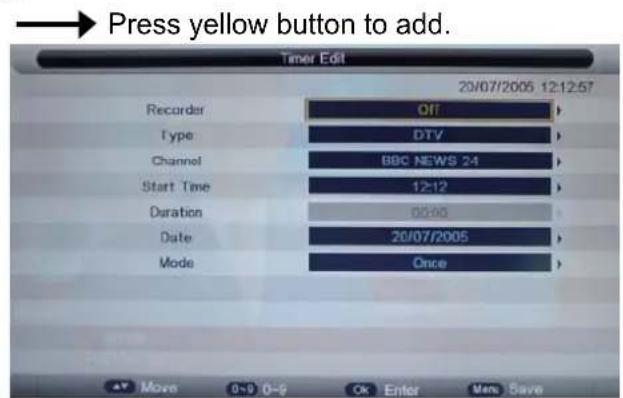
Recorder: Turn on/off the recorder function.
Type: Select the type of the program you want to recording.
Channel: Select the channel you want to recording.
Start Time: Setup the start time for recording the program.
Duration: Setup the duration time for recording.
Date: Select the date for recording.
Mode: Select the mode for recording.
Recording Operation
5). Record List
Display the Record list menu.

Delete: Press RED button to delete the selected record plan.
6). Recorder Start
Press OK button to start recording, as the function of the REC button on the remote control.
EPG and Timer Record
Press EPG button on the remote control to display the EPG menu.
![EPG Weekly Mode 0002 BBC NEWS 24 20/07/2005 12:09:53 20/07/2005 12:00-20/07/2005 13:00 BBC News News as it breaks, with live reports from Britain and around the world. [SL] Wed 20/07 Wed Thu Fri Sat Sun Mon Tue Wed BBC ONE 12:00-13:00 BBC News BBC NEWS 24 13:00-14:00 BBC News CBBC Channel 14:00-15:00 BBC News BBC TWO 15:00-16:00 BBC News ANTENA 3 16:00-17:00 BBC News ANTENA.NEOX 17:00-17:45 BBC News ANTENA.NOVA 17:45-18:00 Sportsday Daily Reminder Prev Day Next Day Move Exit Exit](/content/2026/06/1224510/images/8e763e81a958c05c7d828bd05ed97a897eed64319f22caf32c01f021ddae0d4d.jpg)
EPG mode: Press RED button to change the EPG display mode.
Daily mode: shows the information of the programs to be broadcasted in daily mode.
Weekly mode: shows the information of the programs to be broadcasted in weekly mode.
Reminder: Press GREEN button once to remind the program for watching, and press GREEN button again to remind the program for recording. You could check it in Timer menu, and the TV will record the program according to your settings automatically.
Previous/Next Day: Press YELLOW/BLUE button to display the programs on previous or next day.
Recording Operation
Recording
Press REC button on the remote control to start recording in DTV mode, and the TV will give you a hint. Select "OK" item, and press OK to start recording, there will be a sign on the screen.

Note:
a. Please make sure the USB device is on the TV.
b. Please mke sure the speed and free space of the USB is enough.
c. Press STOP button to exit the recording mode.
d. Press Recording list button to display the Recorder list, and you can play the program you selected.
e. You can also play the Recorded program in Multimedia mode.
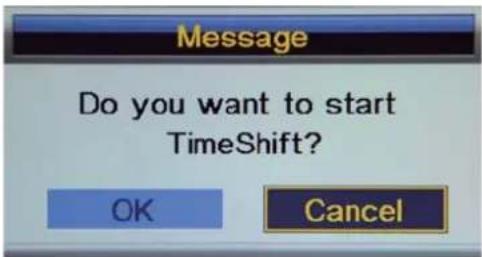
Timeshift
Press IIPAUSE button on the remote control to start timeshift in DTV mode, and the TV will give you a hint. Select "OK" item, and press OK to start timeshift, there will be a sign on the screen, and the screen will be freezed.
Note:
a. Please make sure the USB device is on the TV.
b. Please make sure the speed and free space of the USB is enough.
c. Press STOP button to exit the timeshift mode.
d. Press PLAY button to play the program you are recording from the beginning, and the timeshift will be going on.
e. Timeshift time menu on the right top corner shows the fallen time between the current picture and the living broadcasting picture;
f. During the recoding progress, if the signal is missing, the recording process will take a pause until the signal is stable again.
Simple Troubleshooting
If the display fails or performance dramatically deteriorates check the Display in accordance with the following instructions. Remember to check the peripherals to pinpoint the source of the failure.
If the display still fails to perform as expected, connect your helpline for assistance.
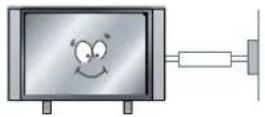
No power
- Check all connections to the TV.
- Press either the power button or the Standby button on the Remote control.
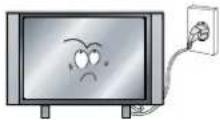
No picture or sound
- Ensure that the TV is plugged in and the power is on.
- Ensure that the aerial is connected.
- Try a different programme.
Poor picture quality
- Check the aerial connections.
- Check that the channel is tuned in properly.
- Adjust the picture settings: brightness, colour, sharpness, contrast, hue.
- Make sure that the TV is not located close to electrical appliances that may emit radio frequency interference.
No colour
- Adjust the colour setting.
- Check that the programme is broadcast in colour.
- Check that the cannel is tuned properly.
TV does not respond to remote control
- Check that there are no obstructions between the remote control and the unit.
- Check that the remote control is within range of the unit.
- Check that the batteries in the remote control and not weak or exhausted.
This TV is for household use and registered as harmless on electromagnetic waves.
Therefor,you can use it in every location as well as residential areas.
| LCD Panel | Panel Size | 21.6" |
| Max. Resolution | 1920 x 1080 | |
| Input Connector | VIDEO | 1 |
| YPbPr | 1 | |
| VGA | 1 | |
| AUDIO (L/R) | 1 | |
| PC AUDIO | 1 | |
| HDMI | 1 | |
| RF | 1 | |
| USB | 1 | |
| Output Connector | HEADPHONE | 1 |
| COAX | 1 | |
| Main Voltage | 12V = 3A | |
| Power | 36W | |
IMPORTANT NOTICE:
This product composes up to 6.0 million cells and a few cell defects may occur In the manufacture of the panel. Several dead pixels (allow up to 2 bright or 2 dark pixels) on the panel are deemed acceptable by the industry standards. In line with manufacturers and would not mean that the panel is faulty. Dead pixels panels with 6 pixels or more within 12 month period, Palsonic Corporation Pty Ltd. complies with industry standard and reserves the right to repair the unit and non-refundable. We hope you will understand that the product that corresponds to this standard is regarded as acceptable.
Palsonic
The AUSTRALIAN Company
Palsonic Customer Service
Telephone (Australia) 1300 657 888
Palsonic Corporation Pty Ltd ABN 34 000 474 108
1 Joynton Avenue, Waterloo NSW 2017 Australia
Telephone (02) 9313 7111 Facsimile (02) 9697 0655
www.palsonic.com.au
- The AUSTRALIAN Company
- 55cm(21.6") LED TV WITH DVB-T
- INSTRUCTION MANUAL TFTV558LED
- OSD Menu
- Multimedia Operation
- Recording Operation
- Warnings
- Cautions
- ⚠️Warnings
- ⚠ Warnings
- Important Safety Instructions
- Warnings and Precautions
- WARNING
- Caution :
- Accessories
- Power on/off
- Input Source select
- Basic OSD Menu operation
- Picture menu
- Description
- Sound menu
- Channel menu(In ATV/DTV mode)
- Feature menu
- SETUP menu
- Basic Operation
- Photo
- Music
- Movie
- eBook
- PVR settings
- 5). Record List
- 6). Recorder Start
- EPG and Timer Record
- Recording
- Timeshift
- Simple Troubleshooting
- No power
- No picture or sound
- Poor picture quality
- No colour
- TV does not respond to remote control
- IMPORTANT NOTICE:
- Palsonic
Brand : Palsonic
Model : TFTV558LED
Category : Television