IR-1032 T - Unknown Salton - Free user manual and instructions
Find the device manual for free IR-1032 T Salton in PDF.

User questions about IR-1032 T Salton
0 question about this device. Answer the ones you know or ask your own.
Ask a new question about this device
Download the instructions for your Unknown in PDF format for free! Find your manual IR-1032 T - Salton and take your electronic device back in hand. On this page are published all the documents necessary for the use of your device. IR-1032 T by Salton.
USER MANUAL IR-1032 T Salton
PLATINUM SERIES salton®
"Prima-press" Steam Iron

natural_image
Exterior view of a Saitony air iron with visible branding and branding (no text-heavy elements)Instruction Booklet
Model: IR-1032 T
IMPORTANT SAFEGUARDS
When using electrical appliances, basic safety precautions should always be followed including the following:
- Read the instructions carefully before using.
- Use iron only for its intended use.
- To protect against risk of electric shock, do not immerse the iron in water or other liquids.
- Close supervision is necessary when any appliance is being used by or near children. Do not leave appliance unattended when connected to the wall outlet or on an ironing board.
- This appliance is not intended for use by young children or infirm persons, without supervision.
- Always turn the Temperature Control Knob counterclockwise to the furthest position before plugging or unplugging from outlet. Never pull cord to disconnect from the electrical outlet. Grasp the plug first, then pull to disconnect.
- Do not allow cord to touch hot surfaces. Let iron cool completely before putting away. Wrap cord loosely around the iron and store upright on it's heel.
- Always disconnect iron from electrical outlet when filling with water or emptying and when not in use.
- Do not operate the iron with a damaged cord or plug or if the iron has been dropped or damaged. To avoid the risk of electric shock, do not disassemble the iron. Contract Salton for examination, repair or adjustment. See Warranty section.
- Burns can occur from touching hot metal parts, hot water or steam. Always use the handle and warn others, especially children, of the possible dangers of burns from steam, hot water or the soleplate.
- Use caution when you turn a steam iron upside down as there may be hot water in the reservoir.
- Use the iron on an ironing board. Ironing on any other surface may damage that surface.
- Do not iron or vertical steam clothes that are being worn.
- Do not use the iron as a vertical steamer in the direction of people or pets.
-
To avoid a circuit overload do not operate another high-wattage appliance on the same circuit.
-
Extension cords may be used if care is exercised in their use. If an extension cord is used, the marked electrical rating of the extension cord should be at least as great as the electrical rating of the appliance. If the appliance is of the grounded type, the extension cord should be a grounded 3-wire cord. Care should be taken to arrange the cord so that it cannot be pulled or tripped over.
POLARIZED PLUG
This appliance has a polarized plug (one blade is wider than the other). To reduce the risk of electric shock, this plug will fit in a polarized outlet only one way. If the plug does not fit fully in the outlet, reverse the plug. If it still does not fit, contact a qualified electrician. Do not modify the plug in any way.
DESCRIPTION OF PARTS
Carefully inspect the packing material as some parts are shipped inside the Styrofoam packaging. Please check the Description of Parts below to be sure that you have all the parts before throwing away the packaging.
- Profiled Soleplate
- Water Reservoir
- Cord Wrap
- Swivel Cord Outlet
- Heel Rest
- Water Reservoir Refill Light
- Temperature Indicator Light
- Temperature Control Dial
- Power 'On' Light
- Burst of Steam Button
-
Spray Mist Button
-
Permanent Anti-Scale Filter (not shown)
-
Variable Steam Control, Self Clean Button and Steam Valve
-
Water Reservoir Cover
-
Mist Nozzle
-
Full Length Button Groove
-
Water Jug

text_image
(not shown) 89107112 17 13 5 6 14 15 1162 4 Barrill 1162 2 Cassava 1162 Cassava 1162 Cassava 1162 Cassava 1162- Profiled Soleplate – Maximum glide, durable ceramic soleplate with Preconditioning Steam Vents, allow steam to reach the fabric before the heated soleplate.
- Water Reservoir – Extra large, easy-fill water reservoir for continual high steam performance without having to refill the tank regularly.
- Permanent Anti-Scale Filter – The filter is designed to reduce the build-up of scale inside your iron to prolong it's life.
- Cord Wrap – The built in cord wrap enables neat and tidy storage of the cord when the iron is not in use. Never cover or wrap the cord around the soleplate.
- Swivel Cord Outlet – Eliminates tangling and allows for free movement of the cord in any direction.
- Heel Rest – Extra large heel rest keeps the iron stable on the ironing board.
- Water Reservoir Refill Light – Light will illuminate when the water level is low.
- Temperature Indicator Light – Align the desired temperature setting with the temperature indicator light. The Light turns on when warming and off when the selected temperature is reached.
- Temperature Control Dial – Allows you to select the desired temperature for each garment. The adjustable temperature dial also indicates the amount of steam recommended for use on each temperature setting.
- Power 'On' Light – Remains on as long as the unit is plugged into the wall outlet.
- Burst of Steam Button – Pressing the Burst of Steam Button instantly produces steam to remove stubborn creases.
- Spray Mist Button – Pressing the Spray Mist Button provides a fine mist spray from the Mist Nozzle to dampen hard to iron fabrics.
- Variable Steam Control, Self Clean and Steam Valve – The Variable Steam Control allows you to select the desired steam output for each garment or select the dry setting to iron without steam. The Self Clean function removes scale and impurities. The Steam Valve can be removed to clean the scale build-up. See Care & Cleaning section.
- Water Reservoir Cover
- Mist Nozzle
- Button Groove – Full length button groove around the entire soleplate.
- Water Jug
BEFORE FIRST USE
- Remove all packaging.
- Remove the soleplate protection. If necessary, wipe the soleplate with a soft cloth and a small amount of denatured alcohol. Wipe with a soft dry cloth. Allow the soleplate to dry before heating.
- Fill the Water Reservoir with the supplied Water Jug. Empty out the Water Reservoir to remove any foreign particles remaining in the Water Reservoir from the manufacturing process. Never fill the Water Reservoir from a tap, always use the supplied Water Jug. NOTE: Do not fill the Water Reservoir above the MAX level indicated on the Water Reservoir.
- When using the Iron for the first time, the Iron may give off vapours for up to 10 minutes. This is due to the initial heating of the materials used. This is normal and will only happen during the first use.
- To clean steam vents, follow the directions for steam ironing and iron over an old cloth for a few minutes. Press the Shot of Steam Button
several times to clean the vents.
HOW TO USE
Setting the Temperature
-
Insert the plug into the wall outlet. The Power 'On' Light at the top of the handle will illuminate and the Water Reservoir will light up.
-
Sort the items to be ironed according to the fabric type. Iron fabrics requiring the coolest temperatures first. Work gradually to higher temperatures. Both the temperature display and most items of laundry have markings corresponding with the following chart (Ill. 2). NOTE: If you cannot determine what type of fabric an item is made of, test the item by ironing a small section on an in
-
Turn the Temperature Control Dial to the desired setting by aligning the setting on the Temperature Control Dial with the Temperature Indicator Light. The Temperature Indicator Light illuminates to show that the soleplate is heating to the selected temperature. When the Temperature Indicator 5
III. 2
| NOTEon label means: "This article cannot be ironed!"(e.g. chlorofibre, acryl, elastodiene.) | |||
| Label (with ironing instruction) | kind of textile | Temperature Control Display | Steam selector (advised position) |
| [46×8] | velvet VELVET | (MAX STEAM) | |
| synthetic modacry polypropylene polyurethane acetate triacetate metallized cupro polyamide (nylon) polyester modal viscose (rayon) | SYNTHETIC | ||
| silk SILK | |||
 | wool WOOL | ||
 | cotton COTTON | ||
| denim DENIM | |||
| linen LINEN | |||
Light goes out, the Iron has reached the selected temperature and is ready to use. NOTE: When the Temperature Control Dial is changed from a high setting to a lower temperature setting during ironing, the Temperature Indicator Light will go out immediately. To ensure that the Iron has reached the selected lower temperature and is not too hot, wait until the Temperature Indicator Light comes on again and then goes out before ironing.
Dry Ironing
- Follow steps 1 - 3 in the 'Setting the Temperature' section.
- Slide the Variable Steam Control to the DRY position ( )
This will shut off the flow of steam if there is any water in the Reservoir. NOTE: If you are dry-ironing for longer than 20 minutes, the Water Reservoir should be emptied to prevent overheating of any remaining water.
- To use the Mist while dry-ironing, ensure that there is sufficient water in the Water Reservoir. Press the Spray Mist Button to dampen the fabric while ironing.
Filling the Iron with Water
- Before filling the Iron with water, ensure that the Temperature Control Knob has been turned counterclockwise to the furthest position and the plug has been removed from the wall outlet. The Iron can be filled with water while it is hot.
- WARNING: Take care around hot steam – it can cause serious burns.
- NEVER fill the Water Reservoir above the MAX level indicator on the Water Reservoir.
-
Use only tap water in the Water Reservoir. Do not fill with fabric conditioner, starches or any other solution as these will damage the steam mechanism. Do not use distilled, demineralised or contaminated water.
-
Set the Variable Steam Button to the dry setting, the furthermost left position (✗).
-
Place the Iron on its Heel on a flat dry level surface. Open the Water Reservoir Cover by grasping the two small tabs at the top of the Cover and gently lowering.
-
Using the supplied Water Jug, SLOWLY pour water into the Water Reservoir until the MAX level indicated on the Water Reservoir is reached.
- Close the Water Reservoir Cover.
Steam Ironing
When the Iron is first switched on, the steam supply is switched Off. It is only possible to Steam Iron at temperatures between •• or MAX. Before you use the steam function, make sure that the Iron is filled with water. NOTE: The Anti-Drip
feature is designed to automatically stop steaming if the iron temperature is set too low.
- Follow steps 1 - 3 in the 'Setting the Temperature' section.
- The desired temperature must be within the steam range, (●● or MAX) (III. 3).
- Slide the Variable Steam Control to the desired steam setting (Ill. 4). NOTE: Do not move the steam setting to the furthest right position as this is the self-clean function. If this setting is selected excess steam and water will be emitted from the soleplate.
- To use the spray mist to remove stubborn creases, press the 'Spray Mist Button' to release a fine mist from the Spray Nozzle (Ill. 5).
Preconditioning Steam

text_image
III. 3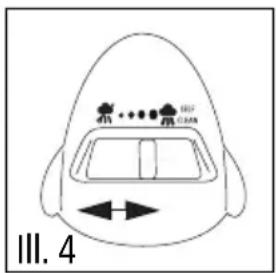
text_image
III. 4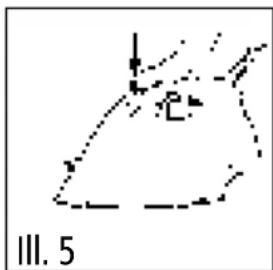
natural_image
Abstract line drawing with no text, numbers, or symbolsThe Preconditioning Steam vents are above the tip of the soleplate and allows the steam to reach the fabric before the heated soleplate. Press the Burst of Steam Button to precondition the fabric on difficult areas such as collars, cuffs, pockets, etc.
CAUTION: Take care around hot steam – it can cause serious burns. Keep children away from the front of the iron and do not place fingers in front of the Soleplate as steam will be released in front of the Iron tip.
Burst of Steam
The Burst of Steam provides an extra burst of steam which is ideal for removal of stubborn creases and wrinkles during Steam or Dry ironing. 7
- The Burst of Steam function can only be used at temperatures settings between ••• or MAX and the indicator light has gone out.
- Lift the Iron slightly above the surface of the fabric and press the Burst of Steam Button down firmly. An intense burst of steam penetrates deep into the fabrics. Release the Burst of Steam Button then continue to iron. NOTE: If the Burst of Steam Button is used several times in close succession, the soleplate temperature will be reduced. The Temperature Indicator Light will illuminate to show that the iron is heating up to the desired temperature and will extinguish once the iron is back up to temperature.
Vertical Steaming
The Burst of Steam Button allows you to use the iron for vertical ironing. This is especially useful for getting wrinkles out of hanging clothes, curtains, wall hangings, etc. NOTE: Vertical Steaming can only be used in the ••• or MAX setting.
- Follow the directions in the 'Filling the Iron with Water' section.
- Turn the Temperature Control Dial to the desired setting and wait until the temperature has been reached and the Temperature Indicator Light goes out.
-
Hang the garment in a location that will not be damaged from heat or moisture. Hold the fabric taut.
-
Press the Burst of Steam Button. Keep the iron a few inches away from the garment and move it up and down the garment (Ill. 6). Creases will be removed and the fabric will be freshened. NOTE: Do not allow the soleplate to touch delicate fabrics.

natural_image
Abstract line drawing with no readable text or symbols, featuring a dashed line and a numbered label 'III. 6' at the bottom (no other text or symbols)- Allow the fabric to cool and air thoroughly before storing away.
HELPFUL HINTS
-
Sort the items to be ironed according to the fabric type. Iron fabrics requiring the coolest temperatures first. Work gradually to higher temperatures. Both the temperature display and most items of laundry have markings corresponding with the following chart. (See chart on page 5) NOTE: If you cannot determine what type of fabric an item is made of, test the item by ironing a small section on an inside seam.
-
If you iron a fabric made of a blend of fibers, set the Temperature Control Dial for the most delicate fiber.
- Silks, wools and synthetic materials should be ironed on the reverse side of the fabric to prevent shiny patches.
- If using starch, it should be sprayed onto the reverse side of the fabric and the soleplate cleaned more frequently.
- The Iron produces a large amount of steam. When ironing damp fabric, switch off the steam supply then run the dry iron over the garment to remove excess moisture.
- Take care when ironing over sharp objects so they do not scratch the soleplate.
CARE AND CLEANING
Storage
- Set the Variable Steam Control Button to 'DRY' ( ).
- Turn the Temperature Control Dial counterclockwise to the furthest position.
-
Remove plug from the wall outlet.
-
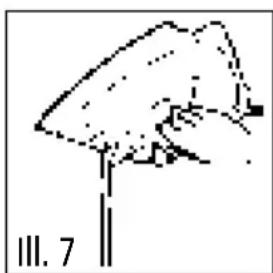
Open the Water Reservoir Cover and turn the Iron upside down to empty the Water Reservoir (Ill. 7). NOTE: The water in the iron may be hot. Be careful when emptying water. Stand the Iron in an upright position and allow to cool.
-
When the Iron has cooled, the power cord can be wrapped around the cord wrap at the base of the iron (III. 8). NOTE: Never wrap the cord around a hot iron. Wrap the cord loosely around the Cord Wrap.
-
Always store the iron upright, not on the Soleplate. Storing on the Soleplate may cause corrosion and staining of the soleplate.
natural_image
Simple line drawing of a mushroom with a stem, labeled III. 7 (no text or symbols on the diagram itself)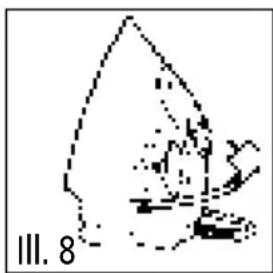
natural_image
Simple line drawing of a fish-like shape with no text or symbolsSelf-Cleaning
Your Iron will give the best ironing results and last longer if you clean the iron once or twice a month to remove any scale or impurities.
-
Set the Variable Steam Control to the 'Dry' position ( )
-
Fill the Water Reservoir to the 'MAX' fill mark.
- Place the Iron on its heel.
- Plug the Iron into the wall outlet.
-
Set the Temperature Control Dial to the MAX (COT/LIN) position.
-
Allow the iron to heat up until the Temperature Indicator Light goes out.
-
Turn the Iron to the lowest setting and remove the plug from the wall outlet.
-
Hold the Iron horizontally over the sink
-
Slide and hold the Variable Steam Control Knob to the 'SELF CLEAN' position (Ill. 9).
-
CAUTION: Boiling water and steam will emit from the holes in the soleplate. Move the iron back and forth while this happens (Ill. 10). Impurities and scale will be flushed out of the iron.
-
A small amount of water may remain in the Water Reservoir. Open the Water Reservoir Cover and empty the remaining water.
-
If steam development is insufficient, repeat the Self-Cleaning process.

text_image
III. 9.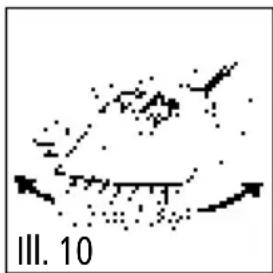
natural_image
Abstract diagram with scattered dots and arrows, no readable text or symbolsCleaning the Removable Steam Valve
- In addition to the self-cleaning operation the Steam Valve should be cleaned once or twice a month.
- Before removing and cleaning the Steam Valve, unplug the iron and empty the Water Reservoir.
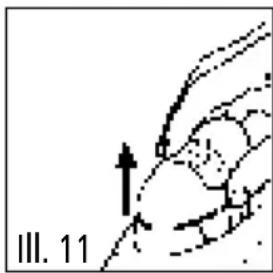
- Carefully pull out the coloured Variable Steam Control (Ill. 11). Do not touch the lower end of the Steam Valve.
- Immerse the Steam Valve in vinegar for 4 hours (Ill. 12) until the lime scale becomes soft. Using a non-metallic brush, remove the remaining residue. Rinse under running water. NOTE: Do not use sharp objects to clean the Steam Valve.
- Replace the Steam Valve (III. 13). Slide the Steam Control Knob to the DRY (✗) position. NOTE: The iron will not operate without the Steam Valve in position.
natural_image
Diagram of a hand holding an object with an arrow indicating direction, labeled 'III. 11' (no readable text or symbols)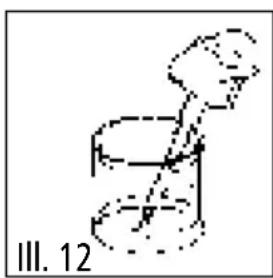
natural_image
Simple line drawing of a figure in motion, possibly a robot or mechanical device, with no text or symbols present.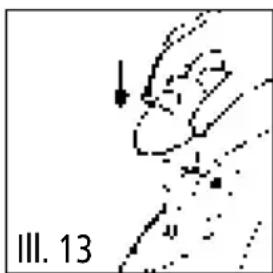
natural_image
Abstract line drawing with no readable text or symbols, featuring a curved line and dotted segments (no readable text or symbols)- Plug power cord into the wall outlet.
- Set the Temperature Control Dial to the MAX setting. Let the iron heat up and the remainder of the water inside the steam chamber will vaporize.
- Turn the Temperature Control Knob to the lowest setting and remove the plug from the wall outlet.
- Allow the Iron to cool then wipe the Soleplate with a soft damp cloth.
Cleaning the Soleplate
- The Iron must be cool and unplugged from the wall outlet.
- Wipe the Soleplate with a cloth soaked in a solution of half water and half white vinegar. NOTE: Do not use abrasive or scouring pads to clean the Soleplate.
Cleaning the Steam Holes
- The Iron must be cool and unplugged from the wall outlet.
- Use a damp cloth to wipe away any build-up of lint or starch in the steam holes. If necessary, remove excess build-up by using a cotton swab moistened in denatured alcohol.
- Rinse by wiping with a clean damp cloth.
- Wipe with a dry soft cloth.
Cleaning the Exterior of the Iron
- The iron must be cool and unplugged from the wall outlet.
- Wipe the exterior with a soft damp cloth.
- Wipe dry. Ensure that the Soleplate is dried thoroughly.
- Do not use harsh abrasives, chemical cleaners or solvents to clean the exterior of the Iron as this may damage the surface.
Extension cords may be used if care is exercised in their use. If an extension cord is used, the marked electrical rating of the detachable power-supply cord or extension cord should be at least as great as the electrical rating of the appliance. If the appliance is of the grounded type, the extension cord should be a grounded 3-wire cord. The extension cord should be arranged so that it will not drape over the counter top or table top, where it can be pulled on by children or tripped over.
LIMITED WARRANTY
Salton Canada warrants that this appliance shall be free from defects in material and workmanship for a period of one year from the date of purchase. During this 'in-warranty' period, defective products will be repaired or replaced at the discretion of the retailer and/or Salton Canada. A defective product should be returned to the original place of purchase within the retailer's stipulated return/exchange period*. If you do not wish or are unable to have a defective product replaced under warranty by the retailer, Salton Canada will repair or replace the defective product without charge. You may contact us for assistance by mail, e-mail, fax or telephone as listed below.
This warranty covers normal domestic usage and does not cover damage which occurs in shipment or failure which results from alteration, accident, misuse, abuse, glass breakage, neglect, commercial use or improper maintenance.
To ensure prompt 'in-warranty' service be sure you have an original proof of purchase. You may be asked to return the product to us along with a description of the defect and your address, zip/postal code.
For repairs not covered by the warranty, please contact us for assistance.
salton®
SALTON CANADA
Customer Service Department
81A Brunswick
Dollard-des-Ormeaux
Quebec, Canada H9B 2J5
Website: www.salton.com
E-mail: service@salton.com
Fax: 514-685-8300
Tel: 514-685-3660