WF-79XL - Washing machine LG - Free user manual and instructions
Find the device manual for free WF-79XL LG in PDF.

User questions about WF-79XL LG
0 question about this device. Answer the ones you know or ask your own.
Ask a new question about this device
Download the instructions for your Washing machine in PDF format for free! Find your manual WF-79XL - LG and take your electronic device back in hand. On this page are published all the documents necessary for the use of your device. WF-79XL by LG.
USER MANUAL WF-79XL LG
NORMAL WASH PROGRAM....9
OTHER WASHING PROGRAMS 10\~11
DELAY START.... 12\~13
SELECTABLE WASHING METHODS....14
MAINTENANCE 15\~16
TROUBLE-SHOOTING GUIDE 17\~18
SPECIFICATION....19
-2


ALL YOU JUST HOW MUCH DETERGENT IS NECESSARY
ATER LEVEL IS AUTOMATICALLY SET
E GANTLY ROUNDED DESIGN
Adds more sophisticated touch to comfortable uses.

ASHING ADJUSTED TO LOAD VOLUME

NITARY WASH
Antimicrobial additive which restrains mold or mildew from growing around the tub is applied to the washing tub for cleaner wash.
text_image
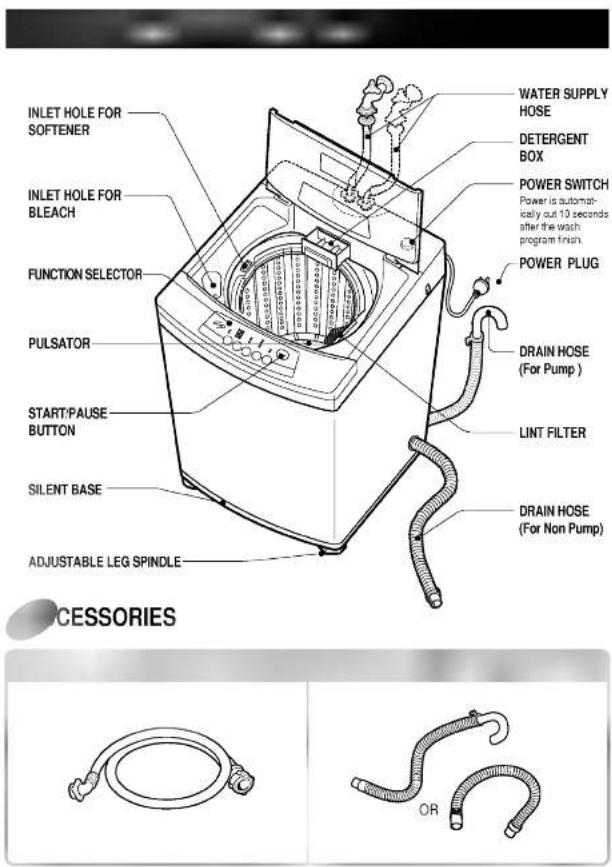
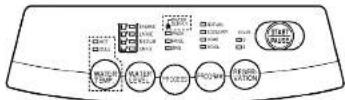
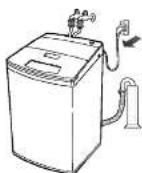
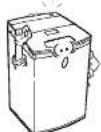
INLET HOLE FOR SOFTENER INLET HOLE FOR BLEACH FUNCTION SELECTOR PULSATOR START/PAUSE BUTTON SILENT BASE ADJUSTABLE LEG SPINDLE WATER SUPPLY HOSE DETERGENT BOX POWER SWITCH Power is automat- ically cut 10 seconds after the wash program finish. POWER PLUG DRAIN HOSE (For Pump ) LINT FILTER DRAIN HOSE (For Non Pump) ACCESSORIES-4
flowchart
graph TD
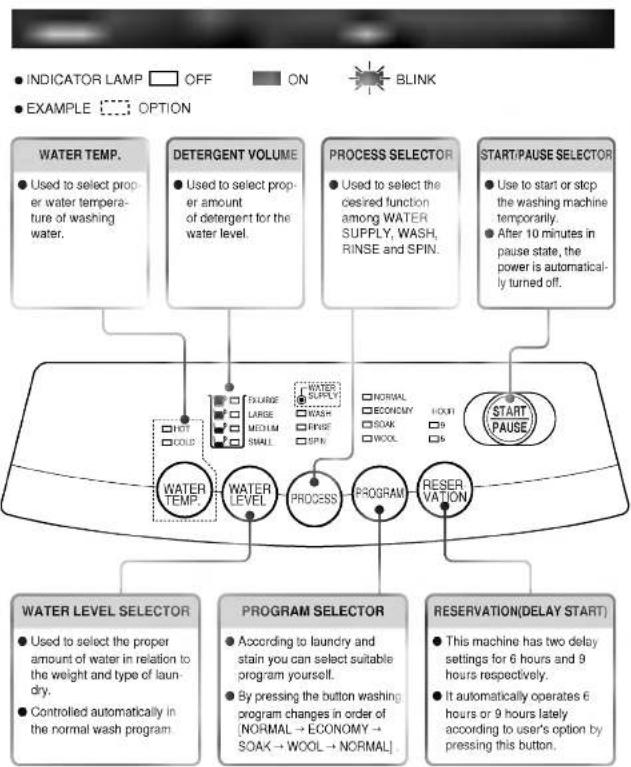
A["INDICATOR LAMP OFF ON BLINK"] --> B["WATER TEMP."]
B --> C["DETERGENT VOLUME"]
C --> D["PROCESS SELECTOR"]
D --> E["START/PAUSE SELECTOR"]
E --> F["RESERVATION DELAY START"]
F --> G["RESERVATION"]
G --> H["PROGRAM SELECTOR"]
H --> I["WATER LEVEL SELECTOR"]
I --> J["WATER LEVEL"]
J --> K["PROGRAM SELECTOR"]
K --> L["RESERVATION DELAY START"]
L --> M["START/PAUSE SELECTOR"]
M --> N["RESERVATION DELAY START"]
5

natural_image
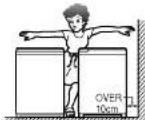
Completely black image with no visible content or text.INSTALL THE WASHING MACHINE ON FIRM AND EVEN PLACE
- Install the washing machine on a flat and firm surface. - Keep the washing machine over 10cm away from the wall to prevent a noisy sound while spinning.


● Turn the A.L spindle CCW or CW and adjust level.
● Turn the A.L spindle CCW or CW and adjust level.
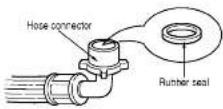
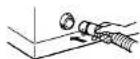
CONNECT THE INLET HOSE (FILL HOSE)
- Connect the inlet hose to inlet valve of the washing machine, and then lock it by turning the hose connecting part. Check to see if there is a rubber seal inside the connector.

CONNECT THE DRAIN HOSE
PUMP MODEL
- Connect the drain hose to the outlet of the drain pump located at the back of the washing machine.
● Fix the drain hose with the clip. And then push it toward the body as in the figure.

- Check if the drain hose is hung up to proper location for drainage.
- Do not use an extension hose.
● The discharge height is approximately 0.9\~1.3m from the floor.
NON-PUMP MODEL
- Connect the drain hose to the outlet of the drain hose located at: the right hand side of the washing machine.


+ Keep downward while the washing machine is working. (Non pump)
+ Ensure the hose is free from kinking.
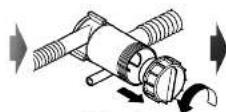
CHANGE THE DIRECTION OF THE DRAIN HOSE FOR NON-PUMP MODEL
1 Unlasten the set screw which secures the drain hose joint, and then push the inside drain hose into the body.

2 Change the direction of the drain hose to the hole of the opposite side.
3 Fasten the set screw to secure the drain hose joint.
☐ How to connect the hose of Nut type
● Turn the inlet Nut to the right hand direction as shown in the below figure. Tighten it firmly to prevent water leakage.
- Connect the other end of the hose to the water valve on washer securely.
● Make sure that the rubber packing is inside the union nut.

CAUTION
- If the power supply cord is damaged, it must be replaced by a special cord or assembly available from the manufacturer or its service agent. All material used for enclosing the power supply cord connection have to be retained as origin after any services.
● The base openings must not be obstructed by carpeting, when the washing machine is installed on a carpet floor.
PREPARATION BEFORE WASH
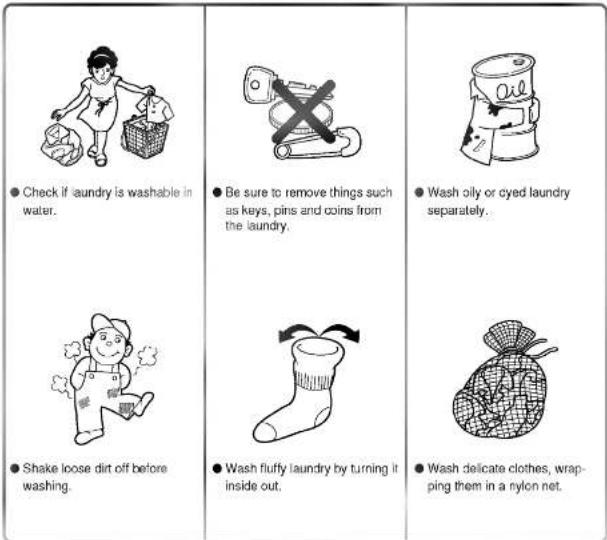
- Check if laundry is washable in water.
● Be sure to remove things such as keys, pins and coins from the laundry.
● Wash oily or cyed laundry separately.
● Shake loose dirt off before washing.
● Wash fluffy laundry by turning it inside out.
● Wash delicate clothes, wrapping them in a nylon net.
READY?
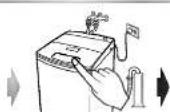
● Plug the power plug into the outlet.
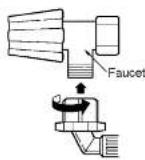
- Let water flow into the tub after connecting the inlet hose to the tap.

8
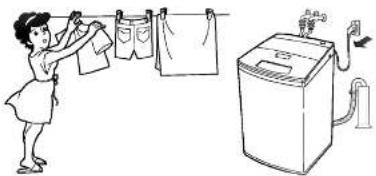
NORMAL WASH PROGRAM

RIMAL WASH (FUZZY)

natural_image
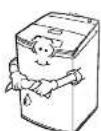
Illustration of a person using a washing machine to clean or store items (no text or symbols visible)● Wash normal clothes except for blankets, woolen clothes or lingerie.
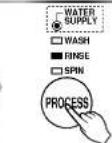
● Operate WASH, RINSE, SPIN and WATER SUPPLY by pressing the process button.

ASHING PROCEDURE

1 Press the power switch.

● Normal wash indicator lamp illuminates when the power is on.
● All selection changes are possible.

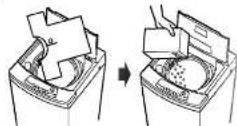
2 Put laundry and detergent in the tub.

3 Begin.

- Press the START/PAUSE button.
- Press the START/PAUSE button again to stop operation temporarily (Washing operation resumes by pressing the START/PAUSE button again.)
- Select WATER SUPPLY, WASH, RINSE or SPIN convertible.

POWER
- Press the power switch.
When you would like to change washing conditions, select them manually.
+ Preset programs mentioned above can be changed at any time.
WASHING PROGRAMS
ECONOMY
□ NORMAL
ECONOM
SOAK
WOOL

PROOFUM
PROGRAM
SOAK
NORMAL
ECONOM
SOAK
□ WOOL

[NO TEXT]
PROGRAM

WOOL
NORMAL
□ ECONOM
SOAK
- WOOL

PROOFAN
-
Use this program for washing a little dirty laundry within a short time.
● This program is economical due to short washing time.
● Preset program : 6-minute wash, one rinse, 3-min spin. -
Use this program for washing heavily soiled laundry after soaking it in water.
● This program provides the best washing effect. - Do not use this program for washing laundry that easily discolors.
● Preset program : 60-minute soaking, 12-minute wash, 2-rinse, 7-minute spin.
● Use this program for washing laundry woolen fabric.
● Microcomputer controls the strength of current circulation.
- Preset program: 6-minutes wash with mild current circulation, 2-rinse, 3-minute intermittent spin.
[EMPTY]
NORMAL
ECONOMY
□SOAK
□ WOOL

NORMAL
ECONOMY
SOAK
WOOL

NORMAL
□ ECONOMY
SOAK
WOOL

Set the course selector to [ECONOMY] by pressing it.
Set the course selector to [SOAK] by pressing it.
Set the course selector to [WOOL] by pressing it.
- With this selection no hot water is added, and the level indicator lamp is lit.
● With this selection no hot water is acced, and the level indicator lamp is lit.

● After closing the lid press the START/PAUSE button.
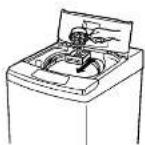
● After all your washing is finished unplug the plug.
Take out laundry.
● Dry woolens in shade.
● Unplug the power plug.
- Switch off the tap, and separate the connecting hose.
● Clean the washing machine.
natural_image
Illustration of a woman washing clothes next to a washing machine (no text or symbols present)-11-
DELAY START
1
Press the power switch ON.

2
Select program.
NORMAL
□ ECONOMY
SOAK
WOOE

- Select a desired program.
● If a specific program is not selected, the NORMAL program will run.
3
Set the time.
HOUR
□9
□6

● This machine has two delay settings for 6 hours and 9 hours respectively.
- It automatically operates 6 hours or 9 hours lately according to user's option by pressing this button.
4 Insert laundry and press the START/PAUSE button.

- Insert laundry and press the START/PAUSE button. The washer senses the amount of laundry and displays recommended amount of deterrent
● The washer does not sense the amount of laundry for the BLANKET or WOOL program.
5
● Pull powder detergent dispenser forward and deposit displayed amount of detergent, then push the dispenser back.
● Concentrated detergent is not suitable for RESERVATION WASHING(Delay Start).
6
Close the lid.
- If the lid is not completely closed, the alarm will sour
- If the lid is opened RESERVATION WASHING(Delay Start) can not proceed.
SELECTABLE WASHING METHODS

LY WASHING

- Press the power switch.
- Set the WASH position press the PROCESS button.


● Press the START/PAUSE button after closing the lid.
● Wash ends. (At this time the water in the tub does not drain.)

LY RINSE

- Press the power switch.
- Set the RINSE position press the PROCESS button.
● Press the START/PAUSE button after closing the lid.

● Rinse ends. (At this time the water in the tub does not drain.)

LY SPIN

- Press the power switch.

- Set the SPIN position press the PROCESS button.

● Press the START/PAUSE button.
● Spin ends.
MAINTENANCE
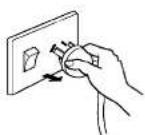
☐ Clean the filter at the inlet valve. When water supply into the tub is bad or the inlet valve is clogged with impurity.
1 Unplug the power cord from the outlet first.
2 Pull out the filter from the inlet valve.
3 Use a tooth brush to get rid of the lint. Reinsert the filter.


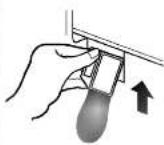
□ Clean the lint filter
1 Remove the lint collection net by gently sliding it up.
2 Turn inside out and wash out lint.
3 Gently reinsert


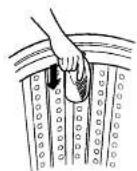
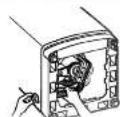
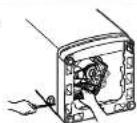
□ Cleaning the pump.
1 Unscrew the 2 screws that secure the back cover.
2 Unscrew the cap(CCW) and remove any blockage.
3 Ensure the rubber seal ring is located inside the cap.
(Bottom view)

(Bottom view)
MAINTENANCE
☐ Observe the following to ensure the durability of the washing machine and your safety.
Do not expose the washing machine to direct sunlight or rain. | Do not install the washing machine in a wet area. | Do not sprinkle water control switches. |
Do not over load plug points. | When removing the plug, do not use the power cord to pull it cut. | Keep children away from the washing machine. |
Keep the washing machine away from fire or heat sources. | Do not pour caustic soda and bleach over the washing machine. It causes damage to rubber parts | Do not pour water that is over 70°C water into the tub |
Ensure the lid is closed, especially when spinning. | Do not put your hands into the rotating tub.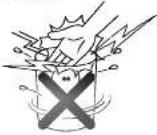 | Ensure water is thoroughly drained. |
TROUBLE-SHOOTING GUIDE
| No water supply. | |||
| Process indicator lamp flickers (Wash, Rinse)when water does not flowinto the tub. |  |  |  |
| Is tap open? | Is the water supplycut off? | Are the pipesfrozen? | |
| Not draining. | |||
| Process indicator lamp flickers (Rinse, Spin) whendraining does not takeplace. | 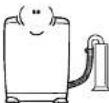 | 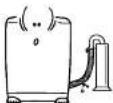 |  |
| Is the power connectedof switched on? | Is the drain hosefrozen? | Is the drain hose hung upproperly? The proper heightof stand pipes is 0.9~1.3m(For pump) | |
| Not spinning. | |||
| Process indicator lamp flickers (Wash, Rinse,Spin) when tub does notspin. |  |  | |
| Is the laundry unevenly balanced? | Is the lid closed? | ||
TROUBLE-SHOOTING GUIDE
| No power. |  Is the power switchpressed? Is the power switchpressed? | 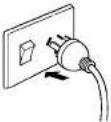 Is the power cordunplugged? Is the power cordunplugged? |  Power failure?Fuse blown? Power failure?Fuse blown? |
| Not working. | 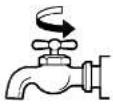 Is the tap closed? Is the tap closed? | 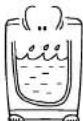 Is the water level normal? Is the water level normal? |  Has the START/PAUSEbutton been pressed? Has the START/PAUSEbutton been pressed? |
| A high level of vibrationand noise during spinning. | 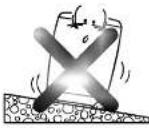 Is the washing machine installed on a level place? Is the washing machine installed on a level place? | ||
-18
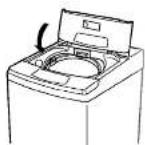
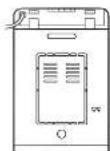
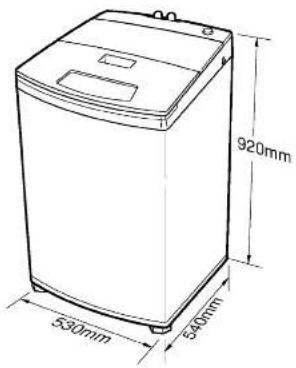
SPECIFICATION
text_image
920mm 530mm 540mm□ ELECTRICITY SOURCE
220V\~50Hz
☐ THE USE RANGE OF WATER PRESSURE
0.3-10kgf/cm²(30-1000kPa)
□ MOTOR OUTPUT
: 90W
□WEIGHT
: 32 kg
SIZE
: 530(W) × 540(D) × 920(H)
□ STANDARD WATER LEVEL
EX-LARGE:47
LARGE :39l
MEDIUM :29l
SMALL :21l
-19