TransformaFence - Weather Station Ambient Weather - Free user manual and instructions
Find the device manual for free TransformaFence Ambient Weather in PDF.

User questions about TransformaFence Ambient Weather
0 question about this device. Answer the ones you know or ask your own.
Ask a new question about this device
Download the instructions for your Weather Station in PDF format for free! Find your manual TransformaFence - Ambient Weather and take your electronic device back in hand. On this page are published all the documents necessary for the use of your device. TransformaFence by Ambient Weather.
USER MANUAL TransformaFence Ambient Weather
Ambient Weather TransformaFence User Manual

ambient weather
Table of Contents
1 Introduction....1
2 Warnings....1
3 Installation....2
3.1 Parts List....2
3.2 Connect the Mounting Pole....2
3.3 Remove the Fence Post End Cap .... 3
3.4 Insert the TransformaFence into the Fence Pole 4
4 Liability Disclaimer .... 4
5 Warranty Information....4
1 Introduction
Thank you for your purchase of the Ambient Weather TransformaFence. The following user guide provides step by step instructions for operation and troubleshooting. To download the latest manual and view product videos, please visit:
www.TransformaFence.com
2 Warnings
Any metal object may attract a lightning strike, including your weather station and TransformaFence. Never install your weather station in a lightning storm.
3 Installation

text_image
1 2 3 4 5 6| # | Description | # | Description |
| 1 | Stop Nut | 4 | Threaded Bolt |
| 2 | Weather Station Mounting Pole Stabilizer | 5 | Fence Post Stabilizer |
| 3 | Fence Post End Cap | 6 | Bolt Head |
Figure 1
3.1 Parts List
| QTY | Part Number | Item |
| 1 | TRANSFORMAFENCE | TransformaFence Assembly |
| 1 | TRANSFORMAFENCE -MANUAL | User Manual |
3.2 Connect the Mounting Pole
- Slide the weather station pole that came with your weather station over the top of the weather station mounting pole stabilizer, as shown in Figure 2.
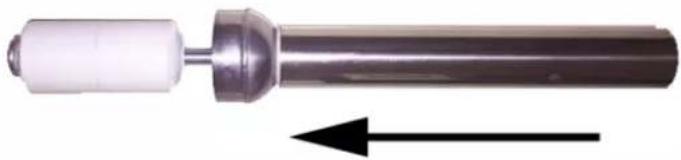
natural_image
Close-up of a metallic cylindrical mechanical component with a white cylindrical shaft and an arrow indicating direction (no text or symbols)Figure 2
- Make sure the fence post stabilizer is firmly inserted into the threaded bolt head.
- With your left hand gripping the fence post stabilizer and your right hand firmly gripping the fence post end cap, turn the topper counter clockwise until tight, as shown in Figure 3.
The expansion of the weather station stabilizer will hold the weather station mounting pole firmly in place.

text_image
Left Hand Right HandFigure 3
3.3 Remove the Fence Post End Cap
To remove the fence post cap, if too tight to remove by hand, use a 2x4 and mallet or hammer for leverage, as shown in Figure 4.
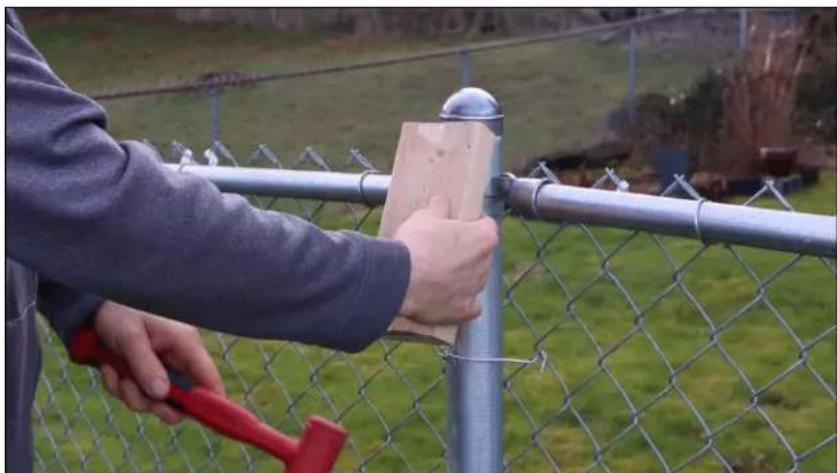
natural_image
Person using a hammer to clean or repair a chain-link fence, no visible text or symbolsFigure 4
3.4 Insert the TransformaFence into the Fence Pole
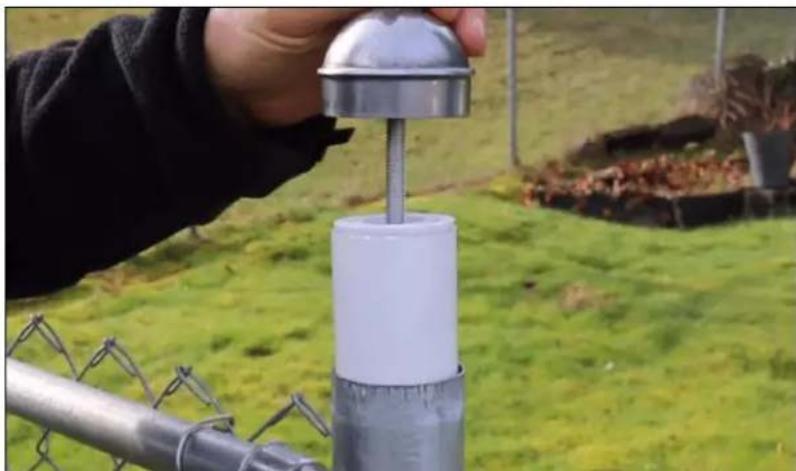
natural_image
Person using a metal measuring tool to measure a white cylindrical object mounted on a chain-link fence, set against a grassy field and fence background (no text or symbols visible)Figure 5
4 Liability Disclaimer
Reading the “User manual” is highly recommended. The manufacturer and supplier cannot accept any responsibility for any incorrect readings and any consequences that occur should an inaccurate reading take place.
This product is not a toy. Keep out of the reach of children.
No part of this manual may be reproduced without written authorization of the manufacturer.
Ambient, LLC WILL NOT ASSUME LIABILITY FOR INCIDENTAL, CONSEQUENTIAL, PUNITIVE, OR OTHER SIMILAR DAMAGES ASSOCIATED WITH THE OPERATION OR MALFUNCTION OF THIS PRODUCT.
5 Warranty Information
Ambient, LLC provides a 1-year limited warranty on this product against manufacturing defects in materials and workmanship.
This limited warranty begins on the original purchase date, and is valid only on products purchased and used in the United States, only to the original purchaser of this product, and only from an authorized dealer. To receive warranty service, the purchaser must contact Ambient, LLC for troubleshooting and service.
Warranty service can only be performed by an Ambient, LLC authorized service representative. The original receipt must be provided upon request as proof of purchase to Ambient, LLC.
Ambient, LLC will replace this product with new or reconditioned parts or products, if found to be defective during the limited warranty period specified above.
Replacement parts and products assume the remaining original warranty, or ninety (90) days, whichever is longer.
The owner must pay any shipping charges incurred in getting your Ambient, LLC product to a Ambient, LLC for replacement or repair. Ambient, LLC will pay reasonable return shipping charges to the owner of the product.
Your Ambient, LLC warranty covers all defects in material and workmanship with the following specified exceptions: (1) damage caused by accident, unreasonable use or neglect (including the lack of reasonable and necessary maintenance); (2) damage resulting from failure to follow instructions contained in your owner's manual; (3) damage resulting from the performance of repairs or alterations by someone other than an authorized Ambient, LLC authorized service center; (4) units used for other than in the manner described in this manual.