Caden CDN20-AU - Heating DIMPLEX - Free user manual and instructions
Find the device manual for free Caden CDN20-AU DIMPLEX in PDF.

User questions about Caden CDN20-AU DIMPLEX
0 question about this device. Answer the ones you know or ask your own.
Ask a new question about this device
Download the instructions for your Heating in PDF format for free! Find your manual Caden CDN20-AU - DIMPLEX and take your electronic device back in hand. On this page are published all the documents necessary for the use of your device. Caden CDN20-AU by DIMPLEX.
USER MANUAL Caden CDN20-AU DIMPLEX
natural_image
Line drawing of a classical architectural eaves with columns and a central rectangular structure (no text or symbols)Caden 2kW Revillusion Suite
Model: CDN20-AU
For domestic household use only.
8/54993/0 Iss 5
OCN 11996
CAUTION: FAILURE TO FOLLOW THESE INSTRUCTIONS MAY CAUSE INJURY AND/OR DAMAGE AND MAY INVALIDATE YOUR WARRANTY
Please read the operating instructions carefully before using your product for the first time and keep them in a safe place.
- When using electrical appliances, basic precautions should always be followed to reduce the risk of fire, electrical shock and injury to persons, including the following:
- If the appliance is damaged, check with the supplier before installation and operation.
- Do not use outdoors.
- Do not use in the immediate surroundings of a bath, shower or a swimming pool.
- Do not use this heater if it has been dropped.
- Do not use if there are visible signs of damage to the heater.
- Use this heater on a horizontal and stable surface, or fix it to the wall, as applicable.
- Do not locate the appliance immediately below a fixed socket outlet or connection box.
- This appliance is not intended for use by persons (including children) with reduced physical, sensory or mental capabilities, or lack of experience and knowledge, unless they have been given supervision or instruction concerning use of the appliance by a person responsible for their safety.
- Children should be supervised to ensure that they do not play with the appliance.
- Do not use this appliance in series with a thermal control, a program controller, a timer or any other device that switches on the heat automatically, since a fire risk exists when the appliance is accidentally covered or dis-placed.
• In the event of a fault, unplug the appliance. - Unplug the appliance when not required for long periods.
- This product is only intended for INDOOR RESIDENTIAL applications only.
- DO NOT cover cord with carpeting, throw rugs, runners, or similar coverings.
- DO NOT route cord under furniture or appliances. Take care to position the cord away from traffic areas and where it will not be a tripping hazard.
• This appliance must not be used in a bathroom. - Although this appliance complies with safety standards, we do not recommend its use on deep pile carpets or on long hair type of rugs
- The appliance must be positioned so that the plug is accessible.
- If the supply cord is damaged it must be replaced by the manufacturer or
service agent or a similarly qualified person in order to avoid a hazard.
- Keep the supply cord away from the front of the appliance.
- Do not use this heater in small rooms when they are occupied by persons not capable of leaving the room on their own, unless constant supervision is provided.
- To reduce the risk of fire, keep textiles, curtains and or flammable material a minimum distance of 1m from the air outlet.
- In order to avoid overheating, DO NOT COVER the appliance. Do not place material or garments on the appliance, or obstruct the air circulation around the appliance, for instance by curtains or furniture, as this could cause overheating and a fire risk.
- This Heater carries the warning symbol indicating that it must not be covered.
- In order to avoid a hazard due to inadvertent resetting of the thermal cut-out, this appliance must not be supplied through an external switching device, such as a timer, or connected to a circuit that is regularly switched on and off by the utility.
- CAUTION Some parts of this product can become very hot and cause burns. Particular attention has to be given where children and vulnerable people are present.
• Children shall not turn on/off the appliance. - Ensure that furniture, curtains or other combustible material are positioned no closer than 1 metre from the appliance.
- Unplug the appliance when not required for long periods.
- Keep the supply cord away from the front of the appliance.
WARNING - KEEP BATTERIES OUT OF REACH OF CHILDREN
- Swallowing may lead to serious injury in as little as 2 hours or death, due to chemical burns and potential perforation of the oesophagus.
- If you suspect your child has swallowed or inserted a button battery immediately call the 24-hour Poisons Information Centre on 13 11 26 (in Australia) or 0800 764 766 (in New Zealand) for fast, expert advice.
- Examine devices and make sure the battery compartment is correctly secured, e.g. that the screw or other mechanical fastener is tightened. Do not use if the compartment is not secure.
- Dispose of used button batteries immediately and safely. Flat batteries can still be dangerous.

WARNING
KEEP OUT OF REACH OF CHILDREN Swallowing can lead to chemical burns, perforation of soft tissue, and death. Severe burns can occur within 2 hours of ingestion. Seek medical attention immediately.


CAUTION: No obvious symptoms
Unfortunately, it is not obvious when a button or coin battery is stuck in a child's oesophagus (food pipe).
There are no specific symptoms associated with this. The child might:
• cough, gag or drool a lot
• appear to have a stomach upset or virus
- be sick
- point to their throat or stomach
• have a pain in their abdomen, chest or throat
- be tired or lethargic
- lose their appetite or have a reduced appetite
• not want to eat solid food/be unable to eat solid food
- be quieter or more clingy than usual or otherwise 'not themselves'
These types of symptoms vary or fluctuate. with the pain increasing and then subsiding.
A specific symptom to button and coin battery ingestion is vomiting fresh (bright red) blood. If the child does this seek immediate help. The lack of clear symptoms is why it is important to be vigilant with 'flat' or spare button or coin batteries in the home and the products that contain them.

text_image
Symbol with red X and Y axes crossed out of a black square, indicating prohibition or exclusionExposed to the weather outdoors
text_image
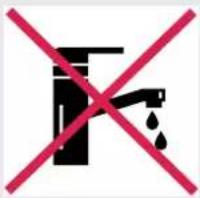
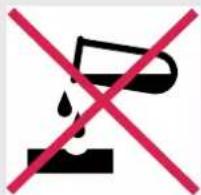
Prohibition sign with faucet and water drop symbol crossed by red XNear water If the power cable wires are frayed or cut

text_image
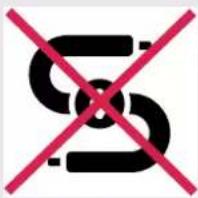
Prohibition sign with red X and black curved lines, indicating no change or restrictionwires are frayed or cut

natural_image
Black silhouette of a person crossed out by a red diagonal line (no text or symbols)Where small children may be left unattended
text_image
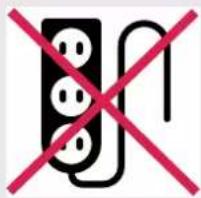
Prohibition sign with three electrical plug symbols crossed out by a red 'X' symbolIf an extension lead may become overloaded
text_image
Prohibition sign with red X and Y crossed-out road symbol, indicating no crossing or restrictionWhere the power cable may be damaged
natural_image
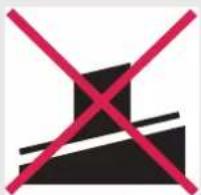
Symbol of a black block with two red X marks, no text or numbers presentOn a slope or uneven surface
text_image
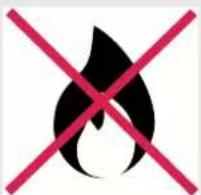
Warning symbol with flame and red X mark, indicating no fire or explosionWhere there is risk of fire or close to a naked flame
text_image
Prohibition sign with crossed-out black-and-white graphic and Chinese charactersWhere it may be damaged by chemicals

Where there is a risk of interference by foreign objects

text_image
Prohibition sign with crossed hammer and screwdriver crossed out, indicating crossed or crossed tool useThis product is not made for DIY repair

If there is a risk of water falling on the unit
Specifications
| Model no. CDN20-AU | |
| Colour/Finish | Natural White |
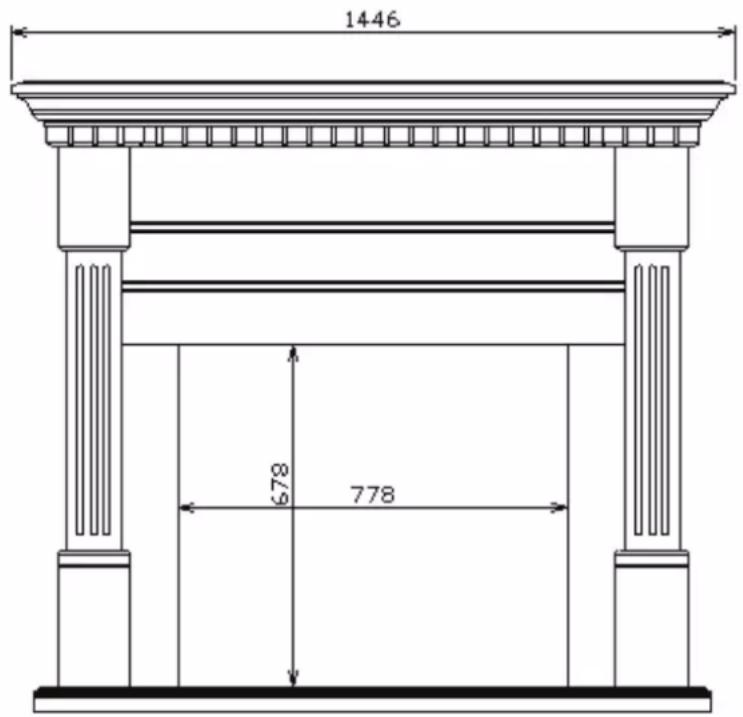
| Dimensions | 1446w x 460d x 1257h |
| Watts | 2000 |
| Heat Settings 1 | |
| Thermostat Control Yes | |
| Remote Control Yes | |
| Warranty 2 years | |
| Dimensions (w x d x h) 150 x 150 x 510mm | |
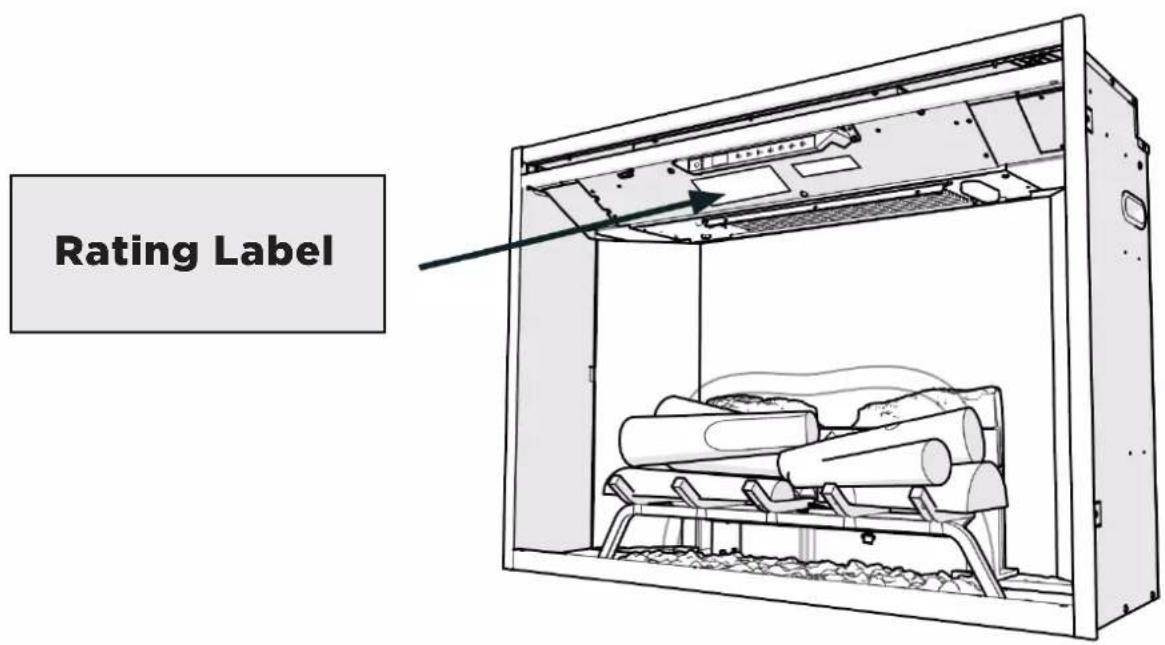
For greater precision, please always refer to the rating label placed on the product.
text_image
Rating LabelOperation Temperature
-20°C to 40°C
Fixed Wiring
In such instances this appliance must be installed by a suitably qualified installer and the means for disconnection must be incorporated in the fixed wiring in accordance with the local wiring rules.
WARNING Electrical outlet wiring must comply with local building codes and other applicable regulations to reduce the risk of fire, electric shock, or injury to persons.
NOTE: A 10 Amp circuit is required. A dedicated circuit is preferred, but not essential in all cases. A dedicated circuit will be required if, after installation, the circuit breaker trips or the fuse blows on a regular basis when the heater is operating. Additional appliances on the same circuit may exceed the current rating of the circuit breaker.
Unpacking the Unit
The unit comes packed with a protective sheet covering the front of the unit. This sheet is intended to prevent dust and debris from entering during construction. This sheet is designed so that it can be partially removed to complete the wiring and unpacking and can be reinstalled until the final installation is complete. The log set was installed on the grate
and the grate permanently fixed to the firebox at the factory. Carefully remove the packaging from around the log set. Make sure the wires from the log set are connected securely
to the grate box.
CAUTION The Realogs contain LED's to create a unique pulse and glow effect. Handle the log set carefully. They are fragile and can crack or break if dropped.
This product is provided with a ‘Tipping Restraint Kit’ as shown below, to prevent the product accidentally tipping over. Fitting Instructions are supplied with this kit please follow these instructions carefully.

natural_image
Line drawing of a mechanical latch or latch mechanism with no visible text or symbolsFitting
WARNING: FALLING OR TIPPING APPLIANCES CAN CAUSE INJURY OR DEATH OF YOUNG CHILDREN, PLEASE ENSURE CHILDREN DO NOT CLIMB, HANG OR STAND ON THIS PRODUCT.
WARNING: THE APPLIANCE IS PROVIDED WITH A TIPPING RESTRAINT, THIS RESTRAINT IS NOT A SUBSTITUTE FOR PROPER ADULT SUPERVISION. THIS RESTRAINT MAY PROVIDE PROTECTION AGAINST TIPPING FURNITURE. DO NOT ALLOW CHILDREN TO CLIMB ON FURNITURE. FAILURE TO DETACH THIS RESTRAINT BEFORE MOVING FURNITURE MAY RESULT IN INJURY AND DAMAGE.
Caden
text_image
1446 678 778
text_image
460 1257Touch Panel & Remote
WARNING The Revillusion Electric Firebox must be installed properly before it is used.
CAUTION Except for installation and cleaning described in this manual, an authorized service representative should perform any other servicing. The manual controls for the Revillusion Electric Firebox are located on the front panel. Touch an icon to activate. The selected setting displays on the left side of the panel.
A multi-function remote control also is provided. The remote control has a range of approximately 9m. To operate correctly, the remote control must be pointed toward the front of the electric firebox.

text_image
A B C D E F G + - + - + - + A H C F E J B D I GRemote Battery Replacement
To replace the battery:
- Remove the screw, push down on the battery cover located on the back of the remote control. Slide the battery cover open.
- Install 3V (CR2032) Lithium battery in the battery holder. The positive (+) side of the battery faces up.
- Close the battery cover and replace the screw.

text_image
Revillus by Dimplex| Function DescriptionIcon | |||
| A | [7H6Y] | Power/ Standby | Press to activate the current standby state (On/Off).Standby State OnPress to turn everything Off. Press again to activate the previous state.Standby State OffPress to activate the previous state.-If the flame effect was On, the previous heat setting will be activated (On or Off).-If the flame effect was Off, the previous heat setting will be activated (High or Low).Press again to turn everything Off. |
| B | [CWBS] | Heat | Heat OnPress to turn heat On (indicated by 1 short beep and the icon appearing on the display). Displays current heater temperature setting. Use the Temp Up/Down icon to change the heater temperature setting.Heat OffPress to turn heat Off (indicated by 1 short beep).! NOT after the heater is switched off, the fan will continue on for 60 seconds before turning off. |
| C | [0Z42] | Temp Down | Press multiple times to lower the heater temperature in 1' F (1' C) increments. Displays current temperature; lowest temperature is 41' F (5' C). This feature is active whenever the heat is enabled. |
| D |  | Temp Up | Press multiple time to raise the heater temperature in 1' F (1' C) increments. Displays current temperature; highest temperature is 99' F (37' C). This feature is active whenever the heat is enabled. |
| Change Fahrenheit (0 F) to Celsius (0 C) | Press both Temp+ (+) and Temp- (-) on the unit. | ||
| Heat Enable | Hold both Heat ( ) and Temp- (-), on the unit, for 2 seconds. Temperature displays on the screen. | ||
| Heat Disable | Hold both Heat ( ) and Temp- (-), on the unit, for 2 seconds, when temperature is adjusted "---" displays on the screen. | ||
Operation
| Function DescriptionIcon | |||
| E |  | Color Themes | Press multiple times to change the flame base colors from Red to Blue to Off. (The first segment on the display will change from "r" to "b" to blank) This feature is active only when the flame effect is On. |
| F |  | 360' Light | Press multiple times to change the LEDs on the sides and back of the unit from Midnight mode to white to yellow to red. (The middle segment on the display will change through 0 - 3 respectively. This feature is active only when the Flame is ON.) |
| G |  | Brightness | Press to change the LED lights from High to Low. (The last segment on the display will change from "H" to "L") The RealogTM LEDs remain On when the heater is ON and the flame effect is Off. !NOTE:en the Light Sensor is activated, High and Low flickering brightness settings are also available (Flashing "H" and "L"). |
| H |  | Flame | Press to light the log set and start the flame effect. Press again to turn feature Off. |
| I |  | Light Sensor | Press to activate (ALS ON) the ambient light sensor. Press again to turn the sensor off (ALS OFF). !NOTE:light sensor will adjust the brightness of the fireplace based on the ambient light in the room. |
| J |  | Timer | Press multiple times to change the sleeper timer in 0.5 hr increments from 0.5 hr to 8.0 hr before turning off. The remaining time on the sleep timer displays. |
| Control Lock Control Unlock | Hold both Temp- ( ) and Brightness ( ), on the unit, for 2 seconds to disable the manual controls. Hold both Temp- ( ) and Brightness ( ), on the unit, for 2 seconds to disable the manual controls. | ||
Resetting the Temperature Cut off Switch
Should the heater overheat, an automatic cut out will turn the heater off and it will not come back on without being reset. It can be reset by disconnecting power at the main electrical panel and waiting 5 minutes before plugging the unit back in.
CAUTION If you need to continuously reset the heater, unplug the unit and call technical support.
Cleaning
Over time, dust can accumulate on the logs, grate & base which can effect performance. It is recommended to clean the unit at least once a month.
CAUTION: ALWAYS Turn the unit OFF and disconnect the appliance from the power supply before undergoing any cleaning and maintenance.
Logs and Base
The electric firebox should not be operated with an accumulation of dust or dirt on or in the firebox, as this can cause a build up of heat and eventual damage.
Dust and vacuum the firebox as needed.
Use a damp cloth and a mild detergent to clean painted surfaces of the electric firebox. Never use abrasive cleaners.
Reflector Screen
The reflector screen is cleaned in the factory during the assembly operation. During shipment, installation, handling, etc., the screen may collect dust particles; these can be removed by dusting lightly with a clean dry cloth.
To remove fingerprints or other marks, clean the reflector screen damp cloth. Never use abrasive cleaners. Dry the screen completely with a lint free cloth to prevent water spots.
IMPORTANT
The control panel and other parts must not come into contact with water or any other liquids.
Maintenance
If the unit fails to operate efficiently, is broken or other problems arise, unplug and do not operate. Ask for advice by calling your local after sales service agent or the Customer Care Centre on 1300 556 816 (AU) / 0800 666 2824 (NZ).
Warranty
Please refer to the warranty card in the box for warranty information. For any troubleshooting advice, please contact the relative Customer Care Centre below.
Glen Dimplex Australia Pty Ltd Glen Dimplex New Zealand Ltd
8 Lakeview Drive, 38 Harris Road, East Tamaki,
Scoresby 3179, Victoria Auckland 2013
Australia New Zealand
Ph: 1300 556 816 Ph: 0800 666 2824
natural_image
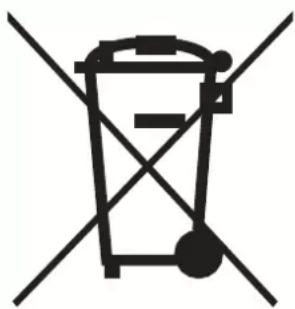
Symbol of a trash bin crossed with two diagonal lines, no text or numbers presentRecycling: Do not dispose of electrical appliances as unsorted municipal waste. Use separate collection facilities. Contact your local government for information regarding the collection systems available. If electrical appliances are disposed of in landfills or dumps, hazardous substances can leak into the ground water, polluting the food chain and damaging health and well-being.
DCDimplex®
Customer Care: 1300 556 816
customer.care@glendimplex.com.au
www.dimplex.com.au
Supplied by Glen Dimplex Australia
8 Lakeview Drive, Scoresby, Victoria, 3179
© Glen Dimplex Australia. All rights reserved. Material contained in this publication may not be reproduced in whole or in part, without prior permission in writing of Glen Dimplex Australia.
CDN20-AU v5