
PEGKT30.X9 - Guitar Pyle - Free user manual and instructions
Find the device manual for free PEGKT30.X9 Pyle in PDF.

| Brand | Pyle |
| Model | PEGKT30.X9 |
| Product Type | Electric Guitar |
| Recommended String Change Interval | Every 3 months (or when signs of wear) |
| Cleaning Frequency | After each use |
| Cleaning Instructions | Wipe fingerboard, strings, and plated parts (tuners, pickups, bridge) to remove perspiration |
| Tuning Method | Use tuning keys: counter-clockwise raises pitch, clockwise lowers |
| Truss Rod Tool Size | 4mm Allen wrench or 8mm pipe wrench |
| Bridge Type | Floating bridge (may include locking tremolo) |
| Output Jack | 1/4" standard guitar cable |
| Controls | Volume (master output) and Tone (high frequency cut) |
| Pickup Types | Magnetic (single coil and/or humbucker, varies by model) |
| Active Electronics | If applicable, disconnect cable after playing to save battery |
| Amplifier Settings Guide | Included in manual (Gain, Treble, Bass, Middle, Presence, Master Volume) |
Frequently Asked Questions - PEGKT30.X9 Pyle
User questions about PEGKT30.X9 Pyle
0 question about this device. Answer the ones you know or ask your own.
Ask a new question about this device
Download the instructions for your Guitar in PDF format for free! Find your manual PEGKT30.X9 - Pyle and take your electronic device back in hand. On this page are published all the documents necessary for the use of your device. PEGKT30.X9 by Pyle.
USER MANUAL PEGKT30.X9 Pyle
Please take a few moments to read through this manual. It will provide you with answers to many of your questions as well as inform you about the care and maintenance of your new instrument.
GUITAR ANATOMY

CLEANING
Cleaning your guitar regularly is one of the best ways to maintain the finish and prolong string life. Clean your guitar after each use, making sure to wipe the fingerboard and strings as well as any of the plated parts such as tuners, pickups, bridge etc. Make sure to remove all perspiration, as it can lead to corrosion and rusting in metal hardware and strings.
TUNING YOUR GUITAR
Tune your instrument using the tuning keys to raise or lower the pitch.
On a guitar with a locking tremolo system, you must first loosen the locking nut before you can adjust the tuning with the tuning machines. Although locking tremolo systems have fine tuners located on the bridge, they only allow limited (fine) tuning. Counter-clockwise rotation of the tuning keys will raise the pitch of the string while clockwise rotation will lower the pitch of the string you are tuning. Tune your guitar starting with the lowest to highest strings. After you have done this once, go back and double-check the tuning again. On some instruments you will have to do this a few times, especially if the strings are new or you have a guitar with a floating tremolo bridge. Tuning one string may affect the other strings and it is necessary to recheck the tuning until all strings are staying at the desired pitch.
Note: New strings tend to stretch and detune until they settle. It is a good idea to stretch the strings when you have just put on a new set. Do this after the initial tuning by bending notes and physically stretching each string by pulling away from the fingerboard (be careful no to pull too hard as you may break a string that way). After thoroughly stretching the strings repeat the tuning process.

CHANGING STRINGS
We strongly recommend that you change your strings fairly often. If you play daily, we recommend that you change your strings every 3 months. A new set of strings will sound clear and precise, while an old set will sound dull and can produce unusual buzzing and dead notes. If you notice that your strings have become dirty, discolored, or produce an unusual buzzing or dull sound, then it is definitely time to put a new set of strings on your guitar.
Always check your new strings and make sure they are smooth and free of defects before installing them. If there are any irregularities, such as kinks, twists, or any other manufacturing defects, they will cause buzzing and untrue notes as well as sound distortion. We recommend replacing one string at a time, so that all the tension is not taken off of the neck. This will make it easier to re-tune and setup the neck.
When winding strings on to the tuning machine post, always wind them tightly and evenly to avoid any slipping than can occur if there are any gaps. Always use at least 2 or 3 winds around the post starting from top to bottom. As a rule of thumb, use about and extra 5cm (2 inches) of slack when restringing a guitar and about 8cm (3 inches) of slack when restringing a bass. For unwound, or plain strings, follow the diagram (Figure 1) detailing how to install these strings on to the post to prevent them from slipping.
- Insert end of string into tuning post (make sure to leave enough slack for a few wraps around the post).
- Wrap end of string clockwise around post and under the string where it goes into the post (counterclockwise when stringing tuners on treble side of headstock).

natural_image
Close-up of a guitar headstock with visible tuning pegs and a logo (no text or symbols beyond the logo)
Figure 1: Stringing Plain Strings
- Pull end of string tight over itself making a sort of knot (end of string may then be bent down and cut off cleanly near knot).
- Tune to pitch, making sure the wraps wind neatly down the tuning post.
Note: Strings are always wound clockwise around the posts on the bass side and counter-clockwise around the posts on the treble side of headstock.
FLOATING BRIDGE ADJUSTMENT
A floating bridge has an arched wooden or metal base held in position on the instrument top only by the downward pressure of the strings. If the bridge is moved even slightly while re-stringing, the intonation will no longer be true (some instruments feature "pinned" bridges that eliminate this possibility).
To adjust floating bridge intonation on a guitar, first check the 12th-fret harmonic and the fretted 12th-fret tuning of both E strings (high and low). If properly intonated, the fretted and harmonic 12-fret pitches of both E strings will agree, with none of them being sharp or flat.

natural_image
Close-up of a guitar fretboard and its internal circuit breakers (no text or symbols visible)If the pitch of the 12th-fret note is sharp relative to the pitch of the 12th-fret harmonic, lightly tap the foot of the bridge to move it back toward the tailpiece until both pitches agree. If the pitch of the 12th-fret note is flat relative to the pitch of the 12th-fret harmonic, lightly tap the foot of the bridge to move it forward toward the neck until the two pitches agree. To fine-tune fully adjustable bridges, adjust each saddle forward or back using the individual intonation screws while checking the tuning of the 12-fret harmonic against the fretted 12th fret pitch.
IMPORTANT NOTE: When re-stringing a guitar with a floating bridge, change strings one at a time. Do not remove all the strings at once, as the bridge is held in the correct position only by the downward pressure of the strings.
To adjust the truss rod, first locate the truss rod access at the headstock (Figure 2) or end of neck by body joint (Figure 3), remove the truss rod cover, and insert the correct size allen wrench (4mm) or pipe wrench (8mm) to adjust. Turn counter-clockwise to loosen and clockwise to tighten.
Note: If your truss rod nut access is not visible, it is possible your instrument has it located inside of the neck pocket (Figure 4) – this will require the neck to be taken off of the body to adjust the truss rod.
Truss rod adjustments should only be performed by a qualified technician. Improperly adjusting or over adjusting the truss rod can result in damage to the guitar neck and is not covered under the warranty.

natural_image
Close-up of a guitar headstock with visible stations and a red circle highlighting a specific section (no text or symbols)
Figure 2: Truss Rod at Headstock

natural_image
Simple line drawing of a mechanical component with no text or symbolsFigure 3: Truss Rod by Body Joint
natural_image
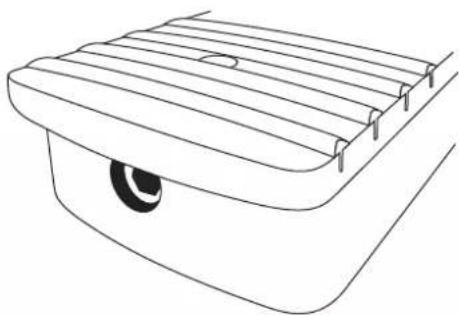
Line drawing of a roof-mounted vehicle showing slats and a wheel (no text or symbols)Figure 4: Truss Rod Inside Neck Pocket
CONTROLS AND SPECS
The following are some brief descriptions of the basic electronic controls and terminology. For more specific information on your model please visit our website at www.PyleUSA.com.
Note: Most control knobs are easily tightened or removed by using a 2.0mm allen wrench or flathead screwdriver to adjust the set screw on the side of the knob. If a knob becomes loose, you should first remove the knob and check the control to make sure It is properly tightened to the body before re-tightening the knob onto the control shaft. A loose control shaft can easily be tightened using any adjustable wrench. You will need to remove the electronics backplate and hold the control from the back of the guitar while tightening the nut from the top of body. This will ensure that you do not move the controls or damage/break any of the wire connections.
Volume Control
Controls the master output level of the guitar. Turning the knob clockwise will increase the volume while turning counterclockwise will decrease the volume. Some instruments will have multiple volume controls in which case, you'll find there's a volume control for each pickup.
Note: In the case of multiple volume controls, when either volume control is turned off and the pickup selector switch is in the middle position w/both pickups on, the entire signal of the instrument will be turned off.
Tone Control
This adjusts the high frequencies present in the signal coming from your guitar. With the knob turned fully clockwise, all frequencies are present. Turning the knob counter-clockwise decreases the high frequencies.
Output Jack
This is where the output signal of the guitar is sent to the amplifier by plugging in any standard 1/4" guitar cable. Most output jacks are located near the bottom corner of the guitar below the electronics cavity.
Note: If your guitar has active electronics, you should always remove your cable after playing. Leaving your cable plugged into your instrument will drain the battery.
If your jack ever comes loose, do not tighten it without first removing the jackplate and securing the inside of the jack, otherwise you may break the wires causing your guitar to lose output.
Pickups
The pickups on your guitar turn the string vibrations into an electronic signal that is sent to your amplifier. Pickups are made up of magnets and coils of wire.
There are 2 types of magnetic pickups used in most electric guitars - Single Coils and Humbuckers. A Single Coil pickup is made up of only 1 coil of wire and generally has a weak output.
Due to its construction, a single coil will be noisy since it cannot block hum and RF interference. Humbuckers on the other hand are in fact "hum-cancelling" because of their construction using 2 coils side by side. The signals from each coil are combined in a certain way that cancels the hum and RF interference that is common with single coil pickups. Humbuckers generally have a higher output signal compared to single coils.
Pickup Selector Switch
The selector is used to switch between different pickups or combinations of pickups (on guitars with two or more pickups).

natural_image
Black electric guitar with gold head and visible grille, no text or symbols on bodyGUITAR AMP SETTINGS GUIDE
STEP 1 HOW TO EQ A GUITAR AMP - UNDERSTANDING THE CONTROLS
The basic controls in the guitar amps include;
- Gain
- Treble
- Bass
- Presence
- Middle
- Master Volume
The 'Gain' Knob
This knob controls the amount of distortion which is featured on the amp. If you keep this control low, your guitar tone will have little to no distortion, if it's set high your guitar will be more distorted.
The 'Bass' Knob
This controls the amount of 'bass' in your guitar sound. If you want your guitar to sound warm and thick, turn this control up. Too much bass can often lead to your guitar sounding muddy, so make sure that you use this control sparingly.
The 'Middle' Knob
This controls the amount of 'mids' in your guitar tone. The more mids you have, the more you will stick out in a band mix.
The 'Treble' Knob
This controls how bright your guitar sounds. If you want your guitar to sparkle, turn this knob up. If you seek warmer tones, try bringing this knob down.
The 'Presence' Knob
The presence knob starts where the treble knob stops. It's essentially like a 'super treble' control. This is perfect for country guitar or spanky funk lines.
The 'Master Volume' Knob
The 'master volume' knob controls how loud or quiet your amp is. Make sure this knob is always cranked! These controls are usually found on the front or top of the guitar amplifier, like this:

STEP 2 HOW TO EQ A GUITAR AMP - DIALLING IN THE PERFECT GUITAR TONE
Tip #1 Set All The Controls To 12 o' Clock
When setting up your guitar amp, the first thing you should do is set all of your controls to 12 o'clock. Setting everything at 12 o'clock gives you a great starting point, from here it's easy to tweak your amp to where you want it.
Tip #2 Gradually Tweak Each Control On Your Amp
When you EQ your amp, make sure that you spend some time on each control. Don't just dive straight into adjusting every single knob, pick one control and gradually turn it until you are happy with your guitar tone.
Tip #3 Don't Crank The Gain Knob
One of the biggest mistakes that beginners make is cranking the gain knob. Cranking the gain knob on the amp will just turn your guitar to mush. Sure, it can be fun and there's nothing wrong with having a great crunch tone. However, it's important to be modest with the gain knob. The level of your gain knob is something that you should definitely be aware of when learning how to EQ a guitar amp.
STEP 3 HOW TO EQ A GUITAR AMP – 3 ESSENTIAL AMP SETTINGS THAT WILL MAKE YOU SOUND AMAZING If you're interested in getting some great amp settings, there are 3 essential tones that you'll need. These are:
- A sparkly clean sound. (This tone is perfect for chords and rhythm guitar.)

- A dirty crunch sound. (This tone is perfect for chunky riffs or bluesy solos.)

- A ripping lead sound. (This tone is perfect for ripping solos or heavy metal riffs.)

These 3 sounds will get you through any gig and any song that you're trying to execute.

natural_image
Abstract logo design featuring a stylized letter 'D' enclosed in concentric ovals (no text or symbols)Questions? Comments?
We are here to help!
Phone:(1)718-535-1800
Email: support@pyleusa.com


- CLEANING
- TUNING YOUR GUITAR
- Tune your instrument using the tuning keys to raise or lower the pitch.
- CHANGING STRINGS
- FLOATING BRIDGE ADJUSTMENT
- CONTROLS AND SPECS
- Volume Control
- Tone Control
- Output Jack
- Pickups
- Pickup Selector Switch
- GUITAR AMP SETTINGS GUIDE
- STEP 1 HOW TO EQ A GUITAR AMP - UNDERSTANDING THE CONTROLS
- The basic controls in the guitar amps include;
- The 'Gain' Knob
- The 'Bass' Knob
- The 'Middle' Knob
- The 'Treble' Knob
- The 'Presence' Knob
- The 'Master Volume' Knob
- STEP 2 HOW TO EQ A GUITAR AMP - DIALLING IN THE PERFECT GUITAR TONE
- Tip #1 Set All The Controls To 12 o' Clock
- Tip #2 Gradually Tweak Each Control On Your Amp
- Tip #3 Don't Crank The Gain Knob
Brand : Pyle
Model : PEGKT30.X9
Category : Guitar