ATSAMW25 - Electronic module Microchip - Free user manual and instructions
Find the device manual for free ATSAMW25 Microchip in PDF.

User questions about ATSAMW25 Microchip
0 question about this device. Answer the ones you know or ask your own.
Ask a new question about this device
Download the instructions for your Electronic module in PDF format for free! Find your manual ATSAMW25 - Microchip and take your electronic device back in hand. On this page are published all the documents necessary for the use of your device. ATSAMW25 by Microchip.
USER MANUAL ATSAMW25 Microchip
Software Programming Guide for SAM W25 Xplained Pro
Atmel SmartConnect
Prerequisites
• Hardware Prerequisites
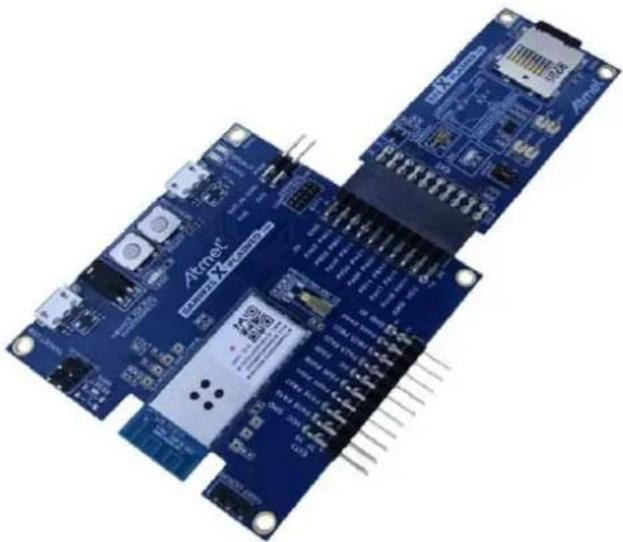
- Atmel® SAM W25 Xplained Pro Evaluation Kit
- Atmel IO1 extension
- Micro-USB Cable (Micro-A / Micro-B)
• Software Prerequisites
- Atmel Studio 6.2
- Wi-Fi IoT Examples
Introduction
Atmel SAM W25 includes the Atmel 2.4GHz IEEE 802.11 b/g/n Wi-Fi WINC1500 along with SAM D21 ARM® Cortex® M0+ based MCU. This software programming guide describes Atmel SAM W25 Wi-Fi module to build state-of-the-art Internet of Things (IoT) applications.
The following topics will be covered:
• How examples are organized
• Target board information
• Instruction for each example
natural_image
Close-up of a blue Arduino PiC2 microcontroller board with visible components and connectors (no readable text or symbols)Table of Contents
1 How the Examples are Organized .... 4
1.1 Basic Examples....4
1.2 Protocol Examples ....4
1.3 Advanced Examples....5
2 Source Organization .... 5
3 Basic Operation Code....6
3.1 Initialization 6
3.2 Wi-Fi Connection....7
4 Examples 8
4.1 Basic Example: How to Get Chip ID....8
4.2 Basic Example: How to Set Debug Level 9
4.3 Basic Example: How to Get MAC Address....11
4.4 Basic Example: How to Run STA Mode....13
4.5 Basic Example: How to Run AP Mode 15
4.6 Basic Example: How to Run P2P Mode ..... 17
4.7 Basic Example: How to Change Mode....19
4.8 Basic Example: How to Scan Aps 21
4.9 Basic Example: How to Set Deep Sleep 23
4.10 Basic Example: Security with WEP/WPA....25
4.11 Basic Example: Connection to Enterprise Security Network 27
4.12 Basic Example: Connection to Security WPS 29
4.13 Basic Example: How to Set Packet Monitoring 31
4.14 Basic Example: Get Signal Status....33
4.15 Basic Example: AP Provision 35
4.16 Basic Example: HTTP Provision 37
4.17 Protocol Example: UDP (Server and Client)....39
4.18 Protocol Example: UDP Client 42
4.19 Protocol Example: UDP Server 44
4.20 Protocol Example: TCP Client....46
4.21 Protocol Example: TCP Server 48
4.22 Protocol Example: NTP Time Client....51
4.23 Protocol Example: SMTP Send Email....53
4.24 Protocol Example: Location Client....56
4.25 Advanced Example: Growl Notification 59
4.26 Advanced Example: MQTT Chat....62
4.27 Advanced Example: Weather Client....65
4.28 Advanced Example: Wi-Fi Serial....68
4.29 Advanced Example: OTA Firmware Upgrade 71
4.30 Advanced Example: SSL Connection....75
4.31 Advanced Example: HTTP File Server....77
4.32 Advanced Example: HTTP File Downloader 80
5 Conclusion....83
6 Revision History 84
Icon Key Identifiers

INFO Delivers contextual information about a specific topic.

TIPS Highlights useful tips and techniques.

TO DO Highlights objectives to be completed.

RESULT Highlights the expected result of an assignment step.

WARNING Indicates important information.

EXECUTE Highlights actions to be executed out of the target.
1 How the Examples are Organized
This example package consists of several example codes and projects. The examples are organized in different levels of codes to explain Wi-Fi driver API usage – from basic Wi-Fi operations to advanced topics. Here's three level of category:
- Basic Examples
- IoT Protocol Examples
• Advanced App Scenario
These example materials are delivered by Atmel Software Framework, or by Atmel FAE (together with hands-on documentation, datasheets, application notes, software, and tools).
1.1 Basic Examples
These examples describe basic Wi-Fi operation in 'how-to' manner:
• How to read Chip ID (to identify H/W revision of Wi-Fi network controller)
• How to adjust debug message level
• How to get MAC address of the Wi-Fi module
- How to start Wi-Fi in specific operation mode, such as:
- STA Mode (Station mode, known as a Wi-Fi client)
- AP mode (Access Point mode)
- P2P mode (Peer-to-Peer mode, also known as Wi-Fi Direct ^® )
• How to switch mode between STA, AP, and P2P modes during the runtime
• How to scan AP list that is nearby
• How to set deep sleep mode
• How to connect to secure Wi-Fi with using WEP/WPA/WPA2 security
• How to connect to enterprise security network
• How to connect to security WPS
• How to set packet monitoring
• How to get RF signal status by reading RSSI value
• How to set AP provision
• How to set HTTP provision
1.2 Protocol Examples
After basic code examples, the user may want to explore how to send and receive network packets. Here are some protocol examples that can be extended for IoT application.
- UDP protocol example
- Server and Client
- Client
- Server
- TCP protocol example
- Client
- Server
• NTP Time client – retrieves network time for IoT application
- Send email – send email from SMTP server
- Location client – get the current location of the network provider using HTTP
1.3 Advanced Examples
These examples demonstrate more complex examples like:
- Growl client – demonstrates using RESTful API over SSL (essential for IoT application)
• MQTT Chat client – demonstrate how to send and receive IoT information using MQTT protocol - Weather client – get the current weather information of the network provider and utilize the IO1 sensor device
• Wi-Fi serial - useful for chatting or controlling a remote device - OTA Firmware Upgrade – Wi-Fi network controller's firmware upgrade via OTA server
- SSL connection - Set up an SSL connection
For customer's IoT application, these examples are useful to how to use Wi-Fi driver APIs and implement a feature for IoT application.
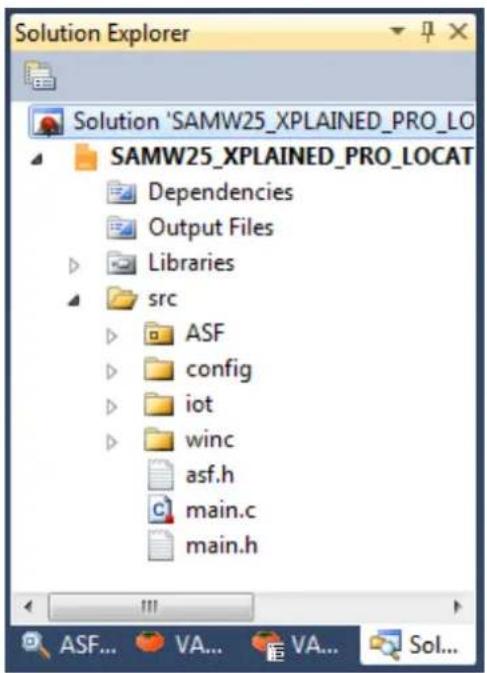
2 Source Organization
There are some folders which are allocated automatically according to user configurations and example source consists of main.c and main.h.
Here is the structure of application source codes:
• ASF
All source codes of ASF modules are located in this folder. You can select various modules with ASF wizard and it will configure the content in this folder.
- config
This folder is consists of configuration header files for SAM W25 and extension boards.
- iot
Some of protocol/advanced examples have this folder. It contains the source codes of IoT protocol like HTTP, MQTT and so forth.
- winc
This is the driver source folder of Wi-Fi module.
Figure 2-1. Structure of Application Source Codes
text_image
Solution Explorer Solution 'SAMW25_XPLAINED_PRO_LO SAMW25_XPLAINED_PRO_LOCAT Dependencies Output Files Libraries src ASF config iot winc asf.h main.c main.h
INFO Some examples may have additional source file. But the structure is similar across the samples.
3 Basic Operation Code
This section explains the basic code for using SAM W25. These codes can be different according to the purpose of your example.
3.1 Initialization
1) Initialize SAM W25 board.
/* Initialize the board. */
system_init();
2) Initialize UART console to print debug messages.
/* Initialize the UART console. */
configure_console();
printf(STRING_HEADER);
3) Initialize board support package to use the Wi-Fi network controller.
/* Initialize the BSP. */
nm_bsp_init();
4) Initialize Wi-Fi driver. You do not need to set the Wi-Fi callback function if you don't use Wi-Fi connection (e.g. Get Chip ID example, Get MAC Address example).
/* Initialize Wi-Fi parameters structure. */
memset((uint8_t *)¶m, 0, sizeof(tstrWifiInitParam));
/* Initialize Wi-Fi driver with data and status callbacks. */
param.pfAppWifiCb = wifi_cb;
ret = m2m_wifi_init(¶m);
if (M2M_SUCCESS != ret) {
printf("main: m2m_wifi_init call error!(%d)\r\n", ret);
while (1) {
}
}
3.2 Wi-Fi Connection
1) Initialize socket module and set socket callback functions to receive socket events and connect SAM W25 to an AP with given information. These are normally defined in main.h.
/* Initialize Socket module */
socketInit();
registerSocketCallback(socket_event_handler, socket_resolve_handler);
/* Connect to router. */
ret = m2m_wifi_connect((char *)MAIN_WLAN_SSID, sizeof(MAIN_WLAN_SSID), MAIN_WLAN_AUTH, (char *)MAIN_WLAN_PSK, M2M_WIFI_CH_ALL);
4 Examples
4.1 Basic Example: How to Get Chip ID
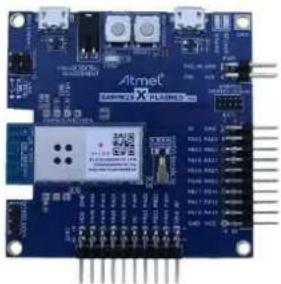
This example demonstrates the use of the SAM W25 Xplained Pro board to retrieve the chip information of the Wi-Fi module. This is a basic operation to identify which HW version is used.
Figure 4-1. The SAM W25 Xplained Pro
natural_image
Close-up of a blue Altnet X microcontroller board with visible components and wiring (no readable text or symbols)main.c: Initialize the SAM W25 and retrieve information.
1) Code summary.
nmi_get_chipid() function returns the chip ID of Wi-Fi network controller.
nmi_get_rfrevid() function returns RF revision ID.
/* Display WINC1500 chip information. */
printf("Chip ID : \r\t\t\t%x\r\n", (unsigned int)nmi_get_chipid());
printf("RF Revision ID : \r\t\t\t%x\r\n", (unsigned int)nmi_get_rfrevid());
2) Build the program and download it into the board.
3) Start the application.

RESULT
The application is now programmed and running. The following information will be displayed on the terminal window. In the below result, you can see the chip ID of 1502b1 and RF revision ID of 4. User must be aware of the version of Wi-Fi module which is used.
-- Chip information example --
-- SAMW25_XPLAINED_PRO --
-- Compiled: xxx xx xxxx xx:xx:xx--
Chip ID : 1502b1
RF Revision ID : 4
Done.

TIPS
Wi-Fi module behavior and corresponding log messages can be different according to the revision.
4.2 Basic Example: How to Set Debug Level
This example demonstrates the use of the SAM W25 Xplained Pro board to configure debug level and print debugging messages of the Wi-Fi module.
Figure 4-2. The SAM W25 Xplained Pro

natural_image
Close-up of a blue printed circuit board with ATmel logo and various electronic components (no readable text or symbols)main.c: Initialize the SAM W25 and print debugging messages according to the debug level.
1) Code summary.
Enable debug mode by configuring the below code in config\conf_winc.h:
/** Debug Options */
#define CONF_WIFI_M2M_DEBUG
(1)
This example demonstrates setting debug level by M2M_DEBUG_LEVEL(...) macro.
for (int8_t i = 0; i < 5; i++) {
    /* Set debug level. */
    M2M_DEBUG_LEVEL(i);

    printf("\r[set debug level : %d]\r\n", (unsigned int)i);

    /* Display debug information. */
    printf("\r");
    M2M_PRINT("test message.\n");
    M2M_ERR("test message.\n");
    M2M_INFO("test message.\n");
    M2M_REQ("test message.\n");
    M2M_DBG("test message.\n");

    printf("\r\n");
}
2) Build the program and download it into the board.
3) Start the application.
The application is now programmed and running. The following information will be displayed on the terminal window.
-- Debug level example --
-- SAMW25_XPLAINED_PRO --
-- Compiled: xxx xx xxxx xx:xx:xx --
[set debug level : 0]
test message.

[set debug level : 1]
test message.
(APP)(ERR)[main][186]test message.

[set debug level : 2]
test message.
(APP)(ERR)[main][186]test message.
(APP)(INFO)test message.

[set debug level : 3]
test message.
(APP)(ERR)[main][186]test message.
(APP)(INFO)test message.
(APP)(R)test message.

[set debug level : 4]
test message.
(APP)(ERR)[main][186]test message.
(APP)(INFO)test message.
(APP)(R)test message.
(APP)(DBG)[main][189]test message.

Done.

TIPS For a debugging session, user must turn on the debug option, and analyze the situation. Engineering team also requires the logs to review.
4.3 Basic Example: How to Get MAC Address
This example demonstrates the use of the SAM W25 Xplained Pro board to retrieve the MAC address of the Wi-Fi module.
Figure 4-3. The SAM W25 Xplained Pro

natural_image
Close-up of a blue printed circuit board with ATmel logo and component labels (no readable text or symbols beyond branding)main.c: Initialize the SAM W25 and print the MAC address of the Wi-Fi module.
1) Code summary.
MAC address is mostly stored in the OTP-ROM. You can get it via m2m_wifi_get_otp_mac_address() function.
/* Get MAC Address from OTP. */
m2m_wifi_get_otp_mac_address(mac_addr, &u8IsMacAddrValid);
If MAC address doesn't exist in OTP then you can set the address by m2m_wifi_set_mac_address() function.
if (!u8IsMacAddrValid) {
    /* Cannot found MAC Address from OTP. Set user define MAC ADDRESS. */
    m2m_wifi_set_mac_address((uint8_t *)main_user_define_mac_address);
}
Finally you can check MAC address via m2m_wifi_get_mac_address() function.
/* Get MAC Address. */
m2m_wifi_get_mac_address(mac_addr);
2) Build the program and download it into the board.
3) Start the application.

RESULT
The application is now programmed and running. The following information will be displayed on the terminal window.
-- MAC ADDRESS example --
-- SAMW25_XPLAINED_PRO --
-- Compiled: xxx xx xxxx xx:xx:xx --
OTP MAC Address : XX:XX:XX:XX:XX:XX
(Or)
USER MAC Address : XX:XX:XX:XX:XX:XX

TIPS Default MAC address: The MAC address in OTP ROM (One Time Programmable ROM).

TIPS User Define MAC address: If you want to use a custom MAC address, you should be set the user define MAC address.

TIPS In this example result, you can see the OTP MAC address or USER MAC address.
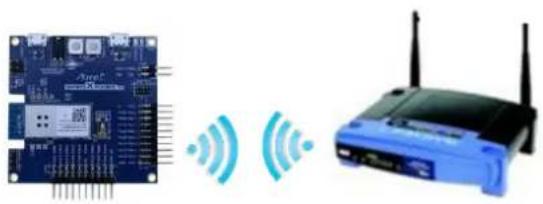
4.4 Basic Example: How to Run STA Mode
This example demonstrates the use of the SAM W25 Xplained Pro board to behave as a station.
Figure 4-4. The SAM W25 Xplained Pro

natural_image
Electronic circuit board connected to a wireless router with signal waves (no text or symbols visible)main.c: Initialize the SAM W25 and connect to AP as a station mode.
1) Code summary.
Configure below code in main.h for AP information to be connected.
#define MAIN_WLAN_SSID "DEMO_AP"
#define MAIN_WLAN_AUTH M2M_WIFI_SEC_WPA_PSK
#define MAIN_WLAN_PSK "12345678"
Connect the SAM W25 to the AP via m2m_wifi_connect() function.
m2m_wifi_connect((char *)MAIN_WLAN_SSID, sizeof(MAIN_WLAN_SSID), MAIN_WLAN_AUTH, (void *)MAIN_WLAN_PSK, M2M_WIFI_CH_ALL);
wifi_cb() function is called with M2M_WIFI_RESP_CON_STATE_CHANGED message and then it request an IP address via m2m_wifi_request_dhcp_client() function.
static void wifi_cb(uint8_t u8MsgType, void *pvMsg)
{
    switch (u8MsgType) {
    case M2M_WIFI_RESP_CON_STATE_CHANGED:
    {
    tstrM2mWifiStateChanged *pstrWifiState = ...;
    if (pstrWifiState->u8CurrState == M2M_WIFI_CONNECTED) {
    m2m_wifi_request_dhcp_client();
    }
    }
}
wifi_cb() function is called with M2M_WIFI_REQ_DHCP_CONF message and finally get an IP address.
case M2M_WIFI_REQ_DHCP_CONF:
{
    uint8_t *pu8IPAddress = (uint8_t *)pvMsg;
    printf("Wi-Fi connected\r\n");
    printf("Wi-Fi IP is %u.%u.%u.%u\r\n", pu8IPAddress[0],
    pu8IPAddress[1], pu8IPAddress[2], pu8IPAddress[3]);
    break;
2) Build the program and download it into the board.
3) Start the application.
The application is now programmed and running. The following information will be displayed on the terminal window.
-- Station mode example --
-- SAMW25_XPLAINED_PRO --
-- Compiled: xxx xx xxxx xx:xx:xx -
Connecting to XXXXXX.
Wi-Fi connected
Wi-Fi IP is xxx.xxx.xxx.xxx
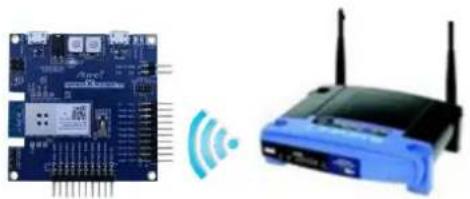
4.5 Basic Example: How to Run AP Mode
This example demonstrates the use of the SAM W25 Xplained Pro board to behave as an AP.
Figure 4-5. The SAM W25 Xplained Pro

natural_image
Illustration of a blue circuit board connected to a smartphone displaying a microchip, with wireless signals shown as icons (no text or symbols present)main.c: Initialize the SAM W25 and act as an AP.
1) Code summary.
Configure below code in main.h for AP information.
#define MAIN_WLAN_SSID "DEMO_AP"
#define MAIN_WLAN_AUTH M2M_WIFI_SEC_OPEN
#define MAIN_WLAN_CHANNEL (6)
In main() function, initialize AP mode configuration structure (strM2MAPConfig) as below. You can enable AP mode via m2m_wifi_enable_ap function().
tstrM2MAPConfig strM2MAPConfig = {
    MAIN_WLAN_SSID,    /* Access Point Name. */
    MAIN_WLAN_CHANNEL,    /* Channel to use. */
    MAIN_WLAN_WEP_KEY_INDEX,    /* Wep key index. */
    MAIN_WLAN_WEP_SIZE,    /* Wep key size. */
    MAIN_WLAN_WEP_KEY,    /* Wep key. */
    MAIN_WLAN_AUTH,    /* Security mode. */
    MAIN_WLAN_SSID_MODE,    /* SSID visible. */
    MAIN_WLAN_DHCP_SERVER_IP    /* DHCP Server IP */
};
ret = m2m_wifi_enable_ap(&strM2MAPConfig);
2) Build the program and download it into the board.
3) Start the application.

RESULT
The application is now programmed and running. The following information will be displayed on the terminal window.
-- AP mode example --
-- SAMW25_XPLAINED_PRO --
-- Compiled: xxx xx xxxx xx:xx:xx -
AP mode started. You can connect to XXXXXX.
Station connected
Station IP is xxx.xxx.xxx.xxx

INFO The SAM W25 supports AP mode operation with the following limitations:
- Only ONE associated station is supported. After a connection is established with a station, further connections are rejected.
- OPEN and WEP security modes.
- The device could not work as a station in this mode (STA/AP Concurrency is not supported).

EXECUTE Now AP mode is ready. You can use a smart phone to connect to the SAM W25 that is running as AP mode.
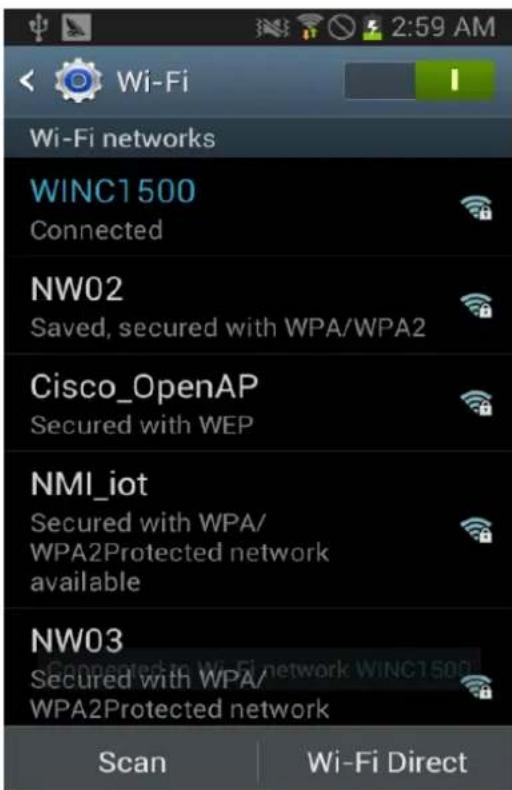
text_image
Wi-Fi networks WINC1 500 Connected NW02 Saved, secured with WPA/WPA2 Cisco_OpenAP Secured with WEP NMI_iot Secured with WPA/ WPA2Protected network available NW03 Secured with WPA/ WPA2Protected network Scan Wi-Fi Direct4.6 Basic Example: How to Run P2P Mode
This example demonstrates the use of the SAM W25 Xplained Pro board to behave as a P2P device. P2P is also known as Wi-Fi Direct.
Figure 4-6. The SAM W25 Xplained Pro

natural_image
Illustration of a blue circuit board connected to an electronic device via wireless signals (no text or symbols present)main.c: Initialize the SAM W25 and act as a P2P device.
1) Code summary.
Configure below code in main.h for P2P information.
#define MAIN_WLAN_DEVICE_NAME "WINC1500_P2P"
#define MAIN_WLAN_CHANNEL (6)
Set your device name which will be shown in the peer device.
ret = m2m_wifi_set_device_name((uint8_t *)MAIN_WLAN_DEVICE_NAME, strlen(MAIN_WLAN_DEVICE_NAME));
Set to P2P mode with the channel number which is defined in main.h.
ret = m2m_wifi_p2p(MAIN_WLAN_CHANNEL);
When your mobile device connects to the SAM W25, Wi-Fi callback will receive M2M_WIFI_REQ_DHCP_CONF message.
static void wifi_cb(uint8_t u8MsgType, void *pvMsg)
{
    case M2M_WIFI_REQ_DHCP_CONF:
    uint8_t *pu8IPAddress = (uint8_t *)pvMsg;
    printf("Wi-Fi connected\r\n");
    printf("Wi-Fi IP is %u.%u.%u.%u\r\n",
    pu8IPAddress[0], pu8IPAddress[1],
    pu8IPAddress[2], pu8IPAddress[3]);
2) Build the program and download it into the board.
3) Start the application.

RESULT
The application is now programmed and running. The following information will be displayed on the terminal window.
-- P2P mode example --
-- SAMW25_XPLAINED_PRO --
-- Compiled: xxx xx xxxx xx:xx:xx -
P2P mode started. You can connect to XXXXXX.
Wi-Fi connected
Wi-Fi IP is xxx.xxx.xxx.xxx

EXECUTE
After running P2P mode, open your smart phone's Wi-Fi Direct menu, then scan and connect to the SAM W25.
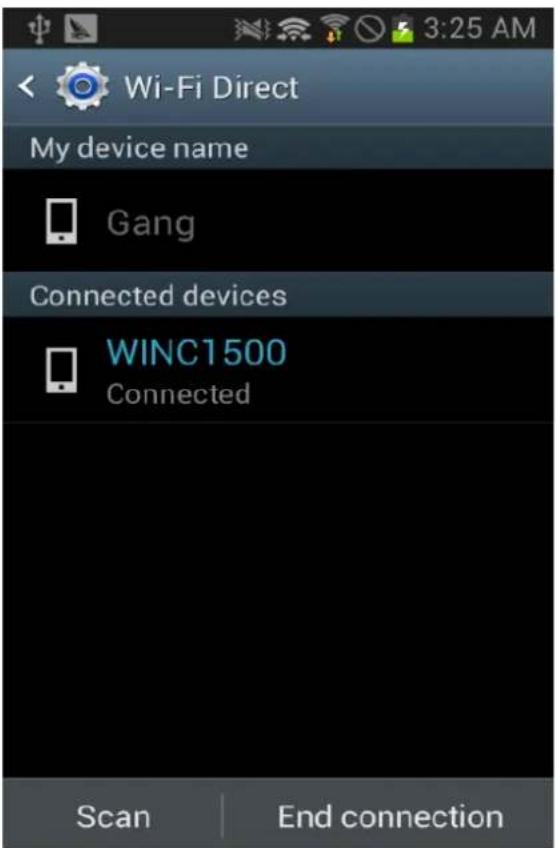
text_image
Wi-Fi Direct My device name Gang Connected devices WINC1500 Connected Scan End connection
INFO
The SAM W25 Wi-Fi module supports Wi-Fi Direct protocol with the following limitations:
- The device can only operate as a Wi-Fi Direct device (Group Owner functionality will be supported in a future release).
- The device cannot work as a station in this mode (STA/P2P Concurrency will be supported in a future release).
4.7 Basic Example: How to Change Mode
This example demonstrates the use of the SAM W25 Xplained Pro board to bring up as a station, an AP or a P2P mode.
Figure 4-7. The SAM W25 Xplained Pro

natural_image
Three electronic devices: a microcontroller, a wireless router, and a tablet with a smartphone (no visible text or symbols)main.c: Initialize the SAM W25. For the first time, the device acts as station mode, then switch to AP mode or P2P mode. For the details in each mode, refer to the MODE_STA, MODE_AP and MODE_P2P example.
1) Code summary.
Configure below code in main.h for AP information.
#define MAIN_WLAN_SSID "DEMO_AP"
#define MAIN_WLAN_AUTH M2M_WIFI_SEC_OPEN
#define MAIN_WLAN_CHANNEL (6)
Configure below code in main.h for P2P information.
#define MAIN_WLAN_DEVICE_NAME "WINC1500_P2P"
#define MAIN_WLAN_P2P_CHANNEL (6)
In main() function, it sets to AP mode first and changes to P2P mode after a little delay. For more details, refer to "How to Run AP mode" example and "How to Run P2P mode" example.
ret = ap_mode_activate_30s();
nm_bsp_sleep(DELAY_FOR_MODE_CHANGE);
ret = p2p_mode_activate_30s();
static int8_t ap_mode_activate_30s (void)
{
    ...
    ret = m2m_wifi_enable_ap(&strM2MAPConfig);
    nm_bsp_sleep(HOLD_TIME_IN_MODE);
    ret = m2m_wifi_disable_ap();
2) Build the program and download it into the board.
3) Start the application.
The application is now programmed and running. The following information will be displayed on the terminal window.
-- Mode change example --
-- SAMW25_XPLAINED_PRO --
-- Compiled: xxx xx xxxx xx:xx:xx --
AP mode, start
AP mode, end
P2P mode, start
P2P mode, end
4.8 Basic Example: How to Scan Aps
This example demonstrates the use of the SAM W25 Xplained Pro board to how to scan AP as a station.
Figure 4-8. The SAM W25 Xplained Pro

natural_image
Illustration of a blue circuit board connected to three wireless network devices (no text or symbols visible)main.c: Initialize the SAM W25 and scan AP until defined AP is founded.
1) Code summary.
Configure below code in main.h for the AP to be connected.
#define MAIN_WLAN_SSID "DEMO_AP"
#define MAIN_WLAN_AUTH M2M_WIFI_SEC_WPA_PSK
#define MAIN_WLAN_PSK "12345678"
Request to scan for all channels.
m2m_wifi_request_scan(M2M_WIFI_CH_ALL);
wifi_cb() function is called with M2M_WIFI_RESP_SCAN_DONE message when scanning is done. You can get the number of found APs as below and request the scan result with a specific channel by calling m2m_wifi_req_scan_result() function.
static void wifi_cb(uint8_t u8MsgType, void *pvMsg)
{
    case M2M_WIFI_RESP_SCAN_DONE:
    tstrM2mScanDone *pstrInfo = (tstrM2mScanDone *)pvMsg;
    if (pstrInfo->u8NumofCh >= 1) {
    m2m_wifi_req_scan_result(scan_request_index);
    scan_request_index++;
    }
}
wifi_cb() function will be called again with M2M_WIFI_RESP_SCAN_RESULT message. You can get the information of the AP for the specific channel number you gave.
If scan result is same with the AP information in main.h then device will connect to the AP.
static void wifi_cb(uint8_t u8MsgType, void *pvMsg)
{
    case M2M_WIFI_RESP_SCAN_RESULT:
    printf("[%d] SSID:%s\r\n",
    scan_request_index, pstrScanResult->au8SSID);
    ...
    if ((demo_ssid_len == scan_ssid_len) &&
    (!memcmp(pstrScanResult->au8SSID,
    (uint8_t *)MAIN_WLAN_SSID, demo_ssid_len))
    ) {
    m2m_wifi_connect((char *)MAIN_WLAN_SSID, ...
2) Build the program and download it into the board.
3) Start the application.
The application is now programmed and running. The following information will be displayed on the terminal window.
-- AP scan example --
-- SAMW25_XPLAINED_PRO --
-- Compiled: xxx xx xxxx xx:xx:xx --
[1] SSID:DEMO_AP1
[2] SSID:DEMO_AP2
[3] SSID:DEMO_AP
Found DEMO_AP
Wi-Fi connected
Wi-Fi IP is xxx.xxx.xxx.xxx
4.9 Basic Example: How to Set Deep Sleep
This example demonstrates the use of the SAM W25 Xplained Pro board to check the PS (Power Save) mode.
Figure 4-9. The SAM W25 Xplained Pro

natural_image
Electronic circuit board with wireless signal icons next to a network device (no text or symbols visible)main.c: Initialize the SAM W25 and set PS Mode and the get RSSI for the connected AP.
1) Code summary.
Configure below code in main.h for AP information to be connected.
#define MAIN_WLAN_SSID "DEMO_AP"
#define MAIN_WLAN_AUTH M2M_WIFI_SEC_WPA_PSK
#define MAIN_WLAN_PSK "12345678"
Configure below code in main.h for the power save mode you want to set.
#define MAIN_PS_SLEEP_MODE M2M_PS_MANUAL
In main() function, set power save mode as defined above.
if (MAIN_PS_SLEEP_MODE == M2M_PS_MANUAL) {
    printf("M2M_PS_MANUAL\r\n");
    m2m_wifi_set_sleep_mode(MAIN_PS_SLEEP_MODE, 1);
} else if (MAIN_PS_SLEEP_MODE == M2M_PS_DEEP_AUTOMATIC) {
    printf("M2M_PS_DEEP_AUTOMATIC\r\n");
    tstrM2mLsnInt strM2mLsnInt;
    m2m_wifi_set_sleep_mode(M2M_PS_DEEP_AUTOMATIC, 1);
    strM2mLsnInt.u16LsnInt = M2M_LISTEN_INTERVAL;
    m2m_wifi_set_lsn_int(&strM2mLsnInt);
}
Connect to the AP.
m2m_wifi_connect((char *)MAIN_WLAN_SSID, sizeof(MAIN_WLAN_SSID), ...
The Wi-Fi module goes to sleep mode automatically in M2M_PS_DEEP_AUTOMATIC mode. The Wi-Fi module will wake up upon any request/callback (Wi-Fi/SOCKET) and the host driver will allow the SoC to sleep again after handling the request.
But you have to request sleep in M2M_PS_MANUAL mode and Wi-Fi module will go to sleep for the given period.
m2m_wifi_request_sleep(MAIN_REQUEST_SLEEP_TIME);
2) Build the program and download it into the board.
3) On the computer, open and configure a terminal application as the follows.
4) Start the application.
The application is now programmed and running. The following information will be displayed on the terminal window.
-- PowerSave mode example --
-- SAMW25_XPLAINED_PRO --
-- Compiled: xxx xx xxxx xx:xx:xx -
Wi-Fi connected
Wi-Fi IP is xxx.xxx.xxx.xxx
RSSI for the current connected AP (-xx)
4.10 Basic Example: Security with WEP/WPA
This example demonstrates how to connect the SAM W25 to AP with WEP, WPA Security.
Figure 4-10. The SAM W25 Xplained Pro
natural_image
Electronic circuit board with wireless signal icons next to a network device (no text or symbols visible)main.c: Initialize the SAM W25 and connect to AP using security mode WEP, WPA.
1) Code summary.
Case 1: WEP
To test WEP security, modify MAIN_WLAN_DEVICE_NAME, MAIN_WLAN_WEP_KEY_INDEX and MAIN_WLAN_WEP_KEY_40 or MAIN_WLAN_WEP_KEY_104 in main.h.
#define MAIN_WLAN_DEVICE_NAME "DEMO_AP"
#define MAIN_WLAN_WEP_KEY_INDEX 1
#define MAIN_WLAN_WEP_KEY_40 "1234567890"
#define MAIN_WLAN_WEP_KEY_104 "1234567890abcdef1234567890"
Use case 1 in main() function and select wep64_parameters or wep128_parameters as security parameters.
tstrM2mWifiWepParams wep64_parameters = { MAIN_WLAN_WEP_KEY_INDEX, sizeof(MAIN_WLAN_WEP_KEY_40), MAIN_WLAN_WEP_KEY_40};
tstrM2mWifiWepParams wep128_parameters = { MAIN_WLAN_WEP_KEY_INDEX, sizeof(MAIN_WLAN_WEP_KEY_104), MAIN_WLAN_WEP_KEY_104};
m2m_wifi_connect((char *)MAIN_WLAN_DEVICE_NAME,
strlen((char *)MAIN_WLAN_DEVICE_NAME), M2M_WIFI_SEC_WEP,
&wep64_parameters, M2M_WIFI_CH_ALL);
Case 2: WPA
To test WPA security, use case 2 in main() function and modify MAIN_WLAN_PSK in main.h.
#define MAIN_WLAN_PSK "12345678"
Connect to the AP with the given information.
m2m_wifi_connect((char *)MAIN_WLAN_DEVICE_NAME, ...
2) Prepare an AP that supports WEP and WPA/WPA2 Security and configure Wi-Fi Security. For more information, refer to AP manufacturer's manual.
3) Run the application. If the device connected successfully, IP address which is assigned by DHCP will be displayed on the terminal program.
The application is now programmed and running. The following information will be displayed on the terminal window.
-- -- Security connection with WEP,WPA security example --
-- SAMW25_XPLAINED_PRO --
-- Compiled: xxx xx xxxx xx:xx:xx -
Connecting to XXXXXX.
Wi-Fi connected
Wi-Fi IP is xxx.xxx.xxx.xxx
4.11 Basic Example: Connection to Enterprise Security Network
This example demonstrates how to connect SAM W25 to AP with WPA/WPA2 enterprise security.
Figure 4-11. The SAM W25 Xplained Pro

text_image
RADIUS servermain.c: Initialize the SAM W25 and connect to an AP with Security WPA/PWA2 enterprise.
1) Code summary.
Modify MAIN_WLAN_802_1X_USR_NAME, MAIN_WLAN_802_1X_PWD to the name and the password, respectively. Modify MAIN_WLAN_DEVICE_NAME to wireless network name.
#define MAIN_WLAN_DEVICE_NAME "DEMO_AP"
#define MAIN_WLAN_802_1X_USR_NAME "atmeluser"
#define MAIN_WLAN_802_1X_PWD "12345678"
Connect to the AP with the given information.
m2m_wifi_connect((char *)MAIN_WLAN_DEVICE_NAME, sizeof(MAIN_WLAN_DEVICE_NAME), M2M_WIFI_SEC_802_1X, (char *)&gstrCred1x, M2M_WIFI_CH_ALL);
2) Prepare an AP that supports WPA/WPA2 enterprise security.
You need to know following things before configuring RADIUS server settings in the AP. Ask your network administrator to get there information and configure it in the AP.
- User name
- Password
• Name of wireless network - Root certificate file
3) Download the root certificate to SAM W25 using RootCertDownload.bat file. For more details, refer to the "Atmel-XXXXX-SAMW25-Platform_Getting Started_Guide" document.
4) Build and run the application. If the device connected successfully, IP address which is assigned by DHCP will be displayed on the terminal program.

RESULT
The application is now programmed and running. The following information will be displayed on the terminal window.
-- Security connection with WPA/WPA2 enterprise example --
-- SAMW25_XPLAINED_PRO --
-- Compiled: xxx xx xxxx xx:xx:xx --
Wi-Fi connected
Wi-Fi IP is xxx.xxx.xxx.xxx
Connection successfully completed.

WARNING
For using the security enterprise network, the root certificate must be installed. For more details about downloading the root certificate, refer to the "Atmel-XXXXX-SAMW25-Platform_Getting Started_Guide" document.

INFO 802.1x EAP(Extensible Authentication Protocol).
| 802.1x EAP TypeFeatures / Benefits | MD5 ↓---- ↓Message Digest 5 | TLS ↓---- ↓Transport Level Security | TTLS ↓---- ↓Tunnel Transport Level Security | PEAP ↓---- ↓Protected Transport Level Security | FAST ↓---- ↓Flexible Authentication via Secure Tunneling | LEAP ↓---- ↓Lightweight Extensible Authentication Protocol |
| Client-side certificate required | No | Yes | No | No | No↓(PAC) | No |
| Server-side certificate required | No | Yes | No | Yes | No↓(PAC) | No |
| WEP Key Manage | No | Yes | Yes | Yes | Yes | Yes |
| Rogue AP Detection | No | No | No | No | Yes | Yes |
| Provider | MS | MS | Funk | MS | Cisco | Cisco |
| Authentication property | One way | Mutual | Mutual | Mutual | Mutual | Mutual |
| Difficulty building | User environment | Difficulties(Due to the client certificate to build) | Normal | Normal | Normal | Normal |
| Wi-Fi Security | Failure | Very High | High | High | High | High (When the use of strong passwords) |
4.12 Basic Example: Connection to Security WPS
This example demonstrates how to connect SAM W25 to AP with WPS Security.
Figure 4-12. The SAM W25 Xplained Pro

natural_image
Electronic circuit board with wireless signal icons next to a network device (no text or symbols visible)main.c: Initialize the SAM W25 and connect AP using WPS.
1) Code summary.
Case 1: Button method
To test WPS button method, configure WPS push button feature in main.h as below and use case 1 in main() function.
#define MAIN_WPS_PUSH_BUTTON_FEATURE "true"
if (MAIN_WPS_PUSH_BUTTON_FEATURE) {
    /* case 1 WPS Push Button method */
    if (!gbPressButton) {
    btn_init();
    }
}
When pressing SW0 button on the SAM W25, it will trigger WPS in btn_press() function.
m2m_wifi_wps(WPS_PBC_TRIGGER, NULL);
wifi_cb() will receive M2M_WIFI_REQ_WPS message and it can connect to the AP with given information.
static void wifi_cb(uint8_t u8MsgType, void *pvMsg)
{
    case M2M_WIFI_REQ_WPS:
    {
    m2m_wifi_connect((char *)pstrWPS->au8SSID, ...
Case 2: PIN method
To test WPS PIN method, configure WPS PIN number and WPS push button feature in main.h as below and use case 2 in main() function.
#define MAIN_PIN_NUMBER "12345670"
#define MAIN_WPS_PUSH_BUTTON_FEATURE "false"
if (!MAIN_WPS_PUSH_BUTTON_FEATURE) {
    /* case 2 WPS PIN method */
    m2m_wifi_wps(WPS_PIN_TRIGGER, (const char *)MAIN_WPS_PIN_NUMBER);
}
2) Prepare an AP that supports Wi-Fi Protected Setup(WPS).
3) Press WPS button on the AP when using WPS button method or enter WPS PIN number in the AP setup menu and start the AP. (For more information, refer to AP product documentation)
4) Run the application. Press SW0 button on the SAM W25 when using WPS button method. The SAM W25 will be connected to the AP automatically without security information.

RESULT In WPS button method, the following information will be displayed on the terminal window.
-- Security connection with Wi-Fi Protected Setup(WPS)
example --
-- SAMW25_XPLAINED_PRO --
-- Compiled: xxx xx xxxx xx:xx:xx -
SW0 button pressed
Device is connecting using WPS Push Button option
Wi-Fi request WPS
SSID : xxxxxxx, AuthType : x, PW : xxxxxxxxxxx
Request Wi-Fi connect
Wi-Fi connected
Wi-Fi IP is xxx.xxx.xxx.xxx

RESULT In WPS PIN method, the following information will be displayed on the terminal window.
-- Security connection with Wi-Fi Protected Setup(WPS)
example --
-- SAMW25_XPLAINED_PRO --
-- Compiled: xxx xx xxxx xx:xx:xx --
Wi-Fi request WPS
SSID : xxxxxx, AuthType : x, PW : xxxxxxxx
Request Wi-Fi connect
Wi-Fi connected
Wi-Fi IP is xxx.xxx.xxx.xxx
4.13 Basic Example: How to Set Packet Monitoring
This example demonstrates the use of the SAM W25 Xplained Pro board to monitor all wireless data packets.
Figure 4-13. The SAM W25 Xplained Pro

natural_image
Illustration of a blue circuit board connected to a smartphone displaying a microchip, with wireless signals shown as icons (no text or symbols present)main.c: Initialize the SAM W25 and then configure to monitoring parameters and start the packet monitoring.
1) Code summary.
Set the below MAC address in the main.c that you want to monitor.
/** Source MAC address for monitoring. */
static const uint8_t SRC_MAC_ADDR[6] = {0xa4, 0xeb, 0xd3, 0xfc, 0x9f, 0x0d};
/** Destination MAC address for monitoring. */
static const uint8_t DST_MAC_ADDR[6] = {0xa4, 0xeb, 0xd3, 0xfc, 0x9f, 0x0d};
Register a monitoring callback function in the Wi-Fi initialization parameter.
Activate one of two memcpy() functions in start_packet_monitoring() function and call m2m_wifi_enable_monitoring_mode() function to start monitoring mode.
int main(void)
{
    ...
    /* Initialize Wi-Fi parameters structure. */
    param.pfAppMonCb = monitoring_cb; /* Register monitoring callback function.
    */
    ...
    /* Start the packet monitoring. */
    start_packet_monitoring();
void start_packet_monitoring()
{
    ...
    /* memcpy(wifi_monitor_conf.au8SrcMacAddress, SRC_MAC_ADDR,
    sizeof(SRC_MAC_ADDR)); */
    memcpy(wifi_monitor_conf.au8DstMacAddress, DST_MAC_ADDR,
    sizeof(DST_MAC_ADDR));
    m2m_wifi_enable_monitoring_mode(&wifi_monitor_conf, payload_buffer,
    sizeof(payload_buffer), 0);
You can see the packet data in monitoring callback function:
void monitoring_cb(tstrM2MWifiRxPacketInfo *pstrWifiRxPacket, uint8 *pu8Payload, uint16 u16PayloadSize)
2) Build the program and download it into the board.
3) Start the application.
The application is now programmed and running. The following information will be displayed on the terminal window.
-- Packet monitoring example --
-- SAMW25_XPLAINED_PRO --
-- Compiled: xxx xx xxxx xx:xx:xx -
Packet monitoring started.
----
Channel : 11
FrameType : 0xFF
FrameSubtype : 0xFF
Source MAC address : 00:00:00:00:00:00
Destination MAC address : 78:F7:BE:FA:92:5A
----
monitoring_cb() MONITOR PACKET u8FrameType:0x00,
u8FrameSubtype:0xD0
monitoring_cb() SRC MAC address : 00:26:66:1A:08:5C
monitoring_cb() DST MAC address : 78:F7:BE:FA:92:5A
monitoring_cb() MONITOR PACKET u8FrameType:0x00,
u8FrameSubtype:0x50
monitoring_cb() SRC MAC address : 00:26:66:C6:00:2A
monitoring_cb() DST MAC address : 78:F7:BE:FA:92:5A
monitoring_cb() MONITOR PACKET u8FrameType:0x08,
u8FrameSubtype:0x88
monitoring_cb() SRC MAC address : 00:26:66:1A:08:5D
monitoring_cb() DST MAC address : 78:F7:BE:FA:92:5A
4.14 Basic Example: Get Signal Status
This example demonstrates the use of the SAM W25 Xplained Pro board to check the signal strength such as RSSI.
Figure 4-14. The SAM W25 Xplained Pro
natural_image
Electronic circuit board connected to a wireless router with signal waves (no text or symbols visible)main.c: Initialize the SAM W25 and get RSSI for the connected AP.
1) Code summary.
Configure below code in main.h for AP information to be connected.
#define MAIN_WLAN_SSID "DEMO_AP"
#define MAIN_WLAN_AUTH M2M_WIFI_SEC_WPA_PSK
#define MAIN_WLAN_PSK "12345678"
Connect to the AP with the given information.
m2m_wifi_connect((char *) MAIN_WLAN_SSID, ...
Call m2m_wifi_req_curr_rssi() to receive RSSI.
static void wifi_cb(uint8_t u8MsgType, void *pvMsg)
{
    case M2M_WIFI_REQ_DHCP_CONF:
    m2m_wifi_req_curr_rssi();
You can get RSSI value when wifi_cb() function is called with M2M_WIFI_RESP_CURRENT_RSSI message.
static void wifi_cb(uint8_t u8MsgType, void *pvMsg)
{
    case M2M_WIFI_RESP_CURRENT_RSSI:
    {
    int8_t *rssi = (int8_t *)pvMsg;
    printf("RSSI for the current connected AP (%d)\r\n",
    (int8_t)(*rssi));
    }
}
2) Build the program and download it into the board.
3) Start the application.
The application is now programmed and running. The following information will be displayed on the terminal window.
-- Signal statistics example --
-- SAMW25_XPLAINED_PRO --
-- Compiled: xxx xx xxxx xx:xx:xx --
Wi-Fi connected
Wi-Fi IP is xxx.xxx.xxx.xxx
RSSI for the current connected AP (-48)
4.15 Basic Example: AP Provision
This example demonstrates the use of the SAM W25 Xplained Pro board to start Provision Mode.
Figure 4-15. The SAM W25 Xplained Pro

natural_image
Diagram showing connected devices including a tablet, a smartphone, an electronic circuit board, and a wireless router (no text or symbols present)main.c: Initialize the SAM W25 and start Provision Mode until one of various APs is selected.
1) Code summary.
Initialize socket module and create TCP server socket.
addr.sin_family = AF_INET;
addr.sin_port = _htons((MAIN_WIFI_M2M_SERVER_PORT));
addr.sin_addr.s_addr = 0;
socketInit();
registerSocketCallback(socket_cb, NULL);
...
while (1) {
    m2m_wifi_handle_events(NULL);
    if (tcp_server_socket < 0) {
    /* Open TCP server socket */
    if ((tcp_server_socket = socket(AF_INET, SOCK_STREAM, 0))
Enable AP mode before the main loop. (Refer to "How to Run AP Mode" example):
ret = m2m_wifi_enable_ap(&strM2MAPConfig);
After your android device is connected to the SAM W25 sends AP configuration, disable AP mode and connect to the AP with the given information.
static void socket_cb(SOCKET sock, uint8_t u8Msg, void *pvMsg)
{
    case SOCKET_MSG_RECV:
    m2m_wifi_disable_ap();
    nm_bsp_sleep(500);
    m2m_wifi_connect((char *)str_ssid, ...
2) Build the program and download it into the board.
3) Start the application.
The application is now programmed and running. The following information will be displayed on the terminal window.
-- AP Provision example --
-- SAMW25_XPLAINED_PRO --
-- Compiled: xxx xx xxxx xx:xx:xx --
AP Provision mode started.
On the android device, connect to WINC1500_PROVISION_AP then run setting app.
socket_cb: Ready to listen.
4) Install provision_ap.apk in the source package to your android device. You can also build the android application source and install it.
5) Connect your android device to SAM W25.
6) Launch the android application to configure AP, press the Connect button then SSID button will be available.
7) Input connection info, then press Apply button.

text_image
Provision AP CONNECT TO WINC1500 Display current state SSID : None Security : None Password : None SSID / SECURITY / PW CURRENT AP NAME FINISH
text_image
Provision AP MSP CONNECTED Display current state SSID Change SSID Security 1:Open, 2:WPA_WPA2, 3:WEP Password CANCEL APPLY8) SAM W25 will be connected to the AP which you configured.
Wi-Fi connected. IP is xxx.xxx.xxx.xxx socket_cb: Client socket is created. Disable to AP Connecting to XXXXXX. wifi_cb: DISCONNECTED wifi_cb: CONNECTED Wi-Fi connected. IP is xxx.xxx.xxx.xxx
4.16 Basic Example: HTTP Provision
This example demonstrates the use of the SAM W25 Xplained Pro board to start Provision Mode.
Figure 4-16. The SAM W25 Xplained Pro

natural_image
Illustration of connected devices including a tablet, smartphone, microcontroller, and wireless network components (no text or symbols)main.c: Initialize the SAM W25 and start Provision Mode until one of various AP is selected.
1) Code summary.
Configure below code in main.h for provision information.
#define MAIN_M2M_DHCP_SERVER_IP {192, 168, 1, 1}
#define MAIN_HTTP_PROV_SERVER_DOMAIN_NAME "atmelconfig.com"
#define MAIN_M2M_DEVICE_NAME "WINC1500_00:00"
Start provision mode before the main loop.
m2m_wifi_start_provision_mode((tstrM2MAPConfig *)&gstrM2MAPConfig, (char *)gacHttpProvDomainName, 1);
When your mobile device sends configuration information, wifi_cb() function will be called with M2M_WIFI_RESP_PROVISION_INFO message and you can connect to the AP with the given information.
static void wifi_cb(uint8_t u8MsgType, void *pvMsg)
{
    case M2M_WIFI_RESP_PROVISION_INFO:
    tstrM2MProvisionInfo *pstrProvInfo = (tstrM2MProvisionInfo *)pvMsg;
    if (pstrProvInfo->u8Status == M2M_SUCCESS) {
    m2m_wifi_connect((char *)pstrProvInfo->au8SSID,
    strlen((char *)pstrProvInfo->au8SSID),
    pstrProvInfo->u8SecType,
    pstrProvInfo->au8Password, M2M_WIFI_CH_ALL);
    }
}

RESULT
The application is now programmed and running. The following information will be displayed on the terminal window.
-- HTTP Provision example --
-- SAMW25_XPLAINED_PRO --
-- Compiled: xxx xx xxxx xx:xx:xx --
Provision Mode started.
Connect to [atmelconfig.com] via AP[WINC1500_xx:xx] and fill up the page
2) Connect your mobile device to SAM W25 AP (WINC1500_xx:xx).
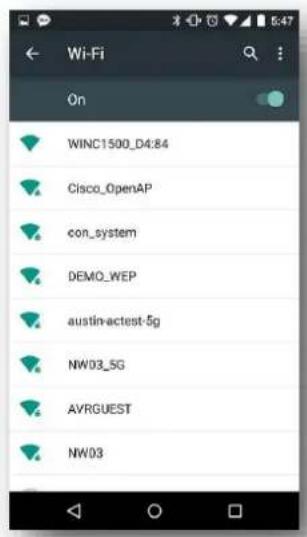
text_image
Wi-Fi On WINC1500_D4:84 Cisco_OpenAP con_system DEMO_WEP austin-actest-5g NW03_SG AVRGUEST NW033) Browse the webpage (atmelconfig.com) to set up AP, fill up the page then press Connect.

text_image
Sign-in to network Atmel Connect to Network Network Name Pass phrase Device Name Connect Detect Device Refresh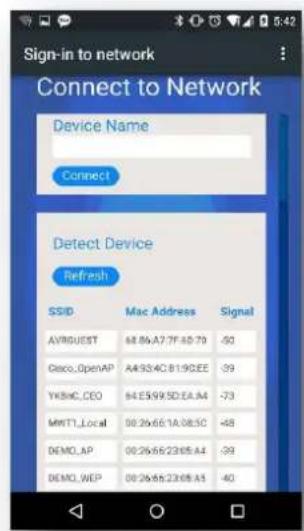
text_image
Sign-in to network Connect to Network Device Name Connect Detect Device Refresh SSID Mac Address Signal AVRQUEST 68.86A7.7F40.79 -50 Cisco_OpenAP A4334C8190EE -39 YKBHC_CEO 64E599.SDEA.A4 -73 MRTL_Local 0026661A085C -48 DEMO_AP 0026662365.A4 -39 DEMO_WEP 0026662365.A5 -404) SAM W25 will be connected to the AP what you configured.
wifi_cb: M2M_WIFI_REQ_DHCP_CONF: IP is xxx.xxx.xxx.xxx
wifi_cb: M2M_WIFI_RESP_CON_STATE_CHANGED: DISCONNECTED.
wifi_cb: M2M_WIFI_RESP_PROVISION_INFO:
wifi_cb: M2M_WIFI_RESP_CON_STATE_CHANGED: CONNECTED
wifi_cb: M2M_WIFI_REQ_DHCP_CONF: IP is xxx.xxx.xxx.xxx
4.17 Protocol Example: UDP (Server and Client)
This program demonstrates the use of the SAM W25 Xplained Pro board to test UDP socket.
Figure 4-17. The SAM W25 Xplained Pro

natural_image
Three electronic circuit boards connected via wireless signals, showing different network configurations (no text or symbols visible)main.c: Initialize the SAM W25 and test UDP server and client.
1) Code summary.
Configure below code in main.h for AP information to be connected.
#define MAIN_WLAN_SSID "DEMO_AP"
#define MAIN_WLAN_AUTH M2M_WIFI_SEC_WPA_PSK
#define MAIN_WLAN_PSK "12345678"
#define MAIN_WIFI_M2M_PRODUCT_NAME "NMCTemp"
#define MAIN_WIFI_M2M_SERVER_IP 0xFFFFFFF
#define MAIN_WIFI_M2M_SERVER_PORT (6666)
#define MAIN_WIFI_M2M_REPORT_INTERVAL (1000)
Initialize socket module.
addr.sin_family = AF_INET;
addr.sin_port = _htons(MAIN_WIFI_M2M_SERVER_PORT);
addr.sin_addr.s_addr = _hton1(MAIN_WIFI_M2M_SERVER_IP);
socketInit();
registerSocketCallback(socket_cb, NULL);
Connect to the AP.
m2m_wifi_connect((char *)MAIN_WLAN_SSID, ...
In the main loop, after the device is connected to the AP, create an RX socket and bind it.
if (rx_socket < 0) {
    if ((rx_socket = socket(AF_INET, SOCK_DGRAM, 0)) < 0) {
    continue;
    }
    bind(rx_socket, (struct sockaddr *)&addr, sizeof(struct sockaddr_in));
}
In socket_cb() function, prepare a buffer to receive data.
static void socket_cb(SOCKET sock, uint8_t u8Msg, void *pvMsg)
{
    ...
    if (u8Msg == SOCKET_MSG_BIND) {
    recvfrom(sock, gau8SocketTestBuffer, MAIN_WIFI_M2M_BUFFER_SIZE, 0);
    }
}
Create a TX socket in the main loop.
if (tx_socket < 0) {
    uint32 u32EnableCallbacks = 0;
    if ((tx_socket = socket(AF_INET, SOCK_DGRAM, 0)) < 0) {
    continue;
    }
    setsockopt(tx_socket, SOL_SOCKET, SO_SET_UDP_SEND_CALLBACK, &u32EnableCallbacks, 0);
}
After binding is completed, send a data from the TX socket to the RX socket.
ret = sendto(tx_socket, &msg_temp_report, sizeof(t_msg_temp_report), 0, (struct sockaddr *)&addr, sizeof(addr));
You can receive data in socket_cb() function with SOCKET_MSG_RECVFROM message.
static void socket_cb(SOCKET sock, uint8_t u8Msg, void *pvMsg)
{
    ...
    } else if (u8Msg == SOCKET_MSG_RECVFROM) {
    tstrSocketRecvMsg *pstrRx = (tstrSocketRecvMsg *)pvMsg;
    if (pstrRx->pu8Buffer && pstrRx->s16BufferSize) {
2) Build the program and download it into the board both device A and device B.
3) Start the application of device A and device B.
-- UDP example --
-- SAMW25_XPLAINED_PRO --
-- Compiled: xxx xx xxxx xx:xx:xx --
wifi_cb: M2M_WIFI_RESP_CON_STATE_CHANGED: CONNECTED
wifi_cb: M2M_WIFI_REQ_DHCP_CONF : IP is xxx.xxx.xxx.xxx
socket_cb: bind success!
main: message sent
socket_cb: received app message
main: message sent
socket_cb: received app message
main: message sent
socket_cb: received app message
main: message sent
socket_cb: received app message
main: message sent
socket_cb: received app message
main: message sent
socket_cb: received app message
main: message sent
socket_cb: received app message
main: message sent
socket_cb: received app message
main: message sent
socket_cb: received app message
main: message send
4.18 Protocol Example: UDP Client
This example demonstrates the use of the SAM W25 Xplained Pro board to test UDP socket.
Figure 4-18. The SAM W25 Xplained Pro

natural_image
Electronic circuit board with wireless signal icons next to a network device (no text or symbols visible)main.c: Initialize the SAM W25 and test UDP server.
1) Code summary.
Configure below code in main.h for AP information to be connected.
#define MAIN_WLAN_SSID "DEMO_AP"
#define MAIN_WLAN_AUTH M2M_WIFI_SEC_WPA_PSK
#define MAIN_WLAN_PSK "12345678"
#define MAIN_WIFI_M2M_PRODUCT_NAME "NMCTemp"
#define MAIN_WIFI_M2M_SERVER_IP 0xFFFFFFF
#define MAIN_WIFI_M2M_SERVER_PORT (6666)
#define MAIN_WIFI_M2M_REPORT_INTERVAL (1000)
Initialize socket module.
addr.sin_family = AF_INET;
addr.sin_port = _htons(MAIN_WIFI_M2M_SERVER_PORT);
addr.sin_addr.s_addr = _hton1(MAIN_WIFI_M2M_SERVER_IP);
socketInit();
Connect to the AP.
m2m_wifi_connect((char *)MAIN_WLAN_SSID, ...
After the device is connected to the AP, Create a TX socket in the main loop.
if (tx_socket < 0) {
    if ((tx_socket = socket(AF_INET, SOCK_DGRAM, 0)) < 0) {
    continue;
    }
}
After binding is completed, send a data from the TX socket to the RX socket.
ret = sendto(tx_socket, &msg_temp_report, sizeof(t_msg_temp_report), 0, (struct sockaddr *)&addr, sizeof(addr));
2) Build the program and download it into the board.
3) Start the application.
The application is now programmed and running. The following information will be displayed on the terminal window.
-- UDP client example --
-- SAMW25_XPLAINED_PRO --
-- Compiled: xxx xx xxxx xx:xx:xx -
wifi_cb: M2M_WIFI_RESP_CON_STATE_CHANGED : CONNECTED
wifi_cb: M2M_WIFI_REQ_DHCP_CONF : IP is xxx.xxx.xxx.xxx
main: message sent
...
main: message sent
UDP client test Complete!
4.19 Protocol Example: UDP Server
This example demonstrates the use of the SAM W25 Xplained Pro board to test UDP socket.
Figure 4-19. The SAM W25 Xplained Pro

natural_image
Electronic circuit board with wireless signal icons next to a networked router (no text or symbols visible)main.c: Initialize the SAM W25 and test UDP client.
1) Code summary.
Configure below code in main.h for AP information to be connected.
#define MAIN_WLAN_SSID "DEMO_AP"
#define MAIN_WLAN_AUTH M2M_WIFI_SEC_WPA_PSK
#define MAIN_WLAN_PSK "12345678"
#define MAIN_WIFI_M2M_PRODUCT_NAME "NMCTemp"
#define MAIN_WIFI_M2M_SERVER_IP 0xFFFFFFF
#define MAIN_WIFI_M2M_SERVER_PORT (6666)
#define MAIN_WIFI_M2M_REPORT_INTERVAL (1000)
Initialize socket module and create UDP server socket.
addr.sin_family = AF_INET;
addr.sin_port = _htons(MAIN_WIFI_M2M_SERVER_PORT);
addr.sin_addr.s_addr = _hton1(MAIN_WIFI_M2M_SERVER_IP);
socketInit();
registerSocketCallback(socket_cb, NULL);
Connect to the AP.
m2m_wifi_connect((char *)MAIN_WLAN_SSID, ...
After the device is connected to the AP, create an RX socket and bind it in the main loop.
if (rx_socket < 0) {
    if ((rx_socket = socket(AF_INET, SOCK_DGRAM, 0)) < 0) {
    continue;
    }
    bind(rx_socket, (struct sockaddr *)&addr, sizeof(struct sockaddr_in));
}
In socket_cb() function, prepare a buffer to receive data.
static void socket_cb(SOCKET sock, uint8_t u8Msg, void *pvMsg)
{
    ...
    if (u8Msg == SOCKET_MSG_BIND) {
    recvfrom(sock, gau8SocketTestBuffer, MAIN_WIFI_M2M_BUFFER_SIZE, 0);
    }
}
You can receive data in socket_cb() function with SOCKET_MSG_RECVFROM message when a client device sends data. (Use "UDP Client" example).
static void socket_cb(SOCKET sock, uint8_t u8Msg, void *pvMsg)
{
    ...
    } else if (u8Msg == SOCKET_MSG_RECVFROM) {
    tstrSocketRecvMsg *pstrRx = (tstrSocketRecvMsg *)pvMsg;
    if (pstrRx->pu8Buffer && pstrRx->s16BufferSize) {
2) Build the program and download it into the board.
3) Start the application.

RESULT
The application is now programmed and running. The following information will be displayed on the terminal window.
-- UDP server example --
-- SAMW25_XPLAINED_PRO --
-- Compiled: xxx xx xxxx xx:xx:xx --
wifi_cb: M2M_WIFI_RESP_CON_STATE_CHANGED : CONNECTED
wifi_cb: M2M_WIFI_REQ_DHCP_CONF : IP is xxx.xxx.xxx.xxx
socket_cb: bind success!
socket_cb: received app message.(1)
...
socket_cb: received app message.(10)
UDP server test Complete!
4.20 Protocol Example: TCP Client
This example demonstrates the use of the SAM W25 Xplained Pro board to test TCP client.
Figure 4-20. The SAM W25 Xplained Pro

natural_image
Electronic circuit board connected to a wireless router with signal waves (no text or symbols visible)main.c: Initialize the SAM W25 and test TCP client.
1) Code summary.
Configure below code in main.h for AP information to be connected.
#define MAIN_WLAN_SSID "DEMO_AP"
#define MAIN_WLAN_AUTH M2M_WIFI_SEC_WPA_PSK
#define MAIN_WLAN_PSK "12345678"
#define MAIN_WIFI_M2M_PRODUCT_NAME "NMCTemp"
#define MAIN_WIFI_M2M_SERVER_IP 0xFFFFFFF
#define MAIN_WIFI_M2M_SERVER_PORT (6666)
#define MAIN_WIFI_M2M_REPORT_INTERVAL (1000)
Initialize socket module and register socket callback function.
addr.sin_family = AF_INET;
addr.sin_port = _htons(MAIN_WIFI_M2M_SERVER_PORT);
addr.sin_addr.s_addr = _hton1(MAIN_WIFI_M2M_SERVER_IP);
socketInit();
registerSocketCallback(socket_cb, NULL);
Connect to the AP.
m2m_wifi_connect((char *)MAIN_WLAN_SSID, ...
After the device is connected to the AP, create a TCP client socket and connect to server in the main loop.
if (tcp_client_socket < 0) {
    if ((tcp_client_socket = socket(AF_INET, SOCK_STREAM, 0)) < 0) {
    continue;
    }
}
ret = connect(tcp_client_socket, (struct sockaddr *)&addr, ...);
Connect, send, and recv operations will be executed sequentially in socket_cb() function.
static void socket_cb(SOCKET sock, uint8_t u8Msg, void *pvMsg)
{
    ...
    case SOCKET_MSG_CONNECT:
    {
    if (pstrConnect && pstrConnect->s8Error >= 0)
    send(tcp_client_socket, &msg_wifi_product, ...);
    }
    ...
    case SOCKET_MSG_SEND:
    {
    recv(tcp_client_socket, gau8SocketTestBuffer, ...);
    }
    ...
    case SOCKET_MSG_RECV:
    {
    tstrSocketRecvMsg *pstrRecv = (tstrSocketRecvMsg *)pvMsg;
    if (pstrRecv && pstrRecv->s16BufferSize > 0) {
    printf("socket_cb: recv success!\r\n");
    printf("TCP Client Test Complete!\r\n");
    }
    }
2) Build the program and download it into the board.
3) Start the application.

RESULT
The application is now programmed and running. The following information will be displayed on the terminal window.
-- TCP client example --
-- SAMW25_XPLAINED_PRO --
-- Compiled: xxx xx xxxx xx:xx:xx -
wifi_cb: M2M_WIFI_RESP_CON_STATE_CHANGED: CONNECTED
m2m_wifi_state: M2M_WIFI_REQ_DHCP_CONF: IP is
xxx.xxx.xxx.xxx

socket_cb: connect success!
socket_cb: send success!
socket_cb: recv success!
TCP Client Test Complete!
4.21 Protocol Example: TCP Server
This example demonstrates the use of the SAM W25 Xplained Pro board to test TCP server.
Figure 4-21. The SAM W25 Xplained Pro

natural_image
Electronic circuit board connected to a wireless router with signal waves (no text or symbols visible)main.c: Initialize the SAM W25 and test TCP server.
1) Code summary.
Configure below code in main.h for AP information to be connected.
#define MAIN_WLAN_SSID "DEMO_AP"
#define MAIN_WLAN_AUTH M2M_WIFI_SEC_WPA_PSK
#define MAIN_WLAN_PSK "12345678"
#define MAIN_WIFI_M2M_PRODUCT_NAME "NMCTemp"
#define MAIN_WIFI_M2M_SERVER_IP 0xFFFFFFF
#define MAIN_WIFI_M2M_SERVER_PORT (6666)
#define MAIN_WIFI_M2M_REPORT_INTERVAL (1000)
Initialize socket module and register socket callback function.
addr.sin_family = AF_INET;
addr.sin_port = _htons(MAIN_WIFI_M2M_SERVER_PORT);
addr.sin_addr.s_addr = _hton1(MAIN_WIFI_M2M_SERVER_IP);
socketInit();
registerSocketCallback(socket_cb, NULL);
Connect to the AP.
m2m_wifi_connect((char *)MAIN_WLAN_SSID, ...
After the device is connected to the AP, create a TCP server socket and bind it in the main loop.
if (tcp_server_socket < 0) {
    if ((tcp_server_socket = socket(AF_INET, SOCK_STREAM, 0)) < 0) {
    continue;
    }
    bind(tcp_server_socket, (struct sockaddr *)&addr, ...);
}
5 operations (bind / listen / accept / recv / send) will be executed sequentially in socket_cb() function.
static void socket_cb(SOCKET sock, uint8_t u8Msg, void *pvMsg)
{
    ...
    case SOCKET_MSG_BIND:
    {
    tstrSocketBindMsg *pstrBind = (tstrSocketBindMsg *)pvMsg;
    if (pstrBind && pstrBind->status == 0)
    listen(tcp_server_socket, 0);
    }
    ...
    case SOCKET_MSG_LISTEN:
    {
    tstrSocketListenMsg *pstrListen = (tstrSocketListenMsg *)pvMsg;
    if (pstrListen && pstrListen->status == 0)
    accept(tcp_server_socket, NULL, NULL);
    }
    ...
    case SOCKET_MSG_ACCEPT:
    {
    tstrSocketAcceptMsg *pstrAccept = (tstrSocketAcceptMsg *)pvMsg;
    if (pstrAccept) {
    accept(tcp_server_socket, NULL, NULL);
    tcp_client_socket = pstrAccept->sock;
    recv(tcp_client_socket, gau8SocketTestBuffer, ..., 0);
    }
    }
    ...
    case SOCKET_MSG_RECV:
    {
    tstrSocketRecvMsg *pstrRecv = (tstrSocketRecvMsg *)pvMsg;
    if (pstrRecv && pstrRecv->s16BufferSize > 0)
    send(tcp_client_socket, &msg_wifi_product, ..., 0);
    }
    ...
    case SOCKET_MSG_SEND:
    {
    printf("socket_cb: send success!\r\n");
    printf("TCP Server Test Complete!\r\n");
    printf("close socket\n");
    }
2) Build the program and download it into the board.
3) Start the application.
The application is now programmed and running. The following information will be displayed on the terminal.
-- TCP server example --
-- SAMW25_XPLAINED_PRO --
-- Compiled: xxx xx xxxx xx:xx:xx -
wifi_cb: M2M_WIFI_RESP_CON_STATE_CHANGED: CONNECTED
wifi_cb: M2M_WIFI_REQ_DHCP_CONF: IP is xxx.xxx.xxx.xxx
socket_cb: bind success!
socket_cb: listen success!
socket_cb: accept success!
socket_cb: recv success!
socket_cb: send success!
TCP Server Test Complete!
close socket
4.22 Protocol Example: NTP Time Client
This example demonstrates the use of the SAM W25 Xplained Pro board to retrieve time information from time server.
Figure 4-22. The SAM W25 Xplained Pro
natural_image
Illustration of a blue circuit board connected to a wireless router with wireless signal icons (no text or symbols)main.c: Initialize the chip and retrieve info.
1) Code summary.
Configure below code in main.h for AP information to be connected.
#define MAIN_WLAN_SSID "DEMO_AP"
#define MAIN_WLAN_AUTH M2M_WIFI_SEC_WPA_PSK
#define MAIN_WLAN_PSK "12345678"
Initialize socket module and register socket callback function.
socketInit();
registerSocketCallback(socket_cb, resolve_cb);
Connect to the AP.
m2m_wifi_connect((char *)MAIN_WLAN_SSID, ...
After the device is connected to the AP, create a UDP socket and bind it in the main loop.
if (udp_socket < 0) {
    udp_socket = socket(AF_INET, SOCK_DGRAM, 0);
    if (udp_socket < 0) {
    continue;
    }

    /* Initialize default socket address structure. */
    addr_in.sin_family = AF_INET;
    addr_in.sin_addr.s_addr = _hton1(MAIN_DEFAULT_ADDRESS);
    addr_in.sin_port = _htons(MAIN_DEFAULT_PORT);

    bind(udp_socket, (struct sockaddr *)&addr_in, ...);
}
Initialize socket module and send an NTP time query to the NTP server in resolve_cb() function.
static void resolve_cb(uint8_t *pu8DomainName, uint32_t u32ServerIP)
{
    ...
    if (udp_socket >= 0) {
    addr.sin_family = AF_INET;
    addr.sin_port = _htons(MAIN_SERVER_PORT_FOR_UDP);
    addr.sin_addr.s_addr = u32ServerIP;

    ret = sendto(udp_socket, (int8_t *)&cDataBuf, ...);
    }
}
Receive NTP time from the server and convert it in socket_cb() function.
static void socket_cb(SOCKET sock, uint8_t u8Msg, void *pvMsg)
{
    ...
    case SOCKET_MSG_BIND:
    {
    if (pstrBind && pstrBind->status == 0)
    ret = recvfrom(sock, gau8SocketBuffer, ..., 0);
    }
    ...
    case SOCKET_MSG_RECVFROM:
    {
    uint32_t secsSince1900 = packetBuffer[40] << 24 |
    packetBuffer[41] << 16 | packetBuffer[42] << 8 |
    packetBuffer[43];

    const uint32_t seventyYears = 2208988800UL;
    uint32_t epoch = secsSince1900 - seventyYears;

    printf("socket_cb: The GMT time is %lu:%02lu:%02lu\r\n", (epoch % 86400L) / 3600, (epoch % 3600) / 60, epoch % 60);
    }
2) Build the program and download it into the board.
3) Start the application.

RESULT
The application is now programmed and running. The following information will be displayed on the terminal window.
-- Time client example --
-- SAMW25_XPLAINED_PRO --
-- Compiled: xxx xx xxxx xx:xx:xx --
wifi_cb: M2M_WIFI_RESP_CON_STATE_CHANGED: CONNECTED
wifi_cb: M2M_WIFI_REQ_DHCP_CONF: IP is xxx.xxx.xxx.xxx
m2m_ip_resolve_handler : DomainName pool.ntp.org
socket_cb: The GMT time is xx:xx:xx

WARNING
If the server connection is unstable may not be operated normally.
4.23 Protocol Example: SMTP Send Email
This example demonstrates the use of the SAM W25 Xplained Pro board to send email for SMTP server.
Figure 4-23. The SAM W25 Xplained Pro

natural_image
Electronic circuit board with wireless signal icons next to a network device (no text or symbols visible)main.c: Initialize the chip and send an email.
1) Code summary.
Configure below code in main.h for AP information to be connected.
#define MAIN_WLAN_SSID "DEMO_AP"
#define MAIN_WLAN_AUTH M2M_WIFI_SEC_WPA_PSK
#define MAIN_WLAN_PSK "12345678"

#define MAIN_SENDER_RFC "<sender@gmail.com>"
#define MAIN_RECIPIENT_RFC "<recipient@gmail.com>"

#define MAIN_TO_ADDRESS "recipient@gmail.com"
#define MAIN_FROM_ADDRESS "sender@gmail.com"
#define MAIN_FROM_PASSWORD "12345678"
Initialize socket module and register socket callback function.
socketInit();
registerSocketCallback(socket_cb, resolve_cb);
Connect to the AP.
m2m_wifi_connect((char *)MAIN_WLAN_SSID, ...
After the device is connected to the AP, try to connect SMTP server. After then, smtpStatehandler will be executed sequentially until socket status become SocketComplete.
if (gu8SocketStatus == SocketInit) {
    if (tcp_client_socket < 0) {
    gu8SocketStatus = SocketWaiting;
    if (smtpConnect() != SOCK_ERR_NO_ERROR) {
    gu8SocketStatus = SocketInit;
    }
    }
} else if (gu8SocketStatus == SocketConnect) {
    gu8SocketStatus = SocketWaiting;
    if (smtpStateHandler() != MAIN_EMAIL_ERROR_NONE) {
    ...
    }
} else if (gu8SocketStatus == SocketComplete) {
    printf("main: Email was successfully sent.\r\n");
    close_socket();
}
Connect to the socket and receive data following SMTP status.
static void socket_cb(SOCKET sock, uint8_t u8Msg, void *pvMsg)
{
    ...
    case SOCKET_MSG_CONNECT:
    {
    if (pstrConnect && pstrConnect->s8Error >= SOCK_ERR_NO_ERROR)
    recv(tcp_client_socket, gcHandlerBuffer, ..., 0);
    }
    ...
    case SOCKET_MSG_RECV:
    {
    switch (gu8SmtpStatus) {
    case SMTP_INIT:
    ...
    case SMTP_HELO:
    ...
    case SMTP_AUTH:
    ...
    case SMTP_AUTH_USERNAME:
    ...
    case SMTP_AUTH_PASSWORD:
    ...
    case SMTP_FROM:
    ...
    case SMTP_RCPT:
    ...
    case SMTP_DATA:
    ...
    case SMTP_MESSAGE_DATAEND:
    ...
    }
}
2) Build the program and download it into the board.
3) Start the application.

RESULT
The application is now programmed and running. The following information will be displayed on the terminal window.
-- Send email example --
-- SAMW25_XPLAINED_PRO --
-- Compiled: xxx xx xxxx xx:xx:xx --
wifi_cb: M2M_WIFI_RESP_CON_STATE_CHANGED: CONNECTED
wifi_cb: M2M_WIFI_REQ_DHCP_CONF: IP is xxx.xxx.xxx.xxx
Host IP is 173.194.72.108
Host Name is smtp.gmail.com
Recipient email address is recipient@gmail.com
main: Email was successfully sent.

WARNING
For using the Gmail, the root certificate must be installed. For more details about downloading the root certificate, refer to the "Platform Getting Started Guide for SAM W25 Xplained Pro".

WARNING
If the server connection is unstable it may not be operated normally.

TIPS
Limitations/Known issues:
- Email is sent to only one recipient.
- Only plain text Email is supported.
4.24 Protocol Example: Location Client
This example demonstrates the use of the SAM W25 Xplained Pro board to get location of the network provider.
Figure 4-24. The SAM W25 Xplained Pro

natural_image
Illustration of a blue circuit board connected to a wireless router with wireless signal icons (no text or symbols)main.c: Initialize the SAM W25 and get location information.
1) Code summary.
Configure below code in main.h for AP information to be connected.
#define MAIN_WLAN_SSID "DEMO_AP"
#define MAIN_WLAN_AUTH M2M_WIFI_SEC_WPA_PSK
#define MAIN_WLAN_PSK "12345678"
Configure HTTP client.
configure_http_client();
Get the default config data and specify user configuration. Then http_client_init() and http_client_register_callback() function will be executed sequentially.
static void configure_http_client(void)
{
    ...
    http_client_get_config_defaults(&httpconf);
    http_conf.recv_buffer_size = 256;
    http_conf.timer_inst = &swt_module_inst;
    http_conf.user_agent = "curl/7.10.6";

    ret = http_client_init(&http_module_inst, &httpconf);
    if (ret < 0) {
    while (1) {
    } /* Loop forever. */
    }

    http_client_register_callback(&http_module_inst, ...);
}
Initialize socket module and register socket callback function.
socketInit();
registerSocketCallback(socket_cb, resolve_cb);
Connect to the AP.
m2m_wifi_connect((char *)MAIN_WLAN_SSID, ...
After the device is connected to the AP, HTTP request will be sent.
static void wifi_callback(uint8_t msg_type, void *msg_data)
{
    ...
    case M2M_WIFI_REQ_DHCP_CONF:
    {
    http_client_send_request(&http_client_module_inst, ...);
    }
}
4 operations will be executed sequentially.
static void http_client_callback(...)
{
    switch (type) {
    case HTTP_CLIENT_CALLBACK_SOCK_CONNECTED:
    printf("Connected\r\n");
    break;
    case HTTP_CLIENT_CALLBACK_REQUESTED:
    printf("Request complete\r\n");
    break;
    case HTTP_CLIENT_CALLBACK_RECV_RESPONSE:
    if (data->recv_response.content != NULL) {
    if (json_create(...) == 0 && json_find(...) == 0) {
    printf("Location : %s\r\n", loc.value.s);
    }
    }
    break;
    case HTTP_CLIENT_CALLBACK_DISCONNECTED:
    printf("Disconnected reason:%d\r\n", data->disconnected.reason);
    ...
    }
}
The first sequence begins with the socket connected.
After request complete, third sequence will be executed and you can get the location data.
2) Build the program and download it into the board.
3) Start the application.

RESULT
The application is now programmed and running. The following information will be displayed on the terminal window.
-- Location client example --
-- SAMW25_XPLAINED_PRO --
-- Compiled: xxx xx xxxx xx:xx:xx --
Wi-Fi connected
Wi-Fi IP is xxx.xxx.xxx.xxx
Connected
Request complete
Received response 200 data size 178
Location : {latitude},{longitude}
Disconnected reason:-104

WARNING If disconnect reason is equal to -ECONNRESET(-104), it means Server disconnected your connection due to the keep alive timeout. This is a normal operation.
This example obtains the location of your network provider not your current position.

WARNING If the server connection is unstable it may not be operated normally.
4.25 Advanced Example: Growl Notification
This example demonstrates the use of the SAM W25 Xplained Pro.
This example transmits a notification from the SAM W25 (based on a certain trigger) to a public remote server which in turn sends it a phone application.
The initiated notification from the SAM W25 is directed to a certain subscriber on the server. The supported applications are PROWL (for iPhone notifications) and NMA (for ANDROID notifications).
The following hardware is used:
Figure 4-25. The SAM W25 Xplained Pro

natural_image
Illustration of a smart home connected to an electronic circuit board with wireless signals, next to a router and a tablet device (no text or symbols present)main.c: Initialize growl and send notification message.
1) Code summary.
Configure below code in main.h for your account.
#define PROWL_API_KEY "6ce3b9ff6c29e5c5b8960b28d9e987aec5ed603a"
#define NMA_API_KEY "0757fe93214fc2cdf2ad42a5005ee0aa83a7a8ea242c0b80"
Get MAC address and set the device name with MAC address.
m2m_wifi_get_mac_address(gau8MacAddr);

set_dev_name_to_mac((uint8_t *)gacDeviceName, gau8MacAddr);
set_dev_name_to_mac((uint8_t *)gstrM2MAPConfig.au8SSID, gau8MacAddr);
m2m_wifi_set_device_name((uint8_t *)gacDeviceName, ...);
Start provision mode.
m2m_wifi_start_provision_mode((tstrM2MAPConfig *)&gstrM2MAPConfig, (char *)gacHttpProvDomainName, 1);
When your mobile device sends configuration information, wifi_cb() function will be called with M2M_WIFI_RESP_PROVISION_INFO message and you can connect to the AP with the given information.
static void wifi_cb(uint8_t u8MsgType, void *pvMsg)
{
    case M2M_WIFI_RESP_PROVISION_INFO:
    tstrM2MProvisionInfo *pstrProvInfo = (tstrM2MProvisionInfo *)pvMsg;
    if (pstrProvInfo->u8Status == M2M_SUCCESS) {
    m2m_wifi_connect((char *)pstrProvInfo->au8SSID,
    strlen((char *)pstrProvInfo->au8SSID),
    pstrProvInfo->u8SecType,
    pstrProvInfo->au8Password, M2M_WIFI_CH_ALL);
    }
}
After the device is connected to the AP, initialize the growl key and execute message handler.
static void wifi_cb(uint8_t u8MsgType, void *pvMsg)
{
    ...
    case M2M_WIFI_REQ_DHCP_CONF:
    {
    ...
    NMI_GrowlInit((uint8_t *)PROWL_API_KEY, (uint8_t *)NMA_API_KEY);
    growl_send_message_handler();
    }
    ...
}
Notification message will be sent thru the below function.
static int grow1_send_message_handler(void)
{
    ...
    NMI_Grow1SendNotification(NMA_CLIENT, (uint8_t *) "Grow1_Sample",
    (uint8_t *) "Grow1_Event", (uint8_t *) "grow1_test", NMA_CONNECTION_TYPE);
    return 0;
}
2) Build the program and download it into the board.
3) Start the application.

RESULT
The application is now programmed and running. The following information will be displayed on the terminal window.
-- Simple growl example --
-- SAMW25_XPLAINED_PRO --
-- Compiled: xxx xx xxxx xx:xx:xx --
Provision Mode started.
Connect to [atmelconfig.com] via AP[WINC1500_08:CA] and fill up the page.
4) Connect your mobile device to SAM W25 AP [WINC1500_08:CA].
5) Browse the webpage (atmelconfig.com) to setup AP, fill up the page then press Connect.
6) SAM W25 will be connected to the AP what you entered.
7) Growl message will be sent.
Wi-Fi connected
Wi-Fi IP is xxx.xxx.xxx.xxx
wifi_cb: M2M_WIFI_RESP_PROVISION_INFO.
Wi-Fi connected
Wi-Fi IP is xxx.xxx.xxx.xxx
send Growl message
Growl CB : 20
This example supports sending GROWL notifications to the following servers.
• PROWL for iOS push notifications (https://www.prowlapp.com/)
• NMA for Android push notifications (http://www.notifymyandroid.com/)
In order to enable the GROWL application (for sending notifications) working, you need to set your own API key to represent your account. Create your own by following instructions:
- Create a NMA account at http://www.notifymyandroid.com/ and create an API key. Copy the obtained key string in the file main.h in the macro NMA_API_KEY as the following.
- Create a PROWL account at https://www.prowlapp.com/ and create an API key. Copy the obtained API key string in the file main.h in the macro PROWL_API_KEY as the following.
define NMA_API_KEY "f8bd3e7c9c5c10183751ab010e57d8f73494b32da73292f6"
define PROWL_API_KEY "117911f8a4f2935b2d84abc934be9ff77d883678"

WARNING
For using the growl, the root certificate must be installed. For more details about downloading the root certificate, refer to the "Platform Getting Started Guide for SAM W25 Xplained Pro".
Launch the Growl or NMA application to receive notification.
text_image
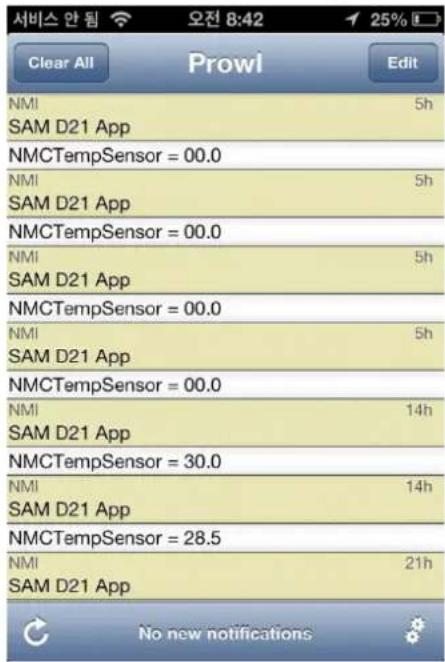
서비스 안 됨 오전 8:42 25% Clear All Prowl Edit NMI SAM D21 App 5h NMCTempSensor = 00.0 NMI SAM D21 App 5h NMCTempSensor = 00.0 NMI SAM D21 App 5h NMCTempSensor = 00.0 NMI SAM D21 App 5h NMCTempSensor = 00.0 NMI SAM D21 App 14h NMCTempSensor = 30.0 NMI SAM D21 App 14h NMCTempSensor = 28.5 NMI SAM D21 App 21h No new notifications
text_image
Growl_Sample Growl_Sample 5:13 PM Growl_Event growl_test You have 1 new notification.4.26 Advanced Example: MQTT Chat
This example demonstrates the use of the SAM W25 Xplained Pro board to chat using MQTT protocol.
Figure 4-26. The SAM W25 Xplained Pro

text_image
MQTT.ORGmain.c: Initialize the board, connect to an MQTT broker and chat with other devices.
1) Code summary.
Configure below code in main.h for the MQTT broker and AP information to be connected.
static const char main_mqtt_broker[] = "test.mosquitto.org";
#define MAIN_WLAN_SSID "DEMO_AP"
#define MAIN_WLAN_AUTH M2M_WIFI_SEC_WPA_PSK
#define MAIN_WLAN_PSK "12345678"
Configure MQTT module. You can set the timer instance and register callback for MQTT messages.
/* Initialize the MQTT service. */
configure_mqtt();
static void configure_mqtt(void)
{
    ...
    mqtt_get_config_defaults(&mqtt_conf);

    mqtt_conf.timer_inst = &swt_module_inst;
    mqtt_conf.recv_buffer = mqtt_buffer;
    mqtt_conf.recv_buffer_size = MAIN MQTT_BUFFER_SIZE;

    result = mqtt_init(&mqtt_inst, &mqtt_conf);

    result = mqtt_register_callback(&mqtt_inst, mqtt_callback);
Set up the user name first. Then the topic value will be set with MAIN_CHAT_TOPIC + user name.
printf("Enter the user name (Max %d characters)\r\n", MAIN_CHAT_USER_NAME_SIZE);
scanf("%s", mqtt_user);
printf("User : %s\r\n", mqtt_user);
sprintf(topic, "%s%s", MAIN_CHAT_TOPIC, mqtt_user);
Initialize socket module and register socket callback function.
socketInit();
registerSocketCallback(socket_cb, resolve_cb);
Connect to the AP.
m2m_wifi_connect((char *)MAIN_WLAN_SSID, ...
After the device is connected to the AP, call mqtt_connect() function to connect the socket.
static void wifi_callback(uint8 msg_type, void *msg_data)
{
    ...
    case M2M_WIFI_REQ_DHCP_CONF:
    ...
    mqtt_connect(&mqtt_inst, main_mqtt_broker);
}
MQTT callback will receive MQTT_CALLBACK_SOCK_CONNECTED message then start sending CONNECT message to the MQTT broker.
static void mqtt_callback(struct mqtt_module *module_inst, int type, union mqtt_data *data)
{
    ...
    case MQTT_CALLBACK_SOCK_CONNECTED:
    {
    mqtt_connect_broker(module_inst, 1, NULL, NULL, mqtt_user, NULL, NULL, 0, 0, 0);
MQTT callback will receive MQTT_CALLBACK_CONNECTED message then register subscription with a specific topic.
static void mqtt_callback(struct mqtt_module *module_inst, int type, union mqtt_data *data)
{
    ...
    case MQTT_CALLBACK_CONNECTED:
    {
    mqtt_subscribe(module_inst, MAIN_CHAT_TOPIC "#", 0);
If other device sends a message with this topic then MQTT callback will receive MQTT_CALLBACK_RECV_PUBLISH message.
static void mqtt_callback(struct mqtt_module *module_inst, int type, union mqtt_data *data)
{
    ...
    case MQTT_CALLBACK_RECV_PUBLISH:
If user inputs some string via terminal, publish MQTT message as below.
static void check_usart_buffer(char *topic)
{
    if (uart_buffer_written >= MAIN_CHAT_BUFFER_SIZE) {
    mqtt_publish(&mqtt_inst, topic, uart_buffer,
    MAIN_CHAT_BUFFER_SIZE, 0, 0);
    uart_buffer_written = 0;
    }
}
2) Build the program and download it into the board.
3) Start the application.
4) On the terminal window, enter the user name through the terminal window.
-- Wi-Fi MQTT chat demo --
-- SAMW25_XPLAINED_PRO --
-- Compiled: xxx xx xxxx xx:xx:xx --
Preparation of the chat has been completed.

WARNING The user name should not contain a white space.
5) After chatting initialization completed, enjoy the chat.

TIPS The Initialization may take longer than a few minutes according to the network environment.

RESULT Application is now successfully running. Below shows two users talking to each other's device connected to the same MQTT chat server.
Enter the user name (Max 64 characters)
User : demo_user
Wi-Fi connected
Wi-Fi IP is xxx.xxx.xxx.xxx
Preparation of the chat has been completed.
demo_user >> hi!
demo_user >> anybody there?
other_user >> I'm here
other_user >> hi

WARNING Maximum message length should be shorter than 128-bytes.

WARNING If the server connection is unstable may not be operated normally.
4.27 Advanced Example: Weather Client
This example demonstrates the use of the SAM W25 Xplained Pro board to retrieve weather information from weather server (openweathermap.org).
Figure 4-27. The SAM W25 Xplained Pro

natural_image
Illustration of a smart home connected to an electronic device via wireless signals (no text or symbols)main.c: Initialize the chip and retrieve info.
1) Code summary.
Configure below code in main.h for AP information to be connected.
Initialize socket module and register socket callback function.
socketInit();
registerSocketCallback(socket_cb, resolve_cb);
Get MAC address and set the device name with MAC address.
m2m_wifi_get_mac_address(gau8MacAddr);

set_dev_name_to_mac((uint8_t *)gacDeviceName, gau8MacAddr);
set_dev_name_to_mac((uint8_t *)gstrM2MAPConfig.au8SSID, gau8MacAddr);
m2m_wifi_set_device_name((uint8_t *)gacDeviceName, ...);
Start provision mode.
m2m_wifi_start_provision_mode((tstrM2MAPConfig *)&gstrM2MAPConfig, (char *)gacHttpProvDomainName, 1);
When your mobile device sends configuration information, wifi_cb() function will be called with M2M_WIFI_RESP_PROVISION_INFO message and you can connect to the AP with the given information.
static void wifi_cb(uint8_t u8MsgType, void *pvMsg)
{
    case M2M_WIFI_RESP_PROVISION_INFO:
    tstrM2MProvisionInfo *pstrProvInfo = (tstrM2MProvisionInfo *)pvMsg;
    if (pstrProvInfo->u8Status == M2M_SUCCESS) {
    m2m_wifi_connect((char *)pstrProvInfo->au8SSID,
    strlen((char *)pstrProvInfo->au8SSID),
    pstrProvInfo->u8SecType,
    pstrProvInfo->au8Password, M2M_WIFI_CH_ALL);
    }
}
After the device is connected to the AP, gethostbyname() function will be called.
static void wifi_cb(uint8_t u8MsgType, void *pvMsg)
{
    ...
    case M2M_WIFI_REQ_DHCP_CONF:
    {
    ...
    gbConnectedWifi = true;
    gethostbyname((uint8_t *)MAIN_WEATHER_SERVER_NAME);
    }
    ...
}
Create a TCP client socket and connect to server in the main loop.
if (gbConnectedWifi && !gbTcpConnection) {
    if (gbHostIpByName) {
    if (tcp_client_socket < 0) {
    if ((tcp_client_socket = socket(...)) < 0) {
    continue;
    }
    }

    if (connect(tcp_client_socket, ...) != SOCK_ERR_NO_ERROR) {
    continue;
    }

    gbTcpConnection = true;
    }
}
Socket callback function will receive SOCKET_MSG_CONNECT message then it requests weather information to the server with a city name.
static void socket_cb(SOCKET sock, uint8_t u8Msg, void *pvMsg)
{
    case SOCKET_MSG_CONNECT:
    sprintf(gau8ReceivedBuffer, ..., MAIN_CITY_NAME, ...);
    ...
    send(tcp_client_socket, gau8ReceivedBuffer, ...);
    recv(tcp_client_socket, ...);
    break;
    case SOCKET_MSG_RECV:
    {
    }
}
Socket callback function will receive SOCKET_MSG_RECV message with weather information.
You can also get the current temperature via IO1 sensor board as below.
static void socket_cb(SOCKET sock, uint8_t u8Msg, void *pvMsg)
{
    case SOCKET_MSG_RECV:
    ...
    getTemperature();
}
static void getTemperature(void)
{
    ...
    double s8SensorTemperature = at30tse_read_temperature();
2) Build the program and download it into the board.
3) Start the application.

RESULT
The application is now programmed and running. The following information will be displayed on the terminal window.
-- Weather client example --
-- SAMW25_XPLAINED_PRO --
-- Compiled: xxx xx xxxx xx:xx:xx -
Provision Mode started.
Connect to [atmelconfig.com] via AP[WINC1500_08:CA] and fill up the page.
4) Connect your mobile device to SAM W25 AP [WINC1500_08:CA].
5) Browse the webpage (atmelconfig.com) to setup AP, fill up the page then press Connect.
6) SAM W25 will be connected to the AP what you entered.
7) The weather info will be printed.
Wi-Fi IP is xxx.xxx.xxx.xxx
wifi_cb: M2M_WIFI_RESP_PROVISION_INFO.
Wi-Fi connected
Wi-Fi IP is xxx.xxx.xxx.xxx
Host IP is 144.76.102.166
Host Name is openweathermap.org
City: Seoul
Weather Condition: sky is clear
Temperature from sensor : 27 degrees
Temperature from server : 3 degrees
Temperature difference : 24 degrees

WARNING
If the server connection is unstable may not be operated normally.
4.28 Advanced Example: Wi-Fi Serial
This example demonstrates how to emulate serial ports between two devices. It reads input data from serial interface and sends it via Wi-Fi connection and terminal window will print the messages which you typed or received. It can be useful for chatting or controlling a remote device. It uses the following hardware and you need to prepare two SAM W25 boards.
Figure 4-28. The SAM W25 Xplained Pro
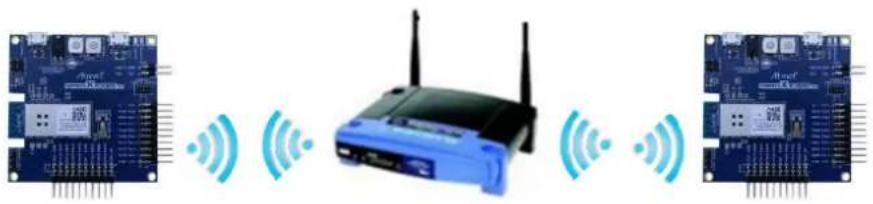
natural_image
Diagram showing wireless network components including a blue Wi-Fi router and two connected circuit boards (no text or symbols)main.c: Initialize devices and USART interface. Create TCP sockets, send/receive messages and print them on the terminal window.
1) Code summary.
Configure below code in main.h for AP information to be connected.
#define MAIN_WLAN_SSID "DEMO_AP"
#define MAIN_WLAN_AUTH M2M_WIFI_SEC_WPA_PSK
#define MAIN_WLAN_PSK "12345678"
Configure USART module to read user input data.
static void configure_console(void)
{
    ...
    stdio_serial_init(&cdc_uart_module, CONF_STDIO_USART_MODULE, &usart_conf);
    /* Register USART callback for receiving user input. */
    usart_register_callback(&cdc_uart_module, uart_callback, SART_CALLBACK_BUFFER_RECEIVED);
    usart_enable_callback(&cdc_uart_module, USART_CALLBACK_BUFFER_RECEIVED);
    usart_enable(&cdc_uart_module);
}
Initialize socket module and register socket callback function.
socketInit();
registerSocketCallback(socket_cb, resolve_cb);
Connect to the AP.
m2m_wifi_connect((char *)MAIN_WLAN_SSID, ...
After the device is connected to the AP, create TCP server socket and bind it in the main loop.
if ((tcp_server_socket = socket(AF_INET, SOCK_STREAM, 0)) < 0) {
    continue;
}
...
bind(tcp_server_socket, (struct sockaddr *)&addr, sizeof(struct sockaddr_in));
If there is user input data then handle_input_message() function in the main loop calls parse_command() function to parse user data and execute the handler function according to the command.
uint8_t parse_command(char *buffer, uint8_t remote)
{
    for (i = i_st; i < i_ed; i++) {
    if (!strcmp(cmd_list[i].cmd_string, cmd_buf)) {
    cmd_list[i].cmd_handler(
    buffer + strlen(cmd_list[i].cmd_string) + 1);
    break;
    }
}
Or handle_input_message() function prints user data in the terminal window and sends it to the remote device.
void handle_input_message(void)
{
    ...
    if (tcp_connected == 1) {
    PRINT_LOCAL_MSG(uart_buffer);
    send(tcp_client_socket, uart_buffer, msg_len + 1, 0);
    }
}
When receiving data from the remote device, it handles the received message to print it or executor a proper command.
There are several commands for Wi-Fi serial functionality in this example.
2) Build the program and download it into the board.
3) Start the application.
4) On the terminal window, the following text should appear:
-- Wi-Fi Serial example --
-- SAMW25_XPLAINED_PRO --
-- Compiled: xxx xx xxxx xx:xx:xx --
Wi-Fi connected.
Wi-Fi IP is xxx.xxx.xxx.xxx
socket_cb: bind success.
socket_cb: listen success.
5) Check IP address of each board and execute connection on one device by typing the below command on the terminal window with the other device's address. Use prefix "<<" to execute local commands.
<<connect xxx.xxx.xxx.xxx
6) If connected, the following text should appear:
(Local device)
Connecting to [xxx.xxx.xxx.xxx] ...
socket_cb: connect success.
(Remote device)
socket_cb: accept success.
7) Type messages on the terminal window and you will see the sent/received messages.
8) You can control LED on the remote device by typing the following command. Use prefix ">>" to execute remote commands.
>>control ledon (Or)
>>control ledoff

RESULT Application reads data from serial interface.

TIPS User commands can be modified to execute various actions.
4.29 Advanced Example: OTA Firmware Upgrade

TIPS This project is available for a specific H/W version of Wi-Fi network controller of SAM W25 which has 4Mb flash memory.
This example demonstrates how to upgrade Wi-Fi network controller's firmware via OTA. It downloads the firmware from OTA Download server. OTA Download server is a web server. You can upload a new firmware image and download it to your device. It uses the following hardware and you need to prepare a web server.
Figure 4-29. The SAM W25 Xplained Pro
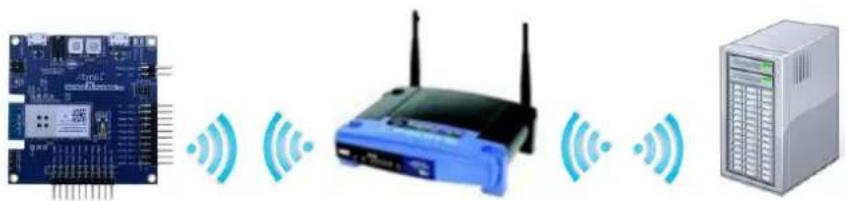
natural_image
Diagram showing a microcontroller connected to a router, with wireless signal icons and a server rack nearby (no text or symbols present)OTA Download Server (Web Server)
main.c: Initialize devices and set the server information. It connects to the OTA Download Server.
1) Set your OTA Download server.
2) Upload OTA firmware binary to the root folder in your server. (e.g. http://192.168.0.137/m2m_ota.bin)
3) Code summary.
Configure below code in main.h for AP information to be connected.
#define MAIN_WLAN_SSID "DEMO_AP"
#define MAIN_WLAN_AUTH M2M_WIFI_SEC_WPA_PSK
#define MAIN_WLAN_PSK "12345678"
#define MAIN_OTA_URL "http://192.168.0.137/m2m_ota.bin"
Connect to the AP.
m2m_wifi_connect((char *)MAIN_WLAN_SSID, ...
Initialize OTA function.
m2m_ota_init(OtaUpdateCb, OtaNotifCb);
After the device is connected to the AP, m2m_ota_start_update() function will be executed in the wifi_cb() function.
static void wifi_cb(uint8_t u8MsgType, void *pvMsg)
{
    ...
    case M2M_WIFI_REQ_DHCP_CONF:
    m2m_ota_start_update((uint8_t *)MAIN_OTA_URL);
If successfully downloaded, m2m_ota_switch_firmware() function will be called thru OtaUpdateCb().
static void OtaUpdateCb(uint8_t u8OtaUpdateStatusType, uint8_t u8OtaUpdateStatus)
{
    m2m_ota_switch_firmware();
}
After then, you can see the "OTA Success. Press reset your board".
4) Build the program and download it into the board.
5) Start the application.
6) The following text should appear on the terminal window:
-- OTA Firmware upgrade example --
-- SAMW25_XPLAINED_PRO --
-- Compiled: xxx xx xxxx xx:xx:xx --
m2m_wifi_connect.
Wi-Fi connected
Wi-Fi IP is xxx.xxx.xxx.xxx.
When you get the IP address the OTA get started.
7) The following text should appear on the terminal window:
(1)Chip ID = 1502b1
(1)Flash ID = c21320c2, Size = 4 MBit
(1)Working Image offset = 0x3000 Rollback =
(2)(M2M)(Efuse) successfully loaded from bank
(2)EFUSE:MAC
(2)(M2M)MAC_ADDR = xx:xx:xx:xx:xx:xx
(3)NMI M2M SW VERSION 18.0
(3)NMI MIN DRV VERSION 18.0
(3)Built at Jan 19 2015 23:48:51
(3)_ROM_FIRMWARE_
(4)(M2M)LOAD SEC
(6)(M2M)1000 400 2f000 2fc00 38000
(7)(M2M)Wifi Connect
(7)(M2M)SSID : NW01
(7)(M2M)AUTH : WPA-Personal
(7)(M2M)PSK : nmisemi2
(8)(M2M)Channel : 256
(8)Reset MAC
(9)>> Sleep clk src <= Int. osc
(9)>> wakeup_delay = 1500 us
(9)>> pds = [652 652 6526 1957 3]
(9)----
(489)MAC State <3>
(494)MAC State <4>
(494)Join on 11
(494)>> sta_wait_join 179
(494)MAC State <5>
(494)MAC State <6>
(495)Init Auth.
(495)MAC State <7>
(495)MAC State <9>
(495)MAC State <10>
(496)MAC State <1>
(496)!@#Rate DN (MCS-5) !@#
(496)Assoc Success.
(498)(M2M)WIFI Connected
(499)(DHCP)<- DISCOVER
(500)Tsf join
(510)Tsf join Done
(532)(DHCP)-> OFFER
(563)(DHCP)-> ACK
(563)(DHCP)Self IP : "xxx.xx.xxx.xxx"
You can find firmware version and build time information.
(3)NMI M2M SW VERSION 18.0
(3)NMI MIN DRV VERSION 18.0
(3)Built at Jan 19 2015 23:48:51
8) If connected to OTA Server, the following text should appear on the terminal window:
(770)(M2M)(OTA) Invalidate RB Image
Start Writing.. at 40000 Size 204380
(809)STATS 0 0 5 25 0, err: 16 - stuck: 0
(809)!@#Rate DN (48.0 Mbps) !@#
(910)!@#Rate DN (MCS-4) !@#
(1079)(M2M)Verification OK 204380
(1080)(M2M)(OTA) Update image done successfully
(1080)(M2M)Socket 6 Closed
(1083)(M2M)(OTA) SWap image done successfully
(1084)(M2M)(OTA) Switching firmware done.
9) If success OTA firmware upgrading, the following text should appear on the terminal window:
Wi-Fi IP is xxx.xxx.xxx.xxx
OtaUpdateCb 1 0
OtaUpdateCb m2m_ota_switch_firmware start.
OtaUpdateCb 2 0
OTA Success. Press reset your board.

RESULT Application reads data from serial interface.
(1) Chip ID = 1502b1
(1) Flash ID = c21320c2, Size = 4 MBit
(1) Working Image offset = 0x3000 Rollback = 0x40000
(2) (M2M)(Efuse) successfully loaded from bank 1.
(2) EFUSE:MAC
(2) (M2M) MAC_ADDR = xx:xx:xx:xx:xx:xx
(3) NMI M2M SW VERSION 18.0
(3) NMI MIN DRV VERSION 18.0
(3) Built at Jan 19 2015 23:48:51
(3) ROM_FIRMWARE
4.30 Advanced Example: SSL Connection
This example demonstrates how to set up an SSL connection.
Figure 4-30. The SAM W25 Xplained Pro
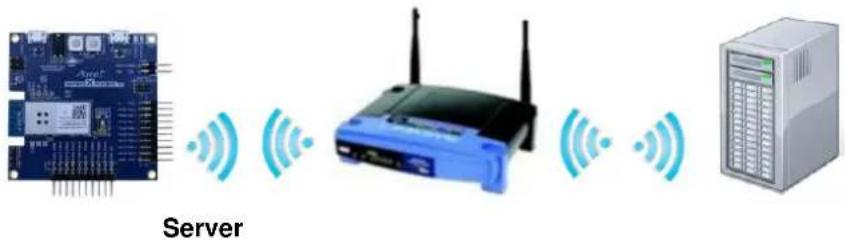
text_image
Servermain.c: Initialize devices and connect to a server using SSL.
1) Code summary.
Configure below code in main.h for AP and the server information to be connected.
#define MAIN_WLAN_SSID "DEMO_AP"
#define MAIN_WLAN_AUTH M2M_WIFI_SEC_WPA_PSK
#define MAIN_WLAN_PSK "12345678"
#define MAIN_SSL_BUF_LEN 1024
#define MAIN_HOST_NAME "www.google.com"
#define MAIN_HOST_PORT 443
Initialize socket module and register socket callback function.
socketInit();
registerSocketCallback(socket_cb, resolve_cb);
Connect to the AP.
m2m_wifi_connect((char *)MAIN_WLAN_SSID, ...
After the device is connected to the AP, gethostbyname() function will be executed.
static void wifi_cb(uint8_t u8MsgType, void *pvMsg)
{
    ...
    case M2M_WIFI_REQ_DHCP_CONF:
    gethostbyname((uint8_t *)MAIN_HOST_NAME);
In the main loop, try to connect to the SSL server.
if (sslConnect() != SOCK_ERR_NO_ERROR) {
    gu8SocketStatus = SocketInit;
}
If successfully connected, socket_cb() function will be called with SOCKET_MSG_CONNECT message.
static void socket_cb(SOCKET sock, uint8_t u8Msg, void *pvMsg)
{
    switch (u8Msg) {
    case SOCKET_MSG_CONNECT:
    if (pstrConnect && pstrConnect->s8Error >= SOCK_ERR_NO_ERROR)
    printf("Successfully connected.\r\n");
    break;
}
2) Build the program and download it into the board.
3) Start the application.
4) The following text should appear on the terminal window.
-- SSL example --
-- SAMW25_XPLAINED_PRO --
-- Compiled: xxx xx xxxx xx:xx:xx --
wifi_cb: M2M_WIFI_RESP_CON_STATE_CHANGED: CONNECTED
wifi_cb: M2M_WIFI_REQ_DHCP_CONF: IP is xxx.xxx.xxx.xxx
Host IP is 173.194.127.115
Host Name is www.google.com
Successfully connected.

RESULT The device is connected to a server using SSL.

WARNING To set up an SSL connection, a root certificate must be installed. For more details about downloading the root certificate, refer to the "Platform Getting Started Guide for SAM W25 Xplained Pro".
4.31 Advanced Example: HTTP File Server
This example demonstrates how HTTP file server responds to client's requests.
Figure 4-31. The SAM W25 Xplained Pro and the IO1 Xplained Pro Header (for MicroSD Storage)
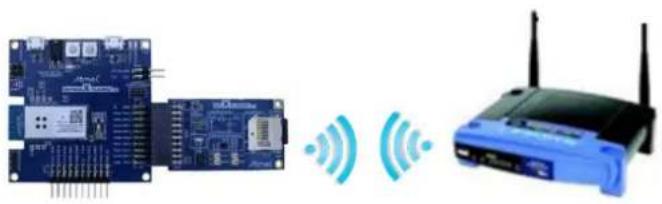
natural_image
Illustration of an Arduino Pi connected to a wireless router via wireless signals (no text or symbols present)main.c: Initialize the devices and HTTP file server module.
1) Code summary.
Configure below code in main.h for AP information to be connected.
#define MAIN_WLAN_SSID "DEMO_AP"
#define MAIN_WLAN_AUTH M2M_WIFI_SEC_WPA_PSK
#define MAIN_WLAN_PSK "12345678"
In main() function, initialize HTTP server module. It will set a callback function for HTTP server response.
configure_http_server();
Initialize SD card on the IO1 extension board.
sd_mmc_init();
Initialize socket module and register socket callback function.
socketInit();
registerSocketCallback(socket_cb, resolve_cb);
Connect to the AP.
m2m_wifi_connect((char *)MAIN_WLAN_SSID, ...
When the HTTP server receives client's request the callback function will be invoked. If the request URI is a file then the server will send a file data. If the URI is a directory then the server will send a file list in the directory on the HTTP response.
http_entity is defined in HTTP module in /src/iot directory and there is also file_entity for file request. This example implements directory_entity to send a file list in the requested directory.
static void http_server_cb(int session_id, int type, union http_server_data *data)
{
    switch (type) {
    case HTTP_SEVER_CALLBACK_RECV_REQ:
    if (data->recv_req.method == HTTP_METHOD_GET) {
    ...
    if (is_dir) {
    struct http_entity entity;
    directory_entity_get(&entity, &dj,
    data->recv_req.uri);
    http_server_send_response(&http_server_mod,
    session_id, 200, &entity);
    } else {
    struct http_entity entity;

    sprintf(file_name, "%d:%s", LUN_ID_SD_MMC_0_MEM,
    data->recv_req.uri + 1);
    ret = file_entity_get(&entity, file_name);
    if (ret != FR_OK) {
    http_server_send_response(&http_server_mod,
    session_id, 404, NULL);
    entity.close(entity.priv_data);
    } else {
    http_server_send_response(&http_server_mod,
    session_id, 200, &entity);
    }
}
2) Save some files and directories in the micro SD card on the IO1 extension board.
3) Build the program and download it into the board.
4) Start the application.
5) The following text should appear on the terminal window:
-- HTTP file server example --
-- SAMW25_XPLAINED_PRO --
-- Compiled: xxx xx xxxx xx:xx:xx -
main: Mount success.
wifi_cb: M2M_WIFI_RESP_CON_STATE_CHANGED: CONNECTED
wifi_cb: M2M_WIFI_REQ_DHCP_CONF: IP is xxx.xxx.xxx.xxx
6) Open a web browser on the computer or a smart phone which is connected to the same AP with your test device and browse directories or files.

RESULT Some text will be printed on the terminal window as shown below and file list or file content will be shown on the browser.
>>> Request : URI (/) method(1)
Directory name(/)

>>> Request : URI(/test1), method(1)
Directory name(/test1)

>>> Request : URI(/test1/doc1.txt), method(1)
File name(0:test1/doc1.txt). Open result(0)

TIPS You have to define ACCESS_MEM_RAM_ENABLED feature to access memory card.

TIPS Check mmc configurations according to the EXT connector which IO1 Xplained PRO is connected to. Below code describes the configurations for the EXT2 connector (src/config/conf_sd_mmc.h).
//! Select the SPI module SD/MMC is connected to
#define SD_MMC_SPI EXT2_SPI_MODULE
#define SD_MMC_SPI_PINMUX_SETTING EXT2_SPI_SERCOM_MUX_SETTING
#define SD_MMC_SPI_PINMUX_PAD0 EXT2_SPI_SERCOM_PINMUX_PAD0
#define SD_MMC_SPI_PINMUX_PAD1 EXT2_SPI_SERCOM_PINMUX_PAD1
#define SD_MMC_SPI_PINMUX_PAD2 EXT2_SPI_SERCOM_PINMUX_PAD2
#define SD_MMC_SPI_PINMUX_PAD3 EXT2_SPI_SERCOM_PINMUX_PAD3
4.32 Advanced Example: HTTP File Downloader
This example demonstrates the use of the SAM W25 Xplained Pro board to get a file via HTTP protocol.
Figure 4-32. The SAM W25 Xplained Pro and the IO1 Xplained Pro on EXT1 Header (for MicroSD Storage)

natural_image
Diagram showing connected electronic devices including a microcontroller, wireless network, and a router (no text or symbols present)HTTP Server (Web Server)
main.c: Initialize to the SD card and the SAM W25 and then get a file via HTTP protocol.
1) Code summary.
Configure below code in main.h for AP information to be connected.
#define MAIN_WLAN_SSID "DEMO_AP"
#define MAIN_WLAN_AUTH M2M_WIFI_SEC_WPA_PSK
#define MAIN_WLAN_PSK "12345678"
Configure below code in main.h to HTTP URL information.
#define MAIN_HTTP_FILE_URL " www.atmel.com/Images/asf-releasenotes-3.10.pdf"
Initialize download state.
init_state();
Initialize the HTTP client service.
static void configure_http_client(void)
{
    struct http_client_config httpc_conf;
    http_client_get_config_defaults(&httpc_conf);
...
    ret = http_client_init(&http_client_module_inst, &httpc_conf);
...
    http_client_register_callback(&http_client_module_inst,
    http_client_callback);
}
Initialize SD card on the IO1 extension board.
init_storage();
Initialize Wi-Fi driver.
param.pfAppWifiCb = wifi_cb;
ret = m2m_wifi_init(¶m);
Initialize socket module and register socket callback function.
socketInit();
registerSocketCallback(socket_cb, resolve_cb);
Connect to the AP.
m2m_wifi_connect((char *)MAIN_WLAN_SSID, ...
Call Wi-Fil handle event and timer task until downloading completed or canceled.
while (!(is_state_set(COMPLETED) || is_state_set(CANCELED))) {
    m2m_wifi_handle_events(NULL);
    sw_timer_task(&swt_module_inst);
}
After the device is connected to the AP, start_download() function will be executed.
static void wifi_cb(uint8_t u8MsgType, void *pvMsg)
{
...
case M2M_WIFI_REQ_DHCP_CONF:
{
...
add_state(WIFI_CONNECTED);
start_download();
break;
}
...
socket_cb and resolve_cb have to link to HTTP client functions.
static void socket_cb(SOCKET sock, uint8_t u8Msg, void *pvMsg)
{
    http_client_socket_event_handler(sock, u8Msg, pvMsg);
}
static void resolve_cb(uint8_t *pu8DomainName, uint32_t u32ServerIP)
{
    http_client_socket_resolve_handler(pu8DomainName, u32ServerIP);
}
Implements the file storing from http_client_callback function.
static void http_client_callback(struct http_client_module *module_inst, int type, union http_client_data *data)
{
    ...
    case HTTP_CLIENT_CALLBACK_RECV_RESPONSE:
    if ((unsigned int)data->recv_response.response_code == 200) {
    http_file_size = data->recv_response.content_length;
    received_file_size = 0;
    } else {
    add_state(CANCELED);
    return;
    }
    break;
    case HTTP_CLIENT_CALLBACK_RECV_CHUNKED_DATA:
    store_file_packet(data->recv_chunked_data.data,
    data->recv_chunked_data.length);
    if (data->recv_chunked_data.is_complete) {
    add_state(COMPLETED);
    }
    break;
}
2) Build the program and download it into the board.
3) Start the application.

RESULT
The application is now programmed and running. The following information will be displayed on the terminal window.
-- HTTP file download example --
-- SAMW25_XPLAINED_PRO --
-- Compiled: xxx xx xxxx xx:xx:xx --
init_storage: Please plug an SD/MMC card in slot.
init_storage: Mount SD card...
init_storage: SD card Mount OK.
main: Waiting for Wi-Fi connection. AP:DEMO_AP
Wi-Fi connected
Wi-Fi IP is xxx.xxx.xxx.xxx
start_download: send http request.
resolve_cb: Host Name:www.atmel.com, ip:114.108.166.11
Http client socket connected
Request completed
Received response 200 data size 47384
store_file_packet: Creating to file :0:asf-releasenotes-3.10.pdf
store_file_packet: received[1186], file size[47384]
...
store_file_packet: received[47384], file size[47384]
store_file_packet: Download completed. location:[0:asf-releasenotes-3.10.pdf]
main: Exit program. Please unplug the card.

TIPS Check mmc configurations according to the EXT connector which IO1 Xplained PRO is connected to.
Below code describes the configuration for the EXT2 connector (/src/config/conf_sd_mmc.h).
//! Select the SPI module SD/MMC is connected to
#define SD_MMC_SPI EXT2_SPI_MODULE

#define SD_MMC_SPI_PINMUX_SETTING EXT2_SPI_SERCOM_MUX_SETTING
#define SD_MMC_SPI_PINMUX_PAD0 EXT2_SPI_SERCOM_PINMUX_PAD0
#define SD_MMC_SPI_PINMUX_PAD1 EXT2_SPI_SERCOM_PINMUX_PAD1
#define SD_MMC_SPI_PINMUX_PAD2 EXT2_SPI_SERCOM_PINMUX_PAD2
#define SD_MMC_SPI_PINMUX_PAD3 EXT2_SPI_SERCOM_PINMUX_PAD3

TIPS If a file error occurs, add SD_MMC_ENABLE and ACCESS_MEM_TO_RAM_ENABLED definitions to the project as below.
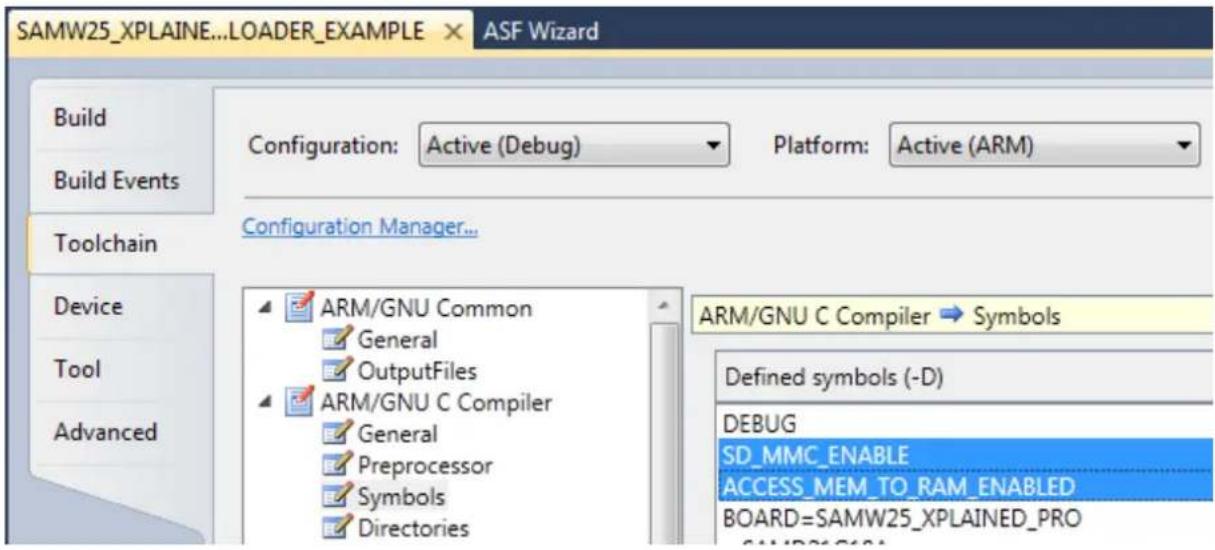
text_image
SAMW25_XPLAINE...LOADER_EXAMPLE ASF Wizard Build Build Events Toolchain Device Tool Advanced Configuration Manager... ARM/GNU Common General OutputFiles ARM/GNU C Compiler General Preprocessor Symbols Directories Configuration: Active (Debug) Platform: Active (ARM) ARM/GNU C Compiler → Symbols Defined symbols (-D) DEBUG SD_MMC_ENABLE ACCESS_MEM_TO_RAM_ENABLED BOARD=SAMW25_XPLAINED_PRO5 Conclusion
This software programming guide explains example of use of the Atmel SAM W25 Wi-Fi module along with the Wi-Fi Software API.
The following topics have been covered:
• Basic example of controlling Wi-Fi module
• Simple protocol examples
• IoT application example
You have seen how the Wi-Fi module makes it easy to add Wi-Fi capabilities to a SAM W25 host MCU.
6 Revision History
| Doc Rev. | Date | Comments |
| 42437A | 04/2015 | Initial document release. |

Atmel
Enabling Unlimited Possibilities®


Atmel Corporation
1600 Technology Drive, San Jose, CA 95110 USA
T: (+1)(408) 441.0311
F: (+1)(408) 436.4200
www.atmel.com
© 2015 Atmel Corporation. / Rev.: Atmel-42437A-Software-Programming-Guide-for-SAM-W25-Xplained-Pro_User-Guide_042015.
Atmel ^® , Atmel logo and combinations thereof, Enabling Unlimited Possibilities ^® , and others are registered trademarks or trademarks of Atmel Corporation in U.S. and other countries. ARM ^® , ARM Connected ^® logo, and others are the registered trademarks or trademarks of ARM Ltd. Other terms and product names may be trademarks of others.
DISCLAIMER: The information in this document is provided in connection with Atmel products. No license, express or implied, by estoppel or otherwise, to any intellectual property right is granted by this document or in connection with the sale of Atmel products. EXCEPT AS SET FORTH IN THE ATMEL TERMS AND CONDITIONS OF SALES LOCATED ON THE ATMEL WEBSITE, ATMEL ASSUMES NO LIABILITY WHATSOEVER AND DISCLAIMS ANY EXPRESS, IMPLIED OR STATUTORY WARRANTY RELATING TO ITS PRODUCTS INCLUDING, BUT NOT LIMITED TO, THE IMPLIED WARRANTY OF MERCHANTABILITY, FITNESS FOR A PARTICULAR PURPOSE, OR NON-INFRINGEMENT. IN NO EVENT SHALL ATMEL BE LIABLE FOR ANY DIRECT, INDIRECT, CONSEQUENTIAL, PUNITIVE, SPECIAL OR INCIDENTAL DAMAGES (INCLUDING, WITHOUT LIMITATION, DAMAGES FOR LOSS AND PROFITS, BUSINESS INTERRUPTION, OR LOSS OF INFORMATION) ARISING OUT OF THE USE OR INABILITY TO USE THIS DOCUMENT, EVEN IF ATMEL HAS BEEN ADVISED OF THE POSSIBILITY OF SUCH DAMAGES. Atmel makes no representations or warranties with respect to the accuracy or completeness of the contents of this document and reserves the right to make changes to specifications and products descriptions at any time without notice. Atmel does not make any commitment to update the information contained herein. Unless specifically provided otherwise, Atmel products are not suitable for, and shall not be used in, automotive applications. Atmel products are not intended, authorized, or warranted for use as components in applications intended to support or sustain life.
SAFETY-CRITICAL, MILITARY, AND AUTOMOTIVE APPLICATIONS DISCLAIMER: Atmel products are not designed for and will not be used in connection with any applications where the failure of such products would reasonably be expected to result in significant personal injury or death ("Safety-Critical Applications") without an Atmel officer's specific written consent. Safety-Critical Applications include, without limitation, life support devices and systems, equipment or systems for the operation of nuclear facilities and weapons systems. Atmel products are not designed nor intended for use in military or aerospace applications or environments unless specifically designated by Atmel as military-grade. Atmel products are not designed nor intended for use in automotive applications unless specifically designated by Atmel as automotive-grade.