
VCSWR519 - Transport Case Cambro - Free user manual and instructions
Find the device manual for free VCSWR519 Cambro in PDF.

| Product Type | Versa Cart (Transport Cart/Case) |
| Model | VCSWR519 |
| Brand | Cambro |
| Dimensions (approx.) | Width: 36 in (91 cm) minimum for door passage; height adjustable with tray rails |
| Weight (approx.) | Not specified; typical Versa Cart approx. 50-70 lbs (23-32 kg) |
| Material | Plastic (thermoplastic) body with metal hardware |
| Power Supply | None (manual cart); electrical access port for optional equipment |
| Key Features | Lockable drawer, adjustable tray rails, adjustable shelf, electrical access port covers, easy access front panel, asset management label, 4 casters with brakes |
| Tray Rail Capacity | 25 lbs (11 kg) per rail |
| Assembly Required | No; comes fully assembled |
| Cleaning Instructions | Mild detergent and warm water or steam cleaning; rinse thoroughly; do not use metal brushes or abrasive cleaners |
| Caster Maintenance | Grease swivel raceway with lubricant (e.g., Lubriplate #930-AA) after washing; light oil on hub; check for damage |
| Safety Warnings | Do not place items hotter than 190°F (88°C) on cart; keep away from direct heat; do not lean, sit, climb, or stand on cart; do not stack items on top |
| Warranty | Up to 3 years from manufacture date; 1 year free replacement, then prorated credit; abuse/misuse voids warranty |
| Replacement Parts | Available at www.cambro.com or through local representative/distributor |
| Optional Accessories | Keyboard tray (VCS32KEYT), vinyl cover (VCSCVR), tray rail kit (VCS32R), straight connectors (VCS32CNT, VCSCNL) |
| Manual Availability | Free PDF download at notice-facile.com; also at www.cambro.com |
Frequently Asked Questions - VCSWR519 Cambro
User questions about VCSWR519 Cambro
0 question about this device. Answer the ones you know or ask your own.
Ask a new question about this device
Download the instructions for your Transport Case in PDF format for free! Find your manual VCSWR519 - Cambro and take your electronic device back in hand. On this page are published all the documents necessary for the use of your device. VCSWR519 by Cambro.
USER MANUAL VCSWR519 Cambro
This owner's manual applies to all Versa Cart models.
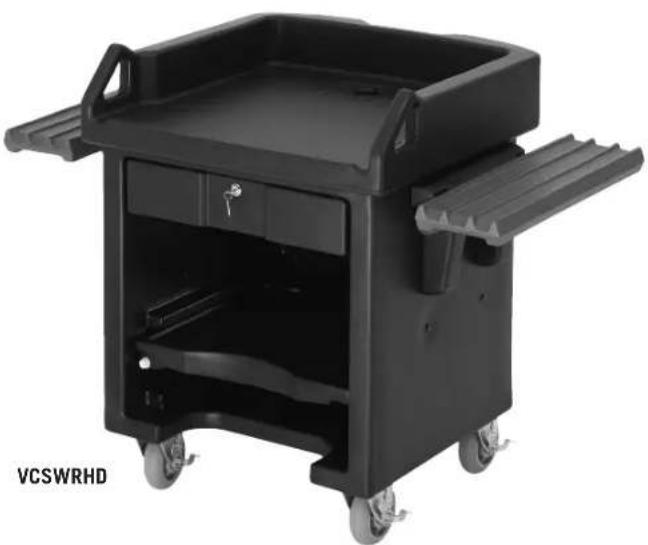
natural_image
Black VCSWRHD electric vehicle chassis with open wheels and handle (no visible text or symbols)Table of Contents
Introduction....1
Section I Operating Instructions....2
Section II Mobility....3
Section III Cleaning and Maintenance....3
Section IV Optional Accessories 4
Section V Warranty....4
Section VI Replacement Parts 4
Introduction
Congratulations on the purchase of your new Cambro Versa Cart. This Owner's Manual provides you with a step-by-step guide to assembling, operating and maintaining your Versa Cart.
If you have any further questions, please do not hesitate to contact your Cambro Sales Representative, visit our Web site at www.cambro.com or call our Customer Service Department at 800 833 3003.


CAMBRO
www.cambro.com
Section I - Versa Cart Operating Instructions
Applies to all Versa Cart models.
Versa Cart Parts List
A. 1 Versa Cart Body and Counter Top Section
B. 1 Key and Lock Set
C. 1 piece Electrical Access Port Cover
D. 2 piece Electrical Access Port Cover
E. 28 Black Snap-in Plugs
F. 1 Asset Management Label
No assembly required: The Versa Cart comes assembled.
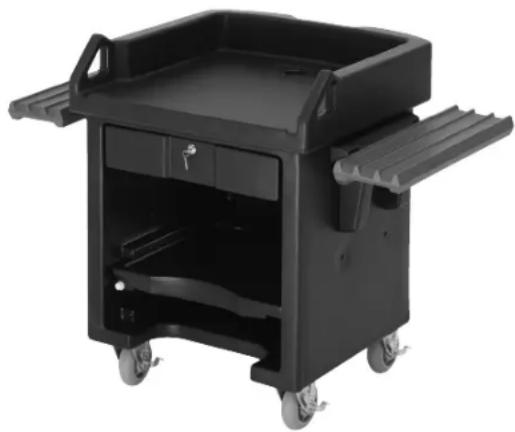
natural_image
Black plastic office cart with handle and wheels, no visible text or symbolsAdjusting the Height of the Tray Rails
Remove the drawer by unscrewing both knobbed bolts located under and inside the drawer interior area. 1.
Remove the drawer from Cart body.2.
Remove the adjustable shelf and nylon thumbscrew from the Cart.3.
- After picking desired side and height position on the Cart, remove the small black plugs from both inside and outside of the Cart wall where rail will be located.
Remove the 3-¼" (8,25 cm) screws and washers that hold the rail mount to the Cart body. 5.
Position the rail mount to the new location on the Cart body. 6.
- Use the 3- 14 " (8,25 cm) screws and washers (4 each) placing them through the sidewall from the inside outward and into the rail mount. Once all four screws are started, tighten with a screwdriver until mount is level and properly snug against Cart body.
- Place one of the nylon bushing into the recessed hole of one side of the rail mount. Place tray rail onto the exposed bushing end.
- Install second bushing through the rail slide on the opposite side and into the recessed hole on that side of mount base.
- With the rail hanging from bushings install two black knob bolts through each bushing and engage into the threads of the mount base. Tighten by hand.
- To check rail, lift to a slightly higher than level position and push inward towards cart body until angled portions of the rail and mount base engage and stop. Rail should rest into a level position.
To lower the rail, slightly lift and pull rail outward and down.12.
- With rail mounting complete, place the black plugs back into remaining holes in the Cart wall being sure to install on both the inside and outside locations.
Adjusting the Versa Cart Shelf
- Remove the nylon bolt and remove the shelf.
- Place the shelf at the desired location.
- Using a nylon bolt, tighten to secure the shelf in place.
- Place the snap-in plugs into the remaining threaded holes.
Section I - Versa Cart Operating Instructions
Using the Electrical Access Port Covers
- The electrical access port covers (single and 2-piece) are packed inside the Versa Cart drawer.
- The electrical access port cover (single) should be used when there are no electrical components on top of the Versa Cart. The electrical access cover fits right into the electrical access port opening.
- The two-piece electrical access port cover can be used with electrical cords to guide the wires through the electrical access.
Using the Versa Cart Lockable Drawer
- The key for the Versa Cart drawer lock is packaged within the unlocked drawer.
- With the drawer fully closed, insert the key into the drawer lock and turn the key counter-clockwise to secure.
Using the Easy Access Front Panel
- To access the front panel in the front of the Versa Cart, remove the decorative front panel.
- Using a #2 Phillips Tip Screwdriver remove the two 10-32" screws holding the front panel to the Versa Cart body.
Using the Asset Management Label
- The Asset Management label will adhere best to a smooth surface on the Versa Cart. If possible, avoid placing the label on a textured surface.
Section II - Mobility
Knock-Down and Transport
- If the model has tray rails, lower the tray rails.
- Adjust the caster brakes to the OFF position.
- The unit is ready for transport.
- Door passage - Turn cart 90^ so it passes through the doorway at its narrowest width dimension. Doorway minimum 36" (91 cm).
Section III – Cleaning and Maintenance
A. Cleaning Instructions
Clean using a mild detergent soap and warm water or steam clean. A plastic bristle brush can be used as well. Rinse thoroughly with clean water. WARNING: Never use a metal brush or abrasive cleaners or pads. These tools will damage the Versa Cart. If staining occurs, use any standard de-stainer.
B. Caster Maintenance
Caster maintenance should be performed each time the Versa Cart has been washed or steam cleaned.
- Grease swivel raceway of caster using a lubricant such as Lubriplate #930-AA, Keystone #84EPXLT multi-purpose grease or equivalent. Apply grease using a grease gun with a needle nose adapter or a tube-type applicator such as Sta-lube Moly-graph Assembly Lube. These can be obtained at most auto parts stores.
- Use a light oil such as WD-40 on the hub. Check caster for damage and test caster spin and swivel rotation before returning to service.
C. Tips for Ensuring Years of Safe Use
To help protect your Cambro Versa Cart and reduce risk of injuries:
- Do not place any item hotter than 190°F (88°C) on the Versa Cart.
- Do not place the Versa Cart against any direct heat source such as a hot oven or grill.
• Maximum weight limit on each Versa Cart Tray Rail is 25 lbs (11 Kg). - Do not lean against, sit, climb, or stand on Versa Cart. Serious injury may occur.
• Do not stack items on top of the Versa Cart.
Section IV - Optional Accessories
A. VCS32KEYT – Versa Cart Keyboard Tray: Convenient, pull-out keyboard tray improves ergonomics.
B. VCSCVR – Versa Cart Vinyl Cover: Keep electrical equipment protected when stored. Keeps dust and debris from valuable electronics.
C. VCS32R – Tray Rail Kit: Increase the functionality and versatility of your Versa Cart by adding side tray rails.
D. VCS32CNT – Versa Cart Straight Connector Standard Height: Use the Versa Cart Straight Connector to connect the Versa Cart to the Versa Food Bar or Versa Work Table for a professional, uniform look. Create a snack or beverage station by connecting the Versa Cart to a Versa Work Table. Improve traffic flow and check-out times by joining a Versa Cart and a Versa Food Bar.
E. VCSCNL – Versa Cart Straight Connector Low Height: Same features as the Standard Height Connector but used to connect to Low Height Versa Food Bars and Versa Work Tables
Section V - Warranty
CAMBRO WARRANTY AND PRODUCT LIABILITY – Versa Cart
Cambro warrants to the original buyer that if a product proves defective:
- Within 1 year from the date of manufacture, Cambro will replace the product free of charge; or,
- After 1 year and up to 2 years from the date of manufacture, Cambro will grant a credit of 2/3 off replacement product; or,
- After 2 years and up to 3 years from the date of manufacture, Cambro will grant a credit of 1/3 of the original price towards a replacement product.
ABUSE OR MISUSE WILL VOID THIS WARRANTY
In the event of a defective product, your Cambro Sales Representative will collect appropriate information, such as date of manufacture and invoice information for warranty process. With proof of purchase to the original owner, Cambro Manufacturing will replace the product to the original owner.
NOTE: Your Cambro Sales Representative will determine if the product should be returned for inspection before issuing credit.
Section VI - Replacement Parts
Please visit www.cambro.com for a complete list of replacement parts or contact your local Cambro Representative or Distributor.
- Table of Contents
- Introduction
- Section I - Versa Cart Operating Instructions
- Versa Cart Parts List
- Adjusting the Height of the Tray Rails
- Adjusting the Versa Cart Shelf
- Using the Electrical Access Port Covers
- Using the Versa Cart Lockable Drawer
- Using the Easy Access Front Panel
- Using the Asset Management Label
- Section II - Mobility
- Knock-Down and Transport
- Section III – Cleaning and Maintenance
- Cleaning Instructions
- Caster Maintenance
- Tips for Ensuring Years of Safe Use
- Section IV - Optional Accessories
- Section V - Warranty
- CAMBRO WARRANTY AND PRODUCT LIABILITY – Versa Cart
- ABUSE OR MISUSE WILL VOID THIS WARRANTY
- Section VI - Replacement Parts
Brand : Cambro
Model : VCSWR519
Category : Transport Case