99-3107G - Kit voiture Metra - Free user manual and instructions
Find the device manual for free 99-3107G Metra in PDF.

User questions about 99-3107G Metra
0 question about this device. Answer the ones you know or ask your own.
Ask a new question about this device
Download the instructions for your Kit voiture in PDF format for free! Find your manual 99-3107G - Metra and take your electronic device back in hand. On this page are published all the documents necessary for the use of your device. 99-3107G by Metra.
USER MANUAL 99-3107G Metra
• DIN radio provision with pocket
• ISO radio provision with pocket
- Painted to match factory finish
99-3107S=Silver, 99-3107G=Gray
natural_image
Interior view of a car air conditioning unit with ventilation grilles and control knobs (no visible text or symbols)KIT COMPONENTS
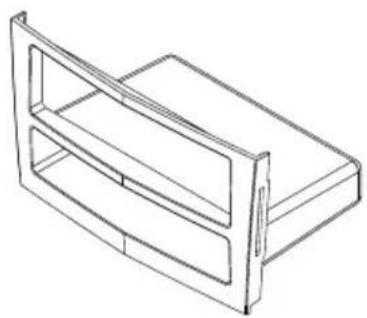
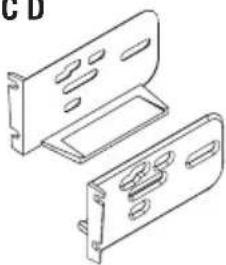
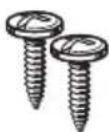
• A) Trim Plate/Pocket • B) ISO Brackets • C) Radio Housing • D) (2) Black Oval Head Phillips Screws
• E) (2) Silver Pan Head Phillips Screws (Small) • F) (2) Silver Pan Head Phillips Screws (Large)
NOTE: Parts "A" and "C" May be snapped together in package
A
natural_image
Line drawing of a 3D rectangular box or shelf unit with two compartments (no text or symbols)BCD
natural_image
Technical line drawing of two mechanical components with mounting holes (no text or symbols)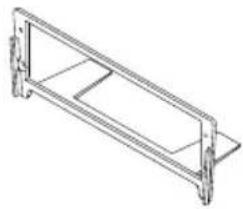
natural_image
Technical line drawing of a rectangular frame with mounting flanges (no text or symbols)
E

F
WIRING & ANTENNA CONNECTIONS (Sold Separately)
Wiring Harness: Not Required
Antenna Adapter: 40-EU10 European Antenna Adapter
TOOLS REQUIRED
Panel Removal Tool • Phillips Screwdriver • Socket Wrench • Radio Removal Keys

natural_image
Line drawings of four different types of screwdrivers and a rectangular object (no text or symbols)- DIN radio provision with pocket .4-5.
- ISO mount radio provision with pocket .6.
Caution
Metra recommends disconnecting the negative battery terminal before beginning any installation. All accessories, switches, and especially air bag indicator lights must be plugged in before reconnecting the battery or cycling the ignition.
*NOTE: Refer also to the instructions included with the aftermarket radio.

KNOWLEDGE IS POWER
Enhance your installation and fabrication skills by enrolling in the most recognized and respected mobile electronics school in our industry. Log onto www.installerinstitute.com or call 800-354-6782 for more information and take steps toward a better tomorrow.

Metra recommends MECP certified technicians
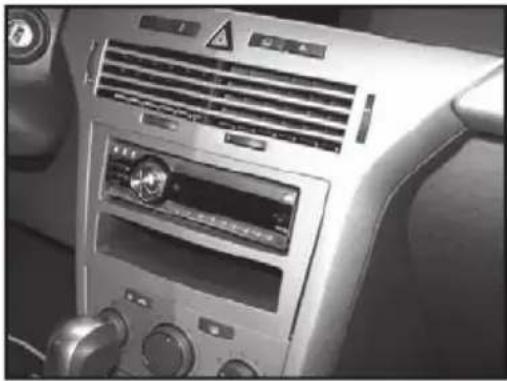
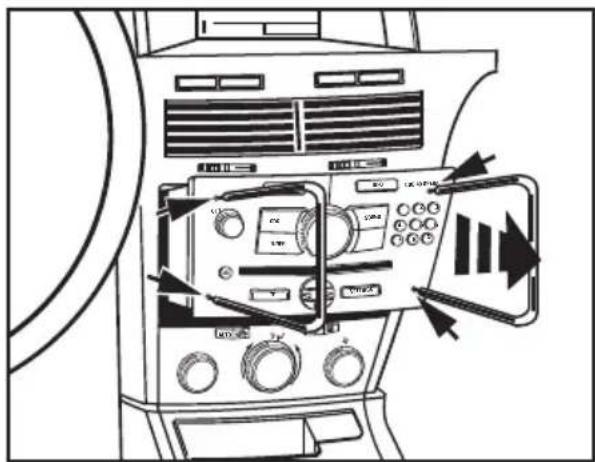
Dash Disassembly
- Using the radio removal keys, pull the factory head unit from the dash and disconnect the wiring. Unplug and remove the radio. (Figure A)
- Pull down on the "cage" from the opening inside on the top and remove. Note: The cage only has 2 sides and a top. (Figure B)
Continue to kit assembly
text_image
Diagram of an air conditioner unit with labeled controls and directional arrows indicating airflow or signal flow.(Figure A)

natural_image
Line drawing of a vintage air conditioner unit with ventilation grilles and control knobs (no text or symbols)(Figure B)
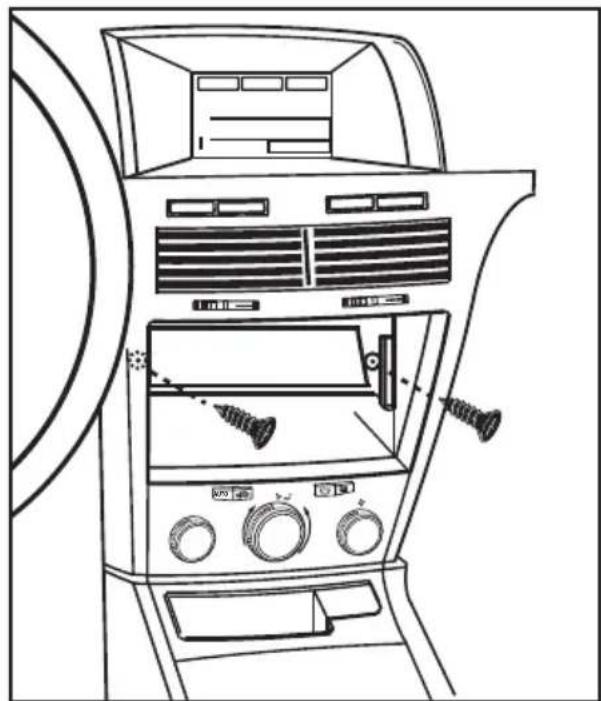
DIN radio provision with pocket
- Locate the factory wiring harness in the dash. Metra recommends using the proper mating adapter from Metra or AXXESS. Re-connect the negative battery terminal and test the unit for proper operation.
- Mount the radio housing into the radio opening in the sub dash using the (2) black oval head Phillips screws provided. (Figure A)
- Slide the DIN cage into the Radio Housing and secure by bending the metal locking tabs outward. (Figure B) Continued on next page
natural_image
Line drawing of a car air intake console with fan, vent, and dials (no text or symbols)(Figure A)

natural_image
Line drawing of a hand inserting a component into a device panel, with no visible text or symbols.(Figure B)
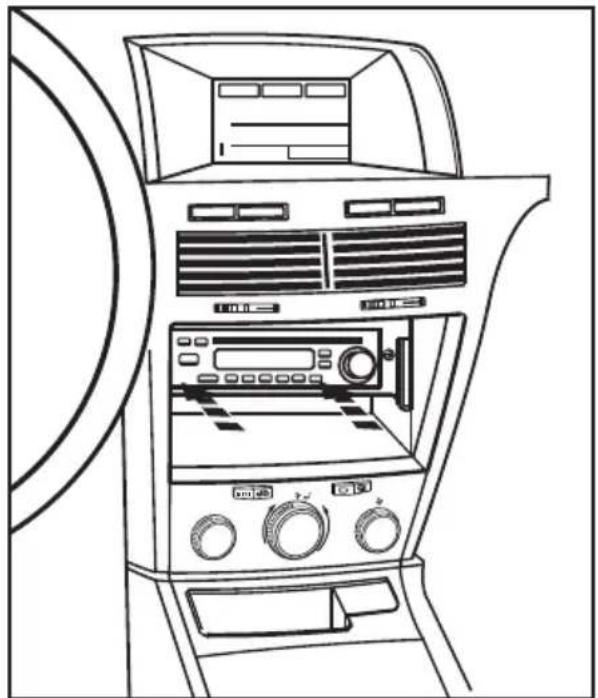
DIN radio provision with pocket
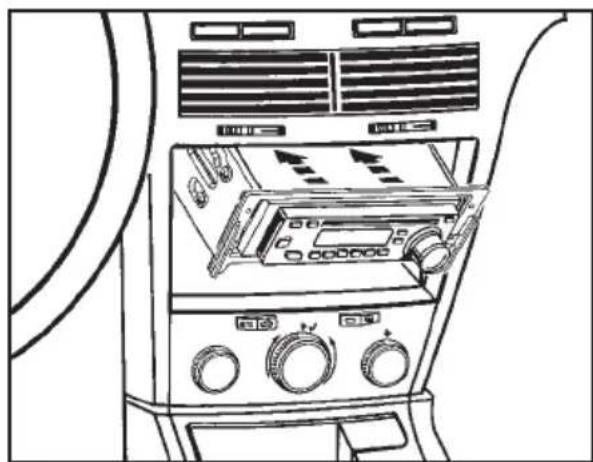
- Slide the aftermarket radio into the cage until it snaps into place. (Figure C)
- Snap the trim plate/pocket onto the radio housing. (Figure D)
- Reassemble dash in reverse order of disassembly.
- Reassemble dash in reverse order of disassembly.
natural_image
Line drawing of a car air conditioner unit with front panel, back panel, and control knobs (no text or symbols)(Figure C)

natural_image
Line drawing of a car air conditioner unit with fan, vent, and door (no text or symbols)(Figure D)
ISO mount radio provision with pocket
- Locate the factory wiring harness in the dash. Metra recommends using the proper mating adapter from Metra or AXXESS. Re-connect the negative battery terminal and test the unit for proper operation.
- Mount the ISO brackets to the aftermarket radio using the screws supplied with the radio. (Figure B)
- Slide the the radio into the radio opening of the radio housing. (Figure C)
- Slide the assembly into the sub dash and secure with the supplied (4) silver pan head phillips screws (small on top and large on bottom). (Figure D)
- Snap the trim plate/pocket onto the radio housing. (Figure E)
- Reassemble dash in reverse order of disassembly.

natural_image
Illustration of a hand using a screwdriver to adjust or install an electronic device with directional arrows (no text or symbols)(Figure A)

natural_image
Line drawing of a device rear panel with two arrows indicating direction (no text or symbols)(Figure B)
natural_image
Line drawing of a car air conditioning unit with control panels and fans (no text or symbols)(Figure C)

natural_image
Line drawing of an open air conditioner unit with fan, door, and control panel (no text or symbols)(Figure D)