LSZES98 - Interrupteur / Prise JUNG - Free user manual and instructions
Find the device manual for free LSZES98 JUNG in PDF.

User questions about LSZES98 JUNG
0 question about this device. Answer the ones you know or ask your own.
Ask a new question about this device
Download the instructions for your Interrupteur / Prise in PDF format for free! Find your manual LSZES98 - JUNG and take your electronic device back in hand. On this page are published all the documents necessary for the use of your device. LSZES98 by JUNG.
USER MANUAL LSZES98 JUNG
Mounting recommendation
LS ZERO
0 mm 3 mm
Mounting recommendation
0 mm
natural_image
Isometric view of a rectangular frame with a square cutout and internal components (no text or symbols)
text_image
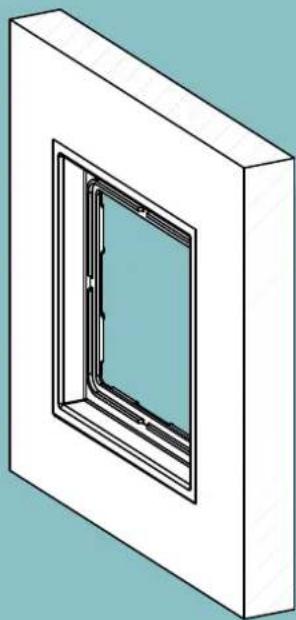
Cover Design frame Insert Wall box FurnitureThe flush mounting installation requires a minimum panel thickness of 13 mm. The supporting frame contact surface must be generated smooth and flat. Subsequently the cut out has to be sealed with a suitable sealing in order to avoid a swelling of the furniture.
Mounting recommendation
0 mm
1-gang frame installation:

text_image
Cut out size: Please consider dimensions of the wall box manufacturer. Recess the wall box edge! A R1 82+0.05 0 78+0.05 0 R1 A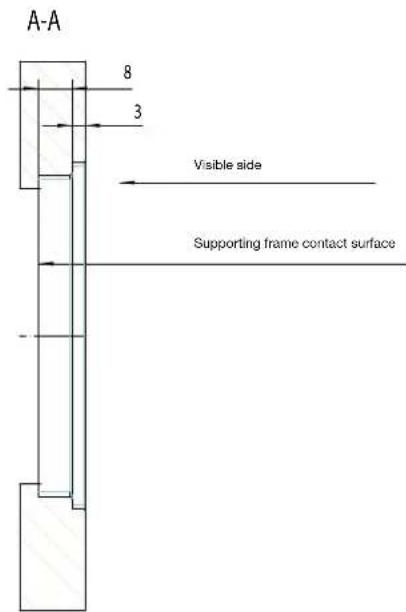
text_image
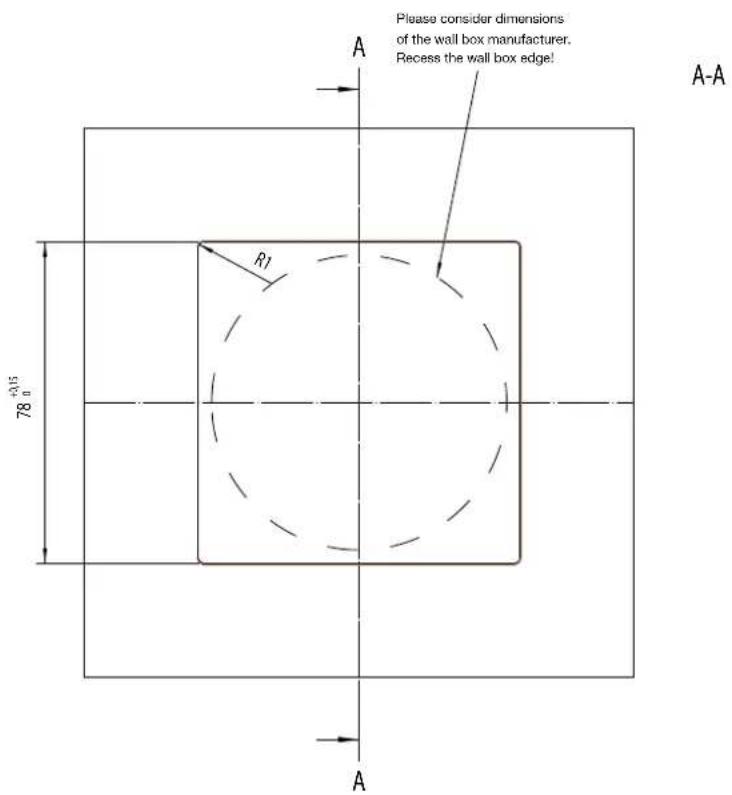
A-A 8 3 Visible side Supporting frame contact surfaceSafety instructions for installation: The insert may only be connected by a qualified electrician to the electrical network.
Mounting recommendation
0 mm
2-gang frame installation:
text_image
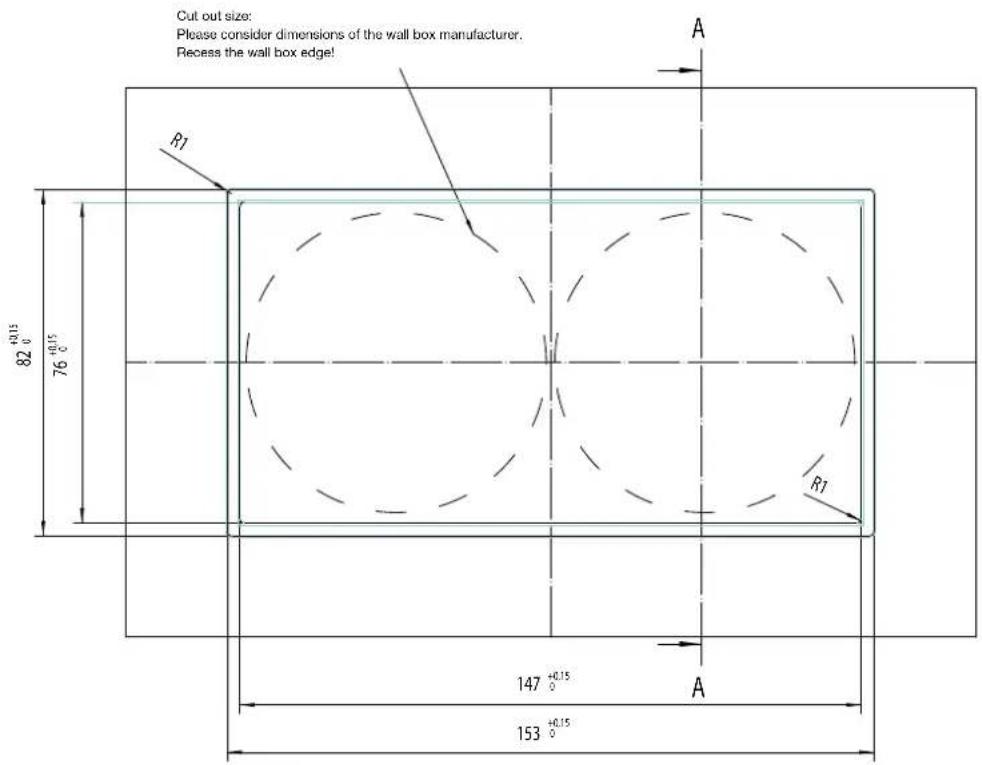
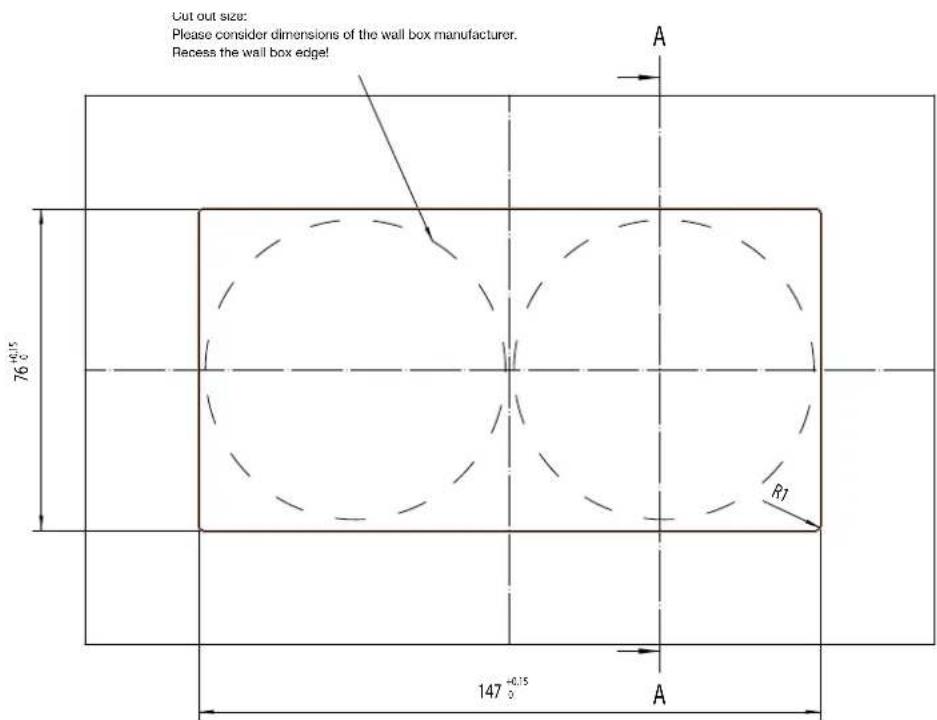
Cut out size: Please consider dimensions of the wall box manufacturer. Recess the wall box edge! R1 82 +0.15 0 76 +0.15 0 A R1 147 +0.15 0 A 153 +0.15 0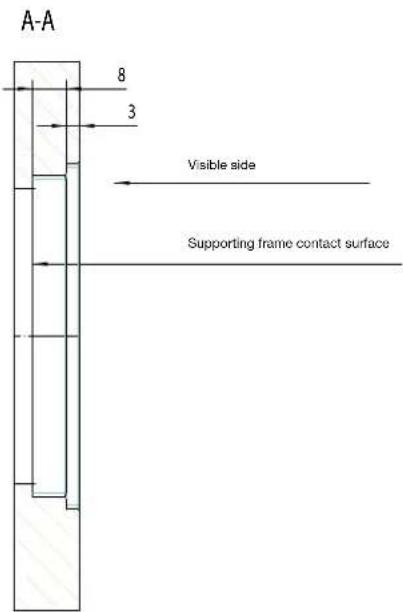
text_image
A-A 8 3 Visible side Supporting frame contact surfaceSafety instructions for installation: The insert may only be connected by a qualified electrician to the electrical network.
Mounting recommendation
0 mm
3-gang frame installation:
text_image
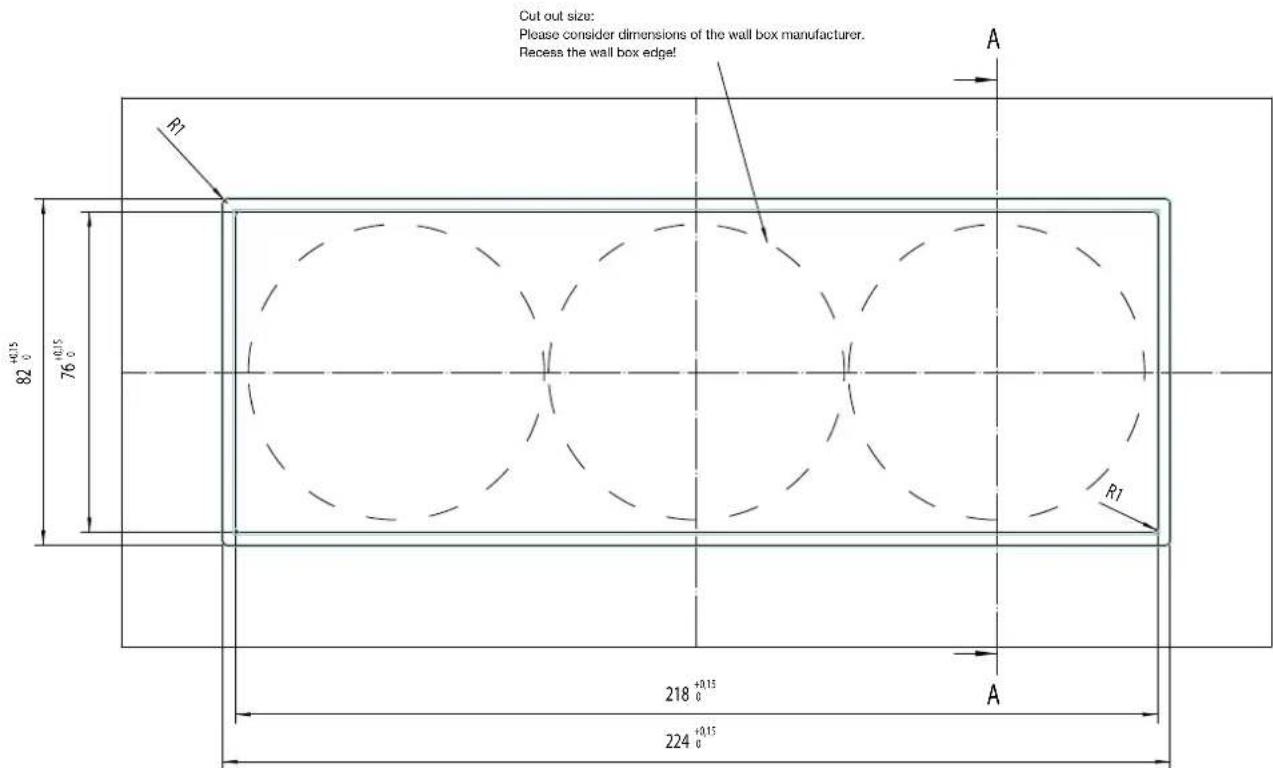
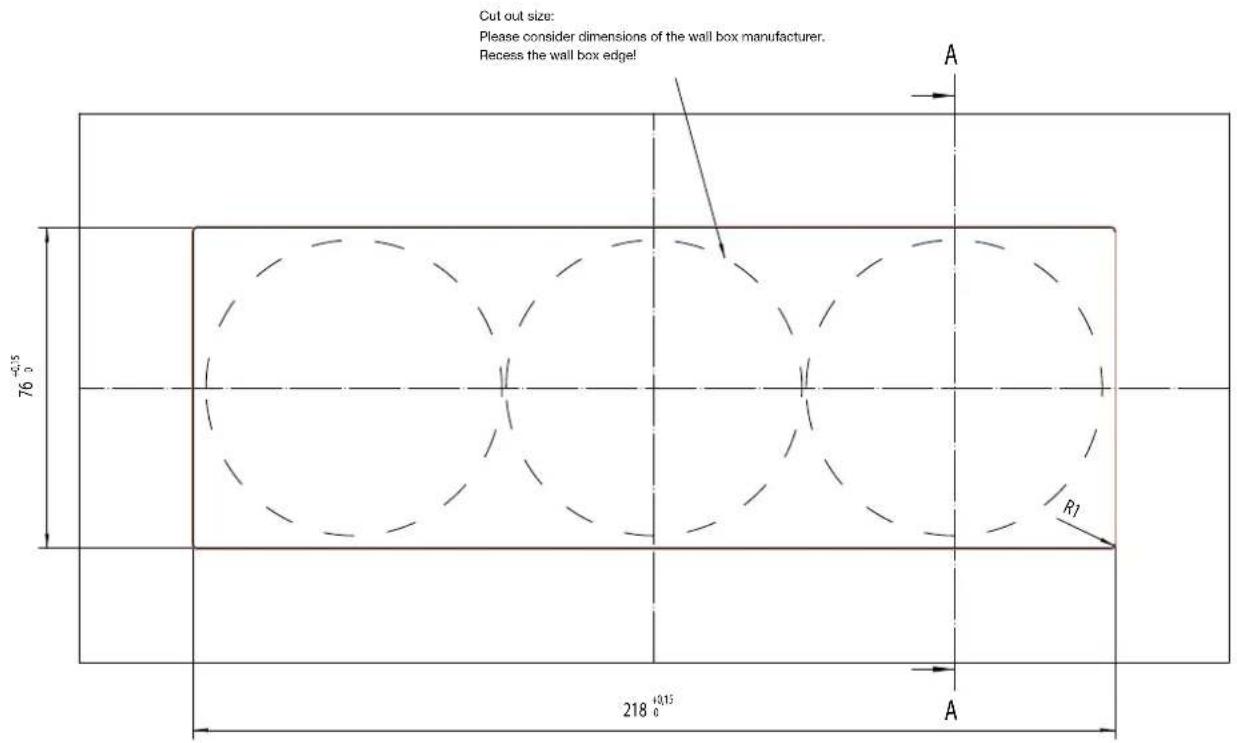
Cut out size: Please consider dimensions of the wall box manufacturer. Recess the wall box edge! R1 82 +0.15 76 +0.15 R1 218 +0.15 224 +0.15 A
text_image
A-A 8 3 Visible side Supporting frame contact surfacSafety instructions for installation: The insert may only be connected by a qualified electrician to the electrical network.
Mounting recommendation
3 mm

natural_image
Isometric view of a square window frame mounted on a rectangular wall (no text or symbols)
text_image
Cover Design frame Insert Wall box FurnitureThe flush mounting installation requires a minimum panel thickness of 13 mm. The supporting frame contact surface must be generated smooth and flat. Subsequently the cut out has to be sealed with a suitable sealing in order to avoid a swelling of the furniture.
Mounting recommendation
3 mm
1-gang frame installation:
text_image
Please consider dimensions of the wall box manufacturer. Recess the wall box edge! A-A 78 +0.15 R1 A
text_image
A-A 8 Visible side Supporting frame contact surfaceSafety instructions for installation: The insert may only be connected by a qualified electrician to the electrical network.
Mounting recommendation
3 mm
2-gang frame installation:
text_image
Cut out size: Please consider dimensions of the wall box manufacturer. Recess the wall box edge! 76⁺⁰·¹⁵ ₀ R1 147⁺⁰·¹⁵ ₀ A
text_image
A-A 8 Visible side Supporting frame contact surfaceSafety instructions for installation: The insert may only be connected by a qualified electrician to the electrical network.
Mounting recommendation
3 mm
3-gang frame installation:
text_image
Cut out size: Please consider dimensions of the wall box manufacturer. Recess the wall box edge! 76⁺⁰·¹⁵ 218⁺⁰·¹⁵ A R₁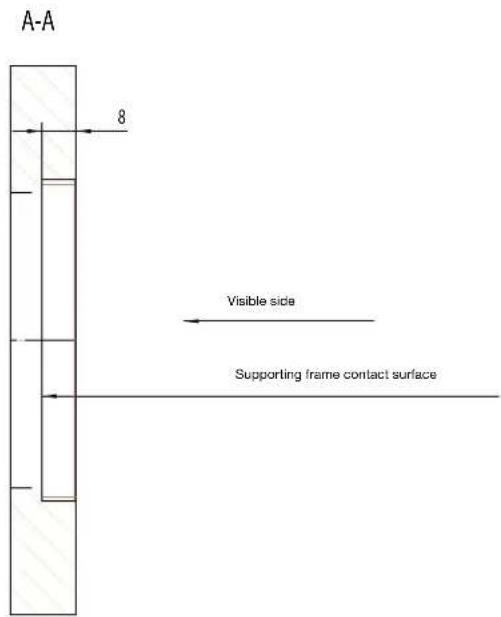
text_image
A-A 8 Visible side Supporting frame contact surfaceSafety instructions for installation: The insert may only be connected by a qualified electrician to the electrical network.