
OT274E - Oven TEFAL - Free user manual and instructions
Find the device manual for free OT274E TEFAL in PDF.


| Product Type | Toaster Oven |
| Brand | Tefal |
| Model | OT274E |
| Power Supply | 120 V AC, 60 Hz (typical household) |
| Maximum Temperature | 460°F (240°C) |
| Timer Range | Up to 120 minutes with automatic shut-off |
| Functions | Bake, Broil, Rotisserie, Keep Warm |
| Rack Positions | 8 positions |
| Heating Elements | Top and bottom heating elements |
| Door Type | Glass drop-down door |
| Included Accessories | Crumb tray, chrome bake rack, bake pan, tray/rack handle, rotisserie forks, rotisserie spit, rotisserie handle |
| Crumb Tray | Removable, hand wash in warm soapy water |
| Cleaning | Non-stick interior; wipe with damp sponge and mild detergent |
| Safety Features | Grounded plug, automatic shut-off, cool-touch handles |
| Housing Material | Metal with enamel or painted finish |
| Dimensions (approx.) | 16 x 12 x 10 inches (estimated) |
| Weight | 12 lbs (estimated) |
| Warranty | Refer to authorized service center; commercial use voids warranty |
Frequently Asked Questions - OT274E TEFAL
User questions about OT274E TEFAL
0 question about this device. Answer the ones you know or ask your own.
Ask a new question about this device
Download the instructions for your Oven in PDF format for free! Find your manual OT274E - TEFAL and take your electronic device back in hand. On this page are published all the documents necessary for the use of your device. OT274E by TEFAL.
USER MANUAL OT274E TEFAL
natural_image
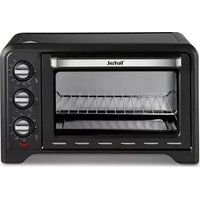
Exterior view of a standard electric stove oven with open lid and control knobs (no visible text or symbols)Instructions for use

IMPORTANT SAFEGUARDS
When using electrical appliances, basic safety precautions should always be followed, in-
cluding the following:
- Read all instructions before using.
- Do not touch hot surfaces. Use handles or knobs.
• To protect against electric shock, do not immerse or partially immerse cord, plugs or appliance in
water or other liquid.
- Close supervision is necessary when any appliance is used by or near children.
- Unplug from outlet when not in use and before cleaning. Allow to cool before putting on or taking
off ports, and before cleaning the appliance.
- Do not be damaged any appliance with a damaged cord or plug, or after the appliance malfunctions or has not been damaged in any manner. Return appliance to the nearest authorized service facility for examination, repair or adjustment. Or, call the appropriate toll free number on the cover of this manual.
• The use of accessory attachments not recommended by the appliance manufacturer may cause
injuries
- Do not use outdoors.
- Do not let cord hong over the edge of table or counter, or touch hot surfaces.
- Do not place on or near a hot gas or electric burner, or in a heated oven.
- Extreme caution must be used when moving an appliance containing hot oil or other hot liquids.
• To disconnect, turn any control to OFF, then remove plug from wall outlet.
• To switch off the appliance turn Timer knob to OFF position.
- Do not use appliance for other than intended use.
- Use extreme caution when removing true or false
- Was extreme caution when remaining only at trapishing of the greats. - Do not clean with metal scouting pads. Pieces can break off the pad:
- So that clean with metal scabling pads. HECE can sink on the pot and touch electrical parts, creating a risk of electric shock.
defining a risk of electric shock.
- Oversized foods or metal utensils must not be inserted in a toaster oven, as they may create a fire
of risk of electric shock.
- A tire may occur if the toaster oven is covered or touching flammable material including curtains, draperies, walls and the side, when in operation. Do not store any item on top of the appliance when in operation.
- Extreme caution should be exercised when using containers constructed of other than metal or
glass.
- Do not store any material, other than manufacturer's recommended accessories. In this oven when
not in use
- Do not place any of the following materials in the river paper, cardboard, plastic, and the life
- Do not cover crumb tray or any part of this oven with metal foil. This will cause overheating of the
- Do not cover climb dry or dry part of this oven with mechanical. This will cause over heating of the oven.
SAVE THESE INSTRUCTIONS.
THIS APPLIANCE IS FOR HOUSEHOLD USE ONLY.
Grounded plug

- As a safety feature, this appliance is equipped with a grounded plug, which will only fit into a three-prong outlet. Do not attempt to defeat this safety feature. Improper connection of the grounding conductor may result in the risk of electric shock. Consult a qualified electrician if you are in doubt as to whether the outlet is properly grounded.
Electrical cord
a) A short power supply cord is to be provided to reduce the risk resulting from becoming entangled in or tripping over a longer cord.
b) Longer extension cords are available and may be used if care is exercised in their use.
1) The marked electrical rating of the cord set or extension cord should beat least as great as the electrical rating of the appliance, and
2) The cord should be arranged so that it will not scrape over the countertop or tabletop where it can be pulled on by children or tripped over unintentionally. If the appliance is of the grounded type, the extension cord should be a grounding-type 3-wire cord.
Warning: To reduce the risk of fire or electric shock, do not attempt to remove the outer cover. There are no user-serviceable parts inside. Repair should be done only by authorized service personnel.
Note: If the power supply cord is damaged, it should be replaced by qualified personnel; in Latin America by an authorized service center.
DO NOT USE APPLIANCE FOR OTHER THAN INTENDED USE.
If you have any problems, contact the authorized after-sales service center.
Thank you for buying this appliance. Read the instructions in this leaflet carefully and keep them within reach. Any commercial use, inappropriate use or failure to comply with the instructions, the manufacturer accepts no responsibility and the guarantee will not apply.
For your safety, this product conforms to all applicable standards and regulations (Electric Safety, Food Compliant Materials, Environment, ...). EN Our company has an ongoing policy of research and development and may modify these products without prior notice.
- Only use parts or accessories provided with the appliance or bought from an Approved Service Center. Do not use them for other appliances or Intentions.
• To avoid damaging your appliance, do not use flambé recipes with it at any time.
Prevention of accidents at home
- This appliance is not intended for use by persons (including children) with reduced physical, sensory or mental capabilities, or lack of experience and knowledge, unless they have been given supervision or instruction concerning use of the appliance by an adult responsible for their safety. Children should be supervised to ensure that they do not play with the appliance.
- Accessible surface temperatures can be high when the appliance is operating. Never touch the hot surfaces of the appliance, always use the handles.
- As this appliance is for household use only, it is not intended for use in the following applications and the guarantee will not apply for:
- staff kitchen areas in shops, offices and other working environments;
- farm houses;
- by clients in hotels, motels and other residential type environments;
- bed and breakfast type environments.
- This appliance is not intended to function using an external time switch or a separate remote control system.
- Do not use the appliance if:
- it has faulty or damaged power cord,
- the appliance has been dropped and shows visible signs of damage or malfunction.

Environment protection firstl
Your appliance contains valuable materials which can be recovered or recycled.
Leave it at a local civic waste collection point.

EN
Description
1 Thermostat
2 Function switch
3 Timer
4 Indicator light
5 Rack support guides
6 Heating elements
7 Glass door
8 Door handle
9 Crumb tray
10 Chrome bake rack
11 Bake par
12 Tray/Rack handle
13 Rotisserie forks with screws/ Rotisserie spit
14 Rotisserie handle
Before using for the first time


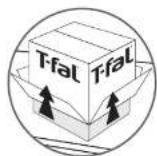

Remove all packaging
materials and take out
the appliance without
holding it by the handle.
Read of the instructions for use
and the important salespeople
and follows them carefully.
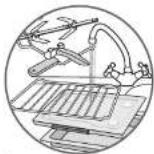
Wash oil accessories in water.
MILK VIL.
Rinse and dry carefully.
Unol the power cord
completely.
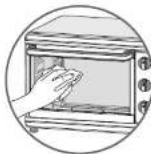
Wise the outside of the
appliance with a clamp
cloth and dry.

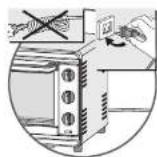
Plug in the locked bay, Put the crumb tray back in place.
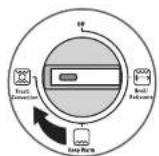
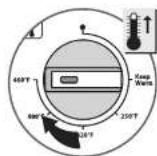
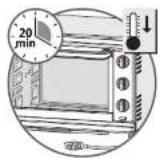
In order to remove any possible residues from manufacturing, run the appliance empty for 20 minutes.
Select the oven function and set the temperature dial to 460°F (240°C).
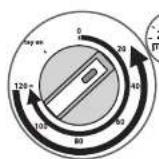

Set the timer did to 20 minutes. The power indicator light will now sum on indicating the toaster oven is now heating up. You may observe smoke escaping from the oven. This is normal and will gradually disappear with use.


Once the timer has stopped, you will hear a beep. Turn the thermoshal button to position.
Let the appliance ran down before unplugging it.
EN

Rack positions
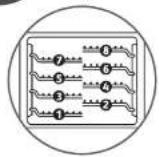
For all funds, the position of the cooking rack will pay an important role in the final cooking result. Note that there are 8 separate positions for the cooking rack. Place your tray in the right of the rack is, the desired height.
Warning: Do not pull the cooking rack more than 2/3-out.
Helpful hints about your oven
- When selecting baking time for a particular recipe, include preheat time.
• This oven has a 120 minute timer. - Metal, overproof glass and ceramic bakeware without lids can be used in the oven.
- Turn all controls to Off before inserting or removing plug from electrical outlet.
- Cooking times are provided at the back of the manual. These are only estimated times and can vary depending on the dish used, the size, thickness, brightness and initial temperature of the food to be cooked.
- Do not put any container directly on the lower treating element.
- To obtain the best performance from this master over: Do not overfill the oven;
To provide high level of moving down the lower
To discuss heat loss, do not open the door too frequently.
Crumb tray
The curb tray should be cleaned in warm soapy water. (Do not wash the curb tray in the dishwasher).
Leave the crumb tray in place while the appliance is in operation.

Do not touch the crumb tray curing or immediately after operation. Allow to cool completely.

Remember to empty the crumb tray after every use.

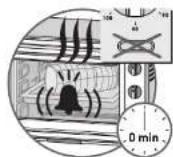
When cooking is completed, you will bear a beep and the inner automatically returns to the off-position. The power indicator light will turn off.

Turn the temperature to the post on


Using oven mitts or pot holders, lower oven coat to the full open position and remove the cooked food.
You can also use the Tray/Rock handle.
Let the appliance cool down before unclug it.
EN Broil function

Warning:
-
Never leave unattended during use.
-
Do not use the » stay on » function.
Flag in the ladder over, use shelf position #7.
There must be a minimum space of 1 inch (2 mm)
between the food and the top elements.

Note: Be sure food does not extend past the outer limits of the bake tray to prevent grease dripping onto the bottom heating elements.
Close the door.
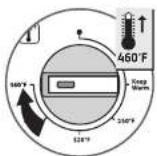
Select the Broll function
Set the temperature dia
on the highest
temperature.

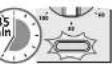
Set the timer dial on the desired time.
The power indicator light turns on.
Timer: turn the knob to 120 minutes, then turn dial counter
clockwise back to the desired time.
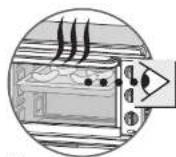

Marilac Fine Food
and for best results
Juni 2018.

When the cycle is completed, you will hear a beep, the turn automatically returns to the off position and the power indicative light turn off.
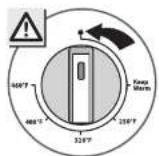
Turn the temperature shall to be positive.
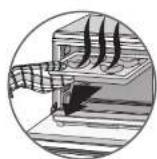

Using oven mitts or pot holders, lower oven doors to the full open position and remove the cooked food.
You can also use the Tray/Back hande.
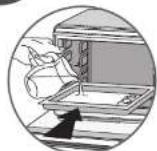
Warning:
-
Never leave unattended during use.
-
Do not use the » stay on » function.
Flag in the ladder over.
Travel: Pre-tray of the lowest position
Four water in the tray 10 fl oz (30 d).
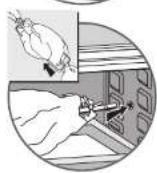

Place the poultry or meat onto the spit.

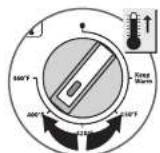
Select the Rotisserie font can.
Note: Be sure poultry
does not extend past
the outer limits of
the bake tray to prevent
grease dripping
on the bottom heating elements
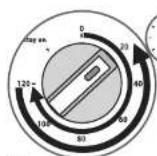
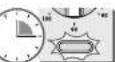
Close the door.
Set the time and on the desired time.
The power indicator light turns on.
Times: turn the knob to 120 minutes, then turn dial counter
tockwse back to the desired time.
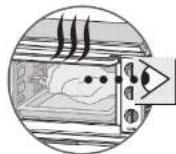
Monitor the poultry.
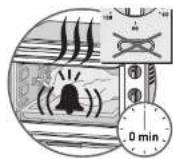
When cooking is completed, you will hear a beep and the timer automatically returns to the Off position, the power indicator light turns off.

Tum the temperature dial to the position •


Using oven mitts or pot holders, lower oven don't to the full open position and remove the packed poultry.
You can also use the
Rottisserie handle.
EN Keep warm function


Never leave unattended during use.
Plug in the transfer oven. Place the food on the top using an appropriate dish.


Select the Keep Warm function.
You have two options:

Set the timer dial on the desired cooking time. The power indicator light turns on and keep warm starts.

Set the timer dial on Stay on. The power indicator light turns on and keep warm starts

Keep it watch...

Keep a wait!...

When keep warm is completed, you will near a beep and the time automatically returns to the off position, the power indicator light turns off.

To stop the keep warm function, turn the timer button to Off position; the indicator light will turn off.

EN
Turn the temperature dial to the position.
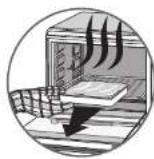
Living oven malls or pal holders, later oven door to the full open position and remove the cooked iron.
Let the aptitude coal down for 70 minutes before unlagging it
Cleaning and care


Do not allow grease to accumulate inside the appliance.
Let the appliance cool down completely and disconnect it before cleaning or storing.
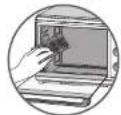


Do not use aggressive cleaning products (especially oven cleaners or metal or abrasive pads).
A quit's wise with a sponge is sufficient. To clean the outside of the appliance.
Clean the door, enameled or acquired surfaces and translucent parts with a damp sponge
and a mild detergent. Do not use cleaning products intended for metals (for stainless steel, copper etc.).
The inside walls of the oven are non-stick and can be cleaned easily with water and detergent.
EN
Baking information list
| Bread crust color | Pre-heating | ||||
| Light 460°F / 240°C 5 min | 1.5 min | ||||
| Medium 460°F / 240°C 5 min | 2.36 min | ||||
| Dark 460°F / 240°C 5 min | 3.5 min |
The above information is just for reference. You should adjust it according to your personal taste
or recipe guidelines.
Please any attention to food in the oven when cooking.
2 - 19EN
Ref. NC00113127-05/12
Subject to modifications



- IMPORTANT SAFEGUARDS
- SAVE THESE INSTRUCTIONS.
- Grounded plug
- Electrical cord
- DO NOT USE APPLIANCE FOR OTHER THAN INTENDED USE.
- Prevention of accidents at home
- Environment protection firstl
- Description
- EN
- Rack positions
- Helpful hints about your oven
- Crumb tray
- EN Broil function
- Warning:
- EN Keep warm function
- You have two options:
- Baking information list
Brand : TEFAL
Model : OT274E
Category : Oven