VideoSync Grabber Box - Boîtier d'acquisition vidéo Pengo - Free user manual and instructions
Find the device manual for free VideoSync Grabber Box Pengo in PDF.

User questions about VideoSync Grabber Box Pengo
0 question about this device. Answer the ones you know or ask your own.
Ask a new question about this device
Download the instructions for your Boîtier d'acquisition vidéo in PDF format for free! Find your manual VideoSync Grabber Box - Pengo and take your electronic device back in hand. On this page are published all the documents necessary for the use of your device. VideoSync Grabber Box by Pengo.
USER MANUAL VideoSync Grabber Box Pengo
natural_image
Close-up of a dark blue electronic device with diagonal striped surface and mounting holes (no text or symbols visible)Table of Contents
1 Introduction....3
2 Features....3
3 System Requirements.... 3
4 Included Accessories in the Package 3
5 Specification 4
6 Installation....4
7 Capture Operation for Windows OS with OBS 6
a. Computer Detection of VideoSync 6
b. Download Third-Party APP .... 7
c. Video Setting in OBS 7
d. Video Resolution Set-up 9
e. Audio Setting 10
f. Resize Output Image....12
1 Introduction
Pengo VideoSync Grabber Box is the absolute capture card a professional gamer must-have. Play and view your game on your VRR/FreeSync monitor whilst capturing/streaming at 4K30*. Life has never been easier to show every critical movement and sound to the world. Currently, it is the only capture card in the market that allows you to activate VRR/FreeSync on your monitor. Designed to input dual HDMI sources to the computer via the USB-C terminal. Streaming media made easy with Pengo's GUI interface, enabling you to perform dual HDMI PIP and PBP mode*.
2 Features
• HDMI 2.0 input and output (loop-out) supports 4K60 HDR
- VRR Mode: Video capture resolution up to 3840 x 2160@30Hz or 1920 x 1080@120Hz
- PIP/PBP mode: Maximum video capture resolution up to 1440p/60Hz or 1080p/120Hz
- HDMI 2.0 loop-out port supports FreeSync/VRR monitors up to 3840 x 2160@60Hz, 2560 x 1440@144Hz, and 1920 x 1080@240Hz
• Supports AUDIO headset (TRRS only)
- Must use Pengo GUI interface to support dual HDMI input sources and displays PIP/PBP mode whilst VRR mode disabled (Windows Only)
- Compatible with third-party applications, such as OBS, XSplit, vMix, Zoom, Skype, Gamecaster, Broadcaster...etc.
3 System Requirements
• CPU: i5 Dual Core 2.8GHz or higher
5 Specification
| MODEL NAME | VideoSync Grabber Box | ||
| INPUT INTERFACE | 2 x HDMI 2.0 Type-A | ||
| OUTPUT INTERFACE | 1 x USB Type-C, 1 x HDMI 2.0 Type-A | ||
| INPUT/OUTPUT(loop out) RESOLUTION | 3840 x 2160p 60/50/30/25/24Hz1920 x 1080p 240(PIP Mode Off)/120/60/50/30/25/24Hz2560 x 1440p 144/60Hz1920 x 1080i 60/50Hz1280 x 720p 60/50Hz | ||
| CAPTURE RESOLUTION | USB3.0SuperSpeed | NV12 | YUY2 |
| 3840 x 2160p(PIP Mode Off) 30 Hz2560 x 1440p 60 Hz1920 x 1080p 120/60/50/30/25 Hz1280 x 720p 60 Hz720 x 480p 60 Hz720 x 576p 50 Hz640 x 480p 60 Hz | 2560 x 1440p 50 Hz1920 x 1080p 60/50/30/25 Hz1280 x 720p 60 Hz720 x 480p 60 Hz720 x 576p 50 Hz640 x 480p 60 Hz | ||
| USB2.0HI-Speed | 1280 x 720p 30 Hz720 x 576p 50 Hz720 x 480p 60 Hz640 x 480p 60 Hz | 1280 x 720p 30Hz720 x 576p 50 Hz720 x 480p 60 Hz640 x 480p 60 Hz | |
| COLOR SAMPLING | RGB, YUV (YCbCr 4:4:4, YCbCr 4:2:2, YCbCr 4:2:0) | ||
| VIDEO FORMAT | NV12 , YUY2 | ||
| UAC AUDIO OUTPUT | Stereo / 16-bit PCM encoded audio at 48KHz sampling rates | ||
| AUDIO INTERFACE | 3.5mm headset (TRRS only) | ||
| SYSTEM REQUIREMENTS | CPU: I5 Dual Core 2.8GHz or higherRAM: 4GB or higherOS: Windows (8 and above) | ||
6 Installation
Please follow the set-up instructions step by step as below:
REMARK: The HDMI source that you input first will be the main display/capture and loop-out images. As a result, the other HDMI source will show up in the small window when using the Pengo GUI interface.
- Plug in the power adapter until the blue light in the front of the grabber is flashing.
- Make sure that both HDMI sources are turned on.
- Plug the main HDMI source that you want to capture to HDMI A on the VideoSync Grabber Box.
- Use another HDMI cable to connect the VideoSync Grabber Box to an external monitor through the loop-out port. The main HDMI source images will show up in the monitor.
- Plug in the other HDMI source to the VideoSync Grabber Box (HDMI B).
- Grab the provided USB-C to C or USB-C to A cable to bridge the VideoSync Grabber Box and your PC. (USB 3.0 connection is recommended)
- Lastly, if you have a headset, plug it into the 3.5mm audio jack. (TRRS only)
- If everything is all set/connected, the blue LED light will always be ON at the front.
NOTE 1: Please mind the plug-in order. No matter which HDMI ports, the one you plug into the VideoSync Grabber Box first will be the main video source and pass-through to your FreeSync/VRR monitors via loop-out port.
NOTE 2: In case you did not follow our steps and the power on the VideoSvc was the last one being
7 Capture Operation for Windows OS with OBS
a. Computer Detection of VideoSync
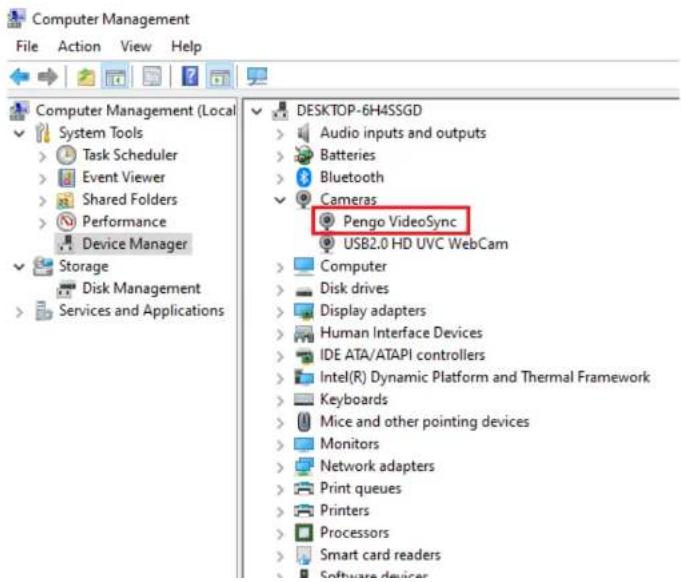
After plugging in your device, go to This PC → click Manager → Device Manager → check Camera and Sound, video and game controllers. If you can see "Pengo VideoSync", the Grabber has been detected by the computer.
text_image
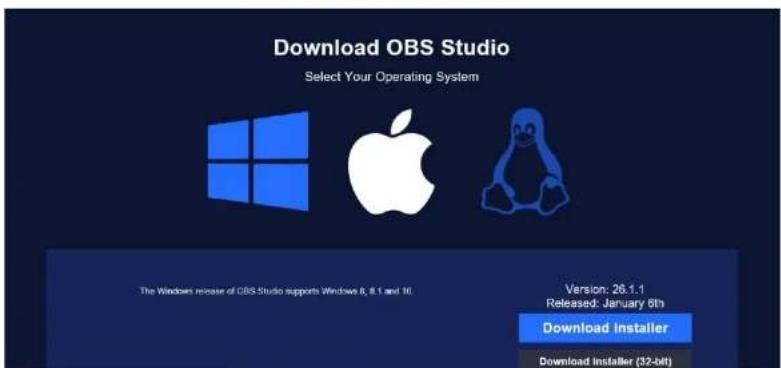
Computer Management File Action View Help Computer Management (Local System Tools > Task Scheduler > Event Viewer > Shared Folders > Performance > Device Manager Storage Disk Management Services and Applications DESKTOP-6H4SSGD Audio inputs and outputs Batteries Bluetooth Cameras Pengo VideoSync USB2.0 HD UVC WebCam Computer Disk drives Display adapters Human Interface Devices IDE ATA/ATAPI controllers Intel(R) Dynamic Platform and Thermal Framework Keyboards Mice and other pointing devices Monitors Network adapters Print queues Printers Processors Smart card readers Software devicesb. Download Third-Party APP (we will use OBS as the set-up example) First, download OBS Studio at https://obsproject.com/download
text_image
Download OBS Studio Select Your Operating System The Windows release of OBS Studio supports Windows 8, 8.1 and 10. Version: 26.1.1 Released: January 6th Download Installer Download Installer (32-bit)c. Video Setting in OBS
Find the Sources column, click "+" icon, and select "Video Capture Device". A pop-up window will show, rename the device if you want, then click OK.
text_image
D85.26.11 [4-bit, windows]: Profile 未命名 - Scenes 未命名 File Edit View Profile Screen/Collection Tech Help
text_image
OBS 20.1.1 (54.64 windows); Profile 按钮器 - Sources 按钮器 File Edit View Profile Create Collection Tools Help No source selected Exams Audio Input Capture Audio Output Capture Browser Cable Source Display Capture Game Capture Image Image Slide Show Media Source Scene Text (000+) Video Capture Device Window Capture Group Depressed Audio Mixer Audio Transition Push Duration: 300 ms Controls Start Streaming Start Recording Start Visual Camera Slide Work Image Exit
text_image
USE EN 11 (4) for windows: Profile 4.03.08 - Screen 4.03.08 File Edit View Profile Server Controls Tools Help Create Select Source Create source Add Existing Delete target radio OK Canceld. Video Resolution Set-up
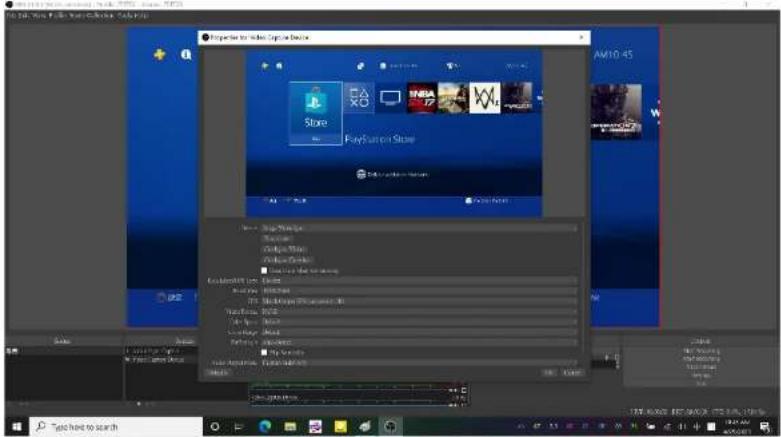
A following pop-up window ensues automatically after pressing OK. From the drop-down menus, choose Pengo VideoSync as your input device. Then, deselect default so you can adjust the capture resolution, frames per second, and video format.
text_image
Properties for Mobile Computer Devices AM10-45 Store PlayStation Store PlayStation Store File Edit View Help Show Image Show Image Show Image Show Image Show Image Show Image Show Image Show Image Show Image Show Image Show Image Show Image Show Image Show Image Show Image Show Image Show Image Show Image Show Image Show Image Show Image Show Image Show Image Show Image Show Image Show Image Show Image Show Image Show Image Show Image Show Image Show Image Show Image Show Image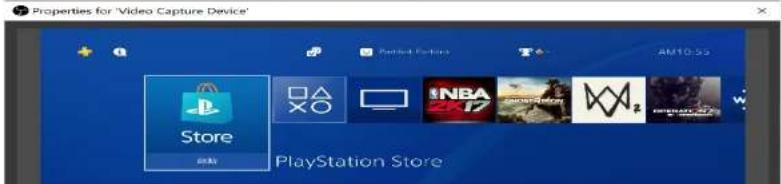
text_image
Properties for 'Video Capture Device' + Q Platform Features T AM10.53 Store PlayStation Storee. Audio Setting
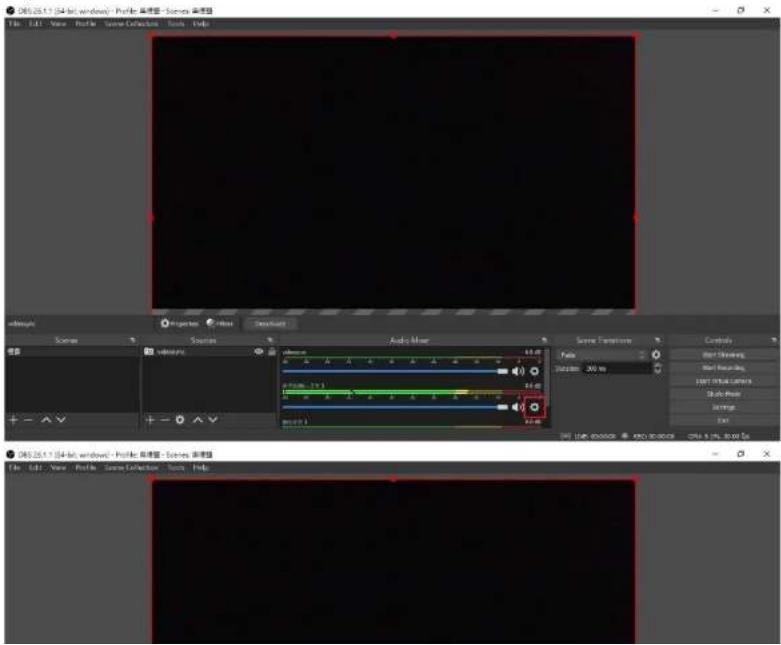
Find the Audio Mixer column, click the set-up icon on the right-hand side, go to Properties. A pop-up window will display and let you choose the audio input source. Select Pengo VideoSync as your audio input device.
text_image
D63.25.1.1 (34-bit, windows): Profile 基本管理 - Scenes 基本管理 File Edit View Profile Scene Collection Tools Help Action Scene Action Audio Mask Scene Function Photo Balance: 300 fps Control Hot Clearing Hot Running Hot Initial Lines Shift Peak Settings End D63.25.1.1 (34-bit, windows): Profile 基本管理 - Scenes 基本管理 File Edit View Profile Scene Collection Tools HelpThe following step is quite important, click the audio set-up icon again, now, choose Advanced Audio Properties. Make sure, under the Audio Monitoring section, allow both monitor and output. Please find the demonstrating pictures below and step by step set-up.

text_image
2002.26.1.1 (84-bit, windows): Profile: 传感器 - Scenes, 系统器 File Edit View Profile Scene Collection Tools Help Lock History Lock Path Hide Rename Copy Files Audio Mixer Vertical Layout Fibers Properties All Audio Audio Properties Controls Start Screening Start Screening Start Initial Camera Audio Mesh Settings Exit
text_image
Microsoft 10.04.04 - Windows - Proctor Protection - Server Protection File Edit View Preview Screen Collection Save Help 普通版空间 Advanced Audio Properties Save Draw Tools % New Window Dev 0/04 Active Memory Toolsf. Resize Output Image
text_image
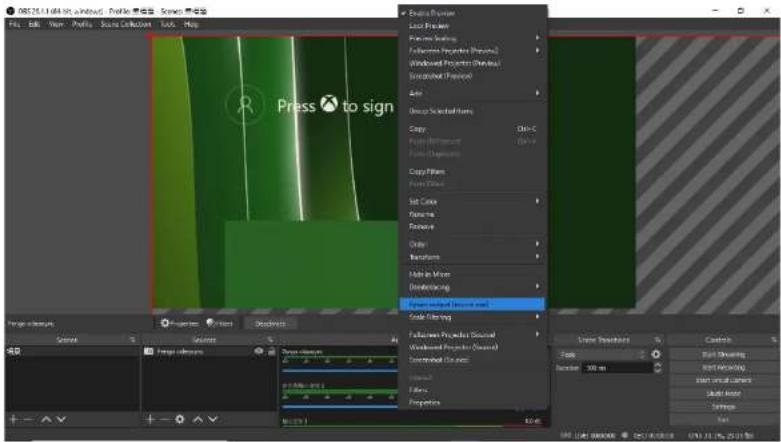
08251.1.064.36 - Windows Profile Scene: 08251.1.064.36 - Windows Profile Scene: 08251.1.064.36 - Windows Profile Scene: 08251.1.064.36 - Windows Profile Scene: 08251.1.064.36 - Windows Profile Scene: 08251.1.064.36 - Web Scene: 08251.1.064.36 - Web Scene: 08251.1.064.36 - Web Scene: 08251.1.064.36 - Web Scene: 08251.1.064.36 - Web Scene: 08251.1.064.36 - Game Scene: 08251.1.064.36 - Game Scene: 08251.1.064.36 - Game Scene: 08251.1.064.36 - Game Scene: 08251.1.064.36 - Game Scene: 08251.1.064.36 - Video Scene: 08251.1.064.36 - Video Scene: 08251.1.064.36 - Video Scene: 08251.1.064.36 - Video Scene: 08251.1.064.36 - Video Scene: 08251.1.064.36 - Game Scene: 08251.1.064.36 - Game Scene: 08251.1.064.36 - Game Scene: 08251.1.064.36 - Game Scene: 08251.1.064.36 - Image Scene: 08251.1.064.36 - Image Scene: 08251.1.064.36 - Image Scene: 08251.1.064.36 - Video Scene: 08251.1.064.36 - Video Scene: 08251.1.064.36 - Video Scene: 08251.1.064.36 - Video Scene: 08251.1.064.36 - Image Scene: 08251.1.064.36 - Image Scene: 08251.1.064.36 - Video Scene: 08251.1.064.36 - Video Scene: 08251.1.064.36 - Image Scene: 08251.1.064.36 - Image Scene: 08251.1.064.36 - Image Scene: 08251.1.064.36 - Video Scene: 08251.1.064.36 - Image Scene: 08251.1.064.36 - Video Scene: 08251.1.064.36 - Image Scene: 08251.1.064.36 - Video Scene: 08251.1.064.36 - Video Scene: 08251.1.064.36 - Image Scene: 08251.1.064.36 - Video Scene: 08251.1.064.36 - Video Scene: 08251.1.064.36 - Video Scene: 08251.1.064.36 - Image Scene: 08251.1.064.36 - Video Scene: 08251.1.064.36 - Image Scene: 08251.1.064.36 - Image Scene: 08251.1.064.36 - Video Scene: 08251.1.064.36 - Image Scene: 08251.1.064.36 - Image Scene: 08251.1.064.36 - Image Scene: 08251.1.064.36 - Image Scene: 08251.1.064.36 - Video Scene: 08251.1.064.36 - Game Scene: 08251.1.064.36 - Video Scene: 08251.1.064.36 - Video Scene: 08251.1.064,777,777,777,777,777,777,777,777,777,777,777,777,777,777,777,777,777,777,777,777,777,777,777,777,777,779,779,779,779,779,779,779,779,779,779,779,779,779,779,779,779,779,779,779,789,789,789,789,789,789,789,789,789,789,789,789,789,789,799,799,799,799,799,799,799,799,799,799,799,799,799,809,809,809,809,809,809,809,809,809,809,809,809,809,809,809,809,809,809,809,809,809,809,809,809,809,8In case you can't see the full image from the HDMI input source. Right click on the middle of the display window, select Resize output (source size). Then, you are all set. Enjoy your gaming/streaming time.
NOTE:
- Different versions of OS will have slightly different interfaces
- Make sure your source doesn't have HDCP, the capture unit doesn't support HDCP
- Consult with your third-party user manual for more details tutorials
8 VideoSync APP Quick Operation Guide
8.1 APP Download
Download the APP at:
Go to the DOWNLOAD folder in your computer, open the ".rar" file to launch the APP. No installation required. Then you will see the interface as below:
text_image
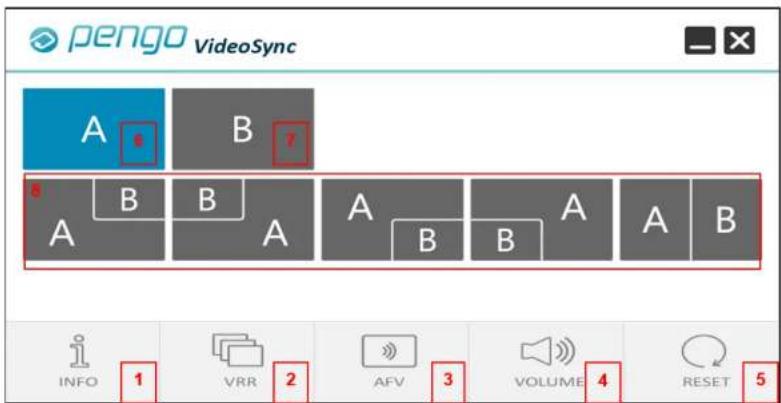
pengo VideoSync A B B A B B A A B A A B INFO 1 VRR 2 AFV 3 VOLUME 4 RESET 5| NO. | Button | DESCRIPTION |
| 1 | INFO | Show system information |
| 2 | VRR | Enable/disable VRR mode |
| 3 | AEV | Audio Follow Video. You can switch anytime during the live |
8.2 Control Panel Description
a. Info Setting
From INFO, you can find all details, including software version, firmware version, dual HDMI input resolution, USB-C capture resolution.

text_image
pengo VideoSync Software Version: 001.00 Firmware Version: -- HDMI Input Resolution -- USB-C Capture Resolution - INFO VRR AFV VOLUME RESETb. VRR Setting
Click VRR to activate the VRR mode.
Choose either A or B to be your streaming image/audio source. You can switch anytime during the live session. However, when VRR mode is on, PiP/PbP button will be disable automatically, as the diagram shows below.

pengo
VideoSync


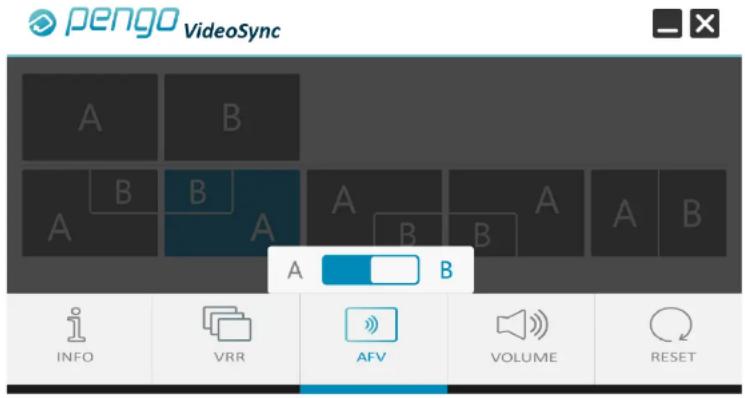
c. AFV Setting
Audio Follow Video. Meaning, you can output only one audio source when adopting PiP/PbP mode. For example, the picture below shows that HDMI B is taken as the audio source and you can switch it anytime without stopping or re-launching the APP.
text_image
pengo VideoSync A B A B B A B A B A B INFO VRR AFV VOLUME RESETd. Volume Setting
A volume bar will show up when you click it. Drag to adjust your headset volume.

text_image
pengo VideoSync A B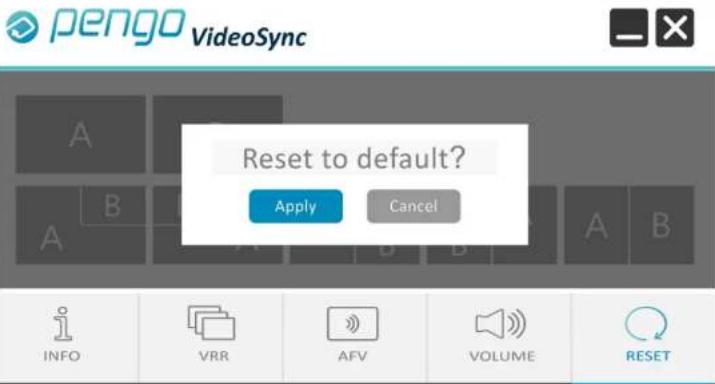
text_image
pengo VideoSync Reset to default? Apply Cancel INFO VRR AFV VOLUME RESETNOTE: When you close the APP, all the settings will remain the same until you unplug the VideoSync Grabber Box. Meaning, the APP will set to default automatically when the VideoSync Grabber Box is powered off.
f. PIP/PBP Setting
Simply click on the APP, input sources will appear in PiP/PbP mode on your preferred APP accordingly. You can swap five displays during the live session.

pengo VideoSync


