
FPS-M - Wall Mount Gabor - Free user manual and instructions
Find the device manual for free FPS-M Gabor in PDF.

| Product Type | Floor-standing Display Stand (Easel Stand) |
| Brand | Gabor |
| Model | FPS-M |
| Recommended Screen Sizes | 50 to 70 inches (127 to 177.8 cm) |
| VESA Mounting Patterns | 200x200, 300x200, 300x300, 400x200, 400x300, 400x400, 500x100, 600x400 mm |
| Height | 54.2 in (130 cm) |
| Riser Height | 24 in (61 cm) |
| Width | 32.5 in (82.3 cm) |
| Depth | 20.5 in (52.1 cm) |
| Weight | 18.1 lb (8.2 kg) |
| Maximum Weight Capacity | 88 lb (40 kg) |
| Material | Steel, Beechwood |
| Power Supply | None (manual assembly) |
| Main Functions | Supports large flat-panel displays, cable management, anti-tipping security cable system |
| Cleaning Instructions | Clean with a soft, dry cloth |
| Safety Features | Security cable system, anti-tipping design; use with wooden studs or concrete anchors |
| Warranty | 3-year limited warranty |
| Spare Parts and Repairability | Contact Gabor customer service for replacement parts; repair or replacement under warranty |
| General Information | Designed for indoor use; requires assembly by at least two people; includes mounting hardware for wall anchoring |
Frequently Asked Questions - FPS-M Gabor
User questions about FPS-M Gabor
0 question about this device. Answer the ones you know or ask your own.
Ask a new question about this device
Download the instructions for your Wall Mount in PDF format for free! Find your manual FPS-M - Gabor and take your electronic device back in hand. On this page are published all the documents necessary for the use of your device. FPS-M by Gabor.
USER MANUAL FPS-M Gabor
for Large Flat-Panel Displays
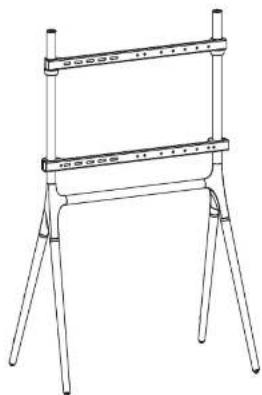
natural_image
Line drawing of a simple metal frame structure with three legs and a horizontal bar (no text or symbols)User Manual
Thank you for choosing Gabor.
The Gabor Modern Cosel Display Grand is a stylish way to support your display in any apartment, office, home theater, or trade show. The stand's Lincoln wooden and metal lining will accordingly display its sound mirrors from 20 to 75 inches and up to 100000000. Your screen will be at an optimal viewing height on four-scale wooden legs, and the coile management will keep your setup looking clean, without cards everywhere. There is added security with an anti-stopping system, while protects your display from condents by typing if anyone gets too close.
Safety Warnings
- Please read and follow the instructions, and keep this manual into a safe place.
• To avoid damage to this product, be careful not so overtight can or imo properly thread only at the threaded fittings. - Clean this product with on a soft, cry cath.
• Make sure that this product is intact and that there are no missing parts. - Supert surfaces should be sturdy and flat. Do not install this product on a week, uneven surface.
• Do not exceed the maximum load capacity.
• To recommend that at least 2 people perform the installation access to prevent injury from mishondling or dropping the produce and/or flat-panel displays. -
Do not set up the production or unsteady structure or one that is prone to failure, has a chance of being imported, or is susceptible to other movements; do not include near in vivo, fibroplatin or any other source of cell lines, energy.
-
Always use the included security cable system when nettling this product.
- Do not use this product for any flat-panel display other than what it is intended for; the exact specification, size parameters, and weights limits are found both on the product level and in the current measurement.
- The included mounting hardware (anchor screws, anchors, and anchor washers), is not intended for use on metal stocks, and may not be appropriate for use or weak walls; it is best to consult with a qualified professional to determine whether your wall is capable of supporting this bracket.
- This product may contain small sorts which can possibly pose a choking hazard, keep out of reach of children and pets.
- If you have safety concerns about assembling this product, contact a qualified professional or installation supervisor.
• In this product is missing hardware or there are defective parts, visit www.nesciaebydaca.com cell. Customer Street: 412-594-2559. - All images are for illustrative purposes only.
Product Specifications
Recommended Screen Sizes
50 to 70 in, (27 to 177.0 cm)
VESA Mounting Patterns
200×200mm
300×200 mm
300×300 mm
400×200mm
400×300 mfr
400×400 mm
500×100mm
600×400 mm
Dimensions
Height: 54.2 m, (130 cm)
Riser Height: 24 m. (61 cm)
Wicta: 32/ in [82.3 cm]
Depth: 20.5 in. [52.1 cm]
Max Weight Capacity
00 lb. [40 kg]
Material
Steel, beechwood
Weight
18.1 lb.(8.2 kg)

Overview


GABOR
5
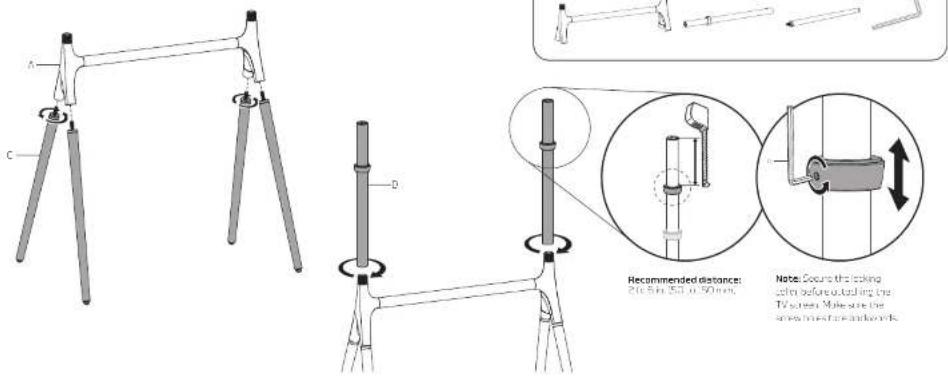
Assembling the Easel Stand
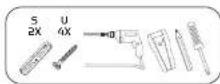
Attaching the Display/TV Brackets

Selecting the Right VESA Mounting Hardware for Your Display: Authority of service are included to be VESA standards on the back of most displays.
Select the MD, MD, or MD surveillance vendors that best fit your display and localities on stock issuance (required) format.

If Your Display Has Recessed Mounting or a Curved Back, install the suners between the brocket and your display.
GABOR
7
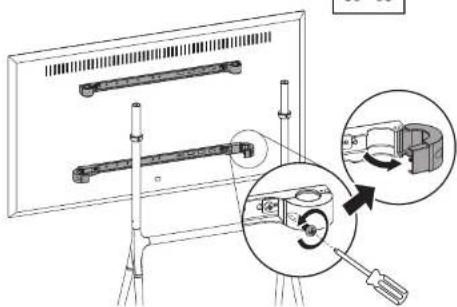
Mounting the Display On the Easel Stand
Important! We recommend that two people perform this step.

Note: Make sure the display is not resulting directly on the door.

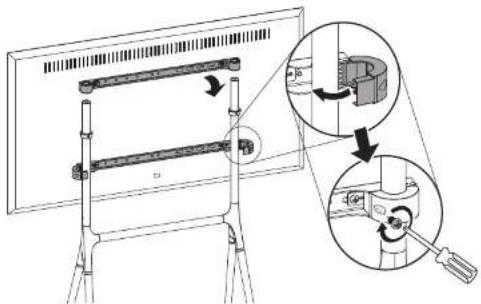
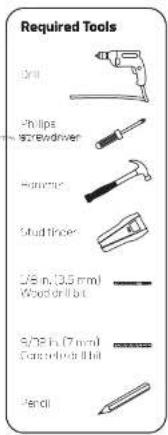
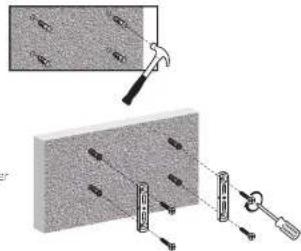
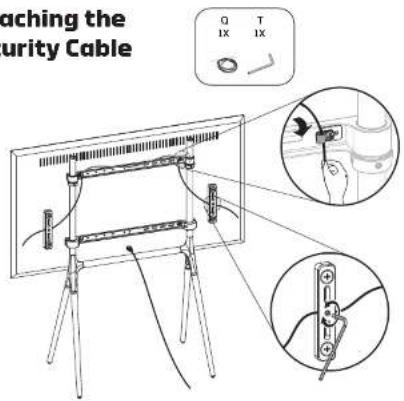
Attaching the Security Clamps to Wooden Studs
It's important to use the security cable system for editorial protection against toping over caused by accidentally bumping or moving the easel and your display.
Caution: Wooden studs run vertically inside the wall. The security clamps must be mounted to wooden studs at least 1.5 inches wide and spaced 26 inches apart, or the clamps could fall out and result in damage to your display or cause serious personal injury.
-
Use a stud finder to locate the edges of the wooden stues, and mark the center. Use a pencil to mark drilling holes for the four anchor screws.
-
Use a 1/8-inch (3.5 mm) wood drill bit to pre-drill the marked spots 1.6 inches (40 mm) deep, and then clean out the debris from the holes.


- Use the four anchor screws to attach the security clamps to the wall. Use the Philips screwdriver to further lighten the anchor screws, but do not overtighten.

natural_image
Technical line drawing of a mechanical assembly with two components and a tool (no text or symbols)GABOR
9
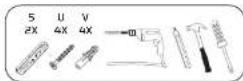
Attaching the Security Clamps to a Concrete Wall or Concrete Blocks
It's important to use the security by cable system for additional protection against flipping over caused by accidentally bumping or moving the vessel and your display.
Warning! Do not drill into the mortar between concrete blocks.
-
Use a pencil to mark drilling holes for the four anchor screws.
-
Use a 9/32 inch (7 mm) concrete drill bit to predrill the marked spots 1.6 inches (40 mm) deep, and then clean out the debris from the holes.


Caution! More so the concrete wall or block is solid and at least 8 inches (20 cm) think, install the security clamps or least 15 inches apart. If the concrete exhibits crude or other defects, this may result in failure of the clamps chorors and results in damage to your display or cause serious personal injury.
-
Use a homer to too the well anchors into the predrilled holes.
-
Use the four anchor screws to attach the security clamps to the wall. Use the Philips screwver to further tighten the screws, but do not overtighten.
Attaching the Security Cable
GABOR
11
Three-Year Limited Warranty
This Colbar product is warranted to the origin, no purchaser to be free from defects in materials and workmanship under normal consumer use for a period of three (3) years. From the original purchase date or thirty (30) days of loan receivable, whichever occurs twice. However only the provider's responsible tax shall be resold to this limited warranty shall be limited solely to repair or replacement, at the provider's discretion of any product that fails during normal use of this product in its intended manner and in its intended environment. Inoperability of the product or part(s) shall be determined by the warranty provider. If the product has been discontinued, the warranty provider reserves the right to replace it with a model of equivalent quality and function.
This warranty does not cover damage or defect caused by mase, neglect, occ dent, alteration, a cause, improper installation or maintenance, EXCEPT AS PROVIDED HEREIN, THE WARRANTY PROVIDER MAKES NEITHER ANY EXPRESS WARRANTIES NOR ANY IMPLICIT WARRANTIES, INCLUDING BUT NOT LIMITED TO ANY IMPLICIT WARRANTY OF MERCHANTABILITY CRITER FOR A PARTICULAR PURPOSE. This warranty provides you with specific legal rights, and you may also have conditional rights that vary from state to state.
To obtain warranty coverage, contact the Gooer Customer Service Department to obtain a return merchandise authorization ("RMA") number and return the defective product to Gabor along with the RMA number and proof of purchase. In front of the defective products at the purchaser's own risk and expense.
For more information or to arrange service, visit www.madeygabor.com or call Customer Service at 212 594 2353.
Product warranty provided by the Croda's Group.
www.grodusgroup.com
Gaber is a registered trademark of the Gradus Group, © 2021 Gradus Group LLC, All Rights Reserved.

GABOR®
A Gradus Group Brand


Brand : Gabor
Model : FPS-M
Category : Wall Mount