Power 2 U91-P2P - Vacuum Cleaner VAX - Free user manual and instructions
Find the device manual for free Power 2 U91-P2P VAX in PDF.

User questions about Power 2 U91-P2P VAX
0 question about this device. Answer the ones you know or ask your own.
Ask a new question about this device
Download the instructions for your Vacuum Cleaner in PDF format for free! Find your manual Power 2 U91-P2P - VAX and take your electronic device back in hand. On this page are published all the documents necessary for the use of your device. Power 2 U91-P2P by VAX.
USER MANUAL Power 2 U91-P2P VAX
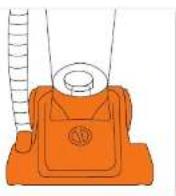
natural_image
Black and white vacuum cleaner with blue wheels and a black handle, no visible text or symbolsContents
Contents 1
Machine Overview 2
General Safety Information 3
Getting Started 4
How To Use 5
Looking After Your Machine — Filters and Dirt Container 6
Looking After Your Machine — Filters
Looking After Your Machine — Removing Blockages 8
Looking After Your Machine — Brushbar 9
FAQs 10
Other Information 11
Guarantee 12
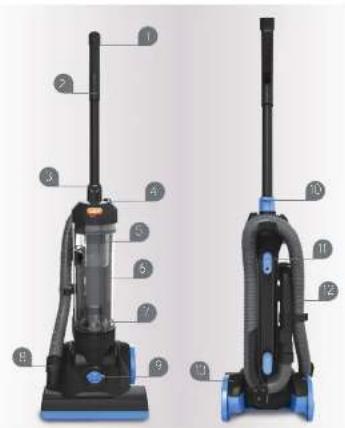
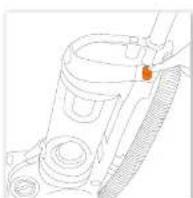
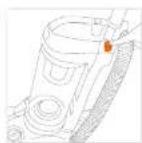
Machine Overview
1 Handle
2 Extension tube
3 Dirt container release button
4 Power on/off button
5 Separator
6 Dirt container
7 Post motor filter cover
8 Hose to machine connector
9 Floor type adjuster
10 Handle release button
11 Quick release cord wrap
12 Hosc
13 Cord
14 Post-motor filter
15 Pre-motor filler
16 3-in-1 crevice dust
and upholstery tool
17 TurcoTool
(available with U87-PVX-P)
text_image
Labeled diagram of a vacuum cleaner with numbered parts for identification
text_image
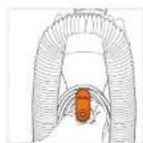
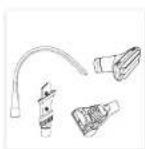
Diagram showing four types of mechanical components with Chinese labels: drum, plate, bulb, and connector.General Safety Information
This vacuum cleaner is intended for household use only and NOT for commercial or industrial use. Please keep instructions for further use.
When using the vacuum cleaner basic safety precautions should always be observed, including the following
- Only use the vacuum cleaner indoors on dry surfaces
- Turn off the on/off switch on the vacuum cleaner controls before disconnecting or connecting from the mains supply.
- Always up plug the vacuum cleaner before connecting or disconnecting the vacuum hose and accessories.
- Children should be suspected to ensure that they do not pay with the appliance.
- This appliance is not intended for use by children under eight years of age and persons with resources, physical, sensory or mental capabilities or lack of experience and knowledge, unless they have been given supervision or instruction concerning use of the appliance in a safe way and understands the hazards involved.
- Clearing and maintenance shall not be made by children without supervision.
- The appliance should only be used as described in the quick start guide or in the full online user juice.
- Only Vax recommended attachments should be used with this appliance.
- Do not use this vacuum cleaner if it has been dropped, damaged, left outdoors or dropped into water. Do not use this vacuum cleaner with a damaged cord or plug. If the supply cord is damaged return the vacuum cleaner to Vax or an authorised Service Agent for examination on repair or adjustment.
- Do not pull or carry this application by the cord. Do not use the cord as a handle, close a door on the cord or put, the cord around sharp edges or corners. Do not run the vacuum cleaner over the cord. Keep the cord away from heated surfaces.
- Do not handle the plug of the vacuum cleaner with wet hands.
- Keep hair, loose clothing, fingers and all parts of the body away from openings and moving parts.
- Do not pick up any hot coals, cigarette butts, matches or any hot, smoking or burning objects.
- Do not pick up any flammable or combustible materials lighter fluid, petrol, kerosene etc., or use in the presence of exclusive liquids or sugars.
- Da red vacuare ag: parrafal or lipo: make a (celrine, bleach, armenta, acan oaceae) cla.)
- De net vacuum as a third sharp objects such as glass, nails, soves, cans etc.
- Store the vacuum charger in a cool, dry area.
- Use only CF approved 13 amp extension cords. Non-approved cords may overheat. Care should be taken to arrange the cords so that the cord cannot be tripped over.
- Do not put any respects into openings. Do not use with any openings checked and do not restrict airflow. Keep all openings free of dust, tint, hair or anything that might reduce airflow.
- Do not use without all of the filters in place
- Take extra care when positioning the vacuum cleaner on the stairs.
Getting Started
PLEASE READ SAFETY INFORMATION BEFORE USE (p31)
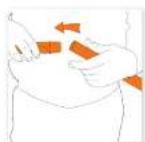
Before plugging the cars into the electrical toilet, make sure the switch is in the 'off position. Hold the vacuum cleaner in mix when starting, and in use.
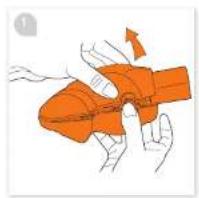
Assembling your upright


Insert the backbone into the flexed head. Learning one necker into a side at the bottom of the prauve boxboes.
Note, take the small, thin and push it down between the end of the cord holder and the machine, to lock the cord holder in place.
- Insert the sion end of the hose into the tube at the back of the machine.
-
Wrap the hose around the machine and connect the hose end to the floorhead.
-
Place the dirt container since the product and click in place to secure.
- Insert the handle at the top of the product.
Plug in your machine and will be
(No text)
How To Use
NOTE: Switching the barometer on whilst a closing card for a may damage clearing
NOTE: This unit has a constantly roasting brushbar. Vax recommends you raise the brushbar before attaching accessories and when using on the stairs.
How to use
- With the card holder to release the cord.
Choose your desired floor type.
Plug in your machine and
tum it on.
Don't over till. the containers to avoid cugging your life
Using accessories
Renipice size and from the clearest.
Choose an necessary. All are necessary smaller to house end.


Attack necessary to these end.
Telescopic extension tube
Remove extension tube from

Attach base to hardware.
Atch necessary to extend
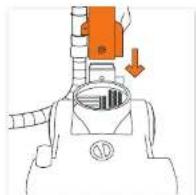
Looking After Your Machine – Filters and Dirt Container
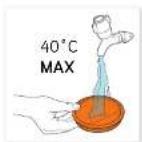
NOTE: Wash Airers with warm water (40°C max) at loss every 3 months for best cleaning results.
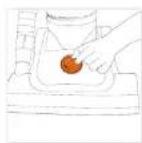
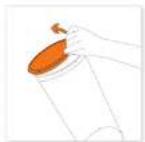
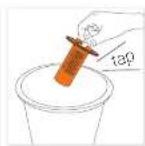
Emptying and cleaning the dirt container
Press dirt container release button to remove the dirt container.
Hold d-l container over a bin and outlet, re lock on the container lid, allowing to fix out.
Close the dirt container. Jo and click dirt container back onto product.
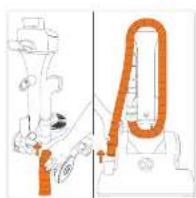
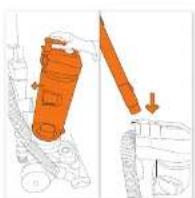
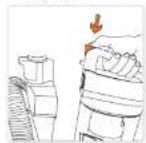
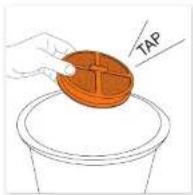
Cleaning the pre-motor filter

um the dirt container
lip anti-clockwise
to remove
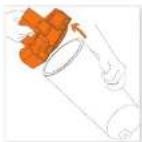
Remove the dirt container lid.
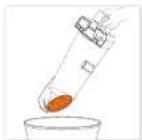
Use the lot on the tler to pull the filter out of its housing.

Tap the filter over a bin
Was the filter under

Leave to 24 hrs for 24 hours
Looking After Your Machine – Filters
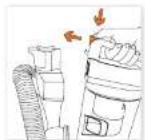
Cleaning the shroud

Turn the del carfanar lid anti-docwise la remove.
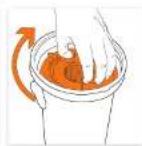
Removing the pre-meter filter is allow access to the solid.
Tap the shroud over a bin
( release of it).

Wash the sheet under running water and leave to dry.
Cleaning the post-motor filter
ap the post-motor filter over a to release the cirt.

Wash the filter under running water (40 degree max

Leave to cry for 24 hours and then replace before using your vacuum
Looking After Your Machine – Removing Blockages
IMPORTANT: *the air net, rose or telescopic tube is clocked, switch of the vacuum cleaner and remove the blockages! before re-starting; the vacuum cleaner
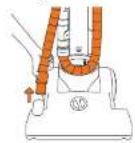
Removing debris from the brushbar

Switch of your vacuum cleaner at the mains socket. Using a pair of scissors cut any hair or debris free from the brusher.
Removing blockages from the TurboTool


Looking After Your Machine – Brushbar
Changing the belt
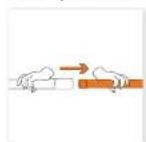
Switch of your vacuum cleaner at the main socket and unplug. Unlip the 2 small whole from the base of the vacuum to enable you to remove the screws from behind. No is. The screw for the height injure or dirt is located here.

Remove the 9 screws from the base of the floorhead cover.

Remove the floorhead cover. Lift the brusher from the machine to remove the bolt. Note: To remove debris from the brushor pan step 5.


Place the salt by attaching it to the brushbar and backing onto the metal side.

Once the felt has been replaced at each the brushier back once, the vacuum.
Attach the floorboard cover, 2 small wheels and height adjusted dial by screwing back into place.
FAQs
Warning: To reduce the risk of personal injury, unplug the vacuum cleaner before performing maintenance/troubleshooting checks.
Is there an accessory missing?
- Check the Getting Started page in this guide or the task that the machine came in to make sure that the part is definitely included in your unit. - Use missing, we're here to help. Happy call us on 0844 412 8455
Why won't the vacuum cleaner pick up?
- "The filters are needed cleaning, please refer to the 'Looking After Your Machine - 'It's page of this user' guide (po-7)
• The operator may be tagged, please refer to the 'Looking After Your Machine - Files' page of this user price (6-7)
- here may be a package in the hose please check the hose and normal the package
• So did consider may be full or standard, please refer to the Leading After Your Award – Enjoying and cleaning dirt container page of this
(2) 2017.15
- 10 hours may not be turning, please refer to the following: Your Marriage Burthor says 9
• KONKIN TAFIRCHENING, PRAZEN ZERI M. EELING, 1924 VECTURE & GAS
Why won't the accessories pick up properly?
• The Turbobox may be blocked, please refer to the Locking After Your Machine - Removing Bookages Page in this user guide (pB)
• No necessary may be broken
What do I do if an accessory/the unit becomes damaged or broken?
- Please check the damage is with the necessary or the unit to do this property remove the necessary from the unit and check if there is auction
from the base. If there is suction from the nose this continues that the damage is with the access to
Please visit www.wcp. website - 48310164pp
• In giving care the above checks, checked the price for blanchages and cleared the fire/there is still no successful method from the heat.
please call our Vox Caroline 0844 4 2 0455
Why is dust escaping from the vacuum?
• 2018e may not be installed correctly, please refer to the 'Locking After your Machine - Filters' page at the user page (16:0)
- "No dirt container may be full or added, please refer to the Leaving After Year Machine - Employing and cleaning dirt container" page of this
user guide
• The filters may need cleaning, please refer to the Locking After Your Machine - Fixers' size of this user guide (p4-1).
- There may be a package in the house, please check the home and remove the package.
Why does my vacuum cleaner have no power?
- It may not be plugged into the electrical socket correctly. Ensure that the plug is pushed into the electrical socket security.
- The electrical socket may not be working. Check the fuse or breaker and correct an electric an
• The motor manufacturer may have impacted Sellboll and upping the varian diameter. Check the unit for management, then the line please refer
to the 'looker After Your Machine - Hitars' page of this user guide (ok 7 and clean the separator please refer to the 'looker After Your
Machine - Emoving and exciting dirt container page of the user guide (p6). Leave the vacuum cleaner for 24 hours before switching the
The quick brown fox jumps over the lazy dog.
Why isn't my brushbar rotating?
• The best may be broken
• The world is a spherical floor line in the London, 40–45 Vat. Ustern - Riscuri-Flas Land's route of six car miles and
1802-06-12
Why does the vacuum cleaner cut out?
• The note sequined with a thermal curve. If the any case is not should be matched, the thermal will absolutely be the arc of
Should this occur, unlike the vacuum cleaner from the short oil socket and turn off the socket. Remove and operate the air container. Check
the hose for steaters. Clean the fizers. Allow the unit to cool for approximately 1 hour Of you have cleaned the filters you will need to wait
2 years for the film to be before pulling, near back in perspective.
What do I do if the unit becomes damaged or broken?
• We're here to help. Simply call 0844 412 8455 or visit vss.co.uk
Other Information
UK Service & Help
Any queries or concerns about using your Vax, simply visit; vax.co.uk/support – vaxireland.ie or call the Vax Caroline. Calls are charged at the UK local rate. Please have your machine with you when calling.
Vax Caroline:
(UK) 0844 412 8455
(ROU) 1-800 928 308
Monday-Friday 0.30am to 6.30pm
Saturday-9.00am to 5.00pm
Consumables
to purchase spares and accessories, please visit vax.co.uk
The use of genuine wax spare parts helps to maintain optimised performance and valides your guarantee
2-in-1 tool Type 1:1-1-29167-00
TurboTool (type 1): 1-1-125261-03
Flexi crevice no. (Type 1): 1-1-131593-20
Tur and Bull tool (Type 1): 1 1 131392 00
Adapler: 1 + 128056 CO

Technical Specification
Voltage: 220-240V 50Hz
F. lers. Pre-mor filter (weshable)
HPPA (anti-bacterial) Post-motor filter
Subject to technical change without notice.
CE
EEC Statement of Compliance
Manufacturer /LEC importer, Vox Limited, her boy on our own responsibility, declare the. Inc
U87-PVX series is manufactured in compliance with the following Directives.
Safety: 2006/95/EC Low Voltage Directive
EMC: 7004/138/E.C. Electromagnetic Compatibility Directive

Guarantee
It's quick and easy to register for your
FREE 2 year guarantee
online at: vax.co.uk/guarantees
Please retain your original receipt for proof of purchase.
UK based customer care centre — Open 6 days a week
Monday-Friday
8:30am-6:30pm
Saturday
9:00am-5:00pm
we're here if you need us
Instead of taking me back to the shop, simply visit:
vax.co.uk/support or call (UK) 0844 412 8455 (ROI) 1-800 928 308
Let us know what you think @VaxUK


Notes
Notes
vax