TE-CCM1 - Dash cam Metra - Free user manual and instructions
Find the device manual for free TE-CCM1 Metra in PDF.


| Product Type | Dash Camera (Commercial Heavy Duty) |
| Brand | Metra |
| Model | TE-CCM1 |
| Resolution | 600 TV lines |
| Field of View | Diagonal 120° |
| TV System | NTSC or PAL (selectable via white loop) |
| Minimum Illumination | 0.01 Lux |
| Working Voltage | 12V DC |
| Storage Temperature | -20°C to 75°C |
| Working Temperature | -30°C to 85°C |
| IP Rating | IP68 (waterproof) |
| Housing Material | Heavy duty metal |
| Night Vision | 18 IR LEDs |
| Audio | Built-in microphone |
| Parking Lines | Selectable (green loop, default on) |
| Connection | 4-pin to RCA adapter included |
| Extension Cables (sold separately) | TE-CEX10, TE-CEX20, TE-HEX10, TE-HEX20 |
| Installation | Use grommet and silicone sealant to prevent water ingress |
| Tools Required | Wire stripper, tape, digital multi-meter |
| Maintenance | Clean lens periodically; check connections |
| Technical Support | Phone: 386-257-1187, Email: techsupport@metra-autosound.com |
Frequently Asked Questions - TE-CCM1 Metra
User questions about TE-CCM1 Metra
0 question about this device. Answer the ones you know or ask your own.
Ask a new question about this device
Download the instructions for your Dash cam in PDF format for free! Find your manual TE-CCM1 - Metra and take your electronic device back in hand. On this page are published all the documents necessary for the use of your device. TE-CCM1 by Metra.
USER MANUAL TE-CCM1 Metra
natural_image
Black-and-white photo of a black rectangular electronic device with multiple audio/video cables and connectors (no visible text or symbols)Commercial Heavy Duty Camera With Microphone
Visit iBEAMUSA.com for more detailed information about the product and up-to-date vehicle specific applications.
Product Features
- Heavy duty metal housing
• 18 IR LEDs for night viewing - Selectable parking lines
• PAL and NTSC selectable - Microphone for audio
Part Components
A) Camera
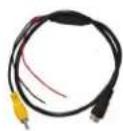
B) 4-pin to RCA adapter and hardware
A

B
11
C) Extension (Sold separately)
C

TABLE OF CONTENTS
Camera....2
Wiring....3
Specifications....4
TOOLS REQUIRED
- Wire stripper
- Tape
• Digital Multi-meter
Attention! When testing the aftermarket equipment, ensure that all factory equipment is connected before cycling the key to ignition.
INSTALLATION
Camera install
-
There are two loops on the camera. If there is a not a need for parking lines, the loop will need to be cut. (Default lines on) If the video format needs to be changed, the loop will need to be cut. (Default NTSC)
-
Green - parking lines
-
White - PAL or NTSC format
-
Depending on your installation needs, the camera wire does have a grommet inline to use to help with sealing the entry place to the vehicle. iBEAM also suggest using some silicon to better help with water from entering the vehicle.
-
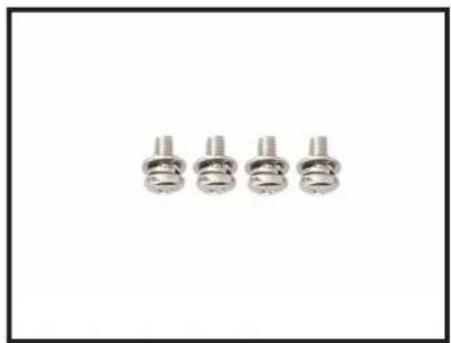
Once installed use the provided stainless screws (Figure B) to secure base in place with the camera. This can also be done before mounting and tightened once mounted. (Figure C)

natural_image
Close-up of a black USB cable with connector and wiring, isolated on white background (no text or symbols)Figure A
natural_image
Four metallic screwdrivers arranged horizontally on a white background (no text or symbols)Figure B

natural_image
Close-up of a black mechanical sensor or camera with a yellow circular annotation highlighting a specific component (no visible text or symbols)Figure C
WIRING
Wiring
Depending on the monitor that the camera will be connected to, there can be two different ways of wiring.
-
Figure A - Connecting to a 4-pin commercial monitor. Using the iBeam commercial camera extension (sold separately) part # TE-CEX10, TE-CEX20, TE-HEX10 or TE-HEX20 depending on your desired length.
-
Figure B - Connecting to a RCA connection style monitor. Using the supplied RCA to 4-pin adapter, connect the desired length of commercial camera extension listed above.
- RED wire connect to 12V accessory or reverse trigger depending on your need for the camera.
- Black wire connect to ground.
• YELLOW RCA to video input on monitor
• WHITE RCA to audio on monitor

Figure A

Figure B

BEAM
TE-CCM1
INSTALLATION INSTRUCTIONS
IBEAM SAFETY

| Resolution | 600 TV lines |
| Field of view | Diagonal 120° |
| TV System | NTSC or PAL - white loop |
| Min. Illumination | 0.01 Lux |
| Working Voltage | 12 V |
| Storage Temp. | -20° ~ 75 °C |
| Working Temp. | -30° ~ 85 °C |
| IP rating | IP68 |
Having difficulties? We're here to help.
Contact our Tech Support line at:
386-257-1187
Or via email at:
techsupport@metra-autosound.com
Tech Support Hours (Eastern Standard Time)
Monday - Friday: 9:00 AM - 7:00 PM
Saturday: 10:00 AM - 7:00 PM
Sunday: 10:00 AM - 4:00 PM

KNOWLEDGE IS POWER
Enhance your installation and fabrication skills to enrolling in the most recognized and respected
enrolling in the most recognized and resp mobile electronics school in our industry.
Log onto www.installerinstitute.com or call
800-354-6782 for more information and take steps toward a better tomorrow.

Metra Recommends MECP
certified technicians


Brand : Metra
Model : TE-CCM1
Category : Dash cam