Primus Flat 10ft - Trampoline Akrobat - Free user manual and instructions
Find the device manual for free Primus Flat 10ft Akrobat in PDF.

User questions about Primus Flat 10ft Akrobat
0 question about this device. Answer the ones you know or ask your own.
Ask a new question about this device
Download the instructions for your Trampoline in PDF format for free! Find your manual Primus Flat 10ft - Akrobat and take your electronic device back in hand. On this page are published all the documents necessary for the use of your device. Primus Flat 10ft by Akrobat.
USER MANUAL Primus Flat 10ft Akrobat
INSTALLATION AND USER MANUAL
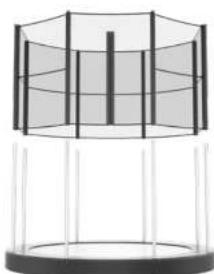
PRIMUS FLAT
ROUND

KROBAT
PASSION FOR JUMPING

10 ft, 12 ft, 14 ft

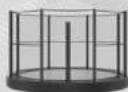
natural_image
3D rendering of a circular trampoline with vertical black frames and a central vertical post (no text or symbols visible)
KROBAT
PASSION FOR JUMPING
Akrobat Trampolines Australia
3/21 Leather Street
Breakwater VIC 3219
E: sales@akrobat.com.au
T 1300 393 004
www.akrobat.com.au

EN/05-2021

100% made
in Europe

2.5 million
jumps guarantee

62.7% softer
bounce absorption
1. WARNINGS!
Read this manual carefully before assembling and using your trampoline. Keep this manual for future reference.
The responsibility of the owner is to ensure that all users of the product are fully informed about the proper use of this trampoline and all safety precautions.
Thank you for choosing Akrobat Trampoline!
Your trampoline is so much more than just another outdoor toy. It was designed to provide engaging playtime, create fun memories and active exercise to all members of the family, no matter what age. Akrobat trampolines are built to last. Made of best quality European materials and as a result of skilled craftsmanship, your trampoline will serve you for years to come.
Safety comes first! In order to achieve the best trampolining experience that will keep you fit and energised, please read these assembly instructions and safety recommendations thoroughly to minimize any chances of injuries.
Maximum user weight is defined by the size of the trampoline:

10 ft / 305 cm 100 kg / 220.5 lbs
12 ft / 366 cm 130 kg / 286.6 lbs
14 ft / 427 cm 130 kg / 286.6 lbs
- Adult supervision and instruction required at all times.
- The trampoline has to be assembled by an adult and cautiously inspected before first use.
- Make sure the safety net and the enclosure poles are correctly and securely positioned. Replace any worn, defective, or missing parts.
- Minors must be supervised by an adult person regardless of their skills or training. Be sure to prevent access to the trampoline without proper supervision.
- Check the trampoline before each use. Regular maintenance check ups of the trampoline and trampoline parts are necessary to prevent injuries. Keeping the trampoline impeccable will prolong the lifetime of your trampoline.
- Serious injury, paralysis or even death can occur if the trampoline is not used properly.
- This trampoline is for outdoor use only.
- Wear clothing free of drawstrings, hooks, locos or anything that could get caught while using the trampoline enclosure and result in entanglement. Do not attach anything to the enclosure that is not a manufacturer-approved accessory or part of the enclosure system.
- Properly secure the trampoline/enclosure when not in use. Protect it against unauthorized use.
- Do not allow a child or other persons under the trampoline. - Jumping on the trampoline is not recommended during pregnancy.
Do not use the brampaline under the influence of alcohol, drugs or heavy medication.
- Keep all sources of heat and flames away from the product. - Always close the net opening before jumping.
The jumping mat should be kept clean and dry. Jumping on a wet jumping mat is prohibited in order to avoid slips and ta is.
- Remove footwear before jumping on the trampoline.
- Do not eat food, sweets or chew gum when bouncing. - Bounce in the center of the mat.
- Stop bouncing by flexing the knees as feet come in contact with the trampoline bed. Learn this skill before attempting other jumps.
- Do not exit by a jump always walk on and off. It is a dangerous practice to jump from the trampoline to the floor or ground when dismounting, or to jump onto the trampoline when mounting. Do not use the trampoline as a springboard to other objects. Do not jump from other objects, buildings or surfaces onto the trampoline, or into or over the trampoline enclosure.
- Avoid bouncing too high or for too long, make regular breaks.
- Suitable for training and therapy. Follow instructions from your therapist or trainer.
- Stay low to control your bounce and repeat landing in the center of the trampoline. Always control your bounce Control is more important than height.
- Do not attempt or allow somersaults. Landing on the head or neck can cause serious injury, paralysis, or death, even when landing in the middle of the bed.
- No more than one person is allowed to use the trampoline at a time. Collision hazard: multiple jumpers increase the chances of loss of control and this can result in serious injury.
- Misuse or abuse of the trampoline is dangerous and can result in serious injury.
- Classes, jewellery and similar objects should be taken off before entering the trampoline. Empty your pockets and keep your hands free when jumping. Always jump on the middle of the jumping mat.
- Do not sit on the trampoline safety pad and do not stand on the edge while another person is jumping.
- Keep small children away from the trampoline while others are bouncing on it, because the edge can move in and cut vigorously.
- Trampoline should be placed on a level grass surface or soft surfaces such as sand or bark. Do not use trampoline on hard surfaces as asphalt, concrete or other similar surfaces. Do not place trampoline around swimming pools, swings, slides, climbing walls etc.
- Do not use the trampoline in windy weather. If you are using a safety net, remove and store it for better weather conditions.
- Installation of this trampoline requires digging a trampoline pit. Before installing the trampoline make sure that your ground will drain well. We advise to get help by a professional if you are not sure about the quality of the ground or other issues regarding the digging.
- Remove all hard objects around and under the trampoline. There should be no objects - such as fences, roofing, tree branches, laundry ropes, electrical cables etc. - anywhere near or above the trampoline. Clear the surroundings for at least 2 m/6" in every direction.
- Ensure there is 6 m / 198 ^1 free head space above the trampoline.
- Each modification made to the trampoline must be approved by the manufacturer.
- When moving the trampoline, disassemble it in reverse order of assembling. Move to desired location and re-assemble according to these instructions.
- In our commitment to customer satisfaction and safety, please check our website regularly for important customer updates and all trampoline specifications.
- For additional information concerning the trampoline equipment, please contact the manufacturer or regularly check our website for important customer updates.
2. TRAMPOLINE PARTS
Primus Flat Primus Flat Primus Flat 10 ft / 305 cm 12 ft / 366 cm 14 ft / 427 cm
| Part A | Frame sections 8 pcs 8 pcs 8 pcs | 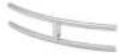 | ||
| Part B | Jumping mat 1 pc 1 pc 1 pc | 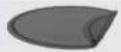 | ||
| Part C | Springs 80 pcs 96 pcs 104 pcs |  | ||
| Part D | Frame pad 1 pc 1 pc 1 pc |  | ||
| Part E | Frame pad elastics 16 pcs 16 pcs 16 pcs |  | ||
| Part F | Retaining PVC panels 8 pcs 8 pcs 8 pcs |  | ||
| Part G | Screws for panels 32 pcs 32 pcs 32 pcs | 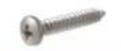 | ||
| Part H | Wood protection 1 pc 1 pc 1 pc |  | ||
| Part I | Measuring tape 1 pc 1 pc 1 pc |  |
Safety net assembly parts*
| Part J | Poles for safety net | 8 pcs 8 pcs 8 pcs |  | |
| Part K | Safety net | 1 pc 1 pc 1 pc | 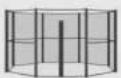 |
* The safety net is not the part of the set. It is available as a separate item for purchase as half or full enclosure net.
3. ASSEMBLY AND INSTALLATION
We recommend at least two people to assemble the trampoline. Use gloves to protect your hands from pinch points and sharp points during assembly. Do not apply excessive force during assembly that will cause damage to the product.
TOOLS: You will need a cross-head screwdriver or battery drill with 7 mm cap for the retaining wall PVC panels.
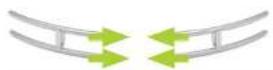
Assembling the frame

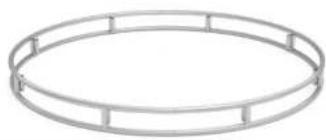
Lay the frame sections (Part A) into a circle with the spring holes facing upwards. Push all sections together until all are fully mated together.
natural_image
Simple wireframe oval ring structure with no text or symbolsAKROBAT HINT:
For easier assembling of frame parts apply some grease for bearings to all junctions.
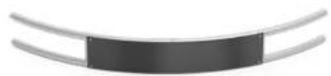
Fitting the mat and installing the springs

Lay the mat flat inside the frame. Make sure the logo is facing upwards. In order to make the installation of the jumping mat easier, locate the four rings in the 12, 3, 6 and 9 o'clock position directly opposite each other and attach four springs on these locations first. Then continue by attaching springs to every eighth ring, followed by every fourth and so on until all springs are attached.

At first, it may look like the mat won't fit, it will however stretch to the correct size when you finish attaching all springs.

natural_image
Close-up of a curved metallic object with a cylindrical rod inserted, no visible text or symbols
Important: Be sure all spring hooks are well attached to the frame.
AKROBAT HINT:
Springs can be hard to attach, you will need a little force. Help yourself by using one spring to pull another towards the frame holes. Do not forget to wear gloves.
Attaching the pvc retaining panels

The next step is screwing the PVC retaining wall panels to the frame. You will need the cross-head screwdriver or battery drill with 7 mm cap and gloves. Take one panel and place it against the outside of the frame. You will find four holes in the frame and four holes in the wall panel, insert and tighten the four screws to attach the panel tightly to the frame. Repeat with all remaining panels.
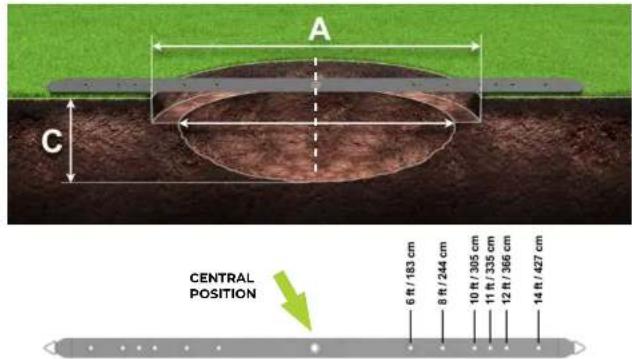
Digging the trampoline pit

Position the frame on the location you chose and mark the position on the ground. It's best to mark out a hole a bit wider than the diameter of your trampoline.
This will make it easier for you to put the frame in and find the right level. Dig the pit to the following dimensions
| TRAMPOLINE SIZE | ||
| Dimension A- Outer hole | Dimension B- Inner hole | Dimension C- Total depth |
| 10 ft / 305 cm 264 cm / | 8'8" 75 cm / 2'6" | |
| 12 ft / 366 cm 326 cm / | 10'8" 90 cm / 2'1" | |
| 14 ft / 427 cm 387 cm / | 12'8" 90 cm / 2'1" | |

text_image
A 25 cm / 10" /8" C B 25 cm / 10" 20 cm / 5"20 cmThe hole should not accumulate water (in which case the drainage is necessary) and it should be possible to clean during maintenance.
First, dig the outer hole to create a ledge for your trampoline frame, which needs to be 25 cm/10" deep. This is the exact frame height, so that the safety pad on top of the frame will be just above the grass level. Continue by digging the inner hole.
Dig the inner hole according to the dimensions of your trampoline and with a bowl-shaped bottom. The inner hole should be 40 cm / 14" narrower than the trampoline size. This will leave a 20 cm / 8" ledge all around on which the trampoline will sit.
AKROBAT HINT:
It's a relatively easy task to hand dig the hole for smaller size trampolines, but it would be best to hire a mini digger to excavate most of the soil and leave you with the finishing touches. Note: You will need to save some of the soil for later.
How to measure the hole depth

To properly measure the depth of the hole, use the measuring tape provided in the kit. Stretch the tape over the entire dimension of the trampoline pit. Smaller holes on both sides of the measuring tape indicate the dimension of your trampoline size. When placing the measuring tape in the area, it is first necessary to check that the measuring marks indicate the edge dimension of your trampoline. Once the edge dimension is determined, then you can easily define the central position of the pit, which indicates, where the pit for your trampoline should be the deepest (75 cm / 2'6" or 30 cm / 2'11").
text_image
A C CENTRAL POSITION 6 ft / 183 cm 8 ft / 244 cm 10 ft / 305 cm 11 ft / 335 cm 12 ft / 366 cm 14 ft / 427 cm
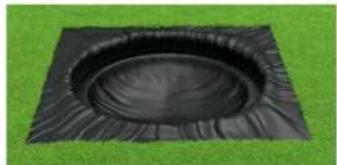
Cover the complete surface with the weed protection, then place the trampoline frame into position. Make sure the membrane 'hugs' the shape of the hole and sits right at the bottom of the hole - keeping wjumping space under the mat.
natural_image
Black textured square with a circular opening on top, set against a green grass background (no text or symbols)Placing the trampoline into the pit

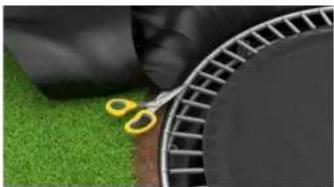
Carefully place the trampoline on the ledge covered with the weed protection. Fill the remaining free space around the trampoline with the remaining soil, then cut off the excess material of the weed protection.
Check that the trampoline is well levelled. You may want to remove the trampoline to make any adjustments to the height that the frame is sitting on. Aim for the trampoline jumping mat to sit flush to the ground.

natural_image
Close-up of a black football net with a white rack, a wooden shovel, and a small brown object on green grass (no text or symbols visible)
There should be no gap between ground and your trampoline.
Finally, re-lay the saved soil around the trampoline and compact down as much as possible.
natural_image
Close-up of a metal rack with yellow clips next to a dark container, placed on green artificial turf (no text or symbols visible)Attaching the frame pad

Lay the safety pad on the top of the trampoline with eyelets facing up. Insert the elastic toggles through the eyelets so the loop end of the elastic faces outwards and the toggle end is on the inside.

natural_image
Close-up of a black mechanical component with a red arrow pointing to a circular feature, no visible text or symbols.
natural_image
Close-up of a metallic chain with two circular loops and a black ball on a dark surface (no text or symbols visible)
Flip the frame pad over and pull the elastic band around the frame. Insert the toggle into the loop, then rotate the toggle inwards to secure it. Repeat with all frame pad elastics.

Important:
The frame pad must cover the entire frame and all springs.
natural_image
Close-up of a metallic tool with a yellow plastic clip attached, placed on a textured surface (no text or symbols visible)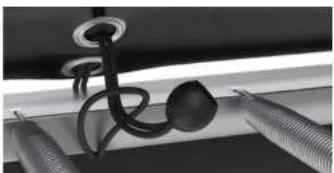
natural_image
Close-up of a mechanical component with a curved spring-like structure and two threaded fasteners (no visible text or symbols)AKROBAT HINT:
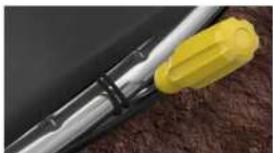
If you find it too difficult to get the toggles in place, wedge a screwdriver carefully between the frame and PVC panel to attach the toggle. Using a flathead screwdriver (or similar), push the loop end between the wall panel and frame. Insert the toggle from underneath and rotate to secure. Repeat with all elastics.

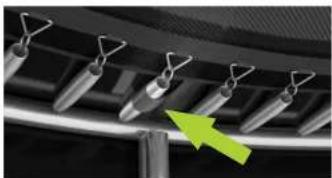
The last step to secure the frame pad to the trampoline is placing springs into the 'spring loops'. You will find them on the underside of the frame pad where each pad section joins the next one. Remove a single spring under every loop, slip it through the loop and react at the frame. Repeat with all loops. This will prevent the front of the pads from lifting up.
natural_image
Close-up of mechanical components with metal hooks and a green arrow pointing to a component (no text or symbols visible)Placing the safety net poles and safety net\*

The safety net is not part of the set. It is available as a separate item for purchase.

Insert the safety net poles into the enclosure sockets through the 10 cm / 4" slot between the pad sections, then place the net flat on the trampoline mat with the closed zipper on top.

natural_image
Top-down view of a circular outdoor structure with vertical supports and a central oval base, set on a green lawn (no text or symbols visible)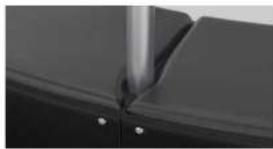
natural_image
Close-up of a mechanical joint or bracket with a metallic rod inserted, showing no visible text or symbols.
We advise two people to install the safety net. Lift the bottom part of the net sleeve at the entrance and start slipping it on the net pole gradually, pole by sole for 10 cm / 4" at a time. A little at a time work your way around the trampoline so the safety net will be pulled down evenly. Repeat the same steps with the half enclosure safety net.
natural_image
3D diagram of a geometric structure with intersecting lines and a circular base (no text or symbols)
Important:
Make sure the net sleeve is pulled down completely and there is no empty space left on the top. Your net has been successfully installed!

KROBAT
MISSION FOR JUMPHO

natural_image
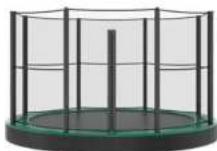
Exterior view of a circular trampoline structure on a grass field (no signage or text)CONGRATULATIONS!
Your Akrobat trampoline is now ready to be used. Enjoy!
If this is your first trampoline, we advise you to start by learning the basic jumps described in this manual.
4. TRAMPOLINE MAINTENANCE
Check your trampoline before each season thoroughly - particularly the frame. Frame bad, springs, jumping mat and safety not. We advise regular check-ups during the season as well. In contrary, damaged parts could be overlooked, which may result in severe accidents or injuries.
Your check list should include following points: All parts are well attached.
- All springs are well secured to the frame and the rings on the jumping mat.
- The tramodine has no damages, such as rips, holes, sharp, twisted or broken parts. If you notice any damage, change the parts immediately.
- Check the safety net and the poles for potential damages and replace the safety net every 2 years.
For the best maintenance of your trampoline, also make sure no animals are allowed on the trampoline as they could damage both the frame pad and the jumping mat.
The trampoline should be disassembled and withdrawn from use at once in case of any damage or missing parts until the defects are repaired or parts replaced.
Extreme weather conditions can impact the trampoline materials, therefore follow these recommendations:
- Disassemble the safety net in case of strong wind and weigh the trampoline down. Store the safety net in a safe place.
- Remove the jumping mat during winter season as the weight of the snow could damage the mat. - Protect the trampoline from direct heat, fire, sparks and fireworks.
- Protect your trampoline from heavy rain and snow as well.
The trampoline pit should not accumulate water (in which case the drainage is necessary) and it should be possible to clean during maintenance.
Cleaning the trampoline:
All Akrobat trampoline mats and frame pads are made of durable high-quality materials and should not be cleaned with any aggressive cleaning products! Trampoline surfaces are best cleaned with mild soapy water and thoroughly rinsed with water afterwards.
Remember, the trampoline should only be used by one person at the time!
User weight must not exceed:

10 ft / 305 cm 100 kg / 220.5 lbs
12 ft / 366 cm 130 kg / 286.6 lbs
14 ft / 427 cm 130 kg / 286.6 lbs
PLEASE KEEP THIS MANUAL FOR LATER USE.
5. TRAMPOLINE ACCESSORIES
Akrobat trampoline weather cover
Providing year-round maximum protection from damage caused by weather and debris. Akrobat trampoline cover increases the lifespan of your trampoline and adds durability for countless jumping moments. It is made of UV-resistant high-quality PVC and available for all sizes and shapes of Akrobat trampolines.


Akrobat PVC protectant spray
All weather conditions and UV-radiation PVC trampoline protectant spray leaves an enduring dirt resilient finish, keeping PVC surfaces clean of soil, sweat, body oils and other. It will protect your frame pad from UV rays and extend the lifetime of PVC trampoline parts. It is safe to use on all PVC parts.
Akrobat trampoline shoe mat
The shoe mat helps you to stand comfortable, while taking the shoes off. It also helps keeping the trampoline nice and tidy.

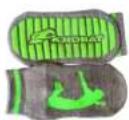
Akrobat trampoline socks
Durable trampoline socks with high quality grios ensure a higher level of safety. The traction material used on the soles of the socks provides friction that reduces sliding and can decrease the likelihood of accidents. In case of numerous users, the socks also help control the spreading of microbes which can be exchanged between bare feet.
6. JUMPING INSTRUCTIONS
Each jumper must start by learning slow and controlled jumps. Safe landings are the base of trampoline jumping skills and are important to learn at the beginning. Lack of these skills may result in severe injuries.
Both jumper and instructor should keep in mind that steady balance at each jump represents the base of successful trampoline jumping.
The stopping technique is equally important as jumping. Correct stopping represents one of the most important safety precautions in trampoline jumping. When losing control of the jump and/or balance the jumper has to react quickly to prevent injuries. In order to achieve this, the jumper should simply bend his knees before landing on the jumping mat. This is the safest way to stop the jump and prevent accidents.
While learning and training trampoline jumps, it is advised to have a persons standing around the trampoline in order to help the jumper if needed. Trampoline jumping is a physical strain and shouldn't lost too long. A tired jumper can easily succumb to errors in jumping thus highly increasing risk of injury.
High trampoline jumps are considered advanced jumps and should not be allowed to inexperienced jumpers. It is extremely important to be sure that the height of the jump corresponds to the experience of the jumper.
PLEASE NOTE:
Beginners should learn the basic body positions and practice the basic bounces described in this manual.
To learn how to balance and jump, stand in the middle of the jumping area and bounce softly up and down to control the movement. Increase the intensity gradually, returning to the same position on the jumping mat with each bounce.
Thus on the jumping mat when jumping, failing to do so may quickly result in losing balance and falling.
Do not perform somersaults without supervision! Somersaults should be carried out only by experienced jumpers under supervision of an expert and using appropriate safety measurements.
7. BASIC TRAMPOLINE JUMPS
THE JUMPING JACK:
- Start from a standing position with feet in shoulder width, head up and eyes on the tramcoline mat.
- Swing your hands forward, above your head and back in a circular motion.
- Bring your feet together in mid-air and point your toes.
- Land back on the center of the mat with your feet in shoulder width (the same as the starting position).
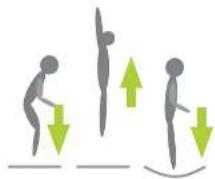
THE FRONT DROP:
- Start by softly bouncing up and down a few times.
- Jump upwards and land with your hands and knees forward.
- Push yourself off with your hands and jump back to the upright position.
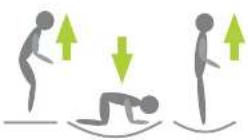
THE PRAYING MANTIS:
- 5art with a low bounce.
- Land on your knees in shoulder width, keeping your back straight and keep your arms stretched out to maintain balance.
- Bounce back to the starting position by using the bounce momentum and swinging your arms upwards.


BOTTOM BOUNCE:
- Start with a basic starting position. Jump up, aiming to the center of the jumping mat.
- Land with your legs stretched in front of you, with hands on both side of your hips and keep your back straight
- Push yourself up with your hands to rebound to the starting position.
THE PANCAKE DROP:
- Start off with a soft, low jump upwards.
- Let yourself fall on your front, placing your hands on the jumping mat in front of you.
- Push yourself up to the starting position.

THE TURTLE DROP:
- Start with a soft upwards jump.
- Land on your back, keeping your chin close to your chest and your knees bent. Keep your chin towards your chest as you land.
- Kick your legs forward in order to jump up and land in the starting position.

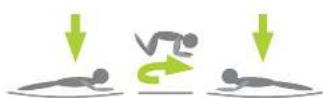
THE ROLLING STONE:
- Start from the front drop position and push to the left or right with your arms to start turning.
- Turn your head and shoulders in the direction that your body is turning.
- Keep your back parallel with the jumping mat and your head straight
- Return to the lying position to finish the jump, lying in the opposite direction as at the beginning.
THE FLYING BALLERINA:
- Start with the sitting position.
- Jump and turn your head left or right and swing your hands in the same direction to turn in the air.
- Follow the motion with your hips to complete the turn.
- Land in the sitting position to complete the jump.
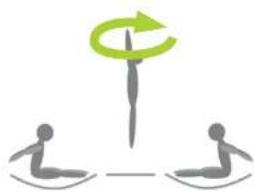
natural_image
Two stylized human figures in water below with a green circular arrow above them, symbolizing rotation or cycle (no text or symbols present)You now master the basic jumps and are ready to jump even higher!
But remember to always stay in control of your jumps.