RS-966 - Unspecified Izzy - Free user manual and instructions
Find the device manual for free RS-966 Izzy in PDF.

| Product Type | Grooming Kit |
| Brand | Izzy |
| Model | RS-966 |
| Power Source | Rechargeable lithium battery (600mAh) |
| Charging Input | DC 5V, 1000mA |
| Charging Time | 60–90 minutes |
| Operating Time | 50–60 minutes |
| Waterproof Rating | IPX7 |
| Motor Voltage | 3.7V DC |
| Display | LCD with battery level indicator |
| Heads / Attachments | Shaving head, clipper head, detail trimmer, nose/ear trimmer, facial cleansing brush |
| Cutting Guides | 3mm, 6mm, 9mm |
| Accessories Included | Cleaning brush, lubricating oil, charging adaptor |
| Safety Features | Auto shut-off, low battery indicator, earthing required |
| Cleaning | Washable heads; use brush or water; dry thoroughly |
| Lubrication | Apply oil to blades periodically |
| Guarantee | 2 years |
| Compliance | EU EMC, LVD, RoHS, Eco-design directives |
| Material | Plastic housing, stainless steel blades |
| Battery Disposal | Remove back cover with screwdriver, recycle battery separately |
Frequently Asked Questions - RS-966 Izzy
User questions about RS-966 Izzy
0 question about this device. Answer the ones you know or ask your own.
Ask a new question about this device
Download the instructions for your Unspecified in PDF format for free! Find your manual RS-966 - Izzy and take your electronic device back in hand. On this page are published all the documents necessary for the use of your device. RS-966 by Izzy.
USER MANUAL RS-966 Izzy
natural_image
Black and white photo of a hand pusher with three circular brushes and a digital display (no text or symbols visible)natural_image
Illustration of a robot head with three wheels and a downward arrow, labeled '3' (no text or symbols on the robot itself)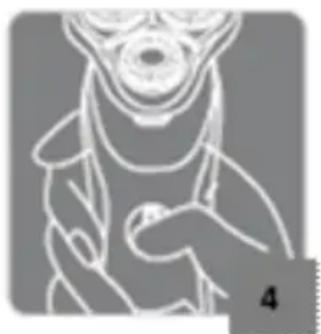
natural_image
Illustration of a stylized animal figure with open mouth and raised arms (no text or symbols)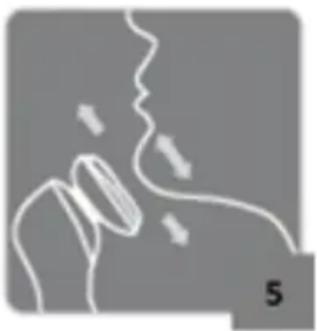
natural_image
Abstract line drawing of a hand holding a device with motion arrows, no text or symbols presentnatural_image
Two-step illustration showing a bottle being inserted into a bottle, with step 12 and step 13 labeled (no text or symbols on the diagrams themselves)natural_image
Illustration of a cartoon character holding a pipe and bottle, with the number 14 in the corner (no text or symbols on the figure itself)
We thank you for having chosen an appliance from the IZZY range.
Safety Interlocks
Please read these instructions carefully before using the appliance and save them for future reference. Please keep the sales receipt for guarantee purposes (pls see below “Guarantee and Customer Service”)
- Make sure your electricity supply is the same as the one shown on the underside of the appliance.
• Always plug your device into an outlet that is earthed. Failure to comply with this requirement may result in electric shock and possible serious injury. - Close supervision is necessary when your appliance is being used near children or infirm people. Ensure that they do not play with the appliance.
- This appliance is not intended for use by people with reduced physical, sensory or mental capabilities, children or those with lack of experience and knowledge, unless they have been given supervision or instruction concerning use of the appliance by a person responsible for their safety.
- Switch off and unplug:
- If a disturbance occurs
- After use and if no recharge is needed
- If the appliance is out of use for a prolonged period of time
- Before removing or inserting accessories
- Before cleaning
- Never use the appliance for any other use than indicated.
- Do not use the appliance on animals. The device is intended for use only in humans.
- The device is intended only for domestic use. Any other use will cancel the warranty.
To avoid any risk of burns, fire, electric shock or injury, always follow the instructions below:
- Do not use the device when you bathe.
- Do not install in a place from which the device can easily fall or be pulled into a tub or sink.
- Do not immerse the device and the charger in water or any other liquid.
- Always unplug the power cord after use, unless you charge the device.
- Never leave the appliance unattended when the charger is plugged in, except when charging.
• Always unplug the power cord before cleaning. - Never expose the device to direct sunlight or temperatures above 60^ .
- Keep the device always dry.
- Check the power cord periodically for possible damages. If the power cord or the plug of the appliance has been damaged, do not use the appliance and contact an authorized BENRUBI Service Center.
IMPORTANT: Do not cut the power cord of the charger at any case!
- Do not use / do not charge the appliance outdoors or in areas where it is carried out using various cleaning agents, insecticides, etc. in spray form or in places where they carried oxygen administration.
- To avoid injury, do not use the device with cut or damaged blades, or damaged parts. Ensure that the blades are properly aligned before use.
- Always turn off the device by pressing the power switch before unplugging the power cord.
- No liability is accepted for any damage resulting from use for other purposes than those indicated in the instructions for use, faulty operation and repairs made from unauthorized technicians. Guarantee services are excluded in such cases.
- Use only attachments recommended by the manufacturer. Otherwise, may cause danger to the user and damage to the device.
- Do not move the appliance by pulling from the power cord. Make sure the power cord is not jammed in any way. Do not wrap the cord around the body of the device and do not tilt.
- Do not use an extension cord or voltage converter with this appliance.
- Never disconnect the device from the mains by pulling the cord. Disconnect always by pulling the plug.
- If the appliance falls into water or any other liquid:
- Take off the power cord.
- Do not put your hands into the liquid.
- Contact with one of the authorized BENRUBI repair centers and do not use the appliance.
- Do not use corrosive, abrasive detergents or hard brushes as they can scratch and cause damage to the device.
- In case of a possible damage, do not attempt to repair the appliance by yourself. Please contact one of the authorized BENRUBI service centers. Any repair made by an unauthorized BENRUBI Service Center CANCELS THE GUARANTEE.
- Any misuse of the device cancels the warranty.
- Use only original spare parts.
- The appliance conforms to EU directive 2014/30/EU on Electromagnetic Compatibility, the 2014/35/EU Low Voltage Directive, the 2011/65/EU RoHS Directive, and the directive 2009/125/EC for eco-design.
SAVE THESE INSTRUCTIONS
Parts of the Appliance
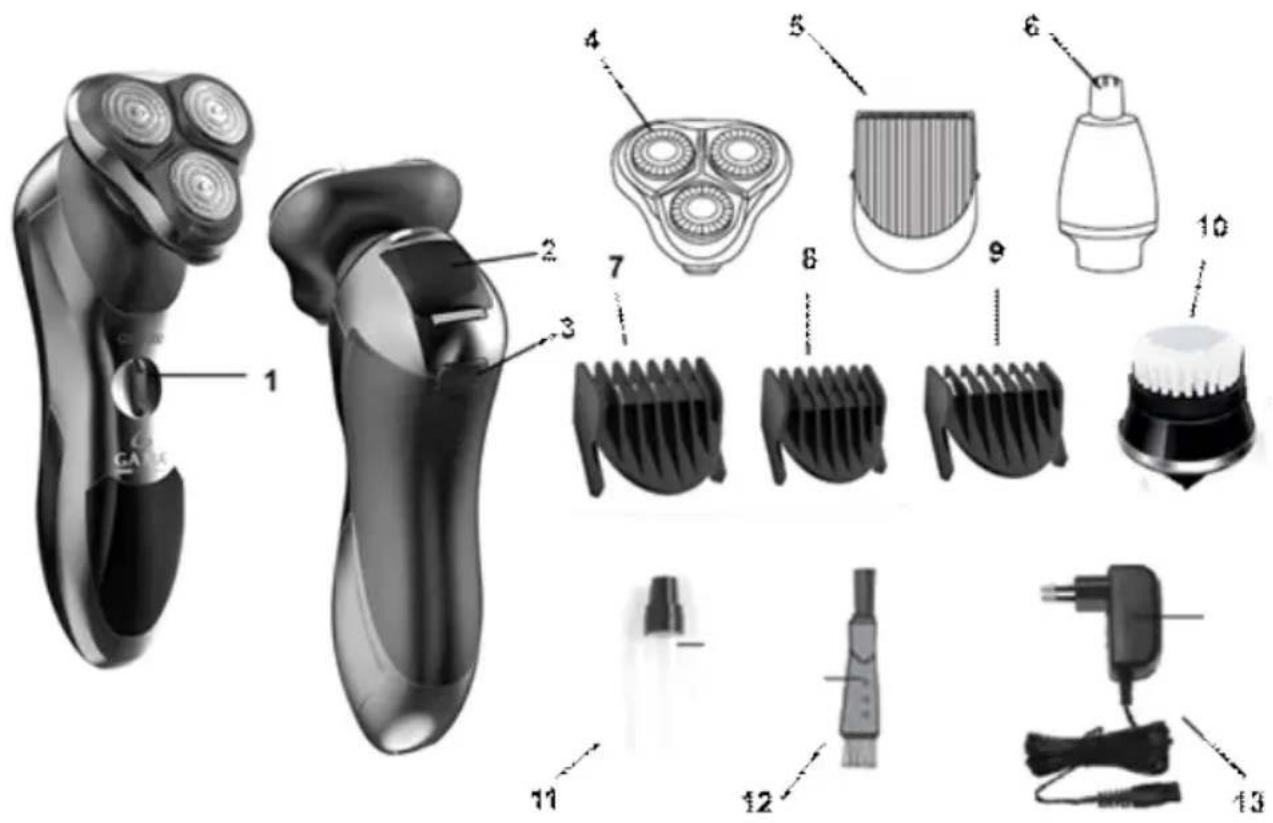
- On/off switch
- Detail trimmer
- Trimmer opening button
- Shaving head
- Clipper head
- Nose/ear trimmer
- Cutting guide 9mm
- Cutting guide 6mm
- Cutting guide 3mm
- Facial cleansing brush
- Lubricating oil
- Cleaning brush for accessories
- Charging adaptor
Charging the Appliance

Caution: Do not charge the appliance outdoors where it is in direct sunlight or in a very hot room (Figure 1).
- Connect the charger plug to the device and connect the charger to the socket (Figure 2). The indicator light will illuminate.
- Charge for 60-90 minutes. The LCD displays "99" when charging is complete.
- When charging is completed, remove the charger from the wall socket.
Note: The operating time at full charge takes about 50-60 minutes.
- The indicator light will turn red when the battery charge reaches below 10%. Connect the charger plugged in to finish shaving.
Note: Do not overcharge the unit. If the device is not used for a long time (2-3 months), unplug it from the electrical outlet and store. Fully charge the device when you want to use it again.
Using the Appliance
- Clean the heads and the device after each use, so that it remains clean by bacteria that are created during use.
- Do not give the device to other people in order to avoid transmission of skin infections.
Shaving head
natural_image
Illustration of a stylized robot head with a circular head and three ears, accompanied by a downward arrow and number 3 (no text or symbols on the robot itself)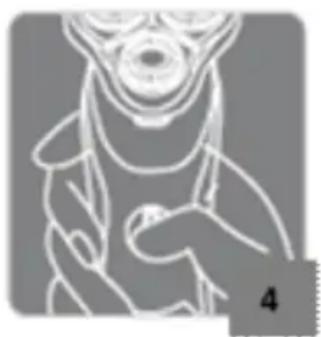
natural_image
Line drawing of a stylized animal figure with open mouth and raised arms (no text or symbols)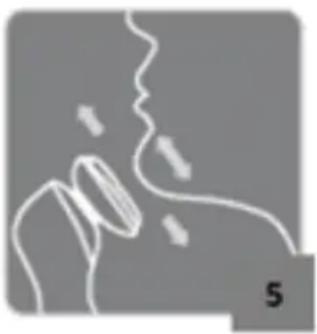
natural_image
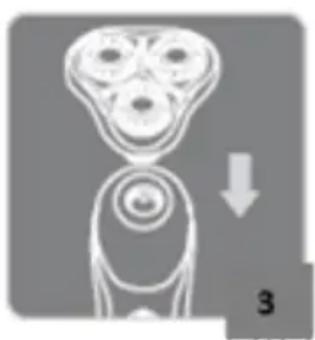
Abstract line drawing of a human hand holding a device, with no visible text or symbols- Place the shaving head (4) in the body of the appliance (Figure 3).
- Press the on/off switch (1) (Figure 4). The LCD will light up showing "99".
- Place the shaving head (4) on your face and gently shave (Figure 5).
- Once finished shaving, press again the on/off switch (1). The LCD screen will turn off.
Notes:
- For best results, make sure your face is clean and dry.
- The shaving head will adjust to your face and skin after the first use.
- You can use the shaving head to shave the hair on your neck.
- Always place the razor head cap after each use to avoid damage to the heads. Do not use the device if you notice wear on the shaving head heads because it can injure your skin.
Clipper head and cutting guides

- Place the clipper head (5) in the body of the appliance (Figure 6).
- Place the cutting guide (7,8,9) of your choice on the clipper head (5) depending on your hair length you want to mow 3/6/9mm (Figure 7 & 8). Make sure the cutting guide has snaps right onto the clipper head.
- Press the on/off switch (1).
- Once finished mowing, press again the on/off switch (1).
- Clean the clipper head and cutting guides with the brush (12) provided or under water. Dry thoroughly and keep them in the tray after each use.
Note: Place one drop of lubricating oil (11) in the blades if you use the clipper head regularly.
Detail trimmer
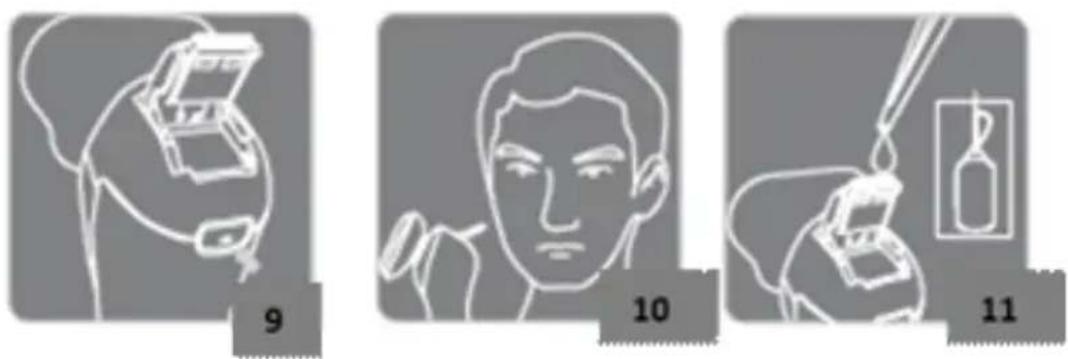
- Press the trimer opening button (3) on the back of the device (Figure 9). The detail trimmer (2) will pop-up on the top of the appliance.
- Press the on/off switch (1).
- Gently move the appliance to create the shapes you need (Figure 10).
- When finished, press again the on/off switch (1).
- Clean the trimer with the brush (12) provided or under water. Dry thoroughly.
- Press down the trimer (3) until you hear a "click" and it locks into place.
Note: Place one drop of lubricating oil (11) on the trimmer blades every two months (Figure 11).
Nose/ear trimmer

natural_image
Two-step diagram showing a bottle being inserted into a bottle, with step 12 and step 13 labeled (no text or symbols on diagrams)- Wash your nose before using the appliance with the nose/ear trimmer (6).
- Place the nose/ear trimmer (6) in the body of the appliance (Figure 12).
- Insert the nose/ear trimmer into your nose or in your ear (not more than 0.5 cm.) (Figure 13).
- Press the on/off switch (1).
- Move the trimmer in your nose or in your ear for better results.
- Once you finished, press again the on/off switch (1).
- Clean nose/ear trimmer with the brush (12) provided or under water. Dry thoroughly before storing.
Facial cleansing brush
- Place the facial cleaning brush (10) in the body of the appliance.
- Wet your face with water and place your facial cleanser soap of your choice on the brush (10).
- Place the cleaning brush (10) on your face and press the on/off switch (1).
- Move the cleaning brush (10) gently from the bottom upwards. Avoid the area around the eyes.
- Once the cleaning is completed, press the switch on/off (1) and rinse with water.
- Rinse the face cleaning brush (10) under water. Dry thoroughly before storing.
Care and Cleaning
CAUTION: Before cleaning please make sure that you have turned off and unpluged the appliance.
After each use:
- Brush the residues from hair.
- The accessories can be removed from the appliance to be washed.
- Cleaning should be done only with a soft brush, such as the one is provided in the packaging of the appliance.
- Use the lubricating oil for the blades.
- Do not use abrasive or corrosive cleaners for cleaning the body of the appliance and accessories.
Shaving head
natural_image
Illustration of a cartoon character wearing a hat and holding a pipe (no text or symbols)
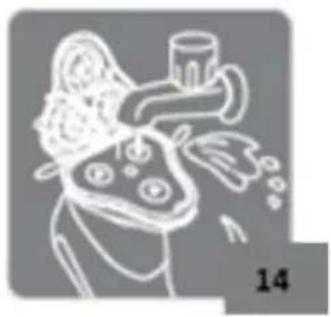
• The appliance has shaving head (2) cleaning notification. The display with the tap will light after continuous shaving of 30 minutes (Figure 14).
- You can clean the shaving head by using the brush (Figure 15) or under running water (Figure 14). Be sure to dry thoroughly before storage or before the next use.
- Clean the shaving head blades once a month. Press the button and remove the blades (Figures 16 & 17). Clean the blades with a brush (Figures 18 & 19). You can put one drop of alcohol in the blades and lubricating oil.
- Ensure that dry thoroughly before installation and before the next use.
- Make sure you put the shaving head blades in the same position after cleaning.
- Test whether the appliance is working properly after cleaning the shaving head.
Clipper head
- Clean the head and the cutting guide with the brush or under water. Dry thoroughly and keep them in the tray after each use.
Trimmer
- Clean the head with the brush or under water. Dry thoroughly before storage.
Nose/ear trimmer
- Clean the head with the brush or under water. Dry thoroughly before storage.
Facial cleaning brush
- Rinse the face cleaning brush under water. Dry thoroughly before storing.
Technical Characteristics
Model: Grooming Kit RS966
Charging Adaptor:
Rated voltage / Frequency: 100-240V AC 50/60 Hz
Output: DC 5V 1000mA
Waterproof IPX7
Motor voltage: 3.7V d.c.
Battery: 600mAh x 1 (lithium battery)
Battery Disposal
- Remove the back cover of the device with a screwdriver to locate the battery.
- Remove the battery from the product and recycle properly.
Safe Appliance Disposal

- This product should not be disposed with other household wastes at the end of its working life. To prevent possible harm to the environment or human health from uncontrolled waste disposal, please separate it from other types of waste and recycle it responsibly to promote the sustainable reuse of material resources.
- Household users should contact either the retailers where they purchased this product, or their local government office, for details of where and how they can take this item for environmental safe recycling. This product should not be mixed with other commercial wastes for disposal.
Guarantee & Customer Service
- Before delivery, our devices are subjected to rigorous quality control. Moreover, your appliance is guaranteed for a period of two (2) years from the date of purchase. During this period BENRUBI after sales SERVICE will repair or replace the product or any defective parts free of charge.
- No guarantee is provided, nor liability in case of any defect arising from willful or accidental damage, fair wear or tear, faulty installation, handling or maintenance of the product, connection to an unsuitable electric supply, negligence, abnormal conditions, failure to follow our instructions, misuse or alteration or repair of the product without the approval of an authorized BENRUBI service center.
FOR MORE INFORMATION CONTACT:
H. BENRUBI & FILS SA
27 Aghiou Thoma str, GR15124
Maroussi - Athens
Tel.: 210 6156400, Fax: 210 6199316
e-mail: benrubi-sda@benrubi.gr


- Safety Interlocks
- Please read these instructions carefully before using the appliance and save them for future reference. Please keep the sales receipt for guarantee purposes (pls see below “Guarantee and Customer Service”)
- To avoid any risk of burns, fire, electric shock or injury, always follow the instructions below:
- IMPORTANT: Do not cut the power cord of the charger at any case!
- SAVE THESE INSTRUCTIONS
- Parts of the Appliance
- Charging the Appliance
- Using the Appliance
- Shaving head
- Notes:
- Clipper head and cutting guides
- Detail trimmer
- Nose/ear trimmer
- Facial cleansing brush
- Care and Cleaning
- After each use:
- Clipper head
- Trimmer
- Facial cleaning brush
- Technical Characteristics
- Battery Disposal
- Safe Appliance Disposal
- Guarantee & Customer Service
- BENRUBI & FILS SA
Brand : Izzy
Model : RS-966
Category : Unspecified