328-10618V2 - Weather Station LA CROSSE TECHNOLOGY - Free user manual and instructions
Find the device manual for free 328-10618V2 LA CROSSE TECHNOLOGY in PDF.

User questions about 328-10618V2 LA CROSSE TECHNOLOGY
0 question about this device. Answer the ones you know or ask your own.
Ask a new question about this device
Download the instructions for your Weather Station in PDF format for free! Find your manual 328-10618V2 - LA CROSSE TECHNOLOGY and take your electronic device back in hand. On this page are published all the documents necessary for the use of your device. 328-10618V2 by LA CROSSE TECHNOLOGY.
USER MANUAL 328-10618V2 LA CROSSE TECHNOLOGY
WITH AccuWeather FORECAST
INSTRUCTION MANUAL

text_image
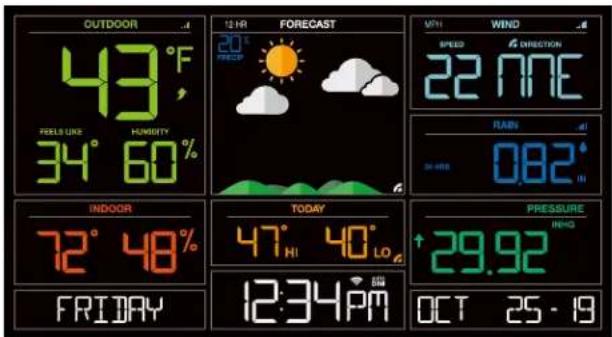
OUTDOOR 43°F NOLATION 34° 60% INDUOR 72° 48% FRIDAY 12:34 PM FORECAST 20° 22.77W MAY - 082. TODAY 47° 40' FRECAST 29.92 OCT 23-20 OUTDOOR 43°F 60% PMT 12:34 °C LA CROSSE® TECHNOLOGY LE CROSSE® TECHNOLOGY LE CROSSE® TECHNOLOGY LE CROSSE® TECHNOLOGY LE CROSSE® TECHNOLOGY LE CROSSE® TECHNOLOGY LE CROSSE® TECHNOLOGY LE CROSSE® TECHNOLOGY LE CROSSE® TECHNOLOGYWelcome!
Congratulations on your new Professional Weather Station and welcome to the La Crosse Technology family! This product was designed with you in mind by our hometown team of weather enthusiasts based in La Crosse, Wisconsin.
Model: V30v2 (328-10618)
DC: 092120
TABLE OF CONTENTS
3 Quick Setup
4 Quick Mounting Tips
4 Button Functions
5 Weather Station Icons
6 Connect to La Crosse View™ App
8 Benefits of Connecting to La Crosse View™
9 Enhanced Weather Forecasts w/La Crosse View™
9 Advanced Forecast & Chance Precipitation
10 AccuWeather Daily Forecasts
10 AccuWeather Hourly Forecasts
11 AccuWeather HI/LO Temperatures
11 AccuWeather Wind Direction
11 Custom Data Streams
12 Additional Sensors can read to your app
13 Status Messages when Connected
14 Features of Your Weather Station
14 Adjustable Backlight
14 Auto Dim Backlight
15 Settings Menu
16 Extra Sensor Area
18 Wind Speed Readings & History
19 Rainfall Readings & History
21 Temperature/Humidity Readings & HI/LO Records
22 Feels Like Temperature
22 Temperature Trend Arrows
22 Relative Pressure Reading
23 Sensor Reception Indicators
23 Sensor ID and Search
24 Delete Sensors
24 Low Battery Indicators
24 Factory Restart Station
25 Detailed Sensor Setup and Mounting
28 Bonus Station Setup
29 Help Us, Help You
29 Join the Conversation
30 Specifications
31 Care and Maintenance
31 Warranty and Support
32 FCC Statement
32 Canada Statement
QUICK SETUP
- Insert 2 - C batteries into your LTV-W1 or LTV-W2 Wind Sensor.
- Insert 2 - AA batteries into your LTV-R3 Rain Sensor.
- Insert 2 - AA batteries into your LTV-TH2 Thermo-Hygro Sensor.
- Insert the power cord into your V30v2 (328-10618) station. Remove the red insulation tab from the CR2032 battery compartment found on the bottom of your station.
- Insert batteries into your Bonus Station.
- Download the La Crosse View™ App (App Store or Google Play)
- Follow along with our instructional videos to connect your station to the app: http://bit.ly/LaCrosseView_Support_Vid_01_1 http://bit.ly/LaCrosseView_Support_Vid_01_2
- Mount your sensors in appropriate locations.


WARNING:
- This product contains a Button Cell Battery.
- If swallowed, it could cause severe injury or death in just 2 hours.
- Seek medical attention immediately.
AVERTISSEMENT:
WARNING - KEEP BATTERIES OUT OF REACH OF CHILDREN
- Swallowing may lead to serious injury in as little as 2 hours or death, due to chemical burns and potential perforation of the oesophagus.
- If you suspect your child has swallowed or inserted a button battery, immediately seek urgent medical assistance.
- Examine devices and make sure the battery compartment is correctly secured, e.g. that the screw or other mechanical fastener is tightened. 4. Do not use if compartment is not secure.
- Dispose of used button batteries immediately and safely. Flat batteries can still be dangerous.
- Tell others about the risk associated with button batteries and how to keep their children safe.
QUICK MOUNTING TIPS
WIND SPEED
Ensure the sensor is mounted vertically - an unobstructed rooftop is ideal.
- Your wind sensor should be the tallest object in the area to avoid educed wind speed values.
RAIN
Mount in an open area, preferably off the ground on a level platform.
- Clean out the bucket regularly to avoid debris; this can affect readings.
THERMO-HYGRO
Keep out of direct sunlight & ensure the sensor is well-ventilated.
• We recommend mounting it on a north-facing wall under an eave or deck for best results.
For detailed sensor setup and mounting instructions, see page 25.
BUTTON FUNCTIONS
Buttons located on top of Profesional Weather Station
| RAIN | WIND | TEMP | + | SET | - | EXTRA SENSOR | SENSOR | LIGHT |
Buttons located on the right side of Professional Weather Station
| DAILY | HOURLY |
| SET | Hold for basic setting. Press to view Wi-Fi status. |
| TEMP, WIND, RAIN | Press to view history. |
| LIGHT | Press to adjust brightness. Hold to set Auto Dim. |
| + or - | Use + or - to adjust values in settings. |
| + & - | Hold both buttons to search for Wi-Fi. |
| SENSOR | Press to view sensor ID numbers, then hold PLUS (+) to search, or hold MINUS (-) to remove. |
| DAILY, HOURLY | Press to see forecast. Must be connected to Wi-Fi. |
| RAIN & LIGHT | Hold both buttons together to reset all sensor ID's and Wi-Fi settings. |
| EXTRA SENSOR | Press to toggle through “extra sensor” & Barometric Pressure. Hold to add Sensors. |
WEATHER STATION ICONS
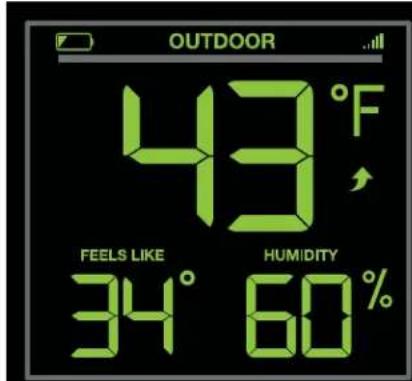
text_image
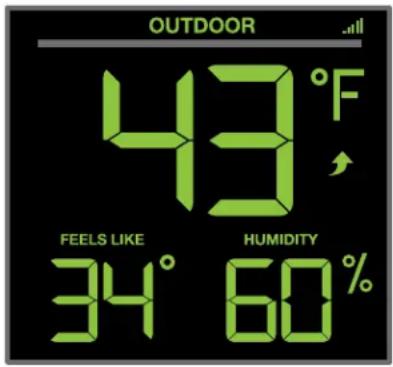
OUTDOOR 43°F FEELS LIKE HUMIDITY 34° 60%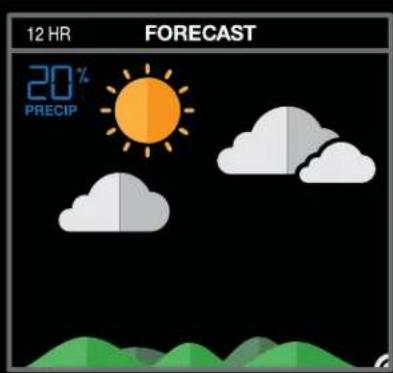
text_image
12 HR FORECAST 20% PRECIP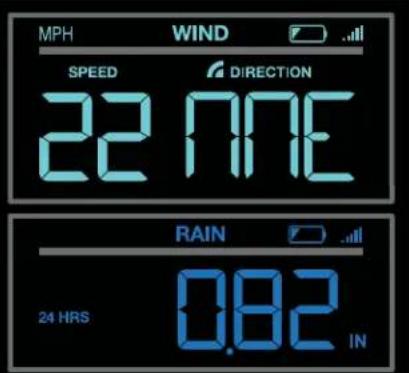
text_image
MPH WIND SPEED DIRECTION 22 NNE 24 HRS 0.82 IN RAIN
text_image
INDOOR 72° 48%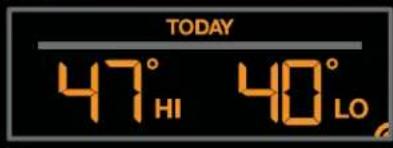
text_image
TODAY 47° HI 40° LO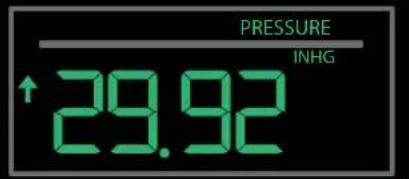
text_image
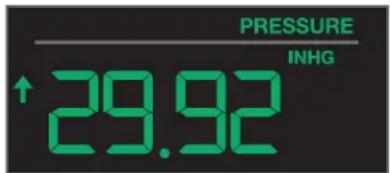
PRESSURE ↑29.92 INHG

text_image
12:34PM AUTO DIM

Low Battery Indicator

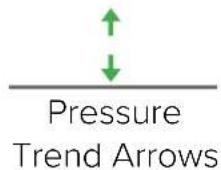
Sensor Reception

Temperature Trend Arrows

Fahreheit Celsius

Percent Humidity
12 HR
12 Hour Forecast

Chance of Precipitation

Forecast Indicators

Internet Indicator

Wi-Fi Indicator
MPH / KMH
Miles or Kilometers
IN/MM
Inches or Millimeters
INHG / HPA
Inches of Mercury or Hecto Pascal

Pressure Trend Arrows

Auto Dim Indicator
EXTRA SENSOR AREA ICONS:
• The Extra Sensor area of your station will default to Pressure when you first power up.
- When you choose to add additional sensors, the Sensor Reception Indicator will show in the upper left corner whether Press ure or Sensor reading is displayed.
- Press and release the EXTRA SENSOR button to view all additional sensors.
text_image
EXTRA SENSOR 73° JRYINHG / HPA Inches of Mercury or Hecto Pascal
Low Battery Indicator

text_image
PRESSURE INHG ↑ 29.92Auto Scroll Pressure/Sensors
Probe Reading
CONNECT TO LA CROSSE VIEW™ APP
MOBILE DEVICE REQUIREMENTS
iOS Requirements:
Mobile device with iOS with cellular or Wi-Fi service
Android Requirements:
Mobile device with Android OS with cellular or Wi-Fi service
Ensure your station's Wi-Fi Indicator is flashing. If it is not, press and hold the Plus (+) and Minus (−) buttons down together until it begins flashing. This tells you that your station is ready to connect.
CHECK YOUR NETWORK
Connect your mobile device (phone or tablet) to your router's 2.4GHz Wi-Fi network. For more Wi-Fi info visit: www.lacrossetechnology.com/router_info
DOWNLOAD
Visit the App Store or Google Play Store to download the free La Crosse View™ app onto your mobile device.


LAUNCH & FOLLOW
Open the La Crosse View™ app and follow the on-screen instructions.
When connecting your station we highly recommend following along with our detailed support videos, found here:
bit.ly/LaCrosseView\_Support\_Playlist
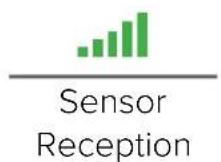
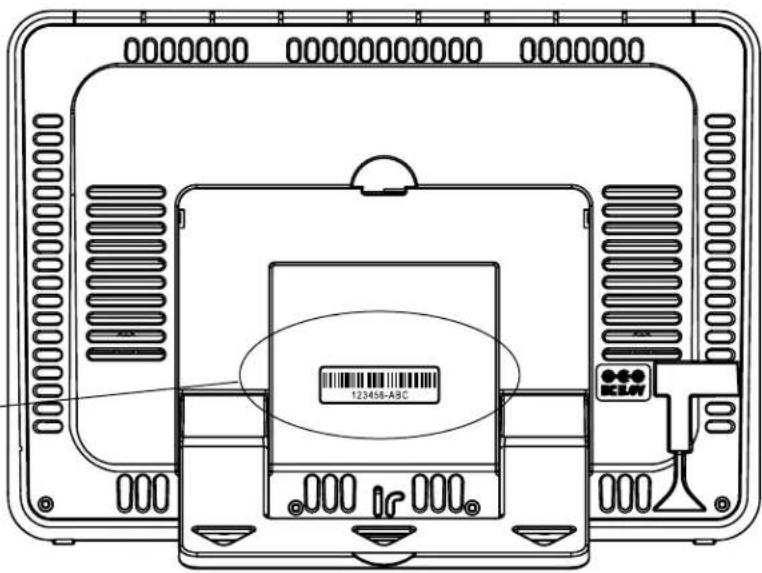
- Your station's device ID can be found on the back of the display.
- Within 15 minutes after your station connects to the La Crosse View app, you should receive notifications to add your sensors. These will display in your app's Notification Center.

text_image
123456-ABCStation Device ID
text_image
0000000 00000000000 0000000 123458-ABC IR 000When your sensors are ready to be added, you'll see your app's cloud turn red. Press this Cloud Icon to begin adding your sensors.

text_image
Add Device Please wait up to 15 minutes for your additional devices to connect to your account. Check the notification icon when your devices are ready to add. If you do not receive device notifications, go to the Main Menu and select Add / Edit Devices to add your devices separately. DONE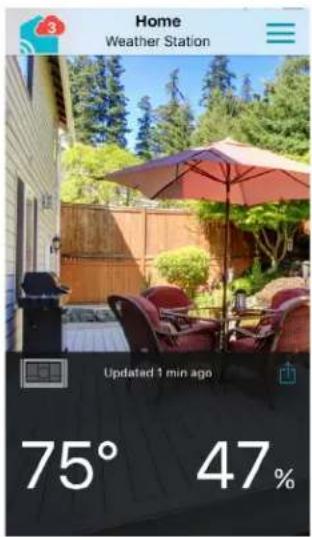
text_image
Home Weather Station Updated 1 min ago 75° 47%
text_image
9:41 AM Clear Alerts Notifications Done TODAY A new Rain Sensor has been detected on your display DISMISS A30 A new Temperature and Humidity Sensor has been detected on your display DISMISS A30 A new Wind Sensor has been detected on your display DISMISS A30BENEFITS OF CONNECTING TO LA CROSSE VIEW™

La Crosse View™
Connecting You to Your Home Anytime, Anywhere.
FEATURES CONNECTEDSTANDALONE
| Wind Speed | √ | √ | |
| Wind Direction | √ | ||
| Rainfall Data | √ | √ | |
| Indoor & Outdoor Temperature | √ | √ | |
| "Feels Like" Temperature | √ | √ | |
| Indoor & Outdoor Humidity | √ | √ | |
| 12-Hour Forecast | √ | √ | |
| Barometric Pressure | √ | √ | |
| Internet Time and Calendar | √ | ||
| Advance Forecast Icons | √ | ||
| Daily Forecast HIs & LOs | √ | ||
| % Chance of Precipitation | √ | ||
| Ability to Add Sensors | √ | √ | |
| Data Stream Technology | √ | ||
| Remote Monitoring | √ | ||
| Set Alerts | √ | ||
| View Graphs | √ |
ENHANCED LACROSSE VIEW CONNECTED FEATURES.
- Advanced Forecast Icons & Chance of Precipitation (12 Hour Forecast)
• AccuWeather Daily & Hourly Forecasts - AccuWeather HI/LO Temperatures
- AccuWeather Wind Direction
- Custom Data Streams
ADVANCED FORECAST & CHANCE OF PRECIPITATION
SUNNY
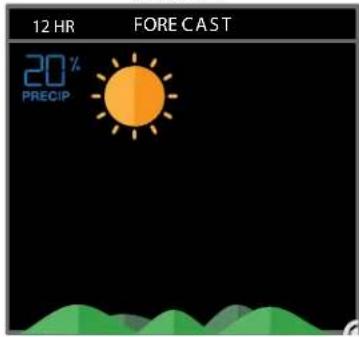
text_image
12 HR FORECAST 20% PRECIPCLOUDSPARTLY SUNNY

text_image
12 HR FORE C AS T 20% PRECIP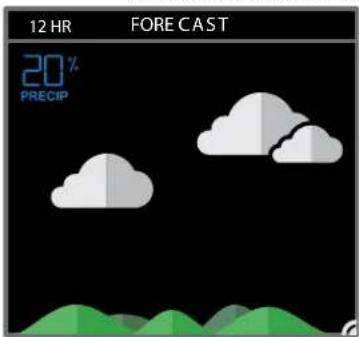
text_image
12 HR FORECAST 20% PRECIPLIGHT RAIN T-STORMRAIN

text_image
12 HR FORECAST 80% PRECIP
text_image
12 HR FORE C AS T 90% PRECIP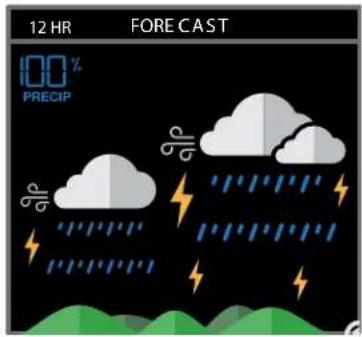
text_image
12 HR FORECAST 100 % PRECIPtext_image
12 HR FORECAST 80% PRECIP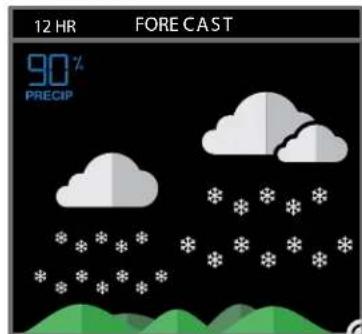
text_image
12 HR FORECAST 90% PRECIP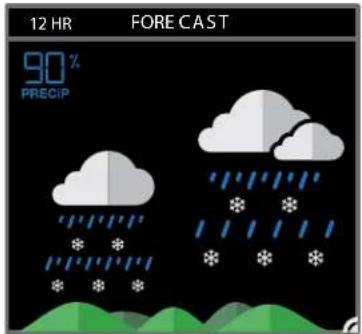
text_image
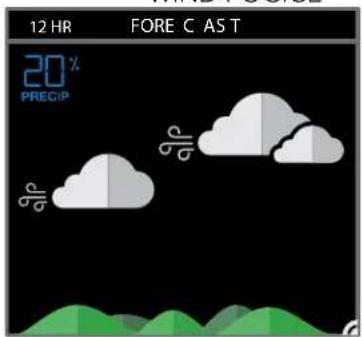
12 HR FORECAST 90% PRECIPWIND FOGICE
text_image
12 HR FORE C AS T 20% PRECIP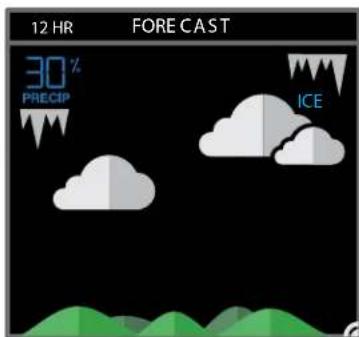
text_image
12 HR FORECAST 30% PRECIP ICE
text_image
12 HR FORECAST 30% PRECIP FOGPress the DAILY button on the side of your station to scroll through 7 days of future forecasts. You'll see changing forecast icons, HI/LO Temperature readings.
IMPORTANT: After viewing your Daily Forecast, the display will automatically revert back to the default 12 hour forecast after 10 seconds.

text_image
12:19 FORECAST 20° POTC TO DAY 47° HILO 40 DAILY OCT 24 - 18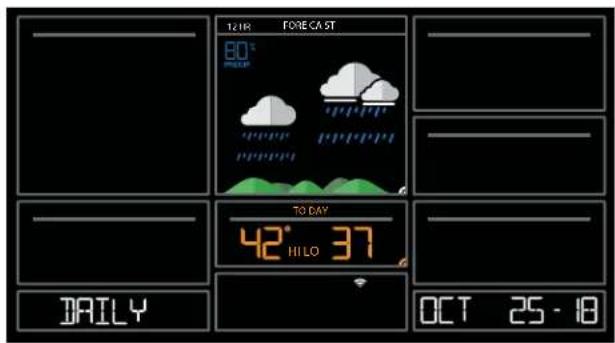
text_image
12:19 FORECAST 80° PEEER TO DAY 42° HILO 37 DAILY OCT 25 - 18Press the HOURLY button on the side of your station to scroll through 12 hours of future forecasts. You'll see hourly changes in:
- Weather Icons
- Chance of Precipitation
- Temperature
- Wind Direction
IMPORTANT: After viewing your Hourly Forecast, the display will automatically revert back to the default 12 hour forecast after 10 seconds.
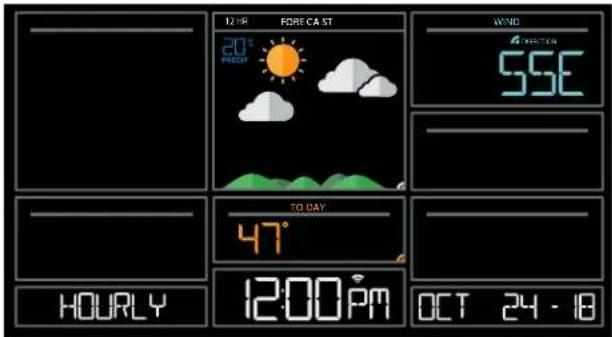
text_image
12:00 FORECAST 20° RED 55E TO DAY 47° 12:00 PM OCT 24 - 18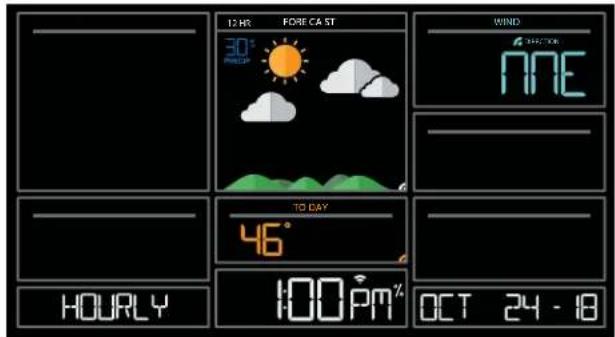
text_image
12 HR FORECAST 30° PICKER WIND NEE TO DAY 46° HOURLY 100PM% OCT 24 - 18Note: If you press the HOURLY or DAILY button when not connected, station will say CONNECT TO WIFI. If your station is connected, but happens to lose connection with the weather service, it will say WAIT FOR WEATHER when your HOURLY or DAILY button is pushed.
IMPORTANT:
There may be small discrepancies between data displayed on your station and data shown through other AccuWeather services, such as their website and/or mobile app. This is common, as there are differences in the timing in which forecast data is fetched by these items. Our connected weather stations will receive forecast updates at least 4 times daily.
ACCUWEATHER HI/LO TEMPERATURES
TODAY Shows

text_image
TO DAY 47° HI LO 40Internet Indicator will appear in bottom right corner when connected.
- When connected, your daily AccuWeather HI/LO Temperature predictions will display in this section.
- If unconnected, this section will display your Outdoor Temperature Records registered daily by your Thermo-Hygro Sensor. These will automatically reset at Midnight everyday.
ACCUWEATHER WIND DIRECTION
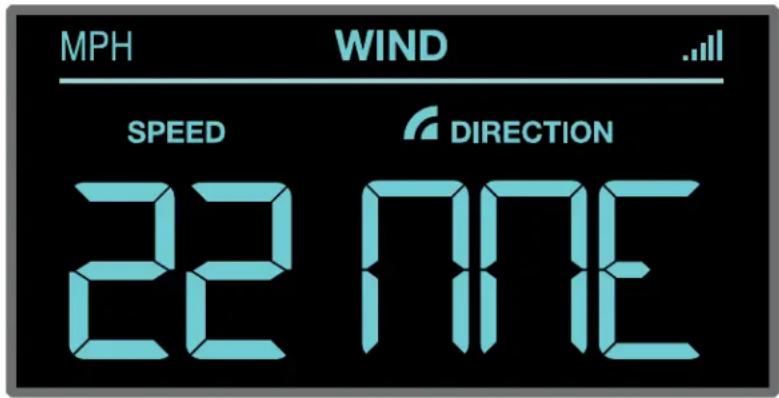
text_image
MPH WIND SPEED DIRECTION 22 TIMEInternet Indicator
Appears and
Wind Direction
replaces Top 1HR
CUSTOM DATA STREAMS
Use the Data Stream Menu in the La Crosse View™ app to select up to 3 items to stream on your station.
- Open the La Crosse View™ app and swipe until you find your station's device page.
- Scroll down to the Data Stream section and press the blue stream icon in the upper right.
- Follow the app's instructions to customize your "Data Stream" to display on your station
Note: Allow up to 10 minutes for new Data Stream selections to appear on your station.

text_image
OUTDOOR 43°F FEELS LIKE HUMIDITY 34° 60% INDOOR 72° 48% UV INDEX 12 HR FORECAST 20% PRECIP M PH WIND SPEED DIRECTION 22 NNE 24 HRS 0.82 IN TODAY 47° HI 40° LO 4 EXTRA SENSOR 73° DRY MODERATECustom Data Stream
Data Stream Items:

AccuWeather
Customizable Data Streams to enhance your in-home display:
Wind Speed • Wind Direction • Wind Gust • UV Index • Visibility • Dew Point • Percentage of Clouds •
Sunrise Time • Sunset Time • Hours of Sunlight • Moon Rise Time • Moon Set Time • Temperature/Humidity • and more!
Personal Messages
Enter up to 20 characters for special events or reminders, such as:
- SOCCER TONIGHT • ICE CREAM IN FREEZER • GREAT JOB MATH TEST or anything you can think of!
Note: Allow up to 10 minutes for new Data Stream selections to appear on your station.
ADDITIONAL SENSORS CAN READ TO YOUR APP
How to add Sensors to your La Crosse View App only:
- Install batteries in the sensor, and if the sensor has a TX button, press the TX button to force a signal.
- Scan sensor bar code ID so it will read in the La Crosse View app.
Details: Open your La Crosse View app to add sensors. Watch the video for adding devices to the La Crosse View app: http://bit.ly/LaCrosseView_Support_Vid_10
- From Main Menu - select "Devices" under "Add/Edit"
- On Edit Devices page - select "ADD DEVICE"
- Scan Device ID - Scan the bar code on your sensor or choose "ADD MANUALLY" to type in the number on the bar code. Select "CONTINUE".
- On Confirm Device page - Confirm the sensor image and select "YES"
- On Enter Device and Location Name page - enter Device Name and select a location or enter a Location Name for your sensor. Select "DONE".
Repeat steps 1-5 for any additional sensors you wish to add.
STATUS MESSAGES WHEN CONNECTED
Quick Tip:
- The Wi-Fi Icon indicates Wi-Fi connection- not necessarily app connection.
- The Internet Icons " by your Forecast, Wind Direction and HI/LO Temperatures will indicate connection to the La Crosse View App and Weather Server.
Status Messages on you station will let you know if there are issues.
Press and release the SET button to view the status of your station.
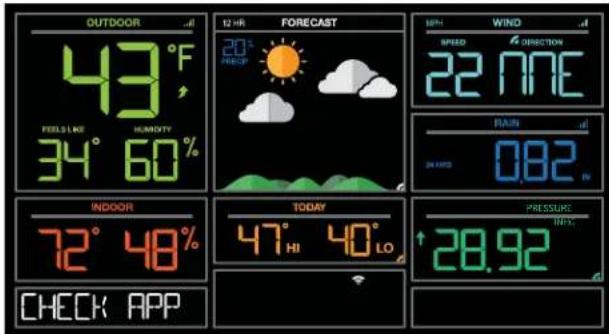
ALL OK CONNECTED
- Station is connected all the way through to the La Crosse View app.
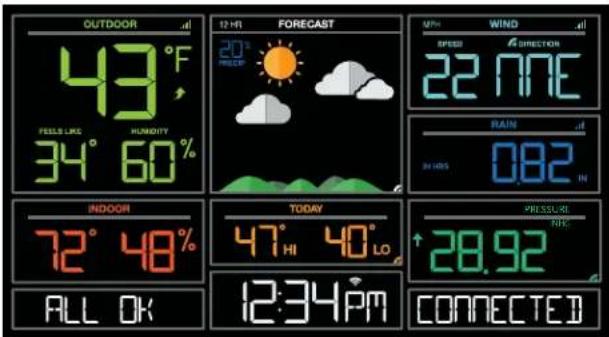
text_image
OUTDOOR 43°F FEELS LIKE 34° 60% INDOOR 72° 48% ALL OK 12 HR FORECAST 20° FROEF 22 HNE SPEED WIND DIRECTION 22 HNE 54 HBS 0.82 IN TODAY 47° 40° LO 12:34 PM PRESSURE 28.92 RTR CONNECTEDCHECK APP
• The Wi-Fi router connection is working.
- Check your connection to the La Crosse View app.
- Check Notifications in the La Crosse View app
• Is there an update to install?
text_image
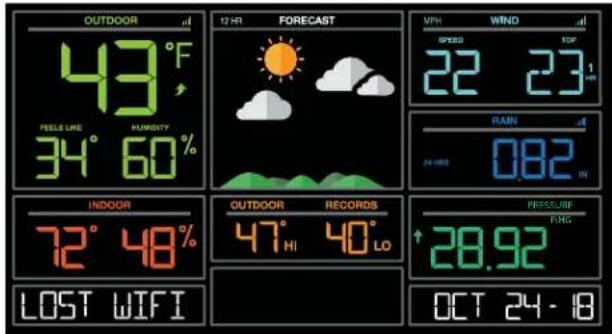
OUTDOOR 43°F FEELS LIKE HUMIDITY 34° 60% INDOOR 72° 48% CHECK APP FORECAST 20° FROOD 22 NNE SPEED CORRITION 22 NNE PINEER 0.82 N TODAY 47° HI 40° LO PRESSURE 28.92LOST WIFI
- Check your power cord connection (power cord required to connect)
- When trying to reestablish your station's Wi-Fi connection, be sure your mobile device is on the same 2.4GHz network you want your station to use.
- Check your network connection.
- Hold the + and – buttons together for 3 seconds to search for Wi-Fi.
text_image
OUTDOOR 43°F PEELS LIME HUMIGITY 34° 60% INDOOR 72° 48% LOST WIFI 12 HR FORECAST VPH WIND SPEED TOP 22 23 m RAIN IN 0.82 OUTDOOR RECORDS 47° HI 40° LO PRESSURE 28.92 OCT 24 - 18NO WEATHER SERVICE
• Wi-Fi, and App are fine.
- Weather/Time service not connecting. This will be resolved at the Weather Server. Please be patient.
- Weather Forecast, Precipitation and Weather HI/LO temperature will not be displayed.
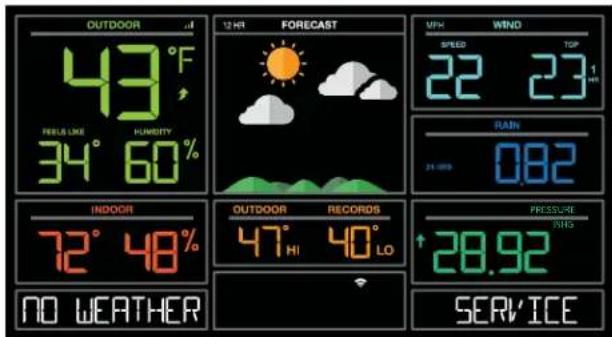
text_image
OUTDOOR 43°F PEELS LIKE 34° 60% INDOOR 72° 48% NO WEATHER FORECAST 12 HR WIND SPEED 22 23 TOP 1 H1 RAIN 24 GPS RECORDS 47° HI 40° LO PRESSURE 28.92 SERVICEFEATURES OF YOUR WEATHER STATION
Your station provides most functionality when connected to the La Crosse View app. However it is fully functional as a standalone station.
Here we have included the details for various functions of your station:
- Adjustable Backlight
- Auto Dim Backlight
- Settings Menu
- Extra Sensor Area
• Wind Speed Readings and History
• Rainfall Readings and History
• Temperature/Humidity Readings and HI/LO Records
• Feels Like Temperature
• Temperature Trend Arrows
• Relative Barometric Pressure - Low Battery Indicators
- Sensor Reception Indicator
- Sensor ID's and Sensor Search
- Delete Sensor
• Factory Restart Station - Bonus Station
Your station has 5 levels of brightness for the backlight:
- Press and release the LIGHT button to adjust the backlight at 5 levels of intensity.
Levels: OFF = 0% | level 1 = 1.5% | level 2 = 20% | level 3 = 50% | level 4 = 100%.
AUTO DIMMING BACKLIGHT
You can set your backlight to automatically dim to level 1 at a set hour for sleeping, then automatically return to full brightness when you wake.
Set Auto Dim (Hour only):
- Hold the LIGHT button 2 seconds to enter dimmer set mode. AUTO DIM OFF will show.
- Press the + or - buttons to turn dimmer (ON). AUTO DIM ON will show.
- Press the LIGHT button to select start time (Hour) for dimmer. AUTO DIM START TIME and the hour will flash.
- Press the + or - buttons to change the hour for the dimmer to be low light level.
- Press the LIGHT button to select start time for dimmer to be on High light level. AUTO DIM STOP TIME and the hour will flash.
- Press the + or - buttons to change the hour for the dimmer to be high light level.
- Press the LIGHT button to confirm exit.
Note: Hold LIGHT button at any time to exit dimmer settings.

text_image
AUTO DIM OFF
text_image
AUTO DIM ON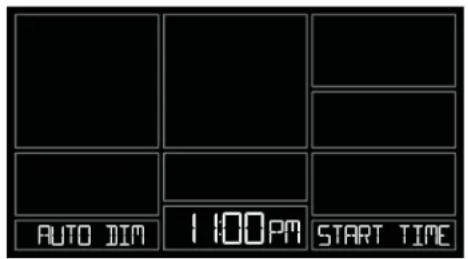
text_image
AUTO DIM 1:00PM START TIME
text_image
AUTO DIM 600AM STOP TIMENote: If you press the LIGHT button to manually adjust the backlight, the Auto Dim feature will resume at the next scheduled time to dim.
SETTINGS MENU
- Hold the SET button for 3 seconds to enter settings menu.
- Press and release the + or - buttons to adjust the flashing values. Hold to adjust quickly.
- Press and release the SET button to confirm and move to the next item.
Note: Press and release the LIGHT button any time to exit settings.
Settings menu order:
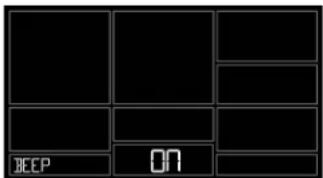
• BEEP ON | OFF
• 12/24 hour format
• Hour
- Minutes
- Year
- Month
- Date
• Temperature Fahrenheit | Celsius
- Pressure: InHg / hPa
• Pressure number setting
Note: Weekday sets automatically as Year, Month and Date are set.
text_image
BEEP ON
text_image
2/24 TIME 12HR FORMAT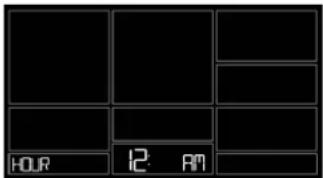
text_image
12 AM HOUR
text_image
MINUTES 34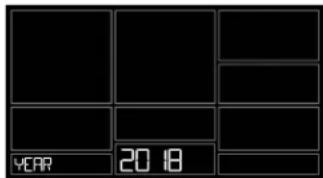
text_image
YEAR 20 18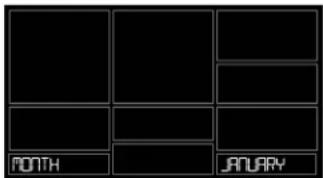
text_image
MONTH JANUARY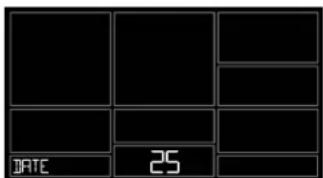
text_image
DATE 25
text_image
TEMP OF FAHRENCHIT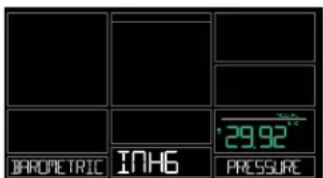
text_image
BHORUETRIC INH6 PRESSURE 29.92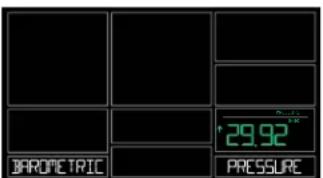
text_image
BAROMETRIC PRESSUREEXTRA SENSOR AREA
The Extra Sensor area of your station will show Relative Pressure when you first power up.
Optional Extra Sensors: Up to 4 additional Thermo-Hygro, Wind Speed, Water Leak or any combination of these sensors can read to the EXTRA SENSOR area of your display. Simply press and release the EXTRA SENSOR button to view these sensors or turn on Auto Scroll.
Note: The Extra Sensor area cannot read Rain sensors.
Note: Not all sensors will read to the station. Be sure to check the chart to see if a sensor can read to the app only, or both station and app.
Relative Pressure (default) Temperature/Humidity

text_image
PRESSURE ↑ 29.92 INHG
text_image
EXTRA SENSOR 74° 60%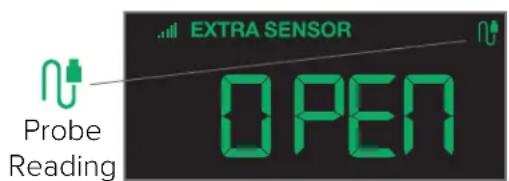
text_image
EXTRA SENSOR Probe Reading OPENWind Speed
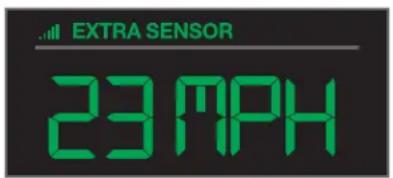
text_image
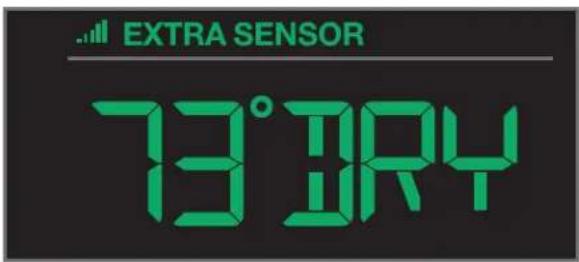
EXTRA SENSOR 23 MPHWater Leak

text_image
EXTRA SENSOR 73° BRY
text_image
Auto Scroll all Extra Sensors EXTRA SENSOR 73°DRYAdd Extra Sensors to your station:
- Hold the EXTRA SENSOR button 3 seconds, to add a sensor to the station.
- Install batteries in the sensor, and if the sensor has a TX button, press the TX button to force a signal.
- Allow up to 3 minutes to view sensor and ID on station.
Note: Once sensor is found the search will stop. Sensor, ID, and type will show for 3 seconds then return to normal display.
- Scan sensor bar code ID so it will read in the La Crosse View app.
-
Added sensors will be available for display in Extra Sensor area of station.
-
Hold the EXTRA SENSOR button
- Install batteries in the sensor
- Press TX button
- Allow up to 3 minutes to connect
- Scan sensor bar code ID

text_image
Sensor Barcode ID - AA + + AA - TX ButtonStation normal display-Pressure showing
text_image
OUTDOOR 43°F FEELS LIKE 34° 60% HUMidity 20° FREET 12 HR FORECAST WIND METHI SPEED 22 NNE DIRECTION FLAW 082° INDOOR 72° 48% FRIDAY TODAY 47° 40° 12:34PM PRESSURE INHO 29.92 OCT 25 - 19Water Leak sensor added
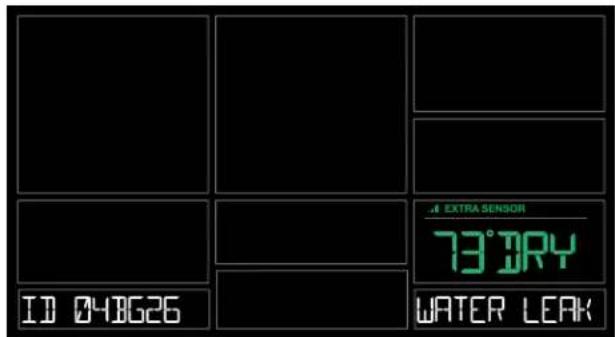
text_image
ID 040626 .4 EXTRA SENSOR 73° JRY WATER LEAKDelete Extra Sensors from your station:
- Press and release the EXTRA SENSOR button until you see the sensor and ID you wish to delete.
- Hold the MINUS (-) button for 3 seconds to delete this sensor. The sensor readings and ID will show dashes.
- Sensor will no longer show in the Extra Sensor area.
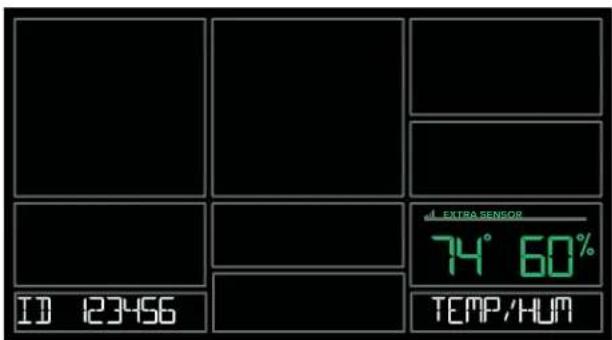
text_image
ID 123456 EXTRA SENSOR 74° 60% TEMP/HUM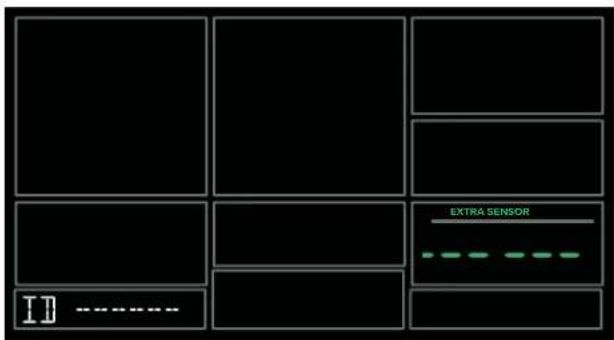
text_image
ID EXTRA SENSORPress and release the EXTRA SENSOR button to view Pressure, and any Extra Sensors connected to your station.
WIND SPEED READINGS & HISTORY
Current Speed: Highest wind speed in past 31 seconds. Samples every 3 seconds
Top Speed (1 HR): Highest wind speed in past 60 minute period.
Wind Direction: When connected wind direction in letters will replace Top 1HR. Top 1HR will still be viewable in history. Internet Indicator will show next to the word DIRECTION.
Not Connected: Current & Top Speed Connected: Current Speed & Internet Wind Direction

text_image
MPH WIND SPEED 22 TOP 23 1 HR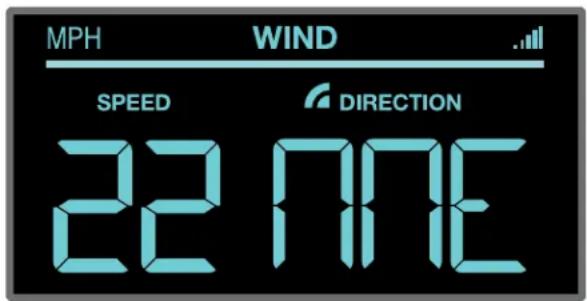
text_image
MPH WIND SPEED DIRECTION 22 TIMEWind Speed History:
- Press and release the WIND button to view the maximum wind history values (Top Speed).
- When viewing MONTH history, press the PLUS button to toggle through the current month and past 11 months top speed.
Note: All other readings will disappear for 5 seconds.
1 Hour: Highest wind speed in past 60 minute period.
24 Hours: Highest wind speed in past 24 hour period, from last record, with time/date stamp. This is a running total.
7 Days: Highest wind speed in past 7-day period, from last record, with time/date stamp. This is a running total.
Month: Highest wind speed in for the month with time/date stamp
o Current Month: First day to current day.
o Previous 11 months. Defined by Calendar Month i.e. January 1 - January 31
Year: Highest wind speed in Current Year. Defined by Calendar Year i.e. January 1 - December 31 Top speed for the year with time/date stamp
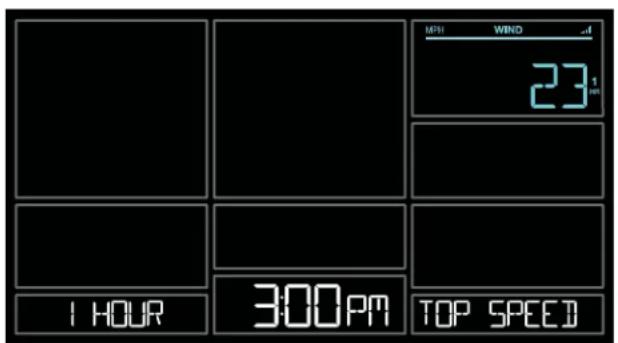
text_image
MWH WIND 23 1 1 HOUR 300PM TOP SPEED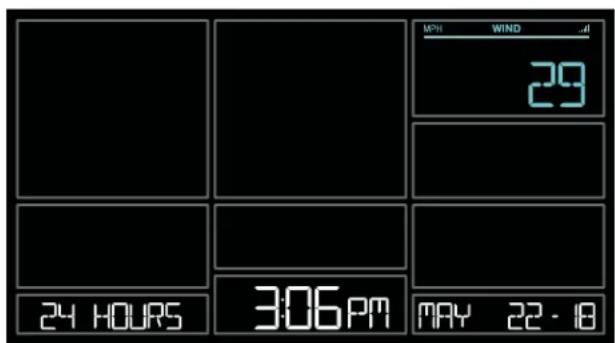
text_image
MWH WIND 29 24 HOURS 306PM MAY 22 - 18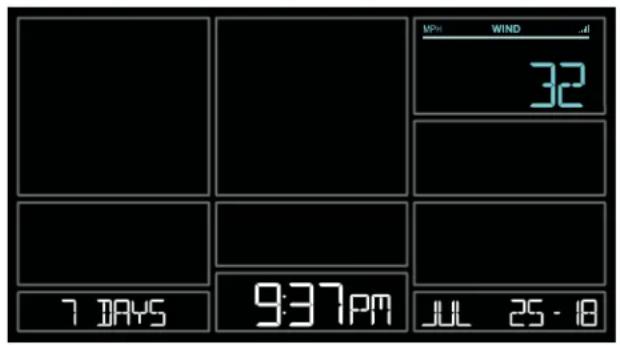
text_image
MP#: WIND .d 32 7 DAYS 9:37PM JUL 25 - 8
text_image
MWH WIND a 53 1 MONTH 12:57PM SEP 01-18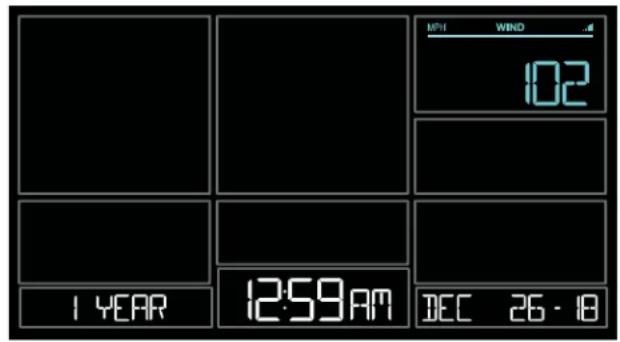
text_image
MPI WIND 102 1 YEAR 12:59AM DEC 26 - 18Reset Wind Speed History:
- Press the WIND button to view individual wind speed readings.
- Hold the MINUS button for five seconds to reset the individual value.
- Wind speed reading will reset to current wind speed, time and date.
RAINFALL READINGS & HISTORY
- Simply press and release the RAIN button to cycle through the exact rain history you'd like displayed (other readings will disappear temporarily). Your station will stay on your selection.
- Press and release the LIGHT button, or wait 20 seconds to return to a full, normal display.
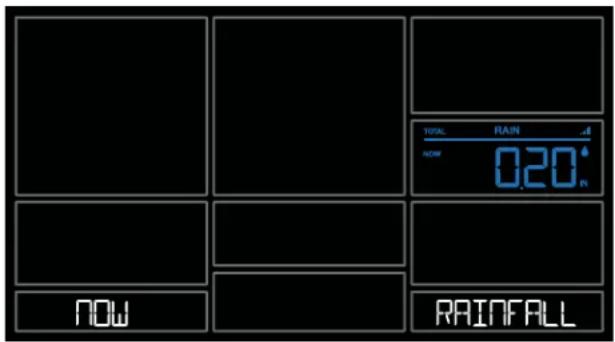
NOW:
- Shows Rain readings from the start of a rain event until no rain has accumulated for 30 minutes.
• After a 30 minute period of no rainfall, this number will reset to zero.
1 Hour:
- Rainfall in the past 60 minutes (last twelve 5 minute samples).
• Example: current time is 6:49, 1HOUR is the accumulated rain between 5:50 to 6:49.
24 Hours:
- Rainfall for the past 24 hours. Updates at each full hour. This is a running total.
7 Days:
- Rainfall from the last 7 consecutive 24 hour rainfall readings.
- Updates each day at 12am midnight. Not subject to your calendar, but be sure you have your time set correctly.
Month:
- Current Month: First day to current day. Current month (MAY) will show.
- Press and release the PLUS button to view previous months.
1 Year:
- Current month plus past 11 months total. Current year will show.
Total:
- Total rainfall since station was powered on or reset.
Note: As time passes without rain, the 1 hour, 24 hour, and 7 day rain totals will count down to zero.
text_image
TICKL RAIN .d NOW 020° NOW RAINFALL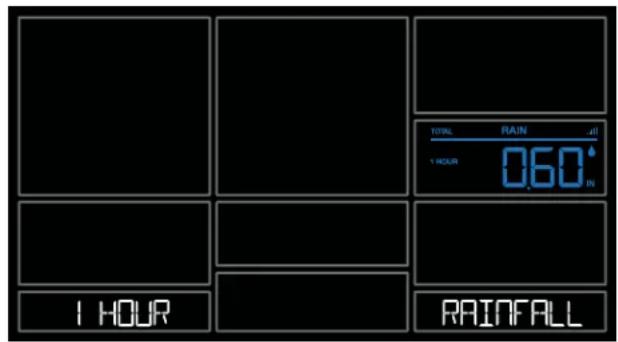
text_image
TOTAL RAIN all 1 HOUR 0.60° 1 HOUR RAINFALL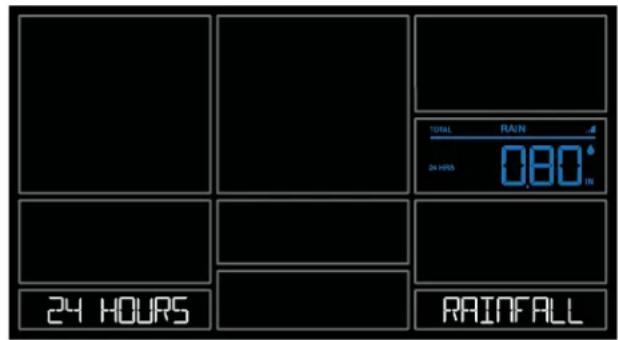
text_image
TOTAL RAIN 4 24 HOURS 080° IN 24 HOURS RAINFALL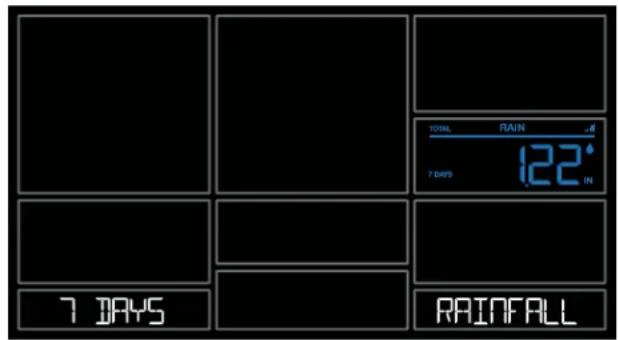
text_image
TOTAL RAIN 7 DAYS 122° IN 7 DAYS RAINFALL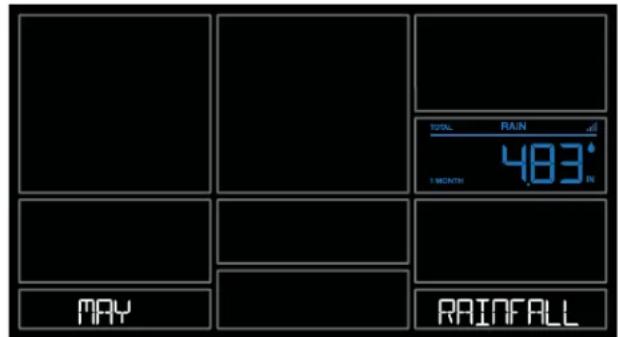
text_image
TOTAL RAIN 483° 1 MONTH MAY RAINFALL
text_image
TOTAL RAIN ./ 1 YEAR 4769° IN 1 YEAR RAINFALL
text_image
TOTAL RAIN 630.1° TOTAL RAINFALLReset Rainfall History:
- Press and release the RAIN button to view individual rain readings.
- Hold the MINUS button for five seconds to reset the individual value.
- Rain reading will reset to zero.
Your current Indoor and Outdoor temperature and Humidity are constantly displayed on your weather station. Your station records your HI and LO Temperature and Humidity with time and date of occurrence.
- Press and release the TEMP button to view your HI and LO records with time and date of occurrence.
- Any new HI or LO record will replace the existing record.
Viewing order:
• Outdoor HI Temp with Time/Date
• Outdoor LO Temp with Time/Date
• Outdoor HI Humidity with Time/Date
• Outdoor LO Humidity with Time/Date
- Indoor HI Temp with Time/Date
- Indoor LO Temp with Time/Date
- Indoor HI Humidity with Time/Date
- Indoor LO Humidity with Time/Date
• Feels Like HI Temp with Time/Date
• Feels Like LO Temp with Time/Date
• Outdoor Dew Point

text_image
108 °F HI [R] [C] [D] 1238PM AUG 25: 8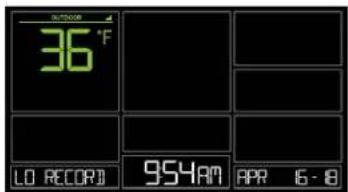
text_image
36 °F LO RECOR 954AM APR 16-8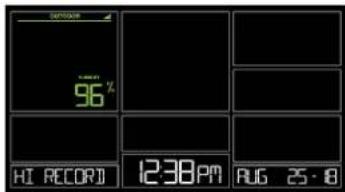
text_image
96% H: RECOR 12:38PM RUG 25·8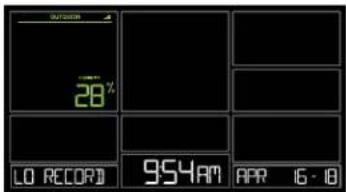
text_image
28% LO RECOR 954AM APR 16 - 18
text_image
86° HI RECORD 4:10 PM FEB 8:8
text_image
57 LO RECORD 12:18AM JAN 25-18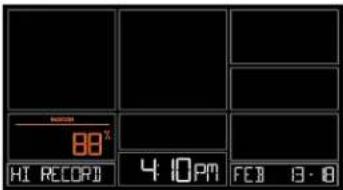
text_image
88° HI RECORP 4 10PM FEB 8·8
text_image
RECOR 22° LO RECORID 12:18AM JAN 25-18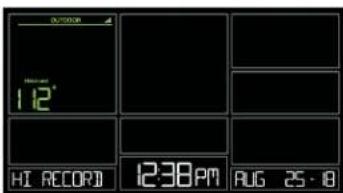
text_image
OUTDOOR 12' HI RECORD 12:38 PM AUG 25:18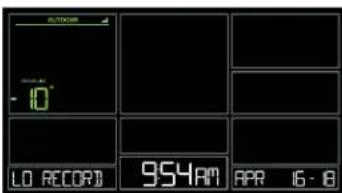
text_image
OUTDOOR -10° LO RECORD 954AM APR 16 - 8
text_image
55 °F NEW POINT DEC 30 - 8Reset HI/LO Temperature/Humidity Records:
- Press and release the TEMP button to view individual temperature/humidity readings.
- Hold the MINUS button for five seconds to reset the individual value.
- Temperature and Humidity readings will reset to current temperature, humidity, time and date.
FEELS LIKE TEMPERATURE
Your “Feels Like” Temperature is a combination of outdoor temperature, humidity and wind speed. It is displayed in the Outdoor Temperature area.
- When outdoor temperature is higher than 80^ , your Feels Like Temperature is showing Heat Index.
- When outdoor temperature is lower than 50^ , your Feels Like Temperature is showing Wind Chill.
- When outdoor temperature is between 50^ and 80^ , your Feels Like Temperature will show Current Outdoor Temperature.
Note: When you have a high humidity reading, but the temperature is not over 80^ F, the Feels Like Temperature will remain the same as the current outdoor temperature.
text_image
OUTDOOR 43°F FEELS LIKE HUMIDITY 34° 60%TEMPERATURE TREMD ARROWS
Your Outdoor Temperature Trend Arrows update every 15 minutes. The trend reflects changes over the past one hour period.
UP ARROW: For this to show, the temperature will have to rise by 2^ F ( 1^ C), or more within the current hour.
RIGHT ARROW: Temperature is steady
DOWN ARROW: For this to show, the temperature will have to fall by 2^ F ( 1^ C), more within the current hour.
RELATIVE PRESSURE READING
- Your station itself has a Pressure Sensor inside to provide accurate Relative Pressure readings.
- The station will default to a Relative Pressure of 29.92 Inches of Mercury.
- Give it up to 3 days to automatically adjust to your environment.
- The Relative Pressure number is programmable in the Settings Menu.
- You can select INHG (Inches or Mercury) or HPA (Hecto Pascal) for Pressure units in the Settings Menu.
- The UP and DOWN Arrows indicate the Pressure Tendency (rising or falling). This is calculated when the average value of the current hour's barometric pressure is compared to the average of the past 3 hours. If the difference is greater than +1hpa, the air pressure trend will increase; if the difference is less than -1hpa, the air pressure trend will decrease; if it is between +1 and -1hpa, it will be flat.
Note: If you choose to add Extra Sensors, simply press and release the EXTRA SENSOR button to switch between the sensor reading and Relative Pressure reading.
text_image
PRESSURE ↑ 29.92 INHGSENSOR RECEPTION INDICATORS
There are Sensor Reception Indicators for your Temperature/Humidity Sensor, Wind Sensor and Rain Sensor. If you add Extra Sensors, There will be a Sensor Reception Indicator for them as well.
- When indicator is solid, sensor is connected.
- When indicator is flashing, it is searching for the individual sensor.
- If there is no indicator, the sensor is not connected.
SENSOR ID & SENSOR SEARCH
Your station and each sensor have a unique ID number that will identify them in the La Crosse View app. This has the added bonus of locking them into your weather station until you manually delete them.
View ID numbers in station:
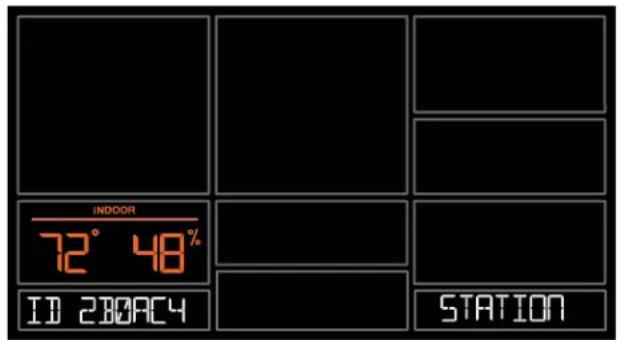
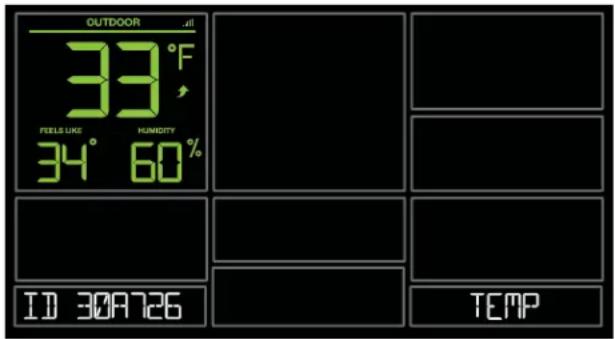
Press and release the SENSOR button. The ID number and type will show on the bottom of the station.
- Station
• TH Sensor - Wind Sensor
- Rain Sensor
- Extra Sensor (if connected to station)
Search for Individual sensors:
- Press and release the SENSOR button to view sensor type and ID.
- Hold the PLUS (+) button to search for the sensor. The reception indicator will flash for up to 3 minutes.
- Allow up to 3 minutes to view sensor and ID on station.
Note: Once sensor is found search will stop. The reception indication will stop flashing.
Sensor and ID will show for 3 seconds.
text_image
INDOOR 72° 48% ID 280AC4 STATION
text_image
OUTDOOR 33°F FEELS LIKE HUMidity 34° 60% ID 30A726 TEMP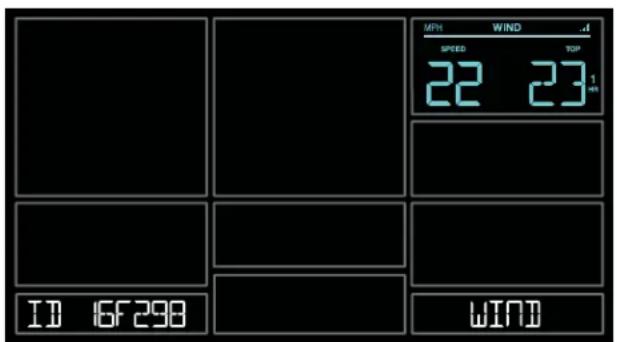
text_image
MPH WIND SPEED TOP 22 23 1 ID 16F298 WIND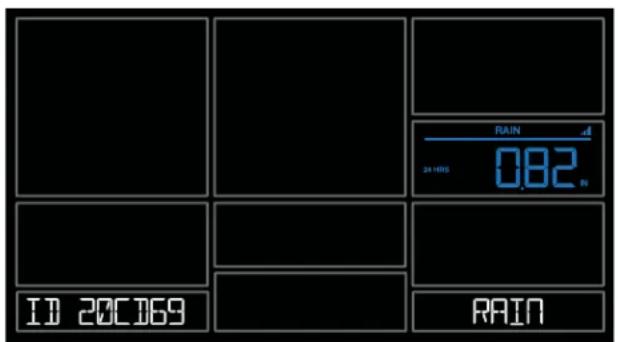
text_image
RAIN 24 HRS 0.82 V ID 20C169 RAINDELETE SENSORS
- Press and release the SENSOR button to view sensor type and ID.
- Hold the MINUS button to delete the sensor from the station.
- Deleted sensor can no longer show on station. Batteries should be removed.
-
Station will automatically search for a replacement sensor of the same type.
Example: Delete a Wind sensor, the station will search for a new Wind sensor. -
If replacing a sensor, insert batteries into the new sensor. Once station receives sensor, press the SENSOR button to confirm sensor ID.
Note: Deleted, working, Sensors with batteries installed, may still pass through to the app but will no longer show on the station.
text_image
OUTDOOR 33°F FEELS LIKE HUMOITY 34° 60% ID 30A726 TEMP
text_image
OUTDOOR HUMIGITY IDLOW BATTERY INDICATORS
- Low battery by Outdoor Temperature, replace batteries in the TH sensor.
- Low battery by Wind, replace batteries in the Wind Sensor.
- Low battery by Rain, replace batteries in the Rain Sensor.
- Low Battery by Indoor Temperature, replace batteries in Station.
- Low Battery by Extra Sensor, replace batteries in Extra Sensor.
FACTORY RESTART STATION
A factory restart of your station will remove all sensor ID numbers and Wi-Fi settings and return it to its default settings and “out of the box” condition.
This may resolve connection issues with your sensors or Wi-Fi.
- Hold the RAIN and LIGHT buttons together for 5 seconds.
- Your station will reset and search for all sensors.
- Allow up to 3 minutes to reacquire all sensors.
- You will need to reconnect to your La Crosse View app by selecting CONNECT WIFI from the menu in your La Crosse View App and entering your Wi-Fi password.
DETAILED SETUP & MOUNTING
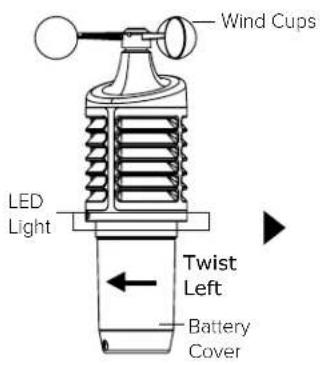
LTV-W1 or LTV-W2 Wind Speed Sensor
- Turn the battery cover of your wind sensor to the left.
- Install fresh "C" batteries.
- Carefully align and turn battery cover right to tighten.
- There is a blue LED light on the sensor that will flash when transmitting.
text_image
Wind Cups LED Light Twist Left Battery Cover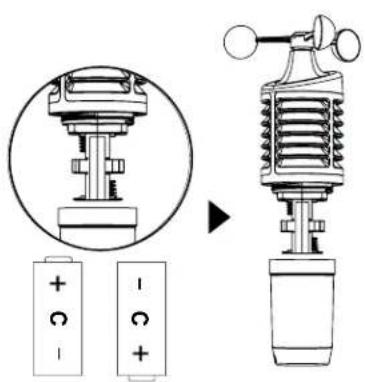
text_image
Diagram illustrating battery charging mechanism and its corresponding charge distribution for a sensor device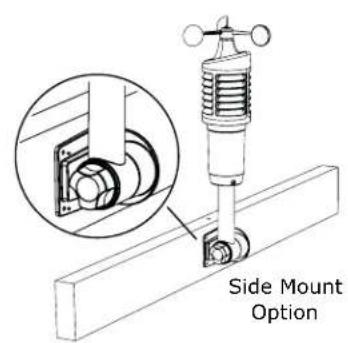
text_image
Side Mount Option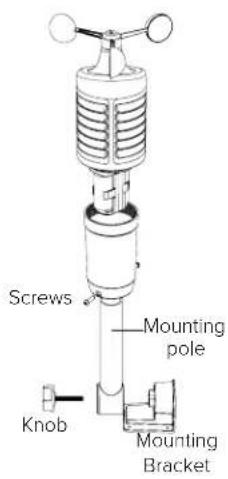
text_image
Screws Mounting pole Knob Mounting BracketMounting:
- Position in an open area that will have the least amount of interference with wind speed.
- Mount your sensor vertically with the wind cups on top.
-
The maximum wireless transmission range to the station is up to 400 feet (121 meters) in open air, not including walls or trees.
-
Use screws through the bottom of the mounting bracket to attach.
- Insert bottom of pole into mounting bracket. Tighten knob to secure
- Insert the included mounting pole into your sensor.
- Tighten screws.
Alternatively:
- Insert your own mounting pole (no more than 1 inch outside diameter") into the sensor.
- Tighten screws
LTV-R3 Rain Sensor:
- Flip open both locking tabs on your rain sensor and lift off the funnel portion.
- Pull up on the battery cover and remove.
- Install 2-AA batteries according to polarity.
- Reposition the battery cover over the battery compartment, and firmly push down to lock it back into place
- Remove cardboard and any tape around the rocker before use. These were used to protect the sensor from unwanted movement during shipping.
- Place the funnel portion back over the sensor and re-secure the locking tabs.
Mounting:
- Mount in an open area, on a stationary level platform for a more accurate rain count.
Note: Avoid placing the bottom of the rain sensor in a depression that would not allow proper water drainage.
- Insert the mounting screws through the holes in the bottom of your rain sensor. Do not over tighten.
- Mount your rain sensor at least 3 feet and optimally 6 feet in the air and in direct line of sight to your station.
- Your rain sensor should be accessible to allow for periodic cleaning of debris or insects.
- The maximum wireless transmission range to your station is up to 400 feet (121 meters) in open air, not including walls or floors.
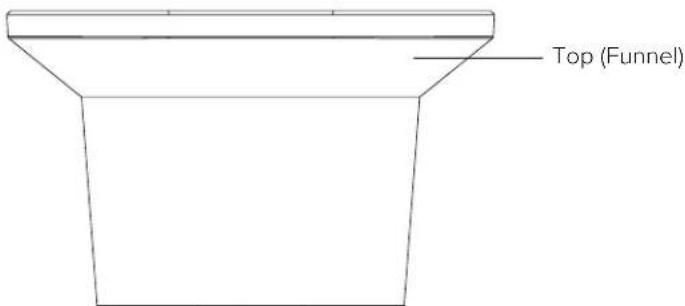
text_image
Top (Funnel)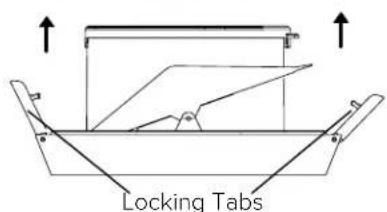
text_image
Locking Tabs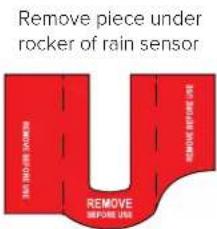
text_image
Remove piece under rocker of rain sensor REMOVE BEFORE USE
text_image
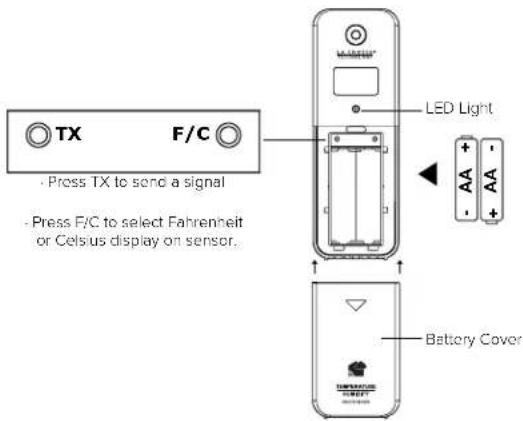
Battery Cover Rocker AA + AA - + +LTV-TH2 Thermo-Hygro Sensor
- Install 2-AA batteries according to polarity and replace battery cover.
Mounting:
-
Use the hole at the top to hang your sensor from the back using a nail. Or, insert one mounting screw through the front of your sensor.
-
Mount your sensor on a north-facing wall or in any shaded area. Under an eave or deck rail is preferred.
-
The maximum wireless transmission range to the weather station is up to 400 feet (121 meters) in open air, not including walls or floors.
-
Be sure your sensor is mounted vertically, to allow moisture to drain out properly.
Note: Watch sensor mounting video: http://bit.ly/TH_SensorMounting
text_image
TX F/C Press TX to send a signal Press F/C to select Fahrenheit or Celsius display on sensor. LED Light Battery Cover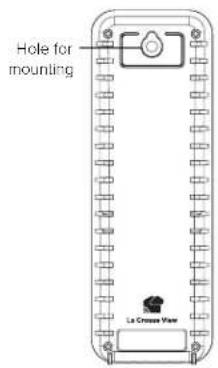
text_image
Hole for mounting La Crosser ViewV30v2 (328-10618) Weather Station:
- Insert the power cord into a wall outlet, then into your station. Remove the red insulation tab from the CR2032 battery installed in the bottom of your weather station to maintain time/date in the event of a power outage.
Mounting:
- Place your station near an outlet. Power cord is required for operation.
- Use the mounting holes on the back to place your station on a wall.
- Use the pull down stand on the back of your station to place on a desk or counter.
- Your station should remain in good Wi-Fi range of your wireless router to use all the remote monitoring options using the La Crosse View app.
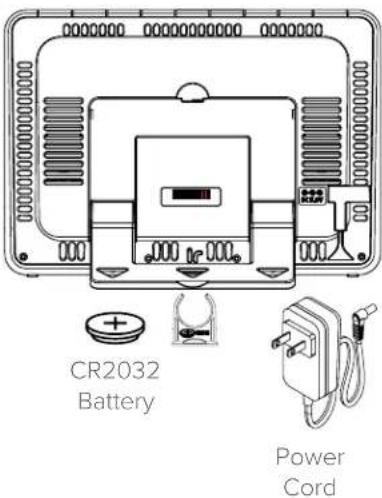
text_image
CR2032 Battery Power CordBONUS STATION SETUP
As an added bonus, we've included an LTV-D1 Bonus Station to provide basic temperature and humidity readings in another room of your home. Your Bonus Station will receive its data from the included LTV-TH2 Thermo-Hygro Sensor.
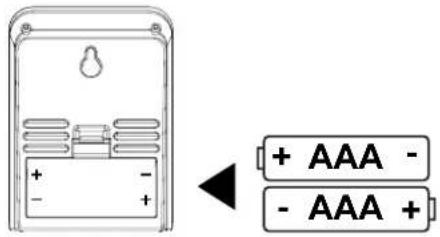
LTV-D1 Bonus Station:
- Insert 2 AAA batteries into your Bonus Station according to polarity.
Mounting:
-
Place your bonus station on a desk or counter top.
-
Use the mounting hole on the back to place your station on a wall.
text_image
+ AAA - - AAA +Settings Menu:
Your Bonus Station does not connect to La Crosse View and will need to be set manually:
- Hold the SET/IN-OUT button for 3 seconds to enter settings menu.
- Press and release the +/SEARCH button to adjust settings. Hold to adjust quickly.
- Press and release the SET/IN-OUT button to move to next item
Setting order:
• 12/24 Hour Time
• Hour
- Minutes
• Fahrenheit/Celsius
- 12 | 24 Hr
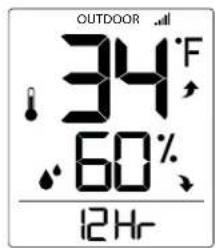
text_image
OUTDOOR 34°F 60% 12Hr- Hour

text_image
OUTDOOR 34°F 60% AM 12: ○- Minutes

text_image
OUTDOOR 34°F 60% :34Note: This Bonus Station will not connect to the La Crosse View app.
View Indoor or Outdoor Data:
Press and release the SET/IN-OUT button to switch between:
• Outdoor temperature/ humidity readings
- Indoor temperature/humidity readings
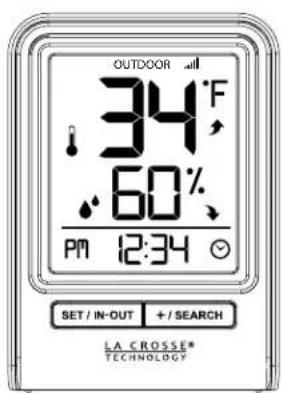
text_image
OUTDOOR 34°F 60% PM 12:34 SET / IN-OUT + / SEARCH LA CROSSE* TECHNOLOGY
text_image
INDOOR 72°F 45% PM 12:34 SET / IN-OUT + / SEARCH LA CROSSE* TECHNOLOGYSearch for Outdoor Sensor:
In the rare event your Bonus Station loses connection with the Thermo-Hygro sensor, the outdoor readings will show dashes.
- Simply hold the + / SEARCH button for 3 seconds to search for the sensor.
- The sensor reception icon will flash while searching.
Restart:
- Remove batteries for 15 minutes.
- Press any button 20 times.
- Install fresh batteries.
- Allow up to 3 minutes to receive your Thermo-hygro sensor
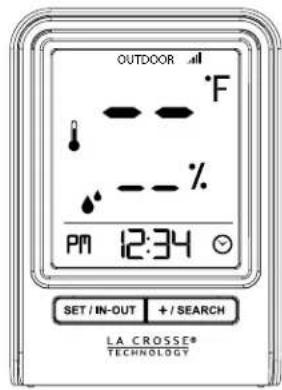
text_image
OUTDOOR °F - % PM 12:34 SET / IN-OUT + / SEARCH LA CROSSE* TECHNOLOGYHELP US, HELP YOU
If you require additional support, call our friendly customer support team based out of La Crosse, Wisconsin. Phone: 1.844.200.8752
Or fill out our online support request form here: bit.ly/contact_techsupport
Our knowledgeable customer support team is available: Monday-Friday, 8am-6pm CST.
JOIN THE CONVERSATION
Ask questions, watch detailed setup videos, and provide feedback on our social media outlets!


SPECIFICATIONS
| Indoor | |
| V30v2 (328-10618) Temperature Range: | 32°F to 99°F (0°C to 37°C) |
| LTV-D1 Temperature Range: | 32°F to 122°F (0°C to 50°C) |
| Both Stations Humidity Range: | 10% RH to 99%RH |
| Relative Pressure: | 23.62 to 32.48 InHg (800 to 1100 hPa)Pressure is measured every 12 minutes |
| Thermo-hygro Sensor | |
| Temperature Range: | -40°F to 140°F (-40°C to 60°C)Note: Temperatures below -20°F (-29°C) require Lithium batteries in the outdoor sensor. |
| Humidity Range: | 10% RH to 99%RH |
| Transmission Range: | Up to 400 feet (121 meters) in open air, RF 915 MHz |
| Wind Speed Sensor | |
| Wind Speed Range: | 0-111 mph (0-178 kmh) |
| Transmission Range: | Up to 400 feet (121 meters) in open air, RF 915 MHz |
| Rain Sensor | |
| Rainfall Range: | 0-393.6 inches (0-9999 mm) |
| Transmission Range: | Up to 400 feet (121 meters) in open air, RF 915 MHz |
| Wi-Fi | |
| Transmission: RF 2.4 GHz | |
| Power | |
| V30v2 (328-10618) Station: | 5.0 Volt power cord included (Required)AC6: XH0500-600W (Input 100-240V)CR2032 battery included, backup for time and date |
| Battery Backup: | |
| LTV-TH2 Thermo-hygro Sensor: | 2-AA batteries not included |
| LTV-W1 or LTV-W2 Wind Speed Sensor: | 2-C batteries not included |
| LTV-R3 Rain Sensor: | 2-AA batteries not included |
| LTV-D1 Bonus Station: | 2-AAA batteries not included |
| Battery Life | |
| V30v2 (328-10618) Station: | over 24 months with power cord use |
| LTV-TH2, LTV-W1 (LTV-W2), & LTV-R3 Sensors: | over 24 months with reputable batteries. |
| LTV-D1 Bonus Station: | over 12 months with reputable batteries. |
Dimensions
| V30v2 (328-10618) Station: | 8.22" W x 1.18" D x 5.83" H (22.88cm W x 3.0 cm D x 14.81cm H) |
| LTV-TH2 Thermo-hygro Sensor: | 1.97" W x 0.75" D x 5.73" H (5.0cm L x 1.91cm W x 14.55cm H) |
| LTV-W1 or LTV-W2 Wind Speed Sensor: | 7.10" W x 7.10" D x 18.57" H (18.03cm L x 18.03cm W x 47.17cm H) with mounting bracket/pole |
| LTV-R3 Rain Sensor: | 7.14" W x 3.43" D x 4.94" H (18.13cm L x 8.72cm W x 12.54cm H) |
| LTV-D1 Bonus Station: | 2.64" W x 1.32" D x 3.62" H (6.7 cm L x 3.35cm W x 9.19cm H) |
Sensor Update Intervals
| LTV-TH2 Thermo-hygro Sensor: | Change of Temp +/- 0.5°C (0.9°F), Hum +/- 2% RH or 3 minutes if no change Checks Temp/Humidity every 51 seconds |
| LTV-W1 or LTV-W2 Wind Speed Sensor: | Change of 0.8km (0.5mph) Wind Speed or 3 minutes if no change Checks for change in Wind Speed every 31 seconds, samples every 3 seconds |
| LTV-R3 Rain Sensor: | Change of 0.2mm (0.008 in) Rainfall - 3 minutes if no change Checks Rain every 45 seconds |
CARE & MAINTENANCE
- Do not mix old and new batteries.
- Do not mix Alkaline, Standard, Lithium, or Rechargeable Batteries.
• Always purchase the correct size and grade of battery most suitable for intended use. - Replace all batteries of a set at the same time.
- Clean the battery contacts and also those of the device prior to battery installation.
- Ensure the batteries are installed with correct polarity (+ and -).
- Remove batteries from equipment when it is not used for an extended period of time.
- Promptly remove expired batteries.
WARRANTY & SUPPORT
La Crosse Technology, Ltd. provides a 1-year limited time warranty (from date of purchase) on this product relating to manufacturing defects in materials & workmanship.
Before returning a product, please contact our friendly customer support with questions or visit our online help:
Phone: 1-844-200-8752
Online Product Support and Registration: bit.ly/contact_techsupport
WARNING: This product can expose you to chemicals including styrene, which is known in the State of California to cause cancer. For more information go to: www.P65Warnings.ca.gov/
FCC STATEMENT
This equipment has been tested and found to comply with the limits for a Class B digital device, pursuant to part 15 of the FCC Rules. These limits are designed to provide reasonable protection against harmful interference in a residential installation. This equipment generates, uses and can radiate radio frequency energy and, if not installed and used in accordance with the instructions, may cause harmful interference to radio communications. However, there is no guarantee that interference will not occur in a particular installation. If this equipment does cause harmful interference to radio or television reception, which can be determined by turning the equipment off and on, the user is encouraged to try to correct the interference by one or more of the following measures:
- Reorient or relocate the receiving antenna.
- Increase the separation between the equipment and receiver.
- Connect the equipment into an outlet on a circuit different from that to which the receiver is connected.
- Consult the dealer or an experienced radio/TV technician for help.
FCC Radiation Exposure Statement
This device complies with FCC radiation exposure limits set forth for an uncontrolled environment and it also complies with Part 15 of the FCC RF Rules. This equipment must be installed and operated in accordance with provided instructions and the antenna(s) used for this transmitter must be installed to provide a separation distance of at least 20 cm from all persons and must not be co-located or operating in conjunction with any other antenna or transmitter. End-users and installers must be provided with antenna installation instructions and consider removing the no-collocation statement.
This device complies with Part 15 of the FCC Rules. Operation is subject to the following two conditions:
(1) This device may not cause harmful interference, and
(2) This device must accept any interference received, including interference that may cause undesired operation.
Caution!
Any changes or modifications not expressly approved by the party responsible for compliance could void the user's authority to operate the equipment.
CANADA STATEMENT
This device complies with Industry Canada's licence-exempt RSSs. Operation is subject to the following two conditions:
(1) This device may not cause interference; and
(2) This device must accept any interference, including interference that may cause undesired operation of the device.
Apple and the Apple logo are trademarks of Apple Inc., registered in the U.S. and other countries.
App Store is a service mark of Apple Inc.
Google Play and the Google Play logo are trademarks of Google Inc.
Made in China - Printed in China