CSBCURVE605 - Range hood Caple - Free user manual and instructions
Find the device manual for free CSBCURVE605 Caple in PDF.

User questions about CSBCURVE605 Caple
0 question about this device. Answer the ones you know or ask your own.
Ask a new question about this device
Download the instructions for your Range hood in PDF format for free! Find your manual CSBCURVE605 - Caple and take your electronic device back in hand. On this page are published all the documents necessary for the use of your device. CSBCURVE605 by Caple.
USER MANUAL CSBCURVE605 Caple
Installation guide for stainless steel splashback
Model code: CSBCURVE605 CSBCURVE705 CSBCURVE905
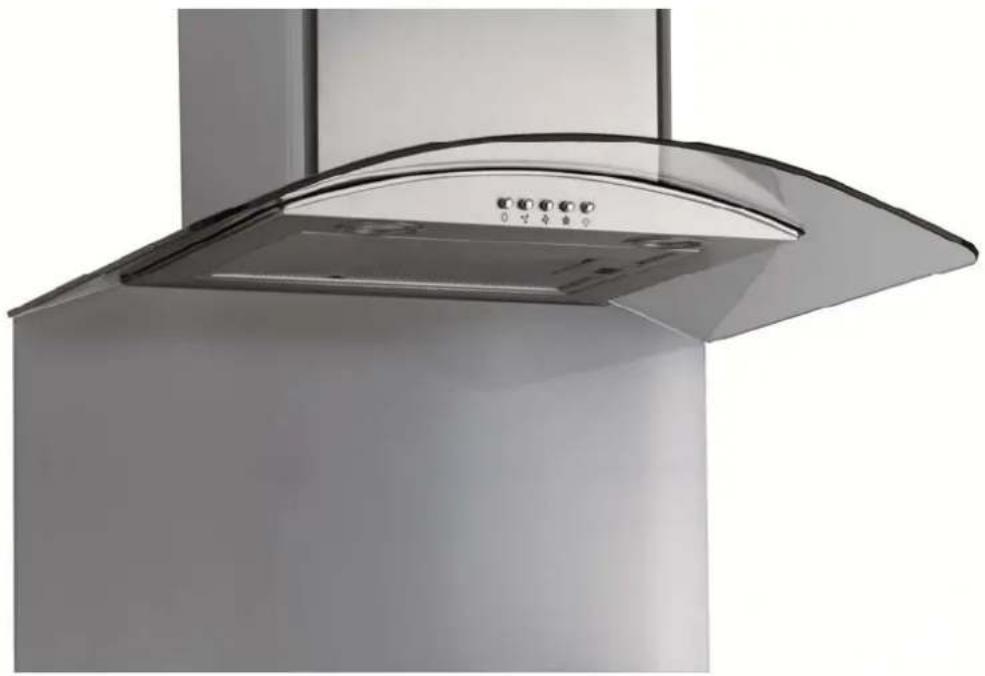
natural_image
Exterior view of a stainless steel kitchen chimney with open lid (no text or symbols visible)Contents
Safety Information 2
Parts 2
Guide to wall mounting and fixings 3
Installation 4
Care and Maintenance 5
Guarantee
5
Important – Please read these instructions fully before installing or using this product
These instructions contain important information which will help you get the best from your product and ensure safe and correct installation, use and maintenance.
Safety information

Important – Please read these instructions fully before installation
• This product is to be installed by a competent person.
• The installation of this product is best carried out by 2 people.
- Depending on the material, it may be necessary to use masonry or hollow wall anchors when fixing screws.
- Be careful of sharp edges when handling this product.
- Dispose of all packaging carefully and responsibly.
Parts
Please familiarise yourself with the parts and accessories listed below
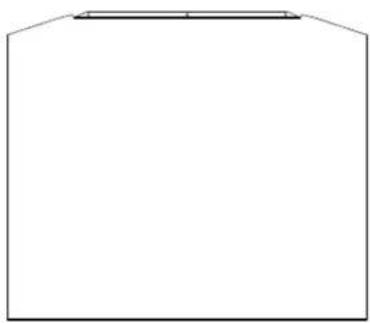
natural_image
Simple line drawing of a rectangular box with a flat top and bottom edge (no text or symbols)Splashback
| Codes Description Finish description | Finish | |
| CSBCURVE605 | 600/750 mm Splash back | Steel |
| CSBCURVE705 | 700/750 mm Splash back | Steel |
| CSBCURVE905 | 900/750 mm Splash back | Steel |
Accessories included

text_image
copie Instructions x 1 Screw (4 x 30mm) x 3 Wall plug x 3Guide to wall mounting and fixings
Important note:If plastic wall plugs are supplied with your product: -these are only suitable for use in masonry walls.If you are in any doubt about the correct wall plugs for your wall, seek professional advice.Failure of the product due to using incorrect fixings is the responsibility of the installer. -these are only suitable for use in masonry walls.If you are in any doubt about the correct wall plugs for your wall, seek professional advice.Failure of the product due to using incorrect fixings is the responsibility of the installer. | Important: When drilling into walls always check that there are no hidden wires or pipes etc.Make sure that the screws and wall plugs being used are suitable for supporting your unit. Consult a qualified tradesperson if you are unsure.Hints:1: Always use a larger screw and wall plug if you are not sure.2: Ensure you use the recommended drill bit to match the wall plug and hole size.3: Ensure you drill the hole horizontally, do not force the drill or enlarge the hole.4: Take extra care when drilling high walls, ceilings and ceramic tiles. Ensure wall plugs are inserted beyond the thickness of the ceramic tiles to avoid the tiles splitting or cracking.5: Ensure wall plugs are well fitted and are a tight fit in the drilled hole. |
| Types of walls | You can use one of the following types of wall plugs if your walls are made of brick, breeze block, concrete, stone or wood. | |
NO.1 “General Purpose” wall plug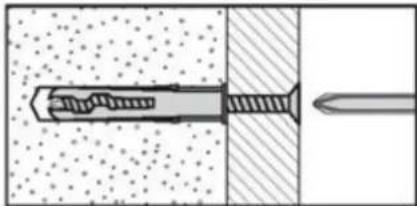 Generally aerated blocks should not be used to support heavy loads, use a specialist fitting in this case. For light loads, general purpose wall plugs can be used.NO.2 “Plasterboard” wall plug Generally aerated blocks should not be used to support heavy loads, use a specialist fitting in this case. For light loads, general purpose wall plugs can be used.NO.2 “Plasterboard” wall plug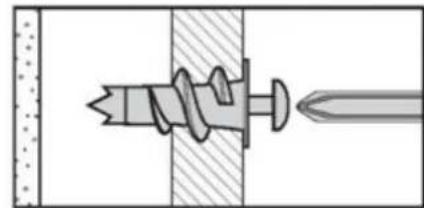 For use when attaching light loads on to plasterboard partitions. For use when attaching light loads on to plasterboard partitions. | NO.3 “Cavity Fixing” wall plug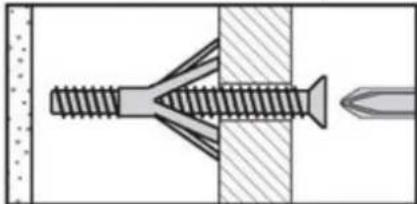 For use with plasterboard partitions or hollow wooden doors.NO.4 “Cavity Fixing –Heavy Duty” wall plug For use with plasterboard partitions or hollow wooden doors.NO.4 “Cavity Fixing –Heavy Duty” wall plug For use when fitting or supporting heavy loads such as shelving, wall cabinets and coat racks. For use when fitting or supporting heavy loads such as shelving, wall cabinets and coat racks. | NO.5 “Hammer Fixing” wall plug For use with walls stuck with plasterboard. The hammer fixing allows it to be fixed to the wall rather than the plasterboard. Always check the fixing is secure to the retaining wall.NO.6 “Shield Anchor” wall plug Heavy loads For use with walls stuck with plasterboard. The hammer fixing allows it to be fixed to the wall rather than the plasterboard. Always check the fixing is secure to the retaining wall.NO.6 “Shield Anchor” wall plug Heavy loads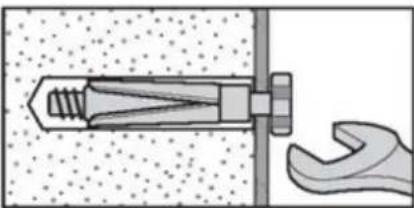 For use with heavier loads such as TV & HiFi speakers and satellite dishes etc. For use with heavier loads such as TV & HiFi speakers and satellite dishes etc. |
| Care and maintenance | Safety: Always check the fitting and location to ensure your safety in and around the home. | Fitting: From time to time check the fitting to ensure the wall plugs or screws do not become loose. |
Installation

Caution: 2 people are required to unpack and handle the product, it is recommended that gloves are worn.
Carefully remove all packaging materials including the foam base, dispose of correctly.
- Ensure that the surface of the wall is flat, free of dust and dirt.
- Carefully measure the wall and mark out the correct position for the splashback.
- Glue the support bracket of the splashback.
- Drill the holes on the wall according to the diagrams on right.
WARNING! Before drilling holes check the wall is clear of any cables, pipes etc.
-
Use the screws (4x30m m) and wall plugs provided to fix the splashback (refer to the previous page to ensure suitable).
-
Tighten the screws and press the splashback to the wall.
-
Any gap b between the worktop and the wall must be sealed to exclude moisture.
natural_image
Pure geometric diagram of a rectangular frame with horizontal lines and top edge, no text or symbols present
natural_image
Diagram of a brick wall corner with an open door and directional arrows indicating force or movement (no text or symbols)Care and maintenance

Important:
- Your splashback should be cleaned regularly using a suitable cleaner. Under no circumstances use an abrasive cleaner or material.
- Never use any sharp instruments or abrasive substances, soap, detergent or wax polish for cleaning.
Guarantee
1 year guarantee against manufacturing defects
Caple products are manufactured to the highest standard, however, should any defect in the material or construction arise within the guarantee period and in the judgment of Caple or an authorised representative is agreed as being defective, we will replace the product or parts free of charge providing the item has been used in a solely domestic application and fitted in accordance with the installation instructions provided. The care instructions and maintenance information must be observed at all times and the product has been cleaned as recommended.
Caple reserves the right to inspect any product reported to be defective prior to replacement and the manufacturer's decision is final.
Exclusions
- Normal wear and tear or any damage or defect due to improper installation or abuse of fitting or damage from misuse, negligence or accident.
- Consequential damage resulting prior to or as a result of agreement to replace the product.
• Labour and transport.
Condition
This guarantee applies to the original purchase only and cannot be transferred. The original installation was completed by a qualified tradesman.
Claims
A claim will only be recognised by Caple if accompanied by a copy of invoice/receipt confirming the date and proof of ownership.
This guarantee is in addition to and does not diminish your statutory or legal rights.
After Sales Support
Telephone 0117 938 1900
Please contact your retailer, call Caple direct on 0117 938 1900, email info@caple.co.uk or visit our website at www.caple.co.uk for further product information.
Caple
Fourth Way
Avonmouth
Bristol
BS11 8DW
www.caple.co.uk