
NLL113EYWO - Coffee maker HOTPOINT - Free user manual and instructions
Find the device manual for free NLL113EYWO HOTPOINT in PDF.


| Product Type | Vented Electric Dryer |
| Model Number | NLL113EYWO |
| Brand | Hotpoint |
| Capacity | Approximately 7.0 cu. ft. |
| Dimensions (H x W x D) | 43” x 27” x 28” (without door) |
| Weight | Approximately 110 lbs (electric model) |
| Power Supply | 240V, 30A, 60Hz (electric); 120V, 15-20A for gas model |
| Drying Cycles | Cottons, Wrinkle Free, Fluff (no heat) |
| Dryness Levels | Less Dry, Optimum Dry, More Dry |
| Lint Filter | Clean before each load; wash with warm soapy water if waxy buildup |
| Exhaust Duct | 4" diameter rigid metal duct; must be exhausted outdoors |
| Maximum Duct Length (rigid metal) | 60 ft with 0 turns; 28 ft with 4 turns (for louvered hood) |
| Door Reversal | Yes, 180° rotation possible |
| Safety Features | Thermal limiter, auto shut-off, grounding required |
| Installation Type | Freestanding; can be installed in closet with proper ventilation |
| Warranty | 1 year parts and labor from date of purchase |
| Service Contact | 800.GE.CARES (800.432.2737) or Hotpoint.com |
| Repairability Index | Not rated; user-replaceable parts include lint filter, power cord (by qualified technician) |
Frequently Asked Questions - NLL113EYWO HOTPOINT
User questions about NLL113EYWO HOTPOINT
0 question about this device. Answer the ones you know or ask your own.
Ask a new question about this device
Download the instructions for your Coffee maker in PDF format for free! Find your manual NLL113EYWO - HOTPOINT and take your electronic device back in hand. On this page are published all the documents necessary for the use of your device. NLL113EYWO by HOTPOINT.
USER MANUAL NLL113EYWO HOTPOINT
Safety Instructions ..... 2-4
Operating Instructions
Control Panels....5
Control Settings ....5
Loading and Using the Dryer . . .6, 7
Installation Instructions
Electrical Requirements ..... 9
Exhausting the Dryer ..... 10
Installing the Dryer ..... 11–17
Preparing to Install the Dryer ... 8
Troubleshooting Tips ..... 18, 19
Consumer Support
Consumer Support .... Back Cover
Product Registration ..... 21, 22
Warranty 23
Owner's Manual and Installation Instructions
NLL113
NVL333
Write the model and serial numbers here:
Model # ____
Serial # ____
You can find them on the label on the front of the left side of the door opening.
IMPORTANT SAFETY INFORMATION. READ ALL INSTRUCTIONS BEFORE USING.
▲WARNING!
For your safety, the information in this manual must be followed to minimize the risk of fire or explosion, electric shock, or to prevent property damage, personal injury, or death.
■Do not store or use gasoline or other flammable vapors and liquids in the vicinity of this or any other appliance.
■Installation and service must be performed by a qualified installer, service agency or the gas supplier.
WHAT TO DO IF YOU SMELL GAS:
Do not try to light a match, or cigarette, or turn on any gas or electrical appliance.
2 Do not touch any electrical switch; do not use any phone in your building.
3 Clear the room, building or area of all occupants.
4 Immediately call your gas supplier from a neighbor's phone. Follow the gas supplier's instructions carefully.
5 If you cannot reach your gas supplier, call the fire department.
California Safe Drinking Water and Toxic Enforcement Act
This act requires the governor of California to publish a list of substances known to the state to cause cancer, birth defects or other reproductive harm and requires businesses to warn customers of potential exposure to such substances.
Gas appliances can cause minor exposure to four of these substances, namely benzene, carbon monoxide, formaldehyde and soot, caused primarily by the incomplete combustion of natural gas or LP fuels.
Properly adjusted dryers will minimize incomplete combustion. Exposure to these substances can be minimized further by properly venting the dryer to the outdoors.

PROPER INSTALLATION
This dryer must be properly installed and located in accordance with the Installation Instructions before it is used.
■Properly ground dryer to conform with all governing codes and ordinances. Follow details in the Installation Instructions section.
■Install or store where it will not be exposed to temperatures below freezing or exposed to the weather.
■Connect to a properly rated, protected and sized power supply circuit to avoid electrical overload.
■Remove all sharp packing items and dispose of all shipping materials properly.
Exhaust/Ducting:
This dryer MUST be exhausted to the outside.
2 Use only rigid metal 4" diameter ductwork inside the dryer cabinet. Use only rigid metal or flexible metal 4" diameter ductwork for exhausting to the outside. USE OF PLASTIC OR OTHER COMBUSTIBLE DUCTWORK CAN CAUSE A FIRE. PUNCTURED DUCTWORK CAN CAUSE A FIRE IF IT COLLAPSES OR BECOMES OTHERWISE RESTRICTED IN USE OR DURING INSTALLATION.
Follow details in the Installation Instructions section.
▲WARNING!
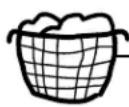
YOUR LAUNDRY AREA
■Keep the area underneath and around your appliances free of combustible materials, such as lint, paper, rags, chemicals, gasoline and other flammable vapors and liquids.
- Keep the floor around your appliances clean and dry to reduce the possibility of slipping.
■Keep area around the exhaust opening and surrounding areas free from the accumulation of lint, dust and dirt.
■Do not obstruct the flow of ventilating air. Do not stack or place laundry or throw rugs against the front or back of the dryer.
■Close supervision is necessary if this appliance is used by or near children. Do not allow children to play on, with or inside this or any other appliance.
■Keep all laundry aids (such as detergents, bleaches, etc.) out of the reach of children, preferably in a locked cabinet. Observe all warnings on container labels to avoid injury.
■Never climb on or stand on the dryer top.
■Do not install or store this appliance where it will be exposed to the weather.

WHEN USING YOUR DRYER
■Never reach into the dryer while the drum is moving. Before loading, unloading or adding clothes, wait until the drum has completely stopped.
■Clean the lint filter before each load to prevent lint accumulation inside the dryer or in the room. DO NOT OPERATE THE DRYER WITHOUT THE LINT FILTER IN PLACE, UNLESS THE DRYING RACK IS IN USE.
■Do not wash or dry articles that have been cleaned in, washed in, soaked in or spotted with combustible or explosive substances (such as wax, oil, paint, gasoline, degreasers, dry-cleaning solvents, kerosene, etc.). These substances give off vapors that may ignite or explode. Do not add these substances to the wash water. Do not use or place these substances around your washer or dryer during operation.
■Any article on which you have used a cleaning solvent or that contains flammable materials (such as cleaning cloths, mops, towels used in beauty salons, restaurants or barber shops, etc.) must not be placed in or near the dryer until solvents or flammable materials have been removed. There are many highly flammable items used in homes such as acetone, denatured alcohol, gasoline, kerosene, some household cleaners, some spot removers, turpentines, waxes, wax removers and products containing petroleum distillates.
The laundry process can reduce the flame retardancy of fabrics. To avoid such a result, carefully follow the garment manufacturer's care instructions.
■Do not dry articles containing rubber, plastic or similar materials such as padded bras, tennis shoes, galoshes, bath mats, rugs, bibs, baby pants, plastic bags, pillows, etc. that may melt or burn. Some rubber materials, when heated, can under certain circumstances produce fire by spontaneous combustion.
■Do not store plastic, paper or clothing that may burn or melt on top of the dryer during operation.
■ Garments labeled Dry Away from Heat or Do Not Tumble Dry (such as life jackets containing Kapok) must not be put in your dryer.
■Do not dry fiberglass articles in your dryer. Skin irritation could result from the remaining particles that may be picked up by clothing during subsequent dryer uses.
■To minimize the possibility of electric shock, unplug this appliance from the power supply or disconnect the dryer at the household distribution panel by removing the fuse or switching off the circuit breaker before attempting any maintenance or cleaning (except the removal and cleaning of the lint filter). NOTE: Turning the Cycle Selector knob to an off position, or pressing PAUSE does NOT disconnect the appliance from the power supply.
■Do not spray any type of aerosol into, on or near dryer at any time.
■Do not place items exposed to cooking oils in your dryer. Items contaminated with cooking oils may contribute to a chemical reaction that could cause a load to catch fire.
IMPORTANT SAFETY INFORMATION. READ ALL INSTRUCTIONS BEFORE USING.
▲WARNING!
WHEN USING YOUR DRYER (cont.)

■Never attempt to operate this appliance if it is damaged, malfunctioning, partially disassembled, or has missing or broken parts, including a damaged cord or plug.
■The interior of the machine and the exhaust duct connection inside the dryer should be cleaned at least once a year by a qualified technician. See the Loading and Using the Dryer section. Do not use any type of spray cleaner when cleaning dryer interior. Hazardous fumes or electrical shock could occur.
If yours is a gas dryer, it is equipped with an automatic electric ignition and does not have a pilot light. DO NOT ATTEMPT TO LIGHT WITH A MATCH. Burns may result from having your hand in the vicinity of the burner when the automatic ignition turns on.
- You may wish to soften your laundered fabrics or reduce the static electricity in them by using a dryer-applied fabric softener or an anti-static conditioner. We recommend you use either a fabric softener in the wash cycle, according to the manufacturer's instructions for those products, or try a dryer-added product for which the manufacturer gives written assurance on the package that their product can be safely used in your dryer. Service or performance problems caused by use of these products are the responsibility of the manufacturers of those products and are not covered under the warranty to this appliance.
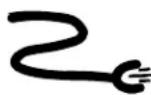
WHEN NOT USING YOUR DRYER
■Grasp the plug firmly when disconnecting this appliance to avoid damage to the cord while pulling. Place the cord away from traffic areas so it will not be stepped on, tripped over or subjected to damage.
- Do not attempt to repair or replace any part of this appliance or attempt any servicing unless specifically recommended in this Owner's Manual or in published user-repair instructions that you understand and have the skills to carry out.
■Before discarding a dryer, or removing it from service, remove the dryer door to prevent children from hiding inside.
■Do not tamper with controls.

READ AND FOLLOW THIS SAFETY INFORMATION CAREFULLY.
SAVE THESE INSTRUCTIONS
You can locate your model number on the label on the front of the left side of the door opening.
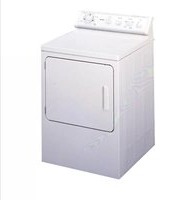
Model NLL113
START


2
1
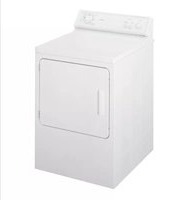
Model NVL333
START


2
1
About the control settings.
NOTE: Not all features are available on all dryer models.
IMPORTANT: Clean the lint filter each time you use the dryer.
1 Automatic cycles automatically determine fabric dryness. Select LESS DRY if you want your clothes slightly damp at the end of the drying cycle. Select MORE DRY if you want them to feel drier.
Drying Cycles
COTTONS For cottons and most linens. For most loads select OPTIMUM DRY.
WRINKLE FREE For wrinkle-free, permanent press and delicate items, and knits.
FLUFF Provides no-heat tumbling for freshening or fluffing already dry clothing, fabric, linens and pillows.
2 Start—Close the dryer door. Turn the START control clockwise to START. Hold for 1–2 seconds and release. Opening the door during operation will stop the dryer. To restart the dryer, close the door and select START to complete the cycle.
NOTE: Drying times will vary according to the type of heat used (Electric, Natural or LP gas), size of load, types of fabrics, wetness of clothes and condition of exhaust ducts.
Loading and using the dryer. Always follow the fabric manufacturer's care label when laundering.

Sorting and Loading Hints
As a general rule, if clothes are sorted properly for the washer, they are sorted properly for the dryer.
Do not add fabric softener sheets once the load has become warm. They may cause fabric softener stains. Bounce® Fabric Conditioner Dryer Sheets have been approved for use in all GE Dryers when used in accordance with the manufacturer's instructions.
Do not overload. This wastes energy and causes wrinkling.
Do not dry the following items: fiberglass items, woolens, rubber-coated items, plastics, items with plastic trim and foam-filled items.
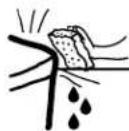
Care and Cleaning of the Dryer
The Exterior: Wipe or dust any spills or washing compounds with a damp cloth. Dryer control panel and finishes may be damaged by some laundry pretreatment soil and stain remover products. Apply these products away from the dryer. The fabric may then be washed and dried normally. Damage to your dryer caused by these products is not covered by your warranty.
The Lint Filter: Clean the lint filter before each use. Remove by pulling straight up. Run your fingers across the filter. A waxy buildup may form on the lint filter from using dryer-added fabric softener sheets. To remove this buildup, wash the lint screen in warm, soapy water. Dry thoroughly and replace. Do not operate the dryer without the lint filter in place.
Have a qualified technician vacuum the lint from the dryer once a year.
The Exhaust Duct: Inspect and clean the exhaust ducting at least once a year to prevent clogging. A partially clogged exhaust can lengthen the drying time.
Follow these steps:
Turn off electrical supply by disconnecting the plug from the wall socket.
2 Disconnect the duct from the dryer. 3 Vacuum the duct with the hose attachment and reconnect the duct.
The Exhaust Hood: Check from the outside that the flaps of the hood move freely when operating. Make sure that there is no wildlife (birds, insects, etc.) nesting inside the duct or hood.

natural_image
Line drawing of a hand opening a door with a black arrow pointing to the lid area (no text or symbols)
Fabric Care Labels
WASH LABELS
Machine wash cycle

Normal

Permanent Press/wrinkle resistant

Gentle/delicate

Hand wash

Do not wash Do not wring

Water temperature

Hot (50°C/120°F)

Warm (40°C/105°F)

Cold/cool (30°C/85°F)
BLEACH LABELS
Bleach symbols

Any bleach (when needed)

Only non-chlorine bleach (when needed)

Do not bleach
DRY LABELS
Tumble dry

Dry

Normal

Permanent Press/wrinkle resistant

Gentle/delicate
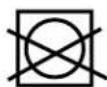
Do not tumble dry

Do not dry (used with do not wash)
Heat setting

High

Medium

Low

No heat/air
Special instructions

Line dry/ hang to dry

Drip dry

Dry flat

In the shade
Preparing to install your dryer.
Read these instructions completely and carefully.

WARNING
This dryer must be exhausted to the outdoors. Use only rigid metal or flexible metal 4" diameter ductwork for exhausting to the outside. Use only rigid metal 4" diameter ductwork inside the dryer cabinet.
■Never use plastic or other combustible ductwork. See Exhausting section.
■This appliance must be properly grounded and installed as described in these Installation Instructions.
■Do not install or store appliance in an area where it will be exposed to water/weather. See Location of Your Dryer section.
■The National Fuel Gas code restricts installations of gas appliances in garages. They must be 18" (45.7 cm) off the ground and protected from vehicles by a barrier. See Location of Your Dryer section.
■ The electrical service to the dryer must conform with local codes and ordinances and the latest edition of the National Electrical Code, ANSI/NFPA 70.
The gas service to the dryer must conform with local codes and ordinances or the latest edition of the National Fuel Gas Code ANSI Z223.1. The gas dryer is designed under ANSI Z 21.5.1 for home use only. This dryer is not recommended for commercial applications such as restaurants or beauty salons, etc.

Tools and Materials Required for Dryer Installation
□ Phillips head screwdriver
□ Adjustable pliers
□ Carpenter's level
☐ Flat or straight blade screwdriver
Duct tape
☐ Rigid or flexible metal 4" (10.2 cm) duct
□ Vent hood
☐ Pipe thread sealer (GAS DRYER)
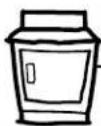
Preparing the Installation Site and Unpacking the Dryer
1 Prepare the area and exhaust for installation of the new dryer.
2 Check to be sure that the existing external exhaust is clean and that it meets attached installation specifications.
3 Using the four shipping carton corner posts as padding (two on each side), carefully lay the dryer on its left side and remove foam shipping pad.


CAUTION: To prevent damage, do not use the control panel as a means to pick up or move the dryer.
4 Return the dryer to an upright position.
5 Move the dryer to the desired location.
6 Connect the external exhaust.
7 Adjust the leveling legs to match the washer height. The dryer must be level and rest firmly on all four leveling legs.
8 Connect the power supply.
9 Check the operation of the power supply and venting.
10 Place the Owner's Manual and the Installation Instructions in a location where they will be noticed by the owner.
Electrical requirements.
Read these instructions completely and carefully.
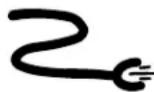
Electrical Connection Information for Electric Dryers
A WARNING —To reduce the risk of fire, electric shock or personal injury:
- DO NOT USE AN EXTENSION CORD WITH THIS APPLIANCE.
• THIS APPLIANCE MUST BE PROPERLY GROUNDED.
This dryer must be electrically grounded in accordance with local codes and ordinances, or in the absence of local codes, in accordance with the NATIONAL ELECTRICAL CODE, ANSI/NFPA NO. 70.
Electrical Requirements
- This dryer must be connected to a 208V or 240V individual branch circuit, protected by 30 amp circuit breakers or time-delay fuses.
- Use copper conductors only.
- If the electric supply does not meet the above specifications, call a licensed electrician.
NOTE: A wiring diagram is located inside the control panel.
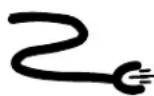
Electrical Connection Information for Gas Dryers
A WARNING —To reduce the risk of fire, electric shock or personal injury:
- DO NOT USE AN EXTENSION CORD OR AN ADAPTER PLUG WITH THIS APPLIANCE.
- DO NOT, UNDER ANY CIRCUMSTANCES, CUT OR REMOVE THE THIRD GROUNDING PRONG FROM THE POWER CORD.
This dryer must be electrically grounded in accordance with local codes and ordinances, or in the absence of local codes, in accordance with the NATIONAL ELECTRICAL CODE, ANSI/NFPA NO. 70.
Electrical Requirements
- This dryer must be supplied with 120V, 60 Hz, and connected to an individual properly grounded branch circuit, protected by a 15 or 20 amp circuit breaker or time-delay fuse.
- If the electric supply provided does not meet the above specifications, it is recommended that a licensed electrician install an approved outlet.
External Ground (if required)
An external ground wire (not provided), which meets local codes, may be added by attaching it to the green ground screw on the rear of the dryer in the upper left corner above the cord, and to grounded metal cold water pipe or other established ground.

NOTE: A wiring diagram is located inside the control panel.

Exhausting the dryer.
Read these instructions completely and carefully.

Exhaust System Requirements
Use only 4"(10.2 cm) diameter (minimum) rigid metal duct for best performance, or flexible metal duct. Use approved vent hood which has swing-out dampers that open when the dryer is in operation. When the dryer stops, the dampers automatically close to prevent drafts and the entrance of insects and rodents. To avoid restricting the outlet, maintain a minimum of 12"(30.5 cm) clearance between the vent hood and the ground or any other obstruction.
If all rigid metal duct cannot be used, then flexible all-metal venting can be used, but it will reduce the maximum recommended duct length. See Additional Installation Instructions following.
Correct
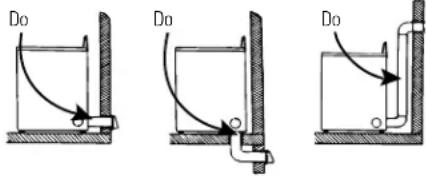
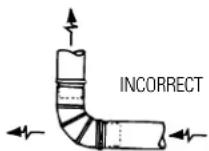
Incorrect


WARNING: The following are specific requirements for proper and safe operation of your dryer. Failure to follow these instructions can create excessive drying times and fire hazards.

DO NOT use plastic flexible duct to exhaust the dryer. Excessive lint can build up inside exhaust system and create a fire hazard and restrict air flow. Restricted air flow will increase drying times. If your present system is made up of plastic duct or metal foil duct, replace it with rigid or flexible metal duct. Ensure the present duct is free of any lint prior to installing dryer duct.

The dryer exhaust system MUST BE EXHAUSTED TO THE OUTSIDE of the dwelling.

DO NOT allow combustible materials (for example: clothing, draperies/curtains, paper) to come in contact with exhaust system.

The dryer MUST NOT be exhausted into a gas vent, chimney, a wall, a ceiling, a common duct with a kitchen exhaust or any concealed space of a building which can accumulate lint, resulting in a fire hazard.

DO NOT exceed the length of duct pipe or number of elbows allowed in the Maximum Length charts. Lint can accumulate in the exhaust system, plugging the system and creating a fire hazard, as well as increasing drying times.

DO NOT screen the exhaust ends of the vent system, nor use any screws or rivets to assemble the exhaust system. Lint can become caught in the screen, on the screws or rivets, clogging the duct work and creating a fire hazard as well as increasing drying times. Use an approved vent hood to terminate the duct outdoors, and seal all joints with duct tape. All male duct pipe fittings MUST be installed downstream with the flow of air.

EXPLOSION HAZARD. Do not install the dryer where gasoline or other flammables are kept or stored. If the dryer is installed in a garage, it must be a minimum of 18" (45.7 cm) above the floor. Failure to do so can result in death, explosion, fire or burns.

Provide an access for inspection and cleaning of the exhaust system, especially at turns. Inspect and clean at least once per year.

Do not obstruct incoming or exhausted air.
Additional Installation Instructions
If all rigid metal duct cannot be used, then flexible all-metal venting can be used, but it will reduce the maximum recommended duct length. In special installations when it is impossible to make a connection with the above recommendations, then UL-listed clothes dryer transition duct may be used as transition venting between the dryer and wall connection only. The use of this ducting will affect drying time.
If flexible transition duct is necessary, only UL-listed duct identified for use with clothes dryers is approved.
The following directions must be followed.
- Use the shortest length possible.
- Stretch the duct to its maximum length.
- Do not crush or collapse.
- Never use transition duct inside the wall, flooring, ceiling or inside the dryer.
- Avoid resting the duct on sharp objects.
- Venting must conform to local building codes.
Installing the dryer.
Exhaust Ducting Length
The exhaust system should be inspected and cleaned at least once a year with normal usage. The more the dryer is used, the more often you should check the exhaust system and vent hood for proper operation.
If roof vents or louvered plenums are used, they must be equivalent to a 4" dampered wall cap in regard to resistance to airflow, prevention of back drafts and maintenance required to prevent clogging.
- DO NOT assemble the duct work with fasteners that extend into the duct. They will serve as collection points for lint.
- Ductwork which runs through an unheated area or is near an air conditioning duct should be insulated to reduce condensation and lint buildup.
| MAXIMUM LENGTH of 4" (10.2 cm) Dia. RIGID METAL DUCT | |||
| PREFERRED VENT HOOD TYPE | |||
| Number of90° turns | 4" (10.2 cm) Louvered→|4"(10.2 cm)| | → | 2.5"(6.35cm)| |
| 0 60' | (18.28 m) 48' (14.63 m) | ||
| 1 52' | (15.84 m) 40' (12.19 m) | ||
| 2 44' | (13.41 m) 32' (9.75 m) | ||
| 3 32' | (9.75 m) 24' (7.31 m) | ||
| 4 28' | (8.53 m) 16' (4.87 m) | ||
| MAXIMUM LENGTH of 4" (10.2 cm) Dia. FLEXIBLE METAL DUCT | |||
| PREFERRED VENT HOOD TYPE | |||
| Number of90° turns | 4" (10.2 cm) Louvered→|4"(10.2 cm)| | → | 2.5"(6.35cm)| |
| 0 30' | (9.14 m) 18' (5.49 m) | ||
| 1 22' | (6.71 m) 14' (4.27 m) | ||
| 2 14' | (4.27 m) 10' (3.05 m) | ||
| 3 not recommended | |||
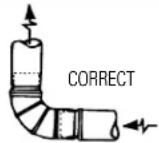
INSTALL MALE FITTINGS IN CORRECT DIRECTION
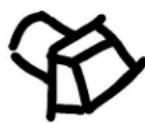
Exhaust Direction
All dryers are shipped set up for rear exhausting. On electric dryers, exhausting can be on the cabinet right or left side, or through the dryer bottom. Gas dryers can exhaust on the cabinet right side or the dryer bottom. To change exhaust direction you will need Exhaust Kit, Pub No. 14-A018 and a rigid metal 4" 90 degree elbow. The kit is available through your GE retailer. Follow the instructions supplied with the kit.


Gas Supply Requirements
⚠️ Replace brass connecting pipe that is not plastic-coated. Stainless steel or plastic-coated brass MUST be used.
WARNING: Never reuse old flexible connectors. The use of old flexible connectors can cause gas leaks and personal injury. Always use NEW flexible connectors when installing a gas appliance.
Installation MUST conform with local codes, or in the absence of local codes, with the National Fuel Gas Code, ANSI Z223.1 (latest edition).
2 The gas supply line should be of 1/2'' (1.27 cm) rigid pipe.
3 If codes allow, flexible metal tubing may be used to connect your dryer to the gas supply line. The tubing MUST be constructed of stainless steel or plastic-coated brass.
4 The gas supply line MUST have an individual shutoff valve.
5 A 1/8" (0.32 cm) NPT minimum plugged tapping, accessible for test gauge connection, MUST be installed immediately upstream of the gas supply connection to the dryer.
6 The dryer and its individual shutoff valve MUST be disconnected from the gas supply piping system during any pressure testing of the gas supply piping system at test pressures in excess of 1/2 psig (3.45 kPa).
7 The dryer MUST be isolated from the gas supply piping system by closing its individual manual shutoff valve during any pressure testing of the gas supply piping system at test pressures equal to or less than 1/2 psig (3.45 kPa).
Installing the dryer.
Read these instructions completely and carefully.

Location of Your Dryer
Do Not Install the Dryer:
Do not install the dryer in an area exposed to dripping water or outside weather conditions.
Do not install the dryer in an area where it will come in contact with curtains, drapes or anything that will obstruct the flow of combustion and ventilation air.
Do not install the dryer on carpet. Floor MUST be solid with a maximum slope of 1" (2.54 cm).
Installation in Recess or Closet
This dryer MUST be exhausted outdoors.
2 No other fuel burning appliance shall be installed in the same closet as the GAS DRYER.
3 Your dryer needs the space around it for proper ventilation. DO NOT INSTALL YOUR DRYER IN A CLOSET WITH A SOLID DOOR.
4 Closet doors must be louvered or otherwise ventilated and must contain a minimum of 60 sq. in. of open area equally distributed. If the closet contains both a washer and a dryer, doors must contain a minimum of 120 sq. in. of open area equally distributed. Air openings are required to be unobstructed when a door is installed. A louvered door with equivalent air openings for the full length of the door is acceptable.
Allow the following clearances for ease of installation:
FRONT SIDES REAR* TOP
1" (2.54 cm) 0 (0 cm) 1" (2.54 cm) 15" (38.1 cm)
*Additional rear clearance may be required depending on the ducting installation.

Closet door
Mobile Home Installation
Dryer MUST be exhausted outside (outdoors, not beneath the mobile home) using metal ducting that will not support combustion. Metal ducting must be 4" (10.16 cm) in diameter with no obstructions. Rigid metal duct is preferred.
2 If dryer is exhausted through the floor, the exhaust system MUST NOT terminate beneath the mobile home. Termination MUST be securely fastened to the mobile home structure.
3 When installing a dryer into a mobile home, a provision must be made for outside make-up air. Provide an opening with a free area of at least 25 square inches for introduction of outside air into the dryer room.
4 Gas dryers MUST be fastened to the floor using Mobile Home Installation Kit Pub. No. 14-D346-33.
5 See the Exhaust System Requirements section for other important venting information.
6 Installation MUST conform to current Manufactured Home Construction & Safety Standard (which is a Federal Regulation Title 24 CFR—Part 32–80) or, when such standard is not applicable, with American National Standard for Mobile Homes, ANSI/NFPA No. 501B.

The dryer is designed under ANSI Z 21.5.1 for HOME USE only.

Rough-In Dimensions

Servicing – Consideration must be given to provide adequate clearances for installation and servicing.
Installing the dryer.
Read these instructions completely and carefully.
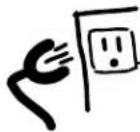
Grounding Requirements

DANGER: Improper connection of the equipment-grounding conductor can result in a risk of electric shock. Check with a licensed electrician if you are in doubt as to whether the appliance is properly grounded.
Grounding must be in accordance with local codes and ordinances, or in the absence of local codes, in accordance with the National Electrical Code ANSI/NFPA No. 70.
For a grounded, cord-connected electric dryer:
The dryer MUST be grounded. In the event of a malfunction or breakdown, grounding will reduce the risk of electrical shock by creating a path of least resistance for electrical current.
2 If your dryer is equipped with a power supply cord having an equipment-grounding conductor and a grounding plug, the plug MUST be plugged into an appropriate, copper-wired receptacle that is properly installed and grounded in accordance with all local codes and ordinances. If in doubt, call a licensed electrician.
For a permanently-connected electric dryer:
■ The dryer MUST be connected to a grounded metal, permanent wiring system; or an equipment-grounding conductor must be run with the circuit conductors and connected to the equipment-grounding terminal or lead on the appliance.
For a cord-connected gas dryer:
This dryer is equipped with a three-prong (grounding) plug for your protection against shock hazard and should be plugged directly into a properly grounded three-prong receptacle. Do not cut or remove the grounding prong from this plug.

Electrical Installation for Electric Dryers

WARNING: The following are specific requirements for proper and safe electrical installation of your dryer. Failure to follow these instructions can create electrical shock and/or a fire hazard.

WARNING: This appliance MUST be properly grounded. Electrical shock can result if the dryer is not properly grounded. Follow the instructions in this manual for proper grounding.

WARNING: DO NOT use an extension cord with this dryer. Some extension cords are not designed to withstand the amounts of electrical current this dryer utilizes and can melt, creating electrical shock and/or fire hazard. Locate the dryer within reach of the wall outlet, taking into account the length of power cord to be purchased and allowing some slack in the cord. Refer to Electrical Requirements in this manual for the proper power cord to be purchased.

WARNING: A UL-approved strain
relief must be installed onto power cord. If the strain relief is not attached, the cord can be pulled out of the dryer and can be cut by any movement of the cord, resulting in electrical shock.

WARNING: Use copper receptacles only.
NOTE: Dryers operating on 208-volt power supply will have longer drying times than those operating on 240-volt power supply.
A wiring diagram is located inside the control panel.
3-Wire System for Electric Dryers—DO NOT use for Mobile Home Installations
Remove the screws securing the terminal block access cover and the strain relief mounting bracket located on the back of the dryer upper corner.
2 Install a UL-approved strain relief into the power cord entry hole of the mounting bracket. Use a strain relief which attaches to the mounting bracket with a nut. Finger-tighten the nut only at this time.
3 Thread a UL-approved 30A, 240V, 3 #10 AWG minimum copper conductor power cord through the strain relief.

4 Attach the power cord neutral (center wire) conductor to the silver-colored center terminal on the terminal block. Tighten the screw securely.
5 Attach the remaining two power cord outer conductors to the outer brass-colored terminals on the terminal block. Tighten both screws securely.
WARNING: Do not make a sharp bend or crimp wiring/conductor at connections.
6 Reattach the strain relief mounting bracket to the back of the dryer with two screws. Tighten screws securely.
7 Tighten the fasteners securing the cord restraint firmly against the power cord.
8 Tighten the strain relief nut securely so that the strain relief does not turn.
9 Reinstall the terminal block access cover.
4-Wire System for Electric Dryers—MUST be used for Mobile Home Installations
Remove the screws securing the terminal block access cover and the strain relief mounting bracket located on the back of the dryer upper corner.
2 Install a UL-approved strain relief in the entry hole of the mounting bracket. Use a strain relief which attaches to the mounting bracket with a nut. Finger-tighten the nut only at this time.
3 Remove the green neutral ground wire from the green ground screw located above the terminal block.
Typical 4 conductor receptacle
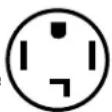

4 Thread a UL-approved 30A, 240V, 4 #10 AWG minimum copper conductor power cord through the strain relief.
5 Attach the green power cord ground wire to the cabinet with the green ground screw.
6 Attach the white (neutral) power cord conductor from the power cord and the green ground wire from the dryer harness to the silver-colored center terminal on the terminal block. Tighten the screw securely.
7 Attach the red and black power cord conductors to the outer brass-colored terminals on the terminal block.
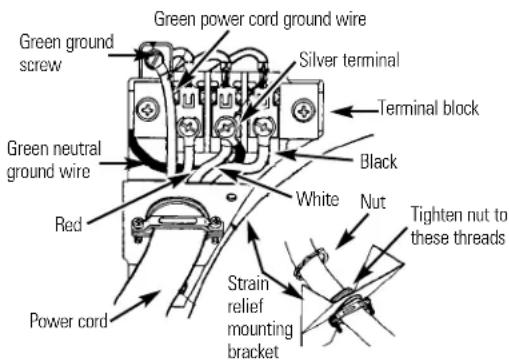
WARNING: Do not make a sharp bend or crimp wiring/conductor at the connections.
8 Tighten the fasteners securing the cord restraint firmly against the power cord.
9 Tighten the strain relief nut securely so the strain relief does not turn.
10 Reinstall the terminal block access cover.
Installing the dryer.
Read these instructions completely and carefully.

Gas Connection for Gas Dryers
Remove the shipping cap from gas pipe at the rear of the dryer.
NOTE: DO NOT connect the dryer to LP gas service without converting the gas valve. An LP conversion kit (Pub. No. 14-A038) MUST be installed by a qualified gas technician.
2 Connect a 1/2" (1.27 cm) I.D. semi-rigid or approved pipe from gas supply line to the 3/8" (0.96 cm) pipe located on the back of the dryer. Use a 1/2" to 3/8" (1.27 cm to 0.96 cm) reducer for a connection. Apply an approved thread sealer that is resistant to the corrosive action of liquefied gases on all pipe connections.
3 Open the shutoff valve in the gas supply line.
4 Test all connections by brushing on a soapy water solution.
Before Operating the Dryer
1 Connect the exhaust duct to outside exhaust system. Use duct tape to seal all joints.
2 With the dryer in its final position, adjust one or more of the legs until the dryer is resting solidly on all four legs. Place a level on top of the dryer. THE DRYER MUST BE LEVEL AND RESTING SOLIDLY ON ALL FOUR LEGS.
3 Plug the power cord into a grounded outlet. NOTE: Check to ensure the power is off at circuit breaker/fuse box before plugging the power cord into the outlet.
4 Turn on the power at the circuit breaker/fuse box.

WARNING: NEVER TEST FOR GAS LEAKS WITH AN OPEN FLAME.
NOTE: On gas dryers, before the burner will light, it is necessary for the gas line to be bled of air. If the burner does not light within 45 seconds the first time the dryer is turned on, the safety switch will shut the burner off. If this happens, turn the timer to OFF and wait 5 minutes before making another attempt to light.
In the Commonwealth of Massachusetts
■This Product must be installed by a licensed plumber or gas fitter.
■When using ball-type gas shut-off valves, they shall be the T-handle-type.
■A flexible gas connector, when used, must not exceed 3 feet.

CAUTION: Before operating the dryer, make sure the dryer area is clear and free from combustible materials, gasoline and other flammable vapors. Also see that nothing (such as boxes, clothing, etc.) obstructs the flow of combustion and ventilation air.
5 Run the dryer through a cycle check for proper operation.
6 If your dryer does not operate, please review the Troubleshooting Tips section in this manual before calling for service.
7 Place these instructions in a location near the dryer for future reference.

Replacement Parts
If replacement parts are needed for your dryer, visit Hotpoint.com, or call GE Parts and Accessories at 800.626.2002 or contact an authorized parts supplier.
WARNING: Destroy the carton and plastic bags after the dryer is unpacked. Children might use them for play. Cartons covered with rugs, bedspreads or plastic sheets can become airtight chambers causing suffocation. Place all materials in a garbage container or make materials inaccessible to children.
WARNING: The instructions in the manual and all other literature included with this dryer are not meant to cover every possible condition and situation that may occur. Good safe practice and caution MUST be applied when installing, operating and maintaining any appliance.

Reversing the Dryer Door Swing
1 Open the dryer door. Remove the 4 hinge hole plugs or screws from the left side of door opening. Place nearby for future installation.
NOTE: You may need a plastic knife to help pull out the plugs. Be careful not to scratch the paint.
2 Remove the four screws that secure the door hinges to the dryer front panel. NOTE: Remove 1 screw from each of the 2 hinges first. Hold the door firmly before removing the last 2 screws.
3 Rotate the door 180° and reinstall the door hinges to the dryer front panel with the 4 screws.
4 Install the 4 hinge hole plugs or screws that were removed in step 1 into the open screw holes on the right side of the door opening.
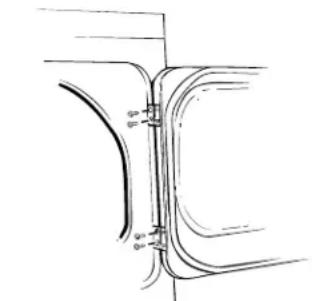
natural_image
Pure technical line drawing of a mechanical component with no text or symbolsRemove 4 screws—one from each hinge first
Before you call for service...

Troubleshooting Tips
Save time and money! Review the charts on the following pages,
or visit Hotpoint.com. You may not need to call for service.
Problem Possible Causes What To Do
| Dryer doesn't start | Dryer is unplugged | Make sure the dryer plug is pushed completely into the outlet. |
| Fuse is blown/circuit breaker is tripped breaker box in your home, and replace fuse or reset breaker. NOTE: Electric dryers use two fuses or breakers. | ||
| Thermal limiter tripped | Check the vent for any obstructions. Call authorized service person for replacement if necessary. | |
| Dryer doesn't heat | Fuse is blown/circuit breaker is tripped; the dryer may tumble and replace both fuses or reset both breakers. but not heat Your dryer may tumble if only one fuse is blown or one breaker tripped. | |
| Gas service is off | Make sure gas shutoff at dryer and main shutoff are fully open. | |
| LP gas supply tank is empty or there has been a utility interruption of natural gas (gas models) | Refill or replace tank. Dryer should heat when utility service is restored. | |
| Dryer shakes or makes noise | Some shaking/noise is normal. Dryer may be sitting unevenly | Move dryer to an even floor space, or adjust leveling legs as necessary until even. |
| Greasy spots on clothes | Improper use of fabric softener | Follow directions on fabric softener package. |
| Drying dirty items with clean ones | Use your dryer to dry only clean items. Dirty items can stain clean items and the dryer. | |
| Clothes were not completely clean | Sometimes stains which cannot be seen when the clothes are wet appear after drying. Use proper washing procedures before drying. | |
| Lint on clothes | Lint filter is full | Clean lint screen before each load. |
| Improper sorting | Sort lint producers (like chenille) from lint collectors (like corduroy). | |
| Static electricity can attract lint | See suggestions in this section under STATIC. | |
| Overloading | Separate large loads into smaller ones. | |
| Paper, tissue, etc. left in pockets | Empty all pockets before laundering clothes. | |
| Static occurs | No fabric softener was used | Try a fabric softener.Bounce® Fabric Conditioner Dryer Sheets have been approved for use in all GE Dryers when used in accordance with the manufacturer's instructions. |
| Overdrying | Try a fabric softener.Adjust controls to LESS DRY. | |
| Synthetics, permanent press and blends can cause static | Try a fabric softener. | |
| Problem Possible Causes What To Do | ||
| Inconsistent drying times of heat used (electric, natural or LP gas), size of load, types of fabrics, wetness of clothes and condition of exhaust ducts. | ||
| Clothes take too long to dry | Improper sorting | ·Separate heavy items from lightweight items (generally, a well-sorted washer load is a well-sorted dryer load). |
| Large loads of heavy fabrics (like beach towels) | ·Large, heavy fabrics contain more moisture and take longer to dry. Separate large, heavy fabrics into smaller loads to speed drying time. | |
| Controls improperly set | ·Match control settings to the load you are drying. | |
| Lint filter is full | ·Clean lint filter before every load. | |
| Improper or obstructed ducting | ·Check installation instructions for proper ducting/venting. ·Make sure ducting is clean, free of kinks and unobstructed. ·Check to see if outside wall damper operates easily. ·Check the Installation Instructions to make sure the dryer venting is correct. | |
| Blown fuses or tripped circuit breaker | ·Replace fuses or reset circuit breakers. Since most dryers use 2 fuses/breakers, make sure both are operating. | |
| Overloading/combining loads | ·Do not put more than one washer load in the dryer at a time. | |
| Underloading | ·If you are drying only one or two items, add a few items to ensure proper tumbling. | |
| Clothes are wrinkled | Overdrying | ·Select a shorter drying time. ·Remove items while they still hold a slight amount of moisture. Select a LESS DRY setting. |
| Letting items sit in dryer after cycle ends | ·Remove items when cycle ends and fold or hang immediately. | |
| Overloading | ·Separate large loads into smaller ones. | |
| Clothes shrink | Some fabrics will naturally shrink when washed. Others can be safely washed, but will shrink in the dryer | ·To avoid shrinkage, follow garment care labels exactly. ·Some items may be pressed back into shape after drying. ·If you are concerned about shrinkage in a particular item, do not machine wash or tumble dry it. |
| Consumer Support | Troubleshooting Tips Operating Instructions Safety InstructionsInstallation Instructions | |||
Notes.
GE Service Protection Plus™
GE, a name recognized worldwide for quality and dependability, offers you Service Protection Plus™—comprehensive protection on all your appliances—No Matter What Brand!
Benefits Include:
- Backed by GE
- All brands covered
• Unlimited service calls - All parts and labor costs included
• No out-of-pocket expenses
• No hidden deductibles
• One 800 number to call
We'll Cover Any Appliance. Anywhere. Anytime.\*
You will be completely satisfied with our service protection or you may request your money back on the remaining value of your contract. No questions asked. It's that simple.
Protect your refrigerator, dishwasher, washer and dryer, range, TV, VCR and much more—any brand! Plus there's no extra charge for emergency service and low monthly financing is available. Even icemaker coverage and food spoilage protection is offered. You can rest easy, knowing that all your valuable household products are protected against expensive repairs.
Place your confidence in GE and call us in the U.S. toll-free at 800.626.2224 for more information.
*All brands covered, up to 20 years old, in the continental U.S.

Cut here
Please place in envelope and mail to:
General Electric Company
Warranty Registration Department
P.O. Box 32150
Louisville, KY 40232-2150
Consumer Product Ownership Registration
Dear Customer:
Thank you for purchasing our product and thank you for placing your confidence in us.
We are proud to have you as a customer!
Follow these three steps to protect your new appliance investment:
1
Complete and mail your Consumer Product Ownership Registration today. Have the peace of mind of knowing we can contact you in the unlikely event of a safety modification.
2
After mailing the registration below, store this document in a safe place. It contains information you will need should you require service. Our service number is 800.GE.CARES (800.432.2737).
3
Read your Owner's Manual carefully. It will help you operate your new appliance properly.
Model Number Serial Number

natural_image
Two identical horizontal lines with tick marks, no text or symbols presentImportant: If you did not get a registration card with your product, detach and return the form below to ensure that your product is registered, or register online at Hotpoint.com.

Consumer Product Ownership Registration

Model Number Serial Number

natural_image
Two identical horizontal lines with tick marks, no text or symbols present


GE Appliances
GE Consumer Products General Electric Company Louisville, Kentucky www.GEAppliances.com
HOTPOINT
Hotpoint Dryer Warranty.

All warranty service provided by our Factory Service Centers, or an authorized Customer Care® technician. To schedule service, on-line, 24 hours a day, visit us at Hotpoint.com, or call 800.GE.CARES (800.432.2737).
Staple your receipt here. Proof of the original purchase date is needed to obtain service under the warranty.
For The Period Of: We Will Replace:
One Year
From the date of the Any part of the dryer which fails due to a defect in materials or workmanship. During this
full one-year warranty, we will also provide, free of charge, all labor and related service costs
original purchase to replace the defective part.
What Is Not Covered:
■Service trips to your home to teach you how to use the product.
■Improper installation, delivery or maintenance.
■Failure of the product if it is abused, misused, or used for other than the intended purpose or used commercially.
■Replacement of the light bulb.
■Replacement of house fuses or resetting of circuit breakers.
■Damage to the product caused by accident, fire, floods or acts of God.
■Incidental or consequential damage caused by possible defects with this appliance.
■Damage caused after delivery.
This warranty is extended to the original purchaser and any succeeding owner for products purchased for home use within the USA. In Alaska, the warranty excludes the cost of shipping or service calls to your home.
Some states do not allow the exclusion or limitation of incidental or consequential damages. This warranty gives you specific legal rights, and you may also have other rights which vary from state to state. To know what your legal rights are, consult your local or state consumer affairs office or your state's Attorney General.
Warrantor: General Electric Company. Louisville, KY 40225

Hotpoint Website
Hotpoint.com
Have a question or need assistance with your appliance? Try the Hotpoint Website 24 hours a day, any day of the year! You can also shop for more great Hotpoint products and take advantage of all of our on-line support services designed for your convenience.

Schedule Service Hotpoint.com
Expert Hotpoint repair service is only one step away from your door. Get on-line and schedule your service at your convenience 24 hours any day of the year! Or call 800.GE.CARES (800.432.2737) during normal business hours.
Real Life Design Studio GEAppliances.com
GE supports the Universal Design concept—products, services and environments that can be used by people of all ages, sizes and capabilities. We recognize the need to design for a wide range of physical and mental abilities and impairments. For details of GE's Universal Design applications, including kitchen design ideas for people with disabilities, check out our Website today. For the hearing impaired, please call 800.TDD.GEAC (800.833.4322).

Extended Warranties GEAppliances.com
Purchase a Hotpoint extended warranty and learn about special discounts that are available while your warranty is still in effect. You can purchase it on-line anytime, or call 800.626.2224 during normal business hours. Hotpoint Consumer Home Services will still be there after your warranty expires.
Parts and Accessories Hotpoint.com
Individuals qualified to service their own appliances can have parts or accessories sent directly to their homes (VISA, MasterCard and Discover cards are accepted). Order on-line today, 24 hours every day or by phone at 800.626.2002 during normal business hours.
Instructions contained in this manual cover procedures to be performed by any user. Other servicing generally should be referred to qualified service personnel. Caution must be exercised, since improper servicing may cause unsafe operation.

Contact Us Hotpoint.com
If you are not satisfied with the service you receive from Hotpoint, contact us on our Website with all the details including your phone number, or write to: General Manager, Customer Relations
Hotpoint, Appliance Park
Louisville, KY 40225

Register Your Appliance Hotpoint.com
Register your new appliance on-line—at your convenience! Timely product registration will allow for enhanced communication and prompt service under the terms of your warranty, should the need arise. You may also mail in the pre-printed registration card included in the packing material.


- Operating Instructions
- Installation Instructions
- Consumer Support
- Owner's Manual and Installation Instructions
- IMPORTANT SAFETY INFORMATION. READ ALL INSTRUCTIONS BEFORE USING.
- ▲WARNING!
- WHAT TO DO IF YOU SMELL GAS:
- California Safe Drinking Water and Toxic Enforcement Act
- PROPER INSTALLATION
- Exhaust/Ducting:
- YOUR LAUNDRY AREA
- WHEN USING YOUR DRYER
- WHEN USING YOUR DRYER (cont.)
- WHEN NOT USING YOUR DRYER
- READ AND FOLLOW THIS SAFETY INFORMATION CAREFULLY.
- SAVE THESE INSTRUCTIONS
- Model NLL113
- Model NVL333
- About the control settings.
- Drying Cycles
- Loading and using the dryer. Always follow the fabric manufacturer's care label when laundering.
- Sorting and Loading Hints
- Care and Cleaning of the Dryer
- Follow these steps:
- Fabric Care Labels
- WASH LABELS
- BLEACH LABELS
- DRY LABELS
- Preparing to install your dryer.
- Read these instructions completely and carefully.
- WARNING
- Tools and Materials Required for Dryer Installation
- Preparing the Installation Site and Unpacking the Dryer
- Electrical requirements.
- Electrical Connection Information for Electric Dryers
- Electrical Requirements
- Electrical Connection Information for Gas Dryers
- External Ground (if required)
- Exhausting the dryer.
- Exhaust System Requirements
- Additional Installation Instructions
- Installing the dryer.
- Exhaust Ducting Length
- Exhaust Direction
- Gas Supply Requirements
- Location of Your Dryer
- Do Not Install the Dryer:
- Installation in Recess or Closet
- Mobile Home Installation
- Rough-In Dimensions
- Grounding Requirements
- For a grounded, cord-connected electric dryer:
- For a permanently-connected electric dryer:
- For a cord-connected gas dryer:
- Electrical Installation for Electric Dryers
- WARNING: A UL-approved strain
- WARNING: Use copper receptacles only.
- 3-Wire System for Electric Dryers—DO NOT use for Mobile Home Installations
- 4-Wire System for Electric Dryers—MUST be used for Mobile Home Installations
- Gas Connection for Gas Dryers
- Before Operating the Dryer
- WARNING: NEVER TEST FOR GAS LEAKS WITH AN OPEN FLAME.
- In the Commonwealth of Massachusetts
- Replacement Parts
- Reversing the Dryer Door Swing
- Before you call for service...
- GE Service Protection Plus™
- Benefits Include:
- We'll Cover Any Appliance. Anywhere. Anytime.\*
- Consumer Product Ownership Registration
- Model Number Serial Number
- Hotpoint Dryer Warranty.
- For The Period Of: We Will Replace:
- One Year
- What Is Not Covered:
- Hotpoint Website
- Hotpoint.com
- Schedule Service Hotpoint.com
- Real Life Design Studio GEAppliances.com
- Extended Warranties GEAppliances.com
- Parts and Accessories Hotpoint.com
- Contact Us Hotpoint.com
- Register Your Appliance Hotpoint.com
Brand : HOTPOINT
Model : NLL113EYWO
Category : Coffee maker