DWHHH24 - Washing machine ZLine - Free user manual and instructions
Find the device manual for free DWHHH24 ZLine in PDF.


| Product Type | Dishwasher |
| Model | DWHHH24 |
| Brand | ZLine |
| Dimensions (W x D x H) | 23.6" x 22.8" x 32.5" (for 24" model) |
| Capacity | 20 place settings (24" model) |
| Power Supply | 120 V, 60 Hz |
| Water Pressure | 0.04 - 1 MPa (5.8 - 145 psi) |
| Inlet Water Temperature | 120°F - 149°F |
| Rated Power Usage | Wash motor: 100W, Heater: 700W |
| Filter System | Multiple filter system with three mesh filters |
| Smart Wash System | Auto-adjusts cycle based on load size and soil level |
| Noise Level | 40 dB |
| Cycles | Heavy, Normal, ECO, Glass, Rapid, Rinse |
| Options | Heating Dry, Sanitize, Hi Temp, Energy Save |
| Delay Start | 1 - 24 hours |
| Rinse Aid Dispenser | Yes, removable cap |
| Detergent Dispenser | Main wash compartment with flap |
| Material | 430-grade stainless steel interior |
| Installation Type | Built-in under counter |
| Color | Not specified (customizable panel ready) |
Frequently Asked Questions - DWHHH24 ZLine
User questions about DWHHH24 ZLine
0 question about this device. Answer the ones you know or ask your own.
Ask a new question about this device
Download the instructions for your Washing machine in PDF format for free! Find your manual DWHHH24 - ZLine and take your electronic device back in hand. On this page are published all the documents necessary for the use of your device. DWHHH24 by ZLine.
USER MANUAL DWHHH24 ZLine
natural_image
Stylized blue water droplet icon with gradient shading (no text or symbols)DISHWASHER
Installation Guide and Users Manual

WARNING

This product can expose you to chemicals including nickel, which is known to the State of California to cause cancer, and birth defects or other reproductive harm.
For more information go to www.P65Warnings.ca.gov.
Even though the materials used in all ZLINE Kitchen and Bath products conform to all federal government regulations and all national product standards, California's Prop 65 requires all businesses to provide a "clear and reasonable warning" if one or more listed chemicals may be present in the product, even if that chemical is present in trace quantities

ZLINE
Customizable dishwashers will easily match your home's unique aesthetic with a wide array of styles that blend seamlessly into your cabinetry. With echo-resistant 430-grade stainless steel and intuitive design, enjoy a peaceful kitchen at only 40 decibels of sound — quieter than its competitors.
The multiple filter system hosts three mesh filters that separate soiled water and clean water into different chambers, optimizing performance while conserving water and energy.
CONTENTS
INSTALLATION GUIDE
- SAFETY INSTRUCTIONS
Important Safety Instructions
Grounding Instructions
BEFORE INSTALLING
Electric Shock Hazard
PREPARING THE DISHWASHER ENCLOSURE 5
Product Dimensions
Enclosure Dimensions
INSTALLING THE DISHWASHER
Step 1: Check the Parts and Tools
Step 2: Select the Best Location for the Dishwasher
Step 3: Check Water Supply Requirements and Cautions
Step 4: Check the Electrical Requirements and Cautions
Step 5: Unpacking and Inspecting the Dishwasher
Step 6: Preparing the Dishwasher
Step 7: Placing the Dishwasher and Connecting the Hot Water Supply Line
Step 8: Leveling the Dishwasher
Step 9: Securing the Dishwasher
Step 10: Connecting the Drain Hose
Step 11: Wiring Connections
Step 12: Completing the Installation
SPECIFICATIONS
CONTENTS
USERS MANUAL
● SAFETY INSTRUCTIONS 28
Proper Installation
Basic Precaution Before Use
FEATURES OF YOUR NEW DISHWASHER 30
Specification
Filter System
Smart Wash System
OPERATING INSTRUCTIONS 34
Control Panel
Cycle Chart
PREPARING AND LOADING DISHES 38
Loading the Lower Basket
Loading the Upper Basket
Loading the Silverware Basket
Adding a Dish
Filling the Detergent Dispenser
Filling the Rinse Aid Reservoir
- USER MAINTENANCE 42
Cleaning the Exterior
Cleaning the Interior
Cleaning the Nozzles
TROUBLESHOOTING 43
INSTALLATION GUIDE
SAFETY INSTRUCTIONS
Throughout this manual, you'll see Warning and Caution notes. These warnings, cautions, and important safety instructions do not cover all possible conditions and situations that may occur. It's your responsibility to use common sense, caution, and care when installing, maintaining, and operating the dishwasher. ZLINE is not liable for damages resulting from improper use.
These warning signs are here to prevent injury to you and others. Please follow them explicitly. After reading this manual, keep it in a safe place for future reference.
Important Safety Instructions

Hazards or unsafe practices that may result in severe personal injury or death.

ds or unsafe practices that may result in personal injury or property damage.

To reduce risk of fire, explosion, electric shock, or personal injury when using the dishwasher, follow these basic safety precautions.

sure the machine is grounded to prevent electric shock.
Read all instructions before using the appliance.
Install and store the dishwasher inside, away from exposure to weather.

Do not install the dishwasher near electrical components. Keep the dishwasher away from open flames.
Do not install the dishwasher on a carpet as this is a fire hazard.
Do not install the dishwasher in a location where the water may freeze (where the temperature falls below 32^(0^) ). Frozen water in the hoses or pipes may damage the dishwasher.
As with all equipment using electricity, water, and moving parts, potential hazards exist. To safely operate this appliance, become familiar with its operation and exercise care when using it.
The dishwasher must be properly grounded. Never connect it to an ungrounded outlet.
SAFETY INSTRUCTIONS

o removal of original dishwasher and the installation of your new unit,
sure to switch off your circuit breaker. Do not connect the dishwasher
until you have completed the installation. Connecting the power cable is the last step when installing the dishwasher. All wiring and grounding must be done in accordance with the electrical code applicable to the region.
Grounding Instructions
For a permanently connected appliance:
This appliance must be connected to grounded metal, a permanent wiring system, or an equipment-grounding conductor must be run with the circuit conductors and connected to the equipment-grounding terminal or lead on the appliance.
The dishwasher is very heavy. Do not attempt to move or carry a dishwasher alone.
Two or more people are needed to move a dishwasher and avoid potential injuries.

CAUTION
If the power cable is damaged, it must be replaced by the manufacturer, a service agent or similarly qualified person in order to avoid a hazard.
Do not touch the power cable with wet hands.
Do not connect another appliance to the same power outlet as the dishwasher.
■ Make sure to use a new water supply line. Old lines are susceptible to breakage because they become hardened and may cause property damage due to a water leakage.
The dishwasher must be connected to a hot water supply with a temperature between 120°F and 149°F. This temperature range provides the best washing result and shortest cycle time. Temperature should not exceed 149°F to prevent damage to dishes.
- Ensure that the water supplied to the dishwasher does not freeze. Frozen water can damage the hoses, valves, pump, or other components.
For a full list of safety information, please refer to the User Manual (page 27.)
BEFORE INSTALLING

WARNING
Do not use the dishwasher until it is correctly installed.
Do not push down on the door when it is open.
Do not place excessive weight on the open door.
Electric Shock Hazard
Failure to follow these instructions can result in death, fire, or electric shock:

Electrically ground the dishwasher.
Connect the ground wire to the green ground connector in the junction box.
Do not use an extension cord.
To reduce the risk of electric shock, fire, or injury to persons, the installer must ensure that dishwasher is completely enclosed at the time of installation.
Product Dimensions
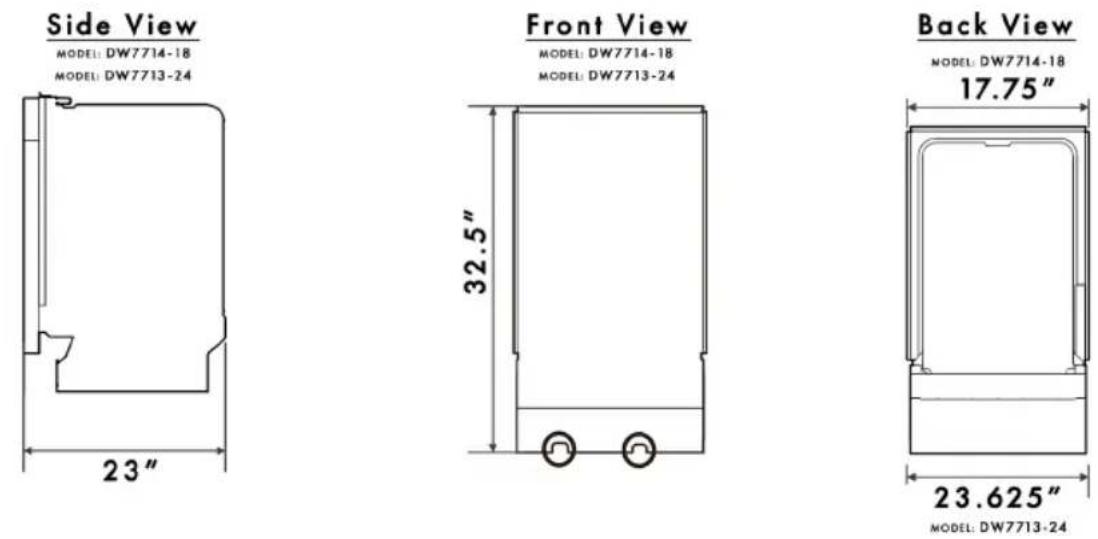
MODEL: DW7714-18
MODEL: DW7713-24
MODEL: DW7714-18
MODEL: DW7713-24
MODEL: DW7714-18
17.75"
MODEL: DW7713-24
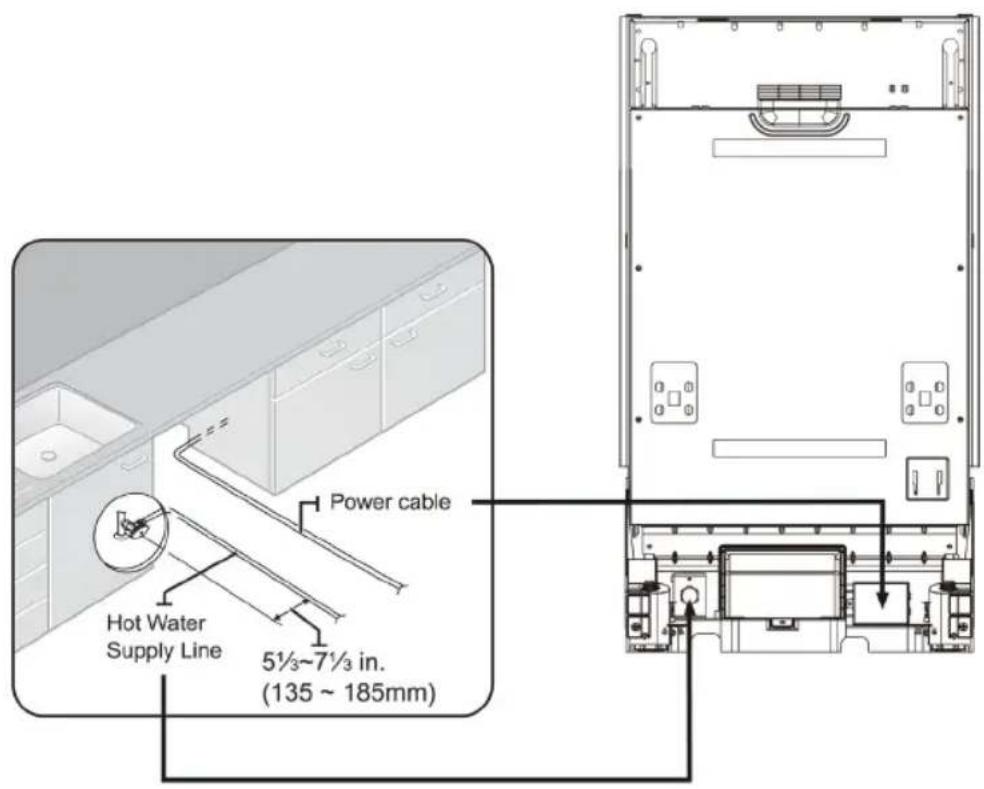
The water supply line, power cable, and drain hose should go through the space behind the dishwasher. The power cable runs in channels under the dishwasher to connections in the front.
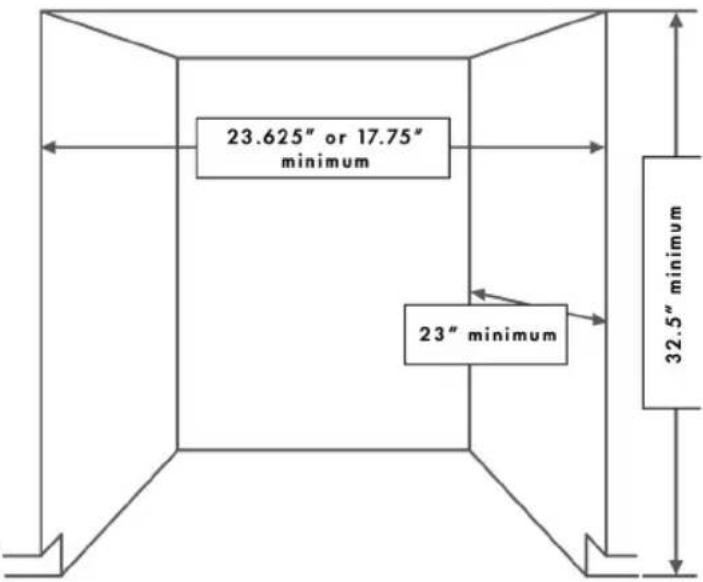
Enclosure Dimensions
This dishwasher is designed to be enclosed on the top and on both sides by a standard residential kitchen cabinet unit. The installation enclosure must be clean and free of any obstructions.
The enclosure must be at least 23.6 inches wide, 23 inches deep, and 32.5 inches high. For the front door of the dishwasher to be flush with the leading edge of the counter top, the counter top must be at least 23 inches deep. For kick plate installation, there needs to be a 1.5 inch wood filler between the bottom of the counter top and the top of the dishwasher.
INSTALLING THE DISHWASHER
Be sure that you or your installer follow these instructions closely so that the new dishwasher works properly and that you're not at risk of injury when washing dishes.
Step 1: Check the Parts and Tools
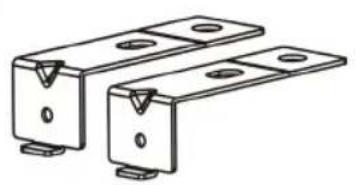
Before starting on the installation, prepare all the necessary tools and parts required to install the dishwasher. This will save installation time and simplify the installation process. Below are all the parts that are provided with the dishwasher. See step 5.
natural_image
Technical line drawing of two metal bracket components with mounting holes (no text or symbols)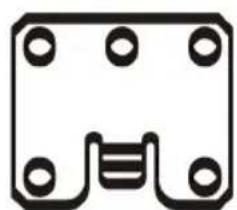
natural_image
Pure electrical circuit lines without any symbols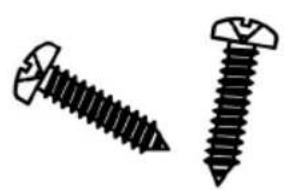
natural_image
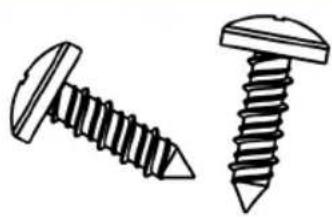
Two types of screwdrivers shown side by side, no text or symbols presentInstallation Bracket #1 x2 Installation Bracket #2 x2 ST3.9*13 x2
(for the kick plate)
natural_image
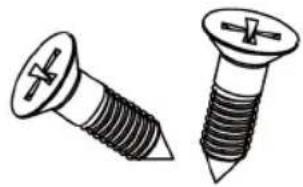
Illustration of two screwdrivers with metal fasteners (no text or symbols)ST4*14 x10 (for install brackets 1&2)
natural_image
Two types of screwdrivers shown in line drawings (no text or symbols)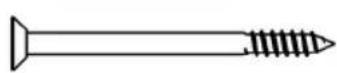
ST3.5*9 ×2 ST3.5*45 ×4
(for the dishwasher panel)
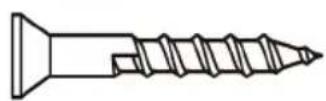
ST3.5*25 x2 (for the dishwasher panel hook)
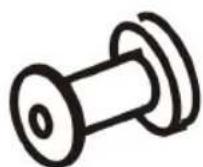
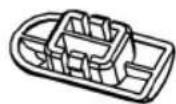
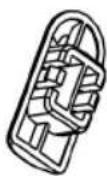
Dishwasher Panel Hook Adjustment Cap x2
Cable Tie (for the drain hose)
natural_image
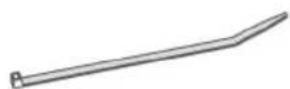
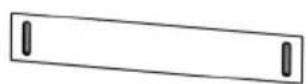
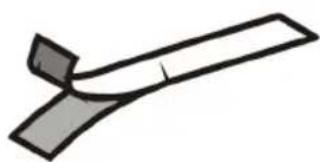
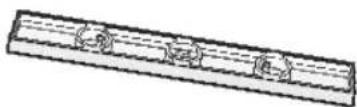
Simple line drawing of a curved, elongated object with no text or symbolsKick Plate Condensation Strip
INSTALLING THE DISHWASHER
Not Provided:
natural_image
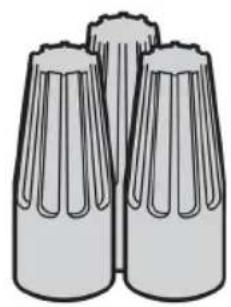
Illustration of binoculars with visible ridges and lenses (no text or symbols)Twist on wire connector Strain relief (oprtional)
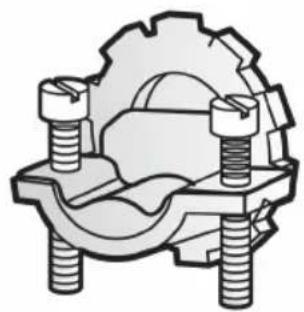
natural_image
Mechanical gear assembly diagram with two bolts and a central housing (no text or labels)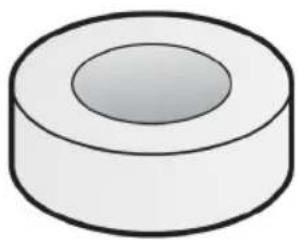
natural_image
Simple 3D illustration of a cylindrical object with a central hole (no text or symbols)Electrical tape & standard duct tape
natural_image
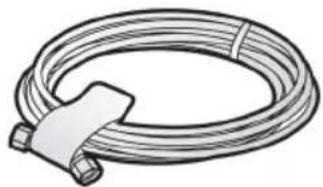
Illustration of a coiled cable with a strap (no text or symbols)Hot water supply line 90° Elbow Tube fittings
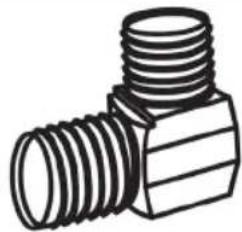
natural_image
Technical illustration of a threaded pipe fitting (no text or symbols)
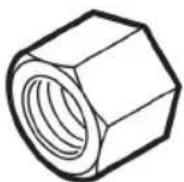
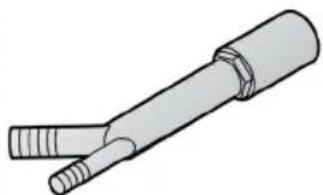
natural_image
Illustration of a cylindrical electrical plug with two leads (no text or symbols)Air gap (optional) Rubber connector (optional) Hose clamp
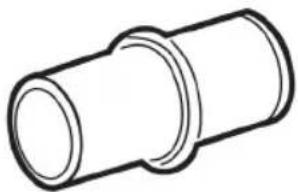
natural_image
Simple line drawing of a cylindrical mechanical component (no text or symbols)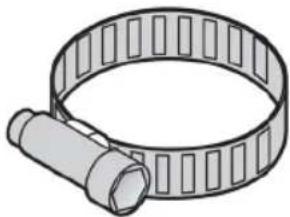
natural_image
Illustration of a mechanical clamp or hose assembly (no text or symbols)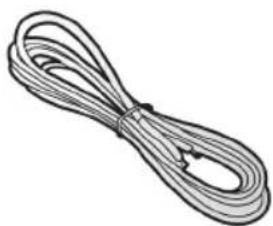
natural_image
Illustration of a coiled cable or wire with no text or symbolsPower cable Teflon tape or sealing compound
natural_image
Simple line drawing of a cylindrical mechanical component (no text or symbols)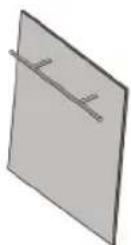
Dishwasher Panel
Do not use plastic tubing. Plastic tubing can deteriorate over time and cause a leak inside the tube fitting. We strongly recommend using copper tubing with a compression fitting or a flexible stainless steel braided hot water supply line.
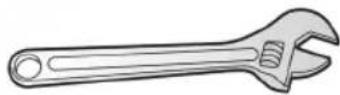
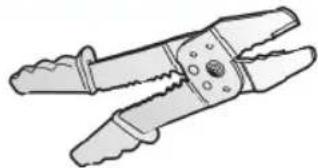
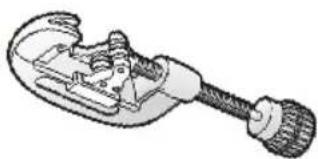
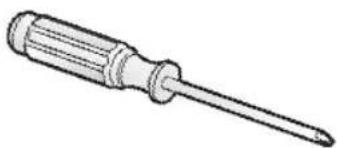
Tools Required (Not Provided):
natural_image
Line drawing of a handheld electric drill bit (no text or symbols)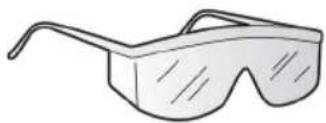
natural_image
Illustration of a pair of eyeglasses with curved bristles (no text or symbols)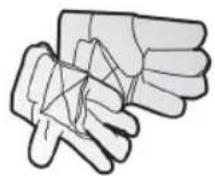
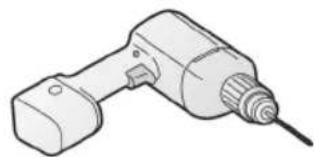
Electric drill Safety glasses Gloves
natural_image
Line drawing of a pair of pliers (no text or symbols)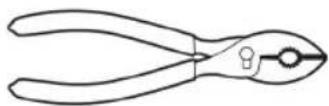
Adjustable wrench Wire stripper Pliers
natural_image
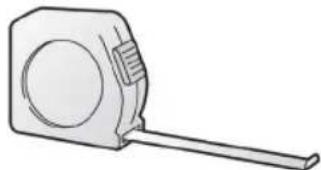
Line drawing of a measuring tape (no text or symbols)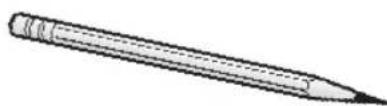
natural_image
Simple line drawing of a pencil (no text or symbols)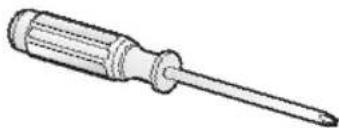
natural_image
Line drawing of a screwdriver with a flat blade and threaded shaft (no text or symbols)Tape measure
Pencil Phillips screwdriver
natural_image
Illustration of a mechanical tool with a handle and lever (no text or symbols)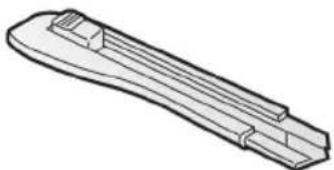
natural_image
Technical line drawing of a mechanical component with flanged ends and a central slot (no text or symbols)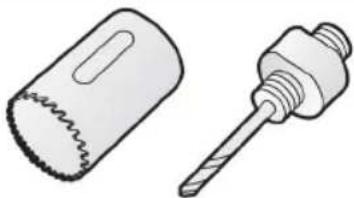
natural_image
Illustration of two types of screwdrivers: a cylindrical head and a threaded screwdriver (no text or symbols)Tubing cutter (optional) Cutting knife Hole saw (optional)
natural_image
Line drawing of a screwdriver with no text or symbols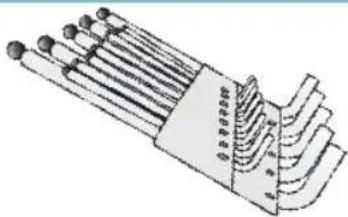
natural_image
Illustration of a multi-pin electrical connector with leads and winding pins (no text or symbols)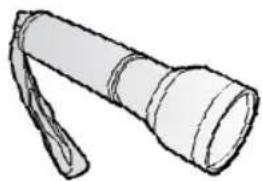
natural_image
Simple line drawing of a flashlight with a strap (no text or symbols)Torx t20 Hex L-wrench Flashlight
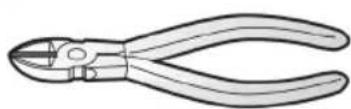
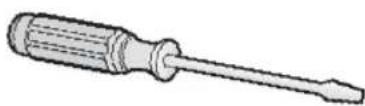
Nipper Flat screwdriver Level
INSTALLING THE DISHWASHER
If the dishwasher is a new installation, most of the installation work must be done before the dishwasher is moved into place. If the dishwasher is replacing an old dishwasher, you must check the existing dishwasher connections for compatibility with the new dishwasher. Replace the existing connections as necessary.
Step 2: Select the Best Location for the Dishwasher
The following criteria are important to ensure the best location for the dishwasher:
The location must have a solid floor that is able to support the weight of the dishwasher.
The location must be near a sink with easy access to the water supply, drain, and electrical outlet.
For the drain to operate properly, the dishwasher should be installed within 9.8 ft of the sink.
The location must let you load your dishes into the dishwasher easily.
The location must have sufficient space for the dishwasher door to open easily and provide enough space between the dishwasher and the cabinet sides (at least 0.1 in).
If the dishwasher is installed in a corner, ensure that the side of the dishwasher is more than 2 inches from the wall or cabinet.
The wall at the back must be free of obstructions.
If this is a new installation, follow these steps:
- Using a hole saw, cut a hole into the side of the cabinet that hold the sink as shown in Figure 1-1 below.
- If the base inside the sink cabinet is raised above the kitchen floor and is higher than the connections on the dishwasher, make a hole in the base inside the cabinet and in the cabinet side as shown in Figure 1-2.
Depending on where your electrical outlet is, you may need to cut a hole in the opposite cabinet side.
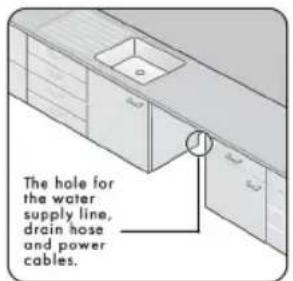
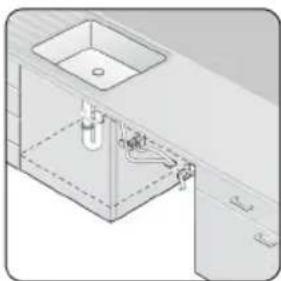
natural_image
Isometric line drawing of a kitchen sink with faucet and drain (no text or symbols)Figure 1-1 Figure 1-2
Step 3: Check Water Supply Requirements and Cautions
The hot water supply line pressure must be between 0.04-1 MPa.
Adjust the water heater to deliver water between 120°F\~149°F.
The dishwasher must be connected to a hot water supply between
120°F\~149 °F. This temperature range provides the best
washing result and shortest cycle time. Temperature should not
exceed 149°F to prevent damage to dishes.
Ensure that the water supply valve is turned off before connecting the hot water supply line to the dishwasher.
Seal the hot water supply line connections using Teflon tape or sealing compound to stop any water leakage.
When you install the dishwasher, ensure there is nothing on the drain hose and be careful not to tear it during the installation process.
Figure 2
Step 4: Check the Electrical Requirements and Cautions
The electrical requirements for the dishwasher are as follows:
In the United States, install in accordance with the National Electric Code/State and Municipal codes and/or local codes.
For cable direct connections.
Use flexible, armored or non-metallic sheathed, copper wire with a grounding wire that meets the wiring requirements for your local codes and ordinances.
Use the strain relief method provided with the wiring junction box or install a U.L.-listed/CSA-certified clamp connector to the wiring junction box. If using conduit, use a U.L.-listed/CSA-certified conduit connector.
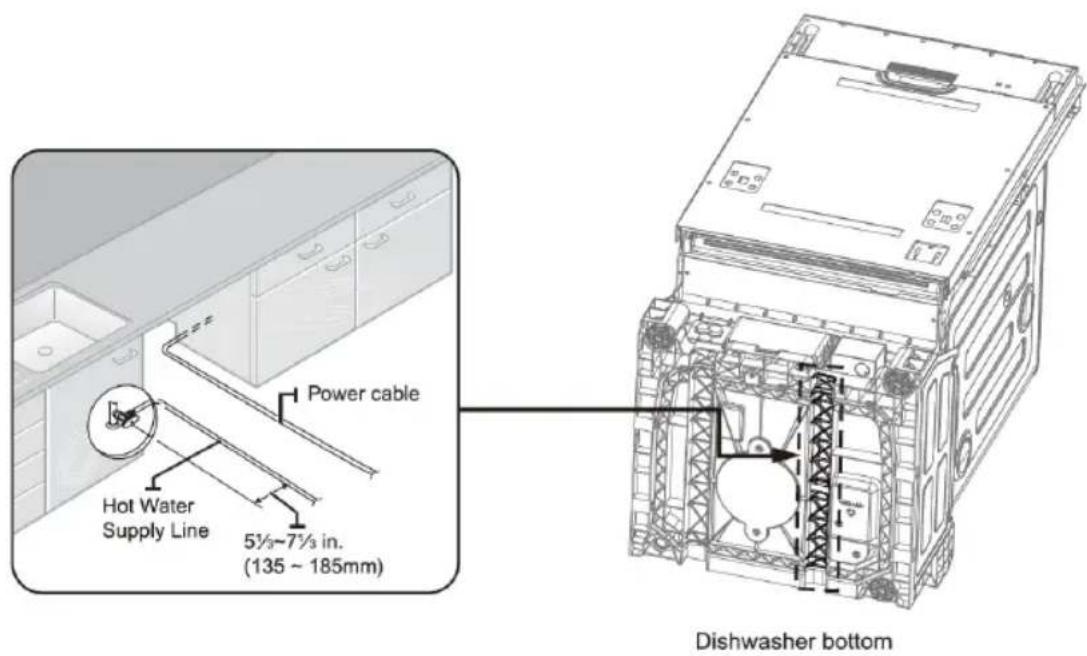
Step 5: Unpacking and Inspecting the Dishwasher
Unbox the dishwasher in an open area free of obstruction both around the carton and overhead. We recommend that you retain the carton and all of the packing materials until the dishwasher is fully installed and operational to ensure you have removed all the product's components from the carton prior to disposal.
Unboxing
- Unbuckle or cut the four straps securing the carton top.
- Lift the top of the telescoping carton clear of the carton tray and the contents, and then turn it over and place it on the floor.
- Put the straps and all of the packing materials from around the dishwasher inside the carton top, inspecting them for any signs of damage.
- Lift the dishwasher from the carton tray, and then place it on the floor. Put the tray into the carton top.
- Remove the bag that protects the dishwasher during shipping.

CAUTION
ALWAYS LIFT THE DISHWASHER TO MOVE IT.
Sliding it over rough surfaces can damage the dishwasher's feet and sliding the feet over finished surfaces can, in some cases, damage that finish or the underlying surface.
- There is also packing inside the dishwasher that you may want to leave in place until the dishwasher is installed.
- Do not, under any circumstances, remove the sound-absorbent padding that surrounds the exterior of the tub of the dishwasher.
Mechanical Inspection
- Check the plastic base assembly to ensure that it is intact.
- Check the dishwasher's feet to ensure they are in place and can be adjusted so you can level and secure the dishwasher.
- Check all the visible components on the bottom of the dishwasher to ensure they are intact and secure.
- Check the door latch, the operation of the hinges, and confirm the door is properly secured to the dishwasher.
Step 5: Unpacking and Inspecting the Dishwasher Continued
Plumbing Inspection
- Check the hot water connection on the front left side of the base of the dishwasher. The mounting plate should be secured to the front of the base, the threads inside the connection should be smooth and shiny, and the area should be clean and free of any debris.
- Check the plastic brake and sensor cases to ensure these assemblies are not cracked and that all connections are secure.
- Check the drain hose for any holes or deformities that could allow a water leak during draining.
Electrical Inspection
- Confirm the junction box cover is secured to the junction box on the front right side of the base of the dishwasher.
- Confirm the electrical box was not damaged during shipping and that it is secured to the base of the dishwasher.
Appearance Inspection
- Confirm there are no dents or scratches on the front of the dishwasher
- Check the edges of the doors for any roughness or cracking
- Check the control panel to ensure it is clear and unscratched, and that all the control markers are in their proper places.
Parts Inspection
- Confirm you have all the parts listed in step 1.
Step 6: Preparing the Dishwasher

e that the circuit breaker and water supply valve are turned off before needing with the following steps.
Before you move or lay down the dishwasher for installation, make sure to adjust the height of the legs so the legs are as short as possible. This prevents the legs from breaking. Level the dishwasher by adjusting the height of the legs after you have the dishwasher in place.
- Make sure there are no kinks and that the hose is not bent at any extreme angles that could constrict the flow of water.
- Remove the junction box cover located at the bottom front right of the dishwasher using a screwdriver, and then Install the strain relief (Figure 4 - C). Make sure to keep the junction box cover you removed. It is used in Step 11, Wiring Connections.
- If the countertop is made of wood or a material that is not damaged by drilling, attach the two Installation brackets that were supplied with the dishwasher using the supplied screws (Figure 4 - A). They will be used in Step 9, Securing the Dishwasher

CAUTION
Do not overtighten the 90^ elbow.
Doing so may damage the water inlet valve and cause a water leak.
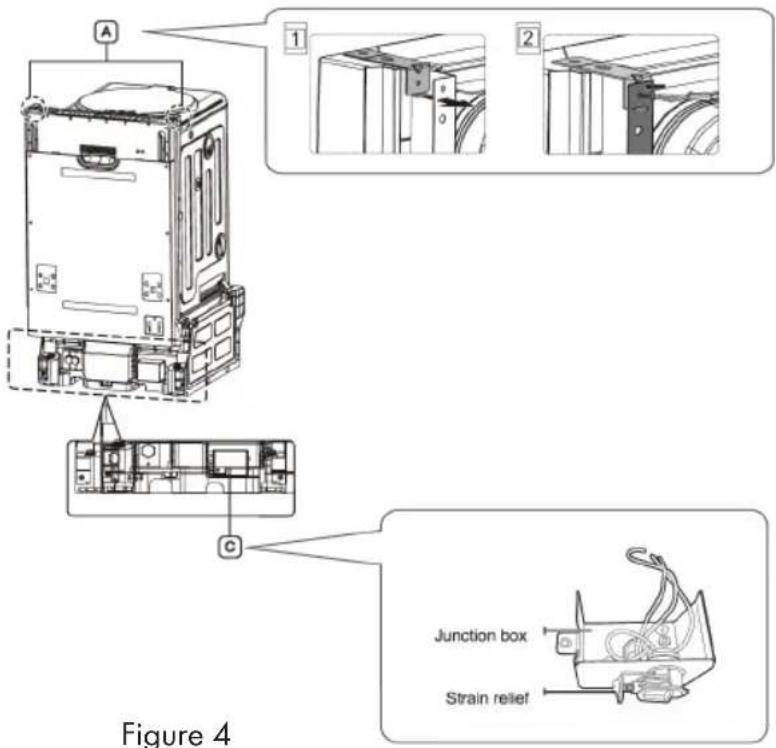
Figure 4
Step 7: Placing the Dishwasher and Connecting the Hot Water Supply Line
- Adjust the three leveling legs at the bottom of the dishwasher after measuring the height of the cabinet opening from under the countertop to the floor. (See Step 8, Leveling the Dishwasher.)
- Locate the hot water supply line and the power cable.
- Place the dishwasher so that the power cable is in the right channel of the base of the dishwasher. Use standard duct tape or cable ties to secure the electrical cable to their adjacent channels in the base. This can prevent the electrical cable from being squeezed when you push the dishwasher into place.
- Pull the drain hose through the hole in the sink cabinet side wall. Keep it free of kinks and twists.
- Make sure the hot water supply line is not twisted, and then connect the hot water supply line to the elbow joint.
- Slide the dishwasher carefully into the installation space. If possible, gently pull any excess lengths of water supply line, drain hose, or power cable back as you move the dishwasher. Get a second or third person to help you do this if necessary.

WARNING
Do not place the dishwasher on the water supply line, drain hose, or power cable. Also, make sure they are not folded or twisted.
Figure 6
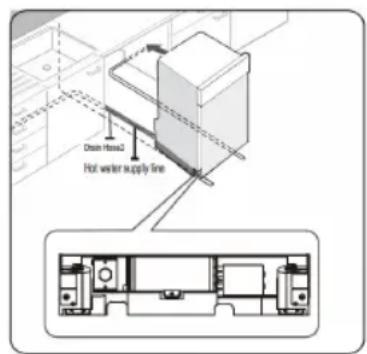
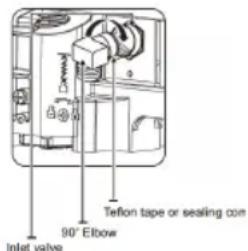
Figure 7
Step 8: Leveling the Dishwasher
-
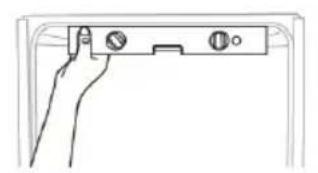
Open the door and place the level against the top of the tub on the inside and check if the dishwasher is level. If it is not level, rotate the leveling legs at the at the bottom front of the dishwasher until the dishwasher is level. See the first note below for instructions on adjusting the height of the front legs.
-
Use the level to check if the dishwasher is level front to back, as shown in the figure to the right. If the dishwasher is not level front to back, adjust the height of the rear leg until the dishwasher is level. See the second note below for the instructions on adjusting the rear leg.
-
Open the door of the dishwasher and check if both the tub and door clearances are correct. If not, rotate the leveling legs on the bottom front of the dishwasher. You can also check this by placing a level against the inside front vertical surface of the tub.
natural_image
Line drawing of a hand holding a device with a scale and circular buttons (no text or symbols)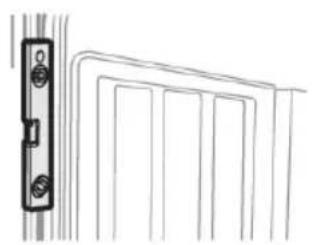
natural_image
Simple line drawing of a door handle and vertical panel, no text or symbols present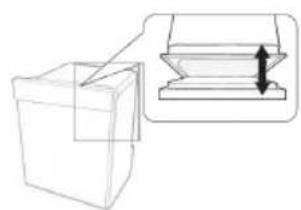
natural_image
Technical line drawing showing a 3D box being cut with an arrow indicating compression or dislocation (no text or symbols)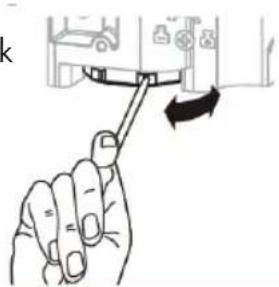
natural_image
Illustration of a hand holding a tool interacting with a device (no text or symbols visible)Note:
-
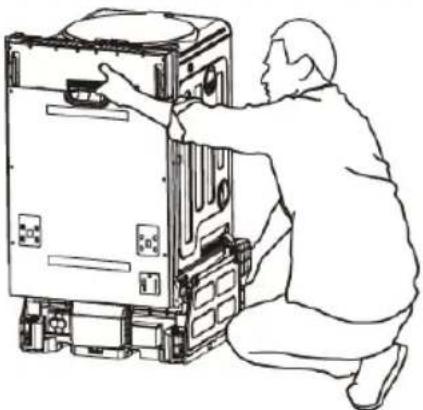
Before you move the dishwasher for installation, make sure to adjust the height of the legs so the legs are as short as possible. This prevents the legs from breaking. Level the dishwasher by adjusting the height of the legs after you have the dishwasher in place.
-
When you prepare to move the dishwasher for installation, you should put your hand under the basement, this prevents injury to your hand.
natural_image
Line drawing of a person assembling or adjusting a large appliance (no text or symbols visible)Step 9: Securing the Dishwasher
You must fix the dishwasher to the countertop or cabinet side walls for additional stability.
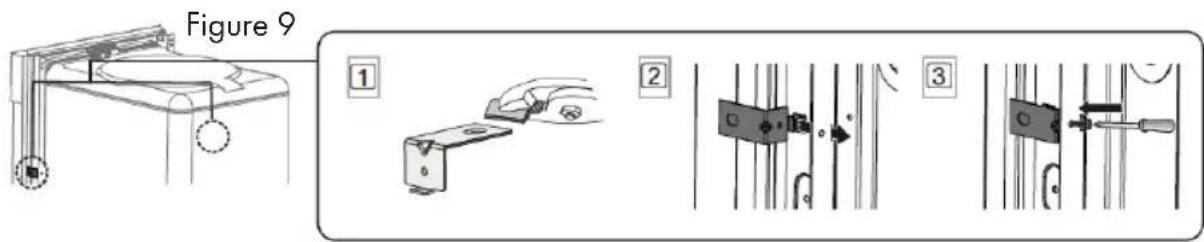
If the countertop is made of wood or the material will not be damaged by drilling, follow the instructions in 1 below.
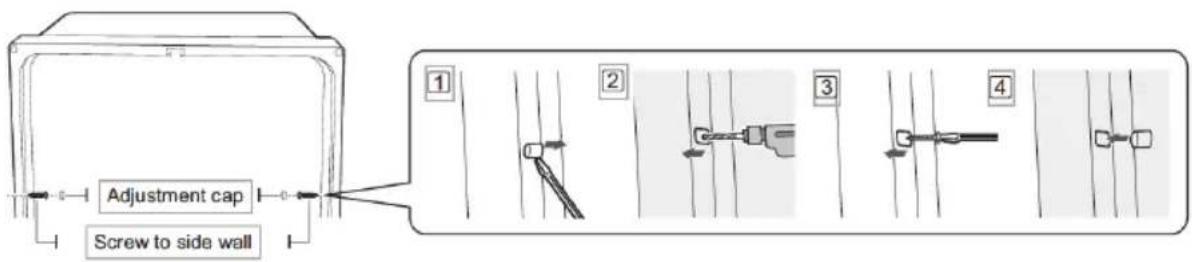
If the countertop is made of granite, marble, or any other material that can be damaged by drilling, follow the Instructions in 2 below.
- Put a large towel into the bottom of the dishwasher to prevent wood shavings or a dropped screw from falling into the dishwasher.
Carefully drill screw holes into the counter top bottom by passing the drill bit through a screw hole in each bracket, and then drilling into the counter top bottom beneath.
Make sure the hole you drill is smaller than the diameter of the screw.
Firstly, put the installation bracket into the slot of the side plane and tighten to the dishwasher with screw ST3.5*9. Secondly, insert the provided screws into the brackets, and then tighten to secure the dishwasher to the counter top.
- Put a large towel into the bottom of the dishwasher to prevent wood shavings or a dropped screw from falling into the dishwasher. Remove the adjustment cap with the tip of a screwdriver. The caps are just inside the tub near the middle of the tub an both sides (Figure 9 on the next page).
Drill a hole into the sides of the kitchen cabinet on both sides by carefully passing a drill bit through the screw holes exposed by the removal of the spacer caps, and then drilling into the cabinet side beneath.
Make sure the hole you drill is smaller than the diameter of the screw.
Also make sure the drill bit does not strike the sides of the spacer cap holes. Firstly, put the installation bracket into the slot of the side plane and tighten to the dishwasher with screw ST3.5*9. Secondly, insert the provided screws into the holes, and then tighten to secure the dishwasher to the cabinet. Make sure the tub is not distorted by pressure from the screws.
If the tub is distorted, loosen the screws a little.
Replace the tub spacer caps.
Step 9: Securing the Dishwasher Continued
Clean the underside of the countertop where the dishwasher will go. Measure and cut the condensation strip to match the opening. Attach the condensation strip to the underside of the counter, close the front edge. This disperses the steam away from the edge of the dishwasher.
The screws or tub spacer cap may fall into the dishwasher while you are working with the door open.
Cover the interior of the dishwasher with a towel to prevent any screws from falling into the dishwasher. If any foreign items such as a screw get into the dishwasher, it may cause noise, an abnormal operation, damage, or a malfunction.
Use a magnetic screwdriver to help prevent screws from falling into the dishwasher.
If a foreign item, such as a screw, gets into the dishwasher and you are unable to remove it, the dishwasher needs to be disassembled. Contact a qualified service technician for this.

Step 10: Connecting the Drain Hose
- Check the parts on the sink to which the drain hose will be connected.
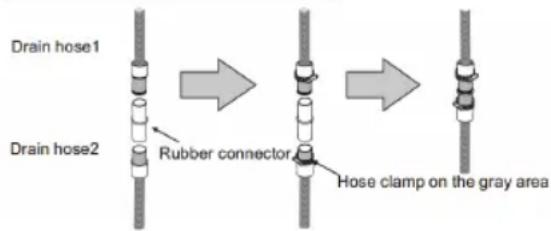
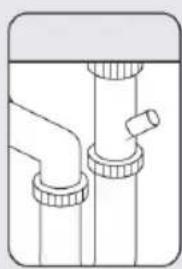
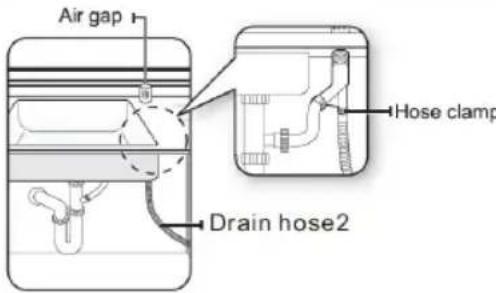
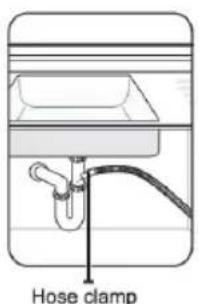
- There are several ways to insert the drain hose into the drain hose connector of the sink, as shown in the following figure. You must connect the drain hose in accordance with the water pipe installation regulations in your region.
Case 1 - Without Disposal
| Without disposal | With an air gap/without disposal | Without an air gap |
 |  |  |
- Check the size of the sink's drain hose connector (21mm (0.83 inches)- as shown in Figure 11 on the next page). If the end of the drain hose does not fit onto the drain hose connector of the sink, use an adapter purchasable at a plumbing/hardware supply store.
- Slide a hose clamp over the end of the drain hose. Attach the drain hose to the sink connector, slide the hose clamp to the end of the hose, and then tighten the hose clamp.
Note :
You must use a hose clamp. Failure to do so may cause water leakage.
- If there is no air gap, make sure to hang the middle of the drain hose well above the sink cabinet base to prevent backflow (see Figure 13 on the next page).
- When drilling a hole for the drain hose on the cabinet wall, take caution not to damage the drain hose by sharp edges of the hole. On wooden walls, use sand paper to soften the edges. On metal walls, use insulation tape or duct tape to cover the sharp edges around the hole.
- Take caution not the damage the drain hose when installing the dishwasher on the floor, wall, or cabinet.
Step 10: Connecting the Drain Hose Continued
To prevent leaks or drainage problems, make sure the drain hose is not damaged, kinked, or twisted.
- Do not cut the wrinkled area of the drain hose to fit the size. When arranging the drain hose, take caution to avoid contact with sharp edges of the cabinet or undersink.

Be careful when cutting off the end of the drain hose as there is a risk of injury. Clean around the sink's drain connection so that it does not damage the hose. Check for any foreign items in the drain hose and remove them.
When arranging the drain hose, make sure the drain hose is not cut, torn, or broken by any sharp edges of the floor, the product itself, or the cabinet. A damaged drain hose causes a leak.
Figure 11 Figure 12
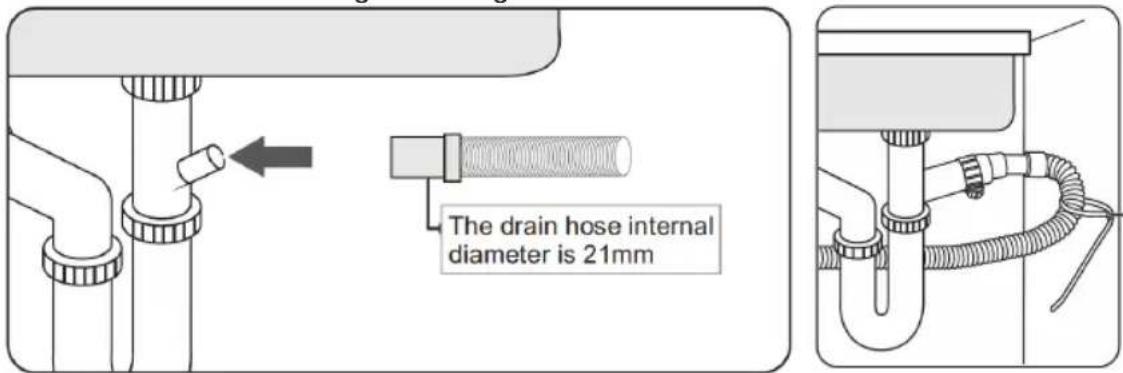
Figure 12: Secure the drain hose to the sink wall using cable ties or other fastening materials. Otherwise, the drain hose may bend at the end causing a drainage problem or excessive supply of water.
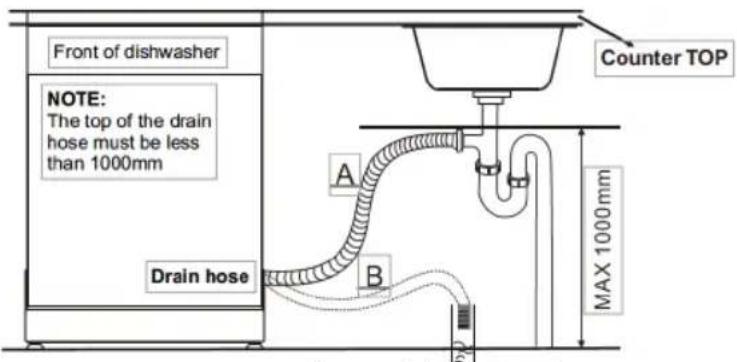
Figure 13
Step 11: Wiring Connections
- Before connecting the power cable to the dishwasher, make sure the circuit breaker is completely turned off.
- In the junction box located at the front bottom right of the dishwasher, find the three power wires from the dishwasher including the grounding line.
- Pass the power cable through the strain relief and into the junction box. Connect the black wire of the dishwasher to the black wire of the power cable by inserting both into a wire nut and then rotating the wire connector as shown in figure 15.
- Connect the white wire to the white wire and the green to the green in the same manner as in step 3.
- Recheck each wire to ensure it is connected correctly and securely.
Each colored wire should be connected to the corresponding wire of the same color. - White should be connected to white, black to black, and green to green.
Replace the junction box cover on the dishwasher.
Figure 15 Figure 14
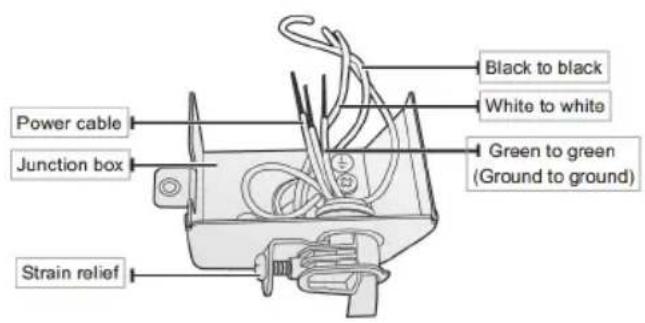
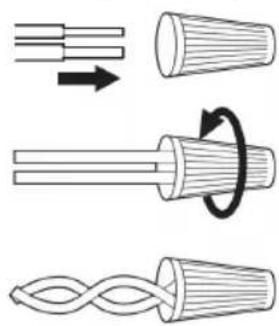
natural_image
Diagram illustrating the process of twisted cable and coiled wire, showing deformation from straight to twisted ends (no text or symbols)Electrical Shock Hazard
To avoid electrical shock, do not work on an energized circuit. Doing so could result in serious injury or death. Only qualified electricians should perform electrical work. Do not attempt any work on the dishwasher electric supply circuit until you are certain the circuit is de-energized.
Fire Hazard
To avoid a fire hazard, make sure electrical work is properly installed. Only qualified electricians should perform electrical work.

CAUTION
Step 12: Completing the Installation
- Open the door and remove all foam, paper packaging, and unnecessary parts.
- Turn on the circuit breaker you turned off before you began the installation.
- Open the water supply valve to supply water to the dishwasher.
- Turn on the dishwasher, and then select and run a cycle.
- Confirm that the kick plate gasket is on the bottom of the kick plate. To install the kick plate with screw ST3.9*13, refer to the figure 16.

Check if the power turns on correctly and if there is any water leakage while the dishwasher is operating. If no errors occur while it is operating, turn off the dishwasher and go to step 5.
If an error has occurred, turn off the dishwasher, close the water supply valve, and refer to the user manual or contact a service center.
Make sure to check for water leakage on both ends of the water supply line and drain hose connector.
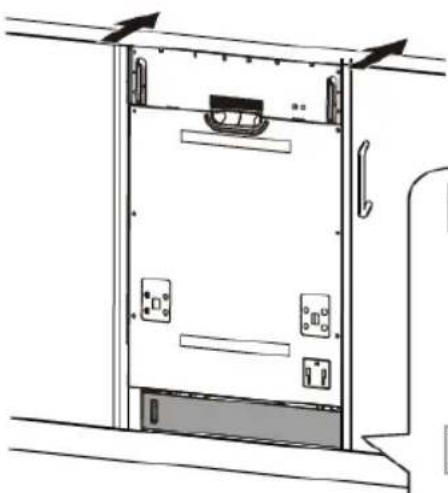
natural_image
Diagram of a server rack with mounting hardware and ventilation ducts (no text or labels)Figure 16
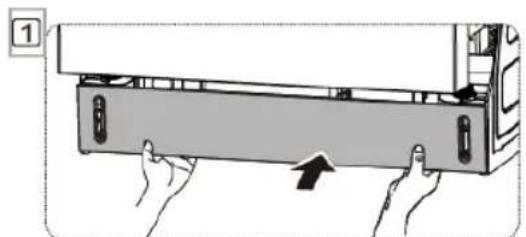
natural_image
Illustration of hands installing or adjusting a device panel with an arrow indicating motion (no text or symbols present)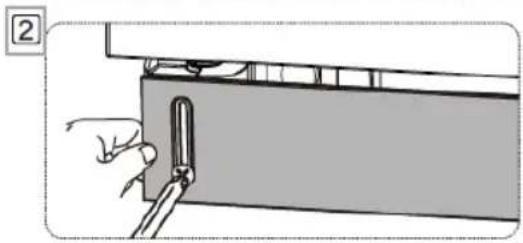
natural_image
Illustration of a hand inserting a tool into a panel or bracket (no text or symbols visible)Step 12: Completing the Installation Continued
- Install the decoration door to the outer door of the dishwasher.
Install the hook and brackets on the dishwasher panel, see figure 17.
Put the hook into the slot of the outer door, see figure 18.
Fix the dishwasher panel onto the outer door with the correct screws and bolts, see figure 19.
Figure 18 Figure 17 Figure 19
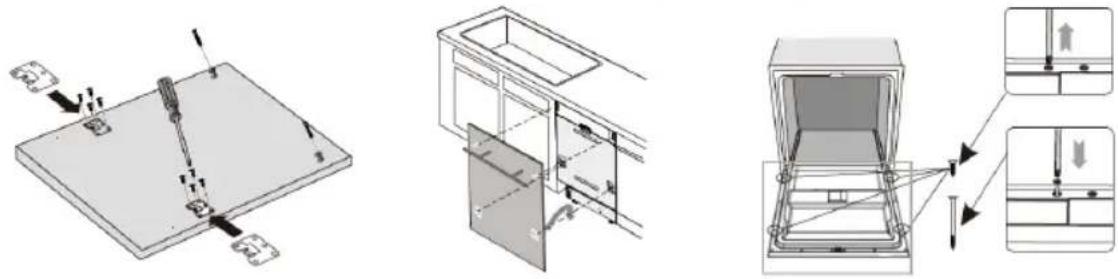
- Adjust the tension of the door spring.
The door springs are set at the factory to the proper tension for the outer door. If the dishwasher panel is installed, you will have to adjust the door spring tension.
Rotate the adjusting screw to drive the adjuster to strain or relax the steel cable, see figure 20.
Door spring tension is correct when the door remains horizontal in the fully opened position, yet rises to a close with the slight lift of a finger.
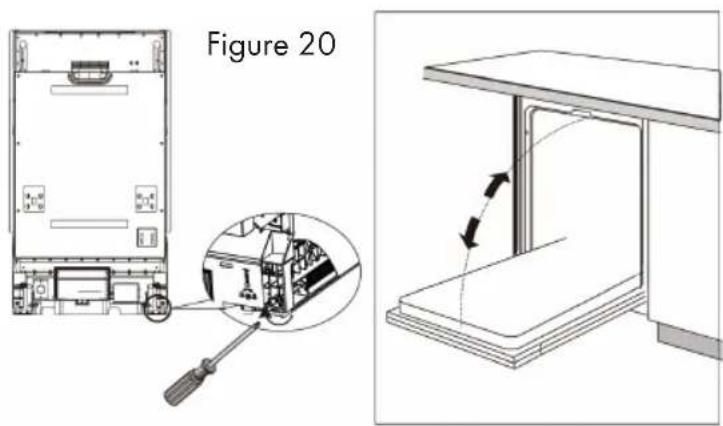
Scan QR code for "How to Install Your ZLINE Designer Dishwasher Panel To Our Dishwasher" Video

ZLINE
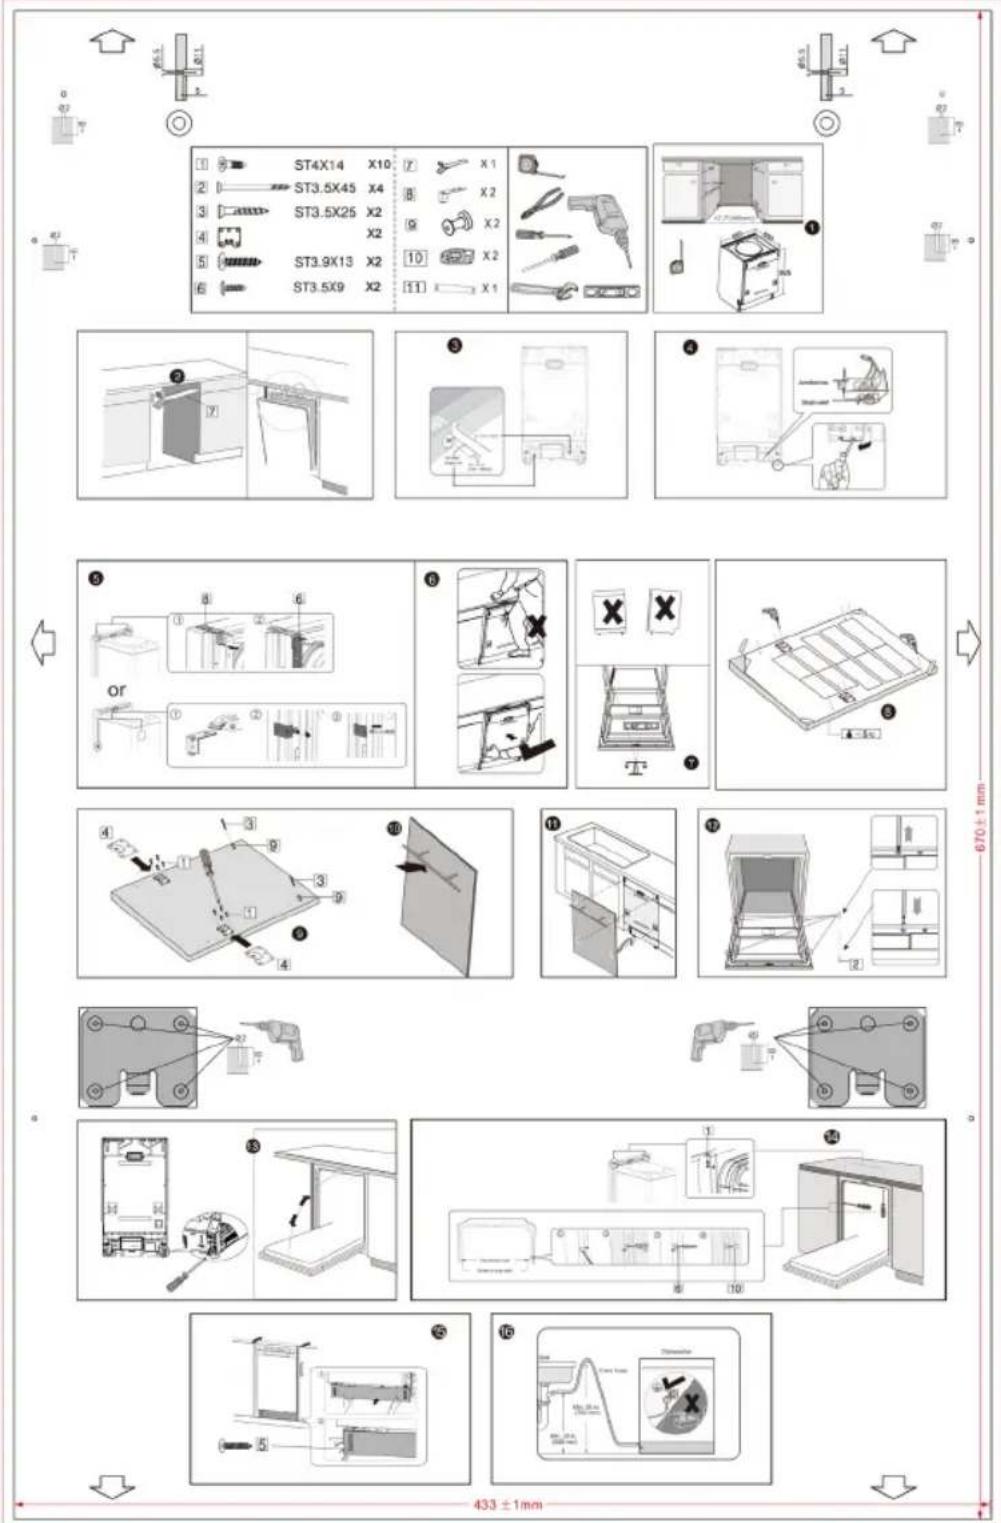
Decorative Front Plate Installation
18" Dishwasher DW7714-18
444.0 mm
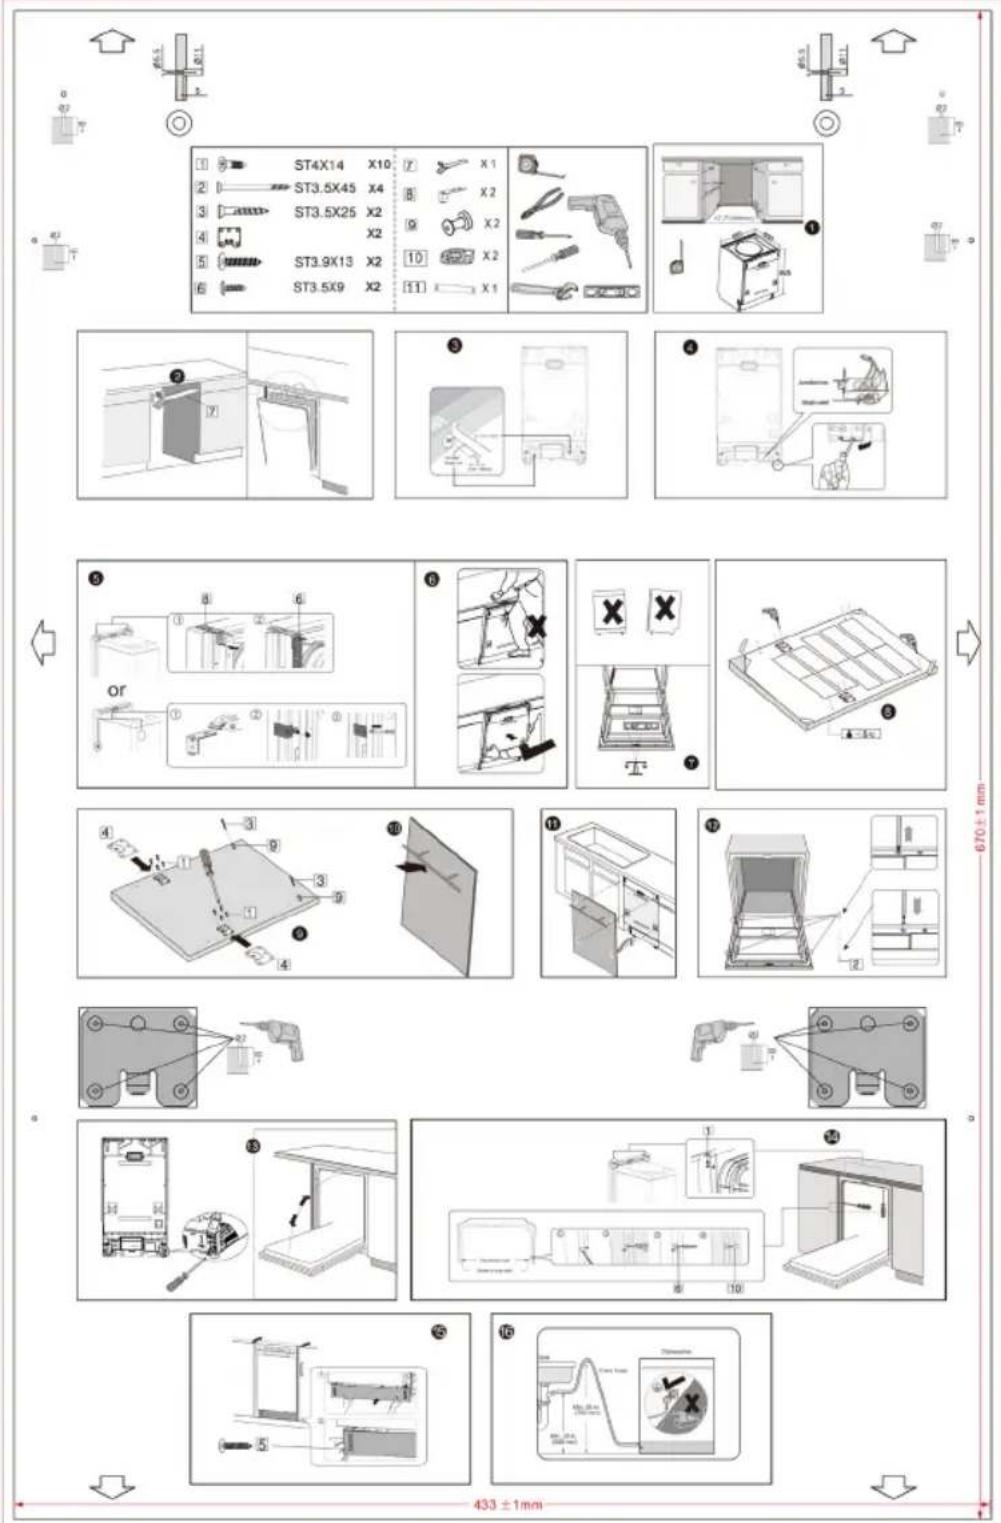
Decorative Front Plate Installation
18" Dishwasher DW7714-18
444.0 mm
SPECIFICATIONS
Specifications are subject to change without any notice for quality improvement purposes. The actual appearance of the dishwasher may differ from the illustrations in this manual.
Specifications for Model DW7714-18
Power Supply 120 Volts, 60 Hz
Water Pressure 0.04 - 1 MPa
Dimensions 17.7" x 22.8" x 32.5"
Inlet Water Temp 120°F
Specifications for Model DW7713-24
Power Supply 120 Volts, 60 Hz
Water Pressure 0.04 - 1 MPa
Dimensions 23.6" x 22.8" x 32.5"
Inlet Water Temp 120°F

WE SELL ENERGY STAR
ZLINE's exclusive integrated EcoWash technology and EnergySave functionality determine the most environmentally-conscious cycle based on the load size and soil level. Each cycle reduces water consumption by up to 30% while delivering optimal cleaning results.
USERS MANUAL
SAFETY INSTRUCTIONS
Proper Installation
Please install your dishwasher properly by following the installation guide.
Water supply inlet temperature should be between 120° and 149°.
■ Dispose of the discarded appliance and packing material properly.
The dishwasher must be properly grounded or it can result in a risk of electric shock. PERMANENTLY CONNECTED is allowed.
If there is any damage to the dishwasher, please contact to your dealer, do not attempt to repair or replace any part by yourself.
Basic Precaution Before Use
Read all instructions before using the dishwasher.
The manual does not cover every possible condition and situation that may occur.
Use the dishwasher only for intended function as described in this manual.
When loading items to be washed:
Load sharp items and knives so that they are not likely to damage the door seal and tub.
Load sharp items and knives with the handles up to reduce the risk of injury.
Do not wash plastic items unless they are marked dishwasher safe, if not marked, check with manufacture for recommendation, items that are not dishwasher safe may melt and create a potential fire hazard.
If the dishwasher drains in to a food disposer, make sure disposer is completely empty before running dishwasher.
Do not tamper with controls.
Do not operate your dishwasher unless all enclosure panels are in the proper place.
Do not touch the heating element during or immediately after use, especially if the sanitize option has been selected.
To reduce the risk of injury, do not allow children to play in or on a dishwasher. Keep young children and infants away from dishwasher when it is operating. Do not let children abuse, sit, or stand on door or racks of the dishwasher.
Do not use the dishwasher if it has a damaged power line or plug and do not plug the dishwasher into a damaged outlet. Failure to observe these instructions may result in electrical shock.
Use only detergents or rinse agents recommended for use in a dishwasher and keep them out of the reach of children.
SAFETY INSTRUCTIONS
Basic Precaution Before Use Continued
Under certain conditions, hydrogen gas may be produced in a hot water system that has not been used for two weeks or more. HYDROGEN GAS IS EXPLOSIVE. If the hot water system has not been used for such a period, before using dishwasher, turn on all hot water faucets and let water flow from each for several minutes. This will release any accumulated hydrogen gas. Hydrogen gas is flammable. Do not smoke or use an open flame during this time.
Do not store or use combustible materials, gasoline, or other flammable vapors and liquids in the vicinity of this or any other appliance.
Remove the door to the washing compartment when removing an old dishwasher from service or discarding it.

WARNING
For your safety, please follow the information in this manual to minimize the risk of fire, explosion, electric shock, and to help prevent property damage or personal injury.
| Term | Description | Location/Appearance |
| Pressure switch | The pressure switch is a protection device that detects water pressure. It prevents the water level from becoming too high. | In the back of the dishwasher on the right.Red, white, and blue. |
| Flowmeter | The flowmeter calculates the amount of water flowing into the dishwasher for every inflow step. | Inside the breather on the side of the dishwasher.White and green. |
| Flooding switch (Micro switch) | The flooding switch detects the E4 error (When the water floods into the bottom of the dishwasher and results in detective switch moves.)Note: You do not need to reset the flooding switch. You only need to resolve the errors associated with it then remove the water at the bottom of the dishwasher.The flooding switch will return to its original state. | At the bottom cap of the dishwasher.Black, blue, and white. |
Specifications for Model DW7714-18
Capacity 16 place settings
Dimensions 17.6" x 22.6" x 32.4" (W x D x H)
Power Supply 120 Volts, 60 Hz
Rated Power Usage Wash motor 100W Heater 700W
Water Feed Pressure 5.8 \~ 145 psi (0.04 \~ 1MPa)
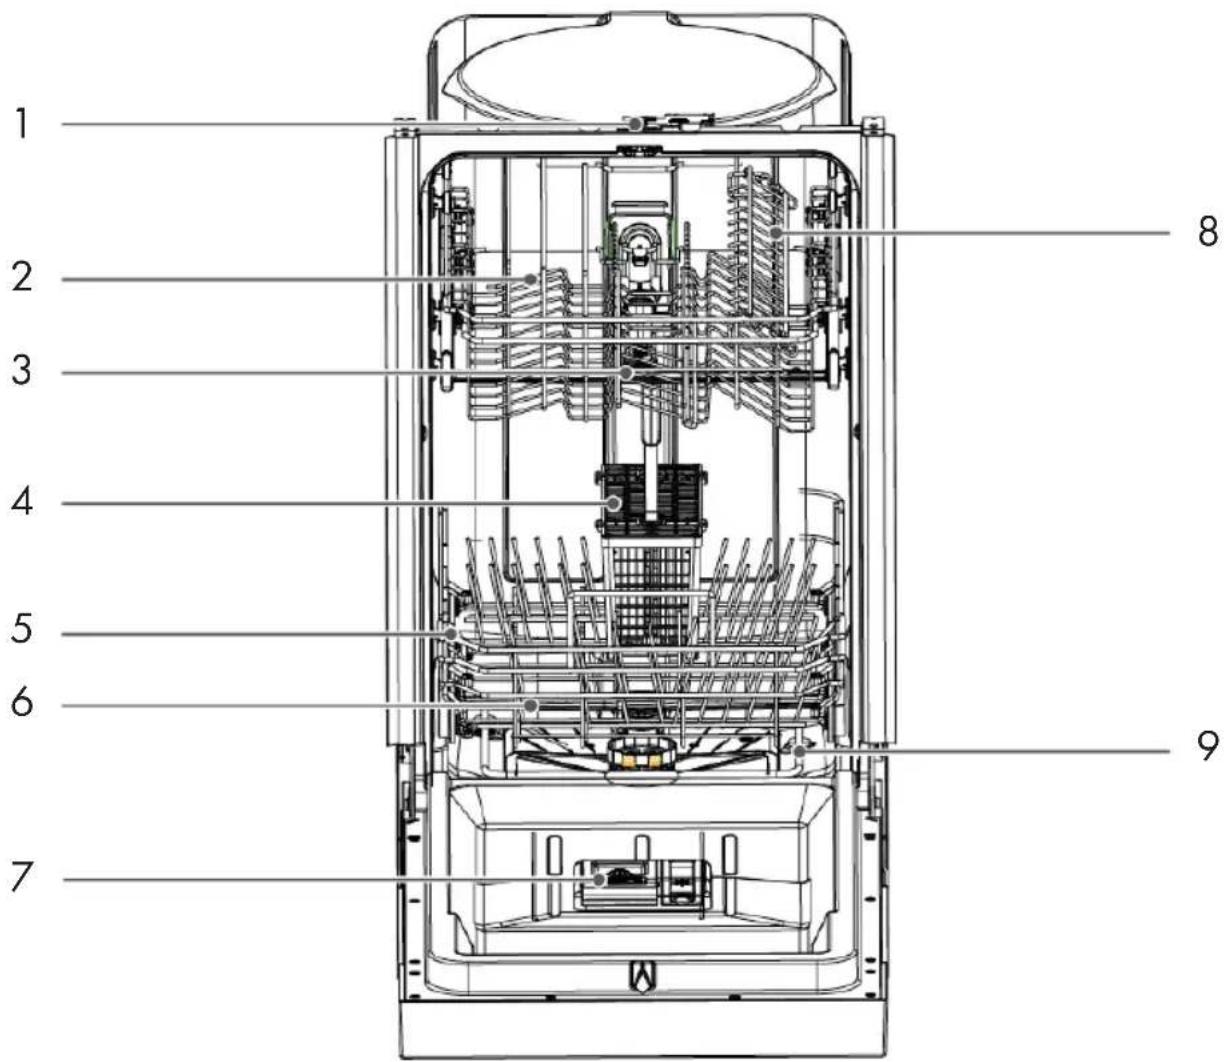
1 Lock
6 Lower Spray Arm
2 Upper Basket
7 Rinse Aid Dispenser
3 Upper Spray Arm
8 Cup Shelf
9 Heating Element
4 Cutlery Basket
5 Lower Basket
Specifications for Model DW7713 - 24
Capacity 20 place settings
Dimensions 23.5" × 22.6" × 32.4" (W × D × H)
Power Supply 120 Volts, 60 Hz
Rated Power Usage Wash motor 100W Heater 700W
Water Feed Pressure 5.8 \~ 145 psi (0.04 \~ 1MPa)
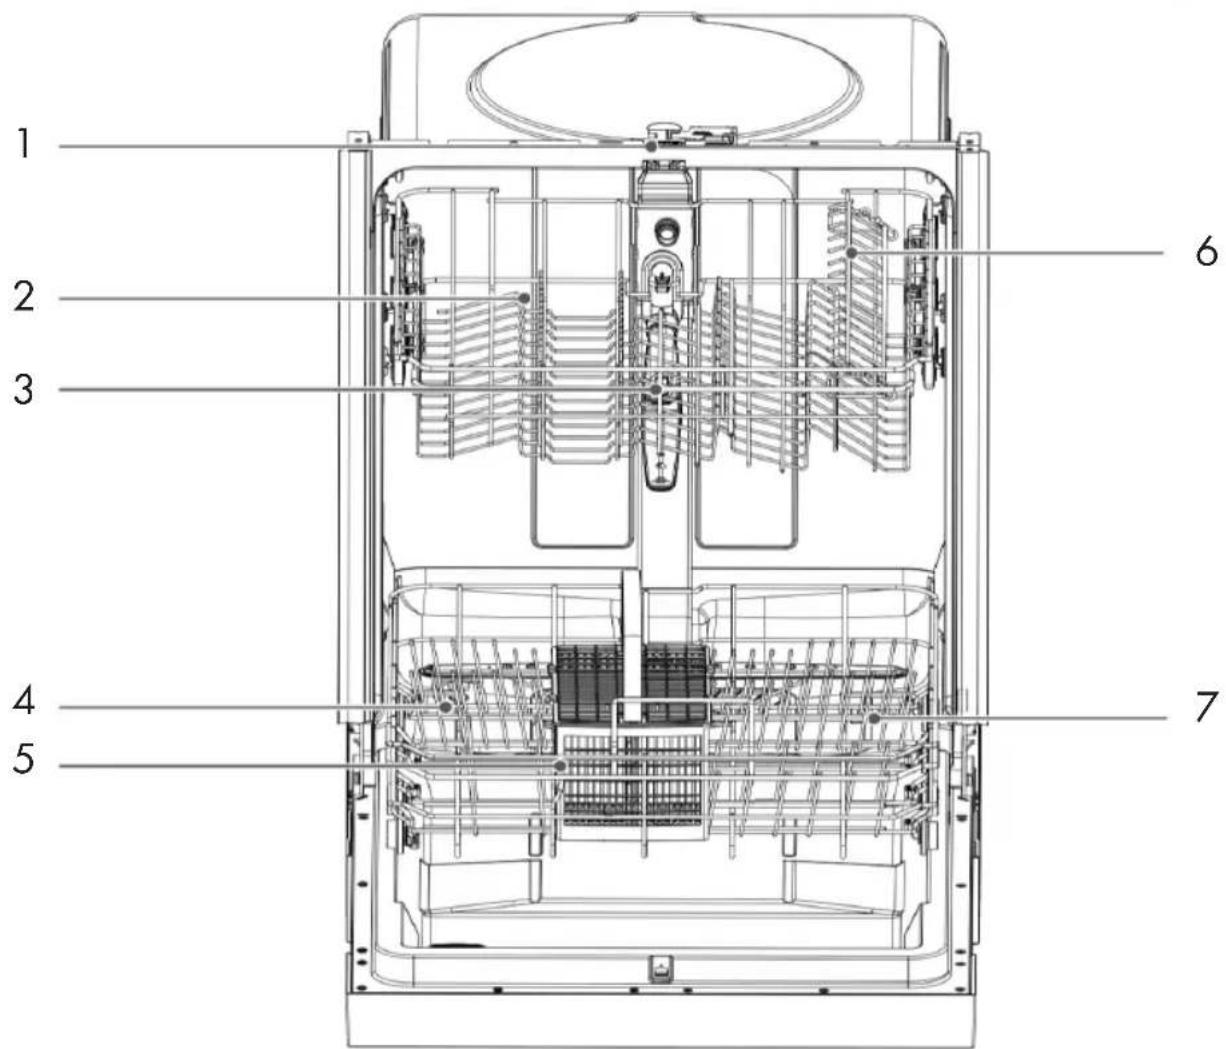
1 Lock
2 Upper
3 Upper Spray Arm
4 Cutlery
5 Lower Basket
6 Cup Shelf
7 Heating Element
FEATURES OF YOUR NEW DISHWASHER
Filter System
Your dishwasher has a multiple filter system. In the system, there are three mesh filters. It can separate soiled water and clean water in different chambers.
The multiple filter system helps your dishwasher to get better performance with less water and less energy.
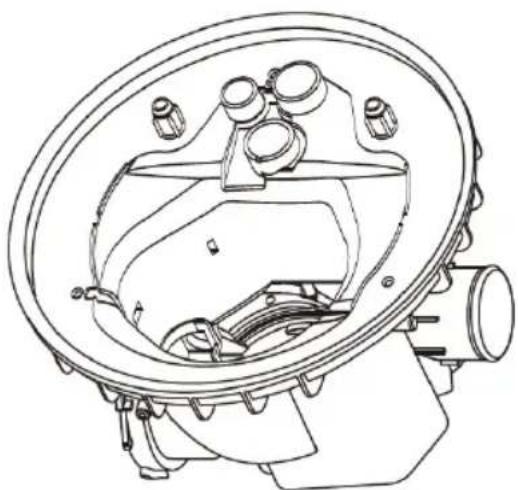
natural_image
Technical line drawing of a mechanical assembly with no visible text or symbolsSmart Wash System
Your dishwasher has a smart wash system. When a partial load of lightly soiled dishes is placed in the unit, a wash cycle similar to a short wash will automatically be performed.
When a full load of heavily soiled dishes is placed in the unit, a heavy wash cycle will automatically be performed. It can determine the type of cycle required to clean the dishes and will clean more efficiently every time.
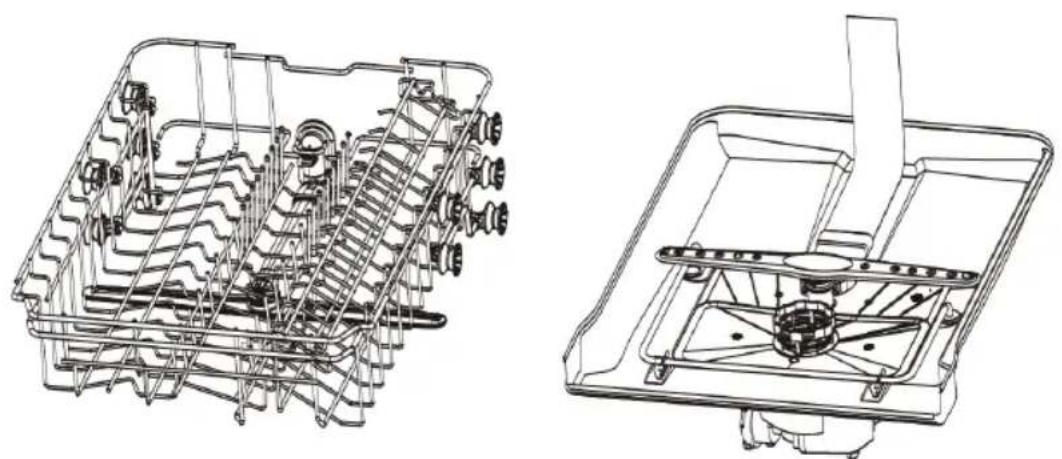
natural_image
Technical line drawings of a mechanical device with internal components and mounting brackets (no text or symbols)How Your Dishwasher Cleans
Your dishwasher cleans by spraying a mixture of hot water and detergent through the spray arms against soiled surfaces.
The dishwasher fills with water covering the filter area. Water is then pumped through the multiple filter and spray arms. Separated soil particles go down the drain as the water is pumped out and replaced with clean water.
The number of water fills will vary with the cycle being used.
Wash Cycle Selections
Cycle times are approximate and will vary with the options selected. Hot water is necessary to activate the detergent and melt fatty food soils. An automatic sensor will check the incoming water temperature. If it is not at the appropriate temperature the timer will delay the cycle to allow automatic water heating during the main wash. When the HI-TEMP wash is selected an even higher temperature will be assured to handle heavier soil loads.
Getting Started
- Load the dishwasher (see dish preparation and loading sections).
- Add detergent (see filling the detergent dispenser).
- Add rinse aid (see filling the rinse aid dispenser).
- Select desired CYCLE (see cycle chart).
- Select desired OPTIONS (see control panel). The indicator light above the pad will glow when selected.
- To start, press start/cancel (see control panel). Then close door
Note:
Your dishwasher has the controls mounted on the front of the door. The door should be closed first if you want to operate the machine.
Control Panel
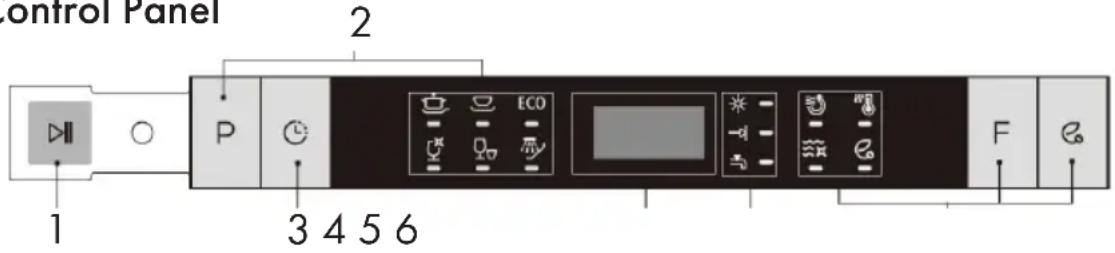
1. Start/Cancel
Open the door to select the desired cycle and options, touch the Start/
Cancel button and close the door within 4 seconds to start the cycle or begin the delay countdown. To cancel and reset the program during the cycle, open the door, and touch Start/Cancel for 3 seconds. Close the door and dishwasher will start a 60 second drain.
2. Wash Cycle Selections
P - Program Buttons
Touch to select the program, corresponding indicator will be lightened.

This cycle is for hard-to-clean, heavily soiled dishes, pots, pans, and dishes.

This is the standard program. It is for regularly soiled dinner dishes or silverware.

It is suitable to clean normally soiled tableware and it is the most efficient program in terms of its combined energy and water consumption for that type of tableware.

For lightly soiled loads, such as glasses, crystal, and fine china.

A shorter wash for lightly soiled loads that do not need drying.

Use for rinsing dishes, glasses, and silverware that will not be washed right away.
OPERATING INSTRUCTIONS
3. Delay
To delay the start of a selected cycle, press the delay start pad until the desired delay time shows in the LED display. You can delay the start for 1 to 24 hours. To cancel the delay start option before the delay period is over, press the start/cancel pad for 3-5 seconds.
4. Display Window
This displays the remaining hours and minutes of the running cycle, delay hours, and error codes etc.
5. Status Indicators
R*Rinse detergent needs to be refilled.
Program end.
Water failure, faucet is not open.
6. Options
Heating Dry
When the heating dry function is selected, the heater will work during the dry process.
Sanitize
When the sanitize function is selected, the temperature of water will be maintained at 156.2^ F max. The max temperature may not be reached if the incoming water temperature is not correct. Certified residential dishwashers are not intended for licensed food establishments.
Note: The sanitize option is available with heavy, normal, and ECO cycles.
Hi Hi Temp
When the hi temp wash function is selected, the temperature of the water will be maintained at 140^ F max.
Note: The hi temp option is available with heavy, normal, ECO, and glass cycles.
OPERATING INSTRUCTIONS
E - Energy Save

hen the energy save function is selected, energy consumption will be reduced during the washing process.
Note:
The energy save option is available with heavy and normal cycles.
Status Window
H:01-H:24
If the delay start option is selected, the number of delay start hours shows in the status window.
2:25 - 0:00
After the machine starts operation, the remaining time of the selected cycle will be shown in the window.
Error Indication
In certain situations which are critical to the machine function and safe operation, the control shall shut down and indicate an error code (See error codes on page 45). If error codes are displayed, contact the dealer or services. They will be able to provide assistance in trouble shooting the problem and/or locate an authorized service technician if needed.
Note:
The remaining time could suddenly increase or drop several minutes. This means the smart sensor has checked the soil level and determined if additional water fills are needed or if water fills can be deleted.
Cycle Chart
| Program | Description of Cycle Water (L or G) | Cycle Time (min) |
| Heavy | Pre WashMain Wash (140°F)Rinse (149°F)Rinse with Sanitize (156.2°F)Drying | 19.7 or 5.2 |
| Normal | Pre WashMain Wash (122-131°F)Rinse (136.4-140°F)Rinse with Sanitize (156.2°F)Drying | 9.5-18.5 or 2.5-4.9 |
| ECO | Pre WashMain Wash (113-122°F)Rinse (122-131°F)Rinse with Sanitize (156.2°F)Drying | 15.5 or 4.1 |
| Glass | Pre WashMain Wash (118.4-122°F)Rinse (122-131°C)Drying | 15.5 or 4.1 |
| Rapid | Pre WashMain Wash (122°F)Rinse (131°F) | 15.5 or 3.3 |
| Rinse | Pre WashMain Wash (122°F) | 6.7 or 1.8 |
Dish Preparation
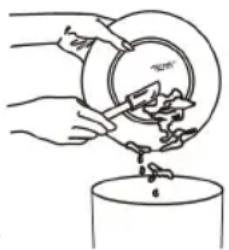
Scrape away large pieces of food, bones, pits, toothpicks, etc. The continuously filtered wash system will remove the remaining food particles. Burned-on foods should be loosened before loading. Empty liquids from glasses and cups. Foods such as mustard, mayonnaise, vinegar, lemon juice and tomato based products may
natural_image
Illustration of hands pouring liquid from a circular container into a tank (no text or symbols)cause discoloration of stainless steel and plastics if allowed to sit for a long period of time. Unless the dishwasher is to be operated at once, it is best to rinse off these food soils. If the dishwasher drains into a food disposer, be sure the disposer is completely empty before starting dishwasher.
Loading the Upper Basket
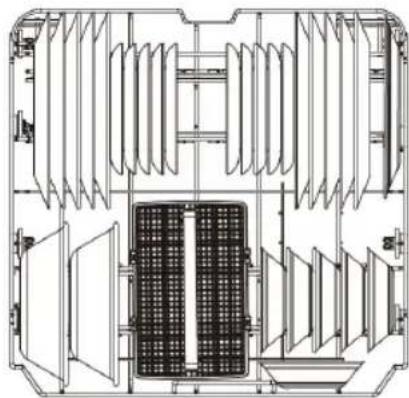
The upper basket is designed for cups, glasses, small plates, bowls and plastic items marked dishwasher safe etc.
For best results, place the bowls, cups, glasses, and sauce pans with soiled surfaces facing down or toward the center. Tilt slightly for better drainage.
Loading the Bottom Basket
The bottom basket is designed to load plates, soup bowls, plates, saucers and cookware. The adjustable basket space will allow you to load items with a maximum height of 11 inches.

WARNING
Make sure the loaded dishes do not interfere with the rotation of the middle spray arm, which is located at the bottom of the upper basket (check this by rotating the middle spray arm by hand). Large items should be placed along the edge so they do not interfere with the middle spray arm rotation. Make sure they do not prevent the detergent dispenser from opening. Large items should be turned so that the inside faces downward. Make sure these items do not interfere with the lower spray arm rotation.
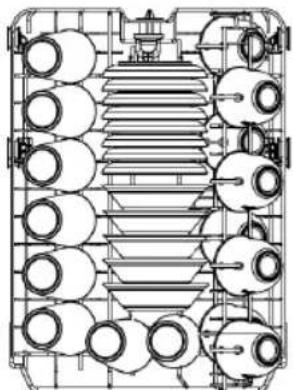
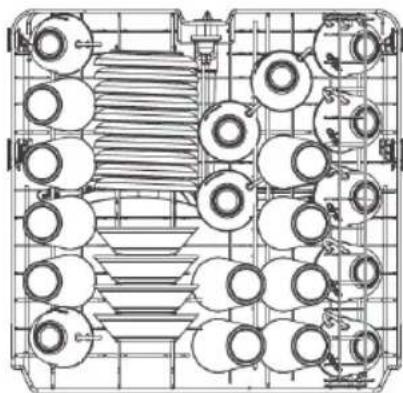
Loading the Lower Basket
The lower basket has been especially designed for dinner dishes, soup bowls, plates, pots, lids, casserole dishes, and plates.
Load large items such as pans and pots into the dishwasher so their open sides face downwards. We recommend loading cups, stemware, and small plates into the upper basket.
natural_image
Technical diagram of a mechanical or electrical component with multiple circular components and internal structure (no text or symbols)Model DW7714-18
8 place settings
natural_image
Top-down schematic of a mechanical or electrical component layout with circular components and grid lines (no text or labels)Model DW7713-24
10 place settings
Loading the Upper Basket
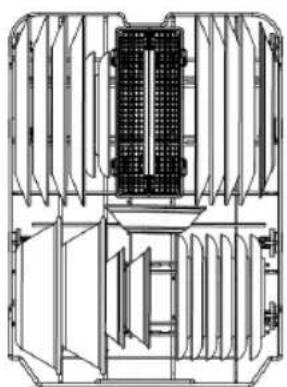
The upper basket has been designed for small plates, mugs, glasses, and plastic items marked dishwasher safe. Load your plates into the dishwasher in two half rows, so that the front of each plate faces the back of the plate in front of it, and the open sides of the plates at the center of the dishwasher face each other.
Make sure the loaded dishes do not interfere with the rotation of the nozzle which is located at the bottom of the upper basket (check this by rotating the nozzle by hand). When loading dishes, pull the upper basket out completely so you can load it without striking the counter.
natural_image
Technical line drawing of a mechanical assembly with internal components (no text or symbols)Model DW7714-18
8 place settings
natural_image
Technical line drawing of an electrical enclosure with multiple panels and doors (no text or symbols)Model DW7713-24
10 place settings
Loading the Silverware Basket
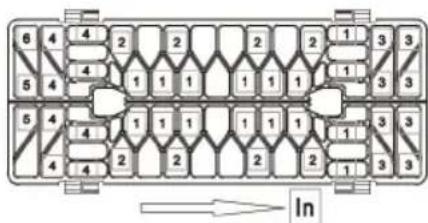
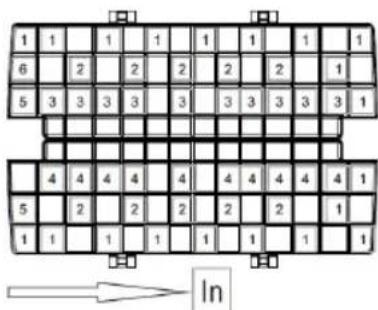
The silverware basket can be divided into three separate modules that can be used in both upper and lower racks.
- Spoons 4. Forks
- Knives 5. Large Spoons
- Salad Forks 6. Large Forks
Model DW7714-18
8 place settings
Adding a Dish
To add or remove items after wash cycle starts:
- Open door slightly and wait a
few seconds until wash action stops completely before opening. - Add the item.
- Close the door firmly to latch within 4 seconds, then cycle will automatically resume.
Model DW7713-24
10 place settings

WARNING
-
Do not let item extend though bottom.
-
Be sure nothing protrudes though bottom of the basket or rack to block the lower spray arm.

CAUTION
TO AVOID BURN INJURY: Slightly open door and wait until spray arms and wash action stop. Hot water may splash out of dishwasher. Failure to do so may result in injury.
Filling the Rinse Aid Dispenser
Rinse aid greatly improves drying and reduces water spots and filming. Without rinse aid, your dishes and dishwasher interior will have excessive moisture.
The heated dry option will not perform as well without rinse aid. The rinse aid dispenser, located next to the detergent cup, automatically releases a measured amount of rinse aid during the last rinse.
If the rinse aid is low, the rinse aid light is illuminated at the beginning and end of the cycle, indicating that it is time to refill.
Filling the Rinse Aid Dispenser

Your dishwasher is designed to use a liquid rinse aid. The use of rinse greatly improves drying performance after the final rinse. Do not use a solid or bar-type rinse aid. Under normal conditions, the rinse aid will last approximately one month. It is best to keep it full, but do not over fill.
Filling the Detergent Dispenser
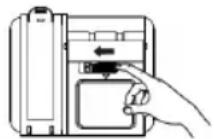
- Open the detergent dispenser cap by pushing the detergent dispenser release catch.
The flap is always open at the end of a dishwashing cycle.
- Add the recommended amount of detergent to the main wash detergent compartment.
- Close the flap and then press it down.
Filling the Rinse Aid Reservoir
Your dishwasher has been designed to use liquid rinse aid only.
Using a powdered rinse aid will clog the reservoir opening and cause the dishwasher to malfunction.
Rinse aid improves the drying performance of the dishwasher.
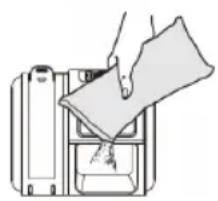
natural_image
Illustration of a hand pouring liquid into a container with a cloth (no text or symbols)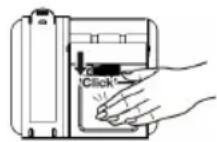

Do not add regular detergent to the rinse aid reservoir. Do not fill the reservoir above the full level indicator. Excess rinse aid can overflow during the wash cycle.
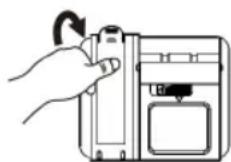
- Remove the rinse aid reservoir cap by rotating it counterclockwise.
- Fill the rinse aid reservoir with rinse aid.
Use the viewing port when filling the rinse aid reservoir.
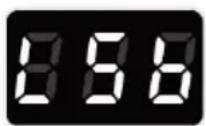
- Add the rinse aid if the LED screen shows "LSb".
- Close the rinse aid reservoir cap by rotating it clockwise.
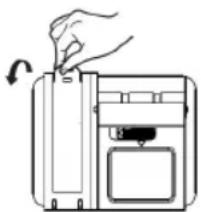
natural_image
Illustration of a hand inserting a device into a memory unit (no text or symbols)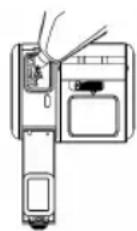
USER MAINTENANCE
Keeping your dishwasher clean improves its performance, reduces unnecessary repairs, and lengthens its life.
Cleaning the Exterior
It's best to clean spills on the outside of your dishwasher as they occur. Use a soft, damp cloth on the control panel to gently wipe away spills and dust. Do not use benzene, wax, thinner, chlorine bleach, or alcohol. These materials may discolor the inner walls and cause stains. Do not clean the dishwasher by sprinkling water over it and avoid letting water come into contact with any of the electrical parts.

If your dishwasher has a stainless steel door panel, you can clean it with a stainless steel cleaner for home appliances or a similar product using a clean, soft cloth.
Cleaning the Interior
Clean the interior of your dishwasher periodically to remove any dirt or food particles. Wipe the inside of the dishwasher and the inner part of the door with a wet dishcloth. We recommend filling the detergent dispenser with dish detergent and then running the dishwasher empty periodically using either the normal or rapid cycle with the sanitize option. This will keep your dishwasher clean.
If white spots and odor are still present in your dishwasher, run the normal cycle with the dishwasher empty and without detergent until it flushes. Then, interrupt the cycle and put an 8 ounce cup of white vinegar into the lower basket. Close the dishwasher and let the cycle finish.

Do not remove the tub front seal (the long rubber seal enclosing the opening of the dishwasher).
Do not touch the heating element during or immediately after use.
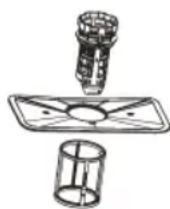
Cleaning the Filters
- Turn off the dishwasher.
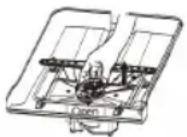
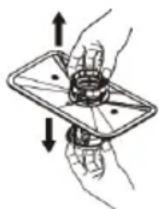
- Rotate the filter insert
counterclockwise to unfasten and then detach the filter insert. - Remove the fine filter (flat, rectangular).
TROUBLESHOOTING
| Problem | Possible Cause | Solution |
| Dishwasher won't start | Power supply or power line is not connectedDelay start option has been selected | Check and connect power supplyRefer to delay start section in this manual |
| Rinse Aid light on | LED screen show "LSb" | Add rinse aid |
| Dishwasher operates too long | The dishwasher is connected to cold waterThe cycle time will vary according to soil levelThe sanitize option is selected | Make sure the dishwasher is connected to hot waterThe cycle will increase based on soil levelThe cycle will increase when using sanitize |
| Dishes are not clean enough | Water pressure is temporarily lowThe inlet water temperature is lowDishes are loaded too close togetherThe selected cycle is not suitable for soil conditionSpray arms are blocked | Try again when water pressure is normalMake sure hot water is connectedRe-load dishes according to manualChoose another cycle with a longer wash timeUnblock spray arms |
| Dishes are not drying | Rinse aid dispenser is emptyImproper dish loadingThe chosen cycle does not include drying | Fill rinse aid dispenserRe-load dishes according to manualChoose a different cycle with drying |
| Spots and film on dishes | Water is too hardImproper dish loadingOld rinse aidRinse dispenser empty | Install water softenerRe-load the dishesUse fresh rinse aidAdd rinse aid |
| Etching | Too much detergentInlet water temp exceeds 158°F | Use less detergentLower inlet water temp |
| Detergent left in dispenser | Detergent may be too oldSpray arm is blocked | Use fresh detergentUnblock spray arms |
| Detergent dispenser won't close | Improper operation of the detergent cover | Add detergent and rise aid as indicated |
| Water remains in the dishwasher | Previous cycle has not finished or has been interrupted | Select the proper cycle |
| Dishwasher does not drain properly | Drain is cloggedDrain hose is kinked | Check the air gap if you have one. Make sure the disposer is empty if the dishwasher is connected to oneMake sure the drain hose is properly connected to the sink |
| Suds in the tub | Improper detergent was used | Only use automatic dishwasher detergent |
| Dishwasher leaks | Improper detergent was usedDishwasher is not level | Only use automatic dishwasher detergentLevel the dishwasher |
| Black or gray marks on dishes | Aluminum utensils rubbed against dishes | Rearrange dishes and make sure water inlet is no less then 120°F |
| Stained tub interior | Coffee and tea soilReddish stain | Use an approved spot cleaner to remove soilUse the rinse only cycle right after loading to decrease staining |
| Noises | Detergent cup is openA hard object entered the wash module | This is normalIf noise persists, call for service |
| Dishwasher won't fill | Water valve is offDoor latch may not be properly sealed | Turn on water valveMake sure door is closed |
TROUBLESHOOTING
| Symptom | Error Message | Possible Reason |
| E1 | During the water inlet step, if the flow meter can't detect the water after 4 minutes, the dishwasher will display an E1 warning. | 1. Check the water supply2. Check the inlet valve3. Check the inlet4. Check the flow meter5. Check the pressure switch6. Check the drain7. Check the PCBSee more detailed instructions on page 47. |
| E3 | (Only appears in the factory mode)When the temperature can't reach the defined temperature after 90 minutes, the dishwasher will display an E3 warning. | 1. Check the heater2. Check the thermistor3. Check the PCBSee more detailed instructions on page 48. |
| E4 | When the water floods into the bottom and results in detective switch moves, the dishwasher will display an E4 warning. | 1. Check the use of the detergent2. Check whether the appliance is level3. Check the micro-switch4. Check the drain pump5. Check the amount of the filled water6. Find where leakage isOR1. Remove the base board2. Remove the switch at the base board3. Lift up the dishwasher4. See where the leak is coming fromSee more detailed instructions on page 49. |

If overflow occurs, turn off the main water supply before calling a service.
If there is water in the base pan because of an overfill or small leak, the water should be removed before restarting the dishwasher.
TROUBLESHOOTING
| Symptom | Error Message | Possible Reason |
| E6 | (Only appears in the factory mode)E6 - Thermal sensor cut. | 1. Check the inlet water temperature |
| E7 | E7 - Thermal sensor short. | 2. Check the thermistor3. Check the PCB |
| E9 | If one button is pushed for more than 30 seconds, the dishwasher will display an E9 warning. | The warning will be resolved when the button is released |
| ED | If the dashboard detects that communication data is abnormal for more than 30 seconds, the dishwasher will display an ED warning. | Communication data abnormal, warning resolved when communication data returns to normal. |
TROUBLESHOOTING
E1 Longer Inlet Time
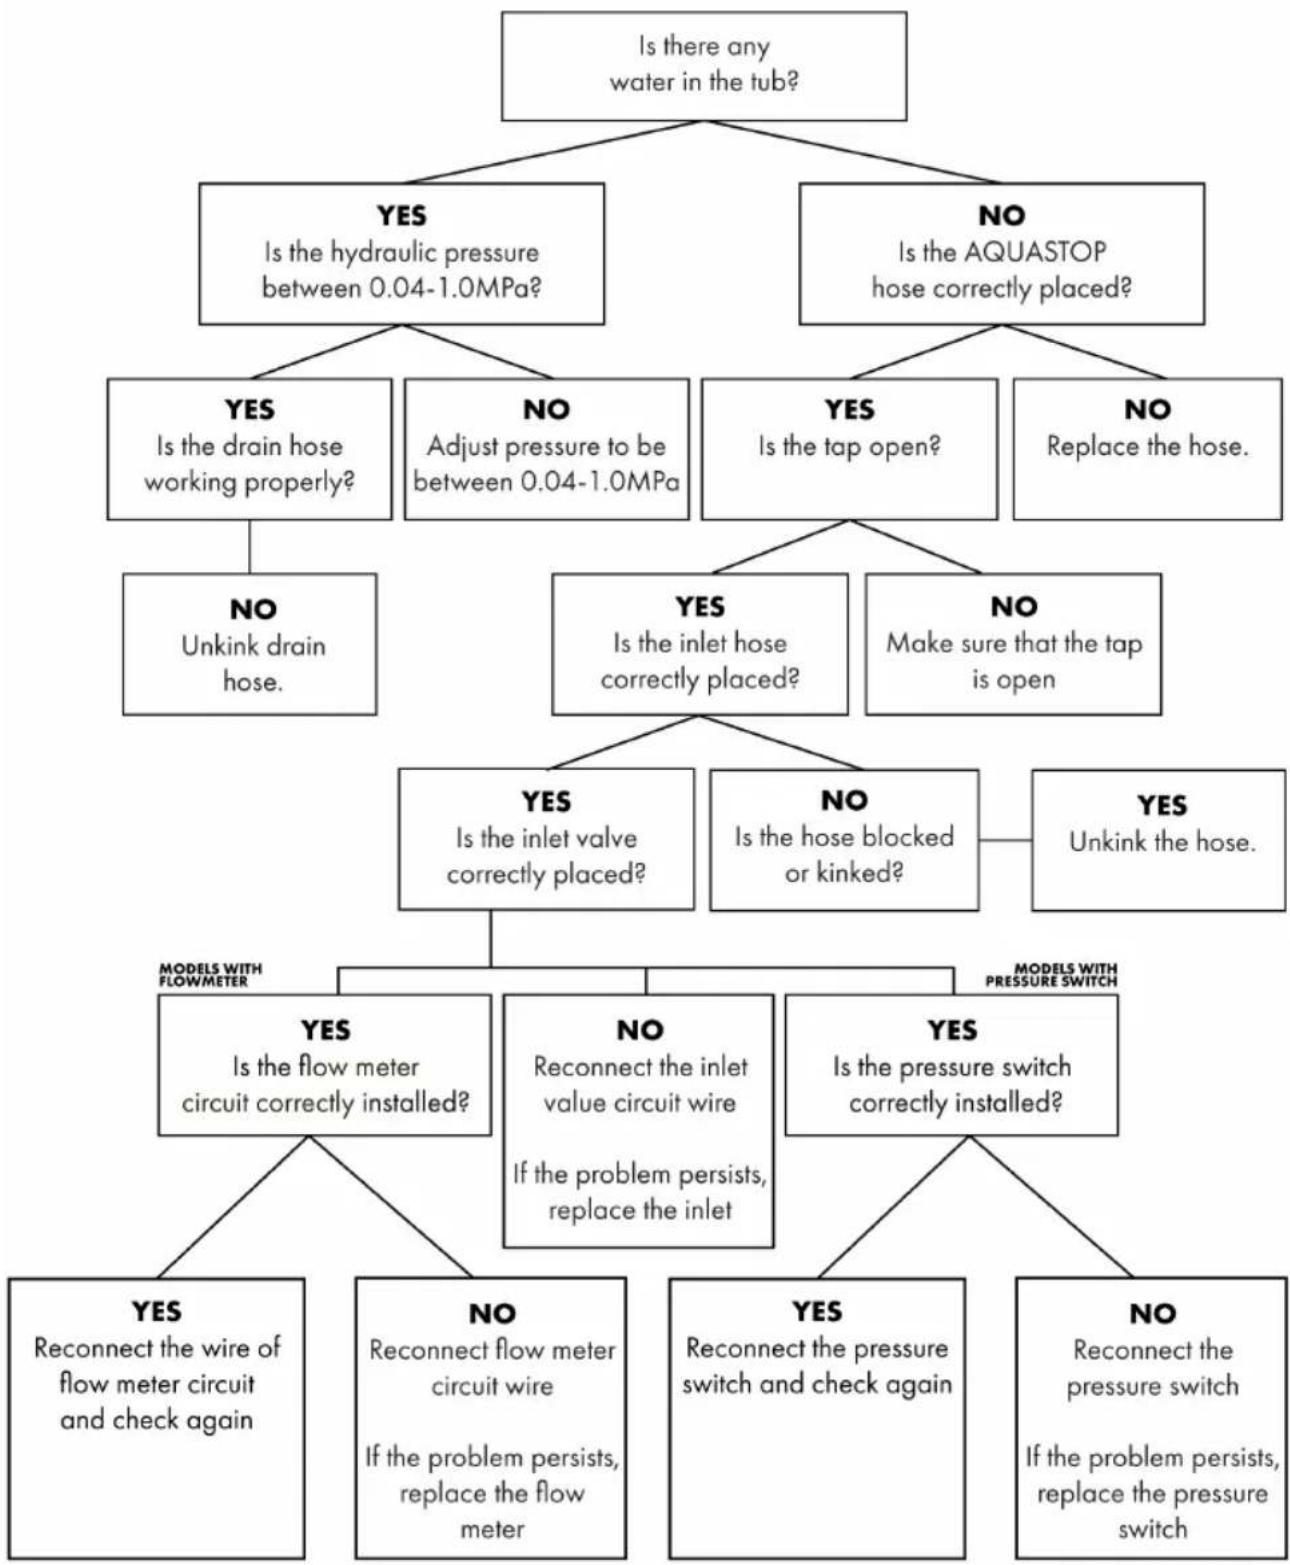
flowchart
graph TD
    A["Is there any water in the tub?"] --> B{YES}
    A --> C{NO}
    B --> D{Is the hydraulic pressure between 0.04-1.0MPa?}
    C --> E{Is the AQUASTOP hose correctly placed?}
    D --> F{YES}
    D --> G{NO}
    E --> H{Is the tap open?}
    E --> I{NO}
    F --> J{Is the drain hose working properly?}
    G --> K{Adjust pressure to be between 0.04-1.0MPa}
    H --> L{Is the inlet hose correctly placed?}
    I --> M{Make sure that the tap is open}
    J --> N{Is the inlet valve correctly placed?}
    K --> O{Is the hose blocked or kinked?}
    L --> P{Unkink the hose.}
    N --> Q{Is the flow meter circuit correctly installed?}
    O --> R{Is the flow meter value circuit wire if the problem persists, replace the inlet}
    P --> S{Is the pressure switch correctly installed?}
    Q --> T{Reconnect the wire of flow meter circuit and check again}
    R --> U{Reconnect flow meter circuit wire if the problem persists, replace the flow meter}
    S --> V{Reconnect the pressure switch and check again}
    T --> W{Reconnect the pressure switch if the problem persists, replace the pressure switch}
    U --> X["No"]
    V --> Y["No"]
If the problem has not been solved through all the instructions mentioned above, the PCB might have a malfunction. Replace PCB and test again
E3 Longer Heating Time
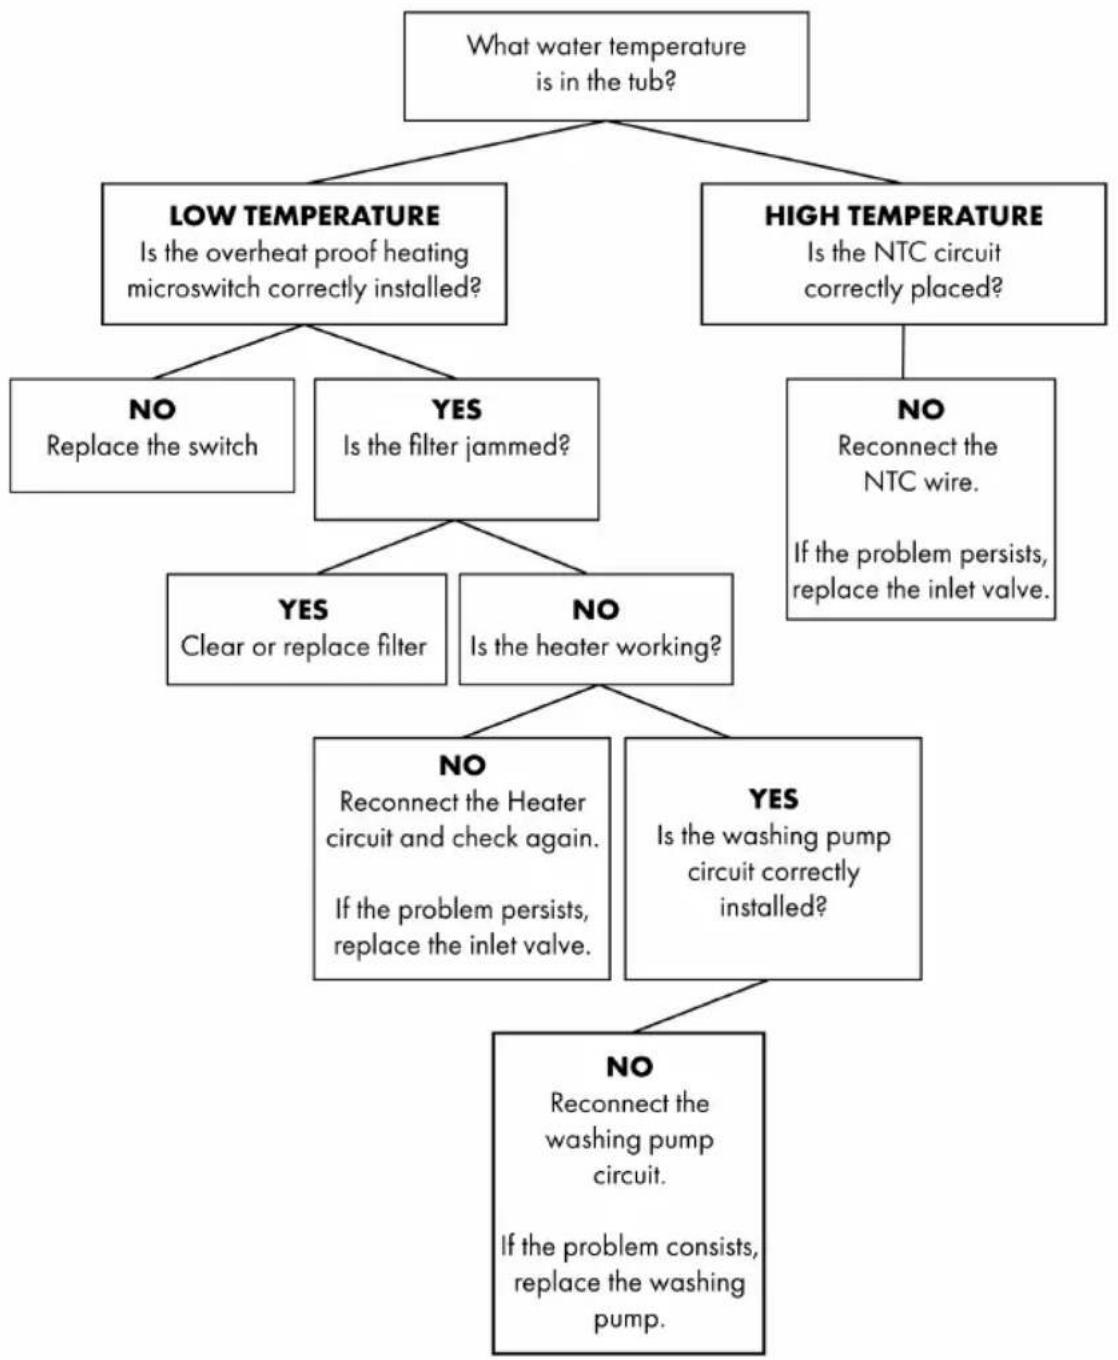
flowchart
graph TD
    A["What water temperature is in the tub?"] --> B["LOW TEMPERATURE"]
    A --> C["HIGH TEMPERATURE"]
    B --> D{Is the overheat proof heating microswitch correctly installed?}
    C --> E{Is the NTC circuit correctly placed?}
    D --> F{NO\nReplace the switch}
    D --> G{YES\nIs the filter jammed?}
    C --> H{NO\nReconnect the NTC wire. If the problem persists, replace the inlet valve.}
    G --> I{YES\nClear or replace filter}
    G --> J{NO\nIs the heater working?}
    I --> K{NO\nReconnect the Heater circuit and check again. If the problem persists, replace the inlet valve.}
    J --> L{NO\nIs the washing pump circuit correctly installed?}
    K --> M{NO\nReconnect the washing pump circuit. If the problem consists, replace the washing pump.}
    L --> M
E4 Overflow
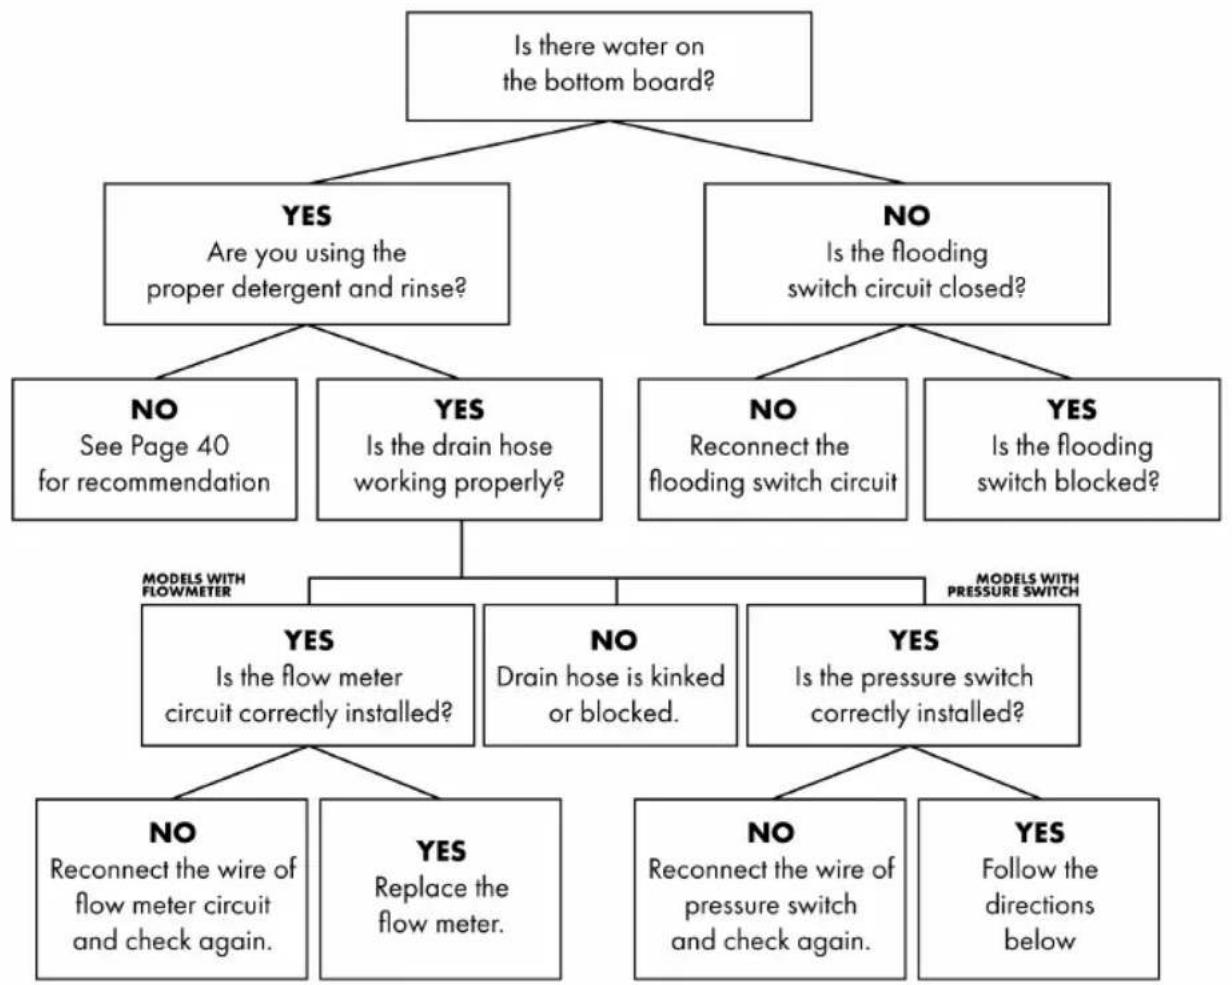
flowchart
graph TD
    A["Is there water on the bottom board?"] --> B{YES}
    A --> C{NO}
    B --> D{Are you using the proper detergent and rinse?}
    C --> E{Is the flooding switch circuit closed?}
    D --> F{NO}
    D --> G{YES}
    E --> H{No}
    E --> I{YES}
    F --> J["See Page 40 for recommendation"]
    G --> K["Is the drain hose working properly?"]
    H --> L["Reconnect the flooding switch circuit"]
    I --> M["Is the flooding switch blocked?"]
    J --> N{MODEL WITH FLOW/METER}
    K --> O{MODEL WITH PRESSURE SWITCH}
    L --> P{MODEL WITH PRESSURE SWITCH}
    N --> Q{YES}
    N --> R{NO}
    N --> S{YES}
    O --> S
    P --> S
    Q --> T{Is the flow meter circuit correctly installed?}
    R --> U{Is the flow meter circuit correctly installed?}
    S --> V{Is the flow meter circuit correctly installed?}
    T --> W{No}
    T --> X{YES}
    U --> Y{No}
    U --> Z{YES}
    V --> AA{No}
    V --> AB{YES}
    W --> AC{No}
    W --> AD{YES}
    X --> AE{No}
    X --> AF{YES}
    Y --> AG{No}
    Y --> AH{YES}
    Z --> AI{No}
    Z --> AJ{YES}
    AA --> AK["Reconnect the wire of flow meter circuit and check again."]
    AB --> AL["Replace the flow meter."]
    AC --> AM["Reconnect the wire of pressure switch and check again."]
    AD --> AN["Follow the directions below"]
INSTRUCTIONS FOR OVERFLOW
1.) Remove the two side panels
2.) Remove the water from the bottom board and make sure there is no water at the bottom board.
3.) Restart the dishwasher with a strong or standard wash program as a leakage could easily repeat at a higher temperature and after a long period of running time.
4.) Observe the bottom tray ever twenty minutes.
5.) If hours passed and water is still not coming, stop the dishwasher with sufficient water in the inner tub, observe after a few hours.

ZLINE
KITCHEN AND BATH
Three Locations:
350 Parr Circle
Reno, NV 89512
916 Delaware Avenue
Marysville, OH 43040
319 Rowland Mill Road
Briceton, TN 38317
www.zlinekitchen.com
1-614-777-5004
- DISHWASHER
- WARNING
- ZLINE
- CONTENTS
- INSTALLATION GUIDE
- - SAFETY INSTRUCTIONS
- BEFORE INSTALLING
- PREPARING THE DISHWASHER ENCLOSURE 5
- INSTALLING THE DISHWASHER
- SPECIFICATIONS
- USERS MANUAL
- ● SAFETY INSTRUCTIONS 28
- FEATURES OF YOUR NEW DISHWASHER 30
- OPERATING INSTRUCTIONS 34
- PREPARING AND LOADING DISHES 38
- - USER MAINTENANCE 42
- TROUBLESHOOTING 43
- SAFETY INSTRUCTIONS
- Important Safety Instructions
- Grounding Instructions
- Electric Shock Hazard
- Product Dimensions
- Enclosure Dimensions
- Step 1: Check the Parts and Tools
- Not Provided:
- Tools Required (Not Provided):
- Step 2: Select the Best Location for the Dishwasher
- Step 3: Check Water Supply Requirements and Cautions
- Step 4: Check the Electrical Requirements and Cautions
- Step 5: Unpacking and Inspecting the Dishwasher
- Unboxing
- ALWAYS LIFT THE DISHWASHER TO MOVE IT.
- Mechanical Inspection
- Step 5: Unpacking and Inspecting the Dishwasher Continued
- Plumbing Inspection
- Electrical Inspection
- Appearance Inspection
- Parts Inspection
- Step 6: Preparing the Dishwasher
- Step 7: Placing the Dishwasher and Connecting the Hot Water Supply Line
- Step 8: Leveling the Dishwasher
- Note:
- Step 9: Securing the Dishwasher
- Step 9: Securing the Dishwasher Continued
- Step 10: Connecting the Drain Hose
- Note :
- Step 10: Connecting the Drain Hose Continued
- Step 11: Wiring Connections
- Electrical Shock Hazard
- Fire Hazard
- Step 12: Completing the Installation
- Step 12: Completing the Installation Continued
- Decorative Front Plate Installation
- Specifications for Model DW7714-18
- Specifications for Model DW7713-24
- Proper Installation
- Basic Precaution Before Use
- Basic Precaution Before Use Continued
- Specifications for Model DW7713 - 24
- FEATURES OF YOUR NEW DISHWASHER
- Filter System
- Smart Wash System
- How Your Dishwasher Cleans
- Wash Cycle Selections
- Getting Started
- Control Panel
- Start/Cancel
- Wash Cycle Selections
- OPERATING INSTRUCTIONS
- Delay
- Display Window
- Status Indicators
- Options
- Status Window
- Error Indication
- Dish Preparation
- Loading the Upper Basket
- Loading the Bottom Basket
- Loading the Lower Basket
- Loading the Silverware Basket
- Adding a Dish
- Filling the Rinse Aid Dispenser
- Filling the Detergent Dispenser
- Filling the Rinse Aid Reservoir
- USER MAINTENANCE
- Cleaning the Exterior
- Cleaning the Interior
- Cleaning the Filters
- TROUBLESHOOTING
- INSTRUCTIONS FOR OVERFLOW
- KITCHEN AND BATH
Brand : ZLine
Model : DWHHH24
Category : Washing machine