Star-Light 960H DWC-BL2553DIR - Security Camera Digital Watchdog - Free user manual and instructions
Find the device manual for free Star-Light 960H DWC-BL2553DIR Digital Watchdog in PDF.


| Product Type | Security Camera |
| Brand | Digital Watchdog |
| Model | Star-Light 960H DWC-BL2553DIR |
| Image Sensor | 960H CCD (960 x 478 pixels) |
| Horizontal Resolution | 700 TV lines (color), 720 TV lines (B/W) |
| Minimum Illumination | 0.0 Lux (F1.2, 30 IRE) |
| Lens | 3.6mm fixed lens, auto iris |
| IR Range | 50 ft (15.2 m) with Smart IR |
| Day/Night | Electronic Day & Night (Auto/Color/B&W) |
| Video Output | CVBS 1.0Vp-p / 75 Ω (BNC) |
| Shutter Speed | 1/60 s to 1/120,000 s |
| White Balance | ATW / Push Lock / Manual |
| Noise Reduction | 3D DNR (Off/Low/Mid/High) |
| WDR | DRC (Dynamic Range Compressor) Off/Low/Mid/High |
| Motion Detection | 4 programmable regions |
| Privacy Zones | 8 programmable masks |
| OSD Menu | Icon-driven with joystick control |
| Power Supply | 12 VDC |
| Power Consumption | 1.1 W (IR off), 2.3 W (IR on) |
| IP Rating | IP66 (weatherproof) |
| Operating Temperature | -10°C to 50°C (14°F to 122°F) |
| Housing Material | Aluminum |
| Dimensions (∅ x H) | 80 x 79.8 mm (3.15 x 3.14 in) |
| Weight | 0.83 lb (376 g) |
| Included Accessories | Mounting template, screws, secondary BNC cable, external OSD controller |
Frequently Asked Questions - Star-Light 960H DWC-BL2553DIR Digital Watchdog
User questions about Star-Light 960H DWC-BL2553DIR Digital Watchdog
0 question about this device. Answer the ones you know or ask your own.
Ask a new question about this device
Download the instructions for your Security Camera in PDF format for free! Find your manual Star-Light 960H DWC-BL2553DIR - Digital Watchdog and take your electronic device back in hand. On this page are published all the documents necessary for the use of your device. Star-Light 960H DWC-BL2553DIR by Digital Watchdog.
USER MANUAL Star-Light 960H DWC-BL2553DIR Digital Watchdog
natural_image
Close-up of a black DWW surveillance camera with circular lens and central lens (no text or symbols visible)
STAR-LIGHT™960H
ABOUT MANUAL
Before installing and using the camera, please read this manual carefully.
Be sure to keep it handy for future reference.
12162013
PRECAUTIONS
■ Do not open or modify.
- Do not open the case except during maintenance and installation, for it may be dangerous and can cause damages.
■ Do not put objects into the unit.
- Keep metal objects and flammable substances from entering the camera.
It can cause fire, short-circuits, or other damages.
■ Be careful when handling the unit.
■ To prevent damages, do not drop the camera or subject it to shock or vibration.
■ Do not install near electric or magnetic fields.
■ Protect from humidity and dust.
■ Protect from high temperature.
- Be careful when installing near the ceiling of a kitchen or a boiler room, as the temperature may rise to high levels.
■ Cleaning:
To remove dirt from the case, moisten a soft cloth with a soft detergent solution and wipe.
■ Mounting Surface:
The material of the mounting surface must be strong enough to support the camera.
FCC COMPLIANCE
This equipment has been tested and found to comply with the limits for a Class B digital device, pursuant to part 15 of the FCC rules. These limits are designed to provide reasonable protection against harmful interference, when the equipment is operated in a residential environment. This equipment generates, uses, and radiates radio frequency energy; and if it is not installed and used in accordance with the instruction manual, it may cause harmful interference to radio communications.
WARNING: Changes or modifications are not expressly approved by the manufacturer.
Table of contents
TABLE OF CONTENTS
Introduction Features 4
Parts and Descriptions 5
Dimensions 6
Installation ____ Inside the Box ____ 7
Mount Installation Instructions____ 8
Connecting to Monitors 9
Control Board 10
Module OSD Menu 11-22
Troubleshooting 23
Warranty Information 24-25
Specifications 26-27
FEATURES\*
■ 960H CCD Image Sensor (960 Horizontal Pixels)
■ 720 TV Lines [B/W], 700 TV Lines [Color]
■ 3.6mm Fixed Lens
■ 50ft Range IR with Intelligent Camera Sync, Smart IR
■ Electronic Day & Night
■ 3D DNR (3D Digital Noise Reduction)
■ Star-Light (Super Low Light Technology)
■ HME (Highlight Masking Exposure)
■ SLC (Side Light Compensation)
■ Programmable Privacy Zones (8) & Motion Detection
■ AGC / BLC / AWB
■ Easy Icon Driven OSD Menu
■ IP66 Certified (Weatherproof)
■ Secondary Video-BNC Output
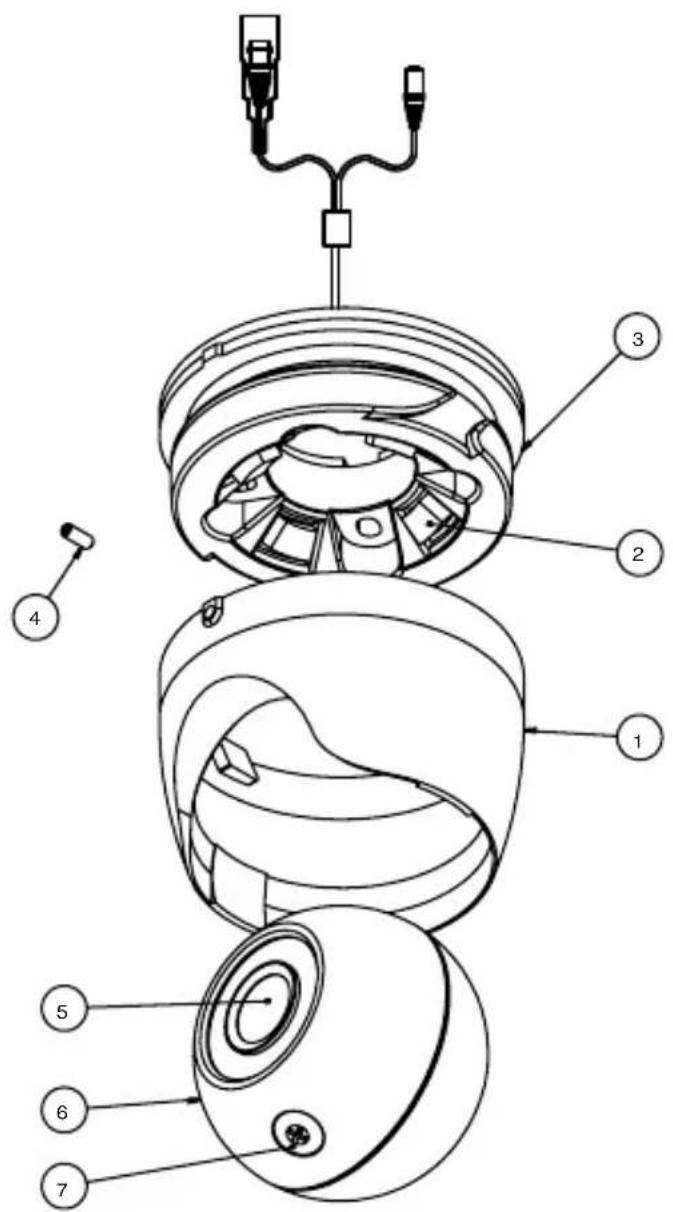
PARTS & DESCRIPTION\*
1 Ball Cover
2 Gap Sponge
3 Ball Base
4 Set Screw
5 Camera's Lens
6 Ball Camera Module
7 OSD Plug
DIMENSIONS IN MILLIMETERS (IN)*
![Ø46.0[1.81"] 54.8[2.16"] 79.88.14" Ø80.03.15"](/content/2026/06/1204097/images/78caaecfc200ee2c188ffadff4cdcc6fc164f9007a0824e11740e2fd7f40249c.jpg)
INSIDE THE BOX\*
Included with Ball Camera:
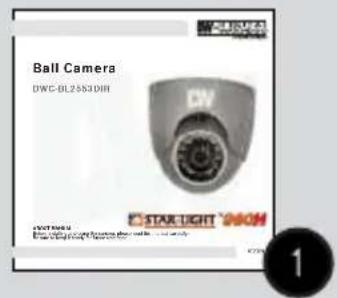
① User Manual
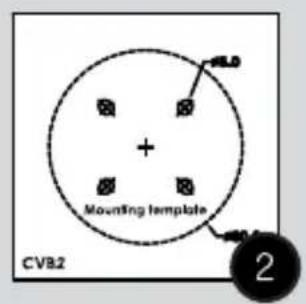
2 Mounting Template
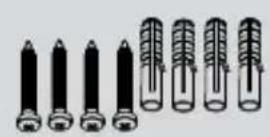
③ 4 Machine Screws and 4 Dry Wall Anchors
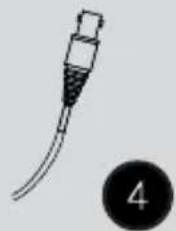
4 Secondary Video-BNC Cable
5 External OSD Controller

natural_image
Simple line drawing of a connector or cable with a numbered circle below (no text or symbols)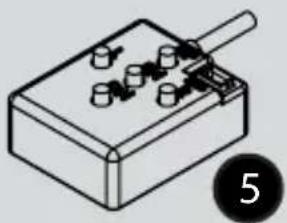
natural_image
Isometric illustration of a mechanical device with multiple cylindrical components and a lever (no text or symbols)INSTALLATION INSTRUCTIONS\*
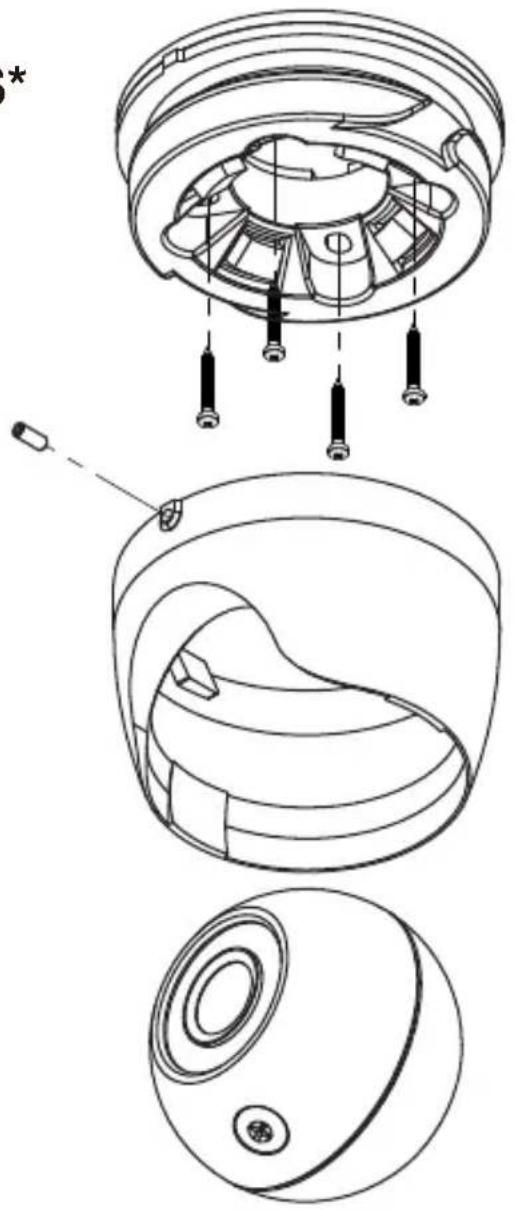
- To disassemble the camera, uncrew the small screw at the base of the camera's housing. The ball with the camera module will get loose and separate from the ball housing.
- Use the camera or mounting template to mark and drill the necessary holes in the wall or ceiling.
- Pull wires through and make connections.
- Using the four (4) included screws, mount and secure the camera to the wall or ceiling.
- Use the joystick to adjust the OSD menu. See pages 11-22 for more information.
- Secure the camera's ball module into the housing using the small screw at the base of the camera's housing.
natural_image
Technical line drawing of a mechanical device showing exploded and assembled views (no text or symbols)CONNECTING TO MONITORS\*
Use the diagram below to connect to a Monitor or CRT Monitor properly.
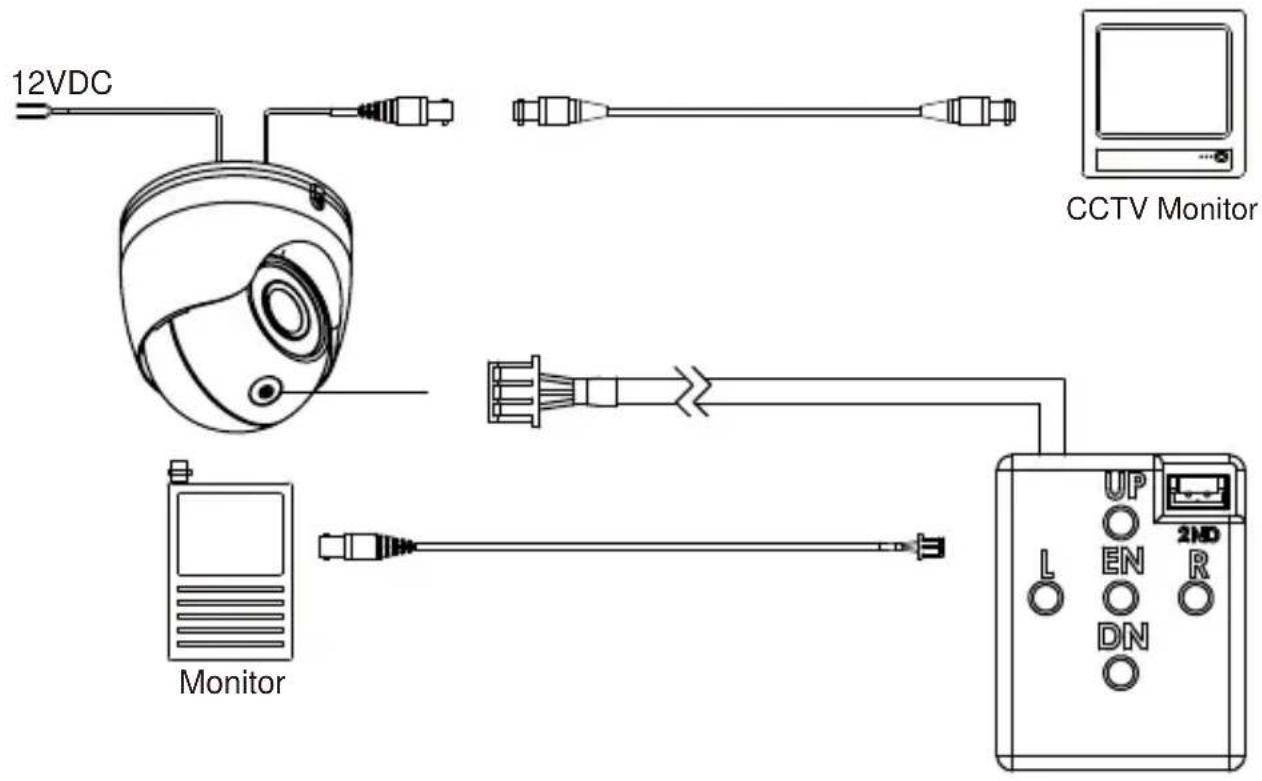
■ Power Connection - 12VDC
■ All cameras are equipped with a second video output for on-site configuration.
CONTROL BOARD\*
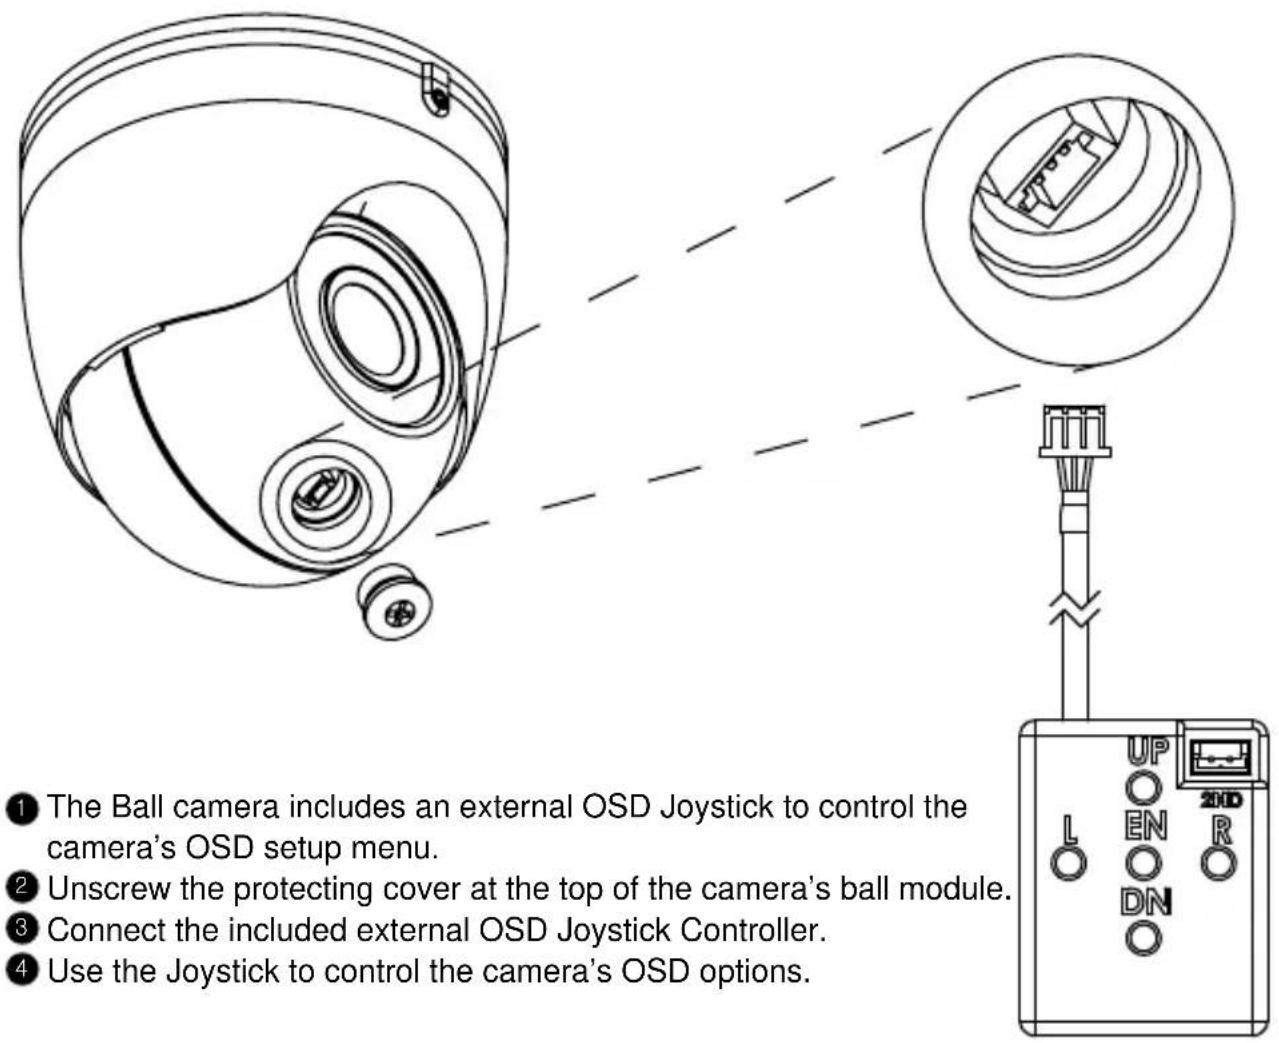
MODULE OSD MENU*
| EXPOSURE | COLOR | DAY & NIGHT | FUNCTION |
| WB BAL.ATW / MANUAL / PUSHLOCKCOLOR GAIN0~20EXIT JUMPSAVE & EXIT / EXIT | D&N MODEAUTO / COLOR / B&WCONTROLAUTO / EXTERNDELAY0 ~ 15B/W BURSTOFF / ONSMART IRANTI-SAT / SAT AREAEXIT JUMPSAVE & EXIT / EXIT | MIRROROFF / ONSHARPNESS0 ~ 20GAMMA0.35 ~ 0.70POSI/NEGAPOSI / NEGASLC0~20EXIT JUMPSAVE & EXIT / EXIT | |
| MOTION | PRIVACY | SETUP | EXIT |
| COLORMOTIONBLACK / GRAY-1/ GRAY-2/GRAY-3/ GRAY-4/ WHITE /YELLOW / GREEN / BLUE /RED / CYAN / MAGNETAPRIVACY SETAREA SET / DISPLAY / TOP /BOTTOM / LEFT / RIGHT/EXIT JUMPSAVE & EXIT / EXIT | CAMERA TITLEOFF / ONSYNCINTCOMMUNICA.CAM ID / ID DISP. / BAUDRATE /PROTOCOL / UTCLANGUAGEENGLISHFONT COLORBLUE / GREEN / CYAN / RED /MAGENTA / YELLOW / BLACK/GRAYSPECIALO.L.P.F / DPCEXIT JUMPSAVE & EXIT / EXIT | SAVERESTOREEXIT |

EXPOSURE
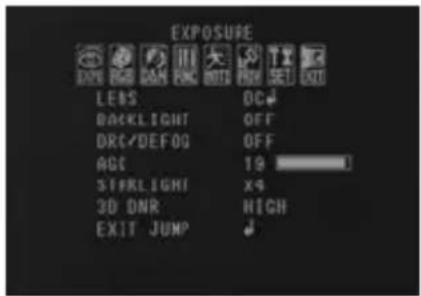
LENS
Manual Manual mode supports the fixed board lens or the manual iris lens.
DC DC mode supports the auto-iris varifocal lens.
NOTE: Both MANUAL and DC mode have FOCUS SET. You can adjust the focus by finding the highest number on the FOCUS SET. See page 15 for focus information.
MANUAL Lens Submenu
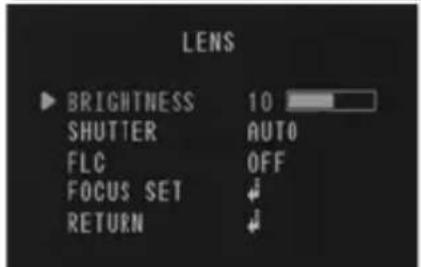
Brightness: Adjust the camera's brightness from 0\~20. The higher the number, the brighter the image will appear.
Shutter: Sets the shutter speed levels from 1/60 to 1/120000.
*For LENS-MANUAL Mode, the default SHUTTER is AUTO.
*For LENS-DC Mode, the default SHUTTER is 1/60. Select DC-AUTO for outdoor use.
DC Lens Submenu
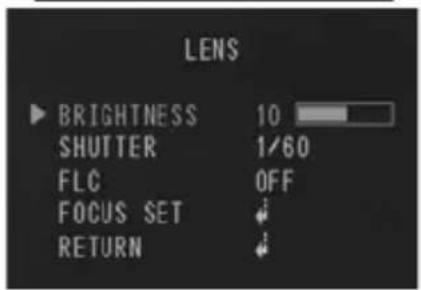
FLC: Enable or disable to adjust the camera's view and prevent the image from flickering.

EXPOSURE
BACKLIGHT
OFF
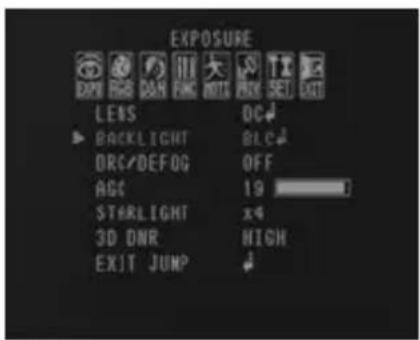
BLC BACK LIGHT COMPENSATION
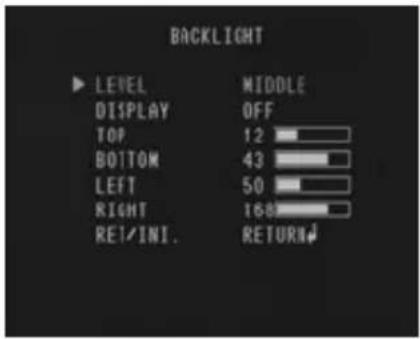
If BLC is selected, adjust the following options in the submenu:
- LEVEL: Set the BLC level from the available options: LOW/ MIDDLE/ HIGH)
- DISPLAY: Selet to show or hide the BLC mask.
- POSITION: Set the BLC masks' size and position.
TOP: Set level from 0\~54. The higher the number, the higher the top border of the BLC mask will be in the camera's view.
BOTTOM: Set level from 1\~55. The higher the number, the lower the bottom border of the BLC mask will be in the camera's view.
LEFT: Set level from 0\~217. The lower the number, the closer the BLC mask will be to the camera's left border.
RIGHT:Set level from 1\~218. The lower the number, the closer the BLC mask will be to the camera's right border.
- RET/ INI.: Select whether to return to the main menu, or reset the BLC settings to factory default.
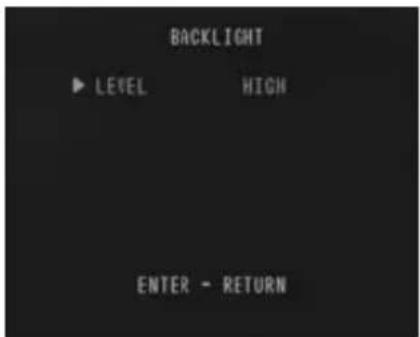
HME HIGHLIGHT MASKING EXPOSURE
HME masks highlights to allow objects to appear clearly on the screen. If ON is selected, HME levels are adjustable. The lower the setting, the darker the masking areas. Select from: LOW / MIDDLE / HIGH.

EXPOSURE
DRC DYNAMIC RANGE COMPRESSOR
DRC enables dark spots in images to become more visible without overexposing the bright spots to create one perfect image.
- DEFOG: AUTO / Manual: If AUTO is selected, the WDR and DRC levels will be set automatically based on the environment. If MANUAL is selected, set the WDR and DRC level from LOW / MIDDLE / HIGH.
- MODE: * ONLY DAY: DRC and WDR will work in day time. * ALL DAY: DRC and WDR will work in day and night time.
AGC AUTO GAIN CONTROL
1\~20 AGC enhances the picture brightness in low light conditions. A higher level AGC setting makes the images brighter; however, it could increase the amount of noise.
STARLIGHT Automatically activates slow shutter function when the image is too dark. OFF/x2\~x512 High values are not recommended as they may cause the image to lag. Starlight menu cannot be controlled if the SHUTTER setting is above 1/60.
3D DNR 3D DIGITAL NOISE REDUCTION- 3D-DNR reduces the noise on the screen OFF/ LOW/ MID/ HIGH in low light conditions and allows for clearer images, even at night.

COLOR
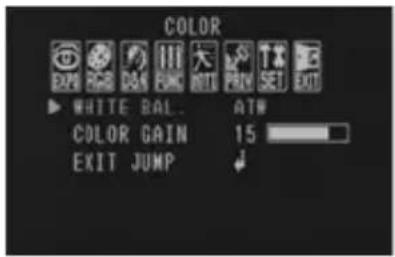
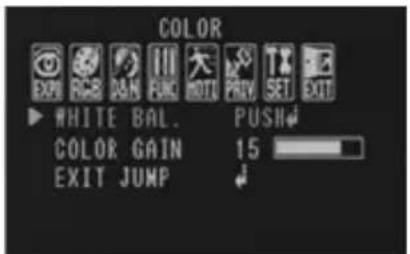
WB MODE
ATW Auto Tracking White Balance Control mode compensates for color temperature changes between 2500K and 9500K.
PUSHLOCK Pushlock is to fix the white balance based on the lighting.
MANUAL Users can control the white balance manually by changing RED GAIN and BLUE GAIN (see below).
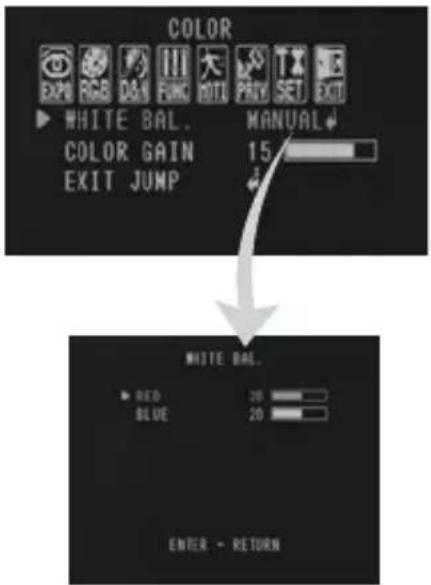
RED GAIN
0 \~ 40 Adjusts the amount of red in the image.
BLUE GAIN
0 \~ 40 Adjust the amount of blue in the image.
COLOR GAIN
Set the color gain from 0\~20.

DAY & NIGHT
D&N MODE
AUTO / In AUTO mode, the camera switches between day and night automatically depending COLOR / on light level. If COLOR is selected, the camera always stays in day/color mode. B&W If B&W is selected, camera always stays in night/B&W mode. If AUTO is selected,
please define the following settings:
CONTROL: AUTO/EXT. If using IR LEDs built into the camera, select AUTO. If using external IR LEDs separately, select EXT.
Adjust the following submenu options:
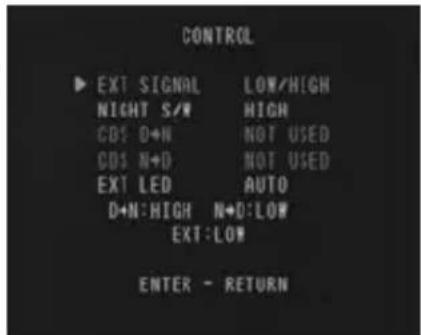
* EXT SIGNAL: Select from CDS or LOW/HIGH. If CDS is selected: Day & Night will work by CDS signal level. If LOW/ HIGH is set for EXT SIGNAL: Day & Night will work by CDS's Low/High signal.
- CDS D>N : Set D>N level from 0 \~ 40. Adjusts the light level at
which the camera switches from day to night. Higher values, the lower the light level. - CDS N>D : Set N>D level from 0 \~ 20. Adjusts the light level at which the camera switches from night to day. This should be lower than the value of D>N above.
- NIGHT S/W : Decide the Low/High signal of CDS.
*EXT LED: If you want to turn off the external LED by force, you can change the value from AUTO to OFF.
DELAY
0 \~ 15 Sec. Time interval delay before switching from day mode to night mode.
B/W BURST
OFF / ON If ON is selected, the camera provides a color burst signal in night mode.
SMART IR - ANTI-SAT: Select level value from 1 \~ 20.
- SAT. AREA : Set SMART IR area from 0 \~ 20.

FUNCTION
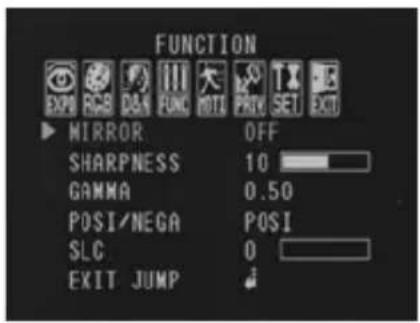
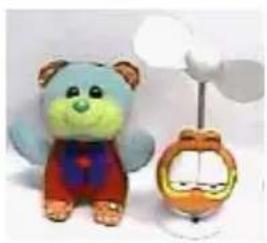
MIRROR
OFF
MIRROR Reflects the camera horizontally.
natural_image
Illustration of a blue teddy bear and a cartoon character with a hat (no text or symbols)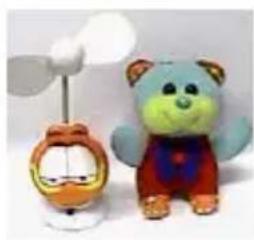
natural_image
Two cartoon figurines, one with a blue bear and orange character, the other in red overalls (no text or symbols visible)Mirror ONMirror OFF
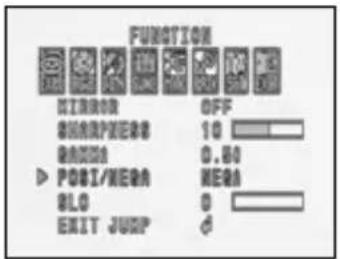
SHARPNESS
0 \~ 30 Sets the image sharpness. The higher the number, the sharper the image.
GAMMA
0.35 \~ 0.7 Select the desired gamma level. 0.45 is default setting.
POSI / NEGATIVE
OFF/ON If NEGATIVE is enabled, the camera's image will appear in negative colors.
SLC (SIDE LIGHT COMPENSATION)
0\~20 Increase the brightness on sides of the image.

MOTION
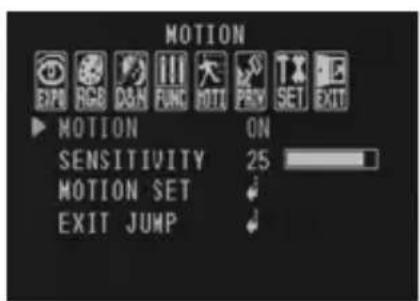
The camera can detect the movement and display an alarm on the screen when movement is detected.
MOTION
OFF/ON Select to enable or disable the camera's motion detection. If ON is selected:
SENSITIV.
0 \~ 30 Sensitivity level of the motion detection is adjustable. Motion Detection will be more sensitive at a higher number.
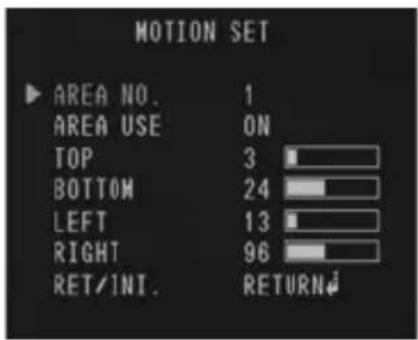
MOTION SET
- Area Number: The camera supports up to 4 different motion detection masks. Select which ones to display.
- Area Use: Select which one of the motion areas to enable.
- TOP: The higher the number, the higher the top border of the mask will be in the camera's view.
- BOTTOM: The higher the number, the lower the bottom border of the mask will be in the camera's view.
- LEFT: The lower the number, the closer the mask will be to the camera's left border.
- RIGHT: The lower the number, the closer the mask will be to the camera's right border.
- RET/ INI.: Select whether to return to the main menu, or reset the motion settings to factory default.

PRIVACY
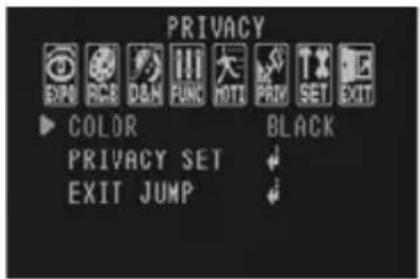
You can hide some parts of the screen for privacy masking. A total of 8 different privacy masking zones are available.
MASK COLOR
Privacy zones can be set with eight different colors-Gray-1, Gray-2, Gray-3, Gray-4, White, Yellow, Green, Blue, Red, Cyan, and Magenta.
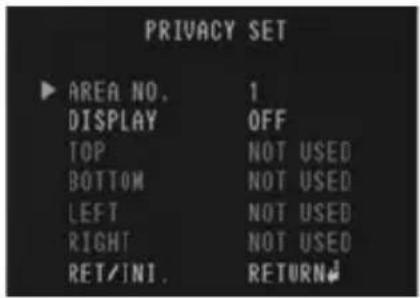
PRIVACY SET
- Area Number: The camera supports up to 8 different privacy masks. select 1\~8 which masks to display.
- Area Use: Select which one of the motion areas to enable.
- TOP: The higher the number, the higher the top border of the mask will be in the camera's view.
- BOTTOM: The higher the number, the lower the bottom border of the mask will be in the camera's view.
- LEFT: The lower the number, the closer the mask will be to the camera's left border.
- RIGHT: The lower the number, the closer the mask will be to the camera's right border.
- RET/ INI.: Select whether to return to the main menu, or reset the motion settings to factory default.

SETUP
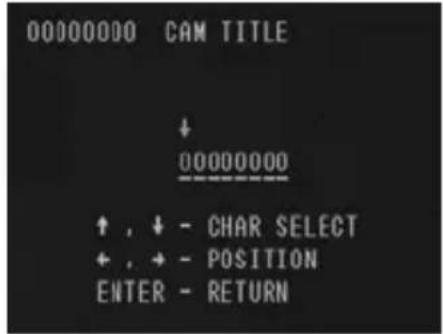
TITLE
OFF / ON If ON is selected, you can display the camera title on the screen. If enabled, manually enter the camera's display name using the joystick controller.
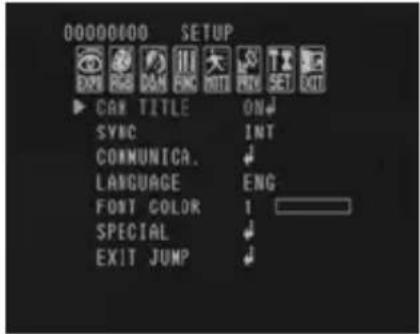
INTERNAL SYNC.
INT/ Select whether the camera synchronizes internally or using Line Lock.
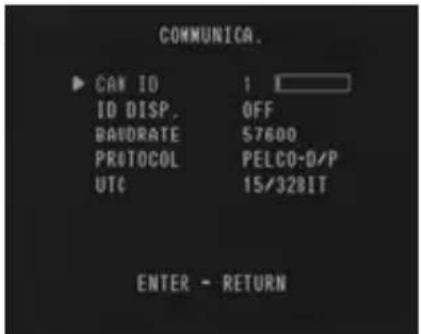
COMMUNICATION
The Communications settings allow you to setup the camera's ID, Baudrate, Protocol, and UTC.
- CAM ID: Provide an ID number for the camera (0 \~ 255).
- ID DISP.: Decide to show the ID on screen or not. Select ON & OFF.
- BAUDRATE: 9600bps is default. Select the baudrate from the following options: 2400/4800/9600/57600 and 115200bps.
- PROTOCOL: Set as PELCO-D/ PELCO-P.
- UTC: Automatically set UTC as 15/32 BIT.

SETUP
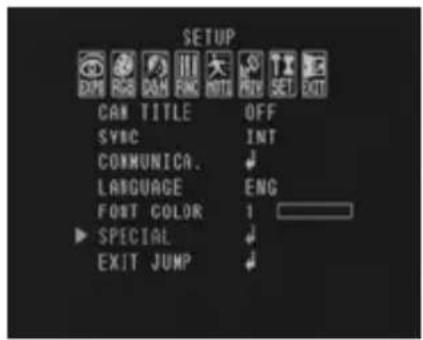
LANGUAGE
The camera supports the following languages: ENGLISH.
FONT COLOR
The following colors are available for the OSD menu: BLUE, GREEN, CYAN, RED, MAGENTA, YELLOW, BLACK, and GRAY.
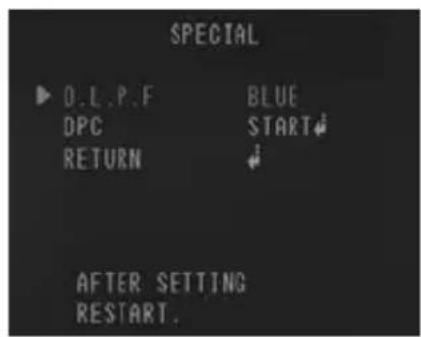
SPECIAL
OLPF: Select the filter that you use from BLUE/RED and PASS, then reboot the camera to use.
DPC: Set as START and compensate the white dot by changing the THRESHOLD value.

EXIT
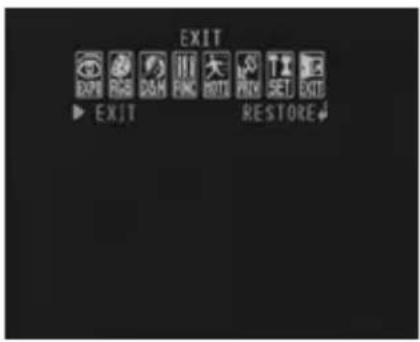
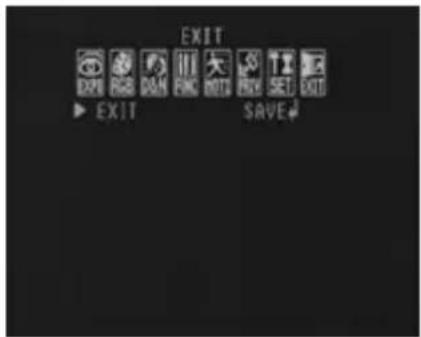
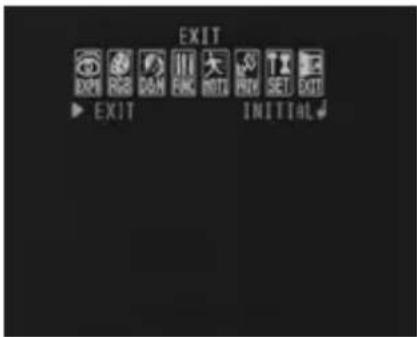
EXIT
SAVE Exit the OSD menu after saving the recent changes.
RESTORE Exit the OSD menu without saving recent changes.
INITIAL Exit the OSD menu after resetting the camera to factory default.
TROUBLESHOOTING
Before sending your camera for repair, check the following or contact our technical specialist.
FOR NO VIDEO
Check the coaxial cable and make sure it is connected securely.
Check the lens' iris adjustment at the camera's OSD menu.
Check the power supply and make sure the camera has the proper voltage and current.
FOR OUT-OF-FOCUS VIDEO
Check the clear dome cover and the lens for dirt or fingerprints. Use a soft cloth and gently clean. Check the lens' manual focal and zoom adjustment. The use of a field test monitor is recommended.
WARRANTY INFORMATION\*
Digital Watchdog (referred to as “the Warrantor”) warrants the Digital Watchdog Camera against defects in materials or workmanship as follows:
LABOR: For the initial five (5) years and one (1) year on IR LED from the original purchase date, if the camera is determined to be defective, the Warrantor will repair or replace the unit with a new or refurbished product at its option at no charge.
PARTS: In addition, the Warrantor will supply replacement parts for the initial five (5) years and one (1) year on IR LED.
To obtain warranty or out of warranty service, please contact a Technical Support Representative at 1-866-446-3595 Monday through Friday from 9:00AM to 8:00PM Eastern Standard Time.
A purchase receipt or other proof of the original purchase date is required before warranty service is rendered. This warranty only covers failures due to defects in materials and workmanship which arise during normal use. This warranty does not cover damage which occurs in shipment or failures which are caused by products not supplied by the Warrantor or failures which result from accident, misuse, abuse, neglect, mishandling, misapplication, alteration, modification, faulty installation, set-up adjustments, improper antenna, inadequate signal pickup, maladjustment of consumer controls, improper operation, power line surge, improper voltage supply, lightning damage, rental use of the product or service by anyone other than an authorized repair facility or damage that is attributable to acts of God.
LIMITS & EXCLUSIONS\*
There are no express warranties except as listed. The warrantor will not be liable for incidental or consequential damages (including damage to recording media without limitation) resulting from the use of these products or arising out of any breach of the warranty. All express and implied warranties, including the warranties of merchantability and fitness for particular purpose, are limited to the applicable warranty period set forth above.
Some states do not allow the exclusion or limitation of incidental or consequential damages, or limitatons on how long an implied warranty lasts, so the exclusions or limitations listed above may not apply to you. This warranty gives you specific legal rights, and you may also have other rights that vary from state-to-state.
If the problem is not handled to your satisfaction, then write to the following address:
Digital Watchdog, Inc.
ATTN: RMA Department
5436 W. Crenshaw Street
Tampa, FL 33634
Service calls which do not involve defective materials or workmanship as determined by the Warrantor, in its sole discretion, are not covered. Costs of such service calls are the responsibility of the purchaser.
SPECIFICATIONS*
| VIDEO | |
| Image Sensor 960H CCD | |
| Total Pixels 960 (H) x 478 (V) | |
| Scanning System 2 : 1 Interlace | |
| Frequency 15.734KHz (H), 59.95Hz (V) | |
| Synchronization Internal or Line Lock | |
| Horizontal Resolution 720 TV Lines [B/W], 700 TV Lines [Color] | |
| Minimum Illumination F1.2 (30IRE): 0.0 Lux | |
| S/N Ratio 52dB (AGC off) | |
| Video Output CVBS: 1.0Vp-p / 75 Ω | |
| LENS | |
| Focal Length 3.6mm | |
| Lens Type Fixed Lens Auto Iris | |
| IR Distance 50ft Range IR | |
| OPERATIONAL | |
| Shutter Speed 1/60s~1/120000s | |
| Backlight OFF / ON | |
| Star-Light X2 ~ X512 | |
| 3D-DNR OFF / Low / Middle / High | |
| White Balance ATW/ PUSH/ MANUAL | |
| Day and Night Auto / Day / Night | |
OPERATIONAL
| Mirror OFF / V. Flip / Rotate | |
| Auto Gain Control 1 ~ 20 | |
| Gamma 0.35 ~ 0.7 | |
| Motion Detection 4 Motion Regions | |
| Privacy Zones 8 Programmable Privacy Masks | |
| Dynamic Range Compressor OFF / Low / Middle / High | |
| Sharpness 0 ~ 20 | |
| Highlight Masking Exposure OFF / Low / Middle / High | |
| DPC (Dead Pixel Cancellation) OFF / ON | |
| ENVIRONMENTAL | |
| Operating Temperature -10 | °C ~ 50°C (14°F ~ 122°F) |
| Operating Humidity Less than 90% (Non-Condensing) | |
| IP Rating IP66 | (Protects against dust and high pressure water.) |
| ELECTRICAL | |
| Power Requirement DC12V | |
| Power Consumption 1.1W, 91mA, LED On: 2.3W, 191mA | |
| MECHANICAL | |
| Housing Material Aluminum | |
| Dimensions ∅80 X 79.8 mm (3.15 X 3.14 in) | |
| Weight 0.83 lbs | |
*Specification is subject to change without prior notice.

Everything's Digital
5436 W Crenshaw St. Tampa, FL 33634
Tel:866-446-3595/813-888-9555
Fax:813-888-9262
www.Digital-Watchdog.com
technicalsupport@dwcc.tv
Technical Support Hours: Monday-Friday
9:00am to 8:00pm EST
- STAR-LIGHT™960H
- ABOUT MANUAL
- PRECAUTIONS
- FCC COMPLIANCE
- Table of contents
- FEATURES\*
- PARTS & DESCRIPTION\*
- INSIDE THE BOX\*
- Included with Ball Camera:
- INSTALLATION INSTRUCTIONS\*
- CONNECTING TO MONITORS\*
- CONTROL BOARD\*
- EXPOSURE
- LENS
- BACKLIGHT
- OFF
- BLC BACK LIGHT COMPENSATION
- HME HIGHLIGHT MASKING EXPOSURE
- DRC DYNAMIC RANGE COMPRESSOR
- AGC AUTO GAIN CONTROL
- COLOR
- WB MODE
- RED GAIN
- BLUE GAIN
- COLOR GAIN
- DAY & NIGHT
- D&N MODE
- DELAY
- B/W BURST
- FUNCTION
- MIRROR
- SHARPNESS
- GAMMA
- POSI / NEGATIVE
- SLC (SIDE LIGHT COMPENSATION)
- MOTION
- SENSITIV.
- MOTION SET
- PRIVACY
- MASK COLOR
- PRIVACY SET
- SETUP
- TITLE
- INTERNAL SYNC.
- COMMUNICATION
- LANGUAGE
- FONT COLOR
- SPECIAL
- EXIT
- TROUBLESHOOTING
- FOR NO VIDEO
- FOR OUT-OF-FOCUS VIDEO
- WARRANTY INFORMATION\*
- LIMITS & EXCLUSIONS\*
Brand : Digital Watchdog
Model : Star-Light 960H DWC-BL2553DIR
Category : Security Camera